1
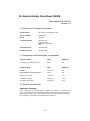
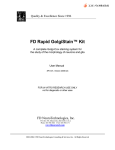
Simple Solution for Your Research Hito Golgi-Cox OptimStain™ Kit An easy to use Golgi-Cox staining system for the morphological characterization of the neurons and glia cells User Manual and Material Safety Data Sheet FOR IN VITRO RESEARCH USE ONLY Hitobiotec Inc. Simple solution for your research Hito Golgi-Cox OptimStain™ Kit An easy to use Golgi-Cox staining system for the morphological characterization of the neurons and glia cells User Manual and Material Safety Data Sheet FOR IN VITRO RESEARCH USE ONLY Hitobiotec Inc. © 2012 All Rights Reserved Index I. Introduction 2 II. Kit Contents 3 III. Impregnation Solution Preparation 4 IV. Tissue Preparation (Standard Protocol) 5 V. Tissue Preparation (Vibratome Protocol) 7 VI. Staining Procedure 8 VII. Alternative Protocol for Microtome 9 VIII. References 11 IX. Material safety data sheet (MSDS) 12 1 I. Introduction Golgi-Cox impregnation1-2 or Golgi staining has been recognized as one of the most elegant and effective procedures for studying the morphology of neurons as well as glia. In recent years the Golgi-Cox staining method remains as a primary technique for visualization of the dendritic branching pattern and dendritic spines, because it allows isolation and visualization of the dendritic arbours from a minor random fraction of the neurons in a certain brain area3-5. Accordingly, Golgi techniques are not only useful for pure anatomical studies, but are also widely used in studies examining behavioral-morphological relationships 3,6 . In some studies, the Golgi-Cox method has been used to identify and study the autonomic innervations in the heart and the results show that the Golgi-Cox method is an attainable and useful tool to identify and study the morphological characteristics of the autonomic innervations in peripheral tissues7. However, the Golgi-Cox staining procedure is time-consuming, the yield of stained cells is usually low and the results are often unreliable. Hito Golgi-Cox OptimStain™ Kit offers a simple solution to these problems. Designed based on the methods described by Glaser and Van der Loos8, this kit makes dramatic improvement of the Golgi-Cox technique. The procedures are simplified and the processing time is greatly reduced. This kit delivers stable and improved staining quality, with minimal overstains and artifacts when used properly. Hito Golgi-Cox OptimStain™ Kit has been tested on the brains, spinal cords and hearts from several species of animals and proven to be sensitive for demonstrating morphological details of neurons and glia. For photo samples, please visit our web site at www.hitobiotec.com 2 II. Kit Contents Store Hito Golgi-Cox OptimStain™ Kit at room temperature Standard Kit Small Kit Mini Kit Kit Contents Solution-1 250 ml 125 ml 60 ml Solution-2 250 ml 125 ml 60 ml Solution-3 500 ml 250 ml 120 ml Solution-4 250 ml 125 ml 60 ml Solution-5 250 ml 125 ml 60 ml Dropping Bottle (20 ml) 1 1 1 Staining Jar (25 ml) 2 1 1 Fine Tip Natural Hair Brush 2 2 1 Glass Specimen Transfer Tool 2 2 1 Hito Dual-Safe Gelatin-coated Slide (Sample) 1 1 0 User Manual and MSDS 1 1 1 Note Before using Hito Golgi-Cox OptimStain™ Kit, please make sure you have the following Required Equipment / Materials in your lab (not included in the kit): 1. Cryostat (capable of cutting 80- to 200-µm thick sections at –19°C) or vibratome. 2. Dry ice, O.C.T. compound, isopentane, ethanol, xylene, double distilled or deionized water 3. Plastic/glass tubes or vials 4. Gelatin-coated slides (recommend Hito Dual-Safe Gelatin-coated Slide Cat# HTHS0102) and coverslips 5. Staining jars for slides wash 6. Resinous mounting medium 7. Light microscope 3 III. Impregnation Solution Preparation 1. Clean all containers, then rinse with distilled water. Do not use metal instruments. 2. Mix an equal volume of Solution-1 and -2 (e.g. mix one part Solution-1 and one part Solution-2) in a clean glass or plastic container. Keep the container tightly closed. 3. Do not stir the solution mixture. Store at room temperature in the dark (e.g. wrapped with aluminum foil) for at least 24 hours before use, and for use within one month. 4. Using the supernatant of the mixed solution (precipitate free) for the impregnation. 5. The volume of the impregnation solution should be at least five times that of the tissue (e.g. 5 ml or more of the impregnation solution for 1 cm3 of the tissue). Warning The kit contains reagents that are toxic and harmful in case of ingestion, inhalation, skin or eye contact. Perform experiment under a chemical hood and wear protective clothing, gloves, goggles, face shield or safety glasses while handling kit reagents. Wash hands thoroughly with soap and water after handling. IF SWALLOWED: Rinse mouth with water and immediately call a doctor or Poison Control Center. IF ON SKIN OR IN EYES: Wash immediately with plenty of water and seek medical advice. IF INHALED: Move person to fresh air and call a doctor or Poison Control Center for further treatment advice. Never pour the waste of Solution-1 and -2 into the sink. Collect the waste solutions in a tightly closed glass or HDPE container and call your safety administration or a licensed professional waste disposal service to dispose of this material. For more information, please read the MSDS. 4 IV. Tissue Preparation (Standard Protocol) 1. Prepare animal for infusion by administering a lethal dose of anesthesia. Monitor it until the point when the animal fails to respond to pinching of the foot. 2. Do not perfuse with buffer or fixative. Remove the tissue (brain, spinal cord or heart) as soon as possible. Handle with care and avoid damage of the tissue. Large specimens should be sliced with a sharp blade into blocks of approximately 10 mm thickness. 3. Rinse tissue in double distilled water for 2-3 seconds to remove blood from the surface. 4. Transfer tissue into the impregnation solution that is at least five times the volume of the tissue and store at room temperature in the dark. 5. Replace the impregnation solution on next day (after 12 -24 hours), and store at room temperature (20 - 25°C) for two weeks in the dark. To avoid non-specific staining, do not extend the impregnation time. 6. Transfer tissue into Solution-3 that is at least five times the volume of the tissue. Store at 4°C in the dark. Replace Solution-3 after 12 hours, and continue to store at 4°C in the dark for 24 to 72 hours. 7. Place ∼300 to 500 ml isopentane in a metal container large enough to hold a corresponding sieve-like basket. Place the metal container with the isopentane in dry ice for 15 to 30 min, until the temperature of the isopentane reaches -70°C. 8. Place the tissue on the mesh bottom of the sieve-like basket in a manner that preserves the normal shape of the tissue. 9. Slowly immerse the basket with the tissue in the cooled isopentane for 30 sec. to 1 min. (The time of immersion is absolutely critical; it must be long enough to result in complete freezing of the tissue, but not so long that the tissue cracks. It may be necessary to test various times to determine the optimal time). 5 10. Rapidly remove the basket with the frozen tissue from isopentane, detach the tissue from the mesh, and place it briefly on absorbent paper in dry ice box to remove excess isopentane. 11. Wrap the dried, frozen tissue in aluminum foil and store at -70°C until sectioning is performed. 12. Set the cryostat chamber temperature at -19°C. * 13. Place specimen holder/cryostat chuck on dry ice and add embedding matrix or distilled water on the surface of the specimen holder/chuck. As the embedding matrix or water begins to freeze, place the frozen tissue into it so that the tissue adheres to the specimen holder/ chuck. Pour embedding matrix over the frozen tissue to provide a thin coat that aids in maintaining the integrity of the tissue sections during cutting. 14. Slowly cut the tissue into sections (80-200 μm thickness) on a cryostat with the chamber temperature set at -19°C. 15. Add a few drops of Solution-3 to a gelatin-coated slide with a dropping bottle. Using a Glass Specimen Transfer Tool or Fine Tip Natural Hair Brush (provided in the kit), transfer sections from the specimen holder/ chuck to a gelatin-coated slide. 16. Using the edge of a filter paper strip, remove excess Solution-3. Air dry slides (over night) at room temperature in the dark. 17. Dried sections should be processed as soon as possible, but may be stored at room temperature for up to three days in the dark. ** Note * The -19°C setting is satisfactory in most cases, but may need optimization for different cryostat and tissue types in order to cut sections smoothly and maintain integrity of the sections. ** Don’t store the sections for a long time, black crystalline background will appear. 6 V. Tissue Preparation (Vibratome Protocol) 1. Prepare animal for infusion by administering a lethal dose of anesthesia. Monitor it until the point when the animal fails to respond to pinching of the foot. 2. Do not perfuse with buffer or fixative. Remove the tissue (brain, spinal cord or heart) as soon as possible. Handle with care and avoid damage of the tissue. Large specimens should be sliced with a sharp blade into blocks of approximately 10 mm thickness. 3. Rinse tissue in double distilled water for 2-3 seconds to remove blood from the surface. 4. Transfer tissue into the impregnation solution that is at least five times the volume of the tissue and store at room temperature in the dark. 5. Replace the impregnation solution on next day (after 12 -24 hours), and store at room temperature (20 - 25°C) for two weeks in the dark. To avoid non-specific staining, do not extend the impregnation time. 6. Transfer tissue into Solution-3 that is at least five times the volume of the tissue. Store at 4°C in the dark. Replace Solution-3 after 12 hours, and continue to store at 4°C in the dark for 24 to 72 hours. 7. Embed the tissue in low gelling temperature agarose. Cut vibratome sections at 80-200 um thickness into double distilled water. Using a Fine Tip Natural Hair Brush (provided in the kit), mount the floating sections onto gelatin-coated slides. 8. Add a few drops of Solution-3 to mounted sections with a dropping bottle, wait for 1-2 minutes, using the edge of a filter paper strip, remove excess Solution-3. Air dry slides (over night) at room temperature in the dark. 9. Dried sections should be processed as soon as possible, but may be stored at room temperature for up to three days in the dark. ** 7 VI. Staining Procedure 1. Rinse slides in distilled water 2 times, 3 minutes each. 2. Mix 5 ml Solution-4, 5 ml Solution-5 and 15 ml double distilled water in a 25 ml staining jar (provided in the kit), then place slides in the solution mixture. Tightly close the staining jar and wait for 10 minutes. 3. Rinse slides in distilled water 2 times, 3 minutes each (distilled water should be renewed frequently). 4. Counterstain sections with cresyl violet (optional step). 5. Dehydrate slides which was previously rinsed with distilled water in 50%, 75% and 95% ethanol, 4 minutes each. 6. Dehydrate slides in 100% ethanol, 2 times, 3 minutes each. 7. Clear in xylene, 2 times, 4 minutes each, and apply coverslip over sections using undiluted xylene based resinous mounting medium. 8. Allow to dry. The slide can be viewed after drying by bright field microscopy. Note If you do not have a cryostat, processed tissue can be prepared as paraffin sections with microtome as an alternative option. (see VI. Alternative Protocol for Microtome). 8 VII. Alternative Protocol for Microtome 1. Prepare animal for infusion by administering a lethal dose of anesthesia. Monitor it until the point when the animal fails to respond to pinching of the foot. 2. Do not perfuse with buffer or fixative. Remove the tissue (brain, spinal cord or heart) as soon as possible. Handle with care and avoid damage of the tissue. Large specimens should be sliced with a sharp blade into blocks of approximately 10 mm thickness. 3. Rinse tissue in double distilled water for 2-3 seconds to remove blood from the surface. 4. Transfer tissue into the mixed impregnation solution that is at least five times the volume of the tissue and store at room temperature in the dark. 5. Replace the impregnation solution on next day (after 12 -24 hours), and store at room temperature (20 - 25°C) for two weeks in the dark. To avoid non-specific staining, do not extend the impregnation time. 6. Transfer tissue into Solution-3 that is at least five times the volume of the tissue. Store at 4°C in the dark. Replace Solution-3 after 24 hours, and continue to store at 4°C in the dark for 5-7 days. 7. After 5-7 days processing in Solution-3, transfer the tissue into a new vial and wash the tissue with running tap water over night at room temperature. 8. After water rinse, dehydrate the tissue in a graded (increasing concentrations) ethanol/water series at room temperature, clear tissue in Chloroform for 12-24 hours and embed tissues in paraffin blocks (recommend paraffin with a lower melting point ). 9. Turn on the water bath and set the temperature at 45ºC. Use fresh deionized water. Insert the paraffin block into the microtome chuck. Set the dial to cut 5080 µm sections. Cut sections very slowly and pick them up with forceps or a fine paint brush and float them on the surface of the water bath. Float the sections onto the surface of gelatin-coated slides. 9 10. Drain slides upright and dry at 37°C for a minimum of 15 minutes. 11. Place the slides with paraffin sections in a 60°C oven for 2 hours (preferably overnight) to bond the tissue to the glass. Slides can be stored in a slide box at room temperature. 12. Deparaffinize sections in xylene, 3 times, 5 minutes each. 13. Rehydrate sections in 100%, 95%, 70% and 50% ethanol 2 times, 5 minutes each. 14. Rinse slides in distilled water 3 times, 3 minutes each. 15. Mix 5 ml Solution-4, 5 ml Solution-5 and 15 ml double distilled water in a 25 ml staining jar (provided in the kit), then place slides in the solution mixture. Tightly close the staining jar and wait for 10 minutes. 16. Rinse slides in distilled water 2 times, 3 minutes each (distilled water should be renewed frequently). 17. Counterstain sections with cresyl violet (optional step). 18. Dehydrate slides which was previously rinsed with distilled water, in 50%, 75% and 95% ethanol, 4 minutes each. 19. Dehydrate slides in 100% ethanol, 3 times, 3 minutes each. 20. Clear in xylene, 3 times, 4 minutes each, and apply coverslip over sections using undiluted xylene based resinous mounting medium. 21. Allow to dry. The slides can be viewed after drying by bright field microscopy. 10 VIII. References 1. Ramon-Moliner, E. A tungstate modification of the Golgi -Cox method. Stain Technol 33, 19-29 (1958). 2. Ramon-Moliner, E., Vane, M. A. & Fletcher, G. V. Basic Dye Counterstaining of Sections Impregnated by the Golgi-Cox Method. Stain Technol 39, 65-70 (1964). 3. Pilati, N., Barker, M., Panteleimonitis, S., Donga, R. & Hamann, M. A rapid method combining Golgi and Nissl staining to study neuronal morphology and cytoarchitecture. J Histochem Cytochem 56, 539-550, doi:jhc.2008.950246 [pii] 10.1369/jhc.2008.950246 (2008). 4. Rosoklija, G. et al. Optimization of Golgi methods for impregnation of brain tissue from humans and monkeys. J Neurosci Methods 131, 1-7, doi:S0165027003001997 [pii] (2003). 5. Spacek, J. Dynamics of the Golgi method: a time-lapse study of the early stages of impregnation in single sections. J Neurocytol 18, 27-38 (1989). 6. Gibb, R. & Kolb, B. A method for vibratome sectioning of Golgi-Cox stained whole rat brain. J Neurosci Methods 79, 1-4, doi:S0165027097001635 [pii] (1998). 7. Gomez-Villalobos, M. J., Gordillo, A. C., Lopez, J. R. & Flores, G. The utility of the Golgi-Cox method in the morphological characterization of the autonomic innervation in the rat heart. J Neurosci Methods 179, 40 -44, doi:S0165-0270(09)00037-5 [pii] 10.1016/ j.jneumeth.2009.01.004 (2009). 8. Glaser, E. M. & Van der Loos, H. Analysis of thick brain sections by obverse-reverse computer microscopy: application of a new, high clarity Golgi-Nissl stain. J Neurosci Methods 4, 117-125, doi:0165-0270(81)90045 -5 [pii] (1981). 11 IX. Material Safety Data Sheet (MSDS) Date Updated: 8/22/2012 Version 1.9 1. Product and Company Information Product Name Hito Golgi-Cox OptimStain™ Kit Product Number HTKNS1125 Brand Hitobiotec Company Address Hitobiotec Inc. P.O.Box 7671 Wilmington, DE 19803 USA Technical Phone: 302-385-6188 Emergency Phone: 302-385-6188 2. Composition and Information on Ingredient Substance Name CAS # SARA 313 Hito Golgi-Cox OptimStain™ Kit None No Ingredient Name CAS # SARA 313 WATER 7732-18-5 No PROPRIETARY COMPONENT(S) None No Mercury (II) chloride 7487-94-7 Yes Potassium chromate 7789-00-6 Yes Potassium dichromate 7778-50-9 Yes 3. Hazards Identification EMERGENCY OVERVIEW Toxic. Dangerous for the environment. Harmful by inhalation or in contact with skin or eyes. May be fatal if swallowed or absorbed through skin. Possible risk of irreversible damage to skin, mucous membranes, eyes, blood, kidneys and digestive, respiratory, reproductive and central nervous systems. 12 HMIS RATING HEALTH: 4 FLAMMABILITY: 0 REACTIVITY: 0 FLAMMABILITY: 0 REACTIVITY: 3 NFPA RATING HEALTH: 4 Potential Health Effects Inhalation May be fatal if inhaled. Material is extremely destructive to the tissue of the mucous membranes and upper respiratory tract. Skin Causes skin burns, skin irritation. May be fatal if absorbed through skin. Eyes Causes eye burns, eye irritation. Ingestion Toxic if swallowed. May be fatal if swallowed. Causes burns. 4. FIRST AID MEASURES General advice Consult a physician. Show this safety data sheet to the doctor in attendance. Move out of dangerous area. If inhaled If breathed in, move person into fresh air. If not breathing give artificial respiration In case of skin contact Take off contaminated clothing and shoes immediately. Wash off with soap and plenty of water. Consult a physician. In case of eye contact Continue rinsing eyes during transport to hospital.Rinse thoroughly with plenty of water for at least 15 minutes and consult a physician. If swallowed Do NOT induce vomiting. Never give anything by mouth to an unconscious person. Rinse mouth with water. Consult a physician. 5. FIRE-FIGHTING MEASURES Flammable properties Flash point no data available Ignition temperature no data available Suitable extinguishing media Use water spray, alcohol-resistant form, dry chemical or carbon dioxide. Special protective equipment for fire-fighters Wear self contained breathing apparatus for fire fighting if necessary. 13 6. ACCIDENTAL RELEASE MEASURES Personal precautions Use personal protective equipment. Avoid dust formation. Avoid breathing dust. Ensure adequate ventilation. Evacuate personnel to safe areas. Environmental precautions Prevent further leakage or spillage if safe to do so. Do not let product enter drains. Discharge into the environment must be avoided. Methods for cleaning up Pick up and arrange disposal without creating dust. Keep in suitable, closed containers for disposal. 7. HANDLING AND STORAGE Handling Perform experiment in a properly functioning chemical hood, which is vented to the outside. Wear glasses and disposable gloves while handling kit reagents. Wash hands thoroughly after performing the test. Storage Keep container tightly closed in a dry and well-ventilated place. Store at room temperature, preferably in a cool place. 8. EXPOSURE CONTROLS/PERSONAL PROTECTION Contains no substances with occupational exposure limit values. Personal protective equipment Respiratory protection Where risk assessment shows air-purifying respirators are appropriate use a fullface respirator with multipurpose combination (US) or type ABEK (EN 14387) respirator cartridges as a backup to engineering controls. If the respirator is the sole means of protection, use a full-face supplied air respirator. Use respirators and components tested and approved under appropriate government standards such as NIOSH (US) or CEN (EU). Hand protection Handle with gloves. Eye protection Safety glasses with side-shields conforming to EN166 Hygiene measures Avoid contact with skin, eyes and clothing. Wash hands before breaks and immediately after handling the product. 9. PHYSICAL AND CHEMICAL PROPERTIES 14 Appearance Form liquid Safety data pH no data available Melting point no data available Boiling point no data available Flash point no data available Ignition temperature no data available Lower explosion limit no data available Upper explosion limit no data available Water solubility no data available 10. STABILITY AND REACTIVITY Storage stability Stable under recommended storage conditions. Avoid Light. Materials to avoid Strong oxidizing agents, metals Hazardous decomposition products Hazardous decomposition products formed under fire conditions. - Hydrogen chloride gas, Mercury/mercury oxides, Potassium oxides, Chromium oxides. 11. TOXICOLOGICAL INFORMATION Acute toxicity Refer to component MSDS Irritation and corrosion Refer to component MSDS Sensitisation Refer to component MSDS Signs and Symptoms of Exposure no data available Potential Health Effects Inhalation May be fatal if inhaled. Material is extremely destructive to the tissue of the mucous membranes and upper respiratory tract. Skin Causes skin burns, skin irritation. May be fatal if absorbed through skin. Eyes Causes eye burns, eye irritation. Ingestion Toxic if swallowed. May be fatal if swallowed. Causes burns. 15 12. ECOLOGICAL INFORMATION Elimination information (persistence and degradability) Refer to component MSDS Ecotoxicity effects Refer to component MSDS Further information on ecology Refer to component MSDS 13. DISPOSAL CONSIDERATIONS Product Observe all federal, state, and local environmental regulations. Contact a licensed professional waste disposal service to dispose of this material. Contaminated packaging Dispose of as unused product. 14. TRANSPORT INFORMATION DOT (US) UN-Number: 3316 Class: 9 Packing Group: III Proper shipping name: Chemical kits Reportable Quantity (RQ): 2000 lbs IMDG UN-Number: 3316 Class: 9 Packing Group: III Proper shipping name: Chemical kits Reportable Quantity (RQ): 2000 lbs IATA UN-Number: 3316 Class: 9 Packing Group: III Proper shipping name: Chemical kits Reportable Quantity (RQ): 2000 lbs 15. OTHER INFORMATION Further information The above information is believed to be correct but does not purport to be all inclusive and shall be used only as a guide. The information in this document is based on the present state of our knowledge and is applicable to the product with regard to appropriate safety precautions. It does not represent any guarantee of the properties of the product. Hito biotech, Inc., shall not be held liable for any damage resulting from handling or from contact with the above product. See reverse side of invoice or packing slip for additional terms and conditions of sale. 16 Notes 17 Notes 18 Hitobiotec Inc. P.O. Box 7671 Wilmington, DE 19803 U.S.A. Phone: 302-385-6188 Email: [email protected] www.hitobiotec.com HTKMA2012