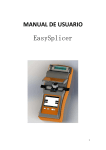
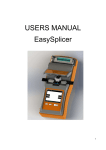
Download USERS MANUAL EasySplicer
Transcript
USERS MANUAL
EasySplicer
1
Table of contents
Introduction......................................................................................................................................3
Disclaimer........................................................................................................................................3
Application.......................................................................................................................................3
EasySplicer components..................................................................................................................3
Basics...............................................................................................................................................4
Quick Start ! ..................................................................................................................................4
Turn On the EasySplicer..................................................................................................................4
Start with a Calibration !..................................................................................................................4
Singlemode or Multimode ? ..........................................................................................................4
Doing the Calibration !....................................................................................................................5
Time to splice !................................................................................................................................5
Oven operation – sleeve protection !...............................................................................................6
Main menu.......................................................................................................................................7
Setup Menu......................................................................................................................................9
Preparing the fibers and place them in the Fusion splicer !...........................................................12
Don´t forget the protective sleeve !...............................................................................................12
Stripping the fiber..........................................................................................................................13
Cleaning the fiber...........................................................................................................................13
Cleaving the fiber...........................................................................................................................14
Place the cleaved and ready fibers in the splicer...........................................................................16
Splicing..........................................................................................................................................18
Cleaning the v-groove of the fusion splicer...................................................................................20
Cleaning the electrodes..................................................................................................................21
Oven maintenance..........................................................................................................................22
Technical specification:.................................................................................................................23
2
Introduction
The EasySplicer incorporates all the best a “Made in Sweden” Fusion splicer can offer.
NOTE: EasySplicer is a high precision instrument and should always be handled with care!
Disclaimer
SB Scandinavia AB reserves the right to modify the product in any way without prior
customer notification or any other form of notice.
In no event shall SB Scandinavia AB be liable for any damages of any type, incidental,
indirect, consequential or other, originating from or relating to this manual or the
information contained herein. While SB Scandinavia AB tries to make the user manual
complete and accurate, it may contain mistakes, and the user uses it solely at his or her
own risk.
Application
Splicing and protection of most common types of SMF and MMF.
EasySplicer components
The following components are included and standard for splicing in the field:
Item
1
2
3
4
5
6
7
8
Description
Quantity
EasySplicer
1
Power supply
1
Fiber cleaver
1
Fiber holders 250μm (black)
1 pair
Fiber holders 900μm (red)
1 pair
Stripper
1
Carrying bag
1
Users manual
on CD
1
3
Basics
NOTE: The EasySplicer is a rugged field instrument designed to withstand field
environment. However, to ensure best performance, it is important to keep maintenance as
described later in this manual.
Quick Start !
Turn On the EasySplicer
If available, connect the splicer to a power source.
- The splicer will also start automatically if the power-supply is connected. Simply
press any button to leave charging-mode.
•
Make sure that that unit is properly charged if operated by the internal battery-pack.
Charge the unit at least 6-8 hours before using it the first time.
- Turn on the EasySplicer by pressing down the “ON”-button (large button below the
display).
The splicer starts in “ready-mode” after a few seconds.
•
Before beginning to splice it is important to verify that the electrodes are in good
(operational) condition. The electrodes are quite easily oxidized due to
environmental conditions (like dirt in the air and/or moisture). The splicer has
probably been stored for a while and lately in transport.
Such oxide can be cleaned (burned off) by using the “CLEAN ELECTRODES”
function (see also page 21).
Start with a Calibration !
Begin all work with a “Calibrate”. This is needed to adapt the splicer to its present
environment (adapt to temperature, moisture etc).
Singlemode or Multimode ?
It´s very important to setup the correct fiber-type in the splicer before doing the
calibration. For ex. Select Singlemode fiber in the “Menu” if You are using a
Singlemode fiber.
- Press the “Menu-button”. Step with the “down-arrow” to “SETUP” and select it by
pressing the large button (SELECT).
- Step with the “down-arrow” to “FIBER TYPE” and select it.
- Chose SINGELMODE, MULTIMODE or OM1 fiber-type.
4
Doing the Calibration !
- Strip one fiber which You are about to splice (strip it some 5-6cm).
- Clean the fiber with alcohol, isopropyl or similar. Make sure not to touch the
fiber with anything after cleaning as it will become dirty.
Place the stripped and cleaned fiber across the V-grove (see picture below).
You can see how the calibration should be done in our Video to be found at:
https://www.dropbox.com/sh/t1bwwrk0i9str6a/AAAKnje_Mvc-_SeXVUH1v0Jva?dl=0
Having placed the fiber in the V-grove enter the “Menu” again and step with “downarrow” to CALIBRATE.
Select it (large button) and the splicer will perform a calibration.
This is seen on the display as the splicer will ignite the spark and shine through the
fiber with various strength.
The operation is finished after some 10 seconds and the display will show “OK” if
the Calibration was done properly.
If not, the display will show the text: “CALIBRATE AGAIN”.
Time to splice !
•
Place fiber in the fiber holders (250 fiber in the black holders and 900 fiber/pigtail
in the red holders). The fiber should “stick-out” some 3-4cm.
- Don´t forget to put on a shrink-tube (sleeve) over one of the fiber-ends before You
start !
5
•
•
•
Strip and clean the fiber.
Cleave the fiber.
Place the fiber holders in the splicer. Push down the bracket which holds the fibers
in place in the V-grove
•
See the operation of the above at page 13-15 and/or watch our Video at:
https://www.dropbox.com/sh/t1bwwrk0i9str6a/AAAKnje_Mvc-_SeXVUH1v0Jva?dl=0
•
If needed, press “RESET”.
The fiber ends should be seen in the display, a bit like this when ready for splicing:
•
Press the “SPLICE”-button (large button). The fibers will move together and
spliced.
The whole process will be shown in the display and take less then 10 sec.
An automatic pull-test will be performed after the splicing.
Finally the splicer will show the estimated splice loss (in dB and in green color) or, if
the process failed, “Bad splice” (if so, re-do the operation from “strip and cleave”
above).
•
Oven operation – sleeve protection !
•
•
•
•
•
Open up the oven (with the little arm on the left hand side of the oven).
Lift up the bracket over the V-grove and then open up both fiber-holders.
Push the shrink-tube over the spliced part and place the fiber/tube in the center of
the oven. Lock the fiber (and close the oven-lid) with the oven-arm.
Start the oven by pressing the “OVEN”-button. The oven is preset for a 60sek
operation but can be set in many combinations (see in the Menu-system).
The splicer is ready for another splice while the oven is in operation (start from
above again). Press “RESET” if the oven-operation is not needed.
6
Main menu
Step up/down with the small buttons (UP/DOWN). Select Your choice with the
SELECT-button.
EXIT
Exit from this Menu (back to Splice-mode).
CLEAN ELECTRODES
Run the “CLEAN ELECTRODES”-program to remove dirt/oxide on the
electrodes.
Running this program will ignite an extra powerful spark which will burn
the electrodes clean.
The “CLEAN ELECTRODES” will also be shown automatically in the display
every 10 splices.
Always run the program several times (3-5 times) for best result.
CALIBRATE
This function shall be used often for automatic environmental
compensation.
This should be done every time the environment changes, for ex. when
starting a new workday, when coming back after lunch, when changing
the type of fiber cable to use.
Performing a Calibration:
- Strip one fiber which You are about to splice (strip it some 5-6cm).
- Clean the fiber with alcohol, isopropyl or similar. Make sure not to touch
the fiber with anything after cleaning as it will become dirty.
7
Place the stripped and cleaned fiber across the V-grove (see picture below).
You can see how it is performed in our VIDEO to be found at:
https://www.dropbox.com/sh/t1bwwrk0i9str6a/AAAKnje_Mvc-_SeXVUH1v0Jva?dl=0
Having placed the fiber in the V-grove enter the “Menu” again and step with
“down-arrow” to CALIBRATE.
Select it (large button) and the splicer will perform a calibration.
This is seen on the display as the splicer will ignite the spark and shine
through the fiber with various strength.
The operation is finished after some 10 seconds and the display will show
“OK” if the Calibration was done properly.
If not, the display will show the text: “CALIBRATE AGAIN”.
* The splicer will adjust to the performed calibration with small steps
at every splice but when changing environment this calibration will
be needed (as the Calibration function compensate with many steps
up/down if necessary).
TURN OVEN ON
Use this function to manually run the oven program. Normally, when a
splice is done the oven program will be executed automatically (see
above “Oven operation” page 6).
But under some circumstances You might want to operate the oven
manually.
If so, place a fiber with a shrink-tube (sleeve) in the oven compartment
and press the OVEN-button. The oven will start and run for as long as
the oven time is set (factory preset is 60 sec.)
Change time under “SETUP” and “Oven” below.
SETUP
Takes You to the next sub-level where the following functions can be
adjusted (see section below):
* FIBERTYPE
* SET CLOCK
* OVEN
* LANGUAGE
* FIBER POSITION
8
*
*
*
*
ELECTRODES
DISPLAY
STARTUP CLEAN
SPLICE PAUSE
INFO
Shows miscellaneous information of the splicer, like firmware version and
number of total splices.
Setup Menu.
FIBER TYPE
Select the correct fiber-type You are about to splice:
• SINGLEMODE
• MULTIMODE
• OM1
SET CLOCK
Set the internal clock by stepping up/down with the small buttons.
Save value and move to the next line by pressing the large button
(MOVE). Select EXIT for leaving this function.
UP
Changes selected items up one step.
DOWN
9
Changes selected items down one step.
MOVE
Steps to next item.
OVEN
Set the oven time by stepping up/down with the small buttons.
Press the large button (SELECT) for choosing a new value (or go to the
top and select EXIT).
LANGUAGE
Set the language by stepping up/down with the small buttons.
Press the large button (SELECT) for choosing a new language (or go to the
top and select EXIT).
FIBER POSITION
Calibrate fiber position when replacing cleaver (and/or if the fibers -for
any reason- are not in the correct position when being placed in the Vgrove).
- Put fibers in their holders and place them in the splicer before starting.
Start automatic calibration of fiber zero point setting by pressing the
large button (SELECT).
If the fibers are visible and in the correct position like in the picture
below then this new position shall be saved.
Save by pressing the large button (SELECT).
10
ELECTRODES
Use this function to reset the splice-counter when the electrodes have
been replaced.
The electrodes are made to last some 2000-2200 splices.
DISPLAY
ONLY IN ENGLISH VERSION !!!
- This function, when enabled, will show all Menus with a larger font.
STARTUP CLEAN
If selected, the splicer will do a clean electrodes every time the splicer is
turned on if the lid is closed and there are no fibers in the camera view.
11
SPLICE PAUSE
If selected, the splicer will pause and wait for a button to be pressed,
when the fibers are in position for splicing.
EXIT
Exit menu.
Preparing the fibers and place them in the Fusion splicer !
Often, incorrect handling or preparation causes splice loss. It is crucial to keep tools and fiber
clean; the invested time used in fiber and tool handling is more than compensated for in reduced
troubleshooting effort.
Don´t forget the protective sleeve !
Before preparing the fiber for splicing, make sure to put the protective sleeve in place.
12
Place fiber in the fiber holders
Place 250 fiber in the black holders and 900 fiber/pigtail in the red holders). The fiber
should “stick-out” some 3-4cm (as seen in the pictures).
Stripping the fiber
Hold the stripping tool to the edge of the fiber holder. Press the handles together and pull
firmly away from the fiber holder to remove the coating (take away some 5-10cm).
13
Cleaning the fiber
Use a pair of tweezers equipped with cotton buds (or a similar tool) soaked
with alcohol, isopropyl or similar.
Press the tweezers together and clean the fiber with by moving the tweezers
from the fiber holder towards the end of the fiber. Repeat, but rotate the
tweezers.
A “squeaking” sound indicates that the fiber is clean
14
Cleaving the fiber
Lift up the lid of the cleaver and position the fiber holder in the cleaver. Insert the fiber
holder from above, a little from the right hand side and let in slide back down into position
(where the magnets will lock it). The fiber holder must be placed tightly towards its inner
position, as far to the right as possible (check by pressing it gently).
See picture below.
Press the “cleaver-wagon” (with the cleaver blade) towards Your working position.
See picture.
15
Close the lid of the cleaver and push the sliding part away from you.
The fiber will be cut off (cleaved) and get a very straight 90´ angle
Lift up the fiber holder in order to prevent the fiber from getting dirty.
16
Place the cleaved and ready fibers in the splicer
Open up the main lid (on top) of the splicer and lift up the little bracket on top of the Vgrove.
Place the fiber holders in their wagons.
- Keep the fiber holder at an angle and move it pass its intended resting place
Lay the holder down and let it slide back into position (where the magnets will lock it).
Don´t try to push them in place from the outer position as it will be very hard to make the
fiber fall in place into the V-grove. See picture below and our videos at:
https://www.dropbox.com/sh/t1bwwrk0i9str6a/AAAKnje_Mvc-_SeXVUH1v0Jva?dl=0
17
Close the bracket over the V-grove and lock the fibers in position
Close the main lid.
The fiber should now be visible in the monitor like this:
18
Splicing
Select the proper splice program in the menu (Singlemode- Multimode- or OM1- fiber).
- Make sure a reset has been performed since last splice.
- Make sure that the fibers/ V-grove are clean (if not, see page 13 and 20).
VERY BAD
GOOD
Are the fibers properly aligned (if not, see page 20 below) ?
BAD
19
If both fibers looks good and clean, Press the SPLICE button and the automatic spliceprocedure will take place (moving the fibers together, igniting the spark, melting the glass
together, make a pull test and estimate a loss value).
If estimated loss is larger than 0.1dB the splice is bad and has to be re-spliced.
20
Cleaning the v-groove of the fusion splicer
The function of the high precision surface of the v-groove is very sensitive and must be
kept 100% clean.
It´s quite easy to contaminate it with dirt so cleaning/maintenance should be done on a
regular basis.
Whenever there is a consistent problem with fiber offset (display showing OFFSET
ERROR) then there is most certainly dirt in the V-grove which You must get rid off.
To clean the v-groove proceed as follows:
Put fibers in the fiber holders, strip clean and cleave them both.
Put them into place in the splicer (like above, page 16) so You see both fiberends in the
display.
Gently slide the fiber holders back and forth in the V-grove quite many times.
You can see how its done at:
https://www.dropbox.com/sh/t1bwwrk0i9str6a/AAAKnje_Mvc-_SeXVUH1v0Jva?dl=0
The fiber ends are so sharp that they will cut the V-grove clean from any dirt which might
have fallen into it.
Most likely You will see some very small items (dirt) which will attach to the fiber during this
procedure (see dirt on the fiber ends in the picture below).
After finishing don´t use these fiber ends for splicing (as they are worn down).
- Strip, clean, cleave new fibers when ready.
Apart from the method above You can also clean the V-grove with a cotton bud with
alcohol/isopropyl.
Preferably, the combination of both methods should be used.
21
Cleaning the electrodes
The electrodes of the splicer are sensitive and can get a bit oxidized due to moisture, dirt
etc. in the air.
Therefor we recommend that the user always clean the electrodes before starting a new
work (before performing a Calibrate). The function is found in the Menu-system; CLEAN
ELECTRODES, and it should be run some 3-5 times for best performance.
The EasySplicer will also, every 10th splice, ask the user to clean the electrodes. This is
suggested only as a precaution but running the CLEAN ELECTRODES function will keep
the splicer fresh and free from problems.
- Under some circumstances it might be that the electrodes get so oxidized that the
CLEAN ELECTRODES function wont be able to fully burn off the oxidation and the
problems remain. If so, take for ex a sharp carpet knife or razor-blade and scratch gently
on the surface of the electrodes (on the tips). See picture below and our video at:
https://www.dropbox.com/sh/t1bwwrk0i9str6a/AAAKnje_Mvc-_SeXVUH1v0Jva?dl=0
22
Oven maintenance
The oven needs to be cleaned and greased with regular intervals, to make removal of the
shrink sleeves easy. Use silicon grease and apply it to the bottom of the oven with a cotton
bud. See below.
23
Technical specification:
Weight:
800g
Dimensions:
230x98x53 mm
Alignment:
Axial: Automatic
Radial: Fixed v-groove
Fusion technique:
Arc fusion
Process:
Automatic
Typical Loss:
SMF 0.03dB
MMF 0.01dB
Splice Programs:
Fiber handling:
Typical cycle time:
3 pre-defined:
– Singlemode
– Multimode
– OM1
Fiber holders, 2 pairs (250-BLACK and 900/pigtail-RED).
7s + 50s (splice cycle + oven cycle).
Display:
Magnification:
2.8” Color TFT
Camera 140x
Heat oven:
Sleeve dimensions:
Built in.
Max 60mm length, 2-5mm diameter.
Power source:
Battery: 7.4V/2200mAh. Li-Ion type.
Built in.
Communication:
Memory:
USB, mini USB-plug.
Internal 1MB, External SD-card.
Power supply:
100-240V AC / 6V DC / 1.25A
Operating environment:
Temperature 0˚C to 45˚C
Humidity max 95% RH,
non-condensing
Storage environment:
Temperature -20˚C to 60˚C
Humidity max 98% RH,
non-condensing
24


