1
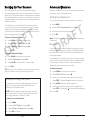
2000668 / PRO-668 User’s Guide HANDHELD DIGITAL TRUNKING SCANNER Thank you for purchasing your Digital Trunking Handheld Radio Scanner from RadioShack. Please read this user’s guide before installing, setting up and using your new scanner. This user’s guide is available in Spanish at www.radioshack.com. Esta guía del usuario está disponible en español en www.radioshack.com. Contents Introduction Introduction....................................................................................... 3 Antenna.......................................................................................... 4 External Power.............................................................................. 4 Batteries......................................................................................... 4 Setting Bandplan and Clock...................................................... 5 Programming by ZIP Code........................................................ 6 Playlists........................................................................................... 6 Programming by City/County................................................... 7 Manual Programming.................................................................. 7 Scanning......................................................................................... 8 Attenuation................................................................................... 9 Scanning Legally........................................................................... 9 Priority Scanning........................................................................10 Monitoring....................................................................................11 Many organizations, such as police and fire departments, emergency response teams, and airports, use radio communication extensively every day. Scanning these radio communications is a great way to listen to all the exciting events happening in your area. • Police • Fire Departments • Air Ports Radio communication is also used to coordinate large events, and spectators with radio scanners listen to behind-the-scenes action. • Auto Races • Air Shows • Sports Searching.........................................................................................12 Signal Stalker II............................................................................12 Service Search............................................................................12 Limit Search.................................................................................13 Search Settings..........................................................................13 One obstacle to scanning can be configuring your scanner. The iScan is designed to simplify this process and get you started as quickly and easily as possible. • Simple Controls Weather Radio................................................................................14 Weather Priority.........................................................................14 SAME Standby............................................................................14 Skywarn........................................................................................15 If you have a ZIP Code, you can program your iScan. This guide will help you set up and program your iScan, and then provide more detailed instructions for fine-tuning your scanning experience. Backing Up Your Scanner.............................................................16 Reprogramming Your iScan.....................................................16 Features T F A R D Advanced Features........................................................................17 Setting Up a Password..............................................................17 Play Sets.......................................................................................17 Configuring Settings.................................................................18 Editing Objects Manually..........................................................20 Recording and Playback...........................................................21 Alert LED Settings.....................................................................22 Saving Found CTCSS or DCS Codes....................................24 Using IF Output..........................................................................24 Changing microSD Cards........................................................25 iScan Directory Folders............................................................25 PC Scanner Software................................................................26 Updating DSP Firmware...........................................................27 Updating CPU Firmware...........................................................27 Updating the Software Database .........................................28 Updating Your iScan Library....................................................28 Maintenance....................................................................................29 Birdie Frequencies.....................................................................29 Specifications.................................................................................30 Frequency Coverage.................................................................31 Library Copyright Notice..........................................................32 Limited Warranty........................................................................33 2 T F A R D • • • • • • • • • • • • • • • Programming by ZIP Code Simple programming by ZIP Code Multi–system trunking Audio recording Weather radio Signal Stalker II V-Scanner II USB Interface, with PC programming software RadioReference database (SD Card) Masks encrypted audio Decodes Radio ID and Talkgroup ID Improved P25 functionality Signal strength meter Programmable alert LED Discriminator output Package Contents • • • • • • • Programming Software Handheld Scanner Antenna USB Cable microSD Card (PC software) Belt Clip User’s Guide 3 Antenna Setting Bandplan and Clock Your iScan's durable antenna provides excellent reception. Align its connector with the iScan antenna post tabs, press down and turn. To turn on your iScan, press the Power button. When you turn on your iScan for the first time, use the fourdirection pad and SEL to set your bandplan, date, and time. To connect a larger antenna, use a coaxto-BNC adapter and 50-ohm coaxial cable (RG-58, RG-8).* T F External Power A R Before starting, make sure the scanner is off. Use the supplied shielded USB cable. Some USB power adapters can interfere with the scanner's reception. Using an incompatible USB cable may damage your scanner. D Batteries Always set the Battery Type: Squelch Higher for stronger signals. Lower for weaker signals. A R D AA AA AA • ALK − Alkaline AA • NI-MH − Rechargeable, NickelMetal Hydride T F Headphones* (not supplied) Disconnect any outdoor antenna during electrical storms to prevent damage. Battery Type Warning: Never install alkaline batteries with the Battery Type switch set to NI-MH. Alkaline batteries can get hot or explode if you try to recharge them. • Use only fresh batteries of the required size and type. Do not mix old and new batteries, different battery types (alkaline or rechargeable), or rechargeable batteries of different capacities. • Dispose of batteries promptly and properly; do not burn or bury them. • For storage of a month or longer, remove the batteries. Batteries can leak chemicals that can damage electronic parts. Power Press and hold. Four-Direction Pad The four-direction pad and SEL button navigate through menus and lists, and controls volume. Belt Clip Align the belt clip and slide down until it clicks. To remove, pull back the tab and slide up. -Set Clock- ‚014-08-22 Fri 08 : 41 : 04 Press SEL to Set or SKIP to Exit 3 2 2 0 ‚4 0 9 *Always ensure safe and proper anntenna installation. Follow instructions provided with your antenna. If none are provided, refer to article 810 of National Electrical Code (NEC) for installation and grounding instructions. *To protect your hearing: • Set the volume to zero before putting on headphones. With the headphones on, adjust the volume to a comfortable level. • Avoid increasing volume. Over time, your sensitivity decreases, so volume levels that do not cause discomfort might damage your hearing. • Avoid or limit listening at high-volume levels. Prolonged exposure to highvolume levels can cause permanent hearing loss. Wearing headphones while operating a motor vehicle or riding a bicycle can create a traffic hazard and is illegal in most areas. Even though some headphones let you hear some outside sounds when listening at normal volume levels, they still can present a traffic hazard. Exercise extreme caution! 4 5 Recycle Rechargeable Batteries Recycle your old rechargeable batteries at one of the many collection sites in the U.S. and Canada. To find the site nearest you, visit www.call2recycle.org or call toll-free 1-877-2-RECYCLE. Programming by ZIP Code All scannable items programmed into your iScan are considered objects. Your iScan automatically imports and organizes objects into playlists. The simplest method for programming your new scanner is by ZIP code. Programming by City/County • Conventional frequencies • Trunked talkgroups • Radio services To program your scanner by ZIP code: 1. Press MENU to access the main menu. 2. Select Select 3. Select By ZIP Code 4. Use the four-direction pad and SEL button to set your zip code. T F and press . Place and press . A R ZIP Code: ‚0000 moves cursor 5. Select Default SEL=OK, MENU=BACK Types or Custom Types . Default 7 Types immediately imports default 6 values, and Custom Types lets you 7 6 ‚0 0 select services. ( = selected) D 4 6. Press SEL. To program your scanner by city or county: 1. Press MENU to access the main menu. 2. Select Select Place 3. Select By or City Your iScan automatically imports and organizes objects into playlists, beginning at Playlist 151 named by service. To organize your iScan, you can rename your playlists. To rename a playlist: 1. Press MENU to access the main menu. 2. Select Playlists and press SEL. 3. Select a playlist and press . The playlist name appears. 4. Use the four-direction pad to change the name, then press SEL. and press . 4. Use the four-direction pad and SEL button to set your location. T F 5. Select Default Types or Custom Types . Default Types immediately imports default values, and Custom Types lets you select services. ( = selected) A R 6. Press SEL. D Note: Not all states have statewide trunked systems. Manual Programming You can program by browsing the library. To program you scanner by browsing: 1. Press MENU to access the main menu. 2. Select Browse Playlists and press . By County Library , then press . 3. Use the four-direction pad and SEL button to select agencies to program. ( = selected) 4. Press MENU. 5. Select Import Selected and press SEL. A list of playlists appears. 6. Use the four-direction pad and SEL button to select a playlist. ( = selected) 7. Press to import the items. Library Structure 2. Select Playlists and press SEL. Each State contains three data types: • Agencies – Statewide non-trunked systems. • Counties/Cities – County or independent city. • Systems – Trunked systems, including control frequencies (sites) and talkgroups. 3. Use the four-direction pad to select a playlist and press SEL. ( = selected) Note: Not all states have a statewide trunked radio system. 5. Press MENU. To enable or disable playlists: 1. Press MENU to access the main menu. 4. Press . 6 7 Scanning Attenuation Your iScan checks all active objects sequentially for transmissions, stoping for transmissions. Attenuation can help prevent interference by reducing the strength of incoming signals. Attenuation can improve scanning in high-traffic areas, such as large urban areas. In rural areas, attenuation is used less frequently. To scan: 1. Press MENU to access the main menu. To activate global attenuation, press ATT. GA appears in the display. 2. Select Play and press . Scanning T F Play Law Talk Fire Talk Emergency Ops Law Dispatch Fire Dispatch Playlists A R Your iScan stops for transmissions plus a two-second delay. During the transmission, the iScan diplay provides information about the transmission source. D Squelch OPEN Trunking Data Global Attenuator ON P25 with AGC Scanning S G DG Law Talk TGRPpsdr FWPD E=SE 1 Fort Worth Regi T Battery Priority Skip Delay Lock out (Off) External Power/Charging Paused AM/FM/NF (Narrow FM) P25 without AGC Attenuator ACTIVE S GA DgF M Law Dispatch CONVpsDr RVO PD Disp NFM453.650000 DSC 311 = Playlist Object Type Object Name Frequency Squelch Code 8 T F Attenuator ACTIVE Recording F =Full A R S GA Law Dispatch CONVPSDL RVO PD Disp NFM453.650000 DSC 311 D Priority Skip Delay Lock out (ON) Press ATT again to remove attenuation from the object. G remains on the display to indicate that global attenuation is still enabled but not active. Press ATT again to disable global attentuation. Scanning Legally Your scanner covers frequencies used by many different groups including police and fire departments, ambulance services, government agencies, private companies, amateur radio services, military operations, pager services, and wireline (telephone and telegraph) service providers. It is legal to listen to almost every transmission your scanner can receive. However, there are some transmissions you should never intentionally listen to. These include: • Telephone conversations (cellular, cordless, or other means of private telephone signal transmission) • Paging transmissions • Any intentionally decoded scrambled or encrypted transmissions According to the Electronic Communications Privacy Act (ECPA), you are subject to fines and possible imprisonment for intentionally listening to, using, or divulging the contents of such a transmission unless you have the consent of a party to the communication (unless such activity is otherwise illegal). This scanner has been designed to prevent reception of illegal transmissions. This is done to comply with the legal requirement that scanners be manufactured so as to not be easily modifiable to pick up those transmissions. Do not open your scanner’s case to make any modifications that could allow it to pick up transmissions that are illegal to monitor. Doing so could subject you to legal penalties. We encourage responsible, legal scanner use. In some areas, mobile use of this scanner is unlawful or requires a permit. Check the laws in your area. It is also illegal in many areas to interfere with the duties of public safety officials by traveling to the scene of an incident without authorization. Warning: Changes or modifications to this unit not expressly approved by the party responsible for compliance could void the user’s authority to operate the equipment. Shielded cables must be used with this unit to ensure compliance with the Class B FCC limits. 9 Priority Scanning Monitoring You may decide that a particular object should be checked more frequently during scans. Your iScan checks Priority objects more frequently than non-priority objects. Monitoring simply means keeping your iScan tuned to a single object, rather than scanning through a playlist. Note: To set priority, Priority Mode must be enabled. The most common form of monitoring is to simply press /II when the iScan stops on a transmission. To enable Priority Mode: To return to scanning, press /II again. 1. Press MENU to access the main menu. T F 2. Select Settings and press SEL. 3. Select Priority Mode and press SEL . A checkmark ( ) indicates Priority Mode is active. A R D Priority -Settings- Save changes Default Vals Simple Display Default PL: 1 Priority Mode √ 4. Press MENU, and then press SEL to confirm. To set priority objects: To manually tune an object: A R 1. Press MENU to access the main menu. 2. Select Browse Objects and press . The first available playlist appears. D 3. Use the direction keys to navigate through playlists and objects. Objects Playlists Playlists 1. Press MENU to access the main menu. 2. Select Browse Objects and press SEL. 3. Use the four-direction pad to select an object and press MENU. Objects 4. Press SEL. Objects Playlists Playlists Objects 4. Select Priority and press SEL . A checkmark ( ) indicates Priority. 5. Press MENU, and then press SEL to confirm. 10 T F You can also monitor a specific object by manually tuning your iScan to the object. 11 Searching Limit Search Your iScan can locate active • Signal Stalker II frequencies in your area that you can • Service Searches save to include in future scans. • Limit Search Limit Searches focus your search to a defined range. To perform a Limit Search: TIP: While searching, you may want to ignore a frequency. Press SKIP and your iScan will ignore the frequency.* 1. Press MENU to access the main menu. Signal Stalker II 3. Select Limit Search, and press . The search begins. Signal Stalker II sweeps quickly through several frequency ranges in 1 MHz blocks. 4. Press MENU. T F To search using Signal Stalker II: 2. Select Search , and press . T F 5. Scroll to Lo , press , and use the four-direction pad and SEL to set the value. A R 1. Press MENU to access the main menu. 6. Scroll to Hi , press , and use the four-direction pad and SEL to set the value. 2. Select Search , and press . 7. 3. Select Signal Stalker and press . 8. Your iScan stops for transmissions. To continue the search, press . A R D 4. Select All Bands or Public Safety and press . 5. Your iScan stops for transmissions. To continue the search, press . 6. To save a frequency, press MENU, select Store Channel , and press SEL. Your iScan adds the object to the default playlist, named by search type. Press to continue the search. D 9. To save a frequency, press MENU, select Store Channel , and press SEL. Your iScan adds the object to the default playlist, named by search type. Search Settings Each type of search includes settings that you can use to improve your experience. Service Search Service Searches sweep through frequencies specifically used by common radio services. Press Menu during a search. To perform a Service Search: Atten 1. Press MENU to access the main menu. 2. In the main menu, select Search , and press . • • • • • • • Public Safety Aircraft Railroad Amateur (HAM) Citizen's Band (CB) Marine FRS/GMRS/MURS 3. Select Service Search and press . 4. Scroll through the available services, select a service, and press . 5. Your iScan stops for transmissions. To continue the search, press . 6. To save a frequency, press MENU, select Store Channel , and press SEL. Your iScan adds the object to the default playlist, named by search type. *To restore all skipped objects, go to the main menu, select Restore Skipped , and press . 12 Signal Stalker II Attenuation Zeromatic Locates frequencies quickly Delay Pause before resuming search Special Mode Skips 1 MHz block where you have skipped five or more frequencies Frequency Ranges Limits the search range Rx Mode Automatic or forced AM/FM modes (Aircraft and Amateur bands) Lo Lowest frequency to search Hi Highest frequency to search 13 Service Search Limit Search Weather Radio SAME Standby The NOAA Weather Radio All Hazards (NWR) network broadcasts official warnings, watches, forecasts, and other information from the National Weather Service (NWS).* Specific Area Message Encoding (SAME) identifies specific geographical areas using 6-digit Federal Information Processing Standards (FIPS) codes, which are mostly aligned along county lines. To monitor the strongest NWR frequency in your area, . press S FM NOAA Weather Wx7 162.550000 SKIP Weather Priority = Standby T F Weather Priority makes the strongest weather frequency a priorty object to be scanned more frequently. To receive severe weather broadcasts while scanning other channels, set the Weather Priority channel. A R To activate Weather Priority: 1. Press . When the transmission starts, make note of the NWR channel number (1-7). D 2. Press MENU. 3. Select Priority and press or to select the channel. 4. Scroll to Save Changes and press . = Standby Priority Skywarn Skywarn™ repeaters relay severe weather reports directly from amateur radio repeaters to local NWS offices. NOTE: Some areas may not have available Skywarn frequencies. To importing Skywarn Frequencies: 1. Browse for Skywarn frequencies in the iScan library: Browse Library United States (State) Counties/Cities (County) Categories Amateur Radio. 2. Select Skywarn and press SEL. 3. Press Menu. The Playlists appear. 4. Select the Skywarn playlist and press SEL. A R D once to enter Weather Mode. 2. Press again to activate Skywarn. 1. Look up your local FIPS code(s). , then press MENU. 3. Scroll down to SAME 1 FIPS and press . 4. Use the four-direction pad and SEL button to set your FIPS code. 5. Select SAME 1 Enable and press . 6. To save additional FIPS codes, select SAME 2 FIPS and repeat steps 4-5. 7. Select Save Changes and press . To activate SAME Standby Mode: 1. Press , and then press or to select a NOAA channel. 2. Press SKIP. The speaker is muted and SKIP = Normal appears. S FM 3. To return to Normal NOAA Weather Wx7 162.550000 Weather Mode, press SKIP again. SKIP Note: Skywarn temporarily disables all other playlists. 14 4 To program FIPS Codes: To activate Skywarn: 1. Press T F TIP: For advance notice, consider programming FIPS codes for adjacent counties. 2. Press S FM NOAA Weather Wx7-P 1 62.550000 SKIP SAME 1 FIPS To use SAME Standby, you ‚00000 must program at least one moves cursor FIPS code. You can obtain SEL=OK, MENU=Back FIPS codes at: www.nws. 7 noaa.gov. You can also call the NWS toll-free at 1-888-NWR-SAME (1-8886 697-7263). 7 6 ‚0 0 15 = Normal Backing Up Your Scanner Advanced Features As a mobile scanner, your iScan is desiged to simplify changing locations with minimal configuration. V-Scanner II stores up to 20 complete scanner configurations, including objects and playlists, so that you can restore your scanner programming any time, and you can save configurations for multiple locations. When you are able to scan, you can use advanced features to improve your scanning experience. For example, if you travel between Texas and Colorado, you can save your Texas programming in one V-Scanner II folder and your Colorado programming in another. When you travel, you can load the folder for your current location, and your programming is complete. T F A R To save a V-Scanner II folder: 1. Press MENU to access the main menu. 2. Select Select Place 3. Select Backup Data D and press . and press . 4. Press SEL. To load a V-Scanner II folder: 1. Press MENU to access the main menu. 2. Select V-Scanner and press . 3. Press or to select the V-Scanner folder. 4. Press SEL. TIP: After you have completely set up your scanner, save a backup. A backup can save you a lot of work later. Setting Up a Password You can set a password to restrict access to you iScan. 1. Press MENU. 2. Scroll to Set Password 3. Use the arrows to set the password. A R 4. Press SEL. Note: The password can be reset using the iScan software, if necessary. D Play Sets If you have a large number of playlists configured, you can manage them using play sets. Your iScan provides 20 play sets that each contain a list of all 200 normal playlists and the Skywarn playlist. For example, you can define a play set for Texas and a play set for Colorado. In each play set, enable or disable playlists for that location. When you travel, you can enable and disable play sets to reconfigure your iScan. To define a play set: 1. Press MENU to access the main menu. 2. Select Play Reprogramming Your iScan T F and press Sets and press . 3. Use the four-direction pad to select a play set and press SEL. Checkmarks ( ) indicate active play set. To change your location by reprogramming, you must clear your current programming. Otherwise, your scanner will scan both locations. 4. Press MENU. The list of playlists appears. NOTE: Clearing channels erases all current scanning data. If you want to re-use this data in the future, save the configuration in a V-Scanner II folder. 6. Press . 5. Use the four-direction pad to select a playlist and press SEL. Checkmarks ( ) indicate included playlists. To clear your current location: 1. Press MENU. 2. Scroll to Set 3. Select Clear Place and press . Channels and press . 4. Press SEL to confirm. 16 17 Configuring Settings Show TGID To access configuration settings, select Settings from the main menu, and press . Displays talkgroup ID. Simple Display must be unchecked. Show Site Name Displays trunking site name, if two or more trunking system sites are programmed. Simple Display must be unchecked. CONV TGID CONV Radio ID Displays the talkgroup ID for P25 conventional talkgroup calls. Displays the Radio ID for P25 conventional calls. Default Vals Restores default settings. Simple Display Limits the information on the display during scanning or monitoring. Default PL The default playlist for scanning and for saving objects found during searches. Priority Mode Priority Time T F Enables Priority Mode, and sets the time between priority scans. See "Priority Scanning" on page 10. A R Enable Record Enables the record feature. See "Recording and Playback" on page 21. Search Record Records received search transmissions. G Atten Mode G Atten On Enables Global Attenuation and activates GA. See "Priority Scanning" on page 10. D Search Dg AGC Applies Digital AGC to digital transmissions. G AGC Mode G AGC On Enables and activates Global AGC. PlaySets Opt Turns on the PlaySet Feature. See "Play Sets" on page 17. Sounds Alerts Sets iScan beeps and alert sounds. Sets alerts: Off, Audio, Visual, Both T F Simple Display must be unchecked. PC/IF CCDump To file Limit Trim Logs Streams ASCII Control Channel Dump data over the USB interface for trunking control channels, stores ASCII Control Channel Dump data to the microSD card, and sets a limit for the number of Trim Logs that are sent: 100, 200, 500, 1000. Low Batt Time Interval (seconds) between low-battery alerts. Charge Time Sets the radio charge time. TG Disp Display format for talkgroup IDs. A R D M36 Stat Bits Uses status bits to track Motorola 3600 baud trunking talkgroup calls. M36 ENC ignores encrypted bits on Motorola 3600 bps control channel systems EDAC Dig ignores encrypted bits on EDACS control channel systems BandPlan Selects USA or Canada. FlexStep Allows smaller steps between frequencies. EncMode For encrypted transmissions: Noise, Silent, or Tone. EncLevel Sets the encrypted call tone level. IF Out Routes the IF Discriminator signal to the headphone jack. DSPLevelAdapt Controls how fast the DSP adjusts to varying P25 levels (default: 64). Higher = faster. ADC Gain Sets input signal to CODEC (default: +0dB). DAC Gain Sets output signal from CODEC, varying the decoded signal audio level (default: +0dB). Turns on your iScan at a specified time, to a set function: Menu, Scan, Weather, or Monitor. Key Beeps Beep Volume Enables or disables key tones and sets key tone volume. Alert Volume Object and low battery alert volume. Contrast Sets the LCD contrast. LModeBAT LModeEXT Sets the backlight mode with batteries and external power: Off, On, Stealth, Normal, Key, Ignore. LiteArea LiteTime LiteLevel Sets LCD and keypad lighting. Welcome Text 1-5 Message when iScan is first turned on. Blink Time 1-2 Controls the display time for each item. Show Radio ID Displays Radio ID (trunked systems). Auto Power On At 00:00 Mode: Tag only Displays only display name (trunked systems). Place Select Use RID Alert Disables the Set Place option on the main menu. Displays an alert for transmissions with Radio ID. Show VC/CC Sig Bar 1-5 Displays voice and control channel. Show Radio ID will override. Simple Display must be unchecked. Sets the range for the Signal Strength indicator. Backlight duration and brightness. 18 19 Editing Objects Manually 1. From the main menu, select Browse Recording and Playback Objects . 2. Use the four-direction pad to select an object. NOTE: Your iScan organizes imported objects beginning at Playlist 151, named by service. Playlist 1 may be empty. 3. Press MENU to enter the Object Edit menu: Your iScan contains a 2GB MicroSD card that can store over 50 hours of recording time. After you activate the recording feature, you can record all transmissions for specific objects and transmissions found during a search. To enable the recording feature: 1. Press MENU to access the main menu. T F Frequency The frequency for the object. 2. Select Settings and press . Alpha Tag The display name for the object. 3. Select Enable Set Playlists Assign the object to playlists. Rx Mode Receiving mode 4. To record during frequency searches, select Search Record and press . Sq Search Sq Code D Sq Exclude T F A R Sq Mode Squelch mode Activates a search for the Squelch code Squelch code Excludes squelch 5. Select Save Record and press . A R Changes and press . 6. Edit the object and activate the Record setting. See "Editing Objects Manually" on page 20. D To play back recordings: Locked objects are not scanned. 1. Press MENU to access the main menu. Skipped objects are not scanned. 2. Select Playback and press . Priority Priority object are checked more frequently. Delay Set a scan delay after a transmission ends. 3. Press /II to play the file. Previous Attenuate Applies attenuation to the object AGC Reduces interference from strong local transmitters (conventional frequencies only). Alarm Select a sound used for alarms. Light On, Off, or Flash. Flash Pattern Alert LED flash pattern.* On Time / Off Time Flash pattern step duration. (Percentage: 100 = 1 second, 50 = 1/2 second). LED Enabled Enables the Alert LED. LED Flash Enables Alert LED flash patterns. Color Count The number of Alert colors. 0 = off. Color 1-4 Hexidecimal value for each color. Record Record received transmissions. ( = Record this object) Locked Out Skipped Delete Object Deletes the programmed object; the frequency remains in the iScan library for later programming, if desired. 5. Use the four-direction pad and SEL button to change settings. ( = selected) 6. Select Save Changes 20 Rewind Forward Next 4. You can press MENU for a list of playback options: • Main Menu – Returns to the main menu. • Back – Returns to the list of recorded files. • Play From Here – Plays the current recording and all recordings afterwards. • Delete All – Deletes all recorded audio files. • Delete Earlier – Deletes recorded audio files prior to the selected audio file. • Delete Later – Deletes the selected audio file and all recorded audio files after the selected file. 5. Press SKIP to stop playback. and press SEL. 21 Alert LED Settings Single-Color Solid (Red) 1. From the main menu, select Browse Objects . Alert LED 2. Use the four-direction pad to select an object. Single-Color Flashing 3. Press MENU to enter the Object Edit menu: T F Flash Patterns Each character defines a flash pattern step, and eight characters (steps) define the flash pattern. A R Flash Pattern 0 =on D 1 2 3 4 Flash Pattern: [Blank] LED Enable: √ Color Count: 1 Color 1: FF0000 =off Flash Pattern: AAAAAAAA On Time: 50 Off Time: 50 LED Enable: √ LED Flash: √ Color Count: 1 Color 1: FF0000 (Red) A A A A R D A 8 8 Two-Color Strobe T F A A A A A 8 A 8 2 2 2 Flash Pattern: A8A8A8A8 On Time: 10 Off Time: 10 LED Enable: √ LED Flash: √ Color Count: 2 Color 1: FF0000 (Red) Color 2: 0000FF (Blue) 5 6 7 8 9 A B A A C D E Three-Color Flashing (Slow) F On Time / Off Time and Off Time determine the flash rate: • 100 = 1 second, 50 = 1/2 second • Lower Value = Faster Rate On Time Common Hexidecimal Color Codes • FF0000 (red) • 00FF00 (green) • FFFF00 (yellow) • FFFFFF (white) • 0000FF (blue) • 9900CC (purple) Flash Pattern: 22222222 On Time: 50 Off Time: 50 LED Enable: √ LED Flash: √ Color Count: 3 Color 1: FF0000 (Red) Color 2: FFFFFF (White) Color 2: 0000FF (Blue) 2 22 2 2 2 2 23 Saving Found CTCSS or DCS Codes Changing microSD Cards When importing objects from the Library, the squelch code is automatically imported. If this information is missing, your scanner can quickly identify thee code during a search. You can purchase additional cards (up to a 32GB) to store backup configurations or recordings. Note: In the Settings menu, Simple unchecked to display squelch codes. Display must be If a conventional channel includes a CTCSS or DCS squelch code, the code appears on the display, followed by an “S.” T F = S Law Dispatch CONVpsDr RVO PD Disp NFM453.650000 CTCSS 127.3 S A R D Squelch Code To save the found code with the channel: 1. When the squelch code appears, press MENU. Store sq code appears. 2. Press SEL. After the code is saved, the scanner will stop only on transmissions that have a matching CTCSS or DCS squelch code. Using IF Output If you use third party signal analysis and decoding software and hardware, your iScan can provide unsquelched and unfiltered IF/discriminator output to the headphone jack. To activate IF Output mode: 1. Turn off and unplug your iScan, and remove the batteries. 2. Press and release the microSD card. T F 3. To insert a microSD card, turn the card with the label facing the front of the radio and press in until it clicks. To format additional cards: A R 1. Open the iScan software on your PC. 2. Select Scanner/ SD Card from the menu bar, and then Prepare Scanner Memory/SD Card For Use. D • Use only the iSCAN software to format the SD card. Formatting the microSD card for other file system types may cause iSCAN to malfunction. • Use the FAT file system with 32k clusters. • For microSD cards larger than 2GB, use FAT32 with 32k clusters. Tip: You can use an external reader, which may provide faster data transfer rates. iScan Directory Folders • BTMP – Contains temporary files used by your iScan. • CDAT – Contains your current iScan data. Save a backup copy of this folder. • CDAT_VS.nnn – Contains V-Scanner data. Folder number nnn, where nnn may range from 001 to 200 1. Press Menu 2. Scroll to the Settings menu. Press to continue 3. Scroll past Expert to the IF To remove the microSD card from the scanner: Out setting. 4. Press to scroll through the available options: • DB – Contains the Library • MTMP – Contains temporary files used by your iScan. • STMP – Contains temporary files used by your iScan. • Off – IF output disabled • CURVS.DAT – Configuration information • HP – IF output to headphone jack only • CONFIG__.BIN – Configuration information • HP/SP – IF output to headphone jack and speaker 5. Connect your equipment to the headphone jack. 24 • REC – Audio recordings WARNING: Modifying these directories or their contents outside of the iScan software is not recommended and may cause the PRO-668 to malfunction. 25 PC Scanner Software Updating DSP Firmware 1. Turn off the iScan. Your scanner comes with an installed 2GB microSD card that contains the entire U.S.A/Canada RadioReference database as well as the iScan software. 2. Connect the iScan to your computer using the supplied USB cable. Radio Refe renc e.co m 3. Select Update from the menu bar, and then Check for DSP Firmware Update. selbaC oediV tnenopmoC T F elbac OEDIV-S The simplest way to program your iScan is ZIP code, but for more advanced programming, the provided software lets you quickly customize your scanner from your computer. elbac latigid laixaoC T F BSU A R D To install your iScan Software: rotcennoc IMDH IMDH 1. Connect the iScan to your PC using the supplied USB cable. An installation wizard should appear, or you can navigate to the microSD card and open setup.exe. 2. Follow the on-screen instructions to complete the installation. 3. When the software is installed, open the software and use the tabs to modify your settings and upload to your iScan. Refer to the online help for current information. A R D 4. Click Check for Updates. 5. If updates are available, click Update My Scanner. 6. When complete, click Done. Updating CPU Firmware 1. Turn off the iScan. Disconnect the USB cable from the scanner, but keep the USB cable connected to your computer. 2. While pressing Menu, connect the USB cable to the iScan. The current boot and CPU versions appear on the display, followed by the CPU SW Upgrade prompt. 3. Select Check for CPU Firmware Updates in the update menu. 4. Click Check for Updates on the update screen. 5. If there are available updates, click Update My Scanner. 6. When complete, click Done. 26 27 Updating the Software Database Maintenance RadioReference frequently updates their databases, which you can use to upload your local database. Modifying or tampering with the scanner’s internal components can cause a malfunction and might invalidate its warranty and void your FCC authorization to operate it. Note: Updating the RadioReference database requires an Internet connection. To update your database: 1. Open the iScan software on your PC. T F 2. Select Update from the menu bar, and then Check for Library Update. 3. Click Check for Updates. A R 4. If updates are available, click Download Updates and click Done when the update is complete. Updating Your iScan Library D After you update the database on your PC, you can update your iScan library. To update your iScan library: 1. Access the Library Import tab in the iScan software. 2. Select Standard from the Select Import Type list. A second Import screen appears. • D – Unsupported digital modulation. • Handle the scanner carefully; do not drop it. • Keep the scanner dry; if it gets wet, wipe it dry immediately. T F • Use and store the scanner only in normal temperature environments. • Keep the scanner free from dust and dirt, and wipe it with a damp cloth occasionally to keep it looking new. A R Birdie Frequencies D Birdies are internal operating frequencies that can cause interference. All scanners have birdies, but if the interference is not severe, adjusting the squelch might avoid the birdie, but if you program one of these frequencies during a search, you will hear only noise on that frequency. If you suspect that a programmed frequency is being affected by a birdie, try removing the antenna. If the noise stops, it is most likely coming from an external source, and moving the scanner may reduce the noise or solve the issue. If the noise on a frequency continues when you remove the antenna, it is almost certainly the result of a birdie. • S – Unsupported trunked system. • – Some frequencies are selected, but not all. 3. Click Update Channels. The Library Import screen appears. 4. Click Update Channels. To update all objects and playlists: 1. Press MENU to access the main menu. 2. Select Update from Lib and press . 3. To use new Alpha Tag (names) from the library. Press SEL for yes or SKIP for no. Note: To update your programming, your iScan must be connected to an external power source. 28 29 Specifications Frequency Coverage Receiving modes ............................................................................AM, FM, ............................................. FM-MOT (Motorola), LTR (EF Johnson), ..................................................................... CTCSS, DCS, NAC on P25, ...................................EDACS wide/narrow (GE/Ericsson/HARRIS), ................................................. P25-Phase I, X2-TDMA, P25-Phase II Receiving system.............................................................................................. ....................................................Triple conversion PLL super heterodyne WX frequencies ..........................................162.400, 162.425, 162.450, ................................................... 162.475, 162.500, 162.525, 162.550 MHz Display................................... Full dot matrix bitmap LCD (132X65 dots) Sensitivity..............................................................................(FM 12 dB SINAD ............................................................. quieting unless otherwise noted) VHF Low.......................................................................................... 0.2 μV VHF Aircraft (20 dBq AM).......................................................... 0.4 μV VHF High 137–174 MHz............................................................. 0.3 μV VHF High 216–300 MHz............................................................ 0.4 μV UHF Low 300–406MHz............................................................. 0.8 μV UHF/UHF-T 406–512 MHz....................................................... 0.4 μV UHF High 764–960 MHz............................................................ 0.5 μV 1240–1300 MHz........................................................................... . 0.5 μV Squelch sensitivity (band center) Threshold..........................................................................AM/FM 0.5 μV Tight....................................................... (S+N)/N: AM 20 dB, FM 25 dB Spurious rejection........................... VHF High at 154.1 MHz: 40 dB (Except Primary image) Signal to noise ratio................................................. 35–40 dB typical (100 μV input signal) Scanning rate (non-trunking).....138–47.9 MHz:70ch/second (in 100 kHz Intervals) Search rate...................................... 162.25 − 167.25 MHz: 80 steps/sec. Scan and Search delay time...................................................... 2 seconds Audio max. power RF input :100 μV at 154.1 MHz (DEV:3kHz at 1kHz) 8 ohms Resistor Load at speaker terminal (BTL): 500 m Watts Intermediate frequency 1st.............................................................................................. 380.8 MHz 2nd................................................................................................ 21.4 MHz 3rd....................................................................................................455 kHz Current drain ............................. 8 Ohm internal speaker at 154.1 MHz, 5V Ext Power, Squelched: 170 mA (Back light off/without charging) Antenna impedance....................................................................... 50 Ohms Temperature range (optimal)...............14°F to 140°F (–10°C to 60°C) Speaker................................... Built-in 36 mm 8 ohms dynamic speaker Operating voltage..................DC 4.8 Volts (4 AA Ni-MH batteries) .....................................................DC 6 Volts (4 AA alkaline batteries) External power and charge voltage......USB Power (DC 5V 500mA) Dimensions (HWD)...............5.31 X 2.12 X 1.06 in. (135 X 67 X 28mm) Weight .................................................................................... 7.4 oz. (210g) Without antenna and batteries T F A R D 30 25.000–26.960 MHz.......................... (in 10 kHz steps/AM) 26.965–27.405 MHz........................... (in 10 kHz steps/AM) 27.410–29.505 MHz...............................(in 5 kHz steps/AM) 29.510–29.700 MHz.............................. (in 5 kHz steps/FM) 29.710–49.830 MHz............................(in 10 kHz steps/FM) 49.835–54.000 MHz............................. (in 5 kHz steps/FM) 108.000–136.9916 MHz................(in 8.33 kHz steps/AM) 137.000–137.995 MHz.......................... (in 5 kHz steps/FM) 138.000–143.9875 MHz.................(in 12.5 kHz steps/AM) 144.000–147.995 MHz.......................... (in 5 kHz steps/FM) 148.000–150.7875 MHz................. (in 12.5 kHz steps/FM) 150.800–150.845 MHz......................... (in 5 kHz steps/FM) 150.8525–154.4975 MHz.................(in 7.5 kHz steps/FM) 154.515–154.640 MHz......................... (in 5 kHz steps/FM) 154.650–156.0450 MHz...................(in 7.5 kHz steps/FM) 156.0500 MHz......................................................................(FM) 156.0525–156.1725 MHz..................(in 7.5 kHz steps/FM) 156.1750 MHz.......................................................................(FM) 156.1800–156.2475 MHz.................(in 7.5 kHz steps/FM) 156.2500–156.2550 MHz.................... (in 5 kHz steps/FM) 156.275–157.450 MHz........................(in 25 kHz steps/FM) 157.470–160.8225 MHz....................(in 7.5 kHz steps/FM) 160.8250 MHz......................................................................(FM) 160.830–161.5725 MHz....................(in 7.5 kHz steps/FM) 161.600–161.975 MHz.......................... (in 5 kHz steps/FM) 162.000–174.000 MHz................... (in 12.5 kHz steps/FM) 216.0025–219.9975 MHz..................... (in 5 kHz steps/FM) 220.000–224.995 MHz......................... (in 5 kHz steps/FM) 225.000–379.99375 MHz............. (in 6.25 kHz steps/AM) 380.000–419.9875 MHz................ (in 12.5 kHz steps/FM) 420.000–450.000 MHz........................ (in 5 kHz steps/FM) 450.00625–512.000 MHz.............(in 6.25 kHz steps/FM) 764.000–781.996875 MHz..........(in 3.125 kHz steps/FM) 791.000–796.996875 MHz..........(in 3.125 kHz steps/FM) 806.000–823.9875 MHz................ (in 12.5 kHz steps/FM) 849.000–868.9875 MHz................ (in 12.5 kHz steps/FM) 894.000–939.9875 MHz................ (in 12.5 kHz steps/FM) 940.000–960.000 MHz..................(in 6.25 kHz steps/FM) 1240.000–1300.000 MHz.............(in 6.25 kHz steps/FM) 137.000–174.000 MHz........ (in 5 kHz steps/FM ) Canada 380.000–512.000 MHz......(in 12 kHz steps/FM) Canada T F A R D *Excludes frequencies utilized by the Cellular Mobile Radiotelephone Service: 824–848.9875 MHz and 869–893.9875 MHz 31 Library Copyright Notice Limited Warranty The data contained in iScan’s library is provided by special arrangement with RadioReference and is copyright ©2014 RadioReference.com, LLC who retains sole ownership of the database. We ask that you respect this copyright by adhering to the following guidelines: The library data is intended for your personal use only in conjunction with programming and using your iScan. As such, RadioReference.com LLC grants the customer a non-exclusive single license to only be used with the iScan radio and its associated PC software. The library shall not be copied or transferred to any third party in any electronic or physical form or posted on any website. To decompile the RadioReference database or convert it for use with another scanning receiver is expressly prohibited. The RadioReference database is developed and maintained by unpaid volunteers who are dedicated scanning hobbyists. The library data is subject to errors in the user-submitted data reported to RadioReference, and also to the system configuration changes that a radio system operator may make from time to time. Field-testing the library data for accuracy is not feasible. For detailed radio system information worldwide, be sure to visit www.radioreference.com frequently. We encourage you to get involved with RadioReference, and submit your own new or updated data to the database, which will result in future updated editions of the library. RadioReference is not responsible for errors, missions or outdated library data. RadioShack warrants this product against defects in materials and workmanship under normal use by the original purchaser for one (1) year after the date of purchase from a RadioShack-owned store or an authorized RadioShack franchisee or dealer. RADIOSHACK MAKES NO OTHER EXPRESS WARRANTIES. This warranty does not cover: (a) damage or failure caused by or attributable to abuse, misuse, failure to follow instructions, improper installation or maintenance, alteration, accident, Acts of God (such as floods or lightning), or excess voltage or current; (b) improper or incorrectly performed repairs by persons who are not a RadioShack Authorized Service Facility; (c) consumables such as fuses or batteries; (d) ordinary wear and tear or cosmetic damage; (e) transportation, shipping or insurance costs; (f) costs of product removal, installation, set-up service, adjustment or reinstallation; and (g) claims by persons other than the original purchaser. Should a problem occur that is covered by this warranty, take the product and the RadioShack sales receipt as proof of purchase date to any RadioShack store in the U.S. RadioShack will, at its option, unless otherwise provided by law (a) replace the product with the same or a comparable product or (b) refund the purchase price. All replaced parts and products, and products on which a refund is made, become the property of RadioShack. RADIOSHACK EXPRESSLY DISCLAIMS ALL WARRANTIES AND CONDITIONS NOT STATED IN THIS LIMITED WARRANTY. ANY IMPLIED WARRANTIES THAT MAY BE IMPOSED BY LAW, INCLUDING THE IMPLIED WARRANTY OF MERCHANTABILITY AND, IF APPLICABLE, THE IMPLIED WARRANTY OF FITNESS FOR A PARTICULAR PURPOSE, SHALL EXPIRE ON THE EXPIRATION OF THE STATED WARRANTY PERIOD. EXCEPT AS DESCRIBED ABOVE, RADIOSHACK SHALL HAVE NO LIABILITY OR RESPONSIBILITY TO THE PURCHASER OF THE PRODUCT OR ANY OTHER PERSON OR ENTITY WITH RESPECT TO ANY LIABILITY, LOSS OR DAMAGE CAUSED DIRECTLY OR INDIRECTLY BY USE OR PERFORMANCE OF THE PRODUCT OR ARISING OUT OF ANY BREACH OF THIS WARRANTY, INCLUDING, BUT NOT LIMITED TO, ANY DAMAGES RESULTING FROM INCONVENIENCE AND ANY LOSS OF TIME, DATA, PROPERTY, REVENUE, OR PROFIT AND ANY INDIRECT, SPECIAL, INCIDENTAL, OR CONSEQUENTIAL DAMAGES, EVEN IF RADIOSHACK HAS BEEN ADVISED OF THE POSSIBILITY OF SUCH DAMAGES. Some states do not allow limitations on how long an implied warranty lasts or the exclusion or limitation of incidental or consequential damages, so the above limitations or exclusions may not apply to you. This warranty gives you specific legal rights, and you may also have other rights which vary from state to state. You may contact RadioShack at: RadioShack Customer Relations 300 RadioShack Circle Fort Worth, TX 76102 T F A R D FCC Statement This equipment has been tested and found to comply with the limits for a Class B digital device, pursuant to Part 15 of the FCC Rules. These limits are designed to provide reasonable protection against harmful interference in a residential installation. This equipment generates, uses and can radiate radio frequency energy and, if not installed and used in accordance with the instructions, may cause harmful interference to radio communications. However, there is no guarantee that interference will not occur in a particular installation. If this equipment does cause harmful interference to radio or television reception, which can be determined by turning the equipment off and on, the user is encouraged to try to correct the interference by one or more of the following measures: • Reorient or relocate the receiving antenna. • Increase the separation between the equipment and receiver. • Connect the equipment into an outlet on a circuit different from that to which the receiver is connected. • Consult the dealer or an experienced radio/TV technician for help. 32 T F A R D 33 ©2014. RadioShack Corporation. All rights reserved. RadioShack is a registered trademark used by RadioShack Corporation. 2000668 Printed in Korea 05A14