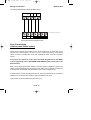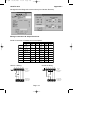
1
872.qxd
05/11/2003
15:01
Page 1
G A R D T E C 872
Control Panel
Installation
Instructions
872.qxd
05/11/2003
15:01
Page 1
Contents
GardTec 872
Contents
1 INTRODUCTION ............................................................3
2 SYSTEM OVERVIEW .....................................................4
Codes .............................................................4
Zones .............................................................6
User Names ...................................................7
Keypads .........................................................8
Up-Loading / Down-Loading...........................8
3 SYSTEM INSTALLATION ................................................9
Planning the System ......................................9
Control Panel Mounting ..................................10
Keypad Mounting ...........................................10
4 WIRING CONNECTIONS ................................................15
Mains Supply Connections .............................15
Keypad Wiring ................................................16
Keypad Jumper Options .................................19
ACE Receiver Wiring & Jumper Options ........21
Output Connections........................................22
Zone Connections (4 Wire) ............................32
Zone Connections (2 Wire) ............................34
Zone Connections (2 Wire EOL) ....................36
Zone Expander Cards ....................................39
Zone Expander Card Ident & Zone Allocation41
Radio Expander Modules ...............................46
Output Expander Modules (OPX)...................47
ID Expanders..................................................47
Engineers RKP Connection............................48
Printer Connection..........................................49
5 AREAS & ZONES ........................................................50
Understanding Areas......................................50
Zone Type Terminology .................................53
Zone Type Terminology Areas/Attributes .......54
Output Type Terminology ...............................56
6 PROGRAMMING ...........................................................62
Quick Programming Guide .............................62
Menu Shortcut Numbers ................................63
Zone Descriptor Programming Template .......69
Understanding Part/Test/Chime .....................70
Program Orders..............................................71
7 GardTec 840 SPECIFICATION & RECORDS ..................74
System Settings Record .................................76
8 MISCELLANEOUS .........................................................81
Resetting to Factory Defaults .........................81
Engineer Reset After an Alarm.......................82
Diagnostics .....................................................83
Zone Programming Tutorial............................86
9 Appendix 1 .............................................................88
Using Point ID ................................................88
New Log Events .............................................89
Digi Functions Programming with Point ID .....90
Tone Security Option......................................90
GardTec 800 Series & DD243 : 2002 ...........91
Other New Features .......................................96
Modem Quick Start (programming) ................97
Nova Active Wiring & Programming ...............102
Extended RKP Wiring.....................................107
Extended Expander Wiring.............................108
Secure RedCare STU Wiring .........................109
Page 1
872.qxd
05/11/2003
15:01
Page 2
GardTec 872
IMPORTANT!
Input:
AC230V +/-10% ~50Hz 125mA Max. 35W Max
Nominal Temp Range: 0 - 50°C
GardTec 872 Metal Versions
For Indoor Use Only
GardTec 872 Plastic Versions
For Indoor Use Only
This equipment is intended only for use as a Security Alarm Control Panel. Adequate ventilation
away from heat and humidity must be provided. The unit must be fixed securely to a nonflammable surface using suitable fixings.
All mains wiring must be to BS7671 (1992) IEEE wiring regulations (or appropriate international
regulatory standards). See Mains Supply Connection section within this manual for more
detailed instructions.
All wiring must be protected from sharp or jagged edges.
All Low voltage (alarm) wiring must be to the appropriate international regulatory standards
and comply to good wiring practice. It should not be possible for the Low Voltage wiring to
touch the Mains wiring.
Replacement fuses should be of the same type and rating conforming to IEC 127.
The maximum current draw from the unit for all output combinations must not exceed 1Amp.
The unit is intended for use with a suitable re-chargeable lead acid battery permanently
connected to the appropriate terminals.
All documentation and manuals must be thoroughly read by suitably qualified installation
personnel prior to installation.
The unit has no user serviceable parts inside. Internal access should only be by suitably qualified personnel.
GardTec 872 Metal Versions
The unit must be Earthed. It is the responsibility of the installation engineer to ensure that the
earth connection to the unit lid is good on completion of the installation or after service.
GardTec 872 Plastic Versions
Provision is provided for an earth connection within the mains input connector block, this connection is for protection of the wiring only and is not functional for the unit.
Page 2
872.qxd
05/11/2003
15:01
Page 3
1 INTRODUCTION
The GardTec 872 control panel consists of two main parts, The master control panel
and the keypad(s). The master control panel is a blank end station if the metal version
is used or, the keypad may be mounted on board if the polycarbonate version is used
with standard type keypads. Various zone wiring modes may be used taking the
maximum number of zones available on any one system to 144 zones with 7 areas
with up to 99 user codes.
If required a Radio expansion cards may be fitted and up to two 8 channel receivers.
These Radio expansion cards are compatible with a range of radio equipment.
If required up to two ID expander cards may be fitted instead of standard and radio
expander card. Each ID expander cards will give up to 30 ID zones using industry
standard ID buscuits or ID detectors. When using any expander cards the control
panel zones are retained and are programmable as 8 (4 wire zones) or 16 (2 wire or 2
wire End of Line) zones
Ample room is provided within the master control panel housing for all the system
wiring, Mains connections, Digicom, Modem or Red-Care communicator (fitting inside
the metal version only) and a 7Ah SLA battery.
Uploading/Downloading capabilities are possible on all models within the range
through the GardTec Modem and the GardTec Remote Software Package for a P.C.
Facility is also provided for direct connection to a P.C via the GardTec Modem Patch
Lead.
The capabilities of the GardTec 872 control panel are endless and we strongly
recommend that all the manuals (both engineer and user) are read and understood
before any installation of the system is carried out. You will find that a little time spent
now understanding the GardTec 872 will prove to be a great time saver for the future.
It must be stressed that the GardTec 872 is one system that is capable of being
split into seven areas. Under no circumstances should you regard it as seven
separate systems.
Page 3
872.qxd
05/11/2003
15:01
Page 4
2 SYSTEM OVERVIEW
Codes
The GardTec 872 is capable of accepting up to 99 user codes plus 1 engineer code.
Each of the user codes is allocated a code type (with the exception of user 1 that is
always Master) at the time the code is programmed. 19 code types plus engineer are
available, these are:Code Type
Master (Default 5678)
Cleaner
Area 2
Area 3
Main 1
Main 2
Main 3
Main 4
Main 5
Main 6
Code Type
Main 7
Area 4
Area 5
Area 6
Area 7
Control
Set Only
Main User
Area 1
Engineer (Default 1234)
Note 1: User 1 will always be Master.
A full list of options that are available for the code types are given in the user manual.
As a general guide for this section the codes for the GardTec 872 are split into two
groups, Global and Area codes. Codes allocated to these groups are as follows:Global Codes (Controlling All Areas).
Master
Main
Set Only
Engineer
If any area is set, entering a global code (not Set Only or Cleaner) will unset all areas
If all areas are unset, entering a global code followed by YES (or code then NO YES if
Engineer code is used) will give the option to set all areas.
The global codes with the exception of Set Only also have other options. More details
of these options are given in the user manual.
Page 4
872.qxd
05/11/2003
15:01
Page 5
System Overview
GardTec 872
Area Codes (Controlling Specific Areas)
Cleaner (Area 0)
Area 2
Main 6
Area 3
Main 7
Main 1
Area 4
Main 2
Area 5
Main 3
Area 6
Main 4
Area 7
Main 5
Area 1
These area codes will only control their specific areas. Area codes are 'low level codes'
and have no user options, they will however allow for the part setting of each area.
Areas 1 to 7 may have up to 3 part sets suites (groups of zones). If part set 1 is used
zones programmed into the part 1 suite will be removed (omitted), if part set 2 is used
zones programmed into the part 2 suite will be removed and if part set 3 is used zones
programmed into both part 1 and part 2 suites will be removed, no programming is
required for part 3 as it combines zones in part 1 and part 2.
It should be noted that the zones programmed into a part set suite are programmed by
the engineer and not the user.
To set an area simply enter the required area code (Press YES if a Main Area Code is
used) and exit the area.
To part set an area enter the area code followed by NO and the part set number
required (1, 2 or 3). If Main Area type code is used enter code followed by part set
number.
To unset an area enter the area code.
Cleaner Code (part set 0)
The Cleaner code or part set 0 acts in a different way to the other area codes. To set
the system and remove the cleaner zones start to set the system followed by YES 0
This will set the system or area and remove the cleaner zones.
If a cleaner code is now entered the cleaner zones will also be set.
If a cleaner code is entered when the system is fully set or area set only the cleaner
zones will be unset.
It should be noted that any entry/exit zones that are removed or unset via the cleaner
code or part set 0 will chime when violated. This is to prevent other users straying into
protected areas without warning.
More details of codes and using the system are given in the relevant sections of this
manual, and in the user manuals.
Page 5
872.qxd
05/11/2003
15:01
Page 6
System Overview
GardTec 872
Duress
If Duress is turned on adding 1 to the first digit of any user code will send a duress
signal to central station (e.g. normal code = 5678 the duress code for this would be
6678). Alternatively Duress 7 may be turned on, if this is done any code programmed
as User number 7 will be the duress code.
Zone Allocation to Areas
Whilst within the zone programming section zones may be allocated to areas. This
may be one single area or multiple (common) areas.
If a zone is allocated to more than one area it is then a common area zone
and the following logic is applied:If any area that is assigned to the zone is unset then the zone is not active.
If all areas that are assigned to a zone are set then the zone is active.
If any area that is assigned to the zone is in exit then the zone is also in exit
(zone type will still apply).
If any area that is assigned to the zone is in entry then the zone is also in
entry (zone type will still apply).
Zones
The control panel is supplied with 8 four wire zones (two wires for zone & two wires for
tamper).
If required this configuration may be programmed for 16 two wire zones. In this case,
two zones should be reserved for global tampers and the remaining 14 zones are then
programmable for the desired zone types.
The control panel zones may also be programmed as 16 EOL (End Of Line resistor)
zones. This configuration gives the highest possible zone wiring security and a
maximum of ten detectors may be wired on to each zone when this option is selected.
Resistors required for EOL operation are supplied with the control panel.
When using EOL zones each detector has a 6K8 resistor in parallel with the alarm
contacts and there is a 4K7 resistor in series with the two zone wires. This gives both
alarm and tamper protection from a single pair of wires. To make full use of this
security feature the 4K7 resistor must be fitted to the furthest most point in the loop.
Page 6
872.qxd
05/11/2003
15:01
Page 7
System Overview
GardTec 872
Zone Expansion
An expansion path is available through zone expander boards. Each expander board
being programmable for 4 x four wire zones, 8 x two wire zones or 8x two wire EOL
zones. Up to sixteen expander boards may be fitted to a GardTec 872 giving a total of
144 zones when configured as 2 wire or 2 wire EOL zones. Each expander board and
the control panel zones may use differing wiring configurations. If required up to two
radio modules that are compatible with Rokonet radio equipment may be fitted
Expander cards may be fitted in locations away from the master control panel.
More details of zone options are given in the relevant sections in this manual.
ID Zone Expansion
As an alternative to ZEX expansion up to two ID expander boards may be fitted. Each
ID expander board will accept up to 30 standard ID biscuits/devices. ID biscuits may
be used with all standard detection devices. This system allows either single leg or ring
wiring using standard alarm cable, detectors may, if required be ‘teed’ of the leg or
ring. This expansion method can offer considerable savings of cable and labour
One ID expander card may be plugged on to the control panel PCB (not with onboard
RKP) with the other remote. Alternatively both ID expander may be mounted remote
from the control panel. If this method of expansion is used standard zone expanders or
radio modules cannot be used.
Zone Descriptions
Up to sixteen characters may be used for zone descriptions on the LCD keypad. The
description that you allocate to a zone will also be applied to the tamper of that zone. If
the cause of an alarm is through a zone tamper the description will be shortened to 13
characters on the display, the last three characters being replaced with <space>T!
The zone descriptor is displayed whilst viewing the cause of an alarm, viewing the log,
if a zone is violated during exit and when programming zone descriptors. While viewing
the zone in the log press 5 to display the zone number.
User Names
Each user (with the exception of the engineer) may be allocated a user name of up to
nine characters. This name will be shown if the system is being set with a master or
main code type and whilst viewing the log.
Page 7
872.qxd
05/11/2003
15:01
Page 8
GardTec 872
System Overview
Keypads
The GardTec 872 control panel may be operated via any Gardtec 800 Series LCD
keypads. Several types of keypad are currently available: Standard or Contour 32
character LCD. Standard keypads will also require a remote housing if not fitted onto
the main control panel. This housing may be fitted in any one of three orientations.
Programming of the system must be carried out through and LCD type keypad.
The GardTec 872 is also ACE compatible. ACE allows for the setting, part setting,
unsetting and resetting (Code level dependant) of the system via Infra-Red remote
control keyfobs. ACE is available as a stand alone receiver or built into a RKP
LCD, LED and ACE keypads may be mixed on the same system allowing for total
flexibility in control of the system. A maximum of eight keypads/ACE (inclusive of ACE)
units may be fitted to the GardTec 872. A maximum of 4 stand alone ACE units may
be fitted.
Uploading/Downloading & Remote System Management
The GardTec 872 control panel is capable of uploading and downloading from both a
primary location and secondary location (e.g Laptop computer), this helps reduce
maintenance costs should there be a need to update the system program or a
customer on site having difficulties.
This uploading/downloading capability has the ability to allow for complete Remote
System Management. One example of the time that can be saved is programming
zone descriptors on a fully populated system (144 zones), if was to take just one
minute to program each zone descriptor this would take 144 minutes, via the GardTec
Remote software package this would only take a few minutes.
Page 8
872.qxd
05/11/2003
15:01
Page 9
3 SYSTEM INSTALLATION
Planning The System
Time should be taken to plan the system. Because the master control panel may be a
blank end station it may be looked upon as an engineer box requiring no attention from
the end user. When choosing a location for the master control panel consideration
should be given to the following:The routing of cables, e.g detection, sounders, mains, telephone line, keypads etc.
Area aesthetics in view of the above.
Future access by service personnel.
Consideration also needs to be given as to the positioning of the remote keypads,
wiring for the keypads may be 'star' or 'daisy chain' format (see Keypad Wiring for
more details). When choosing locations for remote keypads the following points should
be observed:The proximity of the keypad to the entry/exit point(s).
The operation of the keypad.
The readability of the display.
The wiring route to the keypad.
Where ACE units are used a clear line of sight from the transmitter to the receiver at a
distance in the region of 3 to 5 metres.
The metal version of the master control panel has ample trunking and conduit entries
at the top and the bottom of the housing, in addition to these entries there is also a
5mm stand-off at the rear of the panel to allow for side cable entries.
Page 9
872.qxd
05/11/2003
15:01
Page 10
System Installation
GardTec 872
Control Panel Mounting
Remove the two lid securing screws (single screw on polycarbonate version see Fig1)
then (pushing in side buttons on polycarbonate version) pull the lid forwards and lift clear
of the lid securing lip. Store the lid in a safe place.
Offer the base to the wall and using it as a template mark the four fixing point noting (on
the metal version) that the lid securing lip should be at the bottom.
Store the base in a safe place then drill the wall. Under no circumstances should you
drill through the base.
Before mounting the base to the wall remove any trunking or conduit entries that you
require as knockouts.
Mount the base to the wall using 30mm No.10 screws and suitable rawl plugs.
After the installation has been completed refit the lid and secure with the retaining
screw(s).
Keypad Mounting
The standard GardTec 800 Series keypad is available with a 32 character LCD display
or with a twin seven segment LED display. All these keypads require the GardTec 800
Series RKP Housing Part No. 01-063 unless the keypad is to be mounted within the
polycarbonate control panel (see Fig 1). Contour keypads are supplied as a complete
unit for remote mounting.
This housing has been designed to allow mounting in one of three positions. These are:With the hinged flap to the left.
(See Fig 2a.)
Use fixing points A, B, D, E
placing edge of board under tab F
With the hinged flap to the right.
(See Fig 2b.)
With the hinged flap to the bottom. (See Fig 3.)
Use fixing points A, C, D, E
Use fixing points A, B, D, E
placing edge of board under
tab G
The base of the housing should be fixed to the wall using 25mm x No.8 screws and
suitable rawl plugs in three positions.
After the keypad has been mounted in the base, the correct spring (supplied with the
keypad) should be pushed onto the tamper switch (see Figs 2 & 3 for spring details).
Before replacing the cover move the ident jumper to the correct position.
Provided that the panel is mounted horizontally the keypad may also be mounted
onboard the polycarbonate control panel (see Fig1) by removing the keypad blanking
plate in the control panel cover. It should be noted that any zone expanders, ID
expanders or output expanders cannot be fitted onboard if this option is chosen.
Page 10
872.qxd
05/11/2003
15:01
Page 11
System Installation
GardTec 872
Fig 1 Polycarbonate Case with Onboard Keypad Mounting Details
Page 11
872.qxd
05/11/2003
15:01
Page 12
GardTec 872
System Installation
Fig 2a. Flap to left
Standard RKP with
Housing Base
A
D
F
E
B
Use one of the longer
springs (supplied) on the
tamper switch
G
C
Fig 2b. Flap to right
Standard RKP with
Housing Base
G
E
C
B
Use the shorter spring
(supplied) on the tamper
switch
F
D
A
F
D
Fig 3. Flap to bottom
Standard RKP with
E
G
Housing Base
A
Use one of the longer
springs (supplied) on the
tamper switch
B
C
Page 12
872.qxd
05/11/2003
15:01
Page 13
GardTec 872
System Installation
Fig 4 Contour RKP
Lower Flap to reveal single cover fixing screw
Page 13
872.qxd
05/11/2003
15:01
Page 14
GardTec 872
System Installation
A stand alone ACE receiver is also available (max 4 per system using Multi option).
This receiver will allow for the setting, part setting, unsetting, resetting (if programmed)
and activation of alert keys 1 & 3.
To mount the ACE receiver remove the front retaining screw of the receiver that is
situated on the underside of the unit, pull the bottom edge of the cover forwards and
upwards in one movement. The PCB may now be removed by unclipping it at the
bottom edge and lifting clear of the base.
Fig 5. ACE Receiver
The base should be fixed to the wall in three positions using 30mm x No.6 screws and
suitable rawl plugs.
It should be noted that the ACE receiver may only be used as keypad ident 1 or 2.
The new Contour range of stylish remote keypads are also available for the full
GardTec 872 control panel. These keypads are designed to be fitted remote from the
main control panel and both the LED and LCD versions are available with ACE as
standard.
Fig 5a GardTec ACE
Page 14
872.qxd
05/11/2003
15:01
Page 15
4 WIRING CONNECTIONS
With the exception of the mains wiring all
interconnections should be made with multicore 7/.02 alarm cable.
Good wiring practice should be observed throughout the installation and the following
tips may prove useful.
Never run alarm cables parallel to mains cables, telephone cables or any
other cables that may be carrying inductive loads
Whenever you have to cross mains cables with alarm cables ensure that you
do so at 90°
Always wire the mains connection for the control panel back to the
consumer unit via a 3A fused spur.
Never tap into ring main circuits that have fridges/freezers on them.
Never tap into lighting circuits that have fluorescent lighting units on them.
Mains Supply Connection
Mains Wiring only to be carried out by suitably qualified personnel.
The mains connection for the GardTec 872 should be as shown in Fig 6.
Mains (Twin & Earth)
Connection Colours
Fig 6.
Warning the
GardTec 872
control
panel MUST
BE
EARTHED.
Live
=
Neutral =
Earth
=
Red
Black
Copper
Yellow/Green sleeving should be
used for Copper Earth Conductor
Consumer Unit
125mA Anti Surge Fuse
3A Unswitched
L
E
N
Fused Spur
Control Panel Mains
Terminal Block
It should not be possible for mains wiring to touch low voltage wiring
Page 15
872.qxd
05/11/2003
15:01
Page 16
Wiring Connections
GardTec 872
Keypad Wiring
Keypads may be wired in 'Star' format (each keypad being wired back to the master
control panel) see Fig 7a, or 'Daisy Chain' format (from the control panel to the first
keypad then onto the second keypad etc) see Fig 7b. It is also possible to wire the
keypads with a mix of 'Star' and 'Daisy Chain' formats see Fig 8.
Fig 7a. 'Star' format wiring.
RKP 1
RKP 3
Master
Control
Panel
RKP 2
RKP 4
Fig 7b. 'Daisy Chain' format wiring.
Master
Control
Panel
RKP 1
RKP 2
RKP 3
RKP 4
RKP2b
RKP1b
Fig 8. Mix of 'Star' and 'Daisy Chain' wiring.
RKP1a
Master
Control
Panel
RKP2a
RKP3b
RKP 3
RKP4b
RKP 4
8 RKPs example using multi option
Note: All keypads need to be numbered via the onboard ident jumper switches.
Note: ACE receivers count as RKPs and may only be numbered as RKP 1 or 2
(unless built into RKP).
Page 16
872.qxd
05/11/2003
15:01
Page 17
GardTec 872
Wiring Connections
Keypad Terminal Connections
Some keypads that are compatible with other Gardiner Technology control panels may
have additional markings as well as the GardTec 872 legends. These additional
markings are disregarded within this manual.
The keypad port on the master control panel is situated on the bottom edge of the PCB
towards the right hand side. Wiring to the RKP(s) is terminal to terminal as shown in
the following illustrations.
Fig 9. Single RKP wiring.
Control Panel
12V
RKP
0V
CLK
DATA DATA
A
B
DATAB DATAA CLK
OV
12V
SPKR
NOTE: RKP terminal positions may differ (dependent on model)
Page 17
SPKR
872.qxd
05/11/2003
15:01
Page 18
Wiring Connections
GardTec 872
Fig 10. Multiple RKPs 'Daisy Chain' format.
Control Panel
12V
0V
CLK
RKP 1
RKP 2
DATA DATA
A
B
DATAB DATAA CLK
DATAB DATAA CLK
OV
OV
12V
12V
SPKR
SPKR
To other RKPs
NOTE: RKP terminal positions may differ (dependent on model)
Control Panel
Fig 11. Multiple RKPs 'Star' format.
12V
CLK
DATA DATA
A
B
DATAB DATAA CLK
RKP 1
0V
OV
12V
SPKR
DATAB DATAA CLK
RKP 2
OV
12V
SPKR
NOTE: RKP terminal
positions may differ
(dependent on model)
To other RKPs
Page 18
SPKR
SPKR
872.qxd
05/11/2003
15:01
Page 19
Wiring Connections
GardTec 872
Keypad Jumper Options
Keypad Numbering (ident)
All keypads must have the ident jumper in position in order that the system can
recognise the keypad it is communicating with. This information is written to the log as
the system is set and unset. If greater than four RKPs are required on the 872 the Multi
Keypad option should be programmed to On, two keypads may then share the same
ident. It should be noted that LCD & LED RKPs may not share the same ident.
LCD and LED versions
Four jumper links are fitted on the LCD and LED versions of the keypad. On earlier
Standard keypads the legend was slightly different as shown in Fig 12.
KEYPAD No.
Fig 12. Keypad ident legends.
4
A4
JP1
3
A3
JP2
2
A2
JP3
1
A1
JP4
Early Legend
Standard/Contour Legend
(Use left hand legend)
Note: Contour keypads fitted with ACE have two additional jumpers for the ACE
functions, these are:US
This jumper is the user select. With the jumper link removed each
ACE key fob will occupy one user code from the system, this is
termed as high security mode.
With the jumper link in position the ACE will occupy one user code
from the system but up to 28 key fobs may be programmed
into the ACE, this is normal security mode.
NVM
With this jumper in position the ACE NVM contents will be cleared
when the unit is powered up. All codes will be lost
On first power up this jumper should be on and then removed after.
The ident jumper should be positioned across the pins in one of the positions before
the system is powered up.
Page 19
872.qxd
05/11/2003
15:01
Page 20
GardTec 872
Wiring Connections
Note: Instructions for how to program keyfobs to the ACE and using ACE are
contained within the LED user manual
Page 20
872.qxd
05/11/2003
15:01
Page 21
Wiring Connections
GardTec 872
ACE Receiver Wiring & Jumper Options
ACE is also available as a stand alone receiver. The wiring for the receiver is the same
as for the RKP(s) with the exception that the speaker wiring terminal on the ACE is
marked as SP- and not SPKR.
The ACE receiver is link selectable as unit No.1 or unit No.2 and it is permissible to
have two units sharing the same ident.
Five options are available that are selected with jumper links.These options are as
follows.
JP1 (US)
This jumper is the user select. With the jumper link removed each ACE key fob will
occupy one user code from the system, this is termed as high security mode.
With the jumper link in position the ACE will occupy one user code from the system but
up to 28 key fobs may be programmed into the ACE, this is normal security mode.
JP2 (RP)
This jumper is only used when the ACE is fitted to the GardTec 800 Series control
panels and is used to select the ACE ident as 1 or 2 . This ident should be viewed as
the RKP ident. With the jumper off the ACE will be remote device two, with the jumper
fitted the ACE will be device number one.
JP3 (PN) if fitted
This jumper is used to select the panel type when ACE is used with the GardTec 350+
or GardTec 580 control panels. The jumper has no use when used with the
GardTec 800 Series and should be left in position.
JP4 (RST)
The ACE has a Non-Volatile Memory (NVM). If power is applied to the unit with this
jumper in position, the memory contents will be erased. When the unit is first powered
up, this jumper should be in position for at least 5 seconds. After this initial period
the jumper link should be removed.
If a reset of the ACE is required (all fobs to be deleted) this jumper link should be
refitted and the unit re-powered.
JP5 (EOL) if fitted
This jumper is the End Of Line jumper and is applicable to the GardTec 350+ and
GardTec 580 only. This jumper MUST BE REMOVED when used with the GardTec
800 Series.
Note: Ensure all links are in desired position before powering up the ACE.
Page 21
872.qxd
05/11/2003
15:01
Page 22
GardTec 872
Wiring Connections
Output Connections
The output connections for the GardTec 872 are situated along the bottom edge of the
main PCB in the master control panel.
Warning:It should be noted that the total output current available for the GardTec 872 is 1
Amp. Any attempt to draw a total current greater than this could result in serious
damage to the control panel that is not covered by the manufacturers warranty.
Below is a description of each terminal. The order given is the same as the terminal
order on the PCB looking from left to right.
Output Terminal Descriptions
RELAY COMM
A 24V 1Amp *1 changeover relay is provided on the GardTec 872 PCB. This relay is
fully programmable (refer to Programmable Options Description). The relay contacts
are voltage free. This terminal is the common connection (see Fig. 13).
N/O
Normally Open connection for onboard relay (see Fig. 13).
N/C
Normally Closed connection for onboard relay (see Fig. 13).
Fig. 13 Onboard Relay Operation
Relay
Comm
Relay
Comm
N/O
N/C
Relay De-Energised
(Normal)
N/O
N/C
Relay Energised
(Activated)
* 1 No attempt should be made to exceed the stated current and the 1 Amp
maximum current draw from the control panel must be taken into consideration.
Page 22
872.qxd
05/11/2003
15:01
Page 23
GardTec 872
Wiring Connections
BATT + & Factory fitted Sealed Lead Acid battery connections. The GardTec 872 is suitable for
the installation of all the popular sizes of alarm batteries. Suggested sizes would be:12V 1.2Ah
Suitable only for the smallest installations.
12V 2.0Ah
Suitable only for small installations.
12V 3.0Ah
Suitable for small to medium size installations.
12V 7.0Ah
Suitable for all installations.
Reference should be made to current policies to determine the actual battery capacity
requirements for your system. As a general rule:Calculate the total quiescent current draw of the system including
control panel, RKPs, communicator, detectors and any other
auxiliary equipment then use this in the equation shown:Quiescent Current x 8 hours = Minimum Battery Size
(May change with new European Standards)
The actual size of the battery should be made up to the nearest size available.
K/S
Keyswitch input. If required the GardTec 872 may be operated by a keyswitch.
Operation is by applying 12V to this terminal (see Fig. 14). The mode of operation is
dependent on how the keyswitch option is programmed (refer to Programmable
Options Description and also see Remote Reset). Keyswitch will set all areas refer to
Zone Type Keyswitch option for area Keyswitch.
Note:- GardTec 872 zones may also be programmed for keyswitch setting.
Fig. 14 Keyswitch Connection
Note:
Keyswitch
Keyswitch type may be
Normal (Open/Close)
or Biased (Momentary)
or Locked (keypads
lock when used)
12v K/S
Page 23
See also Remote Reset
872.qxd
05/11/2003
15:01
Page 24
GardTec 872
Wiring Connections
ZONE KEYSWITCH OPTION
Up to eight zones may be allocated as zone keyswitches. This option is carried out via
the ‘Program Zone Type’ option. Either Normal or Biased keyswitches may be used
and the correct option for the keyswitch you are using should be chosen during
programming. Will act on area only refer to Keyswitch Terminal for Global Setting.
Wiring for the keyswitch should be across the AZ pair of the zone, the TZ pair of the
zone may be used in the normal manner.
In order for this keyswitch option to operate there must be an Area User code allocated
for the area that the keyswitch is intended to control, e.g if allocated to control area 2
then an area 2 code needs to be programmed on to the system. Will only work on
single areas.
In order that the keyswitch operations are recorded to the log in the correct manner we
would suggest that the highest user codes (e.g 97 - 99 for 3 keyswitches) are used.
The following example shows a typical format for the user names.
User Name (example)
DOOR KEY
STORES KEY
SALES
or
or
or
or
User Name(example)
MARY KEY
FRED KEY
HARRY KEY
Area
Area 1
Area 2
Area 3
User No.
User 97
User 98
User 99
Because the GardTec 872 reads the list of users from high to low the log will show for
example Set MARY KEY A1 hh/mm/dd/mm. If User numbers are not reserved or
allocated then the system will use the first code available (reading high to low) for that
particular area set.
Space has been made at the start of the User manual to give indication to an end
user of what user codes, if any have been reserved for this purpose. Please take
time to fill in this section for end user reference.
0V (DIGI)
0V (-VE) connection to a Digital communicator or Red-Care STU
12V (DIGI)
12V (+VE) connection to a Digital communicator or RED-Care
STU. The output from
1
this terminal is protected by the GARD fuse (400mA)* on the main PCB.
LINE FAULT
This is the Line Fault input terminal. The terminal should be held @12V by the
communicator and swing to 0V to produce a Line Fault condition on the control panel.
If Line Fault is not used the factory fitted resistor to 12V should be left in place.
Note:
To activate this terminal the programmable option 'DIGICOM TYPE' must
be programmed to 'NORMAL'.
Note:
If the GardTec ProDigi or Modem is to be used on serial comms
(plugged into the main PCB) the factory fitted link from this terminal to
12V MUST be removed.
Note:
When DigiModem is used the L/F & 12Hr Terminals cannot be used as
inputs/outputs.
Page 24
872.qxd
05/11/2003
15:01
Page 25
GardTec 872
Wiring Connections
REMOTE RESET
(Note This option may use the Linefault or KS terminal). The Line Fault or the K/S
terminal (dependant on option 127 Remote Reset Source) also doubles as the Remote
Reset input (normally found on Red-Care STUs sometimes termed as Remote Signal
Path). To use this feature the 'REMOTE RESET' option should be programmed to ON
(option 39). After an alarm the control panel will reset when 12V is applied to this
terminal.
The feature allows the use of RedCare units with Remote Reset even when a Modem
is connected. It should be noted that the triggers for the RedCare should be from the
P.A, D1 & D2 terminal. Do not use the 12Hr or L/F terminal as they double as a
data connection for the Modem.
The Remote Reset feature may also be used to auto-reset the control panel after an
alarm. This must only be used on non BS 4737 systems when the panel is being used
for purposes other than security. The auto-reset is achieved by leaving the factory
fitted link in position and turning the 'REMOTE RESET' (option 39) ON
PA
This terminal is the Digicom output for PA (Personal Attack)and would normally be
connected to channel 2 of a communicator. The output is open collector and has a
1
maximum current sink of 50mA* *
2
12HR
This terminal is the Digicom output for 12HR (Alarm )and would normally be connected
1
to channel 3. The output is open collector and has a maximum current sink of 50mA* *
2
If the ProDigi or Modem are not used PA & 12Hr are programmable under the option
D3 & D4
Note:
When testing Digicom Channels via menu 65 (Test Digicom Channels)
and Digicom type Normal has been selected the display will show
1 2 3 4 with zeros under each number. In this instance 1 refers to D1
output. 2 refers to PA output (D3). 3 refers to 12Hr output (D4). 4 refers
to D2 output.
1
* No attempt should be made to exceed the stated current and the 1 Amp
maximum current draw from the control panel must be taken into consideration.
2
* Some Digicoms may require a 6K8 pull-up resistor fitting between this output
and 12V
Page 25
872.qxd
05/11/2003
15:01
Page 26
GardTec 872
Wiring Connections
D1 & D2
These terminals are digicom outputs that are fully programmable by the engineer (see
Programmable Options Description for more details). The outputs are open collector
1
2
and have a maximum current sink of 50mA* * . On systems only using two channels
or systems using the ProDigi or Modem D1 & D2 are free for other uses.
Note:
The start polarity is of the Digicom port is programmable by the
engineer.
Fig. 15 Typical Digicom Wiring
0V
12V
LINE PA 12HR D1
FAULT
ALARM
D2
GardTec 872
6K8
6K8
6K8
6K8
For example
D.A.C 4 or
Red-Care
3GSTU
BLUE STU
Home STU
0V
12V
2
3
1
CHANNELS
4
Notes: D1 should be programmed for FIRE
(Chan1)
D2 should be programmed for OPEN/CLOSE
(Chan4)
Program Digicom Type to NORMAL
6K8 resistors provide Pull-Up for open collector outputs
When ordering STU chips Pin 4 must not be inverted as this is catered
for by the control panel.
1
* No attempt should be made to exceed the stated current and the 1 Amp
maximum current draw from the control panel must be taken into consideration.
2
* Some Digicoms may require a 6K8 pull-up resistor fitting between this output
and 12V
Page 26
872.qxd
05/11/2003
15:01
Page 27
Wiring Connections
GardTec 872
Fig. 16 ProDigi or GardTec Modem Wiring.
Gardtec
GardTec 840
872
MainPCB
PCB
Main
If the GardTec Modem is used
basic system configuration is
available by defaulting the system
using 5, 5, YES, NO. Further
details are given in the GardTec
Modem manual.
ProDigi
or
Gardtec Modem
Modem Patch Lead if
direct connection to PC
is required.
Note:
Communicator
SK3
Modem will give 8 channels and leave D1, D2 & D3 (PA term) free for
other uses
For a ProDigi program Digicom Type to Gardiner
For Modem Mod+FF or MOD+PID
Remove link from 12V & Line Fault Terminals before connecting
ProDigi/Modem
Both the ProDigi and GardTec Modem can be programmed direct from the
GardTec 872 control panel
Modem Patch Lead
If the GardTec Modem patch lead is to be used for direct connection to a PC or LapTop It should be connected to SK3. The factory fitted link between 12V & Line Fault
must be removed. Full instructions on use of the GardTec Modem Patch lead are
supplied with the unit.
Page 27
872.qxd
05/11/2003
15:01
Page 28
Wiring Connections
GardTec 872
SW+ LATCH New Feature this output is now fully programmable.
This terminal is high (+12V) when the system is set and low (0V) when the system is
unset. Typical use for this terminal
would be the latch signal for PIRs and Shockgards
1T
etc. A maximum sink of 50mA * This terminal may be programmed for other uses.
DET RESET New Feature this output is now fully programmable.
This +VE supply terminal is provided for the types of detectors that require the removal
of power to reset them. In the default mode the 12V supply from this terminal will pulse
off for three seconds during the exit time. The terminal is also programmable for other
uses (see Programmable
Options Description for more details). A maximum current
1
draw of 50mA* is available. This terminal is programmable for other uses.
STROBE + | This pair of terminals provide power for the strobe light during and
after an alarm. The
1
negative terminal is switched. A maximum current of 1Amp* can be switched with
these terminals. This terminal is programmable for other uses. The terminal is
redundant if the NovActive range of bell boxes is used.
BELL + | This pair of terminals provide power for the bell1 during an alarm. The negative terminal
is switched. A maximum current draw of 1Amp* is available from these terminals.
The positive terminal also provides the positive hold off for the SAB.
In SCB mode (see Programmable Options Description), the terminals stand at + & -.
The negative terminal will change state to positive for the duration of the alarm.
It should be noted that the operation of the bell is influenced by the
programmable options Bell Delay, Bell Ring Time and Number of Arms (see
Programmable Options Descriptions for more details).
BELL HOLD This terminal is the negative tamper feed and also provides the negative Hold Off for
the SAB.
The terminal has a factory fitted link fitted to the SAB TMP terminal in order to keep the
bell tamper clear. This link should be removed as the bell wiring is connected.
SAB TMP
This terminal is the tamper return from the Bell Box. If unused the factory fitted link to
Bell Hold- should be left in place.
1
* No attempt should be made to exceed the stated current and the 1 Amp
maximum current draw from the control panel must be taken into consideration..
Page 28
872.qxd
05/11/2003
15:01
Page 29
Wiring Connections
GardTec 872
RKP 12V
This terminal provides the +12V supply for the keypads and ACE
units (see Keypad
1
Wiring for more detail). A maximum current draw of 0.5Amp* is available from this
terminal.
RKP 0V
This terminal is the 0V supply for the keypads and ACE units (see Keypad Wiring for
more detail).
CLK (for fault finding the voltage on this terminal should be approx 5V )
This terminal is the Clock connection for the keypads and ACE units (see Keypad
Wiring for more detail).
DATA A (for fault finding the voltage on this terminal should be approx 8V )
This terminal is the Data A connection for the keypads and ACE units (see Keypad
Wiring for more detail).
DATA B (for fault finding the voltage on this terminal should be approx 6V )
This terminal is the Data B connection for the keypads and ACE units (see Keypad
Wiring for more detail).
SPKR & SP+
These terminals are connected to any extension speakers (min impedance 16 Ohm)
that are fitted. The SP+ is the common and SPKR is the output of the amplifier driver.
The SPKR terminal is also connected to the SPKR (speaker terminal) on the RKP(s).
The current drawn by any extension speakers needs to be calculated in the total
system current. The current drawn by a 16 Ohm speaker would typically be 300mA.
Fig. 17 Single Speaker
SPKR
Note:
SP+
Fig. 18 Twin Speakers (wired in series)
SPKR
SP+
Minimum speaker impedance is 16 Ohm
1
* No attempt should be made to exceed the stated current and the 1 Amp
maximum current draw from the control panel must be taken into consideration..
Page 29
05/11/2003
15:01
Page 30
Wiring Connections
GardTec 872
Fig. 19 Typical output wiring
AUX 12V
N/O
Door locks, Additional
N/C
Sounders etc.
RELAY
COMM
872.qxd
+
BATT
-
K/S
Keyswitch
0V
AUX 12V
12V
DIGI
LINE
FAULT
PA
Digital Communicator
12HR
ALARM
or
Red-Care STU
D1
D2
SW+
DET
LATCH RESET
Latch signal for
Gardscan MX+ PIRs,
Shockgards etc.
Programmable SW+ Output
-
STROBE
+
Strobe Light
+
BELL
-
SAB
BELL
HOLD-
Module
SAB
TMP
0V
RKP 3
RKP /ACE 2
RKP
12V
RKP /ACE 1
CLK
RKP 4
etc.
A
DATA
B
DATA
SPKR
Extension Speaker
SP+
Page 30
05/11/2003
15:01
Page 31
Wiring Connections
GardTec 872
Fig. 20 Traditional bell box wiring.
STROBE
+
BELL
-
+
BELL SAB
HOLD- TMP
-
Gardtec
800 Series
N/C Microswitch
Strobe Light
Siren/Bell
Fig. 21 Novagard wiring
STROBE
+
-
BELL
+
BELL SAB
HOLD- TMP
-
Gardtec
800 Series
Program panel
for Bell Tamper
Ring
+
-
STROBE
+
NOVAGARD
1E, 2+T, 2D,
3, 3PD, 3PC, 3A, 3B,
3C, 4, 4B, 4D, 4Q
& Encapsulated SAB/Strobe
F
R
BELL
TAMP TAMP SWFEED RET
-
SUPPLY
Typical Novagard
Note: Terminal positions may change dependent on model.
The Gardtec 872 may be used with the Novagard Active range of external
sounders.When used in Novagard Active mode additional programmable features and
diagnostics are available even from a remote location using the Gardtec Remote
Software package. Diagnostics help to identify failures or potential failures without the
need to send an engineer on a site visit.
STR
SW-
BELL
SW-
12V
IN
0V
IN
TMPR
RTN
Novagard Active
JP1
872.qxd
3
2
Wired & configured
as Unit No.1
1
+
BELL
-
Gardtec 590/591
Control Panel programmed
for 1 Novagard Active
BELL SAB
HOLD TMP
For details of wiring multiple Novagard Active sounders
please refer to Novagard Active Instructions
Page 31
872.qxd
05/11/2003
15:01
Page 32
GardTec 872
Wiring Connections
Fig. 22b Novagard Delta & Novagard Metal wiring.
STROBE
SAB
TMP
BELL
-
BELL
+
BELL
HOLD-
Link F (Tamp Feed) terminal to 0V
STR
SW-
TMPR
BELL
12V
SW-
0V
BAT-
SUPPLY
BAT+
BATTERY
Note: Terminal positions changed for clarity
Zone Connections
(control panel 4 Wire option)
Three wiring methods are possible for the zones located on the main PCB in the
GardTec 872 control panel. The first is 4 wire or normal type wiring, if this default
option is chosen 8 double pole zones are available (8 alarm zones and 8 tamper
zones).
To use the 4 wire option the control panel should be programmed for 8 (4 WIRE)
in the programming section 'PROGRAM ZONE WIRING' (option No.50).This is the
default setting.
Each zone is fully programmable. Details of the zone options available are given in the
section 'Programmable Options Description'. Each alarm zone is marked as AZx and is
a positive loop, each tamper zone is marked as TZx and is a negative loop.
If pressure pads or other normally open devices, are to be used the AZ zone should be
shorted to the TZ zone by the device in order to activate the AZ zone.
Typical wiring of various detectors is given in Fig. 23
Page 32
872.qxd
05/11/2003
15:01
Page 33
Wiring Connections
GardTec 872
Fig. 23 Typical 4 Wire Configuration
-
- Supply
AZ1
Normally Closed Alarm Pair
+ LOOP
-
TAMPER
+
TZ1
ZONE 1
Normally Closed Tamper Pair
- LOOP
-
ALARM
+
Normally Closed Alarm Pair
-
TAMPER
+
ZONE 2
TZ2
+ LOOP
Normally Closed Tamper Pair
- LOOP
-
ALARM
+
+
TZ3
ZONE 3
-
TAMPER
Normally Closed Alarm Pair
Normally Closed Tamper Pair
-
ALARM
+
AZ4
ZONE 4
Normally Closed Alarm Pair
-
+ LOOP
Single Pressure Pad
- LOOP
Double Contact
AZ3
ZONE 3
+ LOOP
Single Contact
AZ2
ZONE 2
Single Passive Infra-Red
+
ALARM
ZONE 1
+ Supply
12V
SUPPLY
+
DETECTOR
Normally Open Device
+
TAMPER
TZ4
ZONE 4
AZ5
ZONE 5
+
ALARM
TZ5
AZ6
+
TZ6
ZONE 6
- LOOP
-
ALARM
+
AZ7
ZONE 7
If unset doorbell is required allocate chime to the
ET zone.
TZ7
-
ALARM
+
Setting Mode should be programmed for ET
Exit terminator zone must be AZ zone
Normally Closed Alarm Pair
Normally Open Push Button
+
TAMPER
Normally Closed Tamper Pair
TZ8
ZONE 8
-
- LOOP
Page 33
(if required)
AZ8
+ LOOP
Exit Terminator Button
- LOOP
ZONE 8
Note:
If exit terminator is required program zone as ET
+
ZONE 7
-
+ LOOP
TAMPER
It is not advisable to connect normally open devices
onto a TZ loop
-
+ LOOP
TAMPER
Any unused zones may be programmed to off
and the factory fitted link can be removed from the
zone terminals.
+
ZONE 6
-
- LOOP
ALARM
Note:
AZ zones are +ve
TZ zones are -ve
To comply with BS4737 alarm and tamper loops
should be oposite polarity
+
ZONE 5
-
+ LOOP
TAMPER
Normally Closed Tamper Pair
-
- LOOP
872.qxd
05/11/2003
15:01
Page 34
GardTec 872
Wiring Connections
Zone Connections
(control panel 2 Wire option)
The second wiring method is Two Wire. This option will give sixteen zones available
from the control panel PCB.
To use the 2 wire option the control panel should be programmed for
16 (2 WIRE) in the programming section 'PROGRAM ZONE WIRING' (option
No.50)
When this wiring option is programmed zones AZ1 to AZ8 are zones 1 to 8 inclusive,
all AZ zones are positive loops. Zone numbering for the AZ zone will be as follows:Zone 1 on terminals AZ1
Zone 2 on terminals AZ2
Zone 3 on terminals AZ3
Zone 4 on terminals AZ4
Zone 5 on terminals AZ5
Zone 6 on terminals AZ6
Zone 7 on terminals AZ7
Zone 8 on terminals AZ8
All AZ zones are positive loops
Because the 2 wire option has been selected the TZ terminals are also programmable
as zones. The zone numbering for the TZ zones will be as follows:Zone 9 on terminals TZ1
Zone 10 on terminals TZ2
Zone 11 on terminals TZ3
Zone 12 on terminals TZ4
Zone 13 on terminals TZ5
Zone 14 on terminals TZ6
Zone 15 on terminals TZ7
Zone 16 on terminals TZ8
All TZ zones are negative loops
It should be noted that in order to comply with the requirements of BS 4737 zones and
tampers should be of opposite polarity. This means that when using the 2 wire wiring
option one AZ zone (e.g zone 8, AZ8) should be programmed as 24Hr and used as a
global tamper for all TZ zones, and one TZ zone (e.g zone 16, TZ8) should be
programmed as 24Hr and used as a global tamper for all the AZ zones.
Typical wiring of various detectors is given in Fig.24
Page 34
872.qxd
05/11/2003
15:01
Page 35
Wiring Connections
GardTec 872
Fig. 24 Typical 2 Wire Configuration
+ Supply
-
- Supply
12V
SUPPLY
+
DETECTOR
Single Passive Infra-Red
(Use TZ8 zone for tamper)
+
ALARM
AZ1
ZONE 1
Normally Closed Alarm Pair
+ LOOP
-
ALARM
+
TZ1
ZONE 9
Normally Closed Alarm Pair
- LOOP
-
ALARM
+
AZ2
ZONE 2
Normally Open Pressure Pad
-
+ LOOP
(To Detector Supply -ve)
TZ2
- LOOP
-
ALARM
+
AZ3
ZONE 3
-
ALARM
+
- LOOP
-
ALARM
+
and the factory fitted link can be removed from the
-
+ LOOP
zone terminals.
+
ALARM
TZ4
ZONE 12
-
ALARM
+
-
ALARM
+
TZ5
+ LOOP
ZONE 13
-
ALARM
+
AZ6
- LOOP
ZONE 6
+
TZ6
ZONE 14
-
+ LOOP
ALARM
- LOOP
-
ALARM
+
-
ALARM
+
+
AZ8
Normally Closed Tamper Contacts
for all TZ zones (9-15)
-
ALARM
+
Normally Close Tamper Contacts
for all AZ zones (1-7)
TZ8
-
- LOOP
Exit Terminator Button
(if required)
TZ7
ALARM
+ LOOP
ZONE 16
Exit terminator zone must be AZ zone
Setting Mode should be programmed for ET
To detector -ve supply
- LOOP
ZONE 8
If unset doorbell is required allocate chime to the
ET zone.
Normally Open Push Button
+ LOOP
ZONE 15
Note:
If exit terminator is required program zone as ET
AZ7
ZONE 7
It is not advisable to connect normally open devices
onto a TZ loop
AZ5
- LOOP
ZONE 5
AZ zones are +ve
TZ zones are -ve
To comply with BS4737 alarm and tamper loops
should be oposite polarity
Any unused zones may be programmed to off
AZ4
ZONE 4
Note:
TZ3
+ LOOP
ZONE 11
Single Pressure Pad
(Pressure Pads on AZ Zones
use TZ8 for tamper)
+
ALARM
ZONE 10
Single Contact
(Use AZ8 for tamper)
Page 35
872.qxd
05/11/2003
15:01
Page 36
GardTec 872
Wiring Connections
Zone Connections
(control panel 2 Wire EOL option)
The third wiring method is Two Wire EOL (End Of Line resistor). This option will give
sixteen zones available from the control panel PCB.
To use the 2 wire EOL option the control panel should be programmed for
16 (2 WIRE EOL) in the programming section 'PROGRAM ZONE WIRING' (option
No.50)
When this wiring option is programmed zones AZ1 to AZ8 are zones 1 to 8 inclusive.
The zone numbering for the AZ zones will be as follows:Zone 1 on terminals AZ1
Zone 2 on terminals AZ2
Zone 3 on terminals AZ3
Zone 4 on terminals AZ4
Zone 5 on terminals AZ5
Zone 6 on terminals AZ6
Zone 7 on terminals AZ7
Zone 8 on terminals AZ8
Because the 2 wire EOL option has been selected the TZ terminals are also
programmable as zones. The zone numbering for the TZ zones will be as follows:Zone 9 on terminals TZ1
Zone 10 on terminals TZ2
Zone 11 on terminals TZ3
Zone 12 on terminals TZ4
Zone 13 on terminals TZ5
Zone 14 on terminals TZ6
Zone 15 on terminals TZ7
Zone 16 on terminals TZ8
Up to 10 detectors may be used on each loop. A 6K8 resistor is connected across the
alarm pair of each detector and a 4K7 resistor is connected in series with the loop at
the furthest most point.
EOL wiring will give the best possible wiring security as it will not allow any bridging or
cutting of the zone loop
Typical wiring of various detectors is given in Figs.25 to 29
Page 36
872.qxd
05/11/2003
15:01
Page 37
Wiring Connections
GardTec 872
Fig. 25 Typical 2 Wire EOL Configuration
+ Supply
-
- Supply
12V
SUPPLY
+
DETECTOR
Single Passive Infra-Red
+
ALARM
6K8
AZ1
ZONE 1
+ LOOP
-
ALARM
+
6K8
TZ1
ZONE 9
- LOOP
-
ALARM
+
6K8
(To Detector Supply -ve)
Only)
6K8
+
4K7
TZ2
- LOOP
-
ALARM
+
Multiple Contacts
Maximum of 10 detectors per loop using EOL
-
+ LOOP
All Normally Closed Contacts
Note:
AZ3
ZONE 3
Single Pressure Pad
(Pressure Pads on AZ Zones
4K7
6K8
ZONE 10
Single Contact
6K8
Normally Open Pressure Pad
-
+ LOOP
ALARM
Normally Closed Alarm Pair
4K7
AZ2
ZONE 2
Normally Closed Alarm Pair
4K7
Note:
6K8 = Blue, Grey, Red with gold tolerance band
-
- LOOP
All unused zones should have factory fitted link removed
and replaced with the 4K7 EOL Resistor.
AZ4
-
+ LOOP
- Bypass Resistor
Note:
+
ALARM
ZONE 4
Resistor Colour Codes Are:4K7 = Yellow, Purple, Red with gold tolerance band - EOL Resistor
TZ3
ZONE 11
+
ALARM
It is not advisable to fit normally open devices
onto TZ loops.
+
ALARM
TZ4
ZONE 12
-
ALARM
+
ZONE 5
AZ5
- LOOP
-
ALARM
+
ZONE 13
TZ5
+ LOOP
-
ALARM
+
ZONE 6
AZ6
- LOOP
-
ALARM
+
ZONE 14
TZ6
+ LOOP
- LOOP
-
ALARM
+
If unset doorbell is required allocate chime to the
ET zone.
AZ7
ZONE 7
Note:
If exit terminator is required program zone as ET
-
+ LOOP
Exit terminator zone must be AZ zone
+
TZ7
ALARM
ZONE 15
Setting Mode should be programmed for ET
- LOOP
-
ALARM
+
To detector -ve supply
AZ8
ZONE 8
Normally Open Push Button
+ LOOP
-
ALARM
+
Exit Terminator Button
(if required)
-
- LOOP
6K8
TZ8
ZONE 16
4K7
Page 37
872.qxd
05/11/2003
15:01
Page 38
GardTec 872
Wiring Connections
Fig. 26
Fig. 27
Double Detector
Single Detector
Gardscan, Shockgard etc.
+
-
Alarm
Alarm
TMP
Gardscan, Shockgard etc.
TMP
+
Alarm
-
Alarm
TMP
TMP
4K7 Resistor
4K7 Resistor
6K8 Resistor
6K8 Resistor
+
+
Aux
Alarm
-
Alarm
TMP
TMP
Alarm
Zone
Wire Link
6K8 Resistor
+
Aux
Fig. 28
Alarm
Zone
Fig. 29
Double Contact
Alarm
Alarm
Use Two Silver
Single Contact
TMP
Alarm
Any Brass Screw
Screws For Alarm
For Tamper
Alarm
Alarm
TMP
Any Brass Screw
Use Two Silver
For Tamper
Screws For Alarm
4K7 Resistor
4K7 Resistor
6K8 Resistor
6K8 Resistor
Alarm
Use Two Silver
Alarm
Zone
Screws For Alarm
6K8 Resistor
Alarm
Zone
Page 38
872.qxd
05/11/2003
15:01
Page 39
Wiring Connections
GardTec 872
Zone Expander Cards
Up to sixteen zone expander cards may be fitted to the GardTec 872. If required one of
these expander cards may be plugged directly onto the the main PCB, the other
expander cards then being wired to the plug-on card as shown in Fig. 30. Four cores
are required for interconnection of the zone expanders. If Output Expanders are
to be used on the same leg as zone expanders an extra core will be required.
The expanders are wired in two groups EXP1 to EXP8 use SAD1 and EXP9 to EXP16
use SAD2
Fig. 30a GardTec 872 Expander Card Wiring 'Daisy Chain' Format for EXP1 to EXP8
Group 1
872
872
To Other
Expander1 (Plugged on)
Expander2
Expander3
Expanders
12V
0V
SAD1
SCLK
12V
0V
SAD 1
SCLK
12V
0V
SAD1
SCLK
If you intend to use Expanders 9 to 16 or any Output expanders also wire SAD2
terminals.
Fig. 30b GardTec 872 Expander Card Wiring 'Daisy Chain' Format for EXP9 to EXP16
From Group1
872
872
To Other
Expander
Expander9
Expander10
Expanders
12V
0V
SAD 2
SCLK
12V
0V
SAD 1
SCLK
12V
0V
SAD 1
SCLK
The expander cards may also be wired back to the onboard expander card in 'Star'
format (each expander card wired back individually).
Alternatively all the zone expander cards may be wired to the main PCB via an
optional zone expander cable Part No. 01-094.. When using the zone expander cable
the following colours should be used (see Figs 31a, 31b).
If Output expanders or Group 2 Expanders are used SAD2 terminals should be used
on the first group. If the expanders are remote from the main PCB a second expander
cable will be required to plug onto PCB EXP2 socket. The SAD2 connection on this
second cable is the yellow core.
Page 39
872.qxd
05/11/2003
15:01
Page 40
GardTec 872
Wiring Connections
Fig. 31a GardTec 872 Zone Expanders (Group1) remote from panel (inc Cable
Colours) for EXP1 to EXP8
872 Expander
872 Expander
Card(2)
Card(1)
1
Expander
Cable 1
Plug to
EXP1
LH Molex
Connector
Main PCB
Red
12V
12V
Black
0V
0V
Yellow
SAD1
SAD1
Blue
SCLK
SCLK
Each of the Expander cards should be idented using the jumpers JP1-JP8 on the
card.
Fig. 31b GardTec 872 Zone Expanders (Group2) remote from panel (inc Cable
Colours) for EXP9 to EXP16
872 Expander
872 Expander
Card(10)
Card(9)
1
Expander
Cable 2
Plug to
EXP2
RH Molex
Connector
Main PCB
Red
12V
12V
Black
0V
0V
Yellow
SAD1
SAD1
Blue
SCLK
SCLK
Each of the Expander cards should be idented using the jumpers JP1-JP8 on the
card. JP1= EXP9, JP2-EXP10, JP3=EXP11, JP4=EXP12, JP5=EXP13, JP6=EXP14,
JP7=EXP15, JP8=EXP16.
Note: In all above examples max cable run is 150 metres. It is recommended that
PSUs are used to supply the detectors on remote expanders
Note:
Remote Expander Cable(s) Part No.01-094 will be required
The expander cable plug MUST be plugged in to the main PCB EXP socket(s)
with the red wire to pin 1.
If required expander cards may be mounted in a remote expander box Part No 02-066
These expander boxes are ideal housings when the expander cards are to be mounted
away from the control panel.
Page 40
872.qxd
05/11/2003
15:01
Page 41
Wiring Connections
GardTec 872
Zone Expander Card Ident & Zone Allocation
The panel and each individual card may be programmed as four wire, two wire or two
wire EOL wiring modes. All zones on ZEX 1 start at 21 and all zones on ZEX 2 start at
31 and so on. The zone allocation for the different modes is given below.
Group 1 Expanders using SAD1 from panel to SAD1 terminal on Expander
EXP1 JP1 On
4 Wire
2 Wire
2 Wire EOL
AZ1 Zone
AZ2 Zone
AZ3 Zone
AZ4 Zone
TZ1 Zone
TZ2 Zone
TZ3 Zone
TZ4 Zone
21
22
23
24
21 Tamper
22 Tamper
23 Tamper
24 Tamper
21
22
23
24
25
26
27
28
21
22
23
24
25
26
27
28
EXP2 JP2 On
4 Wire
2 Wire
2 Wire EOL
AZ1 Zone
AZ2 Zone
AZ3 Zone
AZ4 Zone
TZ1 Zone
TZ2 Zone
TZ3 Zone
TZ4 Zone
31
32
33
34
31 Tamper
32 Tamper
33 Tamper
34 Tamper
31
32
33
34
35
36
37
38
31
32
33
34
35
36
37
38
EXP3 JP3 On
4 Wire
2 Wire
2 Wire EOL
AZ1 Zone
AZ2 Zone
AZ3 Zone
AZ4 Zone
TZ1 Zone
TZ2 Zone
TZ3 Zone
TZ4 Zone
41
42
43
44
41 Tamper
42 Tamper
43 Tamper
44 Tamper
41
42
43
44
45
46
47
48
41
42
43
44
45
46
47
48
EXP4 JP4 On
4 Wire
2 Wire
2 Wire EOL
AZ1 Zone
AZ2 Zone
AZ3 Zone
AZ4 Zone
TZ1 Zone
TZ2 Zone
TZ3 Zone
TZ4 Zone
51
52
53
54
51 Tamper
52 Tamper
53 Tamper
54 Tamper
51
52
53
54
55
56
57
58
51
52
53
54
55
56
57
58
Page 41
872.qxd
05/11/2003
15:01
Page 42
GardTec 872
Wiring Connections
EXP5 JP5 On
4 Wire
2 Wire
2 Wire EOL
AZ1 Zone
AZ2 Zone
AZ3 Zone
AZ4 Zone
TZ1 Zone
TZ2 Zone
TZ3 Zone
TZ4 Zone
61
62
63
64
61 Tamper
62 Tamper
63 Tamper
64 Tamper
61
62
63
64
65
66
67
68
61
62
63
64
65
66
67
68
EXP6 JP6 On
4 Wire
2 Wire
2 Wire EOL
AZ1 Zone
AZ2 Zone
AZ3 Zone
AZ4 Zone
TZ1 Zone
TZ2 Zone
TZ3 Zone
TZ4 Zone
71
72
73
74
71 Tamper
72 Tamper
73 Tamper
74 Tamper
71
72
73
74
75
76
77
78
71
72
73
74
75
76
77
78
EXP7 JP7 On
4 Wire
2 Wire
2 Wire EOL
AZ1 Zone
AZ2 Zone
AZ3 Zone
AZ4 Zone
TZ1 Zone
TZ2 Zone
TZ3 Zone
TZ4 Zone
81
82
83
84
81 Tamper
82 Tamper
83 Tamper
84 Tamper
81
82
83
84
85
86
87
88
81
82
83
84
85
86
87
88
EXP8 JP8 On
4 Wire
2 Wire
2 Wire EOL
AZ1 Zone
AZ2 Zone
AZ3 Zone
AZ4 Zone
TZ1 Zone
TZ2 Zone
TZ3 Zone
TZ4 Zone
91
92
93
94
91 Tamper
92 Tamper
93 Tamper
94 Tamper
91
92
93
94
95
96
97
98
91
92
93
94
95
96
97
98
Note:
Expander 8 cannot be used if a Radio Expander is being used
Page 42
872.qxd
05/11/2003
15:01
Page 43
Wiring Connections
GardTec 872
Group 2 Expanders using SAD2 from panel to SAD1 terminal on Expander
EXP9 JP1 On
4 Wire
2 Wire
2 Wire EOL
AZ1 Zone
AZ2 Zone
AZ3 Zone
AZ4 Zone
TZ1 Zone
TZ2 Zone
TZ3 Zone
TZ4 Zone
101
102
103
104
101 Tamper
102 Tamper
103 Tamper
104 Tamper
101
102
103
104
105
106
107
108
101
102
103
104
105
106
107
108
EXP10 JP2 On
4 Wire
2 Wire
2 Wire EOL
AZ1 Zone
AZ2 Zone
AZ3 Zone
AZ4 Zone
TZ1 Zone
TZ2 Zone
TZ3 Zone
TZ4 Zone
111
112
113
114
111 Tamper
112 Tamper
113 Tamper
114 Tamper
111
112
113
114
115
116
117
118
111
112
113
114
115
116
117
118
EXP11 JP3 On
4 Wire
2 Wire
2 Wire EOL
AZ1 Zone
AZ2 Zone
AZ3 Zone
AZ4 Zone
TZ1 Zone
TZ2 Zone
TZ3 Zone
TZ4 Zone
121
122
123
124
121 Tamper
122 Tamper
123 Tamper
124 Tamper
121
122
123
124
125
126
127
128
121
122
123
124
125
126
127
128
EXP12 JP4 On
4 Wire
2 Wire
2 Wire EOL
AZ1 Zone
AZ2 Zone
AZ3 Zone
AZ4 Zone
TZ1 Zone
TZ2 Zone
TZ3 Zone
TZ4 Zone
131
132
133
134
131 Tamper
132 Tamper
133 Tamper
134 Tamper
131
132
133
134
135
136
137
138
131
132
133
134
135
136
137
138
Page 43
872.qxd
05/11/2003
15:01
Page 44
Wiring Connections
GardTec 872
EXP13 JP5 On
4 Wire
2 Wire
2 Wire EOL
AZ1 Zone
AZ2 Zone
AZ3 Zone
AZ4 Zone
TZ1 Zone
TZ2 Zone
TZ3 Zone
TZ4 Zone
141
142
143
144
141 Tamper
142 Tamper
143 Tamper
144 Tamper
141
142
143
144
145
146
147
148
141
142
143
144
145
146
147
148
EXP14 JP6 On
4 Wire
2 Wire
2 Wire EOL
AZ1 Zone
AZ2 Zone
AZ3 Zone
AZ4 Zone
TZ1 Zone
TZ2 Zone
TZ3 Zone
TZ4 Zone
151
152
153
154
151 Tamper
152 Tamper
153 Tamper
154 Tamper
151
152
153
154
155
156
157
158
151
152
153
154
155
156
157
158
EXP15 JP7 On
4 Wire
2 Wire
2 Wire EOL
AZ1 Zone
AZ2 Zone
AZ3 Zone
AZ4 Zone
TZ1 Zone
TZ2 Zone
TZ3 Zone
TZ4 Zone
161
162
163
164
161 Tamper
162 Tamper
163 Tamper
164 Tamper
161
162
163
164
165
166
167
168
161
162
163
164
165
166
167
168
EXP16 JP8 On
4 Wire
2 Wire
2 Wire EOL
AZ1 Zone
AZ2 Zone
AZ3 Zone
AZ4 Zone
TZ1 Zone
TZ2 Zone
TZ3 Zone
TZ4 Zone
171
172
173
174
171 Tamper
172 Tamper
173 Tamper
174 Tamper
171
172
173
174
175
176
177
178
171
172
173
174
175
176
177
178
Note:
Expander 16 cannot be used if a Radio Expander is being used
Note: Wiring configurations may differ on each zone expander card to suit your
requirements. For example the control panel may be programmed as 4 Wire,
Expander 1 as 2 Wire and Expander 3 as 2 Wire EOL etc, etc.
On all Standard Zone Expanders AZ zones are +ve and TZ zones are -ve
Page 44
872.qxd
05/11/2003
15:01
Page 45
Wiring Connections
GardTec 872
ID Expanders
The GardTec ID Expander card allows thirty detectors to be fitted on a four wire run
using industry standard ID biscuits or ID compatible devices. Two ID expander cards
can be fitted to the control panel. The control panel zones may still be programmed as
'Normal (4 wire)', 'Two Wire' or 'Two Wire EOL. When used to full capacity this allows
the GardTec 872 to have up to 16 control panel zones plus 60 ID zones. Radio
Expanders cannot be used if ID Expansion has been chosen.
Each ID expander may be wired back to the control panel with standard alarm four
core cable.
Wiring Configurations
Several configurations may be used for wiring the ID expanders to the control panel,
these are:One ID Expander onboard the control panel PCB.
The expander is simply plugged across the molex pins marked as EXP1 and EXP2
One ID Expander remote from the control panel PCB.
This will require a Remote Expander cable (Part No. 01-094). This cable is plugged on
to EXP1 with the Red wire to pin 1 and is wired to the ID Expander.
One ID Expander onboard the control panel PCB and one ID Expander remote
from the PCB.
The first module is plugged across the molex pins on the control panel PCB marked as
EXP1 and EXP2. The second module is then wired to the first.
Fig 32 ID Biscuit Wiring Diagram Full wiring details are supplied with the ID
Expander Board Zone No’s 21 - 50 are on ID card 1 (SAD1) Zone No’s 51 - 80 are on
ID card 2 (SAD2)
L+
Yellow
ID Biscuit
Tamper
Switch
White
N/C alarm
Relay Contacts
Blue
L-
Fig33 Detector Using Wired ID Biscuit
Blue
Yellow
ID Biscuit
Fig34 Wired ID Biscuit for Contact/PA
White
Blue
White
+
-
TAMPER
Reed Switch
(PA / Contact)
ALARM
Supply+
SupplyL-
Supply+
Supply-
L+
L+
L-
Page 45
Yellow
872.qxd
05/11/2003
15:01
Page 46
GardTec 872
Wiring Connections
Radio Expanders (Radio ZEX)
Radio Expanders cannot be used if the ID expansion option has been chosen. One
Radio expansion card may be fitted that will allow up to two Radio Receivers (8
channels each) to be fitted. The first Radio Receiver must be idented as receiver
number one. The second receiver is idented as receiver number 2. Each Radio
Receiver is capable of using up to eight radio detectors.
Radio Expander Card to Control Panel.
Control Panel
EXP1
EXP2
Radio Expander
Pin1 12V
+12V
Pin2 0V
0V
Pin3 SAD1
SAD1
Pin4 SCLK
SCLK
Pin3 SAD2
SAD2
Once the Radio Expander Card has been connected to the GardTec 872 control panel
it should be connected to the Radio Receiver as follows:Radio Expander Card to Radio Receiver Wiring
Red
Red
Black
Black
Yellow
Yellow
Green
Green
Notes: Further instruction are supplied with Radio Expander Card
Zones occupied by receiver 1 are 91 to 98
Zones occupied by receiver 2 are 171 to 178
Page 46
872.qxd
05/11/2003
15:01
Page 47
Wiring Connections
GardTec 872
Output Expander Modules (OPX)
Up to four output expander modules may be fitted to the GardTec 872 control panel.
These modules may, if required be wired in a chain of zone expanders or on a
separate leg(s). The zone expanders only require four cores for interconnection,
if Output Expanders are used on the same leg five cores will be required (see
page 38).
Each Output Expander gives four change over relays. Contact rating 1A 12V
(resistive).
Each Output Expander (OPX) has a bank of four jumper switches labelled OPX1 to
OPX4. The output allocation is as follows:Jumper Position
OPX1
OPX1
OPX1
OPX1
Output No (LCD)
OP1
OP2
OP3
OP4
Output No (LED)
1
2
3
4
OPX2
OPX2
OPX2
OPX2
OP1
OP2
OP3
OP4
5
6
7
8
OPX3
OPX3
OPX3
OPX3
OP1
OP2
OP3
OP4
9
10
11
12
OPX4
OPX4
OPX4
OPX4
OP1
OP2
OP3
OP4
13
14
15
16
Notes: If required, two expander cards may be configured on the same ident to
enable duplication of outputs.
When using any devices that consume current, consideration MUST be
given to the overall current available from the control panel.
The invert link on the card will invert all the outputs of the card.
Page 47
872.qxd
05/11/2003
15:01
Page 48
GardTec 872
Wiring Connections
Engineers RKP Connection
To aid installation and programming an Engineers LCD RKP lead is available (part No.
01-090) that may be connected to an LCD RKP and plugged directly onto the main
PCB of the control panel. This engineers RKP may be configured as RKP 1 to 4. It
should be noted that if LED keypads have been fitted to the system for end user
operation an LCD keypad may not share the same ident as an LED keypad.
This engineers RKP should be connected to the plug on the main PCB marked SK2
ENG RKP. The connector is 'keyed' and will only fit in one orientation, the use of force
should be avoided to prevent damage to the plug or socket.
The GardTec 872 Control Panel must be programmed via an LCD Keypad.
The keypad wiring colours for the Engineers RKP lead are as follows.
Cable Colour
RKP Terminals
Red
12V
Yellow
Data A
Black
Data B
Blue
CLK
Green
0V
White
SPKR
Page 48
872.qxd
05/11/2003
15:01
Page 49
Wiring Connections
GardTec 872
Printer Connection
The GardTec 872 has an RS232 port that may be connected to a standard serial
printer, to facilitate this two printer leads are available from GardTec Ltd.
Printer Cable No. 1
Part No 01-091
Connects from PCB direct to printer
Printer Cable No. 2A
Part No 01-092
Connects from PCB to chassis mounting
DIN socket (to be mounted on panel
case).
Printer Cable No. 2B
Part No 01-093
DIN plug to printer
The printer should be capable of being set to the following:Baud Rate
Data Bits
Parity
Stop Bits
Carriage Return
Note:
1200
8
None
4
None
The printer should have its own power supply. Under no circumstances
should the power for the printer be drawn from the control panel.
The printer may be used in one of three modes:1)
For printing the Event Log (user or engineer function). Pressing 1 whilst
viewing the Event Log will start the printer (refer to user manual for more
details).
2)
For printing the Program Review (engineer function). Pressing 1 whilst in the
engineer option Program Review will start the printer.
3)
For Real Time Printing. When Real Time Printing is programmed to ON each
event that is written to the log will also be sent to the printer.
This option needs to be set ON from within the engineer programming mode
(option 96) and may be overridden by the user by using the online / offline
function on the printer.
Two suggested Printers are currently available, one from RS Components and one
from Farnell Electronics. Descriptions and Part Number correct at time of going to
press.
RS Components
Farnell Electronics
Description
Part No.
Description
Part No.
24 col/2.5 lps printer
Power Adaptor
2 Rolls + 1 Ribbon
244-632
244-654
202-981
Serial Printer 2.5 lps
Battery Charger UK
Paper Roll 15m
Paper Roll 30m
Ribbon
255-701
231-540
177-306
231-952
308-213
Page 49
872.qxd
05/11/2003
5
15:01
Page 50
AREAS, ZONES & OUTPUT TYPES
Understanding Areas
This section is intended to simplify the complicated subject of Areas and Area Codes.
It is recommended that you read this section and understand it in its entirety before
moving on to the programming section.
Typical zone programming to allow for the areas shown in Fig. 35 would be:Zone No.
Zone Type
Cover For
Area Allocation
1
Entry/Exit
Sales Office Door
Area 1
2
Access
Sales Office PIR
Area 1
3
Entry/Exit
Distribution Door
Area 2
4
Access
Distribution PIR
Area 2
5
Entry/Exit
Stores Door
Area 3
6
Access
Stores PIR
Area 3
7
Entry/Exit
Reception Door
Areas 1, 3
8
Access
Reception PIR
Areas 1, 3
9
Access
Corridor PIR
Areas 1, 3
Because zones 7, 8 & 9 are allocated to more than one area they will automatically
be classed as a common area by the system. The zones within the common area
will only be set when all areas on the system that contain these common area zones
are set.
As can be seen in Fig. 32 Area 2 (Distribution) does not use the common area and
therefore does not need to have the common area zones allocated to it. Setting and
unsetting Area 2 will have no effect on the common area.
In the example shown each area would have its own RKP with the possibility of a
fourth in the reception as a master RKP.
Consideration should be given to the zone types that are going to be used bearing in
mind that the common area may already have been unset by an area user code,
therefore entry points to other areas would also need to be programmed as entry/exit.
Three Areas are shown in this example, the GardTec 872 has 7 areas available
Page 50
872.qxd
05/11/2003
15:01
Page 51
Areas, Zones & Output Types
GardTec 872
Fig. 35 Typical Area Layout
Zones situated in
Area3:Zone 5
Zone 6
Zones situated in
Area1:Zone 1
Zone 2
Area 1
Sales Office
Area 3
Stores
Zones situated in
Common Area:Zone 7
Zone 8
Zone 9
Common Area
Corridor & Reception
Page 51
Zones situated in
Area2:Zone 3
Zone 4
Area 2
Distribution
872.qxd
05/11/2003
15:01
Page 52
GardTec 872
Areas, Zones & Output Types
The User codes that are allocated to the system shown in Fig. 35 are:-
User No.
User Type
Functions Available
1
Master
Set/Area Sets/Part Set/Unset
Remove Zones
Test Zones
View Log
Change Chime
Change User Codes
Change Time/Date
2
Area 1
Set/Part Set/Unset Area 1
3
Area 2
Set/Part Set/Unset Area 2
4
Area 3
Set/Part Set/Unset Area 3
Note: User codes are programmed via a master level code (factory default 5678).
Note: Part Sets will only be available if they have been programmed by the
engineer.
Note: Reset will be available on the code level programmed by the engineer.
In the event that an area does not have a code allocated to it (e.g area 1 code has
been deleted) any other area code setting the system will also set the area without a
code. This is to ensure that no areas can be left unset unintentionally.
Care should be taken by the engineer when allocating part sets so they do not overlap
into other areas.
The cleaner area acts in a different way to other areas. The cleaner area is set up
within the Zone Attributes programming sequence. Cleaner zones will then be
removed from the system when a Part/Area 0 is used. The different ways that a
cleaner code operates are:With system unset
Cleaner code will fully set the system.
With full system set
Cleaner code will unset only the cleaner zones.
With system part set 0
Cleaner code will set the remainder of the system.
With any one or more
areas set
Cleaner code will set the cleaner zones.
Page 52
872.qxd
05/11/2003
15:01
Page 53
Areas, Zones & Output Types
GardTec 872
Zone Type Terminology (Zone Types)
Each zone has a default type that may be re-programmed. Below is an explanation of
the terminology used for zone types.
12 Hour
Access
24 Hour
Zone active when Control Panel is Set.
Will allow to pass through on exit.
Will allow to pass through on entry only if E/E is opened first.
Internal Sounder if Unset.
Full alarm if Set.
Remains active in Engineer Programming Mode.
Entry/Exit (or E/E)
Zone used as last exit point (will terminate exit time if setting mode is set to
E/E or Time+E/E).
Will start E/E time if opened when Control Panel is Set
Part E/E
Panic
Alert
Fire
ET
Monitor
As Access if Control Panel is Full Set
As Entry/Exit if Control Panel is Part Set
24Hour Personal Attack (or Panic Attack). Active if Control Panel is Set,
Unset or in Engineer Programming Mode . May only be tested via Engineer
code if programmed as testable.
Internal Sounder Only, Recorded to Log when Unset
Recorded to Log when SET
Will give Fire alarm when activated (pulsed sounders) with Control Panel Set
or Unset.
Remains active in Engineer Programming Mode.
Exit terminator. Used for final setting of the system. Exit Mode must be
programmed for ET or Time + ET.
Will write to the log once only in any one set or unset unless chime is
allocated then all activations are written to the log.
KSW Bat
When used zone should be connected to the trouble/status output of third
party radio equipment that is capable of giving a low battery signal.
Line Fault
When used acts as a Line Fault input to the control panel.
Page 53
872.qxd
05/11/2003
15:01
Page 54
GardTec 872
Areas, Zones & Output Types
Zone Type Terminology (Areas & Attributes)
When programming the zone types other zone attributes including area allocation may
be programmed within the same screen. Please refer to the breakdown of the Zone
programming screen below.
Zone Number
Zone Type
000=Ent/Ex
1234567
A=
Rem -
Zone Attribute
Area(s) Zone is allocated to
Zone Programming Screen
Zone Number
The Zone number currently being programmed.
Zone Type
The current Zone Type (refer to previous page for terminology.
Area(s)
Area(s) that the current zone is allocated to.
Zone Attribute
Attribute for current zone. Attributes available are:RemoveZone cannot removed (omitted) by the end user.
Rem+/Dk
Zone may be removed (omitted) by end user and is also Double
Knock.
Page 54
872.qxd
05/11/2003
15:01
Page 55
Areas, Zones & Output Types
GardTec 872
Rem -/Dk
Zone cannot be removed (omitted) by end user and is also Double
Knock.
Off
Zone is turned Off.
Norm.Ky
Zone is a Normal Type Keyswitch Zone.
Bias.Ky
Zone is a Bias Type Keyswitch Zone.
Remove +
Zone may be removed (omitted) by end user.
Note:
Each Zone should be programmed individually for your requirements.
Page 55
872.qxd
05/11/2003
15:01
Page 56
GardTec 872
Areas, Zones & Output Types
Output Types Terminology
There are two groups of outputs types available.
General Outputs. These are available on the following terminals
Detector Reset Terminal
Latch Terminal
On-Board Relay Terminals (com, N/O, N/C)
PGM 3 Terminal (Strobe Terminal)
Optional Output Cards (max 4 cards each having 4 changeover relays)
When programming these outputs and you press no to the current setting the display
will show:Choose . . 1 - 7 = Area
8 = All 9 = Any
At this point choose if you require the output to be allocated to Area 1 - 7 or All Areas
or Any Area
Some General Output Types may be used for triggering Digital
Communicators or RedCare STUs.
Below is given a list of Output Types with a brief description of the option.
Off
Output not used
Pulse Off
Output is active and will switch for 3 seconds when code is entered
Pulse On
Output is inactive and will switch for 3 seconds when code is entered
After Alarm
Will trigger in alarm and stay in alarm until panel has auto rearmed or has been reset
Walk test
Will activate when the panel is in test mode
Pulse Set
Will activate for 5 seconds when the panel sets
Int Sounder
Will activate when panel is in alarm or tamper
Page 56
872.qxd
05/11/2003
15:01
Page 57
Areas, Zones & Output Types
GardTec 872
E/E
Will activate for the duration of the entry exit times
Bell
Will activate when the bell is triggered and will cut of with the bell time
Alert
Will activate when an alert zone is triggered
Any Fire
Will activate when a fire zone is triggered
Any Panic
Will activate when a panic zone is triggered will also activate when a duress code is
entered
Alarm
Will activate when panel is in alarm and will reset when a code is entered
Alarm B
Will activate when a second zone has alarmed (The activation of this output is
dependent upon other system attributes) Please refer to DD243 Section .
Alm Abort
Will activate when the panel is in alarm and unset within the programmed abort time
O/C Cleaner
Used for sending open and closing when a cleaner code is used
Cleaner Set
Will active when a cleaner code is used to set the system
Gen Tamper
Will activate with bell / control / keypad / zex tampers
Zone 24Hr
Will activate when a 24Hr zone is triggered
Part Set
Will activate when the system is part set or when a zone is removed (omitted)
Strobe
Will activate when the strobe is triggered
Page 57
872.qxd
05/11/2003
15:01
Page 58
GardTec 872
Areas, Zones & Output Types
Latch Any
Will activate when panel is set and will reset when entry timer starts
Any Set
Will activate when panel is set and will reset when panel is unset
Power Fail
Will activate when aux. power falls below 10.6 volts
Power OK
Output is active and changes over when the battery volts fall below 10.6 V
Watchdog
Will activate when the processor is reset
Mails Fail
Will Activate when the mains is removed from the panel and will reset when the mains
is restored
Any Digi
Will activate when any Digicom channel is triggered
Status
This output has 3 operating modes intended to provide visual indication of system
status
Set output on for 10 seconds
Unset On for 1 second Off for 1 second for a 10 second period
Confirmed On for 3 seconds Off for 1 second until the system is reset.
Perimeter
Will activate when a perimeter zone is triggered
Zone Exclude
Will activate when the panel auto rearms with a zone in fault condition
Custom 1-8
This output can be used to follow a zone or code
Timed 1-3
This output will follow the programmed On /Off times for times 1/2/3
Any Closed
This output will change over when any area is set
Page 58
872.qxd
05/11/2003
15:01
Page 59
Areas, Zones & Output Types
GardTec 872
Communications Outputs. These are available on the following terminals
D1
D2
D3 (PA terminal)
D4 (12Hr terminal)
Digicom Channels (when used with GardTec ProDigi or Digi / Modem)
Below is given a list of Output Types with a brief description of the option.
Off
Output not used
Zone 24Hr
Will activate when a 24Hr zone is triggered
Gen Tamper
Will activate with bell / control / keypad / zex tampers
Alert
Will activate when an alert zone is triggered
Fire
Will activate when a fire zone is triggered
Part Set
Will activate when the system is part set or when a zone is removed (omitted)
Open / Close
Will activate when panel set or unset
Panic
Will activate when a panic zone is triggered will also activate when a duress code is
entered
Alarm
Will activate when panel is in alarm and will reset when the panel auto rearms or when
the panel is reset
Page 59
872.qxd
05/11/2003
15:01
Page 60
GardTec 872
Areas, Zones & Output Types
Alarm B
Will activate when a second zone has alarmed (The activation of this output is
dependent upon other system attributes) Please refer to the DD243 Section within this
manual.
Alarm Abort
Will activate when the panel is in alarm and unset within the programmed abort time .
Power Fail
Will activate when aux. power falls below 10.6 volts.
Watchdog
Will activate when the processor is reset.
Mails Fail
Will Activate when the mains is removed from the panel and will reset when the mains
is restored.
Area 1-7 Alarm
Will activate when the selected area is in alarm and will reset when the panel auto rearms or when the panel is reset.
O/C Area 1-7
Will activate when the selected area is set and unset.
O/C Cleaner
Used for sending open and closing when a cleaner code is used.
Area 1-7 Alarm B
Will activate when a second zone has alarmed in the selected area (The activation of
this output is dependent upon other system attributes) Please refer to the DD243
Section within this manual.
Alarm Abort 1-7
Will activate when the selected area is in alarm and unset within the programmed abort
time.
Area 1-7 Panic
Will activate when the selected area panic zone is triggered will also activate when a
area duress code is entered.
Page 60
872.qxd
05/11/2003
15:01
Page 61
Areas, Zones & Output Types
GardTec 872
Area 1-7 Fire
Will activate when a selected area fire zone is triggered.
Perimeter
Will activate when a perimeter zone is triggered.
Zone Exclude
Will activate when the panel auto rearms with a zone in fault condition. It is a
requirement of DD243 that a zone that is auto excluded is reported to central station.
Page 61
872.qxd
05/11/2003
15:01
Page 62
6 PROGRAMMING
GardTec 872 Programming
To program the GardTec 872 the engineer must first enter the programming routine by
entering the engineer code (factory default 1234), The LCD display will then show:Do you want to . .
Use ENGNR. Mode ?
(LED displays will show
Press YES to enter into the programming routine.
LCD display will then show:Program . . . .
Zones ?
___
When using the LCD keypad two methods may be used to access the various
programmable options.
Method 1
At any point during programming where three underscores are shown in the top right
hand corner of the screen, you may enter the number of the option (given in the
following section) you wish to program followed by YES. The program will then move
direct to that option.
Method 2
The programming routine is structured with a series of headers for example:-
Program . . . .
Zones ?
___
This is the header of the Zone programming routine, all zone
programming options are accessed through this header. If you do not wish to program
anything under the zone header pressing NO will move to the next header. For
example pressing NO on the display above will move to the next header shown below:-
Program . . . .
Setting Modes ?
___
Details of the available headers and the options available under each header can be
found in the section GardTec 872 Program Orders.
Page 62
872.qxd
05/11/2003
15:01
Page 63
Programming
GardTec 872
Menu Shortcut Numbers
Due to the vast range of features available on the GardTec 872 control panel an
LCD keypad must be used for programming.
For DD243:2002 options please refer to page 85.
Menu No.
1
2
3
4
5
6
7
8
9
10
11
12
13
14
15
16
17
18
19
20
21
22
23
24
25
26
27
28
29
30
31
32
33
34
35
Jumps to
Relay Mode / PGM3 Mode
Timers On Time
Timers On Time
Timers Off Time
Timers Off Time
PA Mode
PA Mode
Chime Level
Entry Exit Level
Exit Sounder Mode
Final Set Delay
Full Set Setting Time / Setting Mode
Part 1 Set Setting Time / Setting Mode
Part 2 Set Setting Time / Setting Mode
Part 3 Set Setting Time / Setting Mode
Full Set Setting Time / Setting Mode
Part 1 Set Setting Time / Setting Mode
Part 2 Set Setting Time / Setting Mode
Part 3 Set Setting Mode / Setting Time
Alert 1 Keys Mode / On Off
Alert 2 Keys Mode / On Off
No. of Keypads / Multi On Off / Keyswitch
Bell Delay / No. of Bell Arms
Bell Ring Time / Sounder Mode
Bell Delay / No. of Arms
NovActive On Off
Bell Tamper Ring On Off
Entry Time 1
Entry Time 2 (use 00 for DD243:2002 system)
Digi Delay / Part Alarm Digi
D1 Mode / D2 Mode
D1 Mode / D2 Mode
Channel Start Polarity
Digicom Type
Key Beep Level
Page 63
872.qxd
05/11/2003
15:01
Page 64
GardTec 872
Programming
Menu No.
36
37
38
39
40
41
42
43
44
45
46
47
48
49
50
51
52
53
54
55
56
57
58
59
60
61
62
63
64
65
66
67
68
69
70
71
72
73
74
75
76
77
Jumps to
No. of Keypads / Multi On Off / Keyswitch
Zone Re-Arm / Double Knock Time
Engineer Code
Remote Reset / Line Fault Source
Line Fault Sounders
Line Fault Mode
Line Fault Log
Duress On Off
Latch Terminal Mode
Bell Ring Time / Sounder Mode
Alarm Reset Mode
Tamper Reset Mode
Backlight Mode
Zone Re-Arm / Double Knock Time
On-Board Zone Wiring Modes
On-Board Zone Wiring Modes (enter zone No.)
Test Zone (entering zones to be on test)
Service Timer On Off
Service Due Weeks
Zone Log Limit
Alert 1 Keys Mode / Alert 1 Keys On Off
Alert 2 Keys Mode / Alert 2 Keys On Off
Digicom Channels
Digicom Channels
Digicom Channels
Digicom Channels
Digicom Channels
Digicom Channels
Alarm Restore / Abort Time
Digicom Type or Test
E/E Zones in Part Set
Engineer Code Locked / Unlocked
Strobe Confirm
Auto Part Set
Part Set Bells
Zone Types (enter zone No.)
Zone Expansion Type
ID mapping (set expansion type ZEX / ID first)
ID mapping (set expansion type ZEX / ID first)
N/A
N/A
N/A
Page 64
872.qxd
05/11/2003
15:01
Page 65
Programming
GardTec 872
Menu No.
78
79
80
81
82
83
84
85
86
87
88
89
90
91
92
93
94
95
96
97
98
99
100
101
102
103
104
105
106
107
108
109
110
111
112
113
114
115
116
117
118
119
Jumps to
N/A
N/A
N/A
N/A
N/A
Expander 1 O/P1 Mode
Timer 2 On Time
Timer 2 On Time
Timer 2 Off Time
Timer 2 Off Time
Timer 3 On Time
Timer 3 On Time
Timer 3 On Time
Timer 3 Off Time
Timer 3 Off Time
Custom Display
Custom Text
Zone Descriptors (enter Zone No.)
List Event Log
List Event Log
Event Log (while viewing 1 = Printer On / Off)
Program review (while viewing 1 = Printer On / Off)
N/A
Alarm 2 Reset Mode
Alarm 3 Reset Mode
D1 / D2 Mode
D1 / D2 Mode
D1 / D2 Mode
D1 / D2 Mode
Bell 2 Ring Time / Bell 3 Ring Time
Bell 2 Ring Time / Bell Ring 3 Time
Bell Delay Time
Bell Delay 3 Time
Full Set Exit Time / Exit Mode Area 2
Part 1 Set Exit Time / Exit Mode Area 2
Part 2 Set Exit Time / Exit Mode Area 2
Part 3 Set Exit Time / Exit Mode Area 2
Full Set Exit Time / Exit Mode Area 3
Part 1 Set Exit Time / Exit Mode Area 3
Part 2 Set Exit Time / Exit Mode Area 3
Part 3 Set Exit Time / Exit Mode Area 3
Full Set Exit Time / Exit Mode Area 2
Page 65
872.qxd
05/11/2003
15:01
Page 66
GardTec 872
Programming
Menu No.
120
121
122
123
124
125
126
127
128
129
130
131
132
133
134
135
136
137
138
139
140
141
142
143
144
145
146
147
148
149
150
151
152
153
154
155
156
157
158
159
160
161
Jumps to
Part 1 Exit Time / Exit Mode Area 2
Part 2 Exit Time / Exit Mode Area 2
Part 3 Exit Time / Exit Mode Area 2
Full Set Exit Time / Exit Mode Area 3
Part 1 Set Exit Time / Exit Mode Area 3
Part 2 Set Exit Time / Exit Mode Area 3
Part 3 Set Exit Time / Exit Mode Area 3
Remote Reset Mode / Line Fault Source
N/A
Forced Walk Test On Off / Forced Walk Test Bypass Time
Forced Walk Test On Off / Forced Walk Test Bypass Time
NovActive On Off
NovActive On Off
NovActive On Off
NovActive On Off
NovActive On Off
NovActive On Off
NovActive On Off
NovActive On Off
PSU Test Time
Duress On Off
Service Timer On Off
Relay Mode / PGM 3 (strobe terminal) Mode
N/A
N/A
N/A
N/A
N/A
N/A
N/A
N/A
N/A
N/A
Test Zones
Test Zones
Confirm Time Window (Start of DD243:2002 Section)
Secondary Time Window
Confirm on Entry On Off
Sounder Trigger
Unconfirm Reset
E/T Mode
Bell Trigger
Page 66
872.qxd
05/11/2003
15:01
Page 67
Programming
GardTec 872
Menu No.
162
163
164
165
166
167
168
169
170
171
172
173
174
175
176
177
178
179
180
181
182
183
184
185
186
187
188
189
190
191
192
193
194
195
196
197
198
199
200
201
202
203
Jumps to
Confirm Start Delay
ACE Battery Monitor On Off
Strobe Timer
Strobe Trigger
Custom 1 OP Mode (zone / code) / No. / Period / Mode
Custom 2 OP Mode (zone / code) / No. / Period / Mode
Custom 3 OP Mode (zone / code) / No. / Period / Mode
Custom 4 OP Mode (zone / code) / No. / Period / Mode
Custom 5 OP Mode (zone / code) / No. / Period / Mode
Custom 6 OP Mode (zone / code) / No. / Period / Mode
Custom 7 OP Mode (zone / code) / No. / Period / Mode
Custom 8 OP Mode (zone / code) / No. / Period / Mode
Comms Restore On Off
Full Set Exit Time / Exit Mode Area 4
Part 1 Set Exit Time / Exit Mode Area 4
Part 2 Set Exit Time / Exit Mode Area 4
Part 3 Set Exit Time / Exit Mode Area 4
Full Set Exit Time / Exit Mode Area 4
Part 1 Set Exit Time / Exit Mode Area 4
Part 2 Set Exit Time / Exit Mode Area 4
Part 3 Set Exit Time / Exit Mode Area 4
Bell Ring Time Area 4 / Bell Ring Time Area 5
Bell Delay Time Area 4
Full Set Exit Time / Exit Mode Area 5
Part 1 Set Exit Time / Exit Mode Area 5
Part 2 Set Exit Time / Exit Mode Area 5
Part 3 Set Exit Time / Exit Mode Area 5
Full Set Exit Time / Exit Mode Area 5
Part 1 Set Exit Time / Exit Mode Area 5
Part 2 Set Exit Time / Exit Mode Area 5
Part 3 Set Exit Time / Exit Mode Area 5
Bell Ring Time Area 4 / Bell Ring Time Area 5
Bell Delay Time Area 5
Full Set Exit Time / Exit Mode Area 6
Part 1 Set Exit Time / Exit Mode Area 6
Part 2 Set Exit Time / Exit Mode Area 6
Part 3 Set Exit Time / Exit Mode Area 6
Full Set Exit Time / Exit Mode Area 6
Part 1 Set Exit Time / Exit Mode Area 6
Part 2 Set Exit Time / Exit Mode Area 6
Part 3 Set Exit Time / Exit Mode Area 6
Bell Ring Time Area 6 / Bell Ring Time Area 7
Page 67
872.qxd
05/11/2003
15:01
Page 68
GardTec 872
Programming
Menu No.
204
205
206
207
208
209
210
211
212
213
214
215
216
217
218
219
220
221
222
Note:
Jumps to
Bell Delay Time Area 7
Full Set Exit Time / Exit Mode Area 7
Part 1 Set Exit Time / Exit Mode Area 7
Part 2 Set Exit Time / Exit Mode Area 7
Part 3 Set Exit Time / Exit Mode Area 7
Full Set Exit Time / Exit Mode Area 7
Part 1 Set Exit Time / Exit Mode Area 7
Part 2 Set Exit Time / Exit Mode Area 7
Part 3 Set Exit Time / Exit Mode Area 7
Bell Ring Tim Area 6 / Bell Ring Time Area 7
Bell Delay Area 7
ZEX9 Wiring Mode
ZEX10 Wiring Mode
ZEX11 Wiring Mode
ZEX12 Wiring Mode
ZEX13 Wiring Mode
ZEX14 Wiring Mode
ZEX15 Wiring Mode
ZEX16 Wiring Mode
Not all options are available from the Menu numbers, some scrolling
may be required to access other options.
Page 68
872.qxd
05/11/2003
15:01
Page 69
Programming
GardTec 872
Zone Descriptor Programming Template
When programming Zone Descriptors (or User Names) please use the template below
for the allocation of keys to characters
1 = ABC
2 = DEF
3 = GHI
4 = JKL
5 = MNO
6 = PQR
7 = STU
8 = VWX
9 = YZ Space
No Delete
0 = 1234567890 Yes Space
Page 69
872.qxd
05/11/2003
15:01
Page 70
GardTec 872
Programming
Understanding Part/Test/Chime in Zone Attributes Section
Part Sets
Three Part Set modes are available on all models. These are Part1, Part 2 & Part3.
Part Set 1 may consist of a suite of zones that have been programmed as Part1 by the
engineer.
Part Set 2 may consist of a suite of zones that have been programmed as Part2 by the
engineer.
Part Set 3 combines all zones in Part1 & Part2 to form the third Part Set. This requires
no additional programming by the engineer other than Part1 & Part2 programming.
Note:
Zones programmed into a Part Set will be removed (omitted) from the
system when that Part Set is used.
Test
Zones programmed as Test will not activate the system when it is set. Activations of
test zones when the system is set will record to the log and will show ‘Test Fail’ when
the system is unset.
Test should only be used for zones that will not be activated when the system is set.
Do not use test on any E/E or Entry Route zones.
Note:
After a zone has been put on test it will be automatically taken off test
after 20 successful Set / Unset operations.
Chime
Any number of zones may be programmed as chime by the engineer. Chime is usually
used as a low level warning when the system is unset that someone has entered a
protected area.
Chime may be turned On and Off by the end user as required
If Exit Terminators are fitted to the system the Exit Terminator zone may be
programmed for chime thus doubling as a door bell.
Walk (Forced Walk Test)
When FWT is used the zones programmed as Walk must be walk tested before the
system will start to set. FWT Mode (option 130) must be programmed to ‘All Sets’ or
‘Full Set Only’ for FWT to operate. A FWT Bypass time is available via option 129. This
allows up to 90 minutes between the system being unset and then set without having
to walk test the system again.
Page 70
872.qxd
05/11/2003
15:01
Page 71
Programming
GardTec 872
Program Orders
As previously mentioned an alternative to entering option numbers with an LCD
keypad is to scroll through the programmable options using the YES and NO keys.
To do this enter the engineer code followed by YES,
the display will show:-
Program . . . .
Zones ?
___
Pressing the NO key will move to the next header;
Pressing the YES key whilst viewing a header will enter into the options under that
header;
Pressing 0 will escape back one step (except when a numeric entry is required).
Below is given a complete list of headers (Shown in Bold Underline), with the options
available below it.
Headers & Options
Headers & Options
Program Zones
Entry Times
Zone Types
Zone Descriptors
Zone Wiring
Zone Attributes
(Test/Part/Chime/Cleaner/Walk)
Zone Double Knock/Arm/Log
Zone E/E Mode
Walk On/Off (FWT)
Walk Bypass Time (FWT)
Entry Time 1
Entry Time 2
Bells / Sounders
Bell Type/No Arms
Bell Delay
Bell & Sounder Ring
Bell Tamper Mode
Bell For Part Set
Setting Modes
Keypad / Keyswitch
Setting For Full Sets
Setting For Part 1 Sets
Setting For Part 2 Sets
Setting For Part 3 Sets
Setting Delay
Setting Sounders
Setting Conformation
Auto Part Set
Keypad Alert 1 Keys
Keypad Alert 2 Keys
Number of Keypads
Multi Keypad Option
Keyswitch Type
Keypad Backlight Mode
Page 71
872.qxd
05/11/2003
15:01
Page 72
GardTec 872
Programming
Headers & Options
Headers & Options
Digicom
Sounder Levels
Type or Test
Start Delay
Channels
Digicom Functions
(Digigard / ProDigi /Modem)
Chime Level
Entry/Exit Level
Key Beep Level
Sens./ Xp/Custom
Line Fault Modes
Line Fault Sounders
Line Fault Mode in Exit
Line Fault Log Mode
Panic / Duress
PA Mode
Testable / Non-Testable
Duress On/Off
Relay / PGM3 / Timers
Onboard Relay Mode
Timer 1 On Time
Timer 1 Off Time
Timer 2 On Time
Timer 2 Off Time
Timer 3 On Time
Timer 3 Off Time
Reset Modes
Alarm 1 Reset
Alarm 2 Reset
Alarm 3 Reset
Tamper Reset
Remote Reset On/Off
Remote Reset Source
Alarm Restore (Immediate)
Abort Time
Sensor Output (Det Reset)
Expander 1 O/P1
1 For LED
Expander 1 O/P2
2 For LED
Expander 1 O/P3
3 For LED
Expander 1 O/P4
4 For LED
Expander 2 O/P1
5 For LED
Expander 2 O/P2
6 For LED
Expander 2 O/P3
7 For LED
Expander 2 O/P4
8 For LED
Expander 3 O/P1
9 For LED
Expander 3 O/P2
10 For LED
Expander 3 O/P3
11 For LED
Expander 3 O/P4
12 For LED
Expander 4 O/P1
13 For LED
Expander 4 O/P2
14 For LED
Expander 4 O/P3
15 For LED
Expander 4 O/P4
16 For LED
Custom Output 1
Custom Output 2
Custom Output 3
Custom Output 4
Custom Output 5
Custom Output 6
Custom Output 7
Custom Output 8
Engineer Code
Engineer Code
Engineer Code Locked/Unlocked
Page 72
872.qxd
05/11/2003
15:01
Page 73
Programming
GardTec 872
Headers & Options
Headers & Options
Engineer Code
Engineer Code
Engineer Code Locked/Unlocked
Service
Service Timer On/Off
Time To Next Service
Service Tel No.
Lock-Out On/Off
Engineer Mode Constant/Timed
Review
Review
Print Settings
Custom Screens
Status Display
Custom Display
Custom Text
Alarm Confirm
Window Time
On Entry
Sounder Mode
Reset Mode
Secondary Time
ET Mode
Bell Mode
Strobe Mode
Start Delay
Ace Battery Monitor
Comms Restore
Keypad Opening
Event Log
View Event Log
Print Event Log
Diagnostics / Log
List Event Log
Change List Diagnostics
Page 73
872.qxd
05/11/2003
15:01
Page 74
7 SPECIFICATION & RECORDS
GardTec 872 Control Panel Specification
Power Input
230V a.c +/- 10% @ 50Hz
Max Loop Resistance
2K (not with E.O.L)
Loop Delay Time
600 milliseconds
FUSES
Bell
R.K.P
Aux
Gard
Mains
1A Quick Blow
500mA Quick Blow
1A Anti-surge
400mA Quick Blow
125mA Anti-surge
Low Voltage Output
13.8 Regulated
Battery Sizes
12V 1.2A, 2.0A, 3.0A, 7.0A
Construction
3mm Polycarbonate
or
1.2mm Mild Steel
Complies With
Conforms with
BS 4737 Parts 1 & 2
CE tested
EMC Directive 89/336/EEC & LVD Directive 73/23/EEC
Number Of Zones
(Standard)
8 (4 Wire), 16 (E.O.L or 2 Wire)
Expandable To
80 (4 Wire), 144 (EOL or 2 Wire)
Expansion Type
Expander Cards with 4 (4 Wire) per card
Zones or 8 (E.O.L or 2 Wire) per card
Zones Per Card
1 Radio Expander may be fitted allowing 2 Receivers may
be fitted in place of Expander 8 &16 (if required)
or
ID Expander Cards (Max2)
30 ID zones per Expander
(Panel zones as normal)
Radio Expander cannot be used with ID
Page 74
872.qxd
05/11/2003
15:01
Page 75
Specification & Records
GardTec 872
Number Of Keypads
4 Normal
or
8 using Multi Option
ACE compatible
Yes
Onboard Relay Rating
Zone Descriptors
24V 1A S.P.C.O
16 Characters
(last 3 omitted with tamper)
Max No of Users
99 + Engineer
Default Codes
Eng 1234 User 5678
Code Length
4, 5 or 6 Digits
User Names
9 Characters
Custom Screen
32 Characters
Log Size
752 Event Log
256 Event Modem Log
Time & Date
Log & Display
Non-Volatile Memory
Yes
Quiescent Currents
Control Panel
LED RKP
LCD RKP
Zone Expander Card
Radio Expander Card
Radio Receiver
Output Expander Card
Digigard Communicator
ProDigi Communicator
GardTec 840 Modem
GardTec Speech Dialler
80mA @ 12V d.c
40mA @ 12V d.c
30mA @ 12V d.c
10mA @ 12V d.c (Max 16 Per System)
15mA @ 12V d.c (One per system allowing 2 receivers)
40mA @ 12V d.c
40mA @ 12V d.c (Max 4 Per System)
15mA @ 12V d.c
80mA @ 12V d.c
80mA @ 12V d.c
80mA @ 12V d.c
Page 75
872.qxd
05/11/2003
15:01
Page 76
Specification & Records
GardTec 872
System Settings Record
Zone No.
Example
1
2
3
4
5
6
7
8
9
10
11
12
13
14
15
16
17
18
19
20
21
22
23
24
25
26
27
28
29
30
31
32
33
34
35
36
37
38
39
40
41
42
43
Descriptor
Living Room
Area(s)
1&2
Loop Ohm V @ Sensor
14 AZ 4 TZ
13.2V
Page 76
Part Info
A1 P1
872.qxd
05/11/2003
15:01
Page 77
Specification & Records
GardTec 872
Zone No.
44
45
46
47
48
49
50
51
52
53
54
55
56
57
58
59
60
61
62
63
64
65
66
67
68
69
70
71
72
73
74
75
76
77
78
79
80
81
82
83
84
85
86
87
88
89
90
Descriptor
Area(s)
Loop Ohm V @ Sensor
Page 77
Part Info
872.qxd
05/11/2003
15:01
Page 78
GardTec 872
Specification & Records
Zone No.
91
92
93
94
95
96
97
98
99
100
101
102
103
104
105
106
107
108
109
110
111
112
113
114
115
116
117
118
119
120
121
122
123
124
125
126
127
128
129
130
131
132
133
134
135
136
137
138
Descriptor
Area(s)
Loop Ohm V @ Sensor
Page 78
Part Info
872.qxd
05/11/2003
15:01
Page 79
Specification & Records
GardTec 872
Zone No.
139
140
141
142
143
144
145
146
147
148
149
150
151
152
153
154
155
156
157
158
159
160
161
162
163
164
165
166
167
168
169
170
171
172
173
174
175
176
177
178
Descriptor
Area(s)
Loop Ohm V @ Sensor
Page 79
Part Info
872.qxd
05/11/2003
15:01
Page 80
GardTec 872
Specification & Records
Aux Current (mA)
Bell Current (mA)
Customer Name:-
Contact Name:-
Tel No:Modem No:Customer Address:-
Fax No:-
RKP Current (mA)
Other:-
Service Due Dates
Completed Date
Page 80
Signature
872.qxd
05/11/2003
15:01
Page 81
8 MISCELLANEOUS
Resetting to Factory Defaults
When resetting the GardTec 800 Series to factory defaults several levels of resetting
are available, these are:a)
Pressing 1, 9, YES, NO during initial power up will revert the Master Code
and Engineer Code (not locked engineer code) back to factory defaults.
b)
Pressing 3, 7, YES, NO during initial power up will revert all system settings
back to defaults with the exception of the User Names and Zone Descriptors.
c)
Pressing 4, 6, YES, NO during initial power up will revert all system settings
back to factory defaults.
d)
to
Pressing 5, 5, YES, NO during initial power up will revert all system settings
factory defaults and will also set the comms options up for GardTec Remote.
ie Modem On; No Return. For commissioning systems for use with
GardTec Remote use this option.
To effect a reset of the factory defaults:1)
Remove all power from the system for at least ten seconds
2)
Apply power to the control panel (mains power)
the display will show for example:(Display will differ dependant on panel)
3)
Whilst this display is showing (the first eight
seconds) press the keys shown in a, b or c
for the reset required, the display will show:-
GardTec 840 v 1.0
Please Wait
This may show for several minutes.
4)
< < < < UN-SET > > > >
01 Jan 00: 00: 01
The display will then show:-
Temporary access may be gained to the factory defaults by removing Lk6 (Reset) on
the main PCB, the link must be replaced before any programming is commenced, this
option will have no effect if the engineer code is locked.
Page 81
872.qxd
05/11/2003
15:01
Page 82
GardTec 872
Miscellaneous
Engineer Reset After An Alarm
If a system is programmed for engineer reset it will be necessary for the engineer to
attend the system. After the engineer has confirmed the integrity system the system
should be reset as follows:1)
The system must be unset Unset,
by a user code.
Enter the engineer code, the display will show:-
2)
Press NO, the display will show:-
3)
Press YES, the display will show:-
4)
Enter the engineer code again to abort the
setting, the display will show:-
5)
The system is now Unset.
Page 82
Do you want to . .
Use ENGNR. Mode ?
Do you want to . .
SET the System ?
Exit Now ! 1 2 3 4 5 6 7 C
All Zones On 28
< < < < UN-SET > > > >
01 Jan 00: 00: 01
872.qxd
05/11/2003
15:01
Page 83
GardTec 872
Miscellaneous
Diagnostics
The GardTec 872 control panel has several engineering diagnostic features available
via an LCD keypad. To access these diagnostics follow the steps below
1)
With the display showing:< < < < UN-SET > > > >
01 Jan 00: 00: 01
2)
3)
4)
5)
Enter the Engineer code (1234 default)
The display will show:-
Press YES. The display will show:-
Press NO until the display shows:-
Press YES. The display will show:-
Page 83
Do you want to . .
Use ENGNR. Mode ?
Program . . . .
Zones ?
Program/ List
Diagnostics / Log ?
List
Event Log ?
___
__
872.qxd
05/11/2003
15:01
Page 84
GardTec 872
Miscellaneous
Change / List
Diagnostics ?
6)
Press NO. The display will show:-
7)
Press YES. The display will show for example:-
Battery Test
= 01 Hrs
8)
Press YES. The display will show for example:-
Aux. Volts
13.6
9)
Press YES. The display will show for example:-
10)
Press YES. The display will show for example:-
11)
If no Novagard Active Sounders are fitted/programmed
the display will return to step 5
Battery Volts
On Charge 13.0V
Battery Volts
Off Charge 12.8V
Or
If at least one Novagard Active Sounder is fitted/
programmed the display will show:-
12)
Press the number of the Novagard Active you
wish to test. The display will show:-
13)
Press YES. The display will show:Then:00 = No Tamper 01 = Front Tamper
02 = Rear Tamper 03 = Front & Rear Tamper
Page 84
Select NovActive
1-8
Refresh Data ?
Please WAIT
Fault Status
00
=
872.qxd
05/11/2003
15:01
Page 85
GardTec 872
Miscellaneous
14)
Press YES. The display will show for example:(for Novagard Active battery)
15)
On-Charge (V)
9.6
=
Press YES. The display will show for example:(for Novagard Active battery)
On-Charge (V)
8.4
=
16)
Press YES. The display will show for example:(for Novagard Active hold-off volts)
Hold-Off (V)
13.6
=
17)
Press YES. The display will show for example:(for Novagard Active sounder current)
Bell (mA)
270
=
18)
Press YES. The display will show for example:(for Novagard Active strobe current)
Strobe (mA)
109
=
19)
Press YES. The display will show for example:(for Novagard Active charge current)
Charge (mA)
10
20)
Press YES. The display will show for example:(for Novagard Active quiescent current)
Static (mA)
25
21)
Press YES. The display will show for example:-
Fault Status
00
This concludes the Diagnostic Tests. To Escape
Press 0 until the display shows:-
Note:
=
=
< < < < UN-SET > > > >
01 Jan 00: 00: 01
If battery test is programmed other than 00 a battery test will be
performed each time you escape from engineer mode.
Page 85
=
872.qxd
05/11/2003
15:01
Page 86
GardTec 872
Miscellaneous
Zone Programming Tutorial
Below is a Zone Programming Tutorial that shows how a single zone is programmed.
This should be repeated for all zones that require programming.
1)
With the display showing:-
2)
Enter the Engineer code (1234 default)
The display will show:-
3)
Press YES. The display will show:-
4)
Press Yes. The display will show:-
5)
Press Yes. The display will show:-
6)
Enter the zone number you wish to program
e.g 1 followed by Yes. The display will show
for example:-
< < < < UN-SET > > > >
01 Jan 00: 00: 01
7)
Press No. The display will show:-
8)
Note the chevron has now appeared before
the Ent/Ex. This is the Zone Type, now press
No until the Zone Type you require is displayed.
A description of the Zone Types available is
given on page 53 in this manual
Page 86
Do you want to . .
Use ENGNR. Mode ?
Program . . . .
Zones ?
___
Program Zone
Types ?
Enter Zone #
_ _ _
001 = Ent/Ex
A=
1
= Remove -
001 > Ent/Ex
A=
1
= Remove -
872.qxd
05/11/2003
15:01
Page 87
GardTec 872
9)
10)
Miscellaneous
Press Yes. The Zone Type you have chosen
will be accepted and the chevron will move
along to the last character on the top line:-
001 = Ent/Ex
A>
1
= Remove -
We are now programming what Area(s) the
Zone will be allocated to. By default all zones are
allocated to Area 1.
At this point the number keys 1 to 7 have a toggle
action, pressing number 2 now will add Zone 1
to Area 2 as well as Area 1, pressing 2 again will
remove the zone from Area 2.
Note: A zone may be allocated to a single Area
or multiple Areas.
When the Areas you require are displayed Press
Yes. The display will show for example:Don’t forget to program user codes for all the
Areas you have used.
11)
001 = Ent/Ex
A>
13 7
> Remove -
The chevron has now moved to the attribute for
Zone 1. The attributes available are given on
pages 54 & 55 within this manual. Press No
until the attribute you require is displayed. Then
Press Yes. The display will show for example:002 = Access
A=
1
= Remove -
12)
This is now Zone 2 programming. To continue
programming this (and other) zone(s) repeat
from step 7
To exit from Zone programming press 0 until
the display shows:-
Page 87
< < < < UN-SET > > > >
01 Jan 00: 00: 01
872.qxd
05/11/2003
15:01
Page 88
Appendix 1
GardTec 872
Appendix 1
Using Point ID
The ProDigi Communicator or GardTec Modem from GardTec may, if required be used
to allow Point ID communication with the GardTec 872. When used in this mode the
ProDigi/Modem will use the Ademco Point ID Protocol.
Point ID allows for the transmission of zone and detector types to be transmitted along
with the alarm information. This qualifies as sequential verification as recommended by
the 1995 ACPO policy.
To use Point ID the ProDigi/Modem should be connected to the GardTec 872 via the
serial lead that is supplied with it (this is shown in Fig 16 on page 25).
To use the communicator in Point ID mode and program the relevant functions, the
control panel needs to be told that it is to use the ProDigi as a Point ID communicator.
This is done via option 34 in the engineer options (Digicom Type), which should be
changed to:Digicom Type.....
= Point ID or Mod+PID for the Modem
If using an LED type keypad to select Point ID:With the display showing E- press 34 followed by YES
Then press NO 03 (or 04 for Modem) followed by YES
It should be noted that although you are able to turn on the Point ID function via an
LED keypad you will not be able to program the Digicom functions unless you are
working via an LCD keypad. This allows for a pre-programmed ProDigi to be fitted onto
an existing system with LED only keypads.
When using the ProDigi or Modem with the GardTec 872 control panel you will
be able to use the ProDigi as a Point ID communicator or fast format
communicator. It is not possible to use both formats at the same time.
Page 88
872.qxd
05/11/2003
15:01
Page 89
Appendix 1
GardTec 872
New Log Events
Two new log events have been added with the implementation of Point ID these are:Alarm Abort
The LCD display will show "Alarm Abort" along with the time and date whilst the LED
will show " AA "
Test Call
The LCD display will show "Test Call Sent" along with the time and date whilst the LED
display will show " tC "
Access to programming the Point ID event actions is gained through the "Program
Channels " options. After D1 & D2 and the polarity options have been programmed the
following new options will be presented for programming.
Note:
All these options are defaulted to off and should be turned on as
required.
Set
Alrm
Unset
PA
24Hr
E/E
12Hr
Bat
Tamp
AC
LF
Alert
Fire
W/D
Duress
Zone Remove
Alrm-Restore
Zone Exclude
AC-Restore
LF-Restore
After Alarm
After-Alarm
Abort-Call
PA Restore
If the After Alarm option is turned on Point ID reports for all options are sent
regardless of whether they are turned on or off following the first alarm event. This will
continue until an Set/Unset event takes place. Note: Alrm=On must be programmed for
this option to work.
Note:
Options that are turned on will send messages regardless of alarm status.
Note:
Power-Fail refers to Aux Fuse fail and will reported as Lo-Batt to the central
station.
Note:
Part-Sets will be reported as Armed Stay to the central station
Note:
Output Module tampers will be reported as Expansion Module Tamper to the
central station.
Page 89
872.qxd
05/11/2003
15:01
Page 90
GardTec 872 Series
Appendix 1
Engineer Code Entered
New Log Event of Engineer Code Entered has been added.
Digi Functions
Programming With Point ID
All normal Digi functions should be programmed as usual with the exception of the
following items that have no function with Point ID protocol.
O/C Channel Select
Restore Report Channel Select
Input Mapping and Polarity
580 Re-mapping
Tone Security Option
The option of Tone Security has been added to the ProDigi. This option is only
applicable when the ProDigi is being used in Point ID mode. When the option is set to
'Tone Security = High' a tone test will occur after any command is used (e.g Set,
Unset, Code Entry). This is in addition to the Tone Test using the Tone Test Time
option.
Page 90
872.qxd
05/11/2003
15:01
Page 91
Appendix 1
GardTec 872
GardTec 872 & DD243 : 2002
From the 1st July 2002 DD243 2002 will come into effect in England, Wales and
Northern Ireland replacing the 1999 policy. All communications systems that require a
Police URN will need to conform to DD243:2002.
This document is intended to help installers of the GardTec 872 control panels
understand the new features that have been incorporated into the panels and use
them to ensure that the system complies to the new DD243:2002 requirements. The
advanced DD243 features must be programmed via a LCD keypad.
This document is intended as a guide only and should be read in conjunction with the
relevant standards relating to the alarm system giving particular attention to BS 4737
and DD243. These may be obtained from the British Standards Institute.
To program the confirm options on the GardTec 872 enter engineer mode (1234
default followed by YES) the display will show 'Program Zones' press NO until the
display shows 'Program Alarm Confirm' press YES to enter into this section.
The first option will be
Confirm Time Window (default = 60)
This time window may be programmed between 1 and 120 minutes. To comply the
required time should be between 30 and 60 minutes.
See 5.4.1 DD243:2002 Criteria for sequentially confirmed alarm conditions.
Confirm on Entry (default = On)
This option may be programmed to On or Off. If Confirm on Entry = Off then confirmed
alarms to central station are disabled if the entry timer is started. If ACE is used then it
is permissible to set this option to On.
See 6.4.4 DD243:2002 Opening the initial entry door disables all means of
conformation.
Sounder Mode (default = Unconfirmed)
This option controls the system speakers fitted, options are confirmed or un-confirmed.
If Sounder Trigger = Confirmed then internal sounder will only trigger with a confirmed
alarm.
If Sounder Trigger = Unconfirmed then internal sounders will trigger with un-confirmed
alarms.
This feature is not mandatory for DD243
Reset Mode (default = Any)
Choose from Any or Normal.
If Unconfirm = Any then any code can be used to reset an un-confirmed alarm.
If Unconfirm = Normal then the programmed reset mode for alarm will still be required
i.e. if alarm reset has been programmed as engineer and Unconfirm reset is Normal
then an engineer reset will be required for Un-confirmed alarms.
See A.4 DD243:2002 Resetting following an alarm condition.
Page 91
872.qxd
05/11/2003
15:01
Page 92
Appendix 1
GardTec 872
Confirm Secondary Time Window (default = 60 minutes)
This time window may be programmed between 1 and 120 minutes we would suggest
a time between 30 and 60 minutes but should typically be the same time as the
confirm time window. This option affects zones that have been allocated as secondary
zones only. For functionality please refer to Secondary Zones Below.
ET (Exit Terminator) Mode (default = Set)
If ET Mode = Set then the exit terminator zone will terminate the exit procedure.
If ET Mode = Door Lock and the ET zone (door lock) is operated on entry then all
confirmed alarms will be disabled.
See 6.4.3 DD243:2002 Unlocking the initial entry door disables all means of
conformation.
Bell Mode (default = Unconfirmed)
This option controls the bells fitted to the system, options are confirmed or unconfirmed.
If Bell Trigger = Confirmed then Bell will only trigger with a confirmed alarm.
If Bell Trigger = Unconfirmed then Bell will trigger with un-confirmed alarms.
This feature is not mandatory for DD243
Strobe Mode (default = Unconfirmed)
This option controls the Strobe(s) fitted to the system, options are confirmed or unconfirmed.
If Strobe Trigger = Confirmed then Strobe will only trigger with a confirmed alarm.
If Strobe Trigger = Unconfirmed then Strobe will trigger with un-confirmed alarms.
This gives the ability to show to the keyholder from outside the premises that a
previously unconfirmed alarm has is now confirmed.
This feature is not mandatory for DD243
Confirmed Start Delay (default = 000m)
May be programmed between 0 & 120 minutes (default 0).
If programmed to anything other than 0 the panel cannot send confirmed signals until
the time programmed has expired. This time starts when the system has set and will
prevent confirmed alarms being generated in situations when a person has been
accidentally locked in the building.
This feature is not mandatory for DD243
Ace Battery monitor (default = On)
Options are On or Off. This option allows for the use of new control panel boards with
V5.1 or later software to be used with earlier keypads. If older non DD243 compliant
type keypads are used with V5.1 or later this option should programmed to Off. It is a
requirement of DD243 2002 that when using ACE Low Battery is reported to the end
user if the system is set using ACE.
See A.1 DD243:2002 Portable ACE used for setting and unsetting.
Comms Restore
For DD243 systems this option should be on (default setting On). With the option On
the alarm channel will be restored at the end of the time programmed in Confirmed
Time Window.
Page 92
872.qxd
05/11/2003
15:01
Page 93
Appendix 1
GardTec 872
Keypad Opening
Options available are:-
Always On
Keypad is always active.
Off in Entry
Keypad will not operate during Entry
Times 1 & 2. Once Entry Time has
expired the keypad may be used.
Off in Ent/Alm
As above + Once the Entry Time has
started and expired (system in alarm) the
keypad will be disabled.
If a non Entry Exit zone has caused an alarm and the system is still in alarm
(confirmed time window not expired) you may enter via the normal Entry point and still
use the keypad
In effect this forces the use of ACE keyfobs to unset during normal entry procedure.
Duress (not user 7 duress) codes will still be active irrespective what setting is
chosen.
Secondary Zones
The Program Part / Test /Chime option has now been renamed to Program Zone
Attributes. Within this section you are able to allocate zones as Secondary Zones.
Secondary type zones would be used for detectors that may be deemed as having an
over sensitive nature, this will stop unwanted user call-outs. Zones that are entered as
Secondary will follow the chain of events below.
During a set period triggering a Secondary Zone will start the Secondary Time
Window. This will be logged but no further action is taken. If the second zone to alarm
during the same set period is also a Secondary Zone then it will be logged and the
Secondary Time Window will be restarted.
If the time set within the Secondary Time Window is still running and a zone that is not
allocated as a Secondary Zone is triggered the event will be logged an Alarm A (unconfirmed) and Alarm B (confirmed) will be transmitted.
This feature is not mandatory for DD243
Perimeter Zones
Within the Program Zone Attribute section you are able to allocate zones as Perimeter.
Zones that are entered as Perimeter will follow the chain of events below.
When activated an unconfirmed alarm will be transmitted to the central station. An
output or digi channel may be programmed as perimeter (or if using Point ID a new
signal type of perimeter will be sent). This will allow central station to inform the
keyholder that an unconfirmed alarm has been received and is a perimeter type device
i.e window backdoor etc. etc. This feature is not mandatory for DD243.
Page 93
872.qxd
05/11/2003
15:01
Page 94
Appendix 1
GardTec 872
Scenarios Relating to DD234:2002.
Sounder / Bell Considerations
Please note careful consideration should be given when programming Confirm
Sounder and Confirm Bell Modes. If both are programmed for confirmed and any of the
above scenarios occur no local sounders will activate.
Other DD243:2002 Notes to Consider
When a system auto re-arms with a zone in fault condition The GardTec control panel
will omit the zone concerned. A signal should be sent to the central station indicating
that a detector(s) has (have) been isolated. To achieve this a Digi channel should be
programmed as Zone Exclude, this automatically send the required signal as the
detector is omitted.
See A.3.1 DD243:2002 IAS Incorporating Sequential Conformation Technology Only
New Output Option (Status)
A new output option of Status has been added, this option has three operating modes
and is intended to provide a visual indication of the system status.
System Set
Output On for 10 seconds
System Unset
Output On for 1s Output Off for 1s for a 10 second
period
Confirmed Alarm
Output On for 3 seconds Output Off for 1s until
system reset.
It is envisaged that this status output would be fitted to an indicator (i.e. LED) that can
be seen from outside the premises.
a)
Scenario specific to systems using completion of unsetting with ACE
6.4.5 DD243:2002.
Event 1
Event 2
Event 3
Event 4
Event 5
Event 6
System Set
Entry Time Starts
Access Zone Triggered
Entry Expired (including Entry Time 2)
Unconfirmed Transmitted
non entry/access Zone Triggered
Second non entry.access Zone Triggered
Confirmed Transmitted
To achieve the above
Confirm on entry = On
Ace Low Battery = On
Page 94
872.qxd
05/11/2003
15:01
Page 95
Appendix 1
GardTec 872
b)
Scenario Unlocking the initial entry door disables all means of conformation
6.4.3 DD243:2002.
Event 1
Event 2
System Set
Entry Door Unlocked
Confirmed Alarms Disabled
Open Entry Door (entry time starts)
Entry Time Expires (inc Entry Time 2)
Unconfirmed Alarm Transmitted
Any subsequent zones triggered
No Confirmed Signals Transmitted
Event 3
Event 4
Event 5
Or
Event 1
Event 2
Event 3
System Set
Entry Door Forced Open (entry time starts)
Entry Time Expires (inc Entry Time 2)
Unconfirmed Alarm Transmitted
non entry/access Zone Triggered
Second non entry.access Zone Triggered
Confirmed Transmitted
Event 4
Event 5
To achieve the above
Confirm on entry = On
ET Mode = Door Lock
Door Lock Zone programmed as ET
c)
Scenario Opening the initial entry door disables all means of conformation
6.4.4 DD243:2002.
Event 1
Event 2
Event 3
Event 4
System Set
Entry Door Opened (entry time starts)
Confirmed Alarms Disabled
Entry Time Expires (inc Entry Time 2)
Unconfirmed Alarm Transmitted
Any subsequent zones triggered
No Confirmed Signals Transmitted
To achieve the above
Confirmed on entry = Off
Page 95
872.qxd
05/11/2003
15:01
Page 96
Appendix 1
GardTec 872
Other New GardTec 872 Features
Several new features have been included into the GardTec 872 control panel, these
are:Chime 1 & Chime 2
Within the Part/Test/Chime section. you are now able to program 2 Chime suites.
Chime Melodies
Different Chime Melodies may now be downloaded to the GardTec 872 control panel
via GardTec Remote upload/download software package only.
PSU Diagnostics
It is possible to undertake various PSU diagnostic tests directly via the LCD RKP.
NovActive Diagnostics
It is possible to undertake NovActive Bell Box Diagnostic tests directly from an LCD
RKP or via GardTec.
PID (Point ID Protocol)
The GardTec 872 control panels has the ability to be programmed as MOD + PID
when used in conjunction with the GardTec Digi Modem or ProDigi allowing Point ID
communications protocol to central station.
Exiting Engineer Mode
When you exit from engineer mode a battery test is performed. If no battery is present
or the battery is flat a Fuse / Bat Fault will be generated. This option may be turned off
by setting the PSU test time to 0 in the diagnostic section.
Zone Expansion
Zone Expansion for the GardTec 872 starts at zone 21 for the first expansion zone for
all types of expansion options.
Page 96
872.qxd
05/11/2003
15:01
Page 97
Appendix 1
GardTec 872
Modem Quick Start
The Gardtec 872 control panel may be programmed on site via the keypad or via
Gardtec Remote Software. In order to program the panel via Gardtec Remote the
communications needs to be initialised.
Note:
Using this method will default any previously programmed settings.
1)
Remove all power from the control panel
2)
Apply the mains power.
3)
Whilst the display is showing the start-up display
for example
Gardtec 872 xx xx
Enter 5 5 YES NO at the keypad
4)
Please WAIT
The display will show
For up to 1 minute
5)
Connect the Digi Modem to SK3 and on the Digi Modem terminals A5 & B2 to
a suitable telephone outlet.
6)
The control panel is now ready to accept a call from
Gardtec Remote.
Or
Digi / Modem Set-Up
1)
With the the control panel unset
Display showing.
2)
Enter the engineer code (1234 default) followed by
< < < < Unset > > > >
01 Jan 15:34:18
Program . . . .
Zones ?
YES. Display will show.
Page 97
___
872.qxd
05/11/2003
15:01
Page 98
Appendix 1
GardTec 872
3)
Enter 34 followed by YES display will show.
4)
Press YES Display will show.
Test Digicom
Channels ?
5)
Press NO four times. Display will show.
Program Digicom
Functions ?
6)
Press YES. Display will show.
View Modem Log ?
7)
Press NO. Display will show.
Program Modem
Functions ?
8)
Press YES. Display will show.
Modem mode
= Off
9)
Press NO until the display shows.
Modem mode
> No Return
Digicom Type . . . .
= Mod + F / F
(this mode allows you to dial the panel directly with no call back)
10)
Press YES. Display will show.
Double Ring
= Off
(Basic modem is now set-up)
11)
Press 0 (to escape). Display will show.
Program Comms
Functions ?
(Start of Comms Programming)
12)
Press YES. Display will show.
Comms = Off
(Use 0 until display shows Unset if you don’t wish
to program the Comms functions).
13)
Press NO twice. Display will show.
Page 98
Comms >On
872.qxd
05/11/2003
15:01
Page 99
Appendix 1
GardTec 872
14)
Press YES. Display will show.
Site ID Code
is Un-Programmed
(Site ID Code is issued by central station. If you are given
a six digit code only use the last four digits)
15)
Press NO. Display will show.
16)
Enter your required four digit Site ID Code
followed by YES. Display will show.
17)
Press NO. Display will show.
18)
Enter the first (primary) telephone number
followed by YES. Display will show.
19)
Press YES or NO as required.
Display will show.
20)
Press NO. Display will show.
21)
Enter the second (secondary) telephone number
followed by YES. Display will show.
Page 99
Site ID Code
________
Phone Number 1
is Un-programmed
Phone Number 1
_____________
Inhibit Display
of New Number ?
Phone Number 2
is Un-programmed
Phone Number 2
_____________
Inhibit Display
of New Number ?
872.qxd
05/11/2003
15:01
Page 100
Appendix 1
22)
GardTec 872
Press YES or NO as required
Display will show.
Line Monitor
= Tone + Volts
For Dedicated line use Tone + Volts.
For Shared line use Line Volts.
23)
Press NO until the required setting is shown.
Display will show for example.
Line Monitor
> Line Volts
For Shared line.
24)
Press YES. Display will show.
Line Security
= High
For Dedicated line use High
For Shared line use Low
25)
Press NO until the required setting is shown.
Display will show for example.
For Shared line.
Page 100
Line Security
> Low
872.qxd
05/11/2003
15:01
Page 101
Appendix 1
GardTec 872
26)
Press YES. Display will show.
Channel 1 2 3 4 5 6 7 8
R/Rep
00010000
This is channel Restore Report
i.e when system is reset channel
is reported clear to Central Station
27)
Press NO. Display will show.
28)
Use the 1 & 0 keys to enter the Restore
Report for the channels you require. 1=on 0=off
Display will show for example.
Preferred setting
29)
This concludes the basic communications
programming. Press 0 several times to
return to
Page 101
Channel 1 2 3 4 5 6 7 8
R/Rep
________
Channel 1 2 3 4 5 6 7 8
R/Rep
11111111
< < < < Unset > > > >
01 Jan 15:34:18
872.qxd
05/11/2003
15:01
Page 102
Appendix 1
GardTec 872
Novagard Active Wiring & Programming
The Novagard Active range of external sounders offers complete compatibility with the
Gardtec 872 control panel. As you would expect a variety of formats and sounder outputs are available that may be wired in standard format to all makes of control panels
or in a serial format to the Gardtec 872 control panel. When wired in serial format the
Novagard Active offers the following features.
Serial Connection (4 wire) to Gardtec 872 control panel.
Up to eight addressable Novagard Active bell boxes per system.
May be programmed on-site or from a remote location via Gardtec
Remote Upload / Download software.
Complete Bell Box Diagnostics via Gardtec Remote including:Bell Hold Off Voltage.
Battery Volts On & Off Charge.
Battery Charge Current.
Quiescent Current.
Tamper(s) Status.
Sounder Current Measurement.
Strobe Current Measurement.
Engineer Bell Test Mode.
Programmable Sounders patterns for Alarm,PA and Tampers.
SAB / SCB option.
Programmable LED Patterns.
The ideal choice for split systems.
Page 102
872.qxd
05/11/2003
15:01
Page 103
Appendix 1
GardTec 872
Novagard Active Diagnostic screen shots (from Gardtec Remote).
Wiring Connections & Jumper Positions.
Serial Connection to Gardtec 872 control panel
Novagard Active Terminals
UNIT 1
UNIT 2
UNIT 3
UNIT 4
STR
SWNo
Connection
No
Connection
LINK TO
0V IN
LINK TO
0V IN
UNIT 5
BELL -
UNIT 6
BELL -
UNIT 7
BELL -
UNIT 8
BELL -
BELL
SW-
12V
IN
BELL -
BELL +
BELL -
BELL +
BELL -
BELL +
BELL -
BELL +
No
Connection
No
Connection
LINK TO
0V IN
LINK TO
0V IN
BELL +
BELL +
BELL +
BELL +
Unit No.1 Wiring.
STR
SW-
BELL
SW-
12V
IN
0V
IN
JP1
POS
OFF
1-2
OFF
1-2
OFF
1-2
OFF
1-2
Unit No.8 Wiring.
STR
SW-
12V
IN
0V
IN
TMPR
RTN
Novagard
Active
3
1
BELL
SW-
JP1
JP1
2
TMPR
RTN
SAB
TMP
SAB
TMP
SAB
TMP
SAB
TMP
SAB
TMP
SAB
TMP
SAB
TMP
SAB
TMP
TMPR
RTN
Novagard
Active
3
0V
IN
BELL
HOLD BELL
HOLD BELL
HOLD BELL
HOLD BELL
HOLD BELL
HOLD BELL
HOLD BELL
HOLD -
2
1
Wired & configured
as Unit No.8
Wired & configured
as Unit No.1
Novagard Active
compatible Gardtec
Control Panel
Novagard Active
compatible Gardtec
Control Panel
+
BELL
-
+
BELL SAB
HOLD TMP
BELL
Page 103
-
BELL SAB
HOLD TMP
872.qxd
05/11/2003
15:01
Page 104
Appendix 1
GardTec 872
Programming
< < < < UN-SET > > > >
01 Jan 00: 00: 01
1) With the display showing:-
2) Enter the Engineer code (1234 default)
The display will show:-
3) Press YES. The display will show:-
Do you want to . .
Use ENGNR. Mode ?
Program . . . .
Zones ?
___
This is Engineer Mode
4) Press 131 (option No.) Followed by YES the
display will show:-
NovActive = Off
5) Press NO until the display shows:-
NovActive = On
6) Press YES the display will show:-
Select NovActive
1- 8
7) Select the unit you wish to
program.The display will show:-
NovA1 = Off LEDS = 0
Confirm = Off
8) Pressing NO will place a chevron against the
first option as shown:-
NovA1 > Off LEDS = 0
Confirm = Off
9) Press NO to select if Unit 1is On or Off. When
finished press YES.
10)The chevron will now move to the LED option:-
Page 104
NovA1 = Off LEDS > 0
Confirm = Off
872.qxd
05/11/2003
15:01
Page 105
Appendix 1
GardTec 872
Press NO to change the LED pattern, choose from
0=
1=
2=
3=
Alternating LEDs
Single Static LED
Twin Flashing LEDs
Off
When finished press YES
11) The chevron will now move to the Confirm option:-
NovA1 = Off LEDS = 0
Confirm > Off
12) Press NO to change if Confirm is On or Off.
When finished press YES
NovA1 A1 = 1 PA = 0
Alarm = 0 Tamper = 0
13) The display will show:14) Pressing NO will place a chevron against the
first option as shown:-
NovA1 A1 > 1 PA = 0
Alarm = 0 Tamper = 0
This first option determines what area alarm the
unit will activate with.
15) Press NO to change the area allocation.
When finished press YES.
16) The chevron will now move to
the PA sounder pattern option:Press NO to change pattern
Sounder patterns available are
0=
1=
2=
3=
Sounder Pattern 0
Sounder Pattern 1
Sounder Pattern 2
Sounder Pattern 3
When finished press YES
Page 105
NovA1 A1 = 1 PA > 0
Alarm = 0 Tamper = 0
872.qxd
05/11/2003
15:01
Page 106
Appendix 1
GardTec 872
17) The chevron will now move to the Alarm
sounder pattern option:-
NovA1 A1 = 1 PA = 0
Alarm > 0 Tamper = 0
18) Press NO to select the sounder pattern required
as shown in step 16. When finished press YES.
19)The chevron will now move to the Tamper
sounder pattern option:-
NovA1 A1 = 1 PA = 0
Alarm = 0 Tamper > 0
20) Press NO to select the sounder pattern required
as shown in step 16. When finished press YES.
21)The display will show:22)To change text press NO. The
display will show:-
NovA1 Text
NovActive1
=
NovA1 Text
_
=
23) Enter text (16 characters) in the same manner
as you would zone descriptors (please
refer to panel manual).
24) After the last character is
entered the display will show:-
Program Bell
Type ?
25) Press 0 three times to return
to the Unset condition.
Page 106
872.qxd
05/11/2003
15:01
Page 107
Appendix 1
GardTec 872
Extending RKP Wiring to 500mtrs
Page 107
872.qxd
05/11/2003
15:01
Page 108
Appendix 1
GardTec 872
Extending Expander Wiring to 500mtrs
Page 108
872.qxd
05/11/2003
15:01
Page 109
Appendix 1
GardTec 872
Typical Secure Wiring to RedCare STU from Output
Card.
The preferred method for secure Comms Channel Wiring is shown below for a single
channel. The security in this format is greater than using Latch / On-board Relay / Det
Reset Terminal(s) and is therefore recommended. This should be repeated for other
required Outputs.
Page 109
872.qxd
05/11/2003
15:01
Page 110
Appendix 1
GardTec 872
Page 110
872.qxd
05/11/2003
15:01
Page 111
GardTec Ltd
Tel: 0161 655 5500 Fax: 0161 655 5501
Internet: www.gardtec.ltd.uk
e-mail: [email protected]
Technical Support: 0161 655 5600
Technical Support Fax: 0161 655 5610
PR5406 Rev1.0