Download WS-6932 - Savebase.com
Transcript
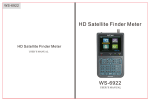
WS-6932
USER’S MANUAL
USER’S MANUAL
T H E P R O F E S S I O N A L E Q U I P M E N T - - - - - - - - - - - - - - - - - - | U S E R ’S M A N U A L |
Product Description
CONTENTS
Product Description
GUIDE
1.1 Face Panel & Button
1.2 Power On/Off
1.3Power Supply & Battery
Menu
2.1 Satellite Search
2.2 Multimedia
2.3 System Setting
2
3
4
4
4
5
10
2.4 TP manage
13
15
2.5 Spectrum
16
2.6 Constellation
20
2.5 Shortout Buttons
22
3. Specifications
T H E P R O F E S S I O N A L E Q U I P M E N T - - - - - - - - - - - - - - - - - - | U S E R ’S M A N U A L |
26
4.Warning
27
5.Product Standard Package
29
Using WS6932 can receive DVB-S and DVB-S2 signal,
Watch HD programing。It's very convenient for installer
to catch quick and accurate alignment for antenna to
the best position.
Ws6932uses microprocessor controller with reliable
and stable performance. When it is turned on , channel
picture , signal strength and signal quality will be
showed on LCD screen. And also big menu window
can be selected for data figure.
Ws6932 displays EL/AZ, CBER/VBER, S/N, signal
strength and lock sound alarm.
Ws6932 can detect very weak signal and provide
antenna power(OFF/13V/18V). It's with auto –
protection for LNB short –circuit.
Ws6932 has the AV in and AV out function.
Ws6932 Key has backlight ,WS6932 with flashligh
function。
Ws6932 uses the 12V power adapter. It includes
8.4V3000mAH high capacity LI-ION battery which
can work for more than 2 hours when it is fully
charged.
Digita Satellite Meter
|
1
T H E P R O F E S S I O N A L E Q U I P M E N T - - - - - - - - - - - - - - - - - - | U S E R ’S M A N U A L |
T H E P R O F E S S I O N A L E Q U I P M E N T - - - - - - - - - - - - - - - - - - | U S E R ’S M A N U A L |
1.GUIDE
1.1Panel keypads
NO.
Name
Function
1
MENU
To show main menu or return to previous menu
2
F1
Function Button
3
F2
Function Button
4
F3
Function Button
5
F4
Function Button
6
EXIT
7
▲▼
8
Mute
Sound On/Off Switching
9
SCAN
Quick search for DVB-S
10
M.INFO
Show 5 channels signal information for DV B-T
11
INFO
Show information of current program
12
0-9 Numerical Button
To input numer for setting para meters
13
Power Connection port
Port for power charging
14
USB Port
Port for Upgrading or connecting to multimedia
15
Flashlight holes
flashlight
16
Power Switch
Power Switch for machine power
17
LNB IN
Connecting to the dish for DVB-S
18
AV OUT
AV OUT
19
AV IN
AV IN
20
Power Indicator Light
The light is on when meter is turned on
21
22K Switch Indicator Light
22K Switch is on when it lights
22
13/18V Indicator Light
To show H/V switch output
23
Signal Lock Indicator Light
Loc ked signal when it lights
24
Charging Indicator Light
The light is on when it’s charging and
To ca ncel selection or exit from current menu
OK
Arrow for Cursor Moving
OK for Confirming
off when charging is completed.
2
Digita Satellite Meter
Digita Satellite Meter
|
3
T H E P R O F E S S I O N A L E Q U I P M E N T - - - - - - - - - - - - - - - - - - | U S E R ’S M A N U A L |
T H E P R O F E S S I O N A L E Q U I P M E N T - - - - - - - - - - - - - - - - - - | U S E R ’S M A N U A L |
1.2 Power On/Off
use Arrow key to move cursor, and then press “OK” key to select
sub-menu.
To turn on the meter when Power Switch moves to I
position.
To turn off the meter when Power Switch moves to 0
position.
Please turn off the meter to charge the meter in time
when system information for showing low power popes
up.
1.3Power Supply and Battery
It's used with 12V 1.5A Power Adaptor. It charges
through external power when battery is out of power.
It's used with 8.4V 3000 mAH Lithium Battery. It needs
4 hours charging time by connecting power adaptor with
external power or car charging. After it's full charge, it
works for more than 5 hours (It also depends on the load
of external antenna).
2.1Satellite Search
Notice: For initial charge, please make battery fullycharged(We suggest it charge for 8 hours).
2.MENU
Press “ MENU” key to enter into main menu, and
4
Digita Satellite Meter
Digita Satellite Meter
|
5
T H E P R O F E S S I O N A L E Q U I P M E N T - - - - - - - - - - - - - - - - - - | U S E R ’S M A N U A L |
T H E P R O F E S S I O N A L E Q U I P M E N T - - - - - - - - - - - - - - - - - - | U S E R ’S M A N U A L |
2.1.7
Pol
Select Polar Mode(VER、HOR)
2.1.8
Search Mode
Set parameters, and press “OK” button to enter the Sub-menu,
and then align direction of antenna according to the interface
parameters.
2.1.9
2.1.10
2.1.1 Satellite
Press [►] button to enter can be change the satellite name,
Press[◄] button to enter can be change the current frequency。
2.1.2 LNB Type
press [◄][►] enter , select (Single、UNIVERSAL、
ONECABLE)
2.1.3 The vibration frequency
press [◄][►] enter ( select 5150、9750、10000、10050、
10600、10750、11200、11250、11300、11475)
LNB Power(OFF、18、13、13/18)
22Khz
22Khz switch(OFF、ON)
2.1.11 Switch type
(None、DisEqC 1.0、DisEqC 1.1)
2.1.12 Motor
(OFF、DisEqC 1.2、USALS)
press “OK” button to enter the Motor -menu
2.1.4 TP NUM
press [◄][►] enter, select TP NUM
2.1.5 Frequency
Use the numerical button to input Freq Value for Down Freq
2.1.6 SymbRate
Use the numerical button to input Value for Symbol Rate
6
Digita Satellite Meter
Digita Satellite Meter
|
7
T H E P R O F E S S I O N A L E Q U I P M E N T - - - - - - - - - - - - - - - - - - | U S E R ’S M A N U A L |
T H E P R O F E S S I O N A L E Q U I P M E N T - - - - - - - - - - - - - - - - - - | U S E R ’S M A N U A L |
Setting up the Satellite Search -menu,Press “OK” button
to enter the Quick search –menu.
Press “OK” button to Search, Program automatically save the
search is complete return to the previous menu.
Press [◄][►] enter select ZOOM、MONITOR、TP SCAN、
AUTO
8
Digita Satellite Meter
Digita Satellite Meter
|
9
T H E P R O F E S S I O N A L E Q U I P M E N T - - - - - - - - - - - - - - - - - - | U S E R ’S M A N U A L |
2.2
Multimedia
Media Player must be external memory into the USB port.
Ortherwise , there will be USB Device is not Find screen.
T H E P R O F E S S I O N A L E Q U I P M E N T - - - - - - - - - - - - - - - - - - | U S E R ’S M A N U A L |
2.2.1 Play MUSIC、VIDEO、PICTURE in MP3、MP4、
JPG format
Press the done button to select MP3 、MP4、JPG , according to the ok button to play
2.2.2 System upgrade
Choose the file named “img”suffix press OK , suggesting to
upgrade “app”or “user ddb”, press up and down button ,
press ok confirmed,comfired once again prompted to confirm
the upgrade , press OK button to start the upgrade , upgrade do
not power off.
10 Digita Satellite Meter
Digita Satellite Meter
|
11
T H E P R O F E S S I O N A L E Q U I P M E N T - - - - - - - - - - - - - - - - - - | U S E R ’S M A N U A L |
2.2.3 Download the current user database
Usb interface , press the F1 key , you can download the current user database 。on the basis of satellite
tp tools to produce there own default satellite database
12 Digita Satellite Meter
T H E P R O F E S S I O N A L E Q U I P M E N T - - - - - - - - - - - - - - - - - - | U S E R ’S M A N U A L |
2.3
System setting
Digita Satellite Meter
|
13
T H E P R O F E S S I O N A L E Q U I P M E N T - - - - - - - - - - - - - - - - - - | U S E R ’S M A N U A L |
2.3.1
Language Select
Choose a kinds of menu languages
T H E P R O F E S S I O N A L E Q U I P M E N T - - - - - - - - - - - - - - - - - - | U S E R ’S M A N U A L |
2.4 TP Manage
2.3.2 Screen format
screen output format slect (4:3TV、16:9TV)
2.3.3 Light setting
Button backlight delay slect switch
(OFF、5 Second、10 Second、20 Second)
2.3.4
Factory reset
Press “OK” key , software return back factory set
2.3.5 Longltude
Enter local longitude by number key
2.3.6 Location
Press [◄][►]choose local west .east of position
USE [▲][▼]use[][] to select TP to see the signal strength
and signal quality of the TP
2.3.7Latitude & Hemisphere
Enter local latitude by number key
2.3.8Hemisphere
Press [◄][►]choose local west .east of position
2.3.9 SW VER
display software version number
2.3.10
Release Time
display software setting time
14 Digita Satellite Meter
Digita Satellite Meter
|
15
T H E P R O F E S S I O N A L E Q U I P M E N T - - - - - - - - - - - - - - - - - - | U S E R ’S M A N U A L |
T H E P R O F E S S I O N A L E Q U I P M E N T - - - - - - - - - - - - - - - - - - | U S E R ’S M A N U A L |
2.5 Spectrum
2.5.1To set parameters according to requirements, and then
press OK button to enter the chart of spectrum.
Press OK button and then enter spectrum parameter to set menu.
2.5.2When the screen appears the spectrum, press F1 button
to change bandwidth and press F2 to change the polarity.
16 Digita Satellite Meter
Digita Satellite Meter
|
17
T H E P R O F E S S I O N A L E Q U I P M E N T - - - - - - - - - - - - - - - - - - | U S E R ’S M A N U A L |
2.5.3Press F4,Scanning near the cursor frequency, and save search program
18 Digita Satellite Meter
T H E P R O F E S S I O N A L E Q U I P M E N T - - - - - - - - - - - - - - - - - - | U S E R ’S M A N U A L |
2.5.4Press OK button , then enter the TP SEARCH,enter
the Constellation。
Digita Satellite Meter
|
19
T H E P R O F E S S I O N A L E Q U I P M E N T - - - - - - - - - - - - - - - - - - | U S E R ’S M A N U A L |
T H E P R O F E S S I O N A L E Q U I P M E N T - - - - - - - - - - - - - - - - - - | U S E R ’S M A N U A L |
2.6 Constellation
2.6.1To set parameters according to the requirements, press
OK button to enter the constellation chart parameter.
To show signal parameter DVB-S(QPSK)、DVB-S2
(8PSK)according to the parameter of satellite finder.
(For the same satellite, different transponders show different
signal strength, the signal of DVB-S(QPSK) ) is stronger
than DVB-S2(8PSK).
Press OK button , then enter the constellation parameter to set menu
20 Digita Satellite Meter
Digita Satellite Meter
|
21
T H E P R O F E S S I O N A L E Q U I P M E N T - - - - - - - - - - - - - - - - - - | U S E R ’S M A N U A L |
2.7
Shortcut Buttons
2.7.1 In the broadcase , press OK to enter the lower menu ,
follow the prompts
2.7.2 In the broadcase , press F1 to enter the lower menu ,
follow the prompts
22 Digita Satellite Meter
T H E P R O F E S S I O N A L E Q U I P M E N T - - - - - - - - - - - - - - - - - - | U S E R ’S M A N U A L |
2.7.3 In the broadcase , press F2to enter the lower
menu , follow the prompts
2.7.4 In the broadcase , press F3 to enter the lower menu ,
follow the prompts
Digita Satellite Meter
|
23
T H E P R O F E S S I O N A L E Q U I P M E N T - - - - - - - - - - - - - - - - - - | U S E R ’S M A N U A L |
2.7.5 In the broadcase , press OK to enter the lower menu ,
follow the prompts
T H E P R O F E S S I O N A L E Q U I P M E N T - - - - - - - - - - - - - - - - - - | U S E R ’S M A N U A L |
2.7.7 In the broadcast , press INFO to enter next menu,
follow the prompts
2.7.8 Press MUTE button to turn on or turn off the sound
2.7.6 in the broadcast, press the TV/Radio , to achieve TV/
Radio feature conversion。
24 Digita Satellite Meter
Digita Satellite Meter
|
25
T H E P R O F E S S I O N A L E Q U I P M E N T - - - - - - - - - - - - - - - - - - | U S E R ’S M A N U A L |
T H E P R O F E S S I O N A L E Q U I P M E N T - - - - - - - - - - - - - - - - - - | U S E R ’S M A N U A L |
Specifications
Handing Precautions and Prohibitions of Battery in
Sat Meter
Fully DVB-S&DVB-T Compliant
Yes
F type,Female
Connector
950MHz-2150MHz
Frequency Range
-65dBm~-25dBm
Signal Level
DVB-S
Atenna input
13/18V,Max350mA
LNB Powewr
22KHz
LNB Switch Control
Ver 1.0/1.1/1.2 USLAS
DiSEqC
Connector
IEC Female 9.5mm
VHF and UHF
Frequency range
DVB-T
8/7/6 MHz
Bandwith
75ohm
Input impedance
QPSK
Front end
DVB-S
2Mbps~-45Mbps
Demodulation Range
Yes
SCPC and MCPC Capable
COFDM Satellite Finder
Modulation
The Professional
Demodulator
QPSK,16QAM,64QAM
Constellation
2K,8K
Transmission mode
DVB-T
1/2,1/4,1/8,1/16,1/32
Guard interval
1/2,2/3,3/4,4/5,5/6,7/8
FEC
32bit processor(133MHz)
Processor
16bit
FLASH
System Resources
8*16bit
SDRAM
MP@ML
MPEG 2
Max 15M bits/s
Data Rate
Video Decoder
720*576,720*480
Resolution
PAL/NTSC/SECAM
Video format
MPEG-1&2
MPEG
Single
Type
Audio
32,44.1&48KHz
Sampling Rate
Data Transfer
USB
Connector
Power
0.5W
Flashlight
LI-ion battery
3000mAH/8.4Max
Power Supply
IN
AC 100-220V
Power Adaptor
Out
DC 12V
12.5*20.5*4.5(CM)
Physical characteristics Size
Net Weight
0.66kg
System
26 Digita Satellite Meter
Warning:
一、 You are using Lithimum ion batteries and Lickel
metal hydride batteries.So Please don't work under high
temprature or high pressure condition. If the following
items happened,abnormal chemical reaction mey occur
which will lead to the battery overheat,emit smoke,ignite
and/or burst.
1.Incinerate and dispose the battery in fire or heat it.
2.Pierce the battery with a nail or other sharp objects.
Strike it with a hammer or step on it.
3.Immerse the batttery with water or connect the positive
(+) and negative
4.Connect the positive (+) and negative (-)terminals with
other metal objects, such as necklaces hair pins and so on.
The battery is only applicable to the charger which supplied or appointed by the manufacturer of this machine.
(二) The battery is only applicable to the charger which
supplied or appointed by the manufacturer of this machine.
1.The battery should be stored within a temprature range
of 0℃ to 40℃.
2.The battery is expendable. When stored for a long time,
charge the battery at least once per half month so as to
prevent over discharge.
Digita Satellite Meter
|
27
T H E P R O F E S S I O N A L E Q U I P M E N T - - - - - - - - - - - - - - - - - - | U S E R ’S M A N U A L |
Handling:
T H E P R O F E S S I O N A L E Q U I P M E N T - - - - - - - - - - - - - - - - - - | U S E R ’S M A N U A L |
5.Product Standard Package
Please use the battery only supplied by the manufacturer,
otherwise it will destroy the battery.
Please do not put the battery in fire or dispose it together with
garbage.
Please contact the waste administrative institute to cope with
waste battery carefully.
AV lable
Power
Car charger cable
Carrying case
Ruobber Cover
28 Digita Satellite Meter
Digita Satellite Meter
|
29


