1
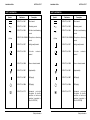
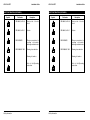
LIPS-F & LIPS-T
LIPS-F & LIPS-T
Software
Software
Installation Guide
Installation Guide
Land Infrared
Dronfield, S18 1DJ
England
Telephone: (01246) 417691
Facsimile:
(01246) 410585
Email: [email protected]
URL: http://www.landinst.com
© Land Infrared, 1999
Land Infrared
2525 Pearl Buck Road
Bristol PA 19007
U.S.A.
Telephone: (215) 781 0700
Facsimile:
(215) 781 0723
Email: [email protected]
Publication Nº: TI198162
Issue A 05/99
Land Infrared
Dronfield, S18 1DJ
England
Telephone: (01246) 417691
Facsimile:
(01246) 410585
Email: [email protected]
URL: http://www.landinst.com
© Land Infrared, 1999
Land Infrared
2525 Pearl Buck Road
Bristol PA 19007
U.S.A.
Telephone: (215) 781 0700
Facsimile:
(215) 781 0723
Email: [email protected]
Publication Nº: TI198162
Issue A 05/99
LIPS-F & LIPS-T
Quality assurance
Installation Guide
LIPS-F & LIPS-T
Installation Guide
Land Infrared Quality Management
System is approved to BS EN ISO
9001: 1994 for the design,
manufacture, repair and on-site
servicing of non contact infrared
temperature measuring equipment
with associated software designed and
developed in accordance with TickIT.
NAMAS Calibration certificates are
available from our UKAS accredited
calibration laboratory Nº 0034.
This product complies with current
European directives relating to
electromagnetic compatibility and
safety (EMC directive 89/336/EEC;
Low voltage directive 73/23/EEC).
This product complies with current
European directives relating to
electromagnetic compatibility and
safety (EMC directive 89/336/EEC;
Low voltage directive 73/23/EEC).
Quality assurance
LIPS-F & LIPS-T
Installation Guide
SAFETY INFORMATION
Symbol
LIPS-F & LIPS-T
Installation Guide
SAFETY INFORMATION
Publication
Description
Symbol
Publication
Description
IEC 417, No. 5031
Direct current
IEC 417, No. 5031
Direct current
IEC 417, No. 5032
Alternating current
IEC 417, No. 5032
Alternating current
IEC 417, No. 5033
Both direct and alternating
current
IEC 417, No. 5033
Both direct and alternating
current
IEC 617-2, No. 02-02-06 Three-phase alternating
current
IEC 617-2, No. 02-02-06 Three-phase alternating
current
IEC 417, No. 5017
Earth (ground) terminal
IEC 417, No. 5017
Earth (ground) terminal
IEC 417, No. 5019
Protective
terminal
IEC 417, No. 5019
Protective
terminal
IEC 417, No. 5020
Frame or chassis terminal
IEC 417, No. 5020
Frame or chassis terminal
IEC 417, No. 5021
Equipotentiality
IEC 417, No. 5021
Equipotentiality
IEC 417, No. 5007
On (Supply)
IEC 417, No. 5007
On (Supply)
IEC 417, No. 5008
Off (Supply)
IEC 417, No. 5008
Off (Supply)
IEC 417, No. 5172
Equipment
protected
throughout by double
insulation or reinforced
insulation (equivalent to
Class II of IEC 536)
IEC 417, No. 5172
Equipment
protected
throughout by double
insulation or reinforced
insulation (equivalent to
Class II of IEC 536)
conductor
Safety information
conductor
Safety information
LIPS-F & LIPS-T
Installation Guide
SAFETY INFORMATION (CONTINUED...)
Symbol
Safety information
Publication
LIPS-F & LIPS-T
Installation Guide
SAFETY INFORMATION (CONTINUED...)
Description
Symbol
Publication
Description
ISO 3864, No. B.3.6
Caution, risk of electric
shock
ISO 3864, No. B.3.6
Caution, risk of electric
shock
ISO 3864, No. B.3.1
Caution
ISO 3864, No. B.3.1
Caution
BS EN 100015
Observe precautions for
handling electrostatic
discharge sensitive devices
BS EN 100015
Observe precautions for
handling electrostatic
discharge sensitive devices
BS EN 60825: 1992
Warning, laser radiation
BS EN 60825: 1992
Warning, laser radiation
Warning, hot surface
Warning, hot surface
Refer to the Operating
Instructions.
Refer to the Operating
Instructions.
Safety information
Installation Guide
LIPS-F & LIPS-T
Installation Guide
LIPS-F & LIPS-T
TECHNICAL SUPPORT
TECHNICAL SUPPORT
Technical support for your LAND Thermal Imaging System can
be obtained by either contacting the address/telephone number
on the cover of this User Guide, or by Email to the following
addresses:
Technical support for your LAND Thermal Imaging System can
be obtained by either contacting the address/telephone number
on the cover of this User Guide, or by Email to the following
addresses:
[email protected]
(For queries regarding LIPS Software)
[email protected]
(For queries regarding LIPS Software)
[email protected]
(For queries regarding FTI 6 Thermal Imagers)
[email protected]
(For queries regarding FTI 6 Thermal Imagers)
Technical support
Technical support
LIPS-F & LIPS-T
Blank
Installation Guide
LIPS-F & LIPS-T
Blank
Installation Guide
LIPS-F & LIPS-T
Installation Guide
LIPS-F & LIPS-T
Installation Guide
Contents
Contents
1.0
INTRODUCTION
1
1.0
INTRODUCTION
1
2.0
LIPS-F HARDWARE INSTALLATION
3
2.0
LIPS-F HARDWARE INSTALLATION
3
2.1
2.2
2.3
2.4
2.5
2.6
3.0
Installing the Frame Grabber
System Interconnections
Viewing live images (no Frame Grabber Card fitted)
Digital link connections
Installing the Digital Input Card
Installing the Digital Output Card
5
7
13
13
15
17
SOFTWARE INSTALLATION
18
3.1
3.2
3.3
3.4
18
19
20
21
Minimum System Requirements
Installing the software
Completing the Setup (Restarting your PC)
Removing ('Uninstalling') the software
Contents
LIPS-F & LIPS-T
Blank
Installation Guide
LIPS-F & LIPS-T
Blank
Installation Guide
Installation Guide
1.0
LIPS-F & LIPS-T
INTRODUCTION
Installation Guide
1.0
LIPS-F & LIPS-T
INTRODUCTION
IMPORTANT NOTE ABOUT THIS GUIDE
IMPORTANT NOTE ABOUT THIS GUIDE
The majority of information contained in this Guide is relevant
to both LIPS-F and LIPS-T.
The majority of information contained in this Guide is relevant
to both LIPS-F and LIPS-T.
In sections where the information is identical, the software is
referred to simply as LIPS.
In sections where the information is identical, the software is
referred to simply as LIPS.
In sections which are relevant to one variant only, the software
is referred to as either LIPS-F or LIPS-T accordingly.
In sections which are relevant to one variant only, the software
is referred to as either LIPS-F or LIPS-T accordingly.
This Installation Guide gives instructions on how to install the LIPS software. The
Guide is divided into two sections, Hardware Installation and Software Installation.
This Installation Guide gives instructions on how to install the LIPS software. The
Guide is divided into two sections, Hardware Installation and Software Installation.
Hardware Installation (Section 2) is relevant to LIPS-F only. This section covers
the installation of a Frame Grabber card in your personal computer (PC) and the
interconnections between your PC and Land FTI 6 Thermal Imagers. A Frame
Grabber card is required if you wish to work on live thermal images. If you intend
to use a Frame Grabber card, this must be installed in your PC before installing the
LIPS-F software.
Section 2 also covers the installation of the following optional extras for LIPS-F:
Section 2 also covers the installation of the following optional extras for LIPS-F:
●
●
Digital Input Card
Digital Output Card
●
●
Software Installation (Section 3) is relevant to both LIPS-F and LIPS-T. It covers
the installation of the LIPS software on your PC. The program is supplied on CD
ROM.
Digital Input Card
Digital Output Card
Software Installation (Section 3) is relevant to both LIPS-F and LIPS-T. It covers
the installation of the LIPS software on your PC. The program is supplied on CD
ROM.
NOTE
NOTE
Before installing the LIPS software, ensure that your computer
system meets the requirements listed in Section 3.1 of this
Installation Guide.
Before installing the LIPS software, ensure that your computer
system meets the requirements listed in Section 3.1 of this
Installation Guide.
Page 1
Page 1
LIPS-F & LIPS-T
Page 2
Installation Guide
LIPS-F & LIPS-T
Page 2
Installation Guide
Installation Guide
2.0
LIPS-F & LIPS-T
LIPS-F HARDWARE INSTALLATION
Installation Guide
2.0
LIPS-F & LIPS-T
LIPS-F HARDWARE INSTALLATION
This section covers the installation of a Frame Grabber card in your personal
computer (PC) and the interconnections between your PC and Land FTI 6 Thermal
Imagers.
This section covers the installation of a Frame Grabber card in your personal
computer (PC) and the interconnections between your PC and Land FTI 6 Thermal
Imagers.
A Frame Grabber card is required if you wish to work on live thermal images. If you
intend to use a Frame Grabber card, this must be installed in your PC before
installing the LIPS-F software.
A Frame Grabber card is required if you wish to work on live thermal images. If you
intend to use a Frame Grabber card, this must be installed in your PC before
installing the LIPS-F software.
This section also covers the installation of the following additional options:
This section also covers the installation of the following additional options:
●
●
Digital Input Card
Digital Output Card
●
●
Page 3
Digital Input Card
Digital Output Card
Page 3
LIPS-F & LIPS-T
Page 4
Installation Guide
LIPS-F & LIPS-T
Page 4
Installation Guide
LIPS-F & LIPS-T
Installation Guide
2.1
Installing the Frame Grabber card for use with LIPS-F
LIPS-F & LIPS-T
Installation Guide
2.1
WARNING
Installing the Frame Grabber card for use with LIPS-F
WARNING
Risk of electric shock. Before opening your PC,
ensure that it is disconnected from the mains supply.
Risk of electric shock. Before opening your PC,
ensure that it is disconnected from the mains supply.
Observe precautions for handling static sensitive
devices.
Observe precautions for handling static sensitive
devices.
NOTE
NOTE
Refer to the Operating Instructions supplied with
your computer, as they contain relevant information
regarding dismantling the PC and installing additional
cards.
Refer to the Operating Instructions supplied with
your computer, as they contain relevant information
regarding dismantling the PC and installing additional
cards.
1)
Ensure that the computer, and any attached peripheral devices, are
switched off and disconnected from the mains supply.
1)
Ensure that the computer, and any attached peripheral devices, are
switched off and disconnected from the mains supply.
2)
Move any obstructions which prevent access to the computer i.e.
monitor, keyboard etc.
2)
Move any obstructions which prevent access to the computer i.e.
monitor, keyboard etc.
3)
Refer to the computer Operating Instructions. Remove the cover from the
computer to reveal the motherboard and expansion slots.
3)
Refer to the computer Operating Instructions. Remove the cover from the
computer to reveal the motherboard and expansion slots.
4)
Select an empty slot with a PCI connector.
4)
Select an empty slot with a PCI connector.
5)
Observe precautions for handling static sensitive devices. Slide the card
into the slot.
5)
Observe precautions for handling static sensitive devices. Slide the card
into the slot.
6)
To ensure that the air flow within the computer is sufficient to cool the
system properly, make sure that any remaining expansion slot covers are
in place.
6)
To ensure that the air flow within the computer is sufficient to cool the
system properly, make sure that any remaining expansion slot covers are
in place.
7)
Refer to the computer Operating Instructions. Replace the computer
cover.
7)
Refer to the computer Operating Instructions. Replace the computer
cover.
8)
Reconnect the computer monitor, keyboard etc.
8)
Reconnect the computer monitor, keyboard etc.
Page 5
Page 5
LIPS-F & LIPS-T
9)
Installation Guide
Reconnect the computer and any attached peripheral devices to the
mains supply. Switch on the computer.
LIPS-F & LIPS-T
9)
When your computer restarts, the Windows software will display the 'New
Hardware Found' window stating that it has detected new hardware on
your PC. The window contains a list of options relating to driver software.
Installation Guide
Reconnect the computer and any attached peripheral devices to the
mains supply. Switch on the computer.
When your computer restarts, the Windows software will display the 'New
Hardware Found' window stating that it has detected new hardware on
your PC. The window contains a list of options relating to driver software.
10)
Select the 'Use disk from manufacturer...' option.
10)
Select the 'Use disk from manufacturer...' option.
11)
Insert the Windows 95/98/NT disk supplied with the Frame Grabber card.
11)
Insert the Windows 95/98/NT disk supplied with the Frame Grabber card.
Page 6
The operating system extracts the relevant driver information from the
disk inserted into your computer.
The operating system extracts the relevant driver information from the
disk inserted into your computer.
Installation of the Frame Grabber card is now complete.
Installation of the Frame Grabber card is now complete.
Page 6
Installation Guide
2.2
LIPS-F & LIPS-T
System Interconnections using a Frame Grabber Card
Installation Guide
2.2
LIPS-F & LIPS-T
System Interconnections using a Frame Grabber Card
In order to capture and display live thermal images, your PC must be connected
to a Thermal Imager via the Frame Grabber card supplied with LIPS-F. Ensure that
the Frame Grabber card is installed correctly in your PC (refer to Section 2.1).
In order to capture and display live thermal images, your PC must be connected
to a Thermal Imager via the Frame Grabber card supplied with LIPS-F. Ensure that
the Frame Grabber card is installed correctly in your PC (refer to Section 2.1).
There are several options for system interconnections, depending on the number
of FTI 6 Thermal Imagers in your system and the method used to connect them to
the Frame Grabber card. Each configuration is described below:
There are several options for system interconnections, depending on the number
of FTI 6 Thermal Imagers in your system and the method used to connect them to
the Frame Grabber card. Each configuration is described below:
●
A single FTI 6 Thermal Imager connected to a PC, displaying a single live
image. The interconnections for this system are illustrated in Fig.1.
●
A single FTI 6 Thermal Imager connected to a PC, displaying a single live
image. The interconnections for this system are illustrated in Fig.1.
●
Up to four FTI 6 Thermal Imagers, connected via an input multiplexer
(i.e. parallel connection) to a PC, displaying a single live image. The live
image 'auto cycles' (i.e. switches to next imager in sequence) after a
user-defined period. The interconnections for this system are illustrated
in Fig. 2.
●
Up to sixteen FTI 6 Thermal Imagers, in a 'daisy chained video' (i.e. serial)
connection to the video input of the PC, displaying a single live image. The
live image 'auto cycles' (i.e. switches to next imager in sequence) after a
user-defined period. The interconnections for this system are illustrated in
Fig. 3.
●
Up to four FTI 6 Thermal Imagers, connected via an input multiplexer (i.e.
parallel connection) to a PC, displaying a live image from one FTI 6 plus
up to three frozen images from the other FTI 6 units. The live image 'auto
cycles' (i.e. switches to next imager in sequence) after a user-defined
period. The interconnections for this system are illustrated in Fig. 4.
●
Up to four FTI 6 Thermal Imagers, in a 'daisy chained video' (i.e. serial)
connection to the video input of the PC, displaying a live image from one
FTI 6 plus up to three frozen images from the other FTI 6 units. The live
image 'auto cycles' (i.e. switches to next imager in sequence) after a
user-defined period. The interconnections for this system are illustrated
in Fig. 5.
Page 7
Page 7
LIPS-F & LIPS-T
Installation Guide
LIPS-F & LIPS-T
Installation Guide
Optional
Alarm Card
Optional
Alarm Card
LIPS-F
Video
LIPS-F
Video 1
Video
Video 1
Live
Image
Comms
Live
Image
Serial
Single FTI 6
Comms
12 Alarm
Relays
Fig. 1 Interconnection diagram for a single FTI 6 to a single live image
Video
Video 1 LIPS-F
Video 2
Live
Video 3
Image
Video 4
Single FTI 6
12 Alarm
Relays
Fig. 1 Interconnection diagram for a single FTI 6 to a single live image
TI990031
TI990031
Optional
Alarm Card
Optional
Alarm Card
Video
Serial
Video 1 LIPS-F
Video 2
Live
Video 3
Image
Video 4
Serial
Live Image 'Auto cycles'
between each FTI 6 unit in turn.
Time that each unit is selected
is adjustable from 2 to 300 secs
12 Alarm
Relays
Live Image 'Auto cycles'
between each FTI 6 unit in turn.
Time that each unit is selected
is adjustable from 2 to 300 secs
Comms
Fig. 2 Interconnection diagram for up to four multiplexed
FTI 6 units to a single live image
12 Alarm
Relays
Comms
Up to four FTI 6 units using
'Input Multiplexer' selection
Page 8
Serial
Up to four FTI 6 units using
'Input Multiplexer' selection
Fig. 2 Interconnection diagram for up to four multiplexed
FTI 6 units to a single live image
TI990032
Page 8
TI990032
LIPS-F & LIPS-T
Installation Guide
LIPS-F & LIPS-T
Installation Guide
Optional
Alarm Card
Video
Video 1
Optional
Alarm Card
Video
LIPS-F
Video 1
Live
Image
LIPS-F
Live
Image
Serial
Serial
Live Image 'Auto cycles'
between each FTI 6 unit in turn.
Time that each unit is selected
is adjustable from 2 to 300 secs
12 Alarm
Relays
Up to sixteen FTI 6 units using
'Daisy Chained Video' selection
Live Image 'Auto cycles'
between each FTI 6 unit in turn.
Time that each unit is selected
is adjustable from 2 to 300 secs
12 Alarm
Relays
Up to sixteen FTI 6 units using
'Daisy Chained Video' selection
Fig. 3 Interconnection diagram for up to sixteen 'daisy chained'
FTI 6 units to a single live image
TI990033
Page 9
Fig. 3 Interconnection diagram for up to sixteen 'daisy chained'
FTI 6 units to a single live image
TI990033
Page 9
LIPS-F & LIPS-T
Installation Guide
Video
Live Image 'Auto cycles'
between each FTI 6 unit in turn.
Time that each unit is selected
is adjustable from 2 to 300 secs
Video 1
LIPS-F
Video 2
1
2
Live
Video 3
Image Frozen
Video 4
3
Serial
4
Frozen Frozen
LIPS-F & LIPS-T
Installation Guide
O ptional
Alarm Card
Video
1
2
3
3
Serial
4
12 Alarm Relays shared
between live images
(i.e. 4 alarms each for 3 images,
6 alarms each for 2 images etc.)
Frozen Frozen
1
2
3
4
Comms
Up to four FTI 6 units using
'Input Multiplexer' selection
Page 10
4
O ptional
Alarm Card
12 Alarm Relays shared
between live images
(i.e. 4 alarms each for 3 images,
6 alarms each for 2 images etc.)
Comms
Fig. 4 Interconnection diagram for up to four
cycled live images via input multiplexer
Live Image 'Auto cycles'
between each FTI 6 unit in turn.
Time that each unit is selected
is adjustable from 2 to 300 secs
Video 1
LIPS-F
Video 2
1
2
Live
Video 3
Image Frozen
Video 4
Up to four FTI 6 units using
'Input Multiplexer' selection
Fig. 4 Interconnection diagram for up to four
cycled live images via input multiplexer
TI990034
Page 10
TI990034
LIPS-F & LIPS-T
Installation Guide
Video
Live Image 'Auto cycles'
between each FTI 6 unit in turn.
Time that each unit is selected
is adjustable from 2 to 300 secs
Video 1 LIPS-F
1
Live
Image
3
LIPS-F & LIPS-T
Installation Guide
O ptional
Alarm C ard
Video
1
Live Image 'Auto cycles'
between each FTI 6 unit in turn.
Time that each unit is selected
is adjustable from 2 to 300 secs
Video 1 LIPS-F
2
Frozen
4
1
Live
Image
2
3
3
Serial
O ptional
Alarm C ard
1
2
Frozen
4
2
3
Serial
Frozen Frozen
Frozen Frozen
4
12 Alarm Relays shared
between live images
(i.e. 4 alarms each for 3 images,
6 alarms each for 2 images etc.)
Up to four FTI 6 units using
'Daisy Chained Video' selection
Fig. 5 Interconnection diagram for up to four
cycled live images via 'daisy chained' video
4
12 Alarm Relays shared
between live images
(i.e. 4 alarms each for 3 images,
6 alarms each for 2 images etc.)
Up to four FTI 6 units using
'Daisy Chained Video' selection
TI990035
Page 11
Fig. 5 Interconnection diagram for up to four
cycled live images via 'daisy chained' video
TI990035
Page 11
LIPS-F & LIPS-T
Installation Guide
LIPS-F & LIPS-T
Video input
Video
Installation Guide
Video input
Video
Monitor
Monitor
Up to sixteen FTI 6
units connected in
'Daisy Chain Video' mode
Comms
Up to sixteen FTI 6
units connected in
'Daisy Chain Video' mode
Serial
Comms
Fig. 6 Interconnection diagram for system not using a Frame Grabber Card
Serial
Fig. 6 Interconnection diagram for system not using a Frame Grabber Card
TI990041
7 Way LEMO
plug to 'COMMS'
socket on FTI 6
9 way D type
to 'COM' port on PC
Fig. 7 Digital link connections
Page 12
TI990041
7 Way LEMO
plug to 'COMMS'
socket on FTI 6
9 way D type
to 'COM' port on PC
Fig. 7 Digital link connections
TI990037
Page 12
TI990037
Installation Guide
2.3
LIPS-F & LIPS-T
Viewing live images when no Frame Grabber Card is fitted
Installation Guide
2.3
LIPS-F & LIPS-T
Viewing live images when no Frame Grabber Card is fitted
You can control up to sixteen FTI 6 units from a PC not fitted with a Frame Grabber
Card. This configuration is possible in both LIPS-F and LIPS-T, but is most likely
to be used with the LIPS-T software.
You can control up to sixteen FTI 6 units from a PC not fitted with a Frame Grabber
Card. This configuration is possible in both LIPS-F and LIPS-T, but is most likely
to be used with the LIPS-T software.
To view live images, a TV monitor must be connected to the 'VIDEO' output of the
thermal imager. In multiple imager applications, the video outputs of up to sixteen
FTI 6 units must be connected in 'daisy chain' mode. Each FTI 6 is controlled from
the PC running the LIPS software. Refer to Fig. 6 for system interconnection
details.
2.4
Digital link connections
2.4
Digital link connections
When your computer is connected to an FTI 6 Thermal Imager via its digital
link, it is possible to transfer information and thermal images between the
LIPS-F software and the Thermal Imager without the need for a Frame
Grabber Card.
When your computer is connected to an FTI 6 Thermal Imager via its digital
link, it is possible to transfer information and thermal images between the
LIPS-F software and the Thermal Imager without the need for a Frame
Grabber Card.
The digital link enables the following facilities:
The digital link enables the following facilities:
●
●
Full remote control of the Thermal Imager functions.
Transfer of images stored on optional memory cards fitted in the FTI 6
Thermal Imager to the LIPS-F software for post-processing and analysis.
Refer to Fig. 7 for details of the digital link connections.
●
●
Full remote control of the Thermal Imager functions.
Transfer of images stored on optional memory cards fitted in the FTI 6
Thermal Imager to the LIPS-F software for post-processing and analysis.
Refer to Fig. 7 for details of the digital link connections.
Page 13
Page 13
LIPS-F & LIPS-T
Installation Guide
Pin 1
Channel A0
PA0
PA0 Return
PA6
PA6 Return
20
3
21
4
22
PB5
Channel B5
PB5 Return
Channel A5
PA5
PA5 Return
PB6
Channel B6
PB6 Return
Channel A6
PA6
PA6 Return
PB2
Channel B2
PB2 Return
PB3
Channel B3
PB3 Return
PB4
Channel B4
PB4 Return
PB5
Channel B5
PB5 Return
PB6
Channel B6
PB6 Return
PA7
Channel A7
PA7 Return
COMA
+12V
+5V
Pin 37
PB7
Channel B7
PB7 Return
COMB
Digital Power Ground
Pin 37
Pin 19
Fig. 8 Digital Input Card (PC 62C) connection schedule
TI990120
Connected to PC 62C/PC263 via
37 way Ribbon Cable
Amplicon Part Nº 908 919 51
37 Way D Connector
37 Way D Connector
6
24
7
25
8
26
9
27
10
28
29
11
30
12
13
31
32
14
33
15
16
34
35
17
36
18
19
1
37
Fig. 9 Layout of Screw Termination Assembly
2
20
Screw Terminal Assembly
Amplicon Part Nº 908 919 50
Page 14
PB1
Channel B1
PB1 Return
PA2
PA2 Return
Connected to PC 62C/PC263 via
37 way Ribbon Cable
Amplicon Part Nº 908 919 51
5
23
PB0
Channel B0
PB0 Return
PA4
Channel A4
PA4 Return
PB7
Channel B7
PB7 Return
COMB
Digital Power Ground
Pin 19
2
PA0
PA0 Return
PA3
Channel A3
PA3 Return
PB4
Channel B4
PB4 Return
Fig. 8 Digital Input Card (PC 62C) connection schedule
1
Channel A2
PB3
Channel B3
PB3 Return
PA7
Channel A7
PA7 Return
COMA
+12V
+5V
Pin 20
PA1
Channel A1
PA1 Return
PB2
Channel B2
PB2 Return
PA4
Channel A4
PA4 Return
Channel A6
Channel A0
PB1
Channel B1
PB1 Return
PA3
Channel A3
PA3 Return
PA5
PA5 Return
Pin 1
PB0
Channel B0
PB0 Return
PA2
PA2 Return
Channel A5
Installation Guide
Pin 20
PA1
Channel A1
PA1 Return
Channel A2
LIPS-F & LIPS-T
3
21
4
22
5
23
6
24
7
25
8
26
9
27
10
28
29
11
30
12
13
31
32
14
33
15
16
34
35
17
36
TI990120
18
19
37
Screw Terminal Assembly
Amplicon Part Nº 908 919 50
Fig. 9 Layout of Screw Termination Assembly
TI990051
Page 14
TI990051
Installation Guide
2.5
LIPS-F & LIPS-T
Installing the Digital Input Card
Installation Guide
2.5
LIPS-F & LIPS-T
Installing the Digital Input Card
The Digital Input Card supplied (as an option) with LIPS-F is the
Amplicon Liveline PC 62C.
The Digital Input Card supplied (as an option) with LIPS-F is the
Amplicon Liveline PC 62C.
For full installation details for the Digital Input Card, refer to Chapters 1 and 2 of the
'User's Manual' supplied with the card.
For full installation details for the Digital Input Card, refer to Chapters 1 and 2 of the
'User's Manual' supplied with the card.
2.5.1
NOTE
NOTE
The default base address of the card is factory-set to 280h. If
you wish to select another address, refer to the 'User's Manual'
supplied with the PC 62C.
The default base address of the card is factory-set to 280h. If
you wish to select another address, refer to the 'User's Manual'
supplied with the PC 62C.
If you change the base address, the new base address must be
entered during the software installation.
If you change the base address, the new base address must be
entered during the software installation.
Digital Input connections
2.5.1
Digital Input connections
The connections to the Digital Input Card (PC 62C) are made via the 37 way D type
connector. The connection schedule is given in Fig. 8.
The connections to the Digital Input Card (PC 62C) are made via the 37 way D type
connector. The connection schedule is given in Fig. 8.
A Screw Termination Assembly (Amplicon Part Nº 908 919 50) is supplied with
the Digital Input Card. The Screw Termination Assembly enables easier
connection to the Digital Input Card. The Terminal Block is DIN rail mountable
and connects to the Input Card via a 37 Way Ribbon Cable (Amplicon Part Nº
908 919 51).
The layout of the Screw Termination Assembly is given in Fig. 9.
The layout of the Screw Termination Assembly is given in Fig. 9.
Page 15
Page 15
LIPS-F & LIPS-T
Installation Guide
LIPS-F & LIPS-T
Pin 20
Pin 1
RL1
N/O Relay Contacts
RL2
N/O Relay Contacts
RL3
N/O Relay Contacts
RL4
N/O Relay Contacts
RL5
N/O Relay Contacts
RL6
N/O Relay Contacts
RL7
N/O Relay Contacts
RL8
Chassis Ground
RL9
N/O Relay Contacts
RL10 N/O Relay Contacts
RL11 N/O Relay Contacts
RL12 N/O Relay Contacts
RL13 N/O Relay Contacts
RL14 N/O Relay Contacts
RL15 N/O Relay Contacts
RL16 N/O Relay Contacts
Pin 19
20
3
21
4
22
RL2
N/O Relay Contacts
RL3
N/O Relay Contacts
RL4
N/O Relay Contacts
RL5
N/O Relay Contacts
RL6
N/O Relay Contacts
RL7
N/O Relay Contacts
RL8
N/O Relay Contacts
RL10 N/O Relay Contacts
RL11 N/O Relay Contacts
RL12 N/O Relay Contacts
RL13 N/O Relay Contacts
RL14 N/O Relay Contacts
RL15 N/O Relay Contacts
RL16 N/O Relay Contacts
+5V DC Output
Digital Power Ground
Chassis Ground
Chassis Ground
Pin 19
Pin 37
Fig. 10 Digital Output Card (PC263) connection schedule
TI990052
Connected to PC 62C/PC263 via
37 way Ribbon Cable
Amplicon Part Nº 908 919 51
37 Way D Connector
37 Way D Connector
6
24
7
25
8
26
9
27
10
28
29
11
30
12
13
31
32
14
33
15
16
34
35
17
36
18
19
1
37
Fig. 11 Layout of Screw Termination Assembly
2
20
Screw Terminal Assembly
Amplicon Part Nº 908 919 50
Page 16
N/O Relay Contacts
RL9
Connected to PC 62C/PC263 via
37 way Ribbon Cable
Amplicon Part Nº 908 919 51
5
23
RL1
Pin 37
Fig. 10 Digital Output Card (PC263) connection schedule
2
N/O Relay Contacts
+5V DC Output
Digital Power Ground
Chassis Ground
Chassis Ground
1
Pin 20
Pin 1
Chassis Ground
N/O Relay Contacts
Installation Guide
3
21
4
22
5
23
6
24
7
25
8
26
9
27
10
28
29
11
30
12
13
31
32
14
33
15
16
34
35
17
36
TI990052
18
19
37
Screw Terminal Assembly
Amplicon Part Nº 908 919 50
Fig. 11 Layout of Screw Termination Assembly
TI990051
Page 16
TI990051
Installation Guide
2.6
LIPS-F & LIPS-T
Installing the Digital Output Card
Installation Guide
2.6
LIPS-F & LIPS-T
Installing the Digital Output Card
The Digital Output Card supplied (as an option) with LIPS-F is the
Amplicon Liveline PC263.
The Digital Output Card supplied (as an option) with LIPS-F is the
Amplicon Liveline PC263.
For full installation details for the Digital Output Card, refer to Chapters 1, 2 and 3
of the 'Instruction Manual' supplied with the card.
For full installation details for the Digital Output Card, refer to Chapters 1, 2 and 3
of the 'Instruction Manual' supplied with the card.
2.6.1
NOTE
NOTE
The default base address of the card is factory-set to 300h. If
you wish to select another address, refer to the 'Instruction
Manual' supplied with the PC263.
The default base address of the card is factory-set to 300h. If
you wish to select another address, refer to the 'Instruction
Manual' supplied with the PC263.
If you change the base address, the new base address must be
entered during the software installation.
If you change the base address, the new base address must be
entered during the software installation.
Digital Output connections
2.6.1
Digital Output connections
The relay output connections from the Digital Output Card (PC 263) are made via
the 37 way D type connector (SK1). The connection schedule is given in Fig. 10.
The relay output connections from the Digital Output Card (PC 263) are made via
the 37 way D type connector (SK1). The connection schedule is given in Fig. 10.
A Screw Termination Assembly (Amplicon Part Nº 908 919 50) is supplied with
the Digital Output Card. The Screw Termination Assembly enables easier
connection to the Digital Output Card. The Terminal Block is DIN rail
mountable and connects to SK1 on the Output Card via a 37 Way Ribbon
Cable (Amplicon Part Nº 908 919 51).
The layout of the Screw Termination Assembly is given in Fig. 11.
The layout of the Screw Termination Assembly is given in Fig. 11.
Page 17
Page 17
LIPS-F & LIPS-T
3.0
Installation Guide
SOFTWARE INSTALLATION
This section covers the installation of the LIPS software on your PC.
3.1
LIPS-F & LIPS-T
3.0
Installation Guide
SOFTWARE INSTALLATION
This section covers the installation of the LIPS software on your PC.
NOTE
NOTE
Before installing the LIPS software, ensure that your computer
system meets the requirements listed in Section 3.1.
Before installing the LIPS software, ensure that your computer
system meets the requirements listed in Section 3.1.
Minimum System Requirements
3.1
Minimum System Requirements
LIPS-F can operate on live thermal images and/or 'post process' images stored on
disk.
LIPS-F can operate on live thermal images and/or 'post process' images stored on
disk.
LIPS-T operates in 'post processing' mode only, working with stored or digitally
transferred images.
LIPS-T operates in 'post processing' mode only, working with stored or digitally
transferred images.
3.1.1
●
●
●
●
●
●
3.1.2
●
●
●
●
●
●
Page 18
Live Image Processing mode (LIPS-F only)
300MHz Pentium PC (or greater) with PCI bus
Windows 95/98 or Windows NT (V4.0 or greater) operating system
16MB RAM for Windows 95/98, 32MB RAM for Windows NT
High speed PCI bus SVGA card capable of 1024 x 768 pixels desktop
area at 65536 colours
CD ROM drive
SVGA monitor
Post Processing mode
166MHz Pentium PC
Windows 95/98 or Windows NT (V4.0 or greater) operating system
16MB RAM for Windows 95/98, 32MB RAM for Windows NT
SVGA card capable of 800 x 600 pixels desktop area at 65536 colours
CD ROM drive
SVGA monitor
Installation Guide
3.2
LIPS-F & LIPS-T
Installing the software
Installation Guide
3.2
LIPS-F & LIPS-T
Installing the software
The LIPS software is supplied on one CD ROM.
The LIPS software is supplied on one CD ROM.
1)
Switch on your computer.
1)
Switch on your computer.
2)
Start a Windows 95/98 or Windows NT session.
2)
Start a Windows 95/98 or Windows NT session.
3)
Insert the CD ROM disk into the CD drive on your PC. If your PC has
'Autostart' enabled, the setup program will begin automatically, otherwise
go to step 4.
3)
Insert the CD ROM disk into the CD drive on your PC. If your PC has
'Autostart' enabled, the setup program will begin automatically, otherwise
go to step 4.
4)
In Windows, select 'Start' > 'Run'.
4)
In Windows, select 'Start' > 'Run'.
5)
Type d:\setup.exe (where d: is the CD drive from which you are installing
the program).
5)
Type d:\setup.exe (where d: is the CD drive from which you are installing
the program).
6)
Follow the instructions on screen to install the software.
6)
Follow the instructions on screen to install the software.
LIPS-F Frame Grabber card software installation
3.2.1
LIPS-F Frame Grabber card software installation
3.2.1
If you wish to use a Frame Grabber card, the 'Select Video Standard' window
appears. The video standard of your Frame Grabber card must be set to match that
of the country in which the software is operating.
If you wish to use a Frame Grabber card, the 'Select Video Standard' window
appears. The video standard of your Frame Grabber card must be set to match that
of the country in which the software is operating.
The countries in the following list use the 525 line NTSC system. All other countries
use the 625 line PAL/SECAM standard.
The countries in the following list use the 525 line NTSC system. All other countries
use the 625 line PAL/SECAM standard.
●
●
●
●
●
●
●
●
●
●
●
●
●
●
●
Bahamas
Barbados
Bermuda
Brazil
Canada
Chile
Japan
Korea
Mexico
Peru
Philippines
Taiwan
Trinidad
USA
Venezuela
●
●
●
●
●
●
●
●
●
●
●
●
●
●
●
Page 19
Bahamas
Barbados
Bermuda
Brazil
Canada
Chile
Japan
Korea
Mexico
Peru
Philippines
Taiwan
Trinidad
USA
Venezuela
Page 19
LIPS-F & LIPS-T
3.3
Installation Guide
LIPS-F & LIPS-T
Installation Guide
NOTE - FRAME GRABBER USERS ONLY
NOTE - FRAME GRABBER USERS ONLY
LIPS-F requires the program Microsoft Direct X to be installed
on your PC. If your PC does not already have this program, the
LIPS-F setup program can install it for you.
LIPS-F requires the program Microsoft Direct X to be installed
on your PC. If your PC does not already have this program, the
LIPS-F setup program can install it for you.
Click on 'Yes' in the ‘Install Query’ dialog box to install this
program.
Click on 'Yes' in the ‘Install Query’ dialog box to install this
program.
Completing the Setup (Restarting your PC)
3.3
Completing the Setup (Restarting your PC)
When set up is complete, your computer needs to be restarted in order for the
LIPS program to run correctly.
When set up is complete, your computer needs to be restarted in order for the
LIPS program to run correctly.
The 'Setup Complete' window appears, giving you the option of restarting your
computer either immediately or later.
The 'Setup Complete' window appears, giving you the option of restarting your
computer either immediately or later.
(i)
(i)
Select a restart option, remove any disks from their drives and click on
'Finish'.
The message 'Click Finish to complete Setup' now appears in the 'Setup
Complete' window.
(ii)
Page 20
Click on 'Finish' to exit the setup program.
Select a restart option, remove any disks from their drives and click on
'Finish'.
The message 'Click Finish to complete Setup' now appears in the 'Setup
Complete' window.
(ii)
Click on 'Finish' to exit the setup program.
Installation of LIPS is now complete.
Installation of LIPS is now complete.
Depending on the restart option chosen, your computer will either restart
or the current Windows session will continue.
Depending on the restart option chosen, your computer will either restart
or the current Windows session will continue.
Page 20
Installation Guide
3.4
LIPS-F & LIPS-T
Removing ('Uninstalling') the software
Installation Guide
3.4
LIPS-F & LIPS-T
Removing ('Uninstalling') the software
Occasionally, you may wish to remove the LIPS software from your PC (to install
it on another computer, for example). The LIPS software is supplied with a simple
'Uninstall' utility, which removes all files related solely to LIPS from your computer.
Occasionally, you may wish to remove the LIPS software from your PC (to install
it on another computer, for example). The LIPS software is supplied with a simple
'Uninstall' utility, which removes all files related solely to LIPS from your computer.
To remove the LIPS software;
To remove the LIPS software;
1)
Switch on your computer.
1)
Switch on your computer.
2)
Start a Windows 95/98 or Windows NT session.
2)
Start a Windows 95/98 or Windows NT session.
3)
From the Control Panel window, select 'Add/Remove Programs'
3)
From the Control Panel window, select 'Add/Remove Programs'
4)
From the list of programs presented, select either LIPS-F or LIPS-T
accordingly.
4)
From the list of programs presented, select either LIPS-F or LIPS-T
accordingly.
5)
Click the 'Add/Remove...' button.
5)
Click the 'Add/Remove...' button.
6)
When prompted, confirm that you wish to remove the software.
6)
When prompted, confirm that you wish to remove the software.
The LIPS software will now be removed from your computer.
The LIPS software will now be removed from your computer.
Page 21
Page 21
LIPS-F & LIPS-T
Page 22
Installation Guide
LIPS-F & LIPS-T
Page 22
Installation Guide