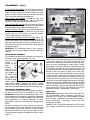
1
SERVICE MANUAL
& PARTS LIST
AEU-525CF TRANSPORT III
PORTABLE DENTAL SYSTEM
P.O. Box 1548 • Woodinville, WA 98072-1548
1-800-426-5913 • 425-487-3157 • Fax: 425-487-2608
www.aseptico.com • [email protected]
TABLE OF CONTENTS
CONTENTS
Page
General Service Information . . . . . . . . . . . . . . . . . . . . . . . . . .1
Inspection & Verification . . . . . . . . . . . . . . . . . . . . . . . . . . . . . .1
Cleaning & Lubrication . . . . . . . . . . . . . . . . . . . . . . . . . . . . . . .2
ESD Precautions . . . . . . . . . . . . . . . . . . . . . . . . . . . . . . . . . . .3
DISASSEMBLY
OVERVIEW . . . . . . . . . . . . . . . . . . . . . . . . . . . . . . . . . . . . . .14
INLET/OUTLET AIR FILTER ASSEMBLY . . . . . . . . . . . . . . . .4
WASTE TANK ASSEMBLY . . . . . . . . . . . . . . . . . . . . . . . . . . .4
WATER BOTTLE . . . . . . . . . . . . . . . . . . . . . . . . . . . . . . . . . . .4
FOOT CONTROL . . . . . . . . . . . . . . . . . . . . . . . . . . . . . . . . . . .5
VACUUM VALVES & HOSES . . . . . . . . . . . . . . . . . . . . . . . . .5
ELECTRIC MOTOR & CORD ASSEMBLY . . . . . . . . . . . . . . .5
AIR/ELECTRIC MODULE ASSEMBLY . . . . . . . . . . . . . . . . . .5
HANDPIECE TUBING GUARD . . . . . . . . . . . . . . . . . . . . . . . .5
INSTRUMENT HOLDERS . . . . . . . . . . . . . . . . . . . . . . . . . . . .6
WATER FILTER & FLUER FITTING . . . . . . . . . . . . . . . . . . . .6
WATER CAP GASKET . . . . . . . . . . . . . . . . . . . . . . . . . . . . . . .6
WATER CAP . . . . . . . . . . . . . . . . . . . . . . . . . . . . . . . . . . . . . .6
ELECTRIC MOTOR CONTROL PANEL HOUSING . . . . . . . .6
AIR/ELECTRIC MODULE TOP PANEL . . . . . . . . . . . . . . . . . .7
REAR WALL . . . . . . . . . . . . . . . . . . . . . . . . . . . . . . . . . . . . . . .7
RIGHT SIDE WALL . . . . . . . . . . . . . . . . . . . . . . . . . . . . . . . . .7
POWER BOARD AND INSULATORS . . . . . . . . . . . . . . . . . . .7
MANIFOLD ASSEMBLY . . . . . . . . . . . . . . . . . . . . . . . . . . . . . .8
SCALER-ADJUSTMENT POTENTIOMETER . . . . . . . . . . . . .8
MANIFOLD BLOCK . . . . . . . . . . . . . . . . . . . . . . . . . . . . . . . . .8
SCALER CONTROL MODULES . . . . . . . . . . . . . . . . . . . . . .10
TWO-WAY VALVE . . . . . . . . . . . . . . . . . . . . . . . . . . . . . . . . .10
ELECTRIC MOTOR RECEPTACLE . . . . . . . . . . . . . . . . . . .11
SYRINGE AND SYRINGE TUBING . . . . . . . . . . . . . . . . . . . .11
SCALER WAND . . . . . . . . . . . . . . . . . . . . . . . . . . . . . . . . . . .11
FOOTSWITCH CONNECTOR . . . . . . . . . . . . . . . . . . . . . . . .12
AIR/ELECTRIC MODULE LOCK-KNOB & HANDLE . . . . . .12
AIR BOTTLE ASSEMBLY . . . . . . . . . . . . . . . . . . . . . . . . . . .12
DIVIDER WALL . . . . . . . . . . . . . . . . . . . . . . . . . . . . . . . . . . .13
STORAGE SHELF . . . . . . . . . . . . . . . . . . . . . . . . . . . . . . . . .13
VACUUM TUBE BAFFLE (PART A) . . . . . . . . . . . . . . . . . . . .13
VACUUM TUBE BAFFLE (PART B) . . . . . . . . . . . . . . . . . . .13
COMPRESSOR ASSEMBLY TOP PANEL . . . . . . . . . . . . . .13
VACUUM HOSE FITTINGS . . . . . . . . . . . . . . . . . . . . . . . . . .14
BULKHEAD INSERT TUBE GUARD . . . . . . . . . . . . . . . . . . .14
MOTOR HOUSING COVER . . . . . . . . . . . . . . . . . . . . . . . . .14
ELECTRICAL PANEL . . . . . . . . . . . . . . . . . . . . . . . . . . . . . . .15
48V POWER SUPPLY . . . . . . . . . . . . . . . . . . . . . . . . . . . . . .15
24V POWER SUPPLY . . . . . . . . . . . . . . . . . . . . . . . . . . . . . .15
DISPLAY MODULE POWER CABLE . . . . . . . . . . . . . . . . . .15
CONTROL BOARD PCB . . . . . . . . . . . . . . . . . . . . . . . . . . . .15
WASTE CONNECTOR CABLE ASSEMBLY . . . . . . . . . . . . .16
ELECTRICAL PANEL 10-POS TERMINAL BLOCK . . . . . . .16
COOLING FAN . . . . . . . . . . . . . . . . . . . . . . . . . . . . . . . . . . . .17
CIRCUIT BREAKERS . . . . . . . . . . . . . . . . . . . . . . . . . . . . . .17
POWER INLET LINE FILTER (EMI) . . . . . . . . . . . . . . . . . . .18
MOTOR HOUSING – LEFT WALL ASSEMBLY . . . . . . . . . .18
MOTOR HOUSING – RIGHT WALL ASSEMBLY . . . . . . . . .19
VENTURI & MUFFLER BRACKET ASSEMBLY . . . . . . . . . .20
COMPRESSOR/VACUUM PUMP ASSEMBLY . . . . . . . . . . .21
MOTOR MOUNT ASSEMBLY . . . . . . . . . . . . . . . . . . . . . . . .22
AIR-ELECTRIC BULKHEAD INSERT . . . . . . . . . . . . . . . . . .22
CASE & LID . . . . . . . . . . . . . . . . . . . . . . . . . . . . . . . . . . . . . .22
Page i
Page
PARTS LISTS
Figure
Figure
Figure
Figure
Figure
Figure
Figure
Figure
Figure
Figure
112 – Final Assembly . . . . . . . . . . . . . . . . . . . . . . .24-32
113 – Air/Electric Module Assembly . . . . . . . . . . .33-36
114 – Air Bottle Assembly . . . . . . . . . . . . . . . . . . . . . .37
115 – Compressor Assembly . . . . . . . . . . . . . . . . . . .38
116 – Electrical Panel Assembly . . . . . . . . . . . . . .39-46
117 – Motor Housing - Left Wall Assembly . . . . . . . . .41
118 – Motor Housing - Right Wall Assembly . . . . . . .42
119 – Venturi & Muffler Bracket Assembly . . . . . . . . .43
120 – Compressor/Vacuum Pump Assembly . . . . . . .44
121 – Inlet/Outlet Air Filter Assembly . . . . . . . . . . . . .45
STERILIZATION & MAINTENANCE . . . . . . . . . . . . . . . . .46-47
TROUBLESHOOTING GUIDE . . . . . . . . . . . . . . . . . . . . . . . .48
DETACHABLE PARTS LIST . . . . . . . . . . . . . . . . . . . . . . . . .49
FINAL INSPECTION & TESTING . . . . . . . . . . . . . . . . . . .50-52
SYMBOL DEFINITIONS . . . . . . . . . . . . . . . . . . . . . . . . . . . . .53
REQUIRED TOOLS LIST . . . . . . . . . . . . . . . . . . . . . . . . . . .54
SPECIFICATIONS . . . . . . . . . . . . . . . . . . . . . . . . . . . . . . . . .55
WARRANTY . . . . . . . . . . . . . . . . . . . . . . . . . . . . . . . . . . . . . .56
NOTES . . . . . . . . . . . . . . . . . . . . . . . . . . . . . . . . . . . . . . . . . .57
GENERAL SERVICE INFORMATION
This service and parts manual offers information and parts
lists not available in the AEU-525CF Transport III Operation
and Maintenance Instruction Manual. It will help you better
understand the operation of the Transport III system, thereby
reducing service time. A Schematic Diagram Set includes
assembly drawings with individual part numbers, plumbing
diagrams, and electrical schematics. The plumbing and
electrical diagrams show all air, water, and wiring
components as installed in the unit. Individual parts are also
listed and referenced to Figures with callouts in the Parts
Lists. A Detachable Parts List is also included. Use the
information in the Parts Lists when ordering replacement
parts.
INSPECTION & OPERATION VERIFICATION
To verify that the Transport III unit is functioning properly, first
follow the Setup procedure Figure 1
in the Operation and
Maintenance Manual or in POWER
the 525 Setup Video ON/OFF
COMPRESSOR
presented on the Aseptico
CIRCUIT
BREAKER
website. The System is
designed to operate from
110V or 230V 50/60Hz
VOLTAGE SELECTOR
SWITCH
power. A manually operated
switch located next to the power inlet cord, allows the user
to select the proper voltage (Fig. 1).
Turn both rocker switches on the motor housing to the ‘ON’
position. The left-hand switch turns the unit power On/Off.
The right-hand switch acts as a circuit breaker for the
compressor. Electrical overloads will trip both switches.
Simply turn the switches back On to reset. Green LED’s
adjacent to each switch illuminate when the switches are
On. NOTE: When the unit is in use, it’s compressor motor
will occasionally turn On and Off, to maintain proper
pressure. IMPORTANT: The switch should be left in the On
position when not in use.
Toggle the water-bottle purge Figure 2a
switch located on the back side of
the air/ electric module to the
“PRESSURE” position (Fig. 2a).
Turn the main power switch, to
the ON position. The compressor
pump should pressurize the air Figure 2b
and water bottles and maintain
the system operating pressure at PRESSURE
45-55 PSI (3.10-3.79 bar). Check GAUGE
the pressure on the gauge
located on the side of the
air/electric module (Fig. 2b).
Vacuum Evacuator (HVE) or low-volume saliva ejector
instruments (Fig. 3) are removed from their holders or if they
aren't
properly Figure 3 SCALER SYRINGE SALIVA
EJECTOR
seated in their
HVE
holders, the compressor will run
continuously, even
when the system ELECTRIC
pressure is fully HANDPIECE
pressurized. If the
HVE and saliva
ejector instruments
are seated in their
holders properly but the compressor fails to turn off, turn the
unit's power switch OFF and check for air leaks in the
system. If the system pressure gauge is showing pressure,
the leaking sound should be detectable. Use your ear, or
place a tube to your ear like a stethoscope, to locate the
source of the leak. If a leak can't be heard from any air lines
or fittings, check the air and water bottles for tightness and
the condition of their seals, and check the three O-rings from
the junction block.
Air/Water Syringe
Check the 3-Way Air/Water Syringe (Fig. 4a) by depressing
the air and water syringe buttons individually then both
simultaneously for air/water mist. This mist can be adjusted
with the two syringe Figure 4a
Figure 4b
flow control knobs
SYRINGE
AIR
WATER
located on the
ADJUST
manifold
control
panel (see Fig. 4b).
The
top
knob
adjusts the water
SYRINGE
WATER
AIR
flow and the bottom
ADJUST
knob adusts the air
flow. Turn the knobs clockwise to decrease the flow or
counterclockwise to increase the flow.
Water Filter
WATER BOTTLE
PURGE SWITCH
The Transport III System uses a single compressor motor
with a split head. The split head provides pressure on one
side and vacuum on the other. The vacuum side uses venturi
boosters to increase the vacuum. The system pressure is
regulated by a switch located on the right wall of the motor
housing assembly. This switch activates the compressor
when the pressure drops to approximately 45 PSI, and it
stops the compressor when the pressure builds to
approximately 55 PSI.
The electric motor/handpiece, scaler, and vacuum
instrument holders are air-activated holders. If the High
Inspect the water filter (Fig. 5) on the Figure 5
end of the water pick-up tube that
protrudes into the water supply bottle. Filter
If the filter becomes clogged and
restricts the water flow, it needs to be
cleaned by reverse flushing, or
replaced. CAUTION: Do not run saline
solutions through the water system -- saline will rust the
water filter.
Air Filters
The
system Figure 5a
Figure 5b
provides a dual
COMPRESSOR
AIR FILTER
air
filtration
system.
The
primary filter (Fig.
5a) is installed
into the door
frame on the
case lid and is
DETACHABLE
used in dusty
AIR FILTER
environments. It
uses a foam filter that can be detached and cleaned. Simply
pull the foam pad off the frame studs and clean with soap
Page 1
and water or compressed air. The secondary air filter is a
cannister-type filter that threads into the compressor head
(Fig. 5b). This filter should be replaced if it becomes clogged
and restricts air flow.
Vacuum System
coolant air flows to the handpiece. An air flow adjustment
valve is located next to this ON/OFF toggle valve (Fig. 7).
Turn this adjustment valve counterclockwise to increase the
volume of air to the handpiece, then turn it clockwise to
decrease the flow.
To check the function of the vacuum system, first allow the
system to reach full pressure. Figure 6a
Check that all four tubes to
the waste tank are fully
LEVEL
seated and locked into their
SENSOR
CORD
fittings on the top of the waste
tank (Fig. 6a). Ensure that the
waste tank level sensor is
WASTE
TANK
plugged into the connector on
the unit’s compressor housing Figure 6b
(Fig. 6b). The system will not
activate the compressor if this
sensor is not connected
properly.
Return the electric handpiece to its holder when testing is
complete.
Scaler
Remove the Scaler from its holder (Fig. 3). A scaler water
ON/OFF toggle switch is located on the manifold control
panel, just below the ultrasonic adjustment knob (Fig. 8).
Place this toggle switch in the “ON” position and depress the
foot pedal. Ensure that coolant water flows to the scaler. A
water flow adjustment valve is also provided to control the
volume of water going to the scaler. This valve is located
next to the On/OFF toggle switch. Turn this adjustment valve
counterclockwise to increase coolant flow, then clockwise to
decrease coolant flow. During normal operation, adjust this
valve until the water flow is no less than 20 ml/min at the tip.
CONNECTOR
Fill a container with one liter of
(Below Air Filter)
water. Turn the valve on the
low vacuum saliva ejector
instrument to the OFF position and submerge the HVE
instrument into the container. It should take approximately 6
seconds to extract the liter of water from the container using
the HVE. Refill the liter of water and turn the HVE instrument
OFF and the saliva ejector to ON, then submerge the saliva
ejector instrument into the container. It should take
approximately 42 seconds to remove one liter of water using
the saliva ejector.
A scaler ultrasonic setting control switch is also located on
the manifold control panel (Fig. 8). This switch adjusts the
ultrasonic intensity of the scaler. Turn the control knob
clockwise to max- Figure 8
imum intensity, then
SCALER
counterclock-wise
ULTRASONIC
to minimum. When
CONTROL SWITCH
scaling, follow the
tip manufacturer's
SCALER
recommended
COOLANT
ultrasonic settings ON/OFF SWITCH
for each tip.
SENSOR CORD
Instruments:
To check the functions of the electric motor/handpiece and
scaler, remove each instrument from its respective holder
one at a time (see Fig. 3), and test the instrument, with
coolant water and/or air flow. Both instruments are activated
by the foot control.
Electric Motor/Handpiece
Remove the electric motor/handpiece from its holder (Fig. 3).
A handpiece water ON/OFF toggle valve is located on the
manifold control panel (Fig. 7). Place this toggle in the “ON”
position and deFigure 7
HANDPIECE WATER
press the foot
ON/OFF VALVE
pedal. Ensure that
coolant water flows
to the handpiece. A
water flow adjust- HANDPIECE WATER
ment valve is also ADJUSTMENT VALVE
provided to control HANDPIECE AIR
the volume of water ON/OFF VALVE
going to the handpiece. This valve is
located next to the
HANDPIECE AIR
ON/OFF
toggle ADJUSTMENT VALVE
valve (Fig. 7). Turn
this adjustment valve counterclock-wise to increase flow,
then clockwise to decrease flow.
A handpiece air ON/OFF toggle valve is also located on the
manifold control panel (see Fig. 7). This valve allows coolant
air to flow to the electric handpiece. Depress the foot pedal
and place this toggle in the “ON” position. Ensure that
Page 2
Return the scaler to
its holder when
testing is complete.
SCALER
COOLANT FLOW
ADJUSTMENT SWITCH
Cleaning and Lubrication:
When servicing the Transport III system, the parts of any
component disassembled should be thoroughly cleaned and
inspected before reassembly. A hot detergent solution is an
effective cleaner on all non-electrical parts. Flush all nonelectrical parts with clear, hot water. Abrasive cleaners have
the potential to damage surface finishes and should be
avoided. Any wiping should be done with a soft lint-free cloth.
Electrical parts should be cleaned with an appropriate
electrical parts cleaner or air.
Use a silicone base lubricating grease, such as Parker
Super O-Lube, PN 490138, to lubricate O-rings and seals in
the system. Before performing any reassembly of parts that
contain O-rings or seals, apply a light coat of silicone grease.
This will make installation easier and prevent the O-rings or
seals from being damaged.
Water Lines
Disinfect the water lines weekly. Prepare a 1:10 bleach
solution (1 part household bleach to 10 parts water).
Remove water supply bottle and discard residual water.
Replace the empty water supply bottle and air purge all
waterlines. Fill water supply bottle with bleach solution.
Run bleach solution through all lines. Allow bleach solution
to stand in lines for 10 minutes. Remove water supply
bottle and discard bleach. Flush water supply bottle and all
lines thoroughly with clean water. Air purge and leave lines
dry until next clinical use.
CAUTION:
Do not run saline solutions through the water
system -- saline will rust the water filters.
REFER TO STERILIZATION AND MAINTENANCE SECTION ON PAGE
46 FOR MORE CLEANING INSTRUCTIONS.
Adhesives
Refer to included Schematic Drawing Set, PN 420991, for
proper identification and application of all adhesives.
ESD PRECAUTIONS
The following electrostatic controls must be used when
working on this unit:
ESD Training and Standards:
Employees handling electronic sub-assemblies and ESD
sensitive components are expected to be trained. Training
should be based on IPC-A-610 or equivalent ESD standard
ANSI/ESD-S-20-20 – Protection of Electrical and Electronic
Parts, Assemblies and Equipment.
ESD Static Controlled Area:
Areas that are designated for handling and working on
electronic sub-assemblies or their components should be
marked off with signs indicating the area where ESD
controls are to be enforced. These areas are to be kept clear
from persons that are not trained to prevent ESD damage
from occurring.
ESD Environment:
The work area is to be free of all static generating materials,
such as plastic containers, water bottles, plastic bags, plastic
objects, such as plastic pens, heat guns (unless made for
the ESD environment).
ESD Jackets:
Clothing should be non-static generating (cotton).
Static generating clothing (e.g. wool, acrylic, nylon) must be
covered with an ESD jacket that is buttoned closed.
Optional gloves:
Nitrile gloves may be used to cover the hands when working,
but are not required.
Seating:
ESD Chairs should be used in place of static generating
chairs (e.g. modern office seating use static generating
materials).
Storage and packaging:
All circuit boards and components are to be stored on or in
static dissipative or static shielding material, throughout
shipping and storage.
ESD Wrist Strap and Mat Routine Checks:
The wrist strap should be checked daily using an ESD wrist
strap testing station. See chart below.
ESD mats should be checked at least quarterly.
Page 3
DISASSEMBLY
OVERVIEW: When disassembling the AEU-525CF Transport
III System, it is recommended that its modular
subassemblies be removed and disassembled in the order
shown below:
1. Inlet/Outlet Air Filter Assy
2. Waste Tank Assy (*)
3. Dental Instruments
4. Water Bottle
5. Air/Electric Module Assy (*)
6. Air Bottle Assy
7. Top Shelf Components
8. Electrical Panel Assy
9. Motor Housing - Left Wall Assy
10. Motor Housing - Right Wall Assy
11. Venturi & Muffler Bracket Assy
12. Compressor/Vacuum Pump Assy
13. Case Assy
(*) The Waste Tank and Air/Electric Manifold Block are not
customer-serviceable subassemblies and should not be
disassembled in the field -- please return these items to
Aseptico if repairs are necessary.
The operator control panels are located on the Air/Electric
Module Assembly. The power inlets and power supplies are
located on the Electrical Panel Assembly, and the
compressor and its vacuum components are located on the
Motor Housing Assembly.
INLET/OUTLET AIR FILTER ASSEMBLY
The socket for the Waste Tank Level Sensor Connector is
located on the Electrical Panel Assemby, behind the Air
Filter Assembly (see Fig. 9).
Grasp the locking collar on the Connector and pull the
Connector straight out of its socket, through the plastic hole
in the Air Filter Assembly. (The Connector is keyed to the
socket, so note the Figure 9
orientation of the white
WASTE
SENSOR
arrow on the locking
SOCKET
collar, to the top center
of the socket. When
WASTE SENSOR
reinstalling the Level
CONNECTOR
Sensor into its socket,
(Note Alignment
Arrow)
simply align the arrow
to the top of the socket
and push the Connector straight in until a click is heard. Ensure that the
connector is dry and free of any moisture before
reconnecting to the socket.
Swing the Connector and cord out of the way. Use either a
standard flat-head screwdriver, or the fastener tool provided
on the inside of the Figure 10
Transport III case lid,
to loosen the four
fasteners on the Filter
frame (Fig. 10). Turn
FILTER
the fasteners counterFASTENERS (4)
clockwise 1/4-turn. Lift
the Filter out of the lid
door frame and move
to a workbench for
further disassembly.
Page 4
Figure 11
TUBE
FOAM PAD
OUTER
FOAM
PAD
INNER FOAM
PAD
VELCRO
MTG STUD (X10)
The three foam filter pads can be detached from the Filter
frame for cleaning or replacement. Carefully peel the large
Outer Foam Pad (PN 730685), Inner Foam Pad (PN
730684), or circular Tube Foam Pan (PN 730687) off their
Mounting Studs (PN 510848) and Velcro Strips (PN 480030)
(Fig. 11). Clean or replace pads as needed and then reattach
to frame.
WASTE TANK ASSEMBLY
The Waste Tank is located on the back side of the Transport
III, hanging from a mounting bracket on the case lid (Fig. 12).
First, remove the four
gray hoses from the Figure 12
ROTATING
top of the waste-tank
LATCH
lid. Note the color
match between the
black
and
white
KEYWAY
rotating latches on the
lid with their respective
black or white hose SALIVA
fittings. Also note that EJECTOR
MOUNTING
HOSE
the HVE and salivaBRACKET
ejector
instrument
hose fittings are keyed
HVE
to only fit their
HOSE
respective inlet ports.
Unplug the waste level sensor from its connector on the
Electrical Panel Assembly (see Fig. 9). Ensure that the tank
has been cleaned of all waste and residue before removing
(refer to Operations Manual for instructions on emptying the
Waste Tank.) Lift Tank off mounting bracket and set aside for
reassembly later.
WATER BOTTLE
Release any residual pressure from the Transport III Water
Bottle by toggling the Pressure Release Valve to the right
(Fig. 13). Unscrew the Water Bottle from its cap and carefully
lower the bottle until clear Figure 13
of its waterCAP
supply tube/
(RELEASE)
filter assembly.
Place
PRESSURE
Bottle aside
RELEASE
for reassemVALVE
bly later.
WATER BOTTLE
FOOT CONTROL
The Transport III Foot Control connector is located on the
bottom of the Air/Electric Module Assembly (Fig. 14). Loosen
the outer sleeve on Figure 14
the cord connector
and
pull
the
RECEPTACLE
connector straight
out of its receptacle.
AE-7PM
Place the Foot
FOOT CONTROL
Control aside for
reassembly later.
IMPORTANT: The
Foot Control is not a
customer serviceable item and should be replaced or returned to Aseptico for
repairs, if necessary.
VACUUM VALVES & HOSES
Remove the HVE and saliva ejector valves from their
respective holders and move to a work bench for inspection
and/or repair (Fig. 15):
Figure 15
SALIVA
EJECTOR
O-RINGS
HIGH VOLUME
EVACUATOR
(HVE)
• Inspect hoses for cracks or leaks - replace if necessary.
• Check the integrity of the HVE ‘O’ rings (PN 520101)
and the saliva ejector ‘O’ ring (PN 520100) - replace if
necessary.
• The anodized aluminum bodies of the HVE & saliva
ejector valves (PNs AA-35LAD & AA-37LAD) can be
snapped apart at their swivel connectors. The levers
and Viton® O-ring spools can be disassembled without
tools, for cleaning and lubrication. (Use small amount of
petroleum jelly to lubricate). Ensure that the valve
heads swivel freely and that the levers turn On/Off
properly - replace if necessary.
the Air/Electric Module Assembly (Fig. 16). Pull the
connector straight out of its receptacle. Set Motor/Cord
aside. When reconnecting the motor connector, ensure that
the round dimple on the cord connector aligns with the
grooved mark on the receptacle. IMPORTANT: The Electric
Motor & Cord Assembly is not a customer-serviceable item
and should not be disassembled in the field. Return the
Motor Assembly to Aseptico if repairs are necessary. Refer
to the Sterilization Section in this manual for more
information on motor maintenance and care. Refer to the
handpiece manufacturers’ instructions for information on
handpiece maintenance and repair.
AIR/ELECTRIC MODULE ASSEMBLY
The Air/Electric Module Assembly (PN 330597) is the main
control module for the Transport III. It provides the operator
controls for the electric motor, scaler, air/water syringe, and
two suction valves.
Detach the Air/Electric Module from the Transport III unit as
outlined below: (Refer to the Operator’s Instruction Manual
for complete detailed instructions on detaching this Module.)
1. Loosen the hold-down thumbscrew that attaches the
rear housing of the Module to the connector block on the
case.
2. Pull the locking tab on the unit’s adjustable handle out
of its slot and raise the Air/Electric Module until it reaches
its highest positon (the locking tab will snap into the next
slot). The Module’s rear housing will become detached
from the connector block on the unit.
3. Locate the knob that locks the Air/Electric Module to
the adjustable handle and rotate the knob 90° so that it
aligns with the vertical slot in the handle.
4. Carefully rotate the bottom of the Air/Electric Module
away from the handle so that the knob backs out of the
slot.
5. Lift the Air/Electric Module assembly up and outward,
until its mounting bracket is free of the large opening at
the top of the handle.
6. Move the Module assembly to a work bench for
component disassembly.
HANDPIECE TUBING GUARD
The Handpiece Tubing Guard (PN 462121) protects the
tubing going to the instrument holders. It is mounted under
the instrument holder bar (Fig. 17). Use a 5/64" Allen wrench
Figure 17
ELECTRIC MOTOR & CORD ASSEMBLY
Remove the Electric Handpiece/Motor from its holder.
Detach the
ELECTRIC MOTOR
h a n d p i e c e Figure 16
& CORD ASSY
from
the
motor and set
RECEPTACLE
aside.
The
receptacle for
the Electric
Motor cord
connector is
located
on
ALIGNMENT
the bottom of
MARKS
HOLDER (X4)
w/ON-OFF
TOGGLE
HOLDER
BAR
HOLDER
BAR
SUPPORT
(X2)
TEE
FITTING (X3)
SLEEVE
CLAMP
(X17)
HOLDER
w/o ON-OFF
TOGGLE
SET
SCREW(S)
TUBING
GUARD
Page 5
DISASSEMBLY - Cont'd
to remove the two mounting screws (PN 510037).
Reassemble the Guard in the reverse order.
INSTRUMENT HOLDERS
Two Instrument Holders (PN AA-59G) with on/off toggle
controls are located at each end of the Holder Bar (Fig. 17).
A fifth toggle-less instrument Holder (PN-68G) is located at
the center of the bar, between the other four Holders.
Remove the Sleeve Clamps (PN 730015) from the tubing
going to each of the Holders. Remove the colored tubing
and Tee Fittings (PN 730152) going to the Holders (take note
of the tubing configurations and colors to each Holder, for
reassembly later). Back out the setscrews on the bottom of
the Holder(s) with a 3/32" Allen wrench. Remove the Holders
from the Holder Bar. Use a 5/64” Allen wrench to remove the
two mounting screws (PN 510160) that attach the Holding
Bar (PN 462095) to the Holding Bar Supports.
Reassemble the Instrument Holders in the reverse order.
Refer to plumbing schematic for proper installation.
WATER FILTER & LUER FITTING
The Water Filter (PN 730326) and Luer Fitting (PN 730073)
are located in the blue tube (PN AA-95B) that protrudes into
the water bottle (Fig. 18). Figure 18
Depressurize the water bottle
and remove it from its water cap.
Remove the Luer Fitting from the
bottom section of the tube.
Loosen the sleeve clamps (PN
730095) located at the top of the
MOUNTING
blue tube and at both ends of the
SCREWS
WATER
(X3)
CAP
Filter. Unscrew and remove the
Filter. Remove the three fittings
(PN 730073) and gaskets (PN
730074) from the tube sections.
To clean the Filter, inject
compressed air from the top end
WATER
to unplug its screen, or replace
FILTER
the filter with a new one.
Reassemble in the reverse
order, with new gaskets if
necessary.
SLEEVE
CLAMP
(X3)
WATER CAP GASKET
The water cap gasket (PN
LUER FITTING
730473) is located on the
underside of the white water Figure 19 SLEEVE
bottle cap (PN 462039) (Fig. 19).
CLAMP
(X2)
Depressurize the water bottle
and remove it from its water cap.
CAP
Reach up into the white cap and
pull the black gasket from the
cap.
Reassemble in the reverse order
with a new gasket.
FITTINGS
GASKET
WATER CAP
The water cap (PN 462039) is attached under the right side
of the Air/Electric Module Top Panel (Fig. 19). Remove the
water bottle as previously described. Remove the two sleeve
clamps (PN 730015) from the two tubes, then detach the
Page 6
blue tube (PN AA-94B) and clear tube (PN AA-94C) from the
fittings on the cap. Remove the three mounting screws (PN
510404) from the top of the panel (Fig. 18) with a 3/32" Allen
wrench and remove cap. Remove the two fittings (PN
730062) and gaskets (PN 730074) from the cap, using a 1/4"
open-ended wrench. Inspect and replace fittings or gaskets
if necessary.
Reassemble the cap in the reverse order. Refer to the
plumbing schematic for the proper installation of tubing.
ELECTRIC MOTOR CONTROL PANEL HOUSING
Locate
the
Figure 20
four mounting
screws
(PN
510650)
on
the bottom of
the Air/Electric
Module Top
Panel
(Fig.
20),
and
TOP PANEL
remove with a MOUNTING SCREWS
(X4)
#2
Phillips
screwdriver.
Disconnect the Figure 21
Wire Harness
4-PIN
(PN 875113)
'JCOMM'
from the 4-pin
CONNECTOR
' J C O M M '
connector
located on the
Motor Control
Panel Display
Board
(PN
330600-C)
(see Fig. 21). HOLDER BAR
Move Motor SUPPORT (X2)
Control Panel
BAR SUPPORT
to the workMTG SCREWS (X4)
bench.
MOUNTING
BAR
ELECTRIC MOTOR
CONTROL PANEL
TOP PANEL
WIRE HARNESS
RUBBER
SEAL
Disconnect
CONTROL PANEL MEMBRANE
Figure 22
the
Control
P a n e l
Membrane
flex cable from
the
6-pin
' J K E Y PA D '
connector on
the
Display
Board
(Fig.
22). If removal
DISPLAY BOARD
FLEX CABLE
of the Display
Board
is
required, use
needlenose
pliers to pinch
together the
MOUNTING STUD (X4)
four mounting
studs on the
Control Panel Housing and lift off the Board. NOTE: The
Display Board is not a user-serviceable subassembly and
should be returned to Aseptico if repairs are required.
The Control Panel Membrane (PN 420918) is attached to
the front of the Panel Housing with an adhesive backing (see
Fig. 22). Removal of the Membrane is not recommended
unless absolutely necessary. If removal is required, carefully
peel the Membrane out of the recess in the Housing and
permanently discard the entire Membrane. (IMPORTANT:
Do not reuse an old Membrane - once detached, it should
always be replaced with a brand new Membrane.) To
reinstall a new Membrane: 1) Insert flex cable pigtail through
the slotted hole in the Top Cover; 2) Remove liner from
adhesive backing on new Membrane; 3) Carefully center
new Membrane in recess in Top Cover; and, 4) Press down
evenly on Membrane until firmly adhered to Cover; and 5)
Add 4-inches of 1-inch diameter heat Shrink around Flex
Cable (Do Not Shrink).
Use a 5/64" Allen wrench to remove the four screws (PN
510037) that attach the two Holder Bar Supports (PN
462096) to the Top Panel (see Fig. 21). Place Supports
aside for reassembly later.
The Rubber Seal strip (PN 520104) is taped to the Top
Panel, along the Panel's back edge (Fig. 23). Peel off the
Seal if necessary, and replace using double-backed
adhesive tape.
AIR/ELECTRIC MODULE TOP PANEL
Use a 5/64" Allen wrench to remove the ten screws (PN
510037) that Figure 23
(BACK
mount the Top
SIDE)
Panel to the
Air/Electric
MOUNTING SCREWS
(X10)
Module (Fig.
23). Note the
two
screws RUBBER
SEAL
located on the
back side of
TOP PANEL
the
Module.
Lift Top Panel
off Module and
place aside for
reassembly later.
REAR WALL
Use a 5/64" Allen wrench to remove the six screws (PN
510037) that Figure 24
attach
the
MOUNTING
SCREWS
Rear Wall to
(X6)
the Air/Electric
Module (Fig.
24). Note that
one mounting
screw is located on the
REAR WALL
Manifold
Assembly
control panel.
Carefully
disconnect the
Rear Wall from
the
Module
and swing it to the right, noting that the tubing to the
Pressure Toggle Valve (PN 730014) is still attached.
Remove sleeve Figure 25
TUBE
PRESSURE
Clamp
(PN
RELEASE
TOGGLE
730015)
and
VALVE
detach the clear
tubing (PN AA94C) from the
Toggle Valve.
POWER
BOARD
Disconnect
REAR
INSULATOR
WALL
Rear Wall and
move to work
bench. Remove
the two Fittings FITTING
(PN
730062) (X2)
TOGGLE
and
gaskets
VALVE
(PN
730074)
with a 1/4" open-ended wrench. Use a 9/16" wrench to
remove the Toggle Valve mounting nut located on the
outside of the Wall, then remove the Valve.
RIGHT SIDE WALL
Locate the two
Figure 26b
Figure 26a
m o u n t i n g
RIGHT
screws
(PN
WALL
510037) on the
MOUNTING
bottom of the
SCREWS
Module
that
attach the Right
Wall
(PN
462036) to the
Module
(see
Fig. 26a). Use a
5/64"
Allen
wrench to remove both screws and set the Wall aside for reassembly later (Fig. 26b).
POWER BOARD AND INSULATORS
Use a 1/16" Allen wrench to remove the four screws (PN
510016) that attach the Power Board Insulator (PN 462117)
to the Module (Fig. 27a). Remove Insulator to expose the
Power Board (PN 330601) (see Fig. 27b), then place
Insulator aside
Figure 27b
Figure 27a
for reassembly
later.
Carefully pull
Power Board
away from the
POWER
Module until the
MOUNTING
BOARD
SCREW
wiring assem(X4)
blies can be
INSULATOR
accessed (Fig.
28). Note the
alignment of the
Board's mountng holes with the nylon stand-offs. Unclamp the brass
Sleeve (PN 461607) from the Pressure Sensor Tube (PN
730227). Detach Tube from 'PSENS1' connector on Power
Board. Disconnect the Motor Connector Wiring Assembly
(PN 330598) from the 'J_MOTOR' connector on the Board.
Note the orientation of the Wiring Assembly's connector and
wires with the locking tab and position '1' on the Board's
connector. Disconnect the 3-pin, 2-pin, and 5-pin (PN's
860118, 860076, and 860019 respectively) connectors from
Page 7
DISASSEMBLY - Cont'd
Figure 28
CLAMP
DISPLAY
BOARD
WIRE
HARNESS
PRESSURE
SENSOR TUBE
INBOARD
INSULATOR
STANDOFF
(X4)
POWER
BOARD
MOTOR
CONNECTOR
CABLE
5-PIN
CONNECTOR
2-PIN
CONNECTOR
3-PIN
CONNECTOR
860118, 860076, and 860019 respectively) connectors from
the 'JPWR1', 'J_SLND', and 'J_FOOTPEDAL' connectors on
the Board (see Fig. 28). Note the orientation of the
connectors' wiring with the Board's connectors. Remove
Power Board from Module and set aside for reassembly
later. IMPORTANT: The Power Board Assembly is not a
customer-serviceable item. Return the Board Assembly to
Aseptico if repairs are necessary.
Pull the inboard Insulator (PN 462113) off the four nylon
mounting Standoffs (PN 462112) (see Fig. 28) and place
aside
for
r e a s s e m b l y Figure 29
later. Unscrew,
by hand, the
nylon Standoffs
from
the THREADED
STUDS
threaded studs
(X4)
on
the
Module's Front
Wall (Fig 29).
Set Standoffs
aside for reassembly later. Figure 30
MANIFOLD
ASSEMBLY
Locate
the
three mounting MANIFOLD
WALL
screws
(PN
510037) for the
MANIFOLD
M a n i f o l d
BLOCK
Assembly (PN
MOUNTING
330591) and
SCREWS
(X3)
Manifold Wall
(PN 462029)
(see Fig. 30) on
the bottom of
the Module and on the face of the Manifold Control Panel.
Use a 5/64" Allen wrench to remove all three screws.
Carefully pull the Manifold Assembly away from the Module
until the plumbing connections on the inboard side are
readily accessible.
Page 8
SCALER-ADJUSTMENT POTENTIOMETER
The scaler potentiometer (part of PN 730654) is located on
the Manifold Assembly (Fig. 31). Loosen the small setscrew
on the side of Figure 31
the potentioSCALER
meter knob with
ADJUSTMENT
KNOB
MOUNTING
a 1/32" Allen
NUT
wrench
and
remove knob.
Remove
the
mounting nut
on the outboard
side of the
Manifold Wall
SETSCREW
with
a
½"
socket or open-ended wrench. From the inboard side of the
Manifold, remove potentiometer through the hole in the Wall
(see Fig. 33).
Reassemble the scaler potentiometer in the reverse order
with the lock washer positioned against the inboard side of
the Maniflold wall and the alignment pin on the potentiometer
keyed into the hole in the Wall.
MANIFOLD BLOCK
The On/Off and Air & Water Control Valves for the Scaler,
Motor/Handpiece, and Syringe are located on the Manifold
Block Assembly (Fig. 32).
Figure 32
SCALER
DISABLE
SWITCH
FITTING &
NYLON
GASKET
SCALER
ACTIVATION
SWITCH
1/4" HOSE
SLEEVE
CLAMP
(TYP.)
1/8" TUBE
SLEEVE
CLAMP
(TYP.)
1/8" TUBE
BRASS
SLEEVE
CLAMP
(TYP.)
1/4" HOSE
ALUMINUM
SLEEVE
CLAMP
(TYP.)
Cut the two wires to the Scaler Disable Switch, PN 830144,
located at the right top corner of the back side of the
Manifold (Fig. 32) and then unscrew Switch by hand. When
reassembling, note the lockwasher (part of Switch) is
positioned against the Block.
Use a 9/16" open-ended wrench to detach the Scaler
Activation Switch, PN 730031, from the fitting on the back
side of the Manifold (Fig. 32). Then, use a 1/4" open-ended
wrench to remove the Fitting, PN 730651, and nylon
Washer, PN 730074, underneath.
Use diagonal cutters or needle-nose pliers to pry off all
sleeve clamps from the tubing and hoses that connect to the
Manifold Block (Fig. 32). The 1/16" tubing is attached with
Sleeve Clamps PN 730152; the 1/8" tubing is clamped with
PN 730015 Clamps or PN 730096 Uni-Clamps; and, the
1/4" tubing is attached with either large white nylon Clamps
PN 730095; large brass Clamps PN 461607, or the large
aluminum Clamps PN 462230.
Detach the connecting tubes and hoses from Manifold
Block. NOTE: To simplify disassembly, at this time, only
detach the tubes and hoses that are still interconnected to
the Module Assembly -- leave the other tubes and hoses
with loose ends attached to the Block (Fig. 33a). Take note
how all tubes and hoses connect to the Block. Inspect the
ends of all tubes and hoses for fraying or cracks and trim off
damaged ends before re-attaching to Block. Refer to
Plumbing Schematic Drawings for proper reassembly of
tubes and hoses.
Move Block to work bench for further disassembly. Detach
remaining sleeve clamps and tubes as necessary. Remove
Water Check Valve, PN 730012. Take note of flow direction
of Valve and ensure the same alignment when reinstalling.
Remove Air Check Valve, PN 730428. Note flow direction
arrow on Valve and ensure same alignment during
reassembly.
IMPORTANT: The Manifold Block is not a customer-serviceable
item. Return the Block to Aseptico if repairs are required.
Figure 33a
WATER
CHECK
VALVE
Figure 33b
MANIFOLD BLOCK:
Not a Customer-Serviceable Item Return to Aseptico For Repairs
The Junction Block provides an interconnecting air, water,
and electrical terminal between the 525CF Control Module
and the Compressor Module. The Block is located in the
pivotal housing attached to the back side of the Air & Water
Manifold Module (Fig. 34).
Figure 34
CAPACITORS
(X2)
REAR
HOUSING
RESISTOR
(PN 870118)
7-POSITION
TERMINAL
BLOCK
1/4" HOSE
SLEEVE
CLAMP
RESISTOR
(PN 810438)
1/8" TUBE
SLEEVE
CLAMP (X2)
JUNCTION BLOCK
Use a 5/64" Allen wrench to
remove the four mounting
Screws (PN 510037) that attach
the Front Housing (PN 462042)
to the Rear Housing (PN
462043) (see Fig. 34 inset).
MOUNTING SCREWS
FRONT
Use diagonal cutters or needleHOUSING
nose pliers to pry off the sleeve
clamps from the two tubes and
hose that connect to the Junction Block (Fig. 34). The 1/8"
tubing is clamped with Clamps PN 730015 and the 1/4" hose
is attached with a large white nylon Clamp (PN 730095).
Use a small flat-head screwdriver to disconnect just the
Junction Block wiring from the 7-position Terminal Block (PN
860283) located inside the Rear Housing (Fig. 34). Take
note of the color wiring-to-terminal connections, for
reassembly later. Note the wiring configuration of the
Resistor (PN 810438). Refer to the electrical schematic for
proper installation.
W
FLO
OW
FL
AIR
CHECK
VALVE
JUNCTION BLOCK
(LEAVE
THIS HOSE
& TUBE
ATTACHED
TO BLOCK
IF NO
REPAIRS
NEEDED)
Locate the Locking Thumbscrew and Bracket (PN 462052)
on the side of the Rear Housing (Fig. 44a). Depress and
hold the Thumbscrew against the bracket while using a #2
Phillips screwdriver to remove the Junction Block mounting
screw (PN 510790). Remove the other mounting screws
(PN 510790) located on the opposite side of the Rear
Housing (Fig. 44b) and on the back side of the Housing.
Remove the Junction Block to the workbench for further
disassembly.
Page 9
DISASSEMBLY - Cont'd
Figure 44a
Figure 44b
JUNCTION
BLOCK
MOUNTING
SCREW
MOUNTING
SCREWS (X3)
At the workbench, use a flat-head screwdriver to remove the
two Screws (PN 510688) that mount the Floating Block (PN
462052) to the Junction Block (Fig. 45). Move the Floating
Block aside and only disassemble if necessary: Use a 5/16"
open-ended wrench to remove its three large Air Junction
Fittings (PN 462051). Use a 1/4" open-ended wrench to
remove
its Figure 45
MOUNTING
smaller 1/16" &
SCREWS (X2)
LARGE
1/8"
Hose O-RINGS (X3)
AIR JUNCTION
Fittings (PNs 1/16"
FITTINGS (X3)
730062
& FITTINGS
FLOATING
730073
res- (X2)
BLOCK
pectively) and
1/8" FITTING
nylon Gaskets
(PN 730074).
Replace
the
large outer ONONrings
(PN
SERVICEABLE
CONNECTOR
520099),
or
RESISTOR
PLUG ASSY
smaller internal
O-rings (PN 520025) as necessary. IMPORTANT: The 12pin Connector Plug (PN 860285) subassembly, which
consists of five Wires (PN's 870304-01, -02, -03, -04, & -06)
and Contact Terminals (PN 860290), Resistor (PN 810438),
and two mounting Screws (PN 510766) are permanently
epoxied to the Junction Block and cannot be serviced.
Replace the entire epoxied Connector Plug/Junction Block
subassembly if repairs are required.
NOTE: It is not necessary to disconnect any remaining
wiring from the 7-Position Terminal Block (PN 860283) or the
4-Positon Block (PN 860250) (see Figs 46a & 46b), nor
remove the Blocks from the unit , unless they are faulty or
damaged.
Figure 46a
Figure 46b
7-POSITION
TERMINAL
BLOCK
4-POS
TERMINAL
BLOCK
SCALER CONTROL MODULES
The two Scaler Control Modules (PN 730654) are located on
the upper left side of the Manifold Module Front Wall. Slide
the covers of each Scaler Module to the left, to expose the
wiring terminal blocks underneath (Fig. 48). Using a tiny
jeweler's flat-head screwdriver, loosen the four wire contact
screws on the smaller Control Module terminal block and
Page 10
disconnect all four Figure 48
TERMINAL BLOCKS
wires (Fig. 49).
When
reassemSCALER
bling later, refer to CONTROL
the wiring guide im- MODULES'
printed on the COVERS
Module's cover, or
consult the System
wiring schematic.
On
the
larger
Control
Module,
remove the entire
wiring connector
from the Module's
12-pin receptacle Figure 49
SCALER MODULE WIRING
(see Fig. 49). When
12-PIN
reattaching
this
connector, refer to CONNECTOR
BLOCK
the wiring guide
imprinted on the
Module cover, or
refer to the System
schematic. Unless
damaged, there is
no
need
to
disconnect
or
remove any remaining Scaler Module wiring - leave it in
place for reassembly later.
Locate the two mounting screws (PN 510793) on the
outboard side of the Front Wall that attach the larger Scaler
Module to the Wall. Using a #1 Phillips screwdriver, remove
the two Screws and then remove the Scaler Module. Set the
Module aside for reassembly later. IMPORTANT: A later
Version (Build Rev-C) of the AEU-525CF System uses a
newer Scaler System - consult Aseptico for details if the
Scaler Modules referenced here need to be repaired or
replaced. Remove the two Locking Nuts (PN 510394) and
Washers (PN 510192) that attach the smaller Scaler Module
to the Front Wall (Fig. 50b). NOTE: The smaller Module uses
adhesive tape Figure 50a
Figure 50b
on its back side
LOCKING NUTS
to adhere it to MOUNTING
& WASHERS
the Wall. Care- SCREWS
fully peel the
Module away
from the Wall
and clean off
any
residual
HOLDING
PAD
tape left on the
Wall. Remove
the rubber Holding Pad (PN 462115). When reattaching the
Module later, use double-sided adhesive tape to affix the
Module into position. Place both Scaler Modules aside for
reassembly later. Reassemble the Modules in the reverse
order.
TWO-WAY VALVE
The Two-Way Valve (PN 730656) and its mounting hardware
is located on the Front Wall (Fig. 51).
Use diagonal cutters or needle-nose pliers to pry off the
large white nylon Sleeve Clamp (PN 730095) from the 1/4"
Figure 51
MOUNTING SCREWS (X2)
MOUNTING
BRACKET
INSULATOR
DETACH ONLY
THIS 1/4"
CLAMP &
HOSE
FITTINGS
(X2)
TWO-WAY
VALVE
SILICONE
TUBE
REAR
HOUSING
Hose (PN AA-96) that protrudes through the large black
silicone tubing from the Rear Housing. Use a 5/64" Allen
wrench to remove the two Mounting Screws (PN 510037)
that attach the Valve to the Mounting Bracket. Leave the
Bracket (PN 462114) and Insulator (PN 462116) attached to
the Front Housing. Move the Valve and its hardware to the
workbench if further disassembly is required.
At the workbench, disconnect the remaining two sleeve
clamps and hoses from the two Fittings (PN 730139) (Fig.
52). Use a 1/4" thin Figure 52
PLUGS (X3)
open-ended wrench
to remove the three
barbed Fittings (PN
730073),
three
CROSS
FITTINGS
Plugs (PN 730072),
TWO-WAY
PN 730139
and eight nylon
VALVE
(X2)
Gaskets
(PN
BARBED
730074). Use a 3/8"
FITTINGS
PN 730073
open-ended wrench
(X3)
to remove the two
cross Fittings (PN
730139).
ELECTRIC MOTOR RECEPTACLE
The Electric Motor Receptacle Assembly (PN 330598) is
mounted onto the bottom panel of the Air & Electric Module
(Fig. 53a). Locate the three Mounting Screws (PN 510160)
Figure 53a
Figure 53b
MOTOR
RECEPTACLE
ASSEMBLY
Line
Hold-Down Figure 57
Nut. Move the entire
R e c e p t a c l e
Assembly to the
SPACER
ADAPTER
workbench
for
further disassembly,
if necessary. NOTE:
At the workbench, MTG.
take note how the SLOT IN
RECEPTACLE
Adapter Plate (PN
462069) slides into the slot on the Receptacle. Also note the
hole-orientation of the Spacer (PN 462135), with the Adapter
Plate and Receptacle (Fig. 57).
SYRINGE AND SYRINGE TUBING
To replace the Syringe (PN TA-90D), remove the two sleeve
clamps (PN 730015) from the Syringe tube splices located
inside the bottom
Figure 58
panel of the Air &
Electric Module (Fig.
58). Pull the tubing
SYRINGE TUBING &
SLEEVE CLAMPS
down through the
GROMMET
grommet and move
Syringe and Tubing
Assembly to work
bench. At bench,
unscrew the bottom
handle from the
Syringe head to Figure 59
TUBING
access the tubing
SLEEVE CLAMPS
(X2)
connections (Fig.
HANDLE
59). Remove the
two sleeve clamps
(PN 730015) and
disconnect the tube
HEAD
(PN AA-85G) from
the head.
To reassemble the Syringe, cut approximately 67" of the
syringe tubing and attach to the Syringe head with two
sleeve clamps. Place the syringe in its holder on the Air &
Electric Module and adjust the length of the tubing so that it
suspends off the floor. Splice the end of the tube as before
and attach to the two fittings on the Manifold Block with two
sleeve clamps. Verify that air comes out the syringe when
the air button is depressed and that water sprays out when
the water button is depressed.
SCALER WAND
MOUNTING SCREWS
(X3)
SCALER ANCHOR
LINE
MOUNTING SCREW &
ANCHOR-LINE NUT (X1)
on the bottom of the Module and remove them using a 5/64"
Allen Wrench (Fig. 53b). Then use a 5/16" open-ended
wrench and the Allen Wrench to remove the single Mounting
Screw (PN 510036) and Anchor-Line Nut (PN 510395).
NOTE: The Scaler Anchor Line is attached to this Anchor
The Scaler Wand (part of PN 730654) is attached inside the
bottom panel of the Air & Electric Module (Fig. 60).
Remove the green
Figure 60
GROUND WIRE
ground wire and the
B&W WIRES
4-POSITION
black and white
BLOCK
CABLE TIE
wires at the 4position connector
SCALER TUBE
block (PN 860250).
Remove the red and
ANCHOR
blue wire from the
LINE
smaller module. Cut
the cable tie around
the Scaler cord,
located just above the grommet. Remove the Scaler tube
Page 11
DISASSEMBLY - Cont'd
Anchor Line from the hold-down Nut with a 5/16" openended wrench (see Fig. 53a). Pull the Scaler Wand cord
down through the grommet in the bottom panel of the Air &
Electric Module. Remove Scaler Wand. IMPORTANT: The
Scaler Wand is not a customer-serviceable item. Return the
Wand to Aseptico if repairs are required.
Reassemble the Scaler Wand in the reverse order, adjusting
the length of the Wand cord to hang suspended off the floor
and then trimming the excess cord and/or water line. Wrap
the cable tie around the scaler cord, just above the grommet
in the bottom panel of the Air & Electric Modulet. Ensure that
the tie is not over-tightened and does not restrict the flow of
water. Attach the anchor line to the hold-down nut. Attach the
green, white, and black wires from the Wand to the matching
colored wires on the 4-position terminal block. Check to
ensure that scaler water flow is appropriate.
FOOTSWITCH CONNECTOR
The Footswitch Connector (PN 860212) is located on the
bottom panel of the Air & Electric Module. Use a 13/16"
open-ended wrench Figure 61
KEYWAY
to remove mounting
nut on outboard side
of bottom panel (Fig. MOUNTING
61). (NOTE: Take
NUT
care to protect the
panel
against
FOOTSWITCH
scratches
when
CONNECTOR
removing nut.) Push
Connector inward
through 'D' shaped Figure 62
cutout in bottom
panel of the Air &
Electric
Module.
'D' SHAPED
Note
that
the
CUTOUT
keyway on the
threaded Connector
is pointing toward
RUBBER
GASKET
the right-hand side.
FOOTSWITCH
Remove
entire
CONNECTOR
W/WIRE
Connector and wire
HARNESS
harness assembly
and set aside for reassembly later. (NOTE: During
reassembly, ensure that the rubber gasket that is supplied
with the Connector (see Fig. 62) is positioned on the inboard
side of bottom panel.
AIR/ELECTRIC MODULE LOCK-KNOB & HANDLE
The Air/Electric Module Locking
Figure 63
Knob and Handle are located on the
HANDLE
Front Wall (Fig. 63). If the Handle
LOCK
(PN 462031) needs to be removed,
KNOB
use a 5/64" Allen wrench to remove
its two mounting Screws (PN
510037). The Locking Knob consists
of six different parts: Use a 1/8"
SPRING
SPACER
Allen wrench to remove the
large shoulder Screw (PN
510767) and Spring (PN
510765) that attach the Lock SHOULDER
Knob (PN 462033). Then, use a SCREW KNOB
Page 12
5/64" Allen wrench to remove the two Screws (PN 510720)
that mount the Spacer (PN 462034) to the Wall.
AIR BOTTLE ASSEMBLY
The Air Bottle Assembly is located inside the Transport III
Case, in the upper right-hand corner of the top compartment
(Fig. 64a). Turn the unit off and purge any residual pressure
Figure 64a
Figure 64b
MOUNTING
SCREW
AIR
BOTTLE
ASSEMBLY
CABLE
TIE
FILTER
ASSY
MOUNTING
SCREW
left in the System (depress the Syringe air button to release
all air pressure). Unscrew the Air Bottle (PN 730657) from its
Lid (PN 462007) and set Bottle aside for reassembly later.
Cut the cable tie around the two gray tubes (PN AA-95G)
running to the Air Bottle Assembly (see Fig. 64b). Use a
Phillips screwdriver to remove the top mounting Screw (PN
510545) which threads into the Assembly Bracket (PN
462006), through the top of the Case. Then, use a 3/32"
Allen wrench to remove the other mounting Screw (PN
510309), which is accessed from the inside of the case.
Carefully pull the Assembly Figure 65
out of the Case to access
its tubing (Fig. 65). At the
Bottle Lid, remove the
Sleeve
Clamp
(PN
1/4" SLEEVE
CLAMPS
730095) and Tube (PN AA(X2)
95G) that runs from the
Compressor
Assembly
(see Fig. 65). At the Filter
(PN 730495), locate the
Tube
going
to
the
TUBE
LID GASKET
FROM
Bulkhead Manifold and use
TUBE TO
COMPRESSOR
a 7/16" open-end wrench ASSEMBLY BULKHEAD MANIFOLD
to remove it from the
straight Fitting on the Filter.
Move the Bracket Figure 66
subassembly to the
workbench. Use a
3/32" Allen wrench to
BUMPER
remove
the
two
PAD (X2)
mounting Screws (PN
510404) for the Lid
and the two Screws
(PN 510309) for the
Filter (see Fig. 66).
BOTTLE CAP
FILTER
Inspect and replace MOUNTING SCREWS MOUNTING SCREWS
the two Bumper Pads
(PN 850067) if necessary. Clean or replace Filter (PN
730495) as necessary. Check Bottle Gasket (PN 730473)
located inside the Lid (Fig. 65) for wear/leakage and replace
as necessary.
DIVIDER WALL
The Divider Wall (PN 462000) is located in the top
compartment of the
Figure 67
Transport III Case
(Fig. 67).
UPPER
MTG.
Use a 5/64" Allen
SCREWS
(X2)
wrench to remove
the
two
upper
DIVIDER
mounting Screws
WALL
LOWER
(PN 510808) and
MTG.
the three lower
SCREWS
(X3)
mounting Screws
(PN
510037).
Remove Wall and
set
aside
for
reassembly later. Inspect the large foam Pad (PM 462100)
and replace if necessary.
STORAGE SHELF
The Storage Shelf Figure 68 GROMMET
(PN 462098) is
located in the top
MTG.
compartment of the
SCREWS
Transport III Case
(X2)
(Fig. 68). Use a
STORAGE
5/64" Allen wrench
VACUUM
SHELF
to remove the two
TUBE
BAFFLE
mounting Screws
(PN 510037) that
attach the Shelf to
the
adjoining
BUNGEE
CORD
Vacuum
Tube
w/HOOK
Baffle.
Remove
Shelf and place aside for reassembly later. To remove the
Bungee Cord (PN 730370), untie the knot in the Cord and
pull the Cord up through the rubber Grommet (PN 870326).
Place Cord aside for reassembly later. Inspect and replace
plastic Hook (PN 730371) if damaged.
a 5/64" Allen wrench Figure 70
to remove the two
LARGE MTG. CLIP
mounting Screws
(PN 510037) that
SMALL MTG.
attach the Baffle to
CLIP (X2)
the Compressor Top
Panel.
Remove
Baffle and move it to
VACUUM TUBE
workbench if further
BAFFLE
disassembly
is
(Part B)
required. At the
VELCRO
bench, use a 3/32"
STRAP
Allen wrench to
remove
the
MTG. SCREWS (X2)
mounting
Screw
(PN 510404) from
the large Mounting Clip (PN 730445). The two smaller
Mounting Clips (PN 510699) are Riveted (PN 510772) to the
Baffle and cannot be detached. Unhook Velcro Strap (PN
462145) and replace if necessary.
COMPRESSOR ASSEMBLY TOP PANEL
The entire Compressor Assembly can be detached and
pulled out of the Transport III Case for component
disassembly.
Use a 3/32" Allen wrench to remove the two mounting
Screws
(PN Figure 71a
MOUNTING
510404) located on
SCREWS
the Compressor Top
Panel (see Fig.
71a). Use a 5/32"
COMPRESSOR
Allen wrench to
TOP PANEL
remove
all
the
Compressor
Assembly mounting
hardware located on Figure 71b
the bottom of the
MOUNTING
Case (see Fig. 71b).
HARDWARE
WASHER
VACUUM TUBE BAFFLE (PART A)
The Vacuum Tube Figure 69
Baffle - Part A (PN
4620001) is located
MTG. SCREWS
in
the
top
(X2)
compartment of the
VACUUM TUBE BAFFLE
Transport III Case
(Part A)
(Fig. 69). Use a
5/64" Allen wrench
VACUUM TUBE BAFFLE
to remove the five
(Part B)
mounting Screws
(PN 510037) that
attach the Baffle to
MTG.
SCREWS
the adjoining Baffle
(X5)
Part B. Use a
Phillips screwdriver to remove the two mounting Screws (PN
510781) at the top of the Baffle that attach it to the Bulkhead
Insert. Remove Baffle and place aside for reassembly later.
VACUUM TUBE BAFFLE (PART B)
The Vacuum Tube Baffle - Part B (PN 4620002) is located in
the top compartment of the Transport III Case (Fig. 70). Use
(PN 510837)
SCREW
(PN 510295)
BUSHING
BUMPER
WASHER
(PN 520118)
(PN 850082)
SCREW
(PN 510837)
(PN 510294)
Pull the High Vacuum and Low
Vacuum Hoses down inside the
Case top compartment, to
provide
slack
when
removing the Compressor Figure 72
Assembly (see Fig. 72).
Carefully pull the entire LOW VAC
Compressor Assembly out HOSE
of the Case and place in
front of Case temporarily.
Leave all tubing attached.
A Top Panel (PN 462063)
covers the Compressor
Assembly (Fig. 72). Use a
5/64" Allen wrench to
remove the six Screws (PN
BUSHING
(PN 520118)
HIGH VAC HOSE
TOP
PANEL
COMPRESSOR ASSY
Page 13
DISASSEMBLY - Cont’d
510037) that mount the Figure 73
Panel to the Compressor.
Remove Panel (see Fig.
73) and place aside for
reassembly later. If the
Handle (PN 850075) on the
Panel needs replacment,
use a 4mm Allen wrench to
(TOP PANEL REMOVED)
remove the two mounting
Screws (PN 510717) and
Lockwashers (PN 510420).
VACUUM HOSE FITTINGS
Locate the Air/
Electric
Manifold Figure 74a HIGH VAC HOSE
LOW VAC
Door on top of the
HOSE
Case. Open Door to
access the High and
Low Vacuum Hose
end Fittings inside
the Bulkhead Insert BULKHEAD
INSERT
(Fig. 74a). Use
Figure
74b
LOW VACUUM
adjustable channel
HOSE FITTING
lock pliers to pry off
the Ferrule (PN (FERRULES)
462138) and then
(O-RINGS)
the Fitting (PN
462021) on the
HIGH VACUUM
larger High Vacuum
HOSE FITTING
Hose (PN AA-259)
(see Fig. 73b). Inspect O-Ring (PN 520101) for wear and
replace if necessary. Next, remove Ferrule (PN 462139) and
Fitting (PN 462022) Figure 75
on the Low Vacuum
Hose (PN 730489)
(Fig. 73b). Inspect
O-Ring
(PN
520100) for wear
and
replace
if
necessary. Pull both
VACUUM
HOSES
COMPRESSOR ASSY
Vacuum
Hoses
ends down through the Bulkhead Insert. Leave opposite
ends attached to the Compressor Assembly (Fig. 75).
BULKHEAD INSERT TUBE GUARD
Locate the Cable Tie
DISPLAY MODULE
POWER CABLE
(PN 510137) that
straps the Display Module Power Cable (PN 875118) to the
Compressor Assembly (see Fig. 77). Cut the Tie to provide
additional slack for the Power Cable.
Carefully rotate the Compressor Assembly onto its back side
(see Fig. 78) (Place a protective pad under the Assembly to
prevent scratching.)
Figure 78
DISPLAY
MODULE
PWR CABLE
MTG. HARDWARE
(X4)
(MOTOR HOUSING COVER)
ROTATE
COMPRESSOR
ASSEMBLY
MOTOR HOUSING COVER
Locate the four mounting Screws Figure 79
that attach the Motor Housing
Cover to the Compressor
Assembly (see Fig. 78). Use a
5/64" Allen wrench to remove the
Screws (PN 510160), metal
ELECTRICAL PANEL
Washers (PN 510431), and
Rubber Washers (PN 510827).
Carefully lift the Cover off the
Compressor Assembly and set
aside until reassembly later (see MOTOR HOUSING COVER
Fig. 79)
Figure 80
24V PWR SUPPLY
48V PWR SUPPLY
}
Locate the Bulkhead Insert Tube Guard (PN 462147), which
is located inside the
Figure 76a
Case, mounted to
MANIFOLD INSERT
(Viewed From Inside
the bottom side of
The Case)
the Insert (see Fig.
76a). Use a Phillips
screwdriver
to
TUBE GUARD
MTG SCREWS (X2)
remove the two
SLEEVE CLAMPS
mounting Screws Figure 76b
(PN
510781).
Remove the Guard
and set aside for reassembly later. Use
1/8" & 1/4" TUBES
diagonal cutters to
pry off the 1/8" &
1/4" Tube Sleeve
TUBE GUARD
Clamps
(PNs
Page 14
730015 & 730095) (Fig. 76b). Then, remove the Red Tube
(PN AA-94R), Green Figure 77
Tube (PN AA-94G),
and Gray Tube (PN
CABLE
TIE
AA-96) from their
fittings. Leave the
opposite ends of the
Tubes attached to
the
Compressor
Assembly.
CONNECTOR
CONNECTOR
DISPLAY MODULE
POWER CABLE
GROUND WIRE
MTG NUT
CABLE TIE (X4)
ELECTRICAL PANEL
The Electrical Panel is located beneath the Motor Housing
Cover (Fig. 79). Locate the Display Module Power Cable
and follow it's leads to the two power supplies on the
Electrical Panel (Fig. 80).
Cut the three Cable Ties (PN 510137) that secure the
Display Module Power Cable to the Electrical Panel (Fig.
80). Leave the three Tie Mounts (PN 510179) in place, for
reassembly later. Use a 5/16" open-ended wrench to
remove the Power Cable Grounding Nut (PN 510293) and
Lockwasher (PN 510419) from the stud on the Electrical
Panel (see Fig. 80).
Figure 81a
Figure 81b 24V POWER SUPPLY
(Underside)
2-WIRE
CONNECTOR
GROUND
WIRE RECEPTACLE
48V POWER SUPPLY
4-PIN RECEPTACLE
2-WIRE
CONNECTOR
48V POWER SUPPLY
The 48V Power Supply (PN 840087-01) provides power to
the Electric Motor Assembly. Detach the Power Cable 2-wire
connector from the 'CN2" 4-pin receptacle on the Supply's
PCB (Fig. 81a). Note the orientation of the connector to the
PCB receptacle latch and pin-position of red wire.
24V POWER SUPPLY
The 24V Power Supply (PN 840120) provides power to the
Scaler Assembly. To access the Supply's power connector,
which is situated on the Supply's underside, the Supply must
first be removed from its mounting Standoffs and turned
over. Use a 1/16" Allen wrench to remove the four Screws
(PN 510016) and Washers (PN 510573) that secure the
Supply to the four Standoffs (PN 462244). Carefully lift the
Power Supply off the Standoffs, then detach the Power
Cable's 2-wire connector from the 'CN2' 4-pin receptacle on
the Supply's PCB (Fig. 81b). Note the orientation of the
connector to the receptacle latch and the pin-position of the
blue wire. Detach the other 2-wire connector from the 'CN1'
receptacle on the Figure 82
MANIFOLD INSERT
Supply's PCB, then
set the 24V Power
Supply aside for
reassembly
later.
Also
note
the
orientation of this
CABLE CLAMP
connector to its
receptacle
latch.
Unscrew the four
Standoffs
(PN
462244) from their DISPLAY MODULE POWER CABLE
studs on the Electrical Panel and place aside for reassembly
later. IMPORTANT: The 24V Power Supply is not a
customer-serviceable item. Replace the entire Supply or
return it to Aseptico if repairs are required.
Locate the Cable Figure 83
Clamp (PN 510410)
for
the
Display
MANIFOLD INSERT
Module
Power
Cable, which is
MTG.
mounted inside the
SCREW
Case, just below the
(X2)
Manifold Insert (see
Fig. 82). Use a 3/32"
DISPLAY MODULE POWER CABLE
12-PIN SOCKET
Allen wrench to
(INSERT
DOOR)
remove the Clamp
mounting Screw (PN
510404). Remove Clamp and set aside for reassembly later.
DISPLAY MODULE POWER CABLE
At the top of the case, open the door to the Manifold Insert
and locate the Display Module Power Cable 12-Pin Socket.
This
Socket
is Figure 84
mounted into the
center of the Insert
48V POWER SUPPLY
housing with two
integral screws (see
Fig. 83). Use a
Phillips screwdriver
to remove the two
mounting screws,
INSULATOR
'CN1'
then feed the entire
PAD
RECEPTACLE
Power Cable up and
out through the Insert housing. Place the Cable Assembly
aside for reassembly later. Inspect the Cable for damage or
faults and replace entire Cable if problems are found.
Detach the remaining 2-wire connector from the 'CN1'
receptacle on the 48V Power Supply (Fig 84). Note the
orientation of the 2-wire connector to the receptacle latch.
Use a 1/16" Allen wrench to remove the four Screws (PN
510016) and Washers (PN 510573) that secure the Supply
to the four Standoffs (PN 462244). Carefully lift the Power
Supply off the Standoffs. and set aside until reassembly
later. Unscrew the four Standoffs on the Electrical Panel and
place aside for reassembly later. Remove the Insulator Pad
(PN 462081) under the Standoffs and set aside for
reassembly later. IMPORTANT: The 48V Power Supply is
not a customer-serviceable item. Replace the entire Supply
or return it to Aseptico if repairs are required.
CONTROL BOARD PCB
A smaller 24V Power Supply (PN 840093) provides power to
the Electronic Control Board (PN 330604) (Fig. 85, page 16).
This Power Supply is mounted to the top of the Control
Board PCB and can be detached if necessary.
Detach the three flag-type wire terminals from connectors
'T1', 'T2', and 'T3' on the Control Board PCB (see Fig. 86).
Note the color-arrangement of the wires and the connectors.
Next, detach the four wire connectors at the PCB sockets
marked 'J_WASTE', 'J_SOL', 'J_PRESS SW', and 'J_LEDS'.
Note the alignment of the connectors to the socket latches,
and the wire color positions. Use a 1/16" Allen wrench to
remove the four mounting Screws (PN 510016), split
lockwashers (PN 510433), and flat nylon washers (PN
510657) that mount the Control Board PCB to the four
Standoffs (PN 510760). Next, use a 5/64" Allen wrench to
Page 15
DISASSEMBLY - Cont’d
Figure 86
'J_SOL'
CONNECTOR
ELECTRICAL PANEL 10-POS TERMINAL BLOCK
'J_PRESS_SW'
CONNECTOR
'J_WASTE'
CONNECTOR
'J_LEDS'
CONNECTOR
Rotate the Compressor Assembly so the Electrical Panel is
facing forward (Fig. 88). Locate the two red wire connectors
Figure 88
(ELECTRICAL PANEL ROTATED FORWARD)
CABLE
TIE
MOUNTING
SCREWS (X4)
(24V PWR
SUPPLY)
CONTROL
BOARD
PCB
'T3'
'T1'
CABLE
TIES
(X8)
'T2'
INSULATOR
PAD
STANDOFF
(X4)
HEATSINK
Figure 85
24V POWER SUPPLY
remove
the
mounting Screw
(PN 510160) that
CONTROL
attaches the the
BOARD
Heatsink
(PN
PCB
462111) to the
PCB. Carefully lift
the Control Board
MOUNTING
Assembly off the
PINS (X4)
Standoffs and move to a workbench for further disassembly.
Use a 1/4" open-ended wrench to remove the four Standoffs
then remove the Insulator Pad (PN 462080) and set aside
for reuse later.
from the Unloader Solenoid
Cable
Assembly
(PN
875115) and the two red
connectors
from
the
Pressure Control Switch
Cable
Assembly
(PN
(TAG WIRE
875116) in the upper right- CONNECTIONS)
hand corner of the Panel
(see Fig. 88 inset). Disconnect all four wire connectors. Cut
all cable ties located on the front of the Electrical Panel and
along the edge of the Cooling Fan.
Locate the four mounting Screws (PN 510037) that attach
the Electrical Panel to the Compressor Assembly (see Fig.
88) and remove them using a 5/64" Allen wrench. Carefully
lower the top front edge of the Panel downward to expose
the back side of the Panel.(Fig. 89).
Figure 89
At the workbench, cut and remove the Cable Tie (PN
510628) that straps the Power Supply to the Control Board
PCB. Lift the Power Supply straight up and off the mounting
pins on the PCB . IMPORTANT: The Power Supply and
Control Board PCB assemblies are not customer
serviceable. If repairs are required to either assembly,
replace the entire item or return it to Aseptico for service.
COMPRESSOR
GROUND WIRE
WASTE CONNECTOR CABLE ASSEMBLY
Locate the Waste Figure 87
MTG SCREW (X2)
Connector Cable
WASTE
Assembly Bracket
CONNECTOR
(Part of Cable Assy
BRACKET
PN 875114) (Fig.
87). Cut the two
Cable Ties (PN
510137) that bundle
the wiring to the
CABLE TIE (X2)
Control
Board
Assembly (see Fig. 86 above). Use a 5/64" Allen wrench to
remove the two mounting Screws (PN 510037) for the
Bracket. Remove Bracket and Cable Assembly and set
aside for reassembly later.
Page 16
GROUND WIRE
MTG HARDWARE
PRESSURE CONTROL
SWITCH CABLE
CONNECTORS
Locate
and
disconnect
the
two pink female
wire connectors
from the Pressure
Control
Switch
Cable Assembly.
Locate
and
detach
the
COMPRESSOR
MOTOR WIRING
TERMINAL
BLOCK
green/yellow ground wire from the Compressor to the
grounding hardware on the back side of the Electrical Panel,
using a 5/16" open ended wrench.
Figure 91
ELECTRICAL PANEL BACK SIDE
Locate the 10-Position Terminal Block (PN 860278) on the
back side of the Electrical Panel (Fig. 89). Note the wire
colors and terminal positions of the eight wires coming from
the Compressor Motor Assembly. Use a small jeweler's
screwdriver to detach these eight wires from the Block.
NOTE: When rewiring the System, refer to the Final
Assembly Wiring Schematic. Move the Electrical Panel to
the work bench for further disassembly (Fig. 90).
COOLING FAN
The Cooling Fan (PN 540012) is located on the Electrical
Panel (Fig. 90). Follow the white and black wires from the
Fan to the terminal block on the opposite side of the Panel.
Use a small jeweler's screwdriver to detach the two wires.
On the front side of the Electrical Panel, remove the four
screws (PN 510160) that mount the Fan to the Panel with a
5/64" Allen wrench. Feed the two wires through the
grommeted hole in the Panel and remove Fan.
Reassemble Fan in the reverse order with the air flow
indicator on the Fan pointing toward the front side of the
Panel. Refer to the Final Assembly Wiring Schematic for
proper installation.
Figure 90
ELECTRICAL PANEL BACK SIDE
COOLING
FAN
COMPRESSOR CIRCUIT BREAKER
remove the two
Grounding Nuts
POWER
(PN 510293) and
ENTRY
CIRCUIT Lockwashers (PN
BREAKER 510419).
Remove
the
three
POWER
VOLTAGE
INLET
blue female wire
SELECTOR
SOCKET
SWITCH
connectors from
POWER
the
three
ENTRY
GROUND terminals on the
WIRE
power
inlet
socket. Set the Ground Wire aside for reassembly later.
Remove the two blue flag-type wire connectors from the
terminals on the Power Entry Circuit Breaker and set the two
wires aside. Remove the six red flag-type wire connectors
from the terminals on the Compressor Breaker.
Figure 92
VOLTAGE
SELECTOR
SWITCH
PANEL FRONT SIDE
RED &
ORANGE
WIRES
COOLING FAN WIRE/TERMINAL POSITIONS
(BLK: POS 4)
(WHT: POS 7)
MTG SCREWS
(X4)
CABLE TIES
(X3)
VOLT SELECTOR WIRE/TERMINAL POSITIONS
(ORANGE: POS 2)
(RED: POS 1)
CIRCUIT
BREAKERS
The Circuit Breaker Housing (PN 462017) is located on the
front of the Electrical Panel. The Housing provides an
enclosure for the Power Entry Circuit Breaker (PN 840119),
Compressor Circuit Breaker (PN 830143), and the Voltage
Selector Switch (PN 840084) (see Figs. 91 & 92).
Note the wiring configuration on the back side of the Circuit
Breaker Housing. Tag the mating female wire terminals at
each Breaker terminal to assure proper rewiring later - refer
to Electrical Schematic in Final Assembly Drawing for proper
wiring configuration. Locate the green/yellow grounding wire
from the power inlet socket on the Power Entry Circuit
Breaker (Fig. 92). Use a 5/16" open-ended wrench to
Cut the three cable
ties (PN 510137)
around the wire
bundles on the back
side of the Panel (see
Fig. 92). Locate the
red and orange wires
from the Voltage Selector Switch and trace them back to the
10-position terminal block (see Fig. 92 Inset). Use a small
jeweler's screwdriver to detach the two wires from positions
#1 and #2.
At the Voltage Selector Switch carefully pull the red and
orange wires through the terminal block grommet and all the
way through the wire bundle heatshrink tube (Fig. 93).
Page 17
DISASSEMBLY - Cont’d
At the Voltage Selector Switch, locate the crimp that
connects the three blue wires together. At the crimp, cut the
single blue wire that leads directly to the Voltage Selector.
Figure 93
CUT THIS
WIRE HERE
REMOVE THIS FLAG TERMINAL
breakers in place. Use a small flat screwdriver to depress
the locking tabs located on the sides of the Power Entry and
Compressor Breakers and pull each Breaker out through the
front side of the Housing. Set the Breakers and the Housing
aside for reassembly later. Replace Breakers if necessary.
POWER INLET LINE FILTER (EMI)
RED &
ORANGE
WIRES
NOTE: During reassembly, reconnect the
three
blue
Voltage
Selector wires shown
here using a Panduit
Model CT-1551 crimp
VOLTAGE
tool, or equivalent tool
SELECTOR
capable of #22-10 AWG
SWITCH
contour crimps. When
reconnecting a new flag terminal to the black wire shown
here, use a Molex Model 640014100 tool, or equivalent tool
capable of crimping flag terminals.
On the front side of the Electrical Panel, use a 5/64" Allen
wrench to remove Figure 94
MOUNTING SCREWS
the four Screws (PN
(X2 Each Side)
510037) that mount
the Circuit Breaker
Cover (PN 462017)
to the Electrical
Panel (see Fig. 94).
Move the Cover
subassembly to a
work bench for
c o m p o n e n t
disassembly
if
CIRCUIT BREAKER COVER
required (see Fig.
95).
Use a 9/16" open- Figure 95 COMPRESSOR LED CABLE ASSY
CIRCUIT
ended wrench or
BREAKER
pliers to loosen the
mounting nut on the
LED
GROMMET
inboard side of the DIFFUSER
LENS (X2)
Voltage
Selector
Switch (Fig. 95). VOLTAGE
POWER
ENTRY
Back the nut off the SWITCH
CIRCUIT
MOUNTING
Switch by hand and
BREAKER
NUT
then slide the nut off
the four wires. Pull
LOCKING TAB (Typical)
the Switch and four
wires through the front side of the Cover and set aside for
reassembly later. Detach the two leads on the LED Cable
Assembly (PN 875117) from the two LED Diffuser Lenses
(PN 850078). Slide Grommet (PN 870185) out of hole in
circuit breaker cover around LED wires. Carefully pull the
LED Cable Assembly out of the Housing and set aside for
reassembly later. Cut the silicone RTV locking the circuit
Page 18
The Power Inlet Figure 96
Line Filter (PN
840121) is mounted
to the back side of
the Electrical Panel
(Fig. 96). Disconnect
the
four
MOUNTING
SCREWS (X2)
t e r m i n a l s / w i r e s EMI FILTER
attached to the Filter. Use a 5/64" Allen wrench to remove
the two mounting Screws (PN 510037). Remove Filter and
set aside for reassembly later. Replace Filter if necessary.
MOTOR HOUSING - LEFT WALL ASSEMBLY
The Left Wall (PN 462010) of the Motor/Compressor can be
detached as a subassembly and then moved to a work
bench for component disassembly.
Cut the four Cable Figure 97
Ties (PN 510137)
around the Low
Vacuum Hose (PN
AA-86G) (Fig. 97).
Use pliers to pry off
the three large
Hose Clamps (PN
510425) around the
two High Vacuum
Hose sections
(PN AA-259).
Remove
the
LOW
High and Low VACUUM
Vacuum Hoses HOSE
from their fittings and place
aside for reas- CABLE
TIES
sembly
later. (X4)
Note that the
Low Vacuum
Hose is comprised of two
sections, joined
together with a
straight barbed VACUUM
Fitting
(PN SPLITTER
730558).
LEFT WALL ASSEMBLY
HIGH
VACUUM
HOSE
HOSE
CLAMPS
(X3)
VACUUM
VALVE
SLEEVE
CLAMP
LOW
VAC
HOSE
SWITCHING
MODULE MANIFOLD TUBE
MTG
SCREWS
(X2)
On the inboard side of the Left Wall Assembly, in the lower
left-hand corner, locate the red 1/8" Tube (PN AA-94R),
which leads from the Switching Module Manifold Assembly
(see Fig. 97 inset). Use diagonal cutters to work the 1/8"
Sleeve Clamp (PN 730015) off the Tube, then disconnect
the Tube from the fitting on the Vacuum Valve.
Use a 5/64" Allen wrench to remove the two mounting
Screws (PN 510160) located at the base of the Left Wall
Assembly (see Fig. 97 inset).
Locate the two Figure 98
mounting Screws
(PN 510037) in the
MOUNTING
top left corner of the
SCREWS
Left Wall Assembly
(X2)
COUPLER
(Fig. 98). Remove
Screws, using a
5/64" Allen wrench.
Locate the two 1/2"
gray vacuum Hoses
(PN
730373)
leading from the
two Venturi AssemVACUUM HOSES (X2)
blies to the Vacuum
Splitter Valve and Vacuum
Valve. Disconnect Hoses
from the Valves' fittings.
Hold the Left Wall
Assembly and carefully
guide it over and off the
Elbow
Fitting
(PN
730484).
Move
the
Assembly to a workbench
for component disassembly
- if necessary.
ELBOW
FITTING
VACUUM
SPLITTER
VALVE
VACUUM
VALVE
O-RING
MOUNTING
SCREWS
(X4)
Locate the four mounting
Screws (PN 510618) that
SPLITTER
attach the Splitter Valve and
VALVE
Vacuum Valve to the Wall
plate (Fig. 98). Remove the
Screws using a #1 Phillips
VACUUM
screwdriver and carefully
VALVE
separate the two Valves
from the Wall. Note the OSPACER
Ring (PN 520079) and
Spacer
(PN
462086)
located between the two Valves. Inspect the O-Ring for
cracks or leakage and replace if necessary. IMPORTANT:
Disassembly of the Vacuum Splitter and Vacuum Valves is
not recommended unless Valve malfunction or breakage
occurs. Refer to the parts breakdown on page 37 for parts
configuration and ordering information for these Valves.
MOTOR HOUSING - RIGHT WALL ASSEMBLY
The Right Wall (PN 462016) of the Motor/Compressor can
be detached as a subassembly and then moved to a work
bench for component disassembly.
Locate the 1/4" black inline filter Tube (PN 730130) which is
attached between the Inline Filter and the elbow fitting
leading through the Right Wall (see Fig. 99). Use a 7/16"
open-end wrench to Figure 99
RIGHT WALL ASSEMBLY
detach the nut at the
filter end of the
Hose. NOTE: To
simplify reassembly
later, leave this nut
attached to this
Hose end; the other
end can remain
attached to the
INLINE FILTER
elbow in the Wall.
On the opposite side
of the Wall Assembly,
locate the loose end of
INLINE FILTER HOSE
the red 1/8" Switching
Manifold Tube and
carefully
draw
it (DETACH
THIS
forward, out of the
END)
Compressor compartment (see Fig. 100). Figure 100 RIGHT WALL ASSEMBLY
Next, use diagonal
cutters to pry the
Sleeve Clamp (PN
730095) off the gray
1/4" Venturi-Muffler
Hose (PN AA-95G),
then detach the Hose
from the fitting on the
Switching Manifold
(PULL TUBE FORWARD)
Assembly.
On the front of the Wall
Assembly, use a 5/64"
Allen wrench to remove
the mounting Screw (PN
510037) at the top righthand corner, and the two
Screws (PN 510160) at the
base of the Wall (Fig. 101).
SWITCHING
MODULE
MANIFOLD
(DETACH
Carefully lift the Right Wall THIS END)
Assembly
off
the
Compressor Assembly and VENTURI MUFFLER
HOSE
move to a workbench for
further
component
Figure 101
disassembly.
VENTURI
MUFFLER ASSY
MOUNTING
SCREW (X1)
IMPORTANT:
Disassembly of the Right Wall
Assembly is not recommended unless component
malfunction
or
breakage occurs. Refer to
the assembly breakdown
on page 42 for parts
configuration and ordering
information.
If further disassembly is
necessary, remove the
main components as
follows:
MOUNTING
SCREWS (X2)
Page 19
DISASSEMBLY - Cont’d
Figure 102
CABLE TIE(S)
HOSE FITTING
PRESSURE
SWITCH
ELBOW
1/4"
BRAIDED
HOSE
3-WAY
AIR
VALVE
ELBOW TO
COMPRESSOR
AIR FILTER
RIGHT WALL ASSEMBLY
SWITCHING
MODULE
MANIFOLD
MTG SCREWS
(X2)
Pressure Switch (PN 830142): On the outboard side of the
Wall (Fig. 102), use a 7/16" open-end wrench to remove the
hose fitting from the pressure switch Elbow (PN 730351) and
disconnect the gray 1/4" Hose (PN AA-95G) end from the
Elbow. Then, on the inboard side of the Wall (Fig. 103),
disconnect the two red wire-connectors from the Pressure
Switch terminals. Use a 1" thin open-end wrench to hold the
Pressure Switch Mounting Nut while spinning off the Elbow
with a 9/16" open-end wrench. Remove Switch, Elbow, and
Washer and set aside for reassembly later.
Figure 103
PRESSURE
SWITCH
Switching Module Manifold (PN 330594): On the inboard
side of the Wall (Fig. 103), use diagonal cutters to pry the
two 1/8" tube Sleeve Clamps (PN 730015) from the Red
Tube (PN AA-94R) and Green Tube (PN AA-94G), then the
1/4" Clamp (PN 730094) and gray braided Hose (PN AA-96).
Set all Tubes and Hoses aside for reassembly later. On the
outboard side of the Wall (Fig. 102), use a 5/64" Allen
wrench to remove the two mounting Screws (PN 510037)
that attach the Switching Module to the Wall. Remove
Module and set aside for reassembly later.
3-Way Air (Unloader) Valve (PN 730578): On the inboard
side of the Wall (Fig. 103), use a 9/64" Allen wrench to
remove the two mounting Screws (PN 510764) that attach
the 3-Way Valve and two Spacers (PN 462094) to the Wall.
Refer to the 3-Way Air Valve subassembly breakdown on
page 42 if further disassembly is required. If the Elbow (PN
462094) that leads through the Wall to the Compressor Air
Filter needs to be removed, use a 9/16" open-end wrench to
hold the Elbow while spinning off the Hose Fitting (PN
730117) with a 7/16" wrench. Cut the Cable Ties (PN
510137) as necessary to free up the two wire leads from the
Valve. Draw the gray braided pressure regulator Hose
through the grommet in the Wall and place the Valve and its
fixtures and hoses aside for reassembly later.
VENTURI & MUFFLER BRACKET ASSEMBLY
The Venturi & Muffler Bracket Assembly is located on the
back side of the Compressor Assembly (Fig. 104). Locate
the Vacuum Hose (PN 730130) leading from the
Compressor Vacuum Head to the Venturi/Muffler Assembly
#2. Use a 7/16" Allen wrench to disconnect the Vacuum
Figure 104
VENTURI & MUFFLER
BRACKET ASSEMBLY
DISCONNECT
THIS VACUUM
HOSE FITTING
COMPRESSOR
VACUUM
HOSE TO
VENTURI #2
PRESSURE SWITCH MOUNTING NUT
WIRE
CONNECTORS (X2)
3-WAY VALVE
MTG SCREWS
(X2)
VENTURI
/MUFFLER
ASSY #2
BRAIDED
HOSE
1/8"
TUBES
ELBOW
HOSE
FITTING
MOTOR
CAPACITOR
VENTURI/MUFFLER ASSY #1
SWITCHING
MODULE
MANIFOLD
RIGHT WALL ASSEMBLY
Page 20
Hose fitting, at the Compressor
Head. Carefully lean the Bracket
Assembly away from the
Compressor Assembly and detach the two brown motor
wires with the blue Connectors (PN 860052) from the bottom
of the motor capacitor. Then, move Bracket Assembly to the
MOTOR WIRE CONNECTORS
(X2)
workbench for further disassembly (Fig. 105).
IMPORTANT: Disassembly of the Venturi & Muffler Bracket
Assembly is not recommended unless component
malfunction or breakage occurs. Refer to the assembly
breakdown on page 43 for parts configuration and ordering
information. If further disassembly is necessary, remove the
main components as follows:
Stall Sensing Switch (PN 875120): Use diagnonal cutters to
pry off the Sleeve Clamp (PN 730015) and 1/8" clear Tube
(PN AA-94C) that is attached between the Stall Sensing
Switch and the Venturi Muffler Assembly #2 (see Fig. 105b).
Cut the Cable Tie (PN 510137) that secures the two Switch
Figure 105a
or box wrench to remove the two Nyloc mounting nuts that
attach the Motor Capacitor Bracket to the Venturi Bracket
(PN 462107) (Fig. 105a).
Hoses: Remove 1/4" and 1/2" hoses from the Venturi/Muffler
Assemblies as necessary (Figs. 105a & 105b). Use a 7/16"
open-end wrench to remove the 1/4" hose fittings. The 1/2"
hoses can be pryed off their fittings by hand.
Venturi/Muffler Assemblies #1 & #2: Use a 3/32" Allen
wrench to remove the two mounting Screws (PN 510309)
and Nylon Gaskets (PN 730074) on each Venturi/Muffler
Assembly (Fig. 105a). Set Assemblies aside for reassembly
later. NOTE: If the Venturi/Muffler Assemblies require
additional breakdown, refer to their Parts Lists on page 43.
VENTURI & MUFFLER BRACKET ASSY - (Inboard View)
COMPRESSOR/VACUUM PUMP ASSEMBLY
CABLE
TIE
MTG LOCKNUT
STALL SENSING
SWITCH
MOTOR CAPACITOR
VENTURI
/MUFFLER
ASSY #2
1/2" HOSE TO
VACUUM SPLITTER
BRACKET
MOUNTING
NUTS (X2)
The Compressor Assembly is comprised of a compressor
motor with a split head, which provides pressure on one side
and vacuum on the other (Figs 106a & 106b). The
Compressor motor includes a vibration mount assembly,
which is bolted to the bottom of the AEU-525CF Case (see
Fig. 107).
Figure 106a
COMPRESSOR/VACUUM PUMP ASSY - (Front View)
(VACUUM END)
(PRESSURE END)
COUPLER
VENTURI
/MUFFLER
ASSY #1
INLET
AIR
FILTER
VENTURI/MUFFLER
ASSY MOUNTING
HARDWARE
(X4)
Figure 105b
VENTURI & MUFFLER BRACKET ASSY - (Outboard View)
STALL SWITCH
STALL
MOTOR CAPACITOR
TUBE
SWITCH
BRACKET
IN-LINE
AIR
FILTER
(TO
VACUUM
SPLITTER)
MOTOR CAPACITOR
VENTURI
/MUFFLER
ASSY #2
1/4" HOSE TO
COMPRESSOR
VENTURI
BRACKET
1/4" HOSE TO
SWITCHING
MODULE
MANIFOLD
1/2" HOSE TO
VACUUM VALVE
VENTURI
/MUFFLER
ASSY #1
wires to the Clip Mount (PN 510759) on the Motor Capacitor
Bracket (PN 462106). Use a 9/16" open-end wrench to
loosen the mounting nut on the top side of the Switch, then
spin the nut and lockwasher (part of Switch Assembly) off the
threads. Feed the two Switch wires through the nut and
lockwaser and then pull the Switch down through the
mounting hole in the Bracket. Place Switch aside for
reassembly later.
Motor Capacitor (Part of Compressor Motor): Use a 11/32"
open-end or box wrench to remove the Nyloc mounting Nut
(PN 510411) that attaches the Motor Capacitor to the
Capacitor Bracket (Fig. 105b). Remove Capacitor and place
aside for reassembly later.
Motor Capacitor Bracket (PN 462106): Use a 1/4" open-end
MOTOR
GROUND
WIRE
Figure 106b
(TO
UNLOADER
VALVE)
COMPRESSOR/VACUUM PUMP ASSY - (Rear View)
(PRESSURE
END)
(VACUUM
END)
COLD
START
VALVE
(TO VENTURI
/MUFFLER
ASSY #2)
MOTOR
CAPACITOR
WIRING
VIBRATION MOUNT
ASSEMBLIES (X2)
IMPORTANT: Disassembly of the Compressor/Pump
Assembly is not recommended unless component
malfunction or breakage occurs. Refer to the Assembly
breakdown on page 44 for parts configuration and ordering
information. If further disassembly is necessary, remove the
main components as follows:
Page 21
DISASSEMBLY - Cont’d
In-Line Air Filter (PN 730001): Use a 3/8" open-end wrench
to disconnect the Elbow Fitting (PN 730120) from the Filter.
Use a 7/16" open-end wrench to remove Fitting (PN 730117)
and/or 1/4" black Tube (PN 730130) at the other end of the
Filter. Place Filter aside for reassembly later.
Figure 108a
1/4" TUBE
FITTING TO
AIR BOTTLE
DOOR HINGE
MTG NUT
(X2)
1/8" TUBE
FITTING TO
VACUUM VALVE
Inlet Air Filter (PN 730494): Unthread the Filter from
compressor head by hand. Inspect, clean, or replace, as
necessary. Place Filter aside for reassembly later.
Cold Start Valve (PN 330633): Use a 9/16" open-end wrench
to remove the Valve from the compressor head. Inspect
Valve and replace or set aside for reassembly later.
Coupler Fitting (PN 730153): Use a 5/8" open-end wrench to
detach the Elbow Fitting (PN 730484) on the end of the
Coupler, then use a 3/4" wrench to remove the Coupler.
Place Coupler aside for reassembly later.
Compressor Head Elbow Fittings and Plugs: Use a 3/8"
open-end wrench to remove the two Elbow Fittings (PN
730329) that lead from the Compressor heads to the In-Line
Filter and Venturi Assembly #2. Only if necessary, use a 1/4"
Allen wrench to remove the 1/4" Plugs (PN 730098) from the
Compressor Heads.
IMPORTANT: The Compressor Motor is not a customerserviceable item. Return the Motor to Aseptico if repairs are
required.
DRAIN
TUBE
Figure 108b
MTG
HARDWARE
(X7)
1/8" TUBE
FITTING TO
SWITCHING
MODULE
DELIVERY
MODULE
LOCK BLOCK
BULKHEAD INSERT DOOR
HINGE MTG NUTS
(X2)
DOOR/HINGE ASSY
MTG HARDWARE
(X2)
DOOR
FASTENERS
(X2)
LOCK BLOCK
MOUNTING
SCREWS (X3)
MOTOR MOUNT ASSEMBLY
The two Motor Vibration Mount Assemblies are located on
the bottom of the Compressor Motor (Fig. 107).
Use a 5/32" Allen Figure 107 RUBBER
WASHER
wrench
to
SPACER
(X4)
RUBBER
MTG
remove the four
(X4)
BUSHING
BOLT
Bolts
(PN
(X4)
(X4)
510295)
that
mount the two
Mounting Blocks
(PN 462082) to
the Motor. Note
MOUNTING
the
mounting
BLOCK
FENDER
(X2)
configuration of
WASHER
the Blocks, Bolts,
(X8)
Fender Washers
(PN 510703), Rubber Bushings (PN 870315, Rubber
Washers (PN 870316) and Spacers (PN 510779). Remove
both Mount Assemblies and set aside for reassembly later.
AIR-ELECTRIC BULKHEAD INSERT
The Air-Electric Bulkhead Insert (PN 462050) is located on
the top of the 525CF Case (PN 410201-08) (Fig. 108b).
IMPORTANT: Disassembly of the Bulkhead Insert is not
recommended unless component malfunction or breakage
occurs. Refer to the Assembly breakdown on page 29 for
parts configuration and ordering information. If further
disassembly is necessary, remove the Insert components as
follows:
Lay the Case down with the Case Lid facing up. Open the
Lid and locate the Drain Outlet Tube (PN AA-86G) that leads
from the bottom of the Insert inside the Case, to the drain
port on the back side of the Case (see Fig. 108a). Twist the
Tube off the plastic nipple on the bottom of the Insert. Locate
Page 22
the seven mounting Screws (PN 510790) and rectangular
Washers (PN 510784) that clamp the Insert to the underside
of the Case. Stand the Case upright and pull the Insert
subassembly up through the cutout in the top of the Case.
Move the Insert subassembly to a work bench if further
disassembly is required. At the bench, open the Insert Door
(PN 462047) to expose the three mounting Screws (PN
510160) that attach the Delivery Module Lock Block (PN
462076) to the Insert (see Fig. 108b). Use a 5/64" Allen
wrench to remove the Screws and Block and set aside for
reassembly later. Locate the two mounting Screws (PN
510016) and Nuts (PN 510394) that attach the Hinge (PN
462046) to the Door (Fig. 108b). Use a 1/16" Allen wrench to
remove the Screws while gripping the Nuts with a 1/4" openend wrench. If necessary, separate the Hinge from the Door
using a 1/4" open-end wrench to remove the two mounting
Nuts (PN 510394). Leave the two Fasteners (PN 510772),
Ejector Spring (PN 510775), and Retainers (PN 510774)
attached to the Door -- disassembly is unnecessary.
CASE & LID
IMPORTANT: Disassembly of the 525CF Case and Lid is
not recommended unless component malfunction or
breakage occurs. Refer to the Case breakdown on pages
30-32 for parts configuration and ordering information. If
further disassembly is necessary, remove the Case
components as follows:
Stand the 525CF Case upright and open the Lid (Fig. 109).
Use a Phillips screwdriver to remove the two Screws (PN
510774) do not Figure 110
need
to
be
removed
from WASTE TANK
the Door.
BRACKET
Figure 109
WATER
BOTTLE
STORAGE
BRACKET
CAP FOR
BOTTLE
STORAGE
TOOL
MTG HARDWARE
BOTTLE
HOLDING
STRAP
Use a Phillips
screwdriver and
11/32" open-end
wrench
to
remove the three
DOOR FASTENER
Screws
(PN
(X4)
510533) along
the top of the
Door Frame (PN
CASE VENT DOOR
(OPEN)
462003).
The
eight
other
Screws (PN 510545) and eleven Nuts (PN 510411) that
attach the Frame to the Case Lid. Set the Frame aside for
reassembly later. Locate the Waste Tank Bracket (PN
462105) on the outboard side of the Lid (Fig. 110). Use an
3/8" open-end or box wrench to remove the two Screws (PN
510124) and flat Washers (PN 510356) that attach the
Bracket to the Lid. Place Bracket aside for reassembly later.
FASTENER
TOOL
w/TETHER
BRACKET
MTG HARDWARE
(X2)
DOOR FRAME (TOP)
MTG HARDWARE (X3)
DOOR FRAME
DOOR FRAME
MTG HARDWARE
(X8)
HINGE STOP
MTG HARDWARE
DOOR
HINGE
(X2)
DOOR
HINGE
STOP
DOOR
HINGE
MTG
HARDWARE
CASE VENT DOOR
(CLOSED)
510655) and Washers (PN 510431) that attach the Water
Bottle Storage Bracket (PN 462109) to the Lid. If necessary,
remove the two mounting Screws (PN 510533) for the Bottle
Storage Cap (PN 462110), using a Phillips screwdriver.
Detach and replace Holding Strap (PN 462144) as
necessary. Locate the Fastener Tool (PN 462137) and
Coiled Tether (PN 520102) in the upper right-hand corner of
the Lid. Remove the Tool mounting Screw (PN 510655) and
Washer (PN 510445) with a Phillips screwdriver and detach
Tool from Case, if necessary.
Locate the Case Vent Door (PN 462004) on the outboard
side of the Lid (see Figs. 109 & 110). Unlock the four Door
Fasteners (PN 510772) and swing the Door open to expose
the two Hinges (PN 462005) and Hinge Stop (PN 510777).
Use a 3/32" Allen wrench to remove the two Screws (PN
510579) that mount the Hinge Stop to the door frame. Use a
1/16" Allen wrench to remove the four Screws (PN 510016)
and Lockwashers (PN 510433) that mount the two Hinges to
the Door Frame. Move the Vent Door subassembly to the
work bench for further disassembly. At the bench, use a 1/4"
open-end or box wrench to remove the six Nuts (PN
510434) and Lockwashers (PN 510433) that attach the
Hinges and Stop to the Door. Separate the Hinges from the
Door and set aside for reassembly later. The Door
Fasteners, Ejector Springs (PN 510775), and Retainers (PN
The
Case
Figure 111
Handle
and
Wheels
are
integrated into
the 525CF Case
Assembly (PN
41021-08). Both
components can
be
detached
from the Case if
necessary: use
a large (#3)
Phillips screwdriver to remove
the ten Screws
that mount the
Handle
and
Wheels to the
Case.
CASE
HANDLE & WHEELS
MTG HARDWARE
(X10)
THIS COMPLETES THE DISASSEMBLY PROCEDURE
FOR THE AEU-525CF TRANSPORT III SYSTEM.
REASSEMBLY:
To reassemble the AEU-525CF System, follow the above
instructions in the reverse order.
ALL TUBING
Refer to the plumbing diagram in Drawing Set, PN
420991, for the approximate length and part number of
the tube to be replaced.
ALL WIRING
Refer to the electrical schematic in Drawing Set, PN
420991, for the proper size and length of the wire to be
replaced
Page 23
FINAL ASSEMBLY PARTS LIST - Figure 112
(Sheet 1 of 9)
ITEM
1
2
3
4
5
6
7
8
9
10
11
12
13
14
15
16
17
18
19
20
21
22
23
24
25
26
27
28
29
30
31
32
33
34
35
36
37
38
39
40
41
42
43
44
45
46
47
48
49
50
51
52
53
54
55
56
57
58
59
60
61
62
63
64
PART NO
FINAL ASSY AEU-525
120379
BOTTLE 1 LITER (32 oz) BLOW MOLDED HDPE
730471
LABEL MYLAR AEU-425 WATER
420299
MOTOR/CABLE ASSY W/SHORT CABLE
AE-240SC-40
VALVE SAL/EJECT AUTOCLAVABLE LEVER DCI
AA-37LAD
TUBING SALIVA EJECT 3/8OD GRY
AA-86G
LOW VACUUM WASTE INLET FITTING AEU-525
462025
O-RING .234 ID X .070 CS SILICONE 2-010
520100
VALVE CENT VAC UNIV LEVER AUTO DCI
AA-35LAD
TUBING ASEPSI-FLEX 1/2ID GRY
AA-83A
HIGH VACUUM WASTE INLET FITTING AEU-525
462026
O-RING .549 ID X .103 CS SILICONE 2-113
520101
FOOTSWITCH ON/OFF 4 PIN MALE
AE-7PM
AIR/ELECTRIC SCALER W/LED MODULE ASSY
330597
TUBING AA-24 1/2 X 1/8 GRAY CUT 6" 10"
AA-259
HIGH VACUUM WASTE OUTLET FITTING AEU-525 462021
HIGH VACUUM WASTE OUTLET FERRULE
462138
TUBING SILICONE .281IDX.375OD 70 DURO GRAY 730489
LOW VACUUM WASTE OUTLET FITTING AEU-525 462022
LOW VACUUM WASTE OUTLET FERRULE AEU-525 462139
FTN 1/4 X 1/4 BARB STRAIGHT SS
730558
WASTE TANK ASSY AEU-525
330603
FTN 1/4 DELRIN SLEEVE
730095
TUBING POLY 1/4ODX.159ID GRY 90 DURO
AA-95G
M/S STNLS PHDPHL 8-32 X 1/2
510545
C/S BTNSOC STNLS 8-32 X 1/4
510309
HOOK CORD 1/4 BLACK PLASTIC
730371
GROMMET 5/16 ID X 5/8 OD X 1/16 GROOVE
870326
CORD BUNGEE 1/4 DIA
730370
SHELF DELIVERY MODULE STORAGE AEU-525
462098
C/S BTNSOC STNLS 6-32X1/4
510037
FOAM PAD LAMINATED LARGE AEU-525
462100
FOAM PAD LAMINATED SMALL AEU-525
462101
M/S PHPHIL 6 X 5/16 PLASTITE HARDEND STEEL 510790
DIVIDER WALL A AEU-525
462000
VACUUM TUBE BAFFLE PART A AEU-525
462001
STRAP DELIVERY MODULE STORAGE AEU-525
462145
HOLDER SPRING ACTION
730445
C/S BTNSOC STNLS 8-32 X 3/8
510404
CLIP COMPONENT SCREW MOUNT .62 DIA
510699
RIVET BLIND AL/AL 3/32D X 1/32-1/8 GRIP
510722
VACUUM TUBE BAFFLE PART B AEU-525
462002
TUBE GUARD AIR-ELECTRIC MODULE AEU-525
462147
M/S PHDPHL #6 X 1/4 PLASTITE STNLS
510781
FOOT BUMPER .5 X .14 CYLIN CLEAR
850067
FTN 1/8 ID SLEEVE CLAMP CLEAR
730015
TUBING POLY 1/8OD GRN
AA-94G
TUBING POLY 1/8OD RED
AA-94R
COMPRESSOR HOUSING TOP PANEL AEU-525
462063
HANDLE STNLS 2.60L X .87H X M4 THREAD
850075
C/S BTNSOC STNLS M4 X 0.7 X 8L
510717
WASHER INT STAR S/S #8
510420
INSULATION MOTOR HOUSING CEILING AEU-525 462014
ADHESIVE FOAM BACKED 1/4 x 3/8
490148
LABEL, SERIAL NO
420300
LABEL ATTENTION CORRECT LINE CORD
420295-15
LABEL CIRCUIT BREAKERS AEU-525/S/CF
420345-11
LABEL CHASSIS AEU-525
420432-13
LABEL WASTE CONNECTOR AEU-525/S/CF
420295-16
FAN GUARD PLASTIC 4.53X .10 TK
540009
RIVET BLIND AL/AL BLACK 1/8 D X 3/16-1/4 GRIP 510785
WASHER BLIND RIVET 1/8
510198
MOTOR HOUSING COVER PLASTIC AEU-525
462008
CABLE ASSY POWER DISPLAY MODULE AEU-525 875118
Page 24
QTY
1
1
1
1
1
6.0625
1
2
1
5
1
2
1
1
3.6458
1
1
2.6875
1
1
1
1
4
6.845
9
7
1
2
1.2917
1
41
1
3
7
1
1
1
1
6
2
2
1
1
6
3
7
2.1458
3.375
1
1
2
2
1
8.25
1
1
1
1
1
4
4
1
1
ITEM
65 FOOT BUMPER 1 DIA X 1/2 TALL X 1/4
66
67
68
69
70
71
72
73
74
75
76
77
78
79
80
81
82
83
84
85
86
87
88
89
90
91
92
93
94
95
96
97
98
99
100
101
102
103
104
105
106
107
108
109
110
111
112
113
PART NO
850082
C/S BTNSOC STNLS 1/4-20 X 1-1/4
510295
WASHER FENDER 1/4 ID X 7/8 OD STNLS
510837
VIBRATION ISOLATOR BUSHING
520118
C/S BTNSOC STNLS 1/4-20 X 1
510294
FASTENER 1/4 TURN STUD 82 SERIES STNLS
510772
EJECTOR SPRING 1/4 TURN 82 SERIES STNLS
510775
RETAINER 1/4 TURN 82 SERIES STNLS
510774
AIR-ELECTRIC BULKHEAD DOOR AEU-525
462047
AIR-ELECTRIC BULKHEAD DOOR HINGE AEU-525 462046
NUT NYLOC 4-40 STNLS HEX
510394
C/S BTNSOC STNLS 4-40 X 1/4
510016
DELIVERY MODULE LOCK BLOCK AEU-525
462076
C/S BTNSOC STNLS 6-32 X 3/8
510160
FTN BARB 10-32 X 1/16 PLATED
730062
GASKET NYLON #10
730074
FTN BARB 10-32 X 1/8 BRIGHT NICKEL
730073
WASHER RECTANGULR STNLS .153 IDX 312X.625 510784
AIR-ELECTRIC BULKHEAD INSERT AEU-525
462050
CLAMP CABLE NYLON 5/16 DIA X .203 MTG HOLE 510410
INSULATION MOTOR HOUSING REAR WALL
462148
PAD LEFT MOTOR MOUNT AEU-525
462221
STRAP WATER BOTTLE STORAGE AEU-525
462144
STORAGE CAP WATER BOTTLE AEU-525
462110
M/S STNLS FLAPHL 8-32 X 1/2
510533
BRACKET WATER BOTTLE STORAGE AEU-525
462109
M/S PHPHL 6 X 1/2 PLASTITE 48-2 HARDEND STL 510655
WASHER FLAT STNLS #6
510431
VELCRO LOOP 5/8" DIA BLK 25 YARDS ROLL
480022
VELCRO HOOK 5/8" DIA BLK 25 YARDS ROLL
480021
DRIVER 1/4 TURN FLAT FASTENER .04 THK STNLS462137
TETHER COILED 31” EXTENDED W/2X1/2 RINGS 520102
WASHER FENDER 3/4 OD X 3/16 ID STNLS
510445
FOOT BUMPER .50 DIA X .25 TALL
850069
CASE VENT DOOR AEU-525
462004
HINGE CONSTANT TORQUE ST-7A LFT SDE 4”-LB 510777
C/S SOCHD STNLS 4-40 X 1/4
510579
CASE VENT DOOR HINGE AEU-525
462005
NUT HEX 4-40 STNLS
510434
WASHER SPLIT STNLS #4
510433
MAIN DOOR BEZEL AEU-525
462003
NUT NYLOC 8-32 STNLS
510411
HOOK BRACKET WASTE TANK AEU-525
462105
NUT NYLOC 10-32 STNLS
510124
WASHER FLAT STNLS #10
510356
LABEL ASEPTICO
420981
CASE SILVER MACHINED AEU-525
410201-08
TIE WRAP 4 INCH PICO WHITE
510137
WASHER RUBBER 3/8''OD X .125-.17''ID .093 THK 510827
QTY
2
6
6
10
4
6
6
6
1
1
6
18
1
12
4
12
3
7
1
1
1
1
1
1
5
1
3
4
1
1
1
1
1
1
1
1
2
2
6
14
1
12
1
2
2
1
1
3
4
FINAL ASSEMBLY PARTS LIST - Figure 112
(Sheet 2 of 9)
14
AIR/ELECTRIC MODULE ASSEMBLY
SEE FIG. 113, PAGE 33
5
6
7
9
1
8
10
11
12
4
5
2
3
13
15
17
18
16
19
17
20
12
8
82
83
81
79
80
80
77 78
20
21
16
17
12
19
20
8
70
76
73
74
75
71
22
72
WASTE TANK ASSEMBLY
(NO COMPONENT BREAKDOWN)
NOTE: Refer to Page 24 for Parts Descriptions
Page 25
FINAL ASSEMBLY PARTS LIST - Figure 112
(Sheet 3 of 9)
43
44
30
45
24 26 23
28
25
44
38
39
33
42
31
33
AIR BOTTLE ASSEMBLY
SEE FIG. 114, PAGE 37
40
41
36
29
37
39
56
35
32 33
27
31
49
NOTE: Refer to Page 24 for Parts Descriptions
Page 26
FINAL ASSEMBLY PARTS LIST - Figure 112
(Sheet 4 of 9)
15
112
18
61
59
62
60
57
78
92
113
63
COMPRESSOR ASSEMBLY
SEE FIG. 115, PAGE 38
58
54
NOTE: Refer to Page 24 for Parts Descriptions
Page 27
FINAL ASSEMBLY PARTS LIST - Figure 112
(Sheet 5 of 9)
73
70
71
72
75
74
50
51
52
49
53
NOTE: Refer to Page 24 for Parts Descriptions
Page 28
FINAL ASSEMBLY PARTS LIST - Figure 112
(Sheet 6 of 9)
34
64
82
79
81
80
80
77
83
78
15
6
44
18
39
23
84
46
47
24
48 26
23
24
25
AIR BOTTLE ASSEMBLY
SEE FIG. 114, PAGE 37
43
44
45
NOTE: Refer to Page 24 for Parts Descriptions
Page 29
FINAL ASSEMBLY PARTS LIST - Figure 112
(Sheet 7 of 9)
108
111
107
109
110
70
71
72
98
99
100
102
101
103
103
104
104
103
104
106
25
105
106
NOTE: Refer to Page 24 for Parts Descriptions
Page 30
FINAL ASSEMBLY PARTS LIST - Figure 112
(Sheet 8 of 9)
111
88
89
91
97
90
96
93
87
94
95
91
92
89
106
55
NOTE: Refer to Page 24 for Parts Descriptions
Page 31
FINAL ASSEMBLY PARTS LIST - Figure 112
(Sheet 9 of 9)
111
28
85
86
65
66
67
67
68
69
111
NOTE: Refer to Page 24 for Parts Descriptions
Page 32
AIR/ELECTRIC MODULE ASSEMBLY - Figure 113
(Sheet 1 of 4 )
ITEM
1
2
3
4
5
6
7
8
9
10
11
12
13
14
15
16
17
18
19
20
21
22
23
24
25
26
27
28
29
30
31
32
33
34
35
36
37
38
39
40
41
42
43
44
45
46
47
48
49
50
51
52
53
54
55
56
57
58
59
60
61
62
63
64
65
66
PART NO
AIR/ELECTRIC SCALER W/LED MODULE ASSY 525 330597
SCALER ASSEMBLY SYSTEM WITH LED LIGHT
730654
SYRINGE 3-WAY AIR/WATER QUICK CHANGE TIP TA-90D
TUBING POLY 1/8OD CLR
AA-94C
TUBING POLY 1/8OD RED
AA-94R
TUBING POLY 1/8OD GRN
AA-94G
FTN BARB 1/16 DELRIN TEE
730152
HOLDER AUTO W/LOCKOUT HPCE GRY
AA-59G
HOLDER 1/2D UNIVERSAL GRY
AA-68G
HOLDER BAR AEU-525
462095
C/S BTNSOC STNLS 6-32 X 3/8
510160
FTN F-LEUR X 1/8 BARB KNURLED S4J A 1241
730055
TUBING POLY 1/4OD BLU
AA-95B
FILTER 10-32 THREAD STAINLESS 100 MICRON
730326
FTN 1/4 DELRIN SLEEVE
730095
FTN BARB 10-32 X 1/8 BRIGHT NICKEL
730073
GASKET FOR NWS-8 BOTTLE LID
730473
FTN BARB 10-32 X 1/16 PLATED
730062
GASKET NYLON #10
730074
TUBING POLY 1/8OD BLU
AA-94B
WATER BOTTLE CAP AEU-525
462039
C/S BTNSOC STNLS 8-32 X 3/8
510404
HEAT SHRINK 1" BLK 4FT LENGTHS
870197
MEMBRANE CONTROL PANEL DELIVERY MODULE 420918
LABEL INSTRUMENT HOLDER WITH SCALER
420961
DELIVERY MODULE CONTROL PANEL HOUSING
462041
M/S PHPHIL 6 X 3/8 PLASTITE 48-2 HARDND STL
510650
WIRE HARNESS BOARD TO BOARD AEU-525
875113
CONN .1 HSNG LOCK/POL 5 PIN
860019
PCB ASSY DISPLAY AEU-5000 COATED
330600-C
HOLDER BAR SUPPORT AEU-525
462096
C/S BTNSOC STNLS 6-32X1/4
510037
SEAL RUBBER BULB 1/2" X 1/2" X 1/4"
520104
DELIVERY MODULE TOP PANEL AEU-525
462040
AIR-ELECTRIC MODULE FRONT HOUSING AEU-525 462042
SLEEVE .31 OD X .035 WALL X .38 LG
462230
TUBING BRAIDED 1/4OD GRY
AA-96
O-RING .208 ID X .070 CS SILICONE
520099
AIR JUNCTION FITTING AEU-525
462051
O-RING .125ID X .070CS VT70
520025
AIR JUNCTION FLOATING BLOCK AEU-525
462052
M/S SHOLDR SCREW STNLS 3/16OD X 3/16LX 8-32 510688
CAP 0.01UF 20% 250V CERAMIC CLASSX1/Y2
810433
TIE WRAP 4 INCH PICO WHITE
510137
HEAT SHRINK 3/32 BLK
870116
HEAT SHRINK 1/8 BLK
870118
HEAT SHRINK 3/16 BLK
870119
RES 0.51 5% 2W METL OXIDE .59LX.2DX.7LS
810438
WIRE PVC #24 WHITE (9)
870304-01
WIRE PVC #24 BLUE (6)
870304-06
WIRE PVC #24 BLACK (0)
870304-02
WIRE PVC #24 RED (2)
870304-03
WIRE PVC #24 GREEN (5)
870304-04
TERM QR/P8 SERIES MALE SIDE SML CONTACT
860290
CONN PLUG QR/P8 SERIES 12 PIN
860285
C/S BTNSOC STNLS M3 X 0.5 X 10L
510766
AIR-ELECTRIC JUNCTION BLOCK AEU-525
462053
M/S PHPHIL 6X5/16 PLASTITE HARDENED STEEL 510790
WIRE PVC #22 GRN (5)
870047
CONN TERMINAL BLOCK 7 POS .315 CENTER 10A 860283
M/S STNLS PHDPHL 4-40 X 1/2 SELF THREADING 510723
TUBING SILICONE .375 ID X .50 OD OPAQUE BLK 730671
GROMMET 1/2 ID X 1/16 GROOVE
870331
DELIVERY MODULE LOCK BRACKET AEU-525
462044
AIR-ELECTRIC MODULE REAR HOUSING AEU-525 462043
RIVET BLIND STNLS 3/16D X 1/16-1/4 GRIP
510716
QTY
1
1
1
4.4583
1.6667
1.8333
3
4
1
1
5
1
0.7083
1
5
7
1
7
20
1
1
3
0.4583
1
1
1
4
1
2
1
2
38
0.5467
1
1
2
1.9791
3
3
3
1
2
0.1750
1.000
0.0417
0.6375
0.7917
1
0.3125
0.2708
0.25
0.25
0.25
5
1
2
1
4
0.8333
1
4
0.5
4
1
1
2
ITEM
PART NO
67 SHIM BRASS 1/4 ID X 3/8 OD X .01 THK
68 WASHER NYLON .196IDX.437ODX.062T #10 FENDR
69 WASHER FLAT STNLS #10
70 GUARD HP TUBING AEU-525
71 LABEL DELIVERY MODULE AEU-525/S/CF
72 DELIVERY MODULE HANDLE BRACKET AEU-525
73 DELIVERY MODULE HANDLE LOCK KNOB AEU-525
74 M/S SOCHD STNLS SHOLDER 10-32 X .63
75 SPRING WAVE STNLS .375 X .250 X .15
76 DELIVERY MODULE HANDLE LOCK KNOB SPACER
77 C/S BTNSOC STNLS 6-32 X 5/8
78 BEARING PAD DELIVERY MODULE AEU-525
79 TAPE FOAM ACRYLIC 3M VHB 1/2 WIDE ROLL BLK
80 DELIVERY MODULE REAR WALL AEU-525
81 VALVE TOGGLE 3W/2P GREY W/EXHAUST
82 INSULATOR TOP POWER BOARD AEU-525
83 C/S BTNSOC STNLS 4-40 X 1/4
84 FERRITE SOLID CORE #28 18.67X 10.16X14.27
85 WIRE PVC #22 BLK (0)
86 HEAT SHRINK 1/4 BLK
87 WIRE PVC #22 RED (2)
88 WIRE PVC #22 YEL (4)
89 WIRE PVC #22 ORN (3)
90 CONN .1 HSNG LOCK/POL 3 PIN
91 CONN .1 TERM CRIMP LOOSE 22-30 AWG
92 CONN .1 HSNG LOCK/POL 2 PIN
93 WIRE PVC #22 WHT (9)
94 PCB ASSY POWER AEU-525 COATED
95 INSULATOR POWER BOARD BOTTOM AEU-525
96 STANDOFF POWER BOARD AEU-525
97 LABEL SCALER FUSE AMC-20
98 HOLE PLUG NYLON 7/16 WHITE
99 DELIVERY MODULE MANIFOLD ASSY AEU-525
100 TUBING SILICONE .281IDX.375OD 70 DURO GRAY
101 SWITCH PUSHBUTTON MINIATURE NO
102 SWITCH AIR ACTIVATED ELECTRIC
103 FTN COUPLER MALE/MALE 10-32 HEX
104 VALVE CHECK ANTI RETRACTION
105 TUBING POLYURETHANE 5/32 OD X 3/32 ID
106 TUBING POLY 1/8 OD YELLOW
107 PEEK 1/16 OD X .016 WALL
108 CLAMP VENTURI TUBE
109 TUBING 2H POLY STRT SYNG GRY
110 TUBING POLY 1/8 OD ORANGE
111 DELIVERY MODULE RIGHT WALL AEU-525
112 HOLDER LED SCALER MODULE AEU-525
113 M/S STNLS FLAPHL M3X4
114 WASHER FLAT STNLS #4
115 NUT NYLOC 4-40 STNLS HEX
116 HEAT SHRINK 1 IN DIA CLEAR
117 RECEPTACLE ASSY AEU-525
118 NUT NYLOC 6-32 STNLS HEX
119 ADAPTER PLATE MOTOR RECEPTACLE AEU-525
120 C/S BTNSOC STNLS 6-32X1/2
121 SPACER MOTOR RECEPTACLE AEU-525
122 CLAMP TUBE AE-240
123 CONN 4 PIN PANEL MT AWG #20 FM
124 CONN TERMINAL BLOCK .315 CENTER 10A 4 POS
125 FTN PLUG 10-32 HEX BRIGHT NICKEL
126 FTN 10-32 CROSS NICKEL PLATED
127 VALVE 2 WAY N/C 12VDC CLIPPARD
128 BRACKET SOLENOID VALVE AEU-525
129 INSULATOR SOLENOID AEU-525
130 GROMMET 1/4 DIA FOR 3/8 DIA X .095 PNL NEOPR
131 DELIVERY MODULE MANIFOLD ASSY AEU-525
132 DELIVERY MODULE FRONT WALL AEU-525
133 FTN 1/8 ID SLEEVE CLAMP CLEAR
510768
510019
510356
462121
420596-16
462031
462033
510767
510765
462034
510720
462102
490145
462037
730014
462117
510016
870278
870042
870120
870044
870046
870045
860118
860023
860076
870051
330601-C
462113
462112
420748-08
510496
330591
730489
830144
730031
730651
730428
730227
AA-94Y
730670
461607
AA-85G
AA-94O
462036
462115
510793
510192
510394
870262
330598
510395
462069
510036
462135
461868
860212
860250
730072
730139
730656
462114
462116
870185
330591
462035
730015
QTY
2
2
2
1
1
1
1
1
1
1
2
3
0.009
1
1
1
4
1
1.9583
0.2917
2.7083
0.375
0.375
1
8
1
1.1667
1
1
4
1
1
1
0.0417
1
1
1
2
0.375
1.0833
2
2
5.5833
0.666
1
1
2
2
4
20.00
1
1
1
1
1
3
1
1
3
2
1
1
1
2
1
1
8
Page 33
AIR/ELECTRIC MODULE ASSEMBLY - Figure 113
(Sheet 2 of 4)
2
3
1
30
29
23
81
26
71
28
80
9
26
27
24
25
10
11
8
70
72
78
32
79
31
32
31
70
32
76
80
77
32
73
74
99
75
111
98
Page 34
NOTE: Refer to Page 33 for Parts Descriptions
AIR/ELECTRIC MODULE ASSEMBLY - Figure 113
(Sheet 3 of 4)
112
104
100 101 110
130
106
132
116
114
115
117
2
118
124
113
103
119
123
120
129
11
121
122
109
128
115
34
32
18
33
20 133 19
102
21
22
125
19
17
126
15
2
13
16
16
19
127
32
15
67
14
68
15
35
32
69
66
12
62
67
41
42
38
39
40
68
69
66
63
65
56
64
32
55
59
45
60
43
61
50
52
46
49
44
54
47
48
53
51
57
37
32
64
58
65
NOTE: Refer to Page 33 for Parts Descriptions
Page 35
AIR/ELECTRIC MODULE ASSEMBLY - Figure 113
(Sheet 4 of 4)
81
94
95
106
2
82
83
110
105
6
4
5
7
92
91
128
33
90
115
91
85
84
89
85
88
87
87
29
91
86
96
132
102
2
93
105
128
85
104
103
20
115
36
99
125
107
19
MANIFOLD ASSEMBLY
(NO COMPONENT BREAKDOWN)
132
133
88
89
87
96
36
37
Page 36
29
91
92
91
90
91
97
NOTE: Refer to Page 33 for Parts Descriptions
PARTS LIST - Figure 114 - Air Bottle Assembly
ITEM
1
2
3
4
5
6
7
PART NO
BOTTLE 750ML (25OZ) BLOW MOLDED HDPE
LABEL MYLAR AEU-425 AIR
GASKET FOR NWS-8 BOTTLE LID
FTN BARB 10-32 X 1/8 BRIGHT NICKEL
GASKET NYLON #10
CAP AIR BOTTLE AEU-525
C/S BTNSOC STNLS 8-32 X 3/8
QTY
730657
420307
730473
730073
730074
462007
510404
1
1
1
2
2
1
2
ITEM
8
9
10
11
12
13
14
FTN ELBOW 90 1/4 POLY X 1/8 MPT
FTN 1/4 POLY X 1/8 MPT POLYTITE
LABEL FILTER DRAIN GENERIC
FILTER 1/8" NPT 5 MICRON
C/S BTNSOC STNLS 8-32 X 1/4
SUPPORT BRACKET AIR BOTTLE AEU-525
FOOT BUMPER .5 X .14 CYLIN CLEAR
PART NO
QTY
730120
730117
420345-10
730495
510309
462006
850067
1
1
1
1
2
1
2
14
13
4
13
5
10
6 7
8
3
2
9
11 12
10
1
Page 37
PARTS LIST - Figure 115 - Compressor Assembly
ITEM
1
2
3
4
5
6
7
8
PART NO
CLAMP HOSE SNAPPER .616 TO .707 GRIP
TUBING AA-24 1/2 X 1/8 GRAY
TUBING SILICONE .281IDX.375OD 70 DURO GRAY
TUBING POLY 1/4ODX.159ID GRY 90 DURO
TUBING POLY 1/8OD GRN
TUBING POLY 1/8OD RED
C/S BTNSOC STNLS 6-32X1/4
FTN 1/4NPT X 1/2" BARB
QTY
510425
AA-259
730489
AA-95G
AA-94G
AA-94R
510037
730484
3
3.6458
2.6875
6.845
2.1458
3.375
41
1
ITEM
9
10
11
12
13
14
15
16
17
PART NO
TUBING 1/2 OD X .062 WALL GREY URETHANE
TUBING SALIVA EJECT 3/8OD GRY
FTN 1/4 X 1/4 BARB STRAIGHT SS
C/S BTNSOC STNLS 6-32 X 3/8
FTN 1/4 DELRIN SLEEVE
TUBING AIR BRAKE 1/4 BLACK
TIE WRAP CLIP MOUNT .187 DIA MNTING HOLE
TUBING POLY 1/8OD CLR
FTN 1/8 ID SLEEVE CLAMP CLEAR
730373
AA-86G
730558
510160
730095
730130
510759
AA-94C
730015
QTY
0.8333
6.0625
1
12
4
1.0683
8
0.1458
7
VENTURI & MUFFLER BRACKET ASSY
SEE FIG. 119, PAGE 43
8
11
10
15
17
13
10
4
1
16
17
LEFT WALL ASSEMBLY
SEE FIG. 117, PAGE 41
9
9
12
14
6
14
COMPRESSOR-VACUUM
PUMP ASSEMBLY
SEE FIG. 120, PAGE 44
RIGHT WALL ASSEMBLY
SEE FIG. 118, PAGE 42
11
5
4
2
6
3
8
2
1
7
7
7
ELECTRICAL PANEL ASSEMBLY
SEE FIG. 116, PAGE 39
Page 38
ELECTRICAL PANEL ASSEMBLY - Figure 116
(Sheet 1 of 2)
ITEM
1
2
3
4
5
6
7
8
9
10
11
12
13
14
15
16
17
18
19
20
21
22
23
24
25
26
27
28
29
30
31
PART NO
QTY
WIRE PVC #18 WHT (9)
870031
TERM FEMALE .250 X .032 22-18 AWG RED
860240
TERMINAL BLIND END CRIMP 4X#18-2X#12
860287
WIRE PVC #18 BLK (0)
870026
TERMINAL FLAG FULL INSULATED AWG 18-22
860286
WIRE PVC #18 BLU (6)
870030
WIRE PVC #18 ORN (3)
870199
HEAT SHRINK 1/8 BLK
870118
WIRE PVC #18 RED (2)
870027
TERMINAL BLIND END CRIMP 2 X #24-3 X #18
860292
WIRE PVC #14 BLK (0)
870238
TERM FEM .250 X .032 16-14AWG BLU KOBICONN 860101
TERM FLAG FEM FULL .250 X.032 16-14AWG BLU 860052
WIRE PVC #14 WHITE (9)
870305-01
WIRE PVC #14 GREEN/YELLOW (54)
870305-11
TERM RING #6 LUG 16-14AWG BLUE
860113
TERM INSUL RING #8 16-14 AWG BLUE
860117
CONN 0.156 HOUSING LOCK/POL 3 PIN VH SERIES 860272
CONN CRIMP CONTACT #22-18 AWG VH SERIES
860271
CONN .156 HSNG LOCK 3 PIN
860018
CONN .156 TERM CRIMP 18-24 AWG TIN PLT
860033
CABLE ASSY POWER DISPLAY MODULE
875118
CABLE ASSY WASTE CONNECTOR AEU-525
875114
C/S BTNSOC STNLS 6-32X1/4
510037
CABLE ASSY UNLOADER SOLENOID AEU-525
875115
CABLE ASSY PRESSUR CNTROL/VAC SWITCH
875116
CABLE ASSY LED AEU-525
875117
LENS 3MM LED DIFFUSER PANEL MOUNT
850078
CIRCUIT BREAKER COVER AEU-525
462017
SWITCH POWER VOLTAGE SELECTOR
840084
CIRCUIT BREAKER 2 POLE 3A ROCKER SNAP MT 830143
3.525
4
3
4.7167
9
3.8542
1.5417
0.1667
1.5417
2
0.25
3
4
0.25
2
2
1
1
2
1
2
1
1
41
1
1
1
2
1
1
1
ITEM
33 GROMMET 1/4 DIA FOR 3/8 DIA X .095 NEOPRENE 870185
34 FAN 115 V TUBEAXIAL 106 CFM 4.69 SQ X 1.5 THK 540012
35 C/S BTNSOC STNLS 6-32 X 3/8
5
5
5
4
1
6
4
2
2
510160
840087-01
C/S BTNSOC STNLS 4-40 X 1/4
510016
WASHER #6 NYLON .140 ID X .312 OD X .032 THK 510573
STANDOFF .375 OD X 1.25L 4-40 FEM/FEM PLASTIC 462244
INSULATOR PETG POWER SUPPLY AEU-525
462081
POWER SUPPLY UNIVERS INPUT 24V 20W
840120
TIE WRAP 8 IN X 18# NYLON
510628
POWER SUPPLY 24VDC 0.63AMP
840093
PCB ASSY CONTROL AEU-525
330604
WASHER SPLIT STNLS #4
510433
WASHER STNLS .128 ID X .238 OD X .014-.018 THK 510657
STANDOFF NYLON 1/4 HEX X 4-40 X .375L MALE/FE510760
INSULATOR PETG PRESS/VAC BOARD
462080
TRIAC HEATSINK ADAPTER AEU-525
462111
POWER INLET LINE FILTER 6A 250V
840121
C/S BTNSOC STNLS 6-32X1/4
510037
CONN TERMINAL STRIP 8MM CENTER 20A 10 POS 860278
M/S STNLS PHDPHL 4-40 X 1/2 SELF THREADING 510723
BRACKET TERMINAL STRIP AEU-525
462099
NUT NYLOC 6-32 STNLS HEX
510395
GROMMET 7/16ID X 1/16GROVE ADU-40CFC
870235
INSULATION FRONT MOTOR CHASSIS AEU-525
462223
INSULATION MOTOR HOUSING FRONT WALL
462013
EDGE TRIM 1/16 ID X 1/4 X 1/4 RUBBER
730378
TIE WRAP CLIP MOUNT .187 DIA MOUNTING HOLE 510759
NUT HEX 6-32 STNLS
510293
WASHER INT STAR S/S #6
510419
COMPRESSOR HOUSING FRONT WALL AEU-525
462012
36 POWER SUPPLY 48VDC 1.25A MED GRADE
37
38
39
40
41
42
43
44
45
46
47
48
49
50
51
52
53
54
55
56
57
58
59
60
61
62
63
5
PART NO
32 PWR ENTRY/CKT BRKR/SWTCH 6A 2-POLE 1.5MM 840119
23
25
26
27
QTY
1
1
1
5
1
18
8
8
1
1
1
1
1
4
4
4
1
1
1
8
1
3
1
2
2
1
1
0.2917
5
2
3
1
23
14
24
42
34
35
43
44
13
8
11
37
12
45
18
46
19
61
62
48
20
15
49
21
16
35
63
15
2
4
58
16
17
59
22
60
Page 39
ELECTRICAL PANEL ASSEMBLY - Figure 116
(Sheet 2 of 2)
48
23
47
34
35
32
31
26
24
44
37
45
46
43
42
27
5
31
32
33
59
28
29
24
30
63
7
9
8
30
29
41
6
57
39
36
37
37
38
38
40
60
10
3
52
53
1
1
2
3
26
54
55
63
4
5
6
5
7
8
9
8
56
50
51
Page 40
58
15
16
17
59
NOTE: Refer to Page 39 for Parts Descriptions
PARTS LIST - Figure 117 - Motor Housing - Left Wall Assembly
ITEM
1
2
3
4
5
6
7
8
9
10
11
PART NO
M/S STNLS PHDPHL 6-32 X 1-3/4
O-RING 0.487 ID X 0.103 WIDE
TUBE VACUUM VALVE ADAPTOR AEU-525
FTN 3/8MPT X 1/2 BARB
3 WAY VACUUM MANIFOLD TOP AEU-525
C/S BTNSOC STNLS 6-32X3/4
O-RING .837 ID X .058 CS SL 70
FTN 1/8 MPT X 3/8 BARB MODIFID
3 WAY VACUUM MANIFOLD BODY AEU-525
FTN BARB 10-32 X 1/16 PLATED
GASKET NYLON #10
510618
520079
462086
730652
462068
510035
520004
730366-08
462067
730062
730074
ITEM
QTY
PART NO
12 TOP VACUUM VALVE AEU-525
4
1
1
2
1
4
2
2
1
1
1
462090
510160
520078
461850
510684
730345
510187
462085
510759
462011
462010
13 C/S BTNSOC STNLS 6-32 X 3/8
14 O-RING 0.489 ID X 0.070 WIDE VITON 60 DUROM
15 PLUNGER VACUUM VALVE
16 SPRING COMPRESSION 0.028 WIRE X 2.5 LONG
17 FTN 1/8MPT X 1/4 DOUBLE BARB
18 SETSCREW SOCCUP STNLS 4-40X1/4
19 BODY VACUUM VALVE AEU-525
20 TIE WRAP CLIP MOUNT .187 DIA MTG HOLE
21 INSULATION MOTOR HOUSING LEFT WALL
22 MOTOR HOUSING LEFT WALL AEU-525
20
QTY
1
4
3
1
1
1
1
1
1
1
1
21
4
22
5
8
6
7
1
8
8
12
13
4
5 6
7
17
8
3
4
9
2
19
19
17
18
7
8
15
14
16
12
10
11
13
Page 41
PARTS LIST - Figure 118 - Motor Housing - Right Wall Assembly
ITEM
1
2
3
4
5
6
7
8
9
10
11
12
13
14
15
PART NO
WIRE PVC #22 BLK (0)
TERM FEMALE .250 X .032 22-18 AWG RED
FTN 1/8 ID SLEEVE CLAMP CLEAR
TUBING POLY 1/8OD RED
FTN BARB 1/16 DELRIN TEE
FTN 1/4 DELRIN SLEEVE
TUBING BRAIDED 1/4OD GRY
SWITCHING MODULE MANIFOLD ASSY AEU-525
C/S BTNSOC STNLS 6-32X1/4
SWITCH PRESSURE 20-120 PSI 1/8 NPT
WASHER NYLON .505 ID X .750 OD X .062T
FTN 1/8 FPT X 1/4 POLY 90 DEGREE ELBOW
GROMMET 7/16ID X 1/16GROVE ADU-40CFC
FTN 1/4 POLY X 1/8 MPT POLYTITE
FTN BARB 10-32 X 1/8 BRIGHT NICKEL
ITEM
QTY
870042
860240
730015
AA-94R
730152
730095
AA-96
330594
510037
830142
510175
730351
870235
730117
730073
PART NO
16 GASKET NYLON #10
3.5
4
5
3.375
1
2
0.7292
1
2
1
1
2
3
1
1
17 FTN ELBOW 90 1/4 POLY X 1/8 MPT
18 FTN STREET/TEE 1/8MPT MOD
19 VALVE CHECK 100PSI 1/8FPT BRAS
20 FTN STREET/TEE 1/8MPT
21 FTN NIPPLE 1/8MPX3/4 CLOSE STN
22 FTN PLUG BRASS 1/8 MPT HEX COUNTERSUNK
23 TERM MALE .250 X .032 22-18 AWG RED
24 MUFFLER/FILTER SINTERD BRNZ
1/8 MPT
25 VALVE AIR 3 WAY 2 POS 1/8 FPT 24V DC 120 PSI
26 C/S SOCHD STNLS 8-32 X 3/4
27 SPACER MAC VALVE AEU-525
28 INSULATION MOTOR HOUSING RIGHT WALL
29 MOTOR HOUSING RIGHT WALL AEU-525
30 TUBING POLY 1/8OD GRN
31 TUBING POLY 1/4ODX.159ID GRY 90 DURO
2
23
29
1
31
730074
730120
730133-01
730453
730133
730116
730341
860239
730450
730578
510764
462094
462015
462016
AA-94G
AA-95G
QTY
1
3
1
1
1
1
1
2
1
1
2
2
1
1
0.9692
4.8583
13
12
28
31
25
17
26
27
20
7
21
6
22
30
13
12
29
31
28
24
14
21
19
15
16
18
10 11
5
22
7
3
25
4
8
20
9
17
23
Page 42
6
PARTS LIST - Figure 119 - Venturi & Muffler Bracket Assembly
ITEM
1
2
3
4
5
6
7
8
9
10
11
PART NO
CABLE ASSY UNLOADER PRESSURE SWITCH
PUMP VACUUM DUAL VOLT
NUT NYLOC 8-32 STNLS
INSULATION VENTRI MUFFLER AEU-525
FTN ELBOW 90DEG 3/8 BARB X 3/8 BARB BLACK
TUBING 1/2 OD X .062 WALL GREY URETHANE
FTN 1/8 MPT X 3/8 BARB MODIFID
FTN 1/4 POLY X 1/8 FPT
VENTURI .043 DIA NOZZLE
MUFFLER ASSY AMC-20
BODY VENTURI AMC-20
875120
730503
510411
462224
730655
730373
730366-08
730195
462229
330564
461851
21
QTY
1
1
12
2
1
0.125
1
1
1
2
2
1
ITEM
PART NO
12 C/S BTNSOC STNLS 8-32 X 1/4
13
14
15
16
17
18
19
20
21
22
510309
GASKET NYLON #10
730074
VENTURI BRACKET AEU-525
462107
NUT NYLOC 4-40 STNLS HEX
510394
FTN BARB 10-32 X 1/16 PLATED
730062
FTN 1/4 POLY X 1/8FPT MOD
730195-01
VENTURI 0.059 DIA NOZZLE ADU-17
461895
FTN ELBOW 90DEG 1/8 MPT X 3/8 BARB BRASS
730658
TIE WRAP CLIP MOUNT .187 DIA MOUNTING HOLE 510759
MOTOR CAPACITOR BRACKET AEU-525
462106
FTN 1/8 ID SLEEVE CLAMP CLEAR
730015
3
QTY
4
6
1
2
2
1
1
1
1
1
2
2
20
22 16 13
19
15
22 16 13
17
4
5
18
6
14
7
8
9
4
10
11
12
13
Page 43
PARTS LIST - Figure 120 - Compressor/Vacuum Pump Assembly
ITEM
1
2
3
4
5
6
7
8
9
10
PART NO
TERM FLAG FEM FULL .250 X.032 16-14AWG BLUE
HEAT SHRINK 1/4 BLK
FTN ELBOW 90 1/4 POLY X 1/8 MPT
FILTER INLINE ONLY
FTN 1/4 POLY X 1/8 MPT POLYTITE
TUBING AIR BRAKE 1/4 BLACK
FTN 1/4 MPT X 1/4 POLY ELBOW
FILTER AIR 1/4 NPT X 1.19 GAST
FTN NIPPLE 1/4 MPT X 1.38 LONG BRASS
FTN PLUG 1/4 MPT X 1/4 HEX COUNTRSNK BRASS
20
860052
870120
730120
730001
730117
730130
730329
730494
730233
730098
QTY
10
9
ITEM
PART NO
11 COLD START VALVE ASSY 1/4 MPT
4
2.791
1
1
1
1.0683
2
1
1
1
12 MOTOR MOUNT AEU-525
13 C/S BTNSOC STNLS 1/4-20 X 1-1/4
14 GROMMET BUSHING SORBOTHANE 70 DURO
15 GROMMET WASHER SORBOTHANE 70 DURO
16 WASHER FENDER STNLS .281 ID X 1.0 OD
17 SPACER ALUM .625OD X .252ID X .25L
18 PAD HANDLE LOWER MIDDLE AEU-525
19 PUMP VACUUM DUAL VOLT AEU-525
20 TERMINAL BLIND END CRIMP 2 X #24-3 X #18 UL
21 TERMINAL BLIND END CRIMP 4 X #18-2 X #12
4
6
7
5
QTY
330633
462082
510295
870315
870316
510703
510779
462226
730503
860292
860287
1
2
6
10
4
14
4
1
1
1
1
11
1
2
8
21
19
12
18
12
3
17
13
16
14
15
16
Page 44
PARTS LIST - Figure 121 - Inlet/Outlet Air Filter Assembly
ITEM
1
2
3
4
5
6
7
8
PART NO
ASSY INLET/OUTLET FILTER AEU-525CF
FOAM FILTER OUTER AEU-525CF
FOAM FILTER INNER AEU-525CF
FOAM FILTER TUBE AEU-525CF
SUPPORT CHASSIS MOUNT REVERSE .25L
GASKET NYLON #10
PLATE CLAMP MEMBRANE PWR INLET AEU-525CF
NUT NYLOC 2-56 SS
QTY
330634
730685
730684
730687
510848
730074
462315
510122
1
1
1
1
12
22
1
12
ITEM
9
10
11
12
13
14
15
16
17
PART NO
MEMBRANE INLET POWER COVER AEU-525CF
PLATE CLAMP WASTE MEMBRANE AEU-525CF
MEMBRANE WASTE SENSOR COVER AEU-525CF
FASTENER 1/4 TURN DZUS LION STUD 82 SERIES
EJECTOR SPRING 1/4 TURN DZUS LION 82SERIES
RETAINER 1/4 TURN DZUS LION 82 SERIES STNLS
EDGE TRIM 1/8 ID X 1/4 X 5/16 RUBBER
VELCRO 1/2” HOOK 50YD RL WHT
DOOR INLET/OUTLET FILTER AEU-525CF
462298
462316
462299
510772
510775
510774
730622
480030
462300
QTY
1
1
1
4
4
4
2.2817
3.8033
1
12
13
15
14
11
8
7
9
8
10
3
5
6
2
17
1
4
5
6
5
16
6
Page 45
STERILIZATION AND MAINTENANCE:
Because of its simple design, the Aseptico AEU-525CF
Transport III System requires very little maintenance. Any
maintenance that is needed can be performed in minutes.
PURGING THE SYSTEM:
If the unit will not be used for an extended period of time, or
if the unit might be subjected to freezing conditions, the user
should purge the system of all water. Simply empty the
contents of the water bottle and install it back into its cap,
then operate the air/water syringe, scaler, and handpiece
with water coolant ‘ON’ until only air comes through the
water lines. Pack the unit and store as normal.
HANDPIECES:
Thorough cleaning and lubrication of E-type handpieces
after each use and before sterilization is very important to
ensure proper operation and service life of
the handpiece. Follow the instructions Fig. 122
provided with the handpiece for complete
maintenance instructions. When sterilizing
IMPORTANT! Protect motor from excess
oil draining from handpieces. After
lubricating and before autoclaving, stand
handpiece on its base, on a paper towel,
and allow excess oil to drain (see Fig. 122).
ELECTRIC MOTOR & CORD ASSEMBLY:
The entire Electric Motor and Cord Assembly is fully
autoclavable (Fig. 123). Steam autoclave motor/cord
assembly at 132° C (270°
F) for ten minutes. Loosely Fig. 123 - MOTOR & CORD
STERILIZATION
coil the motor cord when
autoclaving. Avoid sharply
bending the cord when
autoclaving. Alternatively,
wipe down the motor cord
with disinfecting solution,
and/or sleeve the cord
THE ENTIRE MOTOR &
between each patient.
CORD ASSEMBLY IS
STEAM AUTOCLAVABLE.
ELECTRIC MOTOR O-RINGS:
Replace electric motor O-rings when worn or damaged (see
Fig. 124). Gently
peel old O-rings Fig. 124
O-RINGS
out of grooves and
(3)
replace with new
rings (PN 520069).
Occasionally apply
n o n - t o x i c
( p r e f e r a b l y LED
containing PTFE)
lubricant to O-rings
to
maintain
flexibility.
LARGE O-RINGS (On Air/Electric Module and High/Low
Vacuum Lines):
Keep all O-rings lubricated with PTFE lubricant. Periodically
inspect rings for damage or excessive wear -- damaged or
worn O-rings will create vacuum leaks, degrading system
performance.
Page 46
MOTOR LED LENS CLEANING:
The lens of the LED light on the motor (see Fig. 124) is soft
and can be damaged. It should not be exposed to dust and
debris. Excessive dust and debris may cause a drastic
decrease in optical output. In the event that the light
requires cleaning, first try a gentle swabbing, using a lintfree swab. If needed, use a lint-free swab and isopropyl
alcohol to gently remove dirt from the lens. Do not use other
solvents as they may adversely react with the LED
assembly.
WARNING
• Do not attempt to disassemble the motor or motor
connector.
• Do not oil or lubricate the motor.
• Do not attach a handpiece to the motor while the
motor is running.
• Do not bend motor cord sharply.
Failure to comply with any of the above instructions
may void your warranty
CAUTION:
The Electric Motor is sensitive to shock. Do not
drop or impact motor against a hard surface
CAUTION FOR ALL STERILIZATION:
• Do not exceed 135° C or 275° F
• Do not submerge in any solutions
• Do not use ultrasonic cleaners
GENERAL CLEANING:
The external surfaces of the chassis should be cleaned
using a soft cloth moistened with a mild detergent solution.
Any external surfaces of the unit that are contacted during
use should be wiped down with a soft cloth moistened with
a disinfectant at the beginning of each day and between
each patient use.
WATER LINES:
Disinfect the water lines weekly. Prepare a 1:10 bleach
solution (1 part household bleach to 10 parts water).
Remove water bottle and discard residual water. Replace
empty water bottle and air purge all waterlines. Fill water
bottle with bleach solution. Run bleach solution through all
lines. Allow bleach solution to stand in lines for 10 minutes.
Remove water bottle and discard bleach. Flush water bottle
and all lines thoroughly with clean water. Air purge and
leave lines dry until next clinical use.
CAUTION:
Do not run saline solutions through the water
system -- saline will rust the water filters.
VACUUM SYSTEM:
The HVE and low-volume saliva ejector valves are fully
autoclavable. Remove the valves from their hoses before
autoclaving. The vacuum hoses should not be autoclaved.
Clean hoses with a disinfectant solution.
AIR BOTTLE FILTER:
ULTRASONIC SCALER:
Routinely check the air bottle filter once a day for
condensation. To drain condensa-tion, place a towel or
container below the filter and use pliers to carefully loosen
the black knob on the bottom of the filter. IMPORTANT: To
open the drain, turn the black knob clockwise (follow arrow
on “DRAIN
“ label); to close drain, turn the knob
counterclockwise. Do not overtighten.
The scaler handpiece cover and scaler tips are fully
autoclavable. Disinfect and clean the cover and tips before
autoclaving. Autoclave at a maximum temperature of 135° C
(275° F) for 10 minutes or 120° C (248° F) for 20 minutes.
WASTE SYSTEM CLEANING:
Empty and clean the waste system whenever the level alarm
occurs. Also empty and clean it routinely once a day or
before the unit is to be shipped or stored. Follow these steps:
1) Empty all waste from the waste container.
2) Prepare approximately 2/3 liter of 10% bleach/water
solution in a separate container. Submerge the end of the
high-vacuum ejector (HVE) into this bleach solution and pull
no more than 1/3 liter of the solution through the line into the
waste container. Repeat this process for the saliva ejector
(low vacuum) line. IMPORTANT: The solution will enter the
waste container at a very high rate -- Care must be taken not
to overfill the container’s waste compartments.
3) Discard bleach solution. All components of the waste
container, including the lid assembly and waste container
strainer, can be safely rinsed with 10% bleach solution.
(NOTE: Take care to ensure that water is kept off the levelsensor electrical connector on the case.) Rinse and dry tanks
and the lid. If unit is to be shipped or stored, hang vacuum
lines vertically to allow any residual water to drain before
packing.
3-WAY AIR/WATER SYRINGE:
Depress the right button for air operation, and the left button
for water operation. Depressing both buttons will create a
mist. The syringe features quick-change autoclavable tips: To
remove a tip, press on the locking collar surrounding the tip
socket and pull the used tip straight out of the socket (Fig.
125). To insert a new tip, press locking collar and push tip into
socket as far as it will go. Release ring and gently tug on tip
before using to ensure that tip is securely locked into socket.
Syringe Tip Sterilization:
1) Remove contaminated syringe tip.
2) Remove all visible signs of contamination before
autoclaving.
3) Autoclave tip at 132° C (270° F) for ten minutes.
4) Sterilize between each patient use.
NOTE: Since only the tips can be autoclaved, it is
recommended that the air/water syringe be bagged with a
disposable, single-use plastic sleeve between each patient
use.
FIG. 125
DEPRESS
LOCKING COLLAR
Wipe off the scaler handpiece and it’s silicone hose with a
soft cloth. Use a 45% isopropal and detergent solution. DO
NOT IMMERSE the handpiece in any fluid or spray any fluid
directly on the handpiece.
MOTOR/CORD RECEPTACLE O-RINGS:
The O-rings (PN 520081) for the three water/air ports in the
motor/cord receptacle should be replaced if damaged or
worn. Use the provided O-ring installer pin and sleeve to
replace the O-rings:
1. Remove old O-ring from water or air port fitting.
2. Slide new O-ring over pointed end of installer pin, onto
the pin’s shank (see Figure 126).
FIG. 126
O-RING
INSTALLER
PIN
3. Insert pointed end of installer pin into open end of
installer sleeve until O-ring stops against end of tool.
4. Position concave end of installer pin against end of
water/air port fitting (see Figure 127).
FIG. 127
O-RING
WATER/AIR
FITTING
5. Push installer sleeve inward, until new O-ring seats into
groove on fitting (see Figure 128).
FIG. 128
O-RING
INSTALLER
PIN
INSTALLER
SLEEVE
AIR FILTER ASSEMBLY:
The foam filter on the Air Filter Assembly should be cleaned
regularly if the AEU-525CF is used in a dusty environment.
Gently pull the foam sheet off the white mounting studs on
the Assembly frame and clean with soap and water or
compressed air. If washed, allow filter to dry before
operating unit.
Page 47
TROUBLESHOOTING:
Problem:
Correction:
Unit will not start:
•
•
•
•
Unit starts but trips circuit breaker:
• Check source circuit to see if it is a minimum of 15A.
• Check voltage selector switch for proper voltage.
NOTE: Operating the unit off an extension cord is not recommended.
No water pressure:
• Check water supply bottle water level. Verify that cap is tight and not cross-threaded.
• Check that water supply pressure toggle is in the ‘PRESSURE’ position.
Insufficient vacuum:
• Check HVE and saliva ejector vacuum hose assemblies for blockage.
• Check that the waste container lid is properly seated and tightly secured.
• Check that holder toggle switch is On.
Insufficient handpiece operation:
• Check the pressure gauge on the side of the air/electric module and ensure that system pressure is sufficient.
• Check that handpiece tubing is untangled and not crimped.
• Check handpiece connection for missing or broken gasket.
No water to handpiece:
• Check that handpiece water toggle on side of air/electric module is ‘On’.
• Check that the water flow control valve to the handpiece is open (counterclockwise).
No coolant air to handpiece:
• Check that handpiece air toggle on side of air/electric module is ‘On’.
• Check that the air flow control valve to the handpiece is open (counterclockwise).
Check
Check
Check
Check
system power connection.
if both circuit breaker switches are On.
if waste container sensor is connected.
if waste container is full.
Electric motor control panel does not light up when on: • Press Standby Button on control panel.
Electric motor control panel lights up when turned on,
but handpiece does not turn:
• Check motor plug connection.
• Depress foot switch.
• Turn holder toggle switch toward red dot.
• Increase Torque setting
• Check that a file or bur is properly seated in the handpiece.
Electric motor slowing down or sluggish:
• Increase torque setting.
• Check for dirty, under-lubricated handpiece.
• Check if handpiece lubricant is draining into motor. After lubricating and before autoclaving, stand handpiece on
its base to let excess lubricant drain out.
Electric motor handpiece light does not turn on:
• Confirm that handpiece is a fiberoptic illumination type.
• Press illumination button on control panel to turn light On and/or increase light intensity
Vacuum doesn’t turn off when hoses are in their holders: • Ensure that HVE and saliva ejector vacuum heads are placed firmly in their holders.
• Check vacuum On/Off toggles on holders.
Pressure fails to stabilize:
• Check that air and water bottles are tight. Check line and fittings for air leaks.
Pressure fails to turn off at 55 PSI:
• Check for broken cable to pressure switch.
Unit fails to build pressure:
• Check that bottles are tight. Check wires for breaks to pressure regulation switch.
Red LED on the waste container is lit:
• Empty full waste container.
• Check waste level sensor connection. Verify that connector contacts are dry.
• Check that floats in waste container move freely.
Compressor is on, but gauge shows no increase in
pressure:
• Check unloader valve to see if the valve is switched. Check the line from the
compressor to the valve for a rupture. Check the electrical connections to the valve.
HVE vacuum switch is On (toward red dot), but
vacuum doesn’t activate when hose is removed:
Inspect the toggle lever on the vacuum holder to see if it is stuck. Loosen the setscrew under the switch and
adjust the switch for proper operation. Check instrument control switches on the air/electric module assembly.
HVE vacuum pressure seems lower:
Check to see if the waste container lid is properly seated and tightly secured.
Saliva ejector switch is On (toward red dot), but
vacuum doesn’t activate when hose is removed:
Inspect the toggle lever on the vacuum holder to see if it is stuck. Loosen the setscrew under the switch and
adjust the switch for proper operation. Check the toggling connections to the air pilot valve and pump. Check to
see if the air pilot valve is functioning by removing the line to the pump and seeing if air is present.
Page 48
DETACHABLE PARTS LIST
ITEM
PART NO
WASTE TANK ASSEMBLY AEU-525
INLINE STRAINER WASTE CONTAINER (HVE
O-RING .125ID X .070CS VT70 (AIR-JUNCTION)
O-RING .320ID X .O28 CS VITON 70 (E-HEAD)
O-RING .042ID X .142 X .050 W VITON (MTR RECPTL)
O-RING .208ID X .070 CS SILICONE (AIR-JUNCTION)
O-RING .234ID X .070 CS SILICONE 2-010 (LVE)
O-RING .549ID X .103 CS SILICONE 2-113 (HVE)
FILTER INLINE ONLY 35 MICRON (FOR UNLOADER)
FILTER 10-32 THRD STNLS 100 MICRON (WATR BOT)
BOTTLE 1 LITER BLOW MOLDED HDPE (WATER)
GASKET (FOR AIR & WATER BOTTLE LID)
FILTER AIR 1/4”NPT X 1.19 GAST (INLET FILTER)
330603
462124
520025
520069
520081
520099
520100
520101
730001
730326
730471
730473
730494
QTY
1
1
3
3
3
3
2
2
1
1
1
3
1
ITEM
PART NO
BOTTLE 750 ML (25 OZ) BLOW MOLDED HDPE (AIR)
LINECORD REMOTE US 10 FT HOSP GREY 15A/125A
LINECORD REMOTE EURO BLACK 2.5 M
O-RING FOR AA-35/36 PKG OF 4 AUTOCLAVABLE
O-RING FOR AA-37 SET OF 3/PKG AUTOCLAVABLE
SCALER TIP THIN SUBGINGIVAL
SCALER TIP SLIM UNIVERSAL
SCALER TIP POWER UNIVERSAL
SYRINGE TIP AUTOCLAVABLE
SYRINGE 3-WAY AIR/WATER QUICK CHANGE TIP
FOAM FILTER INNER AEU-525CF7
FOAM FILTER OUTER AEU-525CF
FOAM FILTER TUBE AEU-525CF
730657
840049
840007
AA-35LR
AA-37LR
ASC-10-PE37
ASC-10-PE38
ASC-10-PE39
TA-1
TA-90D
30684
730685
730687
QTY
1
1
1
1
1
1
1
1
1
1
1
1
1
Page 49
FINAL INSPECTION AND TESTING - Procedure for Aseptico AEU-525CF - F-4.10-02-B
(Testing specs subject to change. Refer to latest Schematic
Drawing Set, PN 420991, Sheets 16-18 for updates.)
EXAMINATION FOR DEFECTS:
• Unit design, construction, operation, and performance not
as specified.
• Hardware components such as pins, screws and
fasteners missing, broken or otherwise damaged.
• Finish not as specified.
• Damage or defects on exterior or interior surfaces
present.
• Plating missing which effects function. Plating not free
from blisters, peeling, visible porosity, or other defects.
• Any component fractured, broken punctured, torn,
bowed, deteriorated, or malformed.
• Any component misplaced or not in proper alignment.
• Fastening device requiring loosening or removal is
swaged, peened, staked, or otherwise permanently
fastened, components missing.
• Components do not fit or mate properly.
• Interface fits between components not proper (too loose;
too tight/binding).
• Components not free from defects.
• Removable components cannot be removed or replaced
without difficulty.
• Coarse machine, tool or die marks present.
• Surface not clean, not free of foreign matter, flux or other
defects.
• Damage or defects on exterior or interior surface present.
• Operating instructions not provided.
• Service data not provided.
• Identification markings not present, not complete, not
permanent, not correct.
TEST PROCEDURE - NEW AND REPAIRED
PRODUCTS:
A. Assemble AEU-525 with all instruments in their holders,
plug the power cord into 115VAC, 60Hz, and set the
voltage selector to “115”.
B. Performance Test (Suction):
1. Make sure all instruments are in their holders, and
power switches are “ON”, and turn holder switches to
“OFF”. DO NOT latch the side latches of the Waste
Tank Lid. The Lid sealing gasket should just rest on top
the Waste Tank.
2. Remove the HVE from its holder and turn on the
holder switch. The compressor should come on
continuously and there should be vacuum at the end of
the HVE. Check the maximum vacuum and the free air
flow rate. If < 3.9 SCFM @ 54” WC, remove power for
1 hour and repeat. If still low, mark as non-conforming.
Return HVE to its holder and turn the holder switch off.
3. Remove the LVE from its holder and turn on the
holder switch. The compressor should come on
continuously and there should be vacuum at the end of
the LVE. Check the maximum vacuum and the free air
flow rate. If < 1.2 SCFM @ 20” WC, mark as nonconforming. Return LVE to its holder and turn the holder
switch off.
4. Turn the Purge/Pressure switch to ‘Purge’ and
remove the water bottle. There should be no air leaking
from the bottle cap. Switch the Purge/Pressure switch
to ‘Pressure’ and verify that there is air flow from the
Page 50
bottle cap. Switch to ‘Purge’ and replace the water
bottle.
C. Performance Test (Line Voltage Select):
1. Turn off the compressor power switch and allow all
the air to bleed from the system.
2. Plug the power cord into 230VAC/50Hz and set the
voltage selector to “230”. Turn on the power switches
and run the compressor until it stops. Remove the HVE
from its holder and turn it on to start the compressor
again and run for 15 seconds and then turn off the
compressor power switch and allow all the air to bleed
from the system. Replace HVE in its holder.
D. Performance Test. (Air):
1. Turn on the compressor to fill the air reservoir. Wait
two minutes to ensure there is no leakage. The
compressor should not come on sooner than every 30
seconds after the first two cycles. Check that the
pressure gauge reads 45-55 PSI.
2. Operate the air syringe with a duty cycle of 20
seconds on and 10 seconds off for 5 minutes to check
for any possible stalling of the compressor.
E. Hand Motor Test:
1. If the power is on, turn it off. Now turn on the power
while watching the LCD display and verify that the
software versions are “127” and “11”.
2. Ensure the Standby button turns the display on and
off.
3. Ensure the ratio button causes the display to cycle
through the ratio settings of 1:5, 1:2, 1:1, 5:1, and 8:1.
Set the console to the 1:1 ratio.
4. Ensure the Torque Adjust buttons allow adjustment of
the display up and down from 5% to 100%. Set the
torque to 100%.
5. Ensure the Speed Adjust buttons allow speed
adjustment up and down from 2.00KRPM to 40.0KRPM.
Set the speed to 2.00KRPM.
6. Put a 20:1 handpiece with a large bur of some kind
on the motor. Press the footpedal and verify that the
bur rotates counterclockwise when viewed from the bur.
Release the footpedal and press the motor direction
button and verify that it goes from “FWD” to ”REV” and
back to “FWD”. Set it to “REV” and press the footpedal
and verify that the bur is now turning clockwise when
viewed from the bur and that the console is beeping.
Release the footpedal.
7. Change the ratio to 8:1 and the torque to 5%. Now
press the motor direction button and verify that it goes
from “FWD” to ”REV” to “ENDO” and back to “FWD”.
Set it to “ENDO” and press the footpedal and loosely
grasp the slowly turning bur until you hear a beep and
the direction of the bur will briefly reverse and then
continue in the original direction.
8. Remove the handpiece and press the “sun” symbol
until the LED turns on. Press the Torque Adjust buttons
to verify that the light intensity varies from very bright to
much dimmer. Leave the intensity at 100% and press
the “sun” symbol to turn off the LED. Press the “sun”
symbol to turn on the symbol on the LCD display and
press the “PRESET” button until there is a beep and the
preset number stops flashing. Now press the footpedal
to turn on the motor and LED and then release it and
verify that the LED remains on for 20 +/-5 seconds.
9. Place the motor into a calibrated ATU-0037
tachometer. Confirm that the torque is set to 100%.
Set the speed to 40.0KRPM. Press the footpedal to
turn on the motor and record the speed which the
tachometer shows and verify that it is 40.0KRPM +/2.0KRPM. Values outside this range are nonconforming.
10. Attach an Anthogyr 8:1 (actually 7.2:1) handpiece to
the motor and set the controls to 8:1 ratio, 500RPM,
100% torque and ENDO mode. Attach the handpiece
to the bit on the dynamometer assembly (copper
cylinder) and press the footpedal. While the motor is
running, decrease the Torque% setting until the motor
stops and goes into ENDO mode. Record the Torque
% setting where this happens. It should be less that
50% and greater than 5%. If not, remove the
handpiece and lubricate it with Aseptispray and repeat.
If it still fails, mark it as nonconforming.
11a. Remove the handpiece. Depress the foot pedal
with the Handpiece Water and Handpiece Air toggle
valves off and check that no cooling air or water is
coming from the two holes between the 0-rings on the
motor E-head. You will feel motor cooling air at the
front of the E-head however.
11b. Turn the Handpiece Air toggle valve on and adjust
the Handpiece Air needle valve on the Delivery Module.
Depress the footpedal and verify that air is coming from
the motor E-head hole between the two o-rings farthest
from the motor body on the E-head.
11c. Partially fill the Delivery Module water bottle and
insert an internal irrigation type handpiece such as the
AHP-72MB onto the motor. Turn the Handpiece Air
toggle valve off and the Handpiece Water toggle valve
on and adjust the Handpiece Water needle valve on the
Delivery Module. Depress the footpedal and verify that
water is coming from the handpiece. Turn on the
Handpiece Air and verify that a fine mist is coming from
the handpiece.
11d. Operate the handpiece motor with the Handpiece
Air toggle on and then turn the toggle off while still
operating the motor. Release the foot pedal and place
the hand motor firmly in its holder and wait 5 seconds.
Press the footpedal. If the motor comes on, the
designed leak isn’t present or of adequate magnitude.
11e. Turn off the AEU-525 and trip the HVE and bottle
pressurization toggles to remove all compressed air
from the system. Close the toggles. Fill the ATU-0088
bottle to the line on the side and mount on the AEU525. Turn on the AEU-525 and observe the final
pressure of the ATU-0088 gauge. It should be between
25 and 35 PSI and should be reached within 10
seconds of turn on. Repeat steps 4 more times. If
pressure is wrong or it takes too long to pressurize then
the module needs to be reworked.
12. Simultaneously hold the Preset and Ratio buttons
until the display resets and factory defaults are set.
F. Performance Test (Syringe):
1. Fill the water bottle and turn on the compressor to fill
the air reservoir. Press the syringe air button (the right
one) and check that the pressure gauge doesn’t go
below 20 PSI. If it does, change the screwdriver adjust
for the syringe air.
2. Release the syringe air button and allow the
compressor to refill the reservoir. Press the syringe
water button (left one) and verify that water comes out
the syringe.
3. Press both buttons and verify that a mist is created.
4. Use ATU-0090 and plug the syringe tip into the
syringe. Press the syringe air button and observe the
MAXIMUM pressure on the gauge. It must be between
48.0 and 55.5 PSI
G. Performance Test (Scaler):
1. Remove scaler from its holder, install a tip, turn the
scaler intensity to “10”, turn the Scaler Water control
counterclockwise as far as it will go, turn the Scaler
Water toggle valve on and press the foot pedal and
observe that the scaler produces water from the tip, that
the scaler lights come on, and that when the scaler tip is
placed against a thin metal surface, there is high pitched
noise produced.
2. Turn the Scaler Intensity control from “10” to “100”
and back and verify that the control adjusts the intensity
of the scaler vibrations.
3. With the Scaler Intensity control set to “10”, adjust the
Scaler water control clockwise and counterclockwise to
verify that it controls the amount of water coming from
the scaler tip.
4. Press the foot pedal several times to verify that the
scaler goes on and off with no more than a ½ second
delay. Remove the scaler tip
H. Performance Test (Waste Tank)
1. Remove the Waste Tank lid from the tank and with
the floats at the bottom place the .82“ spacer over the
sensor wells and then press each float upward as far as
possible. There must be no alarms. Remove the .82”
spacer and lift each float about .250” and there must be
flashing from the red LED on the lid and beeping from
the main case.
2. Turn on the HVE so that the compressor is on
continuously and place a .0625 spacer above the first
float and raise the float as high as possible. The
compressor must stop.
3. Repeat for other float.
I. HiPot and Ground Bond Tests:
1. On the AC/DC Withstand Voltage Tester, press MENU
-> MENU -> SYSTEM and change the “PLC REMOTE”
setting to “OFF”.
2. Ground Bond Test - Earth Ground at Power Inlet to
accessible earthed metal.
Test parameters: Current limit 25 Amps, Dwell time 2
seconds, Resistance limit 0.1 Ohms.
Page 51
FINAL INSPECTION AND TESTING - Cont’d
Test Details:
a. Connect the power cord from the test equipment to
the mains power inlet of the AEU-525, and the return
lead of the Ground Bond Tester to the chrome plated
bungee handle.
b. Verify that the settings on the Ground Bond Tester
are correct (Ref. Ground Bond Tester (Preset M0-1).
c. Press the “TEST” button on the Ground Bond
Tester and wait for the test to finish.
3. Dielectric Withstand Test - Mains to accessible
earthed metal.
Test parameters: Test voltage 2520 VDC, Ramp 1
second, Dwell 1 second, Leakage current limit 1.0 mA,
Arc Fail is OFF.
Test Details:
a. Connect the power cord from the test equipment to
the mains power inlet of the AEU-525, and the return
lead of the Hypot III Tester to the chrome handle
inside the ‘525.
b. Verify that the settings on the AC/DC Withstand
Voltage Tester are correct. Press the “TEST” button
on the Dielectric Withstand Tester and wait for the test
to finish.
4. Dielectric Withstand Test - Mains to AEU-5000
Handmotor.
Test parameters: Test voltage 4350 VDC, Dwell Time 1
second, Leakage current limit 1.0 mA, Arc Fail is OFF.
Test Details:
a. Connect the power cord from the test equipment to
the mains power inlet of the AEU-525 and the return
lead of the Ground Bond Tester to the E-head of the
AEU-525 motor.
b. Verify that the settings on the AC/DC Withstand
Voltage Tester are correct.
c. Press the “TEST” button on the Dielectric Withstand
Tester and wait for the test to finish.
5. Dielectric Withstand test – Mains to Scaler Tip.
Test parameters: Test voltage 4350 VDC, Ramp 1
second, Dwell 1 second, Leakage limit 1 mA, Arc Fail is
OFF.
Test Details:
a. Make sure the power switch/circuit breaker and the
compressor circuit breaker are on.
b. Open the transition box on the Delivery Module and
disconnect the green wire at the Euro terminal strip
and fold the wire away from any metal parts.
c. Connect the appliance coupler cord from the hipot
tester to the mains input of the AEU-525. Connect the
return cable of the hipot tester to the scaler tip. Lay
the scaler handle and the return lead on a sheet of
insulator so there is no mechanical stress placed on
the scaler tip.
d. Verify the test settings are correct. Push ‘TEST’
and wait for the test to finish.
e. Reconnect the green wire, check continuity, and
replace transition box cover.
Page 52
6. Dielectric Withstand Test - Mains to the combined
foot pedal wires.
Test parameters: Test voltage 4350 VDC, Ramp 1
second, Dwell 1 second, Leakage limit 1 mA, Arc Fail is
OFF.
Test Details:
a. Make sure the power switch/circuit breaker and the
compressor circuit breaker are on.
b. Attach a foot pedal connector cable 875070 with all
wires joined to form a common test point (ATU-0076).
c. Connect the appliance coupler cord from the hipot
tester to the mains input of the AEU-525. Connect
the return cable of the hipot tester to the joined wires
of the foot pedal connector.
d. Verify the test settings are correct.
e. Push ‘TEST’ and wait for the test to finish
J. Empty Water Bottle and Dry:
Make sure the electric motor is attached to the Delivery
Module and place the motor in a dry absorbent material.
Open Handpiece Water adjust all the way, open the
Handpiece Water toggle valve, press on foot pedal and
blow out water from the lines and motor. Place motor in
holder. Remove scaler from holder and open Scaler
Water adjust all the way, open the Scaler Water toggle
valve, TURN THE SCALER INTENSITY CONTROL AS
LOW AS POSSIBLE, press on foot pedal and blow out
water from the lines and scaler. DON’T OPERATE
LONGER THAN 30 SECONDS!
K. Foot Control:
Ensure that the foot control has “PASSED” label P/N
420301.
L. Labeling and Serial Number:
Make sure all required labels, including the one with the
serial number, are present.
M. Manual and Packaging:
Ensure the instrument has one foot pedal, high vacuum
hose, low vacuum hose, 120VAC power cord, 220VAC
power cord, 40K motor, waste tank and lid, manual and
packing guide.
Refer to Schematic Drawing Set, PN 420991, Sheet 16
for test instructions on the electric motor assembly.
Refer to Schematic Drawing Set, PN 420991, Sheets 17
& 18 for setup instructions and testing parameters for
ground bond and dielectric withstand tests.
SYMBOL DEFINITIONS:
Type BF Equipment
High Volume Evacuator (HVE)
Attention, consult accompanying documents
Pressure Gauge
Consult Instructions For Use
Motor Direction
Manufacturer
Light Controls
Dangerous Voltage
Footswitch
Alternating current
On/Off Switch - Mains
Air
Atmospheric Pressure Limitation
Water
Temperature Limitation
Counterclockwise to Increase/Open
Clockwise to Decrease/Close
Humidity Limitation
Electric Handpiece
Protective earth (ground)
Syringe
IPX1
Protect Against Dripping Water
Scaler
SN
Serial Number
Scaler Tip Ultrasonic Control
Do Not Lift by Top Lid Or Latches
Saliva Ejector
Pressurize / Purge
Water Bottle Pressure
DO NOT THROW INTO TRASH:
Dispose of electronic waste and waste containing
amalgam in accordance with local regulations.
Page 53
REQUIRED TOOLS LIST
Allen Wrenches:
1/16"
5/64"
3/32"
1/8"
9/64"
5/32"
4mm
3/16"
1/4"
Combination Wrenches:
1/4"
5/16"
11/32"
3/8"
7/16"
1/2"
9/16" (Qty: 2)
5/8"
3/4"
13/16"
7/8"
1"
Page 54
Screwdrivers:
1/4" Standard, Slot
3/64" Standard Slot (Jeweler's)
#1 Phillips
#2 Phillips
Electrical Tools:
Wire Stripper
Crimp Tool
Panduit Model CT-1551 (or equivalent)
Molex 640014100 (or equivalent)
Diagonal Cutters
SPECIFICATIONS
Transport III Case Size: . . . . .17.93” W x 22.06” L x 10.43” H
(45.5 cm x 56 cm x 26.5 cm)
Shipping Case Size: . . . . . . .30.5” W x 25.75” L x 24.75” H
(77.47 cm x 65.40 cm x 62.86 cm)
525CF Weight (fully loaded): .57 lbs (25.8 kg)
Shipping Case Weight: . . . . .108 lbs (49 kg)
(fully loaded)
Power Source: . . . . . . . . . . . .AC Manual-Switching
115/220/230 VAC at 60/60/50 Hz
Power Rating: . . . . . . . . . . . .4.7A/4.9A at 50/60Hz, 115VAC
2.7A at 60Hz, 220VAC
2.3A/2.6A at 50/60Hz, 230VAC
Operating Pressure: . . . . . . . .45 - 55 PSI (3.10 - 3.79 bar)
High Volume Vacuum: . . . . . .5.8 SCFM @ 0” Hg (164.2 liters/min @ 0 cm Hg)
4.0 SCFM @ 4” Hg (113.3 liters/min @ 10.2 cm Hg)
Low Volume Vacuum: . . . . . .1.2 SCFM @ 1.5” Hg (33.9 liters/min @ 3.8 cm Hg)
Simultaneous Vacuum: . . . . .High @ 4” Hg = 3.2 SCFM (90.6 liters/min @ 10.2 cm Hg)
Low @ 1.5” Hg = 1.2 SCFM (33.9 liters/min @ 3.8 cm Hg)
Vacuum/Compressor Pump: .1.1 SCFM @ 50 PSI (31.0 liters/min @ 3.45 bar) Oilless Compressor
Water Reservoir Capacity: . . .33.9 fl. oz. (1.0 liters)
Air Storage Capacity: . . . . . . .25.4 fl. oz. (750 ml) nominal
Water Flow: . . . . . . . . . . . . . .5.07 fl. oz./min (0.15 liter/min)
Waste Container Capacity: . .0.48 gallon total/0.24 gal. per side (1.8 liters total/0.90 L per side)
(NOTE: Capacities reflect liquid volumes up to shutoff levels.)
Noise Level: . . . . . . . . . . . . . .62 dBA @ 3’4” (1 meter)
Case Duty Cycle: . . . . . . . . . .Continuous
Compressor Duty Cycle: . . . .Continuous when operating at 50/60 Hz
Electric Motor Duty Cycle: . . .17% (1 minute ON / 5 minutes OFF)
Environmental Conditions: . . .Operating Temperature: 0° to 40° C (32° to 104° F)
Transport/Storage Temperature: -20° to 65° C (-4° to 149° F)
Relative Humidity: 10 to 95% non-condensing
Altitude: 0 to 3048 meters (0 to 10,000 feet)
TRANSPORT &
STORAGE
TEMPERATURE
OPERATING
TEMPERATURE
40°C
(104°F)
0°C
(32°F)
41EJ
-20°C
(-4°F)
65°C
(149°F)
10%
MEDICAL -- GENERAL MEDICAL EQUIPMENT
AS TO ELECTRICAL SHOCK, FIRE AND MECHANICAL
HAZARDS ONLY, IN ACCORDANCE WITH:
UL 60601-1: First Edition - Medical Electrical
Equipment, Part 1: General Requirements for Safety.
ANSI/AAMI ES60601-1:2005/(R)2012 and A1:2012,
C1:2009/(R)2012 and A2:2010/(R)2012 - Medical
electrical equipment—Part 1: General requirements
for basic safety and essential performance.
CAN/CSA C22.2 NO. 60601-1-08 (2013) - Medical
Electrical Equipment - Part 1: General Requirements
for Basic Safety and Essential Performance (Adopted
IEC 60601-1:2005, third edition, 2005-12), Includes
Corrigendum 1:2011.
95%
1013.3
hPa
697
hPa
IMPORTANT
NOTE
When running the
Transport III unit at 50Hz,
expect approximately 17%
less vacuum and pressure
volume due to slower
turning of the compressor.
With regard to setting
the handpieces
pressure, 'kgcm2' and
'bar' are equivalent.
This device has been tested and found to comply with the emissions requirements of
IEC 60601-1-2:2001-09. These requirements provide reasonable protection against
harmful electromagnetic interference in a typical medical installation. However, high
levels of radio-frequency (RF) emissions from electrical devices, such as cellular
phones, may disrupt the performance of this device. To mitigate disruptive
electromagnetic interference, position this device away from RF transmitters and
other sources of electromagnetic energy.
Page 55
WARRANTY
REPAIRS
Aseptico warrants its products against defects in material or
workmanship for a period of two (2) years, from date of
original invoice. Some handpieces are warranted for one
year under the same conditions. Other handpieces and
expendable components, such as air turbines and light
bulbs, are covered by shorter warranty periods, or have no
warranty. Aseptico's sole obligation under product warranty
is (at its sole option and discretion) to repair or replace any
defective component or product in part or whole. Aseptico
shall be the sole arbiter of such action.
Aseptico repairs carry a ninety (90) day limited warranty
against defects in material and workmanship. This warranty
pertains only to the specific repair. Any new and different
defect in materials or workmanship will be treated as a new
repair. If the product is not covered under warranty, Aseptico
offers Repair Services for a fee.
In the event of alleged defect under warranty, the purchaser
is to notify Aseptico's Customer Service Department
promptly. Customer Service will provide instructions, usually
directing that the product be returned for service. Shipment
to Aseptico and the cost thereof is always the responsibility
of the purchaser.
Accidental misuse, inappropriate installation, or failure to
perform directed maintenance voids the warranty.
Deliberately defacing, modifying, or removing the serial
number voids the warranty.
Aseptico does not assume, under this warranty, any risks or
liabilities arising from the clinical use of its products, whether
or not such use involves coincidental utilization of products
manufactured by others.
Page 56
Notes
Page 57
For Further Service And/Or Technical Assistance Contact:
P.O. Box 1548 • Woodinville, WA 98072-1548
1-800-426-5913 • 425-487-3157 • Fax: 425-487-2608
www.aseptico.com • [email protected]
P/N: 420990
Rev. A
ECO 12789
05/2014
PRINTED IN THE USA