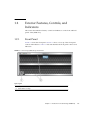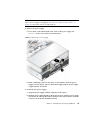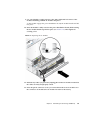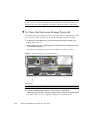
1
TM
Sun Storage J4500 Array
Service Manual
Part No.: 820-3160-12
March 2013, Revision A
Copyright © 2009, 2013 Oracle Corporation, 500 Oracle Parkway, Redwood City, California 94065, U.S.A. All rights reserved.
Sun Microsystems, Inc. has intellectual property rights relating to technology that is described in this document. In particular, and without limitation,
these intellectual property rights may include one or more of the U.S. patents listed at http://www.sun.com/patents and one or more additional patents
or pending patent applications in the U.S. and in other countries.
This document and the product to which it pertains are distributed under licenses restricting their use, copying, distribution, and decompilation. No part
of the product or of this document may be reproduced in any form by any means without prior written authorization of Sun and its licensors, if any.
U.S. Government Rights—Commercial use. Government users are subject to the Sun Microsystems, Inc. standard license agreement and applicable
provisions of the FAR and its supplements.
Use is subject to license terms.
This distribution may include materials developed by third parties.
Sun, Sun Microsystems, the Sun logo, and Sun Storage J4500 Array are trademarks or registered trademarks of Sun Microsystems, Inc., or its subsidiaries,
in the U.S. and other countries.
This product is covered and controlled by U.S. Export Control laws and may be subject to the export or import laws in other countries. Nuclear, missile,
chemical biological weapons or nuclear maritime end uses or end users, whether direct or indirect, are strictly prohibited. Export or reexport to countries
subject to U.S. embargo or to entities identified on U.S. export exclusion lists, including, but not limited to, the denied persons and specially designated
nationals lists is strictly prohibited.
DOCUMENTATION IS PROVIDED "AS IS" AND ALL EXPRESS OR IMPLIED CONDITIONS, REPRESENTATIONS AND WARRANTIES, INCLUDING
ANY IMPLIED WARRANTY OF MERCHANTABILITY, FITNESS FOR A PARTICULAR PURPOSE OR NON-INFRINGEMENT, ARE DISCLAIMED,
EXCEPT TO THE EXTENT THAT SUCH DISCLAIMERS ARE HELD TO BE LEGALLY INVALID.
Copyright 2009, 2013 Oracle Corporation, 500 Oracle Parkway, Redwood City, Californie 94065, États-Unis. Tous droits réservés.
Sun Microsystems, Inc. possède les droits de propriété intellectuels relatifs à la technologie décrite dans ce document. En particulier, et sans limitation, ces
droits de propriété intellectuels peuvent inclure un ou plusieurs des brevets américains listés sur le site http://www.sun.com/patents ,un ou les
plusieurs brevets supplémentaires ainsi que les demandes de brevet en attente aux les États-Unis et dans d’autres pays.
Ce document et le produit auquel il se rapporte sont protégés par un copyright et distribués sous licences, celles-ci en restreignent l’utilisation, la copie, la
distribution, et la décompilation. Aucune partie de ce produit ou document ne peut être reproduite sous aucune forme, par quelque moyen que ce soit,
sans l’autorisation préalable et écrite de Sun et de ses bailleurs de licence, s’il y en a.
Droits du gouvernement des États-Unis—L’utilisation commercial. Les droits des utilisateur du gouvernement des États-Unis sont soumis aux termes de
la licence standard Sun Microsystems et aux conditions appliquées de la FAR et de ces compléments.
L’utilisation est soumise aux termes du contrat de licence.
Cette distributions peut inclure des éléments développés par des tiers.
Sun, Sun Microsystems, le logo Sun,et Sun Storage J4500 Array sont des marques de fabrique ou des marques déposées de Sun Microsystems, Inc., ou ses
filiales, aux États-Unis et dans d’autres pays.
Ce produit est soumis à la législation américaine en matière de contrôle des exportations et peut être soumis à la règlementation en vigueur dans d’autres
pays dans le domaine des exportations et importations. Les utilisations finales, ou utilisateurs finaux, pour des armes nucléaires, des missiles, des armes
biologiques et chimiques ou du nucléaire maritime, directement ou indirectement, sont strictement interdites. Les exportations ou réexportations vers les
pays sous embargo américaine, ou vers des entité figurant sur les listes d’exclusion d’exportations des produits ou des services qui sont régis par la
législation américaine sur le contrôle des exportations et la liste de ressortissants spécifiquement désignés, sont rigoureusement interdites.
LA DOCUMENTATION EST FOURNIE "EN L’ÉTAT" ET TOUTES AUTRES CONDITIONS, DÉCLARATIONS ET GARANTIES EXPRESSES OU
TACITES SONT FORMELLEMENT EXCLUES DANS LA LIMITE DE LA LOI APPLICABLE, Y COMPRIS NOTAMMENT TOUTE GARANTIE
IMPLICITE RELATIVE À LA QUALITÉ MARCHANDE, À L’APTITUDE À UNE UTILISATION PARTICULIÈRE OU À L’ABSENCE DE
CONTREFAÇON.
Please
Recycle
Contents
Preface
1.
Introduction to the Sun Storage J4500 Array
1–1
1.1
Features
1.2
Exterior Features, Controls, and Indicators
1.3
2.
vii
1–1
1–3
1.2.1
Front Panel
1–3
1.2.2
Back Panel
1–4
1.2.3
Sun Storage J4500 Array Internal Components
Accessory Kit
1–8
Configuring and Powering On the Sun Storage J4500 Array
2.1
Configuration and Cabling
2–1
2–1
2.1.1
Terms and Definitions
2.1.2
Configuration Rules
2.1.3
1–6
2–1
2–2
2.1.2.1
General Rules
2–3
2.1.2.2
Connecting Host Bus Adapters (HBAs)
2.1.2.3
Connecting Multiple Sun Storage J4500 Arrays
2.1.2.4
SAS Target Limits
2.1.2.5
Configuration with Blade Servers
Cabling the SAS Connectors
2–3
2–4
2–4
2–5
2–5
iii
2.1.4
2.2
2.1.4.1
Single Host Direct Connection
2.1.4.2
Single Host With Cascaded Arrays
2.1.4.3
Single Host Direct Connection to Two Arrays
2.1.4.4
Multipath Connection to the Array
2.1.4.5
Multi-host Zoned Connection to the Array
2–7
2–7
▼
To Power On the Array
▼
To Place the Array Into Standby Power Mode
▼
To Power Off the Array
2–12
2–13
2–13
3–1
3.1
Options and Replaceable Components
3.2
Tools and Supplies Needed
3.3
Powering Off the Array and Removing It From the Rack
3–1
3–2
▼
To Power Off the Array
▼
To Remove the Array Enclosure From the Rack
3–3
3–3
3–4
Removing and Replacing the Hard Disk Drive Access Cover
▼
To Remove the Hard Disk Drive Access Cover
3–9
▼
To Replace the Hard Disk Drive Access Cover
3–9
3.5
Internal Component Locations
3.6
Replacing Components
3–11
3–12
▼
To Replace a Fan Module
▼
To Replace the Front Indicator Board
▼
To Replace a Hard Disk Drive
▼
To Replace the Power Distribution Board
▼
To Replace a Power Supply
▼
To Replace the System Controller Module
Sun Storage J4500 Array Service Manual • March 2013
2–10
2–12
AC Power Failure Auto-Recovery
3–12
3–15
3–18
3–21
3–26
3–28
2–8
2–9
2–11
Maintaining the Sun Storage J4500 Array
3.4
iv
2–7
Powering On and Off the Array
2.2.1
3.
Example Configurations
3–8
▼
3.7
To Replace the Array Chassis
Upgrading Enclosure Firmware
3.7.1
4.
3–32
3–33
Ensure Both SAS Fabrics are Upgraded to the Same Firmware
Revision Level 3–33
Troubleshooting
4–1
4.1
External Status LEDs
4.2
Internal Disk Drive and Fan LEDs
4–3
4.3
Diagnostic and Management Tools
4–5
4.3.1
SunVTS
4.3.2
Common Array Manager (CAM)
4–5
4–5
▼
To Access Service Advisor Procedures
4–6
▼
To Reserve the Array for Maintenance
4–6
▼
To Release the Array After Maintenance
4.3.2.1
4.4
4–1
Understanding the CAM Event Log
Troubleshooting Problems with the Array
4–7
4–9
4.4.1
Initial Start-up
4.4.2
Check the Event and Performance Logs
4.4.2.1
4–7
4–9
4–10
Identifying Disks in the Array Enclosure
4–10
4.4.3
Using the Array Management Software to Monitor Enclosure
Health 4–11
4.4.4
Array Link Problems
4.4.4.1
4.4.5
Switching SAS Cables or Making New Connections
12
Disk Problems
▼
4–11
4–
4–13
To Replace a Disk
4–13
4.4.5.1
Guidelines for Removal and Replacement of RAID
Storage 4–13
4.4.5.2
Persistent Affiliation When Changing HBAs
4.4.5.3
If You Do Not See All of the 48 Disks
4–13
4–14
Contents
v
4.4.5.4
4.5
4.4.6
Array Environment Problems
4.4.7
Power Problems
4–16
To Reset the Enclosure Hardware Using the Reset Button
4–17
To Clear the Enclosure Zoning Password
A. System Specifications
B. Connector Pinouts
4–18
A–1
B–1
B.1
Mini-SAS Connectors
B.2
I/O-to-Disk Backplane Connectors
B–1
B–3
B.2.1
Power Blade Connector
B–3
B.2.2
High-Speed Dock Connectors
B–3
B.3
Power Supply Connector
B.4
Disk Backplane-to-Front Indicator Connector
B.5
Backplane-to-Disk-Backplane Connector
B.6
Fan Tray Connectors
B.7
Fan Connectors
Index
vi
4–15
Clearing the Enclosure Zoning Password
▼
4–14
4–16
Resetting the Enclosure Hardware
▼
4.6
Multipath Problems With Unsupported Drives
B–7
B–10
B–11
Index–1
Sun Storage J4500 Array Service Manual • March 2013
B–9
B–8
4–16
Preface
This document contains information and procedures for maintaining and upgrading
the Sun™ Storage J4500 array.
Before You Read This Book
It is important that you review the safety guidelines in the Sun Storage J4500 Array
Safety and Compliance Guide (820-3161).
Typographic Conventions
Typeface
Meaning
Examples
AaBbCc123
The names of commands, files,
and directories; on-screen
computer output
Edit your .login file.
Use ls -a to list all files.
% You have mail.
AaBbCc123
What you type, when
contrasted with on-screen
computer output
% su
Password:
AaBbCc123
Book titles, new words or terms,
words to be emphasized.
Replace command-line
variables with real names or
values.
Read Chapter 6 in the User’s Guide.
These are called class options.
To delete a file, type rm filename.
vii
Note – Characters display differently depending on browser settings. If characters
do not display correctly, change the character encoding in your browser to Unicode
UTF-8.
Documentation, Support, and Training
The Sun web site provides information about the following additional resources:
■
Documentation (http://docs.sun.com/app/docs/prod/j4500.array)
■
Support (http://www.sun.com/support)
■
Training (http://www.sun.com/training)
Third-Party Web Sites
Sun is not responsible for the availability of third-party web sites mentioned in this
document. Sun does not endorse and is not responsible or liable for any content,
advertising, products, or other materials that are available on or through such sites or
resources. Sun will not be responsible or liable for any actual or alleged damage or
loss caused by or in connection width the use of or reliance on any such content,
goods, or services that are available on or through such sites or resources.
Sun Welcomes Your Comments
Sun is interested in improving its documentation and welcomes your comments and
suggestions. You can submit your comments by going to:
http://www.sun.com/hwdocs/feedback
Please include the title and part number of your document with your feedback:
Sun Storage J4500 Array Service Manual, part number 820-3160-12.
viii
Sun Storage J4500 Array Service Manual • March 2013
Change History
The following describes the change history of this document:
■
820-3160-10, October 2008, initial publication.
■
820-3160-11, June 2009, updated to include support for additional servers,
multipathing, and zoning of array storage for multiple hosts using the Sun
Common Array Manager.
■
820-3160-12, March 2013, updated to remove restriction on mixing drives from
different supported manufacturers.
Preface
ix
x
Sun Storage J4500 Array Service Manual • March 2013
CHAPTER
1
Introduction to the Sun Storage
J4500 Array
This chapter contains an overview of the Sun™ Storage J4500 array disk enclosure,
including features and included components.
1.1
■
Section 1.1 “Features” on page 1-1
■
Section 1.2 “Exterior Features, Controls, and Indicators” on page 1-3
■
Section 1.3 “Accessory Kit” on page 1-8
Features
The Sun Storage J4500 array is a mid-level, modular, rack-optimized, expansion
storage solution in the Sun storage product family. It is designed for deployment into
commercial server markets in a slide-mounted, horizontally biased enclosure for rack
cabinet installations, primarily in datacenter locations.
TABLE 1-1 summarizes the features of the Sun Storage J4500 array.
1-1
1-2
TABLE 1-1
Summary of Features
Feature or
Component
Description
Hard disks
Up to forty-eight 3.5-inch SATA II drives, of 500 GB, 750 GB or 1 TB
capacity each (48 TB total system capacity), 3 Gbit/sec data rates,
hot-pluggable.
System
Controller
The System Controller contains four LSI™ SAS x36 expanders. These
expanders provide a redundant set of independent SAS fabrics (two
expanders per fabric), enabling two paths to the J4500 array’s 48 drives.
Four external mini-SAS x4 (by four) connector ports, each connector
contains four PHYs (physical links) enabling eight SAS lanes per fabric to
connect to storage. Each x4 connector port links to all 48 disks.
The expander firmware is upgradable (see Chapter 3). The System
Controller module is hot-pluggable.
RAID options
RAID support is specific to the supported host bus adapter.
Data rates
The SAS interface allows 1.5 and 3 Gbit/sec SAS and SATA with
auto-negotiation.
Bandwidth
Up to 48 Gb/sec total bandwidth:
2 (x4-wide) SAS host/uplink ports (24 Gb/sec bandwidth)
2 (x4-wide) SAS expansion port (24 Gb/sec bandwidth)
Protocols
Supports SSP, STP, SMP as defined in the Serial Attached SCSI (SAS) v1.0
and v1.1 specifications.
Management
Enclosure management is provided through SMP and SES-2.
I/O
Four external mini-SAS x4 connector ports (a two-port primary path and a
redundant two-port secondary path).
Power
Two 1500 W DC max output power supplies, two bays, 1+1 redundancy
(array continues to operate with one power supply), hot-swappable.
110–220 VAC input voltage
47-63 Hz input frequency
1100 W DC max power consumption
Cooling
Five variable-speed fan modules (two per module), hot-swappable.
Additionally, each power supply has its own fan.
Cooling is front-to-back forced air.
SAS cables
Two mini-SAS x4 SFF-8088 cables are supplied with the array.
Sun Storage J4500 Array Service Manual • March 2013
1.2
Exterior Features, Controls, and
Indicators
This section describes the features, controls and indicators on the front and back
panels of the J4500 array.
1.2.1
Front Panel
FIGURE 1-1 shows the front panel. FIGURE 1-2 shows a close up of the front panel
controls and indicators. TABLE 1-2 lists and describes the front panel controls and
indicators.
FIGURE 1-1
Sun Storage J4500 Array Front Panel
Figure Legend
1
USB ports—Not used
2
Serial numbers on ledge
Chapter 1
Introduction to the Sun Storage J4500 Array
1-3
1.2.2
FIGURE 1-2
Front Panel Controls and Indicators
TABLE 1-2
Front Panel Controls and Indicators
#
Name
Description
1
Locate button/LED
Using array management software, operators can turn this
LED on remotely to help them to locate the server in a
crowded server room. Press to turn off.
2
System fault
On – Service action is required.
3
Power LED
On – Power is on.
Blinking – Standby power is on but main power is off.
Off – Power is off.
4
System power button
See Section 2.2 “Powering On and Off the Array” on
page 2-11 for details.
5
Top fault LED
On – Hard disk or fan fault.
6
Rear fault LED
On – Power supply, or system controller fault (service is
required).
7
Over temperature LED
On – The enclosure has exceeded the operating
temperature.
Back Panel
FIGURE 1-3 shows the features of the back panel. TABLE 1-3 lists and describes each
feature.
1-4
Sun Storage J4500 Array Service Manual • March 2013
FIGURE 1-3
Sun Storage J4500 Array Back Panel
TABLE 1-3
Back Panel Features
#
Name
Description
1
Power supply fault LED
(amber)
On – Service action is required.
2
Power supply LED (green)
On – Power is on (AC/DC are OK).
Blinking – Standby power is on (AC is OK).
Off – Power is off.
3
AC power connector
Each power supply has its own AC connector with a
clip to secure its power cable.
4
Chassis ground
Connect grounding straps here.
5
Filler panel
This filler panel seals an access area in the chassis
used by service personnel.
6
Locate button/LED (white)
Using array management software, operators can turn
this LED on remotely to help them to locate the
enclosure in a crowded server room. Press to turn off.
7
System fault LED (amber)
On – Service action is required.
8
System power LED (green)
On – Power is on.
Blinking – Standby power is on but main power is off.
Off – Power is off.
Chapter 1
Introduction to the Sun Storage J4500 Array
1-5
TABLE 1-3
1.2.3
Back Panel Features (Continued)
#
Name
Description
9
SAS link activity LED (green) Each SAS port has a SAS Link Activity LED:
On – 1 to 4 links are ready.
Blinking – Read/Write port activity.
Off – Link is lost.
10
Two mini-SAS x4 connector
ports (SAS B)
Secondary (redundant) SAS ports 0 and 1, each with
SAS Link activity LEDs. Port 0 uses subtractive or
direct routing and connects to a host or upstream
devices; Port 1 is universal, using table and direct
routing, and connects to a host or downstream
devices.
11
SAS ID (or WWN)
The label placed here lists the unique SAS ID address
(also known as World-Wide Name) of the enclosure.
12
Two mini-SAS x4 connector
ports (SAS A)
Primary SAS ports 0 and 1, each with SAS Link
activity LEDs. Port 0 uses subtractive or direct routing
and connects to a host or upstream devices; Port 1 is
universal, using table and direct routing, and connects
to a host or downstream devices.
13
Enclosure reset button
Resets the enclosure hardware without powering
down the enclosure. For more information, see
Chapter 4.
14
System controller status
LEDs
Blue – Ready to remove (service action allowed)
Amber – Fault (Service action required)
Green – OK (no action required)
Sun Storage J4500 Array Internal Components
FIGURE 1-4 shows the locations of the J4500 array components, with the covers
removed. All power supplies, drives and fans are numbered and labeled.
1-6
Sun Storage J4500 Array Service Manual • March 2013
FIGURE 1-4
Internal Components
Figure Legend
1
Power supplies (two: PS0 and PS1)
2
System Controller (SC) board (beneath power supplies)
3
Hard Disk Drives (48)
4
Fans (5 trays with two fans each)
Chapter 1
Introduction to the Sun Storage J4500 Array
1-7
1.3
Accessory Kit
The contents of the accessory kit shipped with the J4500 array are listed in TABLE 1-4.
TABLE 1-4
1-8
Sun Storage J4500 Array Accessory Kit
Item
Part Number
Sun Storage J4500 Array Accessory Kit (which includes the items listed
below)
565-1939
Two 3-meter mini-SAS x4 cables
530-3884
Sun Storage J4500 Array Setup poster
820-3152
Sun Storage J4500 Array Document Set (contains the following
documents: Where to Find Your Sun Storage J4500 Array Documentation;
Sun Storage J4500 Array Setup; Important Safety Information; EIP
(Environmental Information)
825-7142
Sun Storage J4500 Array Service Manual • March 2013
CHAPTER
2
Configuring and Powering On the
Sun Storage J4500 Array
This chapter contains the following procedures and information:
2.1
■
Section 2.1 “Configuration and Cabling” on page 2-1
■
Section 2.1.1 “Terms and Definitions” on page 2-1
■
Section 2.1.2 “Configuration Rules” on page 2-2
■
Section 2.1.3 “Cabling the SAS Connectors” on page 2-5
■
Section 2.1.4 “Example Configurations” on page 2-7
■
Section 2.2 “Powering On and Off the Array” on page 2-11
Configuration and Cabling
The J4500 array can be connected to a supported HBA (Host Bus Adapter) installed
in a server. The rules for connecting J4500 array are described here.
2.1.1
Terms and Definitions
There are several terms used in this document that you will need to become familiar
with to better understand J4500 array configuration options.
2-1
TABLE 2-1
2.1.2
Sun Storage J4500 Array Configuration Terms and Definitions
Term
Definition
HBA
Host bus adapter (also called an initiator) is disk controlling circuity
embedded on a motherboard, or an optional expansion card used to
control a set of disks. Some HBAs support hardware RAID (Redundant
Array of Independent Disks), which is configured by the HBA software
and provides redundancy in the event of a disk failure.
SAS target
A device containing logical units and target ports that receives requests
from, and responds to, an initiator. An example of a target device is a hard
disk. Other terms used to describe a SAS target are “device” and “end
device.” In multipath configurations, each hard disk is seen by the HBA as
two targets.
SAS fabric
A SAS fabric is conceptually similar to a network segment. A SAS fabric is
made up of an initiator, targets, and a set of linked expanders that work
like network switches linking end point devices (intitiators and targets)
together as a discreet storage system. The J4500 array uses a dual fabric
scheme with a primary SAS fabric “A” and a secondary, redundant SAS
fabric “B”. A fabric can be expanded by daisy-chaining additional J4500
arrays. There are two 4-lane (or x4) connector ports (Port 0 and Port 1) per
fabric. Each connector port links to all 48 disks.
Single path
configuration
This is a single path connection from a host to a one of the enclosure’s SAS
fabrics (A or B). No path redundancy is available.
Multipath
configuration
This is a dual path connection from a host to both of the array’s SAS
fabrics (A and B). Provides two paths to the array’s disks and uses the
redundant SAS fabric capability of the array for failover.
Daisy-chaining
(or cascading)
A method for linking several J4500 arrays together to increase the amount
of available disks to the host. When cascading multiple arrays using a
multipath configuration, Sun recommends cascading the host links in
opposite directions from the edge of the SAS fabrics to prevent a single
array failure from preventing access to other arrays in the cascade.
Zoning
Zoning is a configuration method that takes the available connected
storage and allows each host to have its own storage resources. Zoning is
done on a per hard disk level and hard disks owned by one host cannot be
accessed by other hosts. Sun Common Array Manager (CAM) version
6.4.1 software is required to perform host initiator-to-disk access
configuration (zoning).
Configuration Rules
Before attaching cables to the J4500 array, read through the following configuration
rules:
2-2
Sun Storage J4500 Array Service Manual • March 2013
2.1.2.1
General Rules
■
The array enclosure drive bays must be fully populated. All 48 SATA hard disk
drives must be present and the same size. Do not mix drive capacities in the array
enclosure; however you could, for example, have one J4500 populated with 750
GB SATA drives and a daisy-chained J4500 array with 1 TB SATA drives. The
J4500 array does not support SAS drives.
■
The mini-SAS connector ports are configured as follows: Port 0 uses subtractive or
direct routing (indicated by the circle icon above the connector, see FIGURE 2-1) and
connects to upstream devices (either an HBA, or an upstream J4500 array). Port 1
is universal (indicated by the diamond and circle icons), using table and direct
routing, and connects to either an upstream HBA or a downstream J4500 array.
■
Use only supported mini-SAS x4 cables (SFF-8088). There are two cables included
with the array. Refer to Section 3.1 “Options and Replaceable Components” on
page 3-1 for additional cable options. Maximum cable lengths between devices is 6
meters. Using non-Sun certified cables or longer cables is not supported.
■
Do not cross connect an array enclosure’s SAS fabrics. The SAS A ports of an
array enclosure must not be cross connected to its SAS B ports.
Caution – Cross connecting the SAS fabrics of a J4500 array (connecting its SAS A
ports to its SAS B ports) can cause the HBA to be unable to properly identify or
access drives in the array which could lead to data loss.
2.1.2.2
Connecting Host Bus Adapters (HBAs)
HBAs can be connected as follows:
■
Use only supported HBAs with the array. At initial release, supported HBAs for
use with your array product are:
■
Sun StorageTek SAS RAID Eight-Port, External HBA (SG-XPCIESAS-R-EXT-Z,
Adaptec™-based RAID controller). Single path configurations only.
■
Sun StorageTek PCI Express SAS 8-Channel External HBA (SG-XPCIE8SAS-E-Z,
LSI™-based disk controller). Single or multipath configurations supported.
■
Sun StorageTek ExpressModule SAS 8-Channel External HBA
(SG-PCIE8SAS-EB-Z, LSI-based disk controller). Single or multipath
configurations supported.
An updated list of supported HBAs is maintained in the Sun Storage J4500 Array
Product Notes (820-3162) available on the Sun documentation web site
http://docs.sun.com.
■
A single path configuration consists of a single SAS cable connecting a single HBA
to one of the array’s SAS fabrics, either A or B.
Chapter 2
Configuring and Powering On the Sun Storage J4500 Array
2-3
■
A multipath configuration consists of connections to both of the J4500 array’s SAS
fabrics, A and B, using one or more HBAs in order to create a dual path. More on
configuring your array for multipathing can be found in the Sun Storage J4500
Array System Overview (820-3163).
■
Configuring zoning of the array storage is currently only available using the Sun
Common Array Manager (CAM) through an LSI-based HBA connected to the
array. For more information on zoning, see the Sun Storage J4500 Array System
Overview (820-3163).
Note – The J4500 array is not supported in a clustering configuration.
2.1.2.3
Connecting Multiple Sun Storage J4500 Arrays
Sun Storage J4500 arrays can be daisy-chained, or cascaded, together as follows:
2.1.2.4
■
The maximum number of arrays that can be daisy-chained together is limited by
the number of SAS targets (also called “devices” or “end devices”) supported by
the attached HBA. Check the HBA’s documentation to see how many SAS targets
are supported. Also see Section 2.1.2.4 “SAS Target Limits” on page 2-4.
■
In single path configuration, arrays may be cascaded from Port 1 (out) of the
upstream array to Port 0 (in) of the downstream array. Array cascade port
connections must be of compatible types (for example, no array cascading from
Port 1-to-1, Port 0-to-0, or Port 0-to1).
■
In a multipath configuration (creating a dual path by utilizing both SAS fabrics),
Sun recommends cascading the host links in opposite directions from the edge of
the SAS fabric. For example, the first host connection goes to the top of the SAS A
fabric and cascades down, while the second host connection goes to the bottom of
the SAS B fabric and cascades up. Array cascade port connections must be of
compatible types (for example, no array cascading from Port 1-to-1 or Port 0-to-0).
For more on configuring for multipathing, see the Sun Storage J4500 Array System
Overview (820-3163).
■
Do not mix a J4500 array with any other type of JBOD array in a daisy-chain.
Check the Sun Storage J4500 Array System Overview (820-3163) for updated
configuration information.
SAS Target Limits
To ensure a given configuration of J4500 array’s does not exceed the HBAs’ target
limit, the following rules apply:
■
2-4
For single path configurations, each hard disk visible to an HBA consumes one
target.
Sun Storage J4500 Array Service Manual • March 2013
2.1.2.5
■
For multipath configurations, each hard disk visible to an HBA consumes two
targets.
■
Each expander visible to an HBA consumes three targets. There are two expanders
per SAS fabric in the array.
■
When zoning is being used on array storage, there must be a host that runs the
zoning manager. This host must be able to communicate with all targets in the
system. This means that the number of targets seen by the zoning host’s HBA(s)
must not exceed the target limit for that HBA.
■
Refer to your HBA documentation to find out how many targets it can support.
Targets might also be called “devices” or “end devices.”
Configuration with Blade Servers
For Sun Blade Server Modules, the same configuration rules listed above for Sun
Storage J4500 arrays apply with the following blade-specific rules:
2.1.3
■
An array may be connected to a Sun Blade Server Module in single path or
multipath configuration using a supported SAS PCIe ExpressModule HBA that
includes SAS x4-wide connectors. An updated list of supported HBAs are
maintained in the Sun Storage J4500 Array Product Notes (820-3162) available on the
Sun documentation web site.
■
The array may not be connected to a SAS NEM in the chassis (a Network
Expansion Module that includes external SAS connectors). A server blade may
also have its own set of drives and expanders, or be connected to a storage blade
and already be using the SAS NEM. This can limit the number of available SAS
targets supported by the blade server’s internal HBA. Therefore, the J4500 array
should only be connected to a supported SAS PCIe ExpressModule HBA that is
used exclusively to connect external SAS devices.
Cabling the SAS Connectors
The following figure shows the SAS connector ports for cabling J4500 array to your
server’s HBA. Before cabling a J4500 array to your server’s HBA, refer to the
Section 2.1 “Configuration and Cabling” on page 2-1.
Chapter 2
Configuring and Powering On the Sun Storage J4500 Array
2-5
FIGURE 2-1
Sun Storage Array Back Panel SAS Ports
Figure Legend
1
SAS B (secondary fabric)
2
SAS A (primary fabric)
The J4500 array has two SAS fabrics: SAS A (primary) and SAS B (secondary). Each
connector port on both fabrics connects to all 48 disks. SAS B is a redundant fabric.
SAS port descriptions and assignments are shown in FIGURE 2-2.
Examples of supported configurations can be found in Section 2.1.4 “Example
Configurations” on page 2-7.
FIGURE 2-2
SAS Ports (Diagram Applies to Both SAS A Ports and SAS B Ports)
Figure Legend
1
2-6
SAS Port 1 (4 PHYs, activity LED, supports direct or table routing)
Sun Storage J4500 Array Service Manual • March 2013
Figure Legend (Continued)
2.1.4
2
SAS Port 0 (4 PHYs, activity LED, supports direct or subtractive routing)
3
Port 1 connects to an HBA, or to a downstream J4500 array
4
Port 0 connects to an HBA, or from an upstream J4500 array
Example Configurations
This section includes examples of supported single path and multipath
configurations for your J4500 array.
2.1.4.1
Single Host Direct Connection
FIGURE 2-3 shows a simple host to array connection. In this configuration, the host
connection can be to any port, either SAS fabric.
FIGURE 2-3
2.1.4.2
Single Host to Array Connection
Single Host With Cascaded Arrays
FIGURE 2-4 shows a host with two cascaded arrays. In this configuration, the cascaded
arrays comsume a total of 108 SAS targets (96 disk targets and 12 expander targets).
All of the supported HBAs for the J4500 array can support this number.
Chapter 2
Configuring and Powering On the Sun Storage J4500 Array
2-7
FIGURE 2-4
2.1.4.3
Host to Cascaded Arrays
Single Host Direct Connection to Two Arrays
FIGURE 2-5 shows a host with two cascaded arrays. In this configuration, the two
arrays also comsume a total of 108 SAS targets (96 disk targets and 12 expander
targets). All of the supported HBAs for the J4500 array can support this number.
2-8
Sun Storage J4500 Array Service Manual • March 2013
FIGURE 2-5
2.1.4.4
Host with Two Direct-Connected Arrays
Multipath Connection to the Array
FIGURE 2-6 shows an example of multipath cabling using one host, two HBAs and two
cascaded arrays. Note that the host links are cascaded in opposite directions from the
edge of the SAS fabric so that if one array enclosure fails, there is still host access to
the working array enclosure. This configuration supports zoned storage and failover.
For more information on configuring multipath, see the Sun Storage J4500 Array
System Overview (820-3163).
Chapter 2
Configuring and Powering On the Sun Storage J4500 Array
2-9
FIGURE 2-6
2.1.4.5
Host with Multipath-Connected Arrays
Multi-host Zoned Connection to the Array
FIGURE 2-7 shows a color-coded example of four hosts connected in single path
configuration to an array. In this configuration, the storage in the array has been
separated into four zones. Each host (indicated by a separate cable color) can only see
the disks in its assigned zone. In this configuration, each of the hosts must have the
Sun Common Array Manager (CAM) proxy agent installed and running, or one of
the hosts can act as the CAM management host while the others run the proxy agent.
The CAM management host is used to configure and manage zones on the array. For
more information on configuring zoning, see the Sun Storage J4500 System Overview
(820-3163).
2-10
Sun Storage J4500 Array Service Manual • March 2013
FIGURE 2-7
2.2
Four Hosts Directly Connected to a Zoned Array
Powering On and Off the Array
The Sun Storage J4500 array has two levels of power: standby power and main
power. The initial setup of the array should be done before plugging in AC power.
The procedures for powering on to main power mode and going from main power
mode to standby power mode are included in this section.
Chapter 2
Configuring and Powering On the Sun Storage J4500 Array
2-11
Caution – Do not operate the enclosure without all fans, component heatsinks, air
baffles, and covers installed. Severe damage to enclosure components can occur if the
enclosure is operated without adequate cooling mechanisms.
▼ To Power On the Array
The proper power-up sequence for a system connected to the Sun Storage J4500 array
is to first power on the array, wait one minute, then power on the host server. This
wait time allows all 48 array hard disk drives to power up to the point where the
server can see them and helps reduce the number of start-up device link messages
saved to the server’s log file
To apply main power to the array, do the following:
1. Connect two grounded AC power cords to the two AC power supply connectors
at the back of the array enclosure.
2. Then connect the other ends of the two AC power cords to grounded AC
(110-220 VAC) power outlets.
Connecting the AC power cords to the array automatically applies main power to
the array. In main power mode, the array Power/OK LED next to the Power
button lights and remains lit.
Note – See the service label on the hard disk drive access cover for an explanation of
the LEDs on the hard disk drives, fans, power supply, and system controller. Or, refer
to Chapter 4.
▼ To Place the Array Into Standby Power Mode
The front panel power button is used to switch the array from main power to
standby power (or from standby power back to main power). Standby power mode
leaves the power supplies partially on, but powers down the enclosure hard disks,
SAS expanders and SAS links.
1. To switch the array enclosure from main power mode to standby mode, use a
stylus to press and hold in the power button on the front panel (see FIGURE 1-2)
for 5 or more seconds (during which the locate LED will flash).
As the enclosure enters standby power mode, the Power/OK LED on the front
and back panel blinks, indicating that standby power mode is working.
2-12
Sun Storage J4500 Array Service Manual • March 2013
2. Release the power button on the front panel.
With AC power connected, the array takes about 10 seconds to go fully into
standby power mode.
Caution – To power off the array completely, you must disconnect the AC power
cords from the back panel of the array enclosure. It takes a full 20 seconds with the
AC power cords unplugged for internal power to be completely drained from the
enclosure.
3. To reapply main power to the array from standby power mode, use a stylus to
press and release the recessed Power button on the array front panel. See
FIGURE 1-2.
When main power is applied to the array, the Power/OK LED next to the Power
button lights and remains lit.
▼ To Power Off the Array
To power off the array completely, you must disconnect the AC power cords from the
power supplies at the back of the array enclosure. The power switch is only used for
putting the array into standby power mode, or applying main power from standby
power mode. Do the following to power off the array:
●
To completely power off the array, disconnect the two AC power cords from the
power supplies at the back of the enclosure.
It takes a full 20 seconds with the AC power cords unplugged for the internal
power to be completely drained form the enclosure.
2.2.1
AC Power Failure Auto-Recovery
If AC power is temporarily lost to the array, for example if the municipal power grid
experiences an outage, the array automatically restarts to main power mode when
power is restored. No user intervention is required.
The same behavior occurs if you disconnect the AC power cords from the back of a
powered-on array and then reconnect them.
Chapter 2
Configuring and Powering On the Sun Storage J4500 Array
2-13
2-14
Sun Storage J4500 Array Service Manual • March 2013
CHAPTER
3
Maintaining the Sun Storage J4500
Array
This chapter describes maintenance procedures for the Sun Storage J4500 array and
covers the following topics:
3.1
■
Section 3.1 “Options and Replaceable Components” on page 3-1
■
Section 3.2 “Tools and Supplies Needed” on page 3-2
■
Section 3.3 “Powering Off the Array and Removing It From the Rack” on page 3-3
■
Section 3.4 “Removing and Replacing the Hard Disk Drive Access Cover” on
page 3-8
■
Section 3.5 “Internal Component Locations” on page 3-11
■
Section 3.6 “Replacing Components” on page 3-12
■
Section 3.7 “Upgrading Enclosure Firmware” on page 3-33
Options and Replaceable Components
TABLE 3-1 lists the after-factory options and replaceable components for the J4500
array. All parts are customer-replaceable units (CRUs).
Note – The J4500 array is shipped from the factory with drives of the same capacity.
Mixing drives of different capacities in the array is unsupported. When ordering a
replacement drive, ensure that the disk subcomponent of the CRU conforms to this
rule.
3-1
Devices described as hot-pluggable may be replaced without requiring a reboot of the
host computer or the array, however the device being replaced first needs to be shut
down or isolated by the operating system to prevent host access during replacement.
Devices described as hot-swappable may be replaced without any kind of system
preparation, reboot or shut down.
Supported components and their part numbers are subject to change over time. For
the most up-to-date list of replaceable components, product updates, and downloads,
see the following URL:
(http://sunsolve.sun.com/handbook_pub/Systems/)
TABLE 3-1
Sun Storage J4500 Array Replaceable Components
Component
Part Number
CRU or FRU
Power Supply 1500W—Type A205 (two PS per enclosure, hot-swappable)
#300-1787
CRU
500 GB SATA 3.5-inch Hard Disk Drive (hot-pluggable)
#541-3050
CRU
750 GB SATA 3.5-inch Hard Disk Drive (hot-pluggable)
#540-7244
CRU
1 TB SATA 3.5-inch Hard Disk Drive (hot-pluggable)
#540-7507
CRU
Fan Module pair (five Fan Module pairs per enclosure, hot-swappable)
#541-0458
CRU
1 meter mini-SAS x4 cable (SFF-8088)
#530-3882
CRU
2 meter mini-SAS x4 cable (SFF-8088)
#530-3883
CRU
3 meter mini-SAS x4 cable (SFF-8088)
#530-3884
CRU
6 meter mini-SAS x4 cable (SFF-8088)
#530-3887
CRU
System Controller module (hot-pluggable)
#541-2474
CRU
Front Indicator Board (FIB) with ribbon cable
#501-7192
CRU
System Enclosure Super FRU
(includes disk backplane and FIB with ribbon cable)
#541-3424
CRU
Power Distribution Board
#501-7104
CRU
X4500-J Rack Slide Rails, stand-alone
#371-3493
CRU
3.2
Tools and Supplies Needed
The J4500 array can be serviced with the following items:
3-2
■
No. 2 Phillips screwdriver (10-inch recommended length with magnetic tip)
■
Antistatic wrist strap
Sun Storage J4500 Array Service Manual • March 2013
■
Stylus or other pointed object (to press the recessed Power button and recessed
system controller release button)
The following component replacements require additional tools:
3.3
■
Replacing the power distribution board requires a No. 1 Phillips screwdriver.
■
Replacing the front indicator board requires a No. 1 Phillips screwdriver
(magnetic tip recommended).
Powering Off the Array and Removing It
From the Rack
Use the procedures in this section when you are referred to them from the removal
and replacement procedures.
▼ To Power Off the Array
Before attempting to work inside the array enclosure, power it down as follows:
1. Shut down the J4500 array from main power as described in Chapter 2.
Caution – When you use the Power button to enter standby power mode, power is
still directed to the power supply fans, indicated when the Power/OK LED is
flashing. To completely power off the array enclosure, you must disconnect the AC
power cords from the back panel of the array.
2. Disconnect both power cords from the array’s power supplies.
3. Disconnect any other cables that must be disconnected in order to remove and
replace a specific component.
It is a good idea to label your cables as you disconnect them to ensure correct
reconnection.
Caution – Before handling components, attach an electrostatic discharge (ESD) wrist
strap to a grounding point on the chassis. The system’s printed circuit boards and
hard disk drives contain components that are extremely sensitive to static electricity.
Chapter 3
Maintaining the Sun Storage J4500 Array
3-3
▼ To Remove the Array Enclosure From the Rack
This procedure assumes you have turned off the system and removed any cables or
cords that would restrict the movement of the system.
Caution – To avoid serious personal injury and/or equipment damage while
handling or moving this product, always use all four chassis handles to support the
product weight. These systems can weigh up to 170 pounds (77 kg) when fully
loaded with components. If only three people are available, remove power supplies,
hard disks, and system controller to reduce the weight to about 50 pounds before
removing the system. Leave the fan trays installed. Attempting this procedure
without a mechanical lift or with fewer than four people could result in personal
injury or equipment damage.
1. If you do not have a mechanical lift, remove the following components from the
rear of the rack to reduce the weight to a safe level for manual lifting:
To remove power supplies, see “To Replace a Power Supply” on page 3-26.
To remove the System Controller, see “To Replace the System Controller Module”
on page 3-28.
Caution – Once components have been removed, do NOT attempt to lift the chassis
at these openings, the sheet metal may deform. Use the lifting handles on the sides of
the chassis (see “4” in FIGURE 3-2).
2. From the front of the rack, extend the rack anti-tip bar.
3. Slide out the system out to its service position by first releasing the latches on
each side of the system, and then sliding it out until it reaches the stops. See the
inset with arrows labeled 1 and 2 in FIGURE 3-1).
3-4
Sun Storage J4500 Array Service Manual • March 2013
FIGURE 3-1
Sliding the Enclosure Out of the Rack
4. If you need to lighten the enclosure, open the hard disk drive access cover and
remove the hard disk drives.
See “To Remove the Hard Disk Drive Access Cover” on page 3-9.
Caution – Make sure you label the drives so you can replace them in their original
locations. Not doing so may result in data loss.
5. To completely remove the system from the rack, do the following:
a. Press the green release lever (with embossed arrow) on each slide rail to
disengage the system inner rails from the slide rail assembly (see the inset
arrows labeled 1 and 2 in FIGURE 3-2.
Chapter 3
Maintaining the Sun Storage J4500 Array
3-5
b. Holding the handles located on each side of the system, slide the system
completely out of the rack (see label 4 in FIGURE 3-2) and set it down on a
clean, stable surface.
FIGURE 3-2
Removing the Enclosure from the Rack
6. To prevent the middle rails from blocking access to the aisle as you service your
system out of the rack, release the middle rail locks and then slide the middle
rails back inside the outer rails. See FIGURE 3-3.
3-6
Sun Storage J4500 Array Service Manual • March 2013
FIGURE 3-3
Releasing the Middle Rail Lock
Note – When reinstalling the system into the rack, first pull the middle rails back out
to their locking position (see FIGURE 3-4) before attempting to reinsert the inner rails
on the system into the middle and outer slide rails.
Chapter 3
Maintaining the Sun Storage J4500 Array
3-7
FIGURE 3-4
3.4
Correct Setup for Inserting the System Into the Slide Rails
Removing and Replacing the Hard Disk
Drive Access Cover
This section describes how to remove and replace the array enclosure hard disk drive
access cover.
3-8
Sun Storage J4500 Array Service Manual • March 2013
▼ To Remove the Hard Disk Drive Access Cover
The hard disk drive access cover protects the 48 hard disks in the array enclosure and
ensures proper cooling to the drives and the system controller.
Caution – When the array is powered on, the hard disk drive access cover should be
in place to ensure proper cooling. Do not remove the cover for more than 60 seconds
when the array power is on.
1. Using a No. 2 Phillips screwdriver, loosen the left and right captive screws. See
FIGURE 3-5.
2. Grasp the cover by its edges, lift the front up from the chassis, and pull it
forward.
FIGURE 3-5
Removing the Hard Disk Drive Access Cover
▼ To Replace the Hard Disk Drive Access Cover
Complete the following steps to replace the hard disk drive access cover.
Chapter 3
Maintaining the Sun Storage J4500 Array
3-9
1. Set the cover on the chassis so that the rear lip of the cover slides under the
chassis. Take care not to damage the cover intrusion switch. See FIGURE 3-6.
Caution – Be careful not to damage the hard disk drive access cover intrusion
switch when you replace the cover. See FIGURE 3-6.
FIGURE 3-6
Hard Disk Drive Access Cover Intrusion Switch
2. Lower the cover and push it toward the rear of the enclosure until it fully
engages under the chassis. The front retaining screws should align with the
holes in the chassis.
3. Use a No. 2 Phillips screwdriver to tighten the cover retaining screws until
hand-tightened.
3-10
Sun Storage J4500 Array Service Manual • March 2013
3.5
Internal Component Locations
The locations of the replaceable components in the enclosure are shown in FIGURE 3-7.
FIGURE 3-7
Sun Storage J4500 Array Internal Components
Figure Legend
1
System Controller (under power supplies)
2
ESD ground location
3
Hard disk drives (numbered 0-47)
4
Fan tray modules (numbered 0-4)
5
Front indicator board (behind bezel)
6
Power supplies (2)
Chapter 3
Maintaining the Sun Storage J4500 Array
3-11
Figure Legend (Continued)
3.6
7
Power Distribution Board (PDB)
8
Hard disk backplane (under chassis plate)
9
Front bezel
Replacing Components
This section provides procedures replacing enclosure components. All of the
components described here are customer-replaceable units (CRUs).
This section describes the following replacement tasks:
■
“To Replace a Fan Module” on page 3-12
■
“To Replace the Front Indicator Board” on page 3-15
■
“To Replace a Hard Disk Drive” on page 3-18
■
“To Replace the Power Distribution Board” on page 3-21
■
“To Replace a Power Supply” on page 3-26
■
“To Replace the System Controller Module” on page 3-28
■
“To Replace the Array Chassis” on page 3-32
Caution – Before handling components, attach an ESD wrist strap to a grounding
location on the chassis (see FIGURE 3-7). The enclosure’s printed circuit boards and
hard disk drives contain components that are extremely sensitive to static electricity.
▼ To Replace a Fan Module
Each fan module (also known as a fan tray) has two fans. The array enclosure has
five fan modules (for a total of 10 fans in the enclosure). This component is customer
replaceable.
Note – Enclosure cooling might be affected by dust and contaminant build-up. It is
recommended that the enclosure be opened and checked approximately every six
months or more often in dirty operating environments. Check component heatsinks,
fans, and air openings. If necessary, clean the enclosure by brushing or blowing
contaminants or carefully vacuuming contaminants from the enclosure.
3-12
Sun Storage J4500 Array Service Manual • March 2013
Caution – The fans are hot-swappable and can be removed and replaced while the
array is running. Do not keep the fan tray access cover open for more than 60
seconds at a time to avoid overheating the array enclosure. Remove and replace only
one fan module at a time.
Fans are labeled FT0 (fan tray 0) to FT4 (fan tray 4). See Section 3.5 “Internal
Component Locations” on page 3-11.
1. If the array enclosure is in a rack, slide it far enough out of the rack so that you
can access the fan modules.
2. From the front of the enclosure, open the fan tray access cover.
Using a No. 2 Phillips screwdriver, loosen the two captive screws on the left and
right sides. See FIGURE 3-8.
FIGURE 3-8
Removing the Fan Tray Cover
3. Identify the defective fan module.
If the amber (left) LED is on, the fan module is defective and should be replaced.
Chapter 3
Maintaining the Sun Storage J4500 Array
3-13
Note – If both green and amber indicators are on, then one of the two fans in the fan
module is still operational. You should replace this fan module last if there is more
than one fan module failure.
4. Remove the fan module.
Caution – Be careful to not damage the gaskets when you remove the fan module.
Damaging the gaskets can disrupt proper airflow.
Using your thumb and forefinger, grasp the top handle of the fan module and lift
the module up and out of the chassis. See FIGURE 3-9.
FIGURE 3-9
Removing a Fan Module
Figure Legend
1
Grab fan tray module by finger handle
2
Be careful not to damage the enclosure fan tray module gaskets
5. Install the new fan module:
3-14
Sun Storage J4500 Array Service Manual • March 2013
a. Align the new fan module with the bay in the chassis.
b. Lower the fan tray into the bay until it comes into contact with the connector
on the fan board.
c. Push down gently on the fan module until its connector is fully engaged.
Once fully engaged, the amber LED on the fan tray may light momentarily.
6. Close the fan cover and tighten the retaining screws on the left and right sides
of the cover.
▼ To Replace the Front Indicator Board
The front indicator board supports the front panel power button and front panel
indicator LEDs. This board also contains the ribbon cable that connects to the hard
disk drive backplane. Be sure you have the tools necessary as described in Section 3.2
“Tools and Supplies Needed” on page 3-2.
1. Power off and unplug the array enclosure as described in Chapter 2.
Caution – To power off the enclosure completely, you must disconnect the AC
power cords from the back panel of the array enclosure. It takes a full 20 seconds
with the AC power cords unplugged for internal power to be completely drained
from the enclosure.
2. If the array enclosure is in a rack, slide it far enough out of the rack so that you
can access the fan modules.
3. From the front of the enclosure, open the fan cover.
Using a No. 2 Phillips screwdriver, loosen the two captive screws on the left and
right sides.
4. Remove fan tray 0 and fan tray 1.
5. Remove the hard disk drive access cover so that the fan cover opens more freely.
See “To Remove the Hard Disk Drive Access Cover” on page 3-9.
Using a No. 2 Phillips screwdriver, loosen the two captive screws on the left and
right sides.
6. Using a No. 1 Phillips screwdriver, remove the three screws (see 1 in FIGURE 3-10)
securing the front indicator board to the chassis.
Chapter 3
Maintaining the Sun Storage J4500 Array
3-15
FIGURE 3-10
Removing the Front Indicator Board Screws
7. Detach the ribbon cable from the front indicator board, see FIGURE 3-11.
If you suspect that the ribbon cable is bad, remove the old ribbon cable from the
hard disk drive backplane and use the new ribbon cable that comes with the new
front indicator board. Make sure you route the ribbon cable through the cable
securing clips to prevent damage to the cable.
3-16
Sun Storage J4500 Array Service Manual • March 2013
FIGURE 3-11
Detaching the Ribbon Cable from the Hard Disk Backplane
Figure Legend
1
Ribbon cable connection to hard disk backplane
8. Install the new front indicator board:
a. Align the holes in the indicator board with the three screw holes in the
inside-front of the chassis.
b. Using a No. 1 Phillips screwdriver, replace and tighten the two screws that
secure the indicator board to the chassis.
c. Connect the ribbon cable to the connector on the hard disk drive backplane
and to the connector on the front indicator board.
9. Replace fan module 0 and fan module 1.
10. Close the fan cover and, using a No. 2 Phillips screwdriver, tighten the two
screws on the left and right sides.
11. Replace the hard disk drive access cover and, using a No. 2 Phillips screwdriver,
tighten the two screws on the left and right sides. See “To Replace the Hard Disk
Drive Access Cover” on page 3-9.
Chapter 3
Maintaining the Sun Storage J4500 Array
3-17
▼ To Replace a Hard Disk Drive
This section describes how to remove and replace a hard disk drive. The J4500 array
comes fully populated with 48 SATA drives installed. When replacing drives, note
the following:
■
Replacement drives must be SATA, of the same capacity, and the same
manufacturer as the drive being replaced. If is configured for multipathing, only
supported drives may be used (for more on drives supported for multipath, see
Section 4.4.5.4 “Multipath Problems With Unsupported Drives” on page 4-14).
■
Drives are a hot-pluggable CRU and can be replaced by anyone. Hot-pluggable
means that the hard drive must be first brought offline by using a management
software or operating system command; however, the array does not need to be
powered off.
■
A single hard disk failure does not cause data loss if the hard disk is part of a
RAID 1 (or higher) volume. The hard disk can be hot-plugged (but not
hot-swapped). When a new hard disk is inserted, the contents are automatically
rebuilt from the rest of the array with no need to reconfigure the RAID
parameters. If the bad hard disk was configured as a hot spare, the new hard disk
is automatically configured as a new hot spare.
■
Do not configure RAID volumes with drives of different capacities. This can cause
unexpected operation or other problems. All drives in the array enclosure must be
SATA and of the same capacity.
■
Each hard disk has a physical drive number, a map of the array hard disks is
shown on the service label.
■
When using Linux hosts, if you add or remove array disks the host might hang or
panic due to known Linux kernel issues. If you encounter this problem, a reboot of
the host should resolve it.
Caution – To avoid overheating the array enclosure, do not leave a hard disk drive
out for longer than 60 seconds at a time when the array power is on. Remove and
replace only one hard disk drive at a time. Replace the hard disk drive access cover
as soon as the service tasks are completed.
1. Remove the hard disk drive access cover as described in “To Remove the Hard
Disk Drive Access Cover” on page 3-9.
2. Identify the defective hard disk by looking at the hard disk LEDs.
If the amber (middle) LED is on, the drive is faulty and should be replaced.
3-18
Sun Storage J4500 Array Service Manual • March 2013
3. A failed drive should have already been taken offline by the system. If you
want to remove a drive that has not failed (the amber LED is not lit), use the
operating system or array management software to take the hard disk offline
before you remove it. Not doing so could cause data loss or unexpected error
messages.
Caution – Taking a disk offline that is part of a non-redundant logical drive causes
the entire logical drive to fail and result in data loss.
If you are using an operating system command line, note that disks in the
enclosure are typically identified in sequential order. Although the enclosure
contains only 48 disks, your operating system may see a list of 51 devices; if this is
the case, the first 4 addresses (0-3) represent the enclosure's four SAS expanders,
the other 48 addresses (4-51) represent the 48 hard disks.
Once the drive has been taken off line, the blue ready-to-remove LED should turn
on. This means the drive is ready to be removed and service action is allowed.
4. Remove the hard disk.
Lift the metal latch and remove the hard disk from the drive bay as shown in
FIGURE 3-12, or on the service label.
Chapter 3
Maintaining the Sun Storage J4500 Array
3-19
FIGURE 3-12
Removing a Hard Disk Drive
Figure Legend
1
Identify desired hard disk
2
Unlatch hard disk
3
Lift and pull hard disk up and out of bay
5. Install the new hard disk of the same capacity as the one removed.
Push the hard disk into the bay until it stops, and make sure the drive is fully
engaged with the connector on the hard disk backplane.
6. Make sure the metal handle is properly seated.
7. Replace the hard disk drive access cover. See “To Replace the Hard Disk Drive
Access Cover” on page 3-9.
8. Configure the new hard disk.
Refer to your HBA or operating system documentation for information on adding
a new hard disk.
3-20
Sun Storage J4500 Array Service Manual • March 2013
Note – If the hard disk was previously configured as a RAID 1 (or higher) array, an
automatic resynchronization is invoked and the contents are automatically rebuilt
from the rest of the array with no need to reconfigure the RAID parameters. If the
bad hard disk was configured as a spare, the new hard disk is automatically
configured as a new spare.
▼ To Replace the Power Distribution Board
This section describes how to remove and replace the power distribution board
(PDB), which is also called the power backplane. Be sure you have the tools
necessary as described in Section 3.2 “Tools and Supplies Needed” on page 3-2.
1. Power off the array enclosure as described in Chapter 2.
Caution – To power off the enclosure completely, you must disconnect the AC
power cords from the back panel of the array enclosure. It takes a full 20 seconds
with the AC power cords unplugged for internal power to be completely drained
from the enclosure.
2. Disconnect all cables from the enclosure.
3. Remove the system controller as described in “To Replace the System Controller
Module” on page 3-28.
4. Remove all power supplies as described in “To Replace a Power Supply” on
page 3-26.
5. From the back of the enclosure, remove the power supply cover.
Using a No. 1 Phillips screwdriver, remove the two screws on the power supply
cover. Pull the cover toward you and lift. Some extra effort may be required to
disengage the eight mushroom-head pins that secure the power supply cover to
the chassis (see FIGURE 3-13).
Chapter 3
Maintaining the Sun Storage J4500 Array
3-21
FIGURE 3-13
Removing the Power Supply Area Cover
Figure Legend
1
Power supply cover securing screws
6. Remove the rear chassis filler panel.
You must remove the rear chassis filler panel to get access to one of the screws that
attaches the PDB to the chassis.
a. Push back the power supply swing door so you can access the area behind
the rear filler panel.
b. Use a No. 2 Phillips screwdriver to remove the four screws that attach the
rear chassis filler panel to the bay, as shown in FIGURE 3-14.
3-22
Sun Storage J4500 Array Service Manual • March 2013
FIGURE 3-14
Removing the Rear Chassis Filler Panel
7. Remove the PDB:
a. Remove the hard disk drive access cover as described in “To Remove the
Hard Disk Drive Access Cover” on page 3-9. By removing the hard disk drive
access cover, you will have more room to maneuver.
b. Use a No. 1 Phillips screwdriver to loosen the three captive screws that secure
the PDB to the chassis. See FIGURE 3-15.
Chapter 3
Maintaining the Sun Storage J4500 Array
3-23
FIGURE 3-15
Removing the Power Distribution Board
Figure Legend
1
Power Distribution Board (PDB) securing screws
c. Put your fingers in the holes to pull the PDB up and then out of its keyed
openings from the chassis standoffs. See FIGURE 3-16.
3-24
Sun Storage J4500 Array Service Manual • March 2013
FIGURE 3-16
Pulling Out the Power Distribution Board
8. Install the new PDB:
a. Align the new PDB so that the chassis standoffs protrude through its keyed
openings, and then slide the PDB downward to lock it into place.
b. Push down on the edge of the board.
c. Use a No. 1 Phillips screwdriver to tighten the three captive screws that
secure the PDB to the chassis. See FIGURE 3-15.
d. Verify that the hard disk drive access cover intrusion switch is functioning
correctly and is not bent during installation of the PDB. See “To Replace the
Hard Disk Drive Access Cover” on page 3-9.
9. Replace the rear chassis filler panel.
10. Replace the power supply cover.
a. Align the mushroom-head pins with the indentations in the cover. This
ensures that the intrusion switch is not blocked. For the locations of the
mushroom-head pins, see FIGURE 3-13.
b. Push down on the cover and then slide the cover forward into place.
c. Replace and tighten the two screws at the rear of the power supply cover.
Chapter 3
Maintaining the Sun Storage J4500 Array
3-25
11. Replace all power supplies:
a. Align the power supply with the empty bay in the chassis.
b. With the power supply handle in the down position, push the power supply
into the bay. It will stop about three-quarters of the way in when it meets the
connector on the PDB.
c. Next, continue to push in and lift the power supply handle up until the
power supply fully engages with the PDB (indicated when the thumb-latch
clicks into place). The power supply should be flush against the chassis. See
“To Replace a Power Supply” on page 3-26.
12. Replace the system controller. See “To Replace the System Controller Module” on
page 3-28.
13. Replace the hard disk drive access cover. See “To Replace the Hard Disk Drive
Access Cover” on page 3-9.
14. Reconnect AC power cords to the power supplies. Make sue to use the power
cord retaining clips to keep power cords secure.
▼ To Replace a Power Supply
This section describes how to remove and replace a power supply.
The power supplies are fully redundant from 110 to 220 VAC; if one power supply
fails, the other power supply will continue to operate.
Note – This component is a hot-swappable CRU and can be replaced by anyone.
Hot-swappable means that you do not need to power off the array during
replacement. However, you must unplug the power supply to be replaced or the
entire system could shut down during removal.
The physical numbering of the two power supplies in the array enclosure is shown
on the service label.
1. Identify which power supply you will replace. Each power supply has one fault
LED that you can view from the rear of the array enclosure. If the LED is amber,
the power supply is faulty and should be replaced.
2. Disconnect the AC power cord from the power supply that you are replacing.
The power supplies are hot-swappable, so you do not have to shut down the array
or disconnect AC power from the other working power supply.
3-26
Sun Storage J4500 Array Service Manual • March 2013
Note – The Service Action Required LEDs on the front panel and back panel blink
when a power supply is unplugged. See Section 4.1 “External Status LEDs” on
page 4-1 for the LED locations and descriptions.
3. Remove the power supply.
a. Press down on the thumb latch at the center of the power supply. See
FIGURE 3-17 or the service label for an illustration.
FIGURE 3-17
Removing a Power Supply
b. While continuing to push on the latch, use the handle to pull the power
supply from the chassis with one hand while supporting the power supply
weight with the other hand.
4. Install the new power supply:
a. Align the power supply with the empty bay in the chassis.
b. With the power supply handle in the down position, push the power supply
into the bay. It will stop about three-quarters of the way in when it meets the
connector on the power distribution board.
Chapter 3
Maintaining the Sun Storage J4500 Array
3-27
c. Next, continue to push in and lift the power supply handle up until the
power supply fully engages with the power distribution board (indicated
when the thumb-latch clicks into place). The power supply should be flush
against the chassis. See FIGURE 3-18.
FIGURE 3-18
Replacing a Power Supply
5. Connect the AC power cord to the new power supply. Make sure you use the
power cord retaining clips to keep the power cord secure.
▼ To Replace the System Controller Module
The system controller (SC) consists of a sub-enclosure module and board that are
removed as a unit from the back of the array enclosure. The system controller board
contains the SAS expanders used to access the enclosure’s 48 hard disk drives. The
module is replaced as a unit—there are no replaceable parts inside.
Note the following before you begin:
3-28
Sun Storage J4500 Array Service Manual • March 2013
■
If the array was configured for zoning (array storage divided among multiple
initiators), ensure that the zoning configurations created with the Sun Comman
Array Manager (version 6.4.1 at a minimum) have been exported to a file. Zoning
configurations (including initiator-to-disk access and SAS domain passwords) are
saved on the array’s SAS expanders in the SC. You will need to import these
configurations (per initiator and SAS domain) after you replace the SC. Refer to
the chapters on zoning and multipathing in the Sun Storage J4500 Array System
Overview (820-3163) for proper initiator-to-disk access configuration.
■
Be sure that you have first taken the array offline to prevent any host computer
processes attempting to accessing it while the system controller is removed.
■
Be aware of SATA affiliations. When SATA drives are used, an affiliation
(dedication) to the initiator (HBA port) is automatically created. This complies
with the SATA protocol and is point-to-point in nature. If multiple initiators are
attached to a single SAS fabric (either SAS A or B), the drive-to-initiator affiliation
will be arbitrarily chosen which can create potential issues (such as disks or
initiators not being seen). Refer to the chapters on zoning and multipathing in the
Sun Storage J4500 Array System Overview (820-3163) for proper initiator-to-disk
access configuration. Also refer to the Sun StorageTek Common Array Manager
Release Notes for the version of CAM being used.
Caution – To prevent electrostatic discharge (ESD) damage to the components on
the system controller, connect a ground strap between yourself and the chassis
ground before proceeding. See FIGURE 3-7.
1. Disconnect the power cables from the array.
Caution – Although both power supplies should turn off when you remove the
system controller, voltage could be present on the chassis connectors if either power
supply did not shut down as expected. Thus, you must disconnect the power cords
from the power supplies and wait 20 seconds to avoid any risk from inadvertent
contact with those connectors.
2. Disconnect the SAS cable(s) connected to the system controller (SC) module.
You must label where your cables are connected as you disconnect them to ensure
correct reconnection to a supported configuration.
3. Use a Phillips screwdriver to loosen the SC module handle lock screw. See
FIGURE 3-19.
4. Rotate the handle downward and pull the SC module from the chassis with one
hand while supporting the system controller weight with the other hand.
Chapter 3
Maintaining the Sun Storage J4500 Array
3-29
FIGURE 3-19
Removing the SC Module
Figure Legend
1
System Controller (SC) handle lock screw location
5. Slide out the SC module from the chassis.
Note that the SC module is connected inside the enclosure to the power
distribution board, you may need to exert some pressure to disengage it.
6. To install the new SC module, first remove the plastic connector covers on the
replacement SC module.
Caution – The module will not plug into the power distribution board with the
connector covers on.
7. Align the SC module with the empty bay in the chassis.
8. Push the SC module into the bay until it stops (about three-quarters of the way
in when it encounters the power distribution board connectors).
3-30
Sun Storage J4500 Array Service Manual • March 2013
9. Use your thumbs to apply pressure to the upper right and left corners of the
module and firmly push the SC module into place.
As the module engages the power distribution board, the module handle will lift
into place.
10. Once the module is fully seated on the power distribution board, finish rotating
the SC module handle up and into place (see FIGURE 3-20). Then tighten its
securing screw.
FIGURE 3-20
Replacing the SC Module
11. Reattach any cables you previously unplugged from the SC module. Ensure that
the cables are fully and properly seated.
12. Place the plastic connector covers you removed from the new SC module on to
the connectors of the defective SC module for return to the factory.
Chapter 3
Maintaining the Sun Storage J4500 Array
3-31
13. If the array was configured for zoning or multipathing, you will need to
re-establish the appropriate initiator-to-disk access configuration using the Sun
Common Array Manager (version 6.4.1 at a minumum).
Detailed instructions for configuring zoning and multipathing for the array can be
found in the Sun Storage J4500 Array System Overview (820-3163) and the Sun
StorageTek Common Array Manager Release Notes for the version of CAM being used.
▼ To Replace the Array Chassis
This section describes how to replace the array chassis, which includes the chassis,
the hard disk drive backplane, and the front indicator board and ribbon cable.
1. Power off the array enclosure as described in Chapter 2.
2. Unplug the power cords and SAS cables. Wait 20 seconds for the power
supplies to power down.
3. Remove the system controller as described in “To Replace the System Controller
Module” on page 3-28.
4. Remove the power supplies as described in “To Replace a Power Supply” on
page 3-26.
5. Remove the fan modules as described in “To Replace a Fan Module” on
page 3-12.
6. Label the hard disks so that you will know which slot to reinstall them in at the
end of the procedure.
Note – When you remove the hard disks from their bays, you must return each hard
disk to the equivalent bay in the new chassis. Use an adhesive note or another
method to temporarily label the hard disks before you remove them.
7. Remove all hard disks from the drive bays as described in “To Replace a Hard
Disk Drive” on page 3-18.
8. Remove old chassis from the rack as described in “To Remove the Array
Enclosure From the Rack” on page 3-4.
9. Remove the rails attached to the old chassis so that you can put them on the
new chassis.
10. Install the chassis side rails and slide the new enclosure chassis into the rack.
Refer to the Sun X4500-J Slide Rail Installation Guide (820-1858) on the Sun
documentation web site for more information.
3-32
Sun Storage J4500 Array Service Manual • March 2013
11. Reinstall all hard disks to the new chassis as described in “To Replace a Hard
Disk Drive” on page 3-18.
Note – You must return each hard disk to the bay from which it was removed. If the
hard disks were previously configured for RAID (level 1 or higher), an automatic
resynchronization should be invoked after the initial power on of the new enclosure
to reconfigure the RAID parameters. Any hot spares should also be automatically
reconfigured as hot spares.
12. Reinstall the power supplies into the new chassis as described in “To Replace a
Power Supply” on page 3-26.
13. Reinstall the fan modules into the new chassis as described in “To Replace a Fan
Module” on page 3-12.
14. Reinstall the SC module into the new chassis as described in “To Replace the
System Controller Module” on page 3-28.
3.7
Upgrading Enclosure Firmware
The Storage J4500 array enclosure contains upgradable firmware. You may want to
upgrade the enclosure firmware to:
■
Install the latest bug fixes and performance enhancements
■
Add new features and capabilities as they become available
The Sun Common Array Management (CAM) software provides firmware upgrade
capabilities for the J4500 array connected to any supported HBA. For more
information on using the CAM software, see the Sun Storage J4500 Array System
Overview (820-3163).
3.7.1
Ensure Both SAS Fabrics are Upgraded to the
Same Firmware Revision Level
The J4500 array contains two SAS fabrics (A and B). Each fabric has its own set of
SAS expanders. The firmware upgrade process is only performed on the fabric with
the active SAS link to the HBA. When upgrading enclosure firmware, Sun
recommends that you upgrade firmware on both SAS fabrics to ensure they are at the
same revision level.
This will require you to take the following steps:
Chapter 3
Maintaining the Sun Storage J4500 Array
3-33
1. Using CAM, perform the upgrade on the enclosure’s primary SAS fabric.
2. Then, at a convenient time, move the SAS cable to the enclosure’s secondary SAS
fabric.
When performing this action, allow time between the removal of the link from the
primary fabric and the reconnection to the secondary fabric for your HBA to
recover from the lost and then re-established SAS link. Depending on the HBA,
this can take up to 2 minutes each time the link state is changed.
3. Using CAM, perform the upgrade on the enclosure’s secondary SAS fabric.
3-34
Sun Storage J4500 Array Service Manual • March 2013
CHAPTER
4
Troubleshooting
This chapter contains information about the troubleshooting the Sun Storage J4500
array and includes locations and behaviors of the array enclosure status and fault
LEDs. The information is organized to describe external LEDs that can be viewed on
the outside of the enclosure, and internal LEDs that can be viewed only with the
main cover removed.
The following sections are included:
4.1
■
Section 4.1 “External Status LEDs” on page 4-1
■
Section 4.2 “Internal Disk Drive and Fan LEDs” on page 4-3
■
Section 4.3 “Diagnostic and Management Tools” on page 4-5
■
Section 4.4 “Troubleshooting Problems with the Array” on page 4-9
■
Section 4.5 “Resetting the Enclosure Hardware” on page 4-16
■
Section 4.6 “Clearing the Enclosure Zoning Password” on page 4-17
External Status LEDs
TABLE 4-1 lists and describes the external LEDs. The front and back panels are shown
in FIGURE 4-1.
4-1
FIGURE 4-1
Sun Storage J4500 Array Front and Back Panel LEDs
TABLE 4-1
Front and Back Panel LEDs
Figure
Callout
Name
Color
Function
1&9
Enclosure locate
button/LED
White
Operators can turn this LED on remotely to help locate the server in
a crowded server room. Press to turn on or off.
Pressing the Locate LED/Switch for five seconds turns all indicators
on for 15 seconds.
2 & 10
System fault
Amber
Alert/Service action is required.
3 & 11
System power
Green
On – Power is on.
Blinking – Standby power is on but main power is off.
Off – Power is off.
4
Top fault
Amber
On – Hard disk or fan fault (service is required or should be
scheduled).
5
Rear fault
Amber
On – Power supply or system controller fault (service is required).
6
Over temperature
Amber
System over temperature.
7
PS fault
Amber
Service action required.
8
PS OK
Green
On – AC and DC OK.
Slow blink – AC OK.
12
SAS link
Green
Each SAS port has a SAS Link Activity LED:
On – 1 to 4 links are ready.
Blinking – Read/Write port activity.
Off – Link is lost.
4-2
Sun Storage J4500 Array Service Manual • March 2013
TABLE 4-1
Front and Back Panel LEDs (Continued)
Figure
Callout
Name
Color
Function
13
SC ready to remove
Blue
System Controller (SC) service action allowed.
14
SC fault
Amber
Service action required.
15
SC OK
Green
Operational. No action required.
4.2
Internal Disk Drive and Fan LEDs
The array includes internal LEDs on the disk drives and the fan modules.
Note – On fan modules, the green and amber (OK and Fault) LEDs might be on
simultaneously. This indicates that one of the fans in the module has failed, the other
fan is still operational.
FIGURE 4-2 shows the location of the internal LEDs and a close-up view of the disk
drive and fan trays, including the symbols that identify the LEDs. TABLE 4-2 lists the
internal LEDs.
Chapter 4
Troubleshooting
4-3
FIGURE 4-2
Disk Drive and Fan Tray LEDs (Fans located at the front of the enclosure)
TABLE 4-2
Internal LEDs
Figure
Callout
4-4
Name
Color
Function
1
Hard disk Ready
to Remove
Blue
Service action is allowed.
2
Hard disk Fault
Amber
Service action is required.
3
Hard disk Status
Green
Unit is OK. Blinking = data transfer.
4
Fan Fault
Amber
Fault (Service action required).
5
Fan Status
Green
Unit is OK. (See Note, above).
Sun Storage J4500 Array Service Manual • March 2013
4.3
Diagnostic and Management Tools
For the most part, you will need to use a combination of HBA and array management
tools, log files, and enclosure LEDs to help isolate problems. However, available
system level software, such as SunVTS™, may contain additional tools for problem
identification/resolution.
4.3.1
SunVTS
SunVTS is the Sun Validation Test Suite, which provides a comprehensive diagnostic
tool that tests and validates Sun hardware by verifying the connectivity and
functionality of most hardware controllers and devices on Sun platforms. SunVTS
software can be tailored with modifiable test instances and processor affinity
features.
SunVTS 6.2 or later software might be preinstalled on some Sun servers or included
as bootable Diagnostics CD. Booting the system with the CD in the server’s internal
DVD drive starts SunVTS software. Diagnostic tests run and write output to log files
that the service technician can use to isolate problems.
4.3.2
Common Array Manager (CAM)
The Sun StorageTek Common Array Manager (CAM) software includes the Service
Advisor application, which provides guided wizards with system feedback for
hardware replacement of Customer Replaceable Units (CRUs). In addition, Service
Advisor provides troubleshooting procedures for alarms.
Note – All Field Replaceable Units (FRUs) are also CRUs in the J4500 array.
Before you can access Service Advisor procedures, you must have already installed
the Common Array Manager software, as described in the Sun StorageTek Common
Array Manager User Guide for your version of CAM.
Enclosure management (including viewing the event log and upgrading enclosure
firmware) and remote command line interface (CLI) functions are performed by the
Sun StorageTek Common Array Manager software.
The CRU replacement procedures available through the Sun StorageTek Common
Array Manager Service Advisor application include (but are not limited to):
■
Disks
Chapter 4
Troubleshooting
4-5
■
Power Supplies
■
Fans
■
System Controller
■
Chassis
▼ To Access Service Advisor Procedures
To launch Service Advisor and access hardware replacement procedures:
1. Log on to the Sun Java Web Console on the management software host.
For example, https://management_host_address:6789
2. In the Storage section of the Sun Java Web Console page, select Sun StorageTek
Common Array Manager.
The navigation pane and the Storage System Summary page appear.
3. Select an array under Storage Systems.
4. At the top right of the Storage System Summary page, click the Service Advisor
button.
The Service Advisor application is displayed in a separate window.
5. In the left pane, select the type of hardware replacement procedure you want to
perform:
■
CRU/FRU Removal/Replacement Procedures
■
Array Utilities
Note – If you see Service-only procedures listed, these are password protected for
access by Sun service personnel only. Contact a Sun service representative for further
information and assistance with service only procedures.
6. To view a procedure, in the right pane either select it or expand its category, and
select the hardware component that corresponds to the procedure.
▼ To Reserve the Array for Maintenance
Do the following to reserve the array for maintenance. This action will alert other
users that a service action is in progress when they login.
1. From the Service Advisor, click the link to reserve the array for maintenance.
2. Enter a description of the service action.
4-6
Sun Storage J4500 Array Service Manual • March 2013
3. Select the estimated duration of the service action in hours from the pull-down.
4. Select the Reserve button.
5. Use the back arrow to return to the procedure.
▼ To Release the Array After Maintenance
Once the required maintenance has been performed, release the array for normal
operation.
●
4.3.2.1
From Service Advisor, disable the reserve array function by selecting the
Release button.
Understanding the CAM Event Log
This section provides a listing of possible J4500 array events, descriptions, and where
applicable, Service action recommendations.
Refer to the Sun StorageTek Common Array Manager User Guide for your version of
CAM for information on viewing system events and configuring automatic
notifications.
The severity of an event in CAM is includes one of the following designations:
■
Down: Identifies a device or component as not functioning and in need of
immediate service.
■
Critical: Identifies a device or component in which a significant error condition is
detected that requires immediate service.
■
Major: Identifies a device or component in which a major error condition is
detected and service may be required.
■
Minor: Identifies a device or component in which a minor error condition is
detected or an event of significance is detected.
Note – When Auto Service Request (ASR) is enabled, it monitors the array system
health and performance and automatically notifies the Sun Technical Support Center
when critical events occur. Critical alarms generate an Auto Service Request case.
The notifications enable SunService to respond faster and more accurately to critical
on-site issues.
Chapter 4
Troubleshooting
4-7
TABLE 4-3
CAM Events for the Sun Storage J4500 Array
Code
Event Name
Severity
Description
xx.5.13
ValueChangeEvent-.disk
Major/ The Disk has changed state from OK to something
Critical else. Action: A disk may have been removed, or
failed. Check the alarm log for additional events.
xx.5.19
ValueChangeEvent-.fan
Major/ A fan has changed state from OK to something
Critical else. Action: Check fan LEDs to locate the fault and
replace the faulty fan to ensure nominal system
operating temperature.
xx.5.227
ValueChangeEvent-.ps
Major/ A power supply has changed state from OK to
Critical something else. Action: check the event log and
chassis fault LEDs to find the trouble. Replace the
faulty power supply.
xx.5.586
ValueChangeEvent-.chassis
Major/ Chassis has had a negative state change. Action:
Critical Look for other events that can help identify the
problem, check chassis fault LEDs. Replace any
failed components.
xx.5.590
ValueChangeEvent-.overTemperatureF Major
ailure
The system has detected a critical
over-temperature. Action: This event should have
shut down the array. Look for other events that can
help identify the problem. Check the array’s
cooling vents and environment. You will need to
press the array’s power button to re-apply main
power to the array, Check chassis fault LEDs and
replace any failed components.
xx.5.591
ValueChangeEvent-.overTemperature
Warning
Major
The system has detected a warning temperature.
Action: Look for other events that can help identify
the problem. Check the array’s cooling vents and
environment. Check chassis fault LEDs and replace
any failed components.
xx.11.21
CommunicationEstablishedEvent.ib
Minor
Indicates that communication has been re-gained
to the storage array via the in-band path.
xx.12.21
CommunicationLostEvent.ib
Major/ Indicates that communication has been lost to the
Critical array, and that the last path successfully used was
the in-band communication path.
xx.12.31
CommunicationLostEvent.oob
Major/ Indicates that communication has been lost to the
Critical proxy host connected to the storage array.
xx.14.16
DiscoveryEvent
Minor
4-8
Sun Storage J4500 Array Service Manual • March 2013
Indicates that the discovery of an array or proxy
host containing one or more arrays has occurred.
TABLE 4-3
CAM Events for the Sun Storage J4500 Array (Continued)
Code
Event Name
Severity
xx.41.13
ComponentRemoveEvent.disk
Major/ A disk has changed state from OK to a removed
Critical state. Action: Check the alarm log to determine
whether the disk has failed or has been removed
for maintenance.
xx.41.19
ComponentRemoveEvent.fan
Minor
A fan has changed state from OK to a removed
state. Action: Check the alarm log to determine
whether the fan has failed or has been removed for
maintenance.
xx.41.227 ComponentRemoveEvent.ps
Minor
A power supply has changed state from OK to a
removed state. Action: Check the alarm log to
determine whether the power supply has failed or
has been removed for maintenance.
xx.75.42
Minor
The firmware revision of the enclosure is not at
baseline. Action: upgrade firmware to baseline.
4.4
RevisionDeltaEvent.revision
Description
Troubleshooting Problems with the
Array
The following sections describe how to troubleshoot problems you may experience
with the J4500 array.
4.4.1
■
“Initial Start-up” on page 9
■
“Check the Event and Performance Logs” on page 10
■
“Using the Array Management Software to Monitor Enclosure Health” on page 11
■
“Array Link Problems” on page 11
■
“Disk Problems” on page 13
■
“Array Environment Problems” on page 15
■
“Power Problems” on page 16
Initial Start-up
If you are unable to see the array drives after powering on the array, check the
following:
■
Ensure all cables are properly connected (power and SAS).
Chapter 4
Troubleshooting
4-9
4.4.2
■
Be sure you are using SAS cables supported for use with the array. Using longer,
or non-certified cables is not supported. For a list of supported cables, see
Section 3.1 “Options and Replaceable Components” on page 3-1.
■
You should carefully follow the configuration rules listed in Section 2.1
“Configuration and Cabling” on page 2-1. Not following these rules could result
in an unsupported configuration.
■
Check the array indicator LEDs to make sure all components are operating
normally and the link LEDs are green.
■
The proper startup sequence for the enclosure is to power-on the enclosure first,
wait one minute, then power-up the server.
Check the Event and Performance Logs
The operating system event log is a good first place to start in identifying problems
or potential issues with the enclosure or its disks. If you experience disk problems,
such as disk errors or invalid read/writes, the system event log can help identify the
problem disk.
Note – By default, errors for the enclosure (temperature, voltage, device status), may
not be logged in the system event log, but only in the array management software
event log. If you want errors to be forwarded to the system event log, refer to the
HBA documentation to see if it supports this feature.
You may have problems with the array listed in multiple log files (system and HBA).
If this is the case, concentrate on recent errors that best relate to the problem. Try to
pinpoint the time when problems began to appear. Search through the log files as
soon as possible for when the problems first appeared—log files can quickly fill up
with errors and some information may be lost.
4.4.2.1
Identifying Disks in the Array Enclosure
Disks in the array enclosure are typically identified by the operating system in
sequential order in a list of 51 devices; the first 4 addresses (0-3) represent the array's
four SAS expanders, the other 48 addresses (4-51) represent the 48 hard disks. Drives
are mapped in numerical order as shown on the drive map label on the top of the
array enclosure. Device names and address information depends on other mass
storage devices attached to the server and where the array’s HBA is located in the
PCI bus boot order.
4-10
Sun Storage J4500 Array Service Manual • March 2013
4.4.3
Using the Array Management Software to Monitor
Enclosure Health
Your J4500 array supports a powerful set of SMP (Serial Management Protocol) and
SES-2 (SCSI Enclosure Services) enclosure management features. Some or all of these
features are available through supported management software (for example, the Sun
Common Array Manager, or the Sun StorageTek RAID Manager software) to provide
a system administrator at the array-connected server or network-connected
management console the following capabilities:
■
Monitor the enclosure status (on/off line status, component health)
■
Monitor the enclosure environment (voltage and temperature)
■
Remotely identify and locate enclosure components
■
Obtain FRU identification and status (expanders, hard disks, fans, power supplies)
■
Remove and install FRU components
■
Remotely reset the enclosure hardware
■
Remotely upgrade the enclosure’s firmware (expanders and hard disk—must use
CAM)
■
View the enclosure event log to aid in troubleshooting
Refer to the Sun Storage J4500 Array System Overview (820-3163) for more information
on array management software.
4.4.4
Array Link Problems
You may encounter a problem where the server is unable to communicate with the
array. Complete the following troubleshooting tasks to reestablish communications
with the array.
■
■
Check the SAS link LEDs at the rear of the enclosure (see Section 4.1 “External
Status LEDs” on page 4-1) to ensure the ports are properly communicating with
the HBA. Each SAS port has a SAS Link Activity LED. The following LED states
will be viewable:
■
On – 1 to 4 links are ready.
■
Blink – Read/Write port activity.
■
Off – Link is lost.
If the link LED is off, check the SAS cables for proper connection. Ensure that the
cables are supported for the enclosure (refer to Section 3.1 “Options and
Replaceable Components” on page 3-1).
Chapter 4
Troubleshooting
4-11
4.4.4.1
■
If you can not reestablish communication with the server, you can try resetting the
enclosure hardware. The enclosure hardware may be reset with the power on. See
Section 4.5 “Resetting the Enclosure Hardware” on page 4-16. You may also
remotely reset the enclosure through the Sun Common Array Manager.
■
There may be a problem with SAS fabric you are using. Try using the redundant
fabric. If you have daisy chained J4500 arrays, be sure to move all cable
connections to the redundant fabric—only one SAS fabric (SAS A or SAS B) may
be used per HBA port connection. Cross fabric connections on an array enclosure
(SAS A to SAS B) are not supported.
■
There may be a problem with the SAS cable. The cable might be damaged and
either prevents communication, or it may allow only degraded communication
(which can manifest itself in poor array performance). The array comes with two
cables, try attaching a new SAS cable.
■
Review the Sun and server operating system vendor knowledge base to see if the
problem is a known issue with a solution, also see the Sun support site
http://www.sun.com/support. The J4500 array SAS expanders have firmware
that may be upgraded as fixes and new features become available from Sun. For
more information on upgrading enclosure firmware, see Section 3.7 “Upgrading
Enclosure Firmware” on page 3-33.
Switching SAS Cables or Making New Connections
In a single path environment: If your J4500 array is connected to the StorageTek SAS
RAID External HBA, and you switch a cable from one port of the HBA to the other
port on the HBA, you should wait long enough after the initial cable pull for all the
physical hard drives shown in the GUI or through the CLI to be removed from the
display. This prevents the problem of the controller attempting to remove drives at
the same time it is reading the same drives on another port. If no display is available,
you should wait at least 2 minutes between pull and reconnect.
In a multipath environment: Since the J4500 array uses SATA drives, the potential
for SATA affiliation conflicts exists. Conflict can occur when more than one initiator
tries to access the drive via the same path (for example, two hosts attached to SAS A
on a J4500 array), or if you move an established connection from one domain port to
another (for example, from port 0 to port 1). Possible symptoms of SATA affiliation
conflicts are: operating system hangs, zoning operations take longer than 10 minutes
to complete, and/or disk utilities like “format” will not return device lists in a timely
fashion. For more about SATA affiliations, see the Sun Storage J4500 Array System
Overview (820-3163).
4-12
Sun Storage J4500 Array Service Manual • March 2013
4.4.5
Disk Problems
Issues with array disks might be identified by viewing the system event log, being
alerted by your array management software, or by viewing the J4500 array’s LEDs. In
the event of a disk failure, the disk may be replaced with the array online.
▼ To Replace a Disk
If the disk must be replaced, complete the following tasks:
1. Slide the J4500 array out of the rack far enough to remove the disk top cover
panel. See “To Remove the Hard Disk Drive Access Cover” on page 3-9.
2. To replace a disk, use the operating system, or enclosure management software
command to unmount the disk and prepare it for removal. This is required to
isolate the disk and stop all read/write activity.
3. Identify the physical disk to be removed by looking for the blue
ready-to-remove LED, or the amber failed LED, on the disk. Then, remove the
disk. For step-by-step procedures for removing disks from the enclosure, see
“To Replace a Hard Disk Drive” on page 3-18.
4. Replace the disk, then use the operating system or enclosure management
software commands to remount the disk. If the disk is part of a RAID volume,
it will automatically rebuild with the required data after replacement.
4.4.5.1
Guidelines for Removal and Replacement of RAID Storage
When removing and replacing RAID disks in the J4500 array, use the following
guidelines:
4.4.5.2
■
Perform RAID disk removal and replacement procedures with the system
powered on. That way, the HBA can update its RAID configuration information.
■
When removing and replacing disks, allow enough time between each operation
for the HBA to update the RAID configuration information. When hot-plugging
non-failed drives for test purposes, you should wait a full minute after removal
before reinserting the drive.
Persistent Affiliation When Changing HBAs
When connecting your array to an HBA, it is possible that the SAS “affiliation”
feature may cause problems if the array was previously connected to another HBA.
An affiliation is used by the SAS protocol to prevent multiple SAS initiators (HBAs)
Chapter 4
Troubleshooting
4-13
from interfering with each other when communicating with SATA drives. If you
encounter such a problem, affiliations may be removed by power cycling the array
enclosure prior to connecting it to a different HBA.
4.4.5.3
If You Do Not See All of the 48 Disks
If you see only some of the available disks (for example, if you see only 20 or 28 of
the total 48 disks), try the following:
4.4.5.4
■
Look through the vents at the back of the System Controller module to see if the 4
green expander heartbeat LEDs are blinking. If not, try power cycling the array.
■
If the problem occurs repeatedly, there might be a problem with the System
Controller module. Check in the Sun Common Array Manager (CAM) to see if the
array is at firmware baseline, if not, you should upgrade the array firmware.
■
If updating the array firmware does not solve the problem, the System Controller
module may need to be replaced. For step-by-step procedures for replacing the
System Controller module, , refer to “To Replace the System Controller Module”
on page 3-28.
■
If you have moved SAS cables from one port to another, you may have SATA
affiliation conflicts. Conflict can occur when more than one initiator tries to access
the drive via the same path (for example, two hosts attached to SAS A on a J4500
array), or if you move an established connection from one domain port to another
(for example, from port 0 to port 1). Possible symptoms of SATA affiliation
conflicts are: operating system hangs, zoning operations take longer than 10
minutes to complete, and/or disk utilities like “format” will not return device lists
in a timely fashion. Refer to the chapters on zoning and multipathing in the Sun
Storage J4500 Array System Overview (820-3163) for proper initiator-to-disk access
configuration. Also refer to the Sun StorageTek Common Array Manager Release Notes
for the version of CAM being used.
Multipath Problems With Unsupported Drives
Only SATA hard disk drives supported for use with the J4500 array may be used for
multipathing. If you install an unsupported drive, you might get the following error
in the System Event Log and you will be unable to configure the drive for multipath:
Target:2, lun:0 doesn’t have a valid GUID, multi pathing for
this drive is not enabled
This error means that the drive does not have a SAS WWN (World Wide Name). All
drives supported for use with the J4500 array have a unique WWN. The WWN does
not change even if the drive firmware is upgraded.
At the release of this document, the following Sun hard disk drives are supported for
use in the J4500 array (check the label on the drive to verify it is a supported):
4-14
Sun Storage J4500 Array Service Manual • March 2013
■
HUA7250SBSUN500G A90A Hitachi 500 GB SATA 390-0384-02
■
HUA7275SASUN750G A90A Hitachi 750 GB SATA 390-0379-02
■
HUA7210SASUN1.0T A90A Hitachi 1.0 TB SATA 390-0381-012
■
ST35002NSSUN500G SU0B Seagate 500GB SATA 390-0412-02
■
ST37502NSSUN750G SU0B Seagate 750GB SATA 390-0413-02
■
ST31000NSSUN1.0T SU0B Seagate 1.0 TB SATA 390-0414-02
Note – The J4500 array is shipped from the factory with drives of the same capacity.
Mixing drives of different capacities in the array is unsupported. Refer to the Sun
Storage J4500 Array Product Notes (820-3162) for updated information.
4.4.6
Array Environment Problems
The array enclosure needs to operate within a specific temperature range (below 35
˚C or 95 ˚F). If the internal temperature is above that, the fans automatically increase
in speed when a thermal threshold is reached. This could be a reaction to higher
external ambient temperatures in the local environment. If the fan noise level and
tone seem high, check to ensure there is no airflow restriction raising the enclosure’s
internal temperature.
If an excessive temperature threshold is reached that could damage components in
the enclosure, the J4500 array Over Temperature LED will light. If this happens do
the following:
■
Use your array management software to check for a faulty fan. An enclosure fan is
a hot-swappable and may be replaced with the power on. The fans include status
LEDs to identify a faulty fan. For step-by-step procedures for replacing enclosure
fans, refer to “To Replace a Fan Module” on page 3-12.
■
Check that there is clear, uninterrupted airflow at the front and rear of the storage
system.
■
Check for enclosure intake restrictions due to dust buildup and clear them.
■
Check for excessive recirculation of heated air from the rear of the array enclosure
to the front.
■
Reduce the ambient temperature in the room where the array enclosure is racked.
Chapter 4
Troubleshooting
4-15
4.4.7
Power Problems
The J4500 array includes redundant, hot-swappable power supplies. If a power
supply fails, you may be alerted by the array management software or the enclosure
power supply status LEDs (an alert LED will light amber both at the front and rear of
the enclosure when service is required). For step-by-step procedures for replacing an
array power supply, see “To Replace a Power Supply” on page 3-26.
4.5
Resetting the Enclosure Hardware
In the event the array becomes non-responsive to host commands or you cannot see
its disks, you may need to reset the array enclosure hardware. You can reset the array
with the power on. The array takes about 1 minute to reset before relinking to the
host.
Note – The enclosure may be reset remotely using the Common Array Manager
(CAM) software.
▼ To Reset the Enclosure Hardware Using the
Reset Button
Resetting the array is done by pressing a recessed button at the rear of the enclosure
(see FIGURE 4-3). The array may also be reset remotely using the Sun Common Array
Manager.
Note – This procedure should only be performed after you’ve checked of other
problems at the server and have shut down all server processes that are actively
accessing the J4500 array.
1. At the back of the J4500 array, locate the enclosure Reset button (see FIGURE 4-3).
2. Using a paper clip or stylus, press and release the recessed button on the back
panel.
The reset process takes about 1 minute. After that, the server should see the array
disks.
4-16
Sun Storage J4500 Array Service Manual • March 2013
FIGURE 4-3
Enclosure Reset Button Location
Figure Legend
1
4.6
Enclosure Reset button
Clearing the Enclosure Zoning Password
When creating storage zones on your J4500 array, use the Common Array Manager
(CAM). CAM allows you to set a zoning password for each of the array’s SAS
domains (each domain equates to one of the array’s SAS fabrics: A or B). The zoning
passwords are stored in the array expanders and in CAM, and are used to prevent
unauthorized changes to storage zones. If the array’s zoning password is ever
forgotten, or becomes corrupt, it can be cleared using the enclosure zoning password
clear button on the back of the J4500 array.
Note – Using the enclosure zoning password clear button clears the zoning
password for both of the J4500 array’s SAS domains. It does not clear zoning
configurations.
After clearing the zoning password on the array enclosure, you will also need to
clear the zoning password for each of the array’s SAS domains stored in CAM. This
can be done from the CAM management host. Once the password is cleared in both
places, you can use CAM to assign a new password to each of the array’s SAS
domains.
Chapter 4
Troubleshooting
4-17
Note – Clearing the password in both places is important to ensure the passwords
stored in the array and in CAM match. Some CAM array maintence operations use
the enclosure zone password during execution to ensure the action is authorized.
▼ To Clear the Enclosure Zoning Password
Clearing the enclosure zoning password is done by pressing a recessed button at the
rear of the array. This operation may be performed with the enclosure running.
1. At the back of the J4500 array, locate the Enclosure Zoning Password Clear
button (see FIGURE 4-4).
2. Using a paper clip, press and hold the recessed button on the back panel for five
seconds and then release.
The enclosure zoning password for both SAS fabrics (A and B) is cleared.
FIGURE 4-4
Enclosure Zoning Password Clear Button
Figure Legend
1
Enclosure Zoning Password Clear button
3. From the CAM management host, select Clear password from the
Administration page and saving the setting for both of the array’s SAS domains.
Once that is done, you can assign new zoning passwords using CAM.
4-18
Sun Storage J4500 Array Service Manual • March 2013
APPENDIX
A
System Specifications
This appendix contains physical, power, environmental, acoustic noise emission and
disk mapping specifications for the Sun Storage J4500 array.
TABLE A-1
Sun Storage J4500 Array Physical Specifications
Specification
Value
Width
17.28 inches (439 mm)
Height
6.89 inches (175.05 mm)
Depth
• 29.52 inches (749.90 mm) for enclosure
• 3 inches (77 mm) for cables
Weight
170 pounds (77 Kg) max
TABLE A-2
Sun Storage J4500 Array Power Specifications
Specification
Value
Universal AC Input
110–220 VAC
Input power (min-max)
90-264 VAC
Input frequency (min-max)
47/63 Hz
Maximum power output per
power supply
1500 Watts
Heat output
1020 Watts (3515 BTU/hr = 0.292 tons of air conditioning)
A-1
TABLE A-2
Sun Storage J4500 Array Power Specifications (Continued)
Specification
Value
Maximum air flow
200 CFM
Maximum power consumption
1100 Watts
Maximum operating current
10 Amps maximum operating @ 110 VAC (100 VAC to 127
VAC range), 47 to 63 Hz
5 Amps maximum operating @ 220 VAC (198 VAC to 264
VAC range), 50 to 60 Hz
TABLE A-3
Sun Storage J4500 Array Environmental Specifications
Specification
Value
Operating temperature
5˚ to 35˚ C (41˚ to 95˚ F)
Operating humidity
10% to 90% relative humidity, 27º C max. wet bulb
(noncondensing)
Operating altitude
Up to 3000 meters (9843 feet), maximum ambient temperature is
derated by 1 º C per 500 meters above 500 meters
Storage temperature
-40˚ to 65˚ C (-40˚ to 149˚ F)
Storage humidity
Up to 93% relative humidity, 38 ºC max. wet bulb
(noncondensing)
Nonoperating altitude
Up to 4000 meters (13,123 feet)
Operating shock
3 G, 11 msec, half-sine
Operating vibration
Swept sine, vertical (Z) axis: 0.15G, 0-peak, 5 Hz to 500 Hz; swept
sine, horizontal (X,Y) axes: 0.10G, 0-peak, 5 Hz to 500 Hz
TABLE A-4 contains the declared noise emissions in accordance with ISO 9296,
A-weighted, operating, and idling.
TABLE A-4
A-2
Sun Storage J4500 Array Acoustic Noise Emission Specifications
Specification
28C and below
Acoustic noise
Less than 83 dB sound power in ambient temperature of up to 24º C
LwAd operating
and idle
8.0 B
8.5 B
LpAm
70 dB
75 dB
Sun Storage J4500 Array Service Manual • March 2013
Above 28C
FIGURE A-1 shows the hard disk numbering scheme. The hardware SATA port number
is composite of two numbers, x/y, x is the expander's number (0-3), y is the
expander's phy port number (0- 47). For example, 0/4 means expander 0/phy 4, each
hard disk connected to two SATA phy ports through an active-active mux.
FIGURE A-1
Hard Disk Drive Phy Map
Appendix A
System Specifications
A-3
A-4
Sun Storage J4500 Array Service Manual • March 2013
APPENDIX
B
Connector Pinouts
This appendix contains information about the Sun Storage J4500 array’s connector
pinouts for the following connectors:
B.1
■
Section B.1 “Mini-SAS Connectors” on page B-1
■
Section B.2 “I/O-to-Disk Backplane Connectors” on page B-3
■
Section B.3 “Power Supply Connector” on page B-7
■
Section B.4 “Disk Backplane-to-Front Indicator Connector” on page B-8
■
Section B.5 “Backplane-to-Disk-Backplane Connector” on page B-9
■
Section B.6 “Fan Tray Connectors” on page B-10
■
Section B.7 “Fan Connectors” on page B-11
Mini-SAS Connectors
The table below defines the pin assignments for mini-SAS x4 receptacle connectors
for applications using up to four of the physical links. Be sure you use supported
mini-SAS x4 (SFF-8088) cables with these connectors (see Section 3.1 “Options and
Replaceable Components” on page 3-1).
B-1
FIGURE B-1
Mini-SAS x4 Connectors
TABLE B-1
Mini-SAS x4 External Connector Pinout
Pin Signals Based on Physical Links Supported by the Cable
B-2
Signal
One
Two
Three
Four
RX0+
A2
A2
A2
A2
RX0-
A3
A3
A3
A3
RX1+
not connected
A5
A5
A5
RX1-
not connected
A6
A6
A6
RX2+
not connected
not connected
A8
A8
RX2-
not connected
not connected
A9
A9
RX3+
not connected
not connected
not connected
A11
RX3-
not connected
not connected
not connected
A12
TX0+
B2
B2
B2
B2
TX0-
B3
B3
B3
B3
TX1+
not connected
B5
B5
B5
TX1-
not connected
B6
B6
B6
TX2+
not connected
not connected
B8
B8
TX2-
not connected
not connected
B9
B9
TX3+
not connected
not connected
not connected
B11
TX3-
not connected
not connected
not connected
B12
GND
A1, A4, A7, A10, A13, B1, B4, B7, B10, B13
Sun Storage J4500 Array Service Manual • March 2013
B.2
I/O-to-Disk Backplane Connectors
There are three connectors between the I/O and disk backplane:
B.2.1
■
Power Blade Connector, J23 to J50. See TABLE B-2
■
Two High-Speed Dock Connectors, J24 to J49, and J25 to J51. See FIGURE B-2,
TABLE B-3 and TABLE B-4.
Power Blade Connector
This connector has ten blades and 20 signal pins, with a 30A limit per blade.
TABLE B-2
B.2.2
Power Blade Connector
Pin
Pin Name
Pin
Pin Name
Pin
Pin Name
Pin
Pin Name
A1
FAN4_CTL0
B1
FAN4_CTL0
C1
FAN4_CTL1
D1
FAN4_CTL1
A2
FAN3_CTL0
B2
FAN3_CTL0
C2
FAN3_CTL1
D2
FAN3_CTL1
A3
FAN2_CTL0
B3
FAN2_CTL0
C3
FAN2_CTL1
D3
FAN2_CTL1
A4
FAN1_CTL0
B4
FAN1_CTL0
C4
FAN1_CTL1
D4
FAN1_CTL1
A5
FAN0_CTL0
B5
FAN0_CTL0
C5
FAN0_CTL1
D5
FAN0_CTL1
Blade 1
5V_DISK
Blade 2
5V_DISK
Blade 3
GND
Blade 4
GND
Blade 5
GND
Blade 6
+12V
Blade 7
GND
Blade 8
+12V
Blade 9
GND
Blade 10
+12V
High-Speed Dock Connectors
Each disk drive uses two 111-circuit Hi-Speed Dock connectors. See in FIGURE B-2.
Appendix B
Connector Pinouts
B-3
FIGURE B-2
TABLE B-3
B-4
High-Speed Dock Connectors
I/O-to-Disk Backplane (J24 to J49) Connector Pinouts
Pin
Pin Name
Pin
Pin Name
Pin
Pin Name
A1
FRONT_USB_P
B1
SHORT_PIN1
C1
POWER_BUTTON_L
A2
FRONT_USB_N
B2
P3_3V
C2
LOCATE_BUTTON_L
A3
5V_AUX
B3
5V_AUX
C3
P5V
A4
PS2_BATT_L
B4
GND
C4
GND
A5
DISK36_TX_P
B5
DISK36_RX_N
C5
DISK24_TX_P
A6
DISK36_TX_N
B6
DISK36_RX_P
C6
DISK24_TX_N
A7
DISK24_RX_N
B7
DISK12_TX_P
C7
DISK12_RX_N
A8
DISK24_RX_P
B8
DISK12_TX_N
C8
DISK12_RX_P
A9
DISK36_ACT_LED_L
B9
DISK24_ACT_LED_L
C9
DISK12_ACT_LED_L
A10
DISK13_ACT_LED_L
B10
DISK1_ACT_LED_L
C10
DISK0_ACT_LED_L
A11
DISK0_TX_P
B11
DISK0_RX_N
C11
DISK1_RX_P
A12
DISK0_TX_N
B12
DISK0_RX_P
C12
DISK1_RX_N
A13
DISK1_TX_N
B13
DISK13_RX_P
C13
DISK13_TX_N
A14
DISK1_TX_P
B14
DISK13_RX_N
C14
DISK13_TX_P
A15
DISK25_RX_P
B15
DISK25_TX_N
C15
DISK37_RX_P
A16
DISK25_RX_N
B16
DISK25_TX_P
C16
DISK37_RX_N
A17
DISK37_TX_N
B17
DISK2_RX_P
C17
DISK2_TX_N
A18
DISK37_TX_P
B18
DISK2_RX_N
C18
DISK2_TX_P
A19
DISK25_ACT_LED_L
B19
DISK37_ACT_LED_L
C19
DISK2_ACT_LED_L
A20
DISK38_ACT_LED_L
B20
DISK26_ACT_LED_L
C20
DISK14_ACT_LED_L
A21
DISK14_RX_P
B21
DISK14_TX_N
C21
DISK26_RX_P
Sun Storage J4500 Array Service Manual • March 2013
TABLE B-3
I/O-to-Disk Backplane (J24 to J49) Connector Pinouts (Continued)
Pin
Pin Name
Pin
Pin Name
Pin
Pin Name
A22
DISK14_RX_N
B22
DISK14_TX_P
C22
DISK26_RX_N
A23
DISK26_TX_N
B23
DISK38_RX_P
C23
DISK38_TX_N
A24
DISK26_TX_P
B24
DISK38_RX_N
C24
DISK38_TX_P
A25
DISK3_RX_P
B25
DISK3_TX_N
C25
DISK15_RX_P
A26
DISK3_RX_N
B26
DISK3_TX_P
C26
DISK15_RX_N
A27
DISK15_TX_N
B27
DISK27_RX_P
C27
DISK27_TX_N
A28
DISK15_TX_P
B28
DISK27_RX_N
C28
DISK27_TX_P
A29
DISK3_ACT_LED_L
B29
DISK15_ACT_LED_L
C29
DISK27_ACT_LED_L
A30
DISK16_ACT_LED_L
B30
DISK4_ACT_LED_L
C30
DISK39_ACT_LED_L
A31
DISK39_RX_P
B31
DISK39_TX_N
C31
DISK4_RX_P
A32
DISK39_RX_N
B32
DISK39_TX_P
C32
DISK4_RX_N
A33
DISK4_TX_N
B33
DISK16_RX_P
C33
DISK16_TX_N
A34
DISK4_TX_P
B34
DISK16_RX_N
C34
DISK16_TX_P
A35
DISK28_RX_P
B35
DISK28_TX_N
C35
DISK40_RX_P
A36
DISK28_RX_N
B36
DISK28_TX_P
C36
DISK40_RX_N
A37
DISK40_TX_N
B37
DISK5_RX_P
C37
DISK5_TX_N
A38
DISK40_TX_P
B38
DISK5_RX_N
C38
DISK5_TX_P
A39
DISK28_ACT_LED_L
B39
DISK40_ACT_LED_L
C39
DISK5_ACT_LED_L
A40
DISK41_ACT_LED_L
B40
DISK29_ACT_LED_L
C40
DISK17_ACT_LED_L
A41
DISK17_RX_P
B41
DISK17_TX_N
C41
DISK29_RX_P
A42
DISK17_RX_N
B42
DISK17_TX_P
C42
DISK29_RX_N
A43
DISK29_TX_N
B43
DISK41_RX_P
C43
DISK41_TX_N
A44
DISK29_TX_P
B44
DISK41_RX_N
C44
DISK41_TX_P
A45
3_3AUX_IN
B45
3_3AUX_IN
C45
3_3AUX_IN
A46
GND
B46
5V_DISK_SENSE_N
C46
GND
A47
3_3_AUX_SENSE_P
B47
5V_DISK_SENSE_P
C47
SP_I2C_CLK
A48
3_3_AUX_SENSE_N
B48
MAMMOTH_INT_L
C48
SP_I2C_DAT
Appendix B
Connector Pinouts
B-5
TABLE B-4
B-6
I/O-to-Backplane (J25 to J51) Connector Pinouts
Pin
Pin Name
Pin
Pin Name
Pin
Pin Name
A1
12V_SENSE_P
B1
3_3AUX_POWERGO
OD
C1
VDD_RTC
A2
12V_SENSE_N
B2
PS1_ENABLE_L
C2
PS0_ENABLE_L
A3
DISK6_RX_P
B3
DISK6_TX_N
C3
DISK18_RX_P
A4
DISK6_RX_N
B4
DISK6_TX_P
C4
DISK18_RX_N
A5
DISK18_TX_N
B5
DISK30_RX_P
C5
DISK30_TX_N
A6
DISK18_TX_P
B6
DISK30_RX_N
C6
DISK30_TX_P
A7
DISK6_ACT_LED_L
B7
DISK18_ACT_LED_L
C7
DISK30_ACT_LED_L
A8
DISK19_ACT_LED_L
B8
DISK7_ACT_LED_L
C8
DISK42_ACT_LED_L
A9
DISK42_RX_P
B9
DISK42_TX_N
C9
DISK7_RX_P
A10
DISK42_RX_N
B10
DISK42_TX_P
C10
DISK7_RX_N
A11
DISK7_TX_N
B11
DISK19_RX_P
C11
DISK19_TX_N
A12
DISK7_TX_P
B12
DISK19_RX_N
C12
DISK19_TX_P
A13
DISK31_RX_P
B13
DISK31_TX_N
C13
DISK43_RX_P
A14
DISK31_RX_N
B14
DISK31_TX_P
C14
DISK43_RX_N
A15
DISK43_TX_N
B15
DISK8_RX_P
C15
DISK8_TX_N
A16
DISK43_TX_P
B16
DISK8_RX_N
C16
DISK8_TX_P
A17
DISK31_ACT_LED_L
B17
DISK43_ACT_LED_L
C17
DISK8_ACT_LED_L
A18
DISK44_ACT_LED_L
B18
DISK32_ACT_LED_L
C18
DISK20_ACT_LED_L
A19
DISK20_RX_P
B19
DISK20_TX_N
C19
DISK32_RX_P
A20
DISK20_RX_N
B20
DISK20_TX_P
C20
DISK32_RX_N
A21
DISK32_TX_N
B21
DISK44_RX_P
C21
DISK44_TX_N
A22
DISK32_TX_P
B22
DISK44_RX_N
C22
DISK44_TX_P
A23
DISK9_RX_P
B23
DISK9_TX_N
C23
DISK21_RX_P
A24
DISK9_RX_N
B24
DISK9_TX_P
C24
DISK21_RX_N
A25
DISK21_TX_N
B25
DISK33_RX_P
C25
DISK33_TX_N
A26
DISK21_TX_P
B26
DISK33_RX_N
C26
DISK33_TX_P
A27
DISK9_ACT_LED_L
B27
DISK21_ACT_LED_L
C27
DISK33_ACT_LED_L
A28
DISK22_ACT_LED_L
B28
DISK10_ACT_LED_L
C28
DISK45_ACT_LED_L
A29
DISK45_RX_P
B29
DISK45_TX_N
C29
DISK10_RX_P
Sun Storage J4500 Array Service Manual • March 2013
TABLE B-4
B.3
I/O-to-Backplane (J25 to J51) Connector Pinouts (Continued)
Pin
Pin Name
Pin
Pin Name
Pin
Pin Name
A30
DISK45_RX_N
B30
DISK45_TX_P
C30
DISK10_RX_N
A31
DISK10_TX_N
B31
DISK22_RX_P
C31
DISK22_TX_N
A32
DISK10_TX_P
B32
DISK22_RX_N
C32
DISK22_TX_P
A33
DISK34_RX_P
B33
DISK34_TX_N
C33
DISK46_RX_P
A34
DISK34_RX_N
B34
DISK34_TX_P
C34
DISK46_RX_N
A35
DISK46_TX_N
B35
DISK11_RX_P
C35
DISK11_TX_N
A36
DISK46_TX_P
B36
DISK11_RX_N
C36
DISK11_TX_P
A37
DISK34_ACT_LED_L
B37
DISK46_ACT_LED_L
C37
DISK11_ACT_LED_L
A38
DISK47_ACT_LED_L
B38
DISK35_ACT_LED_L
C38
DISK23_ACT_LED_L
A39
DISK23_RX_P
B39
DISK23_TX_N
C39
DISK35_RX_P
A40
DISK23_RX_N
B40
DISK23_TX_P
C40
DISK35_RX_N
A41
DISK35_TX_N
B41
DISK47_RX_P
C41
DISK47_TX_N
A42
DISK35_TX_P
B42
DISK47_RX_N
C42
DISK47_TX_P
A43
PS0_FAN_FAIL_L
B43
PS0_POWEROK
C43
PS1_POWEROK
A44
PS1_FAN_FAIL_L
B44
PS0_PRESENT_L
C44
PS2_POWEROK
A45
PS2_FAN_FAIL_L
B45
PS1_PRESENT_L
C45
PS0_FAIL
A46
PS0_VIN_GOOD_L
B46
PS2_PRESENT_L
C46
PS1_FAIL
A47
PS1_VIN_GOOD_L
B47
PS2_VIN_GOOD_L
C47
PS2_FAIL
A48
PS2_ENABLE_L
B48
SHORT_PIN4
C48
INTRUSION_SW
Power Supply Connector
The power supply connector has signal pins and power blades. See TABLE B-5 for
signal pins and TABLE B-6 for power blades.
Appendix B
Connector Pinouts
B-7
TABLE B-5
X,Y
1
2
3
4
5
6
7
D
3.3AUX
GND
12LS
Spare
SCL
A0
3.3 Vsb RS+
C
3.3AUX
GND
AC OK
+12V RS+
+12V RS-
A1
3.3 Vsb RS-
B
3.3AUX
GND
PSON
PSKILL
SDA
A2
Fan fail
A
3.3AUX
GND
PRESENT
PWOK
FAIL
ACL
Reserved
TABLE B-6
B.4
Power Supply Signal Connectors
Power Supply Connector Power Blades
Pin
Function
P1
12VDC
P2
12VDC Return
P3
12VDC
P4
12VDC Return
P5
12VDC
P6
12VDC Return
P7
12VDC
P8
12VDC Return
Disk Backplane-to-Front Indicator
Connector
A 10-wire flex cable connects the disk backplane to the indicator board. TABLE B-7 lists
the pins:
TABLE B-7
B-8
Disk Backplane to Front Indicator Board Pins
Disk Backplane Pin
Pin Name
Front Indicator Board Pin
1
LOCATE_LED
10
2
LOCATE_BUTTON_L
9
3
ALERT_LED
8
Sun Storage J4500 Array Service Manual • March 2013
TABLE B-7
B.5
Disk Backplane to Front Indicator Board Pins
Disk Backplane Pin
Pin Name
Front Indicator Board Pin
4
POWER_LED
7
5
POWER_BUTTON_L
6
6
FAN_FAIL_LED
5
7
PS_FAIL_LED
4
8
OVERTEMP_LED
3
9
PRESENT_L (GND on front indicator
board
2
10
GND
1
Backplane-to-Disk-Backplane Connector
The backplane to disk backplane connector has eight blades that support 30 amps
each. It also has 30 signal pins. See TABLE B-8 for the blades and TABLE B-9 for the
signal pins.
TABLE B-8
Backplane-to-Disk-Backplane Connector Power Blades
Pin
Function
Blade 1
+12V
Blade 2
GND
Blade 3
+12V
Blade 4
GND
Blade 5
+12V
Blade 6
GND
Blade 7
GND
Blade 8
GND
Appendix B
Connector Pinouts
B-9
TABLE B-9
B.6
Backplane-to-Disk-Backplane Connector Signal Pins
Pin
Pin Name
Pin
Pin Name
A1
3.3V AUX
C1
.3V AUX
A2
GND
C2
GND
A3
VDD_RTC
C3
SP_I2C_CLK
A4
INTRUSION_SW
C4
SP_I2C_DAT
A5
PS2_ENABLE_L
C5
PS2_BATT_L
A6
PS2_VIN_GOOD_L
C6
PS0_POWEROK
A7
PS2_POWEROK
C7
PS1_FAN_FAIL_L
A8
PS2_FAIL
C8
PS1_POWEROK
A9
PS2_FAN_FAIL_L
C9
PS1_PRESENT_L
B1
3.3V AUX
D1
3.3V AUX
B2
GND
D2
GND
B3
PS0_FAN_FAIL_L
D3
3_3_AUX_SENSE_P
B4
NC
D4
3_3_AUX_SENSE_N
B5
PS2_PRESENT_L
D5
PS0_FAIL
B6
PS0_PRESENT_L
D6
PS0_VIN_GOOD_L
B7
PS1_FAIL
D7
PS0_ENABLE_L
B8
PS1_VIN_GOOD_L
D8
12V_SENSE_P
B9
PS1_ENABLE_L
D9
12V_SENSE_N
Fan Tray Connectors
The fan tray uses the SATA hard drive connector for the interface to the disk
backplane. The pins have been designed so that no damage occurs if a fan tray is
accidentally inserted into a hard drive slot or vice versa. TABLE B-10 lists the pins.
B-10
Sun Storage J4500 Array Service Manual • March 2013
TABLE B-10
B.7
Fan Tray Connectors
Pin
Name
S1
GND
S2
REMOVE_LED_L
S3
FAIL_LED_L
S4
PRESENT_L
S5
FAN_TACH0
S6
FAN_TACH1
S7
GND
P1
FAN_CTL0
P2
FAN_CTL0
P3
No Connect
P4
GND
P5
GND
P6
GND
P7
3.3AUX
P8
5VAUX
P9
No Connect
P10
GND
P11
OK_LED_L
P12
GND
P13
No Connect
P14
FAN_CTL1
P15
FAN_CTL1
Fan Connectors
The fans have three-pin connectors, listed in TABLE B-11.
Appendix B
Connector Pinouts
B-11
TABLE B-11
Fan Connectors
Pin
Name
1
Ground
Black
2
Power
Red
3
Tach
Blue
FIGURE B-3 shows the connectors.
FIGURE B-3
Fan Connectors
Figure Legend
B-12
Color
1
Fan tach (blue)
2
Fan power (red)
3
Fan ground (black)
Sun Storage J4500 Array Service Manual • March 2013
Index
B
diagnostic tools, 4-5
disk drive cover intrusion switch, 3-10
disk drive LEDs, 4-3
disk drives, identifying, 4-10
disk error for drive that does not have valid
GUID, 4-14
drive LEDs, 4-4
back panel connectors, 2-5
blade servers, connecting, 2-5
E
C
enclosure firmware upgrade, 3-33
external status LEDs, 4-1
A
acoustic noise emission specifications, A-2
array link problems, 4-11
attaching cables, 2-5
available options, 3-1
cables, switching cables or making new
connections, 4-12
cabling configuration examples, 2-7
Cabling diagram, 2-6
cabling rules, 2-2
cabling rules for blade servers, 2-5
cabling the server, 2-5
cascading multiple enclosures, 2-4
configuration rules, 2-2
connecting blade servers to the enclosure, 2-5
connecting HBAs, 2-3
connecting multiple enclosures, 2-4
connecting rules, 2-2
connector pinouts
SAS connector pinouts, B-1
D
daisy chaining multiple enclosures, 2-4
device limits, 2-4
F
fan LEDs, 4-3, 4-4
fan module, removing, 3-12
fans, hot-swapping, 3-13
firmware upgrade, 3-33
H
hard disk drive access cover, removing, 3-9
hard disk drive LEDs, 4-3
hard disk hot-pluggable, 3-18
hard disk numbering, A-3
hard disk sizes and RAID volumes, 3-18
HBA connection rules, 2-3
Host Bus Adapters (HBA), supported, 2-3
hot pluggable, described, 3-2
hot swappable, described, 3-2
hot-plugging a hard disk, 3-18
hot-swappping fans, 3-13
Index-1
I
intrusion switch, disk drive cover, 3-10
L
LEDs
external status, 4-1
internal disk drive and fan, 4-3
LEDs, drives and fans, 4-4
limits for SAS targets, 2-4
M
mini SAS connector pinouts, B-1
multipath disk error, 4-14
multiple enclosures, connecting, 2-4
O
options available, 3-1
P
physical specifications, A-1
pinouts, mini SAS connector, B-1
power distribution board, removing, 3-21
power failure recovery, 2-13
power specifications, A-1
powering on the enclosure, 2-12
problems, 4-9
problems, troubleshooting, 4-9
SAS expander firmware upgrading, 3-33
SAS link problems, 4-11
SAS target limits, 2-4
SATA affiliation issue, 3-29
specifications, system, A-1
startup, 4-9
startup problems, 4-9
SunVTS, 4-5
supported cabling configurations, 2-7
supported HBAs, 2-3
switching SAS cable connections, 4-12
system specifications, A-1
T
tools required, 3-2
troubleshooting
array link problems, 4-11
Troubleshooting problems, 4-9
U
upgrading the enclosure firmware, 3-33
R
RAID volume configuration issue, 3-18
removing
fan module, 3-12
hard disk drive access cover, 3-9
power distribution board, 3-21
replaceable components list, 3-1
replacing components, tools for, 3-2
required tools, 3-2
reset button for enclosure, location, 4-18
resetting the enclosure hardware, 4-16
rules for connecting HBAs, 2-3
S
safety guidelines, vii
SAS connectors, 2-6
Index-2
Sun Storage J4500 Array Service Manual • March 2013