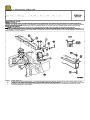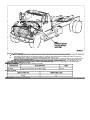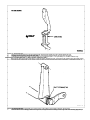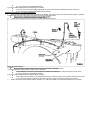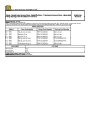
1
TSB Article 98-2-1 has been superseded by Article 98-5-2.
TSB Article 98-2-14 has been superseded by Article 98-4-25.
98-3, Publication Date: FEBRUARY 16, 1998
FORD:
1997 ASPIRE, PROBE, THUNDERBIRD
1997-98 CONTOUR
1998 CROWN VICTORIA, ESCORT, MUSTANG, TAURUS
LINCOLN-MERCURY:
1997 COUGAR
1997-98 MYSTIQUE
1998 CONTINENTAL, GRAND MARQUIS, MARK VIII, SABLE, TOWN CAR, TRACER
LIGHT TRUCK:
1997 AEROSTAR
1997-98 EXPEDITION, EXPLORER, F-150, F-250 LD, F-250 LD, MOUNTAINEER, RANGER, VILLAGER,
WINDSTAR
1998 ECONOLINE, NAVIGATOR
1999 SUPER DUTY F SERIES
MEDIUM/HEAVY TRUCK:
1997 AEROMAX, CARGO SERIES, F & B SERIES, L SERIES, LOUISVILLE
ISSUE:
Exterior paint surface maintenance or damage repair where the basecoat does not show through should be
restored without repainting. The restoration of gloss and luster may be enhanced with new techniques and
three new Ford approved materials.
ACTION:
The following procedure is applicable to repair surface conditions such as dirt particles, "orange peel," runs,
sags, industrial fallout stains, swirl marks, and scratches.
PREPARATION
The affected surface must be clean and dry to be repaired. Mask off adjacent panels, mouldings, stripe, and
character lines as required.
CAUTION:
EYE PROTECTION SHOULD BE WORN. JEWELRY, WATCHES, AND BELT BUCKLES MUST BE
REMOVED OR COVERED TO PREVENT ACCIDENTAL DAMAGE TO PAINT FINISH.
NOTE:
CHECK PAINT FILM THICKNESS BEFORE AND AFTER PERFORMANCE OF REPAIRS. MAXIMUM
PAINT FILM REMOVAL IS 0.3 OF A MIL.
NOTE:
PERFORM A TRIAL REPAIR ON A SMALL AREA. FIRST, TRY A POLISH; IF THIS IS NOT
SUCCESSFUL, TRY BUFFING WITH FORD MEDIUM DUTY BODY SHOP PAINT CLEANER
(F6AZ-19530-BA) OR FORD HEAVY DUTY BODY SHOP PAINT CLEANER (F6AZ-19530-CA) AND,
FINALLY, USE WET SANDING TO REMOVE THE CONDITION. USE THE MOST EFFECTIVE
TECHNIQUE ON THE REMAINING AREAS. AN OUTLINE OF THE COMPLETE PROCEDURE AND
REQUIRED MATERIALS FOLLOWS.
SERVICE NOTES
1.
Remove sanding marks with Ford Medium or Heavy Duty Body Shop Paint Cleaner.
2.
Swirl marks, evident after buffing, may be removed by polishing with Ford Light Duty Body Shop
Polish (F6AZ-19530-AA).
3.
Remove light scratches and small dirt particles with a power buffer and Ford Medium Duty Body
Shop Pain Cleaner followed by polishing with Ford Light Duty Body Shop Polish.
4.
Remove deep scratches and heavy dirt particles or "orange peel" by wet sanding.
REMOVING LIGHT SCRATCHES OR SWIRL MARKS AND/OR RESTORING A DULL FINISH
The Black and Decker Buffmaster® 5950 is the tool of choice. Variable speed buffers are available in a variety
of buffing speeds. The recommended speed range is (1200-1750 rpm).
1.
Apply a small amount of Ford Light Duty Body Shop Polish to the pad.
Always keep the face of the buffing pad completely flat to the surface, reducing the risk of buffer
swirl marks. Watch your pad, especially on angled surfaces, to be certain that it stays flat
When "buffing out" oxidation or other paint defects with a cleaning material, use a liberal amount
of material, slower buffing motion and added downward pressure to increase cutting action
2.
When polishing, keep the pad flat against the surface. Do not bear down. The weight of the buffer is
sufficient.
CAUTION:
DO NOT MIX PRODUCTS. USE A SEPARATE, DEDICATED BUFFING PAD FOR EACH PRODUCT
TO ACHIEVE DESIRED RESULTS.
MEDIUM SCRATCHES, SMALL DIRT PARTICLES, GRIND MARKS AND SANDING MARKS
1.
Apply Ford Medium Duty Body Shop Paint Cleaner to the panel with a clean compound pad on the
wheel.
2.
Spread the product evenly and continue buffing until the condition is removed.
3.
Keep the wheel flat to the surface and use light to moderate pressure and long strokes.
4.
Periodically check the finish and add product as required.
5.
When buffing is complete, polish the panel as described previously.
Untreated wool cutting pads are the most effective cutting pads to use with Ford Heavy Duty Body Shop
Paint Cleaner for removing paint defects and heavy oxidation. Following the use of a wool cutting pad, it
may be necessary to polish the finish with a foam pad to remove the deep swirl marks.
NOTE:
ALWAYS KEEP THE PAD MOVING AND LIMIT YOUR STROKES OVER THE BLEMISH TO
PREVENT EXCESSIVE HEAT BUILDUP AND POSSIBLE BURN-THROUGH. STOP IMMEDIATELY IF
THE SURFACE BECOMES TOO HOT TO LAY THE PALM OF YOUR HAND ON IT. KEEP SURFACE
TEMPERATURE BELOW 38°C (100°F).
NOTE:
HEAT BUILDUP: WHEN BUFFING CREATES EXCESSIVE HEAT, HAZING MAY APPEAR ACROSS
THE SURFACE BEING BUFFED AND THE PRODUCT MAY DRY LIKE A FILM AND REFUSE TO
BUFF OUT. TO REMEDY, WIPE THE AREA DOWN WITH COOL WATER, DRY THE SURFACE AND
RESUME BUFFING, AT A LOWER RPM IF POSSIBLE.
NOTE:
STATIC: STATIC ELECTRICITY MAY BE PRESENT ON A PAINTED FIBERGLASS/PLASTIC
SURFACE BEING BUFFED. THE MATERIAL MAY DRY LIKE A FILM OR TURN "GUMMY" AND
BEGIN TO BALL UP. TO REMEDY, ATTACH A GROUNDING CLAMP TO THE SURFACE BEING
BUFFED TO ELIMINATE THE STATIC CHARGE.
RUN AND SAG REMOVAL
This procedure consists of shaving the run(s) or sag(s) flush with a commercial single edge razor blade,
shaving file or sanding.
NOTE:
IF IT IS NECESSARY TO SHAVE RUNS AND SAGS WITH A RAZOR BLADE, FIRST DULL THE
CORNERS WITH SANDPAPER TO AVOID SCRATCHING THE ADJACENT AREA FINISH.
1.
Lightly scrape the defect until the defect is level with the surface.
2.
Wet sand or compound the surface to remove any small scratches.
3.
Polish to complete the repair.
WET SANDING FOR DEFECT REMOVAL
Typical paint defects that are repaired with this system include: dirt in paint, solvent "pop," cratering,
"orange peel," drips, scratches, water spots, and acid rain
Always use the least abrasive (highest grit) sanding products possible to do this job
The following wet sanding procedure utilizes light grit sandpaper or sanding blocks for removal of surface
damage. These materials cut quickly, leaving a uniform finish requiring a minimum of buffing to restore gloss.
1.
Mist or apply water on the area to be sanded. Continue to flush water on the surface during sanding
for maximum lubrication.
2.
Use sanding blocks or paper. Keep abrasion to the immediate area of the defect. Keep blocks in
water when not in use.
3.
If the cutting is too slow, switch to a lower grade block or paper and resume sanding. When 90% of
the defect is removed, switch to a 2000 grade sand paper or sanding block to finish smoothing and
prepare the surface for buffing.
4.
Sanding blocks can be shaped to work on any angle. When the block is wet, rub it against a dry
sanding block for shaping.
5.
When using sanding papers, wrap the paper tightly around a backing pad. This pad evenly distributes
pressure over the entire surface of the sanding paper. This creates a uniform sanding pattern.
6.
Plan your strokes to limit the abrasion to the smallest area possible.
7.
Always finish sanding with 2000 Grit Sanding Paper. 2000 grit paper will reduce the need for heavy
compound, however, the area should be finished by using a cleaner that will remove the sanding
scratches left by these papers.
NOTE:
IF MULTIPLE GRIT PAPERS ARE USED, IT IS A GOOD IDEA TO CHANGE THE DIRECTION OF
SANDING STROKE TO ALLOW YOU TO SEE THAT THE PREVIOUS GRIT SCRATCH IS
REMOVED.
8.
Buff out sanding marks by applying Ford Medium Duty Body Shop Paint Cleaner with a "Foam"
Cutting Pad (W7000). Follow with Ford Light Duty Body Shop Polish for a swirl-free gloss.
GENERAL TECHNIQUES AND HINTS
"Foam" buffing pads yield maximum gloss and depth of color on all types of paint finishes without
creating buffer swirl marks
Always apply product directly to pad, not to oxidized paint surface. Dry paint absorbs material into
pores upon contact
Avoid short rapid strokes. Move the buffer slowly across the surface using long straight motions and
overlap by 50% the buffing pattern left by the previous pass. This insures uniform coverage and
allows both material and buffer to perform at maximum efficiency
Avoid buffing directly on raised character lines. The reduced paint film on these surfaces increases
the risk of paint burn-through. It is best to buff up to them from each side
If a paint blemish remains after buffing, reapply a small amount of material over the blemish. Confine
your buffing strokes to the immediate area of the blemish while applying additional downward
pressure and keeping the pad flat
⁄ƒƒƒƒƒƒƒƒƒƒƒƒƒƒƒƒƒƒ¬ƒƒƒƒƒƒƒƒƒƒƒƒƒƒƒƒƒƒƒƒƒƒƒƒƒƒƒƒƒƒƒƒƒƒƒƒƒƒƒƒƒƒƒƒƒƒƒƒø
≥
PART NUMBER
≥
PART NAME
≥
√ƒƒƒƒƒƒƒƒƒƒƒƒƒƒƒƒƒƒ≈ƒƒƒƒƒƒƒƒƒƒƒƒƒƒƒƒƒƒƒƒƒƒƒƒƒƒƒƒƒƒƒƒƒƒƒƒƒƒƒƒƒƒƒƒƒƒƒƒ¥
≥ F6AZ-19530-AA
≥ Light Duty Body Shop Polish (Swirl Free)
≥
≥ F6AZ-19530-BA
≥ Medium Duty Body Shop Paint Cleaner (Dual
≥
≥
≥ Action Cleaner/Polish)
≥
≥ F6AZ-19530-CA
≥ Heavy Duty Body Shop Paint Cleaner (Compound
≥
≥
≥ Power Cleaner)
≥
≥
≥
≥
≥
≥ Locally Purchase The Following:
≥
≥
≥ Sanding Block
≥
≥
≥ Mirror Glaze Foam Cutting Pad
≥
≥
≥ Untreated Wool Pad
≥
≥
≥ Foam Polishing Pad
≥
≥
≥ 2000 Grade Finesse Sanding Paper
≥
≥
≥ Backing Pad
≥
¿ƒƒƒƒƒƒƒƒƒƒƒƒƒƒƒƒƒƒ¡ƒƒƒƒƒƒƒƒƒƒƒƒƒƒƒƒƒƒƒƒƒƒƒƒƒƒƒƒƒƒƒƒƒƒƒƒƒƒƒƒƒƒƒƒƒƒƒƒŸ
OTHER APPLICABLE ARTICLES: NONE
WARRANTY STATUS: INFORMATION ONLY
OASIS CODES: 106000
98-4, Publication Date: MARCH 2, 1998
FORD:
1986-93 CROWN VICTORIA, TAURUS, THUNDERBIRD
1988-93 ESCORT, FESTIVA, MUSTANG, TEMPO
1989-93 PROBE
LINCOLN-MERCURY:
1986-92 MARK VII
1986-93 COUGAR, GRAND MARQUIS, SABLE, TOWN CAR
1987-93 TRACER
1988-93 CONTINENTAL, TOPAZ
LIGHT TRUCK:
1986-93 AEROSTAR
1988-90 BRONCO II
1988-93 BRONCO, ECONOLINE, F SUPER DUTY, F-150-350 SERIES, RANGER
1991-93 EXPLORER
1993 VILLAGER
MEDIUM/HEAVY TRUCK:
1985-91 CL-9000
1985-94 L SERIES
1985-95 F SERIES
1989-94 CARGO SERIES
This TSB article is being republished in its entirety to include the latest level parts.
ISSUE:
This TSB article announces the Ford OEM air conditioning retrofit kit availability. Retrofit kits convert R-12 air
conditioning systems to operate on R-134a refrigerant. All Ford kits are designed for specific vehicles and
offer equivalent performance to the original R-12 system.
ACTION:
When a consumer inquires about a retrofit kit, refer to the following Charts to see if a kit is available from
Ford. If the vehicle is not listed, a kit is not available from Ford.
The Chart identifies which components are included in each kit for the purpose of providing repair estimates.
Ford recommends the use of R-12 in R-12 A/C systems as long as it is available and cheaper then retrofitting
to R-134a. Ford does not recommend the use of any refrigerant other than R-134a or R-12.
NOTE:
THE REMOVAL OF MINERAL OIL DURING THE RETROFIT IS NOT REQUIRED UNLESS NOTED
UNDER THE "FLUSHING PROCEDURE" COLUMN (M) IN THE CHARTS FOUND IN THIS TSB
ARTICLE. THE POLYALKYLENE GLYCOL (PAG), SUPPLIED IN EACH KIT, MUST BE ADDED WITH
R-134a. PAG OIL, MINERAL OIL AND R-134a CAN BE MIXED TOGETHER IN THE A/C SYSTEM
WITHOUT CAUSING DAMAGE.
NOTE:
HFC-134a IS THE ONLY CFC-12 (R-12) REPLACEMENT REFRIGERANT APPROVED BY FORD
MOTOR COMPANY.
Detailed service procedure instructions are provided with each retrofit kit.
Heading definitions for lettered columns found in the following charts:
A = Condenser
B = Compressor
C = Accumulator
D = Engine Fan and Clutch
E = Electric Fan
F = Air Deflectors
G = Control Module
H = Suction Hose
J = Condenser-To-Compressor Discharge Hose
K = Orifice Tube
L = Miscellaneous*****
M = Flushing Procedures
*****Miscellaneous kit items for all systems include: Cycling Pressure Switch (CPS), CPS adapter, Refrigerant
Containment Switch (RCS), RCS wiring harness assembly, RCS adapter, low side service port adapter, high
side charge port adapter, PAG oil, and retrofit label.
*Suggested Retail Price (SRP) DOES NOT include the cost of refrigerant or A/C repairs necessary.
**System flushing is required. SRP DOES NOT include cost of flushing agent.
***Approximate installation times include the addition of refrigerant and system flushing.
****For L-Series vehicles built prior to the 1991 model year (vehicles built through December, 1991), replace
the receiver/drier with an R-134a compatible receiver/drier. Refer to the following Compatibility Chart.
⁄ƒƒƒƒƒƒƒƒƒƒƒƒƒƒƒƒƒƒƒƒƒƒƒƒƒƒƒƒƒƒƒƒƒƒƒƒƒƒƒƒƒƒƒƒƒƒƒƒƒƒƒƒƒƒƒƒƒƒƒƒƒƒƒƒƒƒƒƒƒƒø
≥
R-134a COMPATIBLE RECEIVER/DRIERS FOR PRE-1991-1/2 L-SERIES
≥
√ƒƒƒƒƒƒƒƒƒƒƒƒƒƒƒƒƒƒƒƒƒƒƒ¬ƒƒƒƒƒƒƒƒƒƒƒƒƒƒƒƒƒƒƒƒƒƒƒ¬ƒƒƒƒƒƒƒƒƒƒƒƒƒƒƒƒƒƒƒƒƒƒ¥
≥ R-12 Production Part
≥
R-12 Service Part
≥
R-134a Replacement
≥
√ƒƒƒƒƒƒƒƒƒƒƒƒƒƒƒƒƒƒƒƒƒƒƒ≈ƒƒƒƒƒƒƒƒƒƒƒƒƒƒƒƒƒƒƒƒƒƒƒ≈ƒƒƒƒƒƒƒƒƒƒƒƒƒƒƒƒƒƒƒƒƒƒ¥
≥ E7HT-19959-AB
≥
≥ F4HZ-19959-C
≥
≥ E7HT-19959-BA
≥
≥ F4HZ-19959-D
≥
≥ E7HT-19959-CA
≥
≥ F4HZ-19959-E
≥
≥ FOHT-19959-BA
≥
≥ F4HZ-19959-F
≥
≥
≥ F2HZ-19959-A
≥ F4HZ-19959-G
≥
¿ƒƒƒƒƒƒƒƒƒƒƒƒƒƒƒƒƒƒƒƒƒƒƒ¡ƒƒƒƒƒƒƒƒƒƒƒƒƒƒƒƒƒƒƒƒƒƒƒ¡ƒƒƒƒƒƒƒƒƒƒƒƒƒƒƒƒƒƒƒƒƒƒŸ
OTHER APPLICABLE ARTICLES:
≤ 95-10-16
SUPERSEDES: 96-20-9
WARRANTY STATUS: INFORMATION ONLY
OASIS CODES: 205000, 208000, 208200, 208999
98-4, Publication Date: MARCH 2, 1998
MEDIUM/HEAVY TRUCK:
1996-98 AEROMAX, LOUISVILLE
ISSUE:
In combined highway and city delivery applications, premium steering tire life on tractor units may be lower
than expected when compared to previous L-Series models. This may be due to an increase in front wheel cut
for improved low speed maneuverability and turning radius.
ACTION:
Replace the steering axle stop bolts. Replacing the stop bolts should help reduce wheel cut and the possibility
of lower than expected tire life. Refer to the following Service Procedure for details.
SERVICE PROCEDURE
1.
Refer to the appropriate Louisville/AeroMax Service Manual, Section 04, for front axle specifications
and service procedures.
2.
Verify front end alignment (camber and toe), vehicle alignment (axles and thrust angle), and wheel
end play are within specifications. If any of these are not within specifications, they may result in
premature tire wear. Repair as required.
3.
After verification that the front end alignment and wheel end play are within specifications, remove
the steering stop bolts.
4.
Install new Steering Stop Bolts (F6HZ-3145-BB). A letter "Y" is stamped into the end of the new stop
bolt for easy identification. This letter corresponds to the stop bolt setting.
⁄ƒƒƒƒƒƒƒƒƒƒƒƒƒƒƒƒƒƒƒƒƒƒƒƒƒ¬ƒƒƒƒƒƒƒƒƒƒƒƒƒƒƒƒƒƒƒƒƒƒƒƒƒƒƒƒƒƒƒƒƒƒƒƒƒƒƒƒƒƒƒƒƒƒƒƒƒƒƒƒƒƒƒƒƒƒƒƒƒƒƒƒƒƒƒƒƒƒƒø
≥
PART NUMBER
≥
PART NAME
≥
√ƒƒƒƒƒƒƒƒƒƒƒƒƒƒƒƒƒƒƒƒƒƒƒƒƒ≈ƒƒƒƒƒƒƒƒƒƒƒƒƒƒƒƒƒƒƒƒƒƒƒƒƒƒƒƒƒƒƒƒƒƒƒƒƒƒƒƒƒƒƒƒƒƒƒƒƒƒƒƒƒƒƒƒƒƒƒƒƒƒƒƒƒƒƒƒƒƒƒ¥
≥ F6HZ-3145-BB
≥ Steering Stop Bolt
≥
¿ƒƒƒƒƒƒƒƒƒƒƒƒƒƒƒƒƒƒƒƒƒƒƒƒƒ¡ƒƒƒƒƒƒƒƒƒƒƒƒƒƒƒƒƒƒƒƒƒƒƒƒƒƒƒƒƒƒƒƒƒƒƒƒƒƒƒƒƒƒƒƒƒƒƒƒƒƒƒƒƒƒƒƒƒƒƒƒƒƒƒƒƒƒƒƒƒƒƒŸ
OTHER APPLICABLE ARTICLES: NONE
WARRANTY STATUS: INFORMATION ONLY
OASIS CODES: 306000
98-4, Publication Date: MARCH 2, 1998
MEDIUM/HEAVY TRUCK:
1996-98 AEROMAX, LOUISVILLE
This TSB article is being republished in its entirety to correct the Other Applicable Article number listed.
ISSUE:
This TSB article will provide diagnostic information and wiring schematics for both the Horton and Kysor
engine cooling fan clutches.
ACTION:
If the engine cooling fan is not functioning properly, refer to the following text and illustrations to aid in
identifying the root cause of the concern.
DIAGNOSTIC INFORMATION
NOTE:
THIS TSB PROVIDES SPECIFIC ENGINE COOLING FAN SERVICE INFORMATION FOR VEHICLES
EQUIPPED WITH AN FD1460 ENGINE, CAT 3306, 3126, OR 3406C ENGINE, OR CUMMINS N14 OR
M11 ENGINE BUILT BEFORE 10/7/96. ADDITIONAL SERVICE INFORMATION ON FAN CLUTCH
OPERATION CAN BE FOUND IN OTHER TECHNICAL SERVICE BULLETINS, IN SERVICE MANUALS
AND THE ELECTRICAL AND VACUUM TROUBLESHOOTING MANUAL (EVTM).
FAN CLUTCH TIMER MODULE
Controls the operation of the engine cooling fan
Has a built in 3 minute timer that will cause the engine cooling fan to run a minimum of 3 minutes
after the cooling fan has been turned on by either the engine temperature, the override switch, or the
A/C high pressure switch
Is located on the air cleaner support bracket just behind the air cleaner (Figure 1)
Figure 1 - Article 98-4-25
Will turn on the engine cooling fan at 96-99°C (205-210°F)
Has a 5-pin connector which attaches to Connector 192 of the -14290- wiring harness. Each pin's
function is provided below:
Pin A - Circuit 517 (BK/W) module power from Fuse 12
Pin B - Circuit 57 (BK) module ground
Pin C - Circuit 936 (BK) on Kysor clutches goes to the fan control solenoid or Horton clutches to
Relay R-21
Pin D - Circuit 39 (R/W) coolant temperature sensor
Pin E - Circuit 90 (GR/W) goes to the fan clutch override switch and/or A/C high pressure switch
Will turn off the engine cooling fan after 3 minutes of operation if the engine temperature falls below
89°C (192°F)
Will turn engine cooling fan on if the ground circuit is lost on Pin B
Will turn engine cooling fan on if 12V power is lost on Pin A
Turns the Kysor engine cooling fan clutch off by applying power to Pin C
Turns the Horton engine cooling fan clutch off by applying power to Pin C which is wired to Pin 1 or 2
of Relay R-21. This will open Relay R-21 causing a loss of power to the fan control solenoid and
shutting the fan off
The A/C high pressure switch will close under high A/C system pressure, grounding Circuit 90, signaling the
module to turn the fan on.
The fan clutch override switch grounds Circuit 90 through the park brake switch, signaling the module to turn
the engine cooling fan on. The park brakes MUST be applied for the override switch to operate.
The engine coolant temperature sensor is a thermister. The electrical resistance of the sensor decreases as
engine temperature increases. If the temperature sensor is shorted to ground or unplugged, the module, as a
default, will turn the engine cooling fan on.
ILLUSTRATIONS
Fan clutch timer location - Figure 1
Wiring schematic - Horton clutch - Figure 2
Figure 2 - Article 98-4-25
Wiring schematic - Kysor clutch - Figure 3
Figure 3 - Article 98-4-25
OTHER APPLICABLE ARTICLES:
≤ 97-22-18
SUPERSEDES: 98-2-14
WARRANTY STATUS: INFORMATION ONLY
OASIS CODES: 208000, 402000, 499000
98-5,
Publication Date: MARCH 16, 1998
FORD:
1984-86 EXP
LTD
1984-88
1984-94 THUNDERBIRD
TEMPO
1984-97
1984-98 TAURUS
CROWN VICTORIA, ESCORT, MUSTANG
1986-98
1988-93
1989-97 FESTIVA
PROBE
1994-97
1995-98 ASPIRE
CONTOUR
LINCOLN-MERCURY:
1984-86 LN7,
MARQUIS
1984-87
1984-92 TOPAZ
MARKLYNX
VII
1984-94
1984-97 CONTINENTAL,
COUGAR
1984-98
GRAND MARQUIS, TOWN CAR
1986-98
1987-89 SABLE
TRACER
1991-94
CAPRI
1991-98 MARK
TRACER
1993-98
VIII
1995-98 MYSTIQUE
LIGHT TRUCK:
1984-90 BRONCO
BRONCO II
1984-96
1984-97 ECONOLINE,
F SUPER DUTY,
F-250 HD, F-350
1984-98
1986-97 EXPLORER
AEROSTAR F-150, F-250 LD, RANGER
1991-98
1993-98
1995-98 VILLAGER
WINDSTAR MOUNTAINEER
1997-98
EXPEDITION,
1998 SUPER
NAVIGATOR
1999
DUTY F SERIES
MEDIUM/HEAVY TRUCK:
1984-91
SERIES, CL-CLT-9000 SERIES
1984-97 C
L SERIES
1984-98
& B SERIES
1986-97 F
CARGO
SERIES
1996-98
AEROMAX,
LOUISVILLE
This TSB article is being republished in its entirety to update vehicle models and years.
ISSUE:
All
of FordWhen
Motorappropriate,
Company tire
provide warranty
and customer
assistance
their
offices
and Dealer
Network.
thesuppliers
tire manufacturer's
home service
office should
be contacted
by the through
dealership
to home
provide
assistance
in resolving
the customer's
concern.
ACTION:
Refer
to the following Tire Service Telephone Numbers Charts for tire warranty service information.
⁄ƒƒƒƒƒƒƒƒƒƒƒƒƒƒƒƒƒƒƒƒƒƒƒƒƒƒƒƒƒƒƒƒƒƒƒƒƒƒƒƒƒƒƒƒƒƒƒƒƒƒƒƒƒƒƒƒƒƒø
≥
UNITED STATES TIRE SERVICE TELEPHONE NUMBERS
≥
√ƒƒƒƒƒƒƒƒƒƒƒƒƒƒƒƒƒƒƒƒ¬ƒƒƒƒƒƒƒƒƒƒƒƒƒƒƒƒƒƒƒƒƒƒƒƒƒƒƒƒƒƒƒƒƒƒƒƒƒ¥
≥ Tire Manufacturer
≥
Telephone Number
≥
√ƒƒƒƒƒƒƒƒƒƒƒƒƒƒƒƒƒƒƒƒ≈ƒƒƒƒƒƒƒƒƒƒƒƒƒƒƒƒƒƒƒƒƒƒƒƒƒƒƒƒƒƒƒƒƒƒƒƒƒ¥
≥ Firestone
≥ 1-800-356-4644
≥
≥ Bridgestone
≥ 1-800-847-3272
≥
≥ Michelin
≥ 1-800-847-3435 (Continental U.S.)
≥
≥
≥ 1-907-276-2617 (Alaska)
≥
≥
≥ 1-808-671-5457 (Hawaii)
≥
≥ Goodyear
≥ 1-888-637-3784
≥
≥ General
≥ 1-800-847-3349
≥
≥
≥ 1-800-U-TAURUS (For Taurus Only)
≥
≥ Continental
≥ 1-800-338-6186
≥
≥ Yokohama
≥ 1-800-722-9888
≥
¿ƒƒƒƒƒƒƒƒƒƒƒƒƒƒƒƒƒƒƒƒ¡ƒƒƒƒƒƒƒƒƒƒƒƒƒƒƒƒƒƒƒƒƒƒƒƒƒƒƒƒƒƒƒƒƒƒƒƒƒŸ
⁄ƒƒƒƒƒƒƒƒƒƒƒƒƒƒƒƒƒƒƒƒƒƒƒƒƒƒƒƒƒƒƒƒƒƒƒƒƒƒƒƒƒƒƒƒƒƒƒƒƒƒƒƒƒƒƒƒƒƒƒƒƒƒƒƒø
≥
CANADIAN TIRE SERVICE TELEPHONE NUMBERS
≥
√ƒƒƒƒƒƒƒƒƒƒƒƒƒƒƒƒƒƒƒƒƒƒƒƒ¬ƒƒƒƒƒƒƒƒƒƒƒƒƒƒƒƒƒƒƒƒƒƒƒƒƒƒƒƒƒƒƒƒƒƒƒƒƒƒƒ¥
≥
Tire Manufacturer
≥
Telephone Number
≥
√ƒƒƒƒƒƒƒƒƒƒƒƒƒƒƒƒƒƒƒƒƒƒƒƒ≈ƒƒƒƒƒƒƒƒƒƒƒƒƒƒƒƒƒƒƒƒƒƒƒƒƒƒƒƒƒƒƒƒƒƒƒƒƒƒƒ¥
≥ Firestone
≥ 1-800-267-1318
≥
≥ Bridgestone
≥ 1-800-267-1318
≥
≥ Michelin
≥ 1-800-565-7638 (Province of Quebec)
≥
≥
≥ 1-514-636-1940 (Montreal Local)
≥
≥
≥ 1-800-461-8473 (Other Provinces)
≥
≥ Goodyear
≥ 1-800-461-4357
≥
≥ Continental
≥ 1-800-461-4357
≥
≥ Yokohama
≥ 1-800-663-8464 (Western Region)
≥
≥
≥ 1-800-387-4924 (Central Region)
≥
≥
≥ 1-800-361-9444 (Eastern Region)
≥
¿ƒƒƒƒƒƒƒƒƒƒƒƒƒƒƒƒƒƒƒƒƒƒƒƒ¡ƒƒƒƒƒƒƒƒƒƒƒƒƒƒƒƒƒƒƒƒƒƒƒƒƒƒƒƒƒƒƒƒƒƒƒƒƒƒƒŸ
OTHER APPLICABLE ARTICLES:
NONE
SUPERSEDES:
98-2-1
WARRANTY STATUS:
INFORMATION ONLY
OASIS CODES:
306000
98-5, Publication Date: MARCH 16, 1998
MEDIUM/HEAVY
1998 AEROMAX, TRUCK:
LOUISVILLE
ISSUE:
Some vehicles may exhibit a lack of power and/or a "whistling" noise. This may be caused by a crack in the charge air cooler duct.
ACTION:
Replace
the
duct.
TheProcedure
new duct for
hasdetails.
been revised to be a two-piece assembly which should reduce the possibility of cracking. Refer to
the following Service
SERVICE
PROCEDURE
Refer to Figure
1 for the following procedure.
Figure
1. 1 - Article
Loosen 98-5-17
the four (4) clamps that attach the engine charge air cooler duct assembly to the rubber connectors.
2.
Remove
theconnectors.
cracked duct assembly from the charge air cooler and the engine. Discard the duct assembly but retain the clamp
and rubber
3.
Inspect the rubber connectors and clamps to be sure they are serviceable, if not they should be replaced.
4.
Place two (2) clamps over the inner duct, then install the duct into the charge air cooler connector and then into the engine
connector.
5.
Place two (2) clamps over the outer duct, then install the duct into the charge air cooler connector and then into the engine
connector.
6.
Torque the clamps to 3-4 N-m (27-36 lb-in).
⁄ƒƒƒƒƒƒƒƒƒƒƒƒƒƒƒƒƒƒƒƒƒƒƒƒƒ¬ƒƒƒƒƒƒƒƒƒƒƒƒƒƒƒƒƒƒƒƒƒƒƒƒƒƒƒƒƒƒƒƒƒƒƒƒƒƒƒƒƒƒƒƒƒƒƒƒƒƒƒƒƒƒƒƒƒƒƒƒƒƒƒƒƒƒƒƒƒƒƒø
≥
PART NUMBER
≥
PART NAME
≥
√ƒƒƒƒƒƒƒƒƒƒƒƒƒƒƒƒƒƒƒƒƒƒƒƒƒ≈ƒƒƒƒƒƒƒƒƒƒƒƒƒƒƒƒƒƒƒƒƒƒƒƒƒƒƒƒƒƒƒƒƒƒƒƒƒƒƒƒƒƒƒƒƒƒƒƒƒƒƒƒƒƒƒƒƒƒƒƒƒƒƒƒƒƒƒƒƒƒƒ¥
≥ F8HS-6K770-BA
≥ Inner Duct
≥
≥ F8HS-6K770-CA
≥ Outer Duct
≥
¿ƒƒƒƒƒƒƒƒƒƒƒƒƒƒƒƒƒƒƒƒƒƒƒƒƒ¡ƒƒƒƒƒƒƒƒƒƒƒƒƒƒƒƒƒƒƒƒƒƒƒƒƒƒƒƒƒƒƒƒƒƒƒƒƒƒƒƒƒƒƒƒƒƒƒƒƒƒƒƒƒƒƒƒƒƒƒƒƒƒƒƒƒƒƒƒƒƒƒŸ
OTHER APPLICABLE ARTICLES:
NONE
WARRANTY STATUS:
Eligible Under Basic Warranty Coverage And Emissions Warranty Coverage
LABOR ALLOWANCE
⁄ƒƒƒƒƒƒƒƒƒƒƒƒƒƒƒ¬ƒƒƒƒƒƒƒƒƒƒƒƒƒƒƒƒƒƒƒƒƒƒƒƒƒƒƒƒƒƒƒƒƒƒƒƒƒƒƒƒƒ¬ƒƒƒƒƒƒƒƒƒƒƒƒƒƒƒø
≥
OPERATION
≥
DESCRIPTION
≥
TIME
≥
√ƒƒƒƒƒƒƒƒƒƒƒƒƒƒƒ≈ƒƒƒƒƒƒƒƒƒƒƒƒƒƒƒƒƒƒƒƒƒƒƒƒƒƒƒƒƒƒƒƒƒƒƒƒƒƒƒƒƒ≈ƒƒƒƒƒƒƒƒƒƒƒƒƒƒƒ¥
≥ 980517A
≥ Replace Duct
≥ 0.4 Hr.
≥
¿ƒƒƒƒƒƒƒƒƒƒƒƒƒƒƒ¡ƒƒƒƒƒƒƒƒƒƒƒƒƒƒƒƒƒƒƒƒƒƒƒƒƒƒƒƒƒƒƒƒƒƒƒƒƒƒƒƒƒ¡ƒƒƒƒƒƒƒƒƒƒƒƒƒƒƒŸ
DEALER CODING
⁄ƒƒƒƒƒƒƒƒƒƒƒƒƒƒƒƒƒƒƒƒƒƒƒƒƒƒƒƒƒƒƒƒƒƒƒƒ¬ƒƒƒƒƒƒƒƒƒƒƒƒƒƒƒƒƒƒƒƒƒƒƒƒƒƒƒƒƒƒƒƒƒƒƒƒø
≥
BASIC PART NO.
≥
CONDITION CODE
≥
√ƒƒƒƒƒƒƒƒƒƒƒƒƒƒƒƒƒƒƒƒƒƒƒƒƒƒƒƒƒƒƒƒƒƒƒƒ≈ƒƒƒƒƒƒƒƒƒƒƒƒƒƒƒƒƒƒƒƒƒƒƒƒƒƒƒƒƒƒƒƒƒƒƒƒ¥
≥
6K770
≥
01
≥
¿ƒƒƒƒƒƒƒƒƒƒƒƒƒƒƒƒƒƒƒƒƒƒƒƒƒƒƒƒƒƒƒƒƒƒƒƒ¡ƒƒƒƒƒƒƒƒƒƒƒƒƒƒƒƒƒƒƒƒƒƒƒƒƒƒƒƒƒƒƒƒƒƒƒƒŸ
OASIS CODES:
499000, 614000, 614500, 614600
98-5, Publication Date: MARCH 16, 1998
MEDIUM/HEAVY
TRUCK:
1997-98 AEROMAX,
LOUISVILLE
ISSUE:
The
oil level
indicator
may be
be caused
difficult by
to install
and/or when installed
may
contact
crankshaft
some vehicles
with an
FD1060
This
may
indicator
resulting
inthe
a
hard
to installonconcern.
The oil equipped
level indicator
tube
may
alsoengine.
be at the
wrong
angle,
allowingan
theinflexible
indicatoroiltolevel
come
in contact
with the
crankshaft.
ACTION:
Replace
the
oil
level
indicator
tube
and
indicator
assembly.
The
assembly
has
been
redesigned
to
help
reduce
installation
efforts
the
indicator and reduce the possibility of the indicator coming in contact with the crankshaft. Refer to the following Service Procedureoffor
details.
SERVICE
PROCEDURE
Refer to Figures 1 and 2.
Figure 1 - Article 98-5-18
Figure
98-5-18
1. 2 - Article
Clean the
area around the engine oil fill tube assembly, especially where the tube connects with the block.
2.
Loosen
oil tube
fill tube
assembly
attaching
optional and
Easyremove
Reachthe
oil fill
as shown
in Figure
2. bolts and retain. There are two (2) bolts used on vehicles with the
3.
Loosen the turbocharger-to-oil fill tube assembly drain hose clamps and slide the hose off of the fill tube.
4.
Carefully pull the fill tube assembly out of the engine.
5.
Install the revised fill tube into the engine.
6.
Connect the turbocharger drain hose to the fill tube and tighten the hose clamps.
7.
Reinstall
the(16-24
bolt(s)lb-ft).
retaining the fill tube. Torque the lower bolt to 60-95 N-m (44-70 lb-ft) and the upper bolt (if equipped) to
22-33
N-m
⁄ƒƒƒƒƒƒƒƒƒƒƒƒƒƒƒƒƒƒƒƒƒƒƒƒƒ¬ƒƒƒƒƒƒƒƒƒƒƒƒƒƒƒƒƒƒƒƒƒƒƒƒƒƒƒƒƒƒƒƒƒƒƒƒƒƒƒƒƒƒƒƒƒƒƒƒƒƒƒƒƒƒƒƒƒƒƒƒƒƒƒƒƒƒƒƒƒƒƒø
≥
PART NUMBER
≥
PART NAME
≥
√ƒƒƒƒƒƒƒƒƒƒƒƒƒƒƒƒƒƒƒƒƒƒƒƒƒ≈ƒƒƒƒƒƒƒƒƒƒƒƒƒƒƒƒƒƒƒƒƒƒƒƒƒƒƒƒƒƒƒƒƒƒƒƒƒƒƒƒƒƒƒƒƒƒƒƒƒƒƒƒƒƒƒƒƒƒƒƒƒƒƒƒƒƒƒƒƒƒƒ¥
≥ F8HZ-6B667-AA
≥ Standard Oil Fill Tube
≥
≥ F8HZ-6B667-BA
≥ Easy Reach Oil Fill Tube
≥
≥ N601212-S2
≥ Bolt
≥
≥ N630068-S2
≥ Washer
≥
¿ƒƒƒƒƒƒƒƒƒƒƒƒƒƒƒƒƒƒƒƒƒƒƒƒƒ¡ƒƒƒƒƒƒƒƒƒƒƒƒƒƒƒƒƒƒƒƒƒƒƒƒƒƒƒƒƒƒƒƒƒƒƒƒƒƒƒƒƒƒƒƒƒƒƒƒƒƒƒƒƒƒƒƒƒƒƒƒƒƒƒƒƒƒƒƒƒƒƒŸ
OTHER APPLICABLE ARTICLES:
NONE
WARRANTY STATUS:
Eligible Under Basic Warranty Coverage
LABOR ALLOWANCE
⁄ƒƒƒƒƒƒƒƒƒƒƒƒƒƒƒ¬ƒƒƒƒƒƒƒƒƒƒƒƒƒƒƒƒƒƒƒƒƒƒƒƒƒƒƒƒƒƒƒƒƒƒƒƒƒƒƒƒƒ¬ƒƒƒƒƒƒƒƒƒƒƒƒƒƒƒø
≥
OPERATION
≥
DESCRIPTION
≥
TIME
≥
√ƒƒƒƒƒƒƒƒƒƒƒƒƒƒƒ≈ƒƒƒƒƒƒƒƒƒƒƒƒƒƒƒƒƒƒƒƒƒƒƒƒƒƒƒƒƒƒƒƒƒƒƒƒƒƒƒƒƒ≈ƒƒƒƒƒƒƒƒƒƒƒƒƒƒƒ¥
≥ 980518A
≥ Replace Oil Level Indicator And Tube
≥ 0.6 Hr.
≥
≥
≥ Assembly
≥
≥
¿ƒƒƒƒƒƒƒƒƒƒƒƒƒƒƒ¡ƒƒƒƒƒƒƒƒƒƒƒƒƒƒƒƒƒƒƒƒƒƒƒƒƒƒƒƒƒƒƒƒƒƒƒƒƒƒƒƒƒ¡ƒƒƒƒƒƒƒƒƒƒƒƒƒƒƒŸ
DEALER CODING
⁄ƒƒƒƒƒƒƒƒƒƒƒƒƒƒƒƒƒƒƒƒƒƒƒƒƒƒƒƒƒƒƒƒƒƒƒƒ¬ƒƒƒƒƒƒƒƒƒƒƒƒƒƒƒƒƒƒƒƒƒƒƒƒƒƒƒƒƒƒƒƒƒƒƒƒø
≥
BASIC PART NO.
≥
CONDITION CODE
≥
√ƒƒƒƒƒƒƒƒƒƒƒƒƒƒƒƒƒƒƒƒƒƒƒƒƒƒƒƒƒƒƒƒƒƒƒƒ≈ƒƒƒƒƒƒƒƒƒƒƒƒƒƒƒƒƒƒƒƒƒƒƒƒƒƒƒƒƒƒƒƒƒƒƒƒ¥
≥
6B667
≥
07
≥
¿ƒƒƒƒƒƒƒƒƒƒƒƒƒƒƒƒƒƒƒƒƒƒƒƒƒƒƒƒƒƒƒƒƒƒƒƒ¡ƒƒƒƒƒƒƒƒƒƒƒƒƒƒƒƒƒƒƒƒƒƒƒƒƒƒƒƒƒƒƒƒƒƒƒƒŸ
OASIS CODES:
401000, 499000
98-7, Publication Date: APRIL 13, 1998
MEDIUM/HEAVY
TRUCK:
1995 F &LBSERIES
SERIES
1995-96
1995-97 AEROMAX,
CARGO SERIES
1996-98
LOUISVILLE
ISSUE:
The current service replacement coolant level sensor has been discontinued. A revised sensor and jumper harness has been released.
ACTION:
If replacement
of the
coolant
sensor outlined
is required,
replace
the sensor withManual,
the revised
andjumper
jumperharness
harness.
and
install
theattached
sensor
following
thelevel
procedure
in the
appropriate
and sensor
install
the
to Remove
the wire harness
that ⁄ƒƒƒƒƒƒƒƒƒƒƒƒƒƒƒƒƒƒƒƒƒƒƒƒƒ¬ƒƒƒƒƒƒƒƒƒƒƒƒƒƒƒƒƒƒƒƒƒƒƒƒƒƒƒƒƒƒƒƒƒƒƒƒƒƒƒƒƒƒƒƒƒƒƒƒƒƒƒƒƒƒƒƒƒƒƒƒƒƒƒƒƒƒƒƒƒƒƒø
was
to the original
sensor. Connect
the
other
end of theService
jumper to the revised
sensor.
≥
PART NUMBER
≥
PART NAME
≥
√ƒƒƒƒƒƒƒƒƒƒƒƒƒƒƒƒƒƒƒƒƒƒƒƒƒ≈ƒƒƒƒƒƒƒƒƒƒƒƒƒƒƒƒƒƒƒƒƒƒƒƒƒƒƒƒƒƒƒƒƒƒƒƒƒƒƒƒƒƒƒƒƒƒƒƒƒƒƒƒƒƒƒƒƒƒƒƒƒƒƒƒƒƒƒƒƒƒƒ¥
≥ XC4Z-10D968-AA
≥ Coolant Level Sensor
≥
≥ F6HZ-14A382-AA
≥ Jumper Harness
≥
¿ƒƒƒƒƒƒƒƒƒƒƒƒƒƒƒƒƒƒƒƒƒƒƒƒƒ¡ƒƒƒƒƒƒƒƒƒƒƒƒƒƒƒƒƒƒƒƒƒƒƒƒƒƒƒƒƒƒƒƒƒƒƒƒƒƒƒƒƒƒƒƒƒƒƒƒƒƒƒƒƒƒƒƒƒƒƒƒƒƒƒƒƒƒƒƒƒƒƒŸ
NONE
OTHER APPLICABLE ARTICLES:
INFORMATION ONLY
WARRANTY STATUS:
OASIS CODES: 205000, 402000
T S B A rt ic l e 9 8 - 9 - 3 h a s be e n s u
Pr e ss [ C o n ti n u e ] t o v ie w A rt ic le
p e r s e d e d by Article 98-18-2.
9 8 - 1 8 - 2.
98-9, Publication Date: MAY 11, 1998
MEDIUM/HEAVY
TRUCK:
1997-98 AEROMAX,
LOUISVILLE
ISSUE:
The camber specification for the 10-12-13000 lb front axles has been revised in production.
ACTION:
The
revised
camber
specification
for the 10-12-13000 lb front axles is 1/8 ±3/8 degrees (current published specification is 3/8 ±3/8
degrees).
NONE
OTHER APPLICABLE ARTICLES:
INFORMATION ONLY
WARRANTY STATUS:
OASIS CODES: 303000, 390000
TSB Article 98-10-4 has been superseded by Article 98-12-8.
Press [Continue] to view Article 98-12-8.
98-12, Publication Date: JUNE 22, 1998
FORD:
1985-86 EXP
LTD
1985-88
1985-94 THUNDERBIRD
TEMPO
1985-97
1985-98 TAURUS
CROWN VICTORIA, ESCORT, MUSTANG
1986-98
1988-93
1989-97 FESTIVA
PROBE
1994-97
1995-98 ASPIRE
CONTOUR
LINCOLN-MERCURY:
1985-86
MARQUIS
1985-87
1985-92 LYNX
MARK VII
1985-94
1985-97 TOPAZ
COUGAR
1985-98
GRAND MARQUIS, TOWN CAR
1986-98 CONTINENTAL,
SABLE
1987-89
TRACER
1991-94
1991-98 CAPRI
TRACER
1993-98
MARK
VIII
1995-98
MYSTIQUE
1999
COUGAR
MERKUR:
1985-89
1988-89 XR4TI
SCORPIO
LIGHT
1985-90
BRONCO
II
1985-96TRUCK:
BRONCO
1985-97
F-250
HD, F-350
1985-98
F-150, F-250 LD, RANGER
1986-97 ECONOLINE,
AEROSTAR
1988-97
F
SUPER
DUTY
1991-98 VILLAGER
EXPLORER
1993-98
1995-98 EXPEDITION,
WINDSTAR MOUNTAINEER
1997-98
1998
1999 NAVIGATOR
SUPER DUTY F SERIES
MEDIUM/HEAVY
TRUCK:
1985-91
SERIES
1985-99 CL-CLT-9000
F & B SERIES,
L SERIES
1986-98
SERIES
1997-98 CARGO
AEROMAX,
LOUISVILLE
This TSB article is being republished in its entirety to update the tool part number for the Refrigerant Analyzer.
ISSUE:
A number
of non-approved/alternate
refrigerants
have entered
theR-22,
marketplace
and are
being
advertised
asblends
"drop-in
replacements"
for
R-12
and R-134a.
The use of
non-approved
refrigerants
such
as
hydrocarbons,
and
other
refrigerant
could
cause safety,
durability,
andbefore
performance
concerns
if they to
are
installed
in Ford
A/C systems.
Identification
of the
type offrom
refrigerant
contained
in vehicle
A/C systems,
servicing,
is necessary
prevent
dealer
service
equipment
and refrigerant
supplies
being contaminated
with
non-approved
refrigerants.
ACTION:
Refrigerant
beA/C
performed
to serviced
recovering
the
refrigerant
a recovery
to prevent
cross-contamination of
the
recoveryidentification
machine andmust
other
systemsprior
being
with
that
recoveryinto
machine.
Refermachine
to the following
text.
A/C REFRIGERANT ANALYZER FUNCTION
Ford
Motor
Company
has
approved
the Rotunda
Deluxe A/C
Analyzer
(198-00003)
fortype
use on Ford
and Lincoln-Mercury
vehicles
(Figure
1). The
analyzer
provides
the technician
withRefrigerant
a can
quickalso
andprovide
easy way
identify the
refrigerant
(R-134a,
R-12,
R-22,
flammable
hydrocarbon).
The analyzer
theto
percentage
of air inand
thepercentage
A/C systemofand
automatically
purge
airorfrom
the system.
Figure
- Article 98-12-8
The
A/C1 Refrigerant
AnalyzerRefrigerant
is designedvapor
to identify
vapor
gas samples
taken directly
from automotive
air conditioning
systems
or The
refrigerant
storage
cylinders.
through
the multiple
Non-Dispersive
Infra-Red
(NDIR)
sensing
unit.
microprocessor
calculates
each refrigerant
typepasses
and purity
percentage
whichsensor
is displayed
on the Analyzers'
Liquid
Crystal
Display
(LCD).
The
analyzer
identifies
the
purity percentage
ofgreen
R-134a,
R-12,Light
R-22,Emitting
hydrocarbon
and
air will
in the
sample.
If the purity
percentage
of
R-134a
or
R-12
is
98%
or
greater
by
weight,
a
"PASS"
Diode
(LED)
light.
If
refrigerants
R-134a
or
R-12
dothe
not
meet
98% purity is
levels,
the red
"FAIL"
LED
will
light.
Levels
of
R-22
and flammable hydrocarbons
aboveand
2%awill
light
the
red "FAIL"
light.
If
a
hydrocarbon
detected
above
5%,
both
the
"FAIL"
light
and
"HYDROCARBON"
light
will
illuminate
horn
will
sound
alerting
the
user of potential hazards.
The analyzer
The
percent
of
air
contained
in
the
sample
will
be
displayed
if
the
R-134a
or
R-12
content
is
98%
or
above.
eliminates
the
effect
of
air
when
determining
the
refrigerant
sample
content
because
air
is
not
considered
a
contaminant
although
air
can
affect
A/C
system
performance.
Air
will
automatically
be
purged
until
a
pure
refrigerant
with
a
less
than
2%
by
weight
air
measurement
is
reached.
RECOVERY OF CONTAMINATED REFRIGERANT
If
contaminated
following
actions:refrigerant is detected, DO NOT recover the refrigerant into your R-134a or R-12 recovery/recycling equipment. Take the
1.
Repeat the test to verify contaminated refrigerant is present.
2.
Advise
of the contaminated
and any additional cost to repair the system. The customer may wish to
return tothe
thecustomer
service facility
performing theA/C
lastsystem
A/C service.
3.
Recover
theThis
contaminated
refrigerant
using
suitable
recovery-only equipment
designed
for capturing
and to
storing
refrigerant.
equipment
must
only be
used
recover
to prevent
spread
other contaminated
vehicles. As
an
alternative,
contact
an A/C
service
facility
into
your
area contaminated
which has the refrigerant
proper equipment
for the
refrigerant
recovery.
REPAIRING A CONTAMINATED A/C SYSTEM
Once
the contaminated
is removed
the following
to be sure arefrigerant
quality repair
is made:from the system it will be necessary to repair the system. Ford recommends that you do
1.
Determine the cause of the failure.
2.
Determine which parts will need to be replaced.
3.
Flush the heat exchangers to remove any oil that may be degraded due to the contaminated refrigerant.
4.
Install a new suction/accumulator.
5.
Properly oil match the system to verify that the correct amount of clean refrigerant oil is present in the system.
6.
Evacuate the system for 45 minutes.
7.
Recharge the system, verify proper operation and leak test.
DISPOSAL OF CONTAMINATED REFRIGERANT
Disposal
of contaminated
contaminated refrigerant.
refrigerant is
a new
process
to thehas
automotive
industry.
Listed below
that will
assist companies
with
disposal
Ford
Motor
Company
not evaluated
the processes
of are
the companies
listed
refrigerant
disposal
and iswill
notofvary
endorsing
or promoting
transactions
the dealership
and
disposal companies.
Disposal
costs
between
$3.00 and their
$5.00companies.
per pound, Business
plus the cost
of round are
trip between
cylinder shipping.
Omega Refrigerant Reclamation
5263 North Fourth St.
Irwindale, CA 91706
(310) 698-0991 FAX: (310) 696-7908
Full Cycle Global
2966 Wireton
Blue Island, IL 60406
(708) 388-8551 FAX: (708) 399-6550
U.S. Refrigerant Reclaim, Inc.
12420 North Green River Road
Evansville, IN 47711
(800) 207-5931 FAX: (812) 867-1463
Full Cycle Global
343 South Airline Highway
Gonzales, LA 70737
(504) 644-5333 FAX: (504) 644-1609
CFC Reclamation
1321 Swift North
Kansas City, MO 64116
(816) 471-2511
Full Cycle Global
550 James St.
Lakewood, NJ 08701
(908) 370-3400 FAX: (908) 370-3088
National Refrigerants, Inc.
11401 Roosevelt Blvd.
Philadelphia, PA 19154
(215) 698-6620 FAX: (215) 602-8205
Gartech Refrigerant Reclamation
2002 Platinum
Garland, TX 75042
(214) 272-4070 FAX: (214) 272-6548
Refrigerant Reclaim Services
121 S. Norwood Dr.
Hurst, TX 76053-7807
(817) 282-0022 FAX: (800) 831-6182
Full Cycle Global
2055 Silber, Suite 109
Houston, TX 77055
(713) 681-7370 FAX: (713) 681-9947
Refrigerant Reclaim, Inc.
122 Old Stage Coach Road
Dumfries, VA 22026
(800) 238-5902 FAX: (703) 441-0393
OTHER APPLICABLE ARTICLES:
≤
94-14-3
95-18-4
SUPERSEDES: 98-10-4Eligible Under The Provisions Of Bumper To Bumper Warranty Coverage For 1993-99 Model Years, Basic
WARRANTY
STATUS:
Warranty Coverage
For All Other Model Years
LABOR ALLOWANCE
≤
DEALER CODING
OASIS CODES: 208000, 208999
98-12, Publication Date: JUNE 22, 1998
MEDIUM/HEAVY
TRUCK:
1996-98 AEROMAX
ISSUE:
Replacement
of aterm
leaking
or otherwise
damaged
hydromountreduced
cab mount
with life
another
newmount
hydromount
cab mount
may not
provide
satisfactory
long
results.
Vehicles
that
are experiencing
service
with the
operating
on rough
surfaces
should
service
thehigh
vehicle
using
rubber
mounts
a replacement.
Thewhen
hydromount
cab and
mount
is not
capable
ofhighway
reacting
to
continuous
frequency,
amplitude
inputs
that
are as
transmitted
to the cab
the vehicle
operates
on poorly
maintained
highway
surfaces. Aslow
a result,
the cab
mount
can be
damaged.
ACTION:
Replace
both
the
right
and
left
hydromounts
with
the
standard
rubber
cab
mounts
from
the
Louisville
model.
Refer
to
the
following
Service Procedure for details.
SERVICE PROCEDURE
NOTE:
PRIOR
TO IMPLEMENTING
THIS ACTION,
FROMTHE
THERUBBER
CUSTOMER
IS REQUIRED
SINCE THE
HYDROMOUNT
MAY AND
BE PERCEIVED
AS ACONCURRENCE
PREMIUM PRODUCT.
MOUNT
IS MORE
ROBUST
UNDER
ROUGH IF
ROAD
CONDITIONS
SHOULD
NOT
RIDE CHARACTERISTICS
ON
THESE
TYPE
OF ROAD
SEGMENTS.
THE
CUSTOMER
DOES
NOT
AGREE
TODETERIORATE
THIS
SUBSTITUTION,
USE THE CURRENT
SERVICE
A
REPLACEMENT
AND
ADVISE
THAT
THERE
SHOULD
BE NO EXPECTATION
OF SERVICE
LIFEHYDROMOUNT
IMPROVEMENTAS
VERSES
THE
ORIGINAL
FACTORY
INSTALLED
COMPONENT.
Refer to Figure 1 for item callouts.
Figure
98-12-15
1. 1 - Article
Remove
the 23)
rearduring
hydromounts
per the Louisville/AeroMax Workshop Manual, Section 502-02. Save washer (Item 24) and
screw (Item
disassembly.
2.
Install the rear rubber mounts by referring to the Workshop Manual, Section 502-02.
3.
Install until
cab lower
rear suspension
bracket (Item
to the mount
cab first.
Do not
torque
attaching
nut
thisthe
time.
The
bracket
mustbebe kept
loose
bracket
is
installed.
Install7)rubber
(Item
8) and
position
Item 7
soatthat
bolts
(Item
32) can
installed.
4.
Torque all fasteners to specification.
NONE
OTHER APPLICABLE ARTICLES:
WARRANTY STATUS: Eligible Under Basic Warranty Coverage
LABOR ALLOWANCE
DEALER CODING
OASIS CODES: 304000, 305000, 703000
98-12, Publication Date: JUNE 22, 1998
MEDIUM/HEAVY
TRUCK:
1997-98 AEROMAX,
LOUISVILLE
ISSUE:
A
or broken
bug
screen
attachment bracket may cause the bug screen to contact the A/C condenser. This may be due to flexing
of cracked
the engine
fan when
it is
cycled.
ACTION:
Replace the bug screen with a revised Bug Screen (XC45-8198-BA). Refer to the appropriate year Louisville/AeroMax Service Manual for
details.
NONE
OTHER APPLICABLE ARTICLES:
WARRANTY STATUS: Eligible Under Basic Warranty Coverage
LABOR ALLOWANCE
DEALER CODING
OASIS CODES: 208000, 402000, 499000
98-14, Publication Date: JULY 20, 1998
MEDIUM/HEAVY
TRUCK:
1996-98 AEROMAX,
LOUISVILLE
ISSUE:
The
blowerbecause
motor on
vehicles
bemay
inoperative.
Thissufficient
may be load
caused
by thecapability
instrument
motor relay block being
damaged
of some
heat. The
relaymay
block
not provide
carrying
forpanel
someblower
applications.
ACTION:
Replace
the
blower
motor
relay
interminal
1996 through
1998
Louisville/AeroMax
applications.
The
revisedmore
relay bearing
has lesssurface
of a heat
underto
load
than
the
previous
relay.
The
length
of
the
revised
relay
power
terminal
also
provides
andrise
contact
the relay block terminals to reduce the possibility of damage. Refer to the appropriate Service/Workshop Manual for replacement
procedures.
NONE
OTHER APPLICABLE ARTICLES:
WARRANTY STATUS: Eligible Under Basic Warranty Coverage
LABOR ALLOWANCE
DEALER CODING
OASIS CODES: 201200, 203000, 208000, 208300
98-14, Publication Date: JULY 20, 1998
MEDIUM/HEAVY
TRUCK:
1996-98 AEROMAX,
LOUISVILLE
ISSUE:
A
hardheater
or no start
condition
onintake
vehicles
with a Caterpillar
or 3406C but
engine
may occur.
may be battery
causedpower.
by an inoperative
air
intake
system.
The air
heater
light 3306
may illuminate
the heater
doesThis
not receive
This may be
caused
by
the
control
module
sensing
it is inindicator
ato
diagnostic
being improperly wired,
or Circuit
572 shorted
ground. mode due to the diagnostic switch being in the ON position, connector C154
ACTION:
Follow
the procedure
outlined
in this
to determine if the air intake heater control module is functioning in the diagnostic mode. Refer
to
the following
Service
Procedure
forTSB
details.
SERVICE
PROCEDURE
1.
Check
to
ensure
that
the
air
intake
heater diagnostic switch is OFF (switch open). The switch is located under the dash on the
driver's
side.with
If theStep
switch
off,
proceed
2. is ON then turn it to OFF and recheck the operation of the air intake heater system. If the switch is
NOTE:
REFER TO FIGURES 1 AND 2 FOR THE FOLLOWING TWO STEPS.
Figure 1 - Article 98-14-6
Figure
2 - Article
98-14-6 control module has three (3) separate connectors, a 2-pin, 5-pin and 6-pin. The 2-pin connector, C154,
2.
The
air intake
is
used
forcontinuity
the heater
diagnostic
function.
Disconnect
C154
(2-pin connector)
from
theNOT
air intake
module. Using an ohmmeter,
check
for
to ground
on harness
circuits
572-R/W
and 25-BK/O.
DO
probe heater
the module.
Circuit
572-R/W
(module
Pin A)
should
be OPEN
(nodiagnostic
continuity with
ground)
GROUNDED
(have
continuity
with
ground)
when the
switch
is ON.when the diagnostic switch is OFF and
Circuit
25-BK/O
(module
Pin then
B) should
be GROUNDED (have continuity with ground) at all times.If one of these circuits
does
not
check
out
properly,
properly,
then proceed
with Step
3.the wiring should be checked and repaired as necessary. If both circuits check out
3.
Be sure
circuit
mates
control module
Pin
A and
circuit 25-BK/O
mates with
then
the that
wires
in the572-R/W
connector
mustwith
be switched
to mate
with
the correct
control module
pin. control module Pin B. If not,
If a concernManual
still exists
the airand
intake
heaterTroubleshooting
system, refer toManual
the diagnostics
Workshop
andwith
Electrical
Vacuum
(EVTM). found in the appropriate Louisville/AeroMax
NONE
OTHER APPLICABLE ARTICLES:
WARRANTY STATUS: Eligible Under Basic Warranty Coverage
LABOR ALLOWANCE
DEALER CODING
OASIS CODES: 404000, 602300, 603300
98-15, Publication Date: AUGUST 3, 1998
MEDIUM/HEAVY
TRUCK:
1997-98 AEROMAX,
LOUISVILLE
ISSUE:
Front
engine
cover
cracking
maybolts
occurbottoming
on some out
vehicles
with
CAT C10
or C12
engine.
maysufficient
be caused
by the
fanonpulley
support
bracket
upper
mounting
on theequipped
threads in
thea engine
cylinder
head,
not This
allowing
clamp
load
the
pulley
support
bracket.
ACTION:
Replace
current
upper
mounting
bolts
(M12x1.75x120mm)
with
shorter
Bolts
(N601424-S2
(M12x1.75x110mm)).
Depending
on
the
repair that needs to be performed, refer to the following Service Procedure A, B, or C for details.
There are there (3) possible procedures for installing the correct bolts or repairing the bolt holes or front cover. They are:
Service Procedure A - Replace bolts only
Service
Procedure
B - Replace
bolts and option
retap upper
boltthree
threads
the Heavy
Truck Hotline,
(503) 735-7769
number
(3)) (to obtain approval before performing Procedure B, contact
Service Procedure C - Replace bolts, retap upper bolt threads and replace cracked front cover
SERVICE PROCEDURE A
1.
Loosen the A/C Compressor and Generator pivot and adjusting bolts/nuts to position the belts out of your way.
2.
Loosen the Fan Clutch mounting bolts and adjustment bolt and position the fan belt out of your way.
3.
Remove
the fan
clutch mounting bolts and position the fan clutch to one side in order to remove the Fan Pulley support
bracket bolts,
N601425-S2.
4.
Install the new Fan Pulley upper support bracket bolts, N601424-S2, torque the bolts to 80-119 N-m (59-88 lb-ft).
5.
Reinstallprocedure.
the Fan Clutch, then reinstall the Fan clutch, Generator, and A/C Compressor belts per the Service/Workshop
Manual
SERVICE PROCEDURE B
NOTE:
ONCE THE COOLING MODULE IS REMOVED THERE IS NO NEED TO DISASSEMBLE IT.
1.
Remove the Cooling Module per Service/Workshop Manual procedure.
2.
Loosen the A/C Compressor, Fan Clutch, and Generator mounting bolts and adjustment bolts to remove the drive belts.
3.
Remove the A/C Compressor, Fan Clutch, Fan Mounting Bracket, and Generator per Service/Workshop Manual procedures.
4.
Retap and blow out the Fan Mounting Bracket upper bolt holes.
5.
Install the new Fan Mounting Bracket bolts, N601424-S2, and torque to 80-119 N-m (59-88 lb-ft).
6.
Reinstall the Fan Clutch, Generator, A/C Compressor and belts per Service/Workshop Manual procedures.
7.
Reinstall cooling module per Service/Workshop Manual procedures.
SERVICE PROCEDURE C
NOTE:
ONCE THE COOLING MODULE IS REMOVED THERE IS NO NEED TO DISASSEMBLE IT.
1.
Remove the Cooling Module per Service/Workshop Manual procedure.
2.
Loosen the A/C Compressor, Fan Clutch, and Generator mounting bolts and adjustment bolts to remove the drive belts.
3.
Remove the A/C Compressor, Fan Clutch, Fan Mounting Bracket, and Generator per Service/Workshop Manual procedures.
4.
Retap and blow out the Fan Mounting Bracket upper bolt holes.
5.
Replace the cracked front engine cover (obtain locally) per Caterpillar Service/Workshop Manual procedures.
6.
Install the new Fan Mounting Bracket bolts, N601424-S2, and torque to 80-119 N-m (59-88 lb-ft).
7.
Reinstall the Fan Clutch, Generator, A/C Compressor and belts per Service/Workshop Manual procedures.
8.
Reinstall cooling module per Service/Workshop Manual procedures.
NONE
OTHER APPLICABLE ARTICLES:
WARRANTY STATUS: Eligible Under Basic Warranty Coverage
LABOR ALLOWANCE
DEALER CODING
OASIS CODES: 402000, 499000
98-16, Publication Date: AUGUST 11, 1998
MEDIUM/HEAVY
TRUCK:
1996-98 AEROMAX,
LOUISVILLE
ISSUE:
The
hood
than expected efforts to tilt up or down on some vehicles. This may be caused by a loss of lubrication to the
upper
andmay
lowerrequire
hinge higher
pivot bushings.
ACTION:
Replace theRefer
uppertohinge
pins andService
install aProcedure
grease fitting
into the lower hinge pin. The revised hinge pins have a grease fitting to allow for
lubrication.
the following
for details.
SERVICE PROCEDURE
101,1.113 AND
122
VEHICLES
Open
theBBC
hood
and remove the two (2) spring retainers for the LH and RH upper pivot pins and remove the washers (Figure
1).
Figure
1 - Article
98-16-2
2.
Carefully
(Figure
2).close the hood and support the LH and RH hood hinge mounting plate assembly using a floor jack or jack stands
Figure
2 - Article
3.
Remove
the98-16-2
hood hinge pivot pin and replace with revised Hood Hinge Pivot Pin (XC4Z-9016A778-AA).
4.
Repeat the above Step 3 on the opposite side.
5.
Carefully open the hood and replace the washers. Reinstall the spring retainers into the upper pivot pins.
6.
Lubricate the grease fittings with Ford Premium Long Life Grease (XG-1-C or equivalent) for 101 BBC vehicles only.
ADDITIONAL
PROCEDURE
FOR
113retainers
AND 122for
BBC
ONLY
1.
Remove
theRemove
four (4)
spring
the VEHICLES
lower
LHtorsion
and
RH
bar link1).
and remove the washers from the lower torsion
bar link pin.
the pins
and lower LH
and
RH
bartorsion
links (Figure
2.
Bend the shaft retaining tab on the lower torsion bar pivot housing upward using a flat screwdriver or equivalent (Figure 3).
Figure
3 - Article
3.
Slide
the LH98-16-2
and RH link partially out of the housing. The bushing must remain seated in the housing.
4.
Drillcenterline
a 4.75mmof(3/16")
diameter
hole into
each
end ofthrough
the lower
20.3mmand
(0.80")
fromhalf
theof
end
the housing.
Drill
the
the housing,
parallel
to the
ground,
halfhousing
of the housing
through
theofbushing
(Figure
4).at
Figure
4 - Article
98-16-2
5.
Obtain
locally
two (2) push-in grease fittings for a 3/16" hole and press the fittings into the drilled holes.
NOTE:
MAKE SURE WITH
EACHTHE
FITTING
DOESBAR.
NOT PROTRUDE PAST THE BUSHING AND INTO THE HOUSING CAVITY AND
INTERFERE
TORSION
6.
Reassemble LH and RH bushing and pivot bars.
7.
Reassemble the LH and RH torsion links to the plates.
8.
Grease all four (4) fittings using Ford Premium Long Life Grease (XG-1-C or equivalent).
NONE
OTHER APPLICABLE ARTICLES:
WARRANTY STATUS: Eligible Under Basic Warranty Coverage
LABOR ALLOWANCE
DEALER CODING
OASIS CODES: 108000, 111000
98-17, Publication Date: AUGUST 24, 1998
MEDIUM/HEAVY
TRUCK:
1996-98 AEROMAX
ISSUE:
Cracking/breaking
of the
center
rib onofeither
the upper
and/or
grille may occur
on have
someno
vehicles.
This to
may be due to
the insufficient build
shape
andvertical
material
thickness
the vertical
center
rib. lower
Grille bright
side attachment
brackets
adjustment
accommodate
tolerances.
ACTION:
Replace the grille with a revised grille. Refer to the following Service Procedure for details.
SERVICE
PROCEDURE
The
AeroMax
bright grille
is comprised
of an UPPER and LOWER bright grille assembly. The following provides replacement part
requirements
based
upon option
the various
failure modes.
UPPER
Grille
Assembly
Failure is
Only
If the upper bright
grille assembly
broken/cracked, replace with:
(1 required) XC45-8150-FA Grille - Radiator Upper
(4 required) XC45-8A125-AA Bracket - Radiator Grille Support
LOWER
Grille
Assembly
FailureisOnly
If the lower
bright
grille assembly
broken/cracked, replace with:
(1 required) XC45-8150-GA Grille - Radiator Lower
(2 required) XC45-8A125-AA Bracket - Radiator Grille Support
BOTH
both Upper And Lower Grille Assembly Failure
If
upper and lower grille assemblies are broken/cracked, replace with:
(1 required) XC45-8150-FA Grille - Radiator Upper
(1 required) XC45-8150-GA Grille - Radiator Lower
(6 required) XC45-8A125-AA Bracket - Radiator Grille Support
NOTE:
WHEN
INSTALLING
REPLACEMENT
GRILLE
(XC45-8A125-AA),
MAKE
CERTAIN THAT
THE
END OF
BRACKET
WITHADJUSTMENT
THETHE
SLOTTED
MOUNTING
HOLEBRACKETS
IS CLOSED
ATTACHED
THE GRILLE
ASSEMBLY.
IF THE
UPPER
OR THE
LOWER
GRILLE
NEEDS
AFTER
THE HOOD
ONONTO
THE VEHICLE,
SIMPLY
SLOTTED
END OF
THE MOUNTING
BRACKET
ANDISADJUST
THE
GRILLE
TO CENTER
IT. LOOSEN THE BOLT ON THE
Refer to the appropriate year Louisville/AeroMax Workshop Manual for installation details.
NONE
OTHER APPLICABLE ARTICLES:
WARRANTY STATUS: Eligible Under Basic Warranty Coverage
LABOR ALLOWANCE
DEALER CODING
OASIS CODES: 108000, 111000
98-17, Publication Date: AUGUST 24, 1998
MEDIUM/HEAVY
TRUCK:
1996-97 AEROMAX,
LOUISVILLE
ISSUE:
The
restraint cable
springs may rub on the hood and/or hood components. This may be caused by the friction produced by the
cablehood
restraint
before
the hoodsprings
closes.riding on the mounting bracket not allowing the springs to move rapidly enough to achieve the "park position"
ACTION:
Replace
the
current
radiator
mounted
hood
cablereduce
bracket
a revised
assembly
between cable
spring and bracket
which
should
theassembly
possibilitywith
of the
spring assembly.
rubbing onThe
the revised
hood. Refer
to thereduces
followingfriction
Service
Procedure
for details.
SERVICE
PROCEDURE
1.
Reinstall the spring as shown in Figures 1-3. Make sure the check springs are assembled as shown.
Figure 1 - Article 98-17-5
Figure 2 - Article 98-17-5
Figure
3 - Article
98-17-5
2.
Torque
bracket
mounting nuts to 30-43 N-m (22-32 lb-ft).
NONE
OTHER APPLICABLE ARTICLES:
WARRANTY STATUS: Eligible Under Basic Warranty Coverage
LABOR ALLOWANCE
DEALER CODING
OASIS CODES: 111000, 190000, 402000, 490000
98-17, Publication Date: AUGUST 24, 1998
MEDIUM/HEAVY
TRUCK:
1996-98 AEROMAX,
LOUISVILLE
ISSUE:
The
panel dimmer
control switch
high
control
efforts
maythe
break
on slider.
some vehicles. This may be caused by the
Fieldinstrument
Effect Transistor
(FET) overheating
duemay
to arequire
high duty
cycle
which
mayor
warp
switch
ACTION:
Replace dimmer
switch with
a revised
switch. The Louisville/AeroMax
new switch has a revised
FET Manual,
which supports
high duty
cycle. It should
reduce the
possibility
of overheating.
Refer
to the appropriate
Workshop
Sectionthe
211-05,
for replacement
details.
NONE
OTHER APPLICABLE ARTICLES:
WARRANTY STATUS: Eligible Under Basic Warranty Coverage
LABOR ALLOWANCE
DEALER CODING
OASIS CODES: 201000, 201200, 203000, 204000
98-17, Publication Date: AUGUST 24, 1998
MEDIUM/HEAVY
TRUCK:
1996-98 AEROMAX,
LOUISVILLE
ISSUE:
If
for any reason,
completely and the clockspring hub is allowed to spin free, the clockspring must be
re-centered
beforethe
thesteering
steeringwheel
wheelisisremoved
reinstalled.
ACTION:
Refer to the following Service Procedure to properly re-center the clockspring.
SERVICE PROCEDURE
NOTE:
DIRECTIONS TO RE-CENTER THE CLOCKSPRING ARE ALSO IDENTIFIED ON THE TOP OF THE CLOCKSPRING HUB.
Refer to Figure 1.
Figure
98-17-10
1. 1 - Article
Make sure
the vehicle's front wheels are in the straight ahead position.
2.
Use either Step 2a with the clockspring installed in the vehicle or 2b if the clockspring is unmounted.
a.
With
the clockspring
installed on the steering column, rotate the clockspring hub to the left (counterclockwise) until a
resistance
is felt.
b.
With
an unmountedtoclockspring
(inresistance
hand), position
(counterclockwise)
the left until
is felt.the clockspring body slot toward you. Rotate the clockspring hub
3.
Align the arrow on the hub with the slot on the body.
4.
Rotate the clockspring four (4) times clockwise, and align the hub arrow with the slot on the body.
5.
If not already on the column, install the clockspring. (Refer to the Workshop Manual for installation procedures.)
6.
Install
lb-ft). the steering wheel on the column, setting the clear vision as necessary. Torque the retaining nut to 61-88 N-m (45-65
NONE
OTHER APPLICABLE ARTICLES:
INFORMATION ONLY
WARRANTY STATUS:
OASIS CODES: 107000, 203000, 205000, 303000, 390000
98-18, Publication Date: SEPTEMBER 8, 1998
FORD:
1997 ASPIRE,
PROBE,
THUNDERBIRD
1997-98
CONTOUR,
CROWN
VICTORIA, ESCORT, MUSTANG, TAURUS
LINCOLN-MERCURY:
1997 COUGAR
1997-98
CONTINENTAL, GRAND MARQUIS, MARK VIII, MYSTIQUE, SABLE, TOWN CAR, TRACER
LIGHT
TRUCK:
1997
AEROSTAR
1997-98
ECONOLINE, EXPEDITION, EXPLORER, F SUPER DUTY, F-150-350 SERIES, F-47, MOUNTAINEER, RANGER, VILLAGER,
WINDSTAR
1998 NAVIGATOR
MEDIUM/HEAVY
TRUCK:
1997-98 AEROMAX,
CARGO SERIES, F & B SERIES, L SERIES, LOUISVILLE
This TSB article is being republished in its entirety to add additional paint information.
ISSUE:
Ford
Motor
Company's
goal isthat
to eliminate
related repeat
andwere
increase
customer
satisfaction.
To meet
this goal,
Ford has
tested
refinish
paint
materials
are usedpaint
for warranty.
Tests repairs
conducted
designed
around
OEM Refinish
Material
Reliability
and
Durability Standards.
ACTION:
Ford
Customer
Service
Division
(FCSD)
has
released
a
paint
material
specification
(WSS-M2P100-D)
to
the
major
worldwide
paint
supply
companies
for
testing
refinish
paint
systems.
These
paint
systems
are
used
for
refinishing
service
parts
as
well
as
repair
steel
and
plastic OEM finishes.
SYSTEMS TESTED
Ford
MotorVOC
Company
hasOrganic
completed
testing of regulations.
refinish paint materials that are compliant to U.S. "National Rule," "Canadian Rule" and
European
(Volatile
Compounds)
NOTE:
TESTING
OF CALIFORNIA
VOC
COMPLIANT SYSTEMS WILL BEGIN 9/98 DUE TO A RECENT MORATORIUM REQUIRING
NEW
EMISSION
COMPLIANT
PRODUCTS.
SELECTION AND PREPARATION
Each
paint
was
asked
to submit
worldwide "in-use"
paint systems
testing.Employees
The paint of
materials
used
for testing
were
obtained
bymanufacturer
Ford
frompanels.
local
paint
jobbers
and
distributors
and/or
shipped
fromfor
Europe.
each paint
company
prepared
and
sprayed
the test
All testing
was
completed
at the
Ford
CentralinLaboratory
facility.
SUBSTRATES AND TESTS
The
paint materials
approved
these
tested
over
the following
substrates:
cold
rolled
steel, chipping,
E-coated fuel
steel, bare
galvanized
steel,thermal
sanded
OEMfrom
finish,
andspecifications
TPO
plastic. Awere
select
group
of tests
including
salt spray,tests,
initial
adhesion,
resistance,
shock
used
for
screening.
the was
companies
passed
the screening
they
were required
to complete
the balanceand
of the tests listed
inwere
the specifications.
Each As
panel
tested and
reviewed
per OEM testing
methods.
PAINT PRODUCT CHANGES
If a paintretesting.
companySystems
decideswill
to introduce
a newonce
product
intoCost
a tested
system
newresponsibility
primer, sameofclearcoat),
the entire system will
require
only be tested
a year.
of testing
will(i.e.,
be the
the paint suppliers.
APPROVED SUPPLIERS AND MATERIALS
The
Charts
following
articleDealers
(Figureswithout
1-7) indicate
paint
suppliersprovide
and materials.
should
begin
to use the recommended
paint
materials
astheir
soon
as this
practical.
alisted
bodyin
shop
copy mandatory
ofDealers
this bulletin
to the
independent
performing
warranty
repairs. The products
this should
bulletin may be amade
sometime
in the future.body
As ashop
result, dealers
that have
expire)
. jobber/paint company contractual agreements should only contract with recommended suppliers (when existing contracts
Figure 1 - Article 98-18-2
Figure 2 - Article 98-18-2
Figure 3 - Article 98-18-2
Figure 4 - Article 98-18-2
Figure 5 - Article 98-18-2
Figure 6 - Article 98-18-2
Figure 7 - Article 98-18-2
CONCLUSIONS
Testing
of refinish materials will raise standards for these materials. These improved standards will result in improved customer
satisfaction.
OTHER APPLICABLE
ARTICLES: NONE
SUPERSEDES: 98-9-3 INFORMATION ONLY
WARRANTY STATUS:
OASIS CODES: 106000, 190000
98-18, Publication Date: SEPTEMBER 8, 1998
MEDIUM/HEAVY
TRUCK:
1996-98 AEROMAX,
LOUISVILLE
ISSUE:
The
rear suspension
air spring
(bag)
of the
Neway
AD-123/246
Drive
Axle
Suspension
may be punctured
onnut
the(Figure
lower rear
of thetab
bag.
beover
caused
the
locking
plate
tabs the
not
being bent
down
over
the suspension
beam
1). Ifedge
a locking
is
notThis
bentmay
down
this by
nut,
the
tab can
contact
suspension
air bag,
eventually
wearingsupport
a hole in
the bag
.
Figure 1 - Article 98-18-6
ACTION:
If air suspension
spring
has
not
punctured,
make
certain
that and
ALLinspect
three (3)
beenIf bent
over the
suspension
support
beam
If theit.
bag
hasbeen
punctured,
replace
the bag
thelocking
lockingplate
platetabs
for have
damage.
the locking
plate
is
damaged,
thennut.
replace
Refer
tobeen
the following
text
for details.
CAUTION:
WHEN
A "TWO
STUD"
AIR
SPRING
IS USED,
ATTACH
ONLY
THE
REARAND
MOUNTING
NUT
AND
LOCKWASHER.
DO NOT
ATTACH
A
NUT
TO
THE
FRONT
STUD
(FIGURE
2).
USE
OF
A
WASHER
NUT
ON
THE
FRONT
STUD
MAY
CAUSE
AIR
SPRING PISTON FAILURE, THE FRONT STUD IS ONLY TO BE USED AS A LOCATING PIN.
Figure 2 - Article 98-18-6
NOTE:
AFTER THE AIR SPRING MOUNTING PLATE IS MODIFIED, IT WILL ACCEPT BOTH SINGLE AND "TWO STUD" AIR SPRING
CONFIGURATIONS.
Refer to the 1996 Louisville/AeroMax Service Manual, Page 04-02F-11.
AD-123/246 Drivemay
Axlecome
Suspensions
were
originally
suppliedIfwith
single stud air
springs (Figure
The
new Rear single
Suspension
Airspring
Spring
(XC45-5580-AA)
a "two
stud"
configuration.
so,4).
modification
requires
of 3).
theplate
suspension's
studflat
air
mounting
plate to convert
to with
the "two
stud"
configuration
(Figure
All three (3)
tabs ofdrilling
the locking
MUST be bent over
on the
nut
after installation.
Figure 3 - Article 98-18-6
Figure 4 - Article 98-18-6
NONE
OTHER APPLICABLE ARTICLES:
WARRANTY STATUS: Eligible Under Basic Warranty Coverage
LABOR ALLOWANCE
DEALER CODING
OASIS CODES: 110000
TSB Article 98-19-1 has been superseded by Article 98-24-3.
Press [Continue] to view Article 98-24-3.
98-20, Publication Date: SEPTEMBER 25, 1998
MEDIUM/HEAVY
TRUCK:
1996-98
AEROMAX,
LOUISVILLE
1997
CARGO
SERIES
This
TSB
article only applies to 5.9L, 8.3L, CAT 3126, CAT 3306C, and CAT 3406C on Louisville/AeroMax models and 5.9L and 8.3L on
the CF
Series.
ISSUE:
Intermittent
electrical
issues,
such
as dash
lights
flashing
the turn signal
is activated
may occurtoon
some
vehicles.
These may be
caused
by the
low coolant
level
sensor
leaking
coolant
intowhen
the attached
wire harness
and migrating
inline
wire
connectors.
ACTION:
Inspect and
replace low
coolant levelRefer
sensor
withfollowing
revised low
coolant
levelProcedure
sensor and
jumper
harness. Inspect
and replace
inline
connector
assemblies
downstream.
to the
Cargo
Service
and
Louisville/AeroMax
Service
Procedure
for
details.
Within
each
kit need
is an instruction
connector
may
replacing. sheet with the procedure of how to install the connector. Use the service procedure to determine what
NOTE:
A
DAMAGED CONNECTOR
MAY
BE HARNESSES
REPLACED USING
TSB PROCEDURE OR SPLICED USING FORD APPROVED
PROCEDURE
FOR SPLICING
WIRE
IN TSBTHIS
«98-11-3».
SERVICE PROCEDURE - CARGO
1.
Remove
coolant
level
sensor located above the radiator on the side or top of the coolant reservoir (Figure 1). Replace
with
new the
low low
coolant
level
sensor.
Figure
1 - Article 98-20-1
Procedure:
a.
Disconnect the wire harness connector from the low coolant level sensor.
b.
Remove the low coolant level sensor from the coolant reservoir.
c.
Install the new Low Coolant Level Sensor (XC4Z-10D968-AA).
d.
Connect service Jumper Harness (F6HZ-14A382-AA).
2.
Inspect the 2-way wiring connector to the low coolant level sensor (Figure 1).
Procedure:
a.
The 2-way wiring connector should be disconnected from the low coolant level sensor.
b.
Visually inspect the 2-way wiring connector for one of the following scenarios:
1) Is there a greenish coating formed on either of the 2 terminals?
If
yes: connector
Replace the
using
Service
Connector
and connect the new 2-way
wiring
to connector
the other end
of Ford
service
jumper
harness. Kit
Go(F5HT-19K271-FEA)
to Step 3.
If no: go to Step 2b, 2) immediately following.
2) Is there a visible liquid presence of ethylene glycol (coolant)?
If
yes:
out the
connector
using
air hose. Connect the dried out 2-way wiring connector to the other
end
of Dry
service
jumper
harness.
Go atohigh
Steppressure
3.
3.
If no: Connect the existing 2-way wiring connector to the other end of service jumper harness. Go to Step 3.
Inspect
theand
16-way
inline
between
the 2).
-14398- and -14401- wire harnesses located forward of the chassis,
just above
behind
thewiring
centerconnection
of the bumper
(Figure
Figure
2 - Article 98-20-1
Procedure:
a.
Disconnect the 16-way inline connection (Figure 2).
b.
Visually inspect the 16-way wiring connectors (male and female) for one of the following scenarios:
1) Is there a greenish coating or corrosion formed on any of the 16 terminals in each male or female connector?
If yes: Replace the connector using Ford Service Connector Kit (F5HT-19K271-DBA). Go to Step 4.
If no: Go to Step 3a, 2) immediately following.
2) Is there a visible liquid presence of ethylene glycol (coolant)?
If
yes:4.Dry out the connectors using a high pressure air hose. Reconnect the existing 16-way inline connectors. Go to
Step
4.
If no: Reconnect the existing 16-way inline wiring connectors. Do not continue. Operation complete.
Inspectrail
the(Figure
8-way 3).
inline wiring connection between the -14398- and -14405- wire harnesses, located on the RH rear chassis
frame
Figure
3 - Article 98-20-1
Procedure:
a.
b.
Disconnect the 8-way inline connection from the connector support bracket (Figure 3).
Visually inspect the 8-way wiring connectors (male and female) for one of the following scenarios:
Is there a greenish coating or corrosion formed on any of the 8 terminals in each male or female connector?
If yes: Replace the connector using Ford Service Connector Kit (F5HT-19K271-DAA). Go to Step 5.
If no: Reconnect the existing 8-way inline wiring connectors. Do not continue. Operation complete.
5.
Inspect the
8-way
inline wiring
chassis
frame
rail (Figure
3). connection between the -14398- and -15525- or -7E203- wire harnesses located at the RH rear
Procedure:
a.
Disconnect the 8-way inline connection from the connector support bracket shown in Figure 4.
Figure
4 - Article
98-20-1
b.
Visually
inspect
the 8-way connectors (male and female) for one of the following scenarios:
1) Is there a greenish coating or corrosion formed on any of the 8 terminals in each male or female connector?
If
yes: Replace the connector using Ford Service Connector Kit (F5HT-19K271-DCA). Do not continue. Operation
complete.
If no: Go to Step 5b, 2) immediately following.
2) Is there a visible liquid presence of ethylene glycol (coolant)?
If yes: Dry out the connectors using a high pressure air hose. Reconnect the existing 8-way inline connectors.
If no: Reconnect the existing 8-way inline wiring connectors.
SERVICE PROCEDURE - LOUISVILLE/AEROMAX
1.
Remove
coolant
level
sensor located above the radiator on the side or top of the coolant reservoir (Figure 1). Replace
with
new the
low low
coolant
level
sensor.
Procedure:
a.
Disconnect the wire harness connector from the low coolant level sensor.
b.
Remove the low coolant level sensor from the coolant reservoir.
c.
Install the new Low Coolant Level Sensor (XC4Z-10D968-AA).
d.
Connect service Jumper Harness (F6HZ-14A382-AA).
2.
Inspect the 2-way wiring connector to the low coolant level sensor (Figure 5).
Figure
5 - Article 98-20-1
Procedure:
a.
The 2-way wiring connector should be disconnected from the low coolant level sensor.
b.
Visually inspect the 2-way wiring connector for one of the following scenarios:
1) Is there a greenish coating formed on either of the 2 terminals?
If
yes: connector
Replace the
using
Service
Connector
and connect the new 2-way
wiring
to connector
the other end
of Ford
service
jumper
harness. Kit
Go(F5HT-19K271-FEA)
to Step 3.
If no: Go to Step 2b, 2) immediately following.
2) Is there a visible liquid presence of ethylene glycol (coolant)?
If
yes:
out the
connector
using
air hose. Connect the dried out 2-way wiring connector to the other
end
of Dry
service
jumper
harness.
Go atohigh
Steppressure
3.
3.
If no: Connect the existing 2-way wiring connector to the other end of service jumper harness. Go to Step 3.
Inspectrail
thenear
8-way
connection
and -13K081- wire harnesses located at the LH forward
frame
theinline
powerwiring
steering
reservoirbetween
(Figure the
6 or-10D9697).
Figure 6 - Article 98-20-1
Figure
7 - Article 98-20-1
Procedure:
a.
Disconnect the 8-way inline connection from the connector support bracket (Figure 7) without disturbing the Xmas tree
retention.
b.
Visually inspect the 8-way wiring connectors (male and female) for one of the following scenarios:
1) Is there a greenish coating or corrosion formed on any of the 8 terminals in each male or female connector?
If yes: Replace the connector using Ford Service Connector Kit (F6HZ-3L095-LE). Go to Step 4.
If no: Go to Step 3b, 2) immediately following.
2) Is there a visible liquid presence of ethylene glycol (coolant)?
If
yes:4.Dry out the connectors using a high pressure air hose. Reconnect the existing 8-way inline connectors. Go to
Step
4.
If no: Reconnect the existing 8-way inline wiring connectors. Do not continue. Operation complete.
Inspect(Figure
the 16-way
frame
8). inline wiring connection between the -13K081- and -14290- wire harnesses, located on the LH forward
Figure
8 - Article 98-20-1
Procedure:
a.
Disconnect
retention. the 16-way inline connection from the connector support bracket (Figure 8) without disturbing the Xmas tree
b.
Visually inspect the 16-way wiring connectors (male and female) for one of the following scenarios:
Is there a greenish coating or corrosion formed on any of the 16 terminals in each male or female connector?
If yes: Replace the connector using Ford Service Connector Kit (F6HZ-3L095-LD). Go to Step 5.
If no: Reconnect the existing 16-way inline wiring connectors. Do not continue. Operation complete.
5.
Inspect
16-way
inline
wiring
connection
between (Figure
the -13K081forward the
frame
rail near
the
power
steering reservoir
6 or 7).jumper and -13K081- wire harnesses located at the LH
Procedure:
a.
Disconnect
the
16-way
inline
connection
from
the
connector
support bracket shown in Figure 9 without disturbing the
Xmas tree retention.
Figure
9 - Article
98-20-1
b.
Visually
inspect
the 16-way inline connectors (male and female) for one of the following scenarios:
1) Is there a greenish coating or corrosion formed on any of the 16 terminals in each male or female connector?
If yes: Replace the connector using Ford Service Connector Kit (F6HZ-3L095-LC). Go to Step 6.
If no: Go to Step 5b, 2) immediately following.
2) Is there a visible liquid presence of ethylene glycol (coolant)?
If
yes:6.Dry out the connectors using a high pressure air hose. Reconnect the existing 16-way inline connectors. Go to
Step
If no: Reconnect the existing 16-way inline wiring connectors. Go to Step 7.
6.
Inspect
the 16-way
inline wiring connection between the -13A006- and -13K081- jumper wire harnesses located at the LH
hood hinge
(Figure 9).
Procedure:
a.
Disconnect
the
16-way inline connection from the connector support bracket shown in Figure 6 without disturbing the
Xmas tree retention.
b.
Visually inspect the 16-way inline connectors (male and female) for one of the following scenarios:
Is there a greenish coating or corrosion formed on any of the 16 terminals in each male or female connector?
If
yes: Replace
the connector
using Ford
Service Connector
(F6HZ-3L095-LB)
if the
vehicle does NOT
have
Daytime
Running
or Running
replace
the
connector
FordKit
Service
Connector Kit
(F6HZ-3L095-LA)
if the
vehicle
does
haveLamps
Daytime
Lamps.
Go to using
Step 7.
If no: Reconnect the existing 16-way inline wiring connectors. Go to Step 7.
7.
Inspect the lower 76-way bulkhead connection of the -14290- wire harness located at the LH side of the bulkhead (Figure 11).
Figure
11 - Article 98-20-1
Procedure:
a.
Disconnect the 76-way bulkhead using a 5/16" socket (Figure 10).
Figure
10 - Article
98-20-1
b.
Visually
inspect
the 76-way connector for the presence of ethylene glycol (coolant). Is ethylene glycol present?
If
yes:
Dry
out
the 76-way
connector using a high pressure air hose. Reinstall the 76-way bulkhead connector and
torque to 5-6 N-m
(45-55 lb-in).
If no: Reconnect the 76-way bulkhead connector using a 5/16" socket (Figure 10).
OTHER
APPLICABLE ARTICLES:
≤
98-11-3
≤
98-7-11
WARRANTY STATUS: Eligible Under Basic Warranty Coverage
LABOR ALLOWANCE
DEALER CODING
OASIS CODES: 203200, 204000, 206000, 402000
98-20, Publication Date: SEPTEMBER 25, 1998
MEDIUM/HEAVY
TRUCK:
1996-98 AEROMAX,
LOUISVILLE
ISSUE:
The
power
distribution
box cover is now available separately for service. Previously, the box cover was only available as part of the
-14290wire
harness assembly.
ACTION:
If required, replace only the power distribution box cover.
NONE
OTHER APPLICABLE ARTICLES:
INFORMATION ONLY
WARRANTY STATUS:
OASIS CODES: 203000, 203200, 205000
98-20, Publication Date: OCTOBER 1, 1998
MEDIUM/HEAVY
1998 AEROMAX, TRUCK:
LOUISVILLE
ISSUE:
Standard
parts
may
to attach
front PTO
equipment
to theadapter
7/16"-18
threaded
holesand
on the
adapter
for the may
M11
engine.
This
may
benot
duebe
toavailable
the fact that
the 7/16"-18
threads
in the PTO
may
not be bolt
standard
thePTO
attaching
hardware
not
be easily
found.
ACTION:
New
adapters
have
been
released
with
7/16"-14
threaded
holes
with
attaching
bolts
that
are
readily
available
in
service.
If
the
customer
has been
locate 7/16"-18
attaching
bolts removed
for the front
replace
the PTO
adapterthe
with
a revised
PTO
adapter.
Reuse
theunable
four (4)toattaching
bolts and
flatwashers
withPTO
the adapter,
original PTO
adapter
and torque
bolts
to 55-74
N-m
(40-55 lb-ft).
NONE
OTHER APPLICABLE ARTICLES:
WARRANTY STATUS: Eligible Under Basic Warranty Coverage
LABOR ALLOWANCE
DEALER CODING
OASIS CODES: 108000
98-20, Publication Date: OCTOBER 5, 1998
MEDIUM/HEAVY
1998 AEROMAX, TRUCK:
LOUISVILLE
ISSUE:
The turn signal switch handle may become loose/broken on some vehicles.
ACTION:
Replace
the
turn
signal
switch
with a revised turn signal switch. Refer to the 1998 Louisville/AeroMax Workshop Manual, Section 211-05,
for removal and installation
procedures.
NOTE:
MAKE
SURE
THE DATE
CODE
OF IS
THE REVISED
TURN
SIGNAL
SWITCH
IS NO ATTACHING
EARLIER THAN
98047,
(98 = YEAR,
047
DAY OF
THE
CODE
ON
SWITCH
HOUSING
BELOW
POINTS
(SWITCH
MUST
BE=
REMOVED
INYEAR).
ORDERDATE
TO READ
THELOCATED
DATE CODE).
NONE
OTHER APPLICABLE ARTICLES:
WARRANTY STATUS: Eligible Under Basic Warranty Coverage
LABOR ALLOWANCE
DEALER CODING
OASIS CODES: 201000, 201200, 203000, 205000
98-20, Publication Date: OCTOBER 5, 1998
MEDIUM/HEAVY
1998 LOUISVILLETRUCK:
ISSUE:
A
41MT heavy
duty
starter
is now
for service
applications
with
a high
number
ofavailable
stops/starts
per day.for the CAT 3126 engine. Customers have requested heavy duty starters for
ACTION:
On a customer request basis only, replace the starter with a revised 41MT starter. Refer to the following text for details.
Delco-Remy,
working
in conjunction
Caterpillar,
has
heavy dutywho
starter for
theCAT
CAT 3126inengine.
The starter, a high
designated
41MT,
is now
available
inwith
service
and
may
bedeveloped
desired
byaspecified
customers
their
applications
number
of stops
and
starts
occur
each
day
and
the
battery
package
on the use
vehicle
is 18003126
CCA (cold
crankingwhere
amps) or higher.
This
would
include
3-625CCA
batteries
or 2-900CCA
battery
packages
or larger.
The part
number
of the
Starter
is 12
(DR-10479215)
and the
to mount the 41MT starter is the same as for the production
37MT
starter
- three
(3) 41MT
10x30mm
long
pt bolts and three
(3) hardware
10mm lockwashers.
NONE
OTHER APPLICABLE ARTICLES:
INFORMATION ONLY
WARRANTY STATUS:
OASIS CODES: 203100, 497000, 499000, 601300
98-20, Publication Date: OCTOBER 5, 1998
MEDIUM/HEAVY
TRUCK:
1996-98 AEROMAX,
LOUISVILLE
ISSUE:
Delco-Remy has made available a revised generator for service.
ACTION:
Use
the
Delco-Remy
22-SI
generator
in place
of usage.
the Delco 21-SI generator when generator replacement is required. Refer to the
following Cross Reference Chart
for correct
part
The Delco
100, 115,
130, and
Amp,
21-SI generator
beand
replaced
withsame
the equivalent
generator
according to the following
chart.
The 22-SI
generator
is a145
direct
replacement
for thecan
21-SI
uses the
mounting 22-SI
brackets,
belts, etc.
NOTE:
THE 22-SI GENERATOR IS NOT AVAILABLE IN THE 115A RATING. REPLACEMENT IS WITH THE 130A VERSION.
NONE
OTHER APPLICABLE ARTICLES:
INFORMATION ONLY
WARRANTY STATUS:
OASIS CODES: 203000, 203100, 290000
98-20, Publication Date: OCTOBER 5, 1998
MEDIUM/HEAVY
TRUCK:
1996-98 AEROMAX,
LOUISVILLE
ISSUE:
Hinges
doors. and hinge springs are now available for service for the optional ready line access door, butterfly doors or transverse access
ACTION:
If service is required to the hinge and/or hinge springs, refer to the following Application Chart for correct part usage.
NONE
OTHER APPLICABLE ARTICLES:
INFORMATION ONLY
WARRANTY STATUS:
OASIS CODES: 111000, 112000
98-21, Publication Date: OCTOBER 9, 1998
MEDIUM/HEAVY
1995-97 L SERIESTRUCK:
ISSUE:
The
air cleaner
cover
maycover
rub a interfering
hole in thewith
hood
atinside
the front
edge
of of
thethe
airair
cleaner
inlet
"wagon
caused
by the air
cleaner
the
front
edge
cleaner
inlet
on thewheel"
hood. on some vehicles. This may be
ACTION:
Replace the
air cleaner
cover
withfront
a revised
airedge
cleaner
cover
and repair
theon
hole
on
the hood.
Thethe
revised
air cleaner
gives
additional
clearance
to
the
inside
leading
of
the
air
cleaner
inlet,
the
hood,
to
reduce
possibility
of thecover
air cleaner
rubbing on the hood. Refer to the following Service Procedure for details.
SERVICE
PROCEDURE
1.
If wear is evident
at thewing
frontnut
leading
of of
the
hood
on the air
cleaner inlet "wagon wheel," remove the air cleaner cover by
unscrewing
the single
at theedge
center
the
air cleaner
cover.
2.
Install
new
Air Cleaner
Cover
(F4HZ-9661-BA)
by locating
the embossed
word "TOP"
on
the cover
at the
12 o'clock
position
and then
hand
tightening
theposition,
center
wing
nut. The
newclearance
relieved
area
on the
cleaner
cover,
located
at
approximately
the
2 o'clock
will increase
the
between
theair
inside
edge
of thewhich
hoodisand
the cover.
3.
Repair wear on the hood using standard Ford fiberglass hood repair procedures.
NONE
OTHER APPLICABLE ARTICLES:
WARRANTY STATUS: Eligible Under Basic Warranty Coverage And Applicable Emissions Warranty Coverage
LABOR ALLOWANCE
DEALER CODING
OASIS CODES: 106000, 108000, 111000
98-21, Publication Date: OCTOBER 15, 1998
MEDIUM/HEAVY
TRUCK:
1996-98 AEROMAX,
LOUISVILLE
ISSUE:
Overall
vehicle
alignment can
tireas
wear
and, in
some
cases,
vehicle
ride. The(0.125").
front/rear
and rear/rear
tandem
axles
should be
asnot
perpendicular
to reduce
theforframe
possible
and
parallel
withenhance
each
other
within
Hendrickson
beams
typically
do
have
a provision
adjustment.
A new
bar
pin system
and spacers
are 3mm
now available that
will permitwalking
alignment
of the
tandem axles.
ACTION:
Replace
all walking
beamcan
assemblies
withand/or
new walking
beam
assemblies
that
permit
the
use
of axle
spacers
for frame.
axle alignment.
Walking
beam
alignment
spacers
be
changed
positioned
to
align
the
rear
axles
with
the
front
and/or
Refer
to
the
following
text for details.
Replace
walking beam
assembly or
as obtain
specified
in HENDRICKSON
TECHNICAL
PUBLICATION
NUMBER:
17730-213parts
(obtain
from your
local Hendrickson
representative
directly
frominHendrickson
at (630)
910-2800
(Phil
Kantor)).
To determine
required
for a
particular
vehicle,
refer
to
Parts
Usage
Chart
included
this
TSB.
Parts
can
be
obtained
from
your
dealer
or
directly
from
Hendrickson
Suspension.
NOTE:
WHEN
ORDERING
THESE PARTS
THROUGH
YOUR WALKING
STERLINGBEAM
DEALER,
YOU WILLTHAT
NEEDHAVE
TO USE
THE
HENDRICKSON
PART
NUMBER.
REPLACE
CURRENT
SUSPENSION
ASSEMBLIES
NEW
BEAM
ASSEMBLIES
WITH ALIGNMENT SPACER XC45-4B474-AA INCLUDED.
Follow alignment instructions as per Hendrickson Technical Publication No. 17730-213.
NONE
OTHER APPLICABLE ARTICLES:
INFORMATION ONLY
WARRANTY STATUS:
OASIS CODES: 303000, 304000, 306000, 390000
98-21, Publication Date: OCTOBER 15, 1998
MEDIUM/HEAVY
TRUCK:
1997-98 AEROMAX,
LOUISVILLE
ISSUE:
The
radiator
hose isso
being
off atthe
theengine
enginefront
water
pump on some
vehicles.
beinglower
installed
incorrectly
that pulled
it contacts
crossmember
during
engineThis
roll.may be due to the lower radiator hose clamp
ACTION:
Review the
orientation
of the hose,
lower then
radiator
hosethe
clamp
screw
at screw
the water
pump
outlet.
If the
hose
clamphose.
screwThis
is located
on the
outboard
side
of
the
radiator
reorient
hose
clamp
to
the
inboard
side
of the
radiator
theService
possibility of
hose clamp screw coming in contact with the engine front crossmember during
engine
roll. Refer
to will
the reduce
following
Procedure
forthe
details.
SERVICE
PROCEDURE
1.
Review
the orientation
the lower
radiator
clamp
at the screw
water to
pump
outlet. Ifside
the hose
screw
is located on
the outboard
side of theofradiator
hose,
then hose
reorient
the screw
hose clamp
the inboard
of theclamp
radiator
hose.
2.
Tighten the hose clamp to 7-9 N-m (64-80 lb-in).
3.
To
reduce
further
strain
on
the
radiator
hose-to-water
pump
connection
during
engine
roll,
the
wrap
around
the
clip
at the
lower mid-section of the radiator hose may be removed.
NONE
OTHER APPLICABLE ARTICLES:
WARRANTY STATUS: Eligible Under Basic Warranty Coverage
LABOR ALLOWANCE
DEALER CODING
OASIS CODES: 402000, 497000, 499000, 702100
98-21, Publication Date: OCTOBER 19, 1998
MEDIUM/HEAVY
TRUCK:
1996-98 AEROMAX,
LOUISVILLE
ISSUE:
A
"banging"
noise
may
heardduring
on some
vehicles
during engine torque. This may be caused by contact between the flywheel housing
and
the lower
frame
railbe
flange
vehicle
operation.
ACTION:
Modify the starter boss and lower frame rail flange. Refer to the following Service Procedure for details.
SERVICE PROCEDURE
FLYWHEEL
HOUSING/STARTER
BOSS MODIFICATION
1.
Mark
the closest point orMOUNT
point of contact
on the starter mount boss relative to the lower frame rail flange.
2.
Obtain
proper
working
clearance
at the
starterwhich
mount
bossonand
frame rail flange. This can be accomplished by removing
the bolts
from the
rear engine
mount
support
rests
thelower
isolator.
3.
Loosen the front engine mount support bolts. This will allow the engine to pivot when raising the engine from the rear.
4.
At
the
marked
point,
grind
the
starter
mount
boss
while
maintaining
a
tangent plane along the length of the boss (refer to
Figures 1 and 3).
Figure 1 - Article 98-21-18
Figure 3 - Article 98-21-18
WARNING:
NOT GRIND
OFFand
MORE
THAN
5mm (0.20")
THE CLOSEST POINT OR POINT OF CONTACT.
5. DOReseat
the engine
tighten
all mounting
boltsFROM
and fasteners.
6.
Check
the clearance
betweenclearance
the starter
boss and
the lower
rail flange.
The
clearance
is approximately
19mm (0.75").
If the desired
is mount
not obtained,
material
mustframe
be removed
from
thedesired
lower frame
rail flange
(refer to
Figure
3).
WARNING:
DURING
THE
FRAME
RAIL
FLANGE
MODIFICATION
PROCEDURE,
DO
NOT
REMOVE
MORE
FRAME
RAIL
MATERIAL
THAN SPECIFIED.
FRAME
FLANGE
MODIFICATION
SET from
UP the papers delivered with the vehicle. If the papers are not available, your dealer or
1. RAIL
Identify
the frame
section Number
modulus
sales
"HOTLINE"
Bulletin
HB-5-92
will help identify the vehicle frame section modulus.
NOTE:
FRAME SECTION MODULUS 20.25 IS ALREADY CUT OUT IN PRODUCTION.
2.
Identify and mark the portion of the lower frame rail flange which needs to be modified (refer to Figure 2).
Figure
2 - Article 98-21-18
3.
Mark
2). the lower frame rail flange in this area with a straight line no less than 65mm (2.60") from the inside web (refer to Figure
4.
Mark the
Figure
2).ends of the flange area to be modified so that the modified area "blends" into the non-modified frame flange (refer to
5.
Obtain
proper
working
clearance
at the
starter mount
bossonand
lower
frame rail flange. This can be accomplished by removing
the
from the
the
rear engine
mount
support
rests
thethe
isolator.
Thisbolts
will allow
engine
to pivot
when
raisingwhich
the engine
from
rear. Next loosen the front engine mount support bolts.
FLANGE
MODIFICATION
1.
Carefully remove the section of the marked flange by using one of the following methods ONLY.
WARNING:
DO
NOT USEHEAT
A CUTTING
TORCH;
FRAME
TEMPER
ANDREDUCE
INTEGRITY
BE JEOPARDIZED.
DO OF
NOT
APPLY
EXCESSIVE
TO THE
FRAME
MATERIAL.
DOTHAN
NOT
THEMAY
WIDTH
FROM
THE INSIDE
THE
FRAME WEB
TO
EDGE
OF THE
FRAME
FLANGE
TO LESS
65mm
(2.60")
FIGURE
2).marked
a. THE
Use
a plasma
cutter
remove
the
frame
flange
section
only
to within(REFER
3.2mm TO
(0.125")
of the
line. Then use a
grinder
to remove
thetoremaining
material
up
to the
marked
line.
OR
b.
Use a grinder to remove the entire section of the frame flange up to the marked line.
2.
Carefully smooth and blend the modified area into the unmodified flange area. Remove all sharp edges (refer to Figure 2).
NONE
OTHER APPLICABLE ARTICLES:
WARRANTY STATUS: Eligible Under Basic Warranty Coverage
LABOR ALLOWANCE
DEALER CODING
OASIS CODES: 305000, 702000, 702100
98-23, Publication Date: NOVEMBER 6, 1998
MEDIUM/HEAVY
TRUCK:
1996-98 AEROMAX,
LOUISVILLE
ISSUE:
The
heater
coolant
supply
tubes may crack and/or leak coolant on some vehicles. This may be caused by the heater supply not being
robust
enough
for these
applications.
ACTION:
Replace the
heater the
supply
tubes. of
The
revisedand
tubes
have been
a thicker
wall andLouisville/AeroMax
improved welding Service
of the support
brackets
to
reduce
possibility
cracking
leaking.
Referimproved
to Sectionwith
12-02
of the tube
appropriate
Manual
for removal and installation procedures.
NONE
OTHER APPLICABLE ARTICLES:
WARRANTY STATUS: Eligible Under Basic Warranty Coverage
LABOR ALLOWANCE
DEALER CODING
OASIS CODES: 208000, 402000, 499000
98-23, Publication Date: NOVEMBER 12, 1998
MEDIUM/HEAVY
1994-96 L SERIESTRUCK:
ISSUE:
Power
steering
leak
through
the vent The
holepurpose
in the power
reservoir
cap. This
may
be caused
by a relief valve
mounted
on
topcontaminated.
of the
filter influid
themay
power
steering
reservoir.
of upward
thesteering
reliefand
valve
is tocertain
bypass
fluid
during
low
temperatures
when
theinfilter
is
When
the relief
valve
opens, fluid is
directed
under
conditions
may
leak
through theorvent
hole
the
cap.
ACTION:
Replace the
steering
reservoir
filter
and 1install
a Baffle on top of the filter. Refer to the Instruction Sheet included within the Power
Steering
Reservoir
Filter
Kit and
Figure
for details.
Figure 1 - Article 98-23-19
NONE
OTHER APPLICABLE ARTICLES:
WARRANTY STATUS: Eligible Under Basic Warranty Coverage
LABOR ALLOWANCE
DEALER CODING
OASIS CODES: 303000, 390000
98-23, Publication Date: NOVEMBER 16, 1998
MEDIUM/HEAVY
1998 AEROMAX, TRUCK:
LOUISVILLE
ISSUE:
Illumination
of the anti-lock
brake lamp
may
occur
and/or
may4-channel
be false Anti-lock
Brake
(ABS)
messages
on an
theAL6
optional
message center
some
vehicles.
Thisthat
may
be due
to thethere
Bendix
anti-lock
systemSystem
on the
vehicle,
which
uses
Electronic
Controlon
Unit
(ECU)
damage
the internal
components.
addition,
the
module
a low
voltage
condition
that
notmodule,
be
related
tocan
the experience
anti-lock
andtobroadcast
a false
message.InThe
AL6 module
may will
alsoread
broadcast
false messages to themay
optional
message
center
because system
of language
incompatibility.
ACTION:
If
diagnosis
concludes
that
the
ECU
module
requires
replacement,
use
the
new
Bendix
AL7
module.
The
included
diagnostic
procedure
assists
in module,
identifying
whether
the fault
is related
to be
theused.
ECU Refer
or is related
to a non-ABS
source.
If a module replacement is required, the
new
AL7
with
enhanced
electronics,
is to
to the following
text for
details.
This articleBendix
includes
a shortened
version
of be
theobtained
completefrom
ABSyour
diagnostic
procedure
that is setof
upbytocalling
detect1-800-AIRBRAK.
a fault with the module. The
complete
diagnostic
procedure
can
local Bendix
representative
The
AL7
module
is
in
a
kit
that
does
not
contain
the
relay
valve
and
other
parts
that
were
available
the AL6
kit. Itseparately.
is limited toUnlike
the ECU,
a mounting
bracket,
guide and
that aincludes
programming
relay
isinnow
serviced
the
AL6
ECU, the
AL7 isand
not installation
preprogrammed
procedure
must to beinstructions.
followed for The
the unit
tovalve
program
itself
.
When
a fault
the ABS orThe
a low
voltage
condition
detected
on aoff
vehicle
AL6present.
module, the ABS fault lamp stays on
until
the
fault in
is corrected.
AL7
module
will turnisthe
ABS lamp
when equipped
the fault iswith
no the
longer
A
customer
of
a
vehicle
equipped
with
an
AL7
module
may
describe
an
"intermittent
ABS
warning
lamp
activation"
condition.
This
intermittent operation of the warning lamp indicates a system fault and not a defective ECU.
If a new relay is required, order the appropriate part listed below.
FALSE
ABS
WARNING
LAMP
ILLUMINATION
A
vehicle
may
experience
an illumination
of theIfABS
warningislamp
bynot
a non-ABS
source.
ECU continually
monitors
vehicle
system
voltage
and
checks
modulator
circuit
integrity.
the voltage
low or
stable
within
the The
tolerance
range,
the ABS
warning
lamp
will
illuminate.
The
fault
indicated
by
the diagnostic
Emitting
Diodes
(LEDs)
will
be "right
front connectors,
modulator."
The
conditions
which can cause
voltage
fluctuations
are insulation
a faultyLight
alternator,
loose
at generally
the
alternator
or major
or
moisture
connectors.
On
some
1998
vehicles,
the
thebe
first
30.5connections
cm
of the
wiring
assembly
connector
to
the ECUinmay
be damaged, allowing moisture to enter.
This couldinalso
a cause
for(12")
a non-ABS
related
warning from
lampthe
illumination.
FALSE
ABS CODES
IN THE
OPTIONAL
MESSAGE
CENTER
If the
vehicle
equipped
optional
and is displaying anti-lock fault codes but no faults are detected by the ECU,
the
repair
is toisreplace
thewith
AL6the
module
withmessage
the AL7 center
module.
ABS
LAMP
ILLUMINATION
WITH
RIGHT
FRONT
MODULATOR
LED ILLUMINATED ON ECU
When this condition exists, follow the directions in Figures 1 and 2 before
Figure 1 - Article 98-23-22
Figure 2 - Article 98-23-22
NOTE:
IF
FAULT CODES DO NOT DISAPPEAR WHEN THE MAGNET IS HELD OVER "RESET," REPLACE ECU WITH SERVICE
KITTHE
F8HT-2B373-CA.
NONE
OTHER APPLICABLE ARTICLES:
WARRANTY STATUS: Eligible Under Basic Warranty Coverage
LABOR ALLOWANCE
DEALER CODING
OASIS CODES: 204000, 204100, 206000, 301000, 390000
98-23, Publication Date: NOVEMBER 16, 1998
MEDIUM/HEAVY
TRUCK:
1996-97 AEROMAX,
LOUISVILLE
ISSUE:
The
message
center
may transmitting
display falsedata
information/errors
fromwire
the datalink
Anti-lockwhich
Brakethe
System
(ABS).
Thismay
maymisinterpret.
be caused by the ABS
2-channel
control
module
across the J1587
message
center
ACTION:
Revise the
wire
communication
datalink
so will
the still
ABS
control
module
no longer
communicate
the message
center.
TheJ1587
warning
lamp
in the instrument
panel
be2-channel
operational.
Refer
to the will
following
Service
Procedurewith
for details.
SERVICE
PROCEDURE
1.
In
the
rear
chassis
wire
harness
-14405-,
cut
Circuits
712
P(18)
and
716
Y(18)
going
to
the
ABS
control
module
located on
the rear chassis.
2.
Cut circuits at least 76mm (3") from the ABS control module connector, Pins A3 and B3 of the ABS control module connector.
a.
712 - Circuit number P - wire color Purple - (18) wire size
b.
716 - Circuit number Y - wire color Yellow - (18) wire size
3.
Seal the cut wires with dual wall adhesive shrink tubing (both ends of cut wires).
4.
The circuit information may also be found in Section 06-09 of the appropriate Heavy Truck Service Manual.
NONE
OTHER APPLICABLE ARTICLES:
WARRANTY STATUS: Eligible Under Basic Warranty Coverage And Emissions Warranty Coverage
LABOR ALLOWANCE
DEALER CODING
OASIS CODES: 204000, 206000, 290000, 301000, 390000
98-24, Publication Date: NOVEMBER 24, 1998
MEDIUM/HEAVY
TRUCK:
1996-98 AEROMAX,
LOUISVILLE
This TSB article is being republished in its entirety to revise the Service Procedure and provide artwork.
ISSUE:
The
panel
that
contains
parking
brake
valve on
truck
models and the parking
brake valve and trailer air supply valve on tractor
models
or
trucks
with
anthe
optional
trailer
package
may
parking brake or the trailer
air supply
valve
resulting
inbe
thebroken/cracked.
panel cracking. This may be caused by aggressive actuation of either the
ACTION:
Replace
the
instrument
panel
plate
with
a
revised
plate.
The
revised
instrument
panel
plate is thicker and has greater strength to reduce
the possibility of cracking. Refer to the following Service Procedure for details.
SERVICE
PROCEDURE
Refer to Figure 1.
Figure
1. 1 - Article
Remove98-24-3
the trailer brake control valve knob by pulling it straight away from the RH instrument panel finish panel.
2.
Remove the eight (8) screws from the RH instrument panel finish panel.
WARNING:
DO
NOT
DISCONNECT
THE
AIR LINES.
3.
Disconnect the electrical
connectors
and position the RH instrument panel finish panel out of the way.
4.
Remove the four (4) screws from the brake control valve and position the brake control valve out of the way.
5.
Remove
threevalve
(3) screws
air
supplythe
control
out of retaining
the way. the trailer air supply control valve to the instrument panel plate and position the trailer
6.
Remove
remaining
three
(3) screws
from the instrument panel plate and move the instrument panel plate rearward until it
clears thethe
trailer
air supply
control
valve knobs.
7.
Slide
the Sterling Truck Company
Dashair
Panel
Reinforcement
between the Instrument Panel Plate
(XC45-80044D28-AAW)
and the trailer
supply
control valve(18-37257-000)
assembly, -2A622-.
8.
Reverse Steps 1-7 to reinstall.
OTHER APPLICABLE
ARTICLES: NONE
SUPERSEDES: 98-19-1Eligible Under Basic Warranty Coverage
WARRANTY STATUS:
LABOR ALLOWANCE
DEALER CODING
OASIS CODES: 107000, 301000, 302000
98-24, Publication Date: NOVEMBER 25, 1998
FORD:
1981-99 CROWN
ESCORT VICTORIA
1983-99
1984-88 TEMPO
EXP
1984-94
1985-99 PROBE
TAURUS
1986-97
1988-91
1993-99 FESTIVA
MUSTANG
1994-97
1995-99 ASPIRE
CONTOUR
1996-97
THUNDERBIRD
LINCOLN-MERCURY:
1983-99
GRAND MARQUIS
1984-86 CONTINENTAL,
CAPRI
1984-87
1984-94 LN7
TOPAZ
1985-99
1988-92 SABLE
MARK VII
1991-94
CAPRI
1993-98
VIII
1993-99 MARK
TRACER
1995-99
MYSTIQUE
1996-97
COUGAR, TOWN CAR
1999
COUGAR
MERKUR:
1985-88
XR4TI
1988 SCORPIO
LIGHT
1981-96
BRONCO
1981-97TRUCK:
F SUPER DUTY,
F-250
HD, LD
F-350
1981-99
ECONOLINE,
F-150,
F-250
1983-99
1984-90 RANGER
BRONCO II
1984-97
1991-99 AEROSTAR
EXPLORER
1993-99
VILLAGER
1995-99 EXPEDITION,
WINDSTAR MOUNTAINEER
1997-99
1998-99
NAVIGATOR
1999 SUPER
DUTY F SERIES
MEDIUM/HEAVY
TRUCK:
1984-99
& B SERIES
1988-97 F
CARGO
SERIES
1996-98
AEROMAX,
LOUISVILLE
ISSUE:
Ford
Motor
Company
has released a new Electrical Grease (F8AZ-19G208-AA) to reduce the possibility of moisture corrosion at the
terminals.
ACTION:
Add the new grease during electrical connection repair.
CAUTION:
ELECTRICAL
CONNECTOR GREASE SHOULD NOT BE USED IN HIGH VOLTAGE CONNECTIONS FOR SPARK PLUG AND
COIL WIRE APPLICATIONS.
PROPER USES OF THE NEW ELECTRICAL GREASE INCLUDE:
Electrical Connectors
Battery Connections
Light Sockets
Starter Terminals
DO NOT USE ON:
Spark Plug Wires
Coil Wires
Spark Plug-to-Coil Connections
Low Current Flow Switches (12V Systems less than 0.1 amp)
NONE
OTHER APPLICABLE ARTICLES:
INFORMATION ONLY
WARRANTY STATUS:
OASIS CODES: 201000, 201100, 201200, 202000, 203000, 203200, 204000, 205000, 601300
98-25, Publication Date: DECEMBER 8, 1998
MEDIUM/HEAVY
TRUCK:
1996-98 AEROMAX,
LOUISVILLE
This TSB article is being republished in its entirety to revise the Service Procedure.
ISSUE:
The
Front
End
Accessory
Drive
(FEAD) belt may wear
and/orbracket
come off
on some
with a Detroit
This
be
due
to
the
air
conditioning
compressor/alternator
support
wearing
andvehicles
causingequipped
a misalignment
with theDiesel
other engine.
pulleys in
themay
FEAD system.
ACTION:
Replace
two
(2)
of
the
air
conditioning
compressor
support
brackets
with
revised
brackets
and
install
spacers
accordingly.
Revise
alternator bracket if needed. Refer to the following Service Procedure for details.
SERVICE PROCEDURE
NOTE:
A NEW BANDED DRIVE BELT IS AVAILABLE FOR THE ALTERNATOR. REFER TO TSB «97-9-22».
NOTE:
THE
FOLLOWING
PROCEDURES
PROVIDE
INFORMATION
TO REPLACE
THESPLIT
EXISTING
FEADCURRENTLY
SPLIT BUSHINGS
WITHON
AN
ADJUSTABLE
SPACER
TO
INCREASE
THE BEARING
SURFACE
WHERE
THE
BUSHING
PRESSES
THE
BACK SIDE
OF THE
COMPRESSOR/ALTERNATOR
BRACKET.
FOR REMOVAL
AND REPLACEMENT
OF THE
COMPRESSOR
AND
ALTERNATOR,
PLEASE REFER
TOSUPPORT
THE 1997
SERVICE
MANUAL,
SECTIONS
12-03A
AND 14-02
FOR
SPECIFIC PROCEDURES,
WARNINGS,
ANDLOUISVILLE/AEROMAX
CAUTIONS FOR THESE
COMPONENTS
AND
SYSTEMS.
«97-19-24»
FOR VEHICLES WHICH "HAVE" ALREADY BEEN REVISED USING TSB
1»)
AIR 1.
CONDITIONING
(«FIGURE
DisconnectCOMPRESSOR
the negative battery
cable.
2.
Remove and retain both the A/C compressor and alternator drive belts.
3.
Remove and retain the fasteners that attach the A/C compressor.
4.
Replace
the
front
and
rear
A/C
Compressor
Support Brackets (F7HZ-19E633-AA and F7HZ-19D775-AA) with two (2)
F7HZ-19E633-AA brackets.
5.
Measure
thickness
"B" of compressor/alternator
support bracket
F7HT-10239-CC («Figure 1», Item 2) and space "A" between
the
front and
rear brackets
mounted to the air conditioning
compressor.
NOTE:
THE
SPACER
CAN 2)
BEAS
INSTALLED
ATTO
THE
REAR SIDE
(«FIGURE
1») OROF
AT THE
THE PULLEYS
FRONT SIDE
THE BELTS.
SUPPORT (
«FIGURE
1», ITEM
REQUIRED
ASSURE
PROPER
ALIGNMENT
ANDOF
DRIVE
6.
Adjust
the thickness
of Install
Spacer
(XC4Z-18356-AA)
(«Figure
1», Itemand
3) to
equal gap (A-B) by peeling
off
the 0.003"
shims
the
adjustable
spacer.
the
spacer
between
the
rear bracket
compressor/alternator
support
bracket
(«Figure
1»,onthe
Item
2).
If
gap
(A-B)
is
larger
than
1.65mm
(0.065")
(maximum
thickness
of
the
spacer),
use
a
Flatwasher
(44880-S2)
and
spacer to fill the gap.
7.
Reinstall the A/C compressor and drive belts using carryover hardware and torque bolts to specification.
2»)
ALTERNATOR
(«FIGURE
1.
Disconnect
the negative battery cable.
2.
Remove and retain both the A/C compressor and alternator drive belts.
3.
Remove and retain the fasteners that attach the alternator.
4.
Push the assuring
alternatorthat
splitthe
bushing
rearward
bethe
flush
with
theback
alternator
boss and
cut offboss.
the excess length of the
bushing,
bushing
is flush to
with
front
and
side ofhousing
the alternator
housing
5.
Measure
thickness
"B" of
compressor/alternator
support bracket F7HT-10239-CC («Figure 2», Item 2) and space "A" between
the
alternator
front and
rear
bosses.
NOTE:
THE SPACER
CAN 2)
BEAS
INSTALLED
ATTO
THE
REAR SIDE
(«FIGURE
1») OROF
AT THE
THE PULLEYS
FRONT SIDE
THE BELTS.
SUPPORT (
«FIGURE
2», ITEM
REQUIRED
ASSURE
PROPER
ALIGNMENT
ANDOF
DRIVE
6.
Adjust
the thickness
Spacerbetween
(XC4Z-18356-AA)
(«Figureboss
2», Item
3) to equal gap (A-B) by
peeling
off the(«Figure
0.003" layers
of
the
Install
theofspacer
alternator
and compressor/alternator
support
bracket
2», Item
2). Ifspacer.
gap (A-B)
is larger
than the 0.065"the
thick
spacer,rear
use a Flatwasher
(44880-S2) and spacer
to fill
the gap.
7.
Reinstall
the alternator
andas
drive
belts
carryover
plus
added 9/16" Flatwasher (44880-S2) to the back side
of
the alternator
rear boss
shown
inusing
«Figure
2» and hardware
torque bolts
to an
specification.
«97-19-24»
FOR VEHICLES WHICH "HAVE NOT" BEEN PREVIOUSLY SERVICED USING TSB
:
1»)
AIR 1.
CONDITIONING
(«FIGURE
DisconnectCOMPRESSOR
the negative battery
cable.
2.
Remove and retain both the A/C compressor and alternator drive belts.
3.
Remove and retain the fasteners that attach the A/C compressor and alternator.
4.
Remove and discard the two (2) existing support brackets (F7HT-19E633-AA and F7HT-19D775-AA).
NOTE:
IF
THE
PART IS
NUMBER
OF THE COMPRESSOR/ALTERNATOR
BRACKET
IS F7HT-10239-CD, THE MACHINING
OPERATION
"NOT" REQUIRED
AND SHOULD NOT BE DONESUPPORT
- GO TO STEP
6.
5.
Remove the
compressor/alternator
support
bracket
F7HT-10239-CC
(«Figure
1», Itemhole
2) and
have a(2.01")
qualified
machine
shop
machine
(0.12")hole
of the front
and rear
surfaces
at the compressor
mounting
to 51mm
from
the
centerlineoff
of 3.1mm
the pivot
mounting
centerline
of
the
bolt hole. («Figure 3»). Make sure the surfaces are parallel to each other and perpendicular to the
6.
Replace the front and
rear A/C Compressor Support Brackets (F7HT-19E633-AA and F7HT-19D755-AA) with two (2)
F7HZ-19E633-AA
brackets.
NOTE:
THE SPACER
CAN 2)
BEAS
INSTALLED
ATTO
THE
REAR SIDE
(«FIGURE
1») OROF
AT THE
THE PULLEYS
FRONT SIDE
THE BELTS.
SUPPORT (
«FIGURE
1», ITEM
REQUIRED
ASSURE
PROPER
ALIGNMENT
ANDOF
DRIVE
7.
Measure
thickness
"B" of
rear
brackets
mounted
to compressor/alternator
the A/C compressor. support bracket («Figure 1», Item 2) and space "A" between the front and
8.
Adjust
the
thickness
of
Spacer
(XC4Z-13856-AA)
(«Figure
1»,
Item
3)
to
equal
gap
(A-B)
by
peeling
off
the
0.003" shims of
the adjustable
between
theuse
rearthe
bracket
compressor/alternator
Item
2). If gap spacer.
(A-B) is Install
larger the
thanspacer
1.65mm
(0.065"),
spacerand
andthe
a Flatwasher
(44880-S2).support bracket («Figure 1»,
2»)
ALTERNATOR
(«FIGURE
1.
Disconnect the negative battery cable.
2.
Remove and retain both the A/C compressor and alternator drive belts.
3.
Remove and retain the fasteners that attach the alternator.
4.
Push the assuring
alternatorthat
splitthe
bushing
rearward
bethe
flush
with
theback
alternator
boss and
cut offboss.
the excess length of the
bushing,
bushing
is flush to
with
front
and
side ofhousing
the alternator
housing
5.
Measure
thickness
"B" of
compressor/alternator
support bracket F7HT-10239-CC («Figure 2», Item 2) and space "A" between
the alternator
front and
rear
bosses.
NOTE:
THE SPACER
CAN 2)
BEAS
INSTALLED
ATTO
THE
REAR SIDE
(«FIGURE
1») OROF
AT THE
THE PULLEYS
FRONT SIDE
THE BELTS.
SUPPORT (
«FIGURE
2», ITEM
REQUIRED
ASSURE
PROPER
ALIGNMENT
ANDOF
DRIVE
6.
Adjust
the thickness
Spacerbetween
(XC4Z-18356-AA)
(«Figureboss
2», Item
3) to equal gap (A-B) by
peeling
off the(«Figure
0.003" layers
of
the Ifspacer.
Install
theofspacer
alternator
and compressor/alternator
support
bracket
2», Item
2).
gap (A-B)
is larger
than the 0.065"the
thick
spacer,rear
use a Flatwasher
(44880-S2) and spacer
to fill
the gap.
7.
Reinstall
the alternator
andas
drive
belts
carryover
plus
added 9/16" Flatwasher (44880-S2) to the back side
of
the alternator
rear boss
shown
inusing
«Figure
2» and hardware
torque bolts
to an
specification.
OTHER
APPLICABLE ARTICLES:
≤
97-9-22
SUPERSEDES: 97-19-24
WARRANTY STATUS: Eligible Under Basic Warranty Coverage
LABOR ALLOWANCE
DEALER CODING
OASIS CODES: 203100, 206000, 208200, 303000, 402000, 497000, 499000, 702000, 702100
Figure 1 - Article 98-25-7
Figure 2 - Article 98-25-7
Figure 3 - Article 98-25-7
98-25, Publication Date: DECEMBER 14, 1998
MEDIUM/HEAVY
TRUCK:
1996-98 AEROMAX,
LOUISVILLE
ISSUE:
Some
equipped
with frame-mounted vertical muffler supports may exhibit a crack along the pipe bend. This may be caused by
fatiguevehicles
of the pipe
material.
ACTION:
Replace the
support
The revised
cracking.
Refer
to thepipe.
following
text for support
details. pipe has been reinforced internally with a doubler pipe to reduce the possibility of
If
a crack
is found inLouisville/AeroMax
the production muffler
support
pipe or service
support
pipe bend,
install
a revised
Support
(XC4Z-5D220-AA)
per
the appropriate
Service
or Workshop
Manual
using standard
Ford
exhaust
system
repairPipe
procedures.
NONE
OTHER APPLICABLE ARTICLES:
WARRANTY STATUS: Eligible Under Basic Warranty Coverage
LABOR ALLOWANCE
DEALER CODING
OASIS CODES: 403000, 702000, 702200, 703000
98-26, Publication Date: DECEMBER 22, 1998
MEDIUM/HEAVY
TRUCK:
1996-98 AEROMAX,
LOUISVILLE
ISSUE:
Grounding
of
electrical components
the frame
jumpcomponents
starting a vehicle
usinginthe
framewith
as athe
ground
damage
to the
Radio
Frequency
Interference
(RFI) groundtostrap
and/ororother
that come
contact
frame.may
Thecause
electrical
system
does
not
use
the frame
as a ground.
ACTION:
If
concerns
with
the
RFI
strap
are
experienced,
advise
customer
of
wiring
protocol.
Repairs
to
the
vehicle
caused
by
improper
grounding
of electrical devices are not covered under warranty. The frame should not be used as an electrical ground.
The strap
from
the starter
to the
framebuilt
is an
RFI
ground
and
is notthat
designed
totofunction
as anThe
electrical
power
ground.
The
electrical
system
has
dedicated
ground
circuits
into
the
wiring
harness
groundThese
thecircuits
battery.
vehicle
is amps
available
customer
access
circuits
thatGuidelines
should
befor
used
for
power
and ground
connections.
are fused
at 30
for awith
maximum
current
draw ofthat
24 amps.
of both
customer
circuits
are should
specified
in
the Body
Builder
Manual.
Iforthe
requires
a
circuit
more
than
24use
amps,
bothequipment
the access
power to
and
ground
bethen
taken
fromthe
either
the
thecustomer
starter
relay.
Customersrequires
should also
not
ground
electrical
a trailer
frame and
attach
trailer
tostarter
the tow
vehicle
or tractor.
NONE
OTHER APPLICABLE ARTICLES:
INFORMATION ONLY
WARRANTY STATUS:
OASIS CODES: 201000, 203000, 203200, 205000
98-26, Publication Date: DECEMBER 22, 1998
MEDIUM/HEAVY
1982-97 L SERIESTRUCK:
ISSUE:
Customers may request a more durable Hydromount Cab Mount when replacement of the mount becomes necessary.
ACTION:
When
Hydromount
replacement
is required,
use the
Hydromount Cab Mount (XC4Z-18A160-AA (RH) or XC4Z-18A160-BA (LH)).
The revised
mount contains
higher
strength steel
for revised
mount housing.
NONE
OTHER APPLICABLE ARTICLES:
INFORMATION ONLY
WARRANTY STATUS:
OASIS CODES: 303000, 304000, 390000