1
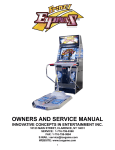
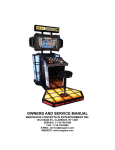
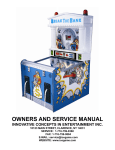
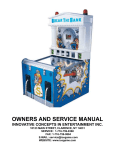
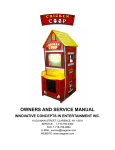
FOR
INDOOR
USE
ONLY
OWNERS AND SERVICE MANUAL
INNOVATIVE CONCEPTS IN ENTERTAINMENT INC.
10123 MAIN STREET, CLARENCE, NY 14031
SERVICE: 1-716-759-0360
FAX: 1-716-759-0884
E-MAIL: [email protected]
WEBSITE: www.icegame.com
1
TABLE OF CONTENTS
FOREWORD……...…………………………………....PAGE 3
INTRODUCTION…………………………….………....PAGE 4
GAME FEATURES
GAME PLAY
INSTALLATION………………………….……..……...PAGE 5
BEFORE YOU BEGIN
INSTALLATION
PROGRAMMING OPTIONS…………………..……..PAGE 6 & 7
INTRODUCTION
HOW TO ADJUST OPTIONS
USING THE PROGRAMMING OPTIONS
MAINTENANCE…………………………………..…...PAGE 8 & 9
SCHEDULED MAINTENANCE
QUICK TROUBLESHOOTING……………………....PAGE 10
GAME REPAIR……………………………………......PAGE 11 & 12
OPERATIONAL BACKGROUND
TROUBLESHOOTING PHILOSOPHY
MECHANICAL REPAIR
PARTS LISTINGS…………………………………......PAGE 13
WARRANTY INFORMATION………………………...PAGE 14 & 15
ICEDOC CK9001
REVISION A
06-26-03
2
FOREWORD
This Manual has been compiled to assist those whose task it is to operate and maintain the
KIDDIE COASTER™. It is essential that all operating and maintenance staff responsible for
the safe operation of the simulator completely understand and comply with information herein.
Further advice and field support is available from:
I.C.E. SERVICE DEPARTMENT
716-759-0360
NORMAL BUSINESS HOURS ARE:
MONDAY – FRIDAY, 8:00 AM TO 5:00 PM
Warnings:
Operation of the KIDDIE COASTER™ without the proper electrical requirements will void the
warranty.
OPERATION OF THIS EQUIPMENT IN A MANNER NOT SPECIFIED BY THE
MANUFACTURER MAY RESULT IN THE PROTECTION DEVICES NOT
AFFORDING THE LEVEL OF SAFETY NORMALLY PROVIDED.
ONLY TRAINED PERSONNEL ARE ALLOWED TO MAINTAIN THE SYSTEM.
THE KIDDIE COASTER™ IS A DYNAMIC MOTION SIMULATOR RIDE.
ANYONE WHO IS PREGNANT OR THINK THEY MAY BE, ARE SUBJECT TO
MOTION SICKNESS, HAVE BACK OR NECK PROBLEMS, OR UNDER THE
INFLUENCE OF ALCOHOL OR DRUGS, HAVE EPILEPSY, HAS A HEART
COMPLAINT, OR OTHER MEDICAL CONDITION, OR IS OF A NERVOUS
DISPOSITION, SHOULD USE CAUTION WHEN USING THIS RIDE.
SMALL CHILDREN SHOULD BE SUPERVISED BY AN ADULT.
NOTICE
Except as may be otherwise provided by contract, this SERVICE MANUAL, including the
drawings and specifications are the property of INNOVATIVE CONCEPTS in ENTERTAINMENT. They are issued in strict confidence and shall not be reproduced, copied or used as a
basis for manufacture or sale of any apparatus.
3
INTRODUCTION
GAME FEATURES
GAME PLAY
Thank you for purchasing the new KIDDIE
COASTER™ from I.C.E. This coaster utilizes all the
technology of its predecessor. The coaster motion is
limited to a “back and forth” motion. This unit was
designed for children so a smoother motion is
necessary.
A person may begin his experience after he or she is
seated securely inside the coaster. (THIS RIDE
SHOULD NEVER BE RIDDEN WHILE STANDING.
ARMS AND LEGS MUST REMAIN IN THE
COASTER AT ALL TIMES) He or she may begin by
inserting the appropriate number of credits.
Then the player must determine which coaster he or
she would like to ride
If a player does not choose a coaster within 1
minute, he or she will lose their credits.
Thick 1/8” metal panels and marine grade water resistant plywood make the game extremely durable.
All metal surfaces are epoxy powder coated for excellent wear properties.
Both side panels of the coaster are covered with a
back printed polycarbonate graphic. This adds a
great look with a durable finish.
As the unit begins to move the player is advised to
hold on to handle bar at all times. A PLAYER MUST
NEVER TRY TO EXIT OR BOARD THE COASTER
ONCE THE MOTION HAS STARTED.
Cost was not the issue when selecting the drive
motor, this is the heart and sole of the piece and
needed to be “bullet proof”. Leeson and Hampton
were the manufacturers selected.
NOTE : ALL PERSON NOT RIDING THE
COASTER MUST REMAIN A SAFE DISTANCE
AWAY.
Electronics and sounds are the state of the art in
digital technology. Robust design ensures a long
trouble free life for your game. The game is very
flexible with its programming options to allow it to be
tailored to most locations easily.
4
INSTALLATION
5. BE SURE THE COASTER IS IN AN AREA
CLEAR OF ALL OTHER OBSTACLES.
I.C.E. RECOMMENDS THAT NOTHING
SHOULD BE CLOSER THAN 10 FEET TO
THE COASTER.
BEFORE YOU BEGIN
WARNING: WHEN INSTALLING THIS GAME, A
GROUNDED A.C. RECEPTACLE MUST BE USED.
FAILURE TO DO SO COULD RESULT IN INJURY
TO YOURSELF OR OTHERS. FAILURE TO USE A
GROUNDED RECEPTACLE COULD ALSO CAUSE
IMPROPER GAME OPERATION, OR DAMAGE TO
THE ELECTRONICS
TO OPERATE THE GAME AT VOLTAGES OTHER
THAN THOSE IT WAS DESIGNED FOR, PLEASE
CONTACT OUR SERVICE DEPARTMENT FOR
VOLTAGE CONVERSION INFORMATION.
DO NOT DEFEAT OR REMOVE THE GROUNDING
PRONG ON THE POWER CORD FOR THE SAME
REASON AS GIVEN ABOVE. USING AN IMPROPERLY GROUNDED GAME COULD VOID YOUR
WARRANTY.
IF YOU HAVE ANY QUESTIONS OR COMMENTS REGARDING INSTALLATION OR
PROPER FUNCTION OF THE GAME,
PLEASE CONTACT OUR SERVICE DEPARTMENT AT:
HAVE A QUALIFIED ELECTRICIAN CHECK
YOU’RE A.C. RECEPTACLE TO BE SURE THE
GROUND IS FUNCTIONING PROPERLY.
PHONE:
FAX:
E-MAIL:
THIS GAME IS DESIGNED TO DISSIPATE STATIC
ELECTRICITY THROUGH THE GROUNDING
PLANE OF THE GAME. IF THE A.C. GROUND
DOES NOT WORK, THE GAME COULD DISCHARGE STATIC ELECTRICITY THROUGH THE
GAME CIRCUITRY, WHICH COULD CAUSE DAMAGE.
INSTALLATION
The game comes ready to play with just a few simple things to keep in mind:
1. When installing the game, be sure you use a
grounded A.C. outlet. If necessary, have it
checked to be sure the ground is good.
2. Make sure the game is level after installation.
It is necessary to make sure the game is
level so the game will work properly.
3. The plug comes from under the ride, once
the ride is plugged in, turn the illuminated
switch to the “ON” position. See the figure
below.
4. It is advised to test the DBV and coin mechanisms before opening the unit for use.
5
1-716-759-0360
1-716-759-0884
[email protected]
PROGRAMMING OPTIONS
DVD Setup
INTRODUCTION
Connect the yellow video cable to the “VIDEO 1”
connector, located in the group of connectors
labeled “LINE OUT” on the back of the DVD.
Connect the red audio cable to the “R FRONT”
connector, located in the group of connectors
labeled “5.1CH OUTPUT” on the back of the
DVD.
Connect the white audio cable to the “L FRONT”
connector, located in the group of connectors
labeled “5.1CH OUTPUT” on the back of the
DVD.
Connect the black RCA cable from the black box
to the “CENTER” connector, located in the
group of connectors labeled “5.1CH OUTPUT” on the back of the DVD.
Do not connect the black 1/8” plug from the black
box until the DVD setup is complete.
This section will describe in detail each of the programming options and how they work.
PLEASE READ THIS SECTION THOROUGHLY
BEFORE CALLING OUR SERVICE DEPARTMENT.
MOST QUESTIONS REGARDING SET-UP AND
OPERATION WILL BE FULLY EXPLAINED HERE.
HOW TO USE THE PROGRAMMING OPTIONS
CREDIT SETUP
Turn off game and then back on.
When the DVD player reaches the “PLEASE
STANDBY” screen, enter the code using the
buttons inside the coin door. The code is printed
on a decal placed near the buttons
Press the “2” button to enter Set-Up. The “1”
button exits Set-Up.
Press the “1” button to select Credits Set-Up or
the “2” button to select Free Play Set-Up. In the
Credits Set-Up screen you can select the number of credits needed per ride. In the Free Play
screen you can select the option of unlimited
rides.
Once a selection is made you will be asked to
press the “STOP” to return to main menu. Press
the “1” button to select Normal Operation.
Turn on DVD player by pushing in the “POWER”
button on the front of the player. You should
see the DVD display on the TV screen.
Using the DVD remote, press the “DISPLAY”
button located in the left bottom corner of the
remote. The Control Menu appears.
Press the Up/Down buttons to select SETUP
(toolbox icon). The options for “SETUP” appear.
Press the Up/Down buttons to select “CUSTOM”,
then press ENTER. The Setup Display appears.
Press the Up/Down buttons to select “CUSTOM
SETUP”, then press ENTER. The Custom
Setup Display appears.
TV Setup
1. Connect video and audio cables from DVD to the
inputs on the back of the TV.
2. Using the TV remote, press the “POWER” button,
located in the upper right corner of the remote, to
turn on the TV. You may have point the remote
down through the glass for the TV to sense the remote.
3. Press the “INPUT” button located under the
“POWER” button to change the video input.
4. You should now see the playing DVD or the DVD
on screen commands if the DVD is connected and
on. The TV will remain blue if there is no active input.
5. This completes the TV setup. The volume can be
raised or lowered using the remote volume control
buttons.
6
PROGRAMMING OPTIONS
Press the Up/Down buttons to select “AUTO
PLAY”, then press ENTER. The settings for
Auto Play appear.
Press the Up/Down buttons to select “DTS”, then
press ENTER. Press the Up/Down buttons to
select “DTS”, then press ENTER to select it
as the setting. Press the Left button to return
to the Setup Display.
Press the Up/Down buttons to select “TIMER”,
then press ENTER. Press the Left button to
return to the Setup Display.
Press the Up/Down buttons to select “AUDIO
SETUP”, then press ENTER. The settings for
Audio Setup appear.
Press the Up/Down buttons to select “DIGITAL
OUT”, then press ENTER. Press the Up/
Down buttons to select “ON”, then press ENTER.
Press the Up/Down buttons to select “DOLBY
DIGITAL”, then press ENTER. Press the Up/
Down buttons to select “DOLBY DIGITAL”,
then press ENTER to select it as the setting.
Press the Up/Down buttons to select “SPEAKER
SETUP”, then press ENTER.
Press the Up/Down buttons to select “SIZE”,
then press ENTER. Set all speakers to
Large.
Press the DISPLAY button twice to exit the setup
screens and complete the DVD setup process.
Connect the black 1/8” plug from the black box to
the jack located near the power cord on the
back of the DVD.
7
MAINTENANCE
GENERAL MAINTENANCE
MONITOR AND GLASS
This game has been designed to be as trouble and
maintenance free as possible.
The monitor glass can be easily removed for the
best results. A standard glass cleaner may be used
to clean the glass and the monitor.
With this in mind, the only basics are to keep the
game clean. Below are the main areas to take care
of with specific directions.
LUBRICATION
BASE BELLOWS
There is very little maintenance to the coaster. The
DC drive motor requires no lubrication.
After several years with excessive use the brushes
may need to be replaced.
Once a year or sooner depending on usage, the reducer bearing will require some grease.
The bellows is made from PVC and vinyl and may
be cleaned with Windex or soapy water.
Over time the bellows may begin to crack or ripe. At
this point the bellows MUST be replaced.
CABINET
The cabinet plastic and decals can be cleaned with
soapy water or spray furniture polish. DO NOT use
any alcohol or petroleum based cleaners as they
could damage the plastic or printed parts.
COIN MECHANISMS
The coin mechanisms should be cleaned
periodically, as they will accumulate dirt, which will
cause the coins to stick.
Remove the coin mech and clean them in a dish detergent solution and a stiff brush. Dry thoroughly and
re-install.
DBV
The DBV requires little to no maintenance. An
occasional cleaning and blow off with an air nozzle
is all that’s required.
8
SCHEDULED MAINTENANCE
4. Lower the seat by turning the motor wheel in the
opposite direction by hand, until the Pin
Assembly is returned to the two o’clock position.
MONTHLY MAINTENANCE
In order to keep your KIDDIE COASTER™ running
smoothly for many years, you will have to perform
maintenance in the following areas at least once
each month, or every 1000 plays. Follow the simple
instructions on this page.
Wipe Off Opto Sensors
1. With a clean cloth, gently wipe off Opto Sensors
very carefully, as shown below. (The Opto
Sensor is located to the right of the Pin
Assembly.)
MAKE SURE GAME IS UNPLUGGED BEFORE
BEGINNING ANY OF THESE PROCEDURES.
The first three areas are found in the lower front
cabinet of the machine, (SEAT SIDE.)
1. Open front cabinet by removing 3 bolts.
2. Carefully pull cabinet cover down.
Grease Bearing Block
OPTO
SENSOR
1. Using a multipurpose grease, apply 3 pumps to
the bearing block as shown below.
2. Once you have finished maintenance on the
previous three items, you must close the cabinet
cover and replace the 3 bolts, tightening them to
secure the cover.
The fourth area is located in the upper rear portion
of the game. (Back of Video Monitor).
Clean DVD Player Opto Sensor
Clean Pin Assembly
1. Open rear of machine by removing 3 bolts.
2. Lift up cabinet panel, laying it on top of video
monitor section of game.
3. Remove Opto Sensor from bracket as shown
below.
1. Raise seat by turning motor wheel, (on right
side), by hand until the pin assembly is visible.
(with pin in the 12 o’clock position.)
2. Clean Pin Assembly with Rubbing Alcohol.
(DO NOT USE SOAP AND WATER.)
OPTO SENSOR
PIN
PIN
ASSEMBLY
4. With a clean cloth, gently wipe off Opto Sensor
very carefully, as shown above. Be especially
careful not to snap Opto Sensor.
5. Replace Opto Sensor into bracket.
6. Close panel and re-secure with 3 bolts.
3. If rust or dirt appears on the Pin Assembly, this
may cause the game to malfunction. Use a
Black Permanent Ink Marker to paint Pin
Assembly, DO NOT PAINT THE PIN. The pin
must stand out as silver from the assembly,
which should be black.
9
QUICK TROUBLESHOOTING
GAME WILL NOT TAKE OR ADD MONEY CORRECTLY:
•
•
•
•
Micro switch not working or returning properly. Check and repair or replace as necessary.
Bad Harnessing or connector. Check w/ohm meter and repair as necessary.
Game programming set incorrectly. Check programming option and re-program if necessary.
Bad Main P.C. Board. Check and repair or replace as necessary.
COASTER WILL NOT MOVE / COASTER MOTION IS NOT IN SYNC WITH VIDEO:
•
•
•
•
•
•
•
•
•
Home sensor is not adjusted to proper distance or faulty. Adjust or replace
Motor sensor is not adjusted to proper distance or faulty. Adjust or replace
Motor reflector is not spinning.
DVD player is not playing. Reset programming or replace
Bad DVD. Replace
Motion is turned off. Turn circuit breaker on (side of black box)
Faulty wiring or connections. Check with meter.
Striped gearbox. Replace
Bad motor or brushes. Replace
COASTER HAS NO VIDEO:
•
•
•
•
•
TV is not set to video. See programming
DVD player is not playing or programmed properly. See programming or replace DVD player
DVD is bad. Replace
Loose connection. Check connections
Game is not turned on or plugged in.
10
GAME REPAIR
WARNING: ALWAYS REMOVE POWER TO
THE GAME BEFORE ATTEMPTING ANY
SERVICE, UNLESS NEEDED FOR SPECIFIC
TESTING.
FAILURE TO OBSERVE THIS PRECAUTION
COULD RESULT IN SERIOUS INJURY TO
YOURSELF OR OTHERS.
TROUBLESHOOTING
PHILOSOPHY
To find problems with the game, always first check
what should be obvious. See that the game is
plugged in, and that all of the fuses on the game are
good. This includes the fuse that is located INSIDE
the power module.
OPERATIONAL
BACKGROUND
Next, check to see that all of the connectors are
firmly seated and that none of the wires have been
pulled out of them. This will help you to know if you
have a problem with a specific component, or maybe
a problem with either the wiring or the Main P.C.
Board.
The KIDDIE COASTER™ game has been
manufactured with modular design in mind. Almost
everything in the game can be EASILY removed for
servicing. This makes it much easier for the
repairman as he / she can work in a quieter less
distracting environment away from the Game Room
floor.
Use extreme caution when using probes or voltmeters if the game is powered up. If doing continuity
checks, it is important to disconnect the harnessing
at both ends, as attached they may yield erroneous
results.
Coin and low ticket sensing are done with
conventional micro switches. In all areas of critical
importance, optical sensors were developed
specifically, and optimized for their particular
application.
If a P.C. Board is suspected as the cause of a problem, check to see that all of the components on the
board are firmly attached. Pay special attention to
any socketed devices.
All P.C. Boards are made of premium quality board
material and use time proven components to assure
you of the most reliable designs possible.
If light bulbs are suspected, swap them with one that
is known to work to narrow the problem down to either a bulb or P.C. Board.
We have put forth our best efforts and tested this
game extensively to assure the best possible
performance under the widest variety of operating
conditions. We are ALWAYS however interested in
our customers input for product improvement. If you
have any questions or comments please feel free to
contact our service department.
I.C.E. SERVICE DEPARTMENT
716-759-0360
NORMAL BUSINESS HOURS ARE:
MONDAY – FRIDAY, 8:00 AM TO 5:00 PM
11
GAME REPAIR
MECHANICAL REPAIR
MOTOR / HOME SENSOR
REPLACEMENT
1) Unplug the coaster before any internal work is
done.
2) Remove the 5/32 Allen screws in the back of the
seat.
3) Using a knife remove the hot melt glue covering
the screw.
4) A number 2 Phillips screw driver will be needed
to remove the sensor. (note: take extra care
removing this screw because it is thread locked)
5) Remove all zip ties this hold the wires together.
6) Unplug the sensor harness from the black
electronic box in the front of the coaster.
7) It is very important that the spacing remains the
same.
IF YOU HAVE ANY QUESTIONS OR
COMMENTS, PLEASE CONTACT OUR
SERVICE DEPARTMENT AT:
716-759-0360
MON. THRU FRI. 8AM - 5PM EST
12
PARTS LISTING
MECHANICAL PARTS
CK4001
CK4002
CK1066
CK2008A
BELLOWS (LOWER SKIRTING)
HANDLE BAR CUSHION
TIE ROD END
GEARBOX (HAMPTON)
ELECTRONIC / ELECTRICAL
CK2039HX
CK2039FX
CK2008X
CK1003X
CK2015X
CK2002X
8522
8521
CK2012
MON19TV
TS2005
CK1030X
CK9001
PCBA OPTO HOME SENSOR ASSEMBLY
PCBA OPTO FAN SENSOR ASSEMBLY
LEESON MOTOR ASSEMBLY
MAIN PCB BOX
DVD PLAYER
TRANSFORMER
15 AMP ILLUMINATED CIRCUIT BREAKER
20 AMP CIRCUIT BREAKER
12 VDC POWER SUPPLY
MONITOR (19” JVC)
BUTTON, LARGE SQUARE 54-0004-31
PROGRAMMING BUTTONS
SERVICE MANUAL
DECALS AND GRAPHICS
CK7001
CK7002
CK7003
CK7004
CK7005
CK7006
CK7007
CK7127
CABINET (LEFT FRONT)
CABINET (LEFT REAR)
CABINET (RIGHT FRONT)
CABINET (RIGHT REAR)
REAR LIGHTS & LICENSE PLATE
BUTTON DECAL (BLUE STREAK)
BUTTON DECAL (GEMINI)
MARQUEE
13
Warranty
I.C.E warrants all components in the KIDDIE COASTER™ game to be free of defects in materials and workmanship for a period of 90 days from the date of purchase. Furthermore, all MAIN P.C. BOARDS are warranted for 180 days.
This warranty does not cover items damaged due to normal wear and tear, subjected to abuse, improperly assembled by the end user, modified, repaired, or operated in a fashion other than that described in the service manual.
If your KIDDIE COASTER™ game fails to conform to the above-mentioned warranty, I.C.E.'s sole responsibility shall be at its discretion to repair or replace any
defective component with a new or remanufactured component of equal to or
greater O.E.M. specification.
I.C.E. will assume no liability whatsoever, for costs associated with labor to replace
defective parts, or travel time associated therein.
I.C.E.'s obligation will be to ship free of charge, replacement parts by U.P.S.
Ground, U.S. mail, or other comparable shipping means. Any express mail or overnight shipping expense is at the cost of the purchaser.
Products will be covered under warranty only when:
·
The serial number of the game with the defective parts is given.
·
The serial number of the defective part, if applicable, is given.
·
Defective parts are returned to I.C.E., shipping pre-paid, in a timely fashion, if
requested by I.C.E.
·
A copy of the sales receipt is available as proof of purchase upon request of
I.C.E.
I.C.E. distributors are independent, privately owned and operated. In their judgment, they may sell parts or accessories other than those manufactured by I.C.E.
We cannot be responsible for the quality, suitability, or safety of any non-I.C.E.
part, or any modification, including labor, which is performed by such a distributor.
14
WARRANTY
ICE Inc warrants that all of its products will be free from defects in material and workmanship.
When placing a warranty request, please be prepared to provide the following information:
·
·
·
Serial Number of Game or Bill of Sale
Machine Type
A Detailed Description of the Equipment Fault Symptoms
ICE product, including Cromptons, Sam’s Billiards, Uniana and Bell Fruit is warranted as follows:
·
·
·
·
·
180 days on the Main PCB and Computers
90 days on all other components (i.e. DBV’s, Ticket Dispensers, etc)
30 days on repaired items
3 years on all Crane Harnessing
9 Months on Printers
ICE Inc shall not be obligated to furnish a warranty request under the following conditions:
·
·
·
Equipment has been subjected to unwarranted stress through abuse or neglect
Equipment has been damaged as a result of arbitrary repair/modification attempts
Equipment that has failed through normal wear and tear
ICE Inc will assume no liability whatsoever for costs associated with labor to replace defective parts or
travel time associated therein.
All defective warranty covered components will be replaced with new or factory refurbished components
equal to OEM specifications. ICE Inc will cover all UPS ground, or comparable shipping means, freight
costs during the warranty period. Expedited shipments are available for an additional charge.
Defective parts are returned to ICE Inc, at the customer’s expense, in a timely fashion.
ICE distributors are independent, privately owned and operated. In their judgment, they may sell parts
and/or accessories other than those manufactured by ICE Inc. We cannot be responsible for the quality,
suitability or safety of any non-ICE part, modification (including labor) that is performed by such a
distributor.
I.C.E. Parts/Service Dept.
Innovative Concepts in Entertainment
10123 Main St.
Clarence, NY 14031
Phone #: (716) - 759 – 0360
Fax #: (716) – 759 – 0884
15