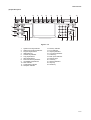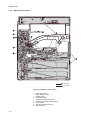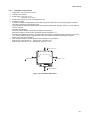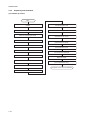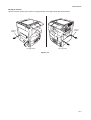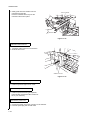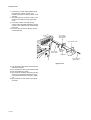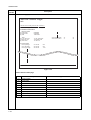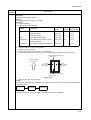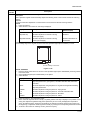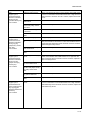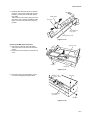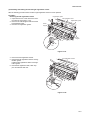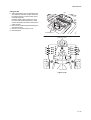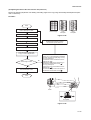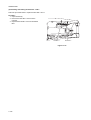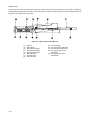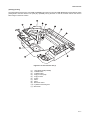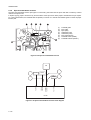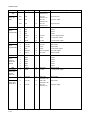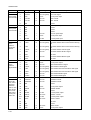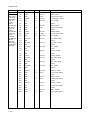
1
KM-3050
KM-4050
KM-5050
SERVICE
MANUAL
Published in Jul ’06
2GN70760
CAUTION
DANGER OF EXPLOSION IF BATTERY IS INCORRECTLY REPLACED. REPLACE ONLY WITH
THE SAME OR EQUIVALENT TYPE RECOMMENDED BY THE MANUFACTURER. DISPOSE OF
USED BATTERIES ACCORDING TO THE MANUFACTURER’S INSTRUCTIONS.
ATTENTION
IL Y A DANGER D’EXPLOSION S’IL Y A REMPLACEMENT INCORRECT DE LA BATTERIE.
REMPLACER UNIQUEMENT AVEC UNE BATTERIE DU MÊME TYPE OU D’UN TYPE RECOMMANDÉ PAR LE CONSTRUCTEUR. METTRE AU RÉBUT LES BATTERIES USAGÉES CONFORMÉMENT AUX INSTRUCTIONS DU FABRICANT.
Revision history
Revision
Date
Replaced pages
Remarks
This page is intentionally left blank.
Safety precautions
This booklet provides safety warnings and precautions for our service personnel to ensure the safety of
their customers, their machines as well as themselves during maintenance activities. Service personnel
are advised to read this booklet carefully to familiarize themselves with the warnings and precautions
described here before engaging in maintenance activities.
Safety warnings and precautions
Various symbols are used to protect our service personnel and customers from physical danger and
to prevent damage to their property. These symbols are described below:
DANGER: High risk of serious bodily injury or death may result from insufficient attention to or incorrect
compliance with warning messages using this symbol.
WARNING: Serious bodily injury or death may result from insufficient attention to or incorrect compliance
with warning messages using this symbol.
CAUTION: Bodily injury or damage to property may result from insufficient attention to or incorrect
compliance with warning messages using this symbol.
Symbols
The triangle ( ) symbol indicates a warning including danger and caution. The specific point
of attention is shown inside the symbol.
General warning.
Warning of risk of electric shock.
Warning of high temperature.
indicates a prohibited action. The specific prohibition is shown inside the symbol.
General prohibited action.
Disassembly prohibited.
indicates that action is required. The specific action required is shown inside the symbol.
General action required.
Remove the power plug from the wall outlet.
Always ground the copier.
1.Installation Precautions
WARNING
• Do not use a power supply with a voltage other than that specified. Avoid multiple connections to
one outlet: they may cause fire or electric shock. When using an extension cable, always check
that it is adequate for the rated current. .............................................................................................
• Connect the ground wire to a suitable grounding point. Not grounding the copier may cause fire or
electric shock. Connecting the earth wire to an object not approved for the purpose may cause
explosion or electric shock. Never connect the ground cable to any of the following: gas pipes,
lightning rods, ground cables for telephone lines and water pipes or faucets not approved by the
proper authorities. ............................................................................................................................
CAUTION:
• Do not place the copier on an infirm or angled surface: the copier may tip over, causing injury. .......
• Do not install the copier in a humid or dusty place. This may cause fire or electric shock. ................
• Do not install the copier near a radiator, heater, other heat source or near flammable material.
This may cause fire. .........................................................................................................................
• Allow sufficient space around the copier to allow the ventilation grills to keep the machine as cool
as possible. Insufficient ventilation may cause heat buildup and poor copying performance. ...........
• Always handle the machine by the correct locations when moving it. ...............................................
• Always use anti-toppling and locking devices on copiers so equipped. Failure to do this may cause
the copier to move unexpectedly or topple, leading to injury. ...........................................................
• Avoid inhaling toner or developer excessively. Protect the eyes. If toner or developer is accidentally ingested, drink a lot of water to dilute it in the stomach and obtain medical attention immediately. If it gets into the eyes, rinse immediately with copious amounts of water and obtain medical
attention. ......................................................................................................................................
• Advice customers that they must always follow the safety warnings and precautions in the copier’s
instruction handbook. .....................................................................................................................
2.Precautions for Maintenance
WARNING
• Always remove the power plug from the wall outlet before starting machine disassembly. ...............
• Always follow the procedures for maintenance described in the service manual and other related
brochures. .......................................................................................................................................
• Under no circumstances attempt to bypass or disable safety features including safety mechanisms
and protective circuits. .....................................................................................................................
• Always use parts having the correct specifications. ..........................................................................
• Always use the thermostat or thermal fuse specified in the service manual or other related brochure when replacing them. Using a piece of wire, for example, could lead to fire or other serious
accident. ..........................................................................................................................................
• When the service manual or other serious brochure specifies a distance or gap for installation of a
part, always use the correct scale and measure carefully. ................................................................
• Always check that the copier is correctly connected to an outlet with a ground connection. .............
• Check that the power cable covering is free of damage. Check that the power plug is dust-free. If it
is dirty, clean it to remove the risk of fire or electric shock. ..............................................................
• Never attempt to disassemble the optical unit in machines using lasers. Leaking laser light may
damage eyesight. ...........................................................................................................................
• Handle the charger sections with care. They are charged to high potentials and may cause electric
shock if handled improperly. ............................................................................................................
CAUTION
• Wear safe clothing. If wearing loose clothing or accessories such as ties, make sure they are
safely secured so they will not be caught in rotating sections. ..........................................................
• Use utmost caution when working on a powered machine. Keep away from chains and belts. ........
• Handle the fixing section with care to avoid burns as it can be extremely hot. ..................................
• Check that the fixing unit thermistor, heat and press rollers are clean. Dirt on them can cause
abnormally high temperatures. ........................................................................................................
• Do not remove the ozone filter, if any, from the copier except for routine replacement. ....................
• Do not pull on the AC power cord or connector wires on high-voltage components when removing
them; always hold the plug itself. .....................................................................................................
• Do not route the power cable where it may be stood on or trapped. If necessary, protect it with a
cable cover or other appropriate item. .............................................................................................
• Treat the ends of the wire carefully when installing a new charger wire to avoid electric leaks. ........
• Remove toner completely from electronic components. ...................................................................
• Run wire harnesses carefully so that wires will not be trapped or damaged. ....................................
• After maintenance, always check that all the parts, screws, connectors and wires that were
removed, have been refitted correctly. Special attention should be paid to any forgotten connector,
trapped wire and missing screws. ...................................................................................................
• Check that all the caution labels that should be present on the machine according to the instruction
handbook are clean and not peeling. Replace with new ones if necessary. ......................................
• Handle greases and solvents with care by following the instructions below: .....................................
· Use only a small amount of solvent at a time, being careful not to spill. Wipe spills off completely.
· Ventilate the room well while using grease or solvents.
· Allow applied solvents to evaporate completely before refitting the covers or turning the power
switch on.
· Always wash hands afterwards.
• Never dispose of toner or toner bottles in fire. Toner may cause sparks when exposed directly to
fire in a furnace, etc. .......................................................................................................................
• Should smoke be seen coming from the copier, remove the power plug from the wall outlet immediately. ............................................................................................................................................
3.Miscellaneous
WARNING
• Never attempt to heat the drum or expose it to any organic solvents such as alcohol, other than the
specified refiner; it may generate toxic gas. .....................................................................................
2GN/2GP/2GR
CONTENTS
1-1 Specifications
1-1-1 Specifications..........................................................................................................................................1-1-1
1-1-2 Parts names............................................................................................................................................1-1-4
(1) Machine.............................................................................................................................................1-1-4
(2) Operation panel.................................................................................................................................1-1-5
1-1-3 Machine cross section ............................................................................................................................1-1-6
1-2 Installation
1-2-1 Installation environment .........................................................................................................................1-2-1
1-2-2 Unpacking and installation ......................................................................................................................1-2-2
(1) Installation procedure ........................................................................................................................1-2-2
(2) Setting initial copy modes................................................................................................................1-2-10
1-2-3 Installing the key counter (option) .........................................................................................................1-2-11
1-3 Maintenance Mode
1-3-1 Maintenance mode .................................................................................................................................1-3-1
(1) Executing a maintenance item ..........................................................................................................1-3-1
(2) Maintenance modes item list.............................................................................................................1-3-2
(3) Contents of the maintenance mode items.........................................................................................1-3-6
1-4 Troubleshooting
1-4-1 Paper misfeed detection .........................................................................................................................1-4-1
(1) Paper misfeed indication ...................................................................................................................1-4-1
(2) Paper misfeed detection conditions ..................................................................................................1-4-2
(3) Paper misfeeds ...............................................................................................................................1-4-11
1-4-2 Self-diagnosis .......................................................................................................................................1-4-22
(1) Self-diagnostic function ...................................................................................................................1-4-22
(2) Self diagnostic codes ......................................................................................................................1-4-23
1-4-3 Image formation problems ....................................................................................................................1-4-44
(1) No image appears (entirely white)...................................................................................................1-4-45
(2) No image appears (entirely black)...................................................................................................1-4-45
(3) Image is too light. ............................................................................................................................1-4-46
(4) Background is visible.......................................................................................................................1-4-46
(5) A white line appears longitudinally. .................................................................................................1-4-46
(6) A black line appears longitudinally. .................................................................................................1-4-47
(7) A black line appears laterally...........................................................................................................1-4-47
(8) One side of the copy image is darker than the other.......................................................................1-4-47
(9) Black dots appear on the image......................................................................................................1-4-47
(10) Image is blurred...............................................................................................................................1-4-48
(11) The leading edge of the image is consistently misaligned with the original. ...................................1-4-48
(12) The leading edge of the image is sporadically misaligned with the original. ...................................1-4-48
(13) Paper creases. ................................................................................................................................1-4-48
(14) Offset occurs. ..................................................................................................................................1-4-49
(15) Image is partly missing....................................................................................................................1-4-49
(16) Fusing is poor..................................................................................................................................1-4-49
(17) Image is out of focus. ......................................................................................................................1-4-49
(18) Image center does not align with the original center. ......................................................................1-4-50
(19) Image is not square.........................................................................................................................1-4-50
1-4-4 Electric problems ..................................................................................................................................1-4-51
1-4-5 Mechanical problems ............................................................................................................................1-4-55
1-5 Assembly and Disassembly
1-5-1 Precautions for assembly and disassembly............................................................................................1-5-1
(1) Precautions .......................................................................................................................................1-5-1
(2) Drum..................................................................................................................................................1-5-1
(3) Toner .................................................................................................................................................1-5-1
1-5-2 Paper feed section ..................................................................................................................................1-5-2
(1) Detaching and refitting the forwarding, paper feed and separation pulleys ......................................1-5-2
(2) Detaching and refitting the MP separation, MP paper feed and MP forwarding pulleys ...................1-5-4
(3) Detaching and refitting the left and right registration cleaner ............................................................1-5-9
2GN/2GP/2GR
1-5-3 Optical section ......................................................................................................................................1-5-11
(1) Detaching and refitting the exposure lamp......................................................................................1-5-11
(2) Detaching and refitting the scanner wires .......................................................................................1-5-13
(3) Detaching and refitting the ISU (reference).....................................................................................1-5-18
(4) Adjusting the position of the ISU (reference)...................................................................................1-5-20
(5) Detaching and refitting the laser scanner unit .................................................................................1-5-21
(6) Adjusting the skew of the laser scanner unit (reference) ................................................................1-5-23
1-5-4 Drum section.........................................................................................................................................1-5-24
(1) Detaching and refitting the drum unit ..............................................................................................1-5-24
(2) Detaching and refitting the main charger unit..................................................................................1-5-25
1-5-5 Developing section................................................................................................................................1-5-26
(1) Detaching and refitting the developing unit .....................................................................................1-5-26
1-5-6 Transfer section ....................................................................................................................................1-5-27
(1) Detaching and refitting the transfer roller unit .................................................................................1-5-27
1-5-7 Fuser section ........................................................................................................................................1-5-28
(1) Detaching and refitting the fuser unit...............................................................................................1-5-28
(2) Detaching and refitting the heat roller separation claws..................................................................1-5-29
(3) Detaching and refitting the press roller............................................................................................1-5-30
(4) Detaching and refitting the fuser heater ..........................................................................................1-5-31
(5) Detaching and refitting the heat roller .............................................................................................1-5-32
(6) Detaching and refitting the fuser unit thermistor 1 and 2.................................................................1-5-33
(7) Adjusting front position of the fuser unit (adjusting lateral squareness) ..........................................1-5-34
1-5-8 Others ...................................................................................................................................................1-5-35
(1) Detaching and refitting the ozone filter 1 and 2...............................................................................1-5-35
(2) Detaching and refitting the dust filter 1 and 2..................................................................................1-5-36
1-6 Requirements on PWB Replacement
1-6-1
1-6-2
1-6-3
1-6-4
Upgrading the firmware...........................................................................................................................1-6-1
Adjustment-free variable resistors (VR) ..................................................................................................1-6-2
Remarks on main PWB replacement......................................................................................................1-6-2
Remarks on scanner PWB replacement.................................................................................................1-6-2
2-1 Mechanical construction
2-1-1 Paper feed section ..................................................................................................................................2-1-1
2-1-2 Main charging section .............................................................................................................................2-1-4
2-1-3 Optical section ........................................................................................................................................2-1-5
(1) Original scanning...............................................................................................................................2-1-6
(2) Image printing....................................................................................................................................2-1-7
2-1-4 Developing section................................................................................................................................2-1-10
(1) Single component developing system.............................................................................................2-1-12
2-1-5 Transfer and separation sections..........................................................................................................2-1-13
2-1-6 Cleaning and charge erasing sections..................................................................................................2-1-14
2-1-7 Fuser section ........................................................................................................................................2-1-15
2-1-8 Eject and switchback sections ..............................................................................................................2-1-16
2-1-9 Duplex section ......................................................................................................................................2-1-17
(1) Paper conveying operation in duplex copying.................................................................................2-1-18
2-2 Electrical Parts Layout
2-2-1 Electrical parts layout..............................................................................................................................2-2-1
(1) PWBs ................................................................................................................................................2-2-1
(2) Switches and sensors .......................................................................................................................2-2-2
(3) Motors ...............................................................................................................................................2-2-4
(4) Other electrical components..............................................................................................................2-2-5
2-3 Operation of the PWBs
2-3-1 Power source PWB.................................................................................................................................2-3-1
2-3-2 Engine PWB............................................................................................................................................2-3-5
2GN/2GP/2GR
2-4 Appendixes
Maintenance parts list .............................................................................................................................2-4-1
Periodic maintenance procedures ..........................................................................................................2-4-3
Chart of image adjustment procedures...................................................................................................2-4-7
General wiring diagram...........................................................................................................................2-4-9
INSTALLATION GUID
PAPER FEEDER
3000 SHEETS PAPER FEEDER
DOCUMENT FINISHER
3000 SHEETS DOCUMENT FINISHER
DOCUMENT PROCESSOR
BUILT-IN FINISHER
JOB SEPARATOR
FAX System (M)
Data Security Kit (C)
2GN/2GP/2GR
1-1 Specifications
1-1-1
Specifications
Type ................................................ Desktop
Copying system .............................. Indirect electrostatic system
Originals.......................................... Sheets, books and three-dimensional objects
Maximum size: A3/Ledger
Original feed system ....................... Fixed
Copy paper ..................................... Weight
Cassette: 60 - 105 g/m2
MP tray: 45 - 200 g/m2
Types
Cassette: Plain, Preprinted, Bond, Recycled, Rough, Letterhead, Color (Colour),
Prepunched, High quality and Custom1 - 8
MP tray: Plain, Transparency, Preprinted, Labels, Bond, Recycled, Vellum, Rough,
Letterhead, Color (Colour), Prepunched, Envelope, Cardstock, Thick paper,
High quality and Custom1 - 8
Copying sizes ................................. Cassette: A3/Ledger - A5R/StatementR
MP tray: A3/Ledger - A6R/StatementR
Magnification ratios......................... Manual mode: 25 - 400%, 1% increments
Auto copy mode: fixed ratios
Metric
1:1 ± 1.0%, 1:4.00/1:2.00/1:1.41/1:1.22/1:1.15/1:0.86/1:0.81/1:0.70/1:0.50/1:0.25
Inch
1:1 ± 1.0%, 1:4.00/1:2.00/1:1.29/1:1.21/1:0.78/1:0.64/1:0.50/1:0.25
Copy speed..................................... At 100% magnification in copy mode:
30 ppm model
A3/Ledger: 20 sheets/min.
B4/Legal: 20 sheets/min.
A4/Letter: 30 sheets/min.
A4R/LetterR: 22 sheets/min.
B5: 30 sheets/min.
B5R: 20 sheets/min.
A5R/StatementR: 14 sheets/min.
A6R: 16 sheets/min.
40 ppm model
A3/Ledger: 23 sheets/min.
B4/Legal: 23 sheets/min.
A4/Letter: 40 sheets/min.
A4R/LetterR: 27 sheets/min.
B5: 40 sheets/min.
B5R: 22 sheets/min.
A5R/StatementR: 16 sheets/min.
A6R: 18 sheets/min.
50 ppm model
A3/Ledger: 26 sheets/min.
B4/Legal: 26 sheets/min.
A4/Letter: 50 sheets/min.
A4R/LetterR: 31 sheets/min.
B5: 50 sheets/min.
B5R: 24 sheets/min.
A5R/StatementR: 18 sheets/min.
A6R: 18 sheets/min.
First copy time ................................ 3.9 s or less (30 ppm model)
3.5 s or less (40/50 ppm model)
Warm-up time ................................. 30 s (room temperature 22°C/71.6°F, 60% RH)
Recovery from sleep mode: 15 s (room temperature 22°C/71.6°F, 60% RH)
Paper feed system.......................... Automatic feed
Capacity:
Cassette: 500 sheets (80 g/m2)
Manual feed
Capacity:
MP tray: 200 sheets (80 g/m2)
Paper eject system ......................... Output tray: 250 sheets (80 g/m2)
1-1-1
2GN/2GP/2GR
Multiple copying .............................. 1 - 999 sheets
Photoconductor............................... a-Si (drum diameter 40 mm)
Charging system............................. Single positive corona charging
Recording system ........................... Semiconductor laser
Developing system ......................... Dry, reverse developing (single component system)
Developer: 1-component, magnetism toner
Toner replenishing: automatic from a toner container
Transfer system .............................. Transfer roller
Separation system .......................... Separation electrode
Fusing system................................. Heat roller
Heat source: halogen heaters
Abnormally high temperature protection devices: thermostats
Charge erasing system................... Exposure by cleaning lamp
Cleaning system ............................. Cleaning blade and roller
Scanning system ............................ Flat bed scanning by CCD image sensor
Memory........................................... Standard 512 MB/Maximum 1024 MB
Hard disk......................................... 40 GB
Resolution....................................... 600 x 600 dpi
Light source .................................... Inert gas lamp
Dimensions ..................................... 599 (W) x 646 (D) x 745 (H) mm
23 9/16" (W) x 25 7/16" (D) x 29 5/16" (H)
Weight............................................. Approx. 85 kg/187 lbs
Floor requirements.......................... 1497 (W) x 646 (D) mm
58 15/16" (W) x 25 7/16" (D)
Functions ........................................ Original size, Paper selection, Mixed sized originals, Original orientation, Collate/Offset mode, Staple/Punch mode, Output destination, Zoom mode, Combine mode, Margin/Centering mode, Border erase, Booklet from sheets, Duplex, Cover mode, Form
overlay, Page numbering, Memo mode, Density adjustment, Selection of image quality, EcoPrint mode, Batch scanning, Auto image rotation, Inverted copying, Mirror
image, Job finish notice, File name, Priority override, Multi-page forms, Repeat copy,
Programmed copying, Registering shortcuts
Power source.................................. 120 V AC, 60 Hz, 11.5 A
220 to 240 V AC, 50/60 Hz, 6.3 A
Options ........................................... Document processor, paper feeder, 3000-sheet paper feeder, 3000-sheet document
finisher, document finisher, built-in finisher, job separator, key counter, fax kit, security
kit, data backup kit and PDF upgrade kit
Printer functions
Printing speed................................. Same as copying speed
First print time ................................. Same as first copy time
Resolution....................................... Fast 1200 mode/600 dpi/300 dpi
Applicable OS ................................. Microsoft Windows 95 (OSR2)
Microsoft Windows 98 (second edition)
Microsoft Windows NT4.0 (service pack 5 or later)
Microsoft Windows 2000 (service pack 2 or later)
Microsoft Windows Me
Microsoft Windows XP
Microsoft Windows Server 2003
Apple Macintosh OS 9.x
Apple Macintosh OS X 10.x
Interface.......................................... Parallel: Bi-directional parallel (IEEE 1284 Nibble/ECP mode)
USB high-speed: 3 slots
USB interface connector
Optional serial interface (RS-232C)
Network interface: 10Base-T/100Base-TX
PDL................................................. PRESCRIBE
Emulation........................................ PCL6 (5e, XL), KPDL3, KC-GL, Line Printer, IBM Proprinter X24E, EPSON LQ-850,
DIABLO 630
1-1-2
2GN/2GP/2GR
Font................................................. Outline font: 80 fonts (PCL6)/136 fonts (KPDL3)
Bitmap font: 1 font/79 fonts are processed by outline font.
OCR characters: OCR-A, OCR-B and OCR-kana
Connectivity .................................... Plug & Play
SNMP (printer MIB supported)
Scanner functions
Ethernet .......................................... 10BASE-T/100BASE-TX
Network Protocol ............................ TCP/IP
Transmission system ...................... PC transmission: SMB Scan to SMB, FTP Scan to FTP
E-mail transmission: SMTP Scan to E-mail
TWAIN scan: TWAIN source
Resolution....................................... 600 dpi, 400 dpi, 300 dpi, 200 dpi, 200 x 100 dpi, 200 x 400 dpi
File Format...................................... Monochrome: TIFF (MMR), PDF (MMR)
Gray: JPEG, PDF (JPEG)
Color: JPEG, PDF (high compression)
Scanning Speed.............................. 1-sided: monochrome 50 sheets/min Color 25 sheets/min
2-sided: monochrome 25 sheets/min Color 12.5 sheets/min
NOTE: These specifications are subject to change without notice.
1-1-3
2GN/2GP/2GR
1-1-2
Parts names
(1) Machine
13
14
1
15
3
9
2
34 35
36
10
4
5
6
33
7
25
26
27
11
12
8
29
16
28
30
19
20
31
32
21
22
17
18
23
24
Figure 1-1-1
1.
2.
3.
4.
5.
6.
7.
8.
9.
10.
11.
12.
1-1-4
Original cover (Option)
Original size indicator plates
Clip holder
Reception indicator
Error indicator
Left cover 1
Left cover 1 Lever
Left cover 2
Platen
Operation panel
Cassette 1
Cassette 2
13.
14.
15.
16.
17.
18.
19.
20.
21.
22.
23.
24.
Toner container
Toner container stopper
Waste toner box
Front cover
Paper width adjusting tab
Length adjustment plate
Top tray
Main power switch
Paper width guides
Multi purpose tray
Memory card cover holder
Handles
25.
26.
27.
28.
29.
30.
31.
32.
33.
34.
35.
36.
USB memory slot (A2)
USB memory slot (A3)
Memory card slot
Network interface connector
USB interface connector
Parallel interface connector
Option interface slot (OPT1)
Option interface slot (OPT2)
USB memory slot (A1)
Green knob (A1)
Paper feed unit (A2)
Paper feed unit cover (A2)
2GN/2GP/2GR
(2) Operation panel
1
5
9
10
11
12
13
14
15
16
17
18
2
3
4
8 7 6
19
20
21 22
23
Figure 1-1-2
1.
2.
3.
4.
5.
6.
7.
8.
9.
10.
11.
12.
System menu key/indicator
Status/Job cancel key/indicator
Program key/indicator
Application key
Counter key/indicator
Copy key/indicator
Send key/indicator
Document box key/indicator
Accessibility key/indicator
Print indicator
Transmission indicator
Reception indicator
13.
14.
15.
16.
17.
18.
19.
20.
21.
22.
23.
Memory indicator
Error indicator
Help key/indicator
Log-out key/indicator
Power key
Main power indicator
Numeric keys
Clear key
Start key/indicator
Stop key
Reset key
1-1-5
2GN/2GP/2GR
1-1-3
Machine cross section
Light path
Paper path
Figure 1-1-3 Machine cross section
1.
2.
3.
4.
5.
6.
7.
8.
9.
1-1-6
Paper feed section
Main charging section
Optical section
Developing section
Transfer and separation section
Cleaning and charge erasing section
Fuser section
Eject and switchback section
Duplex section
2GN/2GP/2GR
1-2 Installation
1-2-1
1.
2.
3.
4.
5.
6.
Installation environment
Temperature: 10 to 32.5°C/50 to 90.5°F
Humidity: 15 to 80%RH
Power supply: 120 V AC, 11.5 A
220 to 240 V AC, 6.3 A
Power source frequency: 50 Hz ± 0.3%/60 Hz ± 0.3%
Installation location
Avoid direct sunlight or bright lighting. Ensure that the photoconductor will not be exposed to direct sunlight or
other strong light when removing paper jams.
Avoid extremes of temperature and humidity, abrupt ambient temperature changes, and hot or cold air directed
onto the machine.
Avoid dust and vibration.
Choose a surface capable of supporting the weight of the machine.
Place the machine on a level surface (maximum allowance inclination: 1°).
Avoid air-borne substances that may adversely affect the machine or degrade the photoconductor, such as mercury, acidic of alkaline vapors, inorganic gasses, NOx, SOx gases and chlorine-based organic solvents.
Select a room with good ventilation.
Allow sufficient access for proper operation and maintenance of the machine.
Machine front: 1000 mm/39 3/8" Machine rear: 100 mm/3 15/16"
Machine right: 300 mm/11 13/16" Machine left: 300 mm/11 13/16"
100 mm/3 15/16"
300 mm/11 13/16"
300 mm/11 13/16"
1000 mm/39 3/8"
Figure 1-2-1 Installation dimensions
1-2-1
2GN/2GP/2GR
1-2-2
Unpacking and installation
(1) Installation procedure
Start
Unpack.
Connect the power cord.
Remove the tapes, spacers and pad.
Install the fixing bracket.
Install the optional paper feeder.
Carry out initial developer setting
(maintenance item U130).
Release the lever holding mirror 1 and 2 frames.
Output an own-status report
(maintenance item U000).
Release of cassette lift plate.
Exit maintenance mode.
Load paper.
Print out the user setting list.
Install the toner container.
Make test copies.
Install the waste toner box.
Attaching the language label
(230 V specifications only).
Install the optional original cover or the DP.
Completion of the machine installation.
Install other optional devices.
1-2-2
2GN/2GP/2GR
Moving the machine
When moving the machine, pull out the four carrying handles on the right and left sides and hold them.
Carrying
handle
Carrying
handle
Carrying handle
Carrying handle
Figure 1-2-2
1-2-3
2GN/2GP/2GR
Unpacking.
Figure 1-2-3 Unpacking
1.
2.
3.
4.
5.
6.
7.
8.
9.
10.
Machine
Outer case
Inner frame
Skid
Bottom front left pad
Bottom front right pad
Bottom rear left pad
Bottom rear right pad
Machine cover
Upper pad
Caution: Place the machine on a level surface.
1-2-4
11.
12.
13.
14.
15.
16.
17.
18.
19.
20.
Spacer
Document tray
Hinge joints
Bar code labels
Power cord
Plastic bag
Leaflet
Plastic bag
M3 x 8 screws
Operation guide
2GN/2GP/2GR
Remove the tapes, spacers and pad.
1. Remove two tapes.
2. Pull the lever and operation section is lowered.
3. Remove two spacers.
Remove waste textile on the operation
panel, if any.
4. Remove the pad.
5. Remove the tape holding the power cord.
Spacers
Pad
Tape
Tape
Figure 1-2-4
Install the optional paper feeder.
1. Install the optional paper feeder as necessary
2. Verify levelness at the four corners of the platen using a level gauge, and
adjust the level bolts at the bottom of the machine to optimize levelness.
Release the lever holding mirror 1 and 2 frames.
1. Turn the lever of the machine rear side with
the tool to release the lever holding the mirror 1 and 2 frames.
Lever
Figure 1-2-5
1-2-5
2GN/2GP/2GR
Release of cassette lift plate.
1. Pull cassette 1 and 2 out.
Remove the lift plate stopper from each cassette and attach it to the storage location.
When moving the machine, attach the lift
plate in original position.
Lift plate stopper
Figure 1-2-6
Load paper.
1. Pull the cassette out.
2. Holding the paper width adjusting tab both
ends, move the paper width guides to fit the
paper.
Paper width guides
Paper width adjusting tab
Figure 1-2-7
3. Adjust the length adjustment plate to fit the
paper size.
Length adjustment plate
Figure 1-2-8
1-2-6
2GN/2GP/2GR
4. Align the paper flush against the left side of
the cassette.
Figure 1-2-9
Install the toner container.
1. Open the front cover.
2. Tap the top of the toner container five to six
times.
Toner container
Figure 1-2-10
3. Shake the toner container approximately 10
times in the horizontal direction to stir toner.
Toner container
Figure 1-2-11
1-2-7
2GN/2GP/2GR
4. Gently push the toner container into the
machine along the rails.
Push the container all the way into the
machine until it locks in place.
Toner container
Figure 1-2-12
Install the waste toner box.
1. Install the waste toner box in the machine.
2. Close the front cover.
Waste toner box
Figure 1-2-13
Install the optional original cover or the DP.
1. Install the optional original cover or DP.
Install other optional devices.
1. Install the optional devices (job separator,
built-in finisher, document finisher and/or fax
kit etc.) as necessary.
Connect the power cord.
1. Connect the power cord to the connector on the machine.
2. Insert the power plug into the wall outlet.
1-2-8
2GN/2GP/2GR
Install the fixing brackets.
Grooves
1. Remove two screws from the rear cover.
2. Hook the catch of fixing bracket onto the
groove of round frame, and secure it using
two screws removed before step.
Fixing brackets
Figure 1-2-14
Carry out initial developer setting (maintenance item U130).
1.
2.
3.
4.
5.
Turn the main power switch on and press the status key.
Enter the maintenance mode by entering 10871087 using the numeric keys.
Enter 130 using the numeric keys and press the start key.
Press the start key to execute the maintenance item. The drive stops within approximately 5 minutes.
Press the stop key.
Output an own-status report (maintenance item U000).
1. Enter 000 using the numeric keys and press the start key.
2. Select MAINTENANCE and press the start key to output a list of the current settings of the maintenance items.
3. Press the stop key.
Exit maintenance mode.
1. Enter 001 using the numeric keys and press the start key. The machine exits the maintenance mode.
Print out the user setting list.
1. Select [Report Print] to output the user various setting reports.
Make test copies.
1. Place an original and make test copies.
Attaching the language label (230 V specifications only).
1. According to need, attach the correspond language label.
Completion of the machine installation.
1-2-9
2GN/2GP/2GR
(2) Setting initial copy modes
Factory settings are as follows:
Maintenance
item No.
1-2-10
Contents
Factory setting
U253
Switching between double and single counts
Double count
U260
Selecting the timing for copy counting
After ejection
U285
Setting service status page
ON
U326
Setting the black line cleaning indication
ON
U328
Side ejection setting
OFF
U342
Setting the ejection restriction
ON
U343
Switching between duplex/simplex copy mode
OFF
2GN/2GP/2GR
1-2-3
Installing the key counter (option)
Key counter installation requires the following parts:
Key counter (P/N 82142540)
Key counter set (P/N 302A369705)
Supplied parts of key counter set:
Key counter cover (P/N 2A360010)
Key counter retainer (P/N 66060030)
Key counter cover retainer (P/N 66060022)
Key counter mount (P/N 66060040)
Key counter socket assembly (P/N 41529210)
Two (2) M3 x 6 bronze flat-head screws (P/N B2303060)
One (1) M4 x 30 tap-tight S screw (P/N B1B54300)
Four (4) M4 x 6 bronze TP screws (P/N B4304060)
Two (2) M4 x 10 bronze TP screws (P/N B4304100)
One (1) M3 x 8 bronze binding screw (P/N B1303080)
One (1) M4 x 6 chrome TP screw (P/N B4104060)
One (1) M4 x 20 tap-tight S screw (P/N 7BB100420H)
One (1) M3 bronze nut (P/N C2303000)
Two (2) M4 x 10 tap-tight screws (P/N B3024100)
Two (2) M4 x 10 tap-tight P screws (P/N B8014100)
Procedure
1. Press the Power key on the operation panel
to off. Make sure that the Power indicator
and the Memory indicator are off before
turning off the main power switch. And then
unplug the power cable from the wall outlet.
2. Fit the key counter socket assembly to the
key counter retainer using the two screws
and nut.
3. Fit the key counter mount to the key counter
cover using the two screws, and attach the
key counter retainer to the mount using the
two screws.
M4 x 6 screws (B4304060)
Key counter retainer (66060030)
Key counter mount (66060040)
M3 nut
(C2303000)
Key counter cover
(2A360010)
M4 x 6 screws (B4304060)
Key counter socket assembly
(41529210)
M3 x 6 flat-head screws (B2303060)
Figure 1-2-15
4. Remove the scanner right cover and the
upper right cover.
5. Cut out the aperture plate on the upper right
cover using nippers.
6. Pass the connect inside the machine
through the aperture and refit the upper right
cover and scanner right cover.
Scanner right cover
Aperture
Connector
Upper right cover
Figure 1-2-16
1-2-11
2GN/2GP/2GR
7. Pass the key counter signal cable through
the aperture in the key counter cover
retainer, and insert into the connector of the
machine.
8. Seat the projection of the key counter cover
retainer in the aperture in the upper right
cover.
9. Fit the key counter cover with the key
counter socket assembly inserted to the key
counter cover retainer on the machine using
the screw.
10. Insert the key counter into the key counter
socket assembly.
Key counter
cover retainer
(66060022)
Key conuter cover
Connector
Key counter
signal cable
Projection
M4 x 30 screw
(B1B54300)
Figure 1-2-17
11. Turn the main power switch on and enter the
maintenance mode.
12. Run maintenance item U204 and select ON.
13. Exit the maintenance mode.
14. Check that the message requesting the key
counter to be inserted is displayed on the
touch panel when the key counter is pulled
out.
15. Check that the counter counts up as prints
are made.
1-2-12
2GN/2GP/2GR
1-3 Maintenance Mode
1-3-1
Maintenance mode
The machine is equipped with a maintenance function which can be used to maintain and service the machine.
(1) Executing a maintenance item
Start
Press the status key.
Enter “10871087” using
the numeric keys.
Enter the maintenance item
number using the cursor up/down keys
or numeric keys.
Maintenance mode is entered.
The maintenance item is
selected.
Press the start key.
The selected maintenance item is run.
Press the stop key.
Yes
Repeat the same
maintenance item?
No
Yes
Run another maintenance
item?
No
Enter “001” using the cursor
up/down keys or numeric keys
and press the start key.
Maintenance mode is exited.
End
1-3-1
2GN/2GP/2GR
(2) Maintenance modes item list
Section
General
Initialization
Drive, paper
feed, paper
conveying
and cooling
system
Item
No.
U000
Outputting an own-status report
Initial
setting*
-
U001
Exiting the maintenance mode
-
U002
Setting the factory default data
-
U003
Setting the service telephone number
U004
Displaying the machine number
-
U005
Copying without paper
-
U019
Displaying the ROM version
-
U020
Initializing all data
-
U021
Initializing counters and mode settings
-
U022
Initializing backup memory
-
U024
HDD formatting
-
U030
Checking motor operation
-
U031
Checking switches for paper conveying
-
****************1
U032
Checking clutch operation
-
U033
Checking solenoid operation
-
U034
Adjusting the print start timing
Adjusting the leading edge registration
Adjusting the center line
245/0/-30/-30*1
490/0/0/0/0/0/0*1
Setting the printing area for folio paper
Length/Width
330/210*1
U051
Adjusting the amount of slack in the paper
0/0/0/0*1
U053
Setting the adjustment of the motor speed
Drive motor
Eject motor
Polygon motor
2*1
0*1
-5*1
U035
Optical
Content of maintenance item
U061
Turning the exposure lamp on
-
U063
Adjusting the shading position
0*1
U065
Adjusting the scanner magnification
Main scanning direction/auxiliary scanning direction
0/0*1
U066
Adjusting the scanner leading edge registration
0/0*1
U067
Adjusting the scanner center line
0/0*1
U068
Adjusting the scanning position for originals from the DP
0/0*1
U070
Adjusting the DP magnification
U071
Adjusting the DP scanning timing
U072
Adjusting the DP center line
0/0/0*1
U073
Checking scanner operation
-
U074
Adjusting the DP input light luminosity
U080
Setting the economy mode
U087
Setting DP reading position modification operation
U089
Outputting a MIP-PG pattern
U093
Setting the exposure density gradient
Text and photo/text/photo
U099
Adjusting original size detection
0/0/0*1
0/0/0/0/0*1
0/0/0*1
-6*1
175/170/160*1
0/0/0*1
105/105/105/60/60/60/*1
150/240*1
*Initial setting for executing U020, *1: The item initialized for executing U020, *2: The item initialized for executing U021
1-3-2
2GN/2GP/2GR
Section
High voltage
Item
No.
Fuser and
cleaning
Setting the main high voltage
U101
Setting the other high voltages
Developing bias AC component frequency at image formation
Developing shift bias potential at image formation
Developing bias AC component duty at image formation
Transfer control voltage
Separation control voltage
28*1
2*1
50*1
130*1
20*1
Setting the cleaning interval for the main charger
5*1,*2
-
U109
Displaying the drum type
-
U110
Checking the drum count
-
U112
Setting toner refresh operation
Time of toner refreshment
Developing bias on time
120*1
700 (30 ppm)*1
540 (40/50 ppm)*1
U114
Setting separation charger mode
U117
Checking the drum number
-
U118
Displaying the drum history
-
U130
Initial setting for the developing unit
U144
Setting toner loading operation
MODE1*1
MODE2*1
U150
Checking sensors for toner
-
U157
Checking/clearing the developing drive time
-
U158
Checking the developing count
-
U161
Setting the fuser control temperature
Driving start temperature when warm-up starts
Control temperature for displaying [Ready for copying.]
Control temperature during printing
U163
Operation
panel and
support
equipment
Initial
setting*
U100
U102
Developing
Content of maintenance item
Resetting the fuser problem data
175 (30 ppm)*1,*2
185 (40/50 ppm)*1,*2
190 (30 ppm)*1,*2
200 (40/50 ppm)*1,*2
190 (30 ppm)*1,*2
200 (40/50 ppm)*1,*2
-
U167
Checking fuser counts
-
U196
Turning the fuser heater on
-
U199
Checking the fuser temperature
-
U200
Turning all LEDs on
-
U201
Initializing the touch panel
-
U202
Setting the KMAS host monitoring system
-
U203
Checking DP operation
U204
Setting the presence or absence of a key card or key counter
OFF/COUNTER*1,*2
U206
Setting the presence or absence of the coin vender
-
U207
Checking the operation panel keys
-
U208
Setting the paper size for the paper feeder
U220
Setting the trial functions
-
U234
Setting punch destination
Inch specifications: INCH*1
Metric specifications:
EUROPE METRIC*1
U236
Setting the limit for the ejection section of the built-in finisher
U237
Setting finisher stack quantity
U240
Checking the operation of the finisher
-
U241
Checking the operation of the switches of the finisher
-
Inch specifications: Letter*1,*2
Metric specifications: A4*1,*2
OFF*1,*2
0/0*1,*2
*Initial setting for executing U020, *1: The item initialized for executing U020, *2: The item initialized for executing U021
1-3-3
2GN/2GP/2GR
Section
Operation
panel and
support
equipment
Mode setting
Image
processing
Item
No.
Content of maintenance item
Initial
setting*
U243
Checking the operation of the DP motors
-
U244
Checking the DP switches
-
U245
Checking messages
-
U246
Setting the finisher
3000-sheet document finisher
Centerfold unit
built-in finisher
0/0/0/0/0/0*1
0/0/0/0/0/0/0/0*1
0/0/0*1
U247
Setting the paper feed device
-
U250
Setting the maintenance cycle
400000 (30 ppm)*1,*2
500000 (40/50 ppm)*1,*2
U251
Checking/clearing the maintenance count
-
U252
Setting the destination
U253
Switching between double and single counts
-
U260
Selecting the timing for copy counting
U265
Setting OEM purchaser code
U285
Setting service status page
U326
Setting the black line cleaning indication
ON/8*1,*2
U328
Side ejection setting
OFF*1,*2
U332
Setting the size conversion factor
Double count*1
After ejection*1,*2
0*1
ON*1
1.0*1,*2
U341
Specific paper feed location setting for printing function
U342
Setting the ejection restriction
ON*1,*2
-
U343
Switching between duplex/simplex copy mode
OFF*1,*2
U345
Setting the value for maintenance due indication
U402
Adjusting margins of image printing
U403
Adjusting margins for scanning an original on the platen
2.0/2.0/2.0/2.0*1
U404
Adjusting margins for scanning an original from the DP
3.0/2.5/3.0/4.0*1
3.0/2.5/3.0/4.0*1
U407
Adjusting the leading edge registration for memory image
printing
U411
Adjusting the scanner automatically
74/70/68/85/140/55*1
0*1
-
U425
Setting the target
Network
scanner
U510
Setting the enterprise mode
-
Others
U901
Checking/clearing copy counts by paper feed locations
U902
Checking/clearing the punch-hole scrap counter
U903
Checking/clearing the paper jam counts
-
U904
Checking/clearing the service call counts
-
U905
Checking/clearing counts by optional devices
-
U906
Resetting partial operation control
-
U908
Checking the total counter value
-
U910
Clearing the black ratio data
-
U911
Checking/clearing copy counts by paper sizes
-
U920
Checking the copy counts
-
U927
Clearing the all copy counts and machine life counts (one
time only)
-
U928
Checking machine life counts
-
Inch specifications: ON*1,*2
Metric specifications: OFF*1,*2
35000/0*1,*2
*Initial setting for executing U020, *1: The item initialized for executing U020, *2: The item initialized for executing U021
1-3-4
2GN/2GP/2GR
Section
Others
Item
No.
Content of maintenance item
U933
Setting the backup kit
U935
Relay board maintenance
U942
Setting of amount of slack for feeding from DP
Initial
setting*
0/0*1
U984
Checking the developing unit number
-
U985
Displaying the developing unit history
-
U989
HDD scandisk
-
U990
Checking/clearing the time for the exposure lamp to light
-
U991
Checking the scanner count
-
U993
Outputting a VTC-PG pattern
-
*Initial setting for executing U020, *1: The item initialized for executing U020, *2: The item initialized for executing U021
1-3-5
2GN/2GP/2GR
(3) Contents of the maintenance mode items
Maintenance
item No.
U000
Description
Outputting an own-status report
Description
Outputs lists of the current settings of the maintenance items, and paper jam and service call occurrences.
Outputs the event log or service status page.
Purpose
To check the current setting of the maintenance items, or paper jam or service call occurrences. Before initializing or replacing the backup RAM, output a list of the current settings of the maintenance items to reenter the
settings after initialization or replacement.
Method
1. Press the start key.
2. Select the item to be output.
Display
Output list
MAINTENANCE
List of the current settings of the maintenance modes
EVENT LOG
Outputs the event log
SERVICE STATUS
Outputs the service status page
3. Press the start key. The interrupt print mode is entered and a list is output.
When A4/Letter paper is available, a report of this size is output. If not, specify the paper feed location.
When output is complete, the screen for selecting an item is displayed.
Event log
Event Log
MFP
Firmware version 2GN_2000.001.036
2006.04.17
(1)
(2)
(3) Paper Jam Log
#
Count.
16
15
14
13
12
11
10
9
8
7
6
5
4
3
2
1
9876543
666554
4988
4988
4988
4988
1103
1103
1103
1103
1027
1027
1027
1027
550
28
(4) Service Call Log
Event
Descriprions
02.11.41.01.01
02.11.42.02.02
02.11.43.01.09
02.11.44.02.11
02.11.45.03.91
02.01.F0.01.01
(a)01.01.01.01.01
(b) (c)
01.09.01.01.01
02.11.41.01.01
02.11.42.02.02
02.11.43.01.09
02.11.44.02.11
02.11.45.03.91
02.01.F0.01.01
01.01.01.01.01
01.09.01.01.01
02. 11. 41. 01. 01
(d)
(e)
#
Count.
Service Code
8
7
6
5
4
3
2
1
7881214
578944
5296
5295
2099
1054
809
30
F0.0030
01.0100
F0.4000
F0.3010
01.2100
01.2100
01.2120
01.2100
(5) Maintenance Log
#
8
7
6
5
4
3
2
1
Count.
9045571
704511
7045
3454
3454
3454
417
35
Item
00.02
01.01
00.01
00.04
00.03
00.02
00.01
01.21
(6) Counter Log
(f) J01:000
J02:000
J03:000
J04:000
J05:002
J06:002
J15:000
J16:000
J17:000
J18:000
J19:000
J20:000
J21:000
J22:000
J23:002
J24:002
J33:000
J34:000
J35:000
J36:000
J37:000
J38:000
J39:000
J40:000
J41:002
J42:002
J51:000
J52:000
J53:000
J54:000
J61:002
J62:000
J63:000
J64:000
(g) C0101:001
C0102:001
C0107:001
C0108:001
C0220:001
C0221:001
C2002:001
C2030:001
C2031:001
C2222:001
Figure 1-3-1
1-3-6
C2223:001
C2225:001
C2228:001
C2259:001
C3002:001
C3003:001
C3411:001
C3412:001
C3421:001
C3431:001
C3502:001
C3503:001
C3552:001
C3553:001
(h) M01:01
M02:01
2GN/2GP/2GR
Maintenance
item No.
U000
Description
Detail of event log
No.
Items
(1)
System version
(2)
System date
(3)
Paper Jam Log
(4)
(5)
Service Call Log
Maintenance Log
Description
#
Count.
Event
Remembers 1 to 16 of The total page count at
occurrence. If the
the time of the paper
occurrence of the previ- jam.
ous paper jam is less
than 16, all of the paper
jams are logged. When
the occurrence
excessed 16, the oldest
occurrence is removed.
Log code (2 digit, hexadecimal, 5 categories)
#
Service Code
Count.
(a) Cause of a paper
jam
(b) Paper source
(c) Paper size
(d) Paper type
(e) Paper eject
Remembers 1 to 8 of
The total page count at
occurrence of self diag- the time of the self
nostics error. If the
diagnostics error.
occurrence of the previous diagnostics error is
less than 8, all of the
diagnostics errors are
logged.
Self diagnostic error
code
(See page 1-4-22)
#
Count.
Item
Remembers 1 to 8 of
occurrence of replacement. If the occurrence
of the previous replacement of toner container
is less than 8, all of the
occurrences of replacement are logged.
The total page count at
the time of the replacement of the toner container.
Code of maintenance
replacing item (1 byte,
2 categories)
First byte (Replacing
item)
01: Toner container
02: Maintenance kit
Second byte (Type of
replacing item)
00: (fixed)
(6)
Counter Log
(f) Jam
(g) Self diagnostic error
(h) Maintenance item
replacing
Comprised of three
log counters including paper jams, self
diagnostics errors,
and replacement of
the toner container.
Indicates the log
counter of paper jams
depending on location.
Indicates the log
counter of self diagnostics errors depending
on cause. (See P.1-422)
Indicates the log
counter depending on
the maintenance item
for maintenance.
Refer to Paper Jam
Log.
All instances including
those are not occurred
are displayed.
Example:
C6000: 4
Self diagnostics error
6000 has happened
four times.
T: Toner container
00: Black
M: Maintenance kit
00: (fixed)
Example:
T00: 1
The toner container has
been replaced once.
1-3-7
2GN/2GP/2GR
Maintenance
item No.
U000
Description
Service status page (1)
Service Status Page
MFP
Firmware version 2GN_2000.XLG.368 2006.04.17
(1)
(2)
Controller Information
Memory Status
(3) Option Slot1
(4) Option Slot2
(5) Total
524288KB
524288KB
1048576KB
Time
(6) Local Time Zone
(7) Data and Time
(8) Time Server
+01:00_Amsterdam
10/27/2005 09:06
10.183.53.13
(9) FRPO Status
User Top Margin
User Left Margin
User Page Length
A1+A2/100
A3+A4/100
A5+A6/100
Auto Continue Mode
Auto Continue Timer
Y0
Y1
0.00
0.00
17.30
1
Figure 1-3-2
Detail of Service status page
No.
1-3-8
Description
(1)
System version
(2)
System date
(3)
Slot 1 RAM size
(4)
Slot 2 RAM size
(5)
Total RAM size
(6)
Local time zone
(7)
Report output date
(8)
NTP server name
(9)
FRPO setting
Supplement
Day/Month/Year hour:minutes
00
06
2GN/2GP/2GR
Maintenance
item No.
U000
Description
Service status page (2)
Service Status Page
MFP
Firmware version 2GN_2000.XLG.368 2006.04.17
Engine Information
(10)
(11)
(12)
(13)
(14)
Engine ROM Version
Front Panel ROM Version
NVRAM Version
Scanner Version
FAX Slot1
FAX BOOT Version
FAX APL Version
FAX IPL Version
(15) Serial No.
(16) MAC Address
Counter
(31) Printed
Total Printed Pages
Copier
Printer
FAX
(32) Scanned
Total Scanned Pages
Copier
Other
(33) Paper Size
A3
A4
A5
A6
B4
B5
Ledger
Folio
Legal
Letter
Statement
Other
2GW_1000.003.001
2GW_A000.001.019
_Bb04B29_Bb04B29
2GW_1200.001.088
3KH_5000.001.001
3KH_5100.001.001
3KH_5200.001.001
AFZ3123456
00:C0:EE:D0:01:0D
Toner Coverage
(17) Period (07/11/05 - 07/12/05 09:05)
(18) Usage Page (A4/Letter Conversion) 3043.50
(19) Average (%)
Total
2.90
Copy
3.56
Printer
2.87
FAX
3.52
(20) Last Page (%)
2.80
Installed Options
(34) FAX Infomation
Rings (Normal)
Rings (FAX/TEL)
Rings (TAD)
TX SPEED
RX SPEED
ECM TX
ECM RX
V.34
REG.G3 TX EQR
REG.G3 RX EQR
RX MODEM LEVEL
SGL LVL MODEM
(21) Document Processor
Installed
(22) Paper Feeder
Cassette
(23) Finisher
3000-Finisher
Mail Box
Not Installed
(24) Job Separator
Installed
(25) Memory Card
Not Installed
(26) PDF Expansion Kit
Installed
(27) Fax Backup Kit
Not Installed
(28) Security Kit
Installed
(29) Data Security Kit (C) Software
(30) Security Library Version 0.50
(35)
(36)
(37)
(38)
(39)
(40)
(41)
(42)
631
11
620
0
1
0
1
69
539
0
0
36
0
7
0
0
0
0
0
3
3
3
V.29 9600bps
9600bps
ON
OFF
TX
4db
0db
-43dBm
-9dBm
1/1
500/530
0/0/0/0
97/0
F00/U00
0A001300/F0A8EF98/000000000000/000000000000/020A1Bt/
1234/1234/0001234abcd567800001234abcd5678/01234567890123456789012345678901/08/00/07
0000000000/F80C001A37/302A183C00/000100013D/8791BFC305/0000003100/000F5D0000/01FD000000/
0000000FB7/0000000000/0000260000/0000000000/0000000000/0000008400/0000000000/011F000F51/
8F0F
2
Figure 1-3-3
1-3-9
2GN/2GP/2GR
Maintenance
item No.
U000
Description
Detail of Service status page
No.
Description
(10)
Engine ROM version
(11)
Operation panel ROM version
(12)
NV RAM version
Supplement
_ Bb 04B29 _ Bb 04B29
(a) (b)
(c) (d) (e)
(f)
(a) Consistency of the present software version and the
database
_ (underscore): OK
* (Asterisk): NG
(b) Database version
(c) The oldest time stamp of database version
(d) Consistency of the present software version and the
ME firmware version
_ (underscore): OK
* (Asterisk): NG
(e) ME firmware version
(f) The oldest time stamp of the ME database version
Normal if (a) and (d) are underscored, and (b) and (e)
are identical with (c) and (f).
1-3-10
(13)
Scanner version
(14)
Fax firmware version
This item is printed only when the optional fax kit is
installed.
(15)
Serial No.
10 digits
(16)
Mac address
(17)
Cleared date and output date
(18)
Page of relation to the A4/Letter
(19)
Average coverage
(20)
Coverage on the final output page
(21)
Presence or absence of the optional
DP
Installed
Not Installed
(22)
Presence or absence of the optional
paper feeder
Cassette: paper feeder
LCF: 3000-sheet paper feeder
Not Installed
(23)
Presence or absence of the optional
document finisher
Inner Finisher: built-in finisher
3000-Finisher: 3000-sheet document finisher
1000-Finisher: document finisher
Not Installed
(24)
Presence or absence of the optional
job separator
Installed
Not Installed
(25)
Presence or absence of the Compact
Flash
Installed
Not Installed
(26)
Presence or absence of the optional
PDF upgrade kit
Installed: The formal version is installed
Not Installed: The PDF upgrade kit is not installed
Trial Version(xx/xx/xx): A trial version is installed
(27)
Presence or absence of the optional
data backup kit
Installed
Not Installed
(28)
Presence or absence of the optional
security kit
Installed
Not Installed
Total/Copy/Printer/Fax
2GN/2GP/2GR
Maintenance
item No.
Description
U000
No.
Description
Supplement
(29)
Identification name for the security kit
(30)
Security kit version
(31)
Printed page counts
Total/Copy/Printer/Fax
(32)
Scanned page counts
Total/Copy/Other
(33)
Counts by paper sizes
(34)
Fax kit information
(35)
Destination information/Area information
(36)
Printable area setting
(37)
Offset for each bin
MP tray (top)/MP tray (left)/Cassette 2 (top)/Cassette 2
(left)
(38)
Margin setting
System (top)/System (left)
(39)
Panel lock information/USB information Panel lock
0: OFF/1: Partial lock/2: Full lock
USB
0: Not installed/1: Full speed/2: Hi speed
(40)
Engine information
(41)
RFID information
(42)
Maintenance information
This item is printed only when the optional fax kit is
installed.
Completion
Press the stop key. The screen for selecting a maintenance item No. is displayed.
U001
Exiting the maintenance mode
Description
Exits the maintenance mode and returns to the normal copy mode.
Purpose
To exit the maintenance mode.
Method
Press the start key. The normal copy mode is entered.
U002
Setting the factory default data
Description
Restores the machine conditions to the factory default settings.
Purpose
To move the mirror frame of the scanner to the position for transport (position in which the frame can be fixed).
Method
1. Press the start key.
2. Press [MODE1(ALL)] on the touch panel.
3. Press the start key.
The mirror frame of the scanner returns to the position for transport.
4. Turn the main power switch off and on.
An error code is displayed in case of an intialization error. Refer to the table of the error codes on P.1-3-14.
When ERROR 09 occurred, turn main power switch off then on, format the hard disk using maintenance
item U024, and execute initialization using maintenance item U002. For other errors occurred, turn main
power switch off then on, and execute initialization using maintenance item U002.
1-3-11
2GN/2GP/2GR
Maintenance
item No.
Description
U003
Setting the service telephone number
Description
Sets the telephone number to be displayed when a service call code is detected.
Purpose
To set the telephone number to call service when installing the machine.
Method
Press the start key. The currently set telephone number is displayed.
Setting
1. Press the start key.
The keys to enter the number are displayed on the touch panel.
2. Press [TEL NO.] on the touch panel.
3. Enter a telephone number (up to 15 digits).
4. Press the start key. The setting is set.
Completion
Press the stop key. The screen for selecting a maintenance item No. is displayed.
U004
Displaying the machine number
Description
Displays the machine number.
Purpose
To check the machine number.
Method
Press the start key. The currently machine number is displayed.
Completion
Press the stop key. The screen for selecting a maintenance item No. is displayed.
U005
Copying without paper
Description
Simulates the copy operation without paper feed.
Purpose
To check the overall operation of the machine.
Method
1. Press the start key.
2. Select the item to be operated.
Display
Operation
MFP
Only the machine operates.
MFP + DP
Both the machine and DP operate (continuous operation).
3. Press the start key.
4. Press the system menu key. The copy mode screen is displayed.
5. Set the operation conditions required on the copy mode screen. Changes in the following settings can
be made.
Paper feed locations
Magnifications
Simplex or duplex copy mode
Number of copies: in simplex copy mode, continuous copying is performed when set to 999; in duplex
copy mode, continuous copying is performed regardless of the setting.
Copy density
Keys on the operation panel
6. To control the paper feed pulley, remove all the paper in the drawers, or the drawers. With the paper
present, the paper feed pulley does not operate.
7. Press the start key. The operation starts.
Copy operation is simulated without paper under the set conditions.
To stop continuous operation, press the stop key.
8. To return to the screen for selecting an item, press the system menu key.
Completion
Press the stop key. The screen for selecting a maintenance item No. is displayed.
1-3-12
2GN/2GP/2GR
Maintenance
item No.
U019
Description
Displaying the ROM version
Description
Displays the part number of the ROM fitted to each PWB.
Purpose
To check the part number or to decide, if the newest version of ROM is installed.
Method
1. Press the start key. The ROM version are displayed.
2. Change the screen using the cursor up/down keys
Display
Description
MAIN
Main PWB ROM IC
MMI
Operation PWB ROM IC
ENGINE
Engine PWB ROM IC
ENGINE BOOT
Engine PWB booting
SCANNER
Scanner PWB ROM IC
OPTION LANGUAGE
Optional language ROM IC
DICTIONARY
-
DP
Optional DP main PWB ROM IC
LCF
Optional 3000-sheet paper feeder main PWB ROM IC
OPTION CASSETTE
Optional paper feeder main PWB ROM IC
DF MAIN
Optional 3000-sheet document finisher main PWB ROM IC
DF MTRAY
Optional 3000-sheet document finisher internal tray PWB
ROM IC
DF SADDLE
Optional centerfold main PWB ROM IC
DF MAILBOX
Optional mail box main PWB ROM IC
INNER DF
Optional built-in finisher main PWB ROM IC
SIMPLE DF MAIN
Optional document sheet finisher main PWB ROM IC
FAX BOOT1
Optional fax control PWB booting
FAX APL1
Optional fax control PWB APL
FAX IPL1
Optional fax control PWB IPL
FAX BOOT2
FAX APL2
-
FAX IPL2
-
Completion
Press the stop key. The screen for selecting a maintenance item No. is displayed.
1-3-13
2GN/2GP/2GR
Maintenance
item No.
U020
Description
Initializing all data
Description
Initializes all the backup RAM on the main PWB to return to the original settings.
Refer to *1 of the maintenance mode item list about the item initialized.
Purpose
To be executed as required.
Method
1. Press the start key.
2. Select the destination.
Display
Description
INCH
Inch (North America) specifications
EUROPE METRIC
Metric (Europe) specifications
ASIA PACIFIC
Metric (Asia Pacific) specifications
3. Press the start key. All data in the backup RAM is initialized
4. Turn the main power switch off and on.
An error code is displayed in case of an intialization error.
When ERROR 09 occurred, turn main power switch off then on, format the hard disk using maintenance
item U024, and execute initialization using maintenance item U020. For other errors occurred, turn main
power switch off then on, and execute initialization using maintenance item U020.
Error codes
Codes
1-3-14
Description
ERROR 01
Configuration initialization error
ERROR 02
Counter initialization error
ERROR 03
One-touch initialization error
ERROR 04
Panel program initialization error
ERROR 05
Event log initialization error
ERROR 06
Account initialization error
ERROR 07
Address book initialization error
ERROR 08
Department initialization error
ERROR 09
Document box initialization error
ERROR 0a
Permissibility initialization error
ERROR 0b
Job log initialization error
ERROR 20
Engine initialization error
ERROR 40
Scanner initialization error
2GN/2GP/2GR
Maintenance
item No.
U021
Description
Initializing counters and mode settings
Description
Initializes all settings, except those pertinent to the type of copier, namely each counter, service call history
and mode setting. Also initializes backup RAM according to region specification selected in maintenance item
U252 Setting the destination.
Refer to *2 of the maintenance mode item list about the item initialized.
Purpose
To return the machine settings to their factory default.
Method
1. Press the start key.
2. Press [EXECUTE] on the touch panel.
3. Press the start key. All data other than that for adjustments due to variations between machines is initialized based on the destination setting.
4. Turn the main power switch off and on.
An error code is displayed in case of an intialization error. Refer to the table of the error codes on P.1-3-14.
When ERROR 09 occurred, turn main power switch off then on, format the hard disk using maintenance
item U024, and execute initialization using maintenance item U021. For other errors occurred, turn main
power switch off then on, and execute initialization using maintenance item U021.
U022
Initializing backup memory
Description
Initializes only the backup data for image processing.
Purpose
To be executed as required.
Method
1. Press the start key.
2. Select the item to initialize.
Display
Description
MAIN+ENGINE
Initialize the backup data of main PWB and engine PWB.
SCANNER
Initialize the backup data of scanner PWB.
DP
Initialize the backup data of DP main PWB.
3. Select the destination.
Display
Description
INCH
Inch (North America) specifications
EUROPE METRIC
Metric (Europe) specifications
ASIA PACIFIC
Metric (Asia Pacific) specifications
4. Press the start key. All data in the backup RAM is initialized.
5. Turn the main power switch off and on.
An error code is displayed in case of an intialization error. Refer to the table of the error codes on P.1-3-14.
When ERROR 09 occurred, turn main power switch off then on, format the hard disk using maintenance
item U024, and execute initialization using maintenance item U022. For other errors occurred, turn main
power switch off then on, and execute initialization using maintenance item U022.
1-3-15
2GN/2GP/2GR
Maintenance
item No.
Description
U024
HDD formatting
Description
Formats the HDD backup data areas for the document management, network scanner and department
administration.
Purpose
To initialize the HDD when replacing the HDD after shipping.
Method
1. Press the start key.
2. Press [EXECUTE] on the touch panel.
3. Press the start key to initialize the hard disk.
4. Turn the main power switch off and on.
U030
Checking motor operation
Description
Drives each motor.
Purpose
To check the operation of each motor.
Method
1. Press the start key.
2. Select the motor to be operated.
3. Press the start key. The operation starts.
Display
Operation
FEED
Paper feed motor operates
MAIN
Drive motor operates
EJECT(FW)
Eject motor rotates forward
EJECT(REV)
Eject motor rotates in reverse
4. To stop operation, press the stop key.
Completion
Press the stop key. The screen for selecting a maintenance item No. is displayed.
U031
Checking switches for paper conveying
Description
Displays the on-off status of each paper detection switch on the paper path.
Purpose
To check if the switches for paper conveying operate correctly.
Method
1. Press the start key.
2. Turn each switch on and off manually to check the status.
When a switch is detected to be in the ON position, the display for that switch will be highlighted.
Display
Switches
FEED1
Feed switch 1 (FSW1)
FEED2
Feed switch 2 (FSW2)
FEED3
Feed switch 3 (FSW3)
MP TRAY
MP feed switch (MPFSW)
REGIST
Registration switch (RSW)
EJECT
Eject switch (ESW)
BRANCH
Feedshift switch (FSSW)
DUPLEX
Duplex paper conveying switch (DUPPCSW)
JOB SEPARATOR
Job separator eject switch (JBESW)*
*: Optional.
Completion
Press the stop key. The screen for selecting a maintenance item No. is displayed.
1-3-16
2GN/2GP/2GR
Maintenance
item No.
U032
Description
Checking clutch operation
Description
Turns each clutch on.
Purpose
To check the operation of each clutch.
Method
1. Press the start key.
2. Select the clutch to be operated.
3. Press the start key. The clutch turns on for 1 s.
Display
Clutches
PF1
Upper paper feed clutch (PFCL-U)
PF2
Lower paper feed clutch (PFCL-L)
PF MP TRAY
MP paper feed clutch (MPPFCL)
FEED1
Feed clutch 1 (FCL1)
FEED2
Feed clutch 2 (FCL2)
FEED3
Feed clutch 3 (FCL3)
FEED MP TRAY
MP feed clutch (MPFCL)
REGIST
Registration clutch (RCL)
DUPLEX
Duplex feed clutch (DUPFCL)
MOTOR ON
The drive motor (DM) and the paper feed motor (PFM) are
turned ON.
To stop motor driving, press [MOTOR ON] again.
Completion
Press the stop key. The screen for selecting a maintenance item No. is displayed.
U033
Checking solenoid operation
Description
Applies current to each solenoid in order to check its ON status.
Purpose
To check the operation of each solenoid.
Method
1. Press the start key.
2. Select the solenoid to be operated.
3. Press the start key. The solenoid turns on for 1 s.
Display
Solenoids
TONER
Toner feed solenoid (TNFSOL)
BRANCH1
Feedshift solenoid (FSSOL)
BRANCH2
Feedshift solenoid (FSSOL)*
MOTOR ON
The drive motor (DM) and the paper feed motor (PFM) are
turned on.
*Optional.
To stop motor driving, press [MOTOR ON] again.
Completion
Press the stop key. The screen for selecting a maintenance item No. is displayed.
1-3-17
2GN/2GP/2GR
Maintenance
item No.
U034
Description
Adjusting the print start timing
Description
Adjusts the leading edge registration or center line.
Purpose
Make the adjustment if there is a regular error between the leading edges of the copy image and original.
Make the adjustment if there is a regular error between the center lines of the copy image and original.
Method
1. Press the start key.
2. Select the item to be adjusted. The setting screen for the selected item is displayed.
Display
Description
LSU OUT TOP
Leading edge registration adjustment
LSU OUT LEFT
Center line adjustment
Adjustment: leading edge registration adjustment
1. Select the item to be adjusted.
2.
3.
4.
5.
Display
Description
Setting
range
Initial
setting
Change in
value per step
TOP
Adjustment of reference value
0 to 500
245
1.0 mm
MP TRAY
Paper feed from MP tray*
-250 to 250
0
1.0 mm
CASSETTE
Paper feed from cassette*
-250 to 250
-30
1.0 mm
DUPLEX
Duplex mode (second)*
-250 to 250
-30
1.0 mm
*: Setting the difference value from reference value
Press the system menu key.
Press the start key to output a test pattern.
Press the system menu key.
Change the setting value using the +/- or numeric keys.
For output example 1, decrease the value. For output example 2, increase the value.
Leading edge registration
Correct image
Output
example 1
Output
example 2
Figure 1-3-4
6. Press the start key. The value is set.
Caution
Check the copy image after the adjustment. If the image is still incorrect, perform the following adjustments in
maintenance mode.
U034
1-3-18
U066
(P.1-3-24)
U071
(P.1-3-28)
2GN/2GP/2GR
Maintenance
item No.
U034
Description
Adjustment: center line adjustment
1. Select the item to be adjusted.
2.
3.
4.
5.
Display
Description
Setting
range
Initial
setting
Change in
value per step
LEFT
Adjustment of reference value
0 to 1000
490
1.0 mm
MP TRAY
Paper feed from MP tray*
-500 to 500
0
1.0 mm
CASSETTE 1
Paper feed from cassette 1*
-500 to 500
0
1.0 mm
CASSETTE 2
Paper feed from cassette 2*
-500 to 500
0
1.0 mm
CASSETTE 3
Paper feed from optional cassette 3*
-500 to 500
0
1.0 mm
CASSETTE 4
Paper feed from optional cassette 4*
-500 to 500
0
1.0 mm
DUPLEX
Duplex mode (second)*
-500 to 500
0
1.0 mm
*: Setting the difference value from reference value
Press the system menu key.
Press the start key to output a test pattern.
Press the system menu key.
Change the setting value using the +/- or numeric keys.
For output example 1, decrease the value. For output example 2, increase the value.
Center line of printing
Correct image
Output
example 1
Output
example 2
Figure 1-3-5
6. Press the start key. The value is set.
Caution
Check the copy image after the adjustment. If the image is still incorrect, perform the following adjustments in
maintenance mode.
U034
U067
(P.1-3-25)
U072
(P.1-3-30)
Completion
Press the stop key. The screen for selecting a maintenance item No. is displayed.
U035
Setting the printing area for folio paper
Description
Changes the printing area for copying on folio paper.
Purpose
To prevent cropped images on the trailing edge or left/right side of copy paper by setting the actual printing
area for folio paper.
Setting
1. Press the start key.
2. Select the item to be set.
3. Change the setting using the +/- keys.
Display
Setting
Setting range
Initial setting
LENGTH DATA
Length
330 to 356 mm
330
WIDTH DATA
Width
200 to 220 mm
210
4. Press the start key. The value is set.
Completion
Press the stop key. The screen for selecting a maintenance item No. is displayed.
1-3-19
2GN/2GP/2GR
Maintenance
item No.
U051
Description
Adjusting the amount of slack in the paper
Description
Adjusts the amount of slack in the paper
Purpose
Make the adjustment if the leading edge of the copy image is missing or varies randomly, or if the copy paper
is Z-folded.
Adjustment
1. Press the start key.
2. Select the item to be adjusted.
3.
4.
5.
6.
Display
Description
Setting
range
Initial
setting
MP TRAY
Paper feed from MP tray
-30 to 20
0
CASSETTE
Paper feed from cassette
-30 to 20
0
DUPLEX
Duplex mode (second)
-30 to 20
0
MP TRAY (THICK)
Paper feed from MP tray (thick paper)
-30 to 20
0
Press the system menu key.
Place an original and press the start key to make a test copy.
Press the system menu key.
Change the setting value using the +/- or numeric keys.
For output example 1, increase the value. For output example 2, decrease the value.
The greater the value, the larger the amount of slack; the smaller the value, the smaller the amount of
slack.
Original
Copy
example 1
Copy
example 2
Figure 1-3-6
7. Press the start key. The value is set.
Completion
Press the stop key. The indication for selecting a maintenance item No. appears.
1-3-20
2GN/2GP/2GR
Maintenance
item No.
U053
Description
Setting the adjustment of the motor speed
Description
Performs fine adjustment of the speeds of the motors.
Purpose
To adjust the speed of the respective motors when the magnification is not correct.
Method
1. Press the start key.
2. Select the item to be adjusted.
Display
Description
Setting
range
Initial
setting
MAIN MOTOR
Drive motor speed adjustment
-40 to 40
2
EJECT MOTOR
Eject motor speed adjustment
-7 to 15
0
POLYGON MOTR
Polygon motor speed adjustment
-20 to 20
-5
Adjustment
1. Press the system menu key.
2. Press the start key to output an A3/Ledger VTC pattern.
Correct values for an A3/Ledger output are:
A = 300 ± 0.75mm
B = 270 ± 1.35 mm
Figure 1-3-7
3. Press the system menu key.
4. Change the setting value using the +/- or numeric keys.
A: Drive motor speed adjustment
Increasing the setting makes the image longer in the auxiliary scanning direction, and decreasing it
makes the image shorter in the auxiliary scanning direction.
B: Polygon motor speed adjustment
Increasing the setting makes the image shorter in the main scanning direction and longer in the auxiliary
scanning direction; decreasing the setting makes the image longer in the main scanning direction and
shorter in the auxiliary scanning direction.
5. Press the start key. The value is set.
Completion
Press the stop key. The indication for selecting a maintenance item No. appears.
1-3-21
2GN/2GP/2GR
Maintenance
item No.
U061
Description
Turning the exposure lamp on
Description
Turns the exposure lamp on.
Purpose
To check the exposure lamp.
Method
1. Press the start key.
2. Select the item.
Display
Description
CCD
Exposure lamp
CIS
CIS (optional DP exposure lamp)
3. Press the start key. The selected lamp lights.
4. To turn the exposure lamp off, press the stop key.
Completion
Press the stop key. The screen for selecting a maintenance item No. is displayed.
U063
Adjusting the shading position
Description
Changes the shading position of the scanner.
Purpose
Used when white lines continue to appear longitudinally on the image after the shading plate is cleaned. This
is due to flaws or stains inside the shading plate. To prevent this problem, the shading position should be
changed so that shading is possible without being affected by the flaws or stains.
Method
1. Press the start key.
2. Change the setting using the +/- or numeric keys.
Description
Setting range
Initial setting
Change in value per step
Shading position
-12 to 18
0
0.11 mm
Increasing the setting moves the shading position toward the machine right, and decreasing it moves
the position toward the machine left.
3. Press the start key. The value is set.
Supplement
While this maintenance item is being executed, copying from an original is available in the interrupt copying
mode.
Completion
Press the stop key. The screen for selecting a maintenance item No. is displayed.
1-3-22
2GN/2GP/2GR
Maintenance
item No.
U065
Description
Adjusting the scanner magnification
Description
Adjusts the magnification of the original scanning.
Purpose
Make the adjustment if the magnification in the main scanning direction is incorrect.
Make the adjustment if the magnification in the auxiliary scanning direction is incorrect.
Caution
Adjust the magnification of the scanner in the following order.
U053
(P.1-3-21)
U065
(main scanning
direction)
U065
U067
(P.1-3-25)
(auxiliary scanning
direction)
U070
(P.1-3-26)
Method
1. Press the start key.
2. Select the item to be adjusted.
Display
Description
Setting
range
Initial
setting
Change in
value per step
MAIN SCAN ADJ
Scanner magnification in the main
scanning direction
-15 to 15
0
0.1 %
SUB SCAN ADJ
Scanner magnification in the auxiliary scanning direction
-25 to 25
0
0.1 %
Adjustment: main scanning direction
1. Press the system menu key.
2. Place an original and press the start key to make a test copy.
3. Press the system menu key.
4. Change the setting value using the +/- or numeric keys.
For copy example 1, increase the value. For copy example 2, decrease the value.
Original
Copy
example 1
Copy
example 2
Figure 1-3-8
5. Press the start key. The value is set.
Adjustment: auxiliary scanning direction
1. Press the system menu key.
2. Place an original and press the start key to make a test copy.
3. Press the system menu key.
4. Change the setting value using the +/- or numeric keys.
For copy example 1, increase the value. For copy example 2, decrease the value.
Original
Copy
example 1
Copy
example 2
Figure 1-3-9
5. Press the start key. The value is set.
Completion
Press the stop key. The screen for selecting a maintenance item No. is displayed.
1-3-23
2GN/2GP/2GR
Maintenance
item No.
U066
Description
Adjusting the scanner leading edge registration
Description
Adjusts the scanner leading edge registration of the original scanning.
Purpose
Make the adjustment if there is a regular error between the leading edges of the copy image and original.
Adjustment
1. Press the start key.
2. Select the item to be adjusted.
Display
3.
4.
5.
6.
Description
Setting
range
Initial
setting
Change in
value per step
ADJUST DATA 1
Scanner leading edge registration
-45 to 45
0
0.11 mm
ADJUST DATA2
Scanner leading edge registration
(rotate copying)
-45 to 45
0
0.10 mm
Press the system menu key.
Place an original and press the start key to make a test copy.
Press the system menu key.
Change the setting value using the +/- or numeric keys.
For copy example 1, increase the value. For copy example 2, decrease the value.
Scanner leading edge registration
Original
Copy
example 1
Copy
example 2
Figure 1-3-10
7. Press the start key. The value is set.
Caution
Check the copy image after the adjustment. If the image is still incorrect, perform the following adjustments in
maintenance mode.
U066
U403
(P.1-3-66)
U071
(P.1-3-28)
U404
(P.1-3-67)
Completion
Press the stop key. The screen for selecting a maintenance item No. is displayed.
1-3-24
2GN/2GP/2GR
Maintenance
item No.
U067
Description
Adjusting the scanner center line
Description
Adjusts the scanner center line of the original scanning.
Purpose
Make the adjustment if there is a regular error between the center lines of the copy image and original.
Adjustment
1. Press the start key.
2. Select the item to be adjusted.
Display
3.
4.
5.
6.
Description
Setting
range
Initial
setting
Change in
value per step
ADJUST DATA 1
Scanner center line
-70 to 70
0
0.08 mm
ADJUST DATA2
Scanner center line (rotate copying)
-25 to 25
0
0.10 mm
Press the system menu key.
Place an original and press the start key to make a test copy.
Press the system menu key.
Change the setting value using the +/- or numeric keys.
For copy example 1, increase the value. For copy example 2, decrease the value.
Scanner center line
Original
Copy
example 1
Copy
example 2
Figure 1-3-11
7. Press the start key. The value is set.
Caution
Check the copy image after the adjustment. If the image is still incorrect, perform the following adjustments in
maintenance mode.
U067
U403
(P.1-3-66)
U072
(P.1-3-30)
U404
(P.1-3-67)
Completion
Press the stop key. The screen for selecting a maintenance item No. is displayed.
1-3-25
2GN/2GP/2GR
Maintenance
item No.
U068
Description
Adjusting the scanning position for originals from the DP
Description
Adjusts the position for scanning originals from the DP. Performs the test copy at the five scanning positions
after adjusting.
Purpose
Used when the image fogging occurs because the scanning position is not proper when the DP is used. Run
U071 to adjust the timing of DP leading edge when the scanning position is changed.
Setting
1. Press the start key.
Display
Description
Setting
range
Initial
setting
Change in
value per step
ADJUST DATA
Starting position adjustment for
scanning originals
-55 to 55
0
0.11 mm
TEST POSITION
Scanning position for the test copy
originals
0 to 3
0
0.71 mm
2. Select [ADJUST DATA] of the screen for selecting an item.
3. Change the setting using the +/- or numeric keys.
When the setting value is increased, the scanning position moves to the right and it moves to the left
when the setting value is decreased.
4. Press the start key. The value is set.
5. Select [TEST POSITION] of the screen for selecting an item.
6. Select the Scanning position using the +/- or numeric keys.
7. Press the start key. The value is set.
8. Set the original (the one which density is known) in the DP and press the system menu key. The screen
for the test copy mode is displayed.
9. Press the start key. Test copy is executed.
10. Perform the test copy at each scanning position with the setting value from 0 to 4 and check that no
black line appears and the image is normally scanned.
Completion
Press the stop key. The screen for selecting a maintenance item No. is displayed.
U070
1-3-26
Adjusting the DP magnification
Description
Adjusts the DP original scanning speed.
Purpose
Make the adjustment if the magnification is incorrect in the main scanning direction or auxiliary scanning
direction when the optional DP is used.
Method
1. Press the start key.
2. Select the item to be adjusted.
Display
Description
Setting
range
Initial
setting
Change in
value per step
CIS MAIN ADJ
Magnification in the main scanning
direction of CIS
-25 to 25
0
0.1 %
CONVEY SPEED Magnification in the auxiliary scanning direction of CCD
-25 to 25
0
0.1 %
CIS SUB ADJ
-15 to 10
0
0.05 %
Magnification in the auxiliary scanning direction of CIS
2GN/2GP/2GR
Maintenance
item No.
U070
Description
Adjustment: main scanning direction of CIS
1. Press the system menu key.
2. Place an original on the DP and press the start key to make a test copy.
3. Press the system menu key.
4. Change the setting value using the +/- or numeric keys.
For copy example 1, increase the value. For copy example 2, decrease the value.
Original
Copy
example 1
Copy
example 2
Figure 1-3-12
5. Press the start key. The value is set.
Caution
Check the copy image after the adjustment. If the image is still incorrect, perform the following adjustments in
maintenance mode.
U070
U071
(P.1-3-28)
U404
(P.1-3-67)
Adjustment: auxiliary scanning direction of CCD/CIS
1. Press the system menu key.
2. Place an original on the DP and press the start key to make a test copy.
3. Press the system menu key.
4. Change the setting value using the +/- or numeric keys.
For copy example 1, increase the value. For copy example 2, decrease the value.
Original
Copy
example 1
Copy
example 2
Figure 1-3-13
5. Press the start key. The value is set.
Caution
Check the copy image after the adjustment. If the image is still incorrect, perform the following adjustments in
maintenance mode.
U070
U071
(P.1-3-28)
U404
(P.1-3-67)
Completion
Press the stop key. The screen for selecting a maintenance item No. is displayed.
1-3-27
2GN/2GP/2GR
Maintenance
item No.
U071
Description
Adjusting the DP scanning timing
Description
Adjusts the DP original scanning timing.
Purpose
Make the adjustment if there is a regular error between the leading or trailing edges of the original and the
copy image when the optional DP is used.
Method
1. Press the start key.
2. Select the item to be adjusted.
Display
Description
Setting
range
Initial
setting
Change in
value per step
ADJUST DATA1
Leading edge registration (first page)
-32 to 32
0
0.09 mm
ADJUST DATA2
Trailing edge registration (first page)
-32 to 32
0
0.09 mm
ADJUST DATA3
Leading edge registration (second
page)
-45 to 45
0
0.09 mm
ADJUST DATA4
Trailing edge registration (second
page)
-45 to 45
0
0.09 mm
ADJUST DATA5
Leading edge registration (rotate
copying)
-20 to 20
0
0.17 mm
Adjustment: leading edge registration
1. Press the system menu key.
2. Place an original on the DP and press the start key to make a test copy.
3. Press the system menu key.
4. Change the setting value using the +/- or numeric keys.
For copy example 1, increase the value. For copy example 2, decrease the value.
Original
Copy
example 1
Copy
example 2
Figure 1-3-14
5. Press the start key. The value is set.
Caution
Check the copy image after the adjustment. If the image is still incorrect, perform the following adjustments in
maintenance mode.
U071
1-3-28
U404
(P.1-3-67)
2GN/2GP/2GR
Maintenance
item No.
U071
Description
Adjustment: trailing edge registration
1. Press the system menu key.
2. Place an original on the DP and press the start key to make a test copy.
3. Press the system menu key.
4. Change the setting value using the +/- or numeric keys.
For copy example 1, increase the value. For copy example 3, decrease the value.
Original
Copy
example 1
Copy
example 2
Copy
example 3
Figure 1-3-15
5. Press the start key. The value is set.
Caution
Check the copy image after the adjustment. If the image is still incorrect, perform the following adjustments in
maintenance mode.
U071
U404
(P.1-3-67)
Completion
Press the stop key. The screen for selecting a maintenance item No. is displayed.
1-3-29
2GN/2GP/2GR
Maintenance
item No.
U072
Description
Adjusting the DP center line
Description
Adjusts the scanning start position for the DP original.
Purpose
Make the adjustment if there is a regular error between the centers of the original and the copy image when
the optional DP is used.
Adjustment
1. Press the start key.
2. Select the item to be adjusted.
3.
4.
5.
6.
Display
Description
Setting
range
Initial
setting
Change in
value per step
ADJUST DATA1
Center line for the simplex copy mode -39 to 39
0
0.17 mm
ADJUST DATA2
Center line for the duplex copy mode
-39 to 39
0
0.17 mm
ADJUST DATA3
Center line for rotate copying
-7 to 7
0
0.17 mm
Press the system menu key.
Place an original on the DP and press the start key to make a test copy.
Press the system menu key.
Change the setting value using the +/- or numeric keys.
For copy example 1, increase the value. For copy example 2, decrease the value.
Reference
Original
Copy
example 1
Copy
example 2
Figure 1-3-16
7. Press the start key. The value is set.
Caution
Check the copy image after the adjustment. If the image is still incorrect, perform the following adjustments in
maintenance mode.
U072
U404
(P.1-3-67)
Completion
Press the stop key. The screen for selecting a maintenance item No. is displayed.
1-3-30
2GN/2GP/2GR
Maintenance
item No.
U073
Description
Checking scanner operation
Description
Simulates the scanner operation under arbitrary conditions.
Purpose
To check scanner operation.
Start
1. Press the start key.
2. Select the item to be operated.
Display
Description
SCANNER MOTOR
Scanner operation
HOME POSITION
Home position operation
DP READING
DP scanning position operation
DUST CHECK
Dust adhesion check operation with lamp on
Setting: SCANNER MOTOR
1. Select [SCANNER MOTOR].
2. Select the item.
3. Change the setting using the +/- keys.
Display
Operating conditions
Setting range
ZOOM
Magnification
25 to 400%
SIZE
Original size
See below.
LAMP
On and off of the exposure lamp
0 (off) or 1 (on)
Original sizes for each setting in SIZE
Setting
Paper size
Setting
Paper size
5000
A4
5000
A5R
4300
B5
7800
Folio
5100
11" x 8 1/2"
10200
11" x 17"
10000
A3
9000
11" x 15"
8600
B4
8400
8 1/2" x 14"
7100
A4R
6600
8 1/2" x 11"
6100
B5R
5100
5 1/2" x 8 1/2"
4. Press the start key. Scanning starts under the selected conditions.
5. To stop operation, press the stop key.
Method: HOME POSITION
1. Select [HOME POSITION].
2. Press the start key.
The mirror frame of the scanner moves to the home position.
Method: DP READING
1. Select [DP READING].
2. Press the start key.
The mirror frame of the scanner moves to the reading position.
Method: DUST CHECK
1. Select [DUST CHECK].
2. Press the start key. The exposure lamp lights.
3. To turn the exposure lamp off, press the stop key.
Completion
Press the stop key when scanning stops. The screen for selecting a maintenance item No. is displayed.
1-3-31
2GN/2GP/2GR
Maintenance
item No.
U074
Description
Adjusting the DP input light luminosity
Description
Adjusts the luminosity of the exposure lamp for scanning originals from the DP.
Purpose
Used if the exposure amount differs significantly between when scanning an original on the contact glass and
when scanning an original from the DP.
Setting
1. Press the start key.
2. Select the item to be set.
Display
Description
Setting
range
Initial
setting
R
DP input light luminosity of R image
-12 to 12
0
G
DP input light luminosity of G image
-12 to 12
0
B
DP input light luminosity of B image
-12 to 12
0
3. Change the setting using the +/- or numeric keys.
Increasing the setting makes the luminosity higher, and decreasing it makes the luminosity lower.
4. Press the start key. The value is set.
Supplement
While this maintenance item is being executed, copying from an original is available in the interrupt copying
mode.
Completion
Press the stop key. The screen for selecting a maintenance item No. is displayed.
U080
Setting the economy mode
Description
Sets the level in the economy mode.
Purpose
To increase or decrease the image density in the eco-print mode.
Setting
1. Press the start key.
2. Select [ADJUST DATA].
Description
Setting range
Initial setting
Exposure is toner economy mode
-12 to 0
-6
3. Change the setting value using the +/- or numeric keys.
Increasing the setting makes the image darker; decreasing it makes the image lighter.
4. Press the start key. The value is set.
Supplement
While this maintenance item is being executed, copying from an original is available in the interrupt copying
mode.
Completion
Press the stop key. The screen for selecting a maintenance item No. is displayed.
1-3-32
2GN/2GP/2GR
Maintenance
item No.
U087
Description
Setting DP reading position modification operation
Description
The presence or absence of dust is determined by comparing the scan data of the original trailing edge and
that taken after the original is conveyed past the DP original scanning position. If dust is identified, the DP
original scanning position is adjusted for the following originals.
Purpose
When using optional DP, to solve the problem when black lines occurs due to the dust with respect to original
reading position.
Method
1. Press the start key.
2. Select the item to be set. The setting screen for the selected item is displayed.
Display
Description
CCD
Setting of standard data when dust is detected.
BLACK
Initialization of original reading position.
Setting: standard data when dust is detected
1. Select the item to be set.
2. Change the value using the +/- or numeric keys.
Display
Description
Setting range
Initial setting
CCD R
Lowest density of the R regard as the dust.
0 to 255
175
CCD G
Lowest density of the G regard as the dust.
0 to 255
170
CCD B
Lowest density of the B regard as the dust.
0 to 255
160
3. Press the start key. The value is set.
Setting: Initialization of original reading position
1. Select [CLEAR].
2. Press the start key. The setting is cleared.
Completion
Press the stop key. The screen for selecting a maintenance item No. is displayed.
1-3-33
2GN/2GP/2GR
Maintenance
item No.
U089
Description
Outputting a MIP-PG pattern
Description
Selects and outputs the MIP-PG pattern created in the machine.
Purpose
To check copier status other than scanner when adjusting image printing, using MIP-PG pattern output (without scanning).
Method
1. Press the start key.
2. Select the MIP-PG pattern to be output.
Display
PG pattern to be output
Purpose
GRAYSCALE
To check the laser scanner unit
engine output characteristics.
MONO-LEVEL
To check the drum quality.
256-LEVEL
To check resolution
reproducibility in printing.
1 dot-LINE
To check fine line reproducibility.
To adjust the position of the laser
scanner unit (lateral squareness)
3. To change the output conditions of MONO-LEVEL and 1dot-LINE, use the +/- or numeric keys to change
the preset values and press the start key to register the setting.
Description
Setting
range
Output density of MONO-LEVEL
0 to 255
0
1dot-LINE
0 to 21
0
4. Press the system menu key.
5. Press the start key. A MIP-PG pattern is output.
6. To return to the screen for selecting an item, press the system menu key.
Completion
Press the stop key. The screen for selecting a maintenance item No. is displayed.
1-3-34
Initial
setting
2GN/2GP/2GR
Maintenance
item No.
U093
Description
Setting the exposure density gradient
Description
Changes the exposure density gradient in the manual density mode, depending on respective image quality
modes.
Purpose
To set how the image density is altered by a change of one step in the manual density adjustment for respective image quality modes. Also used to make copy images darker or lighter.
Method
1. Press the start key.
2. Select the image quality mode. The setting screen for the selected item is displayed.
Display
Description
MIXED
Density in text and photo mode
TEXT
Density in text mode
PHOTO
Density in photo mode
Setting: Density in text and photo mode
1. Select the item to be set.
2. Adjust the setting using the +/- or numeric keys.
Display
Description
Setting
range
Initial
setting
MIXED DARKER
Change in density when manual density is set dark 0 to 3
0
MIXED LIGHTER
Change in density when manual density is set light 0 to 3
0
Increasing the setting makes the change in density larger, and decreasing it makes the change smaller.
Image density
Dark
Setting: 0
Setting: 3
Set to LIGHTER
Set to DARKER
Light
Density adjustment
Light
Center
Dark
Figure 1-3-17
3. Press the start key. The value is set.
4. To return to the screen for selecting an item, press the stop key.
Setting: Density in text mode
1. Select the item to be set.
2. Adjust the setting using the +/- or numeric keys.
Display
Description
Setting
range
Initial
setting
TEXT DARKER
Change in density when manual density is set dark 0 to 3
0
TEXT LIGHTER
Change in density when manual density is set light 0 to 3
0
Increasing the setting makes the change in density larger, and decreasing it makes the change smaller.
3. Press the start key. The value is set.
4. To return to the screen for selecting an item, press the stop key.
1-3-35
2GN/2GP/2GR
Maintenance
item No.
U093
Description
Setting: Density in photo mode
1. Select the item to be set.
2. Adjust the setting using the +/- or numeric keys.
Display
Description
Setting
range
Initial
setting
PHOTO DARKER
Change in density when manual density is set dark 0 to 3
0
PHOTO LIGHTER
Change in density when manual density is set light 0 to 3
0
Increasing the setting makes the change in density larger, and decreasing it makes the change smaller.
3. Press the start key. The value is set.
4. To return to the screen for selecting an item, press the stop key.
Supplement
While this maintenance item is being executed, copying from an original is available in the interrupt copying
mode.
Completion
Press the stop key. The screen for selecting a maintenance item No. is displayed.
1-3-36
2GN/2GP/2GR
Maintenance
item No.
U099
Description
Adjusting original size detection
Description
Checks the operation of the original size detection sensor and sets the sensing threshold value.
Purpose
To adjust the sensitiveness of the sensor and size judgement time if the original size detection sensor malfunctions frequently due to incident light or the like.
Method
1. Press the start key.
2. Select the item. The screen for executing each item is displayed.
Display
Description
DATA
Displaying detection sensor transmission data
B/W LEVEL
Setting detection sensor threshold value
Setting original size judgment time
Method to display the data for the sensor
1. Place the original and close the original cover or DP. The detection sensor transmission data is displayed.
Display
Description
ORIGINAL AREA R
Detected original width size (R)
ORIGINAL AREA G
Detected original width size (G)
ORIGINAL AREA B
Detected original width size (B)
ORIGINAL AREA
Detected original width size
SIZE SW L
Displays the original detection switch ON/OFF
2. To return to the screen for selecting an item, press the stop key.
Setting
1. Select an item to be set.
2. Adjust the setting using the +/- or numeric keys.
Display
Description
ORIGINAL R
Original threshold value (R)
0 to 255
105
ORIGINAL G
Original threshold value (G)
0 to 255
105
ORIGINAL B
Original threshold value (B)
LIGHT SOURCE R Light source threshold value (R)
Setting
range
Initial
setting
0 to 255
105
0 to 255
60
LIGHT SOURCE G Light source threshold value (G)
0 to 255
60
LIGHT SOURCE B
Light source threshold value (B)
0 to 255
60
WAIT TIME
Time from activation of the original detection switch
(ODSW) to original size judgment
0 to 255
150
A4R AREA
Original size detection position display (mm)
220/240
240
3. Press the start key. The value is set.
4. To return to the screen for selecting an item, press the stop key.
Completion
Press the stop key. The screen for selecting a maintenance item No. is displayed.
1-3-37
2GN/2GP/2GR
Maintenance
item No.
U100
Description
Setting the main high voltage
Description
Performs main charging.
Purpose
To check main charging.
Method
1. Press the start key.
2. Select the item to be operated. The selected operation starts.
Display
Description
MC ON
Turning the main charger on
LASER ON/OFF
Turning the main charger on and the laser scanner unit on and off
3. To stop operation, press the stop key.
Completion
Press the stop key when main charger output stops. The screen for selecting a maintenance item No. is displayed.
U101
Setting the other high voltages
Description
Sets the developing bias control voltage, the transfer control voltage, and the separation control voltage or
checks the output of these voltages.
Purpose
To check the developing bias, the transfer voltage and the separation voltage or to take measures against
drop of image density or background fog.
Setting
1. Press the start key.
2. Select the item to be set.
3. Change the setting using the +/- or numeric keys.
Display
Description
Setting range
Initial setting
DEV BIAS
Developing bias AC component frequency at
image formation
20 to 32
28
DEV SBIAS
Developing shift bias potential at image formation
0 to 3
2
DEV DUTY
Developing bias AC component duty at image
formation
0 to 100
50
TC DATA
Transfer control voltage
0 to 300
130
SC DATA
Separation control voltage
0 to 60
20
Increasing the DEV BIAS setting makes the image darker; decreasing it makes the image lighter.
Increasing the DEV SBIAS setting makes the image darker.
Increasing the DEV DUTY setting makes the image lighter; decreasing it makes the image darker.
Increasing the TC DATA setting makes the transfer voltage higher, and decreasing it makes the voltage
lower.
Increasing the SC DATA setting makes the separation voltage higher, and decreasing it makes the voltage lower.
4. Press the start key. The value is set.
Completion
Press the stop key. The screen for selecting a maintenance item No. is displayed.
1-3-38
2GN/2GP/2GR
Maintenance
item No.
U102
Description
Setting the cleaning interval for the main charger
Description
Changes the intervals at which the main charger is cleaned.
Purpose
To change the setting when the background is visible.
Setting
1. Press the start key.
2. Change the setting using the +/- or numeric keys.
Description
Setting range
Initial setting
Main charger cleaning operation intervals
0 to 20 (unit: 1000 sheets)
5
When set to 0, the cleaning for the main charger is not operated.
3. Press the start key. The value is set.
Completion
Press the stop key. The screen for selecting a maintenance item No. is displayed.
U109
Displaying the drum type
Description
Displays the drum surface potential set as EEPROM of the drum unit.
Purpose
To check the drum surface potential.
Method
Press the start key. Drum surface potential (V) is displayed.
Completion
Press the stop key. The screen for selecting a maintenance item No. is displayed.
U110
Checking the drum count
Description
Displays the drum counts for checking.
Purpose
To check the drum status.
Method
Press the start key. The drum counter count is displayed.
Setting
1. Change the setting using the +/- or numeric keys.
2. Press the start key. The count is set.
Completion
Press the stop key. The screen for selecting a maintenance item No. is displayed.
U112
Setting toner refresh operation
Description
Sets the toner refresh operation time and the developing bias on time at power on and after copying.
Purpose
To change the toner refresh operation time and the developing bias on time at power on and after copying if
image flow level is low.
Setting
1. Press the start key.
2. Select the item to be set.
3. Change the setting using the +/- keys.
Display
Description
Setting range
Initial setting
ON TIME(SEC)
Toner refresh operation time
50 to 150 (sec)
120
BIAS TIME(MSEC) Developing bias on time
500 to 1000 (msec) 700 (30 ppm)
540 (40/50 ppm)
4. Press the start key. The value is set.
Completion
Press the stop key. The screen for selecting a maintenance item No. is displayed.
1-3-39
2GN/2GP/2GR
Maintenance
item No.
U114
Description
Setting separation charger mode
Description
Sets the separation charger mode.
Purpose
To change the setting if the fuser offset or carrier leaking occurs.
Method
1. Press the start key.
2. Change the setting using the +/- or numeric keys.
Display
Description
Setting range
Initial setting
MODE
Separation charger mode
0 to 255 (0 to 3)*
3
*: Entering a value other than 0 to 3 will engage the MODE3 (value 3) separation mode.
Details on the modes
Display
Description
MODE0 (Value 0)
Full page separation for both first and second pages
MODE1 (Value 1)
First page: Separation on leading and trailing edges
Second page: Full page sepration
MODE2 (Value 2)
Full page sepration is activated for both first and second pages provided the
ambient temperature is less than 19°C/66.2°F.
First page: Separation is activated for both leading and trailing edges, second page: Full page separation, provided the ambient temperature is more
than 20°C/68°F.
MODE3 (Value 3)
Separation is activated on both leading and trailing edges for both first and
second pages.
3. Press the start key. The setting is set.
Completion
Press the stop key. The screen for selecting a maintenance item No. is displayed.
U117
Checking the drum number
Description
Displays the drum number.
Purpose
To check the drum number.
Method
Press the start key. The drum number is displayed.
Completion
Press the stop key. The screen for selecting a maintenance item No. is displayed.
U118
Displaying the drum history
Description
Displays the past record of machine number and the drum counter.
Purpose
To check the count value of machine number and the drum counter.
Method
Press the start key. Past record of 5 cases is displayed.
Display
Description
MACHINE No.1 to 5
Past record of machine number
COUNT 1 to 5
Past record of drum counter
Completion
Press the stop key. The screen for selecting a maintenance item No. is displayed.
1-3-40
2GN/2GP/2GR
Maintenance
item No.
U130
Description
Initial setting for the developing unit
Description
Replenishes toner to the developing unit to a certain level from the toner container that has been installed.
Purpose
To operate when installing the machine or replacing the developing unit.
Method
1. Press the start key. The screen for executing is displayed.
2. Press the start key.
Toner installation is started and the output value of the sensor and execution time are displayed.
Display
Description
TONER SENSOR
Output value of the sensor
TIME(SEC)
Execution time
Completion
Press the stop key after initial setting is complete. The screen for selecting a maintenance item No. is displayed.
U144
Setting toner loading operation
Description
Sets toner loading operation after completion of copying.
Purpose
To set whether or not toner is loaded on the drum after low density copying. Normally no change is necessary
from the initial setting.
Setting
1. Press the start key.
2. Select the item to be set.
Display
Description
MODE0
Toner not loaded
MODE1
Toner loaded after simplex or duplex copying
MODE2
Toner loaded after simplex copying
Initial setting: MODE2
3. Press the start key. The setting is set.
Completion
Press the stop key. The screen for selecting a maintenance item No. is displayed.
U150
Checking sensors for toner
Description
Displays the on-off status of each sensor or switch related to toner.
Purpose
To check if the sensors and switches operate correctly.
Method
1. Press the start key.
2. Turn each switch on and off manually to check the status.
When the on-status of a switch is detected, that switch is displayed in reverse.
Display
Switches
DEVELOPER SENSOR
Toner sensor (TNS)
CONTAINER SET
Toner container detection switch (TCDSW)
CONTAINER SNSR
Toner container sensor (TCS)
WASTE BOX SET
Waste toner detection switch (WTDSW)
WASTE BOX SENSOR
Overflow sensor (OFS)
MOTOR ON
The toner feed solenoid (TNFSOL) and the paper feed motor
(PFM) are turned on.
To stop motor driving, press [MOTOR ON] again
Completion
Press the stop key. The screen for selecting a maintenance item No. is displayed.
1-3-41
2GN/2GP/2GR
Maintenance
item No.
Description
U157
Checking/clearing the developing drive time
Description
Displays the developing drive time for checking, or clearing a figure, which is used as a reference when correcting the toner control.
Purpose
To check the developing drive time after replacing the developing unit.
Method
Press the start key. The developing drive time is displayed in minutes.
Clearing
1. Press the clear key.
2. Press the start key. The time is cleared.
Setting
1. Enter a drive time (in minutes) using the numeric keys.
2. Press the start key. The time is set.
Completion
Press the stop key. The screen for selecting a maintenance item No. is displayed.
U158
Checking the developing count
Description
Displays the developing count for checking.
Purpose
To check the developing count after replacing the developing unit.
Method
Press the start key. The developing counter count is displayed.
Setting
1. Change the setting using the +/- or numeric keys.
2. Press the start key. The count is set.
Completion
Press the stop key. The screen for selecting a maintenance item No. is displayed.
U161
Setting the fuser control temperature
Description
Changes the fuser control temperature.
Purpose
Normally no change is necessary. However, can be used to prevent curling or creasing of paper, or solve a
fuser problem on thick paper.
Method
1. Press the start key.
2. Select the item to be set.
3. Change the setting using the +/- or numeric keys.
Display
Description
Setting range
Initial setting
DRIVE START TEMP
Driving start temperature when
warm-up starts
0 to 255 (°C)
175 (30 ppm)
185 (40/50 ppm)
READY CONTROL T
Control temperature for displaying
[Ready for copying.]
0 to 255 (°C)
190 (30 ppm)
200 (40/50 ppm)
PRINT CONTROL T
Control temperature during printing
0 to 255 (°C)
190 (30 ppm)
200 (40/50 ppm)
4. Press the start key. The value is set.
Completion
Press the stop key. The screen for selecting a maintenance item No. is displayed.
1-3-42
2GN/2GP/2GR
Maintenance
item No.
Description
U163
Resetting the fuser problem data
Description
Resets the detection of a service call code indicating a problem in the fuser section.
Purpose
To prevent accidents due to an abnormally high fuser temperature.
Method
1. Press the start key.
2. Press [EXECUTE] on the touch panel.
3. Press the start key. The fuser problem data is initialized.
4. Turn the main power switch off and on.
U167
Checking fuser counts
Description
Displays fuser counts for checking.
Purpose
To check fuser counts after replacing the fuser unit.
Method
Press the start key. The fuser counts are displayed.
Setting
1. Change the setting using the +/- or numeric keys.
2. Press the start key. The count is set.
Completion
Press the stop key. The screen for selecting a maintenance item No. is displayed.
U196
Turning the fuser heater on
Description
Turns the fuser heater M or S on.
Purpose
To check fuser heaters turning on.
Method
1. Press the start key.
2. Select the heater to be turned on. The selected heater turns on for 2 s and then turns off.
Display
Description
MAIN
Fuser heater M (FH-M)
SUB
Fuser heater S (FH-S)
Completion
Press the stop key when fuser heaters M and S are off. The screen for selecting the maintenance item No. is
displayed.
U199
Checking the fuser temperature
Description
Displays the fuser temperature, the ambient temperature and the absolute humidity.
Purpose
To check the fuser temperature, the ambient temperature and the absolute humidity.
Method
Press the start key. The fuser temperature and ambient temperature are displayed in centigrade (°C) and the
absolute humidity is displayed in percentage (%).
Display
Description
FIX CENTER TEMP
Fuser center temperature (°C)
FIX EDGE TEMP
Fuser edge temperature (°C)
SURROUND TEMP
Ambient temperature (°C)
HUMIDITY
Absolute humidity (%)
Completion
Press the stop key. The screen for selecting a maintenance item No. is displayed.
1-3-43
2GN/2GP/2GR
Maintenance
item No.
Description
U200
Turning all LEDs on
Description
Turns all the LEDs on the operation panel on.
Purpose
To check if all the LEDs on the operation panel light.
Method
Press the start key. All the LEDs on the operation panel light.
Press the stop key or wait for 10 s. The LEDs turns off, and the screen for selecting a maintenance item No. is
displayed.
U201
Initializing the touch panel
Description
Automatically correct the positions of the X- and Y-axes of the touch panel.
Purpose
To automatically correct the display positions on the touch panel after it is replaced.
Method
1. Press the start key. The + key displayed at the upper left of the touch panel flashes.
2. Press on the center of the + key. The + key on lower right flashes.
3. Press the center of the flashing + key.
Initialization of the touch panel is complete, and the screen for selecting a maintenance item No. is displayed.
Completion
Press the stop key. The screen for selecting a maintenance item No. is displayed.
U202
Setting the KMAS host monitoring system
Description
Initializes or operates the KMAS host monitoring system.
This is an optional device which is currently supported only by Japanese specification machines, so no setting
is necessary.
1-3-44
2GN/2GP/2GR
Maintenance
item No.
U203
Description
Checking DP operation
Description
Simulates the original conveying operation separately in the optional DP.
Purpose
To check the DP operation.
Method
1. Press the start key.
2. Place an original in the DP if running this simulation with paper.
3. Select the item to be operated.
4. When selecting [TEST2], to set the magnification using the +/- keys.
Display
Operation
Setting range
Initial setting
TEST 1(NON P)
Without paper
-
-
TEST 2
With paper
100 to 200 (%)
100
5. Press the start key. The operation starts.
6. To stop continuous operation, press the stop key.
Completion
Press the stop key. The screen for selecting a maintenance item No. is displayed.
U204
Setting the presence or absence of a key card or key counter
Description
Sets the presence or absence of the optional key card or key counter.
Purpose
To run this maintenance item if a key card or key counter is installed.
Method
1. Press the start key.
2. Select the item to be set. The setting screen for the selected item is displayed.
Display
Description
KEY-DEVICE
Sets the presence or absence of the key card or key counter
MESSAGE
Sets the message when optional equipment is not installed.
Setting: KEY-DEVICE
1. Select ON or OFF.
Display
Description
ON
The key card or the key counter is installed
OFF
Not installed
2. Press the start key. The setting is set.
3. Turn the main power switch off and on.
Setting: MESSAGE
1. Select the [COUNTER], [CARD] or [COIN].
2. Press the start key. The setting is set.
3. Turn the main power switch off and on.
Completion
Press the stop key. The screen for selecting a maintenance item No. is displayed.
1-3-45
2GN/2GP/2GR
Maintenance
item No.
Description
U206
Setting the presence or absence of the coin vender
Description
Sets the presence or absence of the optional coin vender. Also sets the details for coin vender operation, such
as mode and unit price.
This is an optional device which is currently supported only by Japanese specification machines, so no setting
is necessary.
U207
Checking the operation panel keys
Description
Checks operation of the operation panel keys.
Purpose
To check operation of all the keys and LEDs on the operation panel.
Method
1. Press the start key. The screen for executing is displayed.
2. COUNT0 is displayed and the leftmost LED on the operation panel lights.
3. As the keys lined up in the same line as the lit indicator are pressed in the order from the top to the bottom, the figure shown on the touch panel increases in increments of 1. When all the keys in that line are
pressed and if there are any LEDs corresponding to the keys in the line on the immediate right, the top
LED in that line will light.
4. When all the keys on the operation panel have been pressed, all the LEDs light for up to 10 seconds.
Completion
Press the stop key. The screen for selecting a maintenance item No. is displayed.
U208
Setting the paper size for the paper feeder
Description
Sets the size of paper used in optional 3000-sheet paper feeder.
Purpose
To change the setting when the size of paper used in the paper feeder is changed.
Method
Press the start key. The screen for selecting an item is displayed.
Setting
1. Press the start key.
2. Select the paper size (A4, B5 or Letter).
Initial setting: Letter (Inch specifications)/A4 (Metric specifications)
3. Press the start key. The setting is set.
Completion
Press the stop key. The screen for selecting a maintenance item No. is displayed.
1-3-46
2GN/2GP/2GR
Maintenance
item No.
U220
Description
Setting the trial functions
Description
Enables the trial of USB functions by period limitation.
Purpose
To try USB activation functions.
Method
Press the start key.
Display
Description
FUNCTION
Selecting trial functions
TRIAL STATUS
Displays the current setting (1: Under trial, 0: Not trial)
COUPON COUNT
Displays remaining times
TIME LIMIT
Displays the end term of the function under present trial.
TRIAL START
Starts the trial of the function selected with FUNCTION.
TRIAL STOP
Stops the trial of the function selected with FUNCTION.
Setting: FUNCTION
1. Select [FUNCTION].
2. Select the function using the +/- keys.
3. Press the start key. The setting is set.
[COUPON COUNT], [TIME LIMIT], [TRIAL START] and [TRIAL STOP] are displayed.
Method: TRIAL START
1. Select [TRIAL STRAT].
2. Press the start key.
Trial of the function selected with [FUNCTION] is started.
The display of [COUPON COUNT] decreases one. The display of [TIME LIMIT] will be the date of the
present date plus 30 days.
Method: TRIAL STOP
1. Select [TRIAL STOP].
2. Press the start key.
Trial of the function selected with [FUNCTION] is stopped.
Completion
Press the stop key. The screen for selecting a maintenance item No. is displayed.
U234
Setting punch destination
Description
Sets the destination of optional punch unit of 3000-sheet document finisher.
Purpose
To be set when installing a different punch unit from the destination of the machine.
Setting
1. Press the start key.
2. Select the destination.
Display
Description
AUTO
With no punch unit
JAPAN METRIC
Metric (Japan) specifications
INCH
Inch (North America) specifications
EUROPE METRIC
Metric (Europe) specifications
Initial setting: INCH (Inch specifications)/EUROPE METRIC (Metric specifications)
3. Press the start key. The setting is set.
Completion
Press the stop key. The screen for selecting a maintenance item No. is displayed.
1-3-47
2GN/2GP/2GR
Maintenance
item No.
U236
Description
Setting the limit for the ejection section of the built-in finisher
Description
If the machine is equipped with an optional built-in finisher, this mode sets whether A5R/B5R/statement size
paper is output to the machine eject tray or not.
Purpose
If the machine is equipped with an optional built-in finisher and if paper jams occur due to curling of paper in
the built-in ejection section when two-sided copying onto A5R/B5R/statement size paper is performed, this
mode is used to change the setting to ON to disable ejection to the machine eject tray.
Method
Press the start key. The screen for executing is displayed.
Setting
1. Press the start key.
2. Select ON or OFF.
Display
Description
ON
Does not eject to the machine eject tray.
OFF
Eject to the machine eject tray.
Initial setting: OFF
3. Press the start key. The setting is set.
Completion
Press the stop key. The screen for selecting a maintenance item No. is displayed.
U237
Setting finisher stack quantity
Description
Sets the number of sheets of each stack on the main tray and on the internal tray in the optional 3000-sheet
document finisher.
Purpose
To change the setting when a stack malfunction has occurred.
Method
1. Press the start key.
2. Select the item to be set.
Display
Description
MAIN TRAY
Number of sheets of stack on the main tray
MIDDLE TRAY
Number of sheets of stack on the internal tray for sort copying or staple copying
Setting the number of sheets of stack on the main tray
1. Change the setting using the +/- or numeric keys.
Setting
Description
0
3000 sheets
1
1500 sheets
Initial setting: 0
2. Press the start key. The setting is set.
Setting the number of sheets of stack on the internal tray
1. Change the setting using the +/- or numeric keys.
Setting
Description
0
For sort copying: 10 sheets, for staple copying: 50 sheets
1
For sort copying: 10 sheets, for staple copying: 30 sheets
Initial setting: 0
2. Press the start key. The setting is set.
Completion
Press the stop key. The screen for selecting a maintenance item No. is displayed.
1-3-48
2GN/2GP/2GR
Maintenance
item No.
U240
Description
Checking the operation of the finisher
Description
Turns each motor and solenoid of the 3000-sheet document finisher ON.
Purpose
To check the operation of each motor and solenoid of the 3000-sheet document finisher.
Method
1. Press the start key.
2. Select the item to be checked. The screen for executing each item is displayed.
Display
Description
FINISHER MOTOR
Checking the motor of the 3000-sheet document finisher
FINISHER SOL
Checking the solenoid of the 3000-sheet document finisher
MAIL BOX
Checking the motor and solenoid of the mail box
BOOKLET
Checking the motor of the centerfold unit
Method: Checking the motor of the 3000-sheet document finisher
1. Select the item to be operated. The operation starts.
Display
Motor
FEED IN MOTOR M
Paper entry motor (PEM) is turned on counterwise.
FEED IN MOTOR L
Paper entry motor (PEM) is turned on clockwise.
CONV MOTOR H
Paper conveying motor is turned on at high speed.
CONV MOTOR M
Paper conveying motor is turned on at middle speed.
CONV MOTOR L
Paper conveying motor is turned on at low speed.
EJECT MOTOR H
Eject motor (EJM) is turned on at high speed.
EJECT MOTOR M
Eject motor (EJM) is turned on at middle speed.
EJECT MOTOR L
Eject motor (EJM) is turned on at low speed.
SUB PATH MOTOR H
Relief path motor (RPM) is turned on counterwise.
SUB PATH MOTOR M
Relief path motor (RPM) is turned on clockwise.
BUNDLE UP MOTOR
Paper conveying belt motor 1 (PCBM1) is turned on.
BUNDLE DOWN MTR
Paper conveying belt motor 2 (PCBM2) is turned on.
WIDTH TEST(A3)
Side registration motor 1/2 (SRM1/2) is turned on.
WIDTH TEST(LD)
Side registration motor 1/2 (SRM1/2) is turned on.
STAPLE FR MOTOR
Staple shift motor 1 (STSM1) is turned on.
STAPLE S MOTOR
Staple shift motor 2 (STSM2) is turned on.
STAPLE MOTOR
Staple motor (STM) is turned on.
TRAY MOTOR
Main tray motor (MTM) is turned on.
PUNCH MOTOR
Punch motor (PUNM) is turned on.
PUDDLE MOTOR
Paddle motor (PDM) is turned on.
2. To stop operation, press the stop key.
1-3-49
2GN/2GP/2GR
Maintenance
item No.
U240
Description
Method: Checking the solenoid of the 3000-sheet document finisher
1. Select the item to be operated. The solenoid turns on for 1 s.
Display
Solenoid
FEED IN SOL
Paper entry solenoid (PESOL)
REAR DOWN SOL 1
Trailing edge holder solenoid 1 (TEHSOL1)
REAR DOWN SOL 2
Trailing edge holder solenoid 2 (TEHSOL2)
SUB PATH SOL
Relief path solenoid (RPSOL)
SUB TRAY R SOL
Feedshift solenoid 1 (FSSOL1)
SUB TRAY L SOL
Feedshift solenoid 2 (FSSOL2)
BOOKLET SOL
Feedshift solenoid 3 (FSSOL3)
PADDLE SOL
Paddle solenoid (PDSOL)
HOLD DOWN SOL
Paper holder solenoid (PHSOL)
EJECT SOL
Pressure switching solenoid (PSWSOL)
PUNCH SOL
Punch pattern solenoid (PPSOL)
M-TRAY LOCK SOL
Lock solenoid (LSOL)
Method: Checking the motor and solenoid of the mail box
1. Select the item to be operated. The operation starts.
Display
Motors and solenoids
FEED IN MOTOR
Mail box drive motor (MBDM)
BRANCH SOL 2
Tray feedshift solenoid 1 (TFSSOL1)
BRANCH SOL 3
Tray feedshift solenoid 2 (TFSSOL2)
BRANCH SOL 4
Tray feedshift solenoid 3 (TFSSOL3)
BRANCH SOL 5
Tray feedshift solenoid 4 (TFSSOL4)
BRANCH SOL 6
Tray feedshift solenoid 5 (TFSSOL5)
BRANCH SOL 7
Tray feedshift solenoid 6 (TFSSOL6)
FEED IN SOL
Mail paper entry solenoid (MPESOL)
2. To stop operation, press the stop key.
Method: Checking the motor of the centerfold unit
1. Select the item to be operated. The operation starts.
Display
Motor
CONV MOTOR
Centerfold main motor (CMM)
BLADE MOTOR
Blade motor (BLM)
BUNDLE UP MOTOR
Centerfold paper conveying belt motor 1 (CPCBM1)
BUNDLE DOWN MTR
Centerfold paper conveying belt motor 2 (CPCBM2)
WIDTH TEST(A3)
Centerfold side registration motor 1/2 (CSRM1/2)
WIDTH TEST(LD)
Centerfold side registration motor 1/2 (CSRM1/2)
STAPLE MOTOR
Centerfold staple motor (CSTM)
2. To stop operation, press the stop key.
Completion
Press the stop key with the operation stopped. The screen for selecting a maintenance item No. is displayed.
1-3-50
2GN/2GP/2GR
Maintenance
item No.
U241
Description
Checking the operation of the switches of the finisher
Description
Displays the status of each switch of the 3000-sheet document finisher.
Purpose
To check the operation of each switch of the 3000-sheet document finisher.
Method
1. Press the start key.
2. Select the item to be checked.
Display
Description
FINISHER
Checking the switch of the 3000-sheet document finisher
MAIL BOX
Checking the switch of the mail box
BOOKLET
Checking the switch of the centerfold unit
Method: Checking the switch of the 3000-sheet document finisher
1. Turn the respective switches on and off manually to check the status.
When a switch is detected to be in the ON position, the display for that switch will be highlighted.
Display
Switches
FRONT COVER SW
Front cover switch (FCSW)
TOP COVER SW
Top cover switch (TCSW)
RIGHT COVER SW
Sub tray right switch (STRSW)
SET SW
Joint switch (JSW)
BOOKLET SW
Centerfold set switch (CSSW)
PUNCH TANK SW
Punch waste box sensor (PWBS)
TRAY L-LIMIT SW
Main tray lower limit detection sensor (MTLLDS)
TRAY U-LIMIT SW
Main tray upper limit detection sensor (MTULDS)
TRAY MIDDLE SW
Main tray middle position detection sensor (MTMPDS)
PAP HOLD DOWN SW
Paper holder home position sensor (PHHPS)
LOAD DET SW
Main tray load detection sensor (MTLDS)
FEED IN SW
Paper entry sensor (PES)
EJECT SW 1
Eject switch 1 (ESW1)
EJECT SW 2
Eject switch 2 (ESW2)
EJECT SW 3
Eject switch 3 (ESW3)
STAPLE HP SW 1
Staple home position switch 1 (STHPSW1)
STAPLE HP SW 2
Staple home position switch 2 (STHPSW2)
MIDDLE FEED SW1
Internal tray paper entry sensor 1 (ITPES1)
MIDDLE FEED SW2
Internal tray paper entry sensor 2 (ITPES2)
BUNDLE DET SW 1
Paper detection sensor 1 (PDS1)
BUNDLE DET SW 2
Paper detection sensor 2 (PDS2)
BUNDLE UP HP SW
Paper conveying belt home position sensor 1 (PCBHPS1)
BNDL DOWN HP SW
Paper conveying belt home position sensor 2 (PCBHPS2)
WIDTH HP SW 1
Side registration home position sensor 1 (SRHPS1)
WIDTH HP SW 2
Side registration home position sensor 2 (SRHPS2)
BUNDLE INTERF SW
Paper conveying belt position detection sensor (PCBDS)
VCARRY SW
Centerfold paper conveying sensor (CPCS)
1-3-51
2GN/2GP/2GR
Maintenance
item No.
U241
Description
Method: Checking the switch of the mail box
1. Turn the respective switches on and off manually to check the status.
When a switch is detected to be in the ON position, the display for that switch will be highlighted.
Display
Switches
FEED IN SW
Mail paper entry switch (MPESW)
EJECT SW
Tray eject sensor (TEJS)
COVER SW
Mail box cover open/close switch (MBCOSW)
OVER FLOW SW 1
Tray overflow switch 1 (TOFSW1)
OVER FLOW SW 2
Tray overflow switch 2 (TOFSW2)
OVER FLOW SW 3
Tray overflow switch 3 (TOFSW3)
OVER FLOW SW 4
Tray overflow switch 4 (TOFSW4)
OVER FLOW SW 5
Tray overflow switch 5 (TOFSW5)
OVER FLOW SW 6
Tray overflow switch 6 (TOFSW6)
OVER FLOW SW 7
Tray overflow switch 7 (TOFSW7)
Method: Checking the switch of the centerfold unit
1. Turn the respective switches on and off manually to check the status.
When a switch is detected to be in the ON position, the display for that switch will be highlighted.
Display
Switches
BUNDLE UP HP SW
Centerfold paper conveying belt sensor 1 (CPCBS1)
BNDL DOWN HP SW
Centerfold paper conveying belt sensor 2 (CPCBS2)
BLADE HP SW
Blade home position sensor (BLHPS)
WIDTH HP SW U
Centerfold side registration sensor 2 (CSRS2)
WIDTH HP SW L
Centerfold side registration sensor 1 (CSRS1)
FEED IN SW
Centerfold paper entry sensor (CPES)
PAPER DET SW
Centerfold paper detection sensor (CPDS)
TRAY PAP DET SW
Tray paper detection sensor (TPDS)
EJECT SW
Centerfold eject switch (CESW)
TRAY DET SW
Centerfold top cover switch (CTCSW)
Completion
Press the stop key. The screen for selecting a maintenance item No. is displayed.
U243
Checking the operation of the DP motors
Description
Turns the motors in the optional DP on.
Purpose
To check the operation of the DP motors.
Method
1. Press the start key.
2. Select the item to be operated.
3. Press the start key. The operation starts.
Display
Motors
DP FEED MOTOR
Original feed motor (OFM) is turned on.
DP REG MOTOR
Original registration motor (ORM) is turned on.
DP CONV MOTOR
Original conveying motor (OCM) is turned on.
DP LIFT MOTOR
DP lift motor (DPLM) is turned on.
CIS FAN MOTOR
DP fan motor 1,2,3 (DPFM1,2,3) is turned on.
DP FEED MOT REV
Original feed motor (OFM) is turned on reversing.
4. To stop operation, press the stop key.
Completion
Press the stop key when operation stops. The screen for selecting a maintenance item No. is displayed.
1-3-52
2GN/2GP/2GR
Maintenance
item No.
U244
Description
Checking the DP switches
Description
Displays the status of the respective switches in the optional DP.
Purpose
To check if respective switches in the optional DP operate correctly.
Method
1. Press the start key.
2. Turn the respective switches on and off manually to check the status.
When a switch is detected to be in the ON position, the display for that switch will be highlighted.
Display
Switches
LIFT LOW LIM SW
DP lift upper limit switch (DPLULSW)
LIFT UP LIM SW
DP lift lower limit switch (DPLLLSW)
DP SET SW
Original set switch (OSSW)
DP PSD SW
Original size length switch (OLSW)
DP FEED SW
Original feed switch (OFSW)
DP REG SW
Original registration switch (ORSW)
CCD TMING SW
DP timing switch 1 (DPTSW1)
CIS TMING SW
DP timing switch 2 (DPTSW2)
DP COVER SW
DP safety switch 2 (DPSSW2)
DP OPEN SW
DP safety switch 1 (DPSSW1)
Completion
Press the stop key. The screen for selecting a maintenance item No. is displayed.
U245
Checking messages
Description
Displays a list of messages on the touch panel of the operation panel.
Purpose
To check the messages to be displayed.
Method
1. Press the start key.
2. Select the item to be displayed.
3. Change the screen using the cursor up/down keys to display each message one at a time.
When a message number is entered with the numeric keys and then the start key is pressed, the message corresponding the specified number is displayed.
Completion
Press the stop key. The screen for selecting a maintenance item No. is displayed.
1-3-53
2GN/2GP/2GR
Maintenance
item No.
U246
Description
Setting the finisher
Description
Provides various settings for the optional finisher, if furnished.
Purpose
Adjustment of registration stop timing in punch mode
Adjust if skewed paper conveying occurs or if the copy paper is Z-folded in punch mode.
Adjustment of paper stop timing in the punch mode
To adjust this item when the position of a punch hole is different from the specified one.
Adjustment of front/rear side registration home position of internal tray
Provides optimization when paper jam occurs due to an inferior fitting of the internal tray adjuster guides to paper.
Adjusting of front and back/slanted stapling home position
Adjusts the stapling position in the staple mode if the position is not proper.
Provides adjustment of slanted stapling.
Adjustment of upper/lower side registration home position of centerfold unit
Provides optimization when paper jam occurs due to an inferior fitting of the centerfold adjuster guides to paper.
Adjustment of booklet stapling position
Adjusts the booklet stapling position in the stitching mode if the position is not proper.
Adjustment of center folding position
Adjusts the center folding position in the stitching mode if the position is not proper.
Start
1. Press the start key.
2. Select the item to be set. The screen for setting each item is displayed.
Display
Description
FINISHER 3000
Adjustment of the 3000-sheet document finisher
BOOKLET FOLDER
Adjustment of the centerfold unit
FINISHER B-IN
Adjustment of the built-in finisher
Setting: 3000-sheet document finisher
1. Select the item to be set.
Display
Description
PUNCH REG ADJ
Adjustment of registration stop timing in punch mode
PUNCH POS ADJ
Adjustment of the paper stop timing in punch mode
WIDTH F HP ADJ
Adjustment of front side registration home position
WIDTH R HP ADJ
Adjustment of rear side registration home position
STAPLE HP ADJ
Adjustment of front and back stapling home position
T-STAPLE HP ADJ
Adjustment of slanted stapling home position
Setting: adjustment of registration stop timing
1. Select [PUNCH REG ADJ].
2. Change the setting using the +/- or numeric keys.
Description
Adjustment of registration stop timing
Setting
range
-20 to 20
Initial
setting
0
Change in
value per step
1 ms
If skewed paper conveying occurs (sample 1), increase the preset value. If the copy paper is Z-folded
(sample 2), decrease the preset value.
Sample 1
Sample 2
Figure 1-3-18
3. Press the start key. The value is set.
4. To return to the screen for selecting an item, press the stop key.
1-3-54
2GN/2GP/2GR
Maintenance
item No.
U246
Description
Setting: adjustment of the paper stop timing
1. Select PUNCH POS ADJ.
2. Change the setting using the +/- or numeric keys.
Description
Setting
range
Initial
setting
Change in
value per step
Adjustment of the paper stop timing
-10 to 10
0
0.49 mm
If the distance of the position of a punch hole is smaller than the specified value A, increase the preset
value. If the distance is larger than the value A, decrease the preset value.
A
Preset value A: 5.5 +
- 2 mm (inch)
9.5 +
- 2 mm (metric)
Figure 1-3-19
3. Press the start key. The value is set.
4. To return to the screen for selecting an item, press the stop key.
Setting: adjustment of front/rear side registration home position
1. Select [WIDTH F HP ADJ] or [WIDTH R HP ADJ].
2. Change the setting using the +/- or numeric keys.
Setting
range
Description
Initial
setting
Change in
value per step
Adjustment of front side registration home position
-10 to 10
0
0.314 mm
Adjustment of rear side registration home position
-10 to 10
0
0.314 mm
3. Press the start key. The value is set.
4. Press the stop key. The screen for selecting a maintenance item No. is displayed.
5. Enter maintenance mode U240 and select [FINISHER MOTOR], then [WIDTH TEST(A3)].
The width guides of the internal tray will move to A3-size position.
6. Pull the internal tray, insert paper between the guides and check that paper is abut the guides.
7. Repeat the above adjustment until paper is properly in position.
Setting: adjustment of front and back stapling home position
1. Select [STAPLE HP ADJ].
2. Change the setting using the +/- or numeric keys.
Description
Setting
range
Initial
setting
Change in
value per step
Adjustment of front and back stapling home position
-10 to 10
0
0.32 mm
When staple positions are off toward the front side of the machine (sample 1), increase the preset value.
When staple positions are off toward the rear side of the machine (sample 2), decrease the preset value.
Sample 1
Sample 2
Figure 1-3-20
3. Press the start key. The value is set.
4. To return to the screen for selecting an item, press the stop key.
1-3-55
2GN/2GP/2GR
Maintenance
item No.
U246
Description
Setting: adjustment of slanted stapling home position
1. Select T-STAPLE HP ADJ.
2. Change the setting using the +/- or numeric keys.
Description
Setting
range
Initial
setting
Change in
value per step
Adjustment of slanted stapling home position
-10 to 10
0
0.99°
To increase the angle for slanted stapling (sample 1), decrease the preset value. To decrease the angle
for slanted stapling (sample 2), increase the preset value.
Sample 1
Sample 2
Figure 1-3-21
3. Press the start key. The value is set.
4. To return to the screen for selecting an item, press the stop key.
Setting: centerfold unit
1. Select the item to be set.
Display
Description
WIDTH U HP ADJ
Adjustment of upper side registration home position
WIDTH L HP ADJ
Adjustment of lower side registration home position
STAPLE POS ADJ1
Adjustment of booklet stapling position for A4/letter size
STAPLE POS ADJ2
Adjustment of booklet stapling position for B4/legal size
STAPLE POS ADJ3
Adjustment of booklet stapling position for A3/ledger size
BOOKLET POS ADJ1
Adjustment of center folding position for A4/letter size
BOOKLET POS ADJ2
Adjustment of center folding position for B4/legal size
BOOKLET POS ADJ3
Adjustment of center folding position for A3/ledger size
Setting: adjustment of upper/lower side registration home position
1. Select [WIDTH U HP ADJ] or [WIDTH L HP ADJ].
2. Change the setting using the +/- or numeric keys.
Description
Setting
range
Initial
setting
Change in
value per step
Adjustment of upper side registration home position
-20 to 20
0
0.1 mm
Adjustment of lower side registration home position
-46 to 46
0
0.1 mm
3. Press the start key. The value is set.
4. Press the stop key. The screen for selecting a maintenance item No. is displayed.
5. Enter maintenance mode U240 and select [BOOKLET], then [WIDTH TEST(A3)].
The width guides of the centerfold unit will move to A3-size position.
6. Pull the centerfold unit, insert paper between the guides and check that paper is abut the guides.
7. Repeat the above adjustment until paper is properly in position.
1-3-56
2GN/2GP/2GR
Maintenance
item No.
U246
Description
Setting: adjustment of booklet stapling position
1. Select the [STAPLE POS ADJ 1], [STAPLE POS ADJ 2] or [STAPLE POS ADJ 3].
2. Change the setting using the +/- or numeric keys.
Description
Setting
range
Initial
setting
Change in
value per step
Adjustment of booklet stapling position for A4/letter size
-10 to 10
0
0.55 mm
Adjustment of booklet stapling position for B4/legal size
-10 to 10
0
0.55 mm
Adjustment of booklet stapling position for A3/ledger size -10 to 10
0
0.55 mm
When staples are placed too far right (sample 1), decrease the preset value. When staples are placed
too far left (sample 2), increase the preset value.
Reference value: within ± 2 mm
2 mm
2 mm
Sample 2
Sample 1
Figure 1-3-22
3. Press the start key. The value is set.
4. To return to the screen for selecting an item, press the stop key.
Setting: adjustment of center folding position
1. Select the [BOOKLET POS ADJ1], [BOOKLET POS ADJ2] or [BOOKLET POS ADJ3].
2. Change the setting using the +/- or numeric keys.
Description
Setting
range
Initial
setting
Change in
value per step
Adjustment of center folding position for A4/letter size
-10 to 10
0
0.55 mm
Adjustment of center folding position for B4R/legal size
-10 to 10
0
0.55 mm
Adjustment of center folding position for A3R/ledger size
-10 to 10
0
0.55 mm
When the centerfold position too far right (sample 1), increase the preset value. When the centerfold
position too far left (sample 2), decrease the setting value.
Reference value: within ± 3 mm
3 mm
Center line
Sample 1
3 mm
Sample 2
Figure 1-3-23
3. Press the start key. The value is set.
4. To return to the screen for selecting an item, press the stop key.
1-3-57
2GN/2GP/2GR
Maintenance
item No.
U246
Description
Setting the side registration cursor stop position
1. Select the desired cursor position.
2. Change the setting using the +/- or numeric keys.
Display
Description
Setting
range
FRONT
Front side registration cursor stop position
-4 to +4
0
REAR
Rear side registration cursor stop position
-4 to +4
0
END
Trailing edge registration cursor stop position
-4 to +4
0
3. Press the start key. The value is set.
4. To return to the screen for selecting an item, press the stop key.
Completion
Press the stop key. The screen for selecting a maintenance item No. is displayed.
U247
Setting the paper feed device
Description
Turns on motors and clutches of optional 3000-sheet paper feeder or paper feeder.
Purpose
To check the operation of motors and clutches of paper feed device.
Method
1. Press the start key. The value varies depending to the option furnished.
3000-sheet paper feeder
Display
Motor and clutches
LCF FEED
Paper feeder conveying motor (PFCM)
CLUTCH B
Paper feeder conveying clutch (PFCCL)
CLUTCH P1
Paper feeder paper feed clutch 1 (PFPFCL1)
CLUTCH P2
Paper feeder paper feed clutch 2 (PFPFCL2)
Paper feeder
Display
Motor and clutches
DESK FEED
Paper feeder drive motor (PFDM)
CLUTCH FEED
Paper feeder feed clutch (PFFCL)
CLUTCH U
Paper feeder paper feed clutch 1 (PFPFCL1)
CLUTCH L
Paper feeder paper feed clutch 2 (PFPFCL2)
2. Select the item to be operated.
3. Press the start key. The operation starts.
4. To stop operation, press the stop key.
Completion
Press the stop key. The screen for selecting a maintenance item No. is displayed.
1-3-58
Initial
setting
2GN/2GP/2GR
Maintenance
item No.
U250
Description
Setting the maintenance cycle
Description
Displays and changes the maintenance cycle.
Purpose
To check and change the maintenance cycle.
Method
Press the start key. The currently set maintenance cycle is displayed.
Setting
1. Change the setting using the numeric keys.
Description
Setting range
Initial setting
Maintenance cycle
0 to 9999999
400000 (30 ppm), 500000 (40/50 ppm)
2. Press the start key. The value is set.
Completion
Press the stop key. The screen for selecting a maintenance item No. is displayed.
U251
Checking/clearing the maintenance count
Description
Displays, clears and changes the maintenance count.
Purpose
To check the maintenance count. Also to clear the count during maintenance service.
Method
Press the start key. The maintenance count is displayed.
Clearing
1. Press the clear key.
2. Press the start key. The count is cleared.
Setting
1. Enter a count using the numeric keys.
2. Press the start key. The count is set.
Completion
Press the stop key. The screen for selecting a maintenance item No. is displayed.
1-3-59
2GN/2GP/2GR
Maintenance
item No.
U252
Description
Setting the destination
Description
Switches the operations and screens of the machine according to the destination.
Purpose
To be executed after initializing the backup RAM by running maintenance item U020, in order to return the setting to the value before replacement or initialization.
Method
Press the start key. The screen for selecting an item is displayed.
Setting
1. Press the start key.
2. Select the destination.
Display
Description
INCH
Inch (North America) specifications
EUROPE METRIC
Metric (Europe) specifications
ASIA PACIFIC
Metric (Asia Pacific) specifications
3. Press the start key. The setting is set.
4. Turn the main power switch off and on.
Supplement
The specified initial settings are provided according to the destinations in the maintenance items below. To
change the initial settings in those items, be sure to run maintenance item U021 after changing the destination.
Initial setting according to the destinations
U253
Maintenance
item No.
Title
Japan
Inch
Europe Metric,
Asia Pacific
208
Setting the paper size for the paper
feeder
A4
Letter
A4
253
Switching between double and single
counts
Single
Double
Double
Switching between double and single counts
Description
Switches the count system for the total counter and other counters.
Purpose
Used to select, according to the preference of the user (copy service provider), if A3/Ledger paper is to be
counted as one sheet (single count) or two sheets (double count).
Setting
1. Press the start key.
2. Select double or single count.
Display
Description
SINGLE COUNT
Single count for all size paper
DBL CNT(A3/LGR)
Double count for A3/Ledger size or larger
DBL COUNT(B4)
Double count for B4 size or larger
Initial setting: DBL CNT(A3/LGR)
3. Press the start key. The setting is set.
Completion
Press the stop key. The screen for selecting a maintenance item No. is displayed.
1-3-60
2GN/2GP/2GR
Maintenance
item No.
U260
Description
Selecting the timing for copy counting
Description
Changes the copy count timing for the total counter and other counters.
Purpose
To be set according to user (copy service provider) request.
If a paper jam occurs frequently in the optional document finisher when the number of copies is counted at the
time of paper ejection, copies are provided without copy counts. The copy service provider cannot charge for
such copying. To prevent this, the copy timing should be made earlier.
If a paper jam occurs frequently in the paper conveying or fuser sections when the number of copies is
counted before the paper reaches those sections, copying is charged without a copy being made. To prevent
this, the copy timing should be made later.
Setting
1. Press the start key.
2. Select the copy count timing.
Display
Description
FEED
When secondary paper feed starts
EJECT
When the paper is ejected
Initial setting: EJECT
3. Press the start key. The setting is set.
Completion
Press the stop key. The screen for selecting a maintenance item No. is displayed.
U265
Setting OEM purchaser code
Description
Sets the OEM purchaser code.
Purpose
Sets the code when replacing the main PWB and the like.
Setting
1. Press the start key.
2. Adjust the preset value using the +/- or numeric keys.
3. Press the start key. The setting is set.
Completion
Press the stop key. The screen for selecting a maintenance item No. is displayed.
U285
Setting service status page
Description
Determines displaying the toner coverage report on reporting.
Purpose
According to user request, changes the setting.
Method
1. Press the start key.
2. Press [COVERAGE].
Highlighted: ON, Non-highlighted: OFF
Initial setting: ON
3. Press the start key. The setting is set.
Completion
Press the stop key. The screen for selecting a maintenance item No. is displayed.
1-3-61
2GN/2GP/2GR
Maintenance
item No.
U326
Description
Setting the black line cleaning indication
Description
Sets whether to display the cleaning guidance when detecting the black line.
Purpose
Displays the cleaning guidance in order to make the call for service with the black line decrease by the rubbish
on the platen when scanning from the DP.
Setting
1. Press the start key.
2. Select ON or OFF.
Display
Description
ON
Displays the cleaning guidance
OFF
Not to display the cleaning guidance
COUNT
Setting counts of the cleaning guidance indication
Initial setting: ON
3. Press the start key. The setting is set.
Setting the count value
1. Select [COUNT].
2. Enter a count using the +/- or numeric keys.
Setting range: 0 to 999
Initial setting: 8
When setting is 0, the black line cleaning indication is displayed only if the black line is detected.
3. Press the start key. The count is set.
Completion
Press the stop key. The screen for selecting a maintenance item No. is displayed.
U328
Side ejection setting
Description
Sets whether to eject to the side of the machine when an optional curl eliminator is installed.
Purpose
Set according to the preference of the user.
Setting
1. Press the start key.
2. Select ON or OFF.
Display
Description
ON
To eject to the side of the machine
OFF
Not to eject to the side of the machine
Initial setting: OFF
3. Press the start key. The setting is set.
Completion
Press the stop key. The screen for selecting a maintenance item No. is displayed.
1-3-62
2GN/2GP/2GR
Maintenance
item No.
U332
Description
Setting the size conversion factor
Description
Sets the coefficient of nonstandard sizes in relation to the A4/Letter size. The coefficient set here is used to
convert the black ratio in relation to the A4/Letter size and to display the result in user simulation.
Purpose
To set the coefficient for converting the black ratio for nonstandard sizes in relation to the A4/Letter size.
Setting
1. Press the start key.
2. Select [CALCULATION RATE].
3. Change the setting using the +/- keys.
Description
Setting range
Initial setting
Size parameter
0.1 to 3.0
1.0
4. Press the start key. The setting is set.
Completion
Press the stop key. The screen for selecting a maintenance item No. is displayed.
U341
Specific paper feed location setting for printing function
Description
Sets a paper feed location specified for printer output.
Purpose
To use a paper feed location only for printer output.
A paper feed location specified for printer output cannot be used for copy output.
Setting
1. Press the start key.
2. Select the paper feed location for the printer.
Two or more cassette can be selected.
3. Press the start key. The setting is set.
Completion
Press the stop key. The screen for selecting a maintenance item No. is displayed.
1-3-63
2GN/2GP/2GR
Maintenance
item No.
U342
Description
Setting the ejection restriction
Description
Sets or cancels the restriction on the number of sheets to be ejected continuously when the internal eject tray
is selected as the eject location.
Purpose
According to user request, sets or cancels restriction on the number of sheets.
Setting
1. Press the start key.
2. Select ON or OFF.
Display
Description
ON
Sets restriction on the number of sheets
OFF
Cancels restriction on the number of sheets
Initial setting: ON
Details of restriction (number of sheets to be ejected continuously after the start key is pressed)
Condition
Number of sheets
When no optional ejection device is installed
250
When the job separator is installed
150
When the finisher is installed
100
3. Press the start key. The setting is set.
Completion
Press the stop key. The screen for selecting a maintenance item No. is displayed.
U343
Switching between duplex/simplex copy mode
Description
Switches the initial setting between duplex and simplex copy.
Purpose
To be set according to frequency of use: set to the more frequently used mode.
Setting
1. Press the start key.
2. Select ON or OFF.
Display
Description
ON
Duplex copy
OFF
Simplex copy
Initial setting: OFF
3. Press the start key. The setting is set.
Completion
Press the stop key. The screen for selecting a maintenance item No. is displayed.
U345
1-3-64
Setting the value for maintenance due indication
Description
Sets when to display a message notifying that the time for maintenance is about to be reached, by setting the
number of copies that can be made before the current maintenance cycle ends.
When the difference between the number of copies of the maintenance cycle and that of the maintenance
count reaches the set value, the message is displayed.
This maintenance mode is effective for only Japanese specification.
2GN/2GP/2GR
Maintenance
item No.
U402
Description
Adjusting margins of image printing
Description
Adjusts margins for image printing.
Purpose
Make the adjustment if margins are incorrect.
Adjustment
1. Press the start key.
2. Select the item to be adjusted.
3.
4.
5.
6.
Display
Description
Setting
range
Initial
setting
Change in
value per step
LEAD
Printer leading edge margin
0 to 236
74
0.1 mm
A
Printer left margin
-80 to 236
70
0.1 mm
C
Printer right margin
-118 to 236
68
0.1 mm
TRAIL
Printer trailing edge margin
-118 to 236
85
0.1 mm
TRAIL(DUP)
Printer trailing edge margin in duplex
mode (second side)
-118 to 236
140
0.1 mm
TRIAL(MP)
Printer trailing edge margin (MP tray)
-118 to 236
55
0.1 mm
Press the system menu key.
Press the start key to output a test pattern.
Press the system menu key.
Change the setting value using the +/- or numeric keys.
Increasing the value makes the margin wider, and decreasing it makes the margin narrower.
Printer leading edge margin
(3.0±2.5mm)
Ejection direction
(reference)
Printer
left margin
(2.0+2.0
–1.5mm)
Printer
right margin
(2.0+2.0
–1.5mm)
Printer trailing edge margin
(3.0±2.5mm)
Figure 1-3-24
7. Press the start key. The value is set.
Caution
Check the copy image after the adjustment. If the image is still incorrect, perform the following adjustments in
maintenance mode.
U402
U403
(P.1-3-66)
U404
(P.1-3-67)
Completion
Press the stop key. The screen for selecting a maintenance item No. is displayed.
1-3-65
2GN/2GP/2GR
Maintenance
item No.
U403
Description
Adjusting margins for scanning an original on the platen
Description
Adjusts margins for scanning the original on the contact glass.
Purpose
Make the adjustment if margins are incorrect.
Adjustment
1. Press the start key.
2. Select the item to be adjusted.
Description
Setting
range
Initial
setting
Change in
value per step
A MARGIN
Scanner left margin
0 to 10.0
2.0
0.5 mm
B MARGIN
Scanner leading edge margin
0 to 10.0
2.0
0.5 mm
Display
3.
4.
5.
6.
C MARGIN
Scanner right margin
0 to 10.0
2.0
0.5 mm
D MARGIN
Scanner trailing edge margin
0 to 10.0
2.0
0.5 mm
Press the system menu key.
Place an original and press the start key to make a test copy.
Press the system menu key.
Change the setting value using the +/- or numeric keys.
Increasing the value makes the margin wider, and decreasing it makes the margin narrower.
Scanner leading edge margin
(3±1.5mm)
Ejection direction
(reference)
Scanner
left margin
(2±1.0mm)
Scanner
right margin
(2±1.0mm)
Scanner trailing edge margin
(2±1.0mm)
Figure 1-3-25
7. Press the start key. The value is set.
Caution
Check the copy image after the adjustment. If the image is still incorrect, perform the following adjustments in
maintenance mode.
U403
U404
(P.1-3-67)
Completion
Press the stop key. The indication for selecting a maintenance item No. appears.
1-3-66
2GN/2GP/2GR
Maintenance
item No.
U404
Description
Adjusting margins for scanning an original from the DP
Description
Adjusts margins for scanning the original from the DP.
Purpose
Make the adjustment if margins are incorrect when the optional DP is used.
Caution
Before making this adjustment, ensure that the following adjustments have been made in maintenance mode
U402
(P.1-3-65)
U403
(P.1-3-66)
U404
Adjustment
1. Press the start key.
2. Select the item to be adjusted.
Description
Setting
range
Initial
setting
Change in
value per step
A MARGIN
Left margin (first page)
0 to 10.0
3.0
0.1 mm
B MARGIN
Leading edge margin (first page)
0 to 10.0
2.5
0.1 mm
Display
3.
4.
5.
6.
C MARGIN
Right margin (first page)
0 to 10.0
3.0
0.1 mm
D MARGIN
Trailing edge margin (first page)
0 to 10.0
4.0
0.1 mm
A MARGIN(BACK)
Left margin (second page)
0 to 10.0
3.0
0.1 mm
B MARGIN(BACK)
Leading edge margin (second
page)
0 to 10.0
2.5
0.1 mm
C MARGIN(BACK)
Right margin (second page)
0 to 10.0
3.0
0.1 mm
D MARGIN(BACK)
Trailing edge margin (second
page)
0 to 10.0
4.0
0.1 mm
Press the system menu key.
Place an original on the DP and press the start key to make a test copy.
Press the system menu key.
Change the setting value using the +/- or numeric keys.
Increasing the value makes the margin wider, and decreasing it makes the margin narrower.
Leading edge margin
(3±1.5mm)
Ejection direction
(reference)
Left margin
(2±1.0mm)
Right margin
(2±1.0mm)
Trailing edge margin
(2±1.0mm)
Figure 1-3-26
7. Press the start key. The value is set.
Completion
Press the stop key. The screen for selecting a maintenance item No. is displayed.
1-3-67
2GN/2GP/2GR
Maintenance
item No.
U407
Description
Adjusting the leading edge registration for memory image printing
Description
Adjusts the leading edge registration during memory copying.
Purpose
Make the adjustment if there is a regular error between the leading edges of the copy image and original during memory copying.
Caution
Before making this adjustment, ensure that the following adjustments have been made in maintenance mode
U034
(P.1-3-18)
U402
(P.1-3-65)
U404
(P.1-3-67)
U407
U066
(P.1-3-24)
U403
(P.1-3-66)
U071
(P.1-3-28)
Adjustment
1. Press the start key.
2.
3.
4.
5.
Description
Setting
range
Initial
setting
Change in
value per step
Leading edge registration for memory image printing
-47 to 47
0
1.0 mm
Press the system menu key.
Place an original and press the start key to make a test copy.
Press the system menu key.
Change the setting value using the +/- or numeric keys.
For copy example 1, decrease the value.
For copy example 2, increase the value.
Original
Copy
example 1
Copy
example 2
Figure 1-3-27
6. Press the start key. The value is set.
Completion
Press the stop key. The screen for selecting a maintenance item No. is displayed.
1-3-68
2GN/2GP/2GR
Maintenance
item No.
U411
Description
Adjusting the scanner automatically
Description
Uses a specified original and automatically adjusts the following items in the scanner and the DP scanning
sections.
Purpose
To perform automatic adjustment of various items in the scanner and the DP scanning sections.
Method
1. Press the start key.
2. Select the item. The screen for executing is displayed.
Display
Description
Original to be used for
adjustment (P/N)
SCANNER
Automatic adjustment in the scanner section
302FZ56990
DP(FACE UP)
Automatic adjustment in the DP scanning
section (first page)
2AC68241
DP(FACE DOWN)
Automatic adjustment in the DP scanning
section (second page)
2AC68241/303JX57010/
303JX57020
Remarks
Cut the trailing edge of the original as shown when the specified original (P/N: 2AC68241) is used.
128 +- 1mm 60 +- 1mm
Cut with the edge of black belt.
Figure 1-3-28
Method: SCANNER
1. Enter the target values which are shown on the specified original (P/N: 302FZ56990) executing maintenance item U425.
2. Set a specified original (P/N: 302FZ56990) on the platen.
3. Select the item.
Display
Description
ALL
Automatic adjustment using the platen for: original size magnification/leading
edge timing/center line, input gamma, chromatic aberration filter, MTF filter
and matrix.
INPUT
Automatic adjustment using the platen for: original size magnification/leading
edge timing/center line.
GAMMA
Automatic adjustment using the platen for: input gamma.
C.A.
Automatic adjustment using the platen for: chromatic aberration filter.
MTF
Automatic adjustment using the platen for: MTF filter.
MATRIX
Automatic adjustment using the platen for: matrix.
4. Press the start key. Auto adjustment starts.
When automatic adjustment has normally completed, [RESULT OK 00] is displayed. If a problem occurs
during auto adjustment, [ERROR XX] (XX is replaced by an error code) is displayed and operation
stops. Should this happen, determine the details of the problem and either repeat the procedure from
the beginning, or adjust the remaining items manually by running the corresponding maintenance items.
5. To return to the screen for selecting an item, press the stop key.
1-3-69
2GN/2GP/2GR
Maintenance
item No.
U411
Description
Method: DP(FACE UP)
1. Set a specified original (P/N: 2AC68241) in the DP.
2. Select [INPUT].
Display
Description
INPUT
Automatic adjustment of first page using the DP for: original size magnification/leading edge timing/center line.
3. Press the start key. Auto adjustment starts.
When automatic adjustment has normally completed, [RESULT OK 00] is displayed. If a problem occurs
during auto adjustment, [ERROR XX] (XX is replaced by an error code) is displayed and operation
stops. Should this happen, determine the details of the problem and either repeat the procedure from
the beginning, or adjust the remaining items manually by running the corresponding maintenance items.
4. To return to the screen for selecting an item, press the stop key.
Method: DP(FACE DOWN)
1. Select the item. The screen for executing is displayed.
Display
Description
NORMAL TARGET
Uses the value determined using maintenance item U425 as the target data.
ORIGINAL TARGET
Uses the specified original for acquiring data as the target data.
Method: NORMAL TREGET
1. Select the item.
Display
Description
Original to be used for
adjustment (P/N)
ALL
Automatic adjustment of second page using the DP
for: original size magnification/leading edge timing/
center line, input gamma, chromatic aberration filter,
MTF filter and matrix.
Automatic adjustment of second page using the DP
for: original size magnification/leading edge timing/
center line.
2AC68241/303JX57010/
303JX57020
GAMMA
Automatic adjustment of second page using the DP
for: tolerance of input gamma.
303JX57010
MTF/MATRIX
Automatic adjustment of second page using the DP
for: tolerance of MTF filter and matrix.
303JX57020
INPUT
2AC68241
[ALL]
1. Enter the target values which are shown on the specified original (P/N: 2AC68241/303JX57010/
303JX57020) executing maintenance item U425.
2. Set specified originals (P/N: 2AC68241/303JX57010/303JX57020) in the DP.
Stack the originals in the order of 2AC68241, 303JX57010, and 303JX57020.
3. Press the start key. Auto adjustment starts.
[INPUT]
1. Enter the target values which are shown on the specified original (P/N: 2AC68241) executing maintenance item U425.
2. Set a specified original (P/N: 2AC24681) in the DP.
3. Press the start key. Auto adjustment starts.
[GAMMA]
1. Enter the target values which are shown on the specified original (P/N: 303JX57010) executing maintenance item U425.
2. Set a specified original (P/N: 303JX57010) in the DP.
3. Press the start key. Auto adjustment starts.
[MTF/MATRIX]
1. Enter the target values which are shown on the specified original (P/N: 303JX57020) executing maintenance item U425.
2. Set a specified original (P/N: 303JX57020) in the DP.
3. Press the start key. Auto adjustment starts.
1-3-70
2GN/2GP/2GR
Maintenance
item No.
U411
Description
When automatic adjustment has normally completed, [RESULT OK 00] is displayed. If a problem
occurs during auto adjustment, [ERROR XX] (XX is replaced by an error code) is displayed and operation stops. Should this happen, determine the details of the problem and either repeat the procedure
from the beginning, or adjust the remaining items manually by running the corresponding maintenance
items.
Method: ORIGINAL TARGET
1. Place the specified original for acquiring gamma target data (P/N: 303JX57010) on the platen, and
press the start key.
2. Place the specified original for acquiring matrix target data (P/N: 303JX57010) on the platen, and press
the start key.
3. Select the item.
Display
Description
Original to be used for
adjustment (P/N)
ALL
Automatic adjustment of second page using the DP
for: original size magnification/leading edge timing/
center line, input gamma, chromatic aberration filter,
MTF filter and matrix.
Automatic adjustment of second page using the DP
for: original size magnification/leading edge timing/
center line.
2AC68241/303JX57010/
303JX57020
GAMMA
Automatic adjustment of second page using the DP
for: input gamma.
303JX57010
MTF/MATRIX
Automatic adjustment of second page using the DP
for: MTF filter and matrix.
303JX57020
INPUT
2AC68241
[ALL]
1. Set specified originals (P/N: 2AC68241/303JX57010/303JX57020) in the DP.
Stack the originals in the order of 2AC68241, 303JX57010, and 303JX57020.
2. Press the start key. Auto adjustment starts.
[INPUT]
1. Set a specified original (P/N: 2AC24681) in the DP.
2. Press the start key. Auto adjustment starts.
[GAMMA]
1. Set a specified original (P/N: 303JX57010) in the DP.
2. Press the start key. Auto adjustment starts.
[MTF/MATRIX]
1. Set a specified original (P/N: 303JX57020) in the DP.
2. Press the start key. Auto adjustment starts.
When automatic adjustment has normally completed, [RESULT OK 00] is displayed. If a problem
occurs during auto adjustment, [ERROR XX] (XX is replaced by an error code) is displayed and operation stops. Should this happen, determine the details of the problem and either repeat the procedure
from the beginning, or adjust the remaining items manually by running the corresponding maintenance
items.
1-3-71
2GN/2GP/2GR
Maintenance
item No.
U411
Description
Error Codes
Codes
ERROR 01
Description
Black band detection error (scanner leading edge registration)
ERROR 02
Black band detection error (scanner center line)
ERROR 03
Black band detection error (scanner main scanning direction magnification)
ERROR 04
Black band is not detected (scanner leading edge registration)
ERROR 05
Black band is not detected (scanner center line)
ERROR 06
Black band is not detected (scanner main scanning direction magnification)
ERROR 07
Black band is not detected (scanner auxiliary scanning direction magnification)
ERROR 08
Black band is not detected (DP main scanning direction magnification far end)
ERROR 09
Black band is not detected (DP main scanning direction magnification near end)
ERROR 0a
Black band is not detected (DP auxiliary scanning direction magnification leading edge)
ERROR 0b
Black band is not detected (DP auxiliary scanning direction magnification leading edge original check)
ERROR 0c
Black band is not detected (DP auxiliary scanning direction trailing edge)
ERROR 0d
Black band is not detected (DP auxiliary scanning direction trailing edge 2)
ERROR 0e
DMA time out
ERROR 0f
Auxiliary scanning direction magnification error
ERROR 10
Auxiliary scanning direction leading edge detection error
ERROR 11
Auxiliary scanning direction trailing edge detection error
ERROR 12
Auxiliary scanning direction skew 1.5 error
ERROR 13
Maintenance request error
ERROR 14
Main scanning direction center line error
ERROR 15
Main scanning direction skew 1.5 error
ERROR 16
Main scanning direction magnification error
ERROR 17
Carriage error
ERROR 18
Service call error
ERROR 19
DP status error
ERROR 1a
DP open error
ERROR 1b
Original is not detected
ERROR 2X
N950 patch for the original error
ERROR 3X
N850 patch for the original error
ERROR 4X
N770 patch for the original error
ERROR 5X
N650 patch for the original error
ERROR 6X
N500 patch for the original error
ERROR 7X
N300 patch for the original error
ERROR 8X
N300 patch for the original error
ERROR 9X
N950 patch for the original error
ERROR aX
Cyan patch for the original error
ERROR bX
Magenta patch for the original error
ERROR cX
Yellow patch for the original error
ERROR dX
Red patch for the original error
ERROR eX
Green patch for the original error
ERROR fX
Blue patch for the original error
ERROR ff
Other error
Completion
Press the stop key. The screen for selecting a maintenance item is displayed.
1-3-72
2GN/2GP/2GR
Maintenance
item No.
U425
Description
Setting the target
Description
The value that is indicated on the back of the chart to be used for adjustment should be entered.
Purpose
Performs data input in order to correct for differences in originals during automatic adjustment.
Method
1. Press the start key.
2. Select the item. The screen for executing is displayed.
Display
Description
Original to be used for
adjustment (P/N)
CCD
Entering the target values for scanner automatic
adjustment
302FZ56990
CIS
Entering the target values for DP automatic
adjustment
2AC68241/303JX57010/
303JX57020
Setting: CCD
1. Select the item to be set.
Display
Description
N875
Setting the N875 patch for the original for adjustment
N475
Setting the N475 patch for the original for adjustment
N125
Setting the N125 patch for the original for adjustment
CYAN
Setting the cyan patch for the original for adjustment
MAGENTA
Setting the magenta patch for the original for adjustment
YELLOW
Setting the yellow patch for the original for adjustment
RED
Setting the red patch for the original for adjustment
GREEN
Setting the green patch for the original for adjustment
BLUE
Setting the blue patch for the original for adjustment
ADJUST ORIGINAL
Setting the main and auxiliary scanning directions
2. Select the item to be set.
3. Change the setting value using the +/- or numeric keys.
Display
Description
Setting range
L
Setting the L value
0.0 to 100.0
a
Setting the a value
-200.0 to 200.0
b
Setting the b value
-200.0 to 200.0
4. Press the start key. The value is set.
5. To return to the screen for selecting an item, press the stop key.
Setting: ADJUST ORIGINAL/MAIN
1. Measure distance from the left edge of the original for adjustment to the black band in three points.
Measurement procedure
1) Measure the distances A (50 mm), B (105 mm) and C (190 mm) along the auxiliary scanning direction.
2) Apply the following formula for the values obtained: ((A + C) / 2 + B) / 2
2. Enter the values solved using the +/- keys in [MAIN ADJ].
3. Press the start key. The value is set.
4. To return to the screen for selecting an item, press the stop key.
Setting: ADJUST ORIGINAL/SUB
1. Measure distance from the leading edge of the original for adjustment to the black band in three points.
Measurement procedure
1) Measure the distances D (30 mm), E (148.5 mm) and C (267 mm) along the main scanning direction.
2) Apply the following formula for the values obtained: ((D + F) / 2 + E) / 2
2. Enter the values solved using the +/- keys in [SUB ADJ].
3. Press the start key. The value is set.
4. To return to the screen for selecting an item, press the stop key.
1-3-73
2GN/2GP/2GR
Maintenance
item No.
U425
Description
Setting: CIS
1. Select the item to be set.
Display
Description
N950
Setting the N950 patch for the original for adjustment
N850
Setting the N850 patch for the original for adjustment
N770
Setting the N770 patch for the original for adjustment
N650
Setting the N650 patch for the original for adjustment
N500
Setting the N500 patch for the original for adjustment
N300
Setting the N300 patch for the original for adjustment
CYAN
Setting the cyan patch for the original for adjustment
MAGENTA
Setting the magenta patch for the original for adjustment
YELLOW
Setting the yellow patch for the original for adjustment
RED
Setting the red patch for the original for adjustment
GREEN
Setting the green patch for the original for adjustment
BLUE
Setting the blue patch for the original for adjustment
2. Select the item to be set.
3. Change the setting value using the +/- or numeric keys.
Display
Description
Setting range
L
Setting the L value
0.0 to 100.0
a
Setting the a value
-200.0 to 200.0
b
Setting the b value
-200.0 to 200.0
4. Press the start key. The value is set.
5. To return to the screen for selecting an item, press the stop key.
Completion
Press the stop key. The screen for selecting a maintenance item No. is displayed.
U510
Setting the enterprise mode
Description
Sets whether or not the enterprise mode setting is enabled.
Purpose
According to user request, changes the setting.
Setting
1. Press the start key.
2. Select ON or OFF.
Display
Description
ON
Enterprise mode setting is enabled.
OFF
Enterprise mode setting is disabled.
Initial setting: ON (Inch specifications)/OFF (Metric specifications)
3. Press the start key. The setting is set.
Completion
Press the stop key. The screen for selecting a maintenance item No. is displayed.
1-3-74
2GN/2GP/2GR
Maintenance
item No.
U901
Description
Checking/clearing copy counts by paper feed locations
Description
Displays or clears copy counts by paper feed locations.
Purpose
To check the time to replace consumable parts. Also to clear the counts after replacing the consumable parts.
Method
Press the start key. The counts by paper feed locations are displayed.
Display
Paper feed locations
MP TRAY
MP tray
CASSETTE 1
Cassette 1
CASSETTE 2
Cassette 2
CASSETTE 3
Optional cassette 3
CASSETTE 4
Optional cassette 4
LCF
Optional 3000-sheet paper feeder
DUPLEX
Duplex section
When an optional paper feed device is not installed, the corresponding count is not displayed.
Clearing
1. Select the count to be cleared.
To clear all counts, press the clear key.
2. Press the start key. The count is cleared.
Completion
Press the stop key. The screen for selecting a maintenance item No. is displayed.
U902
Checking/clearing the punch-hole scrap counter
Description
To set the punch limit, display and clear the punch counter of optional 3000-sheet document finisher.
Purpose
To set the maximum number of punches possible in order to instruct the user of the time to replace punch
waste. Also, used to manually clear the punch-hole scrap count if a message requiring collection of punchhole scrap is shown on the touch panel after collection. If punch-hole scrap is collected with the machine
power turned off, the punch-hole scrap count is not cleared and consequently this problem occurs.
Method
1. Press the start key.
2. Select the item.
Display
Description
Setting range
Initial setting
PUNCH LIMIT
The maximum number of punches
(maximum number of punching times)
0 to 999000
35000
PUNCH COUNT
Punch-hole scrap count
(current number of punching times)
0 to 999999
0
3. Change the setting using the numeric keys or clear key.
4. Press the start key. The value is set.
Completion
Press the stop key. The screen for selecting a maintenance item No. is displayed.
1-3-75
2GN/2GP/2GR
Maintenance
item No.
U903
Description
Checking/clearing the paper jam counts
Description
Displays or clears the jam counts by jam locations.
Purpose
To check the paper jam status. Also to clear the jam counts after replacing consumable parts.
Method
1. Press the start key.
2. Select the item. The screen for executing is displayed.
Display
Description
COUNT
Displays/clears the jam counts
TOTAL COUNT
Displays the total jam counts
Method: Displays/clears the jam counts
1. Select [COUNT]. The count for jam detection by type is displayed.
2. Change the screen using the cursor up/down keys.
3. Select the counts for all jam codes and press the clear key.
4. Press the start key. The count is cleared.
The individual counter cannot be cleared.
5. To return to the screen for selecting an item, press the stop key.
Method: Displays the total jam counts
1. Select [TOTAL COUNT]. The total number of jam counts by type is displayed.
2. Change the screen using the cursor up/down keys.
The total number of jam count cannot be cleared.
3. To return to the screen for selecting an item, press the stop key.
Completion
Press the stop key. The screen for selecting a maintenance item No. is displayed.
U904
Checking/clearing the service call counts
Description
Displays or clears the service call code counts by types.
Purpose
To check the service call code status by types. Also to clear the service call code counts after replacing consumable parts.
Method
1. Press the start key.
2. Select the item. The screen for executing is displayed.
Display
Description
COUNT
Displays/clears the service call counts
TOTAL COUNT
Displays the total service call counts
Method: Displays/clears the service call counts
1. Select [COUNT]. The count for service call detection by type is displayed.
2. Change the screen using the cursor up/down keys.
3. Select the counts for all service call codes and press the clear key.
4. Press the start key. The count is cleared.
The individual counter cannot be cleared.
5. To return to the screen for selecting an item, press the stop key.
Method: Displays the total service call counts
1. Select [TOTAL COUNT]. The total number of service call counts by type is displayed.
2. Change the screen using the cursor up/down keys.
The total number of service call count cannot be cleared.
3. To return to the screen for selecting an item, press the stop key.
Completion
Press the stop key. The screen for selecting a maintenance item No. is displayed.
1-3-76
2GN/2GP/2GR
Maintenance
item No.
U905
Description
Checking/clearing counts by optional devices
Description
Displays or clears the counts of optional DP or finisher.
Purpose
To check the use of optional DP and finisher. Also to clear the counts after replacing consumable parts.
Method
1. Press the start key.
2. Select the device, the count of which is to be checked. The count of the selected device is displayed.
Display
Description
DP
Counts of optional DP
FINISHER
Counts of optional finisher
DP
Display
Description
ADP
No. of single-sided originals that has passed through the DP
RADP
No. of double-sided originals that has passed through the DP
Finisher
Display
Description
CP CNT
No. of copies that has passed
STAPLE
Frequency the stapler has been activated
PUNCH
Frequency the punch has been activated
STACK
Frequency the stacker has been activated
SADDLE
Frequency the center holding has been activated
Clearing
1. Select the item to be cleared.
To clear the counts for all, press the clear key.
2. Press the start key. The count is cleared.
Completion
Press the stop key. The screen for selecting a maintenance item No. is displayed.
U906
Resetting partial operation control
Description
Resets the service call code for partial operation control.
Purpose
To be reset after partial operation is performed due to problems in the casettes or other sections, and the
related parts are serviced.
Method
1. Press the start key.
2. Press [EXECUTE] on the touch panel.
3. Press the start key to reset partial operation control.
The maintenance mode is exited, and the machine returns to the same status as when the main power
switch is turned on.
U908
Checking the total counter value
Description
Displays the total counter value.
Purpose
To check the total counter value.
Method
Press the start key. The screen for total count value is displayed.
Completion
Press the stop key. The screen for selecting a maintenance item No. is displayed.
1-3-77
2GN/2GP/2GR
Maintenance
item No.
Description
U910
Clearing the black ratio data
Description
Clears the accumulated black ratio data for A4 sheet.
Purpose
To clear data as required at times such as during maintenance service.
Method
1. Press the start key.
2. Press [EXCUTE] on the touch panel.
3. Press the start key. The accumulated black ratio data is cleared.
Completion
Press the stop key. The screen for selecting a maintenance item No. is displayed.
U911
Checking/clearing copy counts by paper sizes
Description
Displays and clears the paper feed counts by paper sizes.
Purpose
To check or clear the counts after replacing consumable parts.
Method
Press the start key. The screen for the paper feed counts by paper size is displayed.
Clearing
1. Select the paper size.
To clear all counts, press the clear key.
2. Press the start key. The count is cleared.
Completion
Press the stop/clear key. The screen for selecting a maintenance item No. is displayed.
U920
Checking the copy counts
Description
Checks the copy counts.
Purpose
To check the copy counts.
Method
Press the start key. The current counts of copy counter, printer counter and fax counter are displayed.
Completion
Press the stop key. The screen for selecting a maintenance item No. is displayed.
U927
Clearing the all copy counts and machine life counts (one time only)
Description
Resets all of the counts back to 0.
Purpose
To start the counters with value 0 when installing the machine.
Supplement
The total account counter and the machine life counter can be cleared only once if all count values are 1000
or less.
Method
1. Press the start key.
2. Press [EXECUTE] on the touch panel.
3. Press the start key. All copy counts and machine life counts are cleared.
[CANNOT EXECUTE] is displayed if the count cannot be cleared.
Completion
Press the stop key. The screen for selecting a maintenance item No. is displayed.
U928
Checking machine life counts
Description
Displays the machine life counts.
Purpose
To check the machine life counts.
Method
Press the start key. The current machine life counts is displayed.
Completion
Press the stop key. The screen for selecting a maintenance item No. is displayed.
1-3-78
2GN/2GP/2GR
Maintenance
item No.
U933
Description
Setting the backup kit
Description
Initializes optional data backup kit (CF) and restore the backup data.
Purpose
To initialize the CF when call for service (C0700) occurs. Also, to restore data when the hard disk has been
damaged.
Method
1. Press the start key.
2. Select the item.
Display
Description
INITIALIZE CF
Initializes the data backup kit (CF) and backs up the job accounting
data in the hard disk into the data backup kit (CF).
FAX IMAGE
Prints the fax reception data backed up in the data backup kit (CF).
JOB ACCOUNTING
Restores the job accounting data stored in the data backup kit (CF) to
the hard disk.
Method: Initialization of CF
1. Select [INITIALIZE CF].
2. Press the start key. CF is initialized.
3. Turn the main power switch off and on.
Method: Printing the fax image
1. Select [FAX IMAGE].
2. Press [EXECUTE].
3. Press the start key. The fax reception data is printed out.
Method: Restoration of data of the hard disk
1. Select [JOB ACCOUNTING].
2. Press the start key. The job accounting data is restored.
Completion
Press the stop key. The screen for selecting a maintenance item No. is displayed.
U935
Relay board maintenance
Description
Sets the machine status temporarily when call for service (C0060) occurs. However, after the setting, call for
service (C0060) occurs again when progress of period.
Setting
1. Press the start key.
2. Select the item.
Display
Description
MODE 0
Setting mode: OFF
MODE 1
Setting mode: ON (Usable up to three times of use)
Initial setting: MODE 0
3. Press the start key. The setting is set.
4. Turn the main power switch off and on.
Supplement
After removing the cause of the problem, be sure to change the setting in OFF.
1-3-79
2GN/2GP/2GR
Maintenance
item No.
U942
Description
Setting of amount of slack for feeding from DP
Description
Adjusts the amount of slack generated when the optional DP is used.
Purpose
Use this mode if an original non-feed jam, oblique feed or wrinkling of original occurs when the DP is used.
Setting
1. Press the start key.
2. Select the item to be adjusted.
Display
Description
Setting
range
Initial
setting
Change in
value per step
REGST
Amount of slack in the reading original
from the DP
-31 to 31
0
0.17 mm
REGST MIX
Amount of slack in the reading original
from the DP in the auto selection mode
-31 to 31
0
0.17 mm
3.
4.
5.
6.
Press the system menu key.
Place an original on the DP and press the start key to make a test copy.
Press the system menu key.
Change the setting value using the +/- or numeric keys.
The greater the value, the larger the amount of slack; the smaller the value, the smaller the amount of
slack.
If an original non-feed jam or oblique feed occurs, increase the setting value. If wrinkling of original
occurs, decrease the value.
7. Press the start key. The setting is set.
Completion
Press the stop key. The screen for selecting a maintenance item No. is displayed.
U984
Checking the developing unit number
Description
Displays the developing unit number.
Purpose
To check the developing unit number.
Method
Press the start key. The number is displayed.
Completion
Press the stop key. The screen for selecting a maintenance item No. is displayed.
U985
Displaying the developing unit history
Description
Displays the past record of machine number and the developing counter.
Purpose
To check the count value machine number and the developing counter.
Method
Press the start key. Past record of 5 cases is displayed.
Display
Description
MACHINE No.1 to 5
Past record of machine number
COUNT 1 to 5
Past record of developing counter
Completion
Press the stop key. The screen for selecting a maintenance item No. is displayed.
1-3-80
2GN/2GP/2GR
Maintenance
item No.
Description
U989
HDD scandisk
Description
Restores data in the hard disk by scanning the disk.
Purpose
If power is turned off while accessing to the hard disk is performed, the control information in the hard disk
drive may be damaged. Use this mode to restore the data.
Method
1. Press the start key.
2. Press [EXECUTE] on the touch panel.
3. Press the start key. When scanning of the disk is complete, the execution result is displayed.
4. Turn the main power switch off and on.
Completion
Press the stop key. The screen for selecting a maintenance item No. is displayed.
U990
Checking/clearing the time for the exposure lamp to light
Description
Displays, clears or changes the accumulated time for the exposure lamp to light.
Purpose
To check duration of use of the exposure lamp. Also to clear the accumulated time for the lamp after replacement.
Method
Press the start key. The accumulated time of illumination for the exposure lamp is displayed in minutes.
Display
Description
CCD
Accumulated time for the exposure lamp
CIS
Accumulated time for CIS
Clearing
1. Select the item to be cleared.
2. Press the start key. The accumulated time is cleared.
Completion
Press the stop key. The screen for selecting a maintenance item No. is displayed.
U991
Checking the scanner count
Description
Displays the scanner operation count.
Purpose
To check the status of use of the scanner.
Method
Press the start key.
Display
Description
COPY SCAN COUNT
Scanner operation count for copying
OTHERS SCAN CNT
Scanner operation count except for copying
Completion
Press the stop key. The screen for selecting a maintenance item No. is displayed.
1-3-81
2GN/2GP/2GR
Maintenance
item No.
U993
Description
Outputting a VTC-PG pattern
Description
Selects and outputs a VTC-PG pattern created in the machine.
Purpose
When performing respective image printing adjustments, used to check the machine status apart from that of
the scanner with a non-scanned output VTC-PG pattern.
Method
1. Press the start key.
2. Select the VTC-PG pattern to be output.
Display
PG pattern to be output
Purpose
PG1
Leading edge registration adjustment
Center line adjustment
Margin adjustment
PG2
Lateral squareness adjustment
Magnification adjustment
PG3
Driving unevenness of drum
3. Press the system menu key.
4. Press the start key. A VTC-PG pattern is output.
5. To return to the screen for selecting an item, press the system menu key.
Completion
Press the stop key. The screen for selecting a maintenance item No. is displayed.
1-3-82
2GN/2GP/2GR
1-4 Troubleshooting
1-4-1
Paper misfeed detection
(1) Paper misfeed indication
When a paper misfeed occurs, the machine immediately stops copying and displays the jam location on the operation
panel.
Paper misfeed counts sorted by the detection condition can be checked in maintenance item U903.
To remove paper jammed in the machine, open the front cover, left cover or pull the cassette out.
To remove original jammed in the optional DP, open the document processor top cover or document processor reverse
unit.
To remove the jammed paper in optional document finisher, detach the finisher from the machine.
Paper misfeed detection can be reset by opening and closing the respective covers to turn safety switch off and on.
1-4-1
2GN/2GP/2GR
(2) Paper misfeed detection conditions
OFSW
ORSW
Document processor
DPTSW2
DPTSW1
Built-in finisher
PCSW
FSSW
ESW
DUPPCSW
DUPFCL
RCL
RSW
FCL1
MPFCL MPPFCL
FSW1
PFCL-U MPFSW
FCL2
FSW2
PFCL-L
FCL3
FSW3
PFPFCL1
PPSENS1
PPSENS2
PPSENS3
PFPFCL2
PFPFCL1
PFFCL
PFFSW
PFPFCL2
Paper feeder
3000-sheet paper feeder
Figure 1-4-1
1-4-2
2GN/2GP/2GR
Section
System
Paper
feed
section
Description
Conditions
Specified time
04
Cover open
Cover is open during copying.
-
05
Secondary paper feed
does not start
Secondary paper feed does not start within specified time
of arrival of paper at the registration section.
30 s
09
3000-sheet paper
feeder sequence error
jam
A communication sequence error occurs between the
machine and the 3000-sheet paper feeder.
-
10
No paper feed from
cassette 1
Feed switch 1 (FSW1) does not turn on within the specified time of upper paper feed clutch (PFCL-U) turning on;
the clutch is then successively turned off for 1 s and
turned back on, but the switch again fails to turn on within
the specified time.
1489 ms (30 ppm)/
1152 ms (40/50 ppm)
11
No paper feed from
cassette 2
Feed switch 2 (FSW2) does not turn on within the specified time of lower paper feed clutch (PFCL-L) turning on;
the clutch is then successively turned off for 1 s and
turned back on, but the switch again fails to turn on within
the specified time.
1562 ms (30 ppm)/
1209 ms (40/50 ppm)
12
No paper feed from
optional cassette 3
Feed switch 3 (FSW3) does not turn on within the specified time of paper feeder paper feed clutch 1 (PFPFCL1)
turning on; the clutch is then successively turned off for 1
s and turned back on, but the switch again fails to turn on
within the specified time (paper feed from optional paper
feeder).
1562 ms (30 ppm)/
1209 ms (40/50 ppm)
Feed switch 3 (FSW3) does not turn on within the specified time of paper feeder paper feed clutch 1 (PFPFCL1)
turning on; the clutch is then successively turned off for 1
s and turned back on, but the switch again fails to turn on
within the specified time (paper feed from optional 3000sheet paper feeder).
2044 ms (30 ppm)/
1582 ms (40/50 ppm)
13
No paper feed from
optional cassette 4
The paper feeder feed switch (PFFSW) does not turn on 1562 ms (30 ppm)/
within the specified time of paper feeder paper feed
1209 ms (40/50 ppm)
clutch 2 (PFPFCL2) turning on; the clutch is then successively turned off for 1 s and turned back on, but the switch
again fails to turn on within the specified time (paper feed
from optional paper feeder).
14
No paper feed from MP
tray
The MP feed switch (MPFSW) does not turn on within the
specified time of the MP paper feed clutch (MPPFCL)
turning on; the clutch is then successively turned off for 1
s and turned back on, but the switch again fails to turn on
within the specified time.
5056 ms (30 ppm)/
3913 ms (40/50 ppm)
15
Jam in paper feeder
horizontal paper conveying section 1
Paper path sensor 3 (PPSENS3) does not turn on within
specified time of paper feeder paper feed clutch 2
(PFPFCL2) turning on (paper feed from optional 3000sheet paper feeder).
823 ms (30 ppm)/
637 ms (40/50 ppm)
16
Jam in paper feeder
horizontal paper conveying section 2
Paper path sensor 2 (PPSENS2) does not turn on within
specified time of the paper path sensor 3 (PPSENS3)
turning on (paper feed from optional 3000-sheet paper
feeder).
879 ms (30 ppm)/
681 ms (40/50 ppm)
17
Jam in paper feeder
horizontal paper conveying section 3
Paper path sensor 1 (PPSENS1) does not turn on within
specified time of the paper path sensor 2 (PPSENS2)
turning on (paper feed from optional 3000-sheet paper
feeder).
539 ms (30 ppm)/
417 ms (40/50 ppm)
1-4-3
2GN/2GP/2GR
Section
Paper
feed
section
1-4-4
Description
18
Misfeed in vertical
paper conveying section
Conditions
Specified time
The registration switch (RSW) does not turn on within
specified time of feed switch 1 (FSW1) turning on.
1657 ms (30 ppm)/
1283 ms (40/50 ppm)
Feed switch 1 (FSW1) does not turn on within specified
time of feed switch 2 (FSW2) turning on.
1910 ms (30 ppm)/
1478 ms (40/50 ppm)
Feed switch 2 (FSW2) does not turn on within specified
time of feed switch 3 (FSW3) turning on.
1904 ms (30 ppm)/
1474 ms (40/50 ppm)
19
Misfeed in paper feeder
vertical paper conveying section
Feed switch 3 (FSW3) does not turn on within specified
1573 ms (30 ppm)/
time of the paper feeder feed switch (PFFSW) turning on. 1217 ms (40/50 ppm)
20
Misfeed in MP tray vertical paper conveying
section
The registration switch (RSW) does not turn on within
specified time of the MP feed switch (MPFSW) turning
on.
3933 ms (30 ppm)/
3043 ms (40/50 ppm)
21
Multiple sheets in paper
feed section
The feed switch 1 (FSW1) does not turn off within specified time of its turning on.
Paper length +
4337ms (30 ppm)/
Paper length +
3357ms (40/50 ppm)
The feed switch 2 (FSW2) does not turn off within specified time of its turning on.
Paper length +
4337ms (30 ppm)/
Paper length +
3357ms (40/50 ppm)
The feed switch 3 (FSW3) does not turn off within specified time of its turning on (paper feed from optional paper
feeder).
3382ms (30 ppm)/
2617ms (40/50 ppm)
The feed switch 3 (FSW3) does not turn off within specified time of its turning on (paper feed from optional 3000sheet paper feeder).
Paper length +
1595ms (30 ppm)/
Paper length +
1234ms (40/50 ppm)
The paper feeder feed switch (PFFSW) does not turn off
within specified time of its turning on.
3382ms (30 ppm)/
2617ms (40/50 ppm)
The MP feed switch (MPFSW) does not turn off within
specified time of its turning on.
Paper length +
4337ms (30 ppm)/
Paper length +
3357ms (40/50 ppm)
The feed switch 1 (FSW1) does not turn off within specified time of the upper paper feed clutch (PFCL-U) turning
on.
1489 ms (30 ppm)/
1152 ms (40/50 ppm)
The feed switch 2 (FSW2) does not turn off within specified time of the lower paper feed clutch (PFCL-L) turning
on.
1562 ms (30 ppm)/
1209 ms (40/50 ppm)
The feed switch 3 (FSW3) does not turn off within specified time of the paper feeder paper feed clutch 1
(PFPFCL1) turning on.
3416 ms (30 ppm)/
2643 ms (40/50 ppm)
The paper feeder feed switch (PFFSW) does not turn off
within specified time of the paper feeder paper feed
clutch 2 (PFPFCL2) turning on.
5056 ms (30 ppm)/
3913 ms (40/50 ppm)
The MP feed switch (MPFSW) does not turn off within
specified time of the MP paper feed clutch (MPPFCL)
turning on.
5056 ms (30 ppm)/
3913 ms (40/50 ppm)
2GN/2GP/2GR
Section
Paper
feed
section
Description
Conditions
Specified time
22
Multiple sheets in vertical conveying section
The feed switch 1 (FSW1) does not turn off within specified time of the feed switch 2 (FSW2) turning off.
1910 ms (30 ppm)/
1478 ms (40/50 ppm)
The feed switch 2 (FSW2) does not turn off within specified time of the feed switch 3 (FSW3) turning off.
1989 ms (30 ppm)/
1539 ms (40/50 ppm)
The feed switch 1 (FSW1) does not turn off within specified time of the feed switch 2 (FSW2) turning on
1910 ms (30 ppm)/
1478 ms (40/50 ppm)
The feed switch 2 (FSW2) does not turn off within specified time of the feed switch 3 (FSW3) turning on.
1904 ms (30 ppm)/
1474 ms (40/50 ppm)
The registration switch (RSW) does not turn off within
specified time of the MP feed switch (MPFSW) turning
off.
3539 ms (30 ppm)/
2739 ms (40/50 ppm)
The registration switch (RSW) does not turn off within
specified time of the MP feed switch (MPFSW) turning
on.
3933 ms (30 ppm)/
3043 ms (40/50 ppm)
23
Multiple sheets in MP
tray conveying section
Paper
conveying
section
30
Misfeed in registration/
transfer section
The registration switch (RSW) does not turn off within
specified time of the feed switch 1 (FSW1) turning off.
1511 ms (30 ppm)/
1170 ms (40/50 ppm)
The registration switch (RSW) does not turn off within
specified time of the feed switch 1 (FSW1) turning on.
1652 ms (30 ppm)/
1278 ms (40/50 ppm)
Fuser
section
40
Misfeed in fuser section
(MP tray)
41
Misfeed in fuser section
(cassette 1)
42
Misfeed in fuser section
(cassette 2)
43
Misfeed in fuser section
(optional cassette 3)
44
Misfeed in fuser section
(optional cassette 4)
45
Misfeed in fuser section
(optional 3000-sheet
paper feeder)
46
Misfeed in fuser section
(duplex section)
The eject switch (ESW) does not turn on within specified
time of the registration clutch (RCL) turning on.
2899 ms (30 ppm)/
2243 ms (40/50 ppm)
The feedshift switch (FSSW) does not turn on within
specified time of the registration clutch (RCL) turning on.
2899 ms (30 ppm)/
2243 ms (40/50 ppm)
50
The eject switch (ESW) does not turn off within specified
Misfeed in eject section time of the registration switch (RSW) turning off.
2899 ms (30 ppm)/
2243 ms (40/50 ppm)
The eject switch (ESW) does not turn off within specified
time of the registration clutch (RCL) turning on.
2899 ms (30 ppm)/
2243 ms (40/50 ppm)
The job separator eject switch (JBESW) does not turn on
within specified time of the feedshift switch (FSSW) turning on.
2051 ms (30 ppm)/
1587 ms (40/50 ppm)
The job separator eject switch (JBESW) does not turn off
within specified time of the feedshift switch (FSSW) turning off.
2051 ms (30 ppm)/
1587 ms (40/50 ppm)
The job separator eject switch (JBESW) does not turn off
within specified time of the feedshift switch (FSSW) turning on.
2051 ms (30 ppm)/
1587 ms (40/50 ppm)
Eject
section
51
Misfeed in job separator eject section
1-4-5
2GN/2GP/2GR
Section
Feedshift
section
Description
52
Misfeed in feedshift
section
Conditions
Specified time
The feedshift switch (FSSW) does not turn on within
specified time of the start of eject motor (EM) reverse
rotation.
1545 ms (30 ppm)/
1196 ms (40/50 ppm)
During paper switchback operation, the feedshift switch
(FSSW) does not turn off within specified time of the its
turning on.
2989 ms (30 ppm)/
2313 ms (40/50 ppm)
The feedshift switch (FSSW) does not turn off within
2899 ms (30 ppm)/
specified time of the registration switch (RSW) turning off. 2243 ms (40/50 ppm)
Duplex
section
The feedshift switch (FSSW) does not turn off within
specified time of the registration clutch (RCL) turning on.
2899 ms (30 ppm)/
2243 ms (40/50 ppm)
The duplex paper conveying switch (DUPPCSW) does
not turn on within specified time of the feedshift switch
(FSSW) turning on.
2837 ms (30 ppm)/
2196 ms (40/50 ppm)
The duplex paper conveying switch (DUPPCSW) does
not turn off within specified time of the feedshift switch
(FSSW) turning off.
2837 ms (30 ppm)/
2196 ms (40/50 ppm)
The feed switch 1 (FSW1) does not turn on within specified time of the duplex paper conveying switch (DUPPCSW) turning on.
1994 ms (30 ppm)/
1543 ms (40/50 ppm)
The feed switch 1 (FSW1) does not turn off within specified time of the duplex paper conveying switch (DUPPCSW) turning off.
1994 ms (30 ppm)/
1543 ms (40/50 ppm)
The original feed switch (OFSW) does not turn on within
specified time during the first sheet feeding.
2436 pulse
The original feed switch (OFSW) does not turn on within
specified time during the second sheet feeding.
4430 pulse
71
An original jam in the
original feed/conveying
section 1
DP timing switch 2 (DPTSW2) does not turn off within
specified time.
2500 pulse
72
An original jam in the
original feed/conveying
section 2
The original feed switch (OFSW) and original registration
switch (ORSW) does not turn off within specified time.
16675 pulse
73
An original jam in the
original conveying section
DP timing switch 1 (DPTSW1) does not turn off within
specified time.
4979 pulse
74
An original jam in the
original registration
section
The original registration switch (ORSW) does not turn on
within specified time and after 5 retries.
4979 pulse
60
Duplex paper conveying section 1
61
Duplex paper conveying section 2
Optional
DP
1-4-6
70
No original feed
2GN/2GP/2GR
Section
Optional
DP
Optional
finisher
Description
Conditions
Specified time
75
An original jam in the
original registration
section
The original registration switch (ORSW) does not turn off
within specified time.
19533 pulse
DP timing switch 1 (DPTSW1) does not turn on within
specified time.
4979 pulse
76
An original jam in the
original feed/conveying
section
DP timing switch 2 (DPTSW2) does not turn on within
specified time.
2500 pulse
78
Document processor
top cover open
The document processor top cover is opened during orig- inal feeding.
80
Jam between the finisher and machine
(3000-sheet document
finisher only)
Paper ejection is not output from the machine to the document finisher within specified time of the paper entry
sensor (PES) turning on.
15 s
81
Paper entry sensor
nonarrival jam
(3000-sheet document finisher)
The paper entry sensor (PES) is not turned off even if a
specified time has elapsed after the machine eject signal
was received.
1360 ms (30 ppm)/
1052 ms (40/50 ppm)
(3000-sheet document finisher)
The paper entry sensor (PES) is not turned on even if a
specified time has elapsed after the machine eject signal
was received.
1360 ms (30 ppm)/
1052 ms (40/50 ppm)
(3000-sheet document finisher)
The paper entry sensor (PES) does not turn off within
specified time of its turning on.
2989 ms (30 ppm)/
2313 ms (40/50 ppm)
(Document finisher)
The paper entry sensor (PES) is not turned on even if a
specified time has elapsed after the machine eject signal
was received.
2627 ms
(Built-in finisher)
The paper conveying switch (PCSW) is not turned on
even if a specified time has elapsed after the machine
eject signal was received.
1573 ms (30 ppm)
1217 ms (40/50 ppm)
(Built-in finisher)
The paper conveying switch (PCSW) does not turn off
within specified time of its turning on when paper is conveyed to the intermediate tray from the paper conveying
unit.
Paper length + 1123
ms (30 ppm)
Paper length + 869
ms (40/50 ppm)
(3000-sheet document finisher)
The home position is not detected within the specified
time when driving the staple motor.
600 ms
(Document finisher)
The staple home position sensor (STSPS) is not turned
on within the specified time when driving the staple motor
(STM).
1000 ms
(Built-in finisher)
The staple home position sensor (STHPS) is not turned
on within the specified time when driving the staple motor
(STM).
600 ms
82
Jam in stapler
1-4-7
2GN/2GP/2GR
Section
Optional
finisher
Description
83
Exit sensor stay jam
Specified time
(3000-sheet document finisher)
Eject switch 1 (ESW1) is not turned off within specified
time of its turning on.
1182 ms
(Document finisher)
In the straight mode, the exit sensor (EXS) is not turned
off within specified time of its turning on.
1680ms
(Document finisher)
In the offset or staple mode, the exit sensor (EXS) is not
turned off within specified time of its turning on.
5375ms
(Built-in finisher)
The paper conveying switch (PCSW) does not turn off
within specified time of its turning on when paper is
ejected to the finisher tray from the intermediate tray.
Paper length + 1123
ms (30 ppm)
Paper length + 869
ms (40/50 ppm)
Eject switch 2 (ESW2) is not turned off even if a specified
time has elapsed after the machine eject signal was
received.
1562 ms (30 ppm)/
1209 ms (40/50 ppm)
Eject switch 2 (ESW2) is not turned on even if a specified
time has elapsed after the machine eject signal was
received.
1562 ms (30 ppm)/
1209 ms (40/50 ppm)
Eject switch 2 (ESW2) is not turned off within specified
time of its turning on.
2989 ms (30 ppm)/
2313 ms (40/50 ppm)
Eject switch 3 (ESW3) does not turn off within specified
time of paper entry sensor (PES) turning on.
1843 ms (30 ppm)/
1426 ms (40/50 ppm)
Eject switch 3 (ESW3) does not turn on within specified
time of paper entry sensor (PES) turning on.
1843 ms (30 ppm)/
1426 ms (40/50 ppm)
Eject switch 3 (ESW3) is not turned off within specified
time of its turning on.
2989 ms (30 ppm)/
2313 ms (40/50 ppm)
86
Jam in eject section of
internal tray 1 (3000sheet document finisher only)
Internal tray entry sensor 1 (ITPES1) is not turned on
even if a specified time has elapsed after the eject signal
was received.
2674 ms (30 ppm)/
2070 ms (40/50 ppm)
87
Jam in eject section of
internal tray 2 (3000sheet document finisher only)
Internal tray entry sensor 2 (ITPES2) does not turn on
within specified time of internal tray entry sensor 1
(ITPES1) turning on.
1708 ms (30 ppm)/
1322 ms (40/50 ppm)
Internal tray entry sensor 2 (ITPES2) does not turn off
within specified time of internal tray entry sensor 1
(ITPES1) turning off.
676 ms
Eject switch 1 (ESW1) is not turned on within specified
time.
1324 ms
Side registration home position sensor 1 (SRHPS1) is not
turned off within specified time of its turning on.
500 ms
Side registration home position sensor 2 (SRHPS2) is not
turned off within specified time of its turning on.
500 ms
The paper conveying belt detection sensor (PCBDS) is
not turned off within specified time.
2000 ms
84
Jam in eject section of
right sub tray (3000sheet document finisher only)
85
Jam in eject section of
left sub tray (3000sheet document finisher only)
88
Jam in eject section of
main tray (3000-sheet
document finisher only)
1-4-8
Conditions
2GN/2GP/2GR
Section
Optional
finisher
Description
89
Jam in centerfold unit
(3000-sheet document
finisher only)
89
Jam in centerfold unit
(3000-sheet document
finisher only)
90
Jam in mail box
(3000-sheet document
finisher only)
Conditions
Specified time
The centerfold paper entry sensor (CPES) does not turn 1770 ms (30 ppm)/
off within specified time of centerfold paper detection sen- 1370 ms (40/50 ppm)
sor (CPDS) turning on.
The centerfold paper entry sensor (CPES) does not turn 1770 ms (30 ppm)/
on within specified time of centerfold paper detection sen- 1370 ms (40/50 ppm)
sor (CPDS) turning on.
The centerfold paper entry sensor (CPES) is not turned
off within specified time of its turning on.
2989 ms (30 ppm)/
2313 ms (40/50 ppm)
The centerfold eject switch (CESW) is not turned on
within specified time.
3040 ms
The centerfold eject switch (CESW) is not turned off
within specified time of its turning on.
4213 ms
Centerfold side registration sensor 1 (CSRS1) is not
turned on within specified time.
600 ms
Centerfold side registration sensor 2 (CSRS2) is not
turned on within specified time.
600 ms
The home position is not detected within the specified
time after driving the centerfold staple motor (CSTM).
1000 ms
The centerfold paper detection sensor (CPDS) is not
turned off within specified time.
4528 ms (30 ppm)/
3504 ms (40/50 ppm)
The centerfold paper detection sensor (CPDS) is not
turned on within specified time.
4528 ms (30 ppm)/
3504 ms (40/50 ppm)
The centerfold paper detection sensor (CPDS) is not
turned off within specified time of its turning on.
2989 ms (30 ppm)/
2313 ms (40/50 ppm)
The mail paper entry switch (MPESW) is not turned on
within specified time.
1315 ms (30 ppm)/
1017 ms (40/50 ppm)
The mail paper entry switch (MPESW) is not turned off
within specified time of its turning on.
2989 ms (30 ppm)/
2313 ms (40/50 ppm)
The tray eject sensor (TEJS) does not turn on within
specified time of mail paper entry switch (MPESW) turning on.
Tray 1 to 4
2618 ms (30 ppm)/
2026 ms (40/50 ppm)
Tray 5 to 7
1483 ms (30 ppm)/
1148 ms (40/50 ppm)
The tray eject sensor (TEJS) is not turned off within spec- 2989 ms (30 ppm)/
ified time of its turning on.
2313 ms (40/50 ppm)
91
Finisher cover open
92
Exit sensor non-arrival
jam (document finisher
only)
(3000-sheet document finisher)
The front cover, top cover or right sub tray is opened
when starting the finisher operation.
The centerfold unit top cover is opened when starting the
centerfold operation.
The mail box cover is opened when starting the operation.
-
(Document finisher)
The finisher cover becomes open during paper is running.
Paper is remaining in paths at power on.
-
In the straight mode, the exit sensor (EXS) is not turned
on even if a specified time has elapsed after the paper
entry sensor (PES) was turned on.
1770 ms
1-4-9
2GN/2GP/2GR
Section
Optional
finisher
Description
93
Reverse sensor jam
(document finisher
only)
Conditions
Specified time
The reverse sensor (REVS) does not turn on within spec- 1071 ms
ified time of paper entry sensor (PES) turning on.
The reverse sensor (REVS) is not turned on within speci- 435 ms
fied time.
The reverse sensor (REVS) does not turn off within spec- 622 ms
ified time of paper entry sensor (PES) turning off.
The reverse sensor (REVS) is not turned off within speci- Depends on paper
fied time its turning on.
size
1-4-10
94
Paper entry sensor
stay/remaining jam
(document finisher
only)
The paper entry sensor (PES) is not turned off within
specified time its turning on.
Depends on paper
size
95
Paper conveying sensor jam (document finisher only)
The paper conveying sensor (PCS) does not turn on
within specified time of reverse sensor (REVS) turning
on.
735 ms
The paper conveying sensor (PCS) does not turn off
within specified time of reverse sensor (REVS) turning
off.
1004 ms
96
Jam between the builtin finisher and machine
(built-in finisher only)
Paper ejection is not output from the machine to the document finisher within specified time of the intermediate
tray sensor (ITS) turning on.
1573 ms (30 ppm)
1217 ms (40/50 ppm)
2GN/2GP/2GR
(3) Paper misfeeds
Problem
Causes/check procedures
Corrective measures
(1)
A paper jam in the
paper feed, conveying or eject section is
indicated as soon as
the main power
switch is turned on.
A piece of paper torn from
copy paper is caught
around feed switch 1/2/3,
registration switch, eject
switch or feedshift switch.
Check visually and remove it, if any.
Defective switch.
Run maintenance item U031 and turn switch on and off manually.
Replace the switch if indication of the corresponding switch on the
touch panel is not displayed in reverse.
Feed switch 1/2/3, registration switch, eject switch, feedshift
switch
(2)
A paper jam in the
paper feed section is
indicated during
copying (no paper
feed from cassette
1).
Jam code 10
Paper is extremely curled.
Change the paper.
(3)
A paper jam in the
paper feed section is
indicated during
copying (no paper
feed from cassette
2).
Jam code 11
Check if the paper feed pul- Check visually and replace any deformed pulleys.
ley, separation pulley or forwarding pulley of the
cassette 1 are deformed.
Broken feed switch 1 actua- Check visually and replace switch.
tor.
Defective feed switch 1.
Run maintenance item U031 and turn feed switch 1 on and off
manually. Replace the switch if indication of the corresponding
switch on the touch panel is not displayed in reverse.
Check if the upper paper
feed clutch malfunctions.
Run maintenance item U032 and select the upper paper feed
clutch on the touch panel to be turned on and off. Check the status
and remedy if necessary.
Electrical problem with the
upper paper feed clutch.
Check (see page 1-4-51).
Paper is extremely curled.
Change the paper.
Check if the paper feed pul- Check visually and replace any deformed pulleys.
ley, separation pulley or forwarding pulley of the
cassette 2 are deformed.
Broken feed switch 2 actua- Check visually and replace switch.
tor.
Defective feed switch 2.
Run maintenance item U031 and turn feed switch 2 on and off
manually. Replace feed switch 2 if indication of the corresponding
switch on the touch panel is not displayed in reverse.
Check if the lower paper
feed clutch malfunctions.
Run maintenance item U032 and select the lower paper feed
clutch on the touch panel to be turned on and off. Check the status
and remedy if necessary.
Electrical problem with the
lower paper feed clutch.
Check (see page 1-4-51).
1-4-11
2GN/2GP/2GR
Problem
(4)
A paper jam in the
paper feed section is
indicated during
copying (no paper
feed from optional
cassette 3).
Jam code 12
Causes/check procedures
Corrective measures
Optional paper feeder
Paper is extremely curled.
Change the paper.
Check if the paper feed pul- Check visually and replace any deformed pulleys.
ley, forwarding pulley and
separation pulley of optional
cassette 3 are deformed.
Broken feed switch 3 actua- Check visually and replace switch.
tor.
Defective feed switch 3.
Run maintenance item U031 and turn feed switch 3 on and off
manually. Replace feed switch 3 if indication of the corresponding
switch on the touch panel is not displayed in reverse.
Check if paper feeder paper
feed clutch 1 malfunctions.
Run maintenance item U247 and select paper feeder paper feed
clutch 1 on the touch panel to be turned on and off. Check the status and remedy if necessary.
Electrical problem with
paper feeder paper feed
clutch 1.
Check (see service manual of paper feeder).
Optional 3000-sheet paper feeder
Paper is extremely curled.
Change the paper.
Broken feed switch 3 actua- Check visually and replace switch.
tor.
Defective feed switch 3.
Run maintenance item U031 and turn feed switch 3 on and off
manually. Replace feed switch 3 if indication of the corresponding
switch on the touch panel is not displayed in reverse.
Check if the clutch malfunc- Run maintenance item U247 and select following clutch on the
tions.
touch panel to be turned on and off. Check the status and remedy
if necessary.
Paper feeder paper feed clutch 1/2, paper feeder paper conveying
clutch
(5)
A paper jam in the
paper feed section is
indicated during
copying (no paper
feed from optional
cassette 4).
Jam code 13
1-4-12
Electrical problem with
clutch.
Check (see service manual of 3000-sheet paper feeder).
Paper is extremely curled.
Change the paper.
Check if the paper feed pul- Check visually and replace any deformed pulleys.
ley, forwarding pulley and
separation pulley of optional
cassette 4 are deformed.
Broken paper feeder feed
switch actuator.
Check visually and replace switch.
Defective paper feeder feed
switch.
With 5 V DC present at CN2-8 on the paper feeder main PWB,
check if CN2-7 on the paper feeder main PWB remains low when
the paper feeder feed switch is turned on and off. If it does,
replace the paper feeder feed switch.
Check if paper feeder paper
feed clutch 2 malfunctions.
Run maintenance item U247 and select paper feeder paper feed
clutch 2 on the touch panel to be turned on and off. Check the status and remedy if necessary.
Electrical problem with
paper feeder paper feed
clutch 2.
Check (see service manual of paper feeder).
2GN/2GP/2GR
Problem
(6)
A paper jam in the
paper feed section is
indicated during
copying (no paper
feed from MP tray).
Jam code 14
(7)
A paper jam in the
paper feed section is
indicated during
copying (jam in 3000sheet paper feeder
horizontal paper conveying section).
Jam code 15
(8)
A paper jam in the
paper feed section is
indicated during
copying (jam in 3000sheet paper feeder
horizontal paper conveying section).
Jam code 16
Causes/check procedures
Corrective measures
Paper is extremely curled.
Change the paper.
Check if the MP paper feed
pulley, MP forwarding pulley
and MP separation pulley
are deformed.
Check visually and replace any deformed pulleys.
Broken MP feed switch
actuator.
Check visually and replace switch.
Defective MP feed switch.
Run maintenance item U031 and turn MP feed switch on and off
manually. Replace the switch if indication of the corresponding
switch on the touch panel is not displayed in reverse.
Check if the MP paper feed
clutch malfunctions.
Run maintenance item U032 and select MP paper feed clutch on
the touch panel to be turned on and off. Check the status and remedy if necessary.
Electrical problem with the
MP paper feed clutch.
Check (see page 1-4-51).
Paper is extremely curled.
Change the paper.
Check if the paper side
guides are deformed.
Check visually and replace.
Defective paper path sensor 3.
With 5 V DC present at CN6-12 on the paper feeder main PWB,
check if CN6-11 on the paper feeder main PWB remains low when
paper path sensor 3 is turned on and off. If it does, replace paper
path sensor 3.
Check if paper feeder paper
feed clutch 2 malfunctions.
Run maintenance item U247 and select paper feeder paper feed
clutch 2 on the touch panel to be turned on and off. Check the status and remedy if necessary.
Electrical problem with
paper feeder paper feed
clutch 2.
Check (see service manual of 3000-sheet paper feeder).
Paper is extremely curled.
Change the paper.
Check if the paper side
guides are deformed.
Check visually and replace.
Defective paper path sensor 2.
With 5 V DC present at CN6-9 on the paper feeder main PWB,
check if CN6-8 on the paper feeder main PWB remains low when
paper path sensor 2 is turned on and off. If it does, replace paper
path sensor 2.
Check if paper feeder paper
feed clutch 1 malfunctions.
Run maintenance item U247 and select paper feeder paper feed
clutch 1 on the touch panel to be turned on and off. Check the status and remedy if necessary.
Electrical problem with
paper feeder paper feed
clutch 1.
Check (see service manual of 3000-sheet paper feeder).
1-4-13
2GN/2GP/2GR
Problem
(9)
A paper jam in the
paper feed section is
indicated during
copying (jam in 3000sheet paper feeder
horizontal paper conveying section).
Jam code 17
Causes/check procedures
Corrective measures
Paper is extremely curled.
Change the paper.
Check if the paper side
guides are deformed.
Check visually and replace.
Defective paper path sensor 1.
With 5 V DC present at CN6-6 on the paper feeder main PWB,
check if CN6-5 on the paper feeder main PWB remains low when
paper path sensor 1 is turned on and off. If it does, replace paper
path sensor 1.
Check if paper feeder paper
conveying clutch malfunctions.
Run maintenance item U247 and select paper feeder paper conveying clutch on the touch panel to be turned on and off. Check
the status and remedy if necessary.
Electrical problem with
Check (see service manual of 3000-sheet paper feeder).
paper feeder paper conveying clutch.
(10)
A paper jam in the
paper feed section is
indicated during
copying (jam in vertical paper conveying
section).
Jam code 18
Broken feed switch 1/2/3
actuator.
Check visually and replace switch.
Defective switch.
Run maintenance item U031 and turn following switch on and off
manually. Replace the switch if indication of the corresponding
switch on the touch panel is not displayed in reverse.
Feed switch 1/2/3, registration switch
Defective feed pulleys or
feed rollers.
Check visually and replace.
(11)
A paper jam in the
paper feed section is
indicated during
copying (jam in
optional paper feeder
vertical paper conveying section).
Jam code 19
Broken feed switch 3 actua- Check visually and replace switch.
tor.
(12)
A paper jam in the
paper feed section is
indicated during
copying (jam in MP
tray vertical paper
conveying section).
Jam code 20
1-4-14
Defective feed switch 3.
Run maintenance item U031 and turn feed switch 3 on and off
manually. Replace the switch if indication of the corresponding
switch on the touch panel is not displayed in reverse.
Broken paper feeder feed
switch actuator.
Check visually and replace switch.
Defective paper feeder feed
switch.
With 5 V DC present at CN2-8 on the paper feeder main PWB,
check if CN2-7 on the paper feeder main PWB remains low when
the paper feeder feed switch is turned on and off. If it does,
replace the paper feeder feed switch.
Broken MP feed switch
actuator.
Check visually and replace switch.
Defective switch.
Run maintenance item U031 and turn following switch on and off
manually. Replace the switch if indication of the corresponding
switch on the touch panel is not displayed in reverse.
MP feed switch, registration switch
2GN/2GP/2GR
Problem
Causes/check procedures
Corrective measures
(13)
A paper jam in the
paper feed section is
indicated during
copying (multiple
sheets in paper feed
section).
Jam code 21
Broken feed switch 1/2/3 or
MP feed switch actuator.
Check visually and replace switch.
Defective switch.
Run maintenance item U031 and turn switch on and off manually.
Replace the switch if indication of the corresponding switch on the
touch panel is not displayed in reverse.
Feed switch 1/2/3, MP feed switch
Broken paper feeder feed
switch actuator.
Check visually and replace switch.
Defective paper feeder feed
switch.
With 5 V DC present at CN2-8 on the paper feeder main PWB,
check if CN2-7 on the paper feeder main PWB remains low when
the paper feeder feed switch is turned on and off. If it does,
replace the paper feeder feed switch.
Check if the clutch malfunc- Run maintenance item U247 and select following clutch on the
tions.
touch panel to be turned on and off. Check the status and remedy
if necessary.
Upper paper feed clutch, lower paper feed clutch, MP paper conveying clutch
Electrical problem with
clutch.
Check (see page 1-4-51).
Defective feed pulleys or
feed rollers.
Check visually and replace.
(14)
A paper jam in the
paper feed section is
indicated during
copying (multiple
sheets in vertical
conveying section).
Jam code 22
Broken feed switch 1/2/3
actuator.
Check visually and replace switch.
Defective switch.
Run maintenance item U031 and turn switch on and off manually.
Replace the switch if indication of the corresponding switch on the
touch panel is not displayed in reverse.
Feed switch 1/2/3
Defective feed pulleys or
feed rollers.
Check visually and replace.
(15)
A paper jam in the
paper feed section is
indicated during
copying (multiple
sheets in bypass
conveying section).
Jam code 23
Broken MP feed switch
actuator.
Check visually and replace switch.
Defective switch.
Run maintenance item U031 and turn switch on and off manually.
Replace the switch if indication of the corresponding switch on the
touch panel is not displayed in reverse.
MP feed switch, registration switch
(16)
A paper jam in the
paper conveying section is indicated during copying (jam in
registration/transfer
section).
Jam code 30
Broken feed switch 1 actua- Check visually and replace switch.
tor.
Defective switch.
Run maintenance item U031 and turn switch on and off manually.
Replace the switch if indication of the corresponding switch on the
touch panel is not displayed in reverse.
Feed switch 1, registration switch
The contact between the
right and left registration
rollers is not correct.
Check visually and replace.
1-4-15
2GN/2GP/2GR
Problem
(17)
A paper jam in the
fuser section is indicated during copying
(jam in fuser section).
Jam codes 40 to 44,
46 and 47
Causes/check procedures
Broken eject switch or feed- Check visually and replace switch.
shift switch actuator.
Defective switch.
Run maintenance item U031 and turn switch on and off manually.
Replace the switch if indication of the corresponding switch on the
touch panel is not displayed in reverse.
Eject switch, feedshift switch
Check if the registration
clutch malfunctions.
Run maintenance item U032 and select the registration clutch on
the touch panel to be turned on and off. Check the status and remedy if necessary.
Electrical problem with the
registration clutch.
Check (see page 1-4-51).
(18)
Broken eject switch actuaA paper jam in the
tor.
eject section is indiDefective switch.
cated during copying
(jam in eject section).
Jam code 50
(19)
A paper jam in the
eject section is indicated during copying
(jam in optional job
separator eject section).
Jam code 51
(20)
A paper jam in the
feedshift section is
indicated during
copying (jam in feedshift section).
Jam code 52
1-4-16
Corrective measures
Check visually and replace switch.
Run maintenance item U031 and turn switch on and off manually.
Replace the switch if indication of the corresponding switch on the
touch panel is not displayed in reverse.
Registration switch, eject switch
Check if the registration
clutch malfunctions.
Run maintenance item U032 and select the registration clutch on
the touch panel to be turned on and off. Check the status and remedy if necessary.
Electrical problem with the
registration clutch.
Check (see page 1-4-51).
Broken feedshift switch or
job separator eject switch
actuator.
Check visually and replace switch.
Defective switch.
Run maintenance item U031 and turn switch on and off manually.
Replace the switch if indication of the corresponding switch on the
touch panel is not displayed in reverse.
Feedshift switch, job separator eject switch
Check if the feedshift solenoid malfunctions.
Run maintenance item U033 and select the feedshift solenoid on
the touch panel to be turned on and off. Check the status and remedy if necessary.
Electrical problem with the
feedshift solenoid.
Check (see page 1-4-51).
Broken feedshift switch
actuator.
Check visually and replace switch.
Defective switch.
Run maintenance item U031 and turn switch on and off manually.
Replace the switch if indication of the corresponding switch on the
touch panel is not displayed in reverse.
Feedshift switch, registration switch
Check if the registration
clutch malfunctions.
Run maintenance item U032 and select the registration clutch on
the touch panel to be turned on and off. Check the status and remedy if necessary.
Electrical problem with the
registration clutch.
Check (see page 1-4-51).
2GN/2GP/2GR
Problem
Causes/check procedures
Corrective measures
(21)
A paper jam in the
switchback section is
indicated during
copying (jam in
optional switchback
unit).
Jam code 53
Broken feedshift switch or
switchback eject switch
actuator.
Check visually and replace switch.
Defective feedshift switch.
Run maintenance item U031 and turn the feedshift switch on and
off manually. Replace the feedshift switch if indication of the corresponding switch on the touch panel is not displayed in reverse.
Defective switchback eject
switch.
With 5 V DC present at CN5-2 on the switchback unit main PWB,
check if CN5-4 on the switchback unit main PWB remains low
when the switchback eject switch is turned on and off. If it does,
replace the switchback eject switch.
(22)
A paper jam in the
duplex section is indicated during copying
(jam in duplex paper
conveying section 1).
Jam code 60
Broken feedshift switch or
duplex paper conveying
switch actuator.
Check visually and replace switch.
Defective switch.
Run maintenance item U031 and turn switch on and off manually.
Replace the switch if indication of the corresponding switch on the
touch panel is not displayed in reverse.
Feedshift switch, duplex paper conveying switch
(23)
A paper jam in the
duplex section is indicated during copying
(jam in duplex paper
conveying section 2).
Jam code 61
Broken duplex paper conveying switch or feed switch
1 actuator.
Check visually and replace switch.
Defective switch.
Run maintenance item U031 and turn switch on and off manually.
Replace the switch if indication of the corresponding switch on the
touch panel is not displayed in reverse.
Duplex paper conveying switch, feed switch 1
(24)
An original jams in
optional DP is indicated during copying
(no original feed).
Jam code 70
Defective original feed
switch.
Run maintenance item U244 and turn the original feed switch on
and off manually. Replace the switch if indication of the corresponding switch on the touch panel is not displayed in reverse.
Check if the original feed
motor malfunctions.
Run maintenance item U243 and select the original feed motor on
the touch panel to be turned on and off. Check the status and remedy if necessary.
(25)
An original jams in
optional DP is indicated during copying
(a jam in the original
feed/conveying section).
Jam code 71
Defective DP timing switch
2.
Run maintenance item U244 and turn the DP timing switch 2 on
and off manually. Replace the switch if indication of the corresponding switch on the touch panel is not displayed in reverse.
(26)
An original jams in
optional DP is indicated during copying
(a jam in the original
feed/conveying section).
Jam code 72
Defective switch.
Run maintenance item U244 and turn switch on and off manually.
Replace the switch if indication of the corresponding switch on the
touch panel is not displayed in reverse.
Original feed switch, original registration switch
(27)
An original jams in
optional DP is indicated during copying
(a jam in the original
conveying section).
Jam code 73
Defective DP timing switch
1.
Run maintenance item U244 and turn the DP timing switch 1 on
and off manually. Replace the switch if indication of the corresponding switch on the touch panel is not displayed in reverse.
1-4-17
2GN/2GP/2GR
Problem
Causes/check procedures
Corrective measures
(28)
An original jams in
optional DP is indicated during copying
(a jam in the original
registration section).
Jam code 74
Defective original registration switch.
Run maintenance item U244 and turn the original registration
switch on and off manually. Replace the switch if indication of the
corresponding switch on the touch panel is not displayed in
reverse.
(29)
An original jams in
optional DP is indicated during copying
(a jam in the original
registration section).
Jam code 75
Defective switch.
Run maintenance item U244 and turn switch on and off manually.
Replace the switch if indication of the corresponding switch on the
touch panel is not displayed in reverse.
Original registration switch, DP timing switch 1
(30)
An original jams in
optional DP is indicated during copying
(a jam in the original
feed/conveying section).
Jam code 76
Defective DP timing switch
2.
Run maintenance item U244 and turn the DP timing switch 2 on
and off manually. Replace the switch if indication of the corresponding switch on the touch panel is not displayed in reverse.
(31)
A paper jam in
optional document
finisher is indicated
during copying (jam
between finisher and
machine).
Jam code 80
Defective paper entry sensor.
Run maintenance item U241 and turn the paper entry sensor on
and off manually. Replace the original switchback switch if indication of the corresponding switch on the touch panel is not displayed in reverse.
(32)
A paper jam in
optional document
finisher is indicated
during copying
(paper jam during
paper insertion to the
finisher).
Jam code 81
3000-sheet document finisher/document finisher
Extremely curled paper.
Change the paper.
Defective paper entry sensor.
(3000-sheet document finisher)
Run maintenance item U241 and turn the paper entry sensor on
and off manually. Replace the original switchback switch if indication of the corresponding switch on the touch panel is not displayed in reverse.
(Document finisher)
With 5 V DC present at CN14-1 and CN14-3 on the finisher main
PWB, check if CN14-2 and CN14-4 on the finisher main PWB
remains low or high when the paper entry sensor is turned on and
off. If it does, replace the paper entry sensor.
Defective finisher main
PWB.
Replace the finisher main PWB and check for correct operation.
Built-in finisher
1-4-18
Extremely curled paper.
Change the paper.
Defective paper conveying
switch.
With 5 V DC present at YC2-23 on the finisher control PWB,
check if YC2-21 on the finisher control PWB remains low or high
when the paper conveying switch is turned on and off. If it does,
replace the paper conveying switch.
Check if the feedshift roller
or feedshift pulley is
deformed.
Check and remedy.
2GN/2GP/2GR
Problem
(33)
A paper jam in
optional document
finisher is indicated
during copying (finisher stapler jam).
Jam code 82
(34)
A paper jam in
optional document
finisher is indicated
during copying (eject
sensor stay jam).
Jam code 83
Causes/check procedures
Corrective measures
3000-sheet document finisher/document finisher
Defective staple home posi- Run maintenance item U241 and turn the staple home position
tion sensor.
sensor on and off manually. Replace the sensor if indication of the
corresponding sensor on the touch panel is not displayed in
reverse.
Built-in finisher
The stapler is blocked with
a staple.
Remove the stapler cartridge, and check the cartridge and the stapling section of the stapler. Remove the staple if any.
Defective stapler section.
With 5 V DC present at YC2-24 on the finisher control PWB,
check if YC2-19 on the finisher control PWB remains low or high.
If it does, replace the stapler section.
3000-sheet document finisher
Defective eject switch 1.
Run maintenance item U241 and turn eject switch 1 on and off
manually. Replace the original switchback switch if indication of
the corresponding switch on the touch panel is not displayed in
reverse.
Document finisher
Defective eject sensor.
With 5 V DC present at CN5-4 on the finisher main PWB, check if
CN5-6 on the finisher main PWB remains low or high when the
eject sensor is turned on and off. If it does, replace the eject sensor.
Check if the paper conveying motor malfunctions.
Check and remedy.
Check if the eject roller and
eject pulley contact each
other.
Check and remedy.
Check if the eject guide is
deformed.
Check and remedy.
Defective finisher main
PWB.
Replace the finisher main PWB and check for correct operation.
Built-in finisher
Defective paper conveying
switch.
With 5 V DC present at YC2-23 on the finisher control PWB,
check if YC2-21 on the finisher control PWB remains low when
the paper conveying switch is turned on and off. If it does, replace
the paper conveying switch.
Check if the feedshift roller
or feedshift pulley is
deformed.
Check and remedy.
(35)
A paper jam in
optional document
finisher is indicated
during copying (sub
tray eject jam).
Jam code 84
Defective eject switch 2.
Run maintenance item U241 and turn eject switch 2 on and off
manually. Replace the original switchback switch if indication of
the corresponding switch on the touch panel is not displayed in
reverse.
(36)
A paper jam in
optional document
finisher is indicated
during copying (sub
tray eject jam).
Jam code 85
Defective eject switch 3.
Run maintenance item U241 and turn eject switch 3 on and off
manually. Replace the original switchback switch if indication of
the corresponding switch on the touch panel is not displayed in
reverse.
1-4-19
2GN/2GP/2GR
Problem
Causes/check procedures
Corrective measures
(37)
A paper jam in
optional document
finisher is indicated
during copying (internal tray paper entry
sensor 1 jam).
Jam code 86
Defective internal tray
paper entry sensor 1.
Run maintenance item U241 and turn internal tray paper entry
sensor 1 on and off manually. Replace the original switchback
switch if indication of the corresponding switch on the touch panel
is not displayed in reverse.
(38)
A paper jam in
optional document
finisher is indicated
during copying (internal tray paper entry
sensor 2 jam).
Jam code 87
Defective internal tray
paper entry sensor 2.
Run maintenance item U241 and turn internal tray paper entry
sensor 2 on and off manually. Replace the original switchback
switch if indication of the corresponding switch on the touch panel
is not displayed in reverse.
(39)
A paper jam in
optional document
finisher is indicated
during copying (main
tray eject jam).
Jam code 88
Defective sensor/switch.
Run maintenance item U241 and turn the following switch on and
off manually. Replace the original switchback switch if indication of
the corresponding switch on the touch panel is not displayed in
reverse.
Eject switch 1, side registration home position sensor 1/2, paper
conveying belt position detection sensor
(40)
A paper jam in
optional document
finisher is indicated
during copying (centerfold unit jam).
Jam code 89
Defective sensor/switch.
Run maintenance item U241 and turn the following switch on and
off manually. Replace the original switchback switch if indication of
the corresponding switch on the touch panel is not displayed in
reverse.
Centerfold paper entry sensor, centerfold eject switch, centerfold
paper detection switch
(41)
A paper jam in
optional document
finisher is indicated
during copying (mail
box jam).
Jam code 90
Defective sensor/switch.
Run maintenance item U241 and turn the following switch on and
off manually. Replace the original switchback switch if indication of
the corresponding switch on the touch panel is not displayed in
reverse.
Mail paper entry switch, tray eject sensor
(42)
A paper jam in
optional document
finisher is indicated
during copying (eject
sensor non-arrival
jam).
Jam code 92
Defective eject sensor.
With 5 V DC present at CN5-4 on the finisher main PWB, check if
CN5-6 on the finisher main PWB remains low or high when the
eject sensor is turned on and off. If it does, replace the eject sensor.
Check if the paper conveying motor malfunctions.
Check.
Check if the eject roller and
eject pulley contact each
other.
Check and remedy.
Check if the eject guide is
deformed.
Check and remedy.
Defective finisher main
PWB.
Replace the finisher main PWB and check for correct operation.
1-4-20
2GN/2GP/2GR
Problem
Causes/check procedures
(43)
Defective reverse sensor.
A paper jam in
optional document
finisher is indicated
during copying
Check if the reverse motor
(reverse sensor jam).
malfunctions.
Jam code 93
Check if the reverse roller
and reverse pulley contact
each other.
(44)
A paper jam in
optional document
finisher is indicated
during copying
(paper entry sensor
stay jam).
Jam code 94
(45)
A paper jam in
optional document
finisher is indicated
during copying
(paper conveying
sensor jam).
Jam code 95
Corrective measures
With 5 V DC present at CN14-5 on the finisher main PWB, check
if CN14-7 on the finisher main PWB remains low or high when the
reverse sensor is turned on and off. If it does, replace the reverse
sensor.
Check.
Check and remedy.
Check if the reverse guide
is deformed.
Check and remedy.
Defective finisher main
PWB.
Replace the finisher main PWB and check for correct operation.
Extremely curled paper.
Change the paper.
Defective paper entry sensor.
With 5 V DC present at CN14-1and CN14-3 on the finisher main
PWB, check if CN14-2 and CN14-4 on the main PCB remains low
or high when the paper entry sensor is turned on and off. If it does,
replace the paper entry sensor.
Check if the paper entry
guide is deformed.
Check and remedy.
Defective finisher main
PWB.
Replace the finisher main PWB and check for correct operation.
Defective paper conveying
sensor.
With 5 V DC present at CN4-4 on the finisher main PWB, check if
CN4-6 on the finisher main PWB remains low or high when the
paper conveying sensor is turned on and off. If it does, replace the
paper conveying sensor.
Check if the paper conveying motor malfunctions.
Check.
Check if the paper convey- Check and remedy.
ing roller and paper conveying pulley contact each
other.
Check if the paper conveying guide is deformed.
Check and remedy.
Defective finisher main
PWB.
Replace the finisher main PWB and check for correct operation.
(46)
Defective intermediate tray
A paper jam in
sensor.
optional built-in finisher is indicated during copying (jam
between finisher and
machine).
Jam code 96
With 5 V DC present at YC3-1 on the finisher control PWB, check
if YC3-2 on the finisher control PWB remains low or high when the
intermediate tray sensor is turned on and off. If it does, replace the
intermediate tray sensor.
1-4-21
2GN/2GP/2GR
1-4-2
Self-diagnosis
(1) Self-diagnostic function
This unit is equipped with a self-diagnostic function. When a problem is detected, copying is disabled and the problem displayed as a code consisting of C followed by a number, indicating the nature of the problem.
A message is also displayed requesting the user to call for service.
After removing the problem, the self-diagnostic function can be reset by turning safety switches off and back on.
List of system errors
When an unexpected error is detected for some reason, a system error will be indicated. After a system error is indicated,
the error can be cleared by turning the main power switch off and then on. If the error is detected continuously, however,
perform the operation shown in Table 1-4-1. If a system error occurs frequently, a fault may have occurred. Check the
details of the C call to take proper measures.
System error
Contents
Operation
0800
Image processing problem
System error → Normal service call processing
1800
Paper feeder unit communication problem
System error → service call → partial operation
4200
BD steady-state problem
System error → Normal service call processing
8800
Document finisher communication problem
System error → service call → partial operation
9000
DP communication problem
System error → service call → partial operation
Table 1-4-1
Partial operation control
If any of the following calls for service is detected, partial operation control will be activated. After taking measures against
the cause of trouble, run maintenance item U906 to reset partial operation control.
Code
1-4-22
Contents
C0170
Copy counts problem
C0180
Machine number mismatch error
2GN/2GP/2GR
(2) Self diagnostic codes
Remarks
Code
Contents
Causes
Check procedures/corrective measures
C0030
Fax control PWB system problem
(optional fax)
Processing with the fax software was
disabled due to a hardware or software
problem.
Defective fax control PWB.
Replace the fax control PWB and verify the
operation.
C0060
Main PWB type mismatch error
Defective PWB.
Contact the Service Administrative Division.
C0070
Fax control PWB incompatibility
detection problem (optional fax)
Fax software is not compatible with main
software.
FAX and the
machine are not
compatible.
Use the FAX control PWB that is designed
for use with the machine.
C0130
Backup memory (EEPROM) device
problem (Main PWB)
Reading from or writing to EEPROM
cannot be performed.
Defective main
PWB.
Replace the main PWB and check for correct operation.
Device damage of
EEPROM.
Contact the Service Administrative Division.
C0140
Backup memory (EEPROM) data
Data damage of
problem (Main PWB)
EEPROM.
Reading data from EEPROM is abnormal.
Contact the Service Administrative Division.
C0150
Backup memory device problem
(Engine PWB)
Reading from or writing to EEPROM
cannot be performed.
Defective engine
PWB.
Replace the engine PWB and check for correct operation.
Device damage of
EEPROM.
Contact the Service Administrative Division.
Backup memory data problem
(Engine PWB)
Reading data from EEPROM is abnormal.
Read and write data does not match five
times continuously.
Problem with the
backup memory
data.
Run maintenance item U022 to initialize the
backup memory data.
Defective engine
PWB.
If the C0160 is displayed after initializing the
backup memory, replace the engine PWB
and check for correct operation.
Copy counts problem
A checksum error is detected in the main
and engine backup memories for the
copy counters.
Data damage of
EEPROM.
Contact the Service Administrative Division.
Defective PWB.
Replace the main PWB or engine PWB and
check for correct operation.
C0180
Machine number mismatch error
Machine number of main PWB and
engine PWB does not match.
Data damage of
EEPROM.
Contact the Service Administrative Division.
C0600
DIMM installed incorrectly
DIMM is not installed correctly.
DIMM installed
incorrectly.
Check if the DIMM is inserted into the socket
on the main PWB correctly.
C0610
DIMM problem
The DIMM on the main PWB does not
operate correctly.
Defective main
PWB.
Replace the main PWB and check for correct operation.
Defective DIMM.
Replace the DIMM and check for correct
operation.
C0160
C0170
1-4-23
2GN/2GP/2GR
Remarks
Code
Contents
C0630
DMA problem
DMA transmission of compressed,
decompressed, rotated, relocated or
blanked-out image data does not complete within the specified period of time.
Defective main
PWB.
Replace the main PWB and check for correct operation.
C0640
Hard disk drive problem
The hard disk cannot be accessed.
Poor contact in the
connector terminals.
Check the connection of connector YC49 on
the main PWB and the connector on the
hard disk. Repair or replace if necessary.
Defective hard
disk.
Run U024 (HDD formatting) without turning
the power off to initialize the hard disk.
Replace the hard disk drive and check for
correct operation if the problem is still
detected after initialization.
Defective main
PWB.
Replace the main PWB and check for correct operation.
CF error for backup
Optional data backup kit (CF) is not suitable as backup.
CF installed incorrectly.
Install CF correctly.
Defective CF.
Install normal CF.
C0800
Image processing problem
JAM05 is detected twice.
Defective main
PWB.
Replace the main PWB and check for correct operation.
C0830
Flash ROM program area checksum
error (optional fax)
A checksum error occurred with the program in the Flash ROM on the fax control PWB.
Defective fax control PWB.
Replace the fax control PWB and check for
correct operation.
C0870
Fax control PWB to main PWB high
capacity data transfer problem
(optional fax)
High-capacity data transfer between the
fax control PWB and the main PWB was
not normally performed even if the data
transfer was retried the specified times.
Poor contact in the
connector terminals.
Check the connection of connector YC1 on
the fax control PWB and YC4 on the interface PWB, connection of connector YC30
on the main PWB and YC6 on the interface
PWB and the continuity across the connector terminals. Repair or replace if necessary.
Defective fax control PWB or main
PWB.
Replace the fax control PWB or main PWB
and check for correct operation.
C0880
Fax control PWB program archive
problem (optional fax)
When power is turned on, the compressed program in the Flash ROM on
the fax control PWB was not successfully decompressed.
Defective fax control PWB.
Replace the fax control PWB and check for
correct operation.
C0920
Fax file system error (optional fax)
The backup data is not retained for file
system abnormality of flash memory of
the fax control PWB.
Defective fax control PWB.
Replace the fax control PWB and verify the
operation.
C0700
1-4-24
Causes
Check procedures/corrective measures
2GN/2GP/2GR
Remarks
Code
C1010
C1020
Contents
Upper lift motor error
When cassette 1 is inserted, upper lift
limit switch does not turn on within 12 s
of upper lift motor turning on.
Lower lift motor error
When cassette 2 is inserted, lower lift
limit switch does not turn on within 12 s
of lower lift motor turning on.
Causes
Check procedures/corrective measures
Poor contact in the
connector terminals.
Check the connection of connector of upper
lift motor and the connector YC13 on the
engine PWB, and the continuity across the
connector terminals. Repair or replace if
necessary.
Broken gears or
couplings of upper
lift motor.
Replace upper lift motor.
Defective upper lift
motor.
Check for continuity across the coil. If none,
replace upper lift motor.
Defective upper lift
limit switch.
Check if YC13-B9 on the engine PWB goes
low when upper lift limit switch is turned off.
If not, replace upper lift limit switch.
Poor contact in the
connector terminals.
Check the connection of connector of upper
lift limit switch and the connector YC13 on
the engine PWB, and the continuity across
the connector terminals. Repair or replace if
necessary.
Defective engine
PWB.
Replace the engine PWB and check for correct operation.
Poor contact in the
connector terminals.
Check the connection of connector of lower
lift motor and the connector YC13 on the
engine PWB, and the continuity across the
connector terminals. Repair or replace if
necessary.
Broken gears or
couplings of lower
lift motor.
Replace lower lift motor.
Defective lower lift
motor.
Check for continuity across the coil. If none,
replace lower lift motor.
Defective lower lift
limit switch.
Check if YC13-B15 on the engine PWB
goes low when lower lift limit switch is turned
off. If not, replace lower lift limit switch.
Poor contact in the
connector terminals.
Check the connection of connector of lower
lift limit switch and the connector YC13 on
the engine PWB, and the continuity across
the connector terminals. Repair or replace if
necessary.
Defective engine
PWB.
Replace the engine PWB and check for correct operation.
1-4-25
2GN/2GP/2GR
Remarks
Code
Contents
C1030
Paper feeder lift motor 1 error
(optional paper feeder)
When optional cassette 3 is inserted,
paper feeder lift switch 1 does not turn
on within 12 s of paper feeder lift motor 1
turning on.
C1040
C1100
C1110
1-4-26
Paper feeder lift motor 2 error
(optional paper feeder)
When optional cassette 4 is inserted,
paper feeder lift switch 2 does not turn
on within 12 s of paper feeder lift motor 2
turning on.
Paper feeder lift motor 1 error
(optional 3000-sheet paper feeder)
A motor over-current signal is detected
continuously for 1 s or longer.
Paper feeder lift motor 2 error
(optional 3000-sheet paper feeder)
A motor over-current signal is detected
continuously for 1 s or longer.
Causes
Check procedures/corrective measures
Poor contact in the
connector terminals.
Check the connection of connector on the
engine PWB and the connector on the paper
feeder main PWB, and the continuity across
the connector terminals. Repair or replace if
necessary.
Broken gears or
couplings of paper
feeder lift motor 1.
Replace paper feeder lift motor 1.
Defective paper
feeder lift motor 1.
Check for continuity across the coil. If none,
replace paper feeder lift motor 1.
Defective paper
feeder lift switch 1.
Check if YC1-5 on the paper feeder main
PWB goes low when paper feeder lift switch
1 is turned off. If not, replace paper feeder lift
switch 1.
Poor contact in the
connector terminals.
Check the connection of connector on the
engine PWB and the connector on the paper
feeder main PWB, and the continuity across
the connector terminals. Repair or replace if
necessary.
Broken gears or
couplings of paper
feeder lift motor 2.
Replace paper feeder lift motor 2.
Defective paper
feeder lift motor 2.
Check for continuity across the coil. If none,
replace paper feeder lift motor 2.
Defective paper
feeder lift switch 2.
Check if YC1-7 on the paper feeder main
PWB goes low when paper feeder lift switch
2 is turned off. If not, replace paper feeder lift
switch 2.
Poor contact in the
connector terminals.
Check the connection of connector on the
engine PWB and the connector on the paper
feeder main PWB, and the continuity across
the connector terminals. Repair or replace if
necessary.
Paper feeder lift
motor 1 does not
rotate correctly (the
motor is overloaded).
Check the gears and remedy if necessary.
Poor contact in the
connector terminals.
Check the connection of connector on the
engine PWB and the connector on the paper
feeder main PWB, and the continuity across
the connector terminals. Repair or replace if
necessary.
Paper feeder lift
motor 2 does not
rotate correctly (the
motor is overloaded).
Check the gears and remedy if necessary.
2GN/2GP/2GR
Remarks
Code
Contents
C1120
Paper feeder left lift position problem
(optional 3000-sheet paper feeder)
Paper feeder switch 2 does not turn on
within 30 s of paper feeder lift motor 1
turning on.
C1130
C1800
C1900
Paper feeder right lift position problem (optional 3000-sheet paper
feeder)
Paper feeder switch 1 does not turn on
within 30 s of paper feeder lift motor 2
turning on.
Paper feeder unit communication
problem (optional paper feeder/3000sheet paper feeder)
No communication: there is no reply
after 5 retries.
Abnormal communication: a communication error (parity or checksum error) is
detected five times in succession.
Paper feeder EEPROM error (optional
paper feeder)
When writing the data, the write data and
the read data is not continuously in
agreement three times.
Causes
Check procedures/corrective measures
Poor contact in the
connector terminals.
Check the connection of connector on the
engine PWB and the connector on the paper
feeder main PWB, and the continuity across
the connector terminals. Repair or replace if
necessary.
Defective paper
feeder lift switch 2.
Check if YC5-7 on the paper feeder main
PWB goes low when paper feeder lift switch
2 is turned off. If not, replace paper feeder lift
switch 2.
Defective paper
feeder lift motor 1.
Check for continuity across the coil. If none,
replace paper feeder lift motor 1.
The paper feeder
left lift does not rise
properly.
Check the gears and belts, and remedy if
necessary.
Poor contact in the
connector terminals.
Check the connection of connector on the
engine PWB and the connector on the paper
feeder main PWB, and the continuity across
the connector terminals. Repair or replace if
necessary.
Defective paper
feeder lift switch 1.
Check if YC5-4 on the paper feeder main
PWB goes low when paper feeder lift switch
1 is turned off. If not, replace paper feeder lift
switch 1.
Defective paper
feeder lift motor 2.
Check for continuity across the coil. If none,
replace paper feeder lift motor 2.
The paper feeder
right lift does not
rise properly.
Check the gears and belts, and remedy if
necessary.
Poor contact in the
connector terminals.
Check the connection of connector on the
engine PWB and the connector on the paper
feeder main PWB, and the continuity across
the connector terminals. Repair or replace if
necessary.
Defective engine
PWB.
Replace the engine PWB and check for correct operation.
Defective paper
feeder main PWB.
Replace the paper feeder main PWB and
check for correct operation.
Poor contact in the
connector terminals.
Check the connection of connector on the
engine PWB and the connector on the paper
feeder main PWB, and the continuity across
the connector terminals. Repair or replace if
necessary.
Defective engine
PWB.
Replace the engine PWB and check for correct operation.
Defective paper
feeder.
Replace the paper feeder with another unit
and check the operation. If the operation is
normal, replace or repair optional paper
feeder.
1-4-27
2GN/2GP/2GR
Remarks
Code
C2000
C2250
C2500
1-4-28
Contents
Drive motor problem
Stable OFF is detected for 1 s continuously after drive motor stability.
Main charger cleaning motor error
A locking error has been detected three
times in a row during a reciprocating
cleaning motion.
Paper feed motor error
Stable OFF is detected for 1 s continuously after paper feed motor stability.
Causes
Check procedures/corrective measures
Poor contact in the
connector terminals.
Check the connection of connector YC11 on
the engine PWB and the connector on the
drive motor, and the continuity across the
connector terminals. Repair or replace if
necessary.
Defective drive
transmission system.
Check if the rollers and gears rotate
smoothly. If not, grease the bushings and
gears. Check for broken gears and replace if
any.
Defective engine
PWB.
Replace the engine PWB and check for correct operation.
Defective drive
motor.
Replace the drive motor.
Poor contact in the
connector terminals.
Check the connection of connector YC9 on
the engine PWB and the connector on the
main charger cleaning motor, and the continuity across the connector terminals. Repair
or replace if necessary.
Defective drive
transmission system.
Check if the rollers and gears rotate
smoothly. If not, grease the bushings and
gears. Check for broken gears and replace if
any.
Defective engine
PWB.
Replace the engine PWB and check for correct operation.
Defective main
charger cleaning
motor.
Replace the main charger cleaning motor.
Poor contact in the
connector terminals.
Check the connection of connector YC11 on
the engine PWB and the connector on the
paper feed motor, and the continuity across
the connector terminals. Repair or replace if
necessary.
Defective drive
transmission system.
Check if the rollers and gears rotate
smoothly. If not, grease the bushings and
gears. Check for broken gears and replace if
any.
Defective engine
PWB.
Replace the engine PWB and check for correct operation.
Defective paper
feed motor.
Replace the paper feed motor.
2GN/2GP/2GR
Remarks
Code
C2600
C3100
C3200
Contents
Causes
Check procedures/corrective measures
Poor contact in the
connector terminals.
Check the connection of connector on the
engine PWB and the connector on the paper
feeder main PWB, and the continuity across
the connector terminals. Repair or replace if
necessary.
Paper feeder paper
conveying motor /
paper feeder drive
motor does not
rotate correctly
(the motor is overloaded).
Check the gears and remedy if necessary.
Defective PWB.
Replace the paper feeder main PWB or
engine PWB and check for correct operation.
Defective motor.
Replace the paper feeder paper conveying
motor / paper feeder drive motor.
Poor contact in the
connector terminals.
Check the connection of connector YC4 on
the scanner PWB and the connector on the
scanner home position switch, and the continuity across the connector terminals. Repair
or replace if necessary.
Defective scanner
PWB.
Replace the scanner PWB and check for
correct operation.
Defective scanner
home position
switch.
Replace the scanner home position switch.
Defective scanner
motor.
Replace the scanner motor.
The mirror frame,
exposure lamp, or
scanner wire is
defective.
Check if the mirror flames and exposure
lamp are on the rail. And check the scanner
wire winds correctly.
Exposure lamp problem
Poor contact in the
After the reading starting, when input
connector termivalue at the time of exposure lamp illumi- nals.
nation does not exceed the threshold
value between 5 s.
Check the connection of connector YC6 on
the scanner PWB and the connector on the
inverter PWB, and the continuity across the
connector terminals. Repair or replace if
necessary.
Paper feeder paper conveying motor
error (optional 3000-sheet paper
feeder)
The lock signal of the motor is detected
avobe 450 ms.
Paper feeder drive motor error
(optional paper feeder)
The lock signal of the motor is detected
avobe 500 ms.
Scanner carriage problem
The home position is not correct when
the power is turned on or at the start of
copying using the table.
Defective scanner
PWB.
Replace the scanner PWB and check for
correct operation.
Defective CCD
PWB.
Replace the CCD PWB and check for correct operation.
Defective exposure
lamp or inverter
PWB.
Replace the exposure lamp or inverter
PWB.
Incorrect shading
position.
Adjust the position of the contact glass
(shading plate). If the problem still occurs,
replace the scanner home position switch.
1-4-29
2GN/2GP/2GR
Remarks
Code
Contents
C3210
CIS lamp problem
After the reading starting, when input
value at the time of CIS illumination does
not exceed the threshold value between
5 s.
C3300
C3310
C3500
CCD AGC problem
After AGC, correct input is not obtained
at CCD.
CIS AGC problem
After AGC, correct input is not obtained
at CIS.
Communication error between scanner and SHD
An error code is detected.
Causes
Check procedures/corrective measures
Poor contact in the
connector terminals.
Check the connection of connector on the
main PWB and the connector on the DP
main PWB, and the continuity across the
connector terminals. Repair or replace if
necessary.
Defective DP main
PWB.
Replace the DP main PWB and check for
correct operation.
Defective DP
inverter PWB.
Replace the DP inverter PWB and check for
correct operation.
Defective CIS.
Replace the CIS and check for correct operation.
Poor contact in the
connector terminals.
Check the connection of connector on the
SHD PWB and the connector on the CCD
PWB, and the continuity across the connector terminals. Repair or replace if necessary.
Defective exposure
lamp.
Replace the exposure lamp or inverter
PWB.
Defective PWB.
Replace the SHD PWB or CCD PWB and
check for correct operation.
Defective DP main
PWB.
Replace the DP main PWB and check for
correct operation.
CIS output problem.
Replace the CIS and check for correct operation.
Defective DP
inverter PWB.
Replace the DP inverter PWB and check for
correct operation.
Poor contact in the
connector terminals.
Check the connection of connector YC3 on
the scanner PWB and the connector YC4 on
the SHD PWB, and the continuity across the
connector terminals. Repair or replace if
necessary.
Defective PWB.
Replace the scanner PWB or SHD PWB and
check for correct operation.
C3900
Backup memory read/write problem
(scanner PWB)
Read and write data does not match.
Defective backup
RAM or scanner
PWB.
Replace the scanner PWB and check for
correct operation.
C3910
Backup memory data problem (scanner PWB)
Data in the specified area of the backup
memory does not match the specified
values.
Problem with the
backup memory
data.
Run maintenance item U022 to initialize the
backup memory data.
Defective scanner
PWB.
If the C3910 is displayed after initializing the
backup memory, replace the scanner PWB
and check for correct operation.
Polygon motor synchronization problem
The polygon motor does not reach the
stable speed within 20 s of the START
signal turning on.
Poor contact in the
connector terminals.
Check the connection of connector YC8 on
the engine PWB and laser scanner unit, and
the continuity across the connector terminals. Repair or replace if necessary.
Defective polygon
motor.
Replace the laser scanner unit.
Defective engine
PWB.
Replace the engine PWB and check for correct operation.
C4000
1-4-30
2GN/2GP/2GR
Remarks
Code
Contents
C4010
Polygon motor steady-state problem
The polygon motor rotation is not stable
for 20 s after the polygon motor rotation
has been stabilized.
C4200
C5300
C6000
C6020
C6030
Causes
Check procedures/corrective measures
Poor contact in the
connector terminals.
Check the connection of connector YC8 on
the engine PWB and laser scanner unit, and
the continuity across the connector terminals. Repair or replace if necessary.
Defective polygon
motor.
Replace the laser scanner unit.
Defective engine
PWB.
Replace the engine PWB and check for correct operation.
Poor contact in the
connector terminals.
Check the connection of connector YC8 on
the engine PWB and laser scanner unit, and
the continuity across the connector terminals. Repair or replace if necessary.
Defective laser
scanner unit.
Replace the laser scanner unit.
Defective engine
PWB.
Replace the engine PWB and check for correct operation.
Broken cleaning lamp wire
While the cleaning lamp is on, the broken cleaning lamp wire detection signal
is detected for 2 s continuously.
Defective cleaning
lamp.
Replace the cleaning lamp.
Defective engine
PWB.
Replace the engine PWB and check for correct operation.
Fuser heater break
Fuser thermistor 1 is detected 40°C/
104°F below with 10 s continuously during warm-up and ready in.
Defective fuser
heater M or S.
Replace the fuser heater M or S.
Installation defectiveness on fuser
thermistor 1.
Check the mounting state of the fuser thermistor 1. If any problem is found, repair it.
Defective fuser
thermostat.
Replace the fuser thermostat.
Defective PWB.
Replace the power source PWB or engine
PWB and check for correct operation.
Installation defectiveness on fuser
thermistor 1 or 2.
Check the mounting state of the fuser thermistor 1 or 2. If any problem is found, repair
it.
Defective fuser
thermistor 1 or 2.
Replace the fuser thermistor 1 or 2.
Defective engine
PWB.
Replace the engine PWB and check for correct operation.
Installation defectiveness on fuser
thermistor 1 or 2.
Check the mounting state of the fuser thermistor 1 or 2. If any problem is found, repair
it.
Defective fuser
thermistor 1 or 2.
Replace the fuser thermistor 1 or 2.
Defective engine
PWB.
Replace the engine PWB and check for correct operation.
BD steady-state problem
ASIC detects a BD error A for 2 s after
the polygon motor rotation has been stabilized.
Abnormally high fuser thermistor
temperature
Fuser thermistor 1 or 2 is detected
230°C/446°F or more for 40 ms.
Fuser thermistor break error
The thermistor break signal is detected
continuously for 500 ms.
1-4-31
2GN/2GP/2GR
Remarks
Code
Contents
C6050
Abnormally low fuser thermistor 3
temperature
Fuser thermistor 1 is detected 100°C/
212°F less than 1 s continuously during
copying.
Causes
Check procedures/corrective measures
Defective fuser
heater M or S.
Replace the fuser heater M or S.
Installation defectiveness on fuser
thermistor 1.
Check the mounting state of the fuser thermistor 1. If any problem is found, repair it.
Defective PWB.
Replace the power source PWB or engine
PWB and check for correct operation.
C6400
Zero-cross signal error
While fuser heater ON/OFF control is
performed, the zero-cross signal is not
input within 3 s.
Defective PWB.
Replace the engine PWB or power source
PWB and check for correct operation.
C6410
Fuser unit connector insertion problem
Absence of the fuser unit is detected.
Fuser unit connector inserted incorrectly.
Reinsert the fuser unit connector if necessary.
Defective fuser unit
connector.
Replace the fuser unit.
C6420
C7300
C7400
C7410
C7800
1-4-32
Fuser unit fuse cut problem
Poor contact in the
The fuse in the fuser unit did not blow connector termiwithin three seconds.
nals.
Check the connection of connector YC10 on
the engine PWB and the continuity across
the connector terminals. Repair or replace if
necessary.
Fuser unit connector inserted incorrectly.
Reinsert the fuser unit connector if necessary.
Poor contact in the
connector terminals.
Check the connection of connector YC9 on
the engine PWB and the continuity across
the connector terminals. Repair or replace if
necessary.
Defective toner
container sensor.
Replace the toner container sensor.
Developing unit connector insertion
problem
Absence of the developing unit is
detected.
Developing unit
connector inserted
incorrectly.
Reinsert the developing unit connector if
necessary.
Defective developing unit connector.
Replace the developing unit.
Drum unit connector insertion problem
Absence of the drum unit is detected.
Drum unit connector inserted incorrectly.
Reinsert the drum unit connector if necessary.
Defective drum unit
connector.
Replace the drum unit.
Poor contact in the
connector terminals.
Check the connection of connector YC14 on
the engine PWB and the continuity across
the connector terminals. Repair or replace if
necessary.
Defective humidity
sensor.
Replace the humidity sensor.
Toner container problem
Toner level is not detected when toner
empty is detected.
Broken external thermistor wire
The thermistor output value is 4.5 V or
more.
2GN/2GP/2GR
Remarks
Code
C7810
C7900
C7910
C8020
C8030
Contents
Short-circuited external thermistor
The thermistor input value is 0.5 V or
less.
Drum EEPROM error
Reading from or writing to EEPROM
cannot be performed.
Developing unit EEPROM error
Reading from or writing to EEPROM
cannot be performed.
Punch motor problem (optional 3000sheet document finisher)
The LOCK signal of the punch motor is
detected for more than 500 ms while the
punch motor is operating.
Tray upper limit detection problem
(optional document finisher)
When the tray elevation motor raises a
tray, the ON status of the tray upper limit
sensor is detected.
Causes
Check procedures/corrective measures
Poor contact in the
connector terminals.
Check the connection of connector YC14 on
the engine PWB and the continuity across
the connector terminals. Repair or replace if
necessary.
Defective humidity
sensor.
Replace the humidity sensor.
Poor contact in the
connector terminals.
Check the connection of connector on the
engine PWB and the continuity across the
connector terminals. Repair or replace if
necessary.
Defective drum
unit.
Replace the drum unit.
Poor contact in the
connector terminals.
Check the connection of connector on the
engine PWB and the continuity across the
connector terminals. Repair or replace if
necessary.
Defective developing unit.
Replace the developing unit.
Poor contact in the
connector terminals.
Check the connection of connector on the
punch PWB and the continuity across the
connector terminals. Repair or replace if
necessary.
Defective punch
motor.
Replace the punch motor.
Defective PWB.
Replace the punch PWB or finisher main
PWB and check for correct operation.
The tray upper limit
sensor/push paper
sensor/surface
view sensor connector makes poor
contact.
Reinsert the connector. Also check for continuity within the connector cable. If none,
remedy or replace the cable.
Defective tray
Replace the sensor.
upper limit sensor/
push paper sensor/
surface view sensor.
Defective finisher
main PWB.
Replace the finisher main PWB and check
for correct operation.
1-4-33
2GN/2GP/2GR
Remarks
Code
Contents
C8050
Paper conveying belt motor 1 problem (optional 3000-sheet document
finisher)
Paper conveying belt home position sensor 1 does not turn off within 1.5 s.
Paper conveying belt home position sensor 1 does not turn on within 2.5 s.
Jam 88 is indicated.
C8060
C8070
1-4-34
Paper conveying belt motor 2 problem (optional 3000-sheet document
finisher)
Paper conveying belt home position sensor 2 does not turn off within 1.5 s.
Paper conveying belt home position sensor 2 does not turn on within 2.5 s.
Internal tray communication error
(optional 3000-sheet document finisher)
Communication with the internal tray is
not possible although the connection is
detected.
Causes
Check procedures/corrective measures
Poor contact in the
connector terminals.
Check the connection of connector YC2 on
the internal tray PWB and the connector on
paper conveying belt motor 1, and the continuity across the connector terminals. Repair
or replace if necessary.
Defective paper
conveying belt
home position sensor 1.
Replace paper conveying belt home position
sensor 1.
Defective paper
conveying belt
motor 1.
Replace paper conveying belt motor 1.
Defective PWB.
Replace the internal tray PWB or finisher
main PWB and check for correct operation.
Poor contact in the
connector terminals.
Check the connection of connector YC6 on
the internal tray PWB and the connector on
paper conveying belt motor 2, and the continuity across the connector terminals. Repair
or replace if necessary.
Defective paper
conveying belt
home position sensor 2.
Replace paper conveying belt home position
sensor 2.
Defective paper
conveying belt
motor 2.
Replace paper conveying belt motor 2.
Defective PWB.
Replace the internal tray PWB or finisher
main PWB and check for correct operation.
Poor contact in the
connector terminals.
Check the connection of connector YC6 on
the finisher main PWB and the connector
YC1 on the internal tray PWB, and the continuity across the connector terminals. Repair
or replace if necessary.
Defective PWB.
Replace the internal tray PWB or finisher
main PWB and check for correct operation.
2GN/2GP/2GR
Remarks
Code
Contents
C8140
Causes
Check procedures/corrective measures
Main tray problem (optional 3000sheet document finisher)
The main tray is not detected by the
main tray top limit detection sensor or
the main tray capacity detection sensor
within 20s since the tray has started
ascending.
The main tray upper limit detection sensor or the main tray load detection sensor is not detected to be turned off in 20
seconds after the main tray has
descended.
The main tray low limit detection sensor
is not detected to be turned on in 20 seconds after the main tray has descended.
During main tray ascent, the main tray
upper limit detection sensor or the main
tray load detection sensor stays on for
more than 2 s.
Poor contact in the
connector terminals.
Check the connection of connector YC6 on
the finisher main PWB and the connector on
the main tray motor, and the continuity
across the connector terminals. Repair or
replace if necessary.
Defective main tray
motor.
Replace the main tray motor.
Defective main tray
upper limit detection sensor/main
tray load detection
sensor/main tray
lower limit detection sensor.
Replace the sensor.
Defective finisher
main PWB.
Replace the finisher main PWB and check
for correct operation.
Tray elevation motor problem
(optional document finisher)
When the tray elevation motor is driving,
the ON status of the tray lower limit sensor or surface view sensor cannot be
detected even if a specified time has
elapsed.
The tray elevation
motor connector
makes poor contact.
Reinsert the connector. Also check for continuity within the connector cable. If none,
remedy or replace the cable.
The tray elevation
motor malfunctions.
Replace the tray elevation motor.
The tray lower limit
sensor/push paper
sensor/surface
view sensor connector makes poor
contact.
Reinsert the connector. Also check for continuity within the connector cable. If none,
remedy or replace the cable.
Defective tray
Replace the sensor.
lower limit sensor/
push paper sensor/
surface view sensor.
Defective finisher
main PWB.
Replace the finisher main PWB and check
for correct operation.
1-4-35
2GN/2GP/2GR
Remarks
Code
Contents
C8170
Side registration motor 1 problem
(optional 3000-sheet document finisher)
When operation returned to a home
position is performed at the time of initial
operation and a home position is not
detected even if 3 s passed.
Jam 88 is indicated.
Adjustment motor problem (optional
document finisher)
When the adjustment motor is driving,
the ON status of the adjustment home
position sensor cannot be detected even
if a specified time has elapsed.
When adjustment operation starts, the
ON status of the adjustment home position sensor is not detected.
Finisher front side registration motor
problem (optional built-in finisher)
When the front-side registration homeposition sensor is turned on during initialization, the sensor did not turn on while it
has moved by 106 pulses.
When the front-side registration homeposition sensor is turned off during initialization, the sensor did not turn on in
three seconds.
1-4-36
Causes
Check procedures/corrective measures
Poor contact in the
connector terminals.
Check the connection of connector YC2 on
the internal tray PWB and the connector on
side registration motor 1, and the continuity
across the connector terminals. Repair or
replace if necessary.
Defective side registration motor 1.
Replace side registration motor 1.
Defective PWB.
Replace the internal tray PWB or finisher
main PWB and check for correct operation.
The adjustment
motor connector
makes poor contact.
Reinsert the connector. Also check for continuity within the connector cable. If none,
remedy or replace the cable.
Defective adjustment motor.
Replace adjustment motor.
The adjustment
home position sensor connector
makes poor contact.
Reinsert the connector. Also check for continuity within the connector cable. If none,
remedy or replace the cable.
Defective adjustment home position sensor.
Replace the adjustment home position sensor.
Defective finisher
main PWB.
Replace the finisher main PWB and check
for correct operation.
The front side reg- Reinsert the connector. Also check for contiistration motor con- nuity within the connector cable. If none,
nector makes poor remedy or replace the cable.
contact.
Defective front side
registration motor.
Replace front side registration motor.
The front side registration home
position sensor
connector makes
poor contact.
Reinsert the connector. Also check for continuity within the connector cable. If none,
remedy or replace the cable.
Defective front side
registration home
position sensor.
Replace the front side registration home
position sensor.
Defective finisher
control PWB.
Replace the finisher control PWB and check
for correct operation.
2GN/2GP/2GR
Remarks
Code
Contents
C8180
Side registration motor 2 problem
(optional 3000-sheet document finisher)
When operation returned to a home
position is performed at the time of initial
operation and a home position is not
detected even if 3 s passed.
Jam 88 is indicated.
Finisher rear side registration motor
problem (optional built-in finisher)
When the rear-side registration homeposition sensor is turned on during initialization, the sensor did not turn on while it
has moved by 106 pulses.
When the rear-side registration homeposition sensor is turned off during initialization, the sensor did not turn on in
three seconds.
C8190
Finisher trailing edge registration
motor problem (optional built-in finisher)
When the trailing edge registration
home-position sensor is turned on during
initialization, the sensor did not turn on
while it has moved by 106 pulses.
When the trailing edge registration
home-position sensor is turned off during
initialization, the sensor did not turn on in
three seconds.
Causes
Check procedures/corrective measures
Poor contact in the
connector terminals.
Check the connection of connector YC8 on
the internal tray PWB and the connector of
side registration motor 2, and the continuity
across the connector terminals. Repair or
replace if necessary.
Defective side registration motor 2.
Replace side registration motor 2.
Defective PWB.
Replace the internal tray PWB or finisher
main PWB and check for correct operation.
The rear side regReinsert the connector. Also check for contiistration motor con- nuity within the connector cable. If none,
nector makes poor remedy or replace the cable.
contact.
Defective rear side
registration motor.
Replace rear side registration motor.
The rear side registration home
position sensor
connector makes
poor contact.
Reinsert the connector. Also check for continuity within the connector cable. If none,
remedy or replace the cable.
Defective rear side
registration home
position sensor.
Replace the rear side registration home
position sensor.
Defective finisher
control PWB.
Replace the finisher control PWB and check
for correct operation.
The trailing edge
registration motor
connector makes
poor contact.
Reinsert the connector. Also check for continuity within the connector cable. If none,
remedy or replace the cable.
Defective trailing
edge registration
motor.
Replace trailing edge registration motor.
The trailing edge
registration home
position sensor
connector makes
poor contact.
Reinsert the connector. Also check for continuity within the connector cable. If none,
remedy or replace the cable.
Defective trailing
edge registration
home position sensor.
Replace the trailing edge registration home
position sensor.
Defective finisher
control PWB.
Replace the finisher control PWB and check
for correct operation.
1-4-37
2GN/2GP/2GR
Remarks
Code
Contents
C8210
Stapler moving motor 1 error
(optional 3000-sheet document finisher)
When operation returned to a home
position is performed at the time of initial
operation and a home position is not
detected even if 1.5 s passed.
Causes
Check procedures/corrective measures
Poor contact in the
connector terminals.
Check the connection of connector YC9 on
the finisher main PWB and the connector of
stapler moving motor 1, and the continuity
across the connector terminals. Repair or
replace if necessary.
Defective stapler
moving motor 1.
Replace stapler moving motor 1.
Defective finisher
main PWB.
Replace the finisher main PWB and check
for correct operation.
The stapler connector makes poor
contact.
Reinsert the connector. Also check for continuity within the connector cable. If none,
remedy or replace the cable.
The stapler is
blocked with a staple.
Remove the stapler cartridge, and check the
cartridge and the stapling section of the stapler.
The stapler is broken.
Replace the stapler and check for correct
operation.
Defective finisher
main PWB.
Replace the finisher main PWB and check
for correct operation.
Finisher stapler problem (optional
built-in finisher)
The stapler home position sensor does
not change state from nondetection to
detection within 200 ms of the start of
stapler motor counterclockwise (forward)
rotation.
During initialization, the stapler home
position sensor does not change state
from non-detection to detection within
600 ms of the start of stapler motor
clockwise (reverse) rotation.
The stapler connector makes poor
contact.
Reinsert the connector. Also check for continuity within the connector cable. If none,
remedy or replace the cable.
The stapler is
blocked with a staple.
Remove the stapler cartridge, and check the
cartridge and the stapling section of the stapler.
The stapler is broken.
Replace the front stapler and check for correct operation.
Defective finisher
control PWB.
Replace the finisher control PWB and check
for correct operation.
Stapler moving motor 2 error
(optional 3000-sheet document finisher)
When operation returned to a home
position is performed at the time of initial
operation and a home position is not
detected even if 3.5 s passed.
Poor contact in the
connector terminals.
Check the connection of connector YC10 on
the finisher main PWB and the connector of
stapler moving motor 2, and the continuity
across the connector terminals. Repair or
replace if necessary.
Defective stapler
moving motor 2.
Replace stapler moving motor 2.
Defective finisher
main PWB.
Replace the finisher main PWB and check
for correct operation.
Stapler problem (optional document
finisher)
When the stapler motor is driving, the
ON status of the stapler home position
sensor cannot be detected even if a
specified time has elapsed.
C8220
C8230
1-4-38
Stapler motor problem (optional 3000- Poor contact in the
sheet document finisher)
connector termiJam 82 is indicated.
nals.
Check the connection of connector YC10 on
the finisher main PWB and the connector of
stapler motor, and the continuity across the
connector terminals. Repair or replace if
necessary.
Defective stapler
motor.
Replace the stapler motor.
Defective finisher
main PWB.
Replace the finisher main PWB and check
for correct operation.
2GN/2GP/2GR
Remarks
Code
Contents
C8300
Centerfold unit communication error
(optional centerfold unit of 3000-sheet
document finisher)
Communication with the centerfold unit
is not possible although the connection
is detected.
C8310
C8320
C8330
C8340
Centerfold side registration motor 1
problem (optional centerfold unit of
3000-sheet document finisher)
The home position is not detected when
initial operation even if 1000 ms passed.
Centerfold paper conveying belt
motor problem (optional centerfold
unit of 3000-sheet document finisher)
The home position is not detected when
initial operation even if 2500 ms passed.
Blade motor problem (optional centerfold unit of 3000-sheet document
finisher)
The home position is not detected when
initial operation even if 1500 ms passed.
Centerfold staple motor problem
(optional centerfold unit of 3000-sheet
document finisher)
Jam89 is indicated.
Causes
Check procedures/corrective measures
Poor contact in the
connector terminals.
Check the connection of connector YC22 on
the finisher main PWB and the continuity
across the connector terminals. Repair or
replace if necessary.
Defective centerfold unit set switch.
Replace the centerfold unit set switch.
Defective finisher
main PWB.
Replace the finisher main PWB and check
for correct operation.
Poor contact in the
connector terminals.
Check the connection of connector YC6 on
the centerfold main PWB and the connector
of centerfold side registration motor 1, and
the continuity across the connector terminals. Repair or replace if necessary.
Defective centerfold side registration motor 1.
Replace centerfold side registration motor 1.
Defective PWB.
Replace the centerfold main PWB or finisher
main PWB and check for correct operation.
Poor contact in the
connector terminals.
Check the connection of connector YC6/
YC7 on the centerfold main PWB and the
connector of centerfold paper conveying belt
motor 1/2, and the continuity across the connector terminals. Repair or replace if necessary.
Defective centerfold paper conveying belt motor 1/2.
Replace centerfold paper conveying belt
motor 1/2.
Defective PWB.
Replace the centerfold main PWB or finisher
main PWB and check for correct operation.
Poor contact in the
connector terminals.
Check the connection of connector YC8 on
the centerfold main PWB and the connector
of the blade motor, and the continuity across
the connector terminals. Repair or replace if
necessary.
Defective blade
motor.
Replace the blade motor.
Defective PWB.
Replace the centerfold main PWB or finisher
main PWB and check for correct operation.
Poor contact in the
connector terminals.
Check the connection of connector YC9 on
the centerfold main PWB and the connector
of the centerfold staple motor, and the continuity across the connector terminals. Repair
or replace if necessary.
Defective centerfold staple motor.
Replace the centerfold staple motor.
Defective PWB.
Replace the centerfold main PWB or finisher
main PWB and check for correct operation.
1-4-39
2GN/2GP/2GR
Remarks
Code
Contents
C8350
Centerfold side registration motor 2
problem (optional centerfold unit of
3000-sheet document finisher)
The home position is not detected when
initial operation even if 1000 ms passed.
C8360
C8440
Centerfold main motor problem
(optional centerfold unit of 3000-sheet
document finisher)
The motor lock signal is detected above
1000 ms during driving the centerfold
main motor.
Sensor adjusting problem (optional
document finisher)
The sensor cannot be adjusted within
the specified range.
Causes
Check procedures/corrective measures
Poor contact in the
connector terminals.
Check the connection of connector YC7 on
the centerfold main PWB and the connector
of centerfold side registration motor 2, and
the continuity across the connector terminals. Repair or replace if necessary.
Defective centerfold side registration motor 2.
Replace centerfold side registration motor 1.
Defective PWB.
Replace the centerfold main PWB or finisher
main PWB and check for correct operation.
Poor contact in the
connector terminals.
Check the connection of connector YC12 on
the centerfold main PWB and the connector
of the centerfold main motor, and the continuity across the connector terminals. Repair
or replace if necessary.
Defective centerfold main motor.
Replace the centerfold main motor.
Defective PWB.
Replace the centerfold main PWB or finisher
main PWB and check for correct operation.
The paper entry
sensor connector
makes poor contact.
Reinsert the connector. Also check for continuity within the connector cable. If none,
remedy or replace the cable.
Defective paper
entry sensor.
Replace the paper entry sensor and check
for correct operation.
The optical path of
the paper entry
sensor is blocked
by foreign matter.
Remove the foreign matter.
Defective finisher
main PWB.
Replace the finisher main PWB and check
for correct operation.
C8460
EEPROM problem (optional document
finisher)
Reading from or writing to EEPROM
cannot be performed.
Defective
EEPROM or finisher main PWB.
Replace the finisher main PWB and check
for correct operation.
C8500
Mail box communication error
(optional mail box of 3000-sheet document finisher)
Communication with the mail box is not
possible although the connection is
detected.
Poor contact in the
connector terminals.
Check the connection of the connector of
the mail box and the connector YC7 on the
finisher main PWB, and the continuity
across the connector terminals. Repair or
replace if necessary.
Defective PWB.
Replace the mail box main PWB or finisher
main PWB and check for correct operation.
1-4-40
2GN/2GP/2GR
Remarks
Code
Contents
C8510
Mail box drive motor problem
(optional mail box of 3000-sheet document finisher)
The motor lock signal is detected above
500 ms during driving the mail box drive
motor.
C8800
C8900
C8910
C8920
C8930
Causes
Check procedures/corrective measures
Poor contact in the
connector terminals.
Check the connection of connector YC2 on
the mail box main PWB and the connector of
the mail box drive motor, and the continuity
across the connector terminals. Repair or
replace if necessary.
Defective mail box
drive motor.
Replace the mail box drive motor.
Defective PWB.
Replace the mail box main PWB or finisher
main PWB and check for correct operation.
Document finisher communication
problem (optional 3000-sheet document finisher)
No communication: there is no reply
after 5 retries.
Abnormal communication: a communication error (parity or checksum error) is
detected five times in succession.
Poor contact in the
connector terminals.
Check the connection of connector on the
finisher main PWB and the connector on the
engine PWB, and the continuity across the
connector terminals. Repair or replace if
necessary.
Defective PWB.
Replace the finisher main PWB or engine
PWB and check for correct operation.
Backup memory data problem
(optional 3000-sheet document finisher)
Read and write data does not match.
Poor contact in the
connector terminals.
Check the connection of connector on the
finisher main PWB and the connector on the
engine PWB, and the continuity across the
connector terminals. Repair or replace if
necessary.
Defective finisher
main PWB.
Replace the finisher main PWB and check
for correct operation.
Poor contact in the
connector terminals.
Check the connection of connector on the
punch PWB and the connector YC4 on the
finisher main PWB, and the continuity
across the connector terminals. Repair or
replace if necessary.
Defective punch
PWB.
Replace the punch PWB and check for correct operation.
Poor contact in the
connector terminals.
Check the connection of connector on the
mail box main PWB and the connector YC7
on the finisher main PWB, and the continuity
across the connector terminals. Repair or
replace if necessary.
Defective mail box
main PWB.
Replace the mail box main PWB and check
for correct operation.
Poor contact in the
connector terminals.
Check the connection of connector on the
centerfold main PWB and the connector
YC5 on the finisher main PWB, and the continuity across the connector terminals.
Repair or replace if necessary.
Defective centerfold main PWB.
Replace the centerfold main PWB and
check for correct operation.
Backup memory data problem
(optional punch unit of 3000-sheet
document finisher)
Read and write data does not match.
Backup memory data problem
(optional mail box of 3000-sheet document finisher)
Read and write data does not match.
Backup memory data problem
(optional centerfold unit of 3000-sheet
document finisher)
Read and write data does not match.
1-4-41
2GN/2GP/2GR
Remarks
Code
C9000
C9040
C9050
C9060
C9070
C9080
1-4-42
Contents
Causes
Check procedures/corrective measures
Poor contact in the
connector terminals.
Check the connection of connector YC7 on
the scanner PWB and the connector of the
DP, and the continuity across the connector
terminals. Repair or replace if necessary.
Defective DP main
PWB.
Replace the DP main PWB and check for
correct operation.
Loose connection
of the DP lift motor
connector.
Reinsert the connector. Also check for continuity within the connector cable. If none,
remedy or replace the cable.
Malfunction of the
DP lift motor.
Replace the DP lift motor and check for correct operation.
Malfunction of the
DP lift upper limit
switch.
Replace the DP lift upper limit switch and
check for correct operation.
Loose connection
of the DP lift upper
limit switch connector.
Reinsert the connector. Also check for continuity within the connector cable. If none,
remedy or replace the cable.
Defective DP main
PWB.
Replace the DP main PWB and check for
correct operation.
Loose connection
of the DP lift motor
connector.
Reinsert the connector. Also check for continuity within the connector cable. If none,
remedy or replace the cable.
Malfunction of the
DP lift motor.
Replace the DP lift motor and check for correct operation.
Malfunction of the
DP lift lower limit
switch.
Replace the DP lift lower limit switch and
check for correct operation.
Loose connection
of the DP lift lower
limit switch connector.
Reinsert the connector. Also check for continuity within the connector cable. If none,
remedy or replace the cable.
Defective DP main
PWB.
Replace the DP main PWB and check for
correct operation.
DP EEPROM error (optional DP)
Read and write data does not match.
Data in the specified area of the backup
memory does not match the specified
values.
Defective DP main
PWB.
Replace the DP main PWB and check for
correct operation.
Device damage of
EEPROM.
Contact the Service Administrative Division.
Communication problem between DP
and SHD (optional DP)
A communication error is detected.
Loose connection
of the SHD PWB.
Reinsert the connector. Also check for continuity within the connector cable. If none,
remedy or replace the cable.
Defective SHD
PWB.
Replace the SHD PWB and check for correct operation.
Loose connection
of CIS.
Reinsert the connector. Also check for continuity within the connector cable. If none,
remedy or replace the cable.
Defective CIS.
Replace CIS and check for correct operation.
DP communication problem
(optional DP)
A communication error is detected.
DP lift motor going up error
(optional DP)
The pulse count raised to 10000 at lifting, however, the DP lift switch could not
be turned on. After one time retry, the DP
lift limit switch could not be turned on.
DP lift motor going down error
(optional DP)
The pulse count lowered to 10000 at lifting down, however, the DP bottom limit
switch could not be turned on.
After one time retry, the DP bottom limit
switch could not be turned on.
Communication problem between DP
and CIS (optional DP)
Reading cannot be performed correctly.
2GN/2GP/2GR
Remarks
Code
Contents
F000
Operation panel PWB communication
error
Causes
Check procedures/corrective measures
Defective main
PWB.
Replace the main PWB and check for correct operation.
Defective operation panel PWB.
Replace the operation panel PWB and
check for correct operation.
F010
Main PWB checksum error
Defective main
PWB.
Replace the main PWB and check for correct operation.
F020
Memory checksum error
Defective main
PWB.
Replace the main PWB and check for correct operation.
Defective expansion memory.
Replace the expansion memory and check
for correct operation.
F030
Main PWB system error
Defective main
PWB.
Replace the main PWB and check for correct operation.
F040
Engine PWB communication error
Defective main
PWB.
Replace the main PWB and check for correct operation.
Defective engine
PWB.
Replace the engine PWB and check for correct operation.
Defective main
PWB.
Replace the main PWB and check for correct operation.
Defective scanner
PWB.
Replace the scanner PWB and check for
correct operation.
F041
Scanner PWB communication error
F050
Engine ROM checksum error
Defective engine
PWB.
Replace the engine PWB and check for correct operation.
F060
Engine RAM error
Defective engine
PWB.
Replace the engine PWB and check for correct operation.
F070
Flash ROM error
Defective flash
ROM.
Replace the flash ROM and check for correct operation.
F080
Flash ROM error (during download)
Defective flash
ROM.
Replace the flash ROM and check for correct operation.
F090
Fax control PWB communication
error
Defective main
PWB.
Replace the main PWB and check for correct operation.
1-4-43
2GN/2GP/2GR
1-4-3
Image formation problems
(1)No image appears
(entirely white).
(2)No image appears
(entirely black).
See page 1-4-45.
See page 1-4-45.
(6)A black line
appears longitudinally.
(7)A black line
appears laterally.
See page 1-4-47.
See page 1-4-47.
(11)The leading edge
of the image is consistently misaligned
with the original.
(12)The leading edge
of the image is sporadically misaligned
with the original.
See page 1-4-48.
See page 1-4-48.
(16)Fusing is poor.
See page 1-4-49.
1-4-44
(17)Image is out of
focus.
See page 1-4-49.
(3)Image is too light.
See page 1-4-46.
(8)One side of the
copy image is darker
than the other.
See page 1-4-47.
(13)Paper creases.
See page 1-4-48.
(18)Image center
does not align with
the original center.
See page 1-4-50.
(4)Background is
visible.
See page 1-4-46.
(9)Black dots appear
on the image.
See page 1-4-47.
(14)Offset occurs.
See page 1-4-49.
(19)Image is not
square.
See page 1-4-50.
(5)A white line
appears longitudinally.
See page 1-4-46.
(10)Image is blurred.
See page 1-4-48.
(15)Image is partly
missing.
See page 1-4-49.
2GN/2GP/2GR
(1) No image appears (entirely white).
Copy example
Causes
No transfer charging.
Check procedures/corrective measures
The connector terminals
of the high voltage PWB
make poor contact.
Reinsert the connector. Also check for continuity within the
connector cable. If none, remedy or replace the cable.
Defective engine PWB.
Check if YC7-10 on the engine PWB goes low when maintenance item U101 is run. If not, replace the engine PWB.
Defective high voltage
PWB.
Check if transfer charging takes place when CN1-5 on the
high voltage PWB goes low while maintenance item U101 is
run. If not, replace the high voltage PWB.
No LSU
laser is
output.
Defective laser scanner
unit.
Replace the laser scanner unit (see page 1-5-21).
Defective main PWB.
Check if YC21-A3 on the main PWB goes low when maintenance item U100 is run. If not, replace the main PWB.
No developing bias
output.
The connector terminals
of the high voltage PWB
make poor contact.
Reinsert the connector. Also check for continuity within the
connector cable. If none, remedy or replace the cable.
Defective engine PWB.
Check if YC7-1 on the engine PWB goes low when maintenance item U101 is run. If not, replace the engine PWB.
Defective high voltage
PWB.
Check if developing bias is output when CN1-14 on the high
voltage PWB goes low while maintenance item U101 is run.
If not, replace the high voltage PWB.
(2) No image appears (entirely black).
Copy example
Causes
No main
charging.
Exposure
lamp fails
to light.
Check procedures/corrective measures
Broken main charger
wire.
Replace the main charger unit (see page 1-5-25).
Leaking main charger
housing.
Clean the main charger wire and grid.
The connector terminals
of the high voltage PWB
make poor contact.
Reinsert the connector. Also check for continuity within the
connector cable. If none, remedy or replace the cable.
Defective engine PWB.
Check if YC7-4 on the engine PWB goes low when maintenance item U100 is run. If not, replace the engine PWB.
Defective high voltage
PWB.
Check if main charging takes place when CN1-11 on the high
voltage PWB goes low while maintenance item U100 is run.
If not, replace the high voltage PWB.
Poor contact in the expo- Reinsert the connector. Also check for continuity within the
sure lamp connector ter- connector cable. If none, remedy or replace the cable.
minals.
Defective inverter PWB.
Check if the exposure lamp lights when YC1-3 on the
inverter PWB goes low while maintenance item U061 is run.
If not, replace the inverter PWB.
Defective scanner PWB.
Check if YC6-3 on the scanner PWB goes low when maintenance item U061 is run. If not, replace the scanner PWB.
1-4-45
2GN/2GP/2GR
(3) Image is too light.
Copy example
Causes
Check procedures/corrective measures
Insufficient toner.
If the display shows the message requesting toner replenishment, replace the container.
Deteriorated toner.
Perform the drum refresh operation.
Defective
transfer
charging
output.
The connector terminals
of the high voltage PWB
make poor contact.
Reinsert the connector. Also check for continuity within the
connector cable. If none, remedy or replace the cable.
Defective engine PWB.
Check if YC7-10 on the engine PWB goes low when maintenance item U101 is run. If not, replace the engine PWB.
Defective high voltage
PWB.
Check if transfer charging takes place when CN1-5 on the
high voltage PWB goes low while maintenance item U101 is
run. If not, replace the high voltage PWB.
(4) Background is visible.
Copy example
Causes
Check procedures/corrective measures
Deteriorated toner.
Perform the drum refresh operation.
Dirty main charger wire.
Clean the wire or, if it is extremely dirty, replace it (see page
1-5-25).
(5) A white line appears longitudinally.
Copy example
1-4-46
Causes
Check procedures/corrective measures
Foreign matter in the developing unit.
Check if the magnetic brush is formed uniformly. Replace the
developing unit if any foreign matter (see page 1-5-26).
Dirty shading plate.
Clean the shading plate.
2GN/2GP/2GR
(6) A black line appears longitudinally.
Copy example
Causes
Check procedures/corrective measures
Dirty contact glass.
Clean the contact glass.
Dirty or flawed drum.
Perform the drum refresh operation. If the drum is flawed,
replace the drum unit (see page 1-5-24).
Deformed or worn cleaning blade.
Replace the drum unit (see page 1-5-24).
Dirty scanner mirror.
Clean the scanner mirror.
Dirty main charger wire.
Clean the wire or, if it is extremely dirty, replace it (see page
1-5-25).
(7) A black line appears laterally.
Copy example
Causes
Check procedures/corrective measures
Flawed drum.
Replace the drum unit (see page 1-5-24).
Dirty developing section.
Clean any part contaminated with toner in the developing
section.
Leaking main charger housing.
Clean the main charger wire and grid.
Leaking separation electrode.
Clean the separation electrode.
(8) One side of the copy image is darker than the other.
Copy example
Causes
Check procedures/corrective measures
Dirty main charger wire.
Clean the wire or, if it is extremely dirty, replace it (see page
1-5-25).
Defective exposure lamp.
Check if the exposure lamp light is distributed evenly. If not,
replace the exposure lamp (see page 1-5-11).
(9) Black dots appear on the image.
Copy example
Causes
Check procedures/corrective measures
Dirty or flawed drum.
Perform the drum refresh operation. If the drum is flawed,
replace the drum unit (see page 1-5-24).
Dirty contact glass.
Clean the contact glass.
Deformed or worn cleaning blade.
Replace the drum unit (see page 1-5-24).
Dirty drum separation claws.
Clean the drum separation claws.
Dirty the heat roller separation claws.
Clean the heat roller separation claws.
1-4-47
2GN/2GP/2GR
(10) Image is blurred.
Copy example
Causes
Check procedures/corrective measures
Scanner moves erratically.
Check if there is any foreign matter on the front and rear
scanner rails. If any, remove it.
Deformed press roller.
Replace the press roller (see page 1-5-30).
Paper conveying section drive problem.
Check the gears and belts and, if necessary, grease them.
(11) The leading edge of the image is consistently misaligned with the original.
Copy example
Causes
Check procedures/corrective measures
Misadjusted leading edge registration. Run maintenance mode U034 to readjust the leading edge
registration (see page 1-3-18).
Misadjusted scanner leading edge
registration.
Run maintenance mode U066 to readjust the scanner leading edge registration (see page 1-3-24).
(12) The leading edge of the image is sporadically misaligned with the original.
Copy example
Causes
Feed clutch, paper feed clutch, MP
paper feed clutch or registration
clutch installed or operating incorrectly.
Check procedures/corrective measures
Check the installation position and operation of each clutch.
If any of them operates incorrectly, replace it.
(13) Paper creases.
Copy example
1-4-48
Causes
Check procedures/corrective measures
Paper curled.
Check the paper storage conditions.
Paper damp.
Check the paper storage conditions.
Defective pressure springs.
Replace the pressure springs.
Defective separation.
Check the drum separation claws and heat roller separation
claws.
2GN/2GP/2GR
(14) Offset occurs.
Copy example
Causes
Check procedures/corrective measures
Defective cleaning blade.
Replace the drum unit (see page 1-5-24).
Defective fuser unit.
Check the heat roller and press roller.
Wrong types of paper.
Check if the paper meets specifications. Replace paper.
(15) Image is partly missing.
Copy example
Causes
Check procedures/corrective measures
Paper damp.
Check the paper storage conditions.
Paper creased.
Change the paper.
Drum condensation.
Perform the drum refresh operation.
Dirty or flawed drum.
Perform the drum refresh operation. If the drum is flawed,
replace the drum unit (see page 1-5-24).
(16) Fusing is poor.
Copy example
Causes
Check procedures/corrective measures
Wrong types of paper.
Check if the paper meets specifications. Replace paper.
Defective pressure springs.
Replace the pressure springs.
Flawed press roller.
Replace the press roller (see page 1-5-30).
Flawed fuser heater.
Replace the fuser heater (see page 1-5-31).
(17) Image is out of focus.
Copy example
Causes
Check procedures/corrective measures
Defective image scanning unit.
Replace the image scanning unit (see page 1-5-18).
Drum condensation.
Perform the drum refresh operation.
1-4-49
2GN/2GP/2GR
(18) Image center does not align with the original center.
Copy example
Causes
Check procedures/corrective measures
Misadjusted image center line.
Run maintenance item U034 to readjust the center line of
image printing (see page 1-3-19).
Misadjusted scanner center line.
Run maintenance item U067 to readjust the scanner leading
edge registration (see page 1-3-25).
Original is not placed correctly.
Place the original correctly.
(19) Image is not square.
Copy example
Causes
Laser scanner unit positioned incorrectly.
1-4-50
Check procedures/corrective measures
Adjust the installation position of the laser scanner unit (see
page 1-5-23).
2GN/2GP/2GR
1-4-4
Electric problems
Troubleshooting to each failure must be in the order of the numbered symptoms.
Problem
(1)
The machine does
not operate when the
main power switch is
turned on.
Causes
Check procedures/corrective measures
1. The power cord is not
plugged in properly.
Check the contact between the power plug and the outlet.
2. No electricity at the
power outlet.
Measure the input voltage.
3. Broken power cord.
Check for continuity. If none, replace the cord.
4. Defective main power
switch.
Check for continuity across the contacts. If none, replace the main
power switch.
5. Defective power source
PWB.
With AC present, check for 24 V DC at YC1-7 on the power
source PWB, 5 V DC at YC1-6 and 3.3 V DC at YC1-5. If none,
replace the power source PWB.
1. Poor contact in the connector terminals.
Reinsert the connector. Also check for continuity within the connector cable. If none, remedy or replace the cable.
2. Defective drive transmission system.
Check if the rollers and gears rotate smoothly. If not, grease the
bushings and gears. Check for broken gears and replace if any.
3. Defective eject motor.
Run maintenance item U030 and check if the eject motor operates. If not, replace the eject motor.
4. Defective engine PWB.
Run maintenance item U030 and check if the eject motor operates. If not, replace the engine PWB.
(3)
The scanner motor or
cooling fan motor 1 to
13 does not operate.
1. Poor contact in the connector terminals.
Reinsert the connector. Also check for continuity within the connector cable. If none, remedy or replace the cable.
2. Broken motor coil.
Check for continuity across the coil. If none, replace the motor.
(4)
The upper/lower
paper feed clutch,
feed clutch 1/2/3, MP
paper feed clutch,
MP feed clutch, registration clutch or
duplex feed clutch
does not operate.
1. Broken clutch coil.
Check for continuity across the coil. If none, replace the clutch.
2. Poor contact in the connector terminals.
Reinsert the connector. Also check for continuity within the connector cable. If none, remedy or replace the cable.
3. Defective engine PWB.
Run maintenance item U032 and check if following terminals on
the engine PWB goes low. If not, replace the engine PWB.
Upper paper feed clutch: YC14-B1 on the engine PWB
Lower paper feed clutch: YC14-B4 on the engine PWB
Feed clutch 1: YC11-14 on the engine PWB
Feed clutch 2: YC13-A12 on the engine PWB
Feed clutch 3: YC13-A5 on the engine PWB
MP paper feed clutch: YC6-A9 on the engine PWB
MP feed clutch: YC6-A11 on the engine PWB
Registration clutch: YC14-B6 on the engine PWB
Duplex feed clutch: YC10-B2 on the engine PWB
1. Broken solenoid coil.
Check for continuity across the coil. If none, replace the solenoid.
2. Poor contact in the connector terminals.
Reinsert the connector. Also check for continuity within the connector cable. If none, remedy or replace the cable.
3. Defective engine PWB.
Run maintenance item U033 and check if the solenoid operates. If
not, replace the engine PWB.
(2)
The eject motor does
not operate.
(5)
The feedshift solenoid or toner feed
solenoid does not
operate.
1-4-51
2GN/2GP/2GR
Problem
(6)
The exposure lamp
does not turn on or
off.
Causes
Check procedures/corrective measures
1. Poor contact in the connector terminals.
Reinsert the connector. Also check for continuity within the connector cable. If none, remedy or replace the cable.
2. Defective scanner PWB.
Run maintenance item U061 and check if YC6-3 on the scanner
PWB goes low. If not, replace the scanner PWB.
If YC6-3 on the scanner PWB is always low, replace the scanner
PWB.
3. Defective inverter PWB.
Run maintenance item U061 and check if the exposure lamp turns
on with YC1-3 on the inverter PWB go low. If not, replace the
inverter PWB.
If the exposure lamp does not turn off with YC1-3 on the inverter
PWB high, replace the inverter PWB.
4. Defective exposure lamp. Replace the exposure lamp even if checking or correcting other
measures.
(7)
Main charging is not
performed.
1. Broken main charger
wire.
(See page 1-4-45.)
2. Leaking main charger
housing.
3. The connector terminals
of the high voltage PWB
make poor contact.
4. Defective engine PWB.
5. Defective high voltage
PWB.
(8)
No developing bias is
output.
1. The connector terminals
of the high voltage PWB
make poor contact.
(See page 1-4-45.)
2. Defective engine PWB.
3. Defective high voltage
PWB.
(9)
Transfer charging is
not performed.
1. The connector terminals
of the high voltage PWB
make poor contact.
(See page 1-4-45.)
2. Defective engine PWB.
3. Defective high voltage
PWB.
(10)
The original size is
not detected correctly.
1-4-52
1. Original is not placed cor- Check the original and correct if necessary.
rectly.
2. Poor contact in the original detection switch or
original size detection
sensor connector terminals.
Reinsert the connector. Also check for continuity within the connector cable. If none, remedy or replace the cable.
3. Defective original detection switch.
If the level of YC4-5 on the scanner PWB does not go low when
the original detection switch is turned on and off, replace the original detection switch.
4. Defective original size
detection sensor.
Check if sensor operates correctly. If not, replace it.
2GN/2GP/2GR
Problem
Causes
(11)
The touch panel keys
do not work.
1. Poor contact in the touch
panel connector terminals.
Reinsert the connector. Also check for continuity within the connector cable. If none, remedy or replace the cable.
2. Defective touch panel or
main operation PWB.
If any keys do not work after running the maintenance item U201
to initialize the touch panel, replace the touch panel or main operation PWB.
(12)
The message
requesting paper to
be loaded is shown
when paper is
present on the cassette 1/2 or MP tray.
1. Poor contact in the connector terminals of
upper/lower paper switch
or MP paper switch.
Reinsert the connector. Also check for continuity within the connector cable. If none, remedy or replace the cable.
2. Defective upper/lower
paper switch or MP
paper switch.
If the level of following terminal on PWB does not go low when the
switch is turned on and off, replace the switch.
Upper paper switch: YC13-B12 on the engine PWB
Lower paper switch: YC13-B18 on the engine PWB
MP paper switch: YC6-A6 on the engine PWB
(13)
The size of paper on
the cassette 1/2 or
MP tray is not displayed correctly.
1. Poor contact in the connector terminals of
upper/lower paper size
length switch, upper/
lower paper size width
switch, MP paper size
length switch or MP
paper size width switch.
Reinsert the connector. Also check for continuity within the connector cable. If none, remedy or replace the cable.
2. Defective upper/lower
paper size length switch
or MP paper size length
switch.
If the level of following terminal on PWB does not go low when the
switch is turned on and off, replace the switch.
Upper paper size length switch: YC13-B2 on the engine PWB
Lower paper size length switch: YC13-A19 on the engine PWB
MP paper size length switch: YC6-B11 on the engine PWB
3. Defective upper/lower
paper size width switch
or MP paper size width
switch.
If the level of following terminal on PWB does not change when
the width guide in the cassette 1/2 or insert guide on the MP tray
is moved, replace the switch.
Upper paper size width switch: YC12-3, 4, 5 on the engine PWB
Lower paper size width switch: YC12-9, 10, 11 on the engine PWB
MP paper size width switch: YC6-A1, A2, A3 on the engine PWB
1. A piece of paper torn
from copy paper is
caught around feed
switch 1/2/3, registration
switch, feedshift switch,
eject switch or duplex
paper conveying switch.
Check visually and remove it, if any.
2. Defective feed switch 1/
2/3, registration switch,
feedshift switch, eject
switch or duplex paper
conveying switch.
Run maintenance item U031 and turn each switch on and off
manually. Replace the switch if indication of the corresponding
switch on the touch panel is not displayed in reverse.
(14)
A paper jam in the
paper feed, paper
conveying, fuser,
eject or duplex section is indicated when
the main power
switch is turned on.
Check procedures/corrective measures
1-4-53
2GN/2GP/2GR
Problem
Causes
(15)
The message
requesting cover to
be closed is displayed when the front
cover or left cover 1/2
is closed.
1. Poor contact in the connector terminals of front
cover switch, left cover 1
switch or left cover 2
switch.
Reinsert the connector. Also check for continuity within the connector cable. If none, remedy or replace the cable.
2. Defective front cover
switch, left cover 1 switch
or left cover 2 switch.
Check for continuity across each switch. If there is no continuity
when the switch is on, replace it.
(16)
Others.
1. Wiring is broken, shorted
or makes poor contact.
Check for continuity. If none, repair.
1-4-54
Check procedures/corrective measures
2GN/2GP/2GR
1-4-5
Mechanical problems
Problem
(1)
No primary paper feed.
Causes/check procedures
Corrective measures
Check if the surfaces of the following rollers or
pulleys are dirty with paper powder: upper/
lower forwarding pulleys, upper/lower paper
feed pulleys, upper/lower separation pulleys,
feed rollers, registration rollers, MP forwarding pulley, MP paper feed pulley and MP separation pulley.
Clean with isopropyl alcohol.
Check if the upper/lower forwarding pulleys,
upper/lower paper feed pulleys or upper/lower
separation pulleys is deformed.
Replace the pulley if it is deformed (see
page 1-5-2).
Check if the MP forwarding pulley, MP paper
feed pulley or MP separation pulley is
deformed.
Replace the pulley if it is deformed (see
page 1-5-4).
Electrical problem with the following clutches:
upper/lower paper feed clutches, feed
clutches 1/2/3, MP paper feed clutch and MP
feed clutch.
See page 1-4-51.
Check if the surfaces of the right and left registration rollers are dirty with paper powder.
Clean with isopropyl alcohol.
Electrical problem with the registration clutch.
See page 1-4-51.
Width guide in a cassette installed incorrectly.
Check the width guide visually and correct
or replace if necessary.
Deformed width guide in a cassette.
Check visually and replace any deformed
guide.
Check if a pressure spring along the paper
conveying path is deformed or out of place.
Repair or replace.
(4)
The scanner does not
travel.
Check if the scanner wire is loose.
Reinstall the scanner wire (see page 1-513).
The scanner motor malfunctions.
See page 1-4-51.
(5)
Multiple sheets of paper
are fed at one time.
Paper is extremely curled.
Change the paper.
Check if the upper or lower separation pulley
is worn.
Replace the upper or lower separation pulley if it is worn (see page 1-5-2).
Check if the MP separation pulley is worn.
Replace the MP separation pulley if it is
worn (see page 1-5-4).
(2)
No secondary paper
feed.
(3)
Skewed paper feed.
1-4-55
2GN/2GP/2GR
Problem
(6)
Paper jams.
(7)
Toner drops on the paper
conveying path.
Causes/check procedures
Paper is extremely curled.
Change the paper.
Deformed guides along the paper conveying
path.
Check visually and replace any deformed
guides.
Check if the contact between the right and left
registration rollers is correct.
Check visually and remedy if necessary.
Check if the contact between the feed roller
and feed pulley is correct.
Check visually and remedy if necessary.
Check if the press roller is extremely dirty or
deformed.
Clean or replace the press roller.
Check if the contact between the heat roller
and its separation claws is correct.
Repair if any springs are off the separation
claws.
Check if the contact between the eject roller
and pulley is correct.
Check visually and remedy if necessary.
The feedshift solenoid malfunctions.
See page 1-4-51.
Check if the duplex feed pulley, upper duplex
feed roller or lower duplex feed roller is
deformed.
Check visually and replace the pulley or
roller if deformed.
Check if the developing unit is extremely dirty. Clean the developing unit.
(8)
Check if the pulleys, rollers and gears operate
Abnormal noise is heard. smoothly.
Check if the following clutches are installed
correctly: upper/lower paper feed clutches,
feed clutches 1/2/3, MP paper feed clutch and
MP feed clutch.
1-4-56
Corrective measures
Grease the bearings and gears.
Correct.
2GN/2GP/2GR
1-5 Assembly and Disassembly
1-5-1
Precautions for assembly and disassembly
(1) Precautions
Before starting disassembly, press the Power key on the operation panel to off. Make sure that the Power indicator and the
Memory indicator are off before turning off the main power switch. And then unplug the power cable from the wall outlet.
Turning off the main power switch before pressing the Power key to off may cause damage to the equipped hard disk.
When optional fax kit is installed, be sure to disconnect the modular code before starting disassembly.
When handling PWBs (printed wiring boards), do not touch parts with bare hands.
The PWBs are susceptible to static charge. Do not touch any PWB containing ICs with bare hands or any object prone to
static charge.
Use only the specified parts to replace the fuser unit thermostat. Never substitute electric wires, as the machine may be
seriously damaged.
When replacing battery on a PWB, dispose properly according to laws and regulations.
When removing the hook of the connector, be sure to release the hook.
(2) Drum
Note the following when handling or storing the drum.
When removing the drum unit, never expose the drum surface to strong direct light.
Keep the drum at an ambient temperature between 0°C/32°F and 35°C/95°F and at a relative humidity not higher than
85% RH. Avoid abrupt changes in temperature and humidity.
Avoid exposure to any substance which is harmful to or may affect the quality of the drum.
Do not touch the drum surface with any object. Should it be touched by hands or stained with oil, clean it.
(3) Toner
Store the toner container in a cool, dark place.
Avoid direct light and high humidity.
1-5-1
2GN/2GP/2GR
1-5-2
Paper feed section
(1) Detaching and refitting the forwarding, paper feed and separation pulleys
Follow the procedure below to replace the forwarding, paper feed and separation pulleys.
Procedure
Removing the primary paper feed units
1. Open the front cover and pull out the cassettes 1 and 2.
2. Remove the screw and remove the primary
paper feed unit.
Primary paper feed unit
Figure 1-5-1
Removing the forwarding pulley
3. Remove the stopper from the primary paper
feed unit.
4. Raise the forwarding pulley retainer in the
direction the arrow, and remove from the primary paper feed unit.
Forwarding pulley
retainer
Stopper
Figure 1-5-2
5. Remove the stop ring from the forwarding
pulley retainer.
6. Remove the forwarding pulley from the forwarding pulley shaft.
Forwarding pulley retainer
Forwarding
pulley shaft
Stop ring
Forwarding pulley
Figure 1-5-3
1-5-2
2GN/2GP/2GR
Removing the paper feed pulley
7. Remove two stop rings from the primary
paper feed unit.
8. Pull the paper feed pulley shaft in the direction of the arrow and remove the paper feed
pulley.
Stop ring
Stop ring
Paper feed
pulley shaft
Paper feed pulley
Figure 1-5-4
Removing the separation pulley
9. Remove the stop ring from the primary
paper feed unit.
10. Pull the separation pulley shaft in the direction of the arrow and remove the separation
pulley.
Separation pulley shaft
Stop ring
Separation pulley
Figure 1-5-5
11. Replace the forwarding, paper feed and
separation pulleys.
12. Install the separation and paper feed pulleys
to the primary paper feed unit.
13. Install the forwarding pulley to the forwarding pulley retainer.
When refitting the forwarding pulley, orient it
correctly as shown in Figure 1-5-6.
14. Refit the forwarding pulley retainer to the primary paper feed unit.
15. Refit the primary paper feed unit.
Machine front
Machine rear
Forwarding pulley
Figure 1-5-6
16. When the forwarding pulley, paper feed pulley, separation pulley or the primary paper
feed unit is replaced, perform maintenance
mode U903 to clear the jam counter (see
page 1-3-76).
1-5-3
2GN/2GP/2GR
(2) Detaching and refitting the MP separation, MP paper feed and MP forwarding pulleys
Follow the procedure below to replace the MP separation, MP paper feed and MP forwarding pulleys.
Procedure
Removing the MP unit
1. Remove four screws and remove the right
lower cover.
Right lower cover
Figure 1-5-7
2. Remove two screws and two MP holder
plates.
3. Remove two pins, two screws and two connectors, and then remove the MP unit.
MP unit
Connectors
Pin
MP holder
plate
Pin
MP holder
plate
Figure 1-5-8
Removing the MP separation pulley
4. Reverse the MP unit and remove the spring
and stop ring from the MP separation pulley
shaft and move the bushing inside.
Bushing
MP separation
pully shaft
Spring
Figure 1-5-9
1-5-4
Stop ring
2GN/2GP/2GR
5. Raise the MP separation shaft as shown in
the figure, remove the holder plate and the
bushing, and then remove the MP separation pulley.
Take care not to remove the spring pin of the
gear at the rear of the MP separation pulley
shaft. If it is removed, refit it to its original
position.
Holder plate
Bushing
MP separation
pully shaft
MP separation pully
Figure 1-5-10
Removing the MP paper feed pulley
6. Remove the connector of the MP paper
switch and remove the wire from the three
clamps.
7. Remove the screw and remove the MP unit
cover.
MP unit cover
Clamps
Connector
Figure 1-5-11
8. Remove the stop ring and bushing on the
front of the MP paper feed pulley shaft.
Stop ring
MP paper feed
pully shaft
Bushing
Figure 1-5-12
1-5-5
2GN/2GP/2GR
9. Raise the MP paper feed pulley shaft as
shown in the figure, remove the stop ring,
and then remove the MP paper feed pulley.
Stop ring
MP paper feed
pully shaft
MP paper feed pully
Figure 1-5-13
Removing the MP forwarding pulley
10. Remove the sponge.
11. Remove the stop ring and MP paper feed
clutch.
When refitting, insert the cutout in the MP
paper feed clutch over the stopper on the
machine.
Stop ring
Sponge
MP paper feed clutch
Figure 1-5-14
12. Remove the screw from the cam at the rear
of the MP forwarding pulley shaft and move
the cam and the bushing toward the inner
side.
Bushing
MP forwarding
pully shaft
Cam
Figure 1-5-15
1-5-6
2GN/2GP/2GR
13. Remove the stop ring of the MP paper feed
pulley shaft and slide the bushing in the
direction of the arrow.
Stop ring
Bushing
MP paper feed
pully shaft
Figure 1-5-16
14. Slide the MP forwarding pulley shaft temporarily toward the rear side and then raise it to
remove from the MP unit.
Remove the shaft while raising the actuator
of the MP paper switch.
MP forwarding
pully shaft
Actuator
Figure 1-5-17
15. Remove the bushing an cam on the rear of
the MP forwarding pulley shaft.
Cam
Bushing
MP forwarding
pully shaft
Figure 1-5-18
1-5-7
2GN/2GP/2GR
16. Remove the stop ring and slide the MP forwarding pulley with the forwarding pulley
retainer from the shaft to remove it.
17. Replace the MP separation, MP paper feed
and MP forwarding pulleys.
Stop ring
MP forwarding pully
Forwarding pully
retainer
Figure 1-5-19
18. Install the MP forwarding pulley to the MP
forwarding pulley shaft.
19. Refit the MP forwarding pulley shaft to the
MP unit.
20. Install the MP paper feed pulley to the MP
unit.
21. Refit the MP unit cover to the MP unit.
When refitting the MP unit cover, the film on
the cover is positioned under the MP paper
feed pulley shaft.
22. Install the MP separation pulley to the MP
unit.
23. Refit the MP unit.
MP paper feed pully shaft
Film
Figure 1-5-20
24. When the MP forwarding pulley, MP paper
feed pulley or the MP separation pulley is
replaced, perform maintenance mode U903
to clear the jam counter (see page 1-3-76).
1-5-8
2GN/2GP/2GR
(3) Detaching and refitting the left and right registration cleaner
Take the following procedure when the left or right registration cleaner is to be replaced.
Procedure
Removing the left registration cleaner
1. Open the left cover 1 and remove the transfer roller unit. (see page 1-5-27).
2. Remove two roller stoppers and remove the
left registration roller.
3. Remove two registration guides.
Registration guide
Left registration roller
Registration guide
Roller
stopper
Roller
stopper
Figure 1-5-21
4. Remove the left registration cleaner
5. Replace the left registration cleaner and registration guides.
Install the left registration cleaner and registration guides.
6. Refit the left registration roller, roller stoppers and transfer roller unit.
Left registration cleaner
Figure 1-5-22
1-5-9
2GN/2GP/2GR
Removing the right registration cleaner
1. Remove the developing unit and drum unit.
(see pages 1-5-26 and 24).
2. Remove the right registration cleaner.
3. Replace the right registration cleaner and
Install the cleaner.
4. Refit the drum unit and developing unit.
Right registration cleaner
Frame
Figure 1-5-23
1-5-10
2GN/2GP/2GR
1-5-3
Optical section
(1) Detaching and refitting the exposure lamp
Replace the exposure lamp as follows.
Procedure
1. Remove the original cover or the DP.
2. Remove ten screws and remove the rear
cover.
Rear cover
Figure 1-5-24
3. Remove two screws and remove the scanner right cover.
4. Remove the platen.
Platen
Scanner right cover
Figure 1-5-25
5. Remove the connector of the inverter PWB.
6. Release the wire from the wire saddles and
pull the connector out from the opening on
the rear of the scanner unit.
Opening
Wire saddles
Connector
Figure 1-5-26
1-5-11
2GN/2GP/2GR
7. Remove the sponge from the wire guide and
release the wire.
8. Move the mirror 1 frame to notch position
and release the wire from the wire holder.
Wire holder
Wire
Wire guide
Sponge
Figure 1-5-27
9. Remove the screw and remove the exposure lamp.
10. Replace the exposure lamp and install the
lamp.
11. Refit the platen, scanner right cover and
rear cover.
Exposure lamp
Figure 1-5-28
1-5-12
2GN/2GP/2GR
(2) Detaching and refitting the scanner wires
Take the following procedure when the scanner wires are broken or to be replaced.
NOTE
When fitting the wires, be sure to use those specified below.
Machine front: (P/N: 302GR17110), gray
Machine rear: (P/N: 302GR17100), black
Fitting requires the following tools
Two frame securing tools (P/N 302C968310)
Two scanner wire stoppers (P/N 3596811)
Procedure
Detaching the scanner wires
1. Remove the exposure lamp (see page 1-511).
2. Remove the clip holder.
3. Open the front cover and left cover 1.
4. Remove four screws and remove front left
cover.
Clip holder
Front left cover
Figure 1-5-29
5. Remove the screw and pin and then remove
the left upper cover.
Left upper cover
Pin
Screw
Figure 1-5-30
1-5-13
2GN/2GP/2GR
6. Remove two screws and remove the scanner left cover.
Scanner left cover
Figure 1-5-31
7. Remove each screw and then remove front
and rear wire holder plates from mirror 1
frame.
8. Remove the mirror 1 frame.
Mirror 1 frame
Front wire holder plate
Rear wire holder plate
Figure 1-5-32
9. Remove the round terminals from the scanner wire springs on scanner unit left side.
10. Remove the scanner wire.
Scanner wire springs
Round terminal
Round terminal
Figure 1-5-33
1-5-14
2GN/2GP/2GR
Fitting the scanner wires
11. Move the mirror 2 frame as shown in the figure and insert two frame securing tools into
the positioning holes at the front and rear of
the machine center to fix the mirror 2 frame
in position.
Frame securing tool
Mirror 2 frame
Frame securing tool
Figure 1-5-34
1-5-15
2GN/2GP/2GR
12. Hook the round terminals onto the catches inside of the scanner unit. (1)
13. Loop the scanner wires around the outer grooves in the pulleys on the mirror 2 frame, winding from below to
above. (2)
14. Loop the scanner wire around the groove in the scanner wire pulley at the scanner unit right, winding from
above to below. (3)
15. Wind the scanner wires around the scanner wire drum five turns from the rear toward the hole in the drum. (4)
16. Insert the locating ball on the scanner wire into the hole in the scanner wire drum. (5)
17. Wind the scanner wires three turns from the inner toward the hole in the drum. (6)
18. Install the scanner wire stoppers to the scanner wire drum to fix the wires. (7)
19. Loop the scanner wire around the groove in the scanner wire pulley at the scanner unit left, winding from below
to above. (8)
20. Loop the scanner wires around the inner grooves in the pulleys on the mirror 2 frame, winding from below to
above. (9)
21. Hook the scanner wires around the scanner wire guides at the machine left. (10)
22. Hook the round terminal onto the scanner wire spring. (11)
Five turns from
the rear toward
Locating ball
Three turns from
the inner toward
Three turns from
the inner toward
Figure 1-5-35
1-5-16
Five turns from
the rear toward
2GN/2GP/2GR
23. Remove the two scanner wire stoppers and
frame securing tools.
24. Focusing on the locating ball of the wire
drum, move aside the wires to inside.
25. Move the mirror 2 frame from side to side to
correctly locate the wires in position.
26. Refit the mirror 1 frame.
27. Move the mirror 1 and 2 frames to the
machine left, and insert the two frame securing tools into the positioning holes at the
front and rear of the scanner unit to secure
the frames in position.
28. Hold the wires and fix each front and rear
wire holder plate to mirror 1 frame with the
screw.
29. Remove the two frame securing tools.
30. Refit the exposure lamp.
Frame securing tool
Mirror 2 frame
Frame securing tool
Mirror 1 frame
Figure 1-5-36
1-5-17
2GN/2GP/2GR
(3) Detaching and refitting the ISU (reference)
Follow the procedure below to replace the ISU.
Fitting requires the following tools
Two positions pins (P/N 1856812)
Procedure
Detaching the ISU
1. Remove the platen (see page 1-5-11).
2. Remove seven screws and then remove the
ISU cover.
ISU cover
Figure 1-5-37
3. Remove three screws and two connectors,
and then remove the ISU.
4. Replace the ISU.
Connector
Connector
ISU
Figure 1-5-38
1-5-18
2GN/2GP/2GR
Fitting the ISU
5. Adjust the position of ISU to the frame hole
of number and the same number which are
recorded in the lens of ISU and then insert
two positioning pins.
Example: When a lens number is 5, move
ISU so that the positioning hole of 5 of the
number stamped in the scanner unit suit and
insert two pins.
6. Remove two positioning pins after fixing ISU
with three screws.
7. Refit two connectors and ISU cover.
8. Refit the platen.
ISU
Positioning pins
Positioning holes
Lens number
Figure 1-5-39
1-5-19
2GN/2GP/2GR
(4) Adjusting the position of the ISU (reference)
Perform the following adjustment if the leading and trailing edges of the copy image are laterally skewed (lateral squareness not obtained).
Caution:
Adjust the amount of slack in the paper at the registration roller first (see page 1-3-20). Check for the longitudinal squareness of the copy image, and if it is not obtained, perform the longitudinal squareness adjustment.
Before making the following adjustment, output a VTC-PG2 pattern in maintenance item U993 to use as the original for the
adjustment.
Procedure
Start
Original
Place the original
on the platen.
Copy
example 1
Copy
example 2
Figure 1-5-40
Retighten the two screws and
refit the platen.
Press the start key and make
a test copy at 100% magnification.
Is the image correct?
Yes
No
Remove the platen.
Loosen the two screws and
adjust the position of the
mirror 2 frame.
For copy example 1,
move the frame in the direction of
the white arrow (
).
For copy example 2,
move the frame in the direction of
the black arrow (
).
End
Mirror 2 frame
Screws
Figure 1-5-41
1-5-20
2GN/2GP/2GR
(5) Detaching and refitting the laser scanner unit
Take the following procedure when the laser scanner unit is to be replaced.
Procedure
1. Remove the developing unit and drum unit
(see pages 1-5-24 and 26).
2. Remove the right lower cover and front left
cover (see pages 1-5-4 and 13).
3. Remove four screws and remove the front
right cover.
Front right cover
Figure 1-5-42
4. Remove three screws and remove the top
tray.
Top tray
Figure 1-5-43
5. Remove five screws and remove the inner
cover.
Inner cover
Figure 1-5-44
1-5-21
2GN/2GP/2GR
6. Remove two screws and two connectors,
and then remove the fan duct.
Connectors
Fan duct
Figure 1-5-45
7. Remove six screws and remove the toner
container retainer.
Toner container retainer
Figure 1-5-46
8. Remove four screws and the connector, and
then remove the laser scanner unit.
9. Replace the laser scanner unit and install
the unit.
10. Refit the toner container retainer, fan duct
and inner cover.
11. Refit the top tray, front right cover, right
lower cover and front left cover.
12. Refit the drum unit and the developing unit.
Connector
Laser scanner unit
Figure 1-5-47
1-5-22
2GN/2GP/2GR
(6) Adjusting the skew of the laser scanner unit (reference)
Perform the following adjustment if the leading and trailing edges of the copy image are laterally skewed (lateral squareness not obtained).
Procedure
Start
Enter maintenance mode.
Correct image
Copy
example 1
Copy
example 2
Enter 993 using the numeric keys.
Figure 1-5-48
Press the start key.
Refit the laser scanner unit and
turn the main power switch on.
Select PG2.
Press the system menu key.
Press the start key and make
a copy at 100% magnification.
Is the image correct?
Yes
Press the stop key to
exit maintenance mode.
No
Turn the main switch off and carry out
steps 1 to 7 of (5) Detaching and refitting
the laser scanner unit (see page 1-5-21).
For copy example 1:
Loosen the screw in the direction of the
white arrow ( ).
Reduce the height of the LSU spacer in
the direction of the white arrow ( ).
For copy example 2:
Tighten the screw in the direction of the
black arrow ( ).
Increase the height of the LSU spacer in
the direction of the black arrow ( ).
End
Screw
LSU spacer
Figure 1-5-49
1-5-23
2GN/2GP/2GR
1-5-4
Drum section
(1) Detaching and refitting the drum unit
Follow the procedure below to replace the drum unit.
Cautions:
Avoid direct sunlight or strong light when detaching and refitting the drum unit.
Never touch the drum surface when holding the drum unit.
Procedure
1. Remove the developing unit (see page 1-526).
2. Remove the main charger unit (see page 15-25).
3. Remove the screw and the drum unit.
4. Replace the drum unit and install the unit.
5. Perform maintenance mode U110 to clear
the counter value (see page 1-3-39).
Drum unit
Figure 1-5-50
1-5-24
2GN/2GP/2GR
(2) Detaching and refitting the main charger unit
Follow the procedure below to replace the main charger unit.
Procedure
1. Remove the developing unit (see page 1-526).
2. Release the inserted part and remove the
connector cover.
3. Remove the connector.
Inserted part
Connector cover
Connector
Figure 1-5-51
4. While pushing the hole with a sharp-pointed
object, remove the main charger unit.
Hole
Main charger unit
Figure 1-5-52
5. Release the inserted part and remove the
cleaning motor unit from the main charger
unit.
6. Replace the main charger unit.
7. Refit the cleaning motor unit to the main
charger unit.
8. Install the main charger unit
Main charger unit
Inserted part
Cleaning motor unit
Figure 1-5-53
1-5-25
2GN/2GP/2GR
1-5-5
Developing section
(1) Detaching and refitting the developing unit
Follow the procedure below to replace the developing unit.
Procedure
1. Open the front cover.
2. Remove the toner container and waste toner
box.
3. Remove the pin and turn the developing
release lever in the direction of the arrow.
Developing release lever
Pin
Figure 1-5-54
4. Remove the developing unit.
5. Replace the developing unit and install the
unit.
6. Perform maintenance mode U157 and U158
to clear the counter value (see page 1-3-42,
42).
Developing unit
Figure 1-5-55
1-5-26
2GN/2GP/2GR
1-5-6
Transfer section
(1) Detaching and refitting the transfer roller unit
Follow the procedure below to replace the transfer roller unit.
Procedure
1. Open the left cover 1.
2. While holding down the projection, slide the
transfer roller unit toward the front to remove
it.
3. Replace the transfer roller unit and install
the unit.
Transfer roller unit
Projection
Figure 1-5-56
1-5-27
2GN/2GP/2GR
1-5-7
Fuser section
(1) Detaching and refitting the fuser unit
Follow the procedure below to check or replace the fuser unit.
Procedure
1. Remove the clip holder.
2. Open the front cover and left cover 1.
3. Remove four screws and remove front left
cover.
Clip holder
Front left cover
Figure 1-5-57
4. Remove the screw and remove the fuser
unit.
5. Check or replace the fuser unit and install
the unit.
6. Perform maintenance mode U167 to clear
the counter value (see page 1-3-43).
Fuser unit
Figure 1-5-58
1-5-28
2GN/2GP/2GR
(2) Detaching and refitting the heat roller separation claws
Follow the procedure below to replace the heat roller separation claws.
Procedure
1. Remove the fuser unit. (see page 1-5-28)
2. Remove the two screws and remove the
upper fuser cover while holding the four
claws.
Pin
Upper fuser cover
Pin
Claws
Claws
Figure 1-5-59
3. Remove the heat roller separation claws
from the upper fuser cover.
4. Replace the heat roller separation claws and
install the claws to upper fuser cover.
5. Refit the upper fuser cover.
6. Refit the fuser unit.
Heat roller
separation claws
Figure 1-5-60
1-5-29
2GN/2GP/2GR
(3) Detaching and refitting the press roller
Follow the procedure below to replace the press roller.
Procedure
1. Remove the fuser unit (see page 1-5-28).
2. Remove the upper fuser cover (see page 15-29).
3. Remove the front and rear press springs.
Press spring
Press spring
Figure 1-5-61
4. Remove the press roller from the fuser unit.
5. Replace the press roller and install the roller
to fuser unit.
6. Refit the upper fuser cover.
7. Refit the fuser unit.
Press roller
Figure 1-5-62
1-5-30
2GN/2GP/2GR
(4) Detaching and refitting the fuser heater
Follow the procedure below to replace the fuser heater.
Procedure
1. Remove the fuser unit (see page 1-5-28).
2. Remove the upper fuser cover (see page 15-29).
3. Remove two screws and the connector.
Connector
Figure 1-5-63
4. Pull out the fuser heater from the fuser unit.
Fuser heater
Figure 1-5-64
5. Replace the fuser heater and install the
heater to fuser unit.
6. Refit the upper fuser cover.
7. Refit the fuser unit.
1-5-31
2GN/2GP/2GR
(5) Detaching and refitting the heat roller
Follow the procedure below to replace the heat roller.
Procedure
1. Remove the fuser unit (see page 1-5-28).
2. Remove the upper fuser cover (see page 15-29).
3. Remove the press roller and fuser heater
(see page 1-5-30 and 31).
4. Remove the fuser gear.
Fuser gear
Figure 1-5-65
5. Remove the heat roller from the fuser unit.
Remove the C ring, gear, bearing and bushing on the rear side of the heat roller and
remove the C ring, ground plate, bearing
and bushing on the front side.
6. Replace the heat roller and install the roller
to fuser unit.
C ring
Bushing
Heat roller
Gear
Bearing
Bearing
Ground plate
Bushing
C ring
Figure 1-5-66
7. Refit the fuser gear.
8. Refit the fuser heater, press roller and upper
fuser cover.
9. Refit the fuser unit.
1-5-32
2GN/2GP/2GR
(6) Detaching and refitting the fuser unit thermistor 1 and 2
Follow the procedure below to replace the fuser unit thermistor 1 and 2.
Procedure
1. Remove the fuser unit (see page 1-5-28).
2. Remove the upper fuser cover (see page 15-29).
3. Release the stopper of the fuser unit thermistor 1.
4. Remove the connector and remove the
fuser unit thermistor 1.
5. Replace the fuser unit thermistor 1 and
install the thermistor to fuser unit.
Stopper
Connector
Fuser unit thermistor 1
Figure 1-5-67
6. Remove the press roller and fuser heater
(see page 1-5-30 and 31).
7. Remove the heat roller (see page 1-5-32).
8. Remove the screw and the connector, and
then remove the fuser unit thermistor 2.
9. Replace the fuser unit thermistor 2 and
install the thermistor to fuser unit.
10. Refit the heat roller, fuser heater, press roller
and upper fuser cover.
11. Refit the fuser unit.
Connector
Fuser unit thermistor 2
Figure 1-5-68
1-5-33
2GN/2GP/2GR
(7) Adjusting front position of the fuser unit (adjusting lateral squareness)
Follow the procedure below if the drum is not parallel to the fuser unit and therefore paper is not fed straight to the fuser
section and the trailing edge of image on either the front or rear side becomes longer.
Procedure
Start
Original
Place the original on the contact
glass.
Figure 1-5-69
Press the start key and make
a test copy at 100% magnification.
Is the image correct?
Yes
End
Copy
example 1
Tighten the two screws. Refit the front
left cover and close the front cover.
No
Open the front cover and remove the
front left cover (see page 1-5-13).
Loosen the screw holding each of the
fuser unit and adjusting spacer.
For copy example 1:
Move the adjusting spacer in the direction
of the black arrow ( ) to raise the front
position of the fuser unit.
For copy example 2:
Move the adjusting spacer in the direction
of the white arrow ( ) to lower the front
position of the fuser unit.
Fuser unit
Screw
Screw
Adjusting spacer
Figure 1-5-70
1-5-34
Copy
example 2
2GN/2GP/2GR
1-5-8
Others
(1) Detaching and refitting the ozone filter 1 and 2
Follow the procedure below to replace the ozone filter 1 and 2
Procedure
1. Remove the ozone filter 1 from the machine
left side.
Ozone filter 1
Figure 1-5-71
2. Open the filter cover of the machine rear
side and remove the ozone filter 2.
3. Replace the ozone filter 1 and 2 and install
the filter.
Ozone filter 2
Filter cover
Figure 1-5-72
1-5-35
2GN/2GP/2GR
(2) Detaching and refitting the dust filter 1 and 2
Follow the procedure below to replace the dust filter 1 and 2
Procedure
1. Open the MP tray.
2. Remove the dust filter 1 and 2 from the
machine.
3. Replace the dust filter 1 and 2 and install the
filter.
Dust filter 1
Dust filter 2
Figure 1-5-73
1-5-36
2GN/2GP/2GR
1-6 Requirements on PWB Replacement
1-6-1
Upgrading the firmware
Follow the procedure below to upgrade the firmware of main PWB, engine PWB, scanner PWB and MMI.
Firmware upgrading requires the following tools:
Compact Flash (Products manufactured by SANDISK are recommended.) or USB memory
NOTE
When writing data to a new Compact Flash from a computer, be sure to format it in advance.
Procedure
1. Press the Power key on the operation panel
to off. Make sure that the Power indicator
and the Memory indicator are off before
turning off the main power switch. And then
unplug the power cable from the wall outlet.
2. Insert Compact Flash or USB memory in a
notch hole of the machine.
The Compact Flash must be inserted into
the machine with its rear side facing up.
3. Insert the power plug and turn the main
power switch on. Upgrading firmware starts
for 9 minutes.
Caution:
Never turn the main power switch off during
upgrading.
Compact
Flash
USB memory
Figure 1-6-1
4. [Completed] is displayed on the touch panel
when upgrading is complete.
5. Press the Power key on the operation panel
to off. Make sure that the Power indicator
and the Memory indicator are off before
turning off the main power switch. And then
unplug the power cable from the wall outlet.
6. Remove Compact Flash or USB memory
from the machine.
7. Insert the power plug and turn the main
power switch on.
1-6-1
2GN/2GP/2GR
1-6-2
Adjustment-free variable resistors (VR)
The variable resistors listed below are set at the factory prior to shipping and cannot be adjusted in the field.
High voltage PWB: VR2, VR42, VR201, VR204
1-6-3
Remarks on main PWB replacement
When replacing the main PWB, remove EEPROM from the main PWB that has been removed and then reattach it to the
new main PWB.
EEPROM
Main PWB
Figure 1-6-2
1-6-4
Remarks on scanner PWB replacement
When replacing the scanner PWB, remove the EEPROM from the scanner PWB that has been removed and then reattach
it to the new scanner PWB.
EEPROM
Figure 1-6-3
1-6-2
Scanner PWB
2GN/2GP/2GR
2-1 Mechanical construction
2-1-1
Paper feed section
The paper feed section consists of the primary feed and secondary feed subsections. Primary feed conveys paper from
the cassettes 1, 2 or MP tray to the left and right registration rollers, at which point secondary feed takes place and the
paper travels to the transfer section in sync with the printing timing.
Each cassette consists of a lift driven by the lift motor and other components. Each cassette can hold up to 500 sheets of
paper. Paper is fed from the cassette by the rotation of the forwarding pulley and paper feed pulley. The separation pulley
prevents multiple sheets from being fed at one time, via the torque limiter.
Figure 2-1-1 Paper feed from the cassettes 1 and 2
(1)
(2)
(3)
(4)
(5)
(6)
(7)
(8)
(9)
(10)
(11)
(12)
(13)
(14)
(15)
(16)
Upper forwarding pulley
Lower forwarding pulley
Upper paper feed pulley
Lower paper feed pulley
Upper separation pulley
Lower separation pulley
Upper paper switch (PSW-U)
Lower paper switch (PSW-L)
Upper lift limit switch (LICSW-U)
Lower lift limit switch (LICSW-L)
Upper paper width switch (PWSW-U)
Lower paper width switch (PWSW-L)
Upper paper length switch (PLSW-U)
Lower paper length switch (PLSW-L)
Cassette lift
Right registration roller
(17)
(18)
(19)
(20)
(21)
(22)
(23)
(24)
(25)
(26)
(27)
(28)
(29)
(30)
(31)
Left registration roller
Registration switch (RSW)
Feed roller 1
Feed pulley
Feed switch 1 (FSW1)
Feed roller 2
Feed pulley
Feed switch 2 (FSW2)
Feed roller 3
Feed pulley
Feed switch 3 (FSW3)
Front registration guide
Paper conveying guide
Vertical paper conveying guide 1
Vertical paper conveying guide 2
2-1-1
2GN/2GP/2GR
The MP tray can be hold up to 200 sheets of paper at one time. Paper is fed from the MP tray by the rotation of the MP forwarding pulley and MP paper feed pulley. Also during paper feed, the MP separation pulley prevents multiple sheets from
being fed at one time by the torque limiter.
Figure 2-1-2 Paper feed from the MP tray
(1)
(2)
(3)
(4)
(5)
(6)
(7)
(8)
2-1-2
MP tray
MP lift guide
MP forwarding pulley
MP paper feed pulley
MP separation pulley
MP feed pulley
MP feed roller 1
MP feed pulley
(9)
(10)
(11)
(12)
MP feed roller 2
MP paper switch (MPPSW)
MP feed switch (MPFSW)
MP paper length switch
(MPPLSW)
(13) MP paper width switch
(MPPWSW)
2GN/2GP/2GR
EPWB
RCL
YC14-B6
RSW
YC10-A2
FCL1
YC11-14
YC11-17
FSW1
PSW-U
LICSW-U
YC13-B9
PFCL-U
YC13-B12
YC14-B1
YC13-A12
FCL2
PSW-L
FSW2
LICSW-L
YC13-B15
PFCL-L
YC13-B18
YC14-B4
FCL3
YC13-A5
FSW3
YC13-A2
YC13-A7
Figure 2-1-3 Paper feed section block diagram (cassettes 1 and 2)
MPPFCL
MPFCL
MPPSW
YC6-A9
YC6-A6
YC6-A11
YC9-A2
MPFSW
EPWB
Figure 2-1-4 Paper feed section block diagram (MP tray)
2-1-3
2GN/2GP/2GR
2-1-2
Main charging section
The main charging section consists of the main charger assembly, drum and so on. The drum is electrically charged uniformly by means of a grid to form a latent image on the surface.
The main charger unit charges the drum so that a latent image is formed on the surface, the shield grid ensuring the
charge is applied uniformly.
In addition, the main charger unit is equipped with the main charger cleaning motor, and it is cleaning automatically.
Main charger unit
Tungsten wire
Drum
Shield grid
Figure 2-1-5 Main charging section
MCCM_FWD/REV
YC9-B13,B14
YC7-4
MHVDR
MCCM
MC
YC1-11
Grid
EPWB
HVTPWB
Drum
ZENER PWB
Figure 2-1-6 Main charging section block diagram
2-1-4
2GN/2GP/2GR
2-1-3
Optical section
The optical section consists of the scanner, mirror frame and image scanning unit for scanning and the laser scanner unit
for printing.
Figure 2-1-7 Optical section
(1)
(2)
(3)
(4)
(5)
(6)
(7)
(8)
(9)
(10)
Mirror 1 frame
Mirror 2 frame
Exposure lamp (EL)
Mirror 1
Mirror 2
Mirror 3
Lens
CCD PWB (CCDPWB)
Image scanning unit
Laser scanner unit (LSU)
2-1-5
2GN/2GP/2GR
(1) Original scanning
The original image is illuminated by the exposure lamp (EL) and scanned by the CCD PWB (CCDPWB) in the image scanning unit via the three mirrors, the reflected light being converted to an electrical signal.
The scanner and mirror frames travel to scan on the optical rails on the front and rear of the machine to scan from side to
side. The speed of the mirror frames is half the speed of the scanner.
When the DP is used, the scanner and mirror frames stop at the DP original scanning position to start scanning.
ODSW
SHPSW
YC4-5
YC4-8
YC9-1YC9-4
YC6-3
LAMP ON
EL
INPWB
CCDPWB
Image data
OSDS
SM
YC4-2
Original
CN1-3
YC3
SHDPWB
YC18
YC20
Image data
Serial
communication
YC5
SPWB
MPWB
Figure 2-1-8 Optional section block diagram
2-1-6
2GN/2GP/2GR
(2) Image printing
The image data scanned by the CCD PWB (CCDPWB) is processed on the main PWB (MPWB) and transmitted as image
printing data to the laser scanner unit (LSU). By repeatedly turning the laser on and off, the laser scanner unit forms a
latent image on the drum surface.
Figure 2-1-9 Laser scanner unit (1)
(1)
(2)
(3)
(4)
(5)
(6)
(7)
(8)
(9)
(10)
(11)
Laser diode PWB (LDPWB)
Collimator lens
Cylindrical lens
Polygon motor (PM)
Polygon mirror
fθ lens
Mirror
Mirror
BD sensor mirror
Cylindrical correcting lens
BD sensor
2-1-7
2GN/2GP/2GR
Drum
Figure 2-1-10 Laser scanner unit (2)
1.
2.
Laser diode: Generates the laser beam which forms a latent image on the drum.
Collimator lens: Collimates the diffused laser beam emitted from the laser diode to convert it into a cylindrical
beam.
3. Cylindrical lens: Shapes the collimated laser beam to suit the printing resolution.
4. Polygon mirror: Nine-facet mirror that rotates with each face reflecting the laser beam toward the drum for one
main-direction scan.
5. fθ lens: Corrects for non-linearity of the laser beam scanning speed on the drum surface, keeps the beam diameter constant and corrects for the vertical alignment of the polygon mirror to ensure that the focal plane of the laser
beam is on the drum surface.
6. Mirror: Reflects the laser beam and changes the irradiation direction.
7. Mirror: Reflects the laser beam and changes the irradiation direction.
8. BD sensor mirror: Reflects the laser beam to the BD sensor to generate the main-direction (horizontal) sync signal.
9. Cylindrical correcting lens: Corrects for the deviation of the laser beam reflected by the BD sensor mirror to the
BD sensor.
10. BD sensor: Detects the beam reflected by the BD sensor mirror, outputting a signal to the main PWB (MPWB) to
provide timing for the main-direction sync signal.
2-1-8
2GN/2GP/2GR
The dimensions of the laser beam are as shown in Figure 2-1-11.
Less than 100 µm
Less than 85 µm
Figure 2-1-11
Scanning in the main direction is provided by the rotating polygon mirror, while scanning in the auxiliary direction is provided by the rotating drum, forming a static latent image on the drum.
The static latent image of the letter “A”, for example, is formed on the drum surface as shown in Figure 2-1-12. Electrical
charge is dissipated on the area of the drum surface irradiated by the laser.
The focal point of the laser beam is moved line by line, and adjacent lines slightly overlap each other.
Main scanning direction
Auxilary scanning
direction
: laser beam is on
Figure 2-1-12
2-1-9
2GN/2GP/2GR
2-1-4
Developing section
The developing section consists of the developing unit and the toner container.
The developing unit consists of the developing roller where a magnetic brush is formed, the doctor blade and the developing spirals that agitate the toner.
When the toner sensor (TNS) detects a low toner level in the developing unit, the toner replenishment signal is output to
the engine PWB (EPWB). The engine PWB (EPWB) that has received the signal turns on the toner replenishment solenoid (TNFSOL) and replenishes toner from the toner container to the developing unit.
Also, the toner container sensor (TCS) checks whether or not toner remains in the toner container.
(1)
(2)
(3)
(4)
(5)
(6)
Developing unit housing
Developing roller
Toner sensor (TNS)
Doctor blade
Right developing spiral
Left developing spiral
Figure 2-1-13 Developing section
Developing roller
Left developing spiral
Right developing spiral
Developing paddle
Flow of the toner
Figure 2-1-14 Flow of the toner
2-1-10
2GN/2GP/2GR
YC9-A5
YC9-B2
TCS
TNFSOL
TCS
TNFSOL
EPWB
TNS
YC9-A9
YC7-1
YC7-9
TNS SIG
BVSEL1
BVSEL2
YC1-14
YC1-6
DB
HVTPWB
Figure 2-1-15 Developing section block diagram
2-1-11
2GN/2GP/2GR
(1) Single component developing system
This machine uses the single component developing system, and reversal processing is performed with a + charged drum
(a-Si) and a + charged magnetic toner.
With the single component developing system, toner is electrically charged by friction with the developing sleeve and +
charged when it passes through the magnetic toner blade. The toner that has passed through the magnetic toner blade
forms a uniform layer on the developing sleeve. When the toner layer comes to the location where the developing sleeve
is the nearest to the drum, toner moves between the drum and the developing sleeve by an electric field of the magnetic
pole. Then, when the developing sleeve rotates and passes through the nearest location to the drum, on the portion of the
drum that has been exposed to light, toner is attracted toward the drum by potential difference between the developing
bias and the drum surface and development is performed. On the other hand, on the portion of the drum that has not been
exposed to light, toner is attracted toward the sleeve and development is not performed. When toner comes to an area
where the gap between the drum and the developing sleeve is large, an electric field disappears and toner does not leave
the developing sleeve. Development is complete.
Magnetic toner blade
Toner
South pole
Drum
North pole
Developing sleeve
Figure 2-1-16 Single component developing system
2-1-12
2GN/2GP/2GR
2-1-5
Transfer and separation sections
The transfer and separation section consists mainly of the transfer roller, separation electrode and drum separation claws.
A high voltage generated by the high-voltage transformer PWB (HVTPWB) is applied to the transfer roller for transfer
charging.
Paper after transfer is separated from the drum by applying separation bias that is output from the high-voltage transformer PWB (HVTPWB) to the separation electrode.
Drum
separation claw
Separation electrode
Drum
Transfer roller
Figure 2-1-17 Transfer and separation sections
SC
YC7-10
YC7-6
THVDR
RHVDR
Separation
electrode
Drum
YC1-5
Transfer roller
YC1-9
TC
HVTPWB
EPWB
Figure 2-1-18 Transfer and separation sections block diagram
2-1-13
2GN/2GP/2GR
2-1-6
Cleaning and charge erasing sections
The cleaning section consists of the cleaning blade that removes residual toner from the drum surface after the transfer
process, and the cleaning spiral that carries the residual toner back to the waste toner box.
The cleaning lamp (CL) consists of LEDs and removes residual charge on the drum before main charging.
Also the toner quantity in the waste toner box is sensed with the overflow sensor (OFS).
Cleaning spiral
Cleaning lamp (CL)
Cleaning roller
Cleaning blade
Drum
Figure 2-1-19 Cleaning and charge erasing sections
CL
CL
YC9-B7
Drum
EPWB
OFS
OFS
YC6-B4
Figure 2-1-20 Cleaning and charge erasing sections block diagram
2-1-14
2GN/2GP/2GR
2-1-7
Fuser section
The fuser section consists of the parts shown in Figure 2-1-21. When paper reaches the fuser section after the transfer
process, it passes between the press roller and heat roller, which is heated by fuser heaters M or S (FH-M or FH-S). Pressure is applied by the fuser unit pressure springs so that the toner on the paper is melted, fused and fixed onto the paper.
The heat roller is heated by fuser heaters M or S (FH-M or FH-S) inside it; its surface temperature is detected by the fuser
unit thermistor 1 and 2 (FTH1/2), and is regulated by the fuser heaters turning on and off.
If the fuser section becomes abnormally hot, fuser unit thermostat 1 and 2 (FTS1/2) operates shutting the power to the
fuser heaters off. When the fusing process is completed, the paper is separated from the heat roller by its separation claws
and is conveyed from the machine to eject and switchback section.
(1)
(2)
(3)
(4)
(5)
(6)
(7)
(8)
(9)
(10)
(11)
(12)
Upper fuser unit cover
Fuser housing
Heat roller
Heat roller separation claw
Fuser heater M (FH-M)
Fuser heater S (FH-S)
Fuser unit thermostat 1 (FTS1)
Fuser unit thermostat 2 (FTS2)
Fuser unit thermistor 1 (FTH1)
Fuser unit thermistor 2 (FTH2)
Press roller
Press roller separation claw
Figure 2-1-21 Fuser section
FTS2
FTS1
Heat roller
ILSW
YC5-2
FH-S
YC5-1
FH-M
YC5-3
FTH2
PSPWB
YC10-A10
FTH1
YC10-A6
EPWB
FTH2
YC2-2
FH-S ON
YC1-5
YC1-4
FH-M ON
YC2-3
FTH1
Figure 2-1-22 Fuser section block diagram
2-1-15
2GN/2GP/2GR
2-1-8
Eject and switchback sections
The eject and switchback sections eject paper on which fixing has ended with the eject roller that is rotated by forward
rotation of the eject motor.
In duplex copying, paper is turned over by reverse rotation of the eject motor. When paper is transferred to the job separator or the internal finisher, the feedshift solenoid (FSSOL) is turned on to activate the feedshift guide to switch the paper
transfer path.
(1)
(2)
(3)
(4)
(5)
(6)
(7)
(8)
Feedshift guide
Eject roller
Eject pulley
Switchback roller
Switchback pulley
Eject switch (ESW)
Feedshift switch (FSSW)
Feedshift solenoid (FSSOL)
Figure 2-1-23 Eject and switchback sections
EM
FSSW
FSSOL
YC14-A11
YC14-B11YC14-B14
YC14-A1YC14-A2
YC14-A5
ESW
EPWB
Figure 2-1-24 Eject and switchback sections block diagram
2-1-16
2GN/2GP/2GR
2-1-9
Duplex section
The duplex section consists of the components shown in figure. In duplex mode, after copying on to the reverse face of the
paper, the paper is reversed in the switchback section and conveyed to the duplex section. The paper is then conveyed to
the paper feed section by the upper and lower duplex feed rollers.
(1)
(2)
(3)
(4)
(5)
(6)
Feedshift guide
Upper duplex feed roller
Lower duplex feed roller
Duplex feed pulley
Duplex feed pulley
Duplex paper conveying switch
(DUPPCSW)
Figure 2-1-25 Duplex section
EPWB
DUPPCSW
YC10-B4
DUPFCL
YC10-B2
Figure 2-1-26 Duplex section block diagram
2-1-17
2GN/2GP/2GR
(1) Paper conveying operation in duplex copying
Paper of which copying onto the reverse side is complete is conveyed to the switchback section, the eject motor switches
from normal rotation to reverse rotation to switch the eject roller to reverse rotation, and the paper conveying direction is
reversed. Paper that has been switched back is conveyed to the duplex section via the eject roller and the switchback
roller.
Paper that has been conveyed to the duplex section is conveyed to the paper feed section again by rotation of the upper
duplex feed roller and the lower duplex feed roller and copying onto the front side is performed.
Eject roller
Switchback roller
Eject roller
Eject roller
Upper duplex
feed roller
Lower duplex
feed roller
Copying onto reverse side
(normal rotation of eject motor)
Switchback operation
(reverse rotation of eject motor)
Copying onto front side
(normal rotation of eject motor)
Paper path
Figure 2-1-27
2-1-18
2GN/2GP/2GR
2-2 Electrical Parts Layout
2-2-1
Electrical parts layout
(1) PWBs
12
11
9
5
6
13
10
14
8
7
2
1
4
15
3
Machine front
Machine inside
Machine rear
Figure 2-2-1 PWBs
1.
2.
3.
4.
5.
6.
7.
8.
9.
10.
11.
12.
13.
14.
15.
Engine PWB (EPWB)................................... Controls the other PWBs, electrical components and optional devices.
Main PWB (MPWB) ..................................... Controls the image processing and operation panel.
Power source PWB (PSPWB) ..................... Generates +24 V DC, 5 V DC and 3.3 V DC; controls the fuser heater.
High voltage PWB (HVTPWB) ..................... Main charging. Generates developing bias and high voltages for transfer.
Scanner PWB (SPWB) ................................ Controls the scanning section.
Inverter PWB (INPWB) ................................ Controls the exposure lamp.
SHD PWB (SHDPWB) ................................. Controls the shading correction and AGC of CCD.
CCD PWB (CCDPWB)................................. Reads the image off originals.
Main operation unit PWB (OPWB-M)........... Controls touch panel and LCD indication.
Right operation unit PWB (OPWB-R) .......... Consists of the operation keys and display LEDs.
Left operation unit PWB (OPWB-L) ............. Consists of the operation keys and display LEDs.
Upper operation unit PWB (OPWB-U) ......... Consists of the operation keys and display LEDs.
Front operation unit PWB (OPWB-F)........... Consists of the display LEDs.
LCD inverter PWB (LINPWB) ...................... Controls LCD indication.
Laser diode PWB (LDPWB)......................... Generates and controls the laser light.
2-2-1
2GN/2GP/2GR
(2) Switches and sensors
21
20
3
22
2
25
35
24
33
32
28
31
27
14
37
4
26
30
1
23
34
13
29
19
16
15
7
5
11
17
9
8
Machine front
6
36
12
10
18
Machine inside
Machine rear
Figure 2-2-2 Switches and sensors
1.
2.
3.
4.
5.
6.
7.
8.
9.
10.
11.
12.
13.
14.
15.
Main power switch (MSW) ........................... Turns the AC power on and off.
Interlock switch (ILSW) ................................ Turns the AC power for the fuser heater on and off.
Safety switch 1 (SSW1) ............................... Breaks the safety circuit when the left cover 1 is opened.
Safety switch 2 (SSW2) ............................... Breaks the safety circuit when the front cover is opened.
Upper paper switch (PSW-U)....................... Detects the presence of paper in the cassette 1.
Lower paper switch (PSW-L) ....................... Detects the presence of paper in the cassette 2.
Upper lift limit switch (LICSW-U).................. Detects the cassette 1 lift reaching the upper limit.
Lower lift limit switch (LICSW-L) .................. Detects the cassette 2 lift reaching the upper limit.
Upper paper size length switch
(PLSW-U) .................................................... Detects the length of paper in the cassette 1.
Lower paper size length switch
(PLSW-L) ..................................................... Detects the length of paper in the cassette 2.
Upper paper size width switch
(PWSW-U) ................................................... Detects the width of paper in the cassette 1.
Lower paper size width switch
(PWSW-L) .................................................... Detects the width of paper in the cassette 2.
MP paper switch (MPPSW) ......................... Detects the presence of paper on the MP tray.
MP paper size length switch
(MPPLSW) ................................................... Detects the length of paper on the MP tray.
MP paper size width switch
(MPPWSW).................................................. Detects the width of paper on the MP tray.
2-2-2
2GN/2GP/2GR
16.
17.
18.
19.
20.
21.
22.
23.
24.
25.
26.
27.
28.
29.
30.
31.
32.
33.
34.
35.
36.
37.
Feed switch 1 (FSW1) ................................. Controls feed clutch 1 drive timing.
Feed switch 2 (FSW2) ................................. Controls feed clutch 2 drive timing
Feed switch 3 (FSW3) ................................. Controls feed clutch 3 drive timing
MP feed switch (MPFSW)............................ Controls MP feed clutch drive timing
Scanner home position switch (SHPSW)..... Detects the optical system in the home position.
Original detection switch (ODSW) ............... Operates the original size detection sensor.
Original size detection sensor (OSDS) ........ Detects the size of the original.
Registration switch (RSW) ........................... Controls the secondary paper feed start timing.
Eject switch (ESW) ...................................... Detects a paper misfeed in the fuser section.
Feedshift switch (FSSW) ............................. Detects a paper misfeed in the switchback section in a duplex copy.
Toner sensor (TNS)...................................... Detects the toner density in the developing unit.
Toner container detection switch
(TCDSW) ..................................................... Detects the presence of the toner container.
Toner container sensor (TCS) ...................... Detects the quantity of toner in a toner container.
Waste toner box detection switch
(WTDSW)..................................................... Detects the presence of the waste toner box.
Overflow sensor (OFS) ................................ Detects when the waste toner box is full.
Humidity sensor (HUMS) ............................. Detects absolute humidity.
Fuser unit thermistor 1 (FTH1)..................... Detects the heat roller temperature.
Fuser unit thermistor 2 (FTH2)..................... Detects the heat roller temperature.
Front cover switch (FRCSW) ....................... Detects the opening and closing of the front cover.
Left cover 1 switch (LC1SW) ....................... Detects the opening and closing of the left cover 1.
Left cover 2 switch (LC2SW) ....................... Detects the opening and closing of the left cover 2.
Duplex paper conveying switch
(DUPPCSW) ................................................ Detects a paper jam in the duplex section.
2-2-3
2GN/2GP/2GR
(3) Motors
5
13
6
9
12
7
8
14,15,16
1
21
17,18,19
11
20
2
10
3
Machine front
4
Machine inside
Machine rear
Figure 2-2-3 Motors
1.
2.
3.
4.
5.
6.
7.
8.
9.
10.
11.
12.
13.
14.
15.
16.
17.
18.
19.
20.
21.
Drive motor (DM) ......................................... Drives the machine.
Paper feed motor (PFM) .............................. Drives paper feed section.
Upper lift motor (LM-U) ................................ Drives cassette 1 lift.
Lower lift motor (LM-L) ................................. Drives cassette 2 lift.
Scanner motor (SM)..................................... Drives the optical system.
Eject motor (EM) .......................................... Drives the eject section.
Cooling fan motor 1 (CFM1) ........................ Cools the machine interior.
Cooling fan motor 2 (CFM2) ........................ Cools the machine interior.
Cooling fan motor 3 (CFM3) ........................ Cools the machine interior.
Cooling fan motor 4 (CFM4) ........................ Cools the machine interior (around the power supply unit).
Cooling fan motor 5 (CFM5) ........................ Cools the machine interior (around the LSU).
Cooling fan motor 6 (CFM6) ........................ Cools the machine interior (controller box).
Cooling fan motor 7 (CFM7) ........................ Cools the machine interior (operation panel).
Cooling fan motor 8 (CFM8).......................... Cools the machine interior and supports paper transfer for duplex copying.
Cooling fan motor 9 (CFM9) ......................... Cools the machine interior and supports paper transfer for duplex copying.
Cooling fan motor 10 (CFM10)..................... Cools the machine interior and supports paper transfer for duplex copying.
Cooling fan motor 11 (CFM11) ..................... Cools the machine interior (around the paper conveying).
Cooling fan motor 12 (CFM12) .................... Cools the machine interior (around the paper conveying).
Cooling fan motor 13 (CFM13) .................... Cools the machine interior (around the paper conveying).
Polygon motor (PM) ..................................... Drives the polygon mirror.
Main charger cleaning motor (MCCM)......... Drives the main charger auto cleaning.
2-2-4
2GN/2GP/2GR
(4) Other electrical components
12
18
10
15
14
16,17
11
13
9
8
7
6
3
1
4
Machine front
2
Machine inside
5
19
Machine rear
Figure 2-2-4 Other electrical components
1.
2.
3.
4.
5.
6.
7.
8.
9.
10.
11.
12.
13.
14.
15.
16.
17.
18.
19.
Upper paper feed clutch 1 (PFCL-U) ........... Primary paper feed from the cassette 1.
Lower paper feed clutch 2 (PFCL-L) ............ Primary paper feed from the cassette 2.
Feed clutch 1 (FCL1) ................................... Controls the drive of feed roller.
Feed clutch 2 (FCL2) ................................... Controls the drive of feed roller.
Feed clutch 3 (FCL3) ................................... Controls the drive of feed roller.
MP paper feed clutch (MPPFCL) ................. Primary paper feed from the MP tray.
MP feed clutch (MPFCL).............................. Controls the drive of MP feed roller.
Registration clutch (RCL)............................. Secondary paper feed.
Duplex feed clutch (DUPFCL)...................... Controls the drive of the duplex feed roller.
Feedshift solenoid (FSSOL)......................... Operates the feedshift guide.
Toner feed solenoid (TNFSOL) .................... Replenishes toner.
Exposure lamp (EL) ..................................... Exposes originals.
Cleaning lamp (CL) ...................................... Removes residual charge from the drum surface.
Fuser heater M (FH-M) ................................ Heats the heat roller.
Fuser heater S (FH-S) ................................. Heats the heat roller.
Fuser unit thermostat 1 (FTS1) .................... Prevents overheating in the fuser section.
Fuser unit thermostat 2 (FTS2) .................... Prevents overheating in the fuser section.
Hard disk unit (HDD).................................... Storages the image data and information of job accounting mode.
Cassette heater (CH) ................................... Dehumidifies the cassette section.
2-2-5
2GN/2GP/2GR
2-2-6
2GN/2GP/2GR
2-3 Operation of the PWBs
2-3-1
Power source PWB
MSW
TB3
TB4
Power
source PWB
+24VD
+24VDF
F201
TB2
F101
LIVE
L101
F202
Switching
regulator
NEUTRAL
+12VD
+5V
+5VD
+5VDF
F203
Zero-cross
signal output
circuit
+3R3VD
SLEEP
ZCROSS
CFM4
Heater
control
circuit
FH-M
FH-S
L102
F102
AC
input
TB1
FH-M
Fuser
heater
FH-S
F103
FH LIVE
Cassette heater
Figure 2-3-1 Power source PWB diagram
1
3
1
6 1 2
YC2 YC4
YC5
1
YC1
7
1
YC9
7
1
TB4
YC6
14
TB3
1
YC3
TB1
6
1
YC8
YC7
1
3
TB2
YC10
16
10
1
Figure 2-3-2 Power source PWB silk-screen diagram
2-3-1
2GN/2GP/2GR
Connector
TB
Connected
to the AC
inlet
Pin No.
Signal
I/O
Voltage
Description
TB1
LIVE
I
120 V AC
220-240 V AC
AC power input
TB2
COM
I
120 V AC
220-240 V AC
AC power input
TB3
LIVE
I
120 V AC
220-240 V AC
AC power output
TB4
LIVE
O
120 V AC
220-240 V AC
AC power input
YC1
1
+24VDR
O
24 V DC
24 V DC power output
Connected
to the
engine PWB
2
GND
-
-
Ground
3
GND
-
-
Ground
4
GND
-
-
Ground
5
+3.3VD
O
3.3 V DC
3.3 V DC power output
6
+5VD
O
5 V DC
5 V DC power output
7
+24VD
O
24 V DC
24 V DC power output
YC2
1
GND
-
-
Ground
Connected
to the
engine PWB
2
FH-S ON
I
0/5 V DC
FH-S On/Off
3
FH-M ON
I
5 V DC
FH-M On/Off
4
+5VD
O
5 V DC
5 V DC power output
5
ZCROSS
O
0/5 V DC (pulse) Zero-cross signal
6
CFM3,4
I
0/24 V DC
CFM3,4 On/Off
1
SGND
-
-
Ground
2
SGND
-
-
Ground
3
SGND
-
-
Ground
4
SGND
-
-
Ground
5
SGND
-
-
Ground
6
SGND
-
-
Ground
1
CFM3,4
O
DC0V/24V
CFM3,4 On/Off
2
+24VD
O
24 V DC
24 V DC power output
1
FH-M ON
O
120/0 V AC
220-240/0 V AC
FH-M On/Off
2
FH-S ON
O
120/0 V AC
220-240/0 V AC
FH-S On/Off
3
FH LIVE
O
120 V AC
220-240 V AC
AC power output
YC3
Connected
to the
optional
document
finisher
YC4
Connected
to the cooling fan
motor 3/4
YC5
Connected
to the fuser
heater M/S
2-3-2
2GN/2GP/2GR
Connector
Pin No.
Signal
I/O
Voltage
Description
YC6
1
24V
O
24 V DC
24 V DC power output
Connected
to the scanner PWB
2
24V
O
24 V DC
24 V DC power output
3
24V
O
24 V DC
24 V DC power output
4
PGND
-
-
Ground
5
PGND
-
-
Ground
6
PGND
-
-
Ground
7
SGND
-
-
Ground
8
SGND
-
-
Ground
9
SGND
-
-
Ground
10
SGND
-
-
Ground
11
12V
O
12 V DC
12 V DC power output
12
5V
O
5 V DC
5 V DC power output
13
3.3V
O
3.3 V DC
3.3 V DC power output
14
3.3V
O
3.3 V DC
3.3 V DC power output
1
LIVE
O
120 V AC
220-240 V AC
AC power output
3
NEUTRAL
O
120 V AC
220-240 V AC
AC power output
YC8
1
V24V
O
24 V DC
24 V DC power output
Connected
to the
optional
paper
feeder,
optional
document
finisher and
hard disk
2
V24V
O
24 V DC
24 V DC power output
3
5.1V
O
5 V DC
5 V DC power output
4
PGND
-
-
Ground
5
FGND
-
-
Ground
YC7
Connected
to the
optional
cassette
heater
YC9
Connected
to the main
operation
PWB
6
PGND
-
-
Ground
7
+12VD
O
12 V DC
12 V DC power output
8
GND
-
-
Ground
9
GND
-
-
Ground
10
+5VD
O
5 V DC
5 V DC power output
1
+24VD
O
24 V DC
24 V DC power output
2
+5VD
O
5 V DC
5 V DC power output
3
+5VD
O
5 V DC
5 V DC power output
4
GND
-
-
Ground
5
GND
-
-
Ground
6
GND
-
-
Ground
7
N.C
-
-
Not used
2-3-3
2GN/2GP/2GR
Connector
Pin No.
YC10
1
SLEEP
I
0/5 V DC
SLEEP signal
2
+5V
O
5 V DC
5 V DC power output
3
+5V
O
5 V DC
5 V DC power output
4
+5V
O
5 V DC
5 V DC power output
5
+5V
O
5 V DC
5 V DC power output
6
+5V
O
5 V DC
5 V DC power output
7
+5V
O
5 V DC
5 V DC power output
8
+5V
O
5 V DC
5 V DC power output
9
GND
-
-
Ground
10
GND
-
-
Ground
Connected
to the main
PWB
2-3-4
Signal
I/O
Voltage
Description
11
GND
-
-
Ground
12
GND
-
-
Ground
13
GND
-
-
Ground
14
GND
-
-
Ground
15
GND
-
-
Ground
16
GND
-
-
Ground
2GN/2GP/2GR
2-3-2
Engine PWB
Engine PWB
CPU
(U2)
MPWB
Buffer
(U12)
Optional
finisher
Buffer
(U13)
Optional
paper feeder
3.3 V
Data bus
Address bus
EEPROM
(U3)
XIO
(U11)
Switches
Sensors
Clutches
Motors
Engine G/A
(U8)
HVTPWB
5V
Reset IC
(U9)
LSU
5V
Figure 2-3-3 Engine PWB diagram
YC22
2
YC3
1
8
B10
YC18
12
12
A1
B1
1
B1
A11
A1
B1
B11
YC10
A16
B19
B1
A1
13
YC17
1
YC9
YC14
1
A1
B16
YC1
1
A10
YC13
7
8
1
A19
YC19
B1
6
YC16
YC5
1
A14
YC21
YC12
12
YC7
B1
B14
1
A1
A15
1
YC6
A1
B15
18
14
1
YC23
YC24
1
7
15
14
YC8
YC20
1
1
1
YC2
YC15
1
18
YC11
7
1
10
1
Figure 2-3-4 Engine PWB silk-screen diagram
2-3-5
2GN/2GP/2GR
Connector
Pin No.
YC1
1
CFM3,4
O
0/24 V DC
Connected
to the power
source PWB
2
ZCROSS
I
0/5 V DC (pulse) Zero-cross signal
3
+5VD
I
5 V DC
5 V DC power input
4
FH-M ON
O
0/5 V DC
FH-M: On/Off
5
FH-S ON
O
0/5 V DC
FH-S: On/Off
6
GND
-
-
Ground
YC2
1
+24VDR
I
24 V DC
24 V DC power input
Connected
to the power
source PWB
2
GND
-
-
Ground
3
GND
-
-
Ground
4
GND
-
-
Ground
5
3.3V
I
3.3 V DC
3.3 V DC power input
6
+5VD
I
5 V DC
5 V DC power input
7
+24VDR
I
24 V DC
24 V DC power input
1
SET SIG
I
0/5 V DC
Document finisher connection signal
2
DFSDO
O
0/5 V DC (pulse) Document finisher serial communication data signal
3
DFSDI
I
0/5 V DC (pulse) Document finisher serial communication data signal
4
DFSCLK
O
0/5 V DC (pulse) Document finisher CLOCK signal
5
DFSEL
O
0/5 V DC
Document finisher SELECT signal
6
SISEL
-
-
Not used
7
DFRDY
I
0/5 V DC
Document finisher READY signal
YC3
Connected
to the
optional
document
finisher
Signal
I/O
Voltage
Description
CFM3,4: On/Off
8
SIRDY
-
-
Not used
YC5
1
GND
-
-
Ground
Connected
to the
optional
paper feeder
2
+5VD
O
5 V DC
5 V DC power output
3
PFSEL
O
0/5 V DC
Paper feeder SELECT signal
4
PFSCLK
O
0/5 V DC (pulse) Paper feeder CLOCK signal
5
PFSDI
I
0/5 V DC (pulse) Paper feeder serial communication data signal
6
PFSDO
O
0/5 V DC (pulse) Paper feeder serial communication data signal
7
PFRDY
I
0/5 V DC
Paper feeder READY signal
PFFEED
O
0/5 V DC
Paper feeder FEED signal
YC6
A1
8
MPPWSW0
I
0/5 V DC
MPPWSW: On/Off
Connected
to the MP
unit, waste
toner box
detection
switch, overflow sensor,
front cover
switch and
cooling fan
motor 1/2
A2
MPPWSW1
I
0/5 V DC
MPPWSW: On/Off
A3
MPPWSW2
I
0/5 V DC
MPPWSW: On/Off
A4
GND
-
-
Ground
A5
+5VD
O
5 V DC
5 V DC power output
A6
MPPSW
I
0/5 V DC
MPPSW: On/Off
A7
GND
-
-
Ground
A8
+24VDR
O
24 V DC
24 V DC power output
A9
MPPFCL
O
0/24 V DC
MPPFCL: On/Off
A10
+24VDR
O
24 V DC
24 V DC power output
A11
MPFCL
O
0/24 V DC
MPFCL: On/Off
B1
NC
-
-
Not used
B2
GND
-
-
Ground
B3
CFM2
O
0/24 V DC
CFM2: On/Off
B4
+5VD
O
5 V DC
5 V DC power output
2-3-6
2GN/2GP/2GR
Connector
Pin No.
Signal
I/O
Voltage
Description
YC6
B5
WTDSW
I
0/5 V DC
WTDSW: On/Off
Connected
to the MP
unit, waste
toner box
detection
switch, overflow sensor,
front cover
switch and
cooling fan
motor 1/2
B6
GND
-
-
Ground
B7
OFS
I
0/5 V DC
OFS: On/Off
B8
GND
-
-
Ground
B9
FRCSW
I
0/5 V DC
FRCSW: On/Off
B10
GND
-
-
Ground
B11
CFM1
O
0/24 V DC
CFM1: On/Off
B12
GND
-
-
Ground
B13
+5VD
O
5 V DC
5 V DC power output
B14
MPPLSW
I
0/5 V DC
MPPLSW: On/Off
B15
GND
-
-
Ground
1
BVSEL1
O
0 to 5 V DC
Developing bias control voltage
2
+24VDR
O
24 V DC
24 V DC power output
3
GND
-
-
Ground
4
MHVDR
O
0/5 V DC
Main charging: On/Off
5
HVCLK
O
0/5 V DC (pulse) Developing bias CLOCK signal
6
RHVDR
O
0/5 V DC
Separation charging: On/Off
7
RISEL
O
0 to 5 V DC
Separation charging control voltage
8
TICTL
O
0 to 5 V DC
Transfer charging control voltage
9
BVSEL2
O
0 to 5 V DC
Developing bias control voltage
10
THVDR
O
0/5 V DC
Transfer charging: On/Off
11
NC
-
-
Not used
12
NC
-
-
Not used
13
NC
-
-
Not used
14
NC
-
-
Not used
YC8
1
NC
-
-
Not used
Connected
to the laser
scanner unit
2
NC
-
-
Not used
3
NC
-
-
Not used
4
NC
-
-
Not used
5
NC
-
-
Not used
6
NC
-
-
Not used
7
NC
-
-
Not used
8
NC
-
-
Not used
9
NC
-
-
Not used
10
+24VDR
O
24 V DC
24 V DC power output
11
GND
-
-
Ground
12
SCAN
O
0/24 V DC
PM: On/Off
13
SCRDYN
I
0/5 V DC
PM READY signal
14
SCCLK
O
0/5 V DC (pulse) PM CLOCK signal
YC7
Connected
to the highvoltage
PWB
2-3-7
2GN/2GP/2GR
Connector
Pin No.
Signal
I/O
Voltage
Description
YC9
A1
GND
-
-
Ground
Connected
to the MP
feed switch,
toner container sensor,
developing
unit, toner
feed solenoid, toner
container
detection
switch and
drum unit
A2
MPFSW
I
0/5 V DC
MPFSW: On/Off
A3
+5VD
O
5 V DC
5 V DC power output
A4
+5VD
O
5 V DC
5 V DC power output
A5
TCS
I
0/5 V DC
TCS: On/Off
A6
GND
-
-
Ground
A7
DEVP0
I
0/5 V DC
Developing unit distinction signal
A8
+5VD
O
5 V DC
5 V DC power output
A9
TNS
I
0/5 V DC
TNS: On/Off
A10
GND
-
-
Ground
A11
DVUNITN
I
0/5 V DC
Developing unit detection signal
A12
FUSE_CUT
O
0/5 V DC
Developing unit FUSE CUT signal
A13
EEDATA
I
0/5 V DC
Developing unit EEPROM DATA signal
A14
EESCLK
O
0/5 V DC (pulse) Developing unit EEPROM CLOCK signal
B1
+24VDR
O
24 V DC
24 V DC power output
B2
TNFSOL
O
0/24 V DC
TNFSOL: On/Off
B3
TCDSW
I
0/5 V DC
TCDSW: On/Off
B4
GND
-
-
Ground
B5
DRUMP0
I
0/5 V DC
Drum unit distinction signal
B6
GND
-
-
Ground
B7
CL
O
0/5 V DC
CL: On/Off
B8
EEDATA
I
0/5 V DC
Drum unit EEPROM DATA signal
B9
EESCLK
O
0/5 V DC (pulse) Drum unit EEPROM CLOCK signal
B10
GND
-
-
Ground
B11
DRUNITN
I
0/5 V DC
Drum unit detection signal
B12
+5VD
O
5 V DC
5 V DC power output
B13
MCCM_FWD
O
0/24 V DC
MCCM: On/Off
B14
MCCM_REV
O
0/24 V DC
MCCM: On/Off
YC10
A1
GND
-
-
Ground
Connected
to the registration
switch, fuser
unit, duplex
feed clutch,
duplex
paper conveying
switch and
cooling fan
motor 8 to
13
A2
RSW
O
0/5 V DC
RSW: On/Off
A3
+5VD
O
5 V DC
5 V DC power output
A4
FUSER P0
I
0/5 V DC
Fuser unit distinction signal
A5
3VD
O
3.3 V DC
3.3 V DC power output
A6
FTH1
I
0 to 5 V DC
FTH1 detection voltage signal
A7
FUSE CUT
O
0/5 V DC
FTH1 FUSE CUT signal
A8
GND
-
-
Ground
A9
GND
-
-
Ground
A10
FTH2 STD
I
0 to 5 V DC
FTH2 detection voltage signal
A11
FTH2
I
0 to 5 V DC
FTH2 detection voltage signal
B1
+24VDR
O
24 V DC
24 V DC power output
B2
DUPFCL
O
0/24 V DC
DUPFCL: On/Off
B3
GND
-
-
Ground
B4
DUPPCSW
I
0/5 V DC
DUPPCSW: On/Off
B5
+5VD
O
5 V DC
5 V DC power output
B6
GND
-
-
Ground
2-3-8
2GN/2GP/2GR
Connector
Pin No.
Signal
I/O
Voltage
Description
YC10
B7
CFM11,12,13
O
0/24 V DC
CFM11,12,13: On/Off
Connected
to the registration
switch, fuser
unit, duplex
feed clutch,
duplex
paper conveying
switch and
cooling fan
motor 8 to
13
B8
DUP P0
I
0/5 V DC
Duplex unit distinction signal
B9
+24VDR
O
24 V DC
24 V DC power output
B10
CFM8,9,10
O
0/24 V DC
CFM8,9,10: On/Off
B11
NC
-
-
Not used
YC11
1
R24VDR
O
24 V DC
24 V DC power output
Connected
to the drive
motor, paper
feed motor,
feed clutch 1
and feed
switch 1
2
R24VDR
O
24 V DC
24 V DC power output
3
GND
-
-
Ground
4
GND
-
-
Ground
5
+5VD
O
5 V DC
5 V DC power output
6
+5VD
O
5 V DC
5 V DC power output
7
GND
-
-
Ground
8
GND
-
-
Ground
9
DM_ON
O
0/24 V DC
DM: On/Off
10
PFM_ON
O
0/24 V DC
PFM: On/Off
11
DM_LOCK
I
0/5 V DC
DM LOCK signal
12
PFM_LOCK
I
0/5 V DC
PFM LOCK signal
13
DM_CLK
O
0/5 V DC (pulse) DM CLOCK signal
14
FCL1
O
0/24 V DC
FCL1: On/Off
15
+24VDR
O
24 V DC
24 V DC power output
16
GND
-
-
Ground
17
FSW1
I
0/5 V DC
FSW1: On/Off
18
+5VD
O
5 V DC
5 V DC power output
YC12
1
+24VDR
O
24 V DC
24 V DC power output
Connected
to the Upper
and lower
paper size
width
switches
2
+24VUP
I
24 V DC
24 V DC power input
3
PWSW-U0
I
0/5 V DC
PWSW-U: On/Off
4
PWSW-U1
I
0/5 V DC
PWSW-U: On/Off
5
PWSW-U2
I
0/5 V DC
PWSW-U: On/Off
6
GND
-
-
Ground
7
+24VDR
O
24 V DC
24 V DC power output
8
+24VLO
I
24 V DC
24 V DC power input
9
PWSW-L0
I
0/5 V DC
PWSW-L: On/Off
10
PWSW-L1
I
0/5 V DC
PWSW-L: On/Off
11
PWSW-L2
I
0/5 V DC
PWSW-L: On/Off
12
GND
-
-
Ground
2-3-9
2GN/2GP/2GR
Connector
Pin No.
YC13
A1
GND
-
-
Ground
Connected
to the feed
switch 2/3,
feed clutch
2/3, left
cover 2
switch,
upper/lower
lift motors,
lower lift
motor,
upper/lower
paper size
length
switches,
upper/lower
lift limit
switches
and upper/
lower paper
switches
A2
FSW3
I
0/5 V DC
FSW3: On/Off
2-3-10
Signal
I/O
Voltage
Description
A3
+5VD
O
5 V DC
5 V DC power output
A4
R24VDR
O
24 V DC
24 V DC power output
A5
FCL3
O
0/24 V DC
FCL3: On/Off
A6
GND
-
-
Ground
A7
FSW2
I
0/5 V DC
FSW2: On/Off
A8
+5VD
O
5 V DC
5 V DC power output
A9
GND
-
-
Ground
A10
LC2SW
I
0/5 V DC
LC2SW: On/Off
A11
+24VDR
O
24 V DC
24 V DC power output
A12
FCL2
O
0/24 V DC
FCL2: On/Off
A13
LM-U SW2
I
0/5 V DC
LM-U SW2: On/Off
A14
GND
-
-
Ground
A15
LM-U SW1
I
0/5 V DC
LM-U SW1: On/Off
A16
GND
-
-
Ground
A17
LM-U REM
O
0/24 V DC
LM-U: On/Off
A18
GND
-
-
Ground
A19
PLSW-L
I
0/5 V DC
PLSW-L: On/Off
B1
GND
-
-
Ground
B2
PLSW-U
I
0/5 V DC
PLSW-U: On/Off
B3
LM-L SW2
I
0/5 V DC
LM-L SW2: On/Off
B4
GND
-
-
Ground
B5
LM-L SW1
I
0/5 V DC
LM-L SW1: On/Off
B6
GND
-
-
Ground
B7
LM-L REM
O
0/24 V DC
LM-L: On/Off
B8
GND
-
-
Ground
B9
LICSW-U
I
0/5 V DC
LICSW-U: On/Off
B10
+5VD
O
5 V DC
5 V DC power output
B11
GND
-
-
Ground
B12
PSW-U
I
0/5 V DC
PSW-U: On/Off
B13
+5VD
O
5 V DC
5 V DC power output
B14
GND
-
-
Ground
B15
LICSW-L
I
0/5 V DC
LICSW-L: On/Off
B16
+5VD
O
5 V DC
5 V DC power output
B17
GND
-
-
Ground
B18
PSW-L
I
0/5 V DC
PSW-L: On/Off
B19
+5VD
O
5 V DC
5 V DC power output
2GN/2GP/2GR
Connector
Pin No.
Signal
I/O
Voltage
Description
YC14
A1
FSSOL2
O
0/24 V DC
FSSOL: On/Off (return)
Connected
to the feedshift solenoid,
feedshift
switch, eject
switch, cooling fan
motor 5, left
cover 1
switch,
upper/lower
paper feed
clutches,
humidity
sensor eject
motor
A2
FSSOL1
O
0/24 V DC
FSSOL: On/Off (activate)
A3
+24VDR
O
24 V DC
24 V DC power output
A4
GND
-
-
Ground
A5
FSSW
I
0/5 V DC
FSSW: On/Off
A6
+5VD
O
5 V DC
5 V DC power output
A7
GND
-
-
Ground
A8
NC
-
-
Not used
A9
+5VD
O
5 V DC
5 V DC power output
A10
GND
-
-
Ground
A11
ESW
I
0/5 V DC
ESW: On/Off
A12
+5VD
O
5 V DC
5 V DC power output
A13
CFM5
O
0/24 V DC
CFM5: On/Off
A14
GND
-
-
Ground
A15
GND
-
-
Ground
A16
LC1SW
I
0/5 V DC
LC1SW: On/Off
B1
PFCL-U
O
0/24 V DC
PFCL-U: On/Off
B2
+24VDR
O
24 V DC
24 V DC power output
B3
+24VDR
O
24 V DC
24 V DC power output
B4
PFCL-L
O
0/24 V DC
PFCL-L: On/Off
B5
+24VDR
O
24 V DC
24 V DC power output
B6
RCL
O
0/24 V DC
RCL: On/Off
B7
+3VD
O
3.3 V DC
3.3 V DC power output
B8
HUMS
I
0 to 5 V DC
HUMS detection voltage signal
B9
GND
-
-
Ground
B10
THOUT
I
0 to 5 V DC
Thermistor detection voltage signal
B11
EM_B
O
0/24 V DC (pulse) EM drive control signal
B12
EM B
O
0/24 V DC (pulse) EM drive control signal
B13
EM_A
O
0/24 V DC (pulse) EM drive control signal
B14
EM A
O
0/24 V DC (pulse) EM drive control signal
B15
NC
-
-
Not used
B16
NC
-
-
Not used
YC15
1
+24VDR
O
24 V DC
24 V DC power output
Connected
to the total
counter,
optional key
card and
optional key
counter
2
T_COUNT
O
0/5 V DC
Total counter signal
3
GND
-
-
Ground
4
SET SIG
I
0/5 V DC
Connection signal
5
GND
-
-
Ground
6
SET SIG
I
0/5 V DC
Key counter connection signal
7
+24VDR
O
24 V DC
24 V DC power output
8
K_COUNT
O
0/5 V DC
Key counter signal
9
GND
-
-
Ground
10
SET SIG
I
0/5 V DC
Connection signal
2-3-11
2GN/2GP/2GR
Connector
Pin No.
YC16
1
+24VDR
O
24 V DC
24 V DC power output
2
+24VDR
O
24 V DC
24 V DC power output
3
GND
-
-
Ground
4
GND
-
-
Ground
5
+5VD
O
5 V DC
5 V DC power output
6
GND
-
-
Ground
7
SELECT
O
0/5 V DC
Built-in finisher SELECT signal
8
READY
I
0/5 V DC
Built-in finisher READY signal
9
SDI
I
0/5 V DC (pulse) Built-in finisher serial communication data signal
10
SDO
O
0/5 V DC (pulse) Built-in finisher serial communication data signal
Connected
to the
optional
built-in finisher
Signal
I/O
Voltage
Description
11
SCLK
O
0/5 V DC (pulse) Built-in finisher CLOCK signal
12
NC
-
-
Not used
YC17
1
JBESW
I
0/5 V DC
JBESW: On/Off
Connected
to the
optional job
separator
2
+5VD
O
5 V DC
5 V DC power output
3
GND
-
-
Ground
4
GND
-
-
Ground
5
SET SIG
I
0/5 V DC
Job separator connection signal
6
GND
-
-
Ground
7
EPDSW
I
0/5 V DC
EPDSW: On/Off
8
+5VD
O
5 V DC
5 V DC power output
9
LED REM
O
0/5 V DC
LED: On/Off
10
+5VD LED
O
5 V DC
5 V DC power output
YC20
Connected
to the main
PWB
2-3-12
11
FSSOL2
O
0/24 V DC
FSSOL: On/Off (return)
12
FSSOL1
O
0/24 V DC
FSSOL: On/Off (activate)
13
+24VDR
O
24 V DC
24 V DC power output
1
SCKN
I
0/5 V DC (pulse) CLOCK signal
2
EGSI
I
0/5 V DC (pulse) Serial communication data signal
3
EGSO
O
0/5 V DC (pulse) Serial communication data signal
4
SBSY
O
0/5 V DC
SBSY signal
5
SDIR
O
0/5 V DC
SDIR signal
6
EGIRN
O
0/5 V DC
EGIRN signal
7
OUTPEN
O
0/5 V DC
OUTPEN signal
8
PVSYNC
O
0/5 V DC (pulse) PVSYNC signal
9
+5VD
O
5 V DC
5 V DC power output
10
SGND
-
-
Ground
11
SGND
-
-
Ground
12
LDON
O
0/5 V DC
LDON signal
13
PRST
I
0/5 V DC
PRST signal
14
PMD
I
0/5 V DC
PMD signal
15
HLDENG
I
0/5 V DC
HLDENG signal
2GN/2GP/2GR
2-4 Appendixes
Maintenance parts list
Maintenance part name
Part No.
Name used in service manual
Name used in parts list
Upper/lower paper feed pulley
PULLEY,PAPER FEED
Alternative
part No.
Fig.
No.
Ref.
No.
2AR07220
-
4
2
Upper/lower separation pulley
PULLEY,SEPARATION
2AR07230
-
4
3
Upper/lower forwarding pulley
PULLEY FEED A
2BJ06010
-
4
5
MP paper feed pulley
UPPER PULLEY,BYPASS
61706770
-
11
49
MP separation pulley
PULLEY,SEPARATION
2AR07230
-
11
2
MP forwarding pulley
PULLEY FEED A
2BJ06010
-
11
6
MP feed roller 1
ROLLER2 BYPASSFEED
302BL06541
2BL06541
12
13
MP feed roller 2
ROLLER4 BYPASSFEED
302BL06561
2BL06561
12
14
MP feed pulley
RIGHT PULLEY,FEED
33906660
-
12
22
Left registration roller
ROLLER REGIST
2FG16021
-
7
35
Right registration roller
RIGHT ROLLER REGIST
302FG06211
2FG06211
5
51
Feed pulley
PULLEY FEED
2BL16080
-
6/7
47/19
Feed roller 1
PULLEY MIDDLE FEED A
302GR06010
2GR06010
5
72
Feed roller 1
PULLEY MIDDLE FEED B
302GR06020
2GR06020
5
73
Feed roller 2
ROLLER B FEED
302BL06081
2BL06081
5
22
Feed roller 3
ROLLER C FEED
302BL06091
2BL06091
5
23
Registration switch
SWITCH REGISTRATION
2FG27110
-
5
46
Left registration cleaner
UNDER CLEANER REGIST
2BL07950
-
7
15
Registration guide
GUIDE REGIST F
2BL16130
-
7
22
Right registration cleaner
PARTS,REGISTRATION CLEAN
2BL93450
-
5
44
Laser scanner unit
LK-710
302GR93090
2GR93090
13
1
Platen
PARTS CONTACT GLASS (M) ASSY
302GR93310
2GR93310
10
1
Platen
PARTS CONTACT GLASS (I) ASSY
302GR93320
2GR93320
10
1
Slit glass
PARTS CONTACT GLASS DP ASSY
302GR94380
2GR94380
10
2
Mirror 1
MIRROR A
2FB12140
-
9
25
Mirror 2 and mirror 3
MIRROR B
302GR17280
2GR17280
9
17
Reflector
REFLECTOR SCANNER
302GR17250
2GR17250
9
27
Exposure lamp
PARTS,LAMP SCANNER SP
302GR94330
2GR94330
9
32
Original size detection switch
SENSOR ORIGINAL
2C927090
-
9
44
Transfer roller unit
TR-710
302GR93280
2GR93280
7
A02
Developing unit
DV-715
302GR93030
2GR93030
14
1
Drum unit
DK-715 (30 ppm)
302GN93010
2GN93010
16
A01
Drum unit
DK-716 (40/50 ppm)
302GR93040
2GR93040
16
A01
Main charger unit
MC-710
302GR93070
2GR93070
16
13
Drum separation claw
PARTS CLAW SEPARATION ASSY
302GR93190
2GR93190
16
14
Fuser unit
FK-715 U
302GR93050
2GR93050
15
A01
Fuser unit
FK-715 E
302GR93060
2GR93060
15
A01
Heat roller
PARTS,ROLLER HEAT SP
302GR94270
2GR94270
15
32
Heat roller separation claw
CLAW HEAT ROLLER
2BL20080
-
15
1
Press roller
PARTS,ROLLER PRESS SP
302GR94280
2GR94280
15
A02
Press roller separation claw
CLAW PRESS ROLLER
2BL20350
-
6
34
2-4-1
2GN/2GP/2GR
Maintenance part name
Part No.
Alternative
part No.
Fig.
No.
Ref.
No.
Name used in service manual
Name used in parts list
Upper duplex feed roller
ROLLER DU FEED UP
2BL07020
-
7
4
Lower duplex feed roller
ROLLER DU FEED LOW
2BL07030
-
7
5
Duplex feed pulley
PULLEY DU
2BL07040
-
7
6
Eject roller
ROLLER EXIT
302BL21021
2BL21021
8
24
Switchback roller
ROLLER FEED SHIFT
302BL21031
2BL21031
8
25
Eject pulley
PULLEY EXIT C
2BL21520
-
8
22
Eject pulley
PULLEY EXIT
302GR28060
2GR28060
8
32
Switchback pulley
PULLEY FEED SHIFT
2BL21330
-
6
36
Dust filter 1
PARTS FILTER DUST F1 ASSY
302GR94430
2GR94430
13
13
Dust filter 1
PARTS FILTER DUST F2 ASSY
302GR94440
2GR94440
13
14
2-4-2
2GN/2GP/2GR
Periodic maintenance procedures
Maintenance
part/location
Test copy
Perform at the maxiand test print mum copy size
Section
Section
Paper feed
section
Maintenance
part/location
Method
Test copy
Method
Maintenance cycle
Points and cautions
Page
Points and cautions
Page
Every service
Maintenance cycle
Upper/lower paper feed Replace
pulley
400K (30)
500K (40/50)
Replace.*
P.1-5-2
Upper/lower separation
pulley
Replace
400K (30)
500K (40/50)
Replace.*
P.1-5-2
Upper/lower forwarding
pulley
Replace
400K (30)
500K (40/50)
Replace.*
P.1-5-2
MP paper feed pulley
Replace
400K (30)
500K (40/50)
Replace.*
P.1-5-4
MP separation pulley
Replace
400K (30)
500K (40/50)
Replace.*
P.1-5-4
MP forwarding pulley
Replace
400K (30)
500K (40/50)
Replace.*
P.1-5-4
MP feed roller 1
Clean
400K (30)
500K (40/50)
Clean with alcohol.*
MP feed pulley
Clean
400K (30)
500K (40/50)
Clean with alcohol.*
MP feed roller 2
Clean
400K (30)
500K (40/50)
Clean with alcohol.*
Left registration roller
Clean
400K (30)
500K (40/50)
Clean with alcohol.*
Right registration roller
Clean
400K (30)
500K (40/50)
Clean with alcohol.*
Feed pulley
Clean
400K (30)
500K (40/50)
Clean with alcohol.*
Feed roller 1
Clean
400K (30)
500K (40/50)
Clean with alcohol.*
Feed roller 2
Clean
400K (30)
500K (40/50)
Clean with alcohol.*
Feed roller 3
Clean
400K (30)
500K (40/50)
Clean with alcohol.*
Registration switch
Clean
400K (30)
500K (40/50)
Clean with a dry cloth.
Left registration cleaner Replace
400K (30)
500K (40/50)
Replace.
Registration guide
Replace
400K (30)
500K (40/50)
Replace.
Right registration
cleaner
Replace
400K (30)
500K (40/50)
Replace.
P.1-5-9
P.1-5-9
*Check and clean with alcohol when user call occurs.
2-4-3
2GN/2GP/2GR
Section
Optical
section
Section
Transfer/
separation
section
Section
Developing
section
Maintenance
part/location
Laser scanner unit
Method
Maintenance cycle
Points and cautions
Check or
clean
User call
Clean the shield glass with a
dry cloth.
Platen
Clean
400K (30)
500K (40/50)
Clean with alcohol and then a
dry cloth.
Slit glass
Clean
400K (30)
500K (40/50)
Clean with a dry cloth or alcohol.
Mirror 1
Clean
User call
Clean with alcohol and then a
dry cloth only if vertical black
lines appear on the copy
image.
Mirror 2 and mirror 3
Clean
User call
Clean with alcohol and then a
dry cloth only if vertical black
lines appear on the copy
image.
Lens
Clean
User call
Clean with a dry cloth only if
vertical black lines appear on
the copy image.
Reflector
Clean
User call
Clean with a dry cloth only if
vertical black lines appear on
the copy image.
Exposure lamp
Check or
replace
User call
Replace if an image problem
occurs.
Optical rail
Grease
User call
Check noise and shifting and
then apply scanner rail grease
EM-50L.
Original size detection
sensor
Check or
clean
User call
Clean the sensor emitter and
sensor receiver with alcohol or
a dry cloth only if there is a
problem.
Maintenance
part/location
Transfer roller unit
Maintenance
part/location
Developing unit
Method
Replace
Method
Replace
Maintenance cycle
400K (30)
500K (40/50)
Maintenance cycle
400K (30)
500K (40/50)
Points and cautions
Replace. (Clean when user
call occurs.)
Points and cautions
Replace. (Check and replace
when user call occurs.)
Page
P.1-5-21
P.1-5-11
Page
P.1-5-27
Page
P.1-5-26
2-4-4
2GN/2GP/2GR
Section
Main charging/drum
section
Section
Fuser
section
Section
Maintenance
part/location
Drum unit
Replace
400K (30)
500K (40/50)
Replace. (Check and replace
when user call occurs.)
P.1-5-24
Main charger unit
Clean
User call
Clean with a wet cloth and
then a dry cloth.
P.1-5-25
Drum separation claw
Check or
replace
User call
Replace if the leading edge of
the claws are damaged.
Maintenance
part/location
Fuser unit
Method
Method
Maintenance cycle
Maintenance cycle
Points and cautions
Points and cautions
Page
Page
Replace
400K (30)
500K (40/50)
Replace. (Check and replace P.1-5-28
when user call occurs.)
Heat roller
Check or
replace
User call
Check and replace when user P.1-5-32
call occurs.
Heat roller separation
claw
Clean
400K (30)
500K (40/50)
Clean with alcohol. (Check
and replace when user call
occurs.)
Press roller
Check or
replace
User call
Check and replace when user P.1-5-30
call occurs.
Press roller separation
claw
Clean
400K (30)
500K (40/50)
Clean with alcohol. (Check
and replace when user call
occurs.)
Maintenance
part/location
Eject section Eject roller
Method
Maintenance cycle
Points and cautions
Clean
400K (30)
500K (40/50)
Clean with alcohol. (Check
and clean with alcohol when
user call occurs.)
Eject pulley
Clean
400K (30)
500K (40/50)
Clean with alcohol. (Check
and clean with alcohol when
user call occurs.)
Switchback roller
Clean
400K (30)
500K (40/50)
Clean with alcohol. (Check
and clean with alcohol when
user call occurs.)
Switchback pulley
Clean
400K (30)
500K (40/50)
Clean with alcohol. (Check
and clean with alcohol when
user call occurs.)
P.1-5-29
Page
2-4-5
2GN/2GP/2GR
Section
Covers
Section
Other
Maintenance
part/location
Covers
Clean
Every service
Clean with alcohol or a dry
cloth.
Dust filter 1
Clean
Every service
Vacuum.
Dust filter 2
Clean
Every service
Vacuum.
Maintenance
part/location
Image quality
Method
Method
Check and
adjust
Maintenance cycle
Maintenance cycle
Points and cautions
Points and cautions
Page
Page
Every service
2-4-6
2GN/2GP/2GR
Chart of image adjustment procedures
Adjusting
order
Item
Image
Description
Maintenance mode
Item No.
Adjusting the lateral squareness
(printing adjustment)
Adjusting the skew of the laser scanner
unit (printing adjustment)
Polygon motor speed adjustment
U053
�
Adjusting the magnification in the
main scanning direction (printing
adjustment)
Drive motor speed adjustment
�
Adjusting the magnification in the
auxiliary scanning direction (printing adjustment)
Adjusting the center line (printing
adjustment)
Mode
Original
Page
U993 (PG2)
Test chart
P.1-5-23
POLYGON MOTOR
U053 test pattern
P.1-3-21
U053
MAIN MOTOR
U053 test pattern
P.1-3-21
Adjusting the LSU print start timing
U034
LSU OUT LEFT
U034 test pattern
P.1-3-19
Adjusting the center line of the cassettes and paper feeder (printing
adjustment)
Adjusting the position of the rack adjuster
U034
LSU OUT LEFT
U034 test pattern
-
Adjusting the leading edge registration (printing adjustment)
Registration clutch turning on timing
(secondary paper feed start timing)
U034
LSU OUT TOP
U034 test pattern
P.1-3-18
Adjusting the leading edge margin
(printing adjustment)
LSU illumination start timing
U402
LESD
U402 test pattern
P.1-3-65
Adjusting the trailing edge margin
(printing adjustment)
LSU illumination end timing
U402
TRAIL
TRAIL(DUP)
TRAIL(MP)
U402 test pattern
P.1-3-65
Adjusting the left and right margins
(printing adjustment)
LSU illumination start/end timing
U402
A
C
U402 test pattern
P.1-3-65
Adjusting magnification of the
scanner in the main scanning direction (scanning adjustment)
Data processing
U065
U070
MAIN SCAN ADJ
CIS MAIN ADJ
Test chart
P.1-3-23
P.1-3-26
Remarks
�
�
�
Adjusts the position of each paper source.
�
�
�
To make an adjustment for duplex copying, select
TRAIL(DUP).
To make an adjustment for MP tray, select
TRAIL(MP).
�
��
2-4-7
2GN/2GP/2GR
Adjusting
order
��
Item
Image
Description
Adjusting magnification of the
scanner in the auxiliary scanning
direction (scanning adjustment)
Original scanning speed
Adjusting the center line (scanning
adjustment)
Adjusting the original scan data
(image adjustment)
��
Adjusting the leading edge registration (scanning adjustment)
Original scan start timing
(image adjustment)
��
Adjusting the leading edge margin
(scanning adjustment)
Adjusting the original scan data
(image adjustment)
��
Adjusting the trailing edge margin
(scanning adjustment)
Adjusting the original scan data
(image adjustment)
��
Adjusting the left and right margins
(scanning adjustment)
��
Adjusting the original scan data
(image adjustment)
Maintenance mode
Item No.
Original
Mode
U065
SUB SCAN ADJ
U070
CONVEY SPEED/
CIS SUB ADJ
U067
ADJUST DATA1/2
U072
ADJUST DATA1/2/3
U066
ADJUST DATA1/2
U071
ADJUST DATA1/2/
3/4/5
U403
B MARGIN
U404
B MARGIN/
B MARGIN(BACK)
U403
D MARGIN
U404
D MARGIN/
D MARGIN(BACK)
U403
A MARGIN
C MARGIN
A MARGIN/
A MARGIN(BACK)
C MARGIN/
C MARGIN(BACK)
U404
When maintenance item U411 (Adjusting the scanner automatically) is run using the specified original (P/N 302FZ56990),
the following adjustments are automatically made:
Adjusting the scanner magnification (U065)
Adjusting the scanner leading edge registration (U066)
Adjusting the scanner center line (U067)
When maintenance item U411 (Adjusting the scanner automatically) is run using the specified original (P/N 2AC68241),
the following adjustments are automatically made:
Adjusting the DP magnification (U070)
Adjusting the DP scanning timing (U071)
Adjusting the DP center line (U072)
Test chart
Page
P.1-3-23
P.1-3-26
Test chart
P.1-3-25
P.1-3-30
Test chart
P.1-3-24
P.1-3-28
Test chart
P.1-3-66
P.1-3-67
Test chart
P.1-3-66
P.1-3-67
Test chart
P.1-3-66
P.1-3-67
Remarks
U065: For copying an original placed on
the platen.
U070: For copying originals from the DP.
U067: For copying an original placed on
the platen.
U072: For copying originals from the DP.
U066: For copying an original placed on
the platen.
U071: For copying originals from the DP.
U403: For copying an original placed on
the platen.
U404: For copying originals from the DP.
U403: For copying an original placed on
the platen.
U404: For copying originals from the DP.
U403: For copying an original placed on
the platen.
U404: For copying originals from the DP.
Image quality
Item
100% magnification
Enlargement/reduction
Lateral squareness
Leading edge registration
Skewed paper feed
Left-right difference
Curling
Specifications
Machine: ±0.8%
Using DP: ±1.5%
Machine: ±1.0%
Using DP: ±1.5%
Machine: ±1.5 mm/375 mm
Using DP: ±2.5 mm/375 mm
Cassette: ±2.5 mm
MP tray: ±2.5 mm
Duplex copying: ±2.5 mm
Cassette: 1.5 mm or less
MP tray: 1.5 mm or less
Duplex copying: 2.0 mm or less
Cassette: ±2.0 mm
MP tray: ±2.0 mm
Duplex mode: ±3.0 mm
Simplex mode: 10.0 mm or less
Duplex mode: 10.0 mm or less
2-4-8
FWD
REV
FUSE
TNS
DEVELOPING UNIT
2
1
TCD
SW
2
1
CL
MCCM
TC HV
HVTPWB
OPTION KEY CARD MK-2
(ONLY JAPAN)
TC ROLL
PFCL-U
PFCL-L
HUMS
ESW
FSSW
RCL
FSSOL
CFM5
LC1SW
DM
PFM
DB
EM
MC
MAIN HV
FCL1
EJECT UNIT
7
8
5
6
3
4
1
2
PWSW-U
CASSETTE1
1 2 3
PWSW-L
CASSETTE2
FCL3
FSW1
FSW3
1
2
3 2 1
FSW2
1 2 3
LC2SW
2
1
F.G
1
2
3
2
1
2
1
3
2
1
12
11
10
9
8
7
7
8
6
5
9
10
11
12
4
3
2
1
FCL2
VERTICAL CONVEYING UNIT
6
5
4
3
2
1
1
2
3
4
5
6
6
5
4
3
2
1
1
2
3
4
5
6
YC11
1
2
3
4
5
6
YC5
YC3
LM-U
B1
B2
B3
B4
B5
B6
B7
B8
B9
B10
B11
B12
B13
B14
B15
B16
B17
B18
B19
YC10
B1
B2
B3
B4
B5
B6
B7
B8
B9
B10
B11
B12
B13
B14
B15
B16
B17
B18
B19
1
2
1
2
1
2
DOCUMENT
FINISHER
(OPTION)
1
2
3
4
2
1
1
2
3
4
5
6
1
2
3
4
5
6
2
1
1
2
CFM3,4
+24VD
24V
24V
24V
PGND
PGND
PGND
SGND
SGND
SGND
SGND
12V
5V
3.3V
3.3V
YC6
CFM13
YC1
2
1
LM-L
1
2
1
2
1
NOISE FILTER
TB3
TB4
YC2
SET SIG
GND
K_COUNT
+24VD
SET SIG
GND
SET SIG
GND
T_COUNT
+24VD
GND
FH-S ON
FH-M ON
+5VD
ZCROSS
CFM3,4
1
2
3
5
6
7
8
9
10
11
4
12
13
14
1
2
3
5
6
7
8
9
10
11
4
12
13
14
+12VD
+5VD
+5VD
GND
GND
GND
N.C
2
1
2
1
CFM3
10
9
8
7
6
5
4
3
2
1
7
6
5
4
3
2
1
1
2
3
4
5
6
7
1
2
3
4
5
6
7
A30 A30
B1 B1
10
9
8
7
6
5
4
3
2
1
7
6
5
4
3
2
1
PAPER FEEDER
(OPTION)
5
4
3
2
1
CH
GND
PLSW-U
LM-L SW2
GND
LM-L SW1
GND
LM-L REM
GND
LICSW-U
+5VD
GND
PSW-U
+5VD
GND
LICSW-L
+5VD
GND
PSW-L
+5VD
RSW
W2
YC8 (2/3)
2
1
1 1
2 2
W1
YC3
7
6
5
4
3
2
1
YC8 (1/3)
7
6
5
4
3
2
1
YC9
PLSW-U
2 2
1 1
3
5
3
4
2
PM
2
1
CH (OPTION)
1
+24VD
+5VD
+3.3VD
GND
GND
GND
+24VDR
YC7
7
6
5
4
3
2
1
DUPLEX
UNIT
5
3
4
2
2
3
FGND
5.1V
PGND
V24V
1
PLSW-L
EPWB
YC8 (3/3)
7
6
5
4
3
2
1
1 2 3
7
8
9
10
5
4
3
2
1
DUP
PCSW
7
8
9
10
4
3
2
1
DUP
FCL
YC10
4
3
2
1
CFM12
16
15
14
13
12
11
10
9
8
7
6
5
4
3
2
1
10
9
8
7
6
5
4
3
2
1
4
1
2
1
FH-M ON
FH-S ON
FH LIVE
A1
A2
A3
A4
A5
A6
A7
A8
A9
A10
A11
A12
A13
A14
A15
A16
A17
A18
A19
CFM11
+12VD
GND
GND
+5VD
A1
A2
A3
A4
A5
A6
A7
A8
A9
A10
A11
A12
A13
A14
A15
A16
A17
A18
A19
1
2
3
4
16
15
14
13
12
11
10
9
8
7
6
5
4
3
2
1
GND
FSW3
+5VD
R24VDR
FCL3
GND
FSW2
+5VD
GND
LC2SW
+24VDR
FCL2
LM-U SW2
GND
LM-U SW1
GND
LM-U REM
GND
PLSW-L
4
3
2
1
6
5
4
3
2
1
40
10
9
8
7
6
5
4
3
2
1
6
5
4
3
2
1
YC11
GND
5V
RSSE
XRXC
XTXC
XDSR
XDTR
XCTS
XRTS
SCCCLK
SGND
SGND
SGND
SGND
SGND
SGND
1
10
9
8
7
6
5
4
3
2
1
A6 A1
A5 A2
A4 A3
A3 A4
A2 A5
A1 A6
FFC
10
9
8
7
6
5
4
3
2
1
A1
A2
A3
A4
A5
A6
A7
A8
30
B8
B7
B6
B5
B4
B3
B2
B1
1
2
3
4
2 2 1
1 2 1
4 3 2 1
4 3 2 1
INPWB
SET SIG
DFSDO
DFSDI
DFSCLK
DFSEL
SISEL
DFRDY
SIRDY
FFC
6
1
SM
6
1
A1
PGND
V24V
DP (OPTION)
12
6
2
1
SLEEPN
GND
GND
GND
GND
GND
GND
GND
GND
+5V
+5V
+5V
+5V
+5V
+5V
+5V
SLEEP
12
6
2
1
A1
LIVE
4
3
2
1
5
4
3
2
1
NEUTRAL
34
5
4
3
2
1
1
2
3
4
5
6
7
8
11
10
9
8
7
5
4
3
1
24V
24V
LAMP ON
PGND
PGND
1
2
3
4
5
6
7
8
11
10
9
8
7
5
4
3
40
PFFEED
PFRDY
PFSDO
PFSDI
PFSCLK
PFSEL
+5VD
GND
1
8
7
6
5
4
3
2
1
14
13
12
11
10
9
8
7
6
5
4
3
2
1
8
7
6
5
4
3
2
1
14
13
12
11
10
9
8
7
6
5
4
3
2
1
3 2 1
3 2 1
3 2 1
3 2 1
3 2 1
3 2 1
5V
SHPSW
SGND
5V
ODSW
SGND
5V
OSDS
SGND
PWSW-L2
GND
1
2
3
4
5
2
1
1
2
3
4
5
1
2
2
1
GND
GND
GND
GND
GND
GND
OPEN
OPEN
OPEN
OPEN
OPEN
OPEN
OPEN
OPEN
OPEN
OPEN
5V
5V
5V
5V
+5V2_PD
1
2
3
4
5
6
7
8
YC14
9
8
7
6
5
4
3
2
1
PWSW-U1
PWSW-U2
GND
+24VDR
+24VLO
PWSW-L0
PWSW-L1
RESISTRATION UNIT
1
2
HDD
2
1
ILSW
2
1
FAX DATA
BACKUP KIT
9
8
7
6
5
4
3
2
1
1
2
1
2
YC9
1
2
3
4
5
6
7
8
9
10
11
12
2
1
4
3
2
1
YC10
1
2
3
4
5
6
7
8
9
10
11
12
1
2
1
2
3
4
YC6
+24VDR
+24VUP
PWSW-U0
8
7
6
5
4
3
2
1
SM B_
SM A_
SM B
SM A
YC4
7
8
5
6
3
4
1
2
1
2
3
4
5
6
7
8
2
1
4
5
2
1
SPWB
DUP P0
CFM11,12,13
+24VDR
+5VD
DUPPCSW
GND
DUPFCL
+24VDR
1
2
1
2
3
4
DEBUG
1
2
3
4
5
6
7
8
B8
B7
B6
B5
B4
B3
B2
B1
B8
B7
B6
B5
B4
B3
B2
B1
2
1
2
1
CFM9
1
2
1
2
1
40
CFM8,9,10
+24VDR
1
2
3
1
40
14
15
16
17
18
1
2
3
1
14
15
16
17
18
1
2
3
2
1
YC4
40
FCL1
+24VDR
GND
FSW1
+5VDR
+5VD
RSW
GND
1
2
YC7
1
2
3
4
5
A3
A2
A1
B11
B10
B9
A3
A2
A1
B11
B10
B9
FTH2
2
4
6
8
10
12
FTH1
3VD
FUSER P0
CFM10
2
4
6
8
10
12
1
3
5
7
9
11
13
FTH2
FTH2 STD
GND
GND
FUSE CUT
FUSER P0
5V
FTH1
FUSE CUT
GND
R24VDR
GND
+5VD
GND
PFM_ON
PFM_LOCK
1
3
5
7
9
11
13
YC7
R24VDR
GND
+5VD
GND
DM_ON
DM_LOCK
DM_CLK
A11
A10
A9
A8
A7
A6
A5
A4
FTH1
A11
A10
A9
A8
A7
A6
A5
A4
4
3
2
1
1
2
3
4
YC5
1
2
3
4
5
6
1
2
3
4
5
6
7
B11
B12
B13
B14
B15
B16
PD
B11
B12
B13
B14
B15
B16
YC31
EM B
EM_A
EM A
YC17
EM_B
YC8
5
4
3
2
1
1 2 3
Flash Writer
1
2
3
4
5
4
3
2
1
YC30
A15 A15
A16 A16
1
2
3
4
5
6
7
8
9
10
11
12
13
14
15
16
17
18
19
20
21
22
23
24
25
PGND
PGND
DPTMG
DPRDY
DPSCLK
DPSDO
5V
3.3V
24V
12V
SGND
SGND
SGND
PGND
PGND
DPEND
DPSEL
DPSDI
5V
3.3V
24V
24V
24V
SGND
SGND
B30 B30
A30 A30
B1 B1
A1 A1
YC1
5
4
3
2
1
DEV UNIT
GND
LC1SW
YC8
A13 A13
A14 A14
YC16
CFM5
GND
8
7
6
5
4
3
2
1
8
7
6
5
4
3
2
1
SET SIG
SGND
SCIRN
SCSDIR
SCSBSY
SCSDO
SCSDI
SCSCLK
B30 B30
A30 A30
B1 B1
A1 A1
YC3
2
1
2
1
68
5
4
3
2
1
68
1
2
3
4
5
B30 B30
1
2
5
4
3
2
1
35
34
35
2
1
34
FTS1 FTS2
A30 A30
B1 B1
1
2
3
4
1
1
2
3
4
YC27
1
+24VDR
FSSOL1
FSSOL2
FH-S
FH-M
KUIOPWB
A1 A1
GND
+5VD
FSSW
GND
YC20
A12
A11
A10
A9
A8
A7
A6
A5
A4
A3
A2
A1
LDPWB
A12
A11
A10
A9
A8
A7
A6
A5
A4
A3
A2
A1
1
2
3
8
7
6
5
4
3
2
1
+5VD
ESW
GND
+5VD
+24VDR
GND
SCAN
SCRDYN
SCCLK
1
2
3
YC20
1
2
3
4
5
6
7
8
9
10
11
12
B10
B9
B8
B7
CF
USB
TOUCH PANEL
12
11
10
9
8
7
6
5
4
3
2
1
B10
B9
B8
B7
YC17
A14
A10
B1
A12
B3
B4
A3
B13
A1
1
2
3
4
YC19
A1
A5
B14
A3
B12
B11
A12
B2
A14
4
3
2
1
3 2 1
1
2
3
4
LED
EPDSW JBESW
4
3
2
1
F.G
YC7
YC21
B6
B5
YC9
8
7
6
5
4
3
2
1
LSU
28
27
26
25
24
23
22
21
20
19
18
17
16
15
14
13
12
11
10
9
8
7
6
5
4
3
2
1
2
1
AC HV
1 2 3
1
2
3
4
5
6
7
8
1
2
3
4
5
6
7
8
9
1
2
3
4
5
YC22
28
27
26
25
24
23
22
21
20
19
18
17
16
15
14
13
12
11
10
9
8
7
6
5
4
3
2
1
1
2
SEPARATE
8
7
6
5
4
3
2
1
YC2
B6
B5
1 2 3
YC9
1
2
3
4
5
6
1
2
3
4
5
6
7
ISSCLKAFE
ISSDIAFE
ISSDOAFE
ISSELAFE
IESSCLK
ISSDI
ISSDO
ISSEL
ISRDY
OVMON
PAGEST
ISPLLSYNC
ISDIVSEL
ISPLLSEL0
ISPLLSEL1
ISRESETN
5V
GND
5V
GND
3.3V
GND
3.3V
GND
11V
SGND
11V
SGND
THOUT
GND
HUMS
+3VD
FSSOL
1
2
3
4
5
6
7
8
12
11
10
9
8
7
6
5
4
3
2
1
14
13
12
11
10
9
8
7
6
5
4
3
2
1
YS1
RCL
+24VDR
KMAS
1
2
3
4
5
6
7
8
9
10
11
12
1
2
3
4
5
6
7
8
9
10
11
12
13
14
Code DIMM
5V SAFE
SAMPLE
POWCONT
LASER
VDO+
VDOGND
PD
GND
OPWB-R
YC26
22
21
20
19
18
17
16
15
14
13
12
11
10
9
8
7
6
5
4
3
2
1
1
2
(ONLY JAPAN)
2
1
YC10
22
21
20
19
18
17
16
15
14
13
12
11
10
9
8
7
6
5
4
3
2
1
1
2
3
4
5
6
7
8
9
10
11
12
13
14
15
16
17
18
19
20
21
22
23
24
25
26
27
28
2
1
MP
FCL
1
2
MPWB
14
13
12
11
10
9
8
7
6
5
4
3
2
1
MPPWSW
12
11
10
9
8
7
6
5
4
3
2
1
1
2
3
4
5
6
7
8
9
10
11
12
13
14
JOB SEPARATER
UNIT (OPTION)
2
1
12
11
10
9
8
7
6
5
4
3
2
1
YC25
B4
B3
15
14
13
12
11
10
9
8
7
6
5
4
3
2
1
1
2
1
2
3
4
5
B4
B3
S_LED0
S_LED1
PANEL_RESET
HLDPANEL
SW_FOOTN
24V_DOWN
SUPND_ENTR
AUDIO
SGND
PH_KEY
SGND
SUPND_POWER
YC15
8
7
6
5
4
3
2
1
1
2
INNER FINISHER
(OPTION)
5
4
3
2
1
YC14
USB
SHDPWB
1
2
3
4
5
6
7
8
9
10
11
12
13
14
15
16
17
18
19
20
21
22
23
24
25
26
27
28
2
1
SHIELD
GND
DATA+
DATAVBUS
YC18
B2
B1
CFM6
5V
ETHER USB
NET
SPEAKER
YC16
B2
B1
KEY0
KEY1
KEY2
KEY3
KEY4
SCAN0
SCAN1
SCAN2
SCAN3
LED0
LED1
WakeUp
SGND
5V_MSWON
SGND
FROM
PSPWB
2
1
14
13
12
11
10
9
8
7
6
5
4
3
2
1
PFCL-L
+24VDR
YC13
YC11
LINPWB
YC1
YC5
CFM6
1
2
3
4
5
5
4
3
2
1
YC6
12
11
10
9
8
7
6
5
4
3
2
1
1
2
DIMM1
1
2
3
4
5
2
3
4
5
6
DIMM2
YC7
1
2
3
4
5
6
7
8
9
10
11
12
13
14
15
16
17
18
19
20
21
22
23
24
25
26
27
28
29
30
31
32
33
34
35
36
37
38
39
40
LCD
+24VDR
PFCL-U
1
2
3
4
5
6
7
8
9
10
11
12
13
14
15
YC1
2
1
5
4
3
2
1
1
2
YC19
5
4
3
2
1
12V
5V
5V
PGND
SGND
SGND
15
14
13
12
11
10
9
8
7
6
5
4
3
2
1
OPWB-M
2
1
YC6
1
2
3
4
5
6
7
PGND
12V
BK_ON
ADJUST
SGND
SCKN
EGSI
EGSO
SBSY
SDIR
EGIRN
OUTPEN
PVSYNC
+5VDR
SGND
SGND
LDON
PRST
PMD
HLDENG
YC2
HV
LV
2
3
4
5
6
15
14
13
12
11
10
9
8
7
6
5
4
3
2
1
3 2 1
1
2
3
4
5
SHILED
GND
DATA+
DATAVBUS
1
2
3
4
5
6
7
8
9
10
11
12
13
14
15
MP
PLSW
RIGHT
USB
B10
B9
B8
B7
B6
B5
B4
B3
B2
B1
A10
A9
A8
A7
A6
A5
A4
A3
A2
A1
15
14
13
12
11
10
9
8
7
6
5
4
3
2
1
1
2
3
4
5
6
7
8
9
10
11
12
13
14
15
16
17
18
19
20
21
22
23
24
25
26
27
28
29
30
31
32
33
34
35
36
37
38
39
40
14
13
12
11
10
9
8
7
6
5
4
3
2
1
B10
B9
B8
B7
B6
B5
B4
B3
B2
B1
A10
A9
A8
A7
A6
A5
A4
A3
A2
A1
13
12
11
10
9
8
7
6
5
4
3
2
1
MP
PFCL
1
2
3
4
5
6
7
8
9
10
11
12
13
12
11
10
9
8
7
6
5
4
3
2
1
YC3
+24VDR
FSSOL1
FSSOL2
+5VD LED
LED_REM
+5VD
EPDSW
GND
SET SIG
GND
GND
+5VD
JBESW
1
2
3
4
5
6
7
8
9
10
11
12
3
2
1
SGND
SGND
B5
B4
B3
SGND
B2
B1
B0
SGND
G5
G4
G3
SGND
G2
G1
G0
SGND
R5
R4
R3
SGND
R2
R1
R0
SGND
DE
SGND
L_R
U_D
SGND
DCCLK
NC
SGND
5V
5V
5V
5V
SGND
SGND
4
3
2
1
SGND
5V
SGND
5V
SGND
CCDCP
SGND
CCDRS
SGND
CCDSH
SGND
CCDCLK2A
SGND
CCDCLK1A
KEY_CARD
GND
B0
B1
B2
B3
B4
B5
B6
B7
+24VD
COPY_ENABLE
+5VD
+5VD
+5VD
+5VD
+5VD
+5VD
+5VD
+5VD
13
12
11
10
9
8
7
6
5
4
3
2
1
13
12
11
10
9
8
7
6
5
4
3
2
1
SCLK
SDO
SDI
READY
SELECT
GND
+5VD
GND
GND
+24VD
+24VD
1
2
3
MP TRAY UNIT
1
2
3
4
5
6
7
8
9
10
11
12
13
14
12
11
10
9
8
7
6
5
4
3
2
1
12
11
10
9
8
7
6
5
4
3
2
1
3
2
1
KEY5
KEY6
KEY7
SCAN0
SCAN1
SCAN2
SCAN3
LED2
LED3
LED4
SGND
1
2
3
4
5
6
7
8
9
10
11
12
13
14
B5
B6
B7
B8
B9
B10
B11
B12
B13
B14
1
2
3
YC6
Code DIMM
BVSEL1
+24VDR
GND
MHVDR
HVCLK
RHVDR
RISEL
TICTL
BVSEL2
THVDR
NC
NC
NC
NC
B5
B6
B7
B8
B9
B10
B11
B12
B13
B14
GND
MPPLSW
+5VD
YC14
YC12
14
13
12
11
10
9
8
7
6
5
4
3
2
1
DRUMP0
GND
CL
EEDATA
EESCLK
GND
DRUNITN
+5VD
MCCM_FWD
MCCM_REV
B3
B4
B15
B14
B13
B1
B12
B11
B10
B1
YC5
1
2
3
4
5
6
7
8
9
10
11
12
13
14
15
16
17
18
19
20
21
22
23
24
25
26
27
28
29
30
31
32
33
34
35
36
37
38
39
40
RIGHT
BOTTOM
LEFT
TOP
AGND
REDEVEN
AGND
REDODD
AGND
GREENEVEN
AGND
GREENODD
AGND
BLUEEVEN
AGND
BLUEODD
11V
11V
1
2
3
2
1
10
9
8
7
6
5
4
3
2
1
B3
B4
B1
B2
1
2
3
4
5
YC4
1
2
3
4
5
6
7
8
9
10
11
1
2
3
4
5
6
7
8
9
10
11
12
13
14
15
16
17
18
19
20
21
22
23
24
25
26
27
28
29
30
31
32
33
34
35
36
37
38
39
40
4
3
2
1
1
2
3
4
5
6
7
8
9
10
11
12
13
14
EEPROM
10
9
8
7
6
5
4
3
2
1
2
1
B1
B2
FRCSW
1
2
3
4
5
6
7
8
9
10
11
12
13
14
1
2
MPFSW TCS
1
2
TNF
SOL
TCDSW
GND
+24VDR
TNFSOL
2
1
MP
PSW
2
1
1
2
2
1
1
2
2
1
YC8
2
1
1
2
A7
A8
A9
A10
A11
A12
A13
A14
1
2
OPWB-F
CCDPWB
GND
CL
3 2 1
A7
A8
A9
A10
A11
A12
A13
A14
11
10
9
8
7
6
5
4
3
2
1
WTDSW
3
2
1
F.G
1
2
3
4
5
6
7
8
9
10
11
OFS
MPFCL
+24VDR
MPPFCL
+24VDR
GND
MPPSW
+5VD
GND
MPPWSW2
MPPWSW1
MPPWSW0
1
2
15
DEVP0
+5VD
TNS
GND
DVUNITN
FUSE_CUT
EEDATA
EESCLK
A11
A10
A9
A8
A7
A6
A5
A4
A3
A2
A1
A11
A10
A9
A8
A7
A6
A5
A4
A3
A2
A1
3
2
1
8
7
6
5
4
3
2
1
A4
A5
A6
1
2
3
SGND
S_LED1
S_LED0
LED7
LED6
LED5
SCAN5
SCAN4
A4
A5
A6
1
2
3
4
5
1
2
+5VD
TCS
GND
5
4
3
2
1
2
1
1
2
2
1
OPWB-U
CFM7
5V
10
9
8
7
6
5
4
3
2
1
3
2
1
A1
A2
A3
B4
B5
B6
B7
B8
B1
B2
B3
B4
B5
+5VD
WTDSW
GND
OFS
GND
FRCSW
GND
1
2
2
1
CFM2 CFM1
5
4
3
2
1
1
2
3
OPTION
COIN VENDER
(ONLY JAPAN)
B6 B9
B7 B10
CFM1
GND
GND
CFM2
OPWB-L
12
11
10
9
8
7
6
5
4
3
2
1
A1
A2
A3
B2
B3
B8
B9
B8 B11
B9 B12
A15
A14
A13
A12
A15
A14
A13
A12
SCAN5
LED5
LED6
S_LED1
SGND
1
2
3
3
2
1
1
2
3
4
5
6
7
8
9
10
11
12
1
2
3
4
5
6
7
8
10
9
8
7
6
5
4
3
2
1
1
2
3
1
2
3
1
2
3
4
5
6
7
8
9
10
11
12
CFM7
GND
MPFSW
+5VD
FEED_COUNT
EJECT_COUNT
COPYING_SIG
TxD
GND
RxD
GND
+24VR
GND
GND
COIN_EN
1
2
3
4
5
3
2
1
1
2
3
4
5
6
7
8
9
10
11
12
2GN/2GP/2GR
General wiring diagram
SHPSW
ODSW
OSDS
EL
3.3V
3.3V
5V
12V
SGND
SGND
SGND
SGND
PGND
PGND
PGND
24V
24V
24V
A1
A30 A30
B1 B1
B30 B30
A1
CFM4
B30 B30
TO OPERATION
YC4
PSPWB
YC5
HEATER
CONTROLLER
TB1
TB2
TB3
TB4
NO
COM
TB1
TB2
INLET
CFM8
YC12
LIVE
GROUND
COM
1
2
MSW
YC2
SSW1
KEY CARD1 OR
KEY COUNTER
(OPTION)
TC
SSW2
NO
COM
FUSER UNIT
YC1
YC15
YC18
YC13
8
7
6
5
4
3
2
1
LOWER FEED UNIT
2
1
4
3
6
5
8
7
8
7
6
5
4
3
2
1
2
1
4
3
6
5
8
7
PSW-L
1
2
3
1
2
3
1
2
3
LIC
SW-L
PSW-U
1
2
3
LIC
SW-U
FEED UNIT
UPPER FEED UNIT
DRUM UNIT
2-4-9