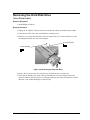
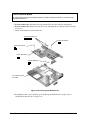
1
® HP Omnibook XT6050 HP Omnibook XT/VT6200 Technology Codes EF, EG Service Manual Notice In a continuing effort to improve the quality of our products, technical and environmental information in this document is subject to change without notice. This manual and any examples contained herein are provided “as is” and are subject to change without notice. Hewlett-Packard Company makes no warranty of any kind with regard to this manual, including, but not limited to, the implied warranties of merchantability and fitness for a particular purpose. Hewlett-Packard Co. shall not be liable for any errors or for incidental or consequential damages in connection with the furnishing, performance, or use of this manual or the examples herein. Consumer transactions in Australia and the United Kingdom: The above disclaimers and limitations shall not apply to Consumer transactions in Australia and the United Kingdom and shall not affect the statutory rights of Consumers. © Copyright Hewlett-Packard Company 1998–2002. All rights reserved. Reproduction, adaptation, or translation of this manual is prohibited without prior written permission of Hewlett-Packard Company, except as allowed under the copyright laws. The programs that control this product are copyrighted and all rights are reserved. Reproduction, adaptation, or translation of those programs without prior written permission of Hewlett-Packard Co. is also prohibited. Portions of the programs that control this product may also be copyrighted by Microsoft Corporation, SystemSoft Corp., Phoenix Technologies, Ltd., ATI Technologies Inc., Intel Corporation, and Adobe Systems Incorporated. See the individual programs for additional copyright notices. This product incorporates copyright protection technology that is protected by method claims of certain U.S. patents and other intellectual property rights owned by Macrovision Corporation and other rights owners. Use of this copyright protection technology must be authorized by Macrovision Corporation and is intended for home and other limited viewing uses only unless otherwise authorized by Macrovision Corporation. Reverse engineering or disassembly is prohibited. Microsoft®, MS-DOS®, and Windows® are U.S. registered trademarks of Microsoft Corporation. Pentium® and the Intel Inside logo are U.S. registered trademarks and Celeron™ and SpeedStep™ are U.S. trademarks of Intel Corporation. TrackPoint™ is a U.S. trademark of International Business Machines. Adobe® and Acrobat® are trademarks of Adobe Systems Incorporated. All certifications may not be completed at product introduction. Check with your HP reseller for certification status. This equipment is subject to FCC rules. It will comply with the appropriate FCC rules before final delivery to the buyer. Hewlett-Packard Company Mobile Computing Division 19310 Pruneridge Ave. Cupertino, CA 95014, U.S.A. Edition History Edition 1 (EF, EG) ..........................April 2002 ii HP Omnibook XT6050, XT/VT6200 Contents 1. Product Information ..................................................................................................1-1 Features......................................................................................................................................... 1-3 Operation ...................................................................................................................................... 1-5 Turning the Computer On and Off ........................................................................................ 1-5 Checking the Status of the Notebook .................................................................................... 1-6 Using Fn Hot Keys................................................................................................................. 1-7 Resetting the Computer.......................................................................................................... 1-8 Specifications................................................................................................................................ 1-9 Internal Design............................................................................................................................ 1-14 2. Removal and Replacement ........................................................................................2-1 Disassembly Flowchart................................................................................................................. 2-3 Removing the Battery (User-Replaceable) ................................................................................... 2-4 Removing a Plug-In Module (User-Replaceable)......................................................................... 2-5 Removing an SDRAM Module (User-Replaceable) .................................................................... 2-6 Removing the Hard Disk Drive (User-Replaceable) .................................................................... 2-7 Removing Mini-PCI Card #1 (User-Replaceable)...................................................................... 2-10 Removing the Power Button Panel (User-Replaceable)............................................................. 2-11 Replacing Small Parts (User-Replaceable)................................................................................. 2-12 Removing the Keyboard (HP Authorized Service Providers Only) ........................................... 2-13 Removing the Heatsink (with Fan) (HP Authorized Service Providers Only) ........................... 2-15 Removing the CPU Module (HP Authorized Service Providers Only)...................................... 2-17 Removing the Display Assembly (HP Authorized Service Providers Only).............................. 2-19 Removing the Top Case (HP Authorized Service Providers Only)............................................ 2-21 Removing the Motherboard or Bottom Case (HP Authorized Service Providers Only) ............ 2-23 Replacing the Motherboard ................................................................................................. 2-26 Replacing the Bottom Case.................................................................................................. 2-28 Repairing the BIOS IC (HP Authorized Service Providers Only).............................................. 2-29 Removing Other Components (HP Authorized Service Providers Only)................................... 2-31 3. Troubleshooting and Diagnostics..............................................................................3-1 Troubleshooting............................................................................................................................ 3-2 Checking for Customer Abuse............................................................................................... 3-3 Troubleshooting the Problem................................................................................................. 3-3 Verifying the Repair .............................................................................................................. 3-4 Suggestions for Troubleshooting ........................................................................................... 3-5 Diagnostic Tools......................................................................................................................... 3-19 e-Diagtools Diagnostic Program.......................................................................................... 3-19 Power-On Self-Test ............................................................................................................. 3-23 Sycard PCCtest 450/460 PC Card (Optional)...................................................................... 3-27 Windows Management Instrumentation (WMI) .................................................................. 3-28 BIOS Setup Utility............................................................................................................... 3-29 4. Replaceable Parts .......................................................................................................4-1 5. Reference Information ...............................................................................................5-1 Password Removal Policy ............................................................................................................ 5-1 Hewlett-Packard Display Quality Statement ................................................................................ 5-2 Service Notes................................................................................................................................ 5-4 HP Omnibook XT6050, XT/VT6200 iii Figures Figure 1-1. Omnibook — Front View ..................................................................................................1-3 Figure 1-2. Omnibook — Back View ..................................................................................................1-4 Figure 1-3. Omnibook — Bottom View...............................................................................................1-4 Figure 1-4. Resetting the Computer .....................................................................................................1-8 Figure 1-5. Replaceable Module Diagram .........................................................................................1-14 Figure 2-1. Disassembly Flow..............................................................................................................2-3 Figure 2-2. Removing the Battery ........................................................................................................2-4 Figure 2-3. Releasing a Module ...........................................................................................................2-5 Figure 2-4. Removing a Module ..........................................................................................................2-5 Figure 2-5. Removing an SDRAM Module .........................................................................................2-6 Figure 2-6. Removing the Hard Disk Drive .........................................................................................2-7 Figure 2-7. Removing the Hard Disk Tray...........................................................................................2-8 Figure 2-8. Removing the Mini-PCI Card..........................................................................................2-10 Figure 2-9. Removing the Power Button Panel..................................................................................2-11 Figure 2-10. Removing the Keyboard ................................................................................................2-13 Figure 2-11. Unplugging the Keyboard Cables..................................................................................2-14 Figure 2-12. Removing the Heatsink..................................................................................................2-15 Figure 2-13. Removing the CPU Module...........................................................................................2-17 Figure 2-14. Removing the Display ...................................................................................................2-20 Figure 2-15. Removing the Top Case.................................................................................................2-22 Figure 2-16. Removing the Motherboard ...........................................................................................2-24 Figure 2-17. Installing the Docking Doors.........................................................................................2-25 Figure 2-18. Installing the Lower PCMCIA Door .............................................................................2-25 Figure 2-19. Replacing Motherboard Components ............................................................................2-26 Figure 2-20. Example of Serial Number Label ..................................................................................2-28 Figure 2-21. Boot-Block Jumper........................................................................................................2-30 Figure 3-1. Basic Troubleshooting Steps .............................................................................................3-2 Figure 3-2. Diagnostic Screens — Basic and Advanced....................................................................3-19 Figure 3-3. Serial and Parallel Loopback Connectors........................................................................3-21 Figure 4-1. Exploded View ..................................................................................................................4-2 iv HP Omnibook XT6050, XT/VT6200 Tables Table 1-1. Omnibook XT6050 and XT/VT6200 Notebooks .............................................................. 1-1 Table 1-2. Product Comparisons ......................................................................................................... 1-2 Table 1-3. Activating Power Modes.................................................................................................... 1-5 Table 1-4. Main Status Lights (front of notebook).............................................................................. 1-6 Table 1-5. Keyboard Status Lights ...................................................................................................... 1-6 Table 1-6. Fn Hot Keys ....................................................................................................................... 1-7 Table 1-7. Omnibook XT6050 and XT/VT6200 Specifications ......................................................... 1-9 Table 1-8. Omnibook XT6050 and XT/VT6200 Accessories........................................................... 1-12 Table 1-9. Functional Structure Description ..................................................................................... 1-15 Table 2-1. Removal Cross-Reference.................................................................................................. 2-1 Table 2-2. Required Equipment........................................................................................................... 2-2 Table 2-3. Recommended Screw Torques........................................................................................... 2-2 Table 2-4. Replacing Small Parts (User-Replaceable) ...................................................................... 2-12 Table 2-5. Removing Omnibook Components.................................................................................. 2-31 Table 3-1. Scope of Diagnostic Tools ................................................................................................. 3-5 Table 3-2. Troubleshooting Suggestions ............................................................................................. 3-6 Table 3-3. POST Terminal-Error Beep Codes .................................................................................. 3-23 Table 3-4. POST Messages ............................................................................................................... 3-25 Table 3-5. Sycard PCCtest Commands ............................................................................................. 3-27 Table 3-6. BIOS Setup Menus and Parameters ................................................................................. 3-29 Table 4-1. Omnibook Replaceable Parts ............................................................................................. 4-3 Table 4-2. Accessory Replaceable Parts.............................................................................................. 4-6 Table 4-3. Part Number Reference ...................................................................................................... 4-7 Table 5-1. Omnibook XT6050 and XT/VT6200 LCD Guidelines ..................................................... 5-3 HP Omnibook XT6050, XT/VT6200 v Introduction This manual provides reference information for servicing the HP Omnibook XT6050 (technology code EF) and XT/VT6200 (technology code EG) series notebook computers. It is for use by HP-authorized service personnel while installing, servicing, and repairing these products. The manual is designed as a self-paced guide that will train you to install, configure, and repair these notebooks. The manual is self-contained, so you can follow it even without having equipment available. The following table lists other sources of information about the computers and related products. Source HP Notebook Web Site HP Business Support web Site HP Partnership Web Address or Number http://www.hp.com/notebooks (http://www.europe.hp.com/notebook, European mirror) www.hp.com/go/bizsupport Comments http://partner.americas.hp.com Restricted to Authorized Resellers only. Restricted to DPSP Partners only. HP Asia Pacific Channel Support Centre for DPSP Partners HP/MCD web site http://www.hp.com.au America Online Keyword: HP CompuServe GO HP HP Support Assist CD-ROM (800) 457-1762 (801) 431-1587 http://www.mcd.hp.com Microsoft Windows manual Microsoft Web vi http://www.microsoft.com HP’s internal web site for division information. Call (800) 827-6364 for membership within the US. Call (800) 524-3388 for membership within the US. US and Canada. Outside US and Canada. Information about Windows operating system. Information and updates for Windows operating systems. HP Omnibook XT6050, XT/VT6200 1 Product Information The HP Omnibook XT6050 and XT/VT6200 series notebooks provide outstanding performance and expandability in a conveniently portable form. Their high-performance components use the latest technologies to enable them to serve as desktop computers or portable multimedia presentation tools. Table 1-1. Omnibook XT6050 and XT/VT6200 Notebooks Omnibook Product * CPU ** Display Hard Drive CD/DVD Drives Standard SDRAM Communication Omnibook XT6050 Series F4506 J/K/H Celeron 1.06 GHz 14-in XGA 10 GB CD 128 MB Modem/LAN F4507 J/K/H Celeron 1.06 GHz 14-in XGA 20 GB DVD 128 MB Modem/LAN F4508 J/K/H Celeron 1.13 GHz 14-in XGA 10 GB DVD 128 MB Modem/LAN F4509 J/K/H Pentium III 933 MHz 14-in XGA 20 GB DVD 256 MB Modem/LAN/802.11b F4510 J/K/H Pentium III 1.06 GHz 14-in XGA 20 GB DVD 256 MB Modem/LAN F4511 J/K/H Pentium III 1.06 GHz 14-in XGA 30 GB DVD 256 MB Modem/LAN F4512 J/K/H Pentium III 1.06 GHz 14-in XGA 30 GB DVD 256 MB Modem/LAN/802.11b F4513 J/K/H Pentium III 1.06 GHz 14-in XGA 20 GB DVD 256 MB Modem/LAN/802.11b F4514 J/K/H Pentium III 1.06 GHz 14-in XGA 20 GB DVD/CDRW 256 MB Modem/LAN F4515 J/K/H Pentium III 1.13 GHz 14-in XGA 30 GB DVD/CDRW 256 MB Modem/LAN F4516 J/K/H Pentium III 1.06 GHz 14-in XGA 20 GB DVD/CDRW 256 MB Modem/LAN/802.11b F4517 J/K/H Celeron 1.06 GHz 14-in XGA 10 GB DVD 128 MB Modem/LAN F4518 J/K/H Pentium III 933 MHz 14-in XGA 10 GB CD 128 MB Modem/LAN F4519 J/K/H Pentium III 933 MHz 14-in XGA 20 GB DVD 256 MB Modem/LAN Omnibook XT6200 Series F4525 H Pentium 4-M 1.4 GHz 14-in XGA 20 GB CD 128 MB Modem/LAN F4526 J Pentium 4-M 1.4 GHz 14-in XGA 20 GB DVD 256 MB Modem/LAN F4527 J Pentium 4-M 1.4 GHz 14-in XGA 20 GB DVD/CDRW 256 MB Modem/LAN F4528 J Pentium 4-M 1.4 GHz 14-in XGA 30 GB DVD 256 MB Modem/LAN F4529 J Pentium 4-M 1.4 GHz 14-in XGA 20 GB DVD 256 MB Modem/LAN/802.11b F4530 J Pentium 4-M 1.4 GHz 15-in SXGA+ 20 GB DVD 256 MB Modem/LAN F4531 J Pentium 4-M 1.4 GHz 15-in SXGA+ 20 GB DVD/CDRW 256 MB Modem/LAN F4532 J Pentium 4-M 1.5 GHz 14-in XGA 30 GB DVD/CDRW 256 MB Modem/LAN F4533 J Pentium 4-M 1.4 GHz 15-in SXGA+ 30 GB DVD/CDRW 256 MB Modem/LAN/802.11b F4534 J Pentium 4-M 1.5 GHz 15-in SXGA+ 30 GB DVD/CDRW 256 MB Modem/LAN/802.11b F4535 J Pentium 4-M 1.6 GHz 15-in SXGA+ 30 GB DVD/CDRW 512 MB Modem/LAN/802.11b HP Omnibook XT6050, XT/VT6200 Product Information 1-1 Omnibook Product * CPU ** Display Hard Drive CD/DVD Drives Standard SDRAM Communication Omnibook VT6200 Series F5037 J Pentium 4-M 1.4 GHz 14-in XGA 20 GB DVD 128 MB Modem/LAN F5038 J Pentium 4-M 1.4 GHz 14-in XGA 30 GB DVD 256 MB Modem/LAN F5039 J Pentium 4-M 1.5 GHz 14-in XGA 30 GB DVD 256 MB Modem/LAN F5040 J Pentium 4-M 1.5 GHz 14-in XGA 30 GB DVD 256 MB Modem/LAN F5041 J Pentium 4-M 1.5 GHz 14-in XGA 20 GB DVD 256 MB Modem/LAN/802.11b F5042 J Pentium 4-M 1.5 GHz 14-in XGA 30 GB DVD 256 MB Modem/LAN/802.11b F5043 J Pentium 4-M 1.5 GHz 14-in XGA 40 GB DVD/CDRW 256 MB Modem/LAN F5044 J Pentium 4-M 1.5 GHz 15-in SXGA+ 40 GB DVD/CDRW 256 MB Modem/LAN/802.11b F5045 J Pentium 4-M 1.6 GHz 15-in SXGA+ 30 GB DVD 256 MB Modem/LAN F5046 J Pentium 4-M 1.6 GHz 15-in SXGA+ 30 GB DVD/CDRW 512 MB Modem/LAN/802.11b F5047 J Pentium 4-M 1.6 GHz 15-in SXGA+ 30 GB DVD/CDRW 256 MB Modem/LAN F5048 J Pentium 4-M 1.6 GHz 15-in SXGA+ 40 GB DVD/CDRW 512 MB Modem/LAN/802.11b F5049 J Pentium 4-M 1.7 GHz 14-in SXGA+ 40 GB DVD/CDRW 512 MB Modem/LAN/802.11b This table lists only base product configurations—custom configurations are not included. * The J/K/H suffix indicates the notebook’s OS: J = Windows XP Professional, K = Windows 2000, H = Windows XP Home. ** Intel Mobile Pentium III or III-M with SpeedStep Technology or Intel Mobile Celeron processor. Table 1-2. Product Comparisons Processor* Omnibook XT/VT6200 Pentium 4-M (1.4 to 1.8 GHz). Memory At least 128 MB RAM preinstalled. Can support up to 2 GB RAM. Display 15-in TFT UXGA or SXGA+, or 14-in TFT SXGA+ or XGA. AGP 4X graphics interface. 16 or 32 MB DDR video RAM with 32- or 64-bit graphics interface. 3D and OpenGL graphics support. Up to 16M colors. Video Windows 2000 or XP Operating preinstalled. System Power States On, Standby, Hibernate, Off. Omnibook XT6050 Celeron (1.06 to 1.13 GHz) or Pentium III-M (933 to 1133 MHz). At least 128 MB SDRAM in system slot. Expandable to 1024 MB. AGP 4X graphics interface. Up to 48 MB dynamically allocated video RAM (shared with system RAM) with 32- or 64-bit graphics interface. 3D and OpenGL graphics support. Up to 16M colors. Windows 2000 or XP preinstalled. Omnibook 6000/6100 Celeron (550 to 750 MHz) or Pentium III-M (600 to 1133 MHz). 64, 128, or 256 MB SDRAM in system slot. Expandable to 512 (OB 6000) or 1024 (OB 6100) MB. 15-in TFT SXGA+ or 15- or 14-in TFT XGA. AGP 2X or 4X graphics interface. 4, 8, or 16 MB video RAM with 32- or 64-bit graphics interface. 3D and OpenGL graphics support. Up to 16M colors (UXGA). Zoomed Video enabled. Windows 98, 2000, or XP preinstalled. On, Standby, Hibernate, Off. On, Standby, Hibernate, Off. 14-in TFT XGA. * Intel Mobile Pentium, Mobile Pentium-M, Mobile Pentium 4-M, or Mobile Celeron Processor. Dual-speed processors use Intel SpeedStep Technology. All models feature HP Toptools, and are ACPI compliant. 1-2 Product Information HP Omnibook XT6050, XT/VT6200 Features The following three illustrations show the computer’s main external features. For an exploded view of the computer, see page 4-2. Figure 1-1. Omnibook — Front View 1. One-Touch buttons. 9. Module release latch. 2. Sleep button. Suspends and resumes operation. 10. Volume control. 3. Keyboard status lights (left to right: Caps Lock, Num Lock, Keypad Lock, Scroll Lock). 11. Audio-off button and audio-off light. 4. Power slide button. Turns the computer on and off. 12. Audio jacks (left to right): audio out, external microphone, audio in (certain models). 5. Built-in microphone. 13. Infrared port. 6. Pointing stick (certain models). 14. S-video port (TV-out) (certain models). 7. Touch pad, click and scroll buttons, plus touch pad on-off button and indicator (certain models). 15. System-off switch. 8. Main status lights (left to right): power mode, hard disk activity, charging status for main battery, and charging status for secondary battery (certain models). 17. Notebook latch. HP Omnibook XT6050, XT/VT6200 16. Kensington lock slot (security connector). Product Information 1-3 Figure 1-2. Omnibook — Back View 18. PS/2 keyboard mouse port (supports Y adapter). 24. AC adapter jack. 19. Universal serial bus (USB) ports. 25. Modem port (certain models). 20. Serial port (COM1). 26. LAN port and indicator LEDs. 21. Parallel port (LPT1). 27. PC card and CardBus slot. 22. External VGA monitor port. 28. Wireless on-off button and indicator light (certain models). 23. Docking port. Figure 1-3. Omnibook — Bottom View 29. Plug-in module bay. Can contain a CD-ROM or DVD drive, floppy disk drive, secondary battery (certain models), or other plug-in module. 30. Main battery. 32. Hard disk drive cover. 33. RAM cover. 34. Mini-PCI cover (no user parts inside). 31. Main battery latch. 1-4 Product Information HP Omnibook XT6050, XT/VT6200 Operation This section gives an overview of the notebook’s operation. Turning the Computer On and Off You will normally start and stop the notebook using its blue sleep button. However, at certain times you may want to use other methods, depending on power considerations, types of active connections, and start-up time. Note This manual describes the notebook in its original factory configuration, with all settings at their default values. Table 1-3. Activating Power Modes Power mode To enter this mode On Power mode status light is on. Press the blue sleep button. Standby mode Saves significant power. Turns off the display and other components. Maintains current session in RAM. Restarts quickly. Restores network connections. Power mode status light blinks. Press the blue sleep button –or– Click Start, Shutdown, Standby (Windows 2000). –or– Click Start, Turn Off Computer, Stand By (Windows XP). –or– Allow timeout. Press the blue sleep button to quickly resume your session. Hibernate mode Saves maximum power. Saves current session to disk, then shuts down. Restores network connections. Power mode status light is off. Press Fn+F12. –or– Click Start, Shut Down, Hibernate (Windows 2000). –or– Click Start, Turn Off Computer, then press and hold Shift and click Hibernate (Windows XP). –or– Allow timeout. Press the blue sleep button to resume your previous session. Shut down (off) Saves maximum power. Turns off without saving current session. At startup, resets everything, starts a new session, and restores network connections. Power mode status light is off. Click Start, Shut Down, Shut down (Windows 2000). –or– Click Start, Turn Off Computer, Turn Off (Windows XP). –or– Slide the power button and hold for five seconds (only if the Start menu procedure doesn’t work). Press the blue sleep button to restart with a new session. HP Omnibook XT6050, XT/VT6200 To turn on again Product Information 1-5 Checking the Status of the Notebook The main status lights on the front of the notebook report power status, battery status, and hard disk activity. Table 1-4. Main Status Lights (front of notebook) Meaning Power status On: notebook is on (even if the display is off). Blinking: notebook is in Standby mode. Off: notebook is off or in Hibernate mode. Red light: notebook failed when resuming, and must be reset. Hard disk drive activity On: notebook is accessing the hard disk drive. Main battery status Green: The AC adapter is connected and the battery is fully charged. Amber: The AC adapter is connected and the battery is charging. Red or blinking: The AC adapter is connected and the battery is missing or has a fault. Off: The AC adapter is not connected. Secondary battery status (XT/VT6200 models only) Green: The AC adapter is connected and the battery is fully charged. Amber: The AC adapter is connected and the battery is charging. Red or blinking: The battery has a fault. Off: The AC adapter is not connected, a secondary battery is not installed, or the battery is not charging. The keyboard status lights, located above the keyboard, indicate the states of the keyboard locks. Table 1-5. Keyboard Status Lights Meaning Caps Lock Caps Lock is active. Num Lock Num Lock is active. (The Keypad Lock must also be on to use the embedded keypad.) Keypad Lock The embedded keypad is active (Fn+F8). Num Lock must also be on for the numeric keys—otherwise, cursor control is active (as marked on an external keyboard). Scroll Lock Scroll Lock is active. In addition, the battery module has five lights on its back (flat) side that indicate its charge level. To see these lights, remove the battery from the notebook and press the pad next to the lights on the battery. The number of lights that turn on indicates the charge. 1-6 Product Information HP Omnibook XT6050, XT/VT6200 Using Fn Hot Keys The combination of the Fn key plus another key creates a hot key—a shortcut key sequence—for various system controls. To use a hot key, press and hold Fn, press the appropriate second key, then release both keys. On Omnibook XT6050 models with Windows 2000, external keyboards support only Fn+F5, Fn+F7, and Fn+F12. To use these, press and hold left Ctrl+left Alt, press the appropriate second key, then release both keys. Windows XP does not support Fn keys on external keyboards. Table 1-6. Fn Hot Keys Hot Key Fn+F1 Fn+F2 Fn+F5 Fn+F7 Fn+F8 Fn+F12 Fn+NumLock Effect Decreases the display brightness. Increases the display brightness. Toggles among the built-in display, an external display, and simultaneous display on both. Mutes the computer’s speakers. Toggles the built-in keypad on and off. Does not affect an external keyboard. If Num Lock is on, then the numeric functions are active; otherwise, cursor control is active. Enters Hibernate mode. Toggles Scroll Lock on and off. HP Omnibook XT6050, XT/VT6200 Product Information 1-7 Resetting the Computer Occasionally, Windows or the computer may stop responding, so that you cannot turn the computer off. If this happens, try the following in the order listed. Press the blue sleep button to restart. • If possible, shut down Windows: click Start, Turn Off Computer, Turn Off (Windows XP) or Start, Shut Down, Shut down (Windows 2000). • Press Ctrl+Alt+Del, then click Shut Down. • Slide and hold the power button for about four seconds, until the display turns off. • Use a straightened paper clip to press the system-off switch on the right side of the notebook. Figure 1-4. Resetting the Computer Note To boot from a CD, insert a bootable CD (such as the Recovery CDs) into the drive, then restart. Press Esc when the HP logo appears, then select the CD-ROM/DVD drive as the temporary boot device. 1-8 Product Information HP Omnibook XT6050, XT/VT6200 Specifications The following tables list the specifications for the notebook and its accessories. These are subject to change: for the latest versions, see the HP Notebook web site (www.hp.com/notebooks). Table 1-7. Omnibook XT6050 and XT/VT6200 Specifications Physical Attributes Size (14-inch display): 315 × 261 × 32 mm (12.4 × 10.3 × 1.3 in). Size (15-inch display): 325 × 264 × 35 mm (12.8 × 10.4 × 1.4 in). Weight: 2.2–2.8 kg (4.9–6.2 lb), depending on configuration. Magnesium display cover on certain models. Processor and Bus Architecture Omnibook XT/VT6200: 1.4- to 1.7-GHz Intel Pentium 4-M processor with Intel SpeedStep technology. 512-KB L2 cache. 1.4-V core low-power processor with 400-MHz processor system bus. Omnibook XT6050: 933- to 1133-MHz Intel Mobile Pentium III-M processor with Intel Speed Step technology or 933- to 1133-MHz Intel Mobile Celeron processor. 512-KB (Pentium models), 256-KB (Celeron models 1000 MHz and above), or 128KB (Celeron models below 1000 MHz) L2 cache. 1.4-V core low-power processor with 133-MHz processor system bus. Video Omnibook XT/VT6200: 14-inch XGA (1024 × 768) or SXGA+ (1400 × 1050), or 15-inch SXGA+ (1400 × 1050) or UXGA (1600 × 1200) active-matrix (TFT) LCD display. Hardware 3D and DVD acceleration. Dual display capability (depends on operating system support). External monitors up to 1600 × 1200 resolution, 16M colors, and at least 75-Hz refresh rate (only 60 Hz at 1400 × 1050). Refresh rate and clarity may vary depending on monitor, resolution, and color depth. ATI Mobility Radeon graphics accelerator with 16- or 32-MB DDR graphics memory, 4x AGP graphics capability. Omnibook XT6050: 14-inch XGA (1024 × 768) active-matrix (TFT) LCD display. Hardware 3D and DVD acceleration. Dual display capability (depends on operating system support). External monitors up to 1600 × 1200 resolution with 16M colors at 60 Hz refresh rate or 64K colors at 85 Hz refresh rate. Up to 48-MB dynamically allocated video RAM shared with system RAM. Power Rechargeable lithium-ion battery with LED charge-level gauge: 11.1 Vdc (certain Omnibook XT6050 models) or 14.8 Vdc. Battery life (one battery): 3 to 4 hours typical (varies with model, usage, and power settings). Fast battery recharge: Omnibook XT/VT6200: 80% in 2 hours, 100% in 3 hours typical. Omnibook XT6050: 80% in 1.5 hours, 100% in 2 hours typical. Low-battery warning. Suspend/resume capability. Universal AC adapter: Omnibook XT/VT6200: 100–240 Vac (50/60 Hz) input, 19 Vdc output minimum, 75 W/3.95 A minimum. Omnibook XT6050: 100–240 Vac (50/60 Hz) input, 19 Vdc output minimum, 60 W/3.16 A minimum. Optional secondary battery available for module bay for Omnibook XT/VT6200. HP Omnibook XT6050, XT/VT6200 Product Information 1-9 Mass Storage Removable hard drive with Ultra-DMA 100 interface: Omnibook XT/VT6200: 20 to 40 GB Omnibook XT6050: 10 to 30 GB 1.44-MB floppy drive module (certain models). 24x CD-ROM, 6x or 8x DVD, or other drive module (or higher). Optional drive modules available. RAM Omnibook XT/VT6200 Two slots for PC2100 DDR266 RAM modules: Up to 1024 MB RAM using 512-MB modules, can support 2 GB RAM maximum. Omnibook XT6050 Two slots for PC133 RAM modules: Up to 1024 MB RAM. All models: At least 128 MB RAM preinstalled. Audio System Stereo sound via two built-in speakers (500 Hz to 10 kHz range). 16-bit Sound Blaster Pro−compatible stereo sound (certain models). 3D-enhanced audio. Built-in microphone. Separate audio-off button with indicator light. Headphone-out and microphone-in jacks; audio line-in jacks for certain models. Keyboard and Pointing Device 87/88-key touch-type QWERTY keyboard with 101/102 key emulation. Embedded numeric keypad. Left and right click buttons, center scroll button. 12 function (Fn) keys. 4 user-programmable One-Touch buttons. Touch pad with on-off button with indicator light (certain models). Pointing stick (certain Omnibook VT6200 models). LAN Ethernet 10Base-T (10 Mbps) and 100Base-TX (100 Mbps) support. Supports wake-on-LAN (Windows 2000 and XP), fast IP, DMI, dRMON. MBA (Managed Boot Agent) support for PXE/BINL, NCP/IPX, DHCP. Modem (certain models) Ambit/Lucent hardware-based controllerless modem or software-based modem (Ambit/ESS), mini-PCI interface. Data speed: 56 Kbps (V.90, V.92) maximum. Fax speed: 14.4 Kbps, Class 1 and 2. Modulation: V.21, V.22, V.22bis, V.23, V.32, V.32bis, V.34, V.90, V.92, X2, Bell 103, Bell 212A. Wireless LAN (certain models) Radio: IEEE 802.11b, WECA Wi-Fi compliant, direct-sequence spread-spectrum. Operating frequency: 2.5-GHz ISM band, exact frequencies and channels depend on country. Raw data rate: 1, 2, 5.5, or 11 Mbps. Transmitter output: 15 dBm typical (approx. 30 mW), 16 dBm max (approx. 40 mW). Receiver sensitivity: –84 dBm typical. Range: up to 100 m (300 ft) or more, depending on environment and conditions. On-off button and indicator. Mini-PCI interface. Input/Output Universal serial bus (USB 1.1), two ports. 9-pin, 115,200-bps serial port. 25-pin bi-directional ECP/EPP parallel port. 15-pin VGA video-out with DDC support. S-video (TV out) (Omnibook XT/VT6200). PS/2 keyboard/mouse. 4-Mbps IrDA-compliant infrared port. Expandability PC card slots: one Type I, II, or III 16-/32-bit. CardBus enabled. Plug-in module bay for accessory modules. Optional port replicator, and mini dock. 1-10 Product Information HP Omnibook XT6050, XT/VT6200 Security Features User and administrator passwords. System, hard drive, and docking passwords. PC identification displayed at boot. DMI-accessible electronic serial number. Kensington MicroSaver lock slot. Environmental Limits Operating temperature: 5 to 35 °C (41 to 95 °F). Operating humidity: 20 to 90 percent RH (5 to 35 °C [40 to 95 °F]). Operating altitude: up to 3000 m (10,000 ft) at 25 °C (77 °F). Storage temperature: –20 to 50 °C (–4 to 122 °F). Major ICs Omnibook XT/VT6200: CPU: Intel Pentium 4-M processor. Core logic: ALI 1671/1535+ chipset. Display controller: ATI Mobility Radeon M6-P. Super I/O: integrated in core logic. Omnibook XT6050: CPU: Intel Mobile Pentium III-M or Celeron processor. Core logic: Intel 830MG/ICH3M chipset. Display controller: integrated in Intel 830MG. Super I/O: National PC87393F. All models: 802.11b wireless LAN: Actiontec with Intersil Prism 2.5 chipset. Keyboard/embedded controller: National PC87570. Audio controller: Realtek AC-97 ALC201 soft audio. Modem: Ambit/Lucent controllerless or Ambit softmodem. LAN: Realtek RTL8100B. CardBus controller: TI PCI1410. HP Omnibook XT6050, XT/VT6200 Product Information 1-11 Table 1-8. Omnibook XT/VT6200 and XT6050 Accessories Accessory Memory F2298A F3495A F3496A F4694A F4695A F4696A Hard Drives F2295A F4690A Plug-in Modules F2009B F2013A F2014A F2015B F2017B F2018B F2018C F2022B F2026B F2107B F4690A Power Options F1455A F1781A F2011A F2019A F2019B F4600A 8120-6312 8120-6313 8120-6314 8120-6316 8121-0702 8120-6317 8120-8367 8120-8373 8120-8441 8120-8452 8120-8699 Communications F2135B F2135C F2136B F2196A F4697A 1-12 Description Omnibook XT/VT6200 • • • 512-MB SDRAM module (PC133) 128-MB SDRAM module (PC133) 256-MB SDRAM module (PC133) 128-MB SDRAM module (DDR266 PC2100) 256-MB SDRAM module (DDR266 PC2100) 512-MB SDRAM module (DDR266 PC2100) • • • 30-GB hard disk drive (replacement) 30-GB hard disk drive replacement/module kit • 250-MB Zip drive module Floppy disk drive module 6-cell secondary lithium-ion battery module DVD module CD-ROM module 20-GB second hard disk drive module 30-GB second hard disk drive module LS-240 SuperDisk drive module CD-RW module DVD/CDRW module 30-GB hard disk drive replacement/module kit Auto/airline power adapter Ultra SlimLine AC Adapter Lithium-ion battery charger (external) Lithium-ion primary battery (14.8 V) Lithium-ion primary battery (14.8 V) 75-watt AC adapter (19 Vdc output, 3.95 A) Replacement power cord (Australia) Replacement power cord (U.S., Canada, Taiwan) Replacement power cord (Europe) Replacement power cord (Japan) Replacement power cord (India) Replacement power cord (South Africa) Replacement power cord (Argentina) Replacement power cord (People’s Rep. of China) Replacement power cord (S. Korea) Replacement power cord (Chile) Replacement power cord (Hong Kong, Singapore) 802.11b wireless LAN access point 802.11b wireless LAN access point 802.11b wireless LAN PC card (128-bit) Bluetooth PC card 802.11b range extender antenna Product Information Omnibook XT6050 • • • • • • • • • • • • • • • • • • • • • • • • • • • • • • • • • • • • • • • • • HP Omnibook XT6050, XT/VT6200 Accessory Docking F1451B F1451C F1452B F1452C F1453A F1477B F2010A F2012A F2012B Adapters/cables F1469A F2008B Security F1645A F1747A Miscellaneous F2100A Description Omnibook XT/VT6200 Omnibook XT6050 • • • • • • • • • • PS/2 Y adapter External floppy disk drive cable • • • • Kensington notebook lock Defcon 1 notebook alarm • • • • USB optical mouse • • Port replicator Port replicator Mini-dock Mini-dock Monitor stand for port replicator and mini-dock Full docking system and monitor stand Docking module bay adapter for docking system Docking tray Docking tray HP Omnibook XT6050, XT/VT6200 • • • Product Information 1-13 Internal Design The motherboard PCA is the central component of the Omnibook’s design. It plays a role in virtually all system functions. The CPU module and most other subsystems connect to the motherboard. The following figure shows the connections among the Omnibook’s replaceable electronic modules. Table 1-9 on page 1-15 lists the roles that these modules play in the Omnibook’s functional subsystems. Speaker assembly Rear antenna PCA Keyboard Top case Display interface PCA Display assembly Front antenna PCA SDRAM modules Motherboard PCA Mini-PCI card #1 Heatsink (fan) Mini-PCI panel CPU module PCMCIA socket Mini-PCI card #2 Hard disk drive PC cards Volume PCA Main battery Plug-in module or battery Key: Direct plug-in connection Cable connection Figure 1-5. Replaceable Module Diagram 1-14 Product Information HP Omnibook XT6050, XT/VT6200 Table 1-9. Functional Structure Description Bootup CPU module Motherboard Hard disk drive Floppy disk module Main processor (MMO). Primary system circuitry, system BIOS. First source of disk-based startup code. Second source of disk-based startup code. Processor CPU module Motherboard Main processor, numeric data processor, L1 and L2 cache. Primary system circuitry. Memory Motherboard SDRAM module Video RAM, no onboard RAM. Changeable RAM (2 slots). Power Battery Motherboard Display interface PCA. AC adapter Power storage. AC adapter socket, power switch, lid switch, system-off switch, power supply, power control circuitry. Blue sleep button. AC-to-DC converter. Display Motherboard Display assembly Graphics controller, video RAM. Display output, backlight, power converter for backlight. Hard disk Motherboard Hard disk drive Hard disk controller. Hard disk mechanism. Floppy drive Motherboard Floppy disk module I/O controller, floppy connector. Floppy disk mechanism. Keyboard Motherboard Keyboard Keyboard BIOS, keyboard controller. Key switches. Pointer Motherboard Keyboard Top case Keyboard circuitry, keyboard controller, keyboard BIOS. Pointing stick sensor (certain models). Touch pad sensor, click buttons, controller (PS/2 output). Audio Motherboard Display interface PCA Volume PCA Speaker assembly Audio controller, audio decoder, speaker amplifier. Microphone. External audio jacks, headphone amplifier, audio-off switch. Speakers. Status Motherboard Display interface PCA Top case LED circuitry, keyboard controller. Keyboard LEDs. Main status LEDs. Serial Motherboard I/O controller, serial connector. Parallel Motherboard I/O controller, parallel connector. Infrared Motherboard I/O controller, infrared transmitter/receiver. PS/2 port Motherboard PS/2 connector, keyboard controller. USB Motherboard Bus controller (South Bridge), USB connector. Docking port Motherboard Docking logic, docking connector. PCMCIA Motherboard PCMCIA socket PCMCIA controller. PCMCIA connector. Wireless LAN Motherboard Front antenna PCA Rear antenna PCA Mini-PCI card #1 I/O controller. Receive antenna, on-off button, indicator light. Transmit/receive antenna. Radio, radio frequency circuitry. LAN Motherboard Mini-PCI panel LAN circuitry, bus controller. LAN connector. Modem Mini-PCI card #1 Mini-PCI card #2 Mini-PCI panel Modem circuitry (certain models). Modem circuitry (certain models). Modem connector. HP Omnibook XT6050, XT/VT6200 Product Information 1-15 2 Removal and Replacement This chapter tells you how to remove and replace the Omnibook’s components and assemblies. The items marked by • in the following table are user-replaceable. Table 2-1. Removal Cross-Reference • Battery, main (page 2-4). Battery, CMOS (page 2-31). • Bumpers, display (page 2-12) • Cap, pointing stick (page 2-12). • Card, mini-PCI #1 (page 2-10). Card, mini-PCI #2 (page 2-31). Case, bottom (page 2-23). Case, top (page 2-21). Cover, center hinge (page 2-31). • Cover, left corner (page 2-12). • Cover, mini-PCI (page 2-12). • Cover, SDRAM (page 2-12). • Cover, right corner (page 2-12). • Covers, screw (page 2-12). CPU module (page 2-17). Display assembly (page 2-19). Doors, docking (page 2-25). Doors, PCMCIA (page 2-25). • Drive, hard disk (page 2-7). • Feet, rubber (page 2-12). Heatsink (with fan) (page 2-15). Keyboard (page 2-13). Panel, sound/IR (page 2-32). Panel, mini-PCI (page 2-32). • Panel, power button (page 2-11). PCA, display interface (page 2-32). PCA, motherboard (page 2-23). PCA, volume (page 2-33). PCA, front antenna (page 2-32). PCA, rear antenna (page 2-33). • Plug-in module (page 2-5). • SDRAM module (page 2-6). Socket, PCMCIA (page 2-33). Speaker assembly (page 2-33). • Tray, hard disk drive (page 2-7). Caution Always provide proper grounding when performing repairs. Without proper grounding, an electrostatic discharge can damage the Omnibook and its components. Notes Reassembly steps are the reverse of the removal steps. Reassembly notes are included at the end of each section below. Symbols like this throughout this chapter show approximate full-size screw outlines. You can use these to verify the sizes of screws before you install them. Installing a wrong-size screw can damage the unit. (The symbol at the left represents an M2.5×5mm T-head screw.) HP Omnibook XT6050, XT/VT6200 Removal and Replacement 2-1 Table 2-2. Required Equipment • Small Phillips screwdriver, preferably magnetized. • Small flat-blade screwdriver. • IC (PLCC) removal tool (similar to OK Industries EX-5). Table 2-3. Recommended Screw Torques Screw Thread Size M2 M2.5 (2–11 mm long) M2.5 (12–19 mm long) M3 2-2 Removal and Replacement Torque (cm-kgf) 1.3 – 1.8 3.0 – 3.5 2.5 – 3.0 3.0 – 3.5 Torque (in-lbf) 1.1 – 1.5 2.6 – 3.0 2.2 – 2.6 2.6 – 3.0 HP Omnibook XT6050, XT/VT6200 Disassembly Flowchart The following diagram shows the general “path” you will use in disassembling the computer to access any particular component. Battery, AC adapter, secondary battery module Plug-in module, SDRAM module, Mini-PCI card #1, hard disk drive * * Only if removing the top case, motherboard, or bottom case. Power button panel Keyboard If removing only display assembly or hinge covers Heatsink (with fan) Display assembly Top case CPU module CMOS battery Center hinge cover Rear antenna PCA (wireless models only) PCMCIA socket Display interface PCA Volume PCA Mini-PCI panel Sound/IR panel Docking doors PCMCIA doors Speaker assembly Front antenna PCA (wireless only) Motherboard or bottom case Mini-PCI card #2 Figure 2-1. Disassembly Flow HP Omnibook XT6050, XT/VT6200 Removal and Replacement 2-3 Removing the Battery (User-Replaceable) Required Equipment • None. Removal Procedure • Slide the battery’s release latch, then lift the battery out of its compartment. Figure 2-2. Removing the Battery Reassembly Notes • Insert the front (rounded) end of the battery into the battery compartment on the bottom of the computer, and lower the back end in until it clicks into place. 2-4 Removal and Replacement HP Omnibook XT6050, XT/VT6200 Removing a Plug-In Module (User-Replaceable) Required Equipment • None. Removal Procedure 1. Press the button on the module release latch, and slide the latch toward the front of the computer. Figure 2-3. Releasing a Module 2. Grasp the module and pull it out. Figure 2-4. Removing a Module HP Omnibook XT6050, XT/VT6200 Removal and Replacement 2-5 Removing an SDRAM Module (User-Replaceable) The notebook has no SDRAM built into its motherboard, but has two slots for SDRAM modules. One slot contains an SDRAM module installed at the factory. Note Omnibook XT6050 models use only PC133 SDRAM modules, and Omnibook XT/VT6200 models use only DDR266 SDRAM modules. Using the wrong type of module prevents the notebook from booting. Caution Handle the SDRAM module only by its edges and provide proper grounding, or you might damage the module through electrostatic discharge. Required Equipment • Small Phillips screwdriver. Removal Procedure 1. Unplug the AC adapter, if present, and remove the battery and any secondary battery module. 2. On the bottom of the notebook, loosen the screws holding the SDRAM cover (the cover retains the screws), and remove the cover. 3. Press outward to release the latches at the sides of the SDRAM module, so that the free edge of the module pops up. 4. Carefully pull the module out of the connector. Figure 2-5. Removing an SDRAM Module Reassembly Notes • Carefully press the SDRAM module into the connector at an angle of about 30°, until it is fully inserted. Then press down on both sides of the module until the latches snap closed. 2-6 Removal and Replacement HP Omnibook XT6050, XT/VT6200 Removing the Hard Disk Drive (User-Replaceable) Required Equipment • Small Phillips screwdriver. Removal Procedure 1. Unplug the AC adapter, if present, and remove the battery and any secondary battery module. 2. On the bottom of the unit, remove the hard drive retaining screws. 3. Raise the cover on the end of the drive so that its retainer tab is free of the notebook case, then carefully pull the hard drive out of the computer. Screw, M2.5×6mm Screw, M3×6mm Figure 2-6. Removing the Hard Disk Drive 4. Remove the screws from the drive and drive tray, then lift the drive out of the tray. 5. Notice that the hard drive has a pin connector attachment at one end. Carefully remove this connector from the end of the drive by working alternately at each end of the connector so that it slides off evenly without bending the connector pins. HP Omnibook XT6050, XT/VT6200 Removal and Replacement 2-7 Pin connector Screws, M3×3mm (2) Screws, M3×3mm (2) Screws, M2×4mm (2) Figure 2-7. Removing the Hard Disk Tray Reassembly Notes • Carefully put the pin connector back onto the pins on the end of the new hard drive. Work at each end alternately so that the connector slides on evenly without bending the pins. • Slide the cover down into place so the retainer tab engages the notebook case. Important If you are installing a new hard disk drive, load the factory software and operating system on the drive as described in “Recovering the Factory Software,” below. 2-8 Removal and Replacement HP Omnibook XT6050, XT/VT6200 Recovering the Factory Software The following procedure describes how to recover the notebook’s original software and operating system. This process can take up to 15 minutes to complete. (For more information about recovering the factory software installation, see the file readme.txt in the root directory of the Recovery CDs.) Caution Do not interrupt the following process or unplug the AC adapter until the process is complete. 1. Connect the AC adapter to the notebook. This is necessary to provide an uninterrupted power source. 2. Insert Recovery CD disk 1 into the notebook’s CD/DVD drive. If the notebook is turned off, use a pin or straightened paper clip to press the release switch on the drive door to open it. 3. Turn on or restart the notebook. 4. When the HP logo appears, press Esc to display the Boot menu. 5. Use the arrow keys to select the CD/DVD drive as the first boot device, then press Enter. 6. When the Recovery CD dialog box appears, follow the displayed instructions. If prompted, accept the recommended partition size. To create the Utility partition without installing the factory software, click Advanced and select not to install the operating system. If the hard disk is partitioned into several drives, you can install the factory software on drive C without affecting other drives. Click Advanced and select to restore only the C partition. 7. When prompted to reboot the notebook, press Ctrl+Alt+Del and follow any instructions that appear. HP Omnibook XT6050, XT/VT6200 Removal and Replacement 2-9 Removing Mini-PCI Card #1 (User-Replaceable) Certain notebooks include a mini-PCI card under the mini-PCI cover on the bottom of the unit. (In addition, certain models may have a second mini-PCI card located under the motherboard—see the table on page 2-31.) Caution Handle the mini-PCI card only by its edges and provide proper grounding, or you might damage the card through electrostatic discharge. Required Equipment • Small Phillips screwdriver. Removal Procedure 1. Unplug the AC adapter, if present, and remove the battery and any secondary battery module. 2. Loosen the screw in the mini-PCI cover (the cover retains the screw), and remove the cover. Caution Be careful when connecting and disconnecting cables from the mini-PCI card. Damaged cables or connectors can degrade performance. 3. Detach all cables from the card. 4. Release the latches at the sides of the card, so that its free edge pops up, and carefully pull the card out of its connector. Figure 2-8. Removing the Mini-PCI Card Reassembly Notes • Carefully press the mini-PCI card into the connector at about a 30° angle, until it is fully inserted. Then press down on both sides until the latches snap closed. 2-10 Removal and Replacement HP Omnibook XT6050, XT/VT6200 Removing the Power Button Panel (User-Replaceable) Required Equipment • Small flat-blade screwdriver. Removal Procedure 1. Unplug the AC adapter, if present, and remove the battery and any secondary battery module. 2. Carefully insert the screwdriver blade under the power button panel along the edge shown below, and gently pry up the center of the cover. 3. Insert a finger under the center of the panel, and lift the panel out. Figure 2-9. Removing the Power Button Panel Reassembly Notes • Insert the tabs on the left end of the panel into their slots in the top case, and press the panel into place. HP Omnibook XT6050, XT/VT6200 Removal and Replacement 2-11 Replacing Small Parts (User-Replaceable) The user can replace the following small parts. Table 2-4. Replacing Small Parts (User-Replaceable) Part Cap, pointing stick Bumpers, display (on display bezel) Cover, mini-PCI Cover, SDRAM Covers, screw (on display bezel) Covers, left/right corner Feet, rubber (on bottom of unit) 2-12 Replacement Procedure Pull the cap off the pointing stick. Insert a small flat-blade screwdriver under the bumper and pry it loose. To replace, firmly press the adhesive side of the bumper into the recess. On the bottom of the computer, loosen the screw in the mini-PCI cover (the cover retains the screw) and remove the cover. On the bottom of the computer, loosen the one or two screws in the SDRAM module cover (the cover may retain the screws) and remove the cover. Insert a pointed edge under the cover and pry it loose. To replace, press the adhesive side of the cover firmly into the recess. From the bottom of the computer, remove the screws (M2.5x6mm) holding the corner covers, then remove the covers. The right cover may be easier to remove if you move the module release latch forward. Insert a small flat-blade screwdriver under the foot and pry it loose. To replace, firmly press the adhesive side of the foot into the recess. Removal and Replacement HP Omnibook XT6050, XT/VT6200 Removing the Keyboard (HP Authorized Service Providers Only) Required Equipment • Small Phillips screwdriver. Removal Procedure 1. Unplug the AC adapter, if present, and remove the battery and any secondary battery module. 2. Remove the power button panel (page 2-11). 3. From the bottom of the unit, remove the single screw marked with a “K.” Warning Be careful not to touch the heatsink until it has cooled. It could be hot if the computer was running recently. 4. Remove the four retaining screws from the tabs along the back end of the keyboard. Screw, M2.5×17mm Screw, M2.5×6mm Screw, M2×13mm Screws, M2.5×6mm (2) Figure 2-10. Removing the Keyboard Caution Be careful not to pull on the cables connecting the keyboard to the computer. 5. Raise the back of the keyboard, then lift the keyboard out of the computer. HP Omnibook XT6050, XT/VT6200 Removal and Replacement 2-13 6. Lay the keyboard face down on the top case, forward of its normal position. Be careful not to pull on the cables. 7. Disconnect the keyboard cable (wide) from the motherboard, and release the pointing stick cable (narrow) if present. Pointing stick cable (certain models) Keyboard cable Figure 2-11. Unplugging the Keyboard Cables Reassembly Notes Caution Do not excessively bend or fold the keyboard cables. • Lay the keyboard face down on the top case, forward of its normal position, then reconnect the keyboard cable and (if present) pointing stick flex cable. • Slip the metal tabs on the bottom of the keyboard into their slots in the top case, then lower the keyboard into place. 2-14 Removal and Replacement HP Omnibook XT6050, XT/VT6200 Removing the Heatsink (with Fan) (HP Authorized Service Providers Only) Required Equipment • Small Phillips screwdriver. • Knife or scraper. Removal Procedure 1. Unplug the AC adapter, if present, and remove the battery and any secondary battery module. 2. Remove these additional assemblies: • Power button panel (page 2-11). • Keyboard (page 2-13). 3. Disconnect the fan cable. Access the cable through the opening in the heatsink (near the fan). 4. Remove all five retaining screws. Screws, M2.5×6mm (5) IMPORTANT: See the Caution on the next page before reinstalling the heatsink! Fan cable Fan cable socket Figure 2-12. Removing the Heatsink HP Omnibook XT6050, XT/VT6200 Removal and Replacement 2-15 5. Raise the left end of the heatsink and lift it out of the unit. Caution Do not spin the fan blades with your finger, or you could damage the fan’s bearings. Reassembly Notes Caution Whenever you remove and reinstall the heatsink, you must also replace the heatsink’s thermal pad to maintain optimum heat transfer. Use a sharp knife or scraper to carefully remove the old thermal pad from the heatsink, then attach the new thermal pad. • Install the heatsink screws in this order: 1. Install all five screws lightly. 2. Tighten the three screws around the CPU. 3. Tighten the two remaining screws. 2-16 Removal and Replacement HP Omnibook XT6050, XT/VT6200 Removing the CPU Module (HP Authorized Service Providers Only) Required Equipment • Small Phillips screwdriver. • Small flat-blade screwdriver. Removal Procedure 1. Unplug the AC adapter, if present, and remove the battery and any secondary battery module. 2. Remove these additional assemblies: • Power button panel (page 2-11). • Keyboard (page 2-13). • Heatsink (page 2-15). 3. Turn the lock screw one-half turn counterclockwise to release the CPU module, and carefully lift the CPU module off of its socket on the motherboard. CPU module lock screw CPU module (screw location may vary) Figure 2-13. Removing the CPU Module HP Omnibook XT6050, XT/VT6200 Removal and Replacement 2-17 Reassembly Notes • Carefully insert the CPU module into the motherboard, and turn the lock screw one-half turn clockwise to secure the CPU module. • The CPU module is keyed for installation, and can only be inserted one way. • Be sure to replace the thermal pad on the heatsink, as described in the reassembly notes on page 2-16. 2-18 Removal and Replacement HP Omnibook XT6050, XT/VT6200 Removing the Display Assembly (HP Authorized Service Providers Only) Required Equipment • Small Phillips screwdriver. Removal Procedure 1. Unplug the AC adapter, if present, and remove the battery and any secondary battery module. 2. Remove the power button panel (page 2-11). 3. Remove all four retaining screws from the back of the computer (two near the PS/2 port, and two near the AC adapter jack). 4. On the bottom of the notebook, remove the two screws from the rear corners (nearest the back edge). 5. Open the display. Remove the screws from the display ground wires, and disconnect the main cable. 6. Remove the screw from the center hinge cover, and from the left and right hinges. 7. Lift the display off of the notebook. HP Omnibook XT6050, XT/VT6200 Removal and Replacement 2-19 Screw, M2.5×5mm Screw, M2.5×17mm Screws, M2.5×4 mm (2) Screws, M2.5×8mm (2) Screws, M2.5×6mm (5) Figure 2-14. Removing the Display Reassembly Notes Important The label on the display cable indicates the display type. • Before installing any screws, make sure the center hinge cover is in place and fits over the tab in the bottom case. 2-20 Removal and Replacement HP Omnibook XT6050, XT/VT6200 Removing the Top Case (HP Authorized Service Providers Only) Required Equipment • Small Phillips screwdriver. Removal Procedure 1. Unplug the AC adapter, if present, and remove the battery and any secondary battery module. 2. Remove these additional assemblies: • Plug-in module (page 2-5). • Hard disk drive (page 2-7). • Power button panel (page 2-9). • Keyboard (page 2-13). • Heatsink (page 2-15). • Display assembly (page 2-19). 3. From the bottom of the computer, remove the screws holding the left and right corner covers, then remove the covers. (The right corner cover may come off more easily if you slide the plug-in module latch forward.) 4. Remove all six retaining screws from the bottom case. 5. Remove both retaining screws from just inside the hard disk drive compartment. 6. Remove the single screw inside the battery compartment. 7. From the top of the computer, release the touch pad flex cable from its motherboard connector. (Certain models have a forked cable and two connectors.) Caution: Wireless Models Be careful not to pull on the cable from the rear antenna PCA. 8. Wireless models only: Remove the retaining screw from the rear antenna PCA, and detach the PCA by sliding it slightly to the left. (The PCA’s cable is still attached to mini-PCI card #1. Unplug the cable only if you are replacing the PCA or removing the bottom case.) 9. Remove the three top case retaining screws: one to the right of the left speaker, and two to the left of the right speaker. 10. Raise the back of the top case, then lift it off the computer. HP Omnibook XT6050, XT/VT6200 Removal and Replacement 2-21 Screws, M2.5x4mm (2) Screw, M2.5x17mm PCMCIA doors Screws, M2.5x8mm (4) Touch pad flex cable Screw, M2.5x4mm Left corner cover Wireless antenna Docking doors (OB 6050 models only) Screw, M2.5x2mm Screw, M2.5x6mm Sound/IR panel Screws, M2.5x6mm (3) Screws, M2.5x4mm (2) Cover, right corner Figure 2-15. Removing the Top Case Reassembly Notes • To reinstall the sound/IR panel, insert the tabs on the ends of the panel into the slots in the bottom case. • When reinstalling the right corner cover, first insert the tab at the back end of the cover into the case, then slide the plug-in module latch forward and snap the cover over the latch and into place. • Wireless models only: If you are replacing the rear antenna PCA, place the PCA in its position near the left hinge, replace the screw, then thread the cable through to the bottom of the computer and reconnect the cable to the mini-PCI card. 2-22 Removal and Replacement HP Omnibook XT6050, XT/VT6200 Removing the Motherboard or Bottom Case (HP Authorized Service Providers Only) Required Equipment • Small Phillips screwdriver. • Small flat-blade screwdriver. Removal Procedure Note: Before Replacing the Motherboard If possible, record the computer’s electronic serial number and service ID before you replace the motherboard. You will then store this information in the EEPROM on the new motherboard using the Service Utility floppy disk. 1. Download the service package for the Omnibook XT6050 (technology code EF) or Omnibook XT/VT6200 (technology code EG) from the Partnership web site (see page vi), and create a Service Utilities floppy disk as described in the package’s Readme file. 2. Connect a floppy disk drive module: insert the module into the notebook, or connect it to the notebook’s parallel port using an F2008 external floppy drive cable. 3. Connect an external monitor to the computer, so you can verify the boot process. 4. Plug in an AC adapter. 5. Insert the Service Utilities floppy disk into the floppy drive. 6. Turn on the notebook. When the HP logo appears (on either the built-in display or the external monitor), press Esc to display the boot menu, then choose Removable Device and boot from the floppy disk. 7. Select the Serial Number option from the boot menu. 8. When prompted, type A for the automatic update option. This stores the current system data from the old motherboard on the floppy disk. 1. Unplug the AC adapter, if present, and remove the battery and any secondary battery module. 2. Remove these additional assemblies: • Plug-in module (page 2-5). • Hard disk drive (page 2-7). • Power button panel (page 2-11). • Keyboard (page 2-13). • Heatsink (page 2-15). • Display assembly (page 2-19). • Top case (page 2-21). 3. Remove the five screws that attach the motherboard to the bottom case. 4. From the back of the unit, remove the screw from the LAN/modem PCI panel, and lift the panel out of the bottom case. HP Omnibook XT6050, XT/VT6200 Removal and Replacement 2-23 Caution: Wireless Models Be careful when removing and attaching antenna cables. Damage to cables or connectors can degrade performance. 5. Wireless models only: Disconnect the front antenna PCA flex cable from the motherboard. 6. Wireless models only: Remove the mini-PCI cover and unplug the two antenna cables from miniPCI card #1. 7. Lift the motherboard out of the bottom case. Screws, M2x15mm (2) Screw, M2.5x4mm Screw, M2.5x3mm Screw, M2.5x4mm Screw, M2x3mm Front antenna PCA flex cable Figure 2-16. Removing the Motherboard 8. Depending on what you are replacing, go to “Replacing the Motherboard” on page 2-26, or “Replacing the Bottom Case” on page 2-28. 2-24 Removal and Replacement HP Omnibook XT6050, XT/VT6200 Reassembly Notes • Reinstall the sound/IR panel before reinstalling the motherboard. • If you need to install or replace the docking doors or PCMCIA doors, see the figures below. Wireless Models Only • Before installing the motherboard, make sure the round coaxial cable from the front antenna PCA is held in place by the clips in the bottom case. • Reconnect the front antenna PCA flex cable before reinstalling the top case. Make sure it lies in its groove in the bottom case (battery compartment). • To reinstall the rear antenna PCA, place the PCA in its position near the left hinge, then replace the screw that attaches the PCA to the top case. Thread the PCA cable through the hole in the motherboard (at the lower left corner of the left speaker) to the bottom of the computer, and reconnect the cable to mini-PCI card #1. Figure 2-17. Installing the Docking Doors Figure 2-18. Installing the Lower PCMCIA Door HP Omnibook XT6050, XT/VT6200 Removal and Replacement 2-25 Replacing the Motherboard Disassembly Procedure 1. If a mini-PCI panel is attached, disconnect the LAN/modem cables from the mini-PCI card or motherboard and remove the mini-PCI panel. 2. If mini-PCI card #1 is present, remove it: release the latches at the sides of the card, so that its free edge pops up, then carefully pull the card out of its connector. 3. If mini-PCI card #2 is present, remove it: release the latches at the sides of the card, so that its free edge pops up, then carefully pull the card out of its connector. 4. Disconnect the cable connecting the display interface PCA to the speaker assembly. 5. Carefully lift the display interface PCA off of its connector. 6. Remove the speaker assembly from the unit. 7. Carefully lift the volume PCA off of its connector. 8. Turn the lock screw one-half turn counterclockwise to release the CPU module, and remove the CPU module from the motherboard. 9. From underneath the motherboard, remove the two retaining screws from the PC card socket and lift the socket off the connector. Rear antenna PCA Mini-PCA panel (LAN/modem) Display interface PCA Screws, M2x4mm (2) Speaker assembly Front antenna PCA Volume PCA CPU module lock screw Screws, M2x4mm (2) Figure 2-19. Replacing Motherboard Components 2-26 Removal and Replacement HP Omnibook XT6050, XT/VT6200 Reassembly Procedure Note: Reprogramming the BIOS IC A new BIOS IC contains only enough basic programming to enable the notebook to boot. After installing a new motherboard, you must reprogram the BIOS IC, preferably with the latest BIOS— see page 2-29. 1. Transfer the following components from the old motherboard onto the new motherboard: • SDRAM module • speaker assembly • display interface PCA • volume PCA • CPU module • PCMCIA socket • mini-PCI card #1 (if present) • mini-PCI card #2 (if present) 2. Follow the reassembly notes in the section entitled “Removing the Motherboard or Bottom Case” on page 2-25. Note: After Replacing the Motherboard After replacing the motherboard, you must use the Service Utility floppy disk to store the system data and display information in the EEPROM on the new motherboard. 1. Connect a floppy disk drive module: insert the module into the notebook, or connect it to the computer using an F2008 external floppy drive cable. 2. Plug in an AC adapter. 3. Insert the Service Utilities floppy disk in the floppy drive. 4. Turn on the computer. 5. If you hear 5 beeps, press F1 to update the display data stored on the motherboard. Let the computer reboot and go to the next step. 6. Select the Serial Number option from the boot menu. 7. If you successfully stored system data on the floppy disk before removing the old motherboard, type A for the automatic update. This restores the old system data on the new motherboard. If you did not store system data, type M for the manual update option. Enter the serial number from the bottom of the unit—you may have to contact an HP support center to do this. HP Omnibook XT6050, XT/VT6200 Removal and Replacement 2-27 Replacing the Bottom Case Installation Procedure 1. Transfer the SDRAM cover and sound/IR panel from the old bottom case to the new bottom case. 2. Install a new Microsoft Product ID label. 3. Transfer the old serial number label and install a new overlay, or create a new serial number label using the steps below. 4. Follow the “Reassembly Notes” on page 2-24. Installing a New Serial Number Label Download the latest version of the serial number label template (Microsoft Word format) from the Partnership web site (see page vi) under Support/Service in Technical Support Information. The latest version includes fields for warranty period and manufacturing location. Store the template with other Word templates on a PC connected to a laser printer. 1. Open a new document based on the serial label template. 2. Enter the information from the old serial label, and print the new label on plain white paper. The new label does not have barcodes. 3. Carefully cut out the new serial label just inside the border and place it into the inner recess in the bottom case. The bottom of the label goes toward the front of the case. 4. While holding the paper label in place, attach a serial label overlay into the outer recess. The overlay covers and protects the serial label. 5. Make sure all regulatory labels that were on the old bottom case are also on the new bottom case. You can do this by keeping the old covers, if necessary. HP Serial Number (S)TW711A1234 1YR (1P) F2072 W EA MFG# TW711A1234 Made in Taiwan Figure 2-20. Example of Serial Number Label 2-28 Removal and Replacement HP Omnibook XT6050, XT/VT6200 Repairing the BIOS IC (HP Authorized Service Providers Only) The notebook’s BIOS IC cannot be replaced separately. If it is defective, you must replace the motherboard. In some cases, however, you may be able to reprogram a malfunctioning BIOS IC using either e-DiagTools for Windows, a BIOS floppy disk, or a Crisis Recovery floppy disk. If the notebook will boot sufficiently, use e-DiagTools for Windows or a BIOS floppy disk to reprogram the BIOS IC. If you cannot boot the notebook adequately, use a Crisis Recovery floppy disk. See below for instructions for all three methods. Caution The BIOS update completely replaces the previous BIOS, so follow the directions in this section exactly or you might damage the notebook. The BIOS update also resets the configurations in the BIOS Setup utility—except for BIOS passwords—so record these before performing the update. Using a BIOS Floppy Disk Use a BIOS floppy disk to update the notebook’s BIOS as follows: 1. Undock the notebook if it is docked, and remove any PC cards from it. 2. Connect a floppy disk drive module: insert the module into the notebook, or connect it to the notebook’s parallel port using an F2008 external floppy drive cable. 3. Connect the AC adapter to the notebook. 4. Insert the BIOS floppy disk into the floppy drive. 5. Turn on the notebook. When the notebook boots, follow the instructions that appear on screen. 6. When the process is completed, press the system-off switch to reset the system. BIOS updates are also available from the HP Business Support web site (www.hp.com/go/bizsupport). Installation utilities and instructions for creating a BIOS floppy disk are provided with the updates. Using e-DiagTools for Windows If the notebook allows you to boot into Windows, you may be able to use e-DiagTools for Windows to update the notebook’s BIOS as follows: 1. In Windows, exit any programs that are running. 2. Undock the notebook if it is docked, and remove any PC cards from it. 3. Connect the AC adapter to the notebook. 4. Connect any cables or equipment needed to connect to the Internet. 5. Click Start, Programs (or All Programs), HP e-DiagTools, e-DiagTools for Windows. 6. Click Update, select Download New and click OK. Follow the instructions that appear. Once the update process begins, do not interrupt it. The first time you make an Internet connection from this program on a particular unit, click Change Settings in the Connect window to define your connection settings. 7. When the process is completed, press the system-off switch to reset the system. HP Omnibook XT6050, XT/VT6200 Removal and Replacement 2-29 Using a Crisis Recovery Floppy Disk If you do not have a BIOS Crisis Recovery floppy, download the package from the Partnership web site (see page vi) under Product Support Information in the Service and Support Library. Follow the instructions for creating the floppy. Caution Make sure to use the correct BIOS Crisis Recovery floppy for the Omnibook model you are repairing. The program does not verify the Omnibook model, so you could accidentally install the wrong BIOS. 1. Insert the BIOS Crisis Recovery disk in the floppy disk drive. 2. Turn on the computer and allow it to boot from the floppy disk. If the notebook does not turn on at all, do the following to boot from the floppy disk: a. Unplug the AC adapter. b. Press and hold Fn+B. c. Plug in the AC adapter. d. Release Fn+B. Note: If the notebook will not boot from the floppy, try plugging the boot-block jumper into the notebook’s parallel port. See the wiring diagram below. 1 13 14 25 Figure 2-21. Boot-Block Jumper 3. The display goes blank for a minute or more while the BIOS is reprogrammed. Note: If you plugged in a boot block jumper, unplug it before the notebook automatically reboots. 4. After the BIOS is reprogrammed, check the BIOS version to make sure it is the latest version. If necessary, download the latest BIOS version and reprogram the BIOS IC. 2-30 Removal and Replacement HP Omnibook XT6050, XT/VT6200 Removing Other Components (HP Authorized Service Providers Only) Required Equipment • Small Phillips screwdriver. • Small flat-blade screwdriver. Removal Procedure 1. Unplug the AC adapter, if present, and remove the battery and any secondary battery module. 2. Remove the assemblies and follow the additional steps given in the table below. Table 2-5. Removing Omnibook Components Component Battery, CMOS Card, mini-PCI #2 Case, bottom Case, top Cover, center hinge CPU module Display assembly Doors, docking Removal Procedure Power button panel (page 2-11). Keyboard (page 2-13). Heatsink (page 2-15). Plug-in module (page 2-5). Hard disk drive (page 2-7). Power button panel (page 2-11). Keyboard (page 2-13). Heatsink (page 2-15). Display assembly (page 2-19). Top case (page 2-21). Motherboard (page 2-23). See page 2-23. See page 2-21. Power button panel (page 2-11). Display assembly (page 2-19). See page 2-17. See page 2-19. Plug-in module (page 2-5). Hard disk drive (page 2-7). Power button panel (page 2-11). Keyboard (page 2-13). Heatsink (page 2-15). Display assembly (page 2-19). Top case (page 2-21). HP Omnibook XT6050, XT/VT6200 Additional Steps Reassembly Notes: After replacing the CMOS battery, set the correct time and date using the BIOS Setup utility or Date/Time in the Control Panel. The card is attached to the underside of the motherboard. Release the two latches at the sides of the card so the free edge of the card pops up. Reassembly Note: Make sure the center hinge cover fits over the tab in the bottom case. See the figure on page 2-25. Removal and Replacement 2-31 Component Doors, PCMCIA Heatsink (with fan) Keyboard Panel, sound/IR Panel, mini-PCI PCA, display interface PCA, front antenna (wireless models only) 2-32 Removal Procedure Plug-in module (page 2-5). Hard disk drive (page 2-7). Power button panel (page 2-11). Keyboard (page 2-13). Heatsink (page 2-15). Display assembly (page 2-19). Top case (page 2-21). See page 2-15. See page 2-13. Plug-in module (page 2-5). Hard disk drive (page 2-7). Power button panel (page 2-11). Keyboard (page 2-13). Heatsink (page 2-15). Display assembly (page 2-19). Top case (page 2-21). Plug-in module (page 2-5). Hard disk drive (page 2-7). Power button panel (page 2-11). Keyboard (page 2-13). Heatsink (page 2-15). Display assembly (page 2-19). Top case (page 2-21). Plug-in module (page 2-5). Hard disk drive (page 2-7). Power button panel (page 2-11). Keyboard (page 2-13). Heatsink (page 2-15). Display assembly (page 2-19). Top case (page 2-21). Plug-in module (page 2-5). Hard disk drive (page 2-7). Power button panel (page 2-11). Keyboard (page 2-13). Heatsink (page 2-15). Display assembly (page 2-19). Top case (page 2-21). Removal and Replacement Additional Steps See the figure on page 2-25. Reassembly Notes: Insert the tabs on the ends of the panel into the slots in the bottom case. On the rear of the computer, remove the screw at the far left end (nearest the mini-PCI panel). Detach the cables from mini-PCI card and motherboard. Unplug the speaker cable, and carefully lift the PCA off of its connector. Disconnect the front antenna PCA flex cable from the motherboard, and the coaxial cable from the mini-PCI card (see Figure 2-19 on page 2-26). HP Omnibook XT6050, XT/VT6200 Component PCA, motherboard PCA, rear antenna (wireless models only) Removal Procedure See page 2-23. Plug-in module (page 2-5). Hard disk drive (page 2-7). Power button panel (page 2-11). Keyboard (page 2-13). Heatsink (page 2-15). Display assembly (page 2-19). Top case (page 2-21). PCA, volume Plug-in module (page 2-5). Hard disk drive (page 2-7). Power button panel (page 2-11). Keyboard (page 2-13). Heatsink (page 2-15). Display assembly (page 2-19). Top case (page 2-21). Plug-in module (page 2-5). Hard disk drive (page 2-7). Power button panel (page 2-11). Keyboard (page 2-13). Heatsink (page 2-15). Display assembly (page 2-19). Top case (page 2-21). Plug-in module (page 2-5). Hard disk drive (page 2-7). Power button panel (page 2-11). Keyboard (page 2-13). Heatsink (page 2-15). Display assembly (page 2-19). Top case (page 2-21). Socket, PCMCIA Speaker assembly HP Omnibook XT6050, XT/VT6200 Additional Steps 1. Remove the retaining screw from the rear antenna PCA, and detach the PCA by sliding it slightly to the left. 2. On the bottom of the computer, loosen the screw holding the mini-PCI cover (the cover retains the screw), and remove the cover. 3. Disconnect the cable from the mini-PCI card, and remove the PCA from the computer. Reassembly Notes: Place the PCA in its position near the left hinge, replace the screw, then thread the cable through to the bottom of the computer and reconnect the cable to the mini-PCI card. Remove the screw from the PCA, and carefully lift it off of its connector. 1. On the bottom of the computer, loosen the screw holding the mini-PCI cover (the cover retains the screw), and remove the cover. 2. Remove both screws (M2x4mm) from inside the mini-PCI compartment. 3. Remove the two screws attaching the socket to the motherboard (see Figure 2-16 on page 2-24). 4. Unplug the PCMCIA socket from the motherboard. 1. Disconnect the cable from the display interface PCA. 2. Lift the display interface PCA out of the notebook. 3. Lift the speaker assembly out of the notebook. Removal and Replacement 2-33 3 Troubleshooting and Diagnostics This chapter includes troubleshooting and diagnostic information for testing the functionality of the notebook, and for identifying faulty components: • Troubleshooting information Checking for customer abuse (page 3-3). Troubleshooting the problem (page 3-3). Verifying the repair (page 3-4). Suggestions for troubleshooting (page 3-5). • Diagnostic tools e-Diagtools diagnostic program (page 3-19). Power-on self-test (page 3-23). Sycard PCCtest 450/460 PC card (page 3-27). Windows Management Instrumentation/Desktop Management Interface (page 3-28). BIOS Setup utility (page 3-29). HP Omnibook XT6050, XT/VT6200 Troubleshooting and Diagnostics 3-1 Troubleshooting The suggestions in this section can help isolate and repair the cause of a problem. To ensure quality repair, follow the basic troubleshooting steps shown below. Check the customer's description of the problem and any supporting information. Check for customer abuse. Try to duplicate the customer's problem. Troubleshoot the problem using: - Diagnostic tools. - Troubleshooting suggestions. Verify the repair by testing the functionality of the complete unit. Figure 3-1. Basic Troubleshooting Steps 3-2 Troubleshooting and Diagnostics HP Omnibook XT6050, XT/VT6200 Checking for Customer Abuse Some units may appear to have been damaged by customer abuse. Use these guidelines to help determine if this is the case: • If the shipping box is seriously damaged, customer abuse cannot be declared. • If the damage could have a cause other than customer abuse, customer abuse cannot be declared. • If the unit shows any of the following, customer abuse is declared: Missing parts. Broken plastic parts. Parts not original to the unit. Damaged or missing keys on the keyboard. Table 3-2 includes additional criteria for determining customer abuse to specific parts of the unit. Important Parts damaged by customer abuse are not covered by the warranty. Troubleshooting the Problem Record pertinent information about the unit: • Model and serial number. • Operating system and version. • Software version (stored in hidden file c:\version.inf). • BIOS version. • Accessories and peripherals used. Analyze the problem: • Observe Symptoms. Using the customer’s information, try to duplicate the problem. Determine how the problem differs from proper behavior. Also, note the functions that do work properly. • Separate Problems. If there are multiple symptoms, separate them into distinct problems. • Consider Causes. Keep in mind possible causes for each problem. Use the diagnostic tools and troubleshooting suggestions to help find possible causes. The e-Diagtools diagnostic program tests most of the notebook’s components using automatic and interactive tests, and will be your primary troubleshooting tool. Other tools include the power-on self-test, WMI/Toptools (if installed), the BIOS Setup utility, and the Sycard PCCtest. Table 3-1 on page 3-5 shows how you can use these tools to isolate the cause of the computer’s problem. The troubleshooting suggestions on page 3-6 include general suggestions for repairing units that show specific failure symptoms. HP Omnibook XT6050, XT/VT6200 Troubleshooting and Diagnostics 3-3 Swapping modules that may be defective with others known to be good is generally an ideal way to find the module responsible for the problem. A failure symptom is rarely caused by more than one module, so you will not usually need to replace more than one to correct a particular failure. After you replace a module, the notebook will normally be in a confused state and lock up when you apply power. If this happens, press the system-off switch: this resets the notebook, so that you can restart it in a known state. Verifying the Repair Before returning the repaired unit to the customer, verify the repair by running the following tests: • e-Diagtools Basic Diagnostic Test. Run the basic test of the e-Diagtools diagnostic program (page 3-19). –and– • Function Tests. Run tests that check the repaired function, such as those in e-Diagtools (page 319). –and– • Failed Tests. Run any other tests that failed during troubleshooting. 3-4 Troubleshooting and Diagnostics HP Omnibook XT6050, XT/VT6200 Suggestions for Troubleshooting Table 3-1. Scope of Diagnostic Tools Function Bootup Processor Memory Fan e-Diagtools Tests (System menu) Tests (Memory menu) Tests (Misc menu) Hard disk Floppy drive Keyboard Pointer Audio Serial Parallel LAN Modem Wireless Infrared PS/2 port USB Docking port PCMCIA Sycard PCCtest 450 Tests Tests DMI/WMI/ Toptools (if installed) Describes Describes BIOS Setup Tests Describes Describes Describes Configures Tests Describes Configures Tests Describes Configures Tests Describes Configures Tests (CMOS battery only) Batteries Display Power-On Self-Test Tests (Video menu) Tests (IDE menu) Tests (FDD menu) Tests (KBD menu) Tests (Misc menu) Tests (System, Misc menus) Tests* (Misc menu) Tests* (Misc menu) Tests* (Misc menu) Tests** (User menu) Tests† (KBD, Misc menus) Tests† (USB menu) Tests (System menu, using docks) Tests*† (Misc menu) Describes Describes Configures Describes Configures Describes Configures Configures Tests Describes Configures Configures Configures Describes Configures Describes Status AC adapter Tests ports and Status Configures Docking internal bus products Describes Plug-in modules * The diagnostic test is more thorough if you use a loop-back connector. ** The test checks only the internal hardware up to the mini-PCI card, and does not check the miniPCI panel or any external cabling. † Use an appropriate external device to exercise the port. See the help text for the tests in the menu. HP Omnibook XT6050, XT/VT6200 Troubleshooting and Diagnostics 3-5 If you cannot isolate the cause of a problem using the above diagnostic tools, use the suggestions in the following table to help find the problem. Table 3-2. Troubleshooting Suggestions Symptom Call Center: Suggestions Repair Center: Likely Causes Repair Center: Comments To help determine likely causes of a problem, determine which replaceable modules are involved in the system function and what roles they play: see the figure on page 1-14 and the table on page 1-15. Startup Does not boot on AC or battery. Beeps once, spins hard disk, repeats, but does not boot. Does not boot on battery, but boots on AC. Does not boot from floppy drive. 3-6 Check power source. Press system-off switch to reset notebook, then press blue sleep button to turn notebook on. Unplug AC adapter, remove all batteries and any PC cards, press system-off switch to reset notebook, then reconnect power and try again. Do not use touch pad while booting or resuming. Remove all but one SDRAM module and try again. Reinsert any other SDRAM module and try again. AC adapter. SDRAM module. CPU module. Display interface PCA. Motherboard. Display assembly. Hard drive. Make sure at least one SDRAM module is installed. SDRAM module. Make sure battery is properly installed and fully charged. Check battery level on battery LEDs. Check battery contacts. If available, try another battery. Make sure floppy disk is bootable. Make sure floppy drive is installed or connected correctly. Use BIOS Setup to check default boot order and make sure floppy boot is enabled. Try using alternate connection (with or without floppy cable). Battery or contacts. Motherboard. Troubleshooting and Diagnostics Check AC adapter. Remove all but one SDRAM module and try again. If power status light does not turn on, reprogram BIOS, replace top case, replace motherboard. If power status light turns on but display remains off, try external monitor. If monitor shows successful boot, replace display assembly. If monitor shows activity but BIOS does not complete, replace display assembly. If monitor is blank, replace display interface PCA, replace display assembly, replace motherboard. If power status light and display turn on, BIOS completes, but OS does not start from hard disk or floppy drive, replace CPU module, replace motherboard. If OS starts from floppy drive, reload hard drive, replace hard drive. Floppy drive or contacts. Floppy cable. Motherboard. HP Omnibook XT6050, XT/VT6200 Symptom Does not boot from CD in CD/DVD drive module Sluggish startup or shutdown. Does not boot into POST. Error message such as “Invalid system disk” or “Auto IDE error”. Password forgotten. Power No power. Turns off immediately after turning on. Does not run on battery; empty battery indication. Beeps repeatedly. Battery does not charge. Call Center: Suggestions Make sure CD is bootable. Use BIOS Setup to check default boot order. Restart notebook. Use Tools tab in disk’s Properties sheet to check hard disk. Use Disk Defragmenter to optimize hard disk. Delete temporary and unneeded files. Try removing wireless miniPCI card. Check for disk in floppy drive. Check boot order in BIOS Setup. Remove and reinstall hard drive. Repair Center: Likely Causes CD/DVD drive module. Motherboard. Hard drive. Mini-PCI card. Replace mini-PCI card. Hard drive contacts. Hard drive. If unit boots from floppy drive, check for corrupt files on hard drive, use Recovery CDs to reinstall factory software onto hard drive, replace hard drive. User must call Technical Support and provide proof of ownership. Password removal is restricted to certain sites. See page 5-1. Verify proper ownership, then follow removal procedure with owner and record appropriate data—see page 5-1. Make sure charged battery is installed or AC adapter connected. Try another battery or AC adapter if available. Battery may be extremely low. Plug in AC adapter, insert charged battery, or plug in secondary battery module (OB XT/VT6200). Check battery and contacts. Try another battery if available. Notebook beeps repeatedly when battery is low. Connect AC adapter or replace battery. Make sure AC adapter is connected properly and battery installed properly. Check battery contacts. If available, try another battery and AC adapter. Move notebook away from any nearby heat source. Unplug AC adapter and allow battery to cool. Check for blocked air vents. HP Omnibook XT6050, XT/VT6200 Repair Center: Comments AC adapter. Battery. Motherboard. Battery. Battery or contacts. Motherboard. Battery. Battery or contacts. AC adapter. Motherboard. Heatsink. Check battery and AC adapter. Check heatsink. Troubleshooting and Diagnostics 3-7 Symptom Notebook has short operating time when on battery. Secondary battery does not charge (Omnibook XT/VT6200 models). AC adapter does not power notebook. 3-8 Call Center: Suggestions Turn down display brightness. Check timeout settings in Power in Control Panel. Check power management settings in BIOS Setup. Try default settings. Run HP Battery Optimizer (Omnibook XT/VT6200 models). Battery gauge may need calibration. Restart notebook, press F6 when HP logo appears, and follow onscreen instructions. This calibrates battery gauge, and requires four to five hours. You cannot use notebook during this process. During process, you may have to disconnect and reconnect AC adapter to begin recharging. Certain applications can cause excess CPU and power usage. (Users can get Intel Power Monitor from www.intel.com and monitor CPU load.) When playing DVD movies on battery power, use Power Options in Control Panel to select Portable/Laptop power scheme. When using applications with automatic save feature (such as MS Word), extend save time or disable to reduce hard disk access and power usage. PCMCIA card use can affect battery life. Some PCMCIA cards draw power even while not in use. Heavy modem use can affect battery operating time. Check power source. Make sure main battery is fully charged. If not, secondary battery will not charge. Check contacts on second battery. Try another AC adapter, if available. Troubleshooting and Diagnostics Repair Center: Likely Causes Battery. Motherboard. Repair Center: Comments Battery capacity often decreases after a year or more. Second battery or contacts. Motherboard. AC adapter. Motherboard. AC adapter cannot be repaired, and must be replaced. HP Omnibook XT6050, XT/VT6200 Symptom Battery indicator is inaccurate. Standby/resume General problems. Notebook resumes slowly from Standby mode. Does not suspend to Standby mode as expected. Does not automatically enter Hibernate mode as expected. Call Center: Suggestions Time Remaining is an estimate based on notebook’s power use at that moment. It therefore depends on current task, and assumes power will be used at that rate until battery runs out. So if notebook is currently using good deal of power (such as when reading CD or DVD), Time Remaining likely shows less time than actually remains. Repair Center: Likely Causes Repair Center: Comments Close all applications before entering (or allowing notebook to enter) Standby or Hibernate mode. If problem appears after installing new software (including drivers), uninstall that software. Contact software vendor for additional support. Notebook can take a minute or longer to resume if network card is installed. Blinking cursor appears while system is loading and checking hardware and network connections. When hardware is reinitialized, Windows desktop appears. Notebook won’t suspend if connection to another computer is active. If notebook is busy, it normally finishes current operation before suspending. Make sure hibernate support is enabled in Power in Control Panel. Also, make sure Hibernate timeouts (Power Schemes tab) for AC and battery power are not set to Never. HP Omnibook XT6050, XT/VT6200 Troubleshooting and Diagnostics 3-9 Symptom Display Dark display, no light. White display. Call Center: Suggestions Repair Center: Likely Causes Repair Center: Comments Make sure notebook is turned on and warmed up. Check power supply. Make sure SDRAM modules are installed properly. Adjust display brightness. Press Fn+F5 several times. Try external monitor. Display cable connection. SDRAM modules. CPU module. Display assembly. Motherboard. Check cable connections. Replace SDRAM modules. Make sure CPU module is installed properly, replace CPU module. Check display cable connections, replace display assembly. If external monitor displays no image, replace motherboard. Adjust display brightness. Display assembly. Display interface PCA. Display cable connection. Display interface PCA. Display assembly. Motherboard. Display cable connection. Display assembly. Erratic display. Bright or missing pixels or lines. See quality statement on page 5-2. Punctured display. Vertical crack near center of display. Scratched display glass. Local area of dark or light discoloration visible when display is on. External display does not work. Hard disk Hard disk never spins. Hard disk makes clunking or scratching noise. Hard disk makes buzzing or whining noise. 3-10 Usually caused by closing display with pencil-sized object on keyboard. Caused by excessive pressure applied to area on screen. Check connections. Press Fn+F5 several times. Try display on another computer. External display. Motherboard. Check power source. Remove and reinstall hard drive. Check connector. Back up disk immediately. Was notebook or drive dropped? Back up disk immediately. Check hard disk installation. Check for alternate noise sources, such as PCMCIA drive or fan. Hard drive or connector. Motherboard. Hard drive. Troubleshooting and Diagnostics Check display cable connection. Check display cable connection. See quality statement on page 5-2. Declared to be caused by customer abuse. Declared to be caused by customer abuse. Declared to be caused by customer abuse. Declared to be caused by customer abuse. If drive case is damaged, drive may not operate properly. Check notebook and drive for evidence of customer abuse. Depends on noise source. HP Omnibook XT6050, XT/VT6200 Symptom Files corrupted. Disk capacity less than normal. Disk’s reported capacity is less than actual size. Floppy drive General problems. Floppy drive does not work as 3-mode drive. CD/DVD drive module Particular CD or DVD not playing properly. Cannot read any CD or DVD. DVD movie stops playing. Call Center: Suggestions Run virus scan program. Check hard disk using Tools tab in disk’s Properties sheet. Test hard disk drive with e-Diagtools diagnostics. Back up files if possible, then use Recovery CDs to reformat hard disk and reinstall factory software. Check hard disk using Tools tab in disk’s Properties sheet. Check partitions using Control Panel, Administrative Tools, Computer Management under Storage. Use Recovery CDs to reformat hard disk and reinstall factory software. Hard disk allocates space to diagnostic software. This space is unavailable for other uses, and not included in hard disk capacity reported by Windows. Repair Center: Likely Causes Make sure floppy drive module is installed and connected correctly. Try alternate connection (with or without floppy cable). Use BIOS Setup to make sure FDD controller is enabled. 3-mode drive not supported when drive is connected to dock. Floppy drive module or contacts. External floppy drive cable. Motherboard. Check disk for proper insertion, dirt, or damage. Clean with soft cloth or replace as needed. If CD was created on CD-RW drive, try using HP certified media. Read and write quality may vary for other media. Restart notebook. Make sure CD/DVD drive module is inserted properly. DVD may be double-sided. Movie may be paused. Press Play button. HP Omnibook XT6050, XT/VT6200 Repair Center: Comments Hard drive. External floppy drive cable. Floppy drive module. CD/DVD drive module. Troubleshooting and Diagnostics 3-11 Symptom Region Code error. “System Error: Unable to read drive” message. All DVD play is erratic. Keyboard Some or all keys do not work properly. Embedded numeric keypad does not work. PS/2 keyboard and mouse with Yadapter do not work. 3-12 Call Center: Suggestions DVDs contain embedded regional codes that prevent them from playing outside region in which they are sold. This error occurs when trying to play DVD intended for different region. Important: Most DVD drives allow region code to be changed only a limited number of times (usually no more than four). When this limit is reached, last change is hard-coded on DVD drive, and is permanent. Refer to DVD player software help for details. Make sure disk is clean, undamaged, and inserted correctly. Clean with soft cloth or replace as needed. Wait 5 to 10 seconds after closing tray before pressing Play. Restart notebook. Make sure CD/DVD drive module is installed properly. Some DVDs include software called “PC Friendly”. This software can cause errors or erratic play. If needed, uninstall PC Friendly and restart notebook. Repair Center: Likely Causes Check settings in Control Panel. Keyboard. Motherboard. Keyboard. Motherboard. Press Fn+F8 to activate numeric keypad, and Lock key to turn on number lock. Avoid touching touch pad while booting or resuming. Check devices separately. Troubleshooting and Diagnostics Repair Center: Comments HP warranty does not cover expense of correcting this situation. CD/DVD drive module. Motherboard. Try reinserting ribbon cable in connector on motherboard. Y-adapter. PS/2 device. Motherboard. HP Omnibook XT6050, XT/VT6200 Symptom Pointing stick General problems. Special pointing stick features not working. Touch pad General problems. Special touch pad features not working. Click button does not work. Memory Out of memory error. Computer doesn’t boot after adding SDRAM. Call Center: Suggestions Repair Center: Likely Causes Repair Center: Comments Reset notebook (see page 1-8). Check settings in Control Panel. Make sure pointing stick is enabled in Mouse Properties. By default, pointing stick is disabled if external PS/2 mouse is connected, Use BIOS Setup to check settings. Check Mouse Properties in Control Panel. Keyboard. Motherboard. Try reinserting flex cable in connector on motherboard. Reset notebook (see page 18). Check settings in Control Panel. Make sure touch pad is enabled in Mouse Properties. By default, touch pad is disabled if external PS/2 mouse is connected, Use BIOS Setup to check settings. Avoid touching touch pad while booting or resuming. Check Mouse Properties in Control Panel. Top case. Motherboard. Keyboard assembly. Motherboard. Top case. Motherboard. Top case. Motherboard. Make sure C drive has adequate free space. Delete temporary and unneeded files. Use memory troubleshooter in Windows Help. Third-party memory cards have not been tested for use with notebook. Use only PC133 (OB XT6050) or PC2100 DDR266 (OB XT/VT6200) SDRAM modules. HP Omnibook XT6050, XT/VT6200 SDRAM module. SDRAM module. Troubleshooting and Diagnostics 3-13 Symptom Audio No sound audible. Sound does not record. Serial/Parallel/USB General problems. Modem General problems. 3-14 Call Center: Suggestions Repair Center: Likely Causes Repair Center: Comments Increase sound volume. Check whether sound is enabled (audio-off button and software controls). Check for sound resource conflicts in Device Manager. Test audio with e-Diagtools diagnostics. Check software controls. Test audio with e-Diagtools diagnostics. Top case. Speaker assembly. Volume PCA. Motherboard. Check operation using headphones or external speakers (volume PCA). Make sure speaker assembly cable is connected. Display interface PCA. Volume PCA. Motherboard. Check operation using external microphone (volume PCA). Check connections. Restart notebook. Use troubleshooters in Windows Help. Check settings in Control Panel. Check settings in BIOS Setup. Check port settings in Device Manager. Test ports with e-Diagtools diagnostics. For USB: contact device vendor and HP Notebook web site (see page vi) for latest USB drivers. For USB: if the device is powered by the USB port, try the other port. Motherboard. Use loop-back connector when testing serial or parallel port—see page 3-21. Check settings in Control Panel. Open hardware Device Manager. If modem is disabled, try to enable. If modem has a conflict, try disabling another device. Use analog telephone line (2, 3, or 4 wires), not PBX or digital line. In a hotel, ask for data line. Try disabling error correction and data compression. Test modem with e-Diagtools diagnostics. Mini-PCI modem card Mini-PCI panel. Motherboard. Troubleshooting and Diagnostics HP Omnibook XT6050, XT/VT6200 Symptom LAN/network General problems. Infrared General problems. Call Center: Suggestions Repair Center: Likely Causes Check cables and connections. Try connecting notebook to another network station (if applicable). If green light next to LAN port does not light, LAN cable may not be connected to network or network may be down. Use networking troubleshooter in Windows Help. Check settings in BIOS Setup. Check settings in Control Panel. Make sure LAN cable is Category 3, 4, or 5 for 10Base-T operation, or Category 5 for 100Base-TX operation. Maximum cable length is 100 meters (330 feet). Test LAN with e-Diagtools diagnostics. Mini-PCI panel. Motherboard. Infrared is disabled and no drivers installed as shipped. (Drivers are included.) Make sure line between infrared ports is not blocked, ports face each other squarely and are no more than 1 meter apart. Sunlight, heat from nearby equipment, or other sources of infrared radiation can cause transmission errors. Check settings in BIOS Setup. Remove any PC cards from notebook (possible IRQ conflict). For fast-IrDA, check for DMA conflict with ECP parallel port. Motherboard. HP Omnibook XT6050, XT/VT6200 Repair Center: Comments Troubleshooting and Diagnostics 3-15 Symptom Wireless General problems. One-Touch buttons Buttons not working properly. On-screen display does not appear when button is pressed. PCMCIA General problems. AC adapter Does not power notebook. Call Center: Suggestions Repair Center: Likely Causes Repair Center: Comments Check TCP/IP setup in Control Panel. Check SSID, channel, and encryption settings: click wireless link icon in taskbar and select Advanced Configuration. Mini-PCI card #1. Rear antenna PCA. Front antenna PCA. Motherboard. Make sure all cables are properly connected to miniPCI card #1 and motherboard. Check for damaged coaxial cables or connectors. Make sure correct applications are associated with buttons in One-Touch tab of Keyboard in Control Panels. Make sure Onscreen Display is enabled in One-Touch tab of Keyboard in Control Panels. Keyboard cover. Display interface PCA. Motherboard. Restart notebook. Try card in another computer or other device. If card requires an IRQ, make sure one is available. In Device Manager, refresh device list and check for conflicts. Check HP Notebook web site for installation instructions (page vi). When using PC card in docking system, insert or remove card while system is turned on. Download current drivers from card manufacturer’s web site. PCMCIA socket. Motherboard. Using a flashlight, look for bent pins inside the PCMCIA socket. Replace PCMCIA socket; replace motherboard. Try another AC adapter, if available. AC adapter. Motherboard. AC adapter cannot be repaired and must be replaced. Motherboard Evidence of spilled liquid. Bent or broken connectors, or burnt component. Motherboard cracked. 3-16 Troubleshooting and Diagnostics Declared to be caused by customer abuse. Declared to be caused by customer abuse. Declared to be caused by customer abuse. HP Omnibook XT6050, XT/VT6200 Symptom Miscellaneous Clock loses time. Notebook gets abnormally hot. Notebook pauses or runs sluggishly. Notebook still on but stops responding. Plug-in Modules General problems. Call Center: Suggestions Repair Center: Likely Causes Repair Center: Comments Plug in AC adapter for 24 hours to charge CMOS battery. Always set notebook on a flat surface, so air can flow freely around and underneath it Make sure air vents are not blocked. Games and other programs that drive CPU usage toward 100% can contribute. May be normal Windows behavior (background processing can affect response time). Certain operations (such as virus scanning or file browsers) can affect performance. Press Ctrl+Alt+Del to see if an application is not responding. Restart notebook. If hard disk has spun down to conserve power, it can take several seconds to spin up (you can hear this). Use Control Panel to modify hard disk power settings. Check for overheating—see previous symptom. If notebook’s hard drive frequently runs (as indicated by hard drive light on front of notebook) while notebook appears to be paused or running slowly, consider installing additional SDRAM. Make sure hard drive has adequate free space. Delete temporary and unneeded files. Press Ctrl+Alt+Del and end any application not responding. Reset notebook (see page 1-8). CMOS battery. Motherboard. Charge CMOS battery. Heatsink. Check heatsink for damage or proper fan operation. Check thermal contact between CPU and heatsink. Replace thermal pad if needed. CPU module. Motherboard. If notebook slows after period of continuous activity, check heatsink—see previous symptom. Make sure module is installed properly. Check module contacts. Reset notebook (see page 1-8). Plug-in module or contacts. Motherboard. Plug-in modules cannot be repaired, and must be exchanged. HP Omnibook XT6050, XT/VT6200 Troubleshooting and Diagnostics 3-17 Symptom Accessories Docking product I/O problems. 3-18 Call Center: Suggestions Repair Center: Likely Causes Repair Center: Comments Make sure AC power is connected to dock, and notebook is fully inserted in dock. Check notebook’s power supply. Check settings in BIOS Setup. Try using corresponding port on notebooks while undocked. Docking product. Motherboard. Test corresponding notebook ports while undocked. Port replicator and mini dock are not repairable, and must be exchanged. Troubleshooting and Diagnostics HP Omnibook XT6050, XT/VT6200 Diagnostic Tools This section describes the following diagnostic tools you can use for troubleshooting and repairing the Omnibook: • Omnibook e-Diagtools diagnostic program (below). • Power-on self-test (page 3-22). • Sycard PCCtest 450 PC card (page 3-27). • Windows/Desktop Management Interface (page 3-28). • BIOS Setup utility (page 3-29). e-Diagtools Diagnostic Program The hardware diagnostic programs provide two levels of testing: • User-level testing using a basic hardware test. • Advanced testing using individual hardware tests. Figure 3-2. Diagnostic Screens — Basic and Advanced The tests are designed to run after the system reboots, so that the notebook will be in a predictable state during the tests. The tests are non-destructive, and are intended to preserve the state of the notebook. The notebook reboots when you exit the program so drivers can be loaded. HP Omnibook XT6050, XT/VT6200 Troubleshooting and Diagnostics 3-19 Running e-Diagtools The following steps describe how to run e-Diagtools. The procedure may differ slightly for different versions of e-Diagtools. 1. Restart the computer. 2. When the HP logo appears, press F10 to start the diagnostic test. 3. When the menu appears, press Enter to run e-Diagtools. 4. The first time you run the program, you are prompted to select the language for the program. 5. Press F2 to proceed with the basic tests. You can also proceed directly to the advanced tests from this point by pressing Ctrl-F9 (in which case skip to step 10, below). 6. When the hardware detection finishes, check the list of detected hardware. Note If a device is not detected or fails its test, it might be configured incorrectly in the notebook’s BIOS. You can confirm this by running BIOS Setup and checking the settings—see “BIOS Setup Utility” on page 3-29. 7. Run the basic test. Press F2 to start the basic hardware test. 8. To exit without running the advanced tests, press F4 to view the Support Ticket. Press F3 to exit. 9. Optional: Run the advanced tests. Press F2 to open the advanced test screen. 10. Select and run the appropriate tests. Note that individual tests do not appear if the hardware they test is not detected. Press the following keys to run tests: Enter F5 or Space F6 F7 F10 Runs the highlighted test. Marks/unmarks the highlighted test. Marks/unmarks all tests in the current menu. Marks/unmarks all tests in all menus. Runs all marked tests. (Press F9 for a list of all function keys.) If a test fails, the error code and description are logged, and the error code is displayed temporarily. If several errors occur, look for patterns that might indicate a common cause. 11. Save the Support Ticket. Press T to update and display a Support Ticket containing system and test information. 12. When you are finished running tests, press Esc to exit the advanced tests. 13. Optional: To save the Support Ticket to a floppy disk, press F7 then Alt+C. 14. Exit. Press F3 and then any key to exit and restart the notebook. 15. Optional: Open the Support Ticket. In Windows, click Start, Programs (or All Programs), Hewlett-Packard, Notebook, HP e-DiagTools, e-DiagTools for Windows. 16. Click View to display the Support Ticket. 17. To add information about the problem, click Comments and type the information, then click OK. 3-20 Troubleshooting and Diagnostics HP Omnibook XT6050, XT/VT6200 To save or print the Support Ticket, click Save As or Print. Note that the serial and parallel port tests are more thorough if you connect a loop-back connector to the port and enable the external loopback option before running the test for that port. See the wiring diagrams below. 13 5 9 1 6 25 These connections are not used. Diodes are 1N4004 or equivalent (IF=1A, VF=1V@1A, VR=30-400V) 1 14 Figure 3-3. Serial and Parallel Loopback Connectors HP Omnibook XT6050, XT/VT6200 Troubleshooting and Diagnostics 3-21 Interpreting the Results The e-Diagtools diagnostic program returns test groups, error codes, and suggestions for repair and/or follow-up actions. The basic hardware test will show a recommended replacement part, while the advanced tests also provide more detailed error descriptions. To help interpret the results of the e-Diagtools tests, refer to the following: • e-Diagtools online help • Replaceable Module Diagram on page 1-14 • Functional Structure Description on page 1-15 This combined information should enable you to determine which of the notebook’s components require service. 3-22 Troubleshooting and Diagnostics HP Omnibook XT6050, XT/VT6200 Power-On Self-Test Note If Quiet Boot is enabled in BIOS Setup (the default setting), press Esc during boot to see POST messages. When the notebook boots, its system BIOS runs a series of initialization routines and diagnostic tests called POST (Power-On Self-Test). The BIOS will not boot the notebook’s operating system if certain components fail the POST diagnostic tests. POST indicates progress by a sequence of codes; if an error occurs, the BIOS displays a message and/or issues a beep code. Note that not all POST messages indicate a failure in the notebook—some messages are for information only. You should not necessarily interpret the failure of one or more POST tests as a hardware, software, or firmware failure. If POST displays an error message or issues a beep code indicating an error, confirm the problem using other diagnostic tools. First, confirm the failure by performing a “clean” boot, as described below: If the notebook fails to restart with a clean boot, it requires repair. 1. Remove all accessories, including SDRAM modules, floppy drive, port replicator, PC cards, printer, external monitor, pointing device, and keyboard. 2. Provide “clean” AC power—no auto adapter or unusual AC adapter configuration. 3. Press the system-off switch to return the notebook to a known state. 4. Press the blue sleep button to start the notebook. If the BIOS detects a terminal error condition, it halts POST after issuing a beep code and/or displaying a message (see the following table). The beep code indicates the POST routine in which the terminal error occurred. Table 3-3. POST Terminal-Error Beep Codes Beep Codes* 1 1-2 1-1-1-3 1-1-1-4 1-1-2-1 1-1-2-3 1-1-2-4 1-1-3-1 1-1-3-2 1-1-3-3 1-1-3-4 1-1-4-1 1-1-4-3 1-1-4-4 1-2-1-1 1-2-1-2 Error Code B4h — 02h 03h 04h 06h 07h 08h 09h 0Ah 0Bh 0Ch 0Eh 0Fh 10h 11h 1-2-1-3 1-2-1-4 1-2-2-1 1-2-2-3 1-2-2-4 1-2-3-1 1-2-3-3 1-2-4-1 12h 13h 14h 16h 17h 18h 1Ah 1Ch POST Description One short beep before boot. Search for option ROMs. Verify Real Mode. Disable Non-Maskable Interrupt (NMI). Get CPU type. Initialize system hardware. Disable shadow and execute code from ROM. Initialize chipset with initial POST values. Set IN POST flag. Initialize CPU registers. Enable CPU cache. Initialize caches to initial POST values. Initialize I/O component. Initialize local bus IDE. Initialize Power Management. Load alternate registers with initial POST values. Restore CPU control word during warm boot. Initialize PCI Bus Mastering devices. Initialize keyboard controller. BIOS ROM checksum. Initialize cache before memory Auto size. 8254 timer initialization. 8237 DMA controller initialization. Reset Programmable Interrupt Controller. HP Omnibook XT6050, XT/VT6200 Beep Codes* 1-3-1-1 1-3-1-3 Error Code 20h 22h 1-3-2-1 1-3-3-1 24h 28h 1-3-3-2 1-3-3-3 1-3-4-1 1-3-4-3 29h 2Ah 2Ch 2Eh 1-3-4-4 1-4-1-1 2Fh — 1-4-1-3 1-4-1-4 1-4-2-3 1-4-3-1 1-4-3-3 1-4-4-1 1-4-4-2 2-1-1-2 2-1-1-3 2-1-2-2 2-1-2-3 2-1-2-4 32h 33h 36h 38h 3Ah 3Ch 3Dh 41h 42h 45h 46h 47h POST Description Test DRAM refresh. Test 8742 Keyboard Controller (on motherboard). Set ES segment register to 4 GB. Auto size DRAM; or wrong type or no RAM installed. Initialize POST Memory Manager. Clear 512 kB base RAM. RAM failure on address line xxxx. RAM failure on data bits xxxx of low byte of memory bus. Enable cache before system BIOS shadow. RAM failure on data bits xxxx of high byte of memory bus. Test CPU bus-clock frequency. Initialize Phoenix Dispatch Manager. Warm start shut down. Shadow system BIOS ROM. Auto size cache. Advanced configuration of chipset registers. Load alternate registers with CMOS values. Initialize extended memory for RomPilot. Initialize interrupt vectors. POST device initialization. Check ROM copyright notice. Initialize I20 support. Troubleshooting and Diagnostics 3-23 Beep Codes* 2-1-3-1 2-1-3-2 2-1-3-3 2-1-3-4 2-1-4-1 2-1-4-3 2-1-4-4 2-2-1-1 2-2-1-2 2-2-1-3 2-2-2-1 2-2-2-2 2-2-3-1 2-2-3-2 2-2-3-3 2-2-3-4 2-2-4-1 2-3-1-1 2-3-1-3 2-3-2-1 2-3-2-3 2-3-2-4 2-3-3-1 2-3-3-2 Error Code 48h 49h 4Ah 4Bh 4Ch 4Eh 4Fh 50h 51h 52h 54h 55h 58h 59h 5Ah 5Bh 5Ch 60h 62h 64h 66h 67h 68h 69h 2-3-3-3 2-3-3-4 2-3-4-1 2-3-4-3 6Ah 6Bh 6Ch 6Eh 2-4-1-1 2-4-1-3 2-4-2-3 2-4-4-1 2-4-4-2 2-4-4-3 3-1-1-1 3-1-1-2 3-1-1-3 3-1-1-4 3-1-2-1 3-1-2-2 3-1-2-3 3-1-2-4 70h 72h 76h 7Ch 7Dh 7Eh 80h 81h 82h 83h 84h 85h 86h 87h 3-1-3-1 3-1-3-2 3-1-3-3 3-1-3-4 3-1-4-1 3-1-4-4 3-2-1-1 3-2-1-2 3-2-1-3 3-2-1-4 3-2-2-2 3-2-2-3 3-2-2-4 3-2-3-2 3-2-3-3 3-2-4-1 3-2-4-2 3-2-4-3 3-2-4-4 3-3-1-1 3-3-1-3 88h 89h 8Ah 8Bh 8Ch 8Fh 90h 91h 92h 93h 95h 96h 97h 99h 9Ah 9Ch 9Dh 9Eh 9Fh A0h A2h 3-24 POST Description Check video configuration against CMOS. Initialize PCI bus and devices. Initialize all video adapters in system. QuietBoot start (optional). Shadow video BIOS ROM. Display BIOS copyright notice. Initialize MultiBoot. Display CPU type and speed. Initialize EISA board. Test keyboard. Set key click if enabled. Enable USB devices. Test for unexpected interrupts. Initialize POST display service. Display prompt "Press F2 to enter SETUP". Disable CPU cache. Test RAM between 512 and 640 kB. Test extended memory. Test extended memory address lines. Jump to UserPatch1. Configure advanced cache registers. Initialize Multi Processor APIC. Enable external and CPU caches. Set up System Management Mode (SMM) area. Display external L2 cache size. Load custom defaults (optional). Display shadow-area message. Display possible high address for UMB recovery. Display error messages. Check for configuration errors. Check for keyboard errors. Set up hardware interrupt vectors. Initialize Intelligent System Monitoring. Initialize coprocessor if present. Disable onboard Super I/O ports and IRQs. Late POST device initialization. Detect and install external RS232 ports. Configure non-MCD IDE controllers. Detect and install external parallel ports. Initialize PC-compatible PnP ISA devices. Re-initialize onboard I/O ports. Configure Motherboard Configurable Devices (optional). Initialize BIOS Data Area. Enable Non-Maskable Interrupts (NMIs). Initialize Extended BIOS Data Area. Test and initialize PS/2 mouse. Initialize floppy controller. Determine number of ATA drives (optional). Initialize hard-disk controllers. Initialize local-bus hard-disk controllers. Jump to UserPatch2. Build MPTABLE for multi-processor boards. Install CD-ROM for boot. Clear huge ES segment register. Fix up Multi Processor table. Check for SMART Drive (optional). Shadow option ROMs. Set up Power Management. Initialize security engine (optional). Enable hardware interrupts. Determine number of ATA and SCSI drives. Set time of day. Check key lock. Troubleshooting and Diagnostics Beep Codes* 3-3-2-1 3-3-3-1 3-3-3-3 3-3-4-1 3-3-4-3 3-4-1-1 3-4-1-2 3-4-1-3 3-4-2-2 3-4-2-3 3-4-2-4 3-4-3-2 3-4-3-3 3-4-3-4 3-4-4-1 3-4-4-2 3-4-4-3 3-4-4-4 4-1-1-1 4-1-1-2 4-1-1-3 4-1-1-4 4-1-2-1 4-1-2-2 4-1-2-3 4-1-2-4 4-1-3-1 4-1-3-2 4-1-3-3 4-1-3-4 Error Code A4h A8h AAh ACh AEh B0h B1h B2h B5h B6h B7h B9h BAh BBh BCh BDh BEh BFh C0h C1h C2h C3h C4h C5h C6h C7h C8h C9h CAh CBh 4-1-4-1 CCh 4-1-4-2 4-1-4-3 4-2-1-3 4-3-1-1 4-3-1-2 4-3-1-3 4-3-1-4 4-3-2-1 4-3-2-2 4-3-2-3 4-3-2-4 4-3-3-1 4-3-3-2 4-3-3-3 4-3-3-4 4-3-4-1 4-3-4-2 4-3-4-3 4-3-4-4 4-4-1-1 4-4-1-2 4-4-1-3 4-4-1-4 4-4-2-1 4-4-2-2 4-4-2-3 4-4-2-4 1 long, 2 short CDh CEh D2h E0h E1h E2h E3h E4h E5h E6h E7h E8h E9h EAh EBh ECh EDh EEh EFh F0h F1h F2h F3h F4h F5h F6h F7h 98h POST Description Initialize typematic rate. Erase F2 prompt. Scan for F2 keystroke. Enter SETUP. Clear Boot flag. Check for errors. Inform RomPilot about the end of POST. POST done - prepare to boot OS. Terminate QuietBoot (optional). Check password (optional). Initialize ACPI BIOS. Prepare Boot. Initialize SMBIOS. Initialize PnP Option ROMs. Clear parity checkers. Display MultiBoot menu. Clear screen (optional). Check virus and backup reminders. Try to boot with INT 19. Initialize POST Error Manager (PEM). Initialize error logging. Initialize error display function. Initialize system error handler. PnPnd dual CMOS (optional). Initialize note dock (optional). Initialize note dock late. Force check (optional). Extended checksum (optional). Redirect Int 15h to enable remote keyboard. Redirect Int 13h to Memory Technologies Devices such as ROM, RAM, PCMCIA, and serial disk. Redirect Int 10h to enable remote serial video. Re-map I/O and memory for PCMCIA. Initialize digitizer and display message. Unknown interrupt. Initialize the chipset. Initialize the bridge. Initialize the CPU. Initialize system timer. Initialize system I/O. Check force recovery boot. Checksum BIOS ROM. Go to BIOS. Set Huge Segment. Initialize Multi Processor. Initialize OEM special code. Initialize PIC and DMA. Initialize Memory type. Initialize Memory size. Shadow Boot Block. System memory test. Initialize interrupt vectors. Initialize Run Time Clock. Initialize video. Initialize System Management Manager. Output one beep. Clear Huge Segment. Boot to Mini DOS. Boot to Full DOS. Improper video configuration (replace motherboard) or external ROM checksum failure. HP Omnibook XT6050, XT/VT6200 The following table lists POST messages and explanations for reported problems. If the system fails after you make changes in BIOS Setup, reset the computer, enter BIOS Setup, and install the defaults or correct the error. Table 3-4. POST Messages Message Description 0200 Failure Fixed Disk Fixed (hard) disk is not working or not configured properly. Make sure the hard disk is installed properly. Run BIOS Setup and make sure the hard disk type is correctly identified. 0210 Stuck key Stuck key on keyboard. 0211 Keyboard error Keyboard is not working. 0212 Keyboard Controller Failed Keyboard controller failed the test. May require replacing the motherboard (contains the keyboard controller). 0213 Keyboard locked – Unlock key switch Unlock the system to proceed. 0220 Monitor type does not match CMOS – Run SETUP Monitor type is not correctly identified in BIOS Setup. 0230 Shadow RAM Failed at offset: nnnn Shadow RAM failed at offset nnnn of the 64k block at which the error was detected. 0231 System RAM Failed at offset: nnnn System RAM failed at offset nnnn of the 64k block at which the error was detected. 0232 Extended RAM Failed at offset: nnnn Extended memory is not working or not configured properly at offset nnnn. Update to the latest BIOS version. 0250 System battery is dead – Replace and run SETUP CMOS clock battery indicator shows that the CMOS battery is dead. Connect the AC adapter for at least 24 hours, then run BIOS Setup to reconfigure the system. 0251 System CMOS checksum bad – Default configuration used System CMOS has been corrupted or modified incorrectly, perhaps by an application that changes CMOS data. In response, the BIOS has installed the default Setup values. Use BIOS Setup to modify these values if needed. If the error persists, check the CMOS battery. Connect the AC adapter for at least 24 hours; replace the motherboard. 0260 System timer error Timer test failed. Replace the motherboard. 0270 Real time clock error Real-time clock failed the BIOS test. May require replacing the motherboard. 0271 Check date and time settings BIOS found the date or time to be out of range, and reset the real-time clock. You may need to use BIOS Setup to reset the legal date. 0280 Previous boot incomplete – Default configuration used Previous POST did not complete successfully. POST loads default values and offers to run BIOS Setup. If the failure was caused by incorrect values that are not corrected, the next boot will likely fail. This error is cleared the next time the system is booted. 0281 Memory Size found by POST differed from CMOS Memory size found by POST differed from that specified in CMOS. 02B0 Diskette drive A error 02B1 Diskette drive B error Drive A: or B: is present but fails the BIOS POST diskette tests. Make sure the drive is defined with the proper diskette type in BIOS Setup and that the drive is connected correctly. 02B2 Incorrect Drive A type – run SETUP Type of floppy drive A: not correctly identified in BIOS Setup. 02B3 Incorrect Drive B type – run SETUP Type of floppy drive B: not correctly identified in BIOS Setup. 02D0 System cache error – Cache disabled RAM cache failed and BIOS disabled the cache. May require replacing the motherboard. A disabled cache slows system performance considerably. HP Omnibook XT6050, XT/VT6200 Troubleshooting and Diagnostics 3-25 Message Description 02F0: CPU ID: CPU socket number for Multi-Processor error. 02F4: EISA CMOS not writeable ServerBIOS2 test error: Cannot write to EISA CMOS. 02F5: DMA Test Failed ServerBIOS2 test error: Cannot write to extended Direct Memory Access (DMA) registers. 02F6: Software NMI Failed ServerBIOS2 test error: Cannot generate software Non-Maskable Interrupt (NMI). 02F7: Fail-Safe Timer NMI Failed ServerBIOS2 test error: Fail-safe timer takes too long. device Address Conflict Address conflict for the specified device. Allocation Error for: device Run ISA or EISA Configuration Utility to resolve a resource conflict for the specified device. CD ROM Drive CD-ROM drive identified. Entering SETUP ... Starting BIOS Setup. Failing Bits: nnnn Hex number nnnn is a map of the bits at the RAM address that failed the memory test. Each 1 (one) in the map indicates a failed bit. See errors 230, 231, or 232 above for offset address of the failure in System, Extended, or Shadow memory. Fixed Disk n Fixed disk n (0–3) identified. Invalid System Configuration Data Problem with NVRAM (CMOS) data. I/O device IRQ conflict I/O device IRQ conflict error. PS/2 Mouse Boot Summary Screen: PS/2 mouse installed. nnnn kB Extended RAM Passed Where nnnn is the amount of RAM in kB successfully tested. nnnn Cache SRAM Passed Where nnnn is the amount of system cache in kB successfully tested. nnnn kB Shadow RAM Passed Where nnnn is the amount of shadow RAM in kB successfully tested. nnnn kB System RAM Passed Where nnnn is the amount of system RAM in kB successfully tested. Operating system not found Operating system cannot be located on drive A: or drive C:. Enter BIOS Setup and see if the hard disk and drive A: are properly identified. Parity Check 1 nnnn Parity error found in the system bus. BIOS attempts to locate the address and display it on the screen. If it cannot locate the address, it displays ????. Parity is a method for checking errors in binary data. A parity error indicates that data has been corrupted. Parity Check 2 nnnn Parity error found in the I/O bus. BIOS attempts to locate the address and display it on the screen. If it cannot locate the address, it displays ????. Press <F1> to resume, <F2> to Setup, <F3> for previous Displayed after any recoverable error message. Press <F1> to start the boot process or <F2> to enter BIOS Setup and change the settings. Press <F3> to display the previous screen (usually an initialization error of an Option ROM, such as an add-on card). Write down and follow the information shown on the screen. Press <F2> to enter Setup Optional message displayed during POST. PS/2 Mouse: PS/2 mouse identified. System BIOS shadowed System BIOS copied to shadow RAM. 3-26 Troubleshooting and Diagnostics HP Omnibook XT6050, XT/VT6200 Message Description UMB upper limit segment address: nnnn Displays the address nnnn of the upper limit of Upper Memory Blocks (UMB), indicating released segments of the BIOS that can be reclaimed by a virtual memory manager. Video BIOS shadowed Video BIOS copied to shadow RAM. Sycard PCCtest 450/460 PC Card (Optional) The PCCtest 450 and 460 cards (version 1.05) from Sycard Technology are the only recommended diagnostic tools that test the functionality of the PCMCIA slots using a PCMCIA card. Each is a Type II PC card that works with test software to exercise PCMCIA functions. (For details, see the Sycard Technology web site: http://www.sycard.com.) The PCCtest product contains these components: • PCCtest 450 or 460 (revision 1.05) PC card. • PCCtest 450/460 software disk. (Software updates are available at the Sycard Technology web site.) • Configuration headers (PC card/16-bit and CardBus/32-bit) that attach to the card. You will also need a CardBus extender card (such as the Sycard PCCextend 70) to avoid wear on the Sycard PCMCIA connector. Use the following tests to check the function of the notebook’s PCMCIA slots. See the Sycard documentation for details about running the tests. Table 3-5. Sycard PCCtest Commands Omnibook XT/VT6200 and XT6050 (PCI1410) HP Omnibook XT6050, XT/VT6200 PCMCIA PC card (16-bit) test (PC card configuration header) PCT450 -0 -v -b75 CardBus (32-bit) test (CardBus configuration header) TESTCB -0 -v -b76(b) Troubleshooting and Diagnostics 3-27 Windows Management Instrumentation (WMI) The Windows Management Instrumentation (WMI) is basically a set of rules for accessing information about a computer. WMI allows an application to determine, for example, the operating system being used, which hardware and software components are in the computer, and possibly whether any of the components need replacing. A local or remote application can use the WMI interface to check which hardware and software components are installed on your computer, and may be able to tell how well they are working or if they need replacement. Installing the WMI Package The WMI package is either preinstalled on the computer’s hard disk or can be downloaded from http://www.hp.com/toptools (the contents are the same in both cases). The package must be properly installed before it can be used. To install the WMI preloaded on the hard disk: 1. Start Windows, if it is not already running. 2. Click Start, Programs (or All Programs), HP Toptools, Setup. Using WMI For a complete description of how to use WMI, see the following documentation provided with the computer: • A README.TXT file: click Start, Programs, HP Toptools, Read me. • A Windows online help file describing Hewlett-Packard’s implementation of WMI (group and attribute definitions): click Start, Programs, HP Toptools, HP Toptools Help. Uninstalling the WMI Package 1. Click Start, Programs (or All Programs), HP Toptools, Uninstall WMI. 2. Restart the notebook. 3-28 Troubleshooting and Diagnostics HP Omnibook XT6050, XT/VT6200 BIOS Setup Utility The BIOS Setup utility provides access to the notebook’s basic configuration settings. It is independent of the operating system. Running the BIOS Setup Utility 1. Close all applications, then restart the notebook: click Start, Shut Down (Windows 2000) or Turn Off Computer (Windows XP), Restart. (If necessary, you can press Ctrl+Alt+Del to restart.) 2. When the HP logo appears, press F2 to enter the BIOS Setup utility. 3. The pointing devices are not active in BIOS Setup, so you will need to use the keyboard to navigate: • Press the LEFT and RIGHT arrow keys to move among menus. • Press the UP and DOWN arrow keys to move among parameters in a menu. • Press F5 or F6 to move through values for the current parameter, or press Enter to change a setting. 4. After you select the options you want, press F10 or use the Exit menu to exit BIOS Setup. If the settings cause a conflict between devices during reboot, the system prompts you to run BIOS Setup, and marks the conflicting settings. Note The listings in the following table are for the initial XT/VT6200 BIOS release, and may differ somewhat for other models. Table 3-6. BIOS Setup Menus and Parameters Omnibook XT6050: Introduced with BIOS version EF.M1.00 (Spring 2002). Omnibook XT/VT6200: Introduced with BIOS version EG.M1.00 (Spring 2002). Main Menu Description Default BIOS Revision Shows the current HP BIOS version. Detected automatically. System Time Sets the date using dd/mm/yy format (except English, which uses mm/dd/yy format). The value set in this field takes effect immediately. System Date Sets the date using mm/dd/yy (English) or dd/mm/yy format. The value set in this field takes effect immediately. Internal Hard Disk Sets the hard disk drive type, capacity, and other parameters. Detected automatically. Quiet Boot When enabled, hides summary of power-on self test and messages during boot. Enabled Video Display Device Sets whether the built-in display automatically switches to an external display, if one is detected. Auto Video Expansion When enabled, the video image covers the entire display in lower-resolution modes. When disabled, the video image is centered in the display. Disabled Video Configuration HP Omnibook XT6050, XT/VT6200 Troubleshooting and Diagnostics 3-29 Primary Video Adapter Sets whether the computer automatically switches to an external video adapter connected to the docking system, if one is detected. Auto Television Type Controls the signal format (NTSC or PAL) output by the S-video port. NTSC System Memory Shows the system memory size. 640 KB Extended Memory Shows the extended memory size (equals total memory size minus 1 MB). Detected automatically. Unique Dock ID Sets whether the computer creates a unique hardware profile for each dock (Enabled) or uses a common profile for all docks (Disabled). Enabled UUID Displays the value of the 16-byte UUID (Universally Unique ID) as 32 hex characters. Detected automatically. MAC Address Displays the internal LAN MAC address. Detected automatically. Serial Number Displays the serial number as it appears on the back of the notebook. Detected automatically. Service ID Displays the “Born On Date” stored in EEPROM in format YYYYDDD. Detected automatically. System Devices Menu Description Default PS/2 Pointing Devices Disables the internal pointing devices when an external PS/2 mouse is connected. Auto FDD Controller Enables the floppy drive. Enabled Legacy USB Support Enables BIOS support for USB mouse, keyboard, and floppy disk drive. Enabled Internal LAN Enables the internal (wired) LAN. Enabled Mini PCI Slot 1 Enables the PCI slot normally used for a wireless LAN. Enabled Mini PCI Slot 2 Enables the PCI slot normally used for a modem, which is located under the cover on the bottom of unit. (Does not affect Ambit modem.) Enabled Serial port Enables the serial port. Enabled Base I/O address Sets the I/O address. 3F8h Interrupt Sets the interrupt. IRQ4 Enables the infrared port. Disabled Mode Sets the hardware to support FIR (Fast IR) or SIR (Standard IR) infrared communications. FIR Base I/O address Sets the I/O address. 2F8h Interrupt Sets the interrupt. IRQ3 DMA channel Sets the DMA channel for Fast IR (FIR) mode. DMA0 Infrared port Parallel Port Enables the parallel port. Enabled Mode Sets the port to output only, bi-directional, EPP, or ECP. ECP Base I/O address Sets the I/O address. 378h Interrupt Sets the interrupt. IRQ7 DMA channel Sets the DMA channel for ECP mode. DMA3 3-30 Troubleshooting and Diagnostics HP Omnibook XT6050, XT/VT6200 Security Menu Description Default User Password is Shows if a user password is set. Clear Administrator Password is Shows if an administrator password is set. Clear Set User Password Press Enter to set, change, or clear the user password. The password can have no more than 8 characters (0-9, A-Z), and cannot include special or accented characters. Enter Set Administrator Password Press Enter to set, change, or clear the administrator password, which protects BIOS Setup settings. The password can have no more than 8 characters (0-9, A-Z), and cannot include special or accented characters. Enter Smart Card Security Enables Smart Card user validation instead of the password scheme. This field appears only if Smart Card Security has been enabled by HP Smart Card software in Windows. Enabled Sets whether a user password is required when the computer boots. Requires the administrator password for changes. Enabled Internal hard disk drive lock Encodes the current user password (or administrator password if that is the only password set) on the hard disk drive. Disabled Removable Device Boot Sets whether the computer will attempt to boot from a floppy drive or other removable device. Enabled Power Menu Description Default Backlight Control When switching to battery power, sets whether the display brightness reverts to the previous battery-power brightness (Auto Restore) or to a very low brightness to save power (Auto Dim). Auto Restore Auto Suspend on Undock* Sets whether the computer suspends to Standby power mode after undocking. When Lid Closed Auto Turn-On on Dock* Sets whether the computer turns on after docking. Enabled Boot Menu Description Default +Hard Disk +Removable Device CD-ROM/DVD Drive Internal NIC Shows the order of boot devices, with “+” indicating a device category. Move the entries to change the order. If the computer has more than one device in a category, you can select the one scanned. Internal NIC provides diskless boot from a network server. 1. Hard Disk 2. Removable Device 3. CD-ROM/ DVD drive 4. Internal NIC Exit Menu Description Password Required to Boot Save Changes and Exit Saves Setup changes, then exits and reboots. Discard Changes and Exit Discards any Setup changes made since last save, then exits and reboots. Does not affect password, date, or time changes. Get Default Values Restores default settings, and remains in Setup. Does not affect password, date, or time changes. Load Previous Values Discards any Setup changes made since last save, and remains in Setup. Does not affect password, date, or time changes. Save Changes Saves Setup changes, and remains in Setup. Security settings are saved when changed. HP Omnibook XT6050, XT/VT6200 Troubleshooting and Diagnostics 3-31 Updating the Notebook’s BIOS Hewlett-Packard may from time to time provide updates to the notebook’s BIOS. Use e-DiagTools for Windows to download and install these BIOS updates as needed—see “Using e-DiagTools for Windows” on page 2-29. Caution The BIOS update completely replaces the previous BIOS, so follow these directions exactly or you might damage the notebook. The BIOS update also resets the configurations in the BIOS Setup utility—except for BIOS passwords—so record these before performing the update. Update the notebook’s BIOS as follows: 1. In Windows, exit any programs that are running. 2. Undock the notebook if it is docked, and remove any PC cards from it. 3. Connect the AC adapter to the notebook. 4. Connect any cables or equipment needed to connect to the Internet. 5. Click Start, Programs (or All Programs), HP e-DiagTools, e-DiagTools for Windows. 6. Click Update, select Download New and click OK. Follow the instructions that appear. Once the update process begins, do not interrupt it. The first time you make an Internet connection from this program on a particular unit, click Change Settings in the Connect window to define your connection settings. 7. When the process is completed, press the system-off switch to reset the system. BIOS updates are also available from the HP Business Support web site (www.hp.com/go/bizsupport). Installation utilities and instructions for creating a BIOS floppy disk are provided with the updates. 3-32 Troubleshooting and Diagnostics HP Omnibook XT6050, XT/VT6200 4 Replaceable Parts This chapter contains an exploded view of the Omnibook and the following lists of parts: • Omnibook replaceable parts (page 4-3). • Accessory replacement parts (page 4-6). • Part number reference (page 4-7). HP Omnibook XT6050, XT/VT6200 Replaceable Parts 4-1 Figure 4-1. Exploded View 4-2 Replaceable Parts HP Omnibook XT6050, XT/VT6200 Table 4-1. Omnibook Replaceable Parts Description Antennas, OB6100, kit 1 Front antenna PCA 2 Rear antenna PCA 3 Battery, main Card, mini-PCI (hardware modem) Card, mini-PCI (software modem) Card, mini-PCI, 802.11b (worldwide) Card, mini-PCI, 802.11b (France only) Card, mini-PCI, 802.11b (Israel only) 4 Case, bottom 4 Case, bottom 5 Case, top 5 Case, top 6 Covers, corner, OB6100, kit Covers, service, kit 7 Panel, sound/IR 8 Cover, rear antenna 9 Doors, PCMCIA (with springs) 10 Doors, docking (with springs) 11 Cover, center display hinge 12 Cover, mini-PCI (no label) 13 Cover, SDRAM (for Actiontech card) 13 Cover, SDRAM (no label) 14 Cover, Trackpoint (bag of 3, Raspberry Red) 15 CPU module, Celeron-T, 1.06 GHz, Tualatin uFCPGA 15 CPU module, Celeron-T, 1.13 GHz, Tualatin uFCPGA 15 CPU module, Pentium III, 933 MHz, Tualatin uPGA2 15 CPU module, Pentium III, 1.00 GHz, Tualatin uFCPGA 15 CPU module, Pentium III, 1.13 GHz, Tualatin uFCPGA 15 CPU module, Pentium 4, 1.4 GHz, Northwood uFCPGA 15 CPU module, Pentium 4, 1.5 GHz, Northwood uFCPGA 15 CPU module, Pentium 4, 1.6 GHz, Northwood uFCPGA 15 CPU module, Pentium 4, 1.7 GHz, Northwood uFCPGA 15 CPU module, Pentium 4, 1.8 GHz, Northwood uFCPGA 16 Display assembly, 14-in XGA, plastic 16 Display assembly, 14-in XGA, plastic 16 Display assembly, 14-in SXGA+, magnesium 16 Display assembly, 14-in XGA, magnesium 16 Display assembly, 15-in SXGA+ 16 Display assembly, 15-in UXGA 17 Drive, hard disk (10 GB, 9.5mm, IBM [diablo], ATA100) 17 Drive, hard disk (10 GB, 9.5mm, Toshiba, ATA100) 17 Drive, hard disk (20 GB, 9.5mm, Toshiba, ATA100, FDB) 17 Drive, hard disk (30 GB, 9.5mm, IBM [diablo], ATA100) HP Omnibook XT6050, XT/VT6200 Part Number Exchange Part Number F3257-60952 (see above kit) (see above kit) F2019-60902 F4624-60906 F4506-60932 F3257-60962 F3257-60963 F3257-60964 F4506-60935 F4525-60908 F4506-60933 F4525-60906 F3257-60951 F4506-60901 (see above kit) (see above kit) (see above kit) (see above kit) (see above kit) F3257-60942 F3257-60943 F3257-60944 5182-5138 1822-0691 1822-0692 1822-0400 1822-0395 1822-0392 1822-0778 1822-0779 1822-0780 1822-0781 1822-0819 F4506-60934 F4525-60911 F4525-60902 F4525-60901 F4525-60903 F4525-60904 0950-4166 0950-4178 0950-4287 F3377-69201 F3377-69202 F3257-69004 F3257-69005 F3257-69006 F3398-69204 F3398-69203 F3398-69202 F3398-69201 F3398-69205 F4506-69034 F4525-69011 F4525-69002 F4525-69001 F4525-69003 F4525-69004 F3257-69100 F3257-69101 F3476-69002 0950-4162 F2072-69115 Omnibook XT6200 XT6050 VT6200 • • • • • • • • • • • • • • • • • • • • • • • • • • • • • • • • • • • • • • • • • • • • • • • • • • • • • • • • • • • • • • Replaceable Parts • User Repl. Yes Yes Yes Yes Yes Yes Yes Yes Yes Yes Yes Yes Yes Yes Yes 4-3 Description 17 Drive, hard disk (30 GB, 9.5mm, TITAN Toshiba ATA100) 17 Drive, hard disk (30 GB, 9.5mm, Toshiba, ATA100) 17 Drive, hard disk (40 GB, 9.5mm, IBM ATA100, FDB) 17 Drive, hard disk (40 GB, 9.5mm, Toshiba, ATA100) Feet/bumpers, OB6100, kit 18 Heatsink (with fan) 18 Heatsink (with fan) 19 Keyboard, Arab/English (with pointing stick) 19 Keyboard, Arab/English (without pointing stick) 19 Keyboard, Belgian (with pointing stick) 19 Keyboard, Belgian (without pointing stick) 19 Keyboard, Czech (with pointing stick) 19 Keyboard, Czech (without pointing stick) 19 Keyboard, Danish (with pointing stick) 19 Keyboard, Danish (without pointing stick) 19 Keyboard, French (with pointing stick) 19 Keyboard, French (without pointing stick) 19 Keyboard, French Canadian (with pointing stick) 19 Keyboard, French Canadian (without pointing stick) 19 Keyboard, German (with pointing stick) 19 Keyboard, German (without pointing stick) 19 Keyboard, Greek (with pointing stick) 19 Keyboard, Greek (without pointing stick) 19 Keyboard, Hebrew (with pointing stick) 19 Keyboard, Hebrew (without pointing stick) 19 Keyboard, Hungarian (with pointing stick) 19 Keyboard, Hungarian (without pointing stick) 19 Keyboard, Iceland (with pointing stick) 19 Keyboard, Iceland (without pointing stick) 19 Keyboard, International English (with pointing stick) 19 Keyboard, International English (without pointing stick) 19 Keyboard, Italian (with pointing stick) 19 Keyboard, Italian (without pointing stick) 19 Keyboard, Japanese (with pointing stick) 19 Keyboard, Japanese (without pointing stick) 19 Keyboard, Norwegian (with pointing stick) 19 Keyboard, Norwegian (without pointing stick) 19 Keyboard, Portuguese (with pointing stick) 19 Keyboard, Portuguese (without pointing stick) 19 Keyboard, Russian (with pointing stick) 19 Keyboard, Russian (without pointing stick) 19 Keyboard, Spanish (with pointing stick) 19 Keyboard, Spanish (without pointing stick) 19 Keyboard, Swedish/Finnish (with pointing stick) 19 Keyboard, Swedish/Finnish (without pointing stick) 19 Keyboard, Swiss (with pointing stick) 4-4 Replaceable Parts Part Number Exchange Part Number 0950-4360 F3414-69501 0950-4176 0950-4320 0950-4288 F3257-60950 F3257-60930 F4525-60907 F3257-60924 F4506-60923 F3257-60902 F4506-60905 F3257-60903 F4506-60906 F3257-60904 F4506-60907 F3257-60905 F4506-60908 F3257-60906 F4506-60909 F3257-60907 F4506-60910 F3257-60908 F4506-60911 F3257-60920 F4506-60921 F3257-60922 F4506-60922 F3257-60921 F4506-60928 F3257-60909 F4506-60912 F3257-60910 F4506-60913 F3257-60911 F4506-60925 F3257-60912 F4506-60914 F3257-60913 F4506-60915 F3257-60923 F4506-60924 F3257-60914 F4506-60916 F3257-60915 F4506-60917 F3257-60916 F3257-69103 F3428-69500 F3378-69102 Omnibook XT6200 XT6050 VT6200 • • • • • • • • • • • • • • • • • • • • • • • • • • • • • • • • • • • • • • • • • • • • • • • • • • • • • • • • • • • • • • • • • • • HP Omnibook XT6050, XT/VT6200 User Repl. Yes Yes Yes Yes Yes 19 19 19 19 19 19 19 19 19 20 21 22 22 23 24 24 25 26 27 28 Description Part Number Keyboard, Swiss (without pointing stick) Keyboard, Traditional Chinese (with pointing stick) Keyboard, Traditional Chinese (without pointing stick) Keyboard, Turkish (with pointing stick) Keyboard, Turkish (without pointing stick) Keyboard, UK English (with pointing stick) Keyboard, UK English (without pointing stick) Keyboard, US English (with pointing stick) Keyboard, US English (without pointing stick) Label, MS Windows W2K/NT POD COA Mini-PCI panels, OB6100, kit Panel, mini-PCI, LAN/modem Module, floppy disk drive Panel, power button Panel, power button PCA, display interface PCA, motherboard PCA, motherboard, 32 MB PCA, volume Screws, OB6000/6100/6050, kit SDRAM module, 128 MB, DDR266B SDRAM module, 128 MB, PC133, SODIMM (X16) SDRAM module, 256 MB, DDR266B SDRAM module, 256 MB, PC133, SODIMM (X16) SDRAM module, 512 MB, DDR266B SDRAM module, 512 MB, PC133, SODIMM (X8) Socket, PCMCIA (one slot) Speaker assembly Tray, business card Tray, hard disk drive F4506-60918 F3257-60919 F4506-60926 F3257-60917 F4506-60919 F3257-60918 F4506-60920 F3257-60901 F4506-60904 B23-02269 F3257-60949 (see above kit) F2013-60901 F3257-60929 F4525-60912 F4506-60929 F4506-60931 F4525-60905 F4506-60930 F4506-60902 F4694-60901 1818-8504 F4695-60901 1818-8635 F4696-60901 1818-8604 F4506-60903 F3257-60936 F2072-60921 F3257-60931 HP Omnibook XT6050, XT/VT6200 Exchange Part Number F4506-69031 F4525-69005 F2298-69001 Omnibook XT6200 XT6050 VT6200 • • • • • • • • • • • • • • • • • • • • • • • • • • • • • • • • • • • • • • • • • • • • • Replaceable Parts 4-5 User Repl. Yes Yes Yes Yes Yes Yes Yes Yes Yes Yes Yes Yes Table 4-2. Accessory Replaceable Parts Description Part Number AC Adapter, Ultraslim Delta, 75W s/PFC Battery, main Battery, secondary module Cable, floppy disk drive (external) Charger, battery (external) Cord, power, Argentina (2w) Cord, power, Australia #ABG (2w) Cord, power, Chile (2w) Cord, power, China #AB2 (2w) Cord, power, Europe #ABB (2w) Cord, power, India (2w) Cord, power, Japan #ABJ (2w) Cord, power, S. Africa #ACQ (2w) Cord, power, S. Korea (2w) Cord, power, U.S #ABA (2w) Cord, power, UK (EPSR) for Hong Kong (2w) Cover, Trackpoint (bag of 3, Raspberry Red) Mini Dock (C) Version Module, floppy disk drive Module, DVD drive Module, CD-ROM drive Module, LS-240 Super Disk drive Module, CDRW drive Module, DVD/CDRW Combo drive Module, 2nd hard disk drive holder Module, weight saving Module, Zip drive Monitor stand (short) Port Replicator (C) Version SDRAM module, 128 MB, DDR266B SDRAM module, 128 MB, PC133, SODIMM (X16) SDRAM module, 256 MB, DDR266B SDRAM module, 256 MB, PC133, SODIMM (X16) SDRAM module, 512 MB, DDR266B SDRAM module, 512 MB, PC133, SODIMM (X8) Tray, docking F F4600-60901 F2019-60902 F2014-60902 F2008-60901 F2011-60901 8120-8367 8120-6312 8120-8452 8120-8373 8120-6314 8121-0702 8120-6316 8120-6317 8120-8441 8120-6313 8120-8699 5182-5138 F1452-60903 F2013-60901 F2015-60903 F2017-60901 F2022-60902 F2026-60902 F2107-60901 F2072-60910 F2072-60922 F2009-60902 F1453-60901 F1451-60903 F4694-60901 1818-8504 F4695-60901 1818-8635 F4696-60901 1818-8604 F2012-60903 4-6 Replaceable Parts Exchange Part Number F2026-69002 F2298-69001 Omnibook XT6200 XT6050 VT6200 • • • • • • • • • • • • • • • • • • • • • • • • • • • • • • • • • • • • • • • • • • • • • • • • • • • • • • • • • • • • • • • • User Repl. Yes Yes Yes Yes Yes Yes Yes Yes Yes Yes Yes Yes Yes Yes Yes Yes Yes Yes Yes Yes Yes Yes Yes Yes Yes Yes Yes Yes Yes Yes Yes Yes Yes Yes Yes Yes HP Omnibook XT6050, XT/VT6200 Table 4-3. Part Number Reference Part Number Exchange Part Number 0950-4162 0950-4166 0950-4176 0950-4178 0950-4287 F2072-69115 F3257-69100 F3257-69103 F3257-69101 F3476-69002 0950-4288 0950-4320 0950-4360 F3378-69102 F3428-69500 F3414-69501 1818-8504 1818-8604 1818-8635 1822-0392 1822-0395 1822-0400 1822-0691 1822-0692 1822-0778 1822-0779 1822-0780 1822-0781 1822-0819 5182-5138 7121-7525 8120-6312 8120-6313 8120-6314 8120-6316 8120-6317 8120-8367 8120-8373 8120-8441 8120-8452 8120-8699 8121-0702 B23-02269 F1451-60903 F1452-60903 F1453-60901 F2008-60901 F2009-60902 F2011-60901 F2012-60903 F2013-60901 F2014-60902 F2298-69001 F3257-69006 F3257-69005 F3257-69004 F3377-69201 F3377-69202 F3398-69204 F3398-69203 F3398-69202 F3398-69201 F3398-69205 Description Drive, hard disk (30 GB, 9.5mm, IBM [diablo], ATA100) Drive, hard disk (10 GB, 9.5mm, IBM [diablo], ATA100) Drive, hard disk (30 GB, 9.5mm, Toshiba, ATA100) Drive, hard disk (10 GB, 9.5mm, Toshiba, ATA100) Drive, hard disk (20 GB, 9.5mm, Toshiba, ATA100, FDB) Drive, hard disk (40 GB, 9.5mm, Toshiba, ATA100) Drive, hard disk (40 GB, 9.5mm, IBM ATA100, FDB) Drive, hard disk (30 GB, 9.5mm, TITAN Toshiba ATA100) SDRAM module, 128 MB, PC133, SODIMM (X16) SDRAM module, 512 MB, PC133, SODIMM (X8) SDRAM module, 256 MB, PC133, SODIMM (X16) CPU module, Pentium III, 1.13 GHz, Tualatin uFCPGA CPU module, Pentium III, 1.00 GHz, Tualatin uFCPGA CPU module, Pentium III, 933 MHz, Tualatin uPGA2 CPU module, Celeron-T, 1.06 GHz, Tualatin uFCPGA CPU module, Celeron-T, 1.13 GHz, Tualatin uFCPGA CPU module, Pentium 4, 1.4 GHz, Northwood uFCPGA CPU module, Pentium 4, 1.5 GHz, Northwood uFCPGA CPU module, Pentium 4, 1.6 GHz, Northwood uFCPGA CPU module, Pentium 4, 1.7 GHz, Northwood uFCPGA CPU module, Pentium 4, 1.8 GHz, Northwood uFCPGA Cover, Trackpoint, (bag of 3, Raspberry Red) Overlay, serial label Cord, power, Australia #ABG (2w) Cord, power, U.S #ABA (2w) Cord, power, Europe #ABB (2w) Cord, power, Japan #ABJ (2w) Cord, power, S. Africa #ACQ (2w) Cord, power, Argentina (2w) Cord, power, China #AB2 (2w) Cord, power, S. Korea (2w) Cord, power, Chile (2w) Cord, power, UK (EPSR) for Hong Kong (2w) Cord, power, India (2w) Label, MS Windows W2K/NT POD COA Port Replicator (C) Version Mini Dock (C) Version Monitor stand (short) Cable, floppy disk drive (external) Module, Zip drive Charger, battery (external) Tray, docking F Module, floppy disk drive Battery, secondary module HP Omnibook XT6050, XT/VT6200 Omnibook XT6200 XT6050 VT6200 • • • • • • • • • • • • • • • • • • • • • • • • • • • • • • • • • • • • • • UserRepl. Yes Yes Yes Yes Yes Yes Yes Yes • • • • • • • • Yes Yes Yes • Yes • • • • • • • • • • • • • • • • • • • • • Yes Yes Yes Yes Yes Yes Yes Yes Yes Yes Yes Replaceable Parts Yes Yes Yes Yes Yes Yes Yes Yes Yes 4-7 Part Number F2015-12003 F2015-60903 F2017-60901 F2019-60902 F2022-60902 F2026-12004 F2026-60902 F2072-60910 F2072-60921 F2072-60922 F2107-60901 F3257-60901 F3257-60902 F3257-60903 F3257-60904 F3257-60905 F3257-60906 F3257-60907 F3257-60908 F3257-60909 F3257-60910 F3257-60911 F3257-60912 F3257-60913 F3257-60914 F3257-60915 F3257-60916 F3257-60917 F3257-60918 F3257-60919 F3257-60920 F3257-60921 F3257-60922 F3257-60923 F3257-60924 F3257-60929 F3257-60930 F3257-60931 F3257-60936 F3257-60942 F3257-60943 F3257-60944 F3257-60949 F3257-60950 F3257-60951 F3257-60952 F3257-60962 4-8 Exchange Part Number F2026-69002 Replaceable Parts Description CD/DVD software (InterVideo ver. v31b53.8) Module, DVD drive Module, CD-ROM drive Battery, main Module, LS-240 drive Super Disk CDRW software (Veritas v31b100B47b) Module, CDRW drive Module, 2nd hard disk drive holder Tray, business card Module, weight saving Module, DVD/CDRW Combo drive Keyboard, US English (with pointing stick) Keyboard, Belgian (with pointing stick) Keyboard, Czech (with pointing stick) Keyboard, Danish (with pointing stick) Keyboard, French (with pointing stick) Keyboard, French Canadian (with pointing stick) Keyboard, German (with pointing stick) Keyboard, Greek (with pointing stick) Keyboard, International English (with pointing stick) Keyboard, Italian (with pointing stick) Keyboard, Japanese (with pointing stick) Keyboard, Norwegian (with pointing stick) Keyboard, Portuguese (with pointing stick) Keyboard, Spanish (with pointing stick) Keyboard, Swedish/Finnish (with pointing stick) Keyboard, Swiss (with pointing stick) Keyboard, Turkish (with pointing stick) Keyboard, UK English (with pointing stick) Keyboard, Traditional Chinese (with pointing stick) Keyboard, Hebrew (with pointing stick) Keyboard, Iceland (with pointing stick) Keyboard, Hungarian (with pointing stick) Keyboard, Russian (with pointing stick) Keyboard, Arab/English (with pointing stick) Panel, power button Heatsink (with fan) Tray, hard disk drive Speaker assembly Cover, mini-PCI (no label) Cover, SDRAM (for Actiontech card) Cover, SDRAM (no label) Mini-PCI panels, OB6100, kit Feet/bumpers, OB6100, kit Covers, corner, OB6100, kit Antennas, OB6100, kit Card, mini-PCI, 802.11b (worldwide) Omnibook XT6200 XT6050 VT6200 • • • • • • • • • • • • • • • • • • • • • • • • • • • • • • • • • • • • • • • • • • • • • • • • • • • • • • • • • • • • • • • • • • • UserRepl. Yes Yes Yes Yes Yes Yes Yes Yes Yes Yes Yes Yes Yes Yes Yes Yes Yes Yes Yes HP Omnibook XT6050, XT/VT6200 Part Number F3257-60963 F3257-60964 F4506-12001 F4506-12002 F4506-12003 F4506-12004 F4506-12005 F4506-12006 F4506-12007 F4506-12008 F4506-12009 F4506-12010 F4506-12011 F4506-12012 F4506-12013 F4506-12014 F4506-12015 F4506-12016 F4506-12017 F4506-12018 F4506-12019 F4506-12020 F4506-12021 F4506-12022 F4506-12023 F4506-12024 F4506-12025 F4506-12026 F4506-12027 F4506-12028 F4506-12029 F4506-12030 F4506-12031 F4506-12032 F4506-12033 F4506-12034 F4506-12035 F4506-12036 F4506-12037 F4506-12039 F4506-12040 F4506-12041 F4506-12042 F4506-12046 F4506-12047 F4506-12048 F4506-12049 Exchange Part Number Description Card, mini-PCI, 802.11b (France only) Card, mini-PCI, 802.11b (Israel only) Recovery CD, W2K, North American English Recovery CD, W2K, International English Recovery CD, W2K, French Recovery CD, W2K, Italian Recovery CD, W2K,German Recovery CD, W2K,Spanish Recovery CD, W2K,Swedish Recovery CD, W2K,Traditional Chinese (Hong Kong) Recovery CD, W2K, Simplified Chinese Recovery CD, W2K,Traditional Chinese (Taiwan) Recovery CD, W2K, NA ENG Recovery CD, W2K, INTL ENG Recovery CD, W2K, French Recovery CD, W2K, Italian Recovery CD, W2K,German Recovery CD, W2K,Spanish Recovery CD, W2K,Swedish Recovery CD, W2K,Traditional Chinese (Hong Kong) Recovery CD, W2K, Simplified Chinese Recovery CD, W2K,Traditional Chinese (Taiwan) Recovery CD, W2K, Japanese Recovery CD, XP Pro, Japanese Recovery CD, W2K, Czech Recovery CD, W2K, Danish Recovery CD, W2K, Dutch Recovery CD, W2K, Finnish Recovery CD, W2K, Norwegian Recovery CD, XP Pro, Czech Recovery CD, XP Pro, Danish Recovery CD, XP Pro, Dutch Recovery CD, XP Pro, Finnish Recovery CD, XP Pro, Norwegian Recovery CD, XP Home, International English Recovery CD, XP Home, North American English Recovery CD, XP Home, German Recovery CD, XP Home, Dutch/English Recovery CD, XP Home, Swedish/English Recovery CD, XP Home, Danish/English Recovery CD, XP Home, Finnish/English Recovery CD, XP Home, Norwegian/English Recovery CD, XP Home, Traditional Chinese (Taiwan) Recovery CD, XP Home, French Recovery CD, XP Home, Japanese Recovery CD, XP Home, Spanish Recovery CD, XP Home, Italian HP Omnibook XT6050, XT/VT6200 Omnibook XT6200 XT6050 VT6200 • • • • • • • • • • • • • • • • • • • • • • • • • • • • • • • • • • • • • • • • • • • • • • • • • Replaceable Parts UserRepl. Yes Yes 4-9 Part Number F4506-12050 F4506-12055 F4506-12057 F4506-12058 F4506-12061 F4506-12062 F4506-12063 F4506-12064 F4506-12065 F4506-12066 F4506-12067 F4506-60901 F4506-60902 F4506-60903 F4506-60904 F4506-60905 F4506-60906 F4506-60907 F4506-60908 F4506-60909 F4506-60910 F4506-60911 F4506-60912 F4506-60913 F4506-60914 F4506-60915 F4506-60916 F4506-60917 F4506-60918 F4506-60919 F4506-60920 F4506-60921 F4506-60922 F4506-60923 F4506-60924 F4506-60925 F4506-60926 F4506-60928 F4506-60929 F4506-60930 F4506-60931 F4506-60932 F4506-60933 F4506-60934 F4506-60935 F4525-60901 F4525-60902 4-10 Exchange Part Number F4506-69031 F4506-69034 F4525-69001 F4525-69002 Replaceable Parts Description Recovery CD, XP Home, Czech Recovery CD, XP Home, German/French Recovery CD, W2K, North American English Recovery CD, W2K, International English Recovery CD, XP Pro, Hebrew/English Recovery CD, XP Pro, Arabic Recovery CD, XP Pro, Hungarian Recovery CD, XP Pro, Russian Recovery CD, XP Pro, Polish Recovery CD, XP Pro, Turkish Recovery CD, XP Pro, Greek/English Covers, service, kit Screws, OB6000/6100/6050, kit Socket, PCMCIA (one slot) Keyboard, US English (without pointing stick) Keyboard, Belgian (without pointing stick) Keyboard, Czech (without pointing stick) Keyboard, Danish (without pointing stick) Keyboard, French (without pointing stick) Keyboard, French Canadian (without pointing stick) Keyboard, German (without pointing stick) Keyboard, Greek (without pointing stick) Keyboard, International English (without pointing stick) Keyboard, Italian (without pointing stick) Keyboard, Norwegian (without pointing stick) Keyboard, Portuguese (without pointing stick) Keyboard, Spanish (without pointing stick) Keyboard, Swedish/Finnish (without pointing stick) Keyboard, Swiss (without pointing stick) Keyboard, Turkish (without pointing stick) Keyboard, UK English (without pointing stick) Keyboard, Hebrew (without pointing stick) Keyboard, Hungarian (without pointing stick) Keyboard, Arab/English (without pointing stick) Keyboard, Russian (without pointing stick) Keyboard, Japanese (without pointing stick) Keyboard, Traditional Chinese (without pointing stick) Keyboard, Iceland (without pointing stick) PCA, display interface PCA, volume PCA, motherboard Card, mini-PCI (software modem) Case, top Display assembly, 14-in XGA, plastic Case, bottom Display assembly, 14-in XGA, magnesium Display assembly, 14-in SXGA+, magnesium Omnibook XT6200 XT6050 VT6200 • • • • • • • • • • • • • • • • • • • • • • • • • • • • • • • • • • • • • • • • • • • • • • • • • • • • • • • • • • • • • • • • • • • • • • • • • • • • • UserRepl. Yes Yes HP Omnibook XT6050, XT/VT6200 Part Number F4525-60903 F4525-60904 F4525-60905 F4525-60906 F4525-60907 F4525-60908 F4525-60911 F4525-60912 F4525-60999 F4600-60901 F4624-60906 F4694-60901 F4695-60901 F4696-60901 Exchange Part Number F4525-69003 F4525-69004 F4525-69005 F4525-69011 Description Display assembly, 15-in SXGA+ Display assembly, 15-in UXGA PCA, motherboard, 32 MB Case, top Heatsink (with fan) Case, bottom Display assembly, 14-in XGA, plastic Panel, power button CD, OB6200 Training OB6050 AC Adapter, Ultraslim Delta, 75W s/PFC Card, mini-PCI (hardware modem) SDRAM module, 128 MB, DDR266B SDRAM module, 256 MB, DDR266B SDRAM module, 512 MB, DDR266B HP Omnibook XT6050, XT/VT6200 Omnibook XT6200 XT6050 VT6200 • • • • • • • • • • • • • • • Replaceable Parts UserRepl. Yes Yes Yes Yes Yes Yes 4-11 5 Reference Information This chapter includes the following reference information: • Password removal policy. • Display quality statement. Password Removal Policy If the user forgets the system password, the user calls Technical Support to determine the proper removal procedure. The user must provide proof of ownership, and the Omnibook must be operated during the procedure. The password removal procedure is protected as HP Company Private information. There are a restricted number of locations that can perform password removal. It may not be disclosed or distributed outside those locations. Password removal is strictly controlled. Hewlett-Packard and authorized support providers must ensure with written evidence that the Omnibook being “cleansed” is actually in the possession of the unit’s actual and current owner. This requires a sales receipt showing the unit serial number and owner’s name, or a written statement from the owner attesting that he or she is the owner of the unit. The statement can be a fax copy of the document. The fact that the unit is in the hands of an HP representative on behalf of the customer is not evidence of ownership. In addition, HP will not remove the password of a unit for any non-owner, even if it is requested by law enforcement agencies. If you receive such a request, you should notify management and HP Corporate Legal immediately. (These requests may require a court order prior to our participation.) Further, the entity removing the password must log the name, serial number and date of the removal, and file the written backup with the log. The log and backup are subject to standard record retention process and review. The final issue relating to removal of passwords is that HP cannot provide information to users that would assist them in improperly removing a password and opening a unit. HP Omnibook XT6050, XT/VT6200 Reference Information 5-1 Hewlett-Packard Display Quality Statement TFT display manufacturing is a highly precise but imperfect technology, and manufacturers cannot produce large displays that are cosmetically perfect. Most, if not all, TFT displays exhibit some level of cosmetic imperfection. These cosmetic imperfections may be visible to the customer under varying display conditions, and can appear as bright, dim, or dark spots. This issue is common across all vendors supplying TFT displays in their products and is not specific to the HP Omnibook display. HP Omnibook TFT displays meet or exceed all HP standards for cosmetic quality of TFT displays. HP does not warrant that the displays will be free of cosmetic imperfections. TFT displays can have a small number of cosmetic imperfections and still conform to HP’s cosmetic quality specifications. Here are some guidelines for determining what action to take on customers’ complaints of cosmetic imperfections in their TFT displays: 1. View the unit under the customer’s normal operating conditions. This means that if the customer uses the unit predominately in DOS, in Windows, or in some other application or combination of applications, you should make the determination under those same applications. Self test is not a normal operating condition and is not a sufficient tool for interpreting display quality. 2. Use the table below to determine whether the display should be considered for replacement. These are the only conditions in this guideline that may call for a replacement due to a defect in material or workmanship based on the HP Limited Warranty Statement. 3. If a display is considered for replacement, make sure the customer understands that cosmetic variations may also exist on the replacement display, and may require the customer to use a workaround to obscure the cosmetic imperfection. 4. Customers with cosmetic-based complaints that do not conform to the above conditions and tests will not normally be considered for display replacement. The HP-responsible person working with the customer should identify work-arounds that are reasonable and appropriate for the individual customer. Customers who must have a more perfect display solution should consider switching to an Omnibook with a DSTN display. We expect that over time the industry will continue to produce displays with fewer inherent cosmetic imperfections, and we will adjust our HP guidelines as these improvements are implemented. 5-2 Reference Information HP Omnibook XT6050, XT/VT6200 Table 5-1. Omnibook XT6050 and XT/VT6200 LCD Guidelines Type of Imperfection Electrical Imperfections: Bright dots (a) Dark dots (a) Imperfections Not Allowed • • • • • 7 or more single bright dots. 7 or more single dark dots. 9 or more total (bright and dark combined) defective dots. Any occurrence of multiple defective dots within 15 mm. Mechanical Imperfections: Any polarizer bubble, discoloration, or dent that is visible from at least 36 cm (14 in). Discoloration (b) Polarizer bubbles, dents Definitions of imperfections: a Bright or dark dot: a subpixel (red, green, or blue dot) that is stuck on or off. b Polarizer dent or bubble: a light spot with a darker border that appears on a lighted display and does not change size. (In contrast, a polarizer scratch is a light line that is visible on a darker background and does not change size.) HP Omnibook XT6050, XT/VT6200 Reference Information 5-3 Service Notes Service notes containing important repair information for Technology Codes EF, EG will be issued as needed. These notes are available online at the Partnership web site—see page vi. 5-4 Reference Information HP Omnibook XT6050, XT/VT6200 Part Number F4506-90026 Printed in U.S.A. 4/02