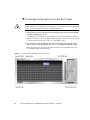
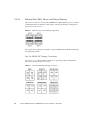
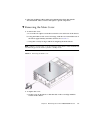
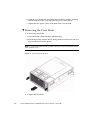
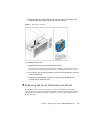
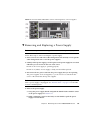
1
TM
Sun Fire X4600 and
Sun Fire X4600 M2 Servers
Service Manual
Part No.: 819-4342-18
March 2011, Revision 01
Copyright © 2010-2011 Oracle Corporation and/or its affiliates. All rights reserved.
This software and related documentation are provided under a license agreement containing restrictions on use and disclosure and are protected by
intellectual property laws. Except as expressly permitted in your license agreement or allowed by law, you may not use, copy, reproduce, translate,
broadcast, modify, license, transmit, distribute, exhibit, perform, publish, or display any part, in any form, or by any means. Reverse engineering,
disassembly, or decompilation of this software, unless required by law for interoperability, is prohibited.
The information contained herein is subject to change without notice and is not warranted to be error-free. If you find any errors, please report them to us
in writing.
If this is software or related software documentation that is delivered to the U.S. Government or anyone licensing it on behalf of the U.S. Government, the
following notice is applicable:
U.S.GOVERNMENT RIGHTS Programs, software, databases, and related documentation and technical data delivered to U.S. Government customers are
“commercial computer software” or “commercial technical data” pursuant to the applicable Federal Acquisition Regulation and agency-specific
supplemental regulations. As such, the use, duplication, disclosure, modification, and adaptation shall be subject to the restrictions and license terms set
forth in the applicable Government contract, and, to the extent applicable by the terms of the Government contract, the additional rights set forth in FAR
52.227-19, Commercial Computer Software License (December 2007). Oracle America, Inc., 500 Oracle Parkway, Redwood City, CA 94065.
This software or hardware is developed for general use in a variety of information management applications. It is not developed or intended for use in any
inherently dangerous applications, including applications which may create a risk of personal injury. If you use this software or hardware in dangerous
applications, then you shall be responsible to take all appropriate fail-safe, backup, redundancy, and other measures to ensure its safe use. Oracle
Corporation and its affiliates disclaim any liability for any damages caused by use of this software or hardware in dangerous applications.
Oracle and Java are registered trademarks of O racle and/or its affiliates. Other names may be trademarks of their respective owners.
AMD, Opteron, the AMD logo, and the AMDOpteron logo are trademarks or registered trademarks of AdvancedMicroDevices. Intel and Intel Xeon are
trademarks or registered trademarks of Intel Corporation. All SPARC trademarks are used under license and are trademarks or registered trademarks of
SPARC International, Inc. UNIX is a registered trademark licensed through X/Open Company, Ltd.
This software or hardware and documentation may provide access to or information on content, products, and services from third parties. Oracle
Corporation and its affiliates are not responsible for and expressly disclaim all warranties of any kind with respect to third-party content, products, and
services.Oracle Corporation and its affiliates will not be responsible for any loss, costs, or damages incurred due to your access to or use of third-party
content, products, or services.
Copyright © 2010-2011, Oracle et/ou ses affiliés. Tous droits réservés.
Ce logiciel et la documentation qui l’accompagne sont protégés par les lois sur la propriété intellectuelle. Ils sont concédés sous licence et soumis à des
restrictions d’utilisation et de divulgation. Sauf disposition de votre contrat de licence ou de la loi, vous ne pouvez pas copier, reproduire, traduire,
diffuser, modifier, breveter, transmettre, distribuer, exposer, exécuter, publier ou afficher le logiciel, même partiellement, sous quelque forme et par
quelque procédé que ce soit. Par ailleurs, il est interdit de procéder à toute ingénierie inverse du logiciel, de le désassembler ou de le décompiler, excepté à
des fins d’interopérabilité avec des logiciels tiers ou tel que prescrit par la loi.
Les informations fournies dans ce document sont susceptibles de modification sans préavis. Par ailleurs, Oracle Corporation ne garantit pas qu’elles
soient exemptes d’erreurs et vous invite, le cas échéant, à lui en faire part par écrit.
Si ce logiciel, ou la documentation qui l’accompagne, est concédé sous licence au Gouvernement des Etats-Unis, ou à toute entité qui délivre la licence de
ce logiciel ou l’utilise pour le compte du Gouvernement des Etats-Unis, la notice suivante s’applique :
U.S.GOVERNMENT RIGHTS. Programs, software, databases, and related documentation and technical data delivered to U.S. Government customers are
"commercial computer software" or "commercial technical data" pursuant to the applicable Federal Acquisition Regulation and agency-specific
supplemental regulations. As such, the use, duplication, disclosure, modification, and adaptation shall be subject to the restrictions and license terms set
forth in the applicable Government contract, and, to the extent applicable by the terms of the Government contract, the additional rights set forth in FAR
52.227-19, Commercial Computer Software License (December 2007). Oracle America, Inc., 500 Oracle Parkway, Redwood City, CA 94065.
Ce logiciel ou matériel a été développé pour un usage général dans le cadre d’applications de gestion des informations. Ce logiciel ou matériel n’est pas
conçu ni n’est destiné à être utilisé dans des applications à risque, notamment dans des applications pouvant causer des dommages corporels. Si vous
utilisez ce logiciel ou matériel dans le cadre d’applications dangereuses, il est de votre responsabilité de prendre toutes les mesures de secours, de
sauvegarde, de redondance et autres mesures nécessaires à son utilisation dans des conditions optimales de sécurité. Oracle Corporation et ses affiliés
déclinent toute responsabilité quant aux dommages causés par l’utilisation de ce logiciel ou matériel pour ce type d’applications.
Oracle et Java sont des marques déposées d’Oracle Corporation et/ou de ses affiliés.Tout autre nom mentionné peut correspondre à des marques
appartenant à d’autres propriétaires qu’Oracle.
AMD, Opteron, le logo AMD et le logo AMD Opteron sont des marques ou des marques déposées d’AdvancedMicroDevices. Intel et Intel Xeon sont des
marques ou des marques déposées d’Intel Corporation. Toutes les marques SPARC sont utilisées sous licence et sont des marques ou des marques
déposées de SPARC International, Inc. UNIX est une marque déposée concédé sous license par X/Open Company, Ltd.
Please
Recycle
Contents
Using This Documentation
1.
Introduction to the Sun Fire X4600/X4600 M2 Servers
1–1
1.1
Features of the Server
1.2
Sun Fire X4600/X4600 M2 Features and Components
1.3
1–1
Sun Fire X4600/X4600 M2 Servers Front Panel Features
1.2.2
Sun Fire X4600/X4600 M2 Servers Back Panel Features
1.2.3
Sun Fire X4600/X4600 M2 Servers Components
Accessory Kits
Additional Options and Replaceable Components
Powering On the Server
▼
2.2
Powering Off the Server
2.3
Configuring BIOS Settings
1–5
1–7
2–1
2–2
2–3
2–3
2.3.1
The System Console
2.3.2
Navigating the BIOS Setup Screens
2.3.3
1–4
2–1
Powering On the Server for the First Time
▼
1–3
1–7
Powering On and Configuring BIOS Settings
2.1
1–3
1.2.1
▼
2.
xix
2–3
2–4
Changing the Configuration of a BIOS Menu Item
BIOS Considerations
2–4
2–5
iii
iv
2.3.3.1
Device Booting Detection Priority
2.3.3.2
Ethernet Port (NIC) Device and Driver Naming
2.3.3.3
BIOS Option ROM Size Limitation
2.3.4
Descriptions of the BIOS Setup Utility Screens
2.3.5
BIOS Setup Utility Menu Screens
2–5
2–6
2–7
2–8
2–10
2.3.5.1
BIOS Main Menu Screen
2–11
2.3.5.2
BIOS Advanced Menu, Main Screen
2.3.5.3
BIOS Advanced Menu, CPU Configuration Screen
2–15
2.3.5.4
BIOS Advanced Menu, IDE Configuration Screen
2–17
2.3.5.5
BIOS Advanced Menu, SuperIO Chipset Configuration
Screen 2–17
2.3.5.6
BIOS Advanced Menu, ACPI Configuration Screen
19
2.3.5.7
BIOS Advanced Menu, Advanced ACPI Configuration
Screen 2–19
2.3.5.8
BIOS Advanced Menu, Event Logging Details Screen
2–21
2.3.5.9
BIOS Advanced Menu, HyperTransport Configuration
Screen 2–23
2.3.5.10
BIOS Advanced Menu, IPMI 2.0 Configuration Screen
2–27
2.3.5.11
BIOS Advanced Menu, IPMI 2.0, View BMC Event Log
Screen 2–27
2.3.5.12
BIOS Advanced Menu, IPMI 2.0, LAN Configuration
Screen 2–29
2.3.5.13
BIOS Advanced Menu, IPMI 2.0, PEF Configuration
Screen 2–31
2.3.5.14
BIOS Advanced Menu, MPS Configuration Screen
2.3.5.15
BIOS Advanced Menu, PCI Express Configuration
Screen 2–33
2.3.5.16
BIOS Advanced Menu, Remote Access Configuration
Screen 2–33
Sun Fire X4600 and Sun Fire X4600 M2 Servers Service Manual • March 2011
2–13
2–
2–31
2.4
2.3.5.18
BIOS PCI/PnP Menu
2.3.5.19
BIOS Boot Menu, Main Screen
2.3.5.20
BIOS Boot Menu, Boot Settings Configuration Screen
41
2.3.5.21
BIOS Boot Menu, Boot Device Priority Screen
2.3.5.22
BIOS Boot Menu, Hard Disk Drives Screen
2.3.5.23
BIOS Boot Menu, Removable Drives Screen
2.3.5.24
BIOS Boot Menu, CD/DVD Drives Screen
2.3.5.25
BIOS Security Settings Menu
2.3.5.26
BIOS Chipset Menu, Main Screen
2.3.5.27
BIOS Chipset Menu, NorthBridge Configuration
Screen 2–49
2.3.5.28
BIOS Chipset Menu, NorthBridge Memory
Configuration Screen 2–51
2.3.5.29
BIOS Chipset Menu, NorthBridge ECC Configuration
Screen 2–53
2.3.5.30
BIOS Chipset Menu, SouthBridge Configuration
Screen 2–55
2.3.5.31
BIOS Exit Options Menu Screen
2–41
▼
2–
2–43
2–43
2–45
2–45
2–47
2–47
2–56
2–56
2–57
2–59
Forcing a Hung Server to Flash a New BIOS
Using the Clear CMOS Jumper P25
2–35
2–37
Resetting the Administration Password Back To the Default
Using the Force-Recovery Jumper P19
▼
2.6
BIOS Advanced Menu, USB Configuration Screen
Resetting SP and BIOS Passwords Using Jumper P20
▼
2.5
2.3.5.17
2–60
2–61
Clearing a Server’s CMOS Settings
2–61
2.7
Using the Reset and NMI Dump Switches
2.8
Updating the BIOS
2.9
Power-On Self-Test (POST)
2.10
BIOS ILOM-based Diagnostics
2–62
2–63
2–63
2–63
Contents
v
3.
Maintaining the Sun Fire X4600/X4600 M2 Servers
3.1
Tools and Supplies Needed
3.2
Powering Off and Removing the Covers
▼
Powering Off the Server
▼
Removing the Main Cover
3–3
▼
Removing the Front Bezel
3–4
3–1
3–2
Replaceable Component Locations
3.4
Replaceable Component Procedures
3–5
3–7
▼
Replacing the Battery
▼
Replacing a CPU Module or CPU Filler Board
▼
Replacing the DVD-ROM Drive
▼
Replacing a Fan Tray
▼
Replacing the Front Panel Indicator Board
▼
Replacing the Front I/O Board
▼
Replacing the GRASP Board
3.4.1
3–7
3–9
3–12
3–14
3–16
3–19
3–22
Replacing a Hard Disk Drive
3–25
▼
Removing and Replacing a Hard Disk Drive
▼
Replacing a Hard Disk Drive Backplane
▼
Replacing Memory Modules (DIMMs)
▼
Replacing the Motherboard
▼
Replacing PCI Cards
Replacing a Power Supply
3–32
3–39
3–42
▼
Removing and Replacing a Power Supply
▼
Replacing the Power Distribution Board
▼
Servicetool FRU Update Procedure
A. System Specifications
vi
3–1
3.3
3.5
3–1
3–47
A–1
A.1
Sun Fire X4600/X4600 M2 Specifications
A.2
PCI-E Slot Information
A–2
A–3
Sun Fire X4600 and Sun Fire X4600 M2 Servers Service Manual • March 2011
3–43
3–44
3–26
3–27
3–30
B. BIOS POST Codes
B.1
B–1
Power-On Self-Test (POST)
B.1.1
How BIOS POST Memory Testing Works
▼
▼
B–1
Redirecting Console Output
Changing POST Options
B–2
B–3
B.1.2
POST Codes
B.1.3
POST Code Checkpoints
C. LEDs and Jumpers
B–4
B–6
C–1
C.1
External LEDs
C–1
C.2
Internal LEDs
C–6
C.3
Jumpers
C–10
D. Connector Pinouts
D–1
D.1
USB Connector
D.2
Serial Connector
D.3
10/100BASE-T Connector
D.4
10/100/1000BASE-T Connector
D.5
VGA Video Connector
D.6
Serial Attached SCSI Connector
D.7
Flex Cable Motherboard Connector
D.8
Flex Cable Power Distribution Board Connector
D.9
Flex Cable DVD-ROM Drive Connector
D–1
D–2
D–2
D–3
D–4
D–5
D–7
D.10 Flex Cable HDD Backplane Connector
D.11
B–1
Motherboard Bus Bar Power Connectors
D–14
D–16
D–18
D.12 Front Flex Cable to Front I/O Board Connector
D.13 Front Flex Cable to Motherboard Connector
D.14 Power Supply Connector
D.15 Fan Module Connector
D–12
D–19
D–21
D–22
D–24
Contents
vii
E. Serial Attached SCSI BIOS Configuration Utility
E.1
Fusion-MPT SAS BIOS Overview
E.1.1
E–1
E–1
Boot Initialization With BIOS Boot Specification (BBS)
E.2
Starting the SAS BIOS Configuration Utility
E.3
Configuration Utility Screens
E–2
E–2
E–3
E.3.1
User Input Keys
E–4
E.3.2
Adapter List Screen
E.3.3
Global Properties Screen
E.3.4
Adapter Properties Screen
E.3.5
SAS Topology Screen
E.3.6
Device Properties Screen
E.3.7
Device Verify Screen
E.3.8
Advanced Adapter Properties Screen
E.3.9
Advanced Device Properties Screen
E–4
E.3.10 PHY Properties Screen
E–7
E–9
E–11
E–16
E–18
E–20
E–23
E–27
E.3.11 Integrated RAID Configuration and Management Screens
E.4
E.3.11.1
Select New Array Type Screen
E.3.11.2
Create New Array Screen
E.3.11.3
View Array Screen
E.3.11.4
Manage Array Screen
E.3.11.5
Exit Screen
E–31
E–37
E–40
E–41
RAID Implementation and Support
E–42
E.4.1.1
Automatic Data Resynchronization and Hot Spares
42
E.4.1.2
RAID Level Support
E.4.1.3
RAID Volume Support
E.4.1.4
RAID Combination Support
▼
viii
E–30
E–34
Performing RAID Configuration Tasks
E.4.1
E–30
Creating a RAID 0 Volume
E–43
E–43
E–44
Sun Fire X4600 and Sun Fire X4600 M2 Servers Service Manual • March 2011
E–43
E–
E.4.2
▼
Creating a RAID 1 Volume
▼
Creating a Second RAID Volume
▼
Viewing RAID Volume Properties
▼
Adding Hot Spares
E–47
▼
Deleting Hot Spares
E–47
▼
Synchronizing an Array
▼
Activating an Array
▼
Deleting an Array
E–48
Locating a Disk Drive
E–48
F. CPU Modules and Memory DIMMs
F.1
CPU Module Models
F.1.1
F.1.2
F.1.3
F.2
F.3
E–45
E–46
E–46
E–47
E–48
F–1
F–1
Sun Fire X4600 CPU Module
F.1.1.1
Physical Layout
F.1.1.2
DIMM Usage
F–2
F–2
F–3
Sun Fire X4600 M2 4-DIMM CPU Module
F.1.2.1
Physical Layout
F.1.2.2
DIMM Usage
F–4
F–4
F–5
Sun Fire X4600 M2 8-DIMM and 8-DIMM Split Plane CPU
Modules F–6
F.1.3.1
Physical Layout
F.1.3.2
DIMM Usage
F–6
F–8
Populating a Server With CPU Modules
F–9
F.2.1
CPU Module Matching Requirements
F.2.2
Population Procedures
F–10
Locating Faulty CPUs and DIMMs
G. Power Supplies
F–9
F–12
G–1
G.1
Power Supply Models
G–1
G.2
Requirements and Redundancy
G–1
Contents
ix
Index
x
G.2.1
Servers Using the Sun Fire X4600 CPU Module
G.2.2
Servers Using Sun Fire X4600 M2 CPU Modules
Index–1
Sun Fire X4600 and Sun Fire X4600 M2 Servers Service Manual • March 2011
G–2
G–3
Figures
FIGURE 1-1
Sun Fire X4600/X4600 M2 Servers Front Panel Features
1–4
FIGURE 1-2
Sun Fire X4600/X4600 M2 Servers Back Panel
FIGURE 1-3
Sun Fire X4600/X4600 M2 Replaceable Component Locations
FIGURE 2-1
Sun Fire X4600/X4600 M2 Servers Front Panel
FIGURE 2-2
Ethernet Port Chassis Labeling Designations
FIGURE 2-3
Sun Fire X4600 NIC Naming Conventions
FIGURE 2-4
Sun Fire X4600 M2 NIC Naming Conventions
FIGURE 2-5
BIOS Setup Utility Menu Tree
FIGURE 2-6
Location of Jumpers on the Motherboard
FIGURE 2-7
Sun Fire X4600/X4600 M2 Servers Back Panel
2–62
FIGURE 3-1
Sun Fire X4600/X4600 M2 Servers Front Panel
3–2
FIGURE 3-2
Removing the Main Cover
3–3
FIGURE 3-3
Removing the Front Bezel
3–4
FIGURE 3-4
Sun Fire X4600/X4600 M2 Replaceable Component Locations
FIGURE 3-5
Removing the Battery
FIGURE 3-6
Removing a CPU Module From a CPU Module Bay
FIGURE 3-7
Installing a CPU Module
FIGURE 3-8
Removing the DVD Drive
FIGURE 3-9
Removing a Fan Tray
FIGURE 3-10
Removing the Fan Tray Carriage
1–5
1–6
2–2
2–6
2–6
2–7
2–9
2–59
3–6
3–8
3–10
3–12
3–13
3–15
3–17
xi
FIGURE 3-11
Removing the Front Panel Indicator Board
FIGURE 3-12
Removing the Front I/O Board
FIGURE 3-13
Removing the GRASP Board
FIGURE 3-14
Sun Fire X4600/X4600 M2 Designation of Hard Disk Drives
FIGURE 3-15
Opening the Hard Disk Drive Latch
FIGURE 3-16
Removing the HDD Backplane
FIGURE 3-17
Removing a DIMM
FIGURE 3-18
Removing Rear CPU Module Guide
FIGURE 3-19
Motherboard Flex Cable Connectors and Bus Bar Screw Locations
FIGURE 3-20
Removing The Motherboard
FIGURE 3-21
Sun Fire X4600/X4600 M2 Locations, Designations, and Speeds of PCI Card Slots
FIGURE 3-22
Opening the PCI Card Locking Lever and Removing the PCI Card
FIGURE 3-23
Sun Fire X4600/X4600 M2 Locations and Designations of Power Supplies
FIGURE 3-24
Removing a Power Supply
FIGURE 3-25
Disconnecting the Power Distribution Board From the Chassis
FIGURE C-1
Sun Fire X4600/X4600 M2 Servers Front Panel LEDs
FIGURE C-2
Sun Fire X4600/X4600 M2 Servers Back Panel LEDs
FIGURE C-3
Fan Tray Fault LED Locations
FIGURE C-4
Sun Fire X4600 Fault LED and Button Locations on the CPU module
FIGURE C-5
LEDs on Motherboard and GRASP board
FIGURE C-6
Jumpers on the Motherboard
FIGURE D-1
USB Connector
FIGURE D-2
Serial Connector
FIGURE D-3
10/100BASE-T Connector
FIGURE D-4
10/100/1000BASE-T Connector
FIGURE D-5
VGA Video Connector
FIGURE D-6
Serial Attached SCSI Connector
FIGURE D-7
Flex Cable Motherboard Connector
FIGURE D-8
Flex Cable PDB Connector
FIGURE D-9
Flex Cable DVD-ROM Drive IDE Connector
xii
3–18
3–21
3–24
3–25
3–26
3–29
3–31
3–34
3–35
3–36
3–42
3–44
3–46
C–2
C–4
C–5
C–8
C–11
D–1
D–2
D–3
D–3
D–4
D–5
D–8
D–12
D–14
Sun Fire X4600 and Sun Fire X4600 M2 Servers Service Manual • March 2011
C–6
3–43
3–41
FIGURE D-10
Flex Cable HDD Backplane IDE Connector
D–16
FIGURE D-11
Motherboard Bus Bar Connector
FIGURE D-12
Front Flex Cable to Front I/O Board Connector
FIGURE D-13
Front Flex Cable to Motherboard Connector
FIGURE D-14
Power Supply Connector
FIGURE D-15
Fan Module Connector
FIGURE F-1
Physical Layout of Sun Fire X4600 CPU Module
FIGURE F-2
Physical Layout of Sun Fire X4600 M2 4-DIMM CPU M
FIGURE F-3
Physical Layout of Sun Fire X4600 M2 8-DIMM CPU Module and Sun Fire X4600 M2 8-DIMM
Split Plane CPU Modules F–7
FIGURE F-4
Sun Fire X4600/X4600 M2 CPU Module Slots
F–10
FIGURE F-5
CPU Module Population rules and numbering
F–11
D–18
D–19
D–21
D–23
D–24
F–2
F–4
Figures
xiii
xiv
Sun Fire X4600 and Sun Fire X4600 M2 Servers Service Manual • March 2011
Tables
TABLE 1-1
Summary of Features
1–2
TABLE 1-2
Sun Fire X4600/X4600 M2 Accessory Kit
TABLE 2-1
BIOS Setup Screens Summary
TABLE A-1
Sun Fire X4600/X4600 M2 Physical Specifications
TABLE A-2
Sun Fire X4600/X4600 M2 Power Specifications
TABLE A-3
Sun Fire X4600/X4600 M2 Environmental Specifications
TABLE A-4
Sun Fire X4600/X4600 M2 Acoustic Noise Emission Specifications
TABLE B-1
POST Codes
TABLE B-2
POST Code Checkpoints
TABLE C-1
Front Panel LED Functions
C–3
TABLE C-2
Back Panel LED Functions
C–4
TABLE C-3
Fan Tray LED Functions
TABLE C-4
CPU Module LED Functions
TABLE C-5
Motherboard and GRASP Board LED Functions
TABLE C-6
Jumper Functions
TABLE D-1
USB Connector Pinouts
TABLE D-2
Serial Connector Pinouts
TABLE D-3
10/100BASE-T Connector Pinouts
TABLE D-4
10/100/1000BASE-T Connector Pinouts
TABLE D-5
VGA Video Connector Pinouts
1–7
2–8
A–2
A–2
A–2
A–3
B–4
B–6
C–5
C–7
C–9
C–11
D–1
D–2
D–3
D–4
D–4
xv
TABLE D-6
Serial Attached SCSI Connector Pinouts
TABLE D-7
Flex Cable Motherboard Connector Pinouts D–8
TABLE D-8
Flex Cable PDB Connector Pinouts
TABLE D-9
Flex Cable DVD-ROM Drive IDE Connector Pinouts
D–14
TABLE D-10
Flex Cable HDD Backplane IDE Connector Pinouts
D–16
TABLE D-11
Motherboard Bus Bar Connector Pinouts
TABLE D-12
Front Flex Cable to Front I/O Board Connector Pinouts
TABLE D-13
Front Flex Cable to Motherboard Connector Pinouts
TABLE D-14
Power Supply Connector Pinouts D–23
TABLE D-15
Fan Module Connector Pinouts D–24
TABLE E-1
User Input Keys E–4
TABLE E-2
Adapter List Screen Field Descriptions
TABLE E-3
Global Properties Screen Field Descriptions
TABLE E-4
Adapter Properties Screen Field Descriptions
TABLE E-5
SAS Topology Screens Field Descriptions E–16
TABLE E-6
Device Properties Screen Field Descriptions E–17
TABLE E-7
Device Verify Screen Field Descriptions E–19
TABLE E-8
Advanced Adapter Properties Screen Field Descriptions
TABLE E-9
Advanced Device Properties Screen Field Descriptions
TABLE E-10
PHY Properties Screen Field Descriptions E–28
TABLE E-11
Create New Array Screen Field Descriptions
TABLE E-12
View Array Screen Field Descriptions
TABLE E-13
Manage Array Screen Field Descriptions
TABLE F-1
Sun Fire X4600 CPU Module LEDs
TABLE F-2
DIMM Slots in Sun Fire X4600 CPU Module
TABLE F-3
LEDs on Sun Fire X4600 M2 CPU 4-DIMM Module
TABLE F-4
DIMM Slots in Sun Fire X4600 CPU Module
TABLE F-5
LEDs on Sun Fire X4600 M2 CPU 4-DIMM Module
TABLE F-6
Sun Fire X4600 M2 8-DIMM and 8-DIMM split plane CPU Module DIMM Slots
TABLE G-1
PSU Redundancy in Sun Fire X4600 M2 Servers
xvi
D–6
D–12
D–18
D–19
D–21
E–6
E–8
E–9
E–21
E–25
E–32
E–35
E–39
F–3
F–3
F–5
F–5
F–7
G–4
Sun Fire X4600 and Sun Fire X4600 M2 Servers Service Manual • March 2011
F–8
Examples
EXAMPLE E-1
Adapter List Screen
E-6
EXAMPLE E-2
Global Properties Screen
EXAMPLE E-3
Adapter Properties Screen
EXAMPLE E-4
SAS Topology Screen
EXAMPLE E-5
SAS Topology Screen Continued 1
E-13
EXAMPLE E-6
SAS Topology Screen Continued 2
E-13
EXAMPLE E-7
SAS Topology Screen Continued 3
E-15
EXAMPLE E-8
SAS Topology Screen Continued 4
E-15
EXAMPLE E-9
Device Properties Screen
EXAMPLE E-10
Device Verify Screen
EXAMPLE E-11
Advanced Adapter Properties Screen
EXAMPLE E-12
Advanced Device Properties Screen
EXAMPLE E-13
PHY Properties Screen
EXAMPLE E-14
Select New Array Type Screen
EXAMPLE E-15
Create New Array Screen
EXAMPLE E-16
View Array Screen
EXAMPLE E-17
Manage Array Screen
EXAMPLE E-18
Exit Screen
EXAMPLE G-1
CPLD Version Screen
E-8
E-9
E-11
E-17
E-19
E-21
E-24
E-28
E-31
E-32
E-35
E-39
E-41
G-3
xvii
xviii
Sun Fire X4600 and Sun Fire X4600 M2 Servers Service Manual • March 2011
Using This Documentation
This Sun Fire X4600 and Sun Fire X4600 M2 Servers Service Manual contains
information and procedures for maintaining and upgrading the Sun Fire X4600
server, and Sun Fire X4600 M2 server, including the system BIOS.
Note – The information in this chapter applies to the original Sun Fire X4600 server,
and to the Sun Fire X4600 M2 server, unless otherwise noted in the text.
Related Documentation
For a description of the document set for the Sun Fire X4600/X4600 M2 Servers, see
the Where To Find Documentation sheet that is packed with your system and also
posted at the product's documentation site.
■
For the Sun Fire X4600:
(http://download.oracle.com/docs/cd/E1912101/sf.x4600/index.html)
■
For the Sun Fire X4600 M2:
(http://download.oracle.com/docs/cd/E1912101/sf.x4600m2/index.html)
Translated versions of some of these documents are available at the web site
described above in French, Simplified Chinese, Traditional Chinese, Korean, and
Japanese. English documentation is revised more frequently and might be more upto-date than the translated documentation.
It is important that you review the safety guidelines in the Sun Fire X4600 and Sun
Fire X4600 M2 Servers Safety and Compliance Guide (819-4348).
xix
Documentation Comments
Oracle is interested in improving product documentation and welcomes your
comments and suggestions. You can submit comments by going to this link:
(http://www.oraclesurveys.com/se.ashx?s=25113745587BE578)
Please include the title and part number of your document with your feedback:
Sun Fire X4600 and Sun Fire X4600 M2 Servers Service Manual, part number 819-434218
xx
Sun Fire X4600 and Sun Fire X4600 M2 Servers Service Manual • March 2011
CHAPTER
1
Introduction to the Sun Fire
X4600/X4600 M2 Servers
This chapter contains an overview of Oracle’s Sun Fire™ X4600/X4600 M2 Servers,
including features and orderable components.
Note – The information in this chapter applies both to the original Sun Fire X4600
server, and to the Sun Fire X4600 M2 server, unless otherwise noted in the text.
1.1
Features of the Server
The Sun Fire X4600/X4600 M2 server takes full advantage of the exceptional power
and performance of the AMD Opteron™ processor. The server has a four-rack-unit
chassis with up to eight CPU modules. Each CPU module is a single-board unit that
provides local power conversion (VRM), a CPU socket, and a number of DIMM slots.
For the original Sun Fire X4600 server, CPU modules are available with 4 DIMM
slots. For the Sun Fire X4600 M2 server, CPU modules are available with 4 and 8
DIMM slots. The 8-DIMM split-plane CPU module supports AMD quad-core CPUs
with Dual Dynamic Power Management™.
This server provides the following maximum system configurations:
■
Eight CPUs (dual-core or quad-core)
■
64 DIMMs (maximum 512 GB using 8-GB DIMMs on 8-DIMM CPU modules)
8 GB per DIMM socket, 8 sockets per CPU book (501-7817 “split-plane” CPU
module), and with 8 501-7817 “split-plane” CPU module cards per system, the
max memory configuration is 512 GB
■
Four 2.5-inch (63.5-mm) SAS hard disk drives
■
Eight PCI Expansion slots (two PCI-X slots and six PCI-Express (PCI-E) slots)
1-1
This server is 24 inches (610-mm) deep and is compatible with all data center 28-inch
(711.2-mm) racks. Airflow is strictly front-to-back and supports the
highest-performance Opteron CPUs at 95˚ F (35˚ C) ambient temperature.
Standard I/O includes four 10/100/1000BASE-T Gigabit Ethernet ports, VGA video,
serial, four USB ports, and one 10/100BASE-T Ethernet management port. An SAS
on-board disk controller supports up to four SAS disk drives.
The Sun Fire X4600 server includes an extensive set of Reliability, Availability, and
Serviceability (RAS) features, such as hot-swappable and redundant hard disk drives
(when RAID1 is used), fans, and power supplies. The servers also provide an
integrated lights out management (ILOM) service processor function, which includes
remote boot and remote software upgrades.
TABLE 1-1 summarizes the features of the Sun Fire X4600 server.
TABLE 1-1
Summary of Features
Feature or
Component
Sun Fire X4600/X4600 M2 Servers
CPU
Two, four, six, or eight CPU modules, each with a single AMD Opteron dual-core or
quad-core processor (1MByte L2 cache per CPU core, up to 140W)
Dual Dynamic
Power
Management™
(Split-plane CPU modules only.) Per-processor power managment that can reduce idle
power consumption.
Processor BIOS
8 Mbit flash EEPROM with LPC interface
Memory
Up to 64 DIMMs of DDR1 (Sun Fire X4600) or DDR2 (Sun Fire X4600 M2).
8 GByte DIMMs are only supported on the 501-7817 “split-plane” CPU module.
Hard disk drives
(HDDs)
Up to four Serial-Attached SCSI (SAS) HDDs
(2.5 inch or 63.5 mm)
Board
management
controller (BMC)
Motorola MPC8248 @ 266 MHz
RAID options
Four-channel SAS RAID disk controller
Network I/O
• Four 10/100/1000BASE-T Gigabit Ethernet ports (RJ-45 connectors)
• One 10/100BASE-T Ethernet net management port (RJ-45 connector)
• One RS-232 serial port (RJ-45 connector)
PCI I/O
Up to eight PCI cards:
• Two 100-MHz low-profile PCI-X slots
• Four 8-lane low-profile PCI-E slots
• Two 4-lane low-profile PCI-E slots
Other I/O
• Four USB 2.0 ports
• One VGA video port
1-2
Sun Fire X4600 and Sun Fire X4600 M2 Servers Service Manual • March 2011
TABLE 1-1
Summary of Features
Feature or
Component
Sun Fire X4600/X4600 M2 Servers
Removable media
devices
Internal slim DVD-ROM drive
Power
Four 850W or 950W power supplies
Fans
Four front fan modules; also one fan in each power supply
Cooling is front-to-back forced air.
1.2
Sun Fire X4600/X4600 M2 Features and
Components
This section contains illustrations that you can use to become familiar with the
features and components of the Sun Fire X4600/X4600 M2 Servers.
1.2.1
Sun Fire X4600/X4600 M2 Servers Front Panel
Features
FIGURE 1-1 shows the features of the front panel.
Chapter 1
Introduction to the Sun Fire X4600/X4600 M2 Servers
1-3
FIGURE 1-1
1.2.2
Sun Fire X4600/X4600 M2 Servers Front Panel Features
Sun Fire X4600/X4600 M2 Servers Back Panel
Features
FIGURE 1-2 shows the features of the back panel.
1-4
Sun Fire X4600 and Sun Fire X4600 M2 Servers Service Manual • March 2011
FIGURE 1-2
1.2.3
Sun Fire X4600/X4600 M2 Servers Back Panel
Sun Fire X4600/X4600 M2 Servers Components
FIGURE 1-3 shows the locations of the Sun Fire X4600/X4600 M2 Servers components,
with the top cover removed.
Chapter 1
Introduction to the Sun Fire X4600/X4600 M2 Servers
1-5
FIGURE 1-3
1-6
Sun Fire X4600/X4600 M2 Replaceable Component Locations
Sun Fire X4600 and Sun Fire X4600 M2 Servers Service Manual • March 2011
1.3
Accessory Kits
TABLE 1-2 lists the contents of the accessory kit that is shipped with the Sun Fire
X4600/X4600 M2 Servers.
TABLE 1-2
Sun Fire X4600/X4600 M2 Accessory Kit
Item
Part Number
Sun Fire X4600 Server Tools and Drivers CD
705-7780
Sun Fire X4600 Server Bootable Diagnostics CD
705-7781
Sun Fire X4600 Server Sun Installation Assistant CD
705-0528
Sun N1 System Manager DVD
825-6459
Sun Fire X4600 Server Installation Guide (printed manual)
819-4341
Where to Find Sun Fire X4600 Documentation (printed sheet)
819-4349
Important Safety Information About Sun Hardware (printed manual)
816-7190
Solaris 10 6/06 Software Entitlement (printed sheet)
819-5836
Software License Agreement (printed sheet)
819-0764
Serial-to-RJ45 cable adapter (DB9S-to-RJ-45F)
530-3100
▼ Additional Options and Replaceable
Components
Supported components and their part numbers are subject to change over time. For
the most up-to-date list of replaceable components for these servers, go to:
(http://sunsolve.sun.com/handbook_pub/Systems/)
1. Click the name and model of your server.
2. On the product page that opens for the server, click Full Components List for
the list of components.
Chapter 1
Introduction to the Sun Fire X4600/X4600 M2 Servers
1-7
1-8
Sun Fire X4600 and Sun Fire X4600 M2 Servers Service Manual • March 2011
CHAPTER
2
Powering On and Configuring BIOS
Settings
Note – The information in this chapter applies to the original Sun Fire X4600 server,
and to the Sun Fire X4600 M2 server, unless otherwise noted in the text.
This chapter contains the following procedures and information:
2.1
■
Section 2.1 “Powering On the Server” on page 2-1
■
Section 2.2 “Powering Off the Server” on page 2-3
■
Section 2.3 “Configuring BIOS Settings” on page 2-3
■
Section 2.4 “Resetting SP and BIOS Passwords Using Jumper P20” on page 2-56
■
Section 2.5 “Using the Force-Recovery Jumper P19” on page 2-59
■
Section 2.6 “Using the Clear CMOS Jumper P25” on page 2-61
■
Section 2.7 “Using the Reset and NMI Dump Switches” on page 2-62
■
Section 2.8 “Updating the BIOS” on page 2-63
■
Section 2.9 “Power-On Self-Test (POST)” on page 2-63
Powering On the Server
Note – Before powering on your server for the first time, follow the installation and
cabling instructions provided in the Sun Fire X4600 and Sun Fire X4600 M2 Installation
Guide (819-4341), which is shipped with the system.
2-1
▼ Powering On the Server for the First Time
Caution – Do not operate the server without all fans, component heat sinks, air
baffles, and the cover installed. Severe damage to server components can occur if the
server is operated without adequate cooling mechanisms.
1. Verify that AC power cords have been connected to the server's power supplies
and that standby power is on.
In standby power mode, the Power/OK LED on the front panel flashes, indicating
that the service processor is working and the system is ready to be fully powered
on to main power mode. See FIGURE 2-1 for the LED location.
2. Use a pencil or other pointed object to press and release the recessed Power
button on the server front panel. See FIGURE 2-1 for the Power button location.
When main power is applied to the full server, the Power/OK LED next to the
Power button lights and remains lit.
FIGURE 2-1
2-2
Sun Fire X4600/X4600 M2 Servers Front Panel
Sun Fire X4600 and Sun Fire X4600 M2 Servers Service Manual • March 2011
2.2
Powering Off the Server
There are two methods for shutting down the server from main power mode to
standby power mode.
■
Graceful shutdown – Use a pencil or other pointed object to press and release the
Power button on the front panel. This causes Advanced Configuration and Power
Interface (ACPI) enabled operating systems to perform an orderly shutdown of
the operating system. Servers not running ACPI-enabled operating systems will
shut down to standby power mode immediately.
■
Emergency shutdown – Press and hold the Power button for four seconds to force
main power off and enter standby power mode.
When main power is off, the Power/OK LED on the front panel begins flashing,
indicating that the server is in standby power mode.
Caution – When you use the Power button to enter standby power mode, power is
still directed to the GRASP board and power supply fans, indicated when the
Power/OK LED is flashing. To completely power off the server, you must disconnect
the AC power cords from the back panel of the server.
2.3
Configuring BIOS Settings
This section describes how to view and modify the BIOS settings.
The Basic Input/Output System (BIOS) has a Setup utility stored in the BIOS flash
memory. The Setup utility reports system information and can be used to configure
the BIOS settings. The configured data is provided with context-sensitive Help and is
stored in the system's battery-backed CMOS RAM. If the configuration stored in the
CMOS RAM is invalid, the BIOS settings will default to the original state specified at
the factory.
2.3.1
The System Console
BIOS setup screens are accessed through the system console at boot time. You can
interact directly with the console using a monitor connected to the VGA connector on
the back, together with a keyboard and mouse connected to USB ports.
Chapter 2
Powering On and Configuring BIOS Settings
2-3
Alternately, you can access the system console using Integrated Lights Out
Management (ILOM). The ILOM is accessible through the serial management port, as
well as over your LAN using the Ethernet management port. For more information,
refer to Integrated Lights Out Manager (ILOM) Administration Guide for ILOM 1.1.1
(820-0280).
2.3.2
Navigating the BIOS Setup Screens
When the system begins booting, the user is prompted (through the system console)
to press the F2 key, If you do so, the first BIOS Setup menu screen is displayed. The
BIOS Setup utility contains seven menu screens, which are displayed in the following
order:
1. Main
2. Advanced
3. PCI/PnP, Boot
4. Security
5. Chipset
6. Exit.
Use the left and right arrow keys to move sequentially back and forth through the
seven screens. Fields that can be reconfigured are displayed in color. All other fields
are non-configurable. Use the up and down arrow keys on the keyboard to scroll
through a screen's menu. Use the Tab key to move back and forth across columns.
▼ Changing the Configuration of a BIOS Menu Item
1. To change the system parameters, enter the BIOS Setup utility by pressing the
F2 key while the system is performing the power-on self-test (POST).
POST testing is indicated when the Power/OK LEDs on the front and back panels
go into slow-blink mode.
2. Highlight the field to be modified using the arrow and Tab keys.
3. Press Enter to select the field.
A dialog box appears. The box presents you with the options available for the
setup field that you have chosen.
4. Modify the setup field and close the screen.
2-4
Sun Fire X4600 and Sun Fire X4600 M2 Servers Service Manual • March 2011
5. If you need to modify other setup parameters, use the arrow and Tab keys to
navigate to the desired screen and menu item, then repeat Steps 1 through 3.
Otherwise, go to Step 6.
6. Press and release the right arrow key until the Exit menu screen is displayed.
7. Follow the instructions on the Exit menu screen to save your changes and exit
the Setup utility.
2.3.3
BIOS Considerations
This section contains special considerations regarding the system BIOS, including:
2.3.3.1
■
Section 2.3.3.1 “Device Booting Detection Priority” on page 2-5
■
Section 2.3.3.2 “Ethernet Port (NIC) Device and Driver Naming” on page 2-6
■
Section 2.3.3.3 “BIOS Option ROM Size Limitation” on page 2-7
Device Booting Detection Priority
The devices and PCI slots are detected by the BIOS during startup in this order:
1. PCI-E slot 2
2. PCI-E slot 3
3. PCI-E slot 4
4. On-board Intel NIC
5. PCI-X slot 0
6. PCI-X slot 1
7. On-board LSI SCSI controller
8. PCI-E slot 5
9. PCI-E slot 6
10. PCI-E slot 7
See Section t “Replacing PCI Cards” on page 3-39 for the locations of the PCI slots.
Chapter 2
Powering On and Configuring BIOS Settings
2-5
2.3.3.2
Ethernet Port (NIC) Device and Driver Naming
These servers each have four 10/100/1000BASE-T Gigabit Ethernet ports connected
to individual Network Interface Cards (NICs). The chassis labeling of the physical
ports is shown in FIGURE 2-2.
FIGURE 2-2
Ethernet Port Chassis Labeling Designations
The logical device naming for the NICs is reported differently by different interfaces
and operating systems.
Sun Fire X4600 NIC Naming Conventions
See FIGURE 2-3 for a diagram that explains how operating systems and interfaces
name the four NICs shown in FIGURE 2-2.
FIGURE 2-3
2-6
Sun Fire X4600 NIC Naming Conventions
Sun Fire X4600 and Sun Fire X4600 M2 Servers Service Manual • March 2011
Sun Fire X4600 M2 NIC Naming Conventions
See FIGURE 2-4 for a diagram that explains how operating systems and interfaces
name the four NICs shown in FIGURE 2-2.
FIGURE 2-4
2.3.3.3
Sun Fire X4600 M2 NIC Naming Conventions
BIOS Option ROM Size Limitation
The BIOS Option ROM is 128 KB. Of these 128 KB, approximately 80 KB are used by
the VGA controller, the LSI controller, and the on-board NIC. Approximately 48 KB
remain for the Option ROM.
2.3.4
Descriptions of the BIOS Setup Utility Screens
TABLE 2-1 contains summary descriptions of the seven top-level BIOS screens.
TABLE 2-1
BIOS Setup Screens Summary
Screen
Description
Main
General system information.
Advanced
Configuration information for the CPUs, IDE, SuperIO, ACPI, PowerNow,
HyperTransport, Event Log, IPMI, MPS, PCI Express, Remote Access, and USB.
Twelve additional screens can be accessed from the Advanced menu.
PCI/PnP
Plug-and-Play (PnP) devices can be configured by the BIOS (default), or by the
operating system (if applicable).
Chapter 2
Powering On and Configuring BIOS Settings
2-7
TABLE 2-1
BIOS Setup Screens Summary
Screen
Description
Boot
Configure the boot device priority (hard disk drives and the ATAPI DVD-ROM
drive).
Security
Install or change the user and supervisor passwords.
Chipset
Configuration options for the NorthBridge, SouthBridge, and PCI-X devices.
Six separate screens can be accessed from the Chipset menu.
Note that the Memory Chipkill option is enabled by default. Enabling Chipkill
improves system reliability but might degrade system performance under
some applications.
Exit
Save or discard changes.
FIGURE 2-5 summarizes the BIOS menu tree. See Section 2.3.5 “BIOS Setup Utility
Menu Screens” on page 2-10 for examples of each of these screens.
2-8
Sun Fire X4600 and Sun Fire X4600 M2 Servers Service Manual • March 2011
FIGURE 2-5
BIOS Setup Utility Menu Tree
Chapter 2
Powering On and Configuring BIOS Settings
2-9
2.3.5
BIOS Setup Utility Menu Screens
The following figures show sample BIOS menu screens.
Note – The screens shown are examples. The version numbers and the screen items
and selections shown are subject to change over the life of the product.
Note – There are differences in some screens between the original Sun Fire x4600
servers and the Sun Fire X4600 M2 servers.
2-10
Sun Fire X4600 and Sun Fire X4600 M2 Servers Service Manual • March 2011
2.3.5.1
BIOS Main Menu Screen
Sun Fire X4600 Server Version
Main
Advanced
PCIPnP
Boot
Security
Chipset
Exit
******************************************************************************
* System Overview
** Use [ENTER], [TAB]
*
* ***************************************************** or [SHIFT-TAB] to
*
* AMIBIOS
** select a field.
*
* Version
: 08.00.12
**
*
* Build Date: 05/01/06
** Use [+] or [-] to
*
* ID
: 0ABHA032
** configure system Time. *
*
**
*
* Product Name
: Sun Fire X4600
**
*
* System Serial Number
: 0525AMF002
**
*
* BMC Firmware Revision : 1.00
**
*
*
**
*
* Processor
**
*
* Type
: AMD Opteron(tm) Processor 852
**
Select Screen
*
* Speed
: 2.6 GHz
**
Select Item
*
* Count
: 8
** +Change Field
*
*
** Tab
Select Field
*
* System Memory
** F1
General Help
*
* Size
: 64 GB
** F10
Save and Exit
*
*
** ESC
Exit
*
* System Time
[14:23:56]
** ESC
Exit
*
* System Date
[Wed 05/25/2006]
**
*
******************************************************************************
Sun Fire X4600 M2 Server Version
Main
Advanced
PCIPnP
Boot
Security
Chipset
Exit
******************************************************************************
* System Overview
** Use [ENTER], [TAB]
*
* ***************************************************** or [SHIFT-TAB] to
*
* AMIBIOS
** select a field.
*
* BIOS Build Version : 0ABIT031
**
*
* Build Date: 09/08/06
** Use [+] or [-] to
*
* Core Version: 08.02.12
** configure system Time. *
*
**
*
* Product Name
: Sun Fire X4600 M2
**
*
* BMC Firmware Revision : 1.01.01
**
*
* CPLD Revision : 5.0
**
*
* Processor
**
*
Chapter 2
Powering On and Configuring BIOS Settings
2-11
* Dual Core AMD Opteron(tm) Processor 8218
** *
Select Screen
*
* Speed
: 2600 MHz
** *
Select Item
*
* Count
: 16
** +Change Field
*
* System Memory
** Tab
Select Field
*
* Size
: 63.5 GB
** F1
General Help
*
*
** F10
Save and Exit
*
* System Time
[14:23:56]
** ESC
Exit
*
* System Date
[Wed 09/27/2006]
** ESC
Exit
*
******************************************************************************
2-12
Sun Fire X4600 and Sun Fire X4600 M2 Servers Service Manual • March 2011
2.3.5.2
BIOS Advanced Menu, Main Screen
Sun Fire X4600 Server Version
Main
Advanced
PCIPnP
Boot
Security
Chipset
Exit
******************************************************************************
**
* Advanced Settings
* Options for CPU
*
* *************************************************** *
*
* WARNING: Setting wrong values in below sections
*
*
*
may cause system to malfunction.
*
*
* * CPU Configuration
*
*
* * IDE Configuration
*
*
* * SuperIO Configuration
*
*
* * ACPI Configuration
*
*
* * Event Log Configuration
*
*
* * Hyper Transport Configuration
*
*
* * IPMI 2.0 Configuration
*
*
* * MPS Configuration
* *
Select Screen
*
* * PCI Express Configuration
*
*
* * AMD PowerNow Configuration
* **
Select Item
*
* * Remote Access Configuration
* Enter Go to Sub Screen *
* * USB Configuration
* F1
General Help
*
*
* F10
Save and Exit
*
*
* ESC
Exit
*
******************************************************************************
Sun Fire X4600 M2 Server Version
Main
Advanced
PCIPnP
Boot
Security
Chipset
Exit
******************************************************************************
**
* Advanced Settings
** Options for CPU
*
* *****************************************************
*
* WARNING: Setting wrong values in below sections
**
*
*
may cause system to malfunction.
**
*
*
**
*
* * CPU Configuration
**
*
* * IDE Configuration
**
*
* * SuperIO Configuration
**
*
* * ACPI Configuration
**
*
* * PowerNow Configuration
**
*
* * Hyper Transport Configuration
**
*
Chapter 2
Powering On and Configuring BIOS Settings
2-13
* * Event Log Configuration
**
*
* * IPMI 2.0 Configuration
** *
Select Screen
*
* * MPS Configuration
** *
Select Item
*
* * PCI Express Configuration
** Enter Go to Sub Screen *
* * Remote Access Configuration
** F1
General Help
*
* * USB Configuration
** F10
Save and Exit
*
*
** ESC
Exit
*
******************************************************************************
2-14
Sun Fire X4600 and Sun Fire X4600 M2 Servers Service Manual • March 2011
2.3.5.3
BIOS Advanced Menu, CPU Configuration Screen
Sun Fire X4600 Server Version
Advanced
******************************************************************************
**
* CPU Configuration
* This option should
*
* Module Version: 14.05
* remain disabled for
*
* Physical Count: 8
* the normal operation. *
* Logical Count : 16
* The driver developer
*
* *************************************************** * may enable it for
*
* AMD Opteron(tm) Processor 852
* testing purpose.
*
* Revision: E4
*
*
* Cache L1: 128KB
*
*
* Cache L2: 1024KB
*
*
* Speed
: 2.6 GHz
*
*
* Current FSB Multiplier: 13x
*
*
* Maximum FSB Multiplier: 13x
*
*
* Able to Change Freq. : Yes
* **
Select Screen
*
* uCode Patch Level
: None Required
* **
Select Item
*
*
* +Change Option
*
* GART Error Reporting
[Disabled]
* F1
General Help
*
* MTRR Mapping
[Continuous]
* F10
Save and Exit
*
* CPU Overclock in MHz
[200]
* ESC
Exit
*
* Speculative TLB Reload
[Enabled]
*
*
* CPU Configuration
[Auto]
*
*
*
*
*
*
*
*
******************************************************************************
Sun Fire X4600 M2 Server Version
Advanced
******************************************************************************
* CPU Configuration
** This option should
*
* Module Version: 14.05
** remain disabled for
*
* AEGSA Version : 02.06.09
** the normal operation.
*
* Physical Count: 8
** The driver developer
*
* Logical Count : 16
** may enable it for
*
* ************************************************* testing purposes.
*
* AMD Opteron(tm) Processor 8218
**
*
* Revision: F2
**
*
* Cache L1: 128KB
**
*
Chapter 2
Powering On and Configuring BIOS Settings
2-15
* Cache L2: 2048KB
**
*
* Speed
: 2600 MHz
**
*
* Current FSB Multiplier: 13x
**
*
* Maximum FSB Multiplier: 13x
**
*
* Able to Change Freq. : Yes
** *
Select Screen
*
* uCode Patch Level
: None Required
** **
Select Item
*
*
** +Change Option
*
* GART Error Reporting
[Disabled]
** F1
General Help
*
* MTRR Mapping
[Continuous]
** F10
Save and Exit
*
* CPU Overclock in MHz
[200]
** ESC
Exit
*
* Speculative TLB Reload
[Enabled]
**
*
* CPU Configuration
[Manual]
**
*
* CPU Slot Comparison
[GPIO 8P]
**
*
******************************************************************************
2-16
Sun Fire X4600 and Sun Fire X4600 M2 Servers Service Manual • March 2011
2.3.5.4
BIOS Advanced Menu, IDE Configuration Screen
Advanced
******************************************************************************
**
* IDE Configuration
* DISABLED: disables the *
* *************************************************** * integrated IDE
*
* OnBoard PCI IDE Controller
[Primary]
* Controller.
*
*
* PRIMARY: enables only *
* * Primary IDE Master
: [ATAPI CDROM]
* the Primary IDE
*
* * Primary IDE Slave
: [Not Detected] * Controller.
*
*
* SECONDARY: enables
*
* Hard Disk Write Protect
[Disabled]
* only the Secondary IDE *
* IDE Detect Time Out (Sec)
[35]
* Controller.
*
*
* BOTH: enables both IDE *
* ATA(PI) 80 Pin Cable Detection [Disabled]
* Controllers.
*
* SATA0 IDE Interface
[Disabled]
*
*
* SATA1 IDE Interface
[Disabled]
* **
Select Screen
*
* IO4 SATA0 IDE Interface
[Disabled]
* **
Select Item
*
* IO4 SATA1 IDE Interface
[Disabled]
* +Change Option
*
* First Boot Device from
[P-ATA]
* F1
General Help
*
*
* F10
Save and Exit
*
*
* ESC
Exit
*
*
*
*
******************************************************************************
2.3.5.5
BIOS Advanced Menu, SuperIO Chipset Configuration Screen
Advanced
******************************************************************************
**
* Configure Smc27X Super IO Chipset
* Allows BIOS to Select *
* *************************************************** * Serial Port1 Base
*
* Serial Port0 Address
[3F8/IRQ4]
* Addresses.
*
*
*
*
*
*
*
*
*
*
*
*
*
*
*
*
*
*
*
*
*
*
*
*
*
*
*
*
*
* **
Select Screen
*
*
* **
Select Item
*
Chapter 2
Powering On and Configuring BIOS Settings
2-17
*
* +Change Option
*
*
* F1
General Help
*
*
* F10
Save and Exit
*
*
* ESC
Exit
*
*
*
*
*
*
*
******************************************************************************
2-18
Sun Fire X4600 and Sun Fire X4600 M2 Servers Service Manual • March 2011
2.3.5.6
BIOS Advanced Menu, ACPI Configuration Screen
Advanced
******************************************************************************
**
* ACPI Configuration
* Yes / No
*
* *************************************************** * ACPI support for
*
* ACPI Aware O/S
[Yes]
* Operating System.
*
*
*
*
* * Advanced ACPI Configuration
* Yes: If OS
*
*
* supports ACPI.
*
*
*
*
*
* No: If OS
*
*
* does not support
*
*
* ACPI.
*
*
*
*
*
*
*
*
* **
Select Screen
*
*
* **
Select Item
*
*
* +Change Option
*
*
* F1
General Help
*
*
* F10
Save and Exit
*
*
* ESC
Exit
*
*
*
*
*
*
*
******************************************************************************
2.3.5.7
BIOS Advanced Menu, Advanced ACPI Configuration Screen
Advanced
******************************************************************************
**
* Advanced ACPI Configuration
* Enable RSDP pointers
*
* *************************************************** * to 64-bit Fixed System *
* ACPI 2.0 Features
[Yes]
* Description Tables.
*
* ACPI APIC support
[Enabled]
*
*
* ACPI SRAT Table
[Enabled]
*
*
* ACPI HPET Support
[Enabled]
*
*
* AMI OEMB table
[Enabled]
*
*
* Headless mode
[Enabled]
*
*
*
*
*
*
*
*
*
*
*
*
*
*
*
* **
Select Screen
*
Chapter 2
Powering On and Configuring BIOS Settings
2-19
*
* **
Select Item
*
*
* +Change Option
*
*
* F1
General Help
*
*
* F10
Save and Exit
*
*
* ESC
Exit
*
*
*
*
*
*
*
******************************************************************************
2-20
Sun Fire X4600 and Sun Fire X4600 M2 Servers Service Manual • March 2011
2.3.5.8
BIOS Advanced Menu, Event Logging Details Screen
BIOS Advanced Menu, PowerNow Configuration
Advanced
******************************************************************************
* Event Logging details
* View all unread events *
* *************************************************** * on the Event Log.
*
* View Event Log
*
*
* Mark all events as read
*
*
* Clear Event Log
*
*
*
*
*
*
*
*
*
*
*
*
*
*
*
*
*
*
*
*
*
*
*
*
* **
Select Screen
*
*
* **
Select Item
*
*
* Enter Go to Sub Screen *
*
* F1
General Help
*
*
* F10
Save and Exit
*
*
* ESC
Exit
*
*
*
*
*
*
*
******************************************************************************
Sun Fire X4600 Server Version
Advanced
******************************************************************************
**
* AMD PowerNow Configuration
* Enabled/Disabled
*
* *************************************************** * PowerNow
*
* PowerNow
[Enabled]
*
*
*
*
*
*
*
*
*
*
*
*
*
*
*
*
*
*
*
*
*
*
*
*
*
*
Chapter 2
Powering On and Configuring BIOS Settings
2-21
*
*
*
*
* **
Select Screen
*
*
* **
Select Item
*
*
* +Change Option
*
*
* F1
General Help
*
*
* F10
Save and Exit
*
*
* ESC
Exit
*
*
*
*
******************************************************************************
2-22
Sun Fire X4600 and Sun Fire X4600 M2 Servers Service Manual • March 2011
Sun Fire X4600 M2 Server Version
Advanced
******************************************************************************
**
* PowerNow Support
* Enable/Disable the
*
* *************************************************** * generation of ACPI
*
* Runtime Legacy PSB
[Disabled]
* _PCC, _PSS, and _PCT
*
* Native PSS Support
[Enabled]
* objects.
*
*
*
*
*
*
*
*
*
*
*
*
*
*
*
*
*
*
*
*
*
*
*
*
*
*
* *
Select Screen
*
*
* **
Select Item
*
*
* +Change Option
*
*
* F1
General Help
*
*
* F10
Save and Exit
*
*
* ESC
Exit
*
*
*
*
*
*
*
******************************************************************************
2.3.5.9
BIOS Advanced Menu, HyperTransport Configuration Screen
Sun Fire X4600 Server Version
Advanced
******************************************************************************
* Hyper Transport Configuration
* The HyperTransport
*
* *************************************************** * link will run at this *
*
* speed if it is slower *
* CPU0:PCIx0 HT Link Speed
[Auto]
* than or equal to the
*
* CPU0:PCIX0 HT Link Width
[Auto]
* system clock and the
*
*
* board is capable.
*
* POGO:CK804 HT Link Speed
[Auto]
*
*
* POGO:CK804 HT Link Width
[Auto]
*
*
*
*
*
* CPU3:IO4-1 HT Link Speed
[Auto]
*
*
Chapter 2
Powering On and Configuring BIOS Settings
2-23
* CPU3:IO4-1 HT Link Width
[Auto]
*
*
* ________________________________________
*
*
*
* **
Select Screen
*
* CPU0:CPU1 HT Link Speed
[Auto]
* **
Select Item
*
* CPU0:CPU1 HT Link Width
[Auto]
* +Change Option
*
*
* F1
General Help
*
* CPU0:CPU2 HT Link Speed
[Auto]
* F10
Save and Exit
*
* CPU0:CPU2 HT Link Width
[Auto]
* ESC
Exit
*
*
*
*
* CPU1:CPU3 HT Link Speed
[Auto]
*
*
* CPU1:CPU3 HT Link Width
[Auto]
*
*
*
*
*
* CPU2:CPU4 HT Link Speed
[Auto]
*
*
* CPU2:CPU4 HT Link Width
[Auto]
*
*
*
*
*
* CPU2:CPU5 HT Link Speed
[Auto]
*
*
* CPU2:CPU5 HT Link Width
[Auto]
*
*
*
*
*
* CPU3:CPU5 HT Link Speed
[Auto]
*
*
* CPU3:CPU5 HT Link Width
[Auto]
*
*
*
*
*
* CPU3:CPU4 HT Link Speed
[Auto]
*
*
* CPU3:CPU4 HT Link Width
[Auto]
*
*
*
*
*
* CPU4:CPU6 HT Link Speed
[Auto]
*
*
* CPU4:CPU6 HT Link Width
[Auto]
*
*
*
*
*
* CPU5:CPU7 HT Link Speed
[Auto]
*
*
* CPU5:CPU7 HT Link Width
[Auto]
*
*
*
*
*
* CPU6:CPU7 HT Link Speed
[Auto]
*
*
* CPU6:CPU7 HT Link Width
[Auto]
*
*
*
*
*
* CPU1:CPU6 HT Link Speed
[Auto]
*
*
* CPU1:CPU6 HT Link Width
[Auto]
*
*
*
*
*
******************************************************************************
2-24
Sun Fire X4600 and Sun Fire X4600 M2 Servers Service Manual • March 2011
Sun Fire X4600 M2 Server Version
Advanced
******************************************************************************
* Hyper Transport Configuration
** The HyperTransport
*
* ***************************************************** link will run at this *
* CPU0:PCIx0 HT Link Speed
[Auto]
** speed if it is slower *
* CPU0:PCIX0 HT Link Width
[Auto]
** than or equal to the
*
*
** system clock and the
*
* POGO:CK804 HT Link Speed
[Auto]
** board is capable.
*
* POGO:CK804 HT Link Width
[Auto]
**
*
*
**
*
* CPU3:IO4-1 HT Link Speed
[Auto]
**
*
* CPU3:IO4-1 HT Link Width
[Auto]
**
*
*
**
*
* CPU0:CPU1 HT Link Speed
[Auto]
**
*
* CPU0:CPU1 HT Link Width
[Auto]
** *
Select Screen
*
*
** **
Select Item
*
* CPU0:CPU2 HT Link Speed
[Auto]
** +Change Option
*
* CPU0:CPU2 HT Link Width
[Auto]
** F1
General Help
*
*
** F10
Save and Exit
*
* CPU1:CPU3 HT Link Speed
[Auto]
** ESC
Exit
*
* CPU1:CPU3 HT Link Width
[Auto]
**
*
*
**
*
* CPU2:CPU4 HT Link Speed
[Auto]
**
*
* CPU2:CPU4 HT Link Width
[Auto]
**
*
*
**
*
* CPU2:CPU5 HT Link Speed
[Auto]
** The HyperTransport
*
* CPU2:CPU5 HT Link Width
[Auto]
** link will run at this *
*
** width.
*
* CPU3:CPU5 HT Link Speed
[Auto]
**
*
* CPU3:CPU5 HT Link Width
[Auto]
**
*
*
**
*
* CPU3:CPU4 HT Link Speed
[Auto]
**
*
* CPU3:CPU4 HT Link Width
[Auto]
**
*
*
**
*
* CPU4:CPU6 HT Link Speed
[Auto]
**
*
* CPU4:CPU6 HT Link Width
[Auto]
**
*
*
**
*
* CPU5:CPU7 HT Link Speed
[Auto]
** *
Select Screen
*
* CPU5:CPU7 HT Link Width
[Auto]
** **
Select Item
*
*
** +Change Option
*
* CPU6:CPU7 HT Link Speed
[Auto]
** F1
General Help
*
* CPU6:CPU7 HT Link Width
[Auto]
** F10
Save and Exit
*
*
** ESC
Exit
*
* CPU1:CPU6 HT Link Speed
[Auto]
**
*
Chapter 2
Powering On and Configuring BIOS Settings
2-25
* CPU1:CPU6 HT Link Width
[Auto]
**
*
*
**
*
******************************************************************************
2-26
Sun Fire X4600 and Sun Fire X4600 M2 Servers Service Manual • March 2011
2.3.5.10
BIOS Advanced Menu, IPMI 2.0 Configuration Screen
Advanced
******************************************************************************
* IPMI 2.0 Configuration
* View all events in the *
* *************************************************** * BMC Event Log.
*
* Status Of BMC
Working
*
*
* * View BMC System Event Log
* It will take up to
*
* Reload BMC System Event Log
* 60 Seconds approx.
*
* Clear BMC System Event Log
* to read all
*
* * LAN Configuration
* BMC SEL records.
*
* * PEF Configuration
*
*
* BMC Watch Dog Timer Action
[Disabled]
*
*
*
*
*
*
*
*
*
*
*
*
* **
Select Screen
*
*
* **
Select Item
*
*
* Enter Go to Sub Screen *
*
* F1
General Help
*
*
* F10
Save and Exit
*
*
* ESC
Exit
*
*
*
*
*
*
*
******************************************************************************
2.3.5.11
BIOS Advanced Menu, IPMI 2.0, View BMC Event Log Screen
Advanced
******************************************************************************
* Total Number Of Entries:
36
* Use +/- to traverse
*
* *************************************************** * the event log.
*
* SEL Entry Number:
[ 1]
*
*
* SEL Record ID:
0100
*
*
* SEL Record Type:
02 (System Event)
*
*
* Event Timestamp:
1166s from SEL init
*
*
* Generator ID:
0020
*
*
* Event Message Format Ver:
04 (IPMI ver 1.5)
*
*
* Event Sensor Type:
25 (Entity Presence)
*
*
* Event Sensor Number:
1F
*
*
* Event Dir Type:
08
*
*
* Event Data:
00 FF FF
*
*
*
* **
Select Screen
*
*
* **
Select Item
*
*
* +Change Option
*
Chapter 2
Powering On and Configuring BIOS Settings
2-27
*
* F1
General Help
*
*
* F10
Save and Exit
*
*
* ESC
Exit
*
*
*
*
*
*
*
******************************************************************************
2-28
Sun Fire X4600 and Sun Fire X4600 M2 Servers Service Manual • March 2011
2.3.5.12
BIOS Advanced Menu, IPMI 2.0, LAN Configuration Screen
Sun Fire X4600 Server Version
Advanced
******************************************************************************
**
* LAN Configuration.
* Enter for IP Address
*
* *************************************************** * Configuration.
*
* Channel Number
[01]
*
*
* Channel Number Status:
Channel number is OK *
*
*
*
*
* IP Assignment:
[DHCP]
*
*
*
*
*
* Current IP Address in BMC:
[010.006.042.155]
*
*
* Current MAC Address in BMC:
[00.03.BA.F2.02.EF] *
*
* Current Subnet Mask in BMC:
[255.255.255.000]
*
*
* Current Gateway in BMC:
[010.006.042.001]
*
*
*
*
*
* Refresh
*
*
*
*
*
* * IP Address
[010.006.042.155]
*
*
* * Subnet Mask
[255.255.255.000]
*
*
* * Default Gateway
[010.006.042.001]
*
*
*
*
*
*
Commit
*
*
*
* **
Select Screen
*
*
* **
Select Item
*
*
* Enter Go to Sub Screen *
*
* F1
General Help
*
*
* F10
Save and Exit
*
*
* ESC
Exit
*
*
*
*
*
*
*
******************************************************************************
Sun Fire X4600M2 Server Version
Advanced
******************************************************************************
* LAN Configuration.
* Enter channel number
*
* *************************************************** * for LAN Configuration. *
* Channel Number
[01]
* Command.
*
* Channel Number Status:
Channel number is OK *
*
Chapter 2
Powering On and Configuring BIOS Settings
2-29
*
* Proper value below 16. *
* IP Assignment:
[DHCP]
*
*
*
*
*
* Current IP Address in BMC:
[010.006.042.161]
*
*
* Current MAC Address in BMC:
[00.14.4F.26.F4.59] *
*
* Current Subnet Mask in BMC:
[255.255.255.000]
*
*
* Current Gateway in BMC:
[010.006.042.001]
*
*
*
* *
Select Screen
*
* Refresh
* **
Select Item
*
*
* Enter Update
*
* * IP Address
[010.006.042.155]
* F1
General Help
*
* * Subnet Mask
[255.255.255.000]
* F10
Save and Exit
*
* * Default Gateway
[010.006.042.001]
* ESC
Exit
*
*
*
*
*
Commit
*
*
******************************************************************************
2-30
Sun Fire X4600 and Sun Fire X4600 M2 Servers Service Manual • March 2011
2.3.5.13
BIOS Advanced Menu, IPMI 2.0, PEF Configuration Screen
Advanced
******************************************************************************
**
* Set PEF Configuration Parameters Command.
* Enable or Disable PEF *
* *************************************************** * Support.
*
* PEF SUPPORT
[Enabled]
* Refer Table 24.6 of
*
* * PEF Action Global Control
* IPMI Specification 1.5 *
* Alert Startup Delay
[Disabled]
*
*
* Startup Delay
[Disabled]
*
*
* Event Message For PEF Action
[Disabled]
*
*
*
*
*
*
*
*
*
*
*
*
*
*
*
*
*
*
* **
Select Screen
*
*
* **
Select Item
*
*
* +Change Option
*
*
* F1
General Help
*
*
* F10
Save and Exit
*
*
* ESC
Exit
*
*
*
*
*
*
*
******************************************************************************
2.3.5.14
BIOS Advanced Menu, MPS Configuration Screen
Advanced
******************************************************************************
* MPS Configuration
* MPS Revision
*
* *************************************************** *
*
* MPS Revision
[1.4]
*
*
*
*
*
*
*
*
*
*
*
*
*
*
*
*
*
*
*
*
*
*
*
*
*
*
*
*
*
*
* **
Select Screen
*
*
* **
Select Item
*
Chapter 2
Powering On and Configuring BIOS Settings
2-31
*
* +Change Option
*
*
* F1
General Help
*
*
* F10
Save and Exit
*
*
* ESC
Exit
*
*
*
*
*
*
*
******************************************************************************
2-32
Sun Fire X4600 and Sun Fire X4600 M2 Servers Service Manual • March 2011
2.3.5.15
BIOS Advanced Menu, PCI Express Configuration Screen
Advanced
******************************************************************************
**
* PCI Express Configuration
*
*
* *************************************************** * Enable/Disable
*
*
* PCI Express L0s and
*
* Active State Power Management [Disabled]
* L1 link power
*
*
* states
*
*
*
*
*
*
*
*
*
*
*
*
*
*
*
*
*
*
*
*
*
*
*
* **
Select Screen
*
*
* **
Select Item
*
*
* +Change Option
*
*
* F1
General Help
*
*
* F10
Save and Exit
*
*
* ESC
Exit
*
*
*
*
*
*
*
******************************************************************************
2.3.5.16
BIOS Advanced Menu, Remote Access Configuration Screen
Advanced
******************************************************************************
**
* Configure Remote Access type and parameters
* Select Remote Access
*
* *************************************************** * type.
*
* Remote Access
[Enabled]
*
*
*
*
*
* Serial port number
[COM1]
*
*
*
Base Address, IRQ
[3F8h, 4]
*
*
* Serial Port Mode
[09600 8,n,1]
*
*
* Flow Control
[None]
*
*
* Redirection After BIOS POST
[Always]
*
*
* Terminal Type
[ANSI]
*
*
* VT-UTF8 Combo Key Support
[Enabled]
*
*
* Sredir Memory Display Delay
[No Delay]
*
*
*
* **
Select Screen
*
Chapter 2
Powering On and Configuring BIOS Settings
2-33
*
* **
Select Item
*
*
* +Change Option
*
*
* F1
General Help
*
*
* F10
Save and Exit
*
*
* ESC
Exit
*
******************************************************************************
2-34
Sun Fire X4600 and Sun Fire X4600 M2 Servers Service Manual • March 2011
2.3.5.17
BIOS Advanced Menu, USB Configuration Screen
Sun Fire X4600 Server Version
Advanced
******************************************************************************
**
* USB Configuration
* Enables support for
*
* *************************************************** * legacy USB. AUTO
*
* Module Version - 2.23.0-7.4
* option disables
*
*
* legacy support if
*
* USB Devices Enabled :
* no USB devices are
*
*
1 Keyboard, 1 Mouse, 1 Hub, 2 Drives
* connected.
*
*
*
*
* USB Controller Support
[USB1.1+USB2.0]
*
*
* Legacy USB Support
[Enabled]
*
*
* USB 2.0 Controller Mode
[FullSpeed]
*
*
* BIOS EHCI Hand-off
[Enabled]
*
*
* Hotplug USB FDD Support
[Auto]
*
*
* Hotplug USB CDROM Support
[Auto]
*
*
*
*
*
* * USB Mass Storage Device Configuration
*
*
*
* **
Select Screen
*
*
* **
Select Item
*
*
* +Change Option
*
*
* F1
General Help
*
*
* F10
Save and Exit
*
*
* ESC
Exit
*
*
*
*
******************************************************************************
Sun Fire X4600 M2 Server Version
Advanced
******************************************************************************
**
* USB Configuration
* Enables USB controller.*
* *************************************************** *
*
* Module Version - 2.23.0-7.4
*
*
*
*
*
* USB Devices Enabled :
*
*
*
2 Keyboards, 2 Mice, 1 Hub, 2 Drives
*
*
*
*
*
Chapter 2
Powering On and Configuring BIOS Settings
2-35
* USB Controller Support
[USB1.1 only]
*
*
* Legacy USB Support
[Enabled]
*
*
* USB 2.0 Controller Mode
[FullSpeed]
*
*
* BIOS EHCI Hand-off
[Enabled]
*
*
* Hotplug USB FDD Support
[Auto]
*
*
* Hotplug USB CDROM Support
[Auto]
*
*
*
*
*
* * USB Mass Storage Device Configuration
*
*
*
* *
Select Screen
*
*
* **
Select Item
*
*
* +Change Option
*
*
* F1
General Help
*
*
* F10
Save and Exit
*
*
* ESC
Exit
*
*
*
*
******************************************************************************
2-36
Sun Fire X4600 and Sun Fire X4600 M2 Servers Service Manual • March 2011
2.3.5.18
BIOS PCI/PnP Menu
Sun Fire X4600 Server Version
Main
Advanced
PCIPnP
Boot
Security
Chipset
Exit
******************************************************************************
* Advanced PCI/PnP Settings
** NO: lets the BIOS
*
* ***************************************************** configure all the
*
* WARNING: Setting wrong values in below sections
** devices in the system. *
*
may cause system to malfunction.
**
*
*
** YES: lets the
*
* Clear NVRAM
[No]
** operating system
*
* Plug & Play O/S
[No]
** configure Plug and
*
* PCI Latency Timer
[64]
** Play (PnP) devices not *
* Allocate IRQ to PCI VGA
[Yes]
** required for boot if
*
* Palette Snooping
[Disabled]
** your system has a Plug *
* PCI IDE BusMaster
[Disabled]
** and Play operating
*
*
** system.
*
* OffBoard PCI/ISA IDE Card
[Auto]
**
*
* PCI Option ROM Control
[Enabled]
**
*
* Scanning Onboard SAS/SATA ROM [Enabled]
**
*
* Scanning Onboard NIC OPROM
[Enabled]
**
*
* Scanning OPROM on PCIX SLOT0
[Enabled]
**
*
* Scanning OPROM on PCIX SLOT1
[Enabled]
** **
Select Screen
*
* Scanning OPROM on PCIE SLOT2
[Enabled]
** **
Select Item
*
* Scanning OPROM on PCIE SLOT3
[Enabled]
** +Change Option
*
* Scanning OPROM on PCIE SLOT4
[Enabled]
** F1
General Help
*
* Scanning OPROM on PCIE SLOT5
[Enabled]
** F10
Save and Exit
*
* Scanning OPROM on PCIE SLOT6
[Enabled]
** ESC
Exit
*
* Scanning OPROM on PCIE SLOT7
[Enabled]
**
*
* Onboard PCI NIC MAC Address
**
*
*
GE NIC 1 : 00 03 BA CD 51 39
**
*
*
GE NIC 2 : 00 03 BA CD 51 38
** Available: Specified
*
*
GE NIC 3 : 00 03 BA CD 51 3B
** DMA is available to be *
*
GE NIC 3 : 00 03 BA CD 51 3B
** used by PCI/PnP
*
*
** devices.
*
* IRQ3
[Available]
** Reserved: Specified
*
* IRQ4
[Reserved]
** DMA is reserved for
*
* IRQ5
[Available]
** use by legacy ISA
*
* IRQ7
[Available]
** devices.
*
* IRQ9
[Available]
**
*
* IRQ10
[Available]
**
*
* IRQ11
[Available]
**
*
* IRQ14
[Available]
**
*
* IRQ15
[Available]
** **
Select Screen
*
*
** **
Select Item
*
* DMA Channel 0
[Available]
** +Change Option
*
Chapter 2
Powering On and Configuring BIOS Settings
2-37
* DMA Channel 1
[Available]
** F1
General Help
*
* DMA Channel 3
[Available]
** F10
Save and Exit
*
* DMA Channel 5
[Available]
** ESC
Exit
*
* DMA Channel 6
[Available]
**
*
* DMA Channel 7
[Available]
**
*
*
**
*
* Reserved Memory Size
[Disabled]
**
*
******************************************************************************
2-38
Sun Fire X4600 and Sun Fire X4600 M2 Servers Service Manual • March 2011
Sun Fire X4600 M2 Server Version
Main
Advanced
PCIPnP
Boot
Security
Chipset
Exit
******************************************************************************
* Advanced PCI/PnP Settings
** Clear NVRAM during
*
* ***************************************************** System Boot.
*
* WARNING: Setting wrong values in below sections
**
*
*
may cause system to malfunction.
**
*
*
**
*
* Clear NVRAM
[No]
**
*
* Plug & Play O/S
[No]
**
*
* PCI Latency Timer
[64]
**
*
* Allocate IRQ to PCI VGA
[Yes]
**
*
* Palette Snooping
[Disabled]
**
*
* PCI IDE BusMaster
[Disabled]
**
*
*
** *
Select Screen
*
* OffBoard PCI/ISA IDE Card
[Auto]
** **
Select Item
*
* PCI Option ROM Control
[Enabled]
** +Change Option
*
* Scanning Onboard SAS/SATA ROM [Enabled]
** F1
General Help
*
* Scanning Onboard NIC OPROM
[Enabled]
** F10
Save and Exit
*
* Scanning OPROM on PCIX SLOT0
[Enabled]
** ESC
Exit
*
* Scanning OPROM on PCIX SLOT1
[Enabled]
**
*
* Scanning OPROM on PCIE SLOT2
[Enabled]
**
*
* Scanning OPROM on PCIE SLOT3
[Enabled]
**
*
* Scanning OPROM on PCIE SLOT4
[Enabled]
**
*
* Scanning OPROM on PCIE SLOT5
[Enabled]
**
*
* Scanning OPROM on PCIE SLOT6
[Enabled]
**
*
* Scanning OPROM on PCIE SLOT7
[Enabled]
**
*
* Onboard PCI NIC MAC Address
**
*
*
GE NIC 1 : 00 14 4F 2A 23 EC
**
*
*
GE NIC 2 : 00 14 4F 2A 23 ED
**
*
*
GE NIC 3 : 00 14 4F 2A 23 EE
**
*
*
GE NIC 3 : 00 14 4F 2A 23 EF
**
*
*
**
*
* IRQ3
[Available]
**
*
* IRQ4
[Reserved]
** *
Select Screen
*
* IRQ5
[Available]
** **
Select Item
*
* IRQ7
[Available]
** +Change Option
*
* IRQ9
[Available]
** F1
General Help
*
* IRQ10
[Available]
** F10
Save and Exit
*
* IRQ11
[Available]
** ESC
Exit
*
* IRQ14
[Available]
**
*
* IRQ15
[Available]
**
*
*
**
*
* DMA Channel 0
[Available]
** *
Select Screen
*
* DMA Channel 1
[Available]
** **
Select Item
*
* DMA Channel 3
[Available]
** +Change Option
*
* DMA Channel 5
[Available]
** F1
General Help
*
Chapter 2
Powering On and Configuring BIOS Settings
2-39
* DMA Channel 6
[Available]
** F10
Save and Exit
*
* DMA Channel 7
[Available]
** ESC
Exit
*
*
**
*
* Reserved Memory Size
[Disabled]
**
*
******************************************************************************
2-40
Sun Fire X4600 and Sun Fire X4600 M2 Servers Service Manual • March 2011
2.3.5.19
BIOS Boot Menu, Main Screen
Main
Advanced
PCIPnP
Boot
Security
Chipset
Exit
******************************************************************************
**
* Boot Settings
* Configure Settings
*
* *************************************************** * during System Boot.
*
* * Boot Settings Configuration
*
*
*
*
*
* * Boot Device Priority
*
*
* * Hard Disk Drives
*
*
* * Removable Drives
*
*
* * CD/DVD Drives
*
*
*
*
*
*
*
*
*
*
*
*
* **
Select Screen
*
*
* **
Select Item
*
*
* Enter Go to Sub Screen *
*
* F1
General Help
*
*
* F10
Save and Exit
*
*
* ESC
Exit
*
*
*
*
*
*
*
******************************************************************************
2.3.5.20
BIOS Boot Menu, Boot Settings Configuration Screen
Boot
******************************************************************************
**
* Boot Settings Configuration
* Allows BIOS to skip
*
* *************************************************** * certain tests while
*
* Quick Boot
[Disabled]
* booting. This will
*
* System Configuration Display
[Disabled]
* decrease the time
*
* Quiet Boot
[Disabled]
* needed to boot the
*
* Language
[English]
* system.
*
* AddOn ROM Display Mode
[Force BIOS]
*
*
* Bootup Num-Lock
[On]
*
*
* Wait For 'F1' If Error
[Disabled]
*
*
* Interrupt 19 Capture
[Disabled]
*
*
* Default Boot Order
[CRHB]
*
*
*
*
*
*
*
*
*
* **
Select Screen
*
Chapter 2
Powering On and Configuring BIOS Settings
2-41
*
* **
Select Item
*
*
* +Change Option
*
*
* F1
General Help
*
*
* F10
Save and Exit
*
*
* ESC
Exit
*
*
*
*
*
*
*
******************************************************************************
2-42
Sun Fire X4600 and Sun Fire X4600 M2 Servers Service Manual • March 2011
2.3.5.21
BIOS Boot Menu, Boot Device Priority Screen
Boot
******************************************************************************
* Boot Device Priority
* Specifies the boot
*
* *************************************************** * sequence from the
*
*
* available devices.
*
* 1st Boot Device
[CD/DVD]
*
*
* 2nd Boot Device
[Removable Dev.]
* A device enclosed in
*
* 3rd Boot Device
[Hard Drive]
* parenthesis has been
*
* 4th Boot Device
[Network:IBA GE Slo] * disabled in the
*
* 5th Boot Device
[Network:IBA GE Slo] * corresponding type
*
* 6th Boot Device
[Network:IBA GE Slo] * menu.
*
* 7th Boot Device
[Network:IBA GE Slo] *
*
*
*
*
*
*
*
*
* **
Select Screen
*
*
* **
Select Item
*
*
* +Change Option
*
*
* F1
General Help
*
*
* F10
Save and Exit
*
*
* ESC
Exit
*
*
*
*
*
*
*
******************************************************************************
2.3.5.22
BIOS Boot Menu, Hard Disk Drives Screen
Boot
******************************************************************************
* Hard Disk Drives
* Specifies the boot
*
* *************************************************** * sequence from the
*
* 1st Drive
[#218 ID00 LUN0 FUJ] * available devices.
*
*
*
*
*
*
*
*
*
*
*
*
*
*
*
*
*
*
*
*
*
*
*
*
*
*
*
*
*
* **
Select Screen
*
*
* **
Select Item
*
*
* +Change Option
*
Chapter 2
Powering On and Configuring BIOS Settings
2-43
*
* F1
General Help
*
*
* F10
Save and Exit
*
*
* ESC
Exit
*
*
*
*
*
*
*
******************************************************************************
2-44
Sun Fire X4600 and Sun Fire X4600 M2 Servers Service Manual • March 2011
2.3.5.23
BIOS Boot Menu, Removable Drives Screen
Boot
******************************************************************************
**
* Removable Drives
* Specifies the boot
*
* *************************************************** * sequence from the
*
* 1st Drive
[USB:AMI Virtual Fl] * available devices.
*
*
*
*
*
*
*
*
*
*
*
*
*
*
*
*
*
*
*
*
*
*
*
*
*
*
*
*
*
* **
Select Screen
*
*
* **
Select Item
*
*
* +Change Option
*
*
* F1
General Help
*
*
* F10
Save and Exit
*
*
* ESC
Exit
*
*
*
*
*
*
*
******************************************************************************
2.3.5.24
BIOS Boot Menu, CD/DVD Drives Screen
Boot
******************************************************************************
* CD/DVD Drives
* Specifies the boot
*
* *************************************************** * sequence from the
*
* 1st Drive
[CD/DVD:PM-QSI DVD-] * available devices.
*
* 2nd Drive
[USB:AMI Virtual CD] *
*
*
*
*
*
*
*
*
*
*
*
*
*
*
*
*
*
*
*
*
*
*
*
*
*
*
* **
Select Screen
*
*
* **
Select Item
*
Chapter 2
Powering On and Configuring BIOS Settings
2-45
*
* +Change Option
*
*
* F1
General Help
*
*
* F10
Save and Exit
*
*
* ESC
Exit
*
*
*
*
*
*
*
******************************************************************************
2-46
Sun Fire X4600 and Sun Fire X4600 M2 Servers Service Manual • March 2011
2.3.5.25
BIOS Security Settings Menu
Main
Advanced
PCIPnP
Boot
Security
Chipset
Exit
******************************************************************************
* Security Settings
* Install or Change the *
* *************************************************** * password.
*
* Supervisor Password :Not Installed
*
*
* User Password
:Not Installed
*
*
*
*
*
* Change Supervisor Password
*
*
* Change User Password
*
*
*
*
*
*
*
*
* Boot Sector Virus Protection
[Disabled]
*
*
*
*
*
*
*
*
*
* **
Select Screen
*
*
* **
Select Item
*
*
* Enter Change
*
*
* F1
General Help
*
*
* F10
Save and Exit
*
*
* ESC
Exit
*
*
*
*
*
*
*
******************************************************************************
2.3.5.26
BIOS Chipset Menu, Main Screen
Main
Advanced
PCIPnP
Boot
Security
Chipset
Exit
******************************************************************************
**
*
* Options for NB
*
* * NorthBridge Configuration
*
*
* * SouthBridge Configuration
*
*
* *
*
*
*
*
*
*
*
*
*
*
*
*
*
*
*
*
*
*
*
*
*
*
*
*
*
*
*
* **
Select Screen
*
*
* **
Select Item
*
Chapter 2
Powering On and Configuring BIOS Settings
2-47
*
* Enter Go to Sub Screen *
*
* F1
General Help
*
*
* F10
Save and Exit
*
*
* ESC
Exit
*
*
*
*
*
*
*
******************************************************************************
2-48
Sun Fire X4600 and Sun Fire X4600 M2 Servers Service Manual • March 2011
2.3.5.27
BIOS Chipset Menu, NorthBridge Configuration Screen
Sun Fire X4600 Server Version
Chipset
******************************************************************************
* NorthBridge Chipset Configuration
*
*
* *************************************************** *
*
* * Memory Configuration
*
*
* * ECC Configuration
*
*
* * Power Down Control
[Disabled]
*
*
* *************************************************** *
*
* Memory Timing Parameters
[CPU Node 0]
*
*
*
Memory CLK
:200 MHz
*
*
*
CAS Latency(Tcl)
:3.0
*
*
*
RAS/CAS Delay(Trcd)
:3 CLK
*
*
*
Min Active RAS(Tras)
:8 CLK
*
*
*
Row Precharge Time(Trp):3 CLK
* **
Select Screen
*
*
RAS/RAS Delay(Trrd)
:2 CLK
* **
Select Item
*
*
Row Cycle (Trc)
:11 CLK
* Enter Go to Sub Screen *
*
Row Refresh Cycle(Trfc):14 CLK
* F1
General Help
*
*
Read Write Delay(Trwt) :4 CLK
* F10
Save and Exit
*
*
Read Preamble
:7.0 ns
* ESC
Exit
*
*
Asynchronous Latency
:8 ns
*
*
*
*
*
******************************************************************************
Sun Fire X4600 M2 Server Version
Chipset
******************************************************************************
* NorthBridge Chipset Configuration
*
*
* *************************************************** *
*
* * Memory Configuration
*
*
* * ECC Configuration
*
*
* Power Down Control
[Disabled]
*
*
* ALternate VID
[0.850 V]
*
*
* *************************************************** *
*
* Memory Timing Parameters
[CPU Node 0]
*
*
*
Memory CLK
:333 MHz
*
*
*
CAS Latency(Tcl)
:5.0
*
*
*
RAS/CAS Delay(Trcd)
:5 CLK
*
*
*
Min Active RAS(Tras)
:13 CLK
* *
Select Screen
*
Chapter 2
Powering On and Configuring BIOS Settings
2-49
*
Row Precharge Time(Trp):5 CLK
* **
Select Item
*
*
RAS/RAS Delay(Trrd)
:3 CLK
* Enter Go to Sub Screen *
*
Row Cycle (Trc)
:18 CLK
* F1
General Help
*
*
Asynchronous Latency
:8 ns
* F10
Save and Exit
*
*
* ESC
Exit
*
******************************************************************************
2-50
Sun Fire X4600 and Sun Fire X4600 M2 Servers Service Manual • March 2011
2.3.5.28
BIOS Chipset Menu, NorthBridge Memory Configuration
Screen
Sun Fire X4600 Server Version
Chipset
******************************************************************************
**
* Memory Configuration
* MEMCLK can be set
*
* *************************************************** * by the code using
*
* Memclock Mode
[Auto]
* AUTO, or if you use
*
* MCT Timing Mode
[Auto]
* LIMIT, you can set
*
* User Config Mode
[Auto]
* one of the standard
*
* Bank Interleaving
[Auto]
* values.
*
* Burst Length
[4 Beats]
*
*
* SoftWare Memory Hole
[Disabled]
*
*
* HardWare Memory Hole
[Disabled]
*
*
* Node Interleaving
[Disabled]
*
*
*
*
*
*
* **
Select Screen
*
*
* **
Select Item
*
*
* +Change Option
*
*
* F1
General Help
*
*
* F10
Save and Exit
*
*
* ESC
Exit
*
*
*
*
*
*
*
******************************************************************************
Sun Fire X4600 M2 Server Version
Chipset
******************************************************************************
* Memory Configuration
* Select the DRAM
*
* *************************************************** * Frequency programming *
* Memclock Mode
[Auto]
* method. If Auto,
*
* MCT Timing Mode
[Auto]
* the DRAM speed will
*
* Bank Interleaving
[Auto]
* be based on SPDs.
*
* Node Interleaving
[Disabled]
* If limit,the DRAM speed*
* Enable Clock to all DIMMs
[Disabled]
* will not exceed
*
* MemClk Tristate C3/ATLVID
[Disabled]
* the specified value. If*
* Memory Hole Remapping
[Disabled]
* Manual, the DRAMs
*
*
* specified will be
*
Chapter 2
Powering On and Configuring BIOS Settings
2-51
*
* programmed regardless. *
*
*
*
*
* *
Select Screen
*
*
* **
Select Item
*
*
* +Change Option
*
*
* F1
General Help
*
*
* F10
Save and Exit
*
*
* ESC
Exit
*
*
*
*
******************************************************************************
2-52
Sun Fire X4600 and Sun Fire X4600 M2 Servers Service Manual • March 2011
2.3.5.29
BIOS Chipset Menu, NorthBridge ECC Configuration Screen
Sun Fire X4600 Server Version
Chipset
******************************************************************************
* ECC Configuration
* DRAM ECC allows
*
* *************************************************** * hardware to report
*
* DRAM ECC Enable
[Enabled]
* and correct memory
*
*
MCA DRAM ECC Logging
[Enabled]
* errors automatically
*
*
ECC Chip Kill
[Enabled]
* maintaining system
*
*
DRAM SCRUB REDIRECT
[Disabled]
* integrity.
*
*
DRAM BG Scrub
[163.8us]
*
*
* L2 Cache BG Scrub
[10.2us]
*
*
* Data Cache BG Scrub
[5.12us]
*
*
*
*
*
*
*
*
*
*
*
*
* **
Select Screen
*
*
* **
Select Item
*
*
* +Change Option
*
*
* F1
General Help
*
*
* F10
Save and Exit
*
*
* ESC
Exit
*
*
*
*
******************************************************************************
Sun Fire X4600 M2 Server Version
Chipset
******************************************************************************
**
* ECC Configuration
* DRAM ECC allows
*
* *************************************************** * hardware to report
*
* DRAM ECC Enable
[Enabled]
* and correct memory
*
*
ECC Chip Kill
[Enabled]
* errors automatically
*
*
DRAM SCRUB REDIRECT
[Disabled]
* maintaining system
*
*
DRAM BG Scrub
[163.8us]
* integrity.
*
* L2 Cache BG Scrub
[10.2us]
*
*
* Data Cache BG Scrub
[5.12us]
*
*
*
*
*
*
*
*
*
*
*
Chapter 2
Powering On and Configuring BIOS Settings
2-53
*
*
*
*
* **
Select Screen
*
*
* **
Select Item
*
*
* +Change Option
*
*
* F1
General Help
*
*
* F10
Save and Exit
*
*
* ESC
Exit
*
******************************************************************************
2-54
Sun Fire X4600 and Sun Fire X4600 M2 Servers Service Manual • March 2011
2.3.5.30
BIOS Chipset Menu, SouthBridge Configuration Screen
Sun Fire X4600 Server Version
Chipset
******************************************************************************
* South Bridge Chipset Configuration
* Enable/disable
*
* *************************************************** * SMBUS 2.0 Controller *
* SM Bus Interface
[Enabled]
* in South Bridge
*
*
*
*
* Onboard IO APIC
[Enabled]
*
*
*
*
*
* CPU Spread spectrum
[Disabled]
*
*
* SATA Spread spectrum
[Disabled]
*
*
* PCI-Express Spread spectrum
[Disabled]
*
*
*
*
*
*
*
*
* Primary Video
[Master PCI-Express] * **
Select Screen
*
*
* **
Select Item
*
*
* +Change Option
*
* Restore on AC/Power Loss
[Last State]
* F1
General Help
*
*
* F10
Save and Exit
*
*
* ESC
Exit
*
*
*
*
*
*
*
******************************************************************************
Sun Fire X4600 M2 Server Version
Chipset
******************************************************************************
* South Bridge Chipset Configuration
* Enable/disable
*
* *************************************************** * SMBUS Controller.
*
* SMBus Interface
[Enabled]
*
*
*
*
*
* Onboard IO APIC
[Enabled]
*
*
*
*
*
* CPU Spread Spectrum
[Down Spread]
*
*
* SATA Spread Spectrum
[Disabled]
*
*
* PCI-Express Spread Spectrum
[Disabled]
*
*
*
*
*
* Restore on AC/Power Loss
[Last State]
*
*
* Power Button Behavior
[Instant Off]
* *
Select Screen
*
*
* **
Select Item
*
Chapter 2
Powering On and Configuring BIOS Settings
2-55
*
* +Change Option
*
*
* F1
General Help
*
*
* F10
Save and Exit
*
*
* ESC
Exit
*
******************************************************************************
2.3.5.31
BIOS Exit Options Menu Screen
Main
Advanced
PCIPnP
Boot
Security
Chipset
Exit
******************************************************************************
* Exit Options
* Exit system setup
*
* *************************************************** * after saving the
*
* Save Changes and Exit
* changes.
*
* Discard Changes and Exit
*
*
* Discard Changes
* F10 key can be used
*
*
* for this operation.
*
* Load Optimal Defaults
*
*
*
*
*
*
*
*
*
*
*
*
*
*
*
*
*
*
* **
Select Screen
*
*
* **
Select Item
*
*
* Enter Go to Sub Screen *
*
* F1
General Help
*
*
* F10
Save and Exit
*
*
* ESC
Exit
*
*
*
*
*
*
*
******************************************************************************
2.4
Resetting SP and BIOS Passwords Using
Jumper P20
This procedure describes how to reset the administration password (the root
password) for the ILOM SP back to the default after it has been set once during
initial setup.
2-56
Sun Fire X4600 and Sun Fire X4600 M2 Servers Service Manual • March 2011
▼ Resetting the Administration Password Back To
the Default
Note – This procedure simultaneously removes any BIOS password that was set.
1. Shut down the server to standby power mode by using a pencil or other pointed
object to press and release the recessed Power button on the front panel.
See Section 2.2 “Powering Off the Server” on page 2-3.
2. Disconnect the AC power cords from the server.
Caution – Before handling components, attach an ESD wrist strap to bare metal on
the chassis. The system’s printed circuit boards and hard disk drives contain
components that are extremely sensitive to static electricity.
3. If the server is in a rack, slide it far enough from the rack so that you can
remove the main cover. If you cannot safely view and access the motherboard,
remove the server from the rack.
4. Remove the main cover from the server.
See “Removing the Main Cover” on page 3-3.
5. Install the shorting jumper across the P20 header pins.
See FIGURE 2-6 for the P20 jumper location. The P20 jumper function is to clear the
ILOM SP password.
6. Replace the server’s main cover.
7. Reconnect AC power cords to the server.
The server powers up to standby power mode, indicated when the Power/OK
LED on the front panel is flashing.
8. Return the server to main power mode by using a pencil or other pointed object
to press and release the recessed Power button on the front panel.
Note – You must allow the entire server, not just the SP, to reboot to main power
mode to complete the password reset. This is because the state of the P20 jumper
cannot be determined without the host CPU running. Wait until the end of POST,
when you see the CMOS password cleared by jumper message, after which
both the BIOS and SP passwords are reset.
■
The ILOM SP password is reset to the default, changeme.
Chapter 2
Powering On and Configuring BIOS Settings
2-57
■
The BIOS password is removed. If you had a BIOS password set, you are no
longer prompted for one.
9. Log in to the ILOM web GUI using root as the user name and changeme as the
password.
For login instructions, refer to the Integrated Lights Out Manager Administration
Guide, 819-1160.
10. Change the default password to a password of your choice.
11. Repeat steps 1 through 8 to remove the P20 jumper. (Remove the jumper in step
5 rather than inserting it.)
Note – If you do not remove the P20 jumper, the ILOM SP and BIOS passwords will
be reset every time you power-cycle the server.
2-58
Sun Fire X4600 and Sun Fire X4600 M2 Servers Service Manual • March 2011
FIGURE 2-6
2.5
Location of Jumpers on the Motherboard
Using the Force-Recovery Jumper P19
Use this jumper to force the server to flash a new BIOS when the system hangs. For
example, if the system hangs after an ILOM SP firmware/BIOS update, use this
procedure to force the server to look for the new BIOS.
Chapter 2
Powering On and Configuring BIOS Settings
2-59
▼ Forcing a Hung Server to Flash a New BIOS
1. Shut down the server to standby power mode by using a pencil or other pointed
object to press and release the recessed Power button on the front panel. See
“Powering Off the Server” on page 2-3.
2. Disconnect the AC power cords from the server.
Caution – Before handling components, attach an ESD wrist strap to bare metal on
the chassis. The system’s printed circuit boards and hard disk drives contain
components that are extremely sensitive to static electricity.
3. If the server is in a rack, slide it far enough from the rack so that you can
remove the main cover. If you cannot safely view and access the motherboard,
remove the server from the rack.
4. Remove the main cover from the server.
See “Removing the Main Cover” on page 3-3.
5. Install the shorting jumper across the P19 header pins.
See FIGURE 2-6 for the P19 jumper location. The P19 jumper function is to instruct
the system to force recovery of the latest BIOS at system reboot.
6. Reinstall the main cover to the server.
7. Reconnect AC power cords to the server.
The server powers up to standby power mode, indicated when the Power/OK
LED on the front panel is flashing.
8. Return the server to main power mode by using a pencil or other pointed object
to press and release the recessed Power button on the front panel.
You must fully power on the server to complete the reset. This is because the state
of the P19 jumper cannot be determined without the host CPU running.
9. Repeat steps 1 through 8 to remove the P19 jumper. (Remove the jumper in step
5 rather than inserting it.)
Note – If you do not remove the P19 jumper, the server will force a recovery of the
new BIOS every time that you power cycle the server.
2-60
Sun Fire X4600 and Sun Fire X4600 M2 Servers Service Manual • March 2011
2.6
Using the Clear CMOS Jumper P25
You can use Jumper P25 to clear the server’s CMOS settings after a system hang. For
example, if the server hangs because of incorrect settings and will not boot, use this
jumper to invalidate the settings and reboot with defaults.
▼ Clearing a Server’s CMOS Settings
1. Shut down the server to standby power mode by using a pencil or other pointed
object to press and release the recessed Power button on the front panel.
See “Powering Off the Server” on page 2-3.
2. Disconnect the AC power cords from the server.
Caution – Before handling components, attach an ESD wrist strap to bare metal on
the chassis. The system’s printed circuit boards and hard disk drives contain
components that are extremely sensitive to static electricity.
3. If the server is in a rack, slide it far enough from the rack so that you can
remove the main cover. If you cannot safely view and access the motherboard,
remove the server from the rack.
4. Remove the main cover from the server.
See “Removing the Main Cover” on page 3-3.
5. Install the shorting jumper across the P25 header pins.
See FIGURE 2-6 for the P25 jumper location. The P25 jumper function is to tell the
system to clear the current CMOS settings at system reboot.
6. Wait 10 seconds, then remove the shorting jumper.
This jumper removes battery power from the SouthBridge chipset where the
CMOS settings are stored, thereby removing the CMOS settings.
7. Reinstall the main cover to the server.
8. Reconnect AC power cords to the server.
The server powers up to standby power mode, indicated when the Power/OK
LED on the front panel is flashing.
Chapter 2
Powering On and Configuring BIOS Settings
2-61
2.7
Using the Reset and NMI Dump
Switches
Caution – Do not use the Reset and NMI Dump switches unless you are instructed
to do so by a Field Service engineer.
The Reset switch (SW2 on the motherboard) sends a reset order to the CPUs,
resetting the main system, but not the service processor. The button for this switch
can be pushed by sticking a paper clip or similar object through the hole provided on
the rear of the chassis (see FIGURE 2-7).
The Non-Maskable Interrupt (NMI) Dump switch (SW3 on the motherboard) sends
an NMI order to the CPUs, which is used by Field Service for debugging activities at
the request of operating system engineers. The button for this switch can be pushed
by sticking a paper clip or similar object through the hole provided on the rear of the
chassis (see FIGURE 2-7).
FIGURE 2-7
2-62
Sun Fire X4600/X4600 M2 Servers Back Panel
Sun Fire X4600 and Sun Fire X4600 M2 Servers Service Manual • March 2011
2.8
Updating the BIOS
The BIOS is updated whenever you update the ILOM SP firmware. For instructions
on updating the firmware, refer to the Integrated Lights Out Manager Administration
Guide, 819-1160.
2.9
Power-On Self-Test (POST)
For information about BIOS POST testing, POST codes, POST code checkpoints, and
console redirection, see Appendix B.
2.10
BIOS ILOM-based Diagnostics
The ILOM-based Diagnostics Advanced->Error Handling entry has the following
functional features and the is default setting:
ShutDown on Hardware Errors
PROCHOT_L
[Disabled]
[Disabled]
Disable Faulty Option Cards
[Disabled]
Spare DIMM Rank Selector
[Disabled]
Retire Faulty Processors
ILOM-based Diagnostics
[Disabled]
[Disabled]
Log Diagnostics on all Resets [Disabled]
Following is the list of features which are not functional:
Disable Faulty Option Cards
Spare DIMM Rank Selector
Retire Faulty Processors
Chapter 2
Powering On and Configuring BIOS Settings
2-63
This feature requires 'hdtl'. Dual CPU x4600 servers do not require filler cards, and
without filler cards hdtl is not functional. For example, 'ILOM-based Diagnostics'
does not work in a G4-F with 2 CPUs unless all empty CPU slots are filled with filler
card.
6652890 ILOM-based error reporting, tier1: Error Handling to provide setup question
and handler
In this three tier scheme, Error Handling provides the following BIOS Setup question
in Error Handling page:
Error Handling configuration --> ILOM-based Hardware Diagnostics
[Disable(default)|Enable]
After observing a sync flood in postmortem, if the above CMOS parameters are
enabled, EH sends "entering diagnostic mode Data2=F5h, Data3=EDh" and
start on an endless loop "jmp $"
Presentation: "System Boot Initiated <EH revision> | Automatic boot to diagnostic"
Event:
========================================
SensorType
01Dh
SensorNumber
EventDir_Type
EventData1
Current EH revision
6Fh
04h
Data2
25h <-- signature MSByte
Data3
EDh <-- signature LSByte
This, along with particular signature in Data2/Data3 (25EDh), will inform ILOM of
the fact that platform BIOS is ready for jtag-based intervention and retrieval of all
critical registers.
2-64
Sun Fire X4600 and Sun Fire X4600 M2 Servers Service Manual • March 2011
CHAPTER
3
Maintaining the Sun Fire
X4600/X4600 M2 Servers
This chapter contains information and procedures for servicing the Sun Fire
X4600/X4600 M2 Servers hardware, including component removal and replacement
procedures.
3.1
Tools and Supplies Needed
The Sun Fire X4600/X4600 M2 Servers can be serviced with the following items:
3.2
■
Manual torque driver settable to 7 inch-lbs (0.8 newton-meters) with No. 1
Phillips, No. 2 Phillips, and 7-mm hex bits.
■
No. 1 Phillips screw driver.
■
No. 2 Phillips screw driver.
■
Antistatic wrist strap.
■
Pencil or other pointed object (to press the recessed power button).
Powering Off and Removing the Covers
Use the preparatory procedures in this section when you are referred to them from
the removal and replacement procedures later in this chapter.
3-1
FIGURE 3-1
Sun Fire X4600/X4600 M2 Servers Front Panel
▼ Powering Off the Server
There are two methods for shutting down the server from main power mode to
standby power mode.
■
Graceful shutdown – Use a pencil or other pointed object to press and release the
Power button on the front panel. This causes Advanced Configuration and Power
Interface (ACPI) enabled operating systems to perform an orderly shutdown of
the operating system. Servers not running ACPI-enabled operating systems will
shut down to standby power mode immediately.
■
Emergency shutdown – Press and hold the Power button for four seconds to force
main power off and enter standby power mode.
When main power is off, the Power/OK LED on the front panel begins flashing,
indicating that standby power is still available.
Caution – In standby power mode, power is still directed to some components. To
completely power off the server, you must disconnect the AC power cords from the
back panel of the server.
Once the server is powered down, complete the following steps before removing the
main cover:
1. Unplug all AC power cords from the server’s power supplies.
2. Turn off all peripheral devices connected to the system.
3-2
Sun Fire X4600 and Sun Fire X4600 M2 Servers Service Manual • March 2011
3. Label any peripheral cables and/or telecommunication lines that must be
disconnected in order to remove and replace a specific component.
▼ Removing the Main Cover
1. To remove the cover:
a. Loosen the two captive screws that secure the cover at the rear of the chassis.
b. Using the indent on the cover for leverage, slide the cover toward the rear of
the chassis approximately 0.5 inches (12 mm.). See FIGURE 3-2.
c. Grasp the cover by its edges and lift it straight up from the chassis.
Note – When you remove the cover, the intrusion switch that is on the motherboard
automatically powers down the system to standby mode.
FIGURE 3-2
Removing the Main Cover
2. To replace the cover:
a. Set the cover on the chassis so that the tabs on the cover align with the
notches in the chassis.
Chapter 3
Maintaining the Sun Fire X4600/X4600 M2 Servers
3-3
b. Slide the cover toward the server front about 0.5 inches (12 mm.), ensuring
that the front lip on the cover slides into the groove on the chassis.
c. Tighten the two captive screws on the back of the cover by hand.
▼ Removing the Front Bezel
1. To remove the front bezel:
a. Grasp the bezel at both side edges simultaneously.
b. Pull the bezel away from the chassis, being careful to evenly release all seven
pegs on the bezel from the chassis.
Note – Avoid bending the bezel by gradually pulling it from the middle and both
ends simultaneously.
FIGURE 3-3
Removing the Front Bezel
2. To replace the front bezel:
3-4
Sun Fire X4600 and Sun Fire X4600 M2 Servers Service Manual • March 2011
a. Align the seven pegs on the bezel with the corresponding holes in the chassis
front.
b. Press in on the edges and center of the bezel until the pegs are firmly
engaged with the holes in the chassis front and no space is left between the
bezel and the chassis.
3.3
Replaceable Component Locations
FIGURE 3-4 shows the locations of the replaceable components documented in this
chapter.
Chapter 3
Maintaining the Sun Fire X4600/X4600 M2 Servers
3-5
FIGURE 3-4
3-6
Sun Fire X4600/X4600 M2 Replaceable Component Locations
Sun Fire X4600 and Sun Fire X4600 M2 Servers Service Manual • March 2011
3.4
Replaceable Component Procedures
Note – Some of the procedures in this section are for customer-replaceable units
(CRUs) and some are for field-replaceable units (FRUs), as noted in the procedures
and in the list below. FRU components should be replaced only by trained service
technicians. Contact your Sun Service representative for assistance with FRU
replacements.
This section contains procedures for replacing the following components:
■
“Replacing the Battery” on page 3-7
■
“Replacing a CPU Module or CPU Filler Board” on page 3-9
■
“Replacing the DVD-ROM Drive” on page 3-12
■
“Replacing the Front Panel Indicator Board” on page 3-16
■
“Replacing the Front I/O Board” on page 3-19
■
“Replacing the GRASP Board” on page 3-22
■
“Replacing a Hard Disk Drive” on page 3-25
■
“Replacing a Hard Disk Drive Backplane” on page 3-27
■
“Replacing Memory Modules (DIMMs)” on page 3-30
■
“Replacing the Motherboard” on page 3-32
■
“Replacing PCI Cards” on page 3-39
■
“Removing and Replacing a Power Supply” on page 3-43
■
“Replacing the Power Distribution Board” on page 3-44
Several of these procedures use information contained in the following section:
■
“Servicetool FRU Update Procedure” on page 3-47
Caution – Internal components are extremely sensitive to static electricity. Before
handling internal components, attach an electrostatic discharge (ESD) wrist strap to
bare metal on the chassis.
▼ Replacing the Battery
Note – This component is a CRU and can be replaced by anyone.
Chapter 3
Maintaining the Sun Fire X4600/X4600 M2 Servers
3-7
Follow these steps to remove and replace the system battery.
1. Power off the server as described in “Powering Off the Server” on page 3-2.
2. If the server is in a rack, slide it far enough from the rack so that you can
remove the main cover. If you cannot safely view and access the component,
remove the server from the rack.
3. Remove the main cover as described in “Removing the Main Cover” on page 3-3.
4. Remove the battery by gently pulling the spring-clip away from the battery face
and lifting the battery straight up. See FIGURE 3-5.
FIGURE 3-5
Removing the Battery
5. Install the new battery:
a. Align the battery with the holder on the motherboard so that the positive
polarity side of the battery is facing the center of the chassis.
b. Press the battery down into the holder until the spring-clip snaps around the
battery.
Note – Install the new battery in the holder with the same orientation (polarity) as
the battery that you removed. The positive polarity, marked with a “+” symbol,
should be facing toward the chassis center.
3-8
Sun Fire X4600 and Sun Fire X4600 M2 Servers Service Manual • March 2011
6. Replace the main cover.
▼ Replacing a CPU Module or CPU Filler Board
A CPU module includes the CPU (with heat sink) and DIMM slots on a removable
board. The CPU modules are not redundant; failure of one CPU module will cause
system failure.
Note – This component is a CRU and can be replaced by anyone.
Follow these steps to remove and replace a CPU module or CPU filler board.
1. Power off the server as described in “Powering Off the Server” on page 3-2.
Caution – The CPU module can be damaged if removed or inserted while standby
power is on. Be sure to disable standby power by disconnecting all external power
cables before proceeding.
■
If the server is in a rack, slide it far enough from the rack so that you can
remove the main cover.
■
If you cannot safely view and access the component, remove the server from
the rack.
2. Remove the main cover as described in “Removing the Main Cover” on page 3-3.
3. Identify the CPU module or CPU filler board you are replacing.
4. Remove the CPU module or CPU filler board from the bay (see FIGURE 3-6):
a. Simultaneously rotate both plastic levers on the top corners of the module to
an upright, 90-degree position.
b. Lift the module straight up to remove it from the metal edge-guides in the
bay.
Caution – The pins that connect the CPU module to the motherboard are very
fragile. When you remove the module, rotate both plastic levers at the top corners of
the module simultaneously to avoid jamming the connector pins.
Chapter 3
Maintaining the Sun Fire X4600/X4600 M2 Servers
3-9
FIGURE 3-6
Removing a CPU Module From a CPU Module Bay
5. If you are replacing a CPU filler board skip to Step 9.
6. Remove the DIMMs from the CPU module.
a. Rotate both DIMM slot ejectors outward as far as they will go. The DIMM is
partially ejected from the socket. See FIGURE 3-17.
b. Carefully lift the DIMM straight up to remove it from the socket.
c. Set the DIMMs on a clean ESD-safe surface until you are ready to install
them to the new CPU module.
7. Unpack the new CPU module, and set it flat on its back surface on an ESD-safe
mat.
8. Install the DIMMs that you removed to the new CPU module.
Note – Use the DIMM population rules that are appropriate for the CPU module.
See “CPU Module Models” on page F-1.
a. Ensure that the DIMM slot ejectors at each end of the slot are fully open
(rotated outward) to accept the new DIMM.
b. Align the notch in the bottom edge of the DIMM with the key in the DIMM
socket. See FIGURE 3-17.
c. Press down evenly on both top corners of the DIMM until the ejectors snap
over the cutouts in the left and right edges of the DIMM.
3-10
Sun Fire X4600 and Sun Fire X4600 M2 Servers Service Manual • March 2011
9. Install the new CPU module or CPU filler board.
Note – All CPU modules in the server must have identical part numbers. Mixing
CPU speeds or mixing dual-core CPUs with single-core CPUs is not supported. Be
sure to populate the CPU module slots according to the rules in “Populating a Server
With CPU Modules” on page F-9.
Caution – The CPU module can be damaged if removed or inserted while standby
power is on. Disable standby power by disconnecting all external power cables
before proceeding.
a. Ensure that both plastic levers on the top corners of the module are in the
fully open, vertical position.
b. Align the module edges with the metal edge-guides in the CPU module bay.
c. Lower the module until it touches the motherboard connector and the open
plastic levers are in contact with the edges of the bay.
d. Rotate both plastic levers downward simultaneously until they are flat
against the top corners of the module.
Caution – The pins that connect the CPU module to the motherboard are very
fragile. When you install the module, be very careful to align the module with the
edge-guides in the bay and to rotate both plastic levers at the top corners of the
module closed simultaneously to avoid jamming the connector pins.
10. Replace the main cover.
Chapter 3
Maintaining the Sun Fire X4600/X4600 M2 Servers
3-11
FIGURE 3-7
Installing a CPU Module
▼ Replacing the DVD-ROM Drive
Note – This component is a FRU and should be replaced only by qualified service
technicians. Contact your Sun Service representative for assistance.
Follow these steps to remove and replace the DVD-ROM drive.
1. Remove any disc from the DVD-ROM drive.
2. Power off the server as described in “Powering Off the Server” on page 3-2.
■
If the server is in a rack, slide it far enough from the rack so that you can
remove the main cover.
■
If you cannot safely view and access the component, remove the server from
the rack.
3. Remove the main cover as described in “Removing the Main Cover” on page 3-3.
4. Remove the front bezel as described in “Removing the Front Bezel” on page 3-4.
3-12
Sun Fire X4600 and Sun Fire X4600 M2 Servers Service Manual • March 2011
FIGURE 3-8
Removing the DVD Drive
5. Remove the DVD-ROM drive from the chassis.
a. Disconnect the flex cable connector from the rear of the DVD-ROM drive.
See FIGURE 3-8.
b. Push the drive from the rear (inside the chassis) until it protrudes from the
front of the chassis.
c. Grasp the drive outside the chassis front and pull it from the chassis bay. See
FIGURE 3-8.
6. Install the new DVD-ROM drive.
a. Align the new drive with the chassis bay.
The top of the drive should face the center of the chassis. See FIGURE 3-8.
b. Push the drive into the bay until the face of the drive is even with the front
of the chassis.
Metal spring-clips inside the chassis grip the drive and hold it in place.
c. Reconnect the flex-cable connector to the connector on the rear of the drive.
7. Replace the front bezel and the main cover.
Note – When you insert a disk into the vertical slot of the DVD-ROM drive, the label
on the disk must face left (toward the chassis center).
Chapter 3
Maintaining the Sun Fire X4600/X4600 M2 Servers
3-13
▼ Replacing a Fan Tray
Supported components and their part numbers are subject to change over time. For
the most up-to-date list of replaceable components for these servers, go to:
(http://sunsolve.sun.com/handbook_pub/Systems/)
■
Click the name and model of your server.
■
On the product page that opens for the server, click Full Components List for the
list of components.
Follow these steps to remove and replace a fan tray. The system will operate with
only 3 of 4 fans operating, and the fans are hot-swappable and can be removed and
replaced while the system is running.This component is a hot-swappable CRU and
can be replaced by anyone.
Caution – Do not operate the server for more than 60 seconds without all four fans
in place. Always replaced a failed fan as soon as possible.
The system designation of each fan tray (FT) is shown below (viewed from the front
of the server).
■
If the server is in a rack, slide it far enough from the rack so that you can access
the fan trays.
■
If you cannot safely view and access the component, remove the server from the
rack.
1. Identify the defective fan tray(s).
■
Fan tray LED lit: The fan tray is faulty and should be replaced.
■
Fan tray LED off: The fan tray is operating properly.
2. Remove the fan tray.
a. Grasp the faulty fan tray by its plastic securing buttons at the top of the fan
tray. See FIGURE 3-9.
3-14
Sun Fire X4600 and Sun Fire X4600 M2 Servers Service Manual • March 2011
b. Pinch both plastic securing buttons toward the center of the fan tray, and
simultaneously lift the fan tray up and out of the chassis.
FIGURE 3-9
Removing a Fan Tray
3. Install the new fan tray.
a. Align the new fan tray with the bay in the chassis.
The connector at the bottom of the fan tray should be on the left (as you face
the server front) to align with the connector on the motherboard. See FIGURE 3-9.
b. Lower the fan tray into the bay until it comes into contact with the connector
on the motherboard.
c. Push down gently until the connector is fully engaged and the plastic
securing buttons snap into place.
▼ Replacing the Front Panel Indicator Board
Follow these steps to remove and replace a front panel indicator board, which
provides function for the front panel Power button and front panel indicator LEDs.
This board also contains the front flex cable that connects to the motherboard and
front I/O board.
Chapter 3
Maintaining the Sun Fire X4600/X4600 M2 Servers
3-15
Note – This component is a FRU and should be replaced only by qualified service
technicians. Contact your Sun Service representative for assistance.
1. Power off the server as described in “Powering Off the Server” on page 3-2.
■
If the server is in a rack, slide it far enough from the rack so that you can
remove the main cover.
■
If you cannot safely view and access the component, remove the server from
the rack.
2. Remove the main cover as described in “Removing the Main Cover” on page 3-3.
3. Remove all fan trays from the fan tray carriage.
a. Grasp the fan tray by its plastic securing buttons at the top of the fan tray.
See FIGURE 3-9.
b. Pinch both plastic securing buttons toward the center of the fan tray, and
simultaneously lift the fan tray up and out of the chassis.
4. Remove all CPU modules or CPU filler boards from the chassis (see FIGURE 3-6).
a. Simultaneously rotate both plastic levers on the top corners of the module to
an upright, 90-degree position.
b. Lift the module straight up to remove it from the metal edge-guides in the
bay.
5. Remove the fan tray carriage from the chassis.
a. Remove the nine screws from the top surface of the fan tray carriage. See
FIGURE 3-10.
b. Loosen the seven captive screws that secure the fan tray carriage to the
chassis and motherboard. See FIGURE 3-10.
c. Lift the fan tray carriage out of the chassis.
3-16
Sun Fire X4600 and Sun Fire X4600 M2 Servers Service Manual • March 2011
FIGURE 3-10
Removing the Fan Tray Carriage
6. Remove the front panel indicator board.
a. Remove the two screws that secure the indicator board to the inside-front of
the chassis. See FIGURE 3-11.
b. Disconnect the indicator board’s two flex cable connectors from the
connectors on the front I/O board and the motherboard. Use the plastic-strip
handles to gently pull the connectors straight up.
Chapter 3
Maintaining the Sun Fire X4600/X4600 M2 Servers
3-17
FIGURE 3-11
Removing the Front Panel Indicator Board
7. Install the new front panel indicator board.
a. Align the holes in the indicator board with the two screw holes in the inside
front of the chassis.
b. Connect the two flex cable connectors to the connectors on the front I/O
board and the motherboard. Carefully align the connectors, then gently push
down on the top of the flex cable connectors.
c. Replace and tighten the two screws that secure the indicator board to the
chassis. Torque screws to 7 inch-pounds (0.8 newton-meters).
8. Replace the fan tray carriage to the chassis.
a. Carefully lower the fan tray carriage into the chassis until it is seated firmly
against the motherboard and the top of the chassis.
The alignment pegs on the motherboard match the holes on the fan tray
carriage.
3-18
Sun Fire X4600 and Sun Fire X4600 M2 Servers Service Manual • March 2011
b. Tighten the seven captive screws that secure the fan tray carriage to the
chassis and motherboard. Torque screws to 7 inch-pounds (0.8
newton-meters). See FIGURE 3-10.
c. Replace and tighten the nine screws to the top surface of the fan tray
carriage. Torque screws to 7 inch-pounds. See FIGURE 3-10.
9. Replace all CPU modules or CPU filler boards.
a. Ensure that both plastic levers on the top corners of the module are in the
fully open, vertical position.
Caution – The pins that connect the CPU module to the motherboard are very
fragile. When you install the module, be very careful to align the module with the
edge-guides in the bay and to rotate both plastic levers at the top corners of the CPU
module closed simultaneously to avoid jamming the connector pins.
b. Align the module edges with the metal edge-guides in the CPU module bay.
c. Lower the module until it touches the motherboard connector and the opened
plastic levers are in contact with the edges of the bay.
d. Rotate both plastic levers downward until they are flat against the top
corners of the module.
10. Replace all fan trays.
a. Align the fan tray with the bay in the chassis. See FIGURE 3-9.
The connector at the bottom of the fan tray should be on the left (as you face
the server front) to align with the connector on the motherboard.
b. Lower the fan tray into the bay until it comes into contact with the connector
on the motherboard.
c. Push down gently until the connector is fully engaged and the plastic
securing buttons snap into place.
11. Replace the main cover.
▼ Replacing the Front I/O Board
Follow these steps to remove and replace the front I/O board, which contains the
front USB ports.
Chapter 3
Maintaining the Sun Fire X4600/X4600 M2 Servers
3-19
Note – This component is a FRU and should be replaced only by qualified service
technicians. Contact your Sun Service representative for assistance.
1. Power off the server as described in “Powering Off the Server” on page 3-2.
■
If the server is in a rack, slide it far enough from the rack so that you can
remove the main cover.
■
If you cannot safely view and access the component, remove the server from
the rack.
2. Remove the main cover as described in “Removing the Main Cover” on page 3-3.
3. Remove all fan trays from the fan tray carriage.
a. Grasp the fan tray by its plastic securing buttons at the top of the fan tray.
See FIGURE 3-9.
b. Pinch both plastic securing buttons toward the center of the fan tray, and
simultaneously lift the fan tray up and out of the chassis.
4. Remove all CPU modules or CPU filler boards from the chassis (see FIGURE 3-6):
a. Simultaneously rotate both plastic levers on the top corners of the module to
an upright, 90-degree position.
b. Lift the module straight up to remove it from the metal edge-guides in the
bay.
5. Remove the fan tray carriage from the chassis.
a. Remove the nine screws from the top surface of the fan tray carriage. See
FIGURE 3-10.
b. Loosen the seven captive screws that secure the fan tray carriage to the
chassis and motherboard. See FIGURE 3-10.
c. Lift the fan tray carriage out of the chassis.
6. Remove the front I/O board.
a. Disconnect the two flex cable connectors that come from the front panel
indicator board from the front I/O board and the motherboard.
It is not necessary to remove the front panel indicator board.
b. Remove the two screws that secure the front I/O board to the chassis floor.
Remove the board from the chassis. See FIGURE 3-12.
3-20
Sun Fire X4600 and Sun Fire X4600 M2 Servers Service Manual • March 2011
FIGURE 3-12
Removing the Front I/O Board
7. Install the new front I/O board.
a. Align the front I/O board so that the holes in the board are aligned with the
screw holes in the chassis floor.
Ensure that the two USB connectors on the board are pressed squarely against
the openings in the chassis front.
b. Replace and tighten the two screws that secure the front I/O board to the
chassis floor. Torque screws to 7 inch-pounds (0.8 newton-meters. See
FIGURE 3-12.
c. Reconnect the two flex cable connectors that come from the front panel
indicator board to the front I/O board and the motherboard.
8. Replace the fan tray carriage to the chassis.
a. Carefully lower the fan tray carriage into the chassis until it is seated firmly
against the motherboard and the top of the chassis.
There are two alignment pegs on the motherboard that match with holes on the
fan tray carriage.
b. Tighten the seven captive screws that secure the fan tray carriage to the
chassis and motherboard. Torque screws to 7 inch-pounds (0.8
newton-meters). See FIGURE 3-10.
Chapter 3
Maintaining the Sun Fire X4600/X4600 M2 Servers
3-21
c. Replace and tighten the nine screws to the top surface of the fan tray
carriage. Torque screws to 7 inch-pounds (0.8 newton-meters). See FIGURE 3-10.
9. Replace all CPU modules or CPU filler boards.
a. Ensure that both plastic levers on the top corners of the module are in the
fully open, vertical position.
b. Align the module edges with the metal edge-guides in the CPU module bay.
c. Lower the module until it touches the motherboard connector and the opened
plastic levers are in contact with the edges of the bay.
d. Rotate both plastic levers downward until they are flat against the top
corners of the module.
Caution – The pins that connect the CPU module to the motherboard are very
fragile. When you install the module, be very careful to align the module with the
edge-guides in the bay and to rotate both plastic levers at the top corners of the CPU
module closed simultaneously to avoid jamming the connector pins.
10. Replace all fan trays.
a. Align the fan tray with the bay in the chassis. See FIGURE 3-9.
The connector at the bottom of the fan tray should be on the left (as you face
the server front) to align with the connector on the motherboard.
b. Lower the fan tray into the bay until it comes into contact with the connector
on the motherboard.
c. Push down gently until the connector is fully engaged and the plastic
securing buttons snap into place.
11. Replace the main cover.
▼ Replacing the GRASP Board
Note – This component is a FRU and should be replaced only by qualified service
technicians. Contact your Sun Service representative for assistance.
Caution – The GRASP board is not hot-swappable. Do not proceed if the GRASP
board’s power status LED (CR1) is lit. (See FIGURE 3-13.) To prevent standby power
from reaching the GRASP board, unplug all power cables from the rear of the system.
3-22
Sun Fire X4600 and Sun Fire X4600 M2 Servers Service Manual • March 2011
Follow these steps to remove and replace the GRASP board.
1. Power off the server as described in “Powering Off the Server” on page 3-2.
■
If the server is in a rack, slide it far enough from the rack so that you can
remove the main cover.
■
If you cannot safely view and access the component, remove the server from
the rack.
2. Remove the main cover as described in “Removing the Main Cover” on page 3-3.
3. Remove the GRASP board.
a. Pinch the tabs on the white plastic standoff post that is closest to the back
panel of the server and simultaneously lift the rear edge the of GRASP board
to free it from that rear standoff post and the connector on the motherboard.
See FIGURE 3-13.
b. With the rear edge free, pivot the GRASP board so that it clears the plastic
retainer that is attached to the motherboard handle. See FIGURE 3-13.
c. Pinch the tabs on the white plastic standoff post that is closest to the front
panel of the server, and simultaneously lift the front edge the of GRASP
board to free it from that front standoff post. See FIGURE 3-13.
Note – Do not bend the GRASP board while removing it or installing it.
Chapter 3
Maintaining the Sun Fire X4600/X4600 M2 Servers
3-23
FIGURE 3-13
Removing the GRASP Board
4. Install the new GRASP board.
a. Align the GRASP board so that its connector aligns with the motherboard
connector, then push down gently to seat the GRASP board onto the front
plastic standoff.
b. Pivot the GRASP board so that it seats into the plastic retainer that is
attached to the motherboard handle.
c. Push the GRASP board down onto the rear plastic standoff.
d. Carefully press down on the rear edge of the GRASP board to seat its
connector into the connector on the motherboard.
5. Replace the main cover.
Note – After you replace the GRASP board FRU, you must use the servicetool
command to update FRU information about the board. See “Servicetool FRU Update
Procedure” on page 3-47.
3-24
Sun Fire X4600 and Sun Fire X4600 M2 Servers Service Manual • March 2011
3.4.1
Replacing a Hard Disk Drive
Note – This component is a hot-swappable CRU and can be replaced by anyone.
Follow these steps to remove and replace a hard disk drive (HDD). The system
designation of the HDDs is shown in FIGURE 3-14.
Note – If your server has fewer than four HDDs, it must have HDD fillers in the
empty drive bays to ensure proper air flow and cooling.
FIGURE 3-14
Sun Fire X4600/X4600 M2 Designation of Hard Disk Drives
Caution – Possible data loss: If you insert a HDD that has been configured with a
RAID volume into a server that did not previously have its HDDs configured with
RAID volumes, the existing HDDs in the server will be converted to RAID volumes
during automatic synchronization and any existing data on the existing HDDs in the
server will be lost. To avoid this problem, use the LSI Configuration Utility to delete
the RAID volume from the HDD before removing it..
A single HDD failure will not cause a data failure if the HDDs are configured as a
mirrored RAID 1 volume. The HDD can be hot-swapped, and when a new HDD is
inserted, the contents are automatically rebuilt from the rest of the array with no
need to reconfigure the RAID parameters. If the bad HDD was configured as a
hot-spare, the new HDD is automatically configured as a new hot-spare to mirror the
data from the good HDD.
For information about the implementation and configuration of RAID on this server,
see “Performing RAID Configuration Tasks” on page E-41.
Chapter 3
Maintaining the Sun Fire X4600/X4600 M2 Servers
3-25
▼ Removing and Replacing a Hard Disk Drive
1. Observe the LEDs on the faces of the HDDs and identify the defective HDD.
■
Left LED: Not functional
■
Middle LED on (amber): The drive is faulty and should be replaced.
■
Right LED on (green): The drive is operating properly.
Note – When you replace the HDDs to their bays, you must return each HDD to the
bay from which it was removed. Use an adhesive note or another method to
temporarily label the HDDs when you remove them.
2. Remove the HDD.
a. Press the button on the face of the HDD to release the spring-loaded securing
latch. See FIGURE 3-15.
b. Grasp the securing latch and remove the HDD from the drive bay.
FIGURE 3-15
Opening the Hard Disk Drive Latch
3. Install the new HDD.
Note – If the HDDs were previously configured as a mirrored RAID 1 array, an
automatic resynchronization is invoked and the contents are automatically rebuilt
from the rest of the array with no need to reconfigure the RAID parameters. If the
bad HDD was configured as a hot-spare, the new HDD is automatically configured
as a new hot-spare.
3-26
Sun Fire X4600 and Sun Fire X4600 M2 Servers Service Manual • March 2011
a. Open the HDD’s securing latch before you push the drive into the bay.
b. Push the HDD into the bay until it stops, then close the securing latch to
fully engage the connector on the HDD backplane.
▼ Replacing a Hard Disk Drive Backplane
Follow these steps to remove and replace the HDD backplane.
Note – This component is a FRU and should be replaced only by qualified service
technicians. Contact your Sun Service representative for assistance.
1. Power off the server as described in “Powering Off the Server” on page 3-2.
■
If the server is in a rack, slide it far enough from the rack so that you can
remove the main cover and front cover.
■
If you cannot safely view and access the component, remove the server from
the rack.
2. Remove the main cover as described in “Removing the Main Cover” on page 3-3.
3. Label the HDDs with adhesive notes or another method so that you will know
where to reinstall them at the end of the procedure.
Note – Always return the HDD to the same bay you removed it from. Use an
adhesive note or another method to temporarily label the HDDs after you remove
them.
4. Remove all HDDs and HDD fillers from the drive bays.
a. Press the button on the face of the HDD or filler to release its spring-loaded
securing latch. See FIGURE 3-15.
b. Grasp the securing latch and remove the HDD or filler from the drive bay.
5. Remove all fan trays from the fan tray carriage.
a. Grasp the fan tray by its plastic securing buttons at the top of the fan tray.
See FIGURE 3-9.
b. Pinch both plastic securing buttons toward the center of the fan tray, and
simultaneously lift the fan tray up and out of the chassis.
6. Remove all CPU modules or CPU filler boards from the chassis (see FIGURE 3-6).
Chapter 3
Maintaining the Sun Fire X4600/X4600 M2 Servers
3-27
a. Simultaneously rotate both plastic levers on the top corners of the module to
an upright, 90-degree position.
b. Lift the module straight up to remove it from the metal edge-guides in the
bay.
7. Remove the fan tray carriage from the chassis.
a. Remove the nine screws from the top surface of the fan tray carriage. See
FIGURE 3-10.
b. Loosen the seven captive screws that secure the fan tray carriage to the
chassis and motherboard. See FIGURE 3-10.
c. Lift the fan tray carriage out of the chassis.
8. Remove the HDD backplane.
a. Disconnect the flex cable connector from the rear of the HDD backplane. See
FIGURE 3-16.
b. Remove the two screws that secure the HDD backplane to the rear of the
drive bays.
c. Loosen the single captive screw that secures the HDD backplane.
d. Remove the backplane from the chassis. See FIGURE 3-16.
3-28
Sun Fire X4600 and Sun Fire X4600 M2 Servers Service Manual • March 2011
FIGURE 3-16
Removing the HDD Backplane
9. Install the new HDD backplane.
a. Position the new HDD backplane against the rear of the HDD bays so that
the holes in the backplane align with the screw holes in the chassis.
b. Replace and tighten the two screws that secure the HDD backplane to the
rear of the drive bays. Torque screws to 7 inch pounds (0.8 newton meters).
See FIGURE 3-16.
c. Tighten the single captive screw that secures the HDD backplane. Torque
screw to 7 inch-pounds (0.8 newton-meters).
Chapter 3
Maintaining the Sun Fire X4600/X4600 M2 Servers
3-29
d. Reconnect the flex cable connector to the rear of the HDD backplane.
10. Reinstall all HDDs or HDD fillers that you removed.
a. Open the HDD’s securing latch.
b. Push the HDD into the bay until it stops, then close the securing latch to
fully engage the connector on the HDD backplane.
Note – Always return each HDD to the bay from which it was removed. If the HDDs
were previously configured as a mirrored RAID 1 array, an automatic
resynchronization is invoked with no need to reconfigure the RAID parameters. Any
hot-spares are automatically reconfigured as hot-spares in the configuration.
11. Replace the main cover.
▼ Replacing Memory Modules (DIMMs)
Note – This component is a CRU and can be replaced by anyone. To use the CPU
module’s built-in DIMM diagnostics, refer to “Locating Faulty CPUs and DIMMs” on
page F-12.
Follow these steps to remove and replace the server’s dual inline memory modules
(DIMMs).
1. Power off the server as described in “Powering Off the Server” on page 3-2.
■
If the server is in a rack, slide it far enough from the rack so that you can
remove the main cover.
■
If you cannot safely view and access the component, remove the server from
the rack.
2. Remove the main cover as described in “Removing the Main Cover” on page 3-3.
3. Remove the CPU module that contains the faulty DIMM from its bay (see
FIGURE 3-6).
a. Simultaneously rotate both plastic levers on the top corners of the module to
an upright, 90-degree position.
b. Lift the module straight up to remove it from the metal edge-guides in the
bay.
c. Lay the CPU module flat on its back surface, on an ESD safe surface.
3-30
Sun Fire X4600 and Sun Fire X4600 M2 Servers Service Manual • March 2011
4. Locate the DIMM slot on the CPU module to which you will install or replace a
DIMM.
5. To remove a DIMM, use the following steps.
a. Rotate both DIMM slot ejectors outward as far as they will go. The DIMM is
partially ejected from the socket. See FIGURE 3-17.
b. Carefully lift the DIMM straight up to remove it from the socket.
FIGURE 3-17
Removing a DIMM
6. To install a DIMM, use the following steps.
Chapter 3
Maintaining the Sun Fire X4600/X4600 M2 Servers
3-31
a. Ensure that the DIMM slot ejectors at each end of the socket are fully open
(rotated outward) to accept the new DIMM.
b. Align the notch in the bottom edge of the DIMM with the key in the DIMM
socket. See FIGURE 3-17.
c. Press down evenly on both top corners of the DIMM until the ejectors snap
over the cutouts in the left and right edges of the DIMM.
Note – Be sure that the DIMM slots are used according to the correct rules for this
CPU module. See “CPU Module Models” on page F-1.
7. Reinstall the CPU module.
a. Ensure that both plastic levers on the top corners of the module are in the
fully open, vertical position.
Caution – The pins that connect the CPU module to the motherboard are very
fragile. When you install the module, be very careful to align the module with the
edge-guides in the bay and to rotate both plastic levers at the top corners of the
module closed simultaneously to avoid jamming the connector pins.
b. Align the module edges with the metal edge-guides in the CPU module bay.
c. Lower the module until it touches the motherboard connector and the opened
plastic levers are in contact with the edges of the bay.
d. Rotate both plastic levers downward until they are flat against the top
corners of the module.
8. Replace the main cover.
▼ Replacing the Motherboard
Note – This component is a FRU and should be replaced only by qualified service
technicians. Contact your Sun Service representative for assistance.
1. Power off the server as described in “Powering Off the Server” on page 3-2.
■
If the server is in a rack, disconnect all external cables from the server and
remove it from the rack.
2. Remove the main cover as described in “Removing the Main Cover” on page 3-3.
3. Remove all PCI cards.
3-32
Sun Fire X4600 and Sun Fire X4600 M2 Servers Service Manual • March 2011
a. Working from the rear of the chassis, pivot both PCI slot locking levers
upward to release the rear of the PCI cards. See FIGURE 3-22.
Push the handle of the locking lever downward slightly before pivoting the
lever to release it from the chassis backpanel notch.
b. Pull the PCI cards out of the PCI slots. Ensure that each PCI card's rear
connector panel is released from the tabs on the chassis back panel.
c. Pivot the PCI card latches back to their closed positions.
4. Remove the GRASP board.
a. Pinch the tabs on the white plastic standoff post that is closest to the back
panel of the server and simultaneously lift the rear edge the of GRASP board
to free it from that rear standoff post and the connector on the motherboard.
See FIGURE 3-13.
b. With the rear edge free, pivot the GRASP board so that it clears the plastic
retainer that is attached to the motherboard handle. See FIGURE 3-13.
c. Pinch the tabs on the white plastic standoff post that is closest to the front
panel of the server, and simultaneously lift the front edge the of GRASP
board to free it from that front standoff post. See FIGURE 3-13.
Note – Do not bend the GRASP board while removing it or installing it.
5. Remove all fan trays from the fan tray carriage.
a. Grasp the fan tray by its plastic securing buttons at the top of the fan tray.
See FIGURE 3-9.
b. Pinch both plastic securing buttons toward the center of the fan tray, and
simultaneously lift the fan tray up and out of the chassis.
6. Remove all CPU modules, CPU filler boards from the chassis (see FIGURE 3-6).
a. Simultaneously rotate both plastic levers on the top corners of the module to
an upright, position.
b. Lift the module straight up to remove it from the metal edge-guides in the
bay.
7. Remove the fan tray carriage from the chassis.
a. Remove the nine screws from the top surface of the fan tray carriage. See
FIGURE 3-10.
b. Loosen the seven captive screws that secure the fan tray carriage to the
chassis and motherboard. See FIGURE 3-10.
Chapter 3
Maintaining the Sun Fire X4600/X4600 M2 Servers
3-33
c. Lift the fan tray carriage out of the chassis.
8. Remove the rear CPU module guide from the chassis.
a. Loosen the six captive screws that secure the guide to the motherboard and
chassis.
b. Lift up evenly on both sides of the guide to remove it from the edge-guides
in the chassis.
FIGURE 3-18
Removing Rear CPU Module Guide
9. Remove the motherboard.
a. Disconnect the flex cable from the motherboard connector. See FIGURE 3-19.
b. Disconnect the front flex indicator board flex cable connector from the
motherboard connector. See FIGURE 3-11.
3-34
Sun Fire X4600 and Sun Fire X4600 M2 Servers Service Manual • March 2011
c. Remove the six screws that secure the motherboard to the power bus bars.
See FIGURE 3-19.
d. Loosen the five captive screws that secure the motherboard to the chassis.
FIGURE 3-19
Motherboard Flex Cable Connectors and Bus Bar Screw Locations
e. Slide the small metal door in the chassis midwall near the flex-cable
connector upward to provide clearance for the power tab of the motherboard.
See FIGURE 3-20.
The metal door stays open when you slide it up into the retaining clips.
f. Use the motherboard lifting handle to raise the forward edge of the board
until it has cleared the bus bar studs.
Caution – When lifting the board, avoid damaging the light pipes and connectors on
the rear edge of the motherboard.
g. Slide the board toward the front of the chassis until the connectors and light
pipes are clear of the chassis back panel.
Chapter 3
Maintaining the Sun Fire X4600/X4600 M2 Servers
3-35
h. Raise the motherboard and remove it from the chassis.
FIGURE 3-20
Removing The Motherboard
10. Install the new motherboard.
a. Carefully lower the motherboard into the chassis with the rear of the
motherboard tilted downward.
b. Insert the light pipes and connectors on the motherboard into the
corresponding holes in the chassis back panel.
c. Lower the front of the motherboard, using care to align the corresponding
holes in the motherboard over the six bus-bar bolts.
d. Lower the small metal door in the chassis midwall that closes over the
motherboard power tab.
When you slide the door down, first push outward on the door’s handle to free
it from the tab in the chassis midwall. This door must be closed to ensure
proper air circulation and cooling.
3-36
Sun Fire X4600 and Sun Fire X4600 M2 Servers Service Manual • March 2011
e. Replace and tighten the six screws that secure the motherboard to the power
bus bars. Torque screws to 7 inch-pounds (0.8 newton meters). See
FIGURE 3-19.
f. Tighten the five captive screws that secure the motherboard to the chassis.
Torque screws to 7 inch-pounds. See FIGURE 3-19.
11. Reconnect the flex cable to the motherboard connector. See FIGURE 3-20.
12. Reconnect the front flex indicator board flex cable connector to the motherboard
connector. See FIGURE 3-11.
13. Replace the rear CPU module guide.
a. Align the edges of the guide with the metal edge-guides in the chassis, then
lower the guide until it is seated firmly against the motherboard.
When you install the guide, be sure to align it so that the intrusion switch lever
is over the intrusion switch on motherboard.
b. Tighten the six captive screws that secure the guide to the motherboard and
chassis.
14. Replace the fan tray carriage to the chassis.
a. Carefully lower the fan tray carriage into the chassis until it is seated firmly
against the motherboard and the top of the chassis.
There are two alignment pegs on the motherboard that match the holes on the
fan tray carriage.
b. Tighten the seven captive screws that secure the fan tray carriage to the
chassis and motherboard. Torque screws to 7 inch-pounds (0.8
newton-meters). See FIGURE 3-10.
c. Replace and tighten the nine screws on the top surface of the fan tray
carriage. Torque screws to 7 inch-pounds (0.8 newton-meters). See FIGURE 3-10.
15. Replace all CPU modules and CPU filler boards.
Note – When restoring CPU modules to a 2-module, 4-module, or 6-module
configuration, be sure to use the same module slots that you used before. CPU
modules in these configurations must be placed according to the rules described in
“Populating a Server With CPU Modules” on page F-9
a. Ensure that both plastic levers on the top corners of the module are in the
fully open, vertical position.
Chapter 3
Maintaining the Sun Fire X4600/X4600 M2 Servers
3-37
Caution – The pins that connect the CPU module to the motherboard are very
fragile. When you install the module, be very careful to align the module with the
edge-guides in the bay and to rotate both plastic levers at the top corners of the
module closed simultaneously to avoid jamming the connector pins.
b. Align the module edges with the metal edge-guides in the CPU module bay.
c. Lower the module until it touches the motherboard connector and the opened
plastic levers are in contact with the edges of the bay.
d. Rotate both plastic levers downward until they are flat against the top
corners of the module.
16. Replace all fan trays.
a. Align the fan tray with the bay in the chassis. See FIGURE 3-9.
The connector at the bottom of the fan tray should be on the left (as you face
the server front) to align with the connector on the motherboard.
b. Lower the fan tray into the bay until it comes into contact with the connector
on the motherboard.
c. Push down gently until the connector is fully engaged and the plastic
securing buttons snap into place.
17. Replace the GRASP board.
a. Align the GRASP board so that its connector aligns with the motherboard
connector, then push down gently to seat the GRASP board onto the front
plastic standoff.
b. Pivot the GRASP board so that it seats into the plastic retainer that is
attached to the motherboard handle.
c. Push the GRASP board down onto the rear plastic standoff.
d. Carefully press down on the rear edge of the GRASP board to seat its
connector into the connector on the motherboard.
Note – If the GRASP board installed is not the same GRASP board previously
removed, you must use the servicetool command to update FRU information
about the board. See “Servicetool FRU Update Procedure” on page 3-47.
18. Replace any PCI cards that you removed.
a. Working from the rear of the chassis, pivot the PCI card latch for the slot
open to receive the new PCI card.
3-38
Sun Fire X4600 and Sun Fire X4600 M2 Servers Service Manual • March 2011
b. Insert the PCI card into the PCI card slot. Ensure that the PCI card's rear
connector panel engages the tab in the chassis rear panel.
c. Pivot the PCI card latch closed over the rear connector panel of the PCI card
until it locks.
19. Check the alignment of the locate button/LED at the rear of the chassis.
Ensure that the button protrudes from the aperture on the chassis and can be
depressed and released.
The mother board can be improperly installed, so that the flexible locate
button/LED at the rear of the machine is slightly misaligned and is permanently
depressed when the button pushes against the chassis. Misalignment causes all
fault LEDs to light and generates false ILOM SEL critical log entries in the event
list.
20. Replace the main cover.
21. After you replace the motherboard, use the servicetool command to update
FRU information about the motherboard. See the “Servicetool FRU Update
Procedure” on page 3-47.
22. Reactivate the RAID arrays. See “Performing RAID Configuration Tasks” on page
E-41.
▼ Replacing PCI Cards
Note – This component is a CRU and can be replaced by anyone.
Follow these steps to remove and replace a PCI card.
1. Power off the server as described in “Powering Off the Server” on page 3-2.
■
If the server is in a rack, slide it far enough from the rack so that you can
remove the main cover.
■
If you cannot safely view and access the component, remove the server from
the rack.
2. Remove the main cover as described in “Removing the Main Cover” on page 3-3.
Chapter 3
Maintaining the Sun Fire X4600/X4600 M2 Servers
3-39
3. Locate the PCI card slot in which you will install or replace a PCI card.
The system designation and the speeds of the eight PCI slots are shown in
FIGURE 3-21.
The slots for the PCI cards are detected by the BIOS during startup in this order:
1. PCI-E slot 2
2. PCI-E slot 3
3. PCI-E slot 4
4. On-board Intel NIC
5. PCI-X slot 0
6. PCI-X slot 1
7. On-board LSI SCSI controller
8. PCI-E slot 5
9. PCI-E slot 6
10. PCI-E slot 7
Note – Before you install a card, consult the manufacturer's documentation for
system requirements and configuration information for your specific PCI card.
3-40
Sun Fire X4600 and Sun Fire X4600 M2 Servers Service Manual • March 2011
FIGURE 3-21
Sun Fire X4600/X4600 M2 Locations, Designations, and Speeds of PCI Card
Slots
Note – If the server is configured with 2 CPU modules, use of PCI slots 5, 6, and 7 is
not supported.
4. Remove any existing PCI card from the slot.
a. Disconnect any external cables from the existing PCI card.
b. Working from the rear of the chassis, pivot each card locking lever upward to
release the rear of the PCI cards. See FIGURE 3-22.
Push the handle of the locking lever downward slightly to release it from the
chassis backpanel notch.
c. Pull the PCI cards out of the PCI slots. Ensure that each PCI card's rear
connector panel is released from the tabs on the chassis back panel.
Chapter 3
Maintaining the Sun Fire X4600/X4600 M2 Servers
3-41
FIGURE 3-22
Opening the PCI Card Locking Lever and Removing the PCI Card
If there is no PCI card in the slot, pivot the slot’s locking lever upward and remove
the PCI-card filler panel from the chassis back panel.
5. Install a PCI card.
a. Working from the rear of the chassis, pivot the PCI card latch for the slot
open to receive the new PCI card.
b. Insert the PCI card into the PCI card slot. Ensure that the PCI card's rear
connector panel engages the tab in the chassis rear panel.
c. Pivot the PCI card latch closed over the rear connector panel of the PCI card
until the lever locks into the notch in the chassis back panel.
6. Replace the main cover.
3.5
Replacing a Power Supply
For general information on power supplies, refer to Appendix G.
The system designation of the four power supplies in the server is shown in
FIGURE 3-23.
3-42
Sun Fire X4600 and Sun Fire X4600 M2 Servers Service Manual • March 2011
FIGURE 3-23
Sun Fire X4600/X4600 M2 Locations and Designations of Power Supplies
▼ Removing and Replacing a Power Supply
Note – This component is a hot-swappable CRU and can be replaced by anyone.
Follow these steps to remove and replace a power supply.
1. If the server is in a rack with a cable management arm attached, swivel open the
cable management arm to view the power supplies.
2. Identify which power supply you will replace. Each power supply has one fault
LED that you can view from the rear of the server:
■
LED is off: Power supply is operating properly.
■
LED is on (amber): Power supply is faulty and should be replaced.
3. Disconnect the AC power cord from the power supply that you are replacing.
The power supplies are hot-swappable, so you do not have to shut down the
server or disconnect the other power supplies.
Note – The Service Action Required LEDs on the front panel and back panel blink
when a power supply is unplugged. See “External LEDs” on page C-1 for the LED
locations and descriptions.
4. Remove the power supply.
a. Grasp the power supply handle and push the thumb latch toward the center
of the power supply. See FIGURE 3-24.
b. While continuing to push on the latch, use the handle to pull the power
supply from the chassis.
Chapter 3
Maintaining the Sun Fire X4600/X4600 M2 Servers
3-43
FIGURE 3-24
Removing a Power Supply
5. Install the new power supply.
a. Align the power supply with the empty bay in the chassis.
b. Press the power supply into the bay until it firmly engages the connector on
the power distribution board, indicated when the thumb latch clicks into
place.
6. Connect the AC power cord to the new power supply.
7. Swivel any cable management arm back into the closed position.
▼ Replacing the Power Distribution Board
Note – This component is a FRU and should be replaced only by qualified service
technicians. Contact your Sun Service representative for assistance.
Follow these steps to remove and replace the power distribution board (PDB). Main
12V power is connected to the Motherboard via a bus bar. Standby power and other
control signals are routed through the flex cable circuit to the motherboard.
1. Power off the server as described in “Powering Off the Server” on page 3-2.
3-44
Sun Fire X4600 and Sun Fire X4600 M2 Servers Service Manual • March 2011
■
If the server is in a rack, slide it far enough from the rack so that you can
remove the main cover.
■
If you cannot safely view and access the component, remove the server from
the rack.
2. Remove the main cover as described in “Removing the Main Cover” on page 3-3.
3. Remove all power supplies.
a. Disconnect AC power cords from all power supplies.
b. Grasp the power supply handle and push the thumb latch toward the center
of the power supply. See FIGURE 3-24.
c. While continuing to push on the latch, use the handle to pull the power
supply from the chassis.
4. Remove the PDB.
a. Disconnect the flex cable connector from the connector on the PDB. See
FIGURE 3-25.
b. Loosen the captive screw that secures the PDB to the chassis. See FIGURE 3-25.
c. Remove the two bus-bar nuts that secure the PDB to the bus bars.
d. Slide the PDB upward slightly to free its keyed openings from the chassis
standoffs, then remove it from the chassis.
Chapter 3
Maintaining the Sun Fire X4600/X4600 M2 Servers
3-45
FIGURE 3-25
Disconnecting the Power Distribution Board From the Chassis
5. Install the new PDB.
a. Align the new PDB so that the chassis standoffs protrude through its keyed
openings, then slide the PDB downward to lock it into place.
b. Replace and tighten the two bus-bar nuts that secure the PDB to the bus bars.
Torque nuts to 7 inch-pounds (0.8 newton-meters). See FIGURE 3-25.
c. Tighten the captive screw that secures the PDB to the chassis. Torque screws
to 7 inch-pounds (0.8 newton-meters). See FIGURE 3-25.
d. Reconnect the flex cable connector to connector on the PDB.
6. Replace all power supplies.
a. Align the power supply with the empty bay in the chassis.
3-46
Sun Fire X4600 and Sun Fire X4600 M2 Servers Service Manual • March 2011
b. Press the power supply into the bay until it firmly engages the connector on
the power distribution board, indicated when the thumb latch clicks into
place.
c. Reconnect AC power cords to the power supplies.
7. Replace the main cover.
▼ Servicetool FRU Update Procedure
Caution – The sunservice account is for the use of Sun service representatives only.
Do not use the sunservice account unless you are instructed to do so in a procedure
developed by Sun Microsystems.
1. Use SSH to log into the sunservice account.
2. At the prompt, enter the servicetool command with options. The options are
defined in the table below.
# servicetool --fru_update=serviceprocessor OtherOptions=value
Other Options
Value
--fru_product_part_number
Write a new part number to the FRU.
--fru_product_serial_number
Write a new serial number to the FRU.
--fru_chassis_serial_number
Write a new chassis serial number to the FRU.
--fru_asset_tag
Write a new asset tag to the FRU.
Where OtherOptions is one of the following:
Chapter 3
Maintaining the Sun Fire X4600/X4600 M2 Servers
3-47
3. Watch the output from the command and respond to the confirmation prompts
for continuing the update and rebooting the server:
Servicetool is going to update the mainboard FRU with product and
chassis information collected from the removed mainboard.
The following preconditions must be true for this to work:
* The new mainboard must be installed.
* The service processor must not have been replaced with
the motherboard.
* The service processor firmware must not have been upgraded
prior to the motherboard replacement; do firmware upgrades
after component swaps!
Do you want to continue (y|n)? y
Mainboard FRU configuration has been updated.
You MUST reboot the service processor for to complete this process.
Allow the service processor to fully boot.
DO NOT UNPLUG THE SYSTEM WHILE THE SERVICE PROCESSOR IS BOOTING!
Would you like to reboot the service processor now (y|n)? y
The system is going down NOW!!
Sending SIGTERM to all processes.
3-48
Sun Fire X4600 and Sun Fire X4600 M2 Servers Service Manual • March 2011
APPENDIX
A
System Specifications
This appendix contains physical, power, environmental, and acoustic noise emission
specifications for the Sun Fire X4600/X4600 M2 Servers. PCI-E slot information is
also included.
Note – The information in this appendix applies to the original Sun Fire X4600
server, and to the Sun Fire X4600 M2 server, unless otherwise noted in the text.
A-1
A.1
Sun Fire X4600/X4600 M2 Specifications
TABLE A-1
Specification
Value
Width
17.5 inches (445 mm)
Height
6.9 inches (176 mm)
Depth
Chassis with bezel: 24.75 (629 mm)
Chassis, bezel, and rear power supply latches: 25.25 inches (642 mm)
Weight
Maximum standalone server: 88 pounds (40 kg)
Maximum with orderable rack-mount kit and cable management
arm: 106 pounds (48 kg)
TABLE A-2
Sun Fire X4600/X4600 M2 Power Specifications
Specification
Value
Universal AC Input
100-240 VAC, 50/60 Hz
Maximum input
current at 200 VAC
10 A
Maximum input
current at 100 VAC
20 A
Maximum power
available
1975 W
Maximum power
consumed
1715 W
TABLE A-3
A-2
Sun Fire X4600/X4600 M2 Physical Specifications
Sun Fire X4600/X4600 M2 Environmental Specifications
Specification
Value
Temperature
(operating)
41 – 90 ˚F
5 – 32 ˚C
Temperature
(storage)
-40 – 149 ˚F
-40 – 65 ˚C
Humidity
20% – 90% non-condensing
Operating altitude
0 – 10,000 feet (0 - 3048 m) maximum
Derate operating temperature 1.8 ˚F (1 ˚C) per 985 feet (300 m) above
2955 feet (900 m) altitude
Sun Fire X4600 and Sun Fire X4600 M2 Servers Service Manual • March 2011
TABLE A-4 contains the declared noise emissions in accordance with ISO 9296,
A-weighted, operating and idling.
TABLE A-4
Sun Fire X4600/X4600 M2 Acoustic Noise Emission Specifications
Specification
Value
LWAd (sound power)
at or below 25 ˚C
8.2 B
above 25 ˚C
9.0 B
LpAm (average bystander sound pressure)
at or below 25 ˚C
67 dB
above 25 ˚C
A.2
75 dB
PCI-E Slot Information
For higher throughput cards, PCI-E slots 3 and 6 are preferred.
2
0x04
0x00/0x0d ck08-xvr1
x08
x08
256B
3
0x05
0x00/0x0e ck08-xvr0
x16
x08
512B
4
0x03
0x00/0x0c ck08-xvr2
x04
x04
128B
5
0x83
0x80/0x0d io4 -xvr1
x08
x08
256B
6
0x84
0x80/0x0e io4 -xvr0
x16
x08
512B
7
0x82
0x80/0c0c io4 -xvr2
x04
x04
128B
Appendix A
System Specifications
A-3
A-4
Sun Fire X4600 and Sun Fire X4600 M2 Servers Service Manual • March 2011
APPENDIX
B
BIOS POST Codes
Note – The information in this appendix applies to the original Sun Fire X4600
server, and to the Sun Fire X4600 M2 server, unless otherwise noted in the text.
B.1
Power-On Self-Test (POST)
The system BIOS provides a rudimentary power-on self-test. The basic devices
required for the server to operate are checked, memory is tested, the LSI 1064 disk
controller and attached disks are probed and enumerated, and the two Intel dualgigabit Ethernet controllers are initialized.
The progress of the self-test is indicated by a series of POST codes.
These codes are displayed at the bottom right corner of the system’s VGA screen
(once the self-test has progressed far enough to initialize the video monitor).
However, the codes are displayed as the self-test runs and scroll off of the screen too
quickly to be read. An alternate method of displaying the POST codes is to redirect
the output of the console to a serial port (see “Redirecting Console Output” on page
B-2).
The message, BMC Responding is displayed at the end of POST.
B.1.1
How BIOS POST Memory Testing Works
The BIOS POST memory testing is performed as follows:
1. The first megabyte of DRAM is tested by the BIOS before the BIOS code is
shadowed (that is, copied from ROM to DRAM).
B-1
2. Once executing out of DRAM, the BIOS performs a simple memory test (a
write/read of every location with the pattern 55aa55aa).
Note – This memory test is performed only if Quick Boot is not enabled from the
Boot Settings Configuration screen. Enabling Quick Boot causes the BIOS to skip the
memory test. See “Changing POST Options” on page B-3 for more information.
Note – The memory test can take several minutes. You can escape from POST testing
by pressing any key during POST.
3. The BIOS polls the memory controllers for both correctable and uncorrectable
memory errors and logs those errors into the service processor.
▼ Redirecting Console Output
Use these instructions to access the service processor and redirect the console output
so that the BIOS POST codes can be read.
1. Initialize the BIOS Setup utility by pressing the F2 key while the system is
performing the power-on self-test (POST).
2. When the BIOS Main Menu screen is displayed, select Advanced.
3. When the Advanced Settings screen is displayed, select IPMI 2.0 Configuration.
4. When the IPMI 2.0 Configuration screen is displayed, select the LAN
Configuration menu item.
5. Determine the server’s IP address.
a. Select the IP Assignment option that you want to use (DHCP or Static).
■
If you choose DHCP, the server’s IP address is retrieved from your network’s
DHCP server and displayed using the following format:
Current IP address in BMC: xxx.xxx.xxx.xxx
■
If you choose Static to assign the IP address manually, perform the
following steps:
i. Type the IP address in the IP Address field.
You can also enter the subnet mask and default gateway settings in their
respective fields.
ii. Select Commit and press Return to commit the changes.
B-2
Sun Fire X4600 and Sun Fire X4600 M2 Servers Service Manual • March 2011
iii. Select Refresh and press Return to see your new settings displayed in the
Current IP address in BMC field.
6. Start a web browser and type the service processor’s IP address in the browser’s
URL field.
7. When you are prompted, type a user name and password as follows:
User name: root
Password: changeme
8. When the ILOM SP GUI screen is displayed, click the Remote Control tab.
9. Click on the Redirection tab.
10. Set the color depth for the redirection console at either 6 or 8 bits.
11. Click on the Start Redirection button.
The javaRConsole window appears and prompts you for your user name and
password again.
12. When you are prompted, type a user name and password as follows:
User name: root
Password: changeme
The current POST screen is displayed.
▼ Changing POST Options
These instructions are optional, but you can use them to change the operations that
the server performs during POST testing.
1. Initialize the BIOS Setup utility by pressing the F2 key while the system is
performing the power-on self-test (POST).
2. When the BIOS Main Menu screen is displayed, select the Boot menu.
3. From the Boot Settings screen, select Boot Settings Configuration.
4. On the Boot Settings Configuration screen, there are several options that you
can enable or disable:
■
Quick Boot – This option is disabled by default. If you enable this, the BIOS
skips certain tests while booting, such as the extensive memory test. This
decreases the time it takes for the system to boot.
■
System Configuration Display – This option is disabled by default. If you
enable this, the system configuration screen is displayed before booting begins.
Appendix B
BIOS POST Codes
B-3
B.1.2
■
Quiet Boot – This option is disabled by default. If you enable this, the Sun
Microsystems logo is displayed instead of POST codes.
■
Language – This option is reserved for future use. Do not change.
■
Add On ROM Display Mode – This option is set to Force BIOS by default. This
option has effect only if you have also enabled the Quiet Boot option, but it
controls whether output from the Option ROM is displayed. The two settings
for this option are as follows:
■
Force BIOS – Remove the Sun logo and display Option ROM output.
■
Keep Current – Do not remove the Sun logo. The Option ROM output is not
displayed.
■
Boot Num-Lock – This option is On by default (keyboard Num-Lock is turned
on during boot). If you set this to off, the keyboard Num-Lock is not turned on
during boot.
■
Wait for F1 if Error – This option is disabled by default. If you enable this, the
system will pause if an error is found during POST and will only resume when
you press the F1 key.
■
Interrupt 19 Capture – This option is reserved for future use. Do not change.
■
Default Boot Order – The letters in the brackets represent the boot devices. To
see the letters defined, position your cursor over the field and read the
definition in the right side of the screen.
POST Codes
TABLE B-1 contains descriptions of each of the POST codes, listed in the same order in
which they are generated. These POST codes appear as a four-digit string that is a
combination of two-digit output from primary I/O port 80 and two-digit output from
secondary I/O port 81. In the POST codes listed in TABLE B-1, the first two digits are
from port 81 and the last two digits are from port 80.
TABLE B-1
POST Codes
Post Code
Description
00d0
Coming out of POR, PCI configuration space initialization, Enabling 8111’s SMBus.
00d1
Keyboard controller BAT, Waking up from PM, Saving power-on CPUID in scratch CMOS.
00d2
Disable cache, full memory sizing, and verify that flat mode is enabled.
00d3
Memory detections and sizing in boot block, cache disabled, IO APIC enabled.
01d4
Test base 512 KB memory. Adjust policies and cache first 8 MB.
01d5
Boot block code is copied from ROM to lower RAM. BIOS is now executing out of RAM.
B-4
Sun Fire X4600 and Sun Fire X4600 M2 Servers Service Manual • March 2011
TABLE B-1
POST Codes (Continued)
Post Code
Description
01d6
Key sequence and OEM specific method is checked to determine if BIOS recovery is
forced. If next code is E0, BIOS recovery is being executed. Main BIOS checksum is tested.
01d7
Restoring CPUID; moving boot block-runtime interface module to RAM; determine
whether to execute serial flash.
01d8
Decompressing runtime module into RAM. Storing CPUID information in memory.
01d9
Copying main BIOS into memory.
01da
Giving control to BIOS POST.
0004
Check CMOS diagnostic byte to determine if battery power is OK and CMOS checksum is
OK. If the CMOS checksum is bad, update CMOS with power-on default values.
00c2
Set up boot strap processor for POST. This includes frequency calculation, loading BSP
microcode, and applying user requested value for GART Error Reporting setup question.
00c3
Errata workarounds applied to the BSP (#78 and #110).
00c6
Re-enable cache for boot strap processor, and apply workarounds in the BSP for errata
#106, #107, #69, and #63 if appropriate.
00c7
HT sets link frequencies and widths to their final values.
000a
Initializing the 8042 compatible Keyboard Controller.
000c
Detecting the presence of Keyboard in KBC port.
000e
Testing and initialization of different Input Devices. Traps the INT09h vector, so that the
POST INT09h handler gets control for IRQ1.
8600
Preparing CPU for booting to OS by copying all of the context of the BSP to all application
processors present. NOTE: APs are left in the CLI HLT state.
de00
Preparing CPU for booting to OS by copying all of the context of the BSP to all application
processors present. NOTE: APs are left in the CLI HLT state.
8613
Initialize PM regs and PM PCI regs at Early-POST. Initialize multi host bridge, if system
supports it. Setup ECC options before memory clearing. Enable PCI-X clock lines in the
8131.
0024
Decompress and initialize any platform-specific BIOS modules.
862a
BBS ROM initialization.
002a
Generic Device Initialization Manager (DIM) - Disable all devices.
042a
ISA PnP devices - Disable all devices.
052a
PCI devices - Disable all devices.
122a
ISA devices - Static device initialization.
152a
PCI devices - Static device initialization.
252a
PCI devices - Output device initialization.
Appendix B
BIOS POST Codes
B-5
TABLE B-1
POST Codes (Continued)
Post Code
Description
202c
Initializing different devices. Detecting and initializing the video adapter installed in the
system that has optional ROMs.
002e
Initializing all the output devices.
0033
Initializing the silent boot module. Set the window for displaying text information.
0037
Displaying sign-on message, CPU information, setup key message, and any OEM specific
information.
4538
PCI devices - IPL device initialization.
5538
PCI devices - General device initialization.
8600
Preparing CPU for booting to OS by copying all of the context of the BSP to all application
processors present. NOTE: APs are left in the CLI HLT state.
B.1.3
POST Code Checkpoints
The POST code checkpoints are the largest set of checkpoints during the BIOS preboot process. TABLE B-2 describes the type of checkpoints that might occur during the
POST portion of the BIOS. These two-digit checkpoints are the output from primary
I/O port 80.
TABLE B-2
POST Code Checkpoints
Post Code
Description
03
Disable NMI, Parity, video for EGA, and DMA controllers. At this point, only ROM
accesses are to the GPNV. If BB size is 64K, require to turn on ROM Decode below
FFFF0000h. It should allow USB to run in E000 segment. The HT must program the NB
specific initialization and OEM specific initialization can program if it need at beginning of
BIOS POST, like overriding the default values of Kernel Variables.
04
Check CMOS diagnostic byte to determine if battery power is OK and CMOS checksum is
OK. Verify CMOS checksum manually by reading storage area. If the CMOS checksum is
bad, update CMOS with power-on default values and clear passwords. Initialize status
register A. Initializes data variables that are based on CMOS setup questions. Initializes
both the 8259 compatible PICs in the system.
05
Initializes the interrupt controlling hardware (generally PIC) and interrupt vector table.
06
Do R/W test to CH-2 count reg. Initialize CH-0 as system timer. Install the POSTINT1Ch
handler. Enable IRQ-0 in PIC for system timer interrupt. Traps INT1Ch vector to
POSTINT1ChHandlerBlock.
C0
Early CPU Init Start--Disable Cache--Init Local APIC.
C1
Set up boot strap processor information.
B-6
Sun Fire X4600 and Sun Fire X4600 M2 Servers Service Manual • March 2011
TABLE B-2
POST Code Checkpoints (Continued)
Post Code
Description
C2
Set up boot strap processor for POST. This includes frequency calculation, loading BSP
microcode, and applying user requested value for GART Error Reporting setup question.
C3
Errata workarounds applied to the BSP (#78 and #110).
C5
Enumerate and set up application processors. This includes microcode loading and
workarounds for errata (#78, #110, #106, #107, #69, #63).
C6
Re-enable cache for boot strap processor, and apply workarounds in the BSP for errata
#106, #107, #69, and #63 if appropriate. In case of mixed CPU steppings, errors are sought
and logged, and an appropriate frequency for all CPUs is found and applied. NOTE: APs
are left in the CLI HLT state.
C7
The HT sets link frequencies and widths to their final values. This routine gets called after
CPU frequency has been calculated to prevent bad programming.
0A
Initializes the 8042 compatible Keyboard Controller.
0B
Detects the presence of PS/2 mouse.
0C
Detects the presence of Keyboard in KBC port.
0E
Testing and initialization of different Input Devices. Also, update the Kernel Variables.
Traps the INT09h vector, so that the POST INT09h handler gets control for IRQ1.
Decompress all available language, BIOS logo, and Silent logo modules.
13
Initialize PM regs and PM PCI regs at Early-POST. Initialize multi host bridge, if system
support it. Setup ECC options before memory clearing. REDIRECTION causes corrected
data to written to RAM immediately. CHIPKILL provides 4 bit error det/corr of x4 type
memory. Enable PCI-X clock lines in the 8131.
20
Relocate all the CPUs to a unique SMBASE address. The BSP will be set to have its entry
point at A000:0. If less than 5 CPU sockets are present on a board, subsequent CPUs entry
points will be separated by 8000h bytes. If more than 4 CPU sockets are present, entry
points are separated by 200h bytes. CPU module will be responsible for the relocation of
the CPU to correct address. NOTE: APs are left in the INIT state.
24
Decompress and initialize any platform specific BIOS modules.
30
Initialize System Management Interrupt.
2A
Initializes different devices through DIM.
2C
Initializes different devices. Detects and initializes the video adapter installed in the
system that have optional ROMs.
2E
Initializes all the output devices.
31
Allocate memory for ADM module and decompress it. Give control to ADM module for
initialization. Initialize language and font modules for ADM. Activate ADM module.
33
Initializes the silent boot module. Set the window for displaying text information.
37
Displaying sign-on message, CPU information, setup key message, and any OEM specific
information.
Appendix B
BIOS POST Codes
B-7
TABLE B-2
POST Code Checkpoints (Continued)
Post Code
Description
38
Initializes different devices through DIM.
39
Initializes DMAC-1 and DMAC-2.
3A
Initialize RTC date/time.
3B
Test for total memory installed in the system. Also, Check for DEL or ESC keys to limit
memory test. Display total memory in the system.
3C
By this point, RAM read/write test is completed, program memory holes or handle any
adjustments needed in RAM size with respect to NB. Test if HT Module found an error in
Boot Block and CPU compatibility for MP environment.
40
Detect different devices (Parallel ports, serial ports, and coprocessor in CPU, etc.)
successfully installed in the system and update the BDA, EBDA, etc.
50
Programming the memory hole or any kind of implementation that needs an adjustment
in system RAM size if needed.
52
Updates CMOS memory size from memory found in memory test. Allocates memory for
Extended BIOS Data Area from base memory.
60
Initializes NUM-LOCK status and programs the KBD typematic rate.
75
Initialize Int-13 and prepare for IPL detection.
78
Initializes IPL devices controlled by BIOS and option ROMs.
7A
Initializes remaining option ROMs.
7C
Generate and write contents of ESCD in NVRam.
84
Log errors encountered during POST.
85
Display errors to the user and gets the user response for error.
87
Execute BIOS setup if needed/requested.
8C
After all device initialization is done, programmed any user selectable parameters relating
to NB/SB, such as timing parameters, non-cacheable regions and the shadow RAM
cacheability, and do any other NB/SB/PCIX/OEM specific programming needed during
Late-POST. Background scrubbing for DRAM, and L1 and L2 caches are set up based on
setup questions. Get the DRAM scrub limits from each node. Workaround for erratum
#101 applied here.
8D
Build ACPI tables (if ACPI is supported).
8E
Program the peripheral parameters. Enable/Disable NMI as selected.
90
Late POST initialization of system management interrupt.
A0
Check boot password if installed.
A1
Clean-up work needed before booting to OS.
B-8
Sun Fire X4600 and Sun Fire X4600 M2 Servers Service Manual • March 2011
TABLE B-2
POST Code Checkpoints (Continued)
Post Code
Description
A2
Takes care of runtime image preparation for different BIOS modules. Fill the free area in
F000h segment with 0FFh. Initializes the Microsoft IRQ Routing Table. Prepares the
runtime language module. Disables the system configuration display if needed.
A4
Initialize runtime language module.
A7
Displays the system configuration screen if enabled. Initialize the CPUs before boot, which
includes the programming of the MTRRs.
A8
Prepare CPU for OS boot including final MTRR values.
A9
Wait for user input at config display if needed.
AA
Uninstall POST INT1Ch vector and INT09h vector. Deinitializes the ADM module.
AB
Prepare BBS for Int 19 boot.
AC
Any kind of Chipsets (NB/SB) specific programming needed during End- POST, just
before giving control to runtime code booting to OS. Programmed the system BIOS
(0F0000h shadow RAM) cacheability. Ported to handle any OEM specific programming
needed during End-POST. Copy OEM specific data from POST_DSEG to RUN_CSEG.
B1
Save system context for ACPI.
00
Prepares CPU for booting to OS by copying all of the context of the BSP to all application
processors present. NOTE: APs are left in the CLIHLT state.
61-70
OEM POST Error. This range is reserved for chipset vendors and system manufacturers.
The error associated with this value may be different from one platform to the next.
Appendix B
BIOS POST Codes
B-9
B-10
Sun Fire X4600 and Sun Fire X4600 M2 Servers Service Manual • March 2011
APPENDIX
C
LEDs and Jumpers
This appendix describes the LEDs and jumpers on the Sun Fire X4600 server and the
Sun Fire X4600 M2 server. The information is organized into three sections:
C.1
■
“External LEDs” on page C-1 describes LEDs on the exterior of the server chassis.
■
“Internal LEDs” on page C-6 describes LEDs that are visible only with the main
cover removed.
■
“Jumpers” on page C-10 describes jumpers on the server motherboard.
External LEDs
See the following figures and tables for information about the LEDs that are viewable
on the outside of the server.
■
FIGURE C-1 and TABLE C-1 describe the front panel LEDs.
■
FIGURE C-2 and TABLE C-2 describe the back panel LEDs.
■
FIGURE C-3 and TABLE C-3 describe the fan tray LEDs.
C-1
FIGURE C-1
C-2
Sun Fire X4600/X4600 M2 Servers Front Panel LEDs
Sun Fire X4600 and Sun Fire X4600 M2 Servers Service Manual • March 2011
TABLE C-1
Front Panel LED Functions
LED Name
Description
Locate button/LED
This LED helps you to identify which system in the rack you are
working on in a rack full of servers.
• Push and release this button to make the Locate LED blink for 30
minutes.
• Hold down the button for 5 seconds to initiate a “push-to-test” mode
that illuminates all other LEDs both inside and outside of the chassis
for 15 seconds.
Service Action Required LED
This LED has two states:
• Off: Normal operation.
• Slow Blinking: An event that requires a service action has been
detected. It also blinks when only one power supply is plugged in.
Power/OK LED
This LED has three states:
• Off: Server main power and standby power are off.
• Blinking: Server is in standby power mode, with AC power applied to
only the GRASP board and the power supply fans.
• On: Server is in main power mode with AC power supplied to all
components.
Appendix C
LEDs and Jumpers
C-3
TABLE C-1
Front Panel LED Functions
LED Name
Description
Front Fan Fault LED
This LED lights when there is a failed front cooling fan module. LEDs on
the individual fan modules indicate which fan module has failed.
Power Supply Fault LED
This LED lights when:
• Two power supplies are present in the system but only one has AC
power connected. To clear this condition either plug in the second
power supply or remove it from the chassis.
• Any voltage related event occurs in the system. For CPU-related
voltage errors the associated CPU Fault LED will also be illuminated.
System Overheat Fault LED
This LED lights when an upper temperature limit is detected.
Hard Disk Drive Status LEDs
The hard disk drives have three LEDs:
• Top LED (blue): reserved for future use.
• Middle LED (amber): Hard disk drive failed.
• Bottom LED (green): Hard disk drive is operating properly.
C-4
Sun Fire X4600 and Sun Fire X4600 M2 Servers Service Manual • March 2011
FIGURE C-2
TABLE C-2
Sun Fire X4600/X4600 M2 Servers Back Panel LEDs
Back Panel LED Functions
LED Name
Description
Power Supply Status LEDs
The power supplies have one LED:
• LED is on (amber): Power supply failed.
• LED is off: AC power to power supply is operating properly.
10/100/1000 Gigabit Ethernet port
LEDs (NET0 – NET3)
Each connector has two LEDs:
• Right side LED on (green): indicates link activity
• Left side LED green: link is established at 1 gigabit
• Left side orange: link is established at 10 or 100 megabits
10/100 Gigabit Ethernet
management port
(NET MGT)
The connector has two LEDs:
• Right side LED on (green): indicates link activity
• Left side LED green: link is established at 100 megabits
• Left side orange: link is established at 10 megabits
Appendix C
LEDs and Jumpers
C-5
TABLE C-2
Back Panel LED Functions
LED Name
Description
Locate button/LED
(Same function as on front panel)
This LED helps you to identify which system in the rack you are
working on in a rack full of servers.
• Push and release this button to make the Locate LED blink for 30
minutes.
• Hold down the button for 5 seconds to initiate a “push-to-test” mode
that illuminates all other LEDs both inside and outside of the chassis
for 15 seconds.
Service Action Required LED
(Same function as on front panel)
This LED has two states:
• Off: Normal operation.
• Slow Blinking: An event that requires a service action has been
detected.
Power/OK LED
(Same function as on front panel)
This LED has three states:
• Off: Server main power and standby power are off.
• Blinking: Server is in standby power mode, with AC power applied to
only the GRASP board and the power supply fans.
• On: server is in main power mode with AC power supplied to all
components.
FIGURE C-3
TABLE C-3
C-6
Fan Tray Fault LED Locations
Fan Tray LED Functions
LED Name
Description
Fan tray fault LEDs
Each fan tray has one LED:
• LED is on (amber): Fan tray failed.
• LED is off: Fan tray is operating properly.
For more information, see “Replacing a Fan Tray” on page
3-14
Sun Fire X4600 and Sun Fire X4600 M2 Servers Service Manual • March 2011
C.2
Internal LEDs
Status indicator LEDs are present several places inside the chassis:
■
Each CPU module has LEDs that indicate faults in its CPU and DIMMs. These
LEDs, can be lit by pressing the Fault Remind Button, even after the CPU module
is removed from the system; a capacitor provides power to light the LEDs for up
to one minute. To locate CPU modules LEDs and the Fault Remind button, refer to
FIGURE C-4. For information on LED behavior, refer to TABLE C-4.
■
LEDs on the motherboard and GRASP board indicate the status of various
subsystems. To locate these LEDs, refer to FIGURE C-5. For information on LED
behavior, refer to TABLE C-5
Appendix C
LEDs and Jumpers
C-7
FIGURE C-4
Sun Fire X4600 Fault LED and Button Locations on the CPU module
TABLE C-4
CPU Module LED Functions
LED Name
Description
CPU module Attention LED
This LED has two states:
• Off: CPU module and its components are operating
properly.
• Lit (amber): Either the CPU module, a DIMM, or a CPU
has failed.
DIMM Fault LED
This LED has two states:
(The ejector levers on the
• Off: DIMM is operating properly.
DIMM slots contain the LEDs.) • Lit (amber): DIMM has failed.
CPU Fault LED
C-8
This LED has two states:
• Off: CPU is operating properly.
• Lit (amber): CPU has encountered a voltage or heat error
condition.
Sun Fire X4600 and Sun Fire X4600 M2 Servers Service Manual • March 2011
FIGURE C-5
TABLE C-5
LEDs on Motherboard and GRASP board
Motherboard and GRASP Board LED Functions
LED Name
Description
GRASP board power status LED
This LED has two states:
• Off: 3.3V standby power is not reaching the GRASP board.
• Lit (green): 3.3V standby power is reaching the GRASP board.
Motherboard auxiliary power LED
(CR21)
This LED has two states:
• Off: 3.3V standby power is not reaching the motherboard.
• Lit (green): 3.3V standby power is reaching the motherboard.
Motherboard power LEDs (CR41,
CR19, CR34, and CR35)
All four LEDs should be lit when system is powered up. Any other state
indicates fault.
Appendix C
LEDs and Jumpers
C-9
TABLE C-5
Motherboard and GRASP Board LED Functions (Continued)
LED Name
Description
DVD activity LED (CR28)
This LED has two states:
• Off: DVD drive is inactive.
• Lit or flickering (green): DVD drive is active.
SAS heartbeat LED (CR7)
Blinks in regular pattern when SAS controller is active. Fault if not
blinking after system is out of reset.
SAS Activity, Slot 0 (CR8)
This LED has two states:
• Off: SAS drive in slot 0 is inactive.
• Lit or flickering (green): SAS drive in slot 0 is active.
SAS Activity, Slot 1 (CR6)
This LED has two states:
• Off: SAS drive in slot 1 is inactive.
• Lit or flickering (green): SAS drive in slot 1 is active.
SAS Activity, Slot 2 (CR29)
This LED has two states:
• Off: SAS drive in slot 2 is inactive.
• Lit or flickering (green): SAS drive in slot 2 is active.
SAS Activity, Slot 3 (CR30)
This LED has two states:
• Off: SAS drive in slot 3 is inactive.
• Lit or flickering (green): SAS drive in slot 3 is active.
SAS Fault, Slot 0 (CR9)
This LED has two states:
• Off: SAS drive in slot 0 is present and working.
• Lit (yellow): SAS slot 1 is empty or contains faulty drive. (Remains
yellow during option ROM execution at boot.)
SAS Fault, Slot 1 (CR10)
This LED has two states:
• Off: SAS drive in slot 1 is present and working.
• Lit (yellow): SAS slot 1 is empty or contains faulty drive. (Remains
yellow during option ROM execution at boot.)
SAS Fault, Slot 2 (CR11)
This LED has two states:
• Off: SAS drive in slot 2 is present and working.
• Lit (yellow): SAS slot 2 is empty or contains faulty drive. (Remains
yellow during option ROM execution at boot.)
SAS Fault, Slot 3 (CR31)
This LED has two states:
• Off: SAS drive in slot 3 is present and working.
• Lit (yellow): SAS slot 3 is empty or contains faulty drive. (Remains
yellow during option ROM execution at boot.)
C-10
Sun Fire X4600 and Sun Fire X4600 M2 Servers Service Manual • March 2011
C.3
Jumpers
The server motherboard has several jumpers, described in FIGURE C-6 and TABLE C-6.
Note that some jumpers are not meant to be used in the field; these are labelled “Do
not use” in the table.
Appendix C
LEDs and Jumpers
C-11
FIGURE C-6
TABLE C-6
C-12
Jumpers on the Motherboard
Jumper Functions
Jumper Name
Function
J32, Interlock Switch Disable
Do not use.
P19, Force BIOS Recovery
See “Using the Force-Recovery Jumper P19” on page 2-59.
P20, Clear Password
See “Resetting SP and BIOS Passwords Using Jumper P20”
on page 2-56
P21, Hard Reset
Bridge to change reset button action from soft reset to hard
reset.
Sun Fire X4600 and Sun Fire X4600 M2 Servers Service Manual • March 2011
TABLE C-6
Jumper Functions (Continued)
Jumper Name
Function
P23, Kill Switch Disable
Do not use.
P25, Clear CMOS
See “Using the Clear CMOS Jumper P25” on page 2-61
P3,
I2C
Do not use.
Appendix C
LEDs and Jumpers
C-13
APPENDIX
D
Connector Pinouts
This appendix contains information about the server’s connector pinouts.
Note – The information in this appendix applies to the original Sun Fire X4600
server, and to the Sun Fire X4600 M2 server, unless otherwise noted in the text.
D.1
USB Connector
The USB connector pins and their corresponding descriptions are shown in the figure
and table in this section.
FIGURE D-1
TABLE D-1
USB Connector
USB Connector Pinouts
Pin Number
Pin Name
Description
1
+5V
+5V supply
2
Data-
Negative side of differential for data
3
Data+
Positive side of differential for data
4
Gnd
Ground
D-1
D.2
Serial Connector
The RJ-45 Serial connector pins and their corresponding descriptions are shown in
the figure and table in this section.
FIGURE D-2
TABLE D-2
D.3
Serial Connector
Serial Connector Pinouts
Pin Number
Pin Name
Description
1
RTS
Ready to send
2
DTR
Data terminal ready
3
TXD
Transmit data
4
GND
Ground
5
GND
Ground
6
RXD
Receive data
7
DSR
Data send ready
8
CTS
Clear to send
10/100BASE-T Connector
The RJ-45 10/100BASE-T connector pins and their corresponding descriptions are
shown in the figure and table in this section.
D-2
Sun Fire X4600 and Sun Fire X4600 M2 Servers Service Manual • March 2011
FIGURE D-3
TABLE D-3
D.4
10/100BASE-T Connector
10/100BASE-T Connector Pinouts
Pin Number
Pin Name
Description
1
TX+
Positive side of transmit data
2
TX-
Negative side of transmit data
3
RX+
Positive side of receive data
4
NC
No connect
5
NC
No connect
6
RX-
Negative side of receive data
7
NC
No connect
8
NC
No connect
10/100/1000BASE-T Connector
The RJ45 10/100/1000BASE-T connector pins and their corresponding descriptions
are shown in the figure and table in this section.
Appendix D
Connector Pinouts
D-3
FIGURE D-4
TABLE D-4
D.5
10/100/1000BASE-T Connector
10/100/1000BASE-T Connector Pinouts
Pin Number
Pin Name
Description
1
TP0+
Positive side of data pair 0
2
TP0-
Negative side of data pair 0
3
TP1+
Positive side of data pair 1
4
TP2+
Positive side of data pair 2
5
TP2-
Negative side of data pair 2
6
TP1-
Negative side of data pair 1
7
TP3+
Positive side of data pair 3
8
TP3-
Negative side of data pair 3
VGA Video Connector
The VGA video connector pins and their corresponding descriptions are shown in
the figure and table in this section.
FIGURE D-5
TABLE D-5
D-4
VGA Video Connector
VGA Video Connector Pinouts
Pin Number
Pin Name
Description
1
RED
Red video
2
GRN
Green video
3
BLU
Blue video
Sun Fire X4600 and Sun Fire X4600 M2 Servers Service Manual • March 2011
TABLE D-5
D.6
VGA Video Connector Pinouts
Pin Number
Pin Name
Description
4
ID2
ID2 (ground)
5
GND
Ground
6
R_GND
Red video return (ground)
7
G_GND
Green video return (ground)
8
B_GND
Blue video return (ground)
9
KEY
No pin
10
S_GND
Sync return (ground)
11
ID0
ID0 (ground)
12
ID1/SDA
ID1 (no connect)
13
HSYNC
Horizontal sync
14
VSYNC
Vertical sync
15
ID3/SCL
ID3 (no connect)
Serial Attached SCSI Connector
The Serial Attached SCSI (SAS) connector pins and their corresponding descriptions
are shown in the figure and table in this section.
Appendix D
Connector Pinouts
D-5
FIGURE D-6
TABLE D-6
D-6
Serial Attached SCSI Connector
Serial Attached SCSI Connector Pinouts
Segment
Pin Number
Pin Name
Description
Signal
Segment
S1
Gnd
Second mate ground
S2
TX+
Positive side of transmit to hard drive
S3
TX-
Negative side of transmit to hard drive
S4
Gnd
Second mate ground
S5
RX-
Negative side of receive from hard drive
S6
RX+
Positive side of receive from hard drive
S7
Gnd
Second mate ground
Sun Fire X4600 and Sun Fire X4600 M2 Servers Service Manual • March 2011
TABLE D-6
Serial Attached SCSI Connector Pinouts (Continued)
Segment
Pin Number
Pin Name
Description
Backside
Signal
Segment
S8
Gnd
Second mate ground
S9
Not used
S10
Not used
S11
Power
Segment
Gnd
Second mate ground
S12
Not used
S13
Not used
S14
Gnd
Second mate ground
P1
3.3 V
Not used
P2
3.3 V
Not used
P3
3.3 V
Not used
P4
Gnd
First mate ground
P5
Gnd
Second mate ground
P6
Gnd
Second mate ground
P7
5.0 V
Pre-charge, second mate
P8
5.0 V
Not used
P9
5.0 V
Not used
P10
Gnd
Second mate ground
P11
Reserved
Not used
P12
Gnd
First mate ground
P13
12.0 V
Pre-charge, second mate
P14
12.0 V
Not used
P15
12.0 V
Not used
Appendix D
Connector Pinouts
D-7
D.7
Flex Cable Motherboard Connector
The flex cable (flex circuit) motherboard connector pins and their corresponding
descriptions are shown in the figure and table in this section.
FIGURE D-7
TABLE D-7
D-8
Flex Cable Motherboard Connector
Flex Cable Motherboard Connector Pinouts
Pin Number
Signal Name
1
DVD_DRST_L
2
DISK_ID0
3
DVD_DDATA[8]
4
DISK_ID1
5
DVD_DDATA[7]
6
+3.3 V
7
DVD_DDATA[9]
8
+3.3 V
9
DVD_DDATA[6]
10
+3.3 V
11
DVD_DDATA[10]
12
+3.3 V
13
DVD_DDATA[5]
14
NOT USED
15
DVD_DDATA[11]
16
+3.3V AUX
17
DVD_DDATA[4]
18
+3.3V AUX
Sun Fire X4600 and Sun Fire X4600 M2 Servers Service Manual • March 2011
TABLE D-7
Flex Cable Motherboard Connector Pinouts (Continued)
Pin Number
Signal Name
19
DVD_DDATA[12]
20
+3.3V AUX
21
DVD_DDATA[3]
22
+3.3V AUX
23
DVD_DDATA[13]
24
+3.3V AUX
25
DVD_DDATA[2]
26
+3.3V AUX
27
DVD_DDATA[14]
28
Not used
29
DVD_DDATA[1]
30
DVD_DDACK_L
31
DVD_DDATA[15]
32
DVD_DRDY
33
DVD_DDRQ_L
34
DVD_INT_L
35
DVD_DDATA[0]
36
GND
37
DVD_DIOR_L
38
SAS_DISK1_RX_P
39
DVD_DIOW_L
40
SAS_DISK1_RX_N
41
DVD_DADDR[1]
42
SAS_DISK3_RX_P
43
DVD_PDIAG_L
44
SAS_DISK3_RX_N
45
DVD_DADDR[0]
46
GND
47
DVD_DADDR[2]
48
SAS_DISK1_TX_P
Appendix D
Connector Pinouts
D-9
D-10
TABLE D-7
Flex Cable Motherboard Connector Pinouts (Continued)
Pin Number
Signal Name
49
DVD_DCS1P_L
50
SAS_DISK1_TX_N
51
DVD_DCS3P_L
52
GND
53
DVD_DASP_L
54
SAS_DISK3_TX_P
55
+5V
56
SAS_DISK3_TX_N
57
GND
58
GND
59
SAS_DISK0_TX_N
60
+5V
61
SAS_DISK0_TX_P
62
+5V
63
GND
64
+5V
65
SAS_DISK2_TX_N
66
+5 V
67
SAS_DISK2_TX_P
68
+5 V
69
GND
70
+5 V
71
SAS_DISK0_RX_N
72
+5 V
73
SAS_DISK0_RX_P
74
+5 V
75
GND
76
+5 V
77
SAS_DISK2_RX_N
78
Not used
Sun Fire X4600 and Sun Fire X4600 M2 Servers Service Manual • March 2011
TABLE D-7
Flex Cable Motherboard Connector Pinouts (Continued)
Pin Number
Signal Name
79
SAS_DISK2_RX_P
80
Not used
81
PS3_PRESENT_L
82
PS1_PRESENT_L
83
Not used
84
PS_ENABLE_L
85
Not used
86
PS_KILL
87
Not used
88
PS1_VIN_GOOD
89
PS3_POWEROK
90
PS1_POWEROK
91
Not used
92
SP_I2C_DAT
93
Not used
94
SP_I2C_CLK
95
Not used
96
Not used
97
Not used
98
Not used
99
PS2_VIN_GOOD
100
PS0_VIN_GOOD
101
Not used
102
Not used
103
Not used
104
Not used
105
PS2_VIN_GOOD
106
PS0_VIN_GOOD
107
PS2_POWEROK
108
PS0_POWEROK
Appendix D
Connector Pinouts
D-11
D.8
TABLE D-7
Flex Cable Motherboard Connector Pinouts (Continued)
Pin Number
Signal Name
109
Not used
110
Not used
111
Not used
112
Not used
113
Not used
114
Not used
115
Not used
116
Not used
117
Not used
118
Not used
119
Not used
120
Not used
Flex Cable Power Distribution Board
Connector
The power distribution board (PDB) brings power from the chassis power supplies to
the motherboard. The main power connection to the motherboard is through two
bus bars. The PS_KILL signals for the power supplies is grounded on the PDB to
permanently enable the AUX output. The flex cable power distribution board (PDB)
connector pins and their corresponding descriptions are shown in the figure and
table in this section.
D-12
Sun Fire X4600 and Sun Fire X4600 M2 Servers Service Manual • March 2011
FIGURE D-8
TABLE D-8
Flex Cable PDB Connector
Flex Cable PDB Connector Pinouts
Pin Number
Signal Name
1
SP_I2C_DAT
2
PS1_ENABLE_L
3
SP_I2C_CLK
4
PS1_KILL
5
GND
6
+3.3 AUX
7
GND
8
+3.3 AUX
9
GND
10
+3.3 AUX
11
PS0_VIN_GOOD
12
PS0_POWEROK
13
PS1_VIN_GOOD
14
PS1_POWEROK
15
PS2_VIN_GOOD
16
PS2_POWEROK
17
PS3_VIN_GOOD
18
PS3_POWEROK
19
PS0_PRESENT_L
20
PS2_PRESENT_L
21
PS1_PRESENT_L
22
PS3_PRESENT_L
23
+12 V
24
GND
25
+12 V
Appendix D
Connector Pinouts
D-13
TABLE D-8
D.9
Flex Cable PDB Connector Pinouts (Continued)
Pin Number
Signal Name
26
GND
27
+12 V
28
GND
29
+12 V
30
GND
Flex Cable DVD-ROM Drive Connector
The flex cable DVD-ROM drive IDE connector pins and their corresponding
descriptions are shown in the figure and table in this section.
FIGURE D-9
D-14
Flex Cable DVD-ROM Drive IDE Connector
TABLE D-9
Flex Cable DVD-ROM Drive IDE Connector Pinouts
Pin Number
Signal Name
1
Not used
2
Not used
3
GND
4
GND
5
DVD_RST_L
6
DVD_DDATA[8]
7
DVD_DDATA[7]
8
DVD_DDATA[9]
9
DVD_DDATA[6]
10
DVD_DDATA[10]
11
DVD_DDATA[5]
Sun Fire X4600 and Sun Fire X4600 M2 Servers Service Manual • March 2011
TABLE D-9
Flex Cable DVD-ROM Drive IDE Connector Pinouts (Continued)
Pin Number
Signal Name
12
DVD_DDATA[11]
13
DVD_DDATA[4]
14
DVD_DDATA[12]
15
DVD_DDATA[3]
16
DVD_DDATA[13]
17
DVD_DDATA[2]
18
DVD_DDATA[14]
19
DVD_DDATA[1]
20
DVD_DDATA[15]
21
DVD_DDATA[0]
22
DVD_DDRQ_L
23
GND
24
DVD_DIOR_L
25
DVD_DIOW_L
26
GND
27
DVD_DRDY
28
DVD_DDACK_L
29
DVD_INT_L
30
Not used
31
DVD_DADDR1
32
DVD_PDIAG_L
33
DVD_DADDR0
34
DVD_DADDR2
35
DVD_DCS1P_L
36
DVD_DCS3P_L
37
DVD_DASP_L
38
+5V
39
+5V
40
+5V
41
+5V
Appendix D
Connector Pinouts
D-15
TABLE D-9
D.10
Flex Cable DVD-ROM Drive IDE Connector Pinouts (Continued)
Pin Number
Signal Name
42
+5V
43
GND
44
GND
45
GND
46
GND
47
GND
48
GND
49
Not used
50
Not used
Flex Cable HDD Backplane Connector
The flex cable hard disk drive backplane IDE connector pins and their corresponding
descriptions are shown in the figure and table in this section.
FIGURE D-10
D-16
Flex Cable HDD Backplane IDE Connector
TABLE D-10
Flex Cable HDD Backplane IDE Connector Pinouts
Pin Number
Signal Name
1
SAS_DISK0_TX_N
2
SAS_DISK2_TX_N
3
SAS_DISK0_TX_P
4
SAS_DISK2_TX_P
5
GND
6
GND
7
SAS_DISK0_RX_N
Sun Fire X4600 and Sun Fire X4600 M2 Servers Service Manual • March 2011
TABLE D-10
Flex Cable HDD Backplane IDE Connector Pinouts (Continued)
Pin Number
Signal Name
8
SAS_DISK2_RX_N
9
SAS_DISK0_RX_P
10
SAS_DISK2_RX_P
11
GND
12
GND
13
DISK_ID0
14
DISK_ID1
15
+12 V
16
+5 V
17
+12 V
18
+5 V
19
+12 V
20
+5 V
21
+3.3 V AUX
22
+5 V
23
SP_I2C_CLK
24
SP_I2C_DAT
25
+5 V
26
+5 V
27
GND
28
GND
29
SAS_DISK1_TX_N
30
SAS_DISK3_TX_N
31
SAS_DISK1_TX_P
32
SAS_DISK3_TX_P
33
GND
34
GND
35
SAS_DISK1_RX_N
36
SAS_DISK3_RX_N
37
SAS_DISK1_RX_P
Appendix D
Connector Pinouts
D-17
TABLE D-10
D.11
Flex Cable HDD Backplane IDE Connector Pinouts (Continued)
Pin Number
Signal Name
38
SAS_DISK3_RX_P
39
GND
40
GND
Motherboard Bus Bar Power Connectors
Main power is delivered to the motherboard through bus bar connectors that also
attach to the power distribution board. There are two connector strips that attach to
the mother board with six bus bar screws to provide +12V and ground. See
FIGURE D-11 for the location of the connector strips under the motherboard.
D-18
Sun Fire X4600 and Sun Fire X4600 M2 Servers Service Manual • March 2011
FIGURE D-11
TABLE D-11
Motherboard Bus Bar Connector
Motherboard Bus Bar Connector Pinouts
Pad Number
Pad Name
Description
1
+12V
+12 V DC power to motherboard
2
GND
Ground
Appendix D
Connector Pinouts
D-19
D.12
Front Flex Cable to Front I/O Board
Connector
The connection from the motherboard to the front I/O board is made through a short
flex cable that is a part of the front panel indicator board. The front flex cable
connector pins and their corresponding descriptions are shown in the figure and
table in this section.
FIGURE D-12
TABLE D-12
D-20
Front Flex Cable to Front I/O Board Connector
Front Flex Cable to Front I/O Board Connector Pinouts
Pin Number
Signal Name
1
5V_USB_D
2
GND
3
5V_USB_D
4
FRONT_USB3_P
5
5V_USB_D
6
GND
7
5V_USB_C
8
FRONT_USB3_N
9
5V_USB_C
10
GND
11
5V_USB_C
12
Not used
13
GND
14
GND
15
Not used
16
GND
17
Not used
Sun Fire X4600 and Sun Fire X4600 M2 Servers Service Manual • March 2011
TABLE D-12
Front Flex Cable to Front I/O Board Connector Pinouts (Continued)
Pin Number
Signal Name
18
GND
19
Not used
20
GND
21
Not used
22
GND
23
Not used
24
GND
25
Not used
26
Not used
27
Not used
28
Not used
29
Not used
30
Not used
31
Not used
32
GND
33
Not used
34
FRONT_USB2_P
35
Not used
36
GND
37
Not used
38
FRONT_USB2_N
39
Not used
40
GND
Appendix D
Connector Pinouts
D-21
D.13
Front Flex Cable to Motherboard
Connector
The connection from the motherboard to the front I/O board is made through a short
flex cable that is a part of the front panel indicator board. The front flex cable
connector pins and their corresponding descriptions are shown in the figure and
table in this section.
FIGURE D-13
TABLE D-13
D-22
Front Flex Cable to Motherboard Connector
Front Flex Cable to Motherboard Connector Pinouts
Pin Number
Signal Name
1
FRONTIO_PRESENT_L
2
FAN_FAIL_LED
3
FRONT_USB2_N
4
PS_FAIL_LED
5
Not used
6
OVERTEMP_LED
7
FRONT_USB2_P
8
POWER_BUTTON
9
Not used
10
POWER_LED
11
Not used
12
Not used
13
5V_USB_D
14
+3.3 V AUX
15
5V_USB_D
16
Not used
17
5V_USB_D
Sun Fire X4600 and Sun Fire X4600 M2 Servers Service Manual • March 2011
TABLE D-13
D.14
Front Flex Cable to Motherboard Connector Pinouts (Continued)
Pin Number
Signal Name
18
ALERT_LED_L
19
Not used
20
FIO_LOCATE_L
21
5V_USB_C
22
P5V_AUX
23
5V_USB_C
24
LOCATE_LED_L
25
5V_USB_C
26
Not used
27
Not used
28
Not used
29
FRONT_USB3_N
30
Not used
31
Not used
32
Not used
33
FRONT_USB3_P
34
Not used
35
GND
36
GND
37
GND
38
GND
39
GND
40
GND
Power Supply Connector
The power supply connector pins and their corresponding descriptions are shown in
the figure and table in this section.
Appendix D
Connector Pinouts
D-23
FIGURE D-14
TABLE D-14
D-24
Power Supply Connector
Power Supply Connector Pinouts
Pin Number
Pin Name
Description
PB RH1
+12V RET
Main Power Return
PB RH2
+12V RET
Main Power Return
PB RH3
+12V RET
Main Power Return
PB RH4
+12V
+12 V Power Output
PB RH5
+12V
+12 V Power Output
PB RH6
+12V
+12 V Power Output
A1
PS_ON
Power supply control
A2
+12VRS_RETURN
+12V Return remote sense
A3
TEMP_OK
Within allowable temperature range (PU)
A4
PS_SEATED
Present, active-low, short-pin (PU)
A5
+3.3V SB
+3.3 V Standby Output
A6
+3.3V SB GND
+3.3 V Standby Return
B1
AC_OK
Input voltage within spec
B2
+12VRS
+12 V remote sense
B3
+12V_ISHARE
+12 V current-share pin
B4
PS_INHIBIT
Grounded in system to Enable, short-pin
B5
+3.3V SB
+3.3 V Standby Output
B6
+3.3V SB GND
+3.3 V Standby Return
C1
SDA
EEPROM serial data I/O
C2
SCL
EEPROM serial clock input
C3
PWR_GOOD
Indicates output within range
C4
FAN_FAIL
Indicates PS fan failure
C5
+3.3V SB
+3.3 V Standby Output
C6
+3.3V SB GND
+3.3 V Standby Return
Sun Fire X4600 and Sun Fire X4600 M2 Servers Service Manual • March 2011
TABLE D-14
D.15
Power Supply Connector Pinouts (Continued)
Pin Number
Pin Name
Description
D1
A0
EEPROM address bit 0 input
D2
A1
EEPROM address bit 1 input
D3
S_INT
Serial interrupt
D4
+3.3V SBRS
+3.3 V Standby remote sense
D5
+3.3V SB
+3.3 V Standby Output
D6
+3.3V SB GND
+3.3 V Standby Return
Fan Module Connector
The fan module connectors and their corresponding descriptions are shown in the
figure and table in this section.
FIGURE D-15
TABLE D-15
Fan Module Connector
Fan Module Connector Pinouts
Pin Number
Pin Name
1
GND
2
FAN_PWR
3
FAN_TACH
4
FAN_PRESENT_L
5
FAN_PWM
6
FAN_LED
Appendix D
Connector Pinouts
D-25
D-26
Sun Fire X4600 and Sun Fire X4600 M2 Servers Service Manual • March 2011
APPENDIX
E
Serial Attached SCSI BIOS
Configuration Utility
This appendix explains how to use the LSI Logic Fusion-MPT Serial Attached SCSI
(SAS) BIOS Configuration Utility. This appendix contains the following sections:
■
“Fusion-MPT SAS BIOS Overview” on page E-1
■
“Starting the SAS BIOS Configuration Utility” on page E-2
■
“Configuration Utility Screens” on page E-3
■
“Performing RAID Configuration Tasks” on page E-41
Note – The information in this appendix applies to the original Sun Fire X4600
server, and to the Sun Fire X4600 M2 server, unless otherwise noted in the text.
E.1
Fusion-MPT SAS BIOS Overview
The Fusion-MPT SAS BIOS features include:
■
Configuration for up to 256 adapters; any four can be chosen for INT13 (bootrom)
support
■
Support for Message Passing Technology (MPT)
■
Support for the LSI53C1064 devices
■
Support for SAS and SATA devices
■
Support for Integrated RAID initialization (with proper firmware)
E-1
The SAS BIOS is the bootable ROM code that manages SAS hardware resources. It is
specific to a family of LSI Logic Fusion-MPT SAS controllers or processors. The
Fusion-MPT SAS BIOS integrates with a standard system BIOS, extending the
standard disk service routine provided through INT13h.
During the boot time initialization, the SAS BIOS determines whether the system
BIOS has already installed other hard disks, such as an IDE drive. If such drives are
already installed, the SAS BIOS maps any SAS drives it finds behind these drives.
Otherwise, the SAS BIOS installs drives starting with the system boot drive. In this
case, the system boots from a drive controlled by the SAS BIOS. The LSI Logic SAS
BIOS supports the BIOS Boot Specification (BBS).
E.1.1
Boot Initialization With BIOS Boot Specification
(BBS)
The Fusion-MPT SAS BIOS supports the BIOS Boot Specification (BBS), which allows
you to choose which device to boot from by selecting the priority.
To use this feature, the system BIOS must also be compatible with the BBS. If the
system supports the BBS, you can use the system BIOS Setup menu to select the boot
order and drive order. In the system BIOS Setup, the Boot Connection Devices menu
lists the available boot options. Use that menu to select the device and rearrange the
order. Then exit to continue the boot process.
E.2
Starting the SAS BIOS Configuration
Utility
If you have SAS BIOS version 6.xx, and it includes the Fusion-MPT SAS BIOS
Configuration Utility, you can change the default configuration of the SAS host
adapters. You may decide to change these default values if there is a conflict between
device settings or if you need to optimize system performance.
The version number of the SAS BIOS appears in a banner displayed on the computer
monitor during bootup. If the utility is available, the following message also appears
during bootup:
Press Ctrl+C to start LSI Logic Configuration Utility...
This message remains on the screen for about five seconds, giving you time to start
the utility. If you press the indicated key sequence, the message changes to:
Please wait, invoking LSI Logic Configuration Utility...
E-2
Sun Fire X4600 and Sun Fire X4600 M2 Servers Service Manual • March 2011
After a brief pause, the computer monitor displays the Main menu of the FusionMPT SAS BIOS Configuration Utility. The following messages may appear during the
boot process:
■
Adapter removed from boot order!
This message appears when an adapter was removed from the system or was
relocated behind a PCI bridge.
■
Adapter configuration may have changed, reconfiguration is
suggested!
This message appears if none of the information in the NVRAM is valid.
■
Updating Adapter List!
This message appears when fewer than four adapters are in the boot order and
more adapters exist than are shown.
Caution – The SAS BIOS Configuration Utility is a powerful tool. If, while using it,
you somehow disable all of the controllers, press Ctrl-E (or Ctrl-A on versions earlier
than 5.00) after memory initialization during reboot to re-enable and reconfigure the
controllers.
Note – Some devices detected by the Configuration Utility cannot be controlled by
the SAS BIOS. Devices such as tape drives and scanners require that a device driver
specific to that device be loaded. However, the SAS BIOS Configuration Utility does
allow you to modify parameters for these devices.
E.3
Configuration Utility Screens
All SAS BIOS Configuration Utility screens are partitioned into the following areas,
starting at the top of the screen:
■
Header Area – This area lists static information text, including the product title
and version.
■
Menu Area – This area lists the current screen title and controller information
when on screens other than Adapter List.
■
Main Area – This is the main area for presenting data. This area has a cursor for
item selection, horizontal scrolling, and vertical scrolling. The horizontal and
vertical scroll bars appear here if needed.
■
Footer Area – This area provides general help information text.
Appendix E
Serial Attached SCSI BIOS Configuration Utility
E-3
Note – The screens shown in this appendix are examples. The version numbers and
the screen items and selections shown are subject to change over the life of the
product.
E.3.1
User Input Keys
The general key inputs that are listed in TABLE E-1 apply on all screens of the SAS
BIOS Configuration Utility.
TABLE E-1
E.3.2
User Input Keys
Key
Definition
Description
F1
Help
Context-sensitive help for the field in which the cursor is
positioned.
Arrow keys
Move cursor
Up, down, left, right movement to position the cursor.
Home/End
Select item
Select the item in which the cursor is positioned.
+/-
Change item
Items with values in [ ] brackets are modifiable. Numeric
keypad + and numeric keypad - update a modifiable field
to its next relative value.
Esc
Abort/Exit
The Esc key aborts the current context operation or exits
the current screen. The user is asked to confirm, if changes
have been made.
Enter
Execute Item
Executable items are indicated by highlighted text and a
different background color. Press Enter to execute the
item’s associated function.
Throughout the GUI, selections that are not currently
permissible are grayed out.
The behavior of executable items varies throughout the
Configuration Utility.
Adapter List Screen
When you start the Fusion-MPT SAS BIOS Configuration Utility, the Adapter List
appears, as shown in EXAMPLE E-1. This screen displays a scrolling list of up to 256
LSI Logic SAS host adapters in the system and information about each of them.
TABLE E-2 describes the fields in this screen.
E-4
Sun Fire X4600 and Sun Fire X4600 M2 Servers Service Manual • March 2011
Use the arrow keys to select an adapter, then press Enter to view and modify the
selected adapter’s properties (and to access the other screens). After you select an
adapter and press Enter, the adapter’s devices are scanned and the Adapter
Properties screen appears. See EXAMPLE E-3.
To change the Adapter boot order, use the -, +, Insert, and Delete keys while on the
Boot Order field. Press Insert or Delete to add or remove an adapter to or from the
boot order. Press the - and + keys to modify an adapter’s position in the boot order.
If you make changes to the boot order, the Configuration Utility prompts you to save
the changes before you exit the screen.
From the Adapter List screen, you can also press Alt+N to access the Global
Properties screen. See EXAMPLE E-2. On this screen you can change global scope
settings.
Appendix E
Serial Attached SCSI BIOS Configuration Utility
E-5
EXAMPLE E-1
Adapter List Screen
******************************************************************************
* LSI Logic MPT Setup Utility v6.02.00.00 (2005.07.08)
*
* Adapter List Global Properties
*
* Adapter
PCI PCI PCI PCI
FW Revision
Status
Boot
*
*
Bus Dev Fnc Slot
Order
*
* SAS1064
02
03
00
00
1.04.00.00-IR
Enabled
0
*
*
*
*
*
*
*
*
*
*
*
*
*
*
*
*
*
*
*
*
*
*
*
*
*
*
*
*
*
*
*
*
*
* Esc = Exit Menu
F1/Shift+1 = Help
*
* Alt+N = Global Properties -/+ = Alter Boot Order Ins/Del = Alter Boot List *
******************************************************************************
TABLE E-2
E-6
Adapter List Screen Field Descriptions
Field
Description
Adapter
The specific LSI Logic SAS controller type.
PCI Bus
The PCI Bus number (range 0x00 - 0xFF, 0 - 255 decimal) assigned by the
system BIOS to an adapter.
PCI Dev
The PCI Device (range 0x00 - 0x1F, 0 - 31 decimal) assigned by the system
BIOS to an adapter.
PCI Fnc
The PCI Function (range 0x00 - 0x7, 0 - 7 decimal) assigned by the system
BIOS to an adapter.
PCI Slot
The PCI slot in which the controller is installed.
Sun Fire X4600 and Sun Fire X4600 M2 Servers Service Manual • March 2011
TABLE E-2
E.3.3
Adapter List Screen Field Descriptions (Continued)
Field
Description
FW Revision
The Fusion MPT firmware version and type (IR or IT).
Status
Status indicates whether an adapter is eligible for LSI Logic software control
or whether it is reserved for control by non-LSI Logic software.
• Enabled: The BIOS is either currently controlling the adapter or will
attempt to control the adapter upon reload.
• Disabled: The BIOS is either not controlling the adapter or will
discontinue control of the adapter upon reload. Whether Enabled or
Disabled, the user can still view and modify settings for the adapter. The
Boot Support setting in the Adapter Properties menu can be used to
change the status of this setting. The BIOS must be reloaded (the system
must be rebooted) in order for a new Boot Support setting to take effect.
• Error: The BIOS encountered a problem with the adapter. Adapter
settings can be viewed and modified, but the available information and
functionality may be limited.
Boot Order
The order in which adapters will boot when the system has more than one
adapter. Up to four of the total adapters in a system may be selected as
bootable. To add an adapter to the boot list, press Insert while on the Boot
Order field. To remove an adapter from the boot list, press Delete while on
the desired adapter’s Boot Order field. Press the - or + keys to change the
adapter’s position in the boot order.
Global Properties Screen
To access the Global Properties screen, press Alt+N while on the Adapter List screen.
To return to the Adapter List from Global Properties, press Alt+N again. EXAMPLE E-2
shows an example of the Global Properties screen. TABLE E-3 describes the fields in
this screen.
Appendix E
Serial Attached SCSI BIOS Configuration Utility
E-7
EXAMPLE E-2
Global Properties Screen
******************************************************************************
* Adapter List Global Properties
*
*
*
*
*
*
*
*
*
*
*
*
Pause When Boot Alert Displayed [No]
*
*
Boot Information Display Mode
[Display adapters & installed devices] *
*
Support Interrupt
[Hook interrupt, the Default]
*
*
*
*
Restore Defaults
*
*
*
*
*
*
*
*
*
*
*
*
*
*
*
*
*
*
*
* Esc = Exit Menu
F1/Shift+1 = Help
*
* Alt+N = Adapter List
*
******************************************************************************
TABLE E-3
E-8
Global Properties Screen Field Descriptions
Field
Description
Pause When Boot
Alert Displayed
This option specifies whether the BIOS pauses for user
acknowledgement after displaying an alert message during boot.
To continue after displaying a message, select No. To wait for the
user to press a key, select Yes.
Boot Information
Display Mode
This option controls how much information the BIOS displays about
adapters and devices during boot. Possible values are:
• Display adapters only.
• Display adapters and all devices.
• Display minimal information.
• Display adapters & installed devices.
Support Interrupt
This option allows you to prevent a hook on INT40, if required.
Possible values are:
• Hook interrupt (default)
• Bypass interrupt hooks
Restore Defaults
Press Enter to restore the default settings.
Sun Fire X4600 and Sun Fire X4600 M2 Servers Service Manual • March 2011
E.3.4
Adapter Properties Screen
The Adapter Properties screen allows you to view and modify adapter settings. It
also provides access to all other screens. EXAMPLE E-3 shows an example of the
Adapter Properties screen. TABLE E-4 describes the fields of the screen.
EXAMPLE E-3
Adapter Properties Screen
******************************************************************************
* LSI Logic MPT Setup Utility v6.02.00.00 (2005.07.08)
*
* Adapter Properties -- SAS1064
*
*
*
*
Adapter
SAS1064
*
*
PCI Slot
00
*
*
PCI Address(Bus/Dev/Func)
02:03:00
*
*
MPT Firmware Revision
1.04.00.00-IR
*
*
SAS Address
50003BA0:000003BA
*
*
Status
Enabled
*
*
Boot Order
0
*
*
Boot Support
[Enabled BIOS & OS]
*
*
*
*
RAID Properties
*
*
*
*
SAS Topology
*
*
*
*
Advanced Adapter Properties
*
*
*
*
*
*
*
*
*
* Esc = Exit Menu
F1/Shift+1 = Help
*
* Enter = Select Item
-/+ = Change Item
*
******************************************************************************
TABLE E-4
Adapter Properties Screen Field Descriptions
Field
Description
Adapter
The specific LSI Logic SAS controller type.
PCI Slot
The PCI slot in which the controller is located.
PCI Address
The PCI address assigned to the adapter by the system BIOS.
Bus value has range 0x00 - 0xFF, 0 - 255 decimal.
Device value has range 0x00 - 0x1F, 0 - 31 decimal.
Function has range 0x00 - 0x7, 0 - 7 decimal.
Appendix E
Serial Attached SCSI BIOS Configuration Utility
E-9
TABLE E-4
E-10
Adapter Properties Screen Field Descriptions (Continued)
Field
Description
MPT Firmware
Revision
The Fusion MPT firmware version and type (IR or IT).
SAS Address
The SAS Address assigned to this adapter.
Status
Indicates whether an adapter is eligible for LSI Logic software
control, or whether it is reserved for control by non-LSI Logic
software:
• Enabled: The BIOS is either currently controlling the adapter or
will attempt to control the adapter upon reload.
• Disabled: The BIOS is either not controlling the adapter or will
discontinue control of the adapter upon reload. Whether Enabled
or Disabled, the user can still view and modify settings for the
adapter. The Boot Support setting in the Adapter Properties menu
can be used to change the status of this setting. The BIOS must be
reloaded (the system must be rebooted) in order for a new Boot
Support setting to take effect.
• Error: The BIOS encountered a problem with the adapter. Adapter
settings can be viewed and modified, but the available information
and functionality may be limited.
Boot Order
The order in which adapters will boot when the system has more
than one adapter. Up to four of the total adapters in a system may be
selected as bootable.
Boot Support
Indicates whether an adapter is eligible for LSI Logic software control
or whether it is reserved for control by non-LSI Logic software. The
options are:
• Enabled BIOS & OS (default): Both the BIOS and OS driver will
control the adapter.
• Enabled BIOS Only: The BIOS will control the adapter; OS drivers
will not control it. Some OS drivers do not support this setting. For
example, there is no way to disable an adapter in a Windows
driver.
• Enabled OS Only: The BIOS will not control the adapter; the OS
driver will control the adapter.
• Disabled: The BIOS will not control the adapter when loaded.
However, the adapter will still be visible through the
Configuration Protocol.
Changes to this setting are reflected in the Status field on the main
Adapter List menu. The new setting does not take effect until the
BIOS is reloaded (that is, until the system is rebooted).
RAID Properties
Press Enter on this field to access this screen.
SAS Topology
Press Enter on this field to access this screen.
Advanced Adapter
Properties
Press Enter on this field to access this screen.
Sun Fire X4600 and Sun Fire X4600 M2 Servers Service Manual • March 2011
E.3.5
SAS Topology Screen
The SAS Topology screen presents a view of the adapter’s SAS hierarchy, as shown
in EXAMPLE E-4. You can scroll right to view additional information about the devices
(see EXAMPLE E-5 through EXAMPLE E-8.) Descriptions of the fields are given in
TABLE E-5.
The SAS Topology screen shows the following objects and their significant properties:
EXAMPLE E-4
■
Adapter
■
PHYs
■
Attached Devices
■
Expanders/Enclosures
SAS Topology Screen
******************************************************************************
* LSI Logic MPT Setup Utility v6.02.00.00 (2005.07.08)
*
* SAS Topology -- SAS1064
*
*
Device Identifier
Discovery
Device
*
* SAS1064(02:03:00)
Status
Info
*
* * PHY 0
Good
*
* * PHY 1
Good
*
* * PHY 2
SEAGATE ST936701LSUN36G 0456
Good
SAS
*
* * PHY 3
SEAGATE ST973401LSUN72G 0356
Good
SAS
*
*
*
*
*
*
*
*
*
*
*
*
*
*
*
*
*
*
*
*
*
*
*
*
*
*
*
* Esc=Exit
F1=Help
Alt+M=More Keys
*
* Alt+D=Device Properties
Alt+E=Expander Properties
*
******************************************************************************
To expand the SAS Topology display, select an expander or enclosure and press Enter
to display all its PHYs/devices/bays. To collapse the display, press Enter again.
While the cursor is on the Device Identifier you can perform the following actions:
Appendix E
Serial Attached SCSI BIOS Configuration Utility
E-11
■
Press Alt+E to access a specific Expander Properties screen or press Alt+D to
access a specific Device Properties screen.
■
Press Enter while on an expander or enclosure to expand or collapse the display.
■
Press Enter while on a device to activate the Locate LED.
At any time while on the screen press C to clear Device Mappings for non-present
devices. Scroll the cursor to the right to display further information (see EXAMPLE E-5
through EXAMPLE E-8).
E-12
Sun Fire X4600 and Sun Fire X4600 M2 Servers Service Manual • March 2011
EXAMPLE E-5
SAS Topology Screen Continued 1
******************************************************************************
* SAS Topology -- SAS1064
*
*
Device Identifier
Negotiated Link
*
* SAS1064(02:03:00)
Speed(Gbps)
*
* * PHY 0
Unknown
*
* * PHY 1
Unknown
*
* * PHY 2
SEAGATE ST936701LSUN36G 0456
3.0
*
* * PHY 3
SEAGATE ST973401LSUN72G 0356
3.0
*
*
*
*
*
*
*
*
*
*
*
*
*
*
*
*
*
*
*
*
*
*
*
*
*
*
*
* Esc=Exit
F1=Help
Alt+M=More Keys
*
* Alt+D=Device Properties
Alt+E=Expander Properties
*
******************************************************************************
EXAMPLE E-6
SAS Topology Screen Continued 2
******************************************************************************
* SAS Topology -- SAS1064
*
*
Device Identifier
Maximum Link
*
* SAS1064(02:03:00)
Speed(Gbps)
*
* * PHY 0
3.0
*
* * PHY 1
3.0
*
* * PHY 2
SEAGATE ST936701LSUN36G 0456
3.0
*
* * PHY 3
SEAGATE ST973401LSUN72G 0356
3.0
*
*
*
*
*
*
*
*
*
*
*
*
*
*
*
*
*
*
*
*
*
*
*
Appendix E
Serial Attached SCSI BIOS Configuration Utility
E-13
*
*
* Esc=Exit
F1=Help
Alt+M=More Keys
*
* Alt+D=Device Properties
Alt+E=Expander Properties
*
******************************************************************************
E-14
Sun Fire X4600 and Sun Fire X4600 M2 Servers Service Manual • March 2011
EXAMPLE E-7
SAS Topology Screen Continued 3
******************************************************************************
**
* SAS Topology -- SAS1064
*
*
Device Identifier
Target
*
* SAS1064(02:03:00)
Capabilities
*
* * PHY 0
*
* * PHY 1
*
* * PHY 2
SEAGATE ST936701LSUN36G 0456
SSP
*
* * PHY 3
SEAGATE ST973401LSUN72G 0356
SSP
*
*
*
*
*
*
*
*
*
*
*
* Esc=Exit
F1=Help
Alt+M=More Keys
*
* Alt+D=Device Properties
Alt+E=Expander Properties
*
******************************************************************************
EXAMPLE E-8
SAS Topology Screen Continued 4
******************************************************************************
* SAS Topology -- SAS1064
*
*
Device Identifier
Initiator
*
* SAS1064(02:03:00)
Capabilities
*
* * PHY 0
*
* * PHY 1
*
* * PHY 2
SEAGATE ST936701LSUN36G 0456
*
* * PHY 3
SEAGATE ST973401LSUN72G 0356
*
*
*
*
*
*
*
*
*
*
*
*
*
*
*
*
*
*
*
*
*
*
*
*
*
*
*
* Esc=Exit
F1=Help
Alt+M=More Keys
*
* Alt+D=Device Properties
Alt+E=Expander Properties
*
******************************************************************************
Appendix E
Serial Attached SCSI BIOS Configuration Utility
E-15
TABLE E-5
E.3.6
SAS Topology Screens Field Descriptions
Field
Description
Device Identifier
The ASCII device identifier string extracted from the device’s inquiry
data.
Discovery Status
The status of SAS topology discovery on this directly attached PHY
or on an expander. This field is only an indicator of an error being
encountered. For specific details and the error value, see the
Expander Properties page for expanders and the PHY Properties
page for directly attached PHYs.
Device Info
Indicates whether a device is SAS or SATA and whether the device
has been selected as the boot device.
Negotiated Link
Speed
The negotiated link speed for this PHY, in Gbits/s. This field also
indicates whether the PHY has been disabled.
Maximum Link
Speed
The maximum hardware link rate possible for this PHY, in Gbits/s.
Target Capabilities
The target capabilities for this device. The following acronyms are
used:
• SSP: Serial SCSI Protocol
• SMP : Serial Management Protocol
Initiator Capabilities
The initiator capabilities for this device. The following acronyms are
used:
• SSP: Serial SCSI Protocol
• SMP : Serial Management Protocol
Device Properties Screen
The Device Properties screen displays information about a specific device, as shown
in EXAMPLE E-9. To access this screen, press Alt+D on the SAS Topology screen when
the cursor is on the Device Identifier field of a device.
Press Alt+N or Alt+P at any time while on this screen to cycle to the next or previous
device.
E-16
Sun Fire X4600 and Sun Fire X4600 M2 Servers Service Manual • March 2011
EXAMPLE E-9
Device Properties Screen
******************************************************************************
* LSI Logic MPT Setup Utility v6.02.00.00 (2005.07.08)
*
* Device Properties -- SAS1064
*
*
*
*
*
*
Device Identifier
SEAGATE ST936701LSUN36G 0456
*
*
Scan Order
2
*
*
Device Information SAS
*
*
SAS Address
5000C500:001047C9
*
*
Serial Number
39000SZC
3LC
*
*
*
*
Verify
*
*
*
*
*
*
*
*
*
*
*
*
*
*
*
*
*
*
*
*
*
* Esc=Exit
F1=Help
Alt+M=More Keys
*
* Alt+N = Next Device
Alt+P = Previous Device
Enter = Select Item
*
******************************************************************************
TABLE E-6
Device Properties Screen Field Descriptions
Field
Description
Device Identifier
The ASCII device identifier string extracted from the device’s inquiry
data.
Scan Order
The scan order for this device. This is the equivalent of a SCSI ID in
parallel SCSI.
Device Information
Indicates whether the device is SAS or SATA.
SAS Address
The SAS address of this device.
Serial Number
The serial number of this device.
Verify
Press Enter to access the Verify All Sectors screen. From this screen
you can start a verification of all sectors on the device (see “Device
Verify Screen” on page E-18). If needed, you can reassign defective
Logical Block Addresses (LBAs), as described in the text following
TABLE E-7.
Appendix E
Serial Attached SCSI BIOS Configuration Utility
E-17
E.3.7
Device Verify Screen
To access the Device Verify screen, press Enter on the appropriate field on the Device
Properties screen. This screen includes an Elapsed Time and status bar, which begins
incrementing when the operation is started and which shows the current progress of
the operation.
When the Device Verify screen appears (see EXAMPLE E-10), press Enter to begin the
verify process. You may press Esc at any time to cancel the verify process. TABLE E-7
describes the fields of the screen.
E-18
Sun Fire X4600 and Sun Fire X4600 M2 Servers Service Manual • March 2011
EXAMPLE E-10
Device Verify Screen
******************************************************************************
* Device Verify -- SAS1064
*
*
*
*
Device Identifier
SEAGATE ST936701LSUN36G 0456
*
*
SAS Address
5000C500:001047C9
*
*
Serial Number
39000SZC
3LC
*
*
*
*
All sectors on the device will be verified.
*
*
Press Enter to continue or any other key to cancel.
*
*
*
*
*
*
*
*
*
*
Elapsed Time:
00:00:00
*
*
*
*
Percent
*
*
Complete
0%
100%
*
*
**************************************************
*
*
*
*
*
*
**************************************************
*
*
*
* Esc=Exit
F1=Help
Alt+M=More Keys
*
******************************************************************************
TABLE E-7
Device Verify Screen Field Descriptions
Field
Description
Device Identifier
The ASCII device identifier string extracted from the device’s inquiry
data.
SAS Address
The SAS address of this device.
Serial Number
The serial number of this device.
Elapsed Time
The total time elapsed since the Format or Verify operation started.
Percent Complete
Graphical status bar that shows the current completion status of the
operation.
If the Logical Block Addresses (LBAs) can be reassigned or need to be reassigned, the
following prompt appears:
Reassign the block?(Yes, No, All, nonE, Cancel)
The reassignment options are as follows:
■
Yes: Reassign only this block. If another block needs to be reassigned in the future,
display the prompt again.
Appendix E
Serial Attached SCSI BIOS Configuration Utility
E-19
E.3.8
■
No: Do not reassign this block. If another block needs to be reassigned in the
future, display the prompt again.
■
All: Reassign the current block, and automatically reassign other blocks that need
it, without displaying the prompt again.
■
nonE: Do not reassign the current block, and do not automatically reassign any
other blocks that need it. Do not display the prompt again.
■
Cancel: Do not reassign anything, and stop the verification process.
Advanced Adapter Properties Screen
The Advanced Adapter Properties screen (see EXAMPLE E-11) allows you to view and
modify infrequently accessed adapter settings. TABLE E-8 describes the fields of the
screen.
The Advanced Adapter Properties screen provides access to advanced Device
Properties and PHY Properties. To modify the Link Error Settings Threshold Count
and Threshold Time, press Enter while the cursor is on the desired field and type the
new value.
E-20
Sun Fire X4600 and Sun Fire X4600 M2 Servers Service Manual • March 2011
EXAMPLE E-11
Advanced Adapter Properties Screen
******************************************************************************
* LSI Logic MPT Setup Utility v6.02.00.00 (2005.07.08)
*
* Advanced Adapter Properties -- SAS1064
*
*
*
*
IRQ
0B
*
*
NVM
Yes
*
*
IO Port Address
A800
*
*
Chip Revision ID
02
*
*
*
*
Spinup Delay (Secs)
[ 2]
*
*
CHS Mapping
[SCSI Plug and Play Mapping]
*
*
*
*
Link Error
Threshold Threshold
*
*
Settings
Count
Time(Secs)
*
*
Invalid DWORDs
0
0
*
*
Loss of DWORD Sync
0
0
*
*
Running Disparity Errors
0
0
*
*
PHY Reset Errors
0
0
*
*
*
*
Advanced Device Properties
*
*
PHY Properties
*
*
Restore Defaults
*
* Esc = Exit Menu
F1/Shift+1 = Help
*
* Enter = Select Item
-/+ = Change Item
*
******************************************************************************
TABLE E-8
Advanced Adapter Properties Screen Field Descriptions
Field
Description
IRQ
The Interrupt Request Line used by the adapter. The system BIOS
assigns this value.
NVM
Indicates whether an adapter has nonvolatile memory (NVM)
associated with it. An adapter’s configuration is stored in its
associated NVM.
IO Port Address
The I/O Port Address used to communicate with the adapter. The
system BIOS assigns this number.
Chip Revision ID
The Revision ID of this adapter.
Spinup Delay
The number of seconds to wait between spinups of devices attached
to this adapter. Staggered spinups balance the total electrical current
load on the system during boot. The default value is 2 seconds, with
choices between 1 and 10 seconds.
Appendix E
Serial Attached SCSI BIOS Configuration Utility
E-21
TABLE E-8
Advanced Adapter Properties Screen Field Descriptions (Continued)
Field
Description
CHS Mapping
Defines how the Cylinder Head Sector values are mapped onto a disk
without pre-existing partition information. CHS Mapping allows two
settings:
• SCSI Plug-and-Play Mapping (default) automatically determines
the most efficient and compatible mapping.
• Alternate CHS Mapping utilizes an alternate, possibly less efficient,
mapping that may be required if a device is moved between
adapters from different vendors.
Note: Neither of these options has any effect after a disk has been
partitioned using the FDISK command. To change the CHS Mapping
on a partitioned disk, use the FDISK command to delete all
partitions. Then reboot the system to clear memory. Otherwise, the
old partitioning data will be reused.
Link Error Settings
• Invalid DWORDs: The number of invalid dwords that have been
received, outside of PHY reset sequences, since the last PHY Link
Error Reset.
• Loss of DWORD Sync: The number of times, since the last PHY
Link Error Reset, that DWORD synchronization was lost and the
link reset sequence occurred.
• Running Disparity Errors: The number of DWORDS with running
disparity errors that have been received, outside of PHY reset
sequences, since the last PHY Link Error Reset.
• PHY Reset Errors: The number of times the PHY reset sequence has
failed, since the last PHY Link Error Reset.
Threshold Count
Link error count threshold values. When a Link Error Count exceeds
a Threshold Count within the Threshold Time (secs) the Fusion-MPT
FW may reduce the link rate. Press Enter on any of these fields to
modify the value.
Threshold Time (secs) Time, in seconds, over which to apply the Threshold Count. When a
Link Error Count exceeds a Threshold Count within the Threshold
Time (secs) the Fusion-MPT FW may reduce the link rate. Press Enter
on any of these fields to modify the value.
E-22
Advanced Device
Properties
Press Enter to view and modify Advanced Device Properties (see
“Advanced Device Properties Screen” on page E-23).
PHY Properties
Press Enter to view and modify PHY properties (see “PHY Properties
Screen” on page E-27).
Restore Defaults
Press Enter to restore the default values for all items on this screen.
Sun Fire X4600 and Sun Fire X4600 M2 Servers Service Manual • March 2011
E.3.9
Advanced Device Properties Screen
The Advanced Device Properties screen (EXAMPLE E-12) allows you to view and
modify infrequently accessed device settings. TABLE E-9 describes the fields of the
screen.
Appendix E
Serial Attached SCSI BIOS Configuration Utility
E-23
EXAMPLE E-12
Advanced Device Properties Screen
******************************************************************************
* LSI Logic MPT Setup Utility v6.02.00.00 (2005.07.08)
*
* Advanced Device Properties -- SAS1064
*
*
*
*
Maximum INT 13 devices for this adapter
24
*
*
Maximum Target device spinups
1
*
*
*
*
IO Timeout for Block Devices
10
*
*
IO Timeout for Block Devices(Removable)
10
*
*
IO Timeout for Sequential Devices
10
*
*
IO Timeout for Other devices
10
*
*
*
*
LUNs to Scan for Block Devices
[All]
*
*
LUNs to Scan for Block Devices(Removable) [All]
*
*
LUNs to Scan for Sequential Devices
[All]
*
*
LUNs to Scan for Other Devices
[All]
*
*
*
*
Removable Media support
[None]
*
*
*
*
Restore Defaults
*
*
*
*
*
* Esc = Exit Menu
F1/Shift+1 = Help
*
* Enter = Select Item
-/+ = Change Item
*
******************************************************************************
E-24
Sun Fire X4600 and Sun Fire X4600 M2 Servers Service Manual • March 2011
TABLE E-9
Advanced Device Properties Screen Field Descriptions
Field
Description
Maximum INT 13
devices for this
adapter
The maximum number of devices attached to the adapter for which
to install a pre-OS I/O interface. The specified number of devices in
the adapter’s device scan order list will have an I/O interface
installed. (An installed I/O interface is defined as INT 13H.) X86
platforms allow a maximum of 24 INT 13h devices per system.
Therefore, fewer than the specified number of INT 13h devices may
be installed. The default for X86 is 24 devices, with a range of 0-24
allowed.
Maximum target
device spinups
The maximum number of targets that can simultaneously spin up.
The IOC must delay by the time indicated in the spin-up delay field
before it starts spin-up of the next set of targets. A value of 0 in this
field is treated the same as a value of 1.
IO Timeout for Block
Devices
The time, in seconds, (0-999, 0 = no-time-out) that the host uses to
timeout I/Os for the following devices with nonremovable media:
• SCSI Device Type 00h - Direct Access
• SCSI Device Type 04h - Write Once
• SCSI Device Type 07h - Optical
• SCSI Device Type 0Eh - Simplified Direct Access
IO Timeout for Block
Devices (Removable)
The time, in seconds, (0-999, 0 = no-timeout) that the host uses to
timeout I/Os for the following devices with removable media:
• SCSI Device Type 00h - Direct Access
• SCSI Device Type 04h - Write Once
• SCSI Device Type 05h - CD-ROM
• SCSI Device Type 07h - Optical
• SCSI Device Type 0Eh - Simplified Direct Access
IO Timeout for
Sequential Devices
The time, in seconds, (0-999, 0 = no-timeout) that the host uses to
timeout I/Os for the following devices:
• SCSI Device Type 01h - Sequential Access
IO Timeout for Other
Devices
The time, in seconds, (0-999, 0 = no-timeout) that the host uses to
timeout I/Os for devices other than the following:
• SCSI Device Type 00h - Direct Access
• SCSI Device Type 01h - Sequential Access
• SCSI Device Type 04h - Write Once
• SCSI Device Type 05h - CD-ROM
• SCSI Device Type 07h - Optical
• SCSI Device Type 0Eh - Simplified Direct Access
Appendix E
Serial Attached SCSI BIOS Configuration Utility
E-25
TABLE E-9
E-26
Advanced Device Properties Screen Field Descriptions (Continued)
Field
Description
LUNs to Scan for
Block Devices
Controls LUN scans for the following devices with nonremovable
media:
• SCSI Device Type 00h - Direct Access
• SCSI Device Type 04h - Write Once
• SCSI Device Type 07h - Optical
• SCSI Device Type 0Eh - Simplified Direct Access
LUN 0 Only: Scan only LUN 0.
All: Scan all LUNs.
LUNs to Scan for
Block Devices
(Removable)
Controls LUN scans for the following devices with removable media:
• SCSI Device Type 00h - Direct Access
• SCSI Device Type 04h - Write Once
• SCSI Device Type 05h - CD-ROM
• SCSI Device Type 07h - Optical
• SCSI Device Type 0Eh - Simplified Direct Access.
LUN 0 Only: Scan only LUN 0.
All: Scan all LUNs.
LUNs to Scan for
Sequential Devices
Controls LUN scans for the following device:
• SCSI Device Type 01h - Sequential Access
LUN 0 Only: Scan only LUN 0.
All: Scan all LUNs.
Sun Fire X4600 and Sun Fire X4600 M2 Servers Service Manual • March 2011
TABLE E-9
E.3.10
Advanced Device Properties Screen Field Descriptions (Continued)
Field
Description
LUNs to Scan for
Other Devices
Controls LUN scans for all devices other than the following:
• SCSI Device Type 00h - Direct Access
• SCSI Device Type 01h - Sequential Access
• SCSI Device Type 04h - Write Once
• SCSI Device Type 05h - CD-ROM
• SCSI Device Type 07h - Optical
• SCSI Device Type 0Eh - Simplified Direct Access
LUN 0 Only: Scan only LUN 0.
All: Scan all LUNs.
Removable Media
Support
• None: Install no INT 13H interface for any Direct Access removable
media devices.
• Boot Device Only: Install INT 13H interface for a Direct Access
removable media device if, and only if, media is present in the
device at the time of BIOS initialization and either:
• BBS System: The device is selected as the boot device. (Refer to the
BIOS Boot Specification for a description of BBS.)
• Non-BBS System: The device is set up as the boot device. The
adapter to which the device is connected is specified as the first
adapter (i.e., 0) in the Boot Adapter List. The device is specified as
the first device in the adapter’s device scan order list.
• With Media Installed: Install INT 13H interfaces for Direct Access
Removable Media devices if media is present in the device at the
time of BIOS initialization.
Restore Defaults
Press Enter to restore the default values for all items on this screen.
PHY Properties Screen
The PHY Properties screen (EXAMPLE E-13) allows you to view and modify PHYspecific settings. TABLE E-10 describes the fields of the screen.
Note – The Link Error Settings values on this screen only display the current values
for this PHY and cannot be modified. To modify the Threshold values, return to the
Advanced Adapter Properties screen.
Appendix E
Serial Attached SCSI BIOS Configuration Utility
E-27
EXAMPLE E-13
PHY Properties Screen
******************************************************************************
* LSI Logic MPT Setup Utility v6.02.00.00 (2005.07.08)
*
* PHY Properties -- SAS1064
*
*
*
*
PHY
2 (3rd of 4 PHYs)
*
*
SAS Port
2
*
*
Link Status
Enabled, 3.0 Gbps
*
*
Discovery Status
00000000
*
*
*
*
Device Identifier
FUJITSU MAV2073RCSUN72G 0301
*
*
Scan Order
2
*
*
Device Information
SAS
*
*
SAS Address
500000E0:10D26642
*
*
*
*
Link Error
Link Error Threshold Threshold
*
*
Settings
Count
Count
Time(Secs)
*
*
Invalid DWORDs
0
0
0
*
*
Loss of DWORD Sync
0
0
0
*
*
Running Disparity Errors
0
0
0
*
*
PHY Reset Errors
0
0
0
*
*
Reset Link Error Counts
*
*
*
* Esc = Exit Menu
F1/Shift+1 = Help
*
* Enter = Reset Phy error logs
Alt+N = Next Phy
Alt+P = Previous Phy
*
******************************************************************************
TABLE E-10
E-28
PHY Properties Screen Field Descriptions
Field
Description
PHY
The PHY number for which this information applies.
SAS Port
The associated SAS Port (0 to N) as configured on this adapter.
Link Status
The PHY link status. Possible values are:
• Enabled, Unknown Link Rate
• PHY Disabled
• Enabled, negotiation failed
• Enabled, 1.5 Gbps
• Enabled, 3.0 Gbps
Sun Fire X4600 and Sun Fire X4600 M2 Servers Service Manual • March 2011
TABLE E-10
PHY Properties Screen Field Descriptions (Continued)
Field
Description
Discovery Status
A 32-bit hexadecimal value indicating the discovery status for the
PHY or expander. Currently defined values are:
• Discovery Completed Successfully 0x00000000
• Loop Detected 0x00000001
• Unaddressable Device Exists 0x00000002
• Multiple Ports 0x00000004
• Expander Error 0x00000008
• SMP Timeout 0x00000010
• Out of Route Entries 0x00000020
• SMP Response Index Does Not Exist 0x00000040
• SMP Response Function Failed 0x00000080
• SMP CRC Error 0x00000100
Device Identifier
The ASCII device identifier string extracted from the device’s inquiry
data.
Scan Order
The scan order for this device. This is the equivalent of a SCSI ID for
parallel SCSI.
Device Information
Indicates whether a device is SAS or SATA.
SAS Address
The SAS address of this device.
Link Error Settings
• Invalid DWORDs: The number of invalid DWORDs that have been
received, outside of PHY reset sequences, since the last PHY Link
Error Reset. The count stops when it reaches the maximum value.
• Loss of DWORD Sync: The number of times, since the last PHY
Link Error Reset, that DWORD synchronization was lost and the
link reset sequence occurred. The count stops when it reaches the
maximum value.
• Running Disparity Errors: The number of DWORDs with running
disparity errors that have been received, outside of PHY reset
sequences, since the last PHY Link Error Reset. The count stops
when it reaches the maximum value.
• PHY Reset Errors: The number of times the PHY reset sequence has
failed, since the last PHY Link Error Reset. The count stops when it
reaches the maximum value.
Link Error Count
Actual link error count values since the last PHY Link Error Reset.
The counts stop when they reach their maximum value.
Appendix E
Serial Attached SCSI BIOS Configuration Utility
E-29
TABLE E-10
PHY Properties Screen Field Descriptions (Continued)
Field
Description
Threshold Count
Link error count threshold values. When a Link Error Count exceeds
a Threshold Count within the Threshold Time (secs), the Fusion-MPT
FW may reduce the link rate.
Threshold Time (secs) Time, in seconds, over which to apply Threshold Count. When a Link
Error Count exceeds a Threshold Count within the Threshold Time
(secs), the Fusion-MPT FW may reduce the link rate.
Reset Link Error
Counts
E.3.11
Press Enter to reset the Link Error Counts for this PHY or all PHYs.
This operation issues a PHY Link Error Reset - SAS IO Unit Control
Request Message.0
Note: When you press Enter, the following prompt appears:
Are you sure you want to reset Phy error counts?
Reset error counts for this Phy only
Reset error counts for all Phys
Cancel
Integrated RAID Configuration and Management
Screens
Integrated RAID configuration and management involves many screens, all of which
are accessed by selecting RAID Properties on the Adapter Properties screen (see
EXAMPLE E-3).
■
If no RAID volumes are currently configured, you are asked to create a RAID
volume.
■
If at least one RAID volume is currently configured, you are shown the current
volume(s) for management purposes.
The screens in the RAID configuration and management area are:
E.3.11.1
■
Select New Array Type
■
Create New Array
■
View Array
■
Manage Array
Select New Array Type Screen
Select the type of array to create, as shown in EXAMPLE E-14.
The two new array type options are described in the text that appears on the screen.
E-30
Sun Fire X4600 and Sun Fire X4600 M2 Servers Service Manual • March 2011
EXAMPLE E-14
Select New Array Type Screen
******************************************************************************
* LSI Logic MPT Setup Utility v6.02.00.00 (2005.07.08)
*
* Select New Array Type -- SAS1064
*
*
*
*
*
*
Create IM Volume
Create Integrated Mirror Array of 2
*
*
disks plus an optional hot spare. Data
*
*
on the primary disk may be migrated.
*
*
*
*
*
*
Create IS Volume
Create Integrated Striping array of
*
*
2 to 8 disks.
*
*
ALL DATA on array disks will be DELETED!
*
*
*
* Esc = Exit Menu
F1/Shift+1 = Help
*
* Enter = Choose array type to create
Esc = Return to Adapter Properties
*
*****************************************************************************
E.3.11.2
Create New Array Screen
The Create New Array screen allows you to select disks for a new array.
EXAMPLE E-15 shows this screen. TABLE E-11 describes the fields of the screen.
For an IM volume, when the first disk is added you are asked about the data on the
disks. You have two options:
■
Press M to keep the existing data and migrate to an IM array. Disk synchronization
will occur.
■
Press D to overwrite existing data and create a new IM array. All data on all disks in
the array will be deleted. No synchronization occurs.
After the volume is configured, press C to create the array. You are asked to save
changes, which will create the array. After the array is created, the utility returns you
to the Adapter Properties screen.
Appendix E
Serial Attached SCSI BIOS Configuration Utility
E-31
EXAMPLE E-15
Create New Array Screen
******************************************************************************
* LSI Logic MPT Setup Utility v6.02.00.00 (2005.07.08)
*
* Create New Array -- SAS1064
*
*
Array Type:
IM
*
*
Array Size(MB):
69618
*
*
*
* Scan Device Identifier
RAID
Hot
Drive
Pred Size
*
* ID
Disk
Spr
Status
Fail (MB)
*
*
2
FUJITSU MAV2073RCSUN72G 0301 [Yes] [No]
Primary
--70007
*
*
3
FUJITSU MAV2073RCSUN72G 0301 [Yes] [No]
Secondary --70007
*
*
*
*
*
*
*
*
*
*
*
*
*
*
*
*
*
*
*
*
*
*
*
*
*
* Esc = Exit Menu
F1/Shift+1 = Help
*
* Space/+/- = Select disk for array or hot spare
C = Create array
*
******************************************************************************
TABLE E-11
E-32
Create New Array Screen Field Descriptions
Field
Description
Array Type
The type of array being created: IM or IS.
Array Size
The size of the array, in Mbytes.
Scan ID
The order in which devices are scanned.
Device Identifier
The ASCII device identifier string extracted from the device’s inquiry
data.
RAID Disk
Specifies whether the disk is part of a RAID array (Yes or No). This
field is grayed out under the following conditions:
• The disk does not meet the minimum requirements for use in a
RAID array.
• The disk is not large enough to mirror existing data on the primary
drive.
• This disk has been selected as the Hot Spare for the RAID array.
Sun Fire X4600 and Sun Fire X4600 M2 Servers Service Manual • March 2011
TABLE E-11
Create New Array Screen Field Descriptions
Field
Description
Hot Spr
Specifies whether the disk is the Hot Spare for a RAID array (Yes or
No). RAID Arrays are not required to have a Hot Spare. Only one
Hot Spare per RAID array is permitted. You can define a Hot Spare
when you create an array or at any time after creation, if the array is
made up of two disks or fewer. This field is grayed out under the
following conditions:
• The disk does not meet the minimum requirements for use in a
RAID array.
• The array already has a Hot Spare.
• The array is made up of the maximum number of disks (three).
• The disk is not large enough to mirror existing data on the primary
disk.
• Integrated Striping firmware is used. (Striped arrays do not
support Hot Spares.)
Appendix E
Serial Attached SCSI BIOS Configuration Utility
E-33
TABLE E-11
Create New Array Screen Field Descriptions
Field
Description
Drive Status
•
•
•
•
•
•
•
•
•
•
•
•
•
•
•
•
E.3.11.3
Ok: Disk is online and fully functional.
Missing: Disk is not responding.
Failed: Disk has failed.
Initing: Disk is initializing.
CfgOffln: Disk is offline at host’s request.
UserFail: Disk is marked failed at host’s request.
Offline: Disk is offline for some other reason.
Inactive: Disk has been set inactive.
Not Syncd: Data on disk is not synchronized with the rest of the
array.
Primary: Disk is the primary disk for a two-disk mirror and is
operating properly.
Secondary: Disk is the secondary disk for a two-disk mirror and is
operating properly.
Wrg Type: Device is not compatible for use as part of a RAID array.
Too Small: Disk is too small to mirror existing data.
Max Dsks: Maximum number of disks allowed for this type of
array reached, or maximum number of total IR disks on a
controller reached.
No SMART: Disk does not support SMART, cannot be used in an
array.
Wrg Intfc: Device interface (SAS) differs from existing IR disks.
Pred Fail
Indicates whether SMART is predicting device failure (Yes or No).
Size (MB)
The size of the device, in Mbytes (1 Mbyte = (1024 x 1024) = 1,048,576
bytes). If the device is part of a two-disk array, this field reflects the
size of the array, not the size of the individual disk. If the device is
part of an array of three or more disks, this field is the size that the
disk makes up within the array.
Note: When creating a striped array, the usable size of the array is
determined by the number of drives, multiplied by the size of the
smallest drive in the array. In arrays consisting of different sized
drives, excess space on larger drives is unusable.
View Array Screen
The View Array screen allows you to view the current array configuration, as shown
in EXAMPLE E-16. Press Alt+N to view the next array. Press C to create a new array.
TABLE E-12 describes the fields of the screen.
E-34
Sun Fire X4600 and Sun Fire X4600 M2 Servers Service Manual • March 2011
EXAMPLE E-16
View Array Screen
******************************************************************************
* LSI Logic MPT Setup Utility v6.02.00.00 (2005.07.08)
*
* View Array -- SAS1064
*
*
Array
1 of 1
*
*
Identifier
LSI LOGIC Logical Volume 3000
*
*
Type
IM
*
*
Scan Order
2
*
*
Size(MB)
69618
*
*
Status
Optimal
*
*
*
*
Manage Array
*
*
*
* Scan Device Identifier
RAID
Hot
Drive
Pred Size
*
* ID
Disk
Spr
Status
Fail (MB)
*
*
3
FUJITSU MAV2073RCSUN72G 0301 Yes
No
Secondary No
69618
*
*
4
FUJITSU MAV2073RCSUN72G 0301 Yes
No
Primary
No
69618
*
*
*
*
*
*
*
*
*
*
*
*
*
* Esc = Exit Menu
F1/Shift+1 = Help
*
* Enter=Select Item Alt+N=Next Array C=Create an array
*
******************************************************************************
TABLE E-12
View Array Screen Field Descriptions
Field
Description
Array
The number of the array.
Identifier
The identifier of the array.
Type
The RAID type of the array.
Scan Order
The scan order of the array.
Size (MB)
The size of the array.
Status
The status of the array.
Scan ID
The order in which devices are scanned.
Device Identifier
The ASCII device identifier string extracted from the device’s inquiry
data.
Appendix E
Serial Attached SCSI BIOS Configuration Utility
E-35
TABLE E-12
E-36
View Array Screen Field Descriptions (Continued)
Field
Description
RAID Disk
Specifies whether the disk is part of a RAID array (Yes or No). This
field is grayed out under the following conditions:
• The disk does not meet the minimum requirements for use in a
RAID array.
• The disk is not large enough to mirror existing data on the primary
drive.
• This disk has been selected as the Hot Spare for the RAID array.
Hot Spr
Specifies whether the disk is the Hot Spare for a RAID array (Yes or
No). RAID Arrays are not required to have a Hot Spare. Only one
Hot Spare per RAID array is permitted. You can define a Hot Spare
when you create an array or at any time after creation, if the array is
made up of two disks or fewer. This field is grayed out under the
following conditions:
• The disk does not meet the minimum requirements for use in a
RAID array.
• The array already has a Hot Spare.
• The array is made up of the maximum number of disks (three).
• The disk is not large enough to mirror existing data on the primary
disk.
• Integrated Striping firmware is used. (Striped arrays do not
support Hot Spares.)
Sun Fire X4600 and Sun Fire X4600 M2 Servers Service Manual • March 2011
TABLE E-12
View Array Screen Field Descriptions (Continued)
Field
Description
Drive Status
•
•
•
•
•
•
•
•
•
•
•
•
•
•
•
•
E.3.11.4
Ok: Disk is online and fully functional.
Missing: Disk is not responding.
Failed: Disk has failed.
Initing: Disk is initializing.
CfgOffln: Disk is offline at host’s request.
UserFail: Disk is marked failed at host’s request.
Offline: Disk is offline for some other reason.
Inactive: Disk has been set inactive.
Not Syncd: Data on disk is not synchronized with the rest of the
array.
Primary: Disk is the primary disk for a two-disk mirror and is
operating properly.
Secondary: Disk is the secondary disk for a two-disk mirror and is
operating properly.
Wrg Type: Device is not compatible for use as part of a RAID array.
Too Small: Disk is too small to mirror existing data.
Max Dsks: Maximum number of disks allowed for this type of
array reached, or maximum number of total IR disks on a
controller reached.
No SMART: Disk does not support SMART, cannot be used in an
array.
Wrg Intfc: Device interface (SAS) differs from existing IR disks.
Pred Fail
Indicates whether SMART is predicting device failure (Yes or No).
Size(MB)
The size of the device, in Mbytes (1 Mbyte = (1024 x 1024) = 1,048,576
bytes). If the device is part of a two-disk array, this field reflects the
size of the array, not the size of the individual disk. If the device is
part of an array of three or more disks, this field is the size that the
disk makes up within the array.
Note: When creating a striped array, the usable size of the array is
determined by the number of drives, multiplied by the size of the
smallest drive in the array. In arrays consisting of different sized
drives, excess space on larger drives is unusable.
Manage Array Screen
The Manage Array screen is used to manage the current array, as shown in
EXAMPLE E-17. TABLE E-13 describes the fields of the screen.
If you select Manage Hot Spare, the utility displays a hot spare management screen
that has the same layout as the Create New Array screen.
Appendix E
Serial Attached SCSI BIOS Configuration Utility
E-37
If you select Synchronize Array, Activate Array, or Delete Array, you are prompted to
confirm the choice by pressing Y for yes or N for no.
E-38
Sun Fire X4600 and Sun Fire X4600 M2 Servers Service Manual • March 2011
EXAMPLE E-17
Manage Array Screen
******************************************************************************
* LSI Logic MPT Setup Utility v6.02.00.00 (2005.07.08)
*
* Manage Array -- SAS1064
*
*
*
*
Identifier
LSI Logic Logical Volume 3000
*
*
Type
IM
*
*
Scan Order
2
*
*
Size(MB)
69618
*
*
Status
Optimal
*
*
*
*
Manage Hot Spare
*
*
*
*
Synchronize Array
*
*
*
*
Activate Array
*
*
*
*
Delete Array
*
*
*
*
*
*
*
*
*
*
*
* Esc = Exit Menu
F1/Shift+1 = Help
*
* Enter = Select Item
*
******************************************************************************
TABLE E-13
Manage Array Screen Field Descriptions
Field
Description
Identifier
The identifier of the array.
Type
The RAID type of the array.
Scan Order
The scan order of the array.
Size (MB)
The size of the array.
Status
The status of the array.
Manage Hot Spare
Press Enter to modify the array hot spare configuration. This field is
grayed out under the following conditions:
• The array is inactive.
• The array is at its maximum number of devices.
• Integrated Striping firmware is used. Striped Arrays do not
support Hot Spares, so no modifications can be made to an array
once it is created.
Appendix E
Serial Attached SCSI BIOS Configuration Utility
E-39
TABLE E-13
E.3.11.5
Manage Array Screen Field Descriptions (Continued)
Field
Description
Synchronize Array
Press Enter to synchronize the RAID array. This field is grayed out
under the following conditions:
• The array is inactive.
• The array does not need to be resynchronized.
• The adapter’s MPT FW does not support the feature.
• Integrated Striping firmware is used.
Activate Array
This field is used to activate a RAID array.
Delete Array
This field is used to delete the currently displayed RAID array.
Exit Screen
It is important to exit the SAS BIOS Configuration Utility correctly, because some
changes take effect only when you exit.
From the Adapter List, press the Esc key to exit.
In addition, a similar Exit screen appears when you exit most other screens, and it
can be used to save settings. EXAMPLE E-18 shows the Exit screen. Some options on
the Exit screen might be grayed out, indicating that they are not available at this
time.
E-40
Sun Fire X4600 and Sun Fire X4600 M2 Servers Service Manual • March 2011
EXAMPLE E-18
Exit Screen
******************************************************************************
* LSI Logic MPT Setup Utility v6.02.00.00 (2005.07.08)
*
*
*
*
*
*
*
*
*
*
*
*
*
*
*
*
*
*
Adapter and/or device property changes have been made.
*
*
Cancel Exit
*
*
Save changes then exit this menu
*
*
Discard changes then exit this menu
*
*
Exit the Configuration Utility and Reboot
*
*
*
*
*
*
*
*
*
*
*
*
*
*
*
* Esc = Exit Menu
F1/Shift+1 = Help
*
*
*
******************************************************************************
E.4
Performing RAID Configuration Tasks
This section explains how to use the Configuration Utility to perform the following
configuration tasks:
■
“Fusion-MPT SAS BIOS Overview” on page E-1
■
“Starting the SAS BIOS Configuration Utility” on page E-2
■
“Configuration Utility Screens” on page E-3
■
“Performing RAID Configuration Tasks” on page E-41
Note – The RAID firmware needs at least 64 MB of unused disk space at the end of
each drive to store metadata.
Appendix E
Serial Attached SCSI BIOS Configuration Utility
E-41
E.4.1
RAID Implementation and Support
The LSISAS1064 controller supports the Integrated RAID hardware solution, which is
a highly integrated, low-cost RAID solution. It is designed for systems requiring
redundancy and high availability, but not requiring a full-featured RAID
implementation.
Integrated RAID includes Integrated Mirroring (IM or RAID 1) and Integrated
Striping (IS or RAID 0) technology. Integrated RAID is OS independent, easy to
install and configure, and does not require a special driver. A RAID Volume is seen as
a single drive by the host BIOS and OS.
The LSISAS1064 controller is based on the Fusion-MPT (Message Passing
Technology) architecture. The Fusion-MPT architecture requires only a thin device
driver that is independent of the I/O bus. LSI Logic provides the device drivers for
various operating environments.
The ILOM SP monitors the GPIOs from the SAS1064 controller. If the controller
indicates a failure, the service processor lights the fault LED on the corresponding
disk drive and logs the error in the SP event log.
E.4.1.1
Automatic Data Resynchronization and Hot Spares
Caution – Possible data loss: If you insert a HDD that has been configured with a
RAID volume into a server that did not previously have its HDDs configured with
RAID volumes, the existing HDD(s) in the server will be converted to RAID volumes
during automatic synchronization and any existing data on the existing HDD(s) in
the server will be erased. Before permanently removing a HDD that is part of an
active RAID volume, use the LSI Configuration Utility to delete the RAID volume
from the HDD to avoid causing this problem.
The SCSI parameters, including RAID volumes configuration, are set up using the
LSI BIOS configuration utility accessible by pressing the CTRL+C keys during the
boot process. The LSI RAID firmware and BIOS is OS-independent and you set up
RAID while in MPTBIOS POST before booting to an OS.
The parameters are saved in both the NVRAM and the disk drives. The RAID
firmware needs 64 MB of unused disk space at the end of each drive to store the
metadata.
The metadata stored on the disk drives contains sufficient information to restore and
reactivate the RAID volumes in case the NVRAM is lost (for example, when the
motherboard is replaced). However, if removed, the disk drives must first be labelled
E-42
Sun Fire X4600 and Sun Fire X4600 M2 Servers Service Manual • March 2011
to make sure that they are placed back in the same disk bays from which they were
removed when reinstalled. When the system is powered on, the RAID volumes are
automatically activated and resynchronization is automatically performed.
One of the disk drives can be set up as a hot-spare disk if a RAID 1 (mirroring)
volume is already set up. If one of the two disk drives used in the RAID 1 volume
fails, the hot-spare drive automatically replaces it in the volume and
resynchronization is immediately performed.
Note – Until the resynchronization is completed, the system is vulnerable to a failure
of the now “primary” disk (the disk left from the original mirrored volume) because
full data redundancy is not yet achieved. When the bad disk is replaced, the new disk
automatically becomes the new hot-spare disk for the mirrored volume.
E.4.1.2
RAID Level Support
The following items describe the RAID level support for these servers:
E.4.1.3
■
RAID 1 (mirroring) is supported.
■
RAID 0 (striping) is supported.
■
LSI RAID 1E or IME (mirroring over more than two drives) is not supported at the
initial release of these servers.
■
RAID 0+1 and 1+0 are not supported by the SAS1064 controller.
RAID Volume Support
The following items describe the RAID volumes supported for these servers:
E.4.1.4
■
Up to two active RAID volumes are supported per system (RAID 0, RAID 1 or
both).
■
A striped volume (RAID 0) can contain up to four disk drives.
■
A mirrored volume (RAID 1) can contain up to two disk drives.
■
One disk drive can be set up as hot spare for a RAID 1 array (one hot-spare disk
per controller maximum).
■
Volumes are transparent to the OS and are seen as a single physical disk drive no
matter how many drives they contain.
RAID Combination Support
Possible RAID Combinations in a four-HDD server are:
■
Two drives RAID 0 + two drives non-RAID
Appendix E
Serial Attached SCSI BIOS Configuration Utility
E-43
■
Two drives RAID 1 + two drives non-RAID
■
Two drives RAID 0 + two drives RAID 1
■
Two drives RAID 0 + two drives RAID 0
■
Two drives RAID 1 + Two drives RAID 1
■
Three drives RAID 0 + one drive non-RAID
■
Four drives RAID 0
■
Two drives RAID 1 + one hot-spare drive + one drive non-RAID
■
Four drives non-RAID
▼ Creating a RAID 0 Volume
A RAID 0 volume, also referred to as Integrated Striping (IS), offers the ability to
stripe data across multiple hard disks. This can increase storage capacity and
performance by combining multiple disks into one logical volume.
Follow these steps to create a RAID 0 volume on an adapter that does not currently
have a volume configured.
1. In the Configuration Utility, select an adapter from the Adapter List.
2. Select the RAID Properties option.
3. When you are prompted to create either an IS volume or an IM volume, select
Create IS Volume.
The next screen shows a list of disks that can be added to a volume.
4. Move the cursor to the RAID Disk column. To add a disk to the volume, change
the “No” to “Yes” by pressing the + key, - key, or space bar.
As disks are added, the Array Size field changes to reflect the size of the new
volume. There are several limitations when creating a RAID 0 volume:
■
All disks must be SAS (with SMART support).
■
Disks must have 512-byte blocks and must not have removable media.
■
There must be at least two drives in a valid volume.
■
No more than eight drives are allowed in a volume.
■
Hot spare drives are not allowed for RAID 0 volumes.
Note – RAID 0 does not provide any data protection in the event of disk failure. It is
primarily used to increase speed.
E-44
Sun Fire X4600 and Sun Fire X4600 M2 Servers Service Manual • March 2011
Note – Once the number of disks in a RAID volume is set, it cannot be changed.
5. When the volume has been fully configured, press C and select Save changes,
then exit this menu to commit the changes.
The Configuration Utility will pause while the array is being created.
▼ Creating a RAID 1 Volume
A RAID 1 volume, also referred to as Integrated Mirroring (IM), offers the ability to
mirror data from one hard disk onto another one. This can increase reliability by
combining multiple disks into one logical volume.
Follow these steps to create a RAID 1 volume on an adapter that does not currently
have a volume configured.
1. In the Configuration Utility, select an adapter from the Adapter List.
2. Select the RAID Properties option.
3. When you are prompted to create either an IS volume or an IM volume, select
Create IM Volume.
The next screen shows a list of disks that can be added to a volume.
4. Move the cursor to the RAID Disk column. To add a disk to the volume, change
the “No” to “Yes” by pressing the + key, - key, or space bar.
When the first disk is added, the utility will prompt you to keep existing data or
overwrite existing data.
5. Press M to keep the existing data on the first disk or press D to overwrite it.
If you keep the existing data, this is called a migration. The first disk will be
mirrored onto the second disk, so the data you want to keep must be on the first
disk added to the volume. Data on all other disks will be lost.
As disks are added the Array Size field will change to reflect the size of the new
volume. There are several limitations when creating a RAID 1 volume:
■
All disks must be SAS (with SMART support).
■
Disks must have 512-byte blocks and must not have removable media.
■
There must be two drives in a valid volume.
6. (Optional) Add a hot spare to the volume by moving the cursor to the Hot Spare
column and pressing the + key, - key, or space bar.
Appendix E
Serial Attached SCSI BIOS Configuration Utility
E-45
7. When the volume has been fully configured, press C and select Save changes,
then exit this menu to commit the changes.
The Configuration Utility will pause while the array is being created.
Note – RAID 1 provides protection against the failure of a single disk. When a disk
fails, it is rebuilt to a hot spare if one is available. This can greatly increase the level
of protection that RAID 1 provides.
Note – Even though multiple volumes can be created, the hot spare is a global hot
spare. Only one active hot spare is allowed for all volumes.
▼ Creating a Second RAID Volume
The LSI Logic SAS controllers support two active RAID volumes. If one volume is
already configured, follow these steps to add a second volume.
1. In the Configuration Utility, select an adapter from the Adapter List.
2. Select the RAID Properties option.
This displays the current volume.
3. Press C to create a new volume.
4. Create the new volume.
■
To create a second RAID 0 volume, continue with Step 2 of “Creating a RAID 0
Volume” on page E-44.
■
To create a second RAID 1 volume, continue with Step 2 of “Creating a RAID 1
Volume” on page E-45.
▼ Viewing RAID Volume Properties
Follow these steps to view the properties of RAID volumes.
1. In the Configuration Utility, select an adapter from the Adapter List.
2. Select the RAID Properties option.
The properties of the current volume are displayed.
3. If more than one volume is configured, press Alt+N to view the next array.
4. To manage the current array, press Enter when the Manage Array item is
selected.
E-46
Sun Fire X4600 and Sun Fire X4600 M2 Servers Service Manual • March 2011
▼ Adding Hot Spares
Follow these steps to add a hot spare to a RAID 1 volume.
1. Select Manage Hot Spare.
2. Select a disk from the list by pressing the + key, - key, or space bar.
Note – A hot spare must be valid RAID disk, as defined in “Creating a RAID 1
Volume” on page E-45.
3. After you select the hot spare disk, press C.
4. Select Save changes then exit this menu to commit the changes.
The Configuration Utility will pause while the hot spare is being added.
▼ Deleting Hot Spares
Follow these steps to delete a hot spare from a RAID 1 volume.
1. Select Manage Hot Spare.
2. Remove the current hot spare disk from the list by pressing the + key, - key, or
space bar.
3. After you clear the hot spare, press C.
4. Select Save changes then exit this menu to commit the changes.
The Configuration Utility will pause while the hot spare is being removed.
▼ Synchronizing an Array
Synchronizing an array means that the firmware synchronizes the data on the
secondary disk(s) with the data on the primary disk of the mirror. Follow these steps
to start a synchronization for a RAID 1 volume.
1. Select Synchronize Array.
2. Press Y to start the synchronization or N to cancel it.
Appendix E
Serial Attached SCSI BIOS Configuration Utility
E-47
▼ Activating an Array
An array can become inactive if, for example, it is removed from one controller or
computer and moved to another one. The Activate Array option enables you to
reactivate an inactive array that has been added to a system. This option is only
available when the selected array is currently inactive.
1. Select Activate Array.
2. Press Y to proceed with the activation or press N to abandon it.
After a pause, the array becomes active.
▼ Deleting an Array
Caution – Before deleting an array, be sure to back up all data on the array that you
want to keep.
Follow these steps to delete a selected array.
1. Select Delete Array.
2. Press Y to delete the array or press N to cancel the deletion.
After a pause, the firmware deletes the array.
Note – Once a volume has been deleted, it cannot be recovered. When a RAID 1
volume is deleted, the data is preserved on the primary disk. The master boot records
(MBR) of other disks in the array are deleted. For other RAID types, the master boot
records of all disks are deleted.
E.4.2
Locating a Disk Drive
There are several ways to physically locate a disk drive, as long as the firmware is
correctly configured and the drives support disk location.
E-48
■
During RAID creation, when a disk is set to Yes as part of a RAID volume, its
Locate LED is enabled. When it is set back to No or the RAID volume is created,
the Locate LED is disabled.
■
Disks can also be located from the SAS Topology screen. To locate a disk, move the
cursor to the disk and press Enter. The Locate LED on the disk remains activate
until the next key is pressed.
Sun Fire X4600 and Sun Fire X4600 M2 Servers Service Manual • March 2011
APPENDIX
F
CPU Modules and Memory DIMMs
A Sun Fire X4600 or X4600 M2 server supports up to 8 CPU modules. Each CPU
module supports a single CPU and a number of memory DIMMs. This appendix
describes the CPU modules available. It also gives procedures for populating CPU
modules with DIMMs, populating the server with CPU modules, and using the
diagnostic features built into each CPU module.
F.1
■
“CPU Module Models” on page F-1 describes the CPU module models and
explains the rules for populating the module with memory DIMMs.
■
“Populating a Server With CPU Modules” on page F-9 describes the rules for
populating a server with CPU modules and explains how module slot letters map
to numeric module IDs.
■
“Locating Faulty CPUs and DIMMs” on page F-12 describes the CPU modules’
built-in diagnostic features.
CPU Module Models
This section describes the various CPU module models. Some models are available in
multiple part numbers. All part numbers within a given model share basic features
such as the kind of CPU they support and the way they use memory DIMMs.
Individual part numbers vary as to the specific CPU they support. For more
information refer to the Sun System Handbook:
(http://sunsolve.sun.com/handbook_pub/)
Each CPU module model description indicates whether it can be used with the X4600
server or the X4600 M2 server. No CPU module model can be used with both
systems.
The sections that document individual CPU modules are:
■
“Sun Fire X4600 CPU Module” on page F-2
F-1
F.1.1
■
“Sun Fire X4600 M2 4-DIMM CPU Module” on page F-4
■
“Sun Fire X4600 M2 8-DIMM and 8-DIMM Split Plane CPU Modules” on page F-6
Sun Fire X4600 CPU Module
This module is only compatible with the Sun Fire X4600 server. It supports an AMD
Opteron 800 series dual-core CPU and a maximum of 8 GB of DDR1 memory.
F.1.1.1
Physical Layout
Physical layout of the Sun Fire X4600 CPU Module is shown in FIGURE F-1.
Note – This module does not number its DIMM slots consecutively. Also, DIMM
pairs are not placed in adjacent slots.
FIGURE F-1
Physical Layout of Sun Fire X4600 CPU Module
Pressing the Fault Remind button lights LEDs that indicate faulty CPU and DIMM.
See “Locating Faulty CPUs and DIMMs” on page F-12.
F-2
Sun Fire X4600 and Sun Fire X4600 M2 Servers Service Manual • March 2011
LEDs are described in TABLE F-1.
TABLE F-1
Sun Fire X4600 CPU Module LEDs
LEDs
Color and Meaning
CR5: Module Fault
Amber. Indicates faulty CPU or DIMM.
CR6: CPU Core VRM On Amber. Indicates power available to CPU.
CR7: DDR Memory VRM Amber. Indicates power available to DIMM slots.
On
F.1.1.2
CR8: Processor Failure
Amber. Indicates faulty CPU when Fault Remind button is
pressed.
DIMM Ejector Lever
LEDs
Amber. Indicate faulty DIMMs when Fault Remind button is
pressed.
DIMM Usage
The Sun Fire X4600 CPU Module provides four DIMM slots (TABLE F-2), for a
maximum of two pairs. Here are the specifications and population rules used with
the DIMM slots:
■
Type: DIMMs must be DDR1.
■
Speed: Maximum speed is 200 MHz (DDR1-400).
■
Capacity: 1-GB and 2-GB DIMMs are supported.
■
Matching: DIMMs must be added in pairs, with both DIMMs in a pair having the
same Sun part number.
■
Slot Usage: Every module must have at least one matched pair of DIMMs.
Populate pair 0 (the white slots) first.
TABLE F-2
DIMM Slots in Sun Fire X4600 CPU Module
Slot
Color
Pair Number
DIMM0
White
0
DIMM2
Black
1
DIMM1
White
0
DIMM3
Black
1
Appendix F
CPU Modules and Memory DIMMs
F-3
F.1.2
Sun Fire X4600 M2 4-DIMM CPU Module
This module is only compatible with the Sun Fire X4600 M2 server. It supports an
AMD Opteron 8000 series dual-core CPU and a maximum of 16 GB of DDR2
memory.
F.1.2.1
Physical Layout
Physical layout of the Sun Fire X4600 M2 4-DIMM CPU module is shown in
FIGURE F-2.
FIGURE F-2
Physical Layout of Sun Fire X4600 M2 4-DIMM CPU M
Pressing the Fault Remind button lights LEDs that indicate faulty CPU and DIMM.
See “Locating Faulty CPUs and DIMMs” on page F-12.
Note – This module can be used in the same system with Sun Fire X4600 M2 8DIMM CPU modules, provided all CPUs are identical. For more information on CPU
module matching requirements, see “CPU Module Matching Requirements” on page
F-9.
F-4
Sun Fire X4600 and Sun Fire X4600 M2 Servers Service Manual • March 2011
LEDs are described in TABLE F-3.
TABLE F-3
LEDs on Sun Fire X4600 M2 CPU 4-DIMM Module
LEDs
Color and Meaning
CR12: Module Fault
Amber. Indicates faulty CPU or DIMM.
CR1: CPU Core VRM On Amber. Indicates power available to CPU.
CR2: DDR Memory VRM Amber. Indicates power available to DIMM slots.
On
F.1.2.2
CR11: Processor Failure
Amber. Indicates faulty CPU when Fault Remind button is
pressed.
DIMM Ejector Levers
Amber. Indicate faulty DIMMs when Fault Remind button is
pressed.
DIMM Usage
The Sun Fire X4600 M2 4-DIMM CPU module provides four DIMM slots (TABLE F-4),
for a maximum of two pairs. Here are the specifications and population rules used
with the DIMM slots:
■
Type: DIMMs must be DDR2.
■
Speed: Maximum speed is 333 MHz (DDR2-667).
■
Capacity: 1-GB, 2-GB, and 4-GB are supported on early CPU module card.
2-GB, 4-GB, and 8-GB DIMMs are supported on Split Plane CPU module card.
■
Matching: DIMMs must be added in pairs, with both DIMMs in a pair having the
same Sun part number.
■
Slot Usage: Every module must have at least one matched pair of DIMMs.
Populate pair 1 (the white slots) first.
TABLE F-4
DIMM Slots in Sun Fire X4600 CPU Module
Slot
Color
Pair Number
DIMM3
White
1
DIMM2
White
1
DIMM1
Black
0
DIMM0
Black
0
Appendix F
CPU Modules and Memory DIMMs
F-5
F.1.3
Sun Fire X4600 M2 8-DIMM and 8-DIMM Split
Plane CPU Modules
These two modules have identical physical layout, and follow the same DIMM usage
rules. They both are compatible with the Sun Fire X4600 M2 server only. They have
important differences:
■
The Sun Fire X4600 M2 8-DIMM CPU module supports a dual-core AMD Opteron
8000 series CPU. It can be used in the same system with Sun Fire X4600 M2 4DIMM CPU modules, provided all CPUs are identical. It supports a maximum of
32-GB of DDR2 memory.
■
The Sun Fire X4600 M2 8-DIMM Split Plane CPU module supports a quad-core
AMD Opteron 8000 series CPU. Quad core is only supported on the Split Plane
CPU module. When this model is used a system, all CPU modules must have the
same Sun part number. It supports a maximum of 64-GB of DDR2 memory.
Note – For more information on CPU module matching requirements, see “CPU
Module Matching Requirements” on page F-9.
F.1.3.1
Physical Layout
Physical layout of the Sun Fire X4600 M2 8-DIMM and 8-DIMM split plane CPU
modules is shown in FIGURE F-2.
F-6
Sun Fire X4600 and Sun Fire X4600 M2 Servers Service Manual • March 2011
FIGURE F-3
Physical Layout of Sun Fire X4600 M2 8-DIMM CPU Module and Sun Fire
X4600 M2 8-DIMM Split Plane CPU Modules
Pressing the Fault Remind button lights LEDs that indicate faulty CPU and DIMM.
See “Locating Faulty CPUs and DIMMs” on page F-12.
LEDs are described in TABLE F-3.
TABLE F-5
LEDs on Sun Fire X4600 M2 CPU 4-DIMM Module
LEDs
Color and Meaning
CR12: Module Fault
Amber. Indicates faulty CPU or DIMM.
CR1: CPU Core VRM On Amber. Indicates power available to CPU.
CR2: DDR Memory VRM Amber. Indicates power available to DIMM slots.
On
CR23: Processor Failure
Amber. Indicates faulty CPU when Fault Remind button is
pressed.
DIMM Ejector Levers
Amber. Indicate faulty DIMMs when Fault Remind button is
pressed.
Appendix F
CPU Modules and Memory DIMMs
F-7
F.1.3.2
DIMM Usage
The Sun Fire X4600 M2 8-DIMM and 8-DIMM split plane CPU modules provides 8
DIMM slots (TABLE F-6), for a maximum of four pairs. Here are the specifications and
population rules used with the DIMM slots:
■
Type: DIMMs must be DDR2.
■
Speed
■
8-DIMM with 2 or 4 DIMMs: Maximum speed is 333 MHz (DDR2-667).
■
8-DIMM with 6 or 8 DIMMs: Maximum speed is 266 MHz (DDR2-533).
■
8-DIMM split plane CPU module: Maximum speed is 333 MHz (DDR2-667).
■
Capacity: 1-GB, 2-GB, and 4-GB DIMMs are supported.
■
Matching: DIMMs must be added in pairs, with both DIMMs in a pair having the
same Sun part number.
■
Slot Usage: Every module must have at least one matched pair of DIMMs.
Populate pair 3 (the white slots farthest from the CPU) first, and work your way
towards the CPU.
TABLE F-6
F-8
Sun Fire X4600 M2 8-DIMM and 8-DIMM split plane CPU Module DIMM
Slots
Slot
Color
Pair Number
DIMM7
White
3
DIMM6
White
3
DIMM5
Black
2
DIMM4
Black
2
DIMM3
White
1
DIMM2
White
1
DIMM1
Black
0
DIMM0
Black
0
Sun Fire X4600 and Sun Fire X4600 M2 Servers Service Manual • March 2011
F.2
Populating a Server With CPU Modules
Note – This section describes configurations with 2, 4, 6, and 8 CPU modules. The
number of modules a system can actually support depends on the software and
firmware versions. To identify the configurations supported by your system, see the
Software Release Notes for the system software you have installed.
F.2.1
CPU Module Matching Requirements
The following CPU modules can be used together:
■
Sun Fire X4600 M2 4-DIMM CPU module
■
Sun Fire X4600 M2 8-DIMM CPU module
Except for the modules listed in this section, all CPU modules in a server must be
identical. This means that each module must have the same Sun part number. If two
modules are the same model but different part numbers, then their CPUs are
different; mixing CPUs in a single server is not supported.
When different CPU modules are in the same system, the CPUs must be identical.
This means that even though the part numbers for the CPU modules may be
different, the part numbers for the CPUs on the modules must be the same.
Mixed four Sun Fire X4600 M2 8-DIMM CPU modules plus four Sun Fire X4600 M2
8-DIMM Split Plane CPU modules with 8220 Series processors on a Sun Fire X4600
server requires a 950w PSU.
The Sun Fire X4600 M2 8-DIMM CPU module is an 8-DIMM CPU board that
supports AMD Opteron 8000 Series Rev. F dual-core processors.
The Sun Fire X4600 M2 8-DIMM Split Plane CPU module is an 8-DIMM CPU board
that supports AMD Opteron 8000 Series Rev. F quad-core processors.
Caution – Only the CPU modules listed in this section can used together.
Appendix F
CPU Modules and Memory DIMMs
F-9
F.2.2
Population Procedures
The 8 CPU module slots are designated by letters A through H, as shown in
FIGURE F-4. Looking from the front of the server, the CPU module slots are lettered
from right to left.
FIGURE F-4
Sun Fire X4600/X4600 M2 CPU Module Slots
When a server contains fewer than 8 CPU modules, only specific slots can be used, as
shown in FIGURE F-5. This figure also shows how the CPU module slot letters map to
the numbers that identify actual CPU modules.
Note – In an eight-module configuration, the modules are not all in numerical order.
Slot B contains module 2, and slot C contains module 1.
F-10
Sun Fire X4600 and Sun Fire X4600 M2 Servers Service Manual • March 2011
Note – In a two-module configuration, use of PCI slots 5, 6, and 7 is not supported.
FIGURE F-5
CPU Module Population rules and numbering
Note – In six-module and four-module configurations, unused CPU slots must
contain filler modules. In two-module configurations, unused CPU slots must be left
empty.
Appendix F
CPU Modules and Memory DIMMs
F-11
F.3
Locating Faulty CPUs and DIMMs
Every CPU module supports the following diagnostic procedure.
1. Make sure that the system is powerd down, but that power cables are still
connected to the PSU. This ensures that standby power is flowing to the CPU
modules
2. Locate the CPU module with a lit amber LED visible at its top edge. The LED
indicates that the module has faulty CPU or DIMM.
3. Remove standby power by disconnecting all power cables from the PSU.
Caution – Removing or inserting a CPU module while standby power is available
can damage the module.
4. Remove the CPU module you previously identified from its slot in the CPU
module bay. See “Replacing a CPU Module or CPU Filler Board” on page 3-9.
5. Press the module’s fault remind button. If a DIMM is faulty, an amber LED is lit in
one of the DIMM’s slot handles. If the CPU is faulty, a CPU fault LED is lit. These
LEDs are powered by an on-board capacity and can remain lit about a minute.
To identify the fault remind button and the CPU fault LED, refer to the individual
module descriptions in “CPU Module Models” on page F-1.
F-12
Sun Fire X4600 and Sun Fire X4600 M2 Servers Service Manual • March 2011
APPENDIX
G
Power Supplies
This appendix describes the power supplies units (PSUs) used with the Sun Fire
X4600 and X4600 M2 servers. It also describes how the system configuration affects
PSU requirements and redundancy.
Caution – The Sun Fire X4600 and X4600 M2 servers are designed to operate with all
four PSUs in place. Leaving a PSU slot empty can interfere with proper airflow and
cause the system to overheat.
G.1
Power Supply Models
Three power supplies are available for the Sun Fire X4600 and X4600 M2 servers: an
850 W PSU (300-1971), a 950 W PSU (300-2013), and an 1133 W PSU. The PSU models
have the same physical form factor, but cannot be used together in the same system.
G.2
Requirements and Redundancy
For the server to power up reliably, four PSUs must be working and connected to
external AC power. Once the server is powered up, one or more PSUs is redundant.
Redundant PSUs should be left in place. Depending on the configuration,
redundancy is either 2+2 (server requires 2 working PSUs, with 2 redundant PSUs) or
3+1 (server requires 3 working PSUs, with 1 redundant PSU).
The specific PSU requirements and redundancy depend on the system configuration
as described in the following sections:
G-1
Read the following notes regarding power supply redundancy for x4600
configurations:
2+2 Power Redundancy is supported as follows:
1. X4600 rev E, (850w OR 950w PSU) ,with CPLD version 8 - both 4 and 8 CPU
module configurations supported with full memory and full I/O. If you have CPLD
version 4 - your rev E system will support 3+1 Power only.
2. X4600 M2 (850w OR 950W PSU)with 4 or 8 95W rev F processors are supported,
with full memory and full I/O. This includes the 8218 2.6GHz rev F processor.
3. X4600 M2 (850w PSU)with 4 120W rev F processors are supported, with full
memory and full I/O. This includes the 8220SE 2.8GHz rev F 120W processors.
An 8-socket 120W rev F processor system with full memory and full I/O achieves
only 3+1 power with 850w PSU, full 2+2 is achieved by having the 950w PSU in this
configuration.
The mixing of 950w and 850w PSU's on the same system is not supported.
105w CPU redundancy: For 8 sockets with 8360SE, maximum memory and I/O, 3+1
power redundancy using a 950W PS is supported, but not 2+2.
For 2 and 4-processor configurations involving the 8360SE processors, with up to
max possible memory and I/O, the system can operate in 2+2 power redundancy
mode with the 950W PSUs.
For 6 and 8-processor, 3+1 power redundancy is supported, but not 2+2.
Note – 950W PSU requirements apply to the 1133 W PSU.
Note – Depending on the configuration, it may be possible to power up a server
with fewer than four PSUs working and connected to external power. However, use
of less than four PSUs may not be reliable and is not supported.
Caution – Always replace faulty power supplies as soon as possible.
G.2.1
Servers Using the Sun Fire X4600 CPU Module
To identify the Sun Fire X4600 CPU module, refer to Section F.1.1 “Sun Fire X4600
CPU Module” on page F-2.
G-2
Sun Fire X4600 and Sun Fire X4600 M2 Servers Service Manual • March 2011
Servers with this module can use either 850W or 950W PSUs.The PSU redundancy
depends on the CPLD version of the motherboard:
■
If the motherboard has CPLD version 4, the PSUs have 2+2 redundancy.
■
If the motherboard has a previous CPLD version, the PSUs have 3+1 redundancy.
The CPLD version is reported at boot time, during power-on self-test (POST). For an
example, see EXAMPLE G-1.
EXAMPLE G-1
CPLD Version Screen
AMIBIOS(C)2004 American Megatrends, Inc.
BIOS Build Version : 0ABIT032 Date: 10/03/06 10:35:39 Core: 08.00.12
CPU : AMD Engineering Sample
Speed : 2.80 GHz
Count : 8
DRAM Clocking CPU0 Core0/1 = 667 MHz, CPU1 Core0/1 = 667 MHz,
CPU2 Core0/1 = 667 MHz, CPU3 Core0/1 = 667 MHz
Sun Fire X4600 M2, 4 AMD North Bridges, Rev F2
1 AMD 8132 PCI-X 2.0 Controller, Rev B2
1 NVidia CK8-04 PRO SB, 1 NVidia IO-4 Slave Bridge(s)
BMC Firmware Revision : 1.00.06
CPLD Revision : 2.0
Initializing USB Controllers .. Done.
Press F2 to run Setup (CTRL+E on Remote Keyboard)
Press F8 for BBS POPUP (CTRL+P on Remote Keyboard)
Press F12 to boot from the network (CTRL+N on Remote Keyboard)
5449MB OK
G.2.2
Servers Using Sun Fire X4600 M2 CPU Modules
The various models of CPU modules used in Sun Fire X4600 M2 servers all have the
power requirements and redundancy described in this section. Servers with these
modules can use either 850W or 950W PSUs. However, if you require 2+2
redundancy, you may have to use 950W PSUs. Follow these rules.
■
If 95W CPUs are used, PSUs have 2+2 redundancy.
■
If 120W CPUs are used and the server has 2 or 4 CPU modules, PSUs have 2+2
redundancy.
■
If 120W CPUs are used and the server has 6 or 8 CPU modules, redundancy
depends on the PSUs used:
■
If 850W PSUs are used, they have 3+1 redundancy.
■
If 950W PSUs are used, they have 2+2 redundancy.
Appendix G
Power Supplies
G-3
Note – 950W PSU rules apply to the 1133 W PSU.
These rules are summarized in TABLE G-1.
TABLE G-1
PSU Redundancy in Sun Fire X4600 M2 Servers
CPU Power
95W
120W
G-4
Number of CPU Modules
PSUs
Redundancy
2,4,6,8
850W or 950W
2+2
2,4
850W or 950W
2+2
850W
3+1
950W
2+2
6, 8
Sun Fire X4600 and Sun Fire X4600 M2 Servers Service Manual • March 2011
Index
SAS RAID, E-1
setup screens summary, 2-8
special considerations, 2-5
startup screens, 2-4
updating, 2-63
Numerics
10/100/1000BASE-T connector pinouts, D-3
10/100BASE-T connector pinouts, D-2
A
accessory kit contents, 1-7
acoustic noise emission specifications, A-3
additional options, 1-7
B
back panel
connector illustration, 1-4
LED definitions, C-4
LED locations, C-4
battery, replacing, 3-7
bezel removal, 3-4
BIOS
accessing, 2-3
Boot specification for SAS, E-2
changing menu settings, 2-4
configuring settings, 2-3
device booting priority, 2-5
menu tree, 2-9
Option ROM size, 2-7
overview, 2-3
password reset, 2-56
POST code checkpoints, B-6
POST codes, B-4
POST options, B-3
POST overview, B-1
POST, redirecting console output for, B-2
sample setup menu screens, 2-10
C
Cautions
Cooling, 2-2
Static electricity, 2-57
Clear CMOS jumper, 2-61
component overview figure, 1-5
Configuration Utility screens for SAS BIOS, E-3
configuring BIOS settings, 2-3
connector pinouts
10/100/1000BASE-T, D-3
10/100BASE-T, D-2
Ethernet 10/100, D-2
Ethernet 10/100/1000, D-3
fan tray, D-24
flex cable DVD-ROM drive, D-14
flex cable motherboard, D-7
flex cable power distribution board, D-12
flex cable to HDD backplane, D-16
front flex cable to motherboard, D-21
front flex to front I/O board, D-19
motherboard bus bar power, D-18
power supply, D-22
serial, D-2
serial attached SCSI, D-5
USB, D-1
VGA, D-4
console output, redirecting, B-2
Index-1
Console, System, 2-3
cover removal, 3-3
CPU fault LED, C-7
CPU Module
Matching requirements, F-9
Module Numbers, F-9
Population Rules, F-10
Slot letters, F-9
CPU module
Attention LED, C-7
replacing, 3-9
CPU Modules
dual-core, F-2, F-4, F-6
quad-core, F-6
Sun Fire X4600 CPU Module, F-2
Sun Fire X4600 M2 4-DIMM CPU Module, F-4
Sun Fire X4600 M2 8-DIMM CPU Module, F-6
Sun Fire X4600 M2 8-DIMM split plane CPU
Module, F-6
CR10 motherboard LED, C-10
CR11 motherboard LED, C-10
CR19 motherboard LED, C-9
CR21 motherboard LED, C-9
CR28 motherboard LED, C-9
CR29 motherboard LED, C-9
CR30 motherboard LED, C-9
CR31 motherboard LED, C-10
CR34 motherboard LED, C-9
CR35 motherboard LED, C-9
CR41 motherboard LED, C-9
CR6 motherboard LED, C-9
CR7 motherboard LED, C-9
CR8 Motherboard LED, C-9
CR9 Motherboard LED, C-9
CRU, 3-7
E
D
H
DIMMs
fault LEDs, C-7
populating CPU module with, F-3, F-5, F-8
replacing, 3-30
slots, F-2, F-4, F-6
documentation, related, -xix
DVD drive, replacing, 3-12
hard disk drive
replacement, 3-25
status LEDs, C-3
hard disk drive backplane replacement, 3-27
hot spares, E-47
emergency shutdown, 2-3
environmental specifications, A-2
Ethernet 10/100 connector pinouts, D-2
Ethernet 10/100/1000 connector pinouts, D-3
external LEDs, C-1
F
fan tray
connector pinouts, D-24
fault LEDs, C-5
replacement, 3-14
feature summary, 1-1
flex cable
DVD-ROM drive connector, D-14
HDD backplane connector, D-16
motherboard connector, D-7
power distribution board connector, D-12
Force Recovery jumper, 2-59
front bezel, 3-4
Front Fan Fault LED, C-3
front flex cable
front I/O board connector pinouts, D-19
motherboard connector pinouts, D-21
front I/O board replacement, 3-19
front panel
feature illustration, 1-3
LED definitions, C-3
LED locations, 1-4, C-2
front panel indicator board replacement, 3-16
FRU, 3-7
Fusion-MPT SAS BIOS, See SAS BIOS
G
graceful shutdown, 2-3
I
I/O board, front, 3-19
Index-2
Sun Fire X4600 and Sun Fire X4600 M2 Servers Service Manual • March 2011
ILOM, 2-3
internal LEDs, C-6
LEDs DIMM fault, F-2, F-4, F-6
limitations of Option ROM size, 2-7
Locate LED and button, C-3
J
jumpers
Clear CMOS, 2-61
diagram of locations, 2-59
Force Recovery, 2-59
NMI dump switch, 2-62
P19, 2-59
P20, 2-56
P25, 2-61
Password Clear, 2-56
Reset switch, 2-62
SW2, 2-62
SW3, 2-62
L
LEDs
10/100 Ethernet (NET MGT), C-4
10/100/1000 Ethernet, C-4
back panel definitions, C-4
back panel locations, C-4
CPU fault, C-7, F-2, F-4, F-6
CPU Module Attention, C-7
DIMM fault, C-7
DVD activity, C-9
external, C-1
fan tray definition, C-5
fan tray locations, C-5
Front Fan Fault, C-3
front panel definitions, C-3
front panel locations, 1-4, C-2
Hard Disk Drive Status, C-3
internal, C-6
Locate, C-3
module fault, F-2, F-4, F-6
Motherboard auxiliary power, C-9
Motherboard power, C-9
Power Supply Fault, C-3
Power Supply Status, C-4, C-5
Power/OK, C-3
SAS activity, C-9
SAS fault, C-9
SAS heartbeat, C-9
Service Action Required, C-3
Service Processor Board Power Status, C-9
System Overheat Fault, C-3
M
main cover removal, 3-3
memory replacement, 3-30
menu tree, BIOS setup screens, 2-9
Motherboard
Auxiliary power LEDs, C-9
DVD Activity LED, C-9
Power LEDs, C-9
SAS activity LEDs, C-9
SAS fault LEDs, C-9
SAS heartbeat LED, C-9
motherboard
bus bar power connector pinouts, D-18
replacement, 3-32
N
NMI dump switch SW3, 2-62
noise emission specs, A-3
O
Option ROM size, 2-7
options additional, 1-7
P
P19 jumper, 2-59
P20 jumper, 2-56
P25 jumper, 2-61
Password Clear jumper, 2-56
passwords, resetting, 2-56
PCI
replacement of PCI cards, 3-39
slot priority in BIOS, 2-5
slot speeds and locations, 3-41
physical specifications, A-2
pinouts, See connector pinouts
POST
changing options, B-3
code checkpoints, B-6
codes table, B-4
overview, B-1
redirecting console output, B-2
Power button location, 2-2
Index-3
power distribution board replacement, 3-44
power specifications, A-2
power supply
connector pinouts, D-22
status LEDs, C-4, C-5
Power Supply Fault LED, C-3
Power/OK LED, C-3
powering off the server, 2-3
powering on the server, 2-1
power-on self-test, See POST
R
RAID
activating an array, E-48
creating RAID 0 volume, E-44
creating RAID 1 volume, E-45
creating second RAID volume, E-46
deleting an array, E-48
locating a disk drive, E-48
managing hot spares, E-47
synchronizing arrays, E-47
viewing RAID volume properties, E-46
redirecting console output, B-2
related documentation, -xix
replaceable component locations, 3-5
replaceable components list, 1-7
Reset switch SW2, 2-62
resetting administrator password, 2-56
T
S
safety guidelines, -xix
sample BIOS setup screens, 2-10
SAS
Activity LEDs, C-9
Fault LEDs, C-9
heartbeat LED, C-9
SAS BIOS
activating a RAID array, E-48
configuration tasks, E-41
Configuration Utility screens, E-3
creating RAID 0 volume, E-44
creating RAID 1 volume, E-45
creating second RAID volume, E-46
deleting a RAID array, E-48
exiting Configuration Utility, E-40
initialize with BIOS Boot Specification, E-2
Index-4
locating a RAID disk, E-48
managing RAID hot spares, E-47
overview, E-1
starting Configuration Utility, E-2
synchronizing RAID arrays, E-47
viewing RAID volume properties, E-46
SCSI connector pinouts, D-5
Serial Attached SCSI BIOS, See SAS BIOS
serial attached SCSI connector pinouts, D-5
serial connector pinouts, D-2
server features list, 1-1
Service Action Required LED, C-3
Service Processor board
power status LED, C-9
replacement, 3-22
shutting down the server, 2-3
SP password reset, 2-56
special considerations, BIOS, 2-5
specifications, system, A-1
speeds of PCI slots, 3-41
summary of features, 1-1
SW2 Reset switch, 2-62
SW3 NMI dump switch, 2-62
system battery, replacing, 3-7
System Console, 2-3
System Overheat Fault LED, C-3
system specifications, A-1
tools required for maintenance procedures, 3-1
U
USB connector pinouts, D-1
V
VGA
connector pinouts, D-4
VGA connector
accessing system console with, 2-3
Sun Fire X4600 and Sun Fire X4600 M2 Servers Service Manual • March 2011