1
W
I
W
I
3
I
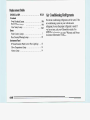
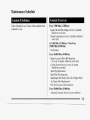
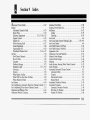
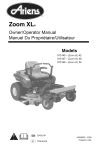
The 1995 OldsrnobileEightyEightOwner’sManual
.
..........................................................
...............................................................
..................................................
Seats and Restraint Systems
1-1
This section tells you how to use your seats and safety belts properly. It also explains
“SRS”
the system.
FeaturesandControls
2-1
This section explains how to start and operate your Oldsmobile.
Comfort Controls and Audio Systems
3-1
This section tells you how to adjust the ventilation and comfort controls and how to operate your
audio system.
Your Driving and the Road
4-1
Here you’ll find information and tips about the road and how to drive under different conditions.
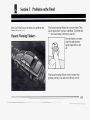
ProblemsontheRoad
5-1
a flat tire or
This section tells you what to do if you have a problem while drivi.ng,assuch
overheated engine, etc.
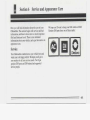
ServiceandAppearanceCare
6-1
Here the manual tells you howto keep your Oldsmobile running properly and looking good.
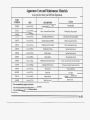
Maintenanceschedule.
7-1
This section tells you when to perform vehicle maintenance and what fluids and lubricants to use.
CustomerAssistanceInformation
8-1
This section tells you
how to contact Oldsmobile for assistance and how to get service publications,
It also givesyou information on “Reporting Safety Defects” on page8-4.
Index .............................................................................
9-1
Here’s an alphabetical listingof almost every subject in this manual.
You can use it to quickly find
something you want to read.
...........................................................
...............................................................
.........................................................
..............................................................
.....................................................
, ,
-
,
,,
-.
.,
I
We support voluntary
technician certification.
GENERAL MOTORS, GM and the GM Emblem,
OLDSMOBILE and the OLDSMOBILE Rocket
Emblem are registered trademarksof General Motors
Corporation.
WE SUPPORT
VOLUNTARY TECHNICIAN
CERTIFICATION THROUGH
Nalional lnsritute for
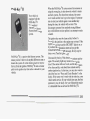
This manual includes the latest informationat the time it
was printed. We reserve the right to make changes in the
product after that time without further notice. For
vehicles first soldin Canada, substitute the name
“General Motorsof Canada Limited” for Oldsmobile
Division whenever it appearsin this manual.
For Canadian Owners Who Prefer a
French Language Manual:
Please keep this manualin your Oldsmobile, so it will
be there if you ever needit when you’re on the road.
If
you sell the vehicle, please leave this manual it
inso the
new owner can useit.
Aux propriktaires canadiens:Vous pouvez vous procurer
un exemplaire de ce guide en franqais chez votre
concessionaire ou au DGN Marketing Services Ltd.,
1500 Bonhill Rd., Mississauga, OntarioL5T 1C7.
Litho in U.S.A.
Part No. 22595327 B First Edition
EXCELLENCE
@Copyright General Motors Corporation 1994
All Rights Reserved
1
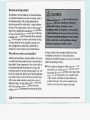
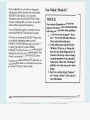
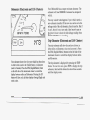
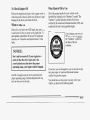
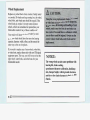
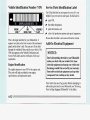
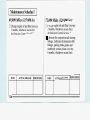
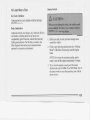
Vehicle Damage Rarnlngs
Also in this book you will find these notices:
NOTICE:
These mean there is something that
could damage your vehicle.
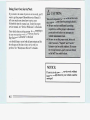
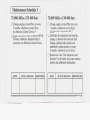
iv
-
In the notice area,we tell you aboutsomething that can
damage your vehicle. Many times, this damage
would
not be coveredby your warranty, and it could be costly.
But the notice will tell
you what to do to help avoid the
damage.
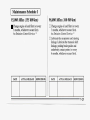
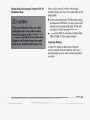
When you read other manuals, you might see
CAUTION and NOTICE warningsin different colors or
in different words.
You’ll also see warning labels on your vehicle. They use
yellow for cautions, bluefor notices and the words
CAUTION or NOTICE.
~
~~
~~~
~
~~
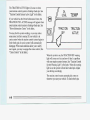
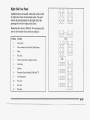
These symbols
are used on
warning and
indicator lights:
Vehicle Symbols
These are some of the symbols you may find on your vehicle.
For example,
these symbols
are used on an
original battery:
CAUTION
POSSIBLE
INJURY
A
These symbols
are important
for you and
your passengers
whenever your
vehicle is
driven:
PROTECT
EYES BY
SHIELDING
FASTEN
BELTS
SEAT
CAUSTIC
BATTERY
ACID COULD
CAUSE
BURNS
4
These symbols
have to do with
your lights:
Q
WINDSHRLD
WIPER
TURN
SIGNALS
ea
ENGINE
COOLANT
TEMP
-F-
BATTERY
CHARGING
SYSTEM
L-1
BRAKE
RADIATOR
COOLANT
WINDOW
DEFOGGER
POWER
WINDOW
HIGH
LAMPSoR
BEAM
SPARK OR
FLAME
COULD
EXPLODE
BAllERY
These symbols
are on some of
your controls:
,\I/,
FOG LAMPS
:o
=
$0
VENTILATING
FAN
TEMP
ANTI-LOCK
BRAKE
FUSE
RADIO
VOLUME
(0)
a
9 3
c OIL
€ b
(@)
a
a
CONDITIONING
AIR
TRUNK
RELEASE
FUEL
ENGINE OIL
PRESSURE
Hefe are some
other symbols
you may see:
LIGHTER
''
e
t
m
HORN
SPEAKER
b
V
NOTES
vi
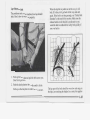
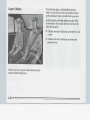
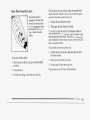
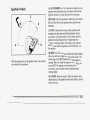
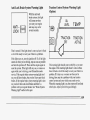
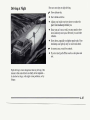
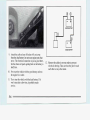
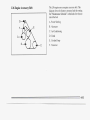
rower Seat (Option)
To adjust the power seat:
Seat Control (A): Raise the
front of the seat byholding
the front of the switchup.
Lower the frontof the seat
by holding thefront of the
switch down.
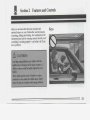
1-2
Raise the rearof the seat by holding the rear
of the
switch up. Lower the rear
of the seatby holding the rear
of the switch down.
Move the seat higherby holding the switchup. Lower
the seat by holding the switch down.
Move the seat forward by holding the switch forward.
Move the seat back by holding the switch back.
Seatback Control (B): Tilt the seatback forward by
holding the switch forward. Tilt the seatback backward
by holding the switch back.
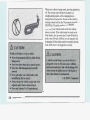
Reclining Front Seatbacks
To adjust the seatback, lift the lever on the outer,side of
the seat andmove the seatback to where you want it.
Release the lever tolock the seatback.Pull up on the
lever andthe seat will PO to an upright position.
is
But don't have a seatback reclined if your vehicle
moving.
1-3
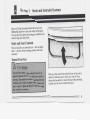
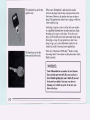
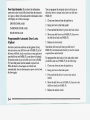
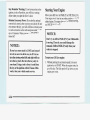
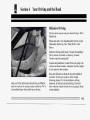
Head Restraints
Slide the head restraint up or down
so that the topof the
restraint is closest to the top
of your ears.This position
reduces thechance of a neck injury in a crash.
Safety Belts: They’re for Everyone
This part of the manual tells you how to use safety belts
properly. It also tells you some things you should not
do
with safety belts.
And it explains theSupplementalRestraint System, or
“air bag” system.
1-4
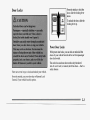
Your vehicle hasa light that
comes on as a reminder to
I
buckle up. (See “Safety Belt
Reminder Light” in the
Index.)
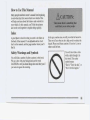
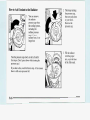
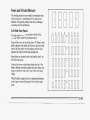
Why Safety Belts Work
When you ridein or on anything, yougo as fast as it
goes.
In many states andCanadian provinces, the l.aw say3 to
wear safety belts. Here’s why:They work.
YOU never knowif you’ll be in acrash. If you do have a
crash, you don’t know
if it will be a bad one.
A few crashes are mild, and some crashes can be so
serious thateven buckled up aperson wouldn’t survive.
of them,
But most crashes are in between. In many
people who buckle up can survive and sometimes walk
away. Withoutbelts they could have been bad19 hurt or
kiiled.
After more than25 years of safety belts in vehicles, the
facts are clear. Inmost crashes buckling up does matter
... a lot!
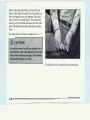
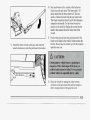
Take the simplest vehicle.Suppose it’s just a seat on
wheels.
Get it up to speed. Then stop the vehicle. The rider
doesn't stop.
1-6
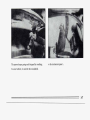
The person keeps going untilstopped by something.
In a real vehicle,it could be the windshield ...
or the instrument panel ...
or the s-afety belts!
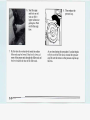
With safety belts,you slow -down asthe vehicle does.
You get more timeto stop. You stop over more distance,
and your strongest bones take
the:forces.That's why
safety belts make such good sense.
1-8
more of themin the-future. But theyare
supplemental systems only;so they work with
safety belts-- not instead.of them. Every air bag
system ever offeredfor sale has requiredthe use of
safety belts. Evenif you're in a vehicle that has
air
bags, you still have to buckle up to get the most
protection. That'strue not only in frontal collisions,
but especiallyin side and other collisions.
@
If I’m a good driver, andI never drive far from
home, why should I wear safety belts?
A:
You may be an excellent driver,but if you’re in an
accident -- even one that isn’t your fault-- you and
your passengers can be hurt. Being a good driver
doesn’t protect youfrom things beyond your
control, such as bad drivers.
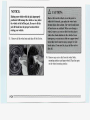
How to Wear Safety Belts Properly
Adults
This part is onlyfor people of adult size.
Be aware that there are special things to know
about
safety belts and children. And there are different rules
for smaller children and babies.
If a child will be riding
in your Oldsmobile, see the partof this manual called
“Children.” Followthose rules for everyone’s
protection.
Most accidents occur within 25 miles (40 km)of
home. And the greatestnumber of serious injuries
and deathsoccur at speeds of less than 40 mph
(65 M).
First, you’ll wantto know which restraintsystems your
vehicle has.
Safety beltsare for everyone.
We’ll start with the driver position.
Driver Position
This part describesthe driver’s restraint system.
1-9
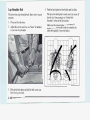
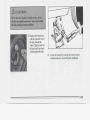
LapmShoulder Belt
The driver has a lap-shoulder belt. Here’s how to wear
it
properly.
1. Close and lock the door.
2. Adjust the seat(to see how, see “Seats’’ in the Index)
so you can sit up straight.
3. Pick up the latch plate and pull
the belt across you.
Don’t let it get twisted.
1-10
4. Push the latch plate intothe buckle until it clicks.
Pull upon the latch plate to make sure
it is secure. If
the belt isn’t long enough, see “Safety Belt
Extender” at the endof this section.
Make sure the release button on the buckle
is
the
positioned so you would be able to unbuckle
safety belt quickly if you ever had
to.
The lap part of the belt should be worn low and snug
on
the hips,just touching the thighs.In a crash, this applies
force to the strong pelvic bones. And you’d
be less
likely to slide underthe lap belt. If you slid underit, the
belt would applyforce at your abdomen.This could
cause serious or evenfatal injuries. The shoulder belt
should goover the shoulder and acrossthe chest. These
parts of the body are best able to take belt restraining
forces.
The safety belt locksif there’s a sudden stopor crash.
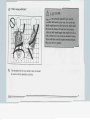
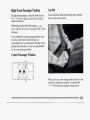
Shoulder Belt Height Adjuster
Before you begin to drive, move the shoulder belt
adiuster to the height that
is right fop you.
To move it down, squeeze the release handle and move
the height adjuster tothe desired position.You can move
the adjuster upjust by pushing upon the bottomof the
release handle. After you move the adjuster
to where
you want it, try to move
it down without squeezing the
release handle to makesure it has lockedinto position.
Adjust the heightso that the shoulder portionof the belt
is centered on your shoulder.
The belt shouldbe away
from your face and neck, but not falling
off your
shoulder.
1-11
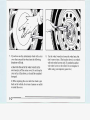
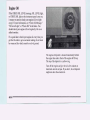
A:
The shoulder belt istoo loose. It won’t give nearly
as much protection this way.
L
L
A:
The shoulder belt is worn under the arm. It should
be worn over the shoulder at times.
all.
&= What’s wrong with this?
t
A:
I
I
1
I
I
The belt is twisted across the body.
1-15
To vnlatch the belt,just push the button on the buckle.
The\belt should go back outof the way.
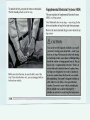
Supplemental Restraint System (SRS)
This part explains the Supplemental Restraint System
(SRS), or air bag system.
-- one air bagfor the
Your Oldsmobile has two air bags
driver and another air bag for
the right front passenger.
Here are the most important things to know about
the air
bag system:
Before you close the door,
be sure the beltis out of the
way. If you slam the dooron it, you can damage both the
belt and your vehicle.
1-16
AIR
BAG
There is an air bag readiness
light on the instrument
panel, which shows the
words AIR BAG.
The system checks the air bag’s electricalsystem for
malfunctions. The light tells youif there is an electrical
problem. See “Air BagReadiness Light” inthe Index
for more information.
1-17
~
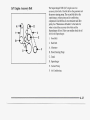
How the Air Bag System works
I
Where is the air bag?
The driver’s air bagis in the middle of the steering
wheel.
The right front passenger’s air bag is in the instrument
panel on the passenger’s side.
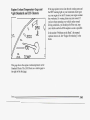
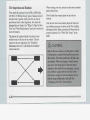
vehicle strikes something that will move ordeform, such
as a parked car, the threshold
level will be higher. The
air bag is notdesigned to inflate in rollovers, side
impacts, or rear impacts,because inflation would not
help the occupant.
In any particular crash,no one can say whetheran air
bag shouldhave inflated simply because of the damage
to a vehicle orbecause of what the repair costs were.
Inflation is determined by the angle of the impact and
the vehicle’s deceleration. Vehicle damage is only
one
indication of this.
What makes an air bag inflate?
When shouldan air bag inflate?
The air bag is designed to inflate in moderate to severe
frontal or near-frontal crashes.The air bag will inflate
only if the impact speed is above the system’sdesigned
“threshold level.” If your vehiclegoes straight into a
wall that doesn’tmove or deform, the threshold levelis
about 9 to 15 mph (14 to 24 W).
The threshold level
can vary, however, with specific vehicle design,so that
it can besomewhat~aboveor below this range.I€your
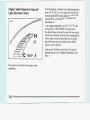
In a frontal or near-frontalimpact of sufficient severity,
the air bag sensingsystem detects thatthe vehicle is
suddenly stopping as a result
of a crash.The sensing
system triggers achemical reaction of the sodium azide
sealed in the inflator.The reaction produces nitrogen
gas, which-‘jnflates theair bag. The inflator, air bag, and
related hardware are all partof the airbag modules
packed insidethe steering wheel and in the instrument
panel in front of the right front passenger.
1-19
How does an airbag restrain?
In moderate tosevere frontal or near-frontal collisions,
1
i
even belted occupantscan contact the steering wheel
or
the instrument panel.The air bag supplements@e
protection provided by safety belts.
Air bags distribute
the force of the impact more evenly over the occupant’s
upper body, stopping the occupant more gradually.
But
air bags would not help you
in many typesof collisions,
including rollovers and rear and
side impacts, primarily
because an occupant’s motionis not towardthe air bag.
Air bags should never be regarded
as anything more
than a supplementto safety belts, and then only in
moderate to severe frontal or near-frontal collisions.
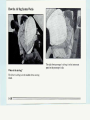
In many crashes severe enough to
inflate an air bag,
What w
liyou see after an air bag inflates?
windshields are brokenby vehicle deformation.
After the air baginflates, it quickly deflates.This occurs
Additional windshield breakage may
also occur from the
so quickly thatsome people may not even realize theair
right front passenger air bag.
bag inflated.Some components of the air bag modulein
The air bags are designedto inflate only once. After
the steering wheel hub
for the driver’s air bag, or the
they inflate, you’ll needsome new parts for your air
instrument panel for the rightfront passenger’s bag, will
bag system.If you don’t get them, the air bag system
be hot for a short time, but the part
of the bag thatcomes
won’t be there to help protect you
in another crash.
into contact with you will not
be hot to the touch.
There
A new system will include airbag modules and
will be some smoke and dustcoming from vents in the
possibly other parts.The service manualfor your
deflated air bags. Air bag inflation will not prevent the
vehicle covers the need
to replace other parts.
driver from seeing or frombeing able to steer the
vehicle, nor will it stop people from leaving the vehicle.
Safety Belt Use During Pregnancy
Safety belts workfor everyone, including pregnant
women. Like all occupants, they are more likely be
to
seriously injuredif they don’t wear safety belts.
.
A pregnant woman should wear a lap-shoulder belt, and
the lap portion shouldbe worn as low as possible
throughout the pregnancy.
..
The best way to protect the fetus is to protect the
mother. When a safety beltis worn properly, it’s more
likely that the fetus won’t
be hurt in a crash. For
pregnant women, as for anyone, the key
to making
safety belts effective is wearing them properly.
1-22
Right Front Passenger Position
Lap Belt
The right front passenger’s safety beltworks the same
way as the driver’s safety belt.See “Driver Position,’’
earlier in this section.
If your vehicle hasfront and rear bench seats, someone
can sit in the center positions.
When the lap portion of the belt is pulled out all
the
way, it will lock. If it does, let it go back all the way and
start again.
If your vehicle has a center
passenger position, be sure
to use the correctbuckle when buckling your
lap-shoulder belt. If you find thatthe latch plate willnot
go fully into the buckle,
see if you are usingthe buckle
for the center passenger position.
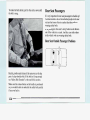
Center Passenger Position
When you sit in a center seating position,
you have a lap
safety belt, which has no retractor.
To make the belt
longer, tilt the latch plate and pull
it along the belt.
To make the belt shorter,pull its free end as shownuntil
the beltis snug.
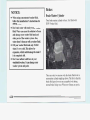
Rear Seat Passengers
It’s very important for rear seat passengers to buckle up!
Accident statisticsshow that unbelted people in the rear
seat are hurt more often
in crashes than those who are
wearing safety belts.
Rear passengers who aren’t safety belted
can be thrown
out of the vehiclein a crash. And they can strike others
in the vehicle who are wearing safety belts.
Rear Seat Outside Passenger Positions
n
Buckle, position and release
it the same way as the lap
part of a lap-shoulder belt.If the belt isn’t long
enough,
see “Safety Belt Extender” at the
end of this section.
on the buckle is positioned
Make sure the release button
so you would be able to unbuckle
the safety belt quickly
if-youever had to.
1-24
I
i
I
force to the strong pelvic bones.And you'd be less
likely to slide under the lap belt.If you slid underit, the
belt would apply force at your abdomen.This could
cause serious or even fatal injuries. The shoulder belt
should go .over
the shoulder and across the chest;
These
parts of the'body are best able to take belt restraining
forces.
The safety belt locksif there's a sudden stop or a crash.
To unlatch the belt,just push the buttonon the buckle.
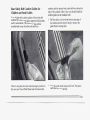
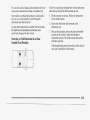
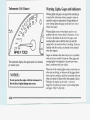
Rear Safety Belt Comfort Guides for
Children andSmall Adults
Rear shoulder belt comfort guides willprovide added
comfort for children whohave outgrown child restraints
and for small adults.The comfort guides pull the
shoulder belts awayfrom the neck and head.
There is one guide for each outside passenger position in
the rear seat.You will find them tuckedin between the
seatback and the interior body,
about half-way down the
edge of the seatback.Here is how you should install the
comfort guides on the shoulder belts:
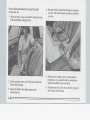
1. Pull the elastic cord out from between theedge of
the seatback and the interior body toremove the
guide from its storage clip.
2. Slide the guide under and pastthe belt. The elastic
cord must be under the belt.
1-27
4. Be sure that the belt is not twisted
and it lies flat. The
3. There is a “button stop’’ on the shoulder belt that
elastic
cord
must
be
under
the
belt
and theguide on
keeps the belt from going toofar into the retractorat
top.
the topof the seatback. Pull the shoulder belt out
of
the retractor, and place the guide over the belt. Make
sure that the guide
is between the button stopon the
belt and the retractor. Insertthe two edges of the belt
into the slotsof the guide.
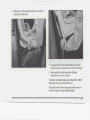
5. Buckle the belt around the child, and make sure that
both the lap belt and
the shoulder belt are secured
properly. Make sure thatthe shoulder belt crosses the
shoulder. See “Safety Belts, Rear SeatPassengers” in
the Index.
1-28
1-30
'..... - ...,
..I
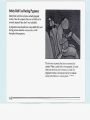
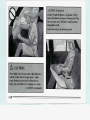
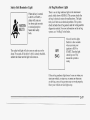
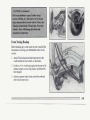
Child Restraints
Be sure to follow the instructions for the restraint. You
may find these instructions onthe restraint itself orin a
booklet, or both.These restraints use the belt system in
your vehicle,but the child also has to be secured within
the restraint tohelp reduce the chance of personal injury.
The instructions thatcome with the infant or child
restraint will show you how to
do that.
Where to Put the Restraint
Accident statistics show that childrenare safer if they
are restrainedin the rear ratherthan the front seat. We at
General Motors therefore recommend that youput your
child restraintin the rear seat. Never put a rear-facing
child restraint in the front passenger seat. Here's why:
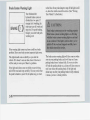
1-31
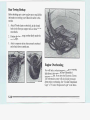
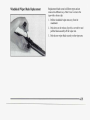
Top Strap
Wherever you install it, be sure to secure the child
restraint properly.
Keep in mind thatan unsecured child restraint can move
around in a collisionor sudden stop and injure people
in
the vehicle. Be sure to properly secure any child
restraint in your vehicle-- even when no childis in it.
If your child restraint has a top strap,
it should be
anchored.
an anchor installed, youcan ask
If you need to have
your Oldsmobile retailerto put it in for you. If you want
to installan anchor yourself, your retailer
can tell you
how to doit.
I
1-32
For cars first sold inCanada, child restraintswith a top
strap must be anchored according to Canadian Law.
You’ll be using the lap-shoulder belt.See the earlier part
about the top strapif the child restraint has one.
Your retailer can obtain thehardware kit and install it
for you, or you may
install it yourself using the
instructions provided in the kit.
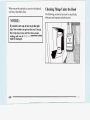
1. Put the restraint on the seat. Followthe instructions
for the child restraint.
Use the tetherhardware ht available from the retailer.
The hardware and installation instructionswere
specifically designed for this vehicle.
Securing a Child Restraint in a Rear
Outside Seat Position
U
2. Secure the child in the child restraint asthe
instructions say.
3. Pick up the latch plate, and run the lap and shoulder
portions of the vehicle’s safety belt through or
around the restraint. The child restraint instructions
will show you how.
If the shoulder belt goesin front of the child’sface or
neck, put it behind the child restraint.
6. To tighten the belt,feed the lap beltinto the retractor
while you push down on the child restraint.
Securing a Child Restraint in the Center
Rear Seat Position
You’ll be using the lap belt.
7 . Push and pull the child restraint in different
directions tobe sure it is secure.
To remove the child restraint,just unbuckle the vehicle’s
safety belt and letit go back all the way.The safety belt
will move freely again and be ready to workfor an adult
or larger child passenger.
7. Push and pull the child restraint in different
directions to be sure it is secure. If the child restraint
isn’t secure,turn the latch plate over and buckle it
again. Then see if it is secure. If it isn’t, securethe
restraint in a different placein the vehicle and
contact the child restraintmaker for their advice
about how to attach the child restraint properly.
To remove the child restraint,just unbuckle the vehicle’s
safety belt.It will be ready to work for an adult or larger
child passenger.
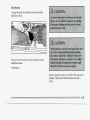
Securing a Child Restraint in the Right
Front Seat Position
U
Your vehicle hasa right front passenger air bag.Never
put a rear-facing child restraint
in this seat. Here’s why:
You’ll be using the lap-shoulder belt.See the earlier part
about the top strap if
the child restraint has one.
1. Because your vehiclehas a rightfront passenger air
bag, always movethe seat asfarback as it will go
before securinga forward-facing child restraint.(See
“Seats” in the Index.)
Follow the instructions
2. Put the restraint on the seat.
for the child restraint.
3. Secure the childin the child restraint as the
instructions say.
4. Pick up the latch plate, and run the lap and shoulder
portions of the vehicle’s safety belt through
or
around the restraint.The child restraint instructions
will show you how.
If the shoulder belt
goes in front of the child’sface or
neck, putit behind the child restraint.
1-38
5. Buckle the belt.
Make surethe release buttonis positioned so you
would be able to unbuckle the safety belt quickly
if
you ever had to.
6.
.What if a childis wearing a lap-shoulder belt,
is
but the childis so small that the shoulder belt
very close to the child’s face
or neck?
A:
Move the child toward the centerof the vehicle,but
be sure that the shoulder belt still is on the child’s
shoulder, so that in a crashthe child’s upper body
If the
would have the restraint that belts provide.
child is sitting in a rear seat outside position, see
“Rear Safety BeltComfort Guides” in the Index.
If the child isso small that the shoulder belt
is still
very close to the child’s
face or neck, you might
want to place the child in the center seat position,
the one that has only a lap
belt.
1-41
Wherever the childsits, the lap portionof the belt
should be worn low
and snug on the hips,just touching
the child’s thighs. This applies belt force
to the child’s
pelvic bones ina crash.
1-42
Safety Belt Extender
If the vehicle’s safety belt will fasten
around you, YQU
should use it.
But if a safety belt isn’tlong enough to fasten, your
retailer will order you an extender. It’s
free. When you
go in to orderit, take the heaviest coat you will wear,
so
the extender will be long enough for you. The extender
will be just for you, andjust for the seat in your vehicle
that you choose.Don’t let someone else use it, and use it
only for the seatit is made to fit. To wear it, just attach it
to the regular safety belt.
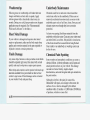
Checking Your Restraint Systems
Now and then, make sureall your belts, buckles, latch
plates, retractors, anchorages and reminder systems are
worlung properly. Look for any otherloose or damaged
restraint system parts. If you see anything that might
keep a restraintsystem from doing its job, have it
repaired.
Torn or frayed belts maynot protect you in a crash.
They can rip apart underimpact forces. If a belt is torn
or frayed, get a newone right away.
Replacing Seat and Restraint System
Parts After a Crash
If you’ve had a crash,do you need new belts?
After a very minor collision, nothing may be necessary.
But if the beltswere stretched, as they would
be if worn
during a more severe crash, then you need new belts.
If belts are cut ordamaged, replace them. Collision
damage also may mean you will need to
have safety belt
or seat parts repaired or replaced.
New parts and repairs
may be necessary even if the belt wasn’t being used
at
the time of the collision.
If your seat adjuster won’t work after a crash, the special
part of the safety belt that goes
through the seat tothe
adjuster may need to
be replaced.
I AA
Keys
The ignition keys arefor the
ignition only.
When a new Oldsmobile is delivered, the retailer
removes the plugsfrom the keys and gives them to
the
first owner. However,the ignition key may not have a
plug. If the ignition key doesn’t
have a plug,it will have
a bar-coded key tag.
Each plug or tag has code
a on it that tells your retailer
or a qualifiedlocksmith how to make extra keys. Keep
the plugs or key tagin a safe place.If you lose your
keys, you’llbe able to havenew ones made easilyusing
these plugs or tags.
If your ignitionkeys don’t have
plugs or tags, go to your
Oldsmobile retailer for the
correct keycode if you need a new ignition key.
The door keys are for the
doors and all other locks.
There are 15 alternative PASS-Key@ blanks, to help
discourage theft. Your retailer can help determine which
blank you need.
NOTICE:
Your Oldsmobile has a number of new features
a
that can help prevent theft. But you can have
lot of trouble getting into your vehicle if you ever
lock your keys inside. You may even have to
damage your vehicle to get
in.So be sure you
have extra keys.
2-2
From the inside, tolock the
door, slide the locking lever
down.
Door Locks
To unlock the door, slidethe
locking lever up.
Power Door Locks
With powerdoor locks, you can lock or unlock all the
doors of your vehiclefrom the driver or front passenger
door lock switch.
There are several ways tolock and unlock your vehicle.
The switch on each rear door works only that door’s
lock. It won’t lock (or unlock) all of the doors -- that’s a
safety feature.
From the outside, use your door key or Remote Lock
Control, if your vehicle hasthis option.
2-3
Door Open Reminder: If you have the information
You can program the automaticdoor lock feature to
into
center anda door is not fully closed when the transaxle allow the doors to remain locked after you shift
is in gear, a chime will soundand the information center
PARK (P).
will displayone of these messages:
1. Close your doors and turn the ignition on.
.
DRIVER DOOR AJAR
2. Keep yourfoot on the brake pedal.
PASSENGER DOOR AJAR
3. Press and hold the driver's powerdoor lock switch.
REAR DOOR AJAR
4. Move your shift lever outof PARK (P), then move
the shift lever back intoPARK (P).
Programmable Automatic Door Locks
5. Release the lock switch.
(Option)
.
;
I
i '
Just close your doors and turn on the ignition. Every
time you move your shift
lever out of P m K (P), all of
the doors will lock., And,
every time you stopand move
your shift leverinto PARK (P), your doors will unlock.
If someone needs to get
out while you're not in PARK
(P), have that person use the manual or power lock.
When the door is closed again,it will not lock.
automatically. Just use the manual or powerlock to lock
the door again.
i""
~
'
Yourdoors will now lock when you shift out of
PARK (P), and remainlocked until youuse the manual
or power door unlock switch.
To reprogram the door locks to lock and unlock when
you shift in and outof PARK (P) do the following:
1. Close your doors and turn the ignition on.
2. Keep your foot on thebrake pedal.
3. Press and hold the driver's power door unlock
switch.
4. Move the shift lever outof PARK (P), then move the
(P).
shift lever back into PARK
5. Release the unlock switch.
Rear Door Security Locks
Your Oldsmobile is
equipped with reardoor
security locks thathelp
prevent passengers from
opening the rear doors of
your vehiclefrom the
inside.
The rear doors of your vehiclecannot be openedfrom
inside when thisfeature is in use. If you want toopen a
rear door when the security
lock is on:
1. Unlock the door from the inside.
2. Then open the door from the outside.
If you don’t cancel the securitylock feature, adults or
older children whoride in the rear won’tbe able to open
the rear door from the inside. You should let adults and
older children know how these security locks work, and
how to cancel thelocks.
To cancel the reardoor security lock:
To use one of these locks:
1. Move the lever all the way up to the ENGAGED
position.
2. Close the door.
1. Unlock the door from the inside and open the door
from the outside.
2. Move the lever all the way down.
3. Do the same for the other rear door.
The rear door locks will now work normally.
3. Do the same thing to the other reardoor lock.
2-5
S e your retailer to match trausmitters to mother
vehicle.
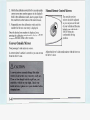
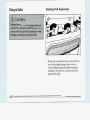
Battery Replacement
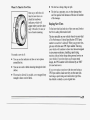
Trunk Lock
Under normal use, the batteries in your key chain
transmitter should last about two years.
To unlock the trunkfrom the outside,insert the door key
and turnit.
You can tell the batteries are weakif the transmitter
won’t work at the normal
range in anylocation. If you
have to get close to your vehicle before the transmitter
works, it’s probablytime to change the batteries.
To replace batteriesin the
Remote Lock Control
transmitter:
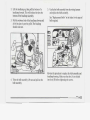
1. Remove the screw from
back cover.
2. Lift the front cover off,
bottom half first.
4. Reassemble the transmitter.
5. Check the transmitter operation.
2-8
Power Trunk Release (Option)
Press therelease button
located tothe left of the
steering column to release
the trunk lid. The Trunk
Security override switch
must bein the ON position,
and thetransaxle in
Move the switch to
OFF to override the power trunk
release. If you lock your glove box door and take the
door key with you (and your remote
lock control if so
equipped), thiswill help keep someone fromgetting into
your trunk. Movethe switch toON to again make the
power trunkrelease usable.
The optional remote lockcontrol transmitter will open
the trunk evenif the override switchis in the OFF
position.
Glove Box
Trunk Security Override (Option)
This feature is standard with
vehicles equipped with
Power Trunk Release.
Inside the glovebox is an
override switch that is
useful if you want to leave
valuables in the trunk when
using a commercial parking
lot.
Use the door key
to lock and unlock the glove box.
To
open, lift the latchrelease on the left side of the glove
box door.
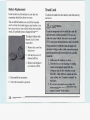
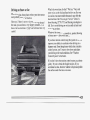
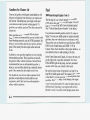
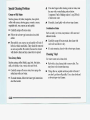
Theft
Vehicle theftis big business, especiallyin some cities.
Although your Oldsmobile hasa number of theft
deterrent features, we know that nothing we put
on it
can makeit impossible to steal. However, there are ways
you can help.
1
Key in the Ignition
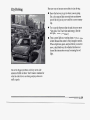
Parking Lots
If you walk awayfrom your vehicle with the
keys
inside, it’s an easy target
for joy riders or professional
thieves -- so don’t do it.
If you parkin a lot where someone willbe watching
your vehicle,it’s best tolock it up and takeyour keys.
But what if you have to leave your ignition key? What if
you have to leave something valuable in your vehicle?
When you park yourOldsmobile and open the driver’s
door, you’ll hear chime
a
reminding you to remove your
key from the ignition and take it with you. Always do
this. Your steering wheel willbe locked, and so will
your ignition and transaxle. And remember to lock the
doors.
Parking at Night
~
Park in a lighted spot, close all windows and lock your
vehicle. Remember tokeep your valuables outof sight.
Put themin a storage area,or take them with you.
1. Put your valuables in a storage area, like your
trunk or glove box.
2. Lock the glove box.
3. Lock all the doors except the driver’s.
4. Then take the door key with you.
PASS-Key@%
Your vehicle is
equipped with the
PASS-Key%
(Personalized
Automotive Security
System) theft deterrent
system.
When the PASS-Key% system senses that someone is
using the wrong key,it shuts down the vehicle’s starter
and fuel systems. For about three minutes,the starter
won’t work andfuel won’t go to the engine. If someone
tries tostart your vehicle again or uses another key
during this time,the vehicle willnot start. This
discourages someonefrom randomly trying different
keys with different resistor pelletsin an attempt to make
a match.
The ignition key mustbe clean and drybefore it’s
inserted in the ignition or
the engine may not start. If the
engine does notstart and the SECURITYlight is on, or
if you have the information center and you getthe
CLEAN KEY-WAIT 3 MIN message, the key may be
dirty or wet. Turn the ignition off.
PASS-Key% is a passive theft deterrent system.
This
means you don’thave to do anything different to arm or
disarm the system. It works when you insert or remove
the key from the ignition. PASS-Key% uses a resistor
pellet in the ignition key thatmatches a decoder in your
vehicle.
Clean and drythe key. Wait about three minutes and try
again. The security light mayremain on during this
time. If the starter still won’t work, andthe key appears
to be clean and dry, waitabout three minutes and try
another ignition key. At this time, you may also want to
check the fuse (see “Fuses and CircuitBreakers” in the
Index). If the starter won’t work with
the other key, your
vehicle needs service. If your vehicle does start, thefirst
ignition key maybe faulty. See your Oldsmobile retailer
or a locksmith who can service the PASS-Key%.
2-11
If you accidentally usea key that hasa damaged or
missing resistor pellet,the starter won’t work and the
SECURITY light willflash or, if you have the
information center,the CLEAN KEY-WAIT 3 MIN
message will appear.But you don’thave to wait ‘three
minutes before trying another ignition
key.
See your Oldsmobile retailer ora locksmith who can
service the PASS-Key% tohave a new key made.
If you’re ever drivingand the SECURITY lightcomes
on, or with theinformation center you get the
PASSKEY SYSTEM PROB message, you will
be able
to restart yourengine if youturn it off. Your
PASS-Key% system, however, is not working properly
and mustbe serviced by your Oldsmobile retailer. Your
vehicle is not protected bythe PASS-Key@% system.
If you lose or damagea PASS-Key’II ignition key,see
your Oldsmobile retailer or a locksmith who
can service
PASS-Key% to have a new key made.
New Vehicle 6LBreak-InS’
NOTICE:
Your modern Oldsmobile doesn’tneed an
elaborate “break-in.” But it will perform better
in the long run if you followthese guidelines:
1. Don’t drive at any one speed fast or
slow for thefirst 500 miles (804 km).
Don’t make full-throttlestarts.
2. Avoid making hard stops for the
first
200 miles (322 km) or so. During this
time your new brake linings aren’tyet
broken in. Hard stops withnew linings
can mean premature wear and earlier
replacement. Follow this “breaking-in”
guideline every time
you get new brake
linings.
3. Don’t tow a trailer during“break-in.”
See “Towinga Trailer” in the Index
for
more information.
--
--
(A) ACCESSORY:An “on” position in which you can
operate your electrical power accessories. Press
in the
ignition switch as youturn the topof it toward you.
Ignition Switch
(B)LOCK: The only positionin which you can remove
the key. This locks your steeringwheel, ignition and
transaxle.
A
E
With the ignition keyin the ignition switch, youcan turn
the switchto five positions:
(C) OFF: Unlocks the steering wheel, ignition, and
transaxle, but does not send electrical power to any
accessories. Use this position
if your vehiclemust be
pushed ortowed, but never try to push-start your
vehicle. A warning chime will soundif you open the
driver’s door when the ignition is off and thekey is in
the ignition.
(D) RUN: An “on” position to whichthe switch returns
after you start yourengine and releasethe switch. The
switch stays in the RUN position when theengine is
running. But even whenthe engine is not running, you
can use RUN to operate your electrical power
accessories, and to displaysome instrument panel
warning lights.
(E) START Starts the engine. When the engine starts,
release the key. The ignition switch will return to run
for
normal driving.
2-13
1
1
1
Key Reminder Warning: If you leave your key in the
ignition, in the off position, you will hear a warning
chime when you open the driver’s door.
Retained Accessory Power: If you have the optional
remote lock control, after you turn your ignition
off and
even remove the key, you will still
have electrical power
to such accessories as the radio and power windows
for
up to 10 minutes. When you opena door, power is
turned off.
NOTICE:
If your key seems stuck in LOCK andyou can’t
turn it, be sure it is all the way in. If it is, then
turn the steeringwheel left and rightwhile you
turn the key hard. But turn the
key only with
your hand.Using a tool to force
it could break
the key or the ignition switch.If none of this
works, then yourvehicle needs service.
Starting Your Engine
Move your shift lever toPARK (P) or NEUTRAL (N).
Your engine won’tstart in any other position-- that’s a
safety feature.To restart when you’re already moving,
use NEUTRAL (N) only.
NOTICE:
Don’t try to shift toPARK (P) if your Oldsmobile
is moving. If you do, you could damage the
transaxle. Shift toPARK (P)only when your
vehicle is stopped.
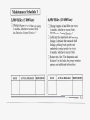
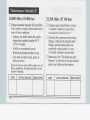
To start your3.8 Liter engine:
1. Without pushing the accelerator pedal, turn your
ignition key toSTART. When the engine starts,let
go of the key.The idle speed will go down as your
engine gets warm.
NOTICE:
Holding your key in START for longer than
15 seconds a t , a time will cause your battery to be
drained muchsooner. And the excessive heat can
damage your starter
motor.
2. If it doesn’t start right away, hold your key
in
START for about three tofive seconds at a time until
your engine starts. Wait about15 seconds between
each try to help avoid draining your battery.
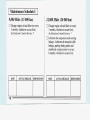
NOTICE:
Your engine is designed to workthe
with
electronics
in your vehicle. If’you add electrical parts or
accessories, you could change the way the fuel
injection system operates. Before
adding electrical
equipment, check with your retailer. you
If don’t,
your engine mightnot performproperly.
If you ever have to have your
vehicle towed, see
the part of this manual thattells how to doit
without damaging yourvehicle. See “Towing
Your Vehicle” in theIndex.
3. If your engine still won’t start (or starts but then
stops), it couldbe flooded with too much gasoline.
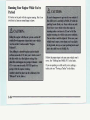
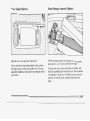
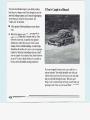
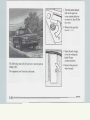
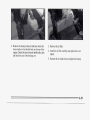
Try pushing your accelerator pedal all the way to the Driving Through Deep Standing Water
floor and holdingit there as you hold the keyin
START for about three seconds.If the vehicle starts
NOTICE:
briefly but then stops again,do the same thing, but
this time keep the pedal down for five or six seconds. If you drive too quicklythrough deep puddles or
This clears theextra gasoline from the engine. After
standing water, water cancome in through your
waiting about 15 seconds, repeat the normal starting
engine’s air intake andbadly damage your
procedure.
engine. Never drive through water that
is slightly
lower than the underbody
of your vehicle. If you
can’t avoid deep puddlesor standingwater, drive
through themvery slowly.
2-15
After you’ve used the
coolmt heater, bestme to
store the cordas it was beforetokeep itaway
from moving engine parts.If you don’t, it could
be damaged.
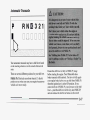
Automatic Transaxle
P
RN0321
c
Your automatic transaxle mayhave a shiftlever located
on the steeringcolumn or on the console between the
seats.
There are several different positionsfor your shift lever.
PARK (P):This locks your front wheels. It's the best
position to use when youstart your engine because your
vehicle can't move easily.
Ensure the shift lever is fullyin PARK (P) range
before starting the engine.Your Oldsmobile has a
brake-transaxle shift interlock.You have to fully apply
your regular brakebefore you can shift from PARK (P)
when the ignition key isin the ON position. If you
cannot shift out of PARK (P), ease pressure on the shift
lever -- push the shift lever all the way
into PARK (P)
and also release the shift
lever button on floor shift
2-17
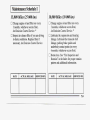
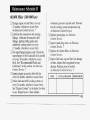
@ AUTOMATIC OVERDRIVE:This position is for
normal driving.If you needmore power for passing, and
you’re:
THIRD GEAR(3): This is like @, but you never go
into OVERDRIVE. Here aresome times you might
choose THIRD instead of @:
Going less than about 35 mph (56 km/h), push your
accelerator pedal about halfway down.
0
Going about 35 mph (56 km/h) or more, push the
accelerator all the waydown.
You’ll shift down tothe next gear andhave more power.
NOTICE:
If your vehicle seems to start up rather
slowly, or
if it seems not to shift gears.as
you go faster,
something may be wrong witha transaxle system
sensor. If you drive veryfar that way, your
vehicle can be damaged.So, if this happens, have
your vehicle serviced rightaway. Until then,you
can use SECOND (2) when you are driving less
than 35 mph (56 kmh) and 0OVERDRIVE for
higher speeds.
When driving on hilly, winding roads.
When towing a trailer,so there is less shifting
between gears.
0
When going down a steep hill.
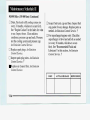
SECOND (2): This position gives you more powerbut
lower fuel economy. You can use SECOND on hills.It
can help control your speed as you
go down steep
mountain roads, but then you would also want to use
your brakesoff and on.
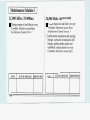
NOTICE:
Don’t drive in SECOND(2) for more than
5 miles (8 km), or at speeds over55 mph
(88 km/h), or you can damage yourtransaxle.
Use 0or THIRDas much as possible.
Don’t shift into SECOND unless
you are going
slower than 65 mph (105 kmh), oryou can
damage yourengine.
2-19
FIRST (1): This position gives you even more
power
(but lowerfuel economy) thanSECOND. You can useit
on very steep hills, or
in deep snow or mud. If the
selector lever is put
in FIRST, the transaxlewon’t shift
into first gear until the vehicle
is going slowly enough.
Parking Brake
NOTICE:
If your frontwheels can’t rotate, don’ttry to
drive. This might happenif you were stuck in
very deepsand or mud were
or up againsta solid
object. You could damage yourtransaxle.
Also, if you stop whengoing uphill, don’t hold
your vehicle there with only the accelerator
pedal. This could overheat and damage the
transaxle. Use your brakes or shift into
PARK (P)
to holdyour vehicle in position ona hin.
To set the parking brake, hold the regular brake pedal
down with your right foot. Push down the parking
brake
pedal with your left foot.
If the ignition is on, the brake
system warning light will
come on.
To release the parking brake, using the “push to release”
park brake pedal, hold the regular brake pedal down and
push the park brake pedal with your left foot.
This will
unlock the pedal. When
you lift your leftfoot, the park
brake pedal will follow it to the released position.
If you
I
2-20
try to drive away with
the parking brake on, the brake
light stays on and achime sounds until you release the
parking brake or recyclethe ignition. If you have the
electronic cluster, thechime can be turnedoff by
pressing RESET,but the PARKING BRAKE SET
message will remain.
Shifting Into PARK (P)
NOTICE:
Driving with the parking brake on can cause
your rear brakes to overheat. You may have
to
replace them, and you could also damage other
parts of your vehicle.
If you are towing a traileror parking on ahill, see
“Towing a Trailer”in the Index. That section explains
what to do first to keep the trailerfrom moving.
Steering Column Shift Lever
1. Hold the brake pedal down with your right foot and
set theparking brake.
2-21
2. Move the shift leverinto the PARK (P) position as
follows:
0
2-22
Pull the lever toward you.
Move the lever up asfar as it will go.
3. Move the ignition keyto LOCK.
4. Remove the key and takeit with you.If you can
walk away from your vehicle withthe ignition key in
your hand, your vehicle
is in PARK (P).
-
Console Shift Lever
1. Hold the brake pedal down with your rightfoot and
set the parking brake.
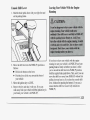
Leaving Your Vehicle With the Engine
Running
If you have to leave your vehicle with the engine
running, be sure your vehicle is PARK
in
(P) and your
2. Move the shiftlever into the PARK (P) position as
parking
brake
is
firmly
set
before
you
leave
it. After
follows:
you’ve movedthe shift leverinto PARK (P) position,
Hold in the button on the lever;
hold the regular brake pedal down. Then,
see if you can
@ Push the lever all the way toward thefront of
move the shiftlever away from PARK (P) without first
your vehicle.
pulling it toward you (or,
if you have the console shift
lever, without first pushing the button).
If you can,it
3. Move the ignition keyto LOCK.
means that the shift lever wasn’t fully locked
into
4. Remove the key and take it with you. If you can
walk awayfrom your vehicle with the ignition key in PARK (P).
your hand, your vehicleis in PARK (P).
2-23
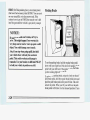
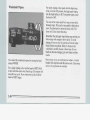
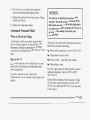
Torque Lock
Shifting Outof PARK (P)
If you are parlungon a hill and you don’t shift your
transaxle intoPARK (P) properly, the weightof the
vehicle may put too much
force on the parking pawl in
the transaxle. You may find it difficult to pull the shift
lever out of PARK (P). This is called “torque lock.”
To
prevent torque lock,set the parking brake and then shift
into PARK (P) properly before you leave the driver’s
seat. To find out how,see “Shifting IntoPARK (P)”
in the Index.
Your Oldsmobile has a brake-transaxle shift interlock.
You have to fullyapply your regular brakebefore you
can shift from PARK (P) when the ignitionis in the on
position. See “Shifting the Automatic Transaxle”
in the
Index.
When you are ready to drive, move
the shift lever outof
PARK (P) before you release the parking brake.
If “torque lock” does occur, you may needhave
to
another vehicle pushyours a little uphill to takesome of
the pressurefrom the transaxle,so you can pull the shift
lever outof PARK (P).
If you cannot shift outof PARK (P), ease pressureon
the shiftlever -- push the shift leverall the way into
PARK (P) as you maintain brake application. Then
move the shift lever into the gear you wish. (Press the
shift lever button before moving the shift lever on floor
shift console models.)
If you ever holdthe brake pedal downbut stdl can’t
shift outof PARK (P), try this:
1. Turn the key tooff. Open and close the driver’s door
to turnoff the Retained Accessory Power feature.
2. Apply and hold the brake until
the end of step 4.
3. Shift to NEUTRAL (N).
4. Start the vehicle and then shift to the drive gear you
want.
5. Have the vehicle fixed as soon asyou can.
2-24
I
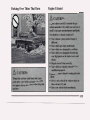
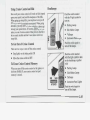
Parking Over Things That Burn
Engine Exhaust
1
f i r n SignaVMultifunctionLever
".
,
The lever on the leftside of the steering column
includes your:
0
Turn Signal and Lane Change Indicator
0
Headlamp High-Low Beam'
WindshieldWipers
WindshieldWasher
0
Cruise Control (Option)
Flash-to-Pass
2-28
Turn Signal and Lane Change Indicator
The turn signal has two upward (for right) and two
downward (forleft) positions. These positions allowyou
to signal a turnor a lane change.
To signal a turn, move the lever all way
the up or down.
When the turn is finished, the lever will return
automatically.
If you leave the turn signal on, achime will sound after
you’ve driven 3/4 of a mile.
A green arrow on the instrument panel will flash in the
direction of the turn orlane change.
Headlamp High-Low Beam Changer
To change the headlamps from low beamto high or high
to low, pullthe turn signallever all the way toward you.
Then release it.
To signal alane change, just raise or lower the lever
until the green arrow starts to flash. Hold it there until
you complete your lane change. The lever will returnby
itself when you release it.
When the high beams are on, a blue
light on the
instrument panel also willbe on.
As you signal a turn or a lane change, if the arrows don’t
flash but just stay on, a signal bulb may be burned out
and other drivers won’tsee your turn signal.If a bulb is
burned out, replaceit to help avoid an accident. If the
green arrows don’t go on at all when you signal a turn,
check the fuse. See “Fuses and Circuit Breakers” in the
Index.
This feature lets you use your high beam headlamps to
signal a driver in
front of you that youwant to pass. It
works evenif your headlamps are off.
If you have added wiringfor the towing a trailer, a
different turn signal flasher may
be used. With this
flasher installed,the signal indicator willflash even if a
turn signal bulb is burned out. Check the front,and rear
turn signallamps regularly to make sure they are
working.
Flash-to-Pass
To use it, pull the turn signal lever toward you.
If your headlamps are on, but on lowbeam, the system
works normally. Justpull the lever until it clicks. Your
headlamps will shift to high
beam and stay there.To
return to low beam,
just pull the lever toward you.
If your headlampsare on, and on highbeam, your
headlamps will switch to low beam.To get back to high
beam, pull the lever toward you.
2-29
Windshield Washer
At the top of the turn signallmultifunction lever there’s a
paddle with the word PUSH on it. To spray washer fluid
on the windshield,push the paddle for less than one
second. The wipers will clear the window and then
either stop or return to your preset speed.
For more
washer cycles,push and hold the paddle.
If the fluid level in the windshield washer is low,
vehicles withthe reminder package have a LOWWASH
FLUID light that willcome on. On vehicles withthe
Electronic Cluster, ifthe fluid level in thewindsheld
washer bottleis low, themessage LOW WASHER
FLUID will appear in the information center.
Driving without washer fluidcan be dangerous. A bad
mud splashcan block your vision.You could hit another
vehicle orgo off the road. Check your washer fluid level
often.
When using concentrated washerfluid,
follow the manufacturer’s instructions for
adding water.
Don’t mix water with ready-to-use washer
fluid. Water can cause the solution to freeze
and damage your washer fluid tank and
other partsof the watersystem. Also, water
doesn’t cleanas well as washerfluid.
Fill your washer fluid tankonly 3/4 fuIl
when it’s very cold. This allows for
expansion, which could damage the tankif
it is completely full.
Don’t use radiator antifreezein your
windshield washer. It can damage your
washer systemand paint.
2-31
Cruise Control (Option)
With cruise control,you can
maintain a speedof about
25 mph (40 krn/h) or more
without keeping your foot
on the accelerator. This can
really help on long trips.
Cruise control does not work at speeds
below about
25 mph (40 krdh).
Ltrol
When you apply your brakes, the cruise con
shllts off.
2-32
If your vehicle isin cruise control when the optional
traction control system beginsto limit wheel spin, the
cruise control will automatically disengage. (See
“Traction Control System’’in the Index.) When road
conditions allow you to safely use it again, you may turn
the cruise control back on.
To Set Cruise Control
1. Move the cruise control
switch to ON.
To Resume a Set Speed
Suppose you set your cruise control at a desired speed
and then you applythe brake. This, of course, shutsoff
the cruise control. But you don’t needto reset it.
Once you’re going about
25 mph (40 km/h) or more,
you can move the cruise
control switch from ON to
RfA (Resume/Accelerate)
for about half a second.
You’ll go right back up to yourchosen speed and stay
there.
2. Get up to the speed you want.
3. Push in the SET button at the end of the lever and
release it.
4. Take your foot off the accelerator pedal.
If you holdthe switch at R/A longer than half a second,
the vehicle willkeep going faster until you release the
switch or applythe brake. You could be startled and
even lose control. So unless you want to go faster, don’t
hold the switch at R/A.
2-33
i
i
To Increase Speed While Using Cruise
Control
To Reduce Speed While Using Cruise
Control
There are two ways togo to ahigher speed. Here’s the
first:
There are two ways toreduce your speed while using
cruise control:
0
Use the acceleratorpedal to get to the higher speed.
0
Push the button at theend of the lever, then release
the button and the accelerator pedal. You’ll now
cruise at the higher speed.
Here’s the second way to
go to ahigher speed:
Move the cruiseswitch from ON to R/A. Hold it
there untilyou get up to the speed you want, and
then release the switch.
To increase your speed invery small amounts, move
the switch toR/A for less than half a second and then
release it. Eachtime you do this, your vehicle willgo
about 1 mph (1.6 M)faster.
The accelerate feature will only work after you turn on
the cruise control and push the
SET button.
2-34
Push in the button at the endof the lever until you
reach the lower speed you want, then release
it.
To slow down in very small amounts, push the
button for less than half a second.Each time you do
this, you’ll go 1 mph (1.6 km/h) slower.
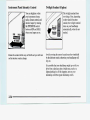
Passing Another Vehicle While Using
Cruise Control
Use the accelerator pedal to increase
your speed. When
you take your footoff the pedal, your vehicle will slow
down to the cruise control speed you set earlier.
Headlamps
Instrument Panel Intensity Control
You can brighten ordim
MIN
MAX
your instrument cluster,
radio, climate control, and
interior lamps by rotating
the INTEFUOR control
between MIN and MAX
when your lamps are on.
Rotate the controlaKthe way to MAX and you willturn
on the interior courtesy lamps.
Twilight Sentinel (Option)
The twilight sentinel does
two things. First, depending
on how darkit becomes
outside, the twilight sentinel
turns on your headlamps
automatically, when theare
needed.
Avoid covering the sensor located near the windshield
by the defroster outlet,otherwise your headlamps will
stay on.
It is possible that your headlamps might
go out if you
drive from a dark area into a bright area, such as a
lighted parking lot.If this happens, turn on your
headlamps with the regular
headlamp switch.
Lamp Warning System
Second, the twilight sentinel will keep yourheadlamps
on for up to three minutes,to light your way when you
leave your vehicle.
If you have the Driver Information Center, it provides a
warning when aheadlamp or other exterior lampis not
working. These are the warnings that could appear in the
information center:
To operate the twilight sentinel, rotatethe control to
MAX for the three minute delay. Rotate it the other way
to reduce the delay. Rotate the control to OFF to turn of
the twilight sentinel.
HIGH BEAM LAMP OUT
If it was off, move the control to the right to turnit on,
then back off. The lamps will come back on when you
put the transaxle in gear.
LOW BEAM LAMP OUT
Lamps On Reminder
BACK-UP LAMP OUT
If you open the drivers door with the ignition off and
while leaving the lamps on, you will hear a continuous
warning tone.
REAR LAMP OUT
CENTER STOP LAMP OUT
TAIL LAMP OUT
REAR TURN LAMP OUT
FRONT TURN LAMP OUT
FRONT PARK LAMP OUT
If there is a malfunctionin the monitoring system, the
message LAMP MONLINK PROB will appear in the
information center.
,
2-37
Cornering Lamps (Option)
When the DRL are on, only your low-beam headlamps
will be on. The taillamps, sidemarker and other lamps
The cornering lamps are designed to comeon when you
won’t be on. Your instrument panel won’tbe lighted
signal a turn. This will provide more light for cornering either.
at night.
When it is dark enough outside, your low-beam
Daytime Running Lamps (Canada Only)
headlamps will change to full brightness. The other
lamps that come on with your headlamps will also come
Daytime Running Lamps( D m ) make it easier to see
on. When it is bright enough outside, the regular lamps
the frontof your vehicle during the day. DRL can be
will go off, and your low-beam headlamps change to the
helpful in many different driving conditions, but they
reduced brightness of DRL.
can be especially helpful in the short periods after dawn
and before sunset.
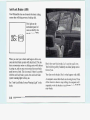
At night you can turn off all exterior lamps when
you
A light sensor on top of the instrument panel makes the are in PARK (P) by moving the twilight sentinel control
all the wayto OFF. If it was off, move the control to the
DRL work, so be sure it isn’t covered.
right to turn it on, then backoff. The lamps will come
The DRL system will make your low beam headlamps
back on when you put the transaxle
in gear.
come on at reduced brightness
in daylight when:
As with any vehicle, you should turn on the regular
0 The ignition is on
headlamp system any time you need
it.
The headlamp switch is off, and
0
The transaxle is not in PARK (P).
2-38 ~
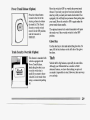
Front Reading Lamps (Option,
These lamps and the interior
courtesy lamps will come
on when you open a door.
They will turn off when you
close the door.
Rear Reading Lamps (Option)
I
.... .. .. '..:.. ..._:...._
..
<-
,
..' ....
, . ... - - _
(
%
~
These lamps go on when
you open a door.To turn on
a readinglamp when the
doors
are
closed,
press
the
:..: lens of the lamp. Press it
.. .
, again to turn the lamp off.
1
I
'
To turn on the readinglamps when the doorsare closed,
press the lens of thelamp you want on. Pressit again to
turn the lamp off.
To avoid draining your vehicle's battery,be sure to turn
off all front and rear reading lamps when leaving your
vehicle.
2-39
Once the compass is calibrated, it does not need tobe
recalibrated for any zone as long asthe mirror is left in
your vehicle and the vehicleremains in the same
geographical zone.
To calibrate the compass:
1. Set the switch on the mirror control to C M .
2. Turn vehicle ignition switchon. The letter C should
be displayed in the mirrorcompass window. If not,
hold in the calibration switchfor more than 10
seconds, andthe letter C will appear.To hold in the
calibration switch, insert apaper clip into the small
hole on thebottom of the mirror housing. The
display will show a number
first, but keep holding
until the letterC appears.
3. Quick Calibration: Drive the vehicle in a 360-degree
circle at less than 5 mph (8 M)until the display
reads a compass direction. Normal Calibration:
Drive the vehicle on your
everyday routine, and the
compass will eventually calibrate.
Compass variance is the difference between magnetic
north and geographic north. In some areas the difference
between the twocan be great enough tocause false
compass readings. If this happens, follow these
instructions to set the variance
for your particular
location:
1. Locate your location on the zone map. Noteyour
zone number.
2-41
2. Hold inthe calibration switchfor five seconds until the
current zone entry number appears
in the display. To
hold in the calibration switch, insert a paper into
clip
the small hole on the bottom
of the mirror housing.
3. Repeatedly press the calibration switch until the
number for the new zone entry
is displayed.
unce the desired zone number is displayed, stop
pressing the calibration switch and the display will show
compass direction within a few seconds.
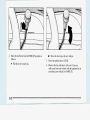
Manual Remote Control Mirrors
The outside rearview
mirrors should be adjusted
so you canjust see the side
of your vehicle and the area
behind your vehicle when
you are sitting in a
comfortable driving
position.
Convex Outside Mirror
Your passenger’s side mirroris convex.
A convex m i ~ ~ o rsurface
’s
is curved so you can see more
from the driver’s seat.
Adjust the driver’s side outside mirror with the lever on
the driver’s door.
Power Remote Control Mirrors (Option)
Convemence Net (Option)
The lever on the driver’s
door armrest controls both
outside rearview mirrors.
Turn the lever to theleft to select the driver’s side
rearview mirror, or tothe right to select the passenger’s
side rearview mirror. Then move the lever to adjust each
mirror so that youcan just see the side of your vehicle
and the area behind your vehicle when you
are sitting in
a comfortable driving position.
Your vehicle may have a convenience net. You’ll see it
just inside the back wall
of the trunk.
To lock the controls, turnthe lever tothe center position.
The net isn’tfor larger, heavierloads. Store them in the
trunk as far forward as you can. You can unhook the net
so that it will lieflat when you’re not using it.
Put small loads, like grocery bags, behind the net
to help
keep them from falling over during sharp turns or quick
starts and stops.
2-43
Sunglasses Storage (Option)
c
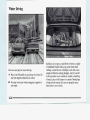
Sun Visors
Some models have a storage
compartment for glasses in
your overhead console.
Press the release button to
lower the door. Placeyour
glasses inside the door.
To
close thedoor, raise it and
press it into position.
To block out glare,you can swing down the visors.
You
can also remove themfrom the center mountand swing
them tothe side, while the auxiliary sunshade remains to
block glarefrom the front.
Visor Vanity Mirrors
Front Storage Armrest (Option)
r
.
.
.
&
. -, - .
.
Open thecover to expose the vanity mirror.
If your vehicle hasthe optional lighted vanity mirrors,
the lamps come on when youopen the cover.You can
adjust the brightness of the lamps by movingthe switch
up or down.
The front armrest opens into a storage areafor cassette
tapes, gloves, etc.To open it, lift the front edge.
You can store coins in theremovable coin holder, and
the dual cup holder flips forward for use. The cup holder
is designed to“break away” shouldit receive excessive
pressure. If it breaks away, snap the edges back into
place.
2-45
Front Storage Armrest(LSS Only)
Ashtrays and Lighter
Pull out the front ashtray
to reveal the ashtray, lighter
and accessory power outlet.
There are two levelsof storage in the armrest.To raise
the top cover, pull up the
fiont edge. To open the lower
storage compartment, pressthe release lever under the
front edge of the lower cover.
To clean the ashtray, open
it fully andlift it out.
To use the lighter,just push itin all the way andlet go.
When it’s ready,it will pop back by itself.
Rear Storage Armrest (Option)
To open, fold down the armrest console, press the latch
on the underside and pull up the top.
In addition to storage space there is a fold-out
cup
holder. The cup holder is designed to “break away”
should it receive excessive pressure.If it breaks away,
snap the edges back into place.
Don’t hold a cigarette lighter in with your hand
while itis heating. If you do, it won’t be able to
back away from the heating element when it’s
To clean the rear ashtray,
open it, push downon the
snuffer and pull the ashtray
out.
Accessory Power Outlets
With the ignition keyin the ON position, the accessory
power outlet canbe used to plugin electrical equipment
such as a cellular telephone,CB radio, etc. Follow the
proper installation instructions thatare included with
any electrical equipment you install.
If you have a benchfront seat, the accessory power
outlet is next to the ashtray and lighter.
If you have a
center console, you have two power outlets in the
console.
I NOTICE:
I
Don’t put papers and other things that burn into
your ashtrays.If you do, cigarettes or other
smoking materials could set them on fire, causing
damage.
NOTICE:
When using the accessory power outlets, the
maximum total loadof any electrical equipment
20 amps.
on all outlets should not exceed
2-47
I
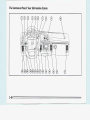
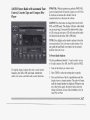
The Instrument Panel: Your Information System
I
2-48
I
-
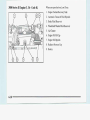
The Eighty Eight Royale Instrument Panel
11. Air Outlet
Your instrument panelis designed to let you knowat a
glance how your vehicle is running. You’ll know how
fast you’re going, how muchfuel you’re using, and
many other things you’ll need
to drive safely and
economically.
12. Glove Box Release
13. Air Outlet
14. Audio System
15. Ashtray, Lighter and Accessory Power Outlet
1. LightControls
16. Air Outlet
2. Turn SignaVMultifunction Lever
17. Traction Control Switch
3. Tilt Steering Wheel Lever
18. Hazard Warning Flashers Switch
4. InstrumentCluster
19. Driver Side Air Bag
5 . Horn
6. IgnitionSwitch
20. Steering Wheel Controlsfor Climate Control
System
7.Gearshift
21. Fuse Panel (under instrument panel)
Lever
8. Steering Wheel Controls for Audio System
9. Climate Controls and Driver Information Center
(Option)
IO. Passenger Side Airbag
22. Trunk Release Switch
23. Air Outlet
24. Hood Release
2-49
2-50
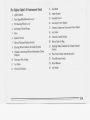
Eighty Eight LSS Instrument Panel
1.3.Air Outlet
Light C Q ~ O I S
14. Audio'System
15. Gearshift'Lever
Turn SignWultfincem Lever
Tilt Steering Wheel Lever
Instrument Cluster&ages
16. Accessory Pow@ Outlets
17. Ashtray, Lighter and Accessmy Pcwer Outlet
S 8. Air Outlet
Xgnition Switch
'
7. Hazard Warning Flashers Switch
8.
9.
10.
11.
12.
1 9 . Traction Control Switch
_ _
.
Drjver Side AirBag
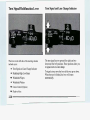
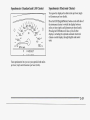
Instrument Panel Clusters
Your Oldsmobile is equipped withone of these
instrument panel clusters, which includes indicator
warning lights and gages that are
explained on the
following pages. Be sure to read about those that apply
to the instrument panel cluster for your vehicle.
I
Electronic Cluster
Standard Cluster
LSS Cluster
Speedometer (Standard andLSS Cluster)
Speedometer (Electronic Cluster)
Your speed is displayed in either miles per hour (mph)
or kilometersper hour (M).
110180
P
120 CZl
MPH km/h
P
RNB321
n
n
I-I
n n n n
Your speedometer lets you see your speed in both miles
per hour (mph) and kilometers per hour (km/h).
Press the E M (EnglisWMetric) button onthe left side of
the instrument cluster to switch the display between
miles per hour (mph) and kilometersper hour (M).
Pressing theE N button will also cycle all other
displays, includingthe optional automatic electronic
climate control display,through English and metric
units.
Odometer
You may wonder what happens if your vehicle needs a
new odometer installed.If the new onecan be set to the
mileage totalof the old odometer, then it must be. ifBut
it can’t, then it’s set at zero and a label be
must
put on
the driver’s door to show the old mileage reading when
the new odometer was installed.
Trip Odometer
Your trip odometer tellshow far you have driven since
you last resetit. To set it to zero, press the trip reset
button located below the trip odometer,
Your odometer shows howfar your vehicle has been
driven in either miles (used in the United States) or
kilometers (used inCanada).
Your Oldsmobile has a tamper resistant odometer.
If you
see silver lines between the numbers, you’ll know
someone has probably tampered with
it and the numbers
may not be true.
2-54
Odometer (Electronic andLSS Clusters)
RPM X 1000
Your Oldsmobile has a tamper resistant odometer.
The
odometer will readERROR if someone has tampered
with it.
You may wonder whathappens if your vehicle needs a
new odometer installed. Ifthe new one can be set tothe
mileage total of the old odometer, then it must be.
But if
it can’t, then it’sset at zero anda label must be put on
the driver’s door to show the old mileage reading when
the new odometer was installed.
Trip Odometer (Electronic andLSS Clusters)
Your trip odometer tells howfar you have driven, in
either miles or lulometers, since you
last reset it. Press
the E M (EnglisMetric) button onthe left side of the
instrument cluster toswitch the display betweenmiles
and kilometers.
Your odometer shows howfar your vehicle has been driven
in either miles (usedin the United States) or kilometers
(used in Canada). Press the EM (EnglishMetric) button
on the left side of the instrument clusterto switch the
display between miles and kilometers. Pressing
the E/M
button will also cycle all other displays through English and
metric units.
The trip odometer is displayed by pressing
the TRIP
button. To reset it to zero, pressTRIP to displaythe trip
odometer, then hold the button
for about three seconds
until the display resets.
2-55
Tachometer (LSS Cluster)
Warning Lights, Gages and Indicators
Warning lights and gages can signal that
something is
wrong beforeit becomes serious enough.to cause an
expensive repair or replacement. Paying attention to
your warning lights and gages could
also save you or
others from injury.
R P M X 1000
u
The tachometer displaysthe engine speed in revolutions
per minute (rpm).
Warning lights come on when there may be or is a
problem with one of your vehicle’s €unctions.
As you
will see in the details on
the next few pages, some
warning lightscome on briefly when you start the
engine just to letyou know they’re working. If you are
familiar with this section, you should
not be alarmed
when thishappens.
Gages can indicate when there may be isora problem
with one of your vehicle’s functions. Often gages
and
warning lights work together
to let you know when
there’s a problem with your vehicle.
When one of the warning lights comes on and stays on
when you are driving, or when
one of the gages shows
NOTICE:
there may be a problem,check the section that tells you
Do not operate the engine with the tachometer in what to do about it. Please follow this manual’s advice.
Waiting to do repairs canbe costly -- and even
the red area. Engine damage may occur.
dangerous. So please get to know your .warning lights
and gages.They’re a big help.
2-56
Safety Belt Reminder Light
When the key is turned
to RUN or START, a
chime will come on
for about eight seconds
to remind people to
fasten their safety
belts.
The safety beltlight will also come on and stay onfor
about 70 seconds. If the driver’s belt is already buckled,
neither the chime nor the light willcome on.
Air Bag Readiness Light
There is an air bag readiness light
on the instrument
panel, which shows AIR BAG. The system checks the
air bag’s electricalsystem for malfunctions. The light
tells you if there is an electrical problem.The system
check includes the air bag sensors and the wiring the
and
diagnostic module.For more information on the airbag
system, see “AirBag” in the Index.
AIR
BAG
You will see this light
flash for a few seconds
when you turn your
ignition to RUNor
START. Then the light
should go out. This
means thesystem is
ready.
If the air bag readiness light doesn’t come on when you
start your vehicle, or stays
on, or comes on when you
are driving, your air bag
system may not work properly.
Have your vehicle serviced right away.
Brake System Warning Light
BRAKE
Your Oldsmobile’s
hydraulic brake systemis
divided into twoparts. If
one part isn’t working,the
other part can still work and
stop you. For good braking,
though, you need both arts
working well.
(0)
to the .floor.It maytake longer to stc~p.Ethe Gghtis still
on, have the vehicle towedfor service. (See “Towing
Your Vehicle’’ in the bdex.)
Anti-Lock Brake System Warning Light
ANT‘LOCK
(@)
With the anti-lock
brake system, thislight
will come on when
you start your engine
and may stayon for
several seconds.
Traction Control System Warning Light
(Option)
TRACTION
ACTIVE
That’s normal.If the light doesn’t come on, have it fixed
so it will be ready to warn you if there
is a problem.
If the light stays on, turnthe ignition off. Or, if the light
comes on when you’re driving, stop as soon as possible
and turnthe ignition off. Then start the engine again to
reset the system. If the light still stays on, or comes on
again while you’re driving, your Oldsmobile needs
service. If the regular brake system warning light isn’t
on, you still have brakes, but you don’t have anti-lock
brakes. If the regular brake system warning light is also
on, you don’thave anti-lock brakes and there’s a
problem with your regular brakes. See “Brake System
Warning Light” earlier in this part.
This warning light shouldcome on brieflyas you start
the engine. If the warning light doesn’tcome on then,
have it fixed so it will be ready to warn you if there’s a
problem. If it stays on, or comes on when you’re
driving, there maybe a problem with your traction
control system and your vehicle may need service.
When this warninglight is on, the system will not limit
wheel spin. .Adjust your driving accordingly.
2-59
The traction control system warning light may
come on
for the following reasons:
1. If you turn the system off by pressing the button
located to the rightof the steering column, the
warning light will come on and stay To
on.turn the
system back on, press the button again.
The warning
light shouldgo off. (See “Traction ControlSystem”
in the Indexfor more information.)
Traction Control System Active Light
Standard andLSS Clusters
When your traction controlsystem is limiting wheel
spin, the TRACTION ACTIVE light will come on.
Slippery road conditions may exist
if this light comes
on, so adjust your driving accordingly.
The light will
stay on for a few seconds after
the traction control
system stops limiting wheel spin.
2. If there’s abrake system problem that is specifically
related to traction control, the traction control system Traction Control System Active Message
will turnoff and the warning light will come
on. If
Electronic Cluster with Driver Information Center
your brakes begin to overheat,
the traction control
When your traction control system is limiting wheel spin,
system will turn off and the warning light will
come
the TRACTION CNTL ACTIVE message will
be
on until your brakes cooldown.
displayed. Slippery road conditions may exist
if this
3. If the traction controlsystem is affectedby an
message is displayed,so adjust your driving accordingly.
off and
engine-related problem, the system will turn
The message will stay on for a few seconds after the
the warning light will
come on.
traction control system stops limiting wheel spin.
If the traction control system warning
light comes on
and stays onfor an extended period of time when the
system is turned on, your vehicle needs service.
Engine Coolant Temperature Gage and
Light (Standard andLSS Clusters)
c
If the gage pointer moves into the red warning zone and
the HOT warning light onyour instrument cluster goes
on, your engine is too hot!It means yourengine coolant
has overheated. A warning chime may also sound.If
you have been operating your vehicle under normal
driving conditions, youshould pull off the road, stop
your vehicle andturn off the engine as soon as possible.
In the section “Problems on the Road”, this manual
explains what to do.See “Engine Overheating” in the
Index.
This gage shows the engine coolant temperature on the
Standard Cluster. The LSS Cluster has a similargage to
the right of the fuel gage.
2-61
Engine Coolant Temperature Gage and
Light (Electronic Cluster)
If all bars light up, it indicates the coolant temperature is
about 255OF (124 O C). A slow chime will sound
for five
seconds and theHOT warning light willcome on. The
message HOT...AC DISABLED will appear in the
information center.
If the coolant temperature is over
26 1O F (127 O C), the
message HOT...STOP ENGINE will appear and a
fast-pulsed chime will sound.
It means that your engine
coolant has overheated.If you have been operating your
vehicle under normal driving conditions, you should
pull off the road, stop your vehicle and turn
off the
engine as soon as possible.
In the section “Problemson the Road”, this manual
explains what todo. See “Engine Overheating”in the
Index.
This gage has bars that show the engine coolant
temperature.
2-62
Low Coolant Warning Light or Message
LOW
COOLANT
If the engine is running and
this warning light comes on,
or the information center
displays LOW ENGINE
COOLANT, your system
may be lowon coolant and
the engine may overheat.
Malfunction Indicator Lamp
(Check Engine)
CHECK
A computer monitors
operation of your fuel,
ignition and emission
controls systems. This
warning light shouldcome
on when the ignition is on
but the engineis not
running, as a check to show
you it is working.
;
A warning chime will also sound.See “Engine Coolant”
in the Index and check your coolant levelat the coolant
recovery tank. If the level is low, bringit up to its proper
level. If the level is not low, have your low coolant
warning system serviced.
The LOW COOLANT warninglight will also come on
when you turn onthe ignition as a bulb check
to show
you it is working. If it doesn’t come on then,have it
fixed right away. After the bulb check, the light go
will
out for 20 seconds. If the light comes backon after
20 seconds, the system may be lowon coolant.
If it does notcome on at all, haveit fixed right away.
If it stays on, orit comes on while youare driving, the
computer is indicating that you
have a problem.You
should take your vehicle in
for service soon.
NOTICE:
If you keep driving your vehicle with this
warning light on, after awhile the emission
controls won’t workas well, your fuel economy
won’t be as good, and your engine may not run
as
smoothly. This could lead to costly repairs not
covered by your warranty.
2-63
I
1
I
I
Low Washer Fluid Warning Light or
Message (Option)
If you have the base or LSS
cluster with the optional
reminder package,the LOW
WASH warning light will
come on when the ignition
is on and the fluid container
is less than one-thirdfull.
LOW
WASH
J
I
If you havethe electronic cluster, LOWWASH FLUID
will be displayed in the infomation center when the
ignition is on andthe fluid container is less than
one-third full. A warning chime may also sound.
Driving without washer fluidcan be dangerous. A bad
mud splash can block your vision.
You could collide
with another vehicle. Check
your washer fluid often.
3 &A
Engine Oil Pressure Warning Light
OIL
PRESS
If you have a problem with
your oil, this warning light
may stay on after youstart
your engine, or come on
when you are driving.
7 3
A fast warning chimemay also sound.If you have the
electronic cluster, LOWPRES STOP ENGINE will be
displayed in the information center.These indicate that
oil is not going through your
engine quickly enoughto
keep it cool. The engine could be low on oil, or could
have some other oil problem.
Have it fixed right away.
The oil pressure warning light could also
come on in
three other situations:
0
1 NOTICE:
When the ignition is on but the engine is not running,
the light willcome on as a test to show you
it is
working, butthe light will go out when you turn the
ignition to start. If it doesn’t come on with the
ignition on, you may have a problem with fuse
the or
bulb. Have it fixed right away.
Sometimes when theengine is idling at a stop, the
light may blink on and off. Thisis normal.
0
If you make a hard stop, the light maycome on for a
moment. This is normal.
Damage to your engine from neglected oil
problems can be costly and is not covered
by your
warranty.
2-65
Engine Oil Level Warning Lightor Message
OIL
WEL
When the CHECK OIL or
OIL LEVEL warning light
comes on, or the
information center displays
CHECK OIL LEVEL, it
indicates that theengine oil
level is 1 to 1 112 quarts
(0.95 L to 1.4 L) low.
A warning chime may also sound.The warning light or
message will come on fortwo to four seconds when the
ignition is turned on, as a bulb check to show you
it is
working. If it doesn’t come on, haveit fixed right away.
It will then gooff. Even if you have a lowoil level, it will
go off for 15 to 25 seconds. Then,if the oil level is low,
the warning light or message will come on20for
to
40 seconds and a’wamingchime may sound. If the oil
level is okay, the warning light or message will remain
off.
If the warninglight or message comes on after the15 to
25 second delay,check the dipstick level.If it reads low,
the engine oil should be brought up to theproper level
(see “Engine Oil”in the Index).The warning light or
message will remainoff after the engine oil has been
2-66
brought to the proper level and
the ignition has beenoff
for eight minutes.The eight-minute delay allows the
majority of the oil to drain back into
the oil panto
prevent afalse low condition.
Battery Warning Light
This light will come on
briefly when you start the
vehicle, as a check to show
you it is working; thenit
should go out.
VOLTS
If it stays on, orcomes on while you are driving, you
may have a problem with the electrical charging system.
If you have the electronic cluster, the warning light may
be accompaniedby the message CHECK CHARGING
SYSTEM in the information center. Have
it checked
right away. Driving while this light
is on could drain
your battery.
If you must drive a short distance with the lightbeon,
certain to turnoff all your accessories, such as the radio
and climate control.
Fuel Cage .andLowFuel Light
I
\\
There are-four
buttons that control
the functionsof 'the
Driver Information
Center.
-
UNLEADED FUEL ONLY
~~
~
SEL
:Press this button to select one of t h five.
~
Momation categories.
SEL 4 :Press this button to change between the two
functions in each category. The functions found in each
category are:
Driver Information Center Displays
Fuel: Fuel Used and Fuel Range
Economy: Instant and Average Fuel Economy since
last reset
0
UNLEADED FUEL ONLY
Gages: Tachometer and Battery Voltage
Oil: Oil Pressure and Oil Life since last reset
Date/ET: Date and Elapsed Time since last reset
ON/OFF: Press this button to turnthe system on oroff.
When off, the DIC willcontinue to display diagnostic
messages as necessary.When you turnthe system back
on, any current diagnosticmessages will be displayed
again. If there are no current
messages, MONITORED
SYSTEMS OK will be displayed.
RE-SET This button is used with other buttons to reset
the system functions. It is also used to shut off the
chime
with most diagnostic messages.
When you turn on the ignition,
the Driver Information
Center (DIC) displays:
INFORMATION CENTER
If no problemsare detected, the screen will return the
to
mode selected whenthe ignition wasturned off.
If a problem is detected, chime
a
will sound andthe
diagnostic message will be displayed.
Except for the
messages HOT...STOP ENGINE, LOW BRAKE
FLUID, LOW PRESSTOP ENGINE (low oil pressure),
and PARKINGBRAKE SET, themessage and chime
can be shut off by pressing RESET.If the message
PARKING BRAKE SET or LOW BRAKEFLUID is
2-69
displayed, only thechime can be shut off by pressing
RESET. If the message HOT. ..STOP ENGINELOW
or
PRES STOP ENGINEis displayed, neither thechime
nor the message canbe shut off the problem requires
immediate attention. The chime associated with a
diagnostic message will shut
off when eitherSEL is
pressed to view other functions.
If there are multiple diagnostic messages, each will be
displayed for two seconds; then the system will display
the next message. All displays are updated continuously.
To change the DIC display,
and all other displays, to
English or metric units,
press theE M button.
Fuel Used
Press SEL until FUEL is selected in the display
directly above the DIC controls. Press SEL 4 if
necessary to display how much fuel has been used since
you last pressed the reset button.
The display will show
a readingsuch as:
10.4 GALLONS USED or
39.3 LITERS USED
To learn how much fuel will be used
from a new starting
point, first display fuel used, then press RESET until
RESET appearsin the display (aboutone second).
If RESET is pressed and held
for at least five seconds,
fuel used, fuel range, average fuel economy, and elapsed
time will all be reset and TRIP FUNCTIONS RESET
will be displayed.
Do not confuse fuel used with the amount
of fuel
remaining in your tank.
Fuel Range
v
Press SEL to select FUEL. Press SEL 4 b if
necessary to display the fuel range. The display will
show a reading such as:
FUEL RANGE235 MI or
FUEL RANGE 378 KM
Fuel range calculates theremaining distance youcan
drive without refueling, allowing a one gallon (4 liter)
reserve. It’sbased on average fuel economy and the fuel
remaining in the tank.
If RESET is pressedand held for at least five seconds,
fuel used, average fuel economy, andelapsed time will
all be reset. TRIP FUNCTIONS RESET will be
displayed briefly.Because fuel range is based on
average fuel economy, the fuel range will also change.
Instantaneous Fuel Economy
Press SEL 7 to select ECONOMY. Press SEL 4 if
necessary to display the instantaneous
fuel economy.
The display will showa reading such as:
Instantaneous fuel economy varies with your driving
conditions (accelerating, bralung, hills,etc.). RESET
does not function in this mode.
Average Fuel Economy
v
Press SEL to select ECONOMY. PressSEL 4 b if
necessary to display theaverage fuel economy.The
display will show a reading
such as:
25.2 AVG MUGAL or
35.1 AVG WlOO KM
Average fuel economy is viewed as a long term
approximation of your driving over all driving
conditions. Press RESET untilRESET appears in the
display (aboutone second) to learn theaverage fuel
economy from a new starting point.
If RESET is pressed and heldfor at leastfive seconds,
fuel used, fuel range,average fuel economy, and elapsed
time will allbe reset and TRIP FUNCTIONS RESET
will be displayed.
22 INST MUGAL or
31 INST W l O O KM
2-71
Tachometer (Engine RPM)
v
Press SEL to select GAGES. Press SEL 4 if
necessary to display theengine rpm. The display will
show a reading such as:
TACHOMETER 1800 W M
Battery Voltage
Press SEL to select GAGES, Press SEL 4 b if
necessary to display the electrical system voltage.
The
display will show a reading
such as:
BATTERY 13.7 VOLTS
Oil Pressure
Press SEL to select OIL. Press SEL 4 b if necessary
to display theoil pressure. The display willshow a
reading such as:
OIL PRESSURE 57 PSI
i
OIL PRESSURE 393 KPA
Oil Life
v
Press SEL to select OIL. Press SEL 4 if necessary
to display theoil life. The display willshow a reading
such as:
OIL LIFE 84%
This is an estimateof the oil’s remaining usefullife. The
system predicts remainingoil life using inputsfrom
coolant temperature,engine rpm, and vehicle speed.It
alerts you to change the oil on
a schedule consistent with
your vehicle’s driving conditions.
When remaining oillife is 9% or less, the displaywill
show:
CHANGE OIL SOON
Then, when you start the vehicle, a tone will sound and
the CHANGE OIL SOON message will displayeach
time the vehicle is started.Your vehicle’s engineoil is
almost spend andyou should schedule an oil change
soon.
2-72 I
When the oil life is zero, a tone will soundand the
display willshow:
CHANGE OIL NOW
Then, when you startthe vehicle, a tone will sound and
the CHANGEOIL NOW message will displayeach
time the vehicle is started.
To reset the oillife display aftereach oil change:
I. Acknowledge all diagnostic messages by pressing
RESET.
2. Press SEL toselect OIL. Press SEL 4
necessary to displaythe oil life.
if
Be careful not to reset the oil
life accidentally at any
time other than when the oil has just been changed.It
can’t be reset accurately until the next
oil change.
The DIC does not replace the Maintenance Schedule in
this manual. The oil change reminder will not detect
dusty conditions orengine malfunctions that may affect
the oil. If you drivein dusty areas, change your oil every
3,000 miles (5 000 km) or three months, whichever
comes first, unless the DIC instructs you to do so sooner.
The DIC doesnot measure how much oil is in the
engine. So, be sure tocheck your oil level often. See
“Engine Oil” in the Index.
3. Press and hold the RESET button for about five
seconds. Once the oil life index has been reset, a
RESET message will be displayed andthen oil life
will change to 100%.
2-73
Date
v
Press SEL to selectDATEET. Press SEL 4 b if
necessary to display thedate. The display will show a
reading such as:
FFU OCTOBER 8
To change the date:
1. Display the date as described above.
2. Press and holdRESET for about one second until the
display shows MONTH?" D D N Y with
MM/DD/YY representing thedate currently stored
in the DIC.
Note: If you allow more than10 seconds to elapse
between steps, theDIC automatically reverts to the
last date stored inthe DIC. You would have to start
this procedure over.
3. The numbers for the month shouldbe flashing. Press
SEL v to decrease these numbers. Press
SEL 4 b to
increase these numbers. Press and hold either button
for more than one second tochange the numbers
more rapidly. The display will scroll from01 to 12.
When the month displayed is correct, press
RESET
to enter the month.
4. The display should showDAY? MM/DD/YY. DD
should be flashing. Using both
SEL buttons, set the
day using the procedure described in step
3. The
display will scrollfrom 1 to 29,30, or 31, depending
on the month selected. When the day displayed is
correct, press RESETto enter the day.
MM/DDNY. YY
5 . The display should show YEAR?
should be flashing. Using bothSEL buttons, set the
year using the procedure described
in step 3. The
display will scroll from00 to 99. When the year
displayed is correct, press RESET to enter the year.
If a valid date is set, the display will automaticallyexit
to the date mode.
If February 29is set and theyear
selected is not a leap year, the setting will be changed to
February 28.
If the radiois removed or replaced with a non-GM
radio, the DIC will ask
for the time before exiting to
the
date mode. The procedure for setting the time is very
similar to the procedure
for setting the date.
Elapsed Time
Press SEL to select DAmLET. I3es.s EEL r( if
necessary to display the time. The dsplay will sho& a
reading such as:
02: 19 ELAPSED
COOLANT LVL SYS PROB
Canadian andExport VehiclesOnly
21
COOLANT SENDER PROB
English messages willappear in the information center
for two seconds. Then the numeric equivalent will
appear for two seconds.
22
OIL PRES SENDER PROB
24
TRACTION CNTL ACTIVE
25
TURN SIGNAL ON
26
DRIVER DOORAJAR
MESSAG?
27
HOT...STOPENGINE
PASSENGER DOOR AJAR
1
28
REAR DOOR AJAR
2
PARK BRAKE SET
29
PASSKEY SYSTEM PROB
3
LOW BRAKE FLUID
30
HIGH BEAMLAMP OUT
4
LOW PRES STOP ENGINE
31
LOW BEAM LAMP OUT
5
CLEAN KEY-WAIT 3 "V
32
CENTER STOP LAMP OUT
9
HOT.. .AC DISABLED
33
TAIL LAMP OUT
10
CHECK OIL LEVEL
34
BACK-UP LAMP OUT
11
CHANGE OIL SOON
35
REARLAMPOUT
12
CHANGE OIL NOW
36
FRONT TURN LAMP OUT
13
LOW FUEL
37
FRONTPARK LAMP OUT
14
LOW AC REFRIGERANT
38
LAMP MON LINK PROB
15
CHECK CHARGE SYSTEM
39
OIL LVL SYS PROB
16
LOW ENGINE COOLANT
40
COOLANT LVL SYS PROB
17
LOW WASHER FLUID
49
BA'ITERY RECONNECT
18
PRND321PROB
50
MONITORED SYSTEMS OK
19
DATE FUNCTION PROB
51
INFORMATION CENTER
20
AIR BAG PROB
NO.
2-76
Section 3 Comfort Controls and Audio Systems
In this sectionyou'll find out how to operate
the comfort
control systems and audio systems offered with your
Oldsmobile. Be sure to readabout the particular system
supplied with your vehicle.
Four Season Climate Control
also has aflow-through ventilation system described in
this section.
Temperature Control: This knob changes the
temperature of the air coming through the system. Turn
the knob toward the red
zone (clockwise) for warmer
air. Turn theknob toward theblue zone
(counterclockwise) for cooler air.
:The fan control manually selects the
force of air
you want. Turn theknob clockwise for more air flow.
Turn the knob counterclockwise for less air flow.
Directional Controls:Turn the directional control knob
to selectthe desired air flow. An indicator
light will
show the current selection.
The air conditioner and heater work best
if you keep
your windows closedwhile using them. Your vehicle
WDefrost: Use to directmost of the air tothe
windshield andside window vents.The air conditioning
may run to dehumidify the air if the
temperature is
above 40°F (4°C).
DEFOG: Use on cold, humid days when the windows
become foggy.The air is directed through the
windshield, side window, andlower vents.
LOWER: Use to direct mostof the air through the
lower vents. Some air willflow through the windshield
and side window vents.
BI-LEV: Use bi-level on cool, but sunny days.This
setting directsair in two ways. Cool outside air is directed
to the upper portion ofyour body through the upper vents
in the instrument panel. Warmedair is directed through the
lower vents, witha little air flow through the windshield
and side window vents. At timesthis temperature
Merence may be more apparentthan others.
UPPER: Use,to direct a+flow through the upper vents
in the instrument panel.Some air willalso flow through
the lower outlets.
RECIRC: When RECIRC is selected, the system will
limit the amountof fresh air entering your vehicle.
This
is helpful when you are trying to cool the air quickly or
limit odors entering your vehicle. Air flow is directed
through the upper instrument
panel vents.
OFF: Turns off the climate control system.This is the
only setting which fully turns
off the fan.
3-2
Air Conditioning
The air conditioning may run when defrost
is selected if
the temperatureis above 40°F (4°C). In any other
mode, you can select or turn off
air conditioning as
desired by pressing N C . The indicator light will glow
while the air conditioningis operating.
For maximum cooling, place the directional control to
RECIRC, turn the fan knob
clockwise for highest fan
speed, and turn the
temperature knob counterclockwise
to the coldest setting.
On very hot days, open the windows
long enough to let
the hot inside air out. This reduces
the time theair
conditioner’s compressor willhave to run, which should
help fuel economy.
Rear Window Defogger (Option)
Press to warm the
defogger grid on the
rear window. The
indicator light will glow
while the rear window
defogger is operating.
The rear window
Automatic Electronic Climate
Control (Option)
lfftl R. DEF: If you turn it on again, thedefogger will
oDerate for about five minutes onlv.
, You can also turn
off the defogger by turning off the ignition or pressing
R. DEF
operation.
changing
Constant
again.
I
Do not attach a temporary vehicle license across
the
defogger grid on the rear window.
NOTICE:
Don't use.a razor blade or something else sharp
on the insideof the rear window.If you do, you
could cut or damage the warming grid, and the
repairs wouldn't be coveredby your warranty.
This climate control system is designed for set-and-forget
temperature
setting
of the
causes erratic operation. Allow about
20 minutes after
starting the vehicle for the system to regulate before
making additional temperature setting adjustments.
Immediately selecting90"F (32"C) will not warm the
vehicle any faster then selecting75"F (16 " C).
With this system, youcan control the ventilation,
heating, and air conditioning in your vehicle, or you can
use the automatic setting. Your control settingis
remembered for the next time you start your car. If the
system was set for
FRONT however, it comes back on
in AUTO if the engine is offfor more than40 minutes.
The air conditioner and heater work best
if you keep the
windows closed while using them.
Your vehicle has the
flow-through ventilation system described later
in this
section.
The digital displays showsthe inside temperature setting
or the outside temperature.
The outside temperature
sensor is most accurate when the vehicle is moving.
During stops, the outsidetemperature display shows the
previous drivingtemperature for best accuracy and
system control.
The display also showsthe fan speed when it is in
manual mode,AUTO when the system is in automatic
mode, andOFF when the system is turnedoff.
If you have the LS or Electronic cluster, press the E/M
(EnglisMetric) button nearthe odometer to cycle the
display between O F and "C.Pressing theE/M button
will also cycle all other displays between
English and
metric units.
3-4
Manual Mode
In manual mode, you select the direction
of air flow and
fan speed. The system will determine the amount
of
heating or cooling needed to maintain the temperature
you select. Air conditioningcan be selected or turnedoff
as desired, except in the DEFOG and FRONT modes.
Automatic Mode
In automatic mode,the amount of air conditioning or
heating, directionof air flow, andfan speed are
automatically controlled to maintain the temperature
you select. You can also manually control either the
fan
speed or directionof air flow, leaving the other function
in automatic.Air conditioning can be selected or turned
off as desired, exceptin the DEFOG and FRONT
modes.
When theengine is cold, fan speed is kept low until
warm airis available.
When the system is set
for FRONT defrost, the fan
speed starts low to reduce windshield fogging,
if any
snow is on the hood as you start driving.
Fan speed will
increase briefly after short stops when engine
the
has
been turned off to reduce any stuffy feeling.
Controls
Temperature Control:Turn the knob to set the interior
temperature you want. Turn theknob toward the red
zone (clockwise) for warmer air. Turn the knob toward
the blue zone (counterclockwise) for cooler air.The
temperature you set will be displayed on the screenfor
five seconds,mthen the outside air temperature will be
displayed. Rotate the knob one click torecall the set
temperature for five seconds. Startwith the midpoint
temperature setting of 75"F (24"C) andallow the
system to adjust.
Your system has two sun sensors ontop of the
instrument panel that detect direct sunlight and
the
increased warmingcaused by it. To keep you
comfortable on a sunny day, the system may reduce the
interior temperature by as much as5OF (3"C) below the
setting on the display.Be careful notto put anything
over the two sun sensors onthe dash. If you do, the
system will think it's night and the vehicle will get
warmer.
h s h the.temperature control knob
to place the entire
system in automatic mode. The word
AUTO will be
displayed. The system will
try to maintain the set
temperature. IT you set the temperature for
60"F (16O C) or
90°F (32"C), the fan willgo to its highest speed, unless
you manually select a lower speed. The systemwill
maintain full cold or full hot operation at these settings.
The direction of air flow will vary with your conditions.
For example, when you startthe vehicle in cold weather,
the system will direct airthrough the lower vents. As the
vehicle warms up, the warm air will
be split between the
windshield andlower vents, with cooler air directed
through the instrument panel vents.
% Fan Control: This knob manually selects theforce
of air you want. Turn the
knob clockwise for more air
flow. Turnthe knob counterclockwise for less air flow.
In automatic, fan speed is controlled automatically.
Turning thisknob places the fan in manual mode.
Although theknob can be turned continuously,tumi
the knob when the display shows maximum or
minimum has no effect on fan speed.
Push this knob to turn the climate control
system off.
When off, thesystem will continue adjusting and
attempt to maintain the inside
temperature you have set.
3-5
Directional Controls:Except when thesystem is set for
LOWER: Use to direct mostof the air through the
DEFOG andFRONT, air conditioning can be selected or lower vents.Some air will flow through the windshield
turned off as desired.
and side window vents.
Press one of the buttons listed below to select the
desired air flow. An indicator
light will show the current
selection. Pressing the button
for the selectionin use
will display the inside
temperature setting.
UPPER: Use to direct mostof the air flowthrough the
upper ventsin the instrument panel. Some air will also
flow through thelower outlets.
BI-LEV: Use bi-level on cool, but sunny days.This
setting directs air intwo ways. Cool outside airis
directed to the upper portionof your body throughthe
upper ventsin the instrument panel. Warmed air is
directed through thelower vents, with a little air
flow
through the windshield and side window vents. At times
this temperature difference maybe more apparent than
others.
DEFOG: Use on cold, humid days with two or more
passengers when the windowsfog. The air is directed
through the windshield, side window, and lower vents.
The air conditioning may run
if the temperature is above
40°F (4" C) to dehumidify theair.
9FRONT Use defrost to direct mostof the air to
the windshield and side window vents.
The air
conditioning may runif the temperature is above40°F
(4"C) to dehumidify theair.
RECIRC: When RECIRC is selected, the system will
limit the amountof fresh air entering your vehicle.
This
is helpful when youare trying to cool theair quickly or
limit odors entering your vehicle. Air
flow is directed
through the upper instrumentpanel vents. This control
does not affect air
flow direction. DEFOG andFRONT
will not recirculate.
Air Conditioning
Rear Window Defogger
The air conditioner cools anddehumidifies the air inside
the vehicle. The air conditioningcompressor runs only
when required by conditions.
@ REAR: Press to warm the defogger grid on the rear
The air conditioning isalways enabled when DEFOG
and FRONT are selected. In any other mode, you
can
select or turnoff the air conditioning as desired by
pressing A/C. The indicator light will glowwhile the air
conditioning is enabled.
For maximum cooling, turnthe temperature knob
counterclockwise to the coldest setting.Do not select
RECIRC while the inside airis hotter than the outside
air. In manual mode, selectingA/C and LOWER will
use the lower vents and coolthe vehicle more quickly.
The direction of the cool aircan be controlled by
adjusting, or turningoff, the outlets in the dash. Aiming
them over your shoulder will benefit bothfront and rear
passengers. Back seatpassengers can also direct airflow
using the air outlets at the
rear of the center console.
window. The indicator light will glow while the rear
window defogger is operating.The rear window defogger
will turn off automatically after about10 minutes of use.
If you turn it on again, the defogger will operate for about
five minutes only.You can alsoturn off the defogger by
turning off the ignition or pressing REAR again.
Do not attacha temporary vehicle license across the
defogger grid on the rear window.
I NOTICE:
Don’t use a razor blade or something else sharp
on the insideof the rear window.If you do, you
could cut or damage the warming grid, and the
repairs wouldn’t be covered
by your warranty.
On very hot days, open the windows long
enough to let
the hot inside air out.
This reduces the time the air
conditioner’s compressor will have to run, which should
help fuel economy.
3-7
Passenger Temperature Control
The right front seat
passenger can control
the temperatureof
their seating area.
Press thePASS button
on the main control
panel to activate the
passenger comfort
control.
Adjust the temperature usingthe control onthe
passenger’s door. The passenger temperature setting can
be up to5O F (3O C) cooler or warmer than
the primary
setting by turning theknob toward bluefor cooler, or
turning the knob toward red
for warmer.
3-23
I
If the climate control systemis off, activating either
control will place the system
in automatic mode.
If you have this feature, sun on
one side of the vehicle
will cause the climate control system
to automatically
supply cooler air to that side.
Extended Idling with Automatic Electronic
Climate Control
When theengine idles for a long time,the outside
temperature sensor may be affected
by warrn airfrom
the engine.The climate control system may blow air
that is too cool.This should stoponce the vehicle is
moving again. Extended idling
is not recommended.See
“Engine Exhaust” in the Index.
Steering Wheel Touch Controls for Climate
Control (Option)
Rear Outlets (Option)
Some heating and cooling
controls can be adjusted at
the steering wheel.Other
touch controls also operate
some audio controls.
Press theupper part of the fan control to increase the fan
speed; press thelower part toreduce the fan speed.
Press theupper part of the TEMP control toraise the
inside temperature setting; pressthe lower part tolower
the setting.
Slide the center controlup to direct airupward. Slide it
down to direct air downward.The center positionwill
also directair toward eitherside of the rear seating area.
3-9
I
I
Flow-Through Ventilation System
Audio Systems
Your Oldsmobile’s flow-through ventilation system
supplies outsideair into the vehicle whenit ismoving.
Outside air will also enter the vehicle when the h :er or
the air conditioningfan is running.
The following pages describe the audio systems
available for your Oldsmobile, and howget
to the best
performance from them. Please read about the system
in
your vehicle.
Ventilation Tips
Keep the hoodand front air inlet free of ice, snow, or
any other obstruction (such as leaves).
The heater
and defroster will work better, reducing the chance
of fogging the insideof your windows.
Setting the Clock
j
0
H R or MN button
To set the clock, press and hold the
until the number in the display begins to change.
Let up
as it gets close to the correct time.
There will be an
When you enter a vehicle in cold weather, select
the
LOWER setting, thenturn the blower fan to highfor
initial two-second delay before the clock goes
into the
a few moments before driving away. This will blow time-set mode.The A or P in the display designates AM
moist airfrom intake ducts toward the floor, not the or PM in clock adjust mode.The A or P replaces the
windshield. It reduces the chanceof fogging the
channel momentarily. The clock may be set with the
inside of your windows.
ignition off.
Keep the air path under the front seats clear
of
objects. This helps airto circulate throughout your
vehicle.
I
I
No matter which audio system you
have in your vehicle,
setting the clock is easy.
3-10
A W M Stereo Radio
AM/FM: Press the A
" button to change-between
the AM, FMl, and FM2 bands.The display will show
which band you are receivirig:
TUNE: Press the TUNE knob to release itfrom the
recessed position. Turnit to tune radio stations.. Push the
knob back in to return it to the recessed position when
not in use.
To Preset Radio Stations
The five pushbuttons labeled 1-5 can be used toset up
to 15 radio stations (five AM,five FM1 and five FM2).
1. Tune in the station you wantto store.
The digital display indicates thetime or radio station
frequency, theAM or FM radio band, whether the
station isin stereo, and other audio system functions.
PWRNOL: With the ignition on, push thePWRNOL
(powerlvolume)knob to turnthe system on oroff. Turn
it clockwise to increase thevolume. Turn it
counterclockwise to decrease the volume.
2. Press and holdone of the five pushbuttons until the
display shows achannel number. The radio will mute
until the channel, number is displayed. Whenever you
press that button again,
,the preset station will return.
Always check whether you're in AM, FM1,or FM2.
RECALL: When the ignition isoff, press RECALL to
display the time.When the radio is on, pressRECALL
to change the display between the radio station and the
time. After five seconds the display will return tothe
normal display.
3-11
i
I
I
The radio can be set so that eitherthe time or radio
station is normally displayed when the radio
is playing.
To do this, press RECALL to display the
time or radio
station as desired, thenhold RECALL down until the
display flashes.
TREB: Press the treble button lightly to release
it from
its recessed position, then pull
it out to its fully extended
position. Turnit to adjust treble response.As you turn
the knob you willfeel the center position.Push the knob
back in to returnit to its recessed position.
A SEEK 7:When you pressSEEK while playing the
radio, the radio will searchfor the next higher or lower
station and stop. The radio will be muted while seeking.
BAL: Press thebalance button lightly to release
it from
the recessed position. Turn
it to adjust the right and
left
speaker balance.As you turnthe knob you willfeel the
center position. Push the knob back
in to returnit to the
recessed position.
FADE: Press this button lightly to release
it from the
recessed position, then pull
it out toits fully extended
position. Turnit to the right to increase front speaker
volume. Turn it to the
left to increase rear speaker
volume. As you turn theknob you will feel the center
position. h s h the knob back in to return it to the
recessed position.
SCAN: When you pressSCAN while playing the radio,
the radio willgo through each station, pausing for a few
seconds at each station. PressSCAN again to stop at a
istation. The radio will be muted
while scanning and
SCAN will appear onthe display.
When you press SCAN and hold it for abouttwo seconds
:until the display shows PSCAN (Preset Scan), the radio
will scan only stations that you’ve preset with your radio
pushbuttons. Press SCAN again to stop at a station.
BASS: Press this button lightly to releaseit from the
recessed position. Turnit to adjust bass response.
As
you turn the knob you willfeel the’centerposition. Push
the knob back in to returnit to the recessed position.
:
3-12
Ii
AM/FM Stereo Radio with Automatic Tone
ControlandCassetteTapePlayer
PWRNOL: Withtheignitionon,pushthepower/volume
knob
to turn the
system
on
or
off. Turn
clockwise
it
to
increase the volume. Turn it counterclockwise to decrease
the volume.
AM/FM: Press the AM/FM button to change between
the AM, FMl, and FM2 bands.The display will show
which band youare receiving. If you press this button
while a tape is playing, the tape will stop and the radio
will returnto the AM or FM band that you were
previously receiving.
TUNE: Press lightlyon this knob to release it
from its
recessed position. Turnit to tune in radio stations.
You
may push the knob back in to return
it to its recessed
position when not in use.
The digital display indicates the timeor radio station
frequency, the AMor FM radio band, whether the
station is in stereo, and otheraudio system functions.
3-13
I
To Preset Radio Stations
The five pushbuttons labeled 1-5 can be used to set
up
to 15 radio stations (fiveAM, five FM1 and five FM2).
1. Tune in the station you want to store.
When you press SCAN and hold
it for about two
seconds until the display shows PSCAN (Preset Scan),
the radio willscan only stations that you’ve preset with
your radio pushbuttons. Press SCAN again
to stop
on a station.
2. Press TONE to select the tone setting that
you prefer.
RCL: When the ignitionis off, press RCL (recall) to
display the time. Whenthe radio is on, press RCL to
3. Press and hold oneof the five pushbuttons until the
change
the display between the radio station and the
display shows a channel number.
The radio will mute
to its
until the channel number is displayed. Whenever you time. Afterfive seconds the display will return
press that button again, the station and tone setting normal display.
will return. Always check whether you’re in AM,
The radio can be setso that either the time or radio
FMl,orFM2.
station is normally displayed when the radio is playing.
To do this, press RCLto display the time or radio station
A SEEK v:When you pressSEEK while playing the
as desired, then holdRCL down until the display
radio, the radio will search
for the next higheror lower
flashes.
station and stop. Theradio will be muted while seeking.
SCAN: When you press SCAN while playing the radio,
the radio will go through each station, pausing
for a few
seconds at each station. Press SCAN again to stop on a
station. The radio will be muted while scanning and
SCAN will appear on the display.
1
I
I
3-14
I
display and the equalization will
be adjusted
automatically. If you select a tone setting for your tape,
it will be activated when you play another tape.
SEEK: When you press SEEK while playing a tape, it
will search for the next hlgher or lower selection and stop.
SCAN: When you press SCAN while playing a tape,
NR: This radio has Dolby@B Noise Reduction to reduce you’ll hear the fiist few seconds of each selection. Press
background noiseon Dolby@B encoded tapes. Press this SCAN again to stop on a selection. The tape will be muted
button to reduce background noise
on your tape. The
while scanning and SCAN will appear on the display.
Dolby symbol will appear in the display. Dolby@ Noise FWD: Press FWD (fast forward) to advance a cassette
Reduction is manufactured under license from Dolby
tape rapidly; press again to play the tape.
Laboratories Licensing Corporation. Dolby@ and the
REV: Press REV to reverse a cassette tape rapidly; press
symbol are trademarks of Dolby Laboratories
again to play the tape.
Licensing Corporation.
~
I
I
1
PROG: Press PROG (program) to playthe other side of
If Cln (clean) appears on the display when you insert
your cassette tape, your cassette player needs to be
a tape.
cleaned. It will still play cassette tapes, but it should be TAPE/AUX: If you have a tape inserted and the radio
is
cleaned to prevent damage to your cassette tapes and theplaying, press TAPE/AUX to play your tape.
To return
cassette tape player.See “Cassette Tape Player Care”
to the radio while the tape
is playing, pressAMEM. The
later in this section. After you have cleaned the cassette tape will remain safely inside the radio for future
tape player, press and hold EJECT for 5 seconds to reset
listening.
the Cln indicator. The radio will display
“---” to show
EJECT Press to eject the cassette tape. The radio will
that the clean feature has been reset.
then play.
If E and a number appearson the display at any time,
an
error has occurred. See “Cassette Tape and CD Errors”
later in this section.
3-16
ANUFM Stereo Radio with Automatic Tone
Control, Cassette Tape and Compact Disc
Player
PWRNOL: With the ignition on, push thePWRNOL
(powerholume) knob to turn the system on or off. Turn
it clockwise to increase the volume. Turn in
counterclockwise to decrease the volume.
AM/FM: Press this buttonto change betweenthe AM,
FM1 and FM2 bands. The display will show which band
you are receiving. If you press this button. while
a tape
or CD is playing, the tapeor CD will stop and the radio
will returnto the previousAM or FM band.
TUNE: Press lightly on this knob to release it from the
recessed position. Turnit to tune in radio stations.You
may push the knob back in to return
it to its recessed
position when not in use.
To Preset Radio Stations
The five pushbuttons labeled 1-5 can be used to set up
to 15 radio stations (fiveAM,five FMl and five FM2).
The digital display indicates the time or
radio station
frequency, theAM or FM radio band, whether, the
station is in stereo, and other audio system functions.
1. Tune in the station you want to store.
2. Press TONE to select the setting that you prefer.
3. Press and holdone of the five pushbuttons until the
display showsa channel number. The radio will mute
until the channel numberis displayed. Whenever you
press that button again, the preset station and tone
setting will return. Always check whether you’re in
AM,FM1 or FM2.
3-17
SEEK: ‘When you press SEEK while
playing the radio,
the radio will search for the next higher or lower station
This button scrolls throughthree functions whena CD is
playing:
.and stop.The radio will be muted
while seeking.
Press to see which track is playing.
SCAN: When you press SCANwhile playing the radio
=theradio willgo through each station, pausing for a few
:seconds at each station. Press SCAN
again to stop on a
station. The radio will be mutedwhile scanning and
SCAN will appear on the display.
Press again while the track is displayed (within
about
five seconds), and EL TM (Elapsed Time) will
appear in the display together with how much
time
has elapsed since the track started playing.
0 Press again to view the time.
When you press SCAN and
hold it for about two
seconds until the display shows PSCAN (Preset Scan), You can select which functionis normally displayed
the radio will scan only stations that you’ve preset with when a CD is playing.To do this, press RCL until the
your radio pushbuttons. Press SCAN again to stop on a display showsthe desired function, then hold RCL down
until the display flashes.
station.
TONE: This button controls the Automatic Tone
RCL: When the ignitionis off, press RCL (recall) to
Control (ATC) feature whichlets you select an
display the time. Whenthe radio is on, pressRCL,to
equalization for the typeof music or voicebeing heard.
change the display between the radio station and the
For example, JAZZ emphasizes bass and treble while
time. After five seconds the displaywill return toits
ROCK emphasizes bass. PressTONE to step through
normal display.
.the six settings: JAZZ, VOCAL,POP, ROCK,
The radio can be set so that either the time or radio
CLASSIC, andMANUAL. Each setting will appear on
station is normally displayed when the radio
is playing.
the display. In MANUAL you
can adjust tone with the
To do this, press RCL to display the
time or radio station TREB and BASS controls. Any time TREB or BASS is
as desired, then hold RCL down until the display
turned, TONE will automatically go to the MANUAL
flashes.
setting. Separate tone settings can be stored with
each
preset station.You can also select separate tone settings
for playing cassette tapes and compact discs.
If you’ve
3-18
I
I
selected a tone setting for a tape or CD, then play the
radio, the tone you set
for the tape or CD will
be
reactivated when a tapeor CD is played again.
volume. As you turn the knob you willfeel the center
position. Push the knob back
in to return it to the
recessed position.
BASS: Press this button lightlyto release it from the
recessed position. Turn it to adjust bass response. As
you turn the knob you will
feel the center position. Push
the knob back into return itto the recessed position.
Turning BASS willchange the radio’s Automatic Tone
Control featureto MANUAL.
To Play a Cassette Tape
TREB: Press the treble button lightly to release
it from
the recessed position, then pull
it out to its fully
extended position. Turnit to adjust treble response.As
you turn theknob you will feel the center position. Push
the knob back into return it to the recessed position.
Turning TREB will changethe radio’s Automatic Tone
Control featureto MANUAL.
BAL: Press the balance button lightly to release it from
the recessed position. Turn it to adjust
the right and left
speaker balance.As you turn the knob you will feel
the
center position. Push theknob back in to return to
it the
recessed position.
FADE: Press this button lightly to release
it from the
recessed position, then pullit out to its fully extended
position. Turn it to the right to increase
front speaker
volume. Turnit to the left to increase rear speaker
With the ignition on, insertthe tape andit will begin
playing. The audio system will turnon automatically.
Your tape playeris designed to work best with tapes that
are 30 to 45 minutes long on each side. Longer tapes
may not work as well.
Note that when a tape is inserted,
TP will be displayed.
When the tape is played, TP with a box around it, will
be displayed along withan arrow to show whether the
top or bottom of the tapeis playing. Any time a tape
is
inserted, the top side will play first.
If a high bias metal
or CrO2 tapeis played, HI-BIAS will appear in the
display and the equalization willbe adjusted
automatically. If you select a tone setting for your tape,
it will be activated each time you play a tape.
If Cln (clean) appears on the display when you insert
your cassette tape, your cassette player needs to be
cleaned. It will still play cassette tapes,
but it should be
cleaned to prevent damageto your cassette tapes and the
cassette tape player.See “Cassette Tape Player Care”
later in this section. After
you have cleaned the cassette
3-19
;tape player, press and hold EJECT
for five seconds to
reset the Cln indicator.The radio will display“---” to
$how that the clean feature has been reset.
PROG: Press PROG (program) to play the other side of
the tape.
TAPE/CD: If you have a tape inserted and the radio
is
If E and a number appears
on the display at any time, an playing, press TAPE/CD to play your tape. To return to
error has occurred. See “Cassette Tape and
CD Errors”
later in this section.
the radio while the tape is playing, press
AMEM. You
can also press TAPE/CD to change between a tape and
a
NR: This radio has Dolby@B Noise Reduction to reduce compact discif both are inserted.The inactive tape or CD
will remain safely inside the radio for future listening.
background noiseon Dolby B encoded tapes. When
playing a cassette tape, press this button to reduce
EJECT Press to eject the cassette tape.
The radio will
background noise on your tape. The Dolby symbol will then play.
appear in the display. Dolby Noise Reduction
is
Playing a CompactDisc
manufactured under license from Dolby Laboratories
Licensing Corporation. Dolby@ and the
00 symbol are
The CD player will play either normal-size discs or the
trademarks of Dolby Laboratories Licensing Corporation. smaller 8 cm discs withoutan adapter.
A SEEK When you press SEEK while playing a tape, With the ignition on, insert the
disc partway into the
it will search for the next higher
or lower selection and
slot, with the label side up. The player should pull it in
stop.
and it will begin playing.
SCAN: When you press SCAN while playing a tape,
Note that when the disc
is inserted, CD will be
you’ll hear the first few seconds
of each selection. Press
displayed. When the disc is playing, CD
with a box
SCAN againto stop on a selection. The tape will be muted around it will be displayed.
If you select aTONE setting
while scanning andSCAN will appear on the display.
for your CD, it will be activated each time you play a
CD.
FWD: Press FWD (fast forward) to advance a cassette
tape rapidly; press again to play the tape.
As each new track starts to play, the track number will
appear in the display.
REV: Press REV (reverse) to reverse a cassette tape
rapidly; press again to play the tape.
v:
3-20
If E and a number appears on the display at anytime, an
error has occurred.See “Cassette Tape and CD Errors’’
later in this section.
A SEEK v: When you press SEEK (down) while
playing a CD, it will go back to the startof the current
track, if more than eightseconds have played. When you
press SEEK (up), it will searchfor the next higher track
and stop.
SCAN: When you press SCANwhile playing a CD,
you’ll hearthe first few seconds of each selection. Press
SCAN again to stopon a selection. The CD willbe
muted while scanning and SCAN willappear on the
display.
FWD: To advance a CD, press and hold FWD (fast
forward). While the CD advances, elapsed time will be
displayed to help you find the desired passage.
REV: To reverse a CD, press and hold REV (reverse).
While the CD reverses, elapsed time will be displayed to
help you find the desired passage.
TAPEKD: If you have a CD inserted and the radio is
playing, press TAPEKD to play yourCD. To return to
the radiowhile the CD is playing, pressA”. You
can also pressTAPEKD to switch betweena tape anda
compact disc if both are inserted.The inactive tape or
CD willremain safely insidethe radio for future
listening.
RDM: Press to play the CD tracks random
in
order.
RDM will appear onthe display. PressRDM again to
play the tracks in disc order.
COMPRESSION: While playing a CD, pressNR to
turn oncompression. COMP will appear in the display.
Compression make loud and soft passagesmore equal in
volume. PressNR again to turnoff compression.
EJECT Press to ejectthe CD. The radio will then play.
If both a tape andCD are inserted, the lastone played
will eject.
3-21
THEFTLOCKTM
I
3. Press the PWRNOL button to turnoff the radio.
THEFTLOCK is designed to discourage theft
of your
radio. It works by using a secret code to disable all radio
functions whenever the battery
power is removed.
Note: If you allow more than15 seconds to pass
between any steps, the radio automatically revertsto
time and you must start the procedure overat step 4.
The THEFTLOCK feature for the radiomay be used or
ignored. If ignored, the system plays normally and the
radio is not protectedby the feature.If THEFTLOCK is
activated, your radio will not operate
if stolen.
4. Press the 1 and4 buttons together. Hold then down
until
shows on the display. Next you will use
the secret code number which
you have written
down.
‘b---”
When THEFTLOCKis activated, the radio will display 5. Press the MN button and “000” will appear in the
display.
LOC to indicate a locked condition anytime the battery
power isremoved. If your battery loses power for any
6 . Press MN again to make the last two digits agree
reason, you must unlock the radio with the secret code
with your code.
before it will operate.
7. Press the HR button to makethe first one or two
Enabling the THEFTLOCK feature: The following
digits agree with your code.
instructions explain how to enter your secret
code to
activate the THEFTLOCK system. It is recommended 8. After you have confirmed that thecode matches the
one you wrote down, pressAMEM. The display will
that you read through all nine steps before starting
the
show ‘YEP’ to indicate that you need to repeat steps
procedure.
5-7 to confirm your secret code.
1. Write down a three or four digit number from
000 to
9. Press AM/F’h4 and this time the display will show
1999 and keep it in a safe place, separate from the
SEC indicating that your radio is secure.
vehicle.
Anytime the THEFTLOCK is activated and the battery
2. Turn the ignition to the accessory or run position.
power is removed the radio will display LOC.
Unlocking THEFTLOCK after a power
loss:
Enter your secret code as follows; pause no more than
15 seconds between steps.
Disabling THEFTLOCK:Enter your secretcode as
follows; pause no morethan 15 seconds between steps.
1. Turn the ignition to the accessory or run position.
0
LOC willappear when the ignitionis on.
2. Press the PWRNOL button to turnoff the radio.
0
Press the MN button and“000” will appear in the
display.
0
Press MN again tomake the last two digits agree
with your code.
3. Press the 1 and 4 buttons together. Hold themdown
until SEC shows in the display.
4. Press the MN button and “000” will appear in the
display.
0
Press the HR button to make the first one or two
digits agree withyour code.
5. Press MN again to make thelast two digits agree
with your code.
0
After youhave confirmed that thecode in the display
matches the secretcode you have written down,
press AM/FM. SEC willappear in the display
indicating thatthe radio is now operable and secure.
6. Press the H R button to makethe first one or two
digits agree withyour code.
7. After you have confirmed that the code in the display
matches the secretcode you have written down,
press A”.
The display will show“---”
indicating thatthe radio is no longer secured.
If the code entered tounlock THEFTLOCK is incorrect,
the radio willremain locked. After eight unsuccessful
attempts tounlock the radio, the display will showInOP
If the code entered is incorrect, SEC will appearin the
(inoperative). At this point you will needkeep
to the
ignition on for one hour before you may attempt to enter display. The radio willremain secured until the correct
code is entered.
another code. After three unsuccessful attempts to
unlock the radio, the display will showInOP
(inoperative) again.
If you forget yourcode or cannot unlock the radio,
contact your retailerfor assistance.
3-23
Cassette Tape and CDErrors
If the error occurred while trying
to.play a CD in the
radio orin the CD changer, the following conditions
If E and a number appears in the radio display, an error may have caused the error:
has occurred and the cassette orcompact disc cannot
The road is too rough. The disc should play whenthe
play temporarily.
road is smoother.
If the error occurredwhile trying to play a cassette tape,
The disc is dirty, scratched, wet or upside down.
the following conditions may have caused
the error:
The cassette tape is tight and the cassette player
cannot turn the hubsof the cassette tape.El0 may be
displayed. Hold the cassette with the open
end down
and try turning the right hub
counterclockwisewith a
pencil. Flip the tape over and repeat.
If the hubs do
not turn easily, your cassette tape may be damaged
and should not be used in the cassette player. Try a
new tape to make sure that your cassette player
is
working properly.
The air is very humid.If so, wait about an hour and
try again
If an error occurs repeatedly if
oran error cannot be
corrected, please contact your retailer.
If your radio
disphys an error number, writeit down and provideit to
your retailer when reportingthe problem.
I
The cassette tape is broken.E l l may be displayed.
Check to seeif your tapeis broken. Try a new
cassette tape.
3-24
-
Steering Wheel Touch Controlsfor Audio
System (Option)
SEEK: Each time you press SEEK, you will tune in a
radio station higher on the
AM or FM band.
When playing a tape or CD, press
SEEK to listen to the
next selectionon the disc.
PROG: Press PROG to tunein a preset radio station
higher on the AM or FM band.
When playing a tape, press PROG to play
the other side
of the tape.
Understanding Radio Reception
FM Stereo
FM stereo will give you the best sound, FM
but signals
will reach only about 10 to 40 miles(16 to 65 km). Tall
buildings or hills can interfere withFM signals, causing
the sound to come and go.
Some audio system functions described in the previous
pages can also be operated with the Steering Wheel
Touch Controls option. Other touch controls also operate
AM
some climatecontrols. See “Steering Wheel Touch
The range for most AM stations is greaterthan for FM,
Controls for Climate
earlier
in
this
section.
especially
at
night.
The longer
range,
however,
can
cause stations to interfere witheach other. AM can also
VOL: Press the top partof the switch to increase
pick up noisefrom things like storms and power lines.
volume, the bottom part todecrease volume.
To lower this noise,try reducing the treble level.
3-25
Tips AboutYour Audio System
Hearing damagefrom loud noiseis almost undetectable
until it is too late. Your hearing can adapt to higher
volumes of sound. Sound that seems normal
can be loud
and harmful to your hearing. Take precautions
by
adjusting the volume control on your radio to a safe
sound level before your hearing adapts to it.
To help avoid hearingloss or damage:
I
0
Adjust the volume control to the
lowest setting.
Increase volume slowly until you hear comfortably
and clearly.
NOTICE:
Before you add any sound equipment to your
vehicle like a tape player, CB radio, mobile
telephone ortwo-way radio be sure you can
add whatyou want. If you can, it’s very
important to doit properly. Added sound
equipment may interferewith the operationof
your vehicle’s engine, Delco@radio or other
systems, and even damage them.And, your
vehicle’s systems may interferewith the
operation of sound equipment that has
been
added improperly.So, before adding sound
equipment, check with your retailer andbe sure
to checkFederal rules covering
mobile radio and
telephone units.
--
--
Proper tape player cleaning should be
done with a
scrubbing-action, non-abrasive cleaning cassette.This is
A tape player that is not cleaned regularly is subject to
a wet-type cleaning system that uses a cleaning cassette
reduced sound quality, ruined cassettes, or a damaged
with pads which scrub the tape head as the hubs
of the
mechanism. Tape cassettes that are not
properly stored
cleaner cassette turn.This type of cleaner may display
in their plastic cases awayfrom contaminants, direct
an error message and eject the cartridge.This is normal
sunlight, andextreme heat may not operate properly and and isthe result of an added featurein the tape player
could cause premature failure of the tape player.
that detects broken tapes.If an error occurs, you will
need to insert the cleaning cassette at least three times to
Cassettes are subject to wear and
the sound qualitymay
degrade over time. Always verify that the cassette tape thoroughly cleanthe tape player.
is in good conditionand that the tape player is clean
You may prefer touse a non-scrubbing action wet-type
before obtaining service on your tape player.
cleaner. This type of cleaner uses a cassette with a fabric
belt which cleans the tape head.
This type of cleaning
Your tape player shouldbe cleaned with every50 hours
cassette will notcause an error, butit may not clean the
of use toprovide the bestperformance. Your radio may
tape player asthoroughly as the scrubbing-type cleaner.
display Cln to remind you that you
have used your tape
player for 50 hours without re-setting the tape clean
Follow the instructions with the cleaning
cassette to
time. If you notice a reduction in sound quality,
properly clean the tape player.
Cleaning cassettes are
regardless of when the tape player was last cleaned, try available in most stores that
sell audio products and a
playing a different cassettetape to see if the tape or the
scrubbing action cleaning cassette is available
from your
tape player is atfault. If this other cassette resultsin no
retailer.
improvement in sound quality, cleanthe tape player.
Cassette Tape Player Care
3-27
Please note that cassette tape adapter kits
for portable
Fixed Mast Antenna
CD players will not
work in your cassette player.
These
adapters will cause the radio to display an error and theThe fixed mast antennacan withstand most car washes
without being damaged.If the mast should ever become
adapter cassette willbe ejected.
slightly bent, you can straighten
it out by hand. If the
mast is badly bent, as
it might be by vandals, you should
Compact Disc Care
replace it.
Handle discs carefully.Store them in their original cases
or other protective cases and away from direct sunlight Check everyonce in a whileto be sure the mastis still
tightened to the fender.
and dust.If the surfaceof a disc is soiled, dampen a
clean, soft cloth in a mild, neutral detergent solution and
clean it, wiping from the center to the edge.
Be sure never to touch
the signal surface whenhandling
discs. Pickup discs by grasping the outeredges or the
edge of the hole and the outer edge.
3-28
Power Antenna Mast Care
Your power antenna will look its best and work well if
it’s cleaned from time to time.
To Clean theAntenna Mast:
1. Turn on the ignition and radioto raise the antenna to
full mast extension.
2. Dampen a clean cloth withmineral spirits or an
equivalent solvent.
3. Wipe the cloth over
the mast sections,
removing any dirt.
4. Wipe it dry with a
clean cloth before
retracting.
5 . Make the antenna
go up and down by
turning the radio or
ignition onand off.
I NOTICE:
I
Don’t lubricate thepower antenna. Lubrication
could damage it.
NOTICE:
Before entering an automatic car
wash, turn off
your radio to make the power antenna
go down.
This will prevent the mast from
possibly getting
damaged. If the antennadoes notgo down when
you turn the radiooff, it may be damaged or
need to be cleaned. In either case, lower the
antenna by hand by carefully pressing the
antenna down.
If the mast portionof your antenna is damaged, you can
easily replaceit. See your retailerfor a replacement kit
and follow the instructionsin the kit.
6. Then repeat if necessary.
3-29
NOTES
1
Section 4 Your DrivingandtheRoad
Defensive Driving
The best advice anyonecan give about drivingis: Drive
defensively.
rlease start with a very important safety device
in your
Oldsmobile: Buckle up. (See “Safety Belts” in the
Index.)
Defensive driving really means“be ready for anything.”
On city streets, rural roads,
or freeways, it means
“always expect the unexpected.”
Assume that pedestriansor other drivers are going to be
careless and make mistakes. Anticipate what they might
do. Be ready for their mistakes.
1
Rear-end collisions are about the most preventableof
accidents. Yet they are common. Allow enough
following distance. It’s the best defensive driving
Here you’ll find information about drivingon different
maneuver, in both city and rural driving.You never
kinds of roads and in varying weather conditions. We’ve know when the vehiclein front of youis going to brake
also included many other useful tips
on driving.
or turn suddenly.
4-1
Vision
Attentiveness
The amount of food that is consumed before and
during drinking
The length of time it has taken the drinkerto
consume the alcohol
According to the American
Medical Association, a
180-pound (82 kg) person who drinks three 12-ounce
(355 ml) bottles of beer in an hour will end up with a
BAC of about 0.06 percent. The person wouldreach the
(120
glasses
same BAC by drinking three 4-ounce
of wine or three mixed drinks if each 1-had
1/2 ounces
(45 ml) of a liquor like whiskey, gin
or vodka.
ml>
man of her same body weight wheneach has the same
number of drinks.
The law in many U.S. states sets the legal limit aatBAC
of 0.10 percent. In a growing numberof U.S. states, and
throughout Canada, the limitis 0.08 percent. In some
other countries it’seven lower. The BAC limitfor all
com&cial drivers in the U.S. is 0.04 percent.
The BAC willbe over 0.10 percent after three tosix
drinks (in one hour). Of course, as we’ve seen, it
depends on how much alcohol isin the drinks, andhow
quickly the person drinks them.
It’s the amount of alcohol that counts.For example, if
the same person drank three double martinis (3 ounces
or 90 m l of liquor each) within an hour,the person’s
BAC wouldbe close to0.12 percent. A person who
consumes food just before or during drmking will have a
somewhat lower BAC level.
There is a gender difference, too. Women generallyhave
a lower relative percentage of body waterthan men.
Since alcohol is carriedin body water, thismeans that a
woman generally willreach a higher BAC level than a
But the ability to driveis affected well below a BAC
of 0.10 percent. Research shows that the driving skills
of many people are impaired at a BAC approaching
0.05 percent, and that the effects are worse at night.
All
drivers areimpaired at B,AC levels above0.05 percent.
Statistics show thatthe chance of being in a collision
increases sharplyfor drivers whohave a BACof
0.05 percent or above. A driver witha BAC levelof
0.06 percent hasdoubled his or her chance of having a
collision. Ata BAC levelof 0.10 percent, thechance of
this driverhaving a collision istwelve times greater;at a
level of 0.15 percent, the chance is twenty-five times
greater!
The body takesabout an hourto rid itselfof the alcohol
in one drink. No amount of coffee or number of cold
4-3
showers will speed that up. “I’ll
be careful” isn’t the
right answer. What if there’s an emergency, a need to
take sudden action,as when a child darts into the street?
A person with evena moderate BAC might not be able
to react quickly enough to avoid the collision. .
There’s somethingelse about drinking and driving that
many people don’t know.
Medical research shows that
alcohol ina person’s system can make crash injuries
worse, especially injuries tothe brain, spinal cordor
heart. This means that when anyone who has been
drinking -- driver orpassenger -- is in a crash, that
person’s chance of being killedor permanently disabled
is higher than if the person had not been drinking.
Control of a Vehicle
You have three systems that make your vehicle
go where
you want it to go. They arethe brakes, the steering and
the accelerator. All three systems have
to do their work
at the places where
the tires meet the road.
Sometimes, as when you’re driving on snow ice,
or it’s
easy to ask moreof those control systems than
the tires
and road can provide. That means
you can lose control
of your vehicle.
4-4
Braking
Braking actioninvolves perception time and reaction
time.
First, youhave to decide to push on the brake pedal.
That’s perception time. Then you have to bring up your
foot and do it. That’s reaction time.
Average reaction time is about 3/4 of a second. But
that’s only an average.It might be less with one driver
and aslong as twoor three seconds or more with
another. Age, physical condition, alertness, coordination,’
and eyesight all play a part.So do alcohol, drugs and
frustration. But even in3/4 of a second, a vehicle
moving at 60 mph (100 km/h) travels 66 feet (20 m).
That could be a lot of distance in an emergency, so
keeping enough space between your vehicle and others
is important.
Avoid needless heavy braking. Some peopledrive
in spurts -- heavy acceleration followedby heavy
braking -- rather than keeping pace with traffic.
This
is a mistake.Your brakes may not have time to cool
between hard stops.Your brakes will wearout much
faster if youdo a lot of heavy braking.If you keep pace
with the traffic and allow realistic following distances,
you will eliminatea lot of unnecessary braking. That
means better braking and longer brake life.
If your engine ever stops while you’re driving, brake
normally but don’t pump your brakes.
If you do, the
pedal mayget harder to push down.If your engine
stops, you will stillhave some power brake assist. But
you will use it when you brake. Once the power assist
is
used up, it may take longer to stop and the brake pedal
will be harder to push.
And, of course, actual stopping distances vary greatly
with the surfaceof the road (whether it’s pavement
or
gravel); the conditionof the road (wet, dry, icy); tire
tread; and the conditionof your brakes.
4-5
Anti-Lock Brakes (ABS)
Your Oldsmobile has an advanced electronic braking
system that will help prevent a braking skid.
ANT‘LOCK
(@)
This light on the
instrument panel will
come on briefly when
you start your vehicle.
When you start your vehicle and begin to drive away,
your anti-lock brake system will check
itself. You may
Here’s how anti-lock works. Let’s say the roadis wet.
hear a momentary motoror clicking noise while this test You’re driving safely. Suddenly an animal
jumps out in
is going on, and you may even notice that your brake front of you.
pedal moves a little. This is normal. If there’s a problem
You slam on the brakes. Here’s what happens with ABS.
with the anti-lock brake system, the anti-lock brake
system warning light will stayon.
A computer senses that wheels are slowing down.
If one
of the wheels is about to stop rolling, the computer will
See “Anti-Lock BrakeSystem Warning Light” in the
separately work the brakesat each front wheel and at the
Index.
rear wheels.
4-6
The anti-locksystemcanchangethebrakepressureAsyoubrake,yourcomputerkeepsreceivingupdateson
fasterthananydrivercould.
The computer is
wheelspeedandcontrolsbrakingpressureaccordingly.
tire and road
Remember:Anti-lockdoesn’tchangethetirne
you need
programed to make the most Of
conditions.
to get your,foot up to the brake pedal.If you get too
close to the vehicle infront of you, you won’thave time
to apply your brakes if that vehicle suddenly slows
or
stops. Alwaysleave enough room up ahead to stop, even
though you have anti-lock brakes.
To Use Anti-Lock
Don’t pump the brakes. Just hold the brake pedal down
and let anti-lock work for you. You may hear a motoror
clicking noise during a hard stop, but this
is normal.
Traction Control System (Option)
~~~~~
You can steer around the obstacle while braking hard.
Your vehicle mayhave a traction control system that
limits wheel spin.This is especially useful in slippery
road condktions.The system operates onlyif it senses
that one or both of the front wheelsare spinning or
beginning to lose traction. When this happens, the
system works the front brakes and reduces engine power
(by shutting offfuel injectors and managing engine
spark) to limit wheel spin.
4-7
The TRACTION ACTIVE light will come on when
your traction controlsystem is limiting wheel spin.See
“Traction ControlSystem Active Light” in the Index.
1
If your vehicle has the
Driver Information Center,the
TRACTION CNTL ACTIVE message will
appear when
your traction controlsystem is limiting wheel spin.See
“Driver Information Center” in the Index.
You may feel the system working, or you may notice
some noise, but this
is normal. If your vehicleis in
cruise control whenthe traction control system begins
to
limit wheel spin, the cruise control will automatically
disengage. Whenroad conditions allow you to safely
use it again, you mayre-engage the cruise control.(See
“Cruise Control” inthe Index.)
When the system is on, the TRACTION OFF warning
light will comeon to let you know
if there’s a problem
with your traction control system.
See “Traction Control
System Warning Light” in theIndex. When this warning
light is on, the system will not limit wheel spin. Adjust
your driving accordingly.
The traction control system automatically comes on
whenever you start your vehicle.To limit wheel spin,
4-8
especially in slippery road conditions, you should
always leave the system on. But you can turn the
traction control system off if you ever need to. (You
should turn the system off if your vehicle ever gets stuck
in sand, mud, ice or snow. See “Rocking Your Vehicle”
in the Index.)
To turn the system off, press
the T/C button located to
the rightof the steering
wheel.
You can turn thesystem back on at anytime by pressing
the button again.The TRACTION OFF warning light
should go off.
Braking in Emergencies
Use your anti-lock brakingsystem when you need to.
With anti-lock, you can steer andbrake at the same
time. In many emergencies, steering can help you more
than even the very best braking.
Steering
Power Steering
If you lose power steering assist because the
engine
stops orthe system is not functioning, youcan steer but
it will take much more effort.
Steering Tips
The TRACTION OFF warning light will come on and
stay on.If the system is limiting wheel spin when you
press the button, thesystem won’t turn off right away. It
will wait until there’s no longer a current need to limit
wheel spin.
Driving on Curves
It’s important to take curves at reasonable
a
speed.
A lot of the “driver lost control” accidents mentioned on
the news happen on curves. Here’s why:
4-9
Experienced driver or beginner, each
of us is subject to
the same laws of physics when driving on curves.
The
traction of the tires againstthe road surface makesit
possible for the vehicle to
change its path when you
turn
the front wheels. If there’s no traction, inertia will keep
the vehicle goingin the same direction.If you’ve ever
tried to steer a vehicle on wet ice, you’ll understand
this.
Speed limit signs near curves warn that you should
adjust your speed.Of course, the posted speeds are
based on good weather and road conditions. Under less
favorable conditions you’ll want to go slower.
If you need to reduce your speed as you approach a
curve, doit before you enter the curve, while your
front
wheels are straight ahead.
The traction you can get
in a curve depends onthe
Try to adjust your speedso you can “drive” through the
condition of your tires and the road surface, the angle at
curve. Maintain a reasonable, steady speed.
Wait to
which the curveis banked, and your speed.While
accelerate until you are out
of the curve, and then
you’re in a curve, speedis the one factor you can
accelerate gently into the straightaway.
control.
Suppose you’re steering through a sharp curve. Then
you suddenly accelerate. Both control systems
-steering and acceleration-- have todo their work where
the tires meet the road.
Unless you have traction control
and the system is on,adding the sudden acceleration can
demand too muchof those places.You can lose control.
Steering in Emergencies
There are times when steering
can be more effective
than braking. Forexample, you come over ahill and
find a truck stopped in your lane,
or a car suddenly pulls
out from nowhere, or a child darts out
from between
parked cars and stops right
in front of you. You can
avoid these problemsby braking -- if you can stop in
What should youdo if this ever happens?Ease up on the
accelerator pedal, steer the vehicle the way you want it time. But sometimesyou can’t; there isn’t room. That’s
the timefor evasive action-- steering aroundthe
to go, and slow down.
problem.
Your Oldsmobile can perform very wellin emergencies
like these. First applyyour brakes. It is better to remove
as much speed as you can from a possible collision.
Then steer around the problem, to the left or right
depending on the space available.
An emergency like this requires close attention and
a
quick decision. If you are holding the steering wheel at
the recommended 9 and 3 o’clock positions, you can
turn it a full 180 degrees very quickly without removing
either hand. But you have to act fast, steer quickly, and
just as quickly straightenthe wheel once you have
avoided the object.
I
The fact that such emergency situations are always
possible is a goodreason to practice defensive driving at
all times and wear safety belts properly.
4-11
Off-Road Recovery
Passing
You may find sometime that your right wheels have
dropped off the edgeof a road onto the shoulder while
you’re driving.
The driver of a vehicle aboutto pass another ona
two-lane highway waitsfor justthe right moment,
accelerates, moves around the vehicle ahead, then goes
back into the right lane again.A simple maneuver?
If the level of the shoulderis only slightly below the
pavement, recovery shouldbe fairly easy.Ease off the
accelerator and then, if there
is nothing in the way, steer
so that your vehicle straddles
the edge of the pavement.
You can turn the steering wheel up
to 114 turn until the
right front tire contactsthe pavement edge. Then turn
your steering wheelto go straight downthe roadway.
Not necessarily! Passing another vehicle
on a two-lane
highway is a potentially dangerous move, since the
passing vehicle occupies the same lane as oncorning
traffic for several seconds.A miscalculation, an error in
judgment, or a brief surrenderto fixstration or angercan
suddenly put the passing driver
face to face with the
worst of all traffic accidents-- the head-on collision.
So here are some tipsfor passing:
“Drive ahead.”Look down the road,
to the sides, and
to
crossroads for situations that might affect your passing
patterns. If you have any doubt whatsoever about
making a successful pass, wait
for a better time.
0
Watch for traffic signs, pavement markings, and
lines. If you can see sign
a up ahead that might
indicate a turnor an intersection, delayyour pass.
A broken center line usually indicates it’sall right to
pass (providing the road ahead is clear). Never cross
a solid line on your side
of the laneor a double solid
line, evenif the road seems empty
of approaching
traffic.
0
Do not get too close tothe vehicle you want to pass
while you’re awaiting an opportunity.For one thing,
following too closely reduces your areaof vision,
especially if you’re following a larger vehicle.Also,
you won’thave adequate space if the vehicle ahead
suddenly slows or stops. Keepback a reasonable
distance.
0
When it looks like a chance to pass is coming up,
start to accelerate but stay in the right lane and don’t
0
get too close. Time your move
so you willbe
increasing speed asthe time comes to move into the
other lane.If the way is clear to pass, you will have a
“running start” thatmore than makesup for the
distance you wouldlose by dropping back. And if
something happens to cause you to cancel your pass,
you need only slow down anddrop back again and
wait for another opportunity.
0
If other cars are lined up to pass a slow vehicle, wait
your turn.But take care that someone isn’t trying to
pass you as you pull out topass the slow vehicle.
Remember to glance over your shoulder and check
the blind spot.
Check your mirrors, glance over your shoulder, and
start your left lane change signal before moving out
of the right lane to pass. When you
are far enough
ahead of the passed vehicle tosee its front in your
inside mirror, activate your right lane
change signal
and moveback into the right lane. (Remember that
your right outside mirroris convex. The vehicle you
just passed may seem to
be farther awayfrom you
than it really is.)
Try not to pass more thanone vehicle at a timeon
two-lane roads. Reconsider before passing the next
vehicle.
Don’t overtake a slowly moving vehicle too rapidly.
Even though thebrake lamps are not flashing,it may
be slowing down or starting to turn.
If you’re being passed, makeit easy for the
following driver to get aheadof you. Perhaps you
can ease a little to the right.
4-13
If you do not have traction control,
or if the system is
off, then an acceleration skid is also best handled
by
Let’s review what driving experts
say about what
easing your footoff the accelerator pedal.
happens when the three control systems (brakes, steering
If your vehicle starts to slide,
ease your footoff the
and acceleration)don’t have enough friction where the
Loss of Control
tires meet the road to
do what the driver has asked.
In any emergency, don’t give up. Keep trying to steer
and constantly seek an
escape route or areaof less
danger.
accelerator pedal and quickly steer the
way you want the
vehicle to go.If you start steering quickly enough, your
vehicle may straighten out. Always be ready for a
second skidif it occurs.
Of course, tractionis reduced when water, snow, ice,
gravel, or other material is on the road.
For safety, you’ll
Skidding
want to slow down and adjust your driving to these
In a skid, a driver
can lose control of the vehicle.
conditions. It is important to slow down on slippery
Defensive drivers avoid most skids by taking reasonable surfaces because stopping distance will be longer and
care suited to existing conditions, and
by not
vehicle control more limited.
“overdriving” those conditions. But skids are always
While driving on a surface with reduced traction, try
possible.
your best to avoid sudden steering, acceleration, or
The three typesof skids correspond to your
braking (includingengine braking by shifting toa lower
Oldsmobile’s three control systems. In the braking skid gear). Any sudden changes couldcause the tires to slide.
your wheels aren’t rolling. In the steering or cornering
You may not realize the surface is slippery until your
skid, too much speed or steering incurve
a
causes tires
vehicle is skidding. Learn to
recognize warning clues -to slip andlose cornering force. And in the acceleration
such as enough water, ice or packed snow
on the road to
skid too much throttlecauses the driving wheels to spin. make a “mirrored surface”-- and slow down when you
have any doubt.
A cornering skidis best handled by easing your foot
off
the accelerator pedal.
Remember: Any anti-lockbrake system (ABS) helps
avoid only the braking skid.
If you havethe traction control system, remember:
It
helps avoidonly the acceleration skid.
4-14
.
Here aresome tips on night driving.
Driving at Night
Drive defensively.
0
Don’t drink and drive.
0
Adjust your inside rearview mirror toreduce the
glare from headlamps behnd you.
down and keep more space between you and other
vehicles.
.‘
0
Slow down, especially onhigher speed roads. Your
headlamps can light uponly so much road ahead.
In remote areas, watch for animals.
0
I€ you’re tired, pull off the road in a safe place and
rest.
Night driving is more dangerous than day driving. One
reason is that some drivers are likely to be imp$ired
-by alcohol or drugs, with night vision
problems, or by
fatigue.
Night Vision
Keep your windshield and all the glass on your vehicle
clean -- inside and out.Glare at night is made much
No one can see as well at night as in
the daytime. Butas
worse by dirt on the glass. Even the inside
of the glass
we get older these differences increase.
A 50-year-old
can build up a film caused by dust. Dirty glass makes
driver may require at
least twice as much light to see the lights dazzle and flash more than clean glass would,
same thing at night as a 20-year-old.
making the pupilsof your eyes contract repeatedly.
What you do in thedaytime can also affect your night
Remember that your headlamps light
up far less of a
vision. For example,if you spend the day in bright
roadway when you arein a turn or curve. Keep your
sunshine you are wise to wear sunglasses.Your eyes will
eyes moving; thatway, it’s easier to pick out dimly
have less trouble adjusting to night. But
if you’re
lighted objects. Just as your headlamps should be
driving, don’t wear sunglasses at night. They may cut checked regularly for proper
aim, so should youreyes
down on glarefrom headlamps, but they also make alot
be examined regularly.Some drivers suffer from night
of things invisible.
blindness -- the inability tosee in dim light -- and
You can be temporarily blinded by approaching lights.
It
can take a second or two, or even several seconds,
for
your eyes to readjust tothe dark. When you arefaced
with severe glare (asfrom a driver who doesn’t lower
the high beams,or a vehicle with misaimed headlamps),
slow down a little. Avoid staring directly into the
approaching lights.
4-16
aren’t even awareof it.
Driving inthe Rain
The heavier the rain, the harderit is to see. Even if your
windshield wiper bladesare in good shape, a heavy rain
can makeit harder to see road signs and traffic signals.
pavement markings, the edge of the road, and even
people walking.
It’s wise to keep your wipingequipment in goodshape
and keep your windshield washer tank filled. Replace
your windshield wiper inserts when they show signs
of
streaking or missing areas on
the windshield, or when
strips of rubber start to separate fromthe inserts.
Rain and wet roads can mean driving trouble.On a wet
road you can’t stop, accelerate or turn
as well because
your tire-to-road traction isn’t as good as on dry roads.
And, if your tires don’thave much treadleft, you’ll get
even less traction. It’salways wise to go slower and be
cautious if rain starts tofall while you are driving.The
surface may get wet suddenly when
your reflexes are
tuned for driving ondry pavement.
4-17
Driving too fast through large water puddles or even
going through some car washes
can cause problems, too.
The water may affect your brakes.Try to avoid puddles.
But if you can’t,try to slow down before you hit them.
Some Other Rainy WeatherTips
Turn on yourlow-beam headlamps -- not just your
parking lamps-- to help make you more visible to
others.
0
Besides slowing down, allow some extrafollowing
distance. And be.especially careful whenyou pass
another vehicle. Allow yourself more clear room
ahead, and be prepared to have your view restricted
by road spray.
0
Have good tires with proper tread depth.’(See
“Tires” in the Index.)
Hydroplaning
Hydroplaning is dangerous.So much water can buildup
under your tires that they
can actually ride on the water.
This can happenif the road is wet enough and you’re
going fast enough. When your vehicle
is hydroplaning,
it has little orno contact with the road.
4-18
City Driving
Here are ways to increase your safety in city driving:
Know the best way to get to where you are going.
Get a city map and plan your trip
into an unknown
part of the city just as you wouldfor a cross-country
trip.
Try to use the freeways that rim and crisscross most
large cities. You’llsave time and energy. (See the
next part, “Freeway Driving.”)
Treat a green light as a warning signal.A traEic light
is therebecause the corner is busy enough to needit.
When alight turns, green, and
just before youstart to
move, check both ways for vehicles thathave not
cleared the intersection or maybe running the red
light.
One of the biggest problems with city streets isthe
amount of traffic on them. You’ll want to watchout for
what the other drivers aredoing and pay attention to
traffic signals.
4-19
Freeway Driving
The most important advice on freeway driving is: Keep
up with traEc and keep to the right. Drive the
at same
check traffic. Try to determine where you expect
to
blend with the flow.
Try to merge.into the gap at close to
the prevailing speed.Switch on your turn signal, check
your mirrors and glance over your shoulder as often
as
necessary. Try to blend smoothly with the traffic flow.
Once you are on the freeway, adjust your speed
theto
posted limit or to the prevailing rate
if it’s slower. Stay
in the right lane unless
you want to pass.
Before changing lanes,check your mirrors. Then use
your turn signal.
Mile for mile, freeways (also called thruways, parkways, Just beforeyou leave the lane,glance quickly over your
expressways, turnpikes, or superhighways) are the safest shoulder to make sure there isn’t another vehicle
in your
of all roads. But they have their own~specialrules.
“blind” spot.
Once you are moving on the freeway, make certainyou
allow areasonable following distance. Expect to move
slightly slower at night.
When you want to leave the freeway, move to the
proper
lane well in advance. If you miss your exit do not, under
any circumstances,stop and back up.Drive on to the
next exit.
The exit ramp can be curved, sometimes quite sharply.
The exit speed is usually posted.
Reduce your speed according to your speedometer, not
to yoursense of motion. After drivingfor any distance
at higher speeds, youmay tend to think you aregoing
slower than you actually are.
service, have it done before startingout. Of course,
you’ll find experienced and able service experts in
Oldsmobile retail facilities all across North America.
They’ll be ready and willing to help
if you needit.
Here aresome things youcan check before a trip:
0
Windshield Washer Fluid: Is the reservoirfull? Are
all windows cleaninside and outside?
0
Wiper Blades: Are they in goodshape?
0
Fuel, Engine Oil, Other Fluids: Have you checked
all levels?
0
Lamps: Are they all working? Are the lenses clean?
0
Tires: They are vitally important to a safe,
trouble-free trip. Is the tread good enoughfor
long-distance driving? Are the tires all M a t e d to the
recommended pressure?
0
Weather Forecasts: What’s the weather outlook
along your route? Should you delay your tripa short
time to avoid amajor storm system?
0
Maps: Do youhave up-to-date maps?
Before Leaving on a Long Trip
Make sureyou’re ready. Try to be well rested.If you
must start when you’re not fresh -- such as after a day’s
work -- don’t plan tomake too many miles thatfirst part
of the journey. Wear comfortable )thing and shoes you
can easilydrive in.
Is your vehicle readyfor a long trip? If you keep it
serviced and maintained, it’s ready to go.
If it needs
Highway Hypnosis
Hill and Mountain Roads
Is there actuallysuch a condition as “highway
hypnosis?’’ Oris it just plain falling asleep at
the wheel?
Call it highway hypnosis, lack
of awareness, or
whatever.
There is something aboutan easy stretchof road with
the same scenery, along with the hum
of the tires on the
road, the drone of the engine, and the
rush of the wind
against the vehicle that
can make you sleepy. Don’t let
it
happen to you!If it does, your vehicle can leave the
road in less than a second, and you could crash and be
injured.
What canyou do about highwayhypnosis? First, be
aware that it can happen.
Then here are some tips:
Make sure your vehicleis well ventilated, with a
comfortably cool interior.
Keep your eyes moving. Scan the road ahead and to
the sides. Check your rearview mirrors and your
instruments frequently.
Driving on steep hills or mountains is different
from
driving in flat or rolling terrain.
If you get sleepy, pull off theroad into a rest, service,
or parking area and take a nap, get some exercise, or
both. For safety, treatdrowsiness on the highway as
an emergency.
4-22
.
.
If you drive regularly insteep country, orif you’re
planning to visit there,here are some tips that can make
your trips safer andmore enjoyable.
0 Keep your vehicle in good shape.
Check all fluid
levels and also the brakes, tires, cooling
system and
transaxle. These parts can work hard on mountain
roads.
0
Know how to go downhills. The most important
thing to know is this: let your
engine do some of the
slowing down. Shift to a lower gear when you go
down a steep orlong hill.
0
Know how togo uphill. Shift down to THIRD(3).
This will help cool yourengine and transaxle, and
you can climb the hill better.
0
Stay in your own lane when driving
on two-lane
roads in hills ormountains. Don’t swingwide or cut
across the centerof the road.Drive at speeds that let
you stay in your own lane.
0
As you go over the topof a hill, be alert.There could
be something in your lane,like a stalled car oran
accident.
0
You may see highway signs on mountains that warn
of special problems. Examples are long grades,
passing orno-passing zones, a falling rocks area, or
winding roads. Be alert to these andtake appropriate
action.
Winter Driving
Here are sometips for winter driving:
0
Have your 'Oldsmobile in good shape for winter. Be
sure yourengine coolant mix is correct.
You may want to putwinter emergency suppliesin
your trunk.
4-24
Include anice scraper, a small brush or broom, a supply
of windshield washer fluid,a rag, some winter outer
clothing, a small shovel,a flashlight, ared cloth, and a
couple of reflective warning triangles. And, you
if will
be driving under severe conditions, include a small bag
of sand, a pieceof old carpet or a couple
of burlap bags
to helpprovide traction. Be sure you properly secure
these items in your vehicle.
Driving on Snowor Ice
What’s the worst timefor this? “Wet ice.” Very cold
snow or ice canbe slick and hard to drive on. But wet
Most of the time, those places where your tires meet the ice can be even more troublebecause it may offer the
road probablyhave good tr.action.
least tractionof all. You can get “wet ice” when it’s
about freezing (32°F; OOC) and freezing rain beginsto
However, if thereis snow orice between your tires and
fall. Try to avoid driving on wetice until salt and sand
the road, you can have a very slippery situation. You’ll
crews can get there.
have a lot less traction or “grip” and will need be
to very
careful.
Whatever the condition-- smooth ice, packed, blowing
or loose snow-- drive with caution.
If you have traction control,keep the system on.It will
improve your ability to accelerate when driving on a
slippery road. Even though your vehicle has a traction
control system, you’ll want to slow down and adjust
your drivingto the road conditions.See “Traction
Control System” in the Index.
If you don’t havethe traction control system, accelerate
gently. Try not to break the fragile traction.
If you
accelerate toofast, the drive wheels will spin and polish
the surface under the tires even more.
4-25
Your anti-lock brakes improveyour ability to make a
hard stop on a slippery road. Even though you have the
anti-lock braking system, you’ll want to begin stopping
sooner than you would
on dry pavement. See
“Anti-Lock” in the Index.
Allow greater following distanceon any slippery
road.
If’You’re Caught in a Blizzard
e Watch for slippery spots.The road might be fine
until you hit a spot that’s covered with ice. On an
otherwise clear road,ice patches may appear in
shaded areas wherethe sun can’t reach: around
clumps of trees, behind buildings,or under bridges.
Sometimes the surfaceof a curve oran overpass may
remain icy when the surrounding roads
are clear. If
you see a patchof ice ahead of you, brakebefore you
are on it. Try not to brake while you’re actually
on
the ice, and avoid sudden steering maneuvers.
If you are stopped by heavy snow, you could in
bea
serious situation.You should probably stay with your
vehicle unless you know
for sure that youare near help
and you can hike through the snow. Here some
are
things to doto summon help and keep yourself and your
passengers safe: Turnon your hazard flashers. Tie a red
L
Run your engine only as long as you must.This saves
fuel. When you runthe engine, make it go a little faster
than just idle.,That is, push the accelerator slightly.
This
uses less fuelfor the heat that you get andit keeps the
battery charged.You will need a well-charged battery to
restart the vehicle, and possibly
for signaling later on
with your headlamps.Let the heaterrun for awhile.
Then, shut theengine off and close the window almost
all the way to preserve the heat. Start the
engine again
and repeatthis only when youfeel really uncomfortable
from the cold. Butdo it as little as possible. Preserve the
fuel as long as you can. To help
keep warm, youcan get
out of the vehicle anddo some fairly vigorous exercises
every half hour orso until help comes.
Loading Your Vehicle
b
l
TIRE-LOADING INFORMATION
OCCUPANTS
VEHICLE CAP. WT.
FRT.
CTR.
RR.
TOTAL
LBS.
KG
MAX. LOADING & GVWR SAME AS VEHICLE
COLD TIRE
CAPACITY
WEIGHT
XXX
SPEED
PRESSURE
TIRE SIZE
RTG
PSI/KPa
FRT.
RR.
SPA.
IF TIRES ARE HOT, ADD 4PS1/28KPa
SEE OWNER'S MANUAL FOR ADDITIONAL
INFORMATION
Two labels on your vehicle show how much weight
it
may properly carry.The Tire Loading Information label
found on the rearedge of the driver's door tells you the
proper size, speed rating and recommended inflation
pressures for the tireson your vehicle. It also gives you
important information about the numberof people that
can be in your vehicle andthe total weight that you
can
carry. This weight is called the Vehicle Capacity Weight
and includes the weightof all occupants,cargo, and all
nonfactory-installed options.
4-28
MFD BY GENERAL MOTORS CORP
DATE
GVWR
GAWR FRT GAWR RR
And, if you do have a heavy load, you should spread it
out. Don’t carry more than176 pounds (80 kilograms) in
your trunk.
THIS VEHICLE CONFORMS TO ALL APPLICABLE U.S. FEDERAL MOTOR VEHICLE
SAFETY, BUMPER, AND THEFT PREVENTION
STANDARDS IN EFFECT ON THE DATE OF
MANUFACTURE SHOWN ABOVE.
The other label isthe Certification label, found on the
rear edge of the driver’s door.It tells youthe gross
weight capacityof your vehicle, calledthe GVWR
(Gross Vehicle Weight Rating).The GVWR includes
the weightof the vehicle, all occupants, fuel and cargo.
Never exceed the GVWR for your vehicle, or theGross
Axle Weight rating (GAWR)for either the front or
rear axle.
I NOTICE:
Your warranty doesnot cover parts or
components that fail because of overloading
If you put things inside your vehicle--like suitcases,
tools, packages, or anything else--they will go as fast as
4-29
the vehicle goes.If you haveto stop or turn quickly,or
if there is a crash, they’ll keep going.
Towing a Trailer
NOTICE:
Pulling a trailer improperly can damage your
not covered by
vehicle and result in costly repairs
your warranty.To pull a trailer correctly, follow
the advice in this part, and see your Oldsmobile
retailer for important information about towing
a trailer with your vehicle.
4-30
If You Do Decide To Pull A Trailer
Your vehicle can tow a trailer
if it is equipped with
either the 3800 (L36) engine or the optional3800
If you do, hereare some important points.
Supercharged (L67) engine and proper trailer towing
0 There are many different laws, including speed limit
equipment. To identify whatthe vehicle trailering
restrictions, having todo with trailering. Make sure
capacity is for your vehicle, you should read the
your rig willbe legal, not only where you
live but
information in “Weightof the Trailer” that appears later
also where you’ll be driving.
A good source for this
in this section.But trailering is different thanjust
information can be state or provincial police.
driving your vehicle by itself. Trailering means changes
in handling, durability, andfuel economy. Successful,
Consider using a sway control.
safe trailering takes correct equipment, and
it has to be
You can ask a hitch retailer about sway controls.
used properly.
0 Don’t tow a trailer
at all during the first1000 miles
That’s the reason for this part. In
it are many
(1 600 km) your new vehicleis driven. Your engine,
time-tested, important trailering tips and safety rules.
axle or other parts could be damaged.
Many of these are important for your safety and thatof
your passengers.So please read this section carefully
0 Then, during the first
500 miles (800 km) that you
before you pull a trailer.
tow a trailer, don’t drive over
50 mph (80 km/h) and
don’t make starts at full throttle.
This helps your
Load-pulling components such as the engine, transaxle,
engine and other parts
of your vehicle wear in at the
wheel assemblies, and tiresare forced to work harder
heavier loads.
against the dragof the added weight.The engine is
required to operate at relatively higher speeds and under 0 Obey speed limit restrictions when towing
a trailer.
greater loads, generating extra heat. What’s more, the
Don’t drive faster than the maximum posted speed
trailer adds considerably to wind resistance, increasing
for trailers (orno more than55 mph (90 km/h)) to
the pulling requirements.
save wear on your vehicle’s parts.
4-31
<
Three important considerations have todo with weight:
Weight of the Trailer Tongue
Weight of the Trailer
The tongue load(A) of any trailer isan important
weight to measure because
it affects the total capacity
weight of your vehicle.The capacity weight includes the
curb weight of the vehicle,any cargo you may carry in
it, and the people who will
be riding in the vehicle.And
if you will tow a trailer, you must subtract the tongue
load from your vehicle’s capacity weight because your
vehicle will be carrying that weight, too.
See “Loading
Your Vehicle” in the Index for more information about
your vehicle’s maximum load capacity.
ow heavycan a trailer safelybe?
It should never weigh more than
1,000 pounds (450 kg).
But even that can
be too heavy.
It depends on how you plan to use your rig.
For
example, speed, altitude, road grades, outside
temperature and how much your vehicle is usedpull
to a
trailer are all important. And,it can also depend on any
special equipment that you
have on your vehicle.
You can ask your retailer
for our trailering information
or advice, or you can write
us at:
Oldsmobile Customer Assistance Network
P.O. Box 30095
Lansing, MI 48909
In Canada, write to:
General Motorsof Canada Limited
Customer Assistance Center
1908 Colonel Sam Drive
Oshawa, OntarioL1H 8P7
A
B
J
4-32
I
1
If you’re using a“dead-weight” hitch, the trailertongue
(A) should weigh10%of the total loaded trailer weight
(B). If you have a “weight-distributing” hitch, the trailer
tongue (A) should weigh 12% of the total loaded trailer
weight (B).
After you’ve loaded your trailer, weigh the trailer and
then the tongue, separately, to see
if the weights are
proper. If they aren’t, you maybe able to get them right
simply by moving some items aroundin the trailer.
Total Weight on Your Vehicle’s Tires
Be sure your vehicle’s tires are inflated to the
recommended pressurefor cold tires. You’ll find these
numbers onthe Tire-Loading Information label atthe
rear edge of the driver’s door or see“Loading Your
Vehicle” in the Index. Then be sure you don’tgo over
the GVW limitfor your vehicle, including the weight
of
the trailer tongue.
Hitches
It’s important to have the correct hitchequipment.
Crosswinds, large trucksgoing by, and rough roads are a
few reasons whyyou’ll need the right hitch. Here are
some rules to follow:
a Will you have to make any holes in the body
of your
vehicle when you install a trailer hitch?
If you do,
then be sure to seal the holes later when you remove
the hitch. If you don’t sealthem, deadly carbon
monoxide (CO)from your exhaust can get into your
vehicle (see “Carbon Monoxide” in
the Index). Dirt
and water can, too.
a The bumpers on your vehicle are not
intended for
hitches. Do not attach rental hitches or other
bumper-type hitches tothem. Use only a
frame-mounted hitch that does not attach the
to
bumper.
4-33
Safety Chains
Driving with a Trailer
You should always attach chains between your vehicle
and your trailer. Cross
the safety chains under the
tongue
of the trailer so that the tongue will not drop to the road
if it becomes separatedfrom the hitch. Instructions
about safety chains maybe provided by the hitch
manufacturer orby the trailer manufacturer. Follow the
manufacturer’s recommendationfor attaching safety
chains anddo not attach them to the bumper. Always
leave just enough slackso you can turn with your rig.
And, never allow safety chains to drag on the ground.
Towing a trailer requires a certain amount
of experience.
Before setting out for the open road, you’ll want to get
to know your rig. Acquaint yourself with the
feel of
handling and braking with the added weight
of the
trailer. And always keep in mind that the vehicle you are
driving is now a good deal longer and not nearly as
responsive as your vehicle is itself.
by
Trailer Brakes
Does your trailer have
its own brakes?
I
Be sure to read andfollow the instructionsfor the trailer
brakes so you’ll be able to install, adjust and maintain
them
properly.
Because you have anti-lock brakes,do not try to tap into
your vevcle’s brake system.If you do, both brake
systems won’t work well,
or at all.
Before you start, check the trailer hitch and platform
(and attachments), safety chains, electrical connector,
lamps, tires and mirror adjustment.
If the trailer has
electric brakes, start your vehicle and trailer moving
and
then apply the trailer brake controller
by hand to besure
the brakes are working.This lets you check your
electrical connection at the same time.
During your trip, check occasionally to be sure that the
load is secure, and that the lamps and any trailer brakes
are still working.
Following Distance
Stay at leasttwice as far behind the vehicle ahead as
you
would when driving your vehicle without a trailer.
This
can help youavoid situations that require heavy braking
and sudden turns.
Passing
You’ll need morepassing distance up ahead when
you’re towing a trailer. And,because you’re a good deal
longer, you’ll need togo much farther beyond the
passed vehicle before youcan return to your lane.
Backing Up
Hold the bottom of the steering wheel withone hand.
Then, to move the trailer to the
left, just move that hand
to the left. To move the trailerto the right, move your
hand tothe right. Alwaysback up slowly and,if
possible, have someone guide you.
Making Turns
~~
~~
NOTICE:
Making very sharp turns while trailering could
cause the trailer to come in contact with the
vehicle. Your vehicle could be damaged. Avoid
making very sharp turns while trailering.
When you’re turning witha trailer, make wider turns
than normal.Do this so your trailer won’t strike soft
shoulders, curbs, road signs, trees, or other objects.
Avoid jerky or sudden maneuvers. Signal well in
advance.
4-35
Turn Signals When Towing a Trailer
Driving On Grades
When you tow a trailer, your vehicle hashave
to a
different ~LUII signal flasher and extra wiring.
The green
arrows on your instrument panel will flash whenever
you signala turn or lane change. Properly hooked up,
the trailer lamps will also
flash, telling other drivers
you’re aboutto turn, change lanes or stop.
Reduce speed and shift tolower
a gear before you start
down a long or steep downgrade.
If you don’t shift
down, you might have use
to your brakesso much that
they wouldget hot and no longer work well.
When towing a trailer, the green arrows
on your
instrument panel willflash for turns evenif the bulbs on
the trailerare burned out. Thus, youmay think drivers
behind you are seeing your signal when they
are not. It’s
important to check occasionally to be sure the trailer
bulbs are still working.
Your vehicle may have bulb warning messages. When
you plug a trailer lighting system into your vehicle’s
lighting system,its bulb warning messages may not
let
you knowif one of your lamps goes out.So, when you
have a trailer lighting system plugged
in, be sure to
check your vehicle and trailer lamps
from time to time
to be sure they’re all working. Once you disconnect the
trailer lamps, the bulb warning messages again
can tell
you if one of your vehiclelamps is out.
4-36
On a long uphill grade, shift down to THIRD
(3) and
reduce your speed to around
45 mph (70 km/h) to reduce
the possibilityof engine and transaxle overheating.
Parking on Hills
You really should not park your vehicle, with a trailer
attached, on a hill.If something goes wrong, your rig
could startto move. People canbe injured, and both
your vehicle and the trailer
can be damaged.
But if you ever have to park your rig on a hill, here’s
how to do it:
1. Apply your regular brakes, but don’t shift
into
Park (P) yet.
2. Have someone place chocks under the trailer wheels.
3. When the wheel chocks are in place, release the
regular brakes until the chocks absorb the load.
4. Reapply the regular brakes. Then apply your parking
brake, and then shift to
PARK (P).
5. Release the regular brakes.
When YOUAre Ready to Leave After
Parking on a Hill
1. Apply your regular brakes and hold the pedal down
while you: ’.
Start your engine;
Shift into a gear; and
Release the parking brake.
2. Let up on the brake pedal.
3. Drive slowly until the trailer is clearof the chocks.
4. Stop and have someone pick up and store the chocks.
Maintenance When TrailerTowing
Your vehicle will need service more often when
you’re
pulling a trailer.See the Maintenance Schedule for more
on this.Things that are especiallyimportant in trailer
operation are automatic transaxle fluid (don’t overfill),
engine oil, belt, cooling system, and brake adjustment.
Each of these is coveredin this manual, and the Index
will help you find them quickly.
If you’re trailering, it’s
a good idea to review these sections before you start
your trip.
Check periodically tosee that all hitch nuts and bolts
are tight.
NOTES
4-38
Section 5 Problems on theRoad
Here you’ll find what todo about some problems that
can occur on the road.
3azard Warning Flashers
Your hazard warning flasherslet you warn others. They
also let police know you have a problem.
Your front and
rear turn signal lamps will flash
on and off.
Press the button into make
your front and rear turn
signal lamps flash onand
Off.
Your hazard warning flashers work no matter what
position your keyis in, and evenif the key isn’tin.
5-1
i
5. Check that thejumper cables don’thave loose or
missing insulation.If they do, you could get a shock.
The vehicles couldbe damaged, too. Before you
connect the cables, here are some basic things
you
should know. Positive(+) will go to positive (+) and
negative (-) will go to negative (-) or a metal engine
part. Don’t connect(+) to (-) or you’ll get ashort
that would damagethe battery and maybe other
parts, too.
6. Connect the red positive (+) cable to the positive (+)
terminal of the vehicle withthe dead battery. Use a
remote positive (+) terminal if the vehicle hasone.
7. Don’t let the other end touch metal. Connect it to
the
positive (+) terminal of the good battery. Use a
remote positive (+) terminal if the vehicle has one.
8. Now connect the black negative (-) cable to the good
battery’s negative (-) terminal.
Don’t let the other end touch anything until the next
step. The other endof the negative cabledoesn’t go
to the dead battery.It goes to a heavy unpainted
metal part on theengine of the vehicle with the dead
battery.
5-5
-+j=
GOOD BAlTERY
DEAD BATTERY
9. Attach the cable at least18 inches (45 cm) away
from the dead battery, but not near engine parts that
move. The electrical connection isjust as good there,
but the chanceof sparks getting back to
the battery is 12. Remove the cablesin reverse order to prevent
electrical shorting.Take.care that they don’t touch
much less.
each otheror any other metal.
10. Now start the vehicle with the good battery and run
the engine for a while.
11. Try to start the vehicle with
the dead battery. If it
won’t start after a few tries,
it probably needs
service.
Towing Your Vehicle
If your vehicle hasbeen changed or modified since
it
was factory-new by adding aftermarket items like
fog
lamps, aero skirting,or special tires and wheels, these
instructions and illustrations may not
be correct.
Before you do anything, turn on the hazard warning
flashers.
When you call, tell the towing service:
That your vehicle can only be towed with certain
equipment, as described later in this section.
0
That your vehicle has front-wheel drive.
The make, model and yearof your vehicle.
Try to havea GM retailer or a professional towing
service tow your Oldsmobile.The usual towing
equipment is:
0
Whether you can still move the shift lever.
0
If there was an accident, what was damaged.
When the towing service arrives,let the tow operator
know that this manual contains detailed towing
instructions and illustrations.The operator may wantto
see them.
A. Sling-type tow truck
B. Wheel-lift tow truck
C. Car carrier
5-7
When your vehicle is being towed, have the ignition
key
off. The steering wheel should be clamped
in a
straight-ahead position, with a clamping device
designed for towing service.Do not use the vehicle’s
steering columnlock for this. The transaxle shouldbe in
NEUTRAL (N) and the parking brake released.
Don’t have your vehicle towed on the front wheels,
unless you must.If the vehicle mustbe towed on the
front wheels, don’t go more than 55 mph (88 M )or
farther than 500 miles (800 km) or your transaxle will
be damaged. If these limits mustbe exceeded, then the
front wheels have to be supported
on a dolly.
Front Towing Hookup
Before hooking up to a tow truck,be sure to read all the
information on towing yourOldsmobile earlier in this
section.
1. Attach T-hook chains into the bottom slots in the
cradle behind the front wheels, on both sides.
2. Position a4 X 4 wood beam against thebottom of the
radiator support, across slingchains, and behind the
front bumper.
3. Attach a separate safetychain around the outboard
end of each control arm.
5-9
Rear Towing Hookup
Before hooking up to a tow truck, be sure
to read all the
information on towing your Oldsmobile earlier in this
section.
1. Attach T-hook chains on both sides, in the slotted
holes in the floorpan support rails,just ahead of the
rear wheels.
2. Position the lower sling crossbar directly under the
rear bumper.
3. Attach a separate safety chain around the outboard
end of each lower control arm.
Engine Overheating
You will find a coolant temperature gage or warning
light about a hot engine on your Oldsmobile’s
instrument panel. If you have the Electronic Cluster,
your information center will also display messages
about engine overheating. See “Coolant Temperature
Gage” or “Coolant Temperature Light”in the Index.
5-10
If Steam Is Coming From Your Engine
NOTICE:
If your engine catches fire because you keep
driving withno coolant, your vehicle can be
badly damaged. The costly repairs would not be
covered by your warranty.
If No Steam Is Coming FromYour Engine
If you get the overheat warning butsee or hear no
steam, the problemmay not be too serious. Sometimes
the engine can geta little too hot whenyou:
0 Climb a long hill on a hot day.
0 Stop after high speed driving.
0 Idle for long periods in traffic.
0 Tow a trailer.
5-11
If you get the overheat warning with no sign
of steam,
try thisfor a minuteor so:
Cooling System
1. Turn off your air conditioner.
I
~
,
,
2. Turn on your heaterto full hot at the highest fan
speed and open the window as necessary.
3. If you’re in a trafficjam, shift to NEUTRAL(N);
otherwise, shift tothe highest gear while driving-AUTOMATIC OVERDRIVE (GO) or DRIVE (D).
If you no longer have the overheat warning, you can
drive. Just to be safe, drive slower
for about ten minutes.
If the warning doesn’t come back on, you can drive
normally.
If the warning continues, pull over, stop, and park your
vehicle right away.
If there’s still no sign of steam, you can idle the engine
for two or three minutes while you’re parked, to ifsee
the warning stops.But then, if you still have the
warning, turn o f t h e engine and get everyone out of the
vehicle until it cools down.
You may decide not to lift the hood but to get service
help right away.
5-12
When you decide it’s safe to lift the hood, here’s what
you’ll see:
A. Coolant recovery tank
B. Radiator pressure cap
C. Electric engine fans
How to Add Coolant to the Coolant
Recovery Tank
If you haven’t found a problem yet, but the coolant level
isn’t atFULL COLD, add a50150 mixture of clean water
(preferably distilled) and a proper antifreeze at the coolant
recovery tank. (See “Engine Coolant”in the Index for
more information about the proper coolant
mix.)
NOTICE:
In cold weather, water can freeze and crack the
engine, radiator, heater core and other parts. Use
the recommended coolant.
When thecoolant in the coolant recovery tank is at
FULL COLD, start your vehicle.
If the overheat warning continues, there’sone more
thing youcan try. You can add the proper coolant mix
directly to the radiator, but be sure the coolingsystem is
cool beforeyou do it.
5-15
How to Add Coolant tothe Radiator
1. You can remove
the radiator
pressure cap when
the cooling system,
including the
radiator pressure
cap and upper
radiator hose,is no
longer hot.
Turn the pressurecap slowly tothe left untilit
first stops. (Don't press downwhile turning the
pressure cap.)
If you hear a hiss, wait
for that to stop.A hiss means
there is still some pressure left.
5-16
2. Then keep turning
the pressurecap,
but now push down
as you turnit.
Remove the
pressure cap.
3. Fill the radiator
with the proper
mix, up to the base
of the filler neck.
4. Then fill the coolant recovery tank to theW L L
COLD mark.
5. Put the cap back on the coolant recovery tank, but
leave the radiator pressure capoff.
5-17
6. Start the engine
and let it run until
you can feel the
upper radiator hose
getting hot. Watch
out for the engine
fans.
7. By this time the coolant level inside the radiator
filler neck maybe lower. If the levelis lower, add
more of the proper mix through the filler neck until
the level reaches the
base of the filler neck.
5-18
8. Then replace the
pressure cap.
At any time during this procedure if coolant begins
to flow out of the filler neck, reinstall the pressure
cap. Be sure themows on the pressure cap line
up
like this.
If a Tire Goes Flat
Changing a Flat Tire
It’s unusual for a tire to “blow out” while you’re driving,
If a tire goes flat, avoid further tire and wheel damage
especially ,if you maintain your tires properly. If air goes
by driving slowly to a level place. Turn on your hazard
out of a tire,it’smuchmorelikelytoleakoutslowly.warningflashers.
But if youshould ever have a “blowout,” here are a few
tips about what toexpect and what to do:
If a front tire fails, the flat tire willcreate a drag that
pulls the vehicle toward that side. Take your footoff the
accelerator pedal and grip the steering wheel firmly.
Steer tomaintain lane position, then gently brake toa
stop wellout of the traffic lane.
A rear blowout, particularly on a curve, acts much like a
skid and may requirethe same correction you’d use in a
skid. In any rearblowout, remove your footfrom the
accelerator pedal.Get the vehicle under control by
steering the way you wantthe vehicle to go.It may be
very bumpy and noisy,but you can still steer. Gently
brake toa stop, welloff the road if possible.
If a tire goes flat, the next partshows how to use your
jacking equipment to change a flat tire safely.
5-19
1.
2.
-
. . .
Open the jackstorage
cover by twisting the
knob 114 turn
counterclockwise.
Remove thejack and
wheel wrench.
to remove the nut.
. , ,,
I AI
7. If you have an alloy (aluminum) wheel with 'a center
cover that conceals the wheel nuts
the following
directions will help.
..
a) Insert the flat endof the wheel wrench in the
notch and pry off the center cover. Do not drop the
cover or lay it face down, asit could be scratched or
damaged.
b) When replacing the cover after the wheel is put
back on the vehicle, do not use a hammer or mallet
to install the cover.
I,i
8. Use the wheel wrench to loosen the wheel nuts, but
don't remove them. (The bracket shown
is on wheels
with wire wheel covers only. It's needed to anchor
wire wheel covers to
the wheel. Do not misplaceit
while using your temporaryspare tire.)
m
10. Near each wheel well is a notch in theframe into
which to put thejack head. The front notch is 10
inches backfrom the front wheel well.The rear
notch is 8 inches forwardfrom the rear wheel well.
The wheel wrench has these8 and 10 inch distances
stamped on the handle. Usethe wheel wrenchto
measure to the notch by flipping the socket
into the
handle, then measurefrom the socket endof the
wrench.
11. Position thejack and raisethe jack head until it fits
firmly on the ridge in the vehicle's
frame nearest the
flat tire.Do not raise the vehicle yet. Put the compact
9. Attach the wheel wrenchto the jack, and rotate the
spare tire near you.
wrench clockwiseto raise thejack head a few inches.
12. Raise the vehicle by rotating the wheel wrench
clockwise in thejack. Raise thejack far enough so
there's enough room for the spare tire to fit.
Raishg your vehicle with the jack improperly
positioned will damage the vehicle ur may allow
the vehide to fall aff the jack. Be sure to fit the
jack lift head into the proper location before
raising your vehicle.
17. Tighten the wheel
nuts firmly in a
crisscross sequence.
on the compact sparetire.
Don’t try to put the wheel cover
It won’t fit. Store the wheel cover
in the .trunk until you
have replaced the compact spare tire with
a regular tire.
NOTICE:
Wheel covers won’tfit on your compact spare.
If you try to put a wheel cover
OR your compact
spare, you could damage the cover or the spare.
18. Store the flat tire asfar forward in the trunk as
possible. Store thejack and wheel wrench in their
compartment in the trunk.
The compact spareis for temporary use only.Replace
the compact spare tire withfull-size
a
tire as soonas
you can.
Compact Spare Tire
Although the compact spare was fully inflated when
your vehicle was new,it can lose air after a time. Check
the inflation pressure regularly.It should be 60 psi
(420 P a ) . After installing the compact spare on your
vehicle, you should stop as soon as possible and make
sure your spare tire is correctly inflated.
The compact
spare is made to perform well at posted speed limits for
distances up to 3,000 miles (5 000 lun), so you can
finish your trip andhave your full-size tire repairedor
replaced where you want.Of course, it’s best to replace
your spare with a full-size tire as soon as you can. Your
spare willlast longer andbe in good shape in case you
need it again.
NOTICE:
Don’t take your compact spare through an
automatic carwash with guide rails.The
compact spare canget caught on the rails. That
can damage the tire and
wheel, and maybe other
parts of your vehicle.
Don’t use yourcompact spare on some other vehicle.
And don’t mixyour compact spare or wheel with other
wheels or tires. They won’tfit. Keep your spare andits
wheel together.
I NOTICE:
Tire chainswon’t fit your compact spare.Using
them will damage yourvehicle and destroy the
chains too. Don’t use tire chains on your compact
spare.
5-27
If You’re Stuck: In Sand, Mud, Ice
or
NOTICE:
Snow
Spinning your wheels can destroy parts of your
vehicle as well as the tires. If you spin the wheels
too fast while shifting your transaxle back and
forth, you can destroy your transaxle.
What you don’t want to
do when your vehicleis stuck is
to spin your wheels toofast. The method known as
“rocking” can help youget out when you’re stuck, but
you must use caution.
I
I
For information about using tire chains
on your vehicle,
see “Tire Chains” in the Index.
Rocking your vehicle to get it out
First, turn your steering wheel left and right. That
will
clear the area around your front wheels.
If your vehicle
has traction control, you should turn the system
off. (See
“Traction Control System”in the Index.) Then shift
back and forth between REVERSE
(R) and a forward
gear, spinning the wheels as little as possible. Release
the accelerator pedal while you shift, and press lightly
on the accelerator pedal when the transaxle
is in gear. If
that doesn’t get you
out after a few tries, you may need
to be towed out. If youdo need to be towed out, see
“Towing Your Vehicle’’in the Index.
Doing Your Own Service Work
If you want todo some of your own servicework, you’ll
want to get theproper Oldsmobile Service Manual.It
tells you much more about how to serviceyour
Oldsmobile than this manual can.To order the proper
service manual, see “Service Publications” in the Index.
Your vehicle hasan air bag system. Before attempting t0
do your own service work, see “Servicing
Your Air
Bag-Equipped Oldsmobile”in the Index.
You should keep arecord with all parts receipts and:tlis
the mileage and the date
of any service work you
perform. See “MaintenanceRecord” in the Index.
NOTICE:
If you try to do yourown service work without
knowing enough aboutit, your vehicle could be
damaged.
6-2
Fuel
3800 Series IIEngine (CodeK)
The 8th digit of your vehicle identification number
(VIN) shows the code letter for your engine. You will
find the VIN at the topleft of your instrument panel.
(See “Vehicle IdentificationNumber” in the Index .)
Use regular unleaded gasoline rated at octane
87
or
higher. It should meet specifications ASTMD4814 in
the United States and CGSB 3.5-92 in Canada. These
fuels should have the proper additives, so you should not
have to addanything to the fuel.
In the United States andCanada, it’s easy to be sure you
get the rightkind of gasoline (unleaded). You’llsee
UNLEADED right on thepump. And only unleaded
nozzles willfit into your vehicle’sfiller neck.
Be sure theposted octane is at least 87.If the octane is
less than 87, you may get a heavy knocking
noise when
you drive.If it’s bad enough, it can damage your engine.
If you’re using fuel rated at 87octane or higher and you
still hear heavyknocking, your engine needs service.
But don’t worry if you
hear a little pinging noise when
you’re accelerating or driving up a hill. That’s normal,
and you don’t have to buy ahigher octane fuel to getrid
of pinging. It’s the heavy, constant knock that means
you have aproblem.
What about gasoline withblending materials that
contain oxygen (oxygenates),such as MTBE or alcohol?
WTBE is “methyl tertiary-butyl ether.”Fuel that is no
more than 15%MTBE is fine for your vehicle.
Ethanol is ethyl or grain alcohol.Properly-blended fuel
chat is no more than 10% ethanol is fine for your
vehicle.
‘Methanolis methyl or wood alcohol.
-
NOTICE:
Fuel that is more than5% methanol is bad for
your vehicle. Don’t use it. It can corrode metal
parts in your fuel system and also damage plastic
and rubber parts. That damage wouldn’t be
covered under your warranty. And even 5%
at or
less, there must be %osolvents” and corrosion
preventers in this fuel to help avoid these
problems.
6-3
Gasolines for Cleaner Air
Fuel
Your use of gasoline with deposit control additives will
help prevent deposits from forming in yourengine and
fuel system. That helpskeep your engine in tune and
your emission control system working properly. It’s
good for your vehicle, and you’ll
be doing your partfor
cleaner air.
3800 Supercharged Engine (Code 1)
The 8th digitof your vehicle identification number
(VIN) shows the code letterfor your engine.You will
find theVIN at the top left
of your instrument panel.
(See “Vehicle Identification Number” in the Index.)
Use premium unleaded gasoline rated 91
at octane or
Many gasolines are now blended with oxygenates.
General Motors recommends that you use gasolines withhigher. You may use middlegrade or regular unleaded
these blending materials,such as MTBE and ethanol. By gasolines, but your vehicle may not accelerate as well.
The gasoline you use should meet specifications ASTM
doing so, you can help cleanthe air, especially in those
D4814 in the United States and
CGSB 3.5-92 in
parts of the country thathave h g h carbon monoxide
Canada. These fuels should have the proper additives,
so
levels.
you should not have to add anything to the
fuel.
In addition,some gasoline suppliers are.now producing
In the United States and Canada, it’s easy to be sure you
reformulated gasolines. These gasolines are specially
get the right kindof gasoline (unleaded). You’ll see
designed to reduce vehicle emissions. General Motors
UNLEADED right on the pump. And only unleaded
recommends that you use reformulated gasoline.
By
nozzles willfit into your vehicle’s filler neck.
doing so, you can help cleanthe air, especiallyin those
parts of the country thathave high ozone levels.
Be sure the posted octane for premium is at least 91 (at
least 89 for middle grade and 87 for regular).
If the octane
You should ask your service station operators if their
is less than 87, youm y get a heavy knocking noise when
gasolines contain deposit control additives and
you drive. If it’s bad enough,it can damage your engine.
oxygenates, andif they havebeen reformulated to
reduce vehicle emissions.
91 octane or higher and you
If you’re using fuel rated at
still hear heavy knocking, your
engine needs service.
But don’t worry if
you hear a little pinging noise when
6-4
you’re accelerating ordriving up a hill. That’s normal
and you don’thave to buy a higheroctane fuel to get rid
of pinging. It’sthe heavy, constant knock that means
you have a problem.
What about gasoline with blending materials that
contain oxygen (oxygenates), such as MTBE or alcohol?
MTBE is “methyl tertiary-butyl ether.” Fuel that is no
more than 15% MTBE is fine for your vehicle.
Methanol is methylor wood alcohol.
I
Your use of gasoline with deposit control additives will
help prevent deposits from forming in yourengine and
fuel system. That helps keep yourengine in tune and
your emission control system working properly. It’s
good for your vehicle, and you’llbe doing your partfor
cleaner air.
Many gasolines are now blended with oxygenates.
General Motors recommends that you use gasolines with
these blending materials, such as MTBE and ethanol.
By doing so, you can help clean the air, especiallyin
those parts of the country thathave high carbon
monoxide levels.
Ethanol is ethyl or grain alcohol.Properly-blended fuel
that is no more than 10%ethanoE is fine for your
vehicle.
I
Gasolines for Cleaner Air
In addition, some gasoline suppliers are now producing
reformulated gasolines. These gasolines are specially
NOTICE:
designed toreduce vehicle emissions. General Motors
Fuel that is more than
5% methanol is badfor
recommends that youuse reformulated gasoline. By
your vehicle. Don’t use it. It can corrode metal
doing so, you can help clean the air, especially
in those
parts in your fuel system and also damage plastic parts of the country thathave high ozone levels.
and rubber parts. That damage wouldn’t be
You should ask your service station operators
if their
covered under your warranty. And even5%
at or
gasolines contain deposit control additives and
less, there must be “cosolvents” and corrosion
oxygenates, andif they have been reformulated to
preventers in this fuel to help avoid these
reduce vehicle emissions.
problems.
I
6-5
~
Fuels in Foreign Countries
Filling Your Tank
-If you plan on driving in another country outside the
X . S . or Canada, unleaded fuel maybe hard tofind. Do
not use leaded gasoline. If you use evenone tankful,
your emission controls won’t work
well or at all. With
continuous use, spark plugs can get fouled, theexhaust
,system can corrode, andyour engine oil can deteriorate
quickly. Your vehicle’s oxygen sensor will be damaged.
All of that means costly repairs that wouldn’t
be covered
:by your warranty.
-To check on fuel availability, ask an auto club,
or
’contact a major oil company that does business in the
country where you’llbe driving.
The cap is behind a hinged
door on the left sideof your
‘You can also write us atthe following address for
vehicle.
.advice. Just tell us where you’re going give
and your
Vehicle Identification Number (VIN).
General Motors Overseas Distribution Corporation,
North American Export Sales (NAES)
1908 Colonel Sam Drive
Oshawa, Ontario
L1H 8P7
6-6
1
When you put thecap back on, turn it to theright until
you hear at least three clicks.
Checking Things Under the Hood
The following sections tellyou how to check fluids,
lubricants andimportant underhood parts.
NOTICE:
If you needa new cap, be sure to get the right
type..Your retailercan get one for you. If you get
fit or have proper
the wrong type, it may not
venting, and your fuel tank and emissions system
might be damaged.
6-8
I
Hood Release
To open the hood,first pull the hood releasehandle
inside the vehicle.
Then go to the front of the vehicle and pull up on the
underhood release.
Lift the hood.
Before closing the hood, be sure all thefiller caps are on
properly. Thenjust pull the hood down
and clase~it
firmly.
1
I
-
3800 Series I1 Engine (L 36 Code K)
When you open the hood, you’ll see:
1. Engine Coolant Recovery Tank
2. Automatic Transaxle Fluid Dipstick
3. Brake Fluid Reservoir
4. Windshield Washer Fluid Reservoir
5.
6.
7.
8.
9.
6-10
Air Cleaner
Engine Oil Fill Cap
Engine Oil Dipstick
Radiator Pressure Cap
Battery
The L36 engine uses anengine accessory belt. This
diagram shows the features connected and the routing.
See “Maintenance Schedule” in the Index
for when to
check the belt.
L36 Engine Accessory Belt
A. Power Steering
B. Alternator
C. Air Conditioning
D. Crank
A
E. Coolant Pump
C
E Tensioner
-
3800 Supercharged Engine(L67 Code 1)
(Option)
When you openthe hood, you’ll see:
1. Engine Coolant Recovery Tank
2. Automatic Transaxle Fluid Dipstick
3. Power Steering Fluid Reservoir
4. Brake Fluid Reservoir
5. Windshield Washer Fluid Reservoir
6. Air Cleaner
7. Engine Oil Fill Cap
8. Engine Oil Dipstick
9. Radiator Pressure Cap
10. Battery
6-12
The Supercharged 3800 (L67) engine uses two
accessory drive belts. One belt drives the generator and
the power steering pump.The second belt drives the
supercharger, coolant pump and air conditioning
compressor. Each belt hasits own tensioner and idler
pulley. See “Maintenance Schedule” in the Index for
when to check the accessory drive belts and the
Supercharger oil level. Have your retailer check
the oil
level in the Supercharger.
L67 Engine Accessory Belt
1. Front Belt
2. Back Belt
F
A. Alternator
B . Power Steering Pump
C. Crank
D. Supercharger
E. Coolant Pump
F. AirConditioning
6-13
Engine Oil
If the CHECK OIL LEVEL message, OIL LEVEL light,
or CHECK OIL light onthe instrument panel comes on,
it means you need to check your engine oil level right
away. For more information, see “Check Oil Message,”
“Oil Level Light,”or “Check Oil” in the Index.
You
should check your engine oil level regularly; is
this
an
added reminder.
It’s a good idea
to check your engine oil every time
you
get fuel.In order to get an accurate reading, the oil must
be warm and the vehicle must be
on level ground.
The engine oil dipstickis located immediately behind
the enginefans and infront of the engine oil fill cap.
The topof the dipstickis a yellow ring.
Turn off the engine and give the oil a few minutes
to
drain back into the oil pan.
If you don’t, theoil dipstick
might not show the actual level.
6-14
To Check Engine Oil
What Kind of Oil to Use
Pull out the dipstickand clean it with apaper towel or
cloth, then push itback in all the way. Remove it again,
keeping the tip down, and check the level.
Oils of the proper qualityfor your vehiclecan be
identified bylooking for the “Starburst” symbol.The
“Starburst” symbol indicates thatthe oil has been
certified by the AmericanPetroleum Institute (API), and
is preferredfor use in your gasoline engine.
When to Add Oil
If the oil is at or belowthe ADD mark, then you’ll need
to add some oil. But you must usethe right kind.This
part explains what kindof oil to use.For crankcase
capacity, see “Capacities and Specifications”in the
Index.
If you change your own oil,
be sure you useoil that has
the “Starburst” symbol on
the front of the oil
container.
NOTICE:
Don’t add too much oil.
If your engine hasso
much oil that theoil level gets above the
cross-hatched area that shows the proper
operating range, your engine could be damaged.
Just fill it enough to putthe level somewhere in the
proper operating range.Push the dipstick allthe way
back in when you’re through.
I
I
If you have your oil changed for you, be sure the oil put
into yourengine is AmericanPetroleum Institute
certified for gasoline engines.
You should also usethe proper viscosity oil for your
vehicle, as shownin the following chart:
RECOMMENDED SAE VISCOSITY GRADE ENGINE OILS
FOR BEST FUEL ECONOMY AND COLDSTARTING,SELECTTHELOWEST
SAE VISCOSITY GRADE OIL FOR THE EXPECTED TEMPERATURE RANGE.
LOOK
FOR THIS
SYMBOL
HOP
WEATHER
~I
I
"F
tlOO
7
"C
-
- 38
- 16
.b
i-. 7
'
18
SAE 1OW-30
PREFERRED
SAE W-30
above 0°F
(-1WC)
GM Goodwrench@ oil (in Canada,
GM Engine Oil)
meets all the requirementsfor your vehicle.
Engine Oil Additives
WEATHER
6-16
ITICE
Use only engine oil with the American Petroleum
Institute Certified For Gasoline Engines
"Starburst" symbol. Failure to use the proper oil
by your
can result in engine damage not covered
warranty.
- 27
+ 20
As shown in the chart, SAE 1OW-30 is best for your
vehicle. However, youcan use SAE 5W-30 if it's going
to be colder than60 * F ( 16"C) before your next oil
change. When it's very cold, you should use
SAE
5W-30. These numbers on an oil container show its
viscosity, or thickness.Do not use other viscosity oils,
such as SAE 20W-50.
DO NOT USE SAE 2OW-56 OR ANY OTHER
GRADE OIL NOT RECOMMENDED
Don't add anything to your oil. Your Oldsmobile retailer
is ready to advise if you think somethingshould be
added.
When to Change Engine Oil
Engine Coolant Heater
See if any one of these is true for you:
An engine coolant heater canbe a big helpif you have
to park outside in very cold weather,
0°F (- 18 C) or
colder. If your vehicle has this option,
see “Engine
Coolant Heater” in the Index.
0
Most trips are less than 5 to 10 miles (8 to 16 km).
This is particularlyimportant when outside
temperatures are belowfreezing.
0
Most trips include extensive idling (suchas frequent
driving in stop and go traffic).
0
Most trips are through dusty areas.
You frequently tow a trailer or use a carrier on topof
your vehicle.
If any one of these is true for your vehicle, thenyou
need to change your oil and filter every 3,000 rniles
(5 000 km) or 3 months -- whichever comes first. (See
“Change Oil Indicator” in the Index.)
If the CHANGE
OIL NOW message appears in the optional Driver
Information Center, you shouldchange your oil.
If none of them is true, change the oil and filter every
7,500 miles (12 500 km) or 12 months -- whichever
comes first.
(See “Change Oil Indicator” inthe Index.) If your
vehicle isequipped with the Driver Information Center,
always reset the engine oil life to 100% after every oil
change.
O
What to Do with Used Oil
Did you know that usedengine oil contains certain
elements that may be unhealthy for your skin and could
even cause cancer? Don’t let used oil stay on your skin
for very long.Clean your skin and nails with soap and
water, or a good hand cleaner. Wash or properly throw
away clothing or rags containing used
engine oil. (See
the manufacturer’s warnings about the use and disposal
of oil products.)
Used oil can be a real threat to theenvironment. If you
change your own oil, be sure to drain all free-flowing oil
from the filter before disposal.Don’t ever disposeof oil
by putting it in the trash, pouringit on the ground, into
sewers, or into streams or
bodies of water. Instead,
recycle it by taking it toa place that collects used oil.
If
you have a problem properly disposingof your used oil,
ask your retailer,a service station ora local recycling
center for help.
6-17
Air Cleaner
To Check or Replace theAir Cleaner
Refer tothe MaintenanceSchedule to determine when to
replace the air filter.
See “Scheduled Maintenance Services” in the Index.
1. Remove the three wingscrewsin the housing cover
and pull back.
If you have the3800 Supercharged Engine, unsnap
the three clips holding the air cleaner housing cover
and pull apart.
NOTICE:
If the air cleaner is
off, a backfire can cause a
damaging engine fire. And, dirt can easily get
into your engine, which will damage it. Always
have the air cleaner
in place when you’re driving.
6-18
2. Remove the clamp on the air intake hose where the
hose attaches to the throttle body near the top
of the
engine. Detach the hose from the throttle body, then
pull back the rearof the housing cover.
3. Remove the air filter.
4. Install the air filter carefully and replace the cover
tightly.
5. Reattach the air intake hose and tighten the clamp.
Supercharger Oil
When to Check
Check oil level every 30,000 miles (SO 000 km)or
every 36 months.
What Und of Oil to Use
See “Recommended Fluids and Lubricants” in the Index
and use only tbe recommended oil.
How to Check and Add Oil
Check oil only when the engineis cold. M o w the
engine tu cool 2 to 3 hours after running.
Unless you are technically qualified and have the proper
tools, you should let your retailer or a qualified service
center per€ormthis maintenance.
1. Remove the wiring hamess shield.
2. Clean the area around the oil fiU plug before
removing it.
3. Remove the oil fill plug using a 3/16 inch Allen
wrench.
I
I
6-20
4. The oil level is correct when it just reaches the
bottom of the threadsof the inspection hole.
5. Replace the oil plug with the O-ring in place. Torque
to 88 lb-in (10 N-m).
6. R.eplace the wiring harness shield.
Automatic Transaxle Fluid
When to Check and Change
A good time to check your automatic transaxle fluid
level is when the engine oil is changed. Refer to the
Maintenance Schedule to determine when to change
your fluid. See “Scheduled Maintenance Services” in the
Index.
I NOTICE:
Too much or too little fluid can damage your
transaxle. Too much can mean that some of the
fluid could come out and fall on hot engine parts
or exhaust system parts, starting a fire. Be sure to
get an accurate reading if you check your
transaxle fluid.
Wait at least30 minutes before checking the transaxle
fluid levelif you have been driving:
When outside temperatures are above 90°F (32°C).
At high speed for quite a while.
How to Check
In heavy traffic - especially in hot weather.
Because this operation can be a little difficult, you may
choose to have this done at yourOldsmobile retailer
Service Department.
While pulling a trailer.
If you do it yourself, be sure tofollow all the
instructions here, or you could get afalse reading on the
dipstick.
To get the right reading,the fluid should be at normal
operating temperature, which is180°F to 200°F
(82°C to 93°C).
Get the vehicle warmed upby driving about 15 miles
(24 k
rn)when outside temperatures areabove 50 OF
(10”C). If it’s colder than50 OF (10”C), you mayhave
to drive longer.
To check the fluid level
0
Park your vehicle on a level place. Keep theengine
running.
2. Push it back in all the way, wait three seconds and
then pullit back out again.
With the parkingbrake applied, place the shiftlever
in PARK (P).
0
With your foot onthe brake pedal, move the shift
lever through each gear range, pausing for about
three seconds ineach range. Then, position the shift
lever in PARK (P).
Let the engine run at idle for three to five minutes.
Then, without shuttingoff the engine, follow these
steps:
1. The transaxle fluid
dipstick is located onthe
right sideof the engine
compartment, near the
master brake cylinder.
The dipstick has a red
ring or red printing on
top. Pull out the dipstick
and wipeit with a clean
rag or paper towel.
6-22
3. Check both sidesof the dipstick,and read thelower
level. The fluid level must be in the cross-hatched
area.
4. If the fluid levelis in the acceptable range, push the
dipstick back in all theway.
How to Add Fluid
Engine Coolant
Refer to theMaintenance Schedule to determine what
kind of transaxle fluid to use.See “Recommended
Fluids and Lubricants” in the Index.
The following explains your coolingsystem and how to
add coolant whenit is low. If you have a problem with
engine overheating, see “Engine Overheating” in the
Index.
If the fluid levelis low, add onlyenough of the proper
fluid to bringthe level into the cross-hatched area on the
dipstick.
1. Pull outthe dipstick.
2. Using along-neck funnel, add enough fluid at the
dipstick hole to bringit to theproper level. It doesn’t
take muchfluid, generally less than a pint (OSL).
Don’t overjill. We recommend you use only fluid
labeled DEXRON@-III,because fluid with that label
is made especially for your automatic transaxle.
Damage caused by fluid other thanDEXRON@-111
is not covered by your new vehicle warranty.
a After adding fluid, recheck the fluid level as
described under “How to Check.”
a When the correct fluid levelis obtained, push the
dipstick backin all the way.
The proper coolant for your Oldsmobile will:
Give freezing protectiondown to -34°F (-37 “C) .
Give boiling protection up to262°F (128” C) .
Protect against rust and corrosion.
Help keep the proper engine temperature.
Let the warning lights work as they should.
What to Use
Use amixture of one-half clean water (preferably
distilled) and one-half antifreeze that meets “GM
Specification 1825M,” which won’t damage aluminum
parts. You can also use a recycled coolant conforming to
GM Specification 1825Mwith a complete coolant flush
and refill. Use GM Engine Coolant Supplement (sealer)
with anycomplete coolant flush and refill.If you use
this mixture, you don’t need to add
anything else.
6-23
Adding Coolant
NOTICE:
If you use an improper coolantmix, your engine
could overheat and be badly damaged. The
repair cost wouldn’t be covered
by your
warranty. Too much waterin the mix can freeze
and crack the engine, radiator, heater core and
other parts.
6-24
To Check Coolant
When your engine is cold, the coolant level should
be at
FULL COLD or a little higher. When your engine is
warm, the level should be to
upFULL HOT or alittle
higher.
LOW
COOLANT
If you have the electronic cluster and your coolant level
is low, the information center display will showLOW
ENGINE COOLANT. If this light comes on, it means
you’re low on engine coolant.
To Add Coolant
If you needmore coolant, add the propermix at the
coolant recovery tank.
Add coolant mix at the recovery tank, but be careful not
to spillit.
Radiator Pressure Cap
When youreplace your radiatix pressure cap,an AC@
cap is recomended.
'memostat
~
~~
The power steering fluid reservoiron the L67 engine is
to the right of the supercharger andinfront of the
transaxle fluid dipstick.
The power steering-fluid reservoir
on the L36 engine is
located belowthe alternator and behindthe accessory
drive belt.
How To Check Power SteeringFluid
Windshield Washer Fluid
When the engine compartment is cool, unscrew the
cap
and wipe the dipstickwith a clean rag. Replace the
cap
and completely tightenit. Then remove thecap again
and look at the fluid levelon the dipstick.
What to Use
The level should be at the FULL COLD mark. Add
enough fluid to bringthe level up to the mark.
A fluid loss in this system could indicate a problem.
Have the system inspected and repaired.
When you need windshield washer fluid, be sure to read
the manufacturer’s instructions before use.If you will be
operating your vehiclein an area where the temperature
may fall below freezing, use a fluid that has sufficient
protection against freezing.
To Add
What to Add
Refer tothe Maintenance Schedule to determine what
kind of fluidto use. See “Recommended Fluids and
Lubricants” in the Index.
NOTICE:
When adding power steering fluid or making
a
complete fluid change, always use the proper
fluid. Failure to use the proper fluid can cause
leaks and damage hoses and seals.
Open the cap labeled WASHER FLUID ONLY. Add
washer fluid until the tank isfull.
6-27
YOTICE:
Brakes
A
e When using concentrated washer fluid,
follow the manufacturer’s instructions for
adding water.
e Don’t mix water with ready-to-use washer
fluid. Water can cause the solution to freeze
and damage your washer
fluid tank and
other partsof the washersystem. Also,
water doesn’t clean as well as washer fluid.
e FiIl your washer fluid tank
only 314 full
when it’s very cold. This allows for
expansion, which could damage the tank
if
it is completely full.
e Don’t use radiator antifreeze
in your
windshield washer. It can damage your
washer system and paint.
Brake Master Cylinder
Your brake master cylinder is here. Itis filled with
DOT-3 brake fluid.
There are only two reasons why the brake fluid levelin
your master cylinder mightgo down. The first is that the
brake fluid goesdown to an acceptable level during
normal brake lining wear. When new linings are put in,
the fluid level goes back up.The other reasonis that
fluid is leaking out of the brake system.If it is, you
should have your brake system fixed,since a leak means
that sooner or later your brakes won’t work well, or
won’t work at all. So, it isn’t a good idea
to “top off’
your brake fluid. Adding brake fluid won’t correct a
leak. If you add fluid when your liningsare worn, then
you’ll havetoo much fluid when youget new brake
linings. You should add (or remove)brake fluid, as
necessary, only when workis done on the brake
hydraulic system.
What toAdd
When you do need brake fluid, use only DOT-3 brake
fluid -- such as Delco Supreme 11 (GM Part
No. 1052535). Use new brakefluid from a sealed
container only, and always clean the brake fluid
reservoir cap before removing it.
@
L
NOTICE:
Don’t let someone put in thewrong kind of
fluid. For example, just a few drops of
mineral-based oil, such as engine
oil, in
your brake system can damage brake
system parts so badly thatthey’ll have tobe
replaced.
Brake fluid can damage paint,so be careful
not tospill brake fluidon your vehicle. If
you do, washit off immediately. See
“Appearance Care” in the
Index.
When your brake fluid falls to a low level, your brake
warning light willcome on. A chime will sound if you
try to drive with this warninglight on. See “Brake
System Warning Light”in the Index.
6-29
Brake Wear
Your Oldsmobile has front disc brakes and rear drum
brakes.
Disc brake pads have built-in wear indicators that make
a high-pitched warning sound when the brake pads are
worn and new pads are needed.
The sound maycome
and go or be heardall the time your vehicle is moving
(except when you are pushing on the brake pedal
firmly).
NOTICE:
Continuing to drive with worn-outbrake pads
could resultin costly brake repair.
Some driving conditionsor climates may cause a brake
squeal when the brakes are
first applied or lightly
applied. This does not mean something is wrong
with
your brakes.
Your rear drum brakes don’t have wear indicators, but
if
you ever hear a rear brake rubbing noise, have
the rear
brake linings inspected.Also, the rear brake drums
should be removed and inspected each time the tires
are
removed for rotation or changing. When you have the
Eront brakes replaced, have the rear brakes inspected, too.
Brake linings should always
be replaced as complete
axle sets.
i
I
6-30
Brake Pedal Travel
Battery
See your retailerif the brake pedal does not return to
normal height,or if there is a rapid increase
in pedal
travel. T h s could be a sign of brake trouble.
Brake Adjustment
Every new Oldsmobile has a Delco Freedom’ battery.
You never have to add water to one of these. When it’s
time for a new battery, we recommendDelco
a
Freedom@battery. Getone that has thereplacement
number shown onthe original battery’s label.
Every time you apply thebrakes moderately, withor
without the vehicle moving, your brakes adjust for wear.
Vehicle Storage
Replacing Brake System Parts
The braking system on a modern vehicleis complex. Its
many parts have to be of top quality andwork well
together if the vehicle is to have really good braking.
Vehicles wedesign and testhave top-quality GM brake
parts in them, as yourOldsmobile does when it is new.
When you replace partsof your braking system -- for
example, when your brake linings wear down and you
have to have new onesput in -- be sure you get new
genuine GM replacement parts. If you don’t, your
brakes may no longer work properly.For example, if
someone puts in brake linings that are wrongfor your
vehicle, thebalance between yourfront and rearbrakes
can change -- for the worse. The braking performance
you’ve come to expect can change in many other ways if
someone puts in the wrongreplacement brake parts.
If you’re not going to drive your vehiclefor 25 days or
more, takeoff the black, negative(-) cable from the
battery. This will help keep your batteryfrom running
down.
Contact your retailer to learn how prepare
to
Your
vehicle for longer storage periods.
6-31
Halogen Bulbs
Headlamp Bulb Replacement
1. Remove the two quarter-turn wing screwsfrom the
top of the headlamp housing. Remove the
two
screws holding thepart of the grille covering the
headlamps. Be careful not to scratch
or bend this
portion of the grille.
A
4. Twist the bulb assembly 1/6 turn and pull out the
bulb assembly.
Reverse the procedure to replacethe bulb assembly and
headlamp housing. Make sure the tabs (A) are locked
into slots (B) before tightening the screws.
The Torx@ screws(C) are headlamp aiming screws.Do
not turn these screws. Only a qualified service
technician using proper equipment should adjust these
screws.
Taillamp Bulb Replacement
For the typeof bulb, see the Index under “Replacement
Bulbs.”
1. In the trunk, remove the plastic screw holding
the
carpeting in place and pull back the carpeting.
If you
have the optional convenience net, you must first
remove it from the hooks.
2. Pull the carpet away from the rear corner
of the trunk.
3. Rotate the bulb housing1/8 turn and remove it.
4. To remove the bulb, push inand rotate it
counterclockwise.
5. Replace the bulb.
6. Reverse the steps to reassemble the taillamp.
6-34
Windshield Wiper Blade Replacement
Replacement blades come in different types and are
removed in different ways. Here’s how
to remove the
type with a release clip:
1. Pull the windshield wiperarm away from the
windshield.
2. Push down on the release clip witha screwdriver and
pull the blade assembly off the wiperarm.
3. Push the new wiper blade securely on the wiperarm.
6-35
-
Inflation Tire Pressure
The Tire-Loading Information label whichis on the rear
edge of the driver’sdoor shows the correct inflation
pressures for your tires, whenthey’re cold. “Cold”
means your vehicle has been sitting
for at least three
hours or drivenno more than a mile.
NOTICE:
Don’t let anyone tellyou that underinflationor
overinflation is all right. It’s not. If your tires
don’t have enoughair (underinflation) you can
get:
Too much flexing
Too much heat
0 Tire overloading
Bad wear
Bad handling
Bad fuel economy.
NOTICE: (Continued)
NOTICE: (Continued)
If your tires have too much
air (overinflation),
you can get:
Unusual wear
Bad handling
Rough ride
0 Needless damage from road hazards.
When to Check
Check your tiresonce a month or more.
Don’t forget your compact spare tire. It should be at
60 psi (420 Wa).
How to Check
Use a good quality pocket-type gage to check tire
pressure. Simplylooking at the tires will not tell you the
pressure, especiallyif you have radial tires-- which
may look properly inflated evenif they’re underinflated.
If your tires have valve caps, be sure to put them back
on. They helpprevent leaks by keeping out dirt and
moisture.
6-37
When rotating your tires, d,way,suse the Correct mtation
pattern shown here.
When it’s Time forNew Tires
One way to tell when it’s
time for new tiresis to
check the treadwear
indicators, which will
appear when your tires have
only 1/16 inch (1.6 mm) or
less of tread remaining.
You need a new tireif:
0
You can see the indicators at three or more places
around the tire.
0
You can see cord or fabric showing through the tire’s
rubber.
0
The tread or sidewall is cracked,cut or snagged deep
enough to show cord or fabric.
-~
0
The tire has a bump, bulge or split.
0
The tire has a puncture,cut, or other damage that
can’t be repaired well because of the size or location
of the damage.
Buying New Tires
To find out what kind and sizeof tires you need,look at
the Tire-Loading Information label.
The tires installed on your vehicle when
it was new had
a TirePerformance Criteria Specification (TPCSpec)
number oneach tire’s sidewall. When you
get new tires,
get ones with thatsame TPC Spec number. That way,
your vehicle willcontinue to have tires thatare designed
to give proper endurance, handling, speed rating,
traction, ride and other things duringnormal service on
your vehicle.If your tireshave an all-season tread
design, theTPC number willbe followed by an “MS”
(for mud and snow).
If you everrepl, 3 your tires with those not having a
TPC Spec number, make sure they are the s m e size,
load range, speed rating and construction type (bias,
bias-belted or radial) as your original tires.
~
6-39
Treadwear
The treadwear gradeis a comparative rating basedon
the wear rateof the tire when tested under controlled
conditions ona specified government test course. For
example, a tire graded 150 would wear one anda half
(1 1/2) times as well on the government courseaas
tire
graded 100. The relative performanceof tires depends
upon the actual conditionsof their use, however, and
may depart significantly from the norm due
to variations
in driving habits, service practices and differences
in
road characteristics and climate.
-
Uniform Tire Quality Grading
The following information relates to the system
developed by the UnitedStates National Highway
Traffic Safety Administration which grades tires
by
treadwear, traction and temperature performance. (This
applies only to vehicles sold
in the United States.)
6-40
Traction A, B, C
The traction grades, from highest to lowest are:
A, B,
and C. They represent the tire’s ability to stop on wet
pavement as measured under controlled conditions
on
specified government test surfaces
of asphalt and
concrete. A tire marked C may have poor traction
performance.
Warning: The traction grade assigned tothis tire is based
on braking (straight-ahead) traction tests
and does not
include cornering (turning) traction.
-
Temperature A, B, C
The temperature grades are A (the highest),B, and C ,
representing the tire’s resistance tothe generation of
heat andits ability todissipate heat when testedunder
controlled conditions on a specified
indoor laboratory
test wheel.Sustained high temperature can cause the
material of the tire to degenerate and reduce tire life, and
excessive temperature can lead to sudden tire failure.
The grade C corresponds to alevel of performance
which allpassenger car tires mustmeet under the
Federal Motor Vehicle Safety Standard No. 109. Grades
B and A represent higher levels of performance on the
laboratory testwheel than the minimum required by law.
Warning: The temperature grade for this tire is
established for a tire that is properly inflated and
not
overloaded. Excessive speed, underinflation, or
excessive loading, either separately or combination,
in
can cause heat buildup and possible tire failure.
While the tires available as standard or optional
equipment on General Motors vehicles may varywith
respect to these grades, all such tires meet
General
Motors performance standards andhave been approved
for use on General Motors vehicles. Allpassenger type
(P Metric) tiresmust conform to Federal safety
requirements in addition to these grades.
Wheel Alignmentand Tire Balance
The wheels on your vehiclewere aligned and balanced
carefully atthe factory to give youthe longest tirelife
and best overall performance.
In most cases, you willnot need tohave your wheels
aligned again. However,if you noticeunusual tire wear
or your vehicle pullingone way or the other,the
alignment may need tobe reset. If you notice your
vehicle vibrating when drivingon a smooth road, your
wheels may need to be rebalanced.
These grades are molded on the sidewalls of passenger
car tires.
6-41
Wheel Replacement
Replace any wheel thatis bent, cracked,or badly rusted
or corroded. If wheel nuts keep coming loose, the wheel,
wheel bolts, and wheel nuts should be replaced.
If the
wheel leaks air, replace it (except some aluminum
wheels, which can sometimes be repaired). See your
Oldsmobile retailer if any
of these conditions exist.
Your retailer will know the kind
of wheel you need.
Each new wheel should have the same load carrying
capacity, diameter, width, offset, and be mounted the
same wayas the one it replaces.
If you need to replace any
of your wheels, wheel bolts,
or wheel nuts, replace them only with new
GM original
equipment parts. This way, you will be surehave
to the
right wheel, wheel bolts. and wheel uuts
for your
Oldsmobile model.
I
6-42
NOTICE:
The wrong wheel canalso cause problems with
bearing life, brake cooling,
speedometer/odometer calibration, headlamp
aim, bumper height, vehicle ground clearance,
and tire or tire chain clearance to the body and
chassis.
Used Replacement Wheels
Tire Chains
Use tire chains only where legal and
only when
you must. Use only SAE Class “S” type chains
that are the proper
size for yourtires. ZnstaIl
them on the front tires and tighten them as
tightly as possible withthe endssecurely
fastened. Driveslowly and follow the chain
manufacturer’s instructions.If you can hear the
chains contacting yourvehicle, stop and retighten
them. If the contact continues,slow down until it
stops. Driving too fast
or spinning the
wheels
with chains onwill damage yourvehicle.
6-43
Using Foam-Qpe Cleaner on Fabric
0
Vacuum and brushthe area to remove anyloose dirt.
0
Always clean a wholetrim panel or section. Mask
surrounding trim along stitch or welt lines.
NOTICE:
Be careful. A blow dryer may scorch the fabric.
Wipe with a clean cloth.
e Mix Multi-Purpose Powdered Cleaner following the
directions onthe container label.
0
Use suds only and apply with clean
a
sponge.
0
Don’t saturate the material.
Using Solvent-Type Cleaner on Fabric
e Don’t rub it roughly.
First, see if youhave to use solvent-type cleaner at all.
Some spots and stains will clean
off better withjust
water and mild soap.
e As soon as you’ve cleaned the section, use a sponge
If you need touse a solvent:
to removethe suds.
0
Rinse the section with aclean, wet sponge.
0
Wipe off what’s left with a slightlydamp paper towel
or cloth.
0
Then dry it immediately with a blow dryeror a heat
lamp.
0
Gently scrape excess soil from the trim material with
a clean, dull knifeor scraper. Use verylittle cleaner,
light pressure andclean cloths (preferably
cheesecloth). Cleaning should start at the outside of
the stain, “feathering” toward the center. Keep
changing to a clean sectionof the cloth.
0
When you cleana stain from fabric, immediately dry
the area with a blow dryer to help prevent a cleaning
ring. (See the previous NOTICE.)
6-45
If an odor lingers after cleaning vornit or urine, treat
the area witha waterhaking soda solution:
1 teaspoon (5 ml) of baking soda to1 cup (250 ml)
of lukewarm water.
Special Cleaning Problems
Greasy or Oily Stains
Such as grease, oil, butter, margarine, shoe polish,
coffee with cream, chewing gum,
cosmetic creams,
vegetable oils, wax crayon, tar and asphalt.
0
Carefully scrape off excess stain.
Follow the solvent-type instructions described
earlier.
Shoe polish, wax crayon, tar and asphalt will stainif
left on a vehicle seat fabric. They should
be removed
as soon as possible.Be careful, because the cleaner
will dissolve them and may
cause them to spread.
I
I
I
If needed, clean lightly with solvent-type cleaner.
Combination Stains
Such as candy, ice cream, mayonnaise, chili sauce and
unknown stains.
Carefully scrape off excess stain, then clean with
dry.
cool water and allow to
0
If a stain remains, cleanit with solvent-type cleaner.
Cleaning Vinyl
Non-Greasy Stains
Use warm water and a clean cloth.
Such as catsup, coffee (black), egg, fruit,
fruit juice,
milk, soft drinks, wine, vomit, urine and blood.
0
0
Carefully scrape off excess stain, then sponge the
soiled area with cool water.
0
If a stain remains, follow the foam-type instructions
described earlier.
6-46
Rub with a clean, damp cloth to remove dirt.You
may have to do it more than once.
Things like tar, asphalt and shoe polish will stainif
you don’t get themoff quickly. Use a clean cloth and
a solvent-type vinyl cleaner.
,
I
Cleaning the Outsideof the
Windshield and Wiper Blades
Washing Your Vehicle
The best way to preserve your vehicle’s
finish is to keep
it clean by washing
it often with lukewarm or cold
water.
If the windshield is not clear after using the windshield
washer, or if the wiperblade chatters when running, wax
Don’t wash your vehicle in the direct of
rays
the sun.
or other material may
be on theblade or windshield.
Don’t use strong soaps or
chemical detergents. Use
Clean the outsideof the windshield withGM
liquid hand, dish or car washing (mild detergent) soaps.
Windshield Cleaner, Bon-AmiPowder’ (GM Part
Don’t use cleaning agents that are petroleum based, or
No. 1050011). The windshield is cleanif beads do not
that contain acid or abrasives.
All cleaning agents
form when you rinseit with water.
should be flushed promptly and not allowed toon
dry
Clean the bladeby wiping vigorously with a cloth
the surface, or they could stain. Dry the finish with a
soaked in full strength windshield washer solvent. Then soft, clean chamois or 100%
a
cotton towel to avoid
rinse the blade with water.
surface scratches and water spotting.
Wiper blades should be checked on a regular basis and High pressure car washes may
cause water to enteryour
replaced when worn.
vehicle.
Cleaning the Outsideof Your
Oldsmobile
Finish Care
Occasional waxing or mild polishing
of your
Oldsmobile
by
hand
may
be
necessary
to remove
The paint finish on your vehicle provides beauty, depth
residue from the paint finish.
You can get GM approved
of color, gloss retention and durability.
cleaning products from your retailer. (See “Appearance
Care and Materials” in the Index.)
Your Oldsmobile has a “basecoatklearcoat” paint finish.
The clearcoat gives more depth and gloss tothe colored
basecoat. Always use waxes and polishes that are
non-abrasive and made for a basecoatklearcoat paint
finish.
NOTICE:
Machine compounding or aggressive polishing on
a basecoat/clearcoat.paintfinish may dull the
fmish OF leave swirl marks.
Foreign materials such ascalcium chloride and other
salts, ice melting agents, road oil and tar, tree sap, bird
droppings, chemicals from industrial chimneys, etc. can
damage your vehicle’s finish
if they remain on painted
surfaces. Wash the vehicle assoon as possible.If
necessary, use non-abrasive cleaners thatare marked
safe for painted surfaces toremove foreign matter.
Exterior painted surfaces are subject to aging,
weather
and chemical fallout that can take their tollover a period
of years. You can help tokeep the paint finishlooking
new by keeping your Oldsmobile garaged or covered
whenever possible.
Aluminum Wheels(If So Equipped)
Your aluminum wheels have a protective coating similar
to the painted surfaceof your vehicle. Don’tuse strong
soaps, chemicals, chrome polish, abrasive cleaners or
abrasive cleaning brushes on them because you could
damage this coating. After rinsing thoroughly, a wax
may be applied.
NOTICE:
If you have aluminum wheels, don’t use an
automatic car wash that has hard silicon carbide
cleaning brushes. These brushes can take the
protective coatingoff your aluminum wheels.
Tires
To clean your tires, use a stiff
brush with a tire cleaner.
When applying a tire dressing always take care to wipe
off any overspray or splashfrom painted surfaces.
Petroleum-based products may damage the paint finish.
6-49
Weatherstrips
Underbody Maintenance
Silicone greaseon weatherstrips will make them
last:
longer, seal better, and not stick
or squeak. Apply
silicone grease with a clean cloth
at least every six
months. During very cold, damp weather more frequent
application maybe required. (See “Recommended
Fluids and Lubricants” in the Index.)
Chemicals usedfor ice and snow removal and dust
control can collect on the underbody. If theseare not
removed, accelerated corrosion (rust) can occur on the
underbody parts such as fuel lines, frame,
floor pan, and
exhaust system even though they have corrosion
protection.
Sheet Metal Damage
If your vehicleis damaged and requires sheet metal
repair or replacement, make sure the body repair shop
applies anti-corrosion material to the parts repaired or
replaced to restore corrosion protection.
At least every spring, flush these materials from the
underbody with plain water. Clean any areas where mud
and other debris can collect. Dirt packed
in closed areas
of the frame should be loosened before being flushed.
Your retailer or an underbody car washing system can
do thisfor you.
Finish Damage
Chemical Paint Spotting
Any stone chips, fractures or deep scratches in the finishSome weather and atmospheric conditions can create a
should be repaired right away. Bare metal will corrode chemical fallout. Airborne pollutants can fall upon and
quickly and may develop
into a major repair expense.
attack painted surfaces on your vehicle.
This damage
Minor chips and scratches
can be repaired with touch-up can take two forms: blotchy, ringlet-shaped
discolorations, and small irregular dark spots etched
into
materials availablefrom your retailer or other service
the
paint
surface.
outlets. Larger areasof finish damage can be corrected
in your retailer’s body and paint shop.
Although no defect in the paint
job causes this,
Oldsmobile will repair, at no charge to the owner, the
surfaces of new vehicles damagedby this fallout
condition within 12 months or 12,000 miles (20 000 km)
of purchase, whichever comes first.
Appearance Care and Maintenance Materials
You can get these from your GM Parts Department.
Spray-A-Squeak SiliconeWeatherstrips,
Grease
squeaks
Stops
See your General Motors Parts Departments for these products.
See your Maintenance Schedule
for other products.
6-51
Vehicle Identification Number(VIN)
Service Parts Identification Label
You’ll findthis label on your spare tire cover. It’s very
helpful if you ever need to order parts. On this label
is:
I
I
ENGINE
YEAR
MODEL
CODE
/
’gg5
\ ASSEMBLY
PLANT
This is the legal identifierfor your Oldsmobile.It
appears on a platein the front corner of the instrument
panel, on the driver’sside. You can see it if you look
through the windshieldfrom outside your vehicle.The
VIN also appears on the Vehicle Certification and
service Parts labels and the certificates of title and
?registration.
Engine Identification
The eighth characterin your VIN is theengine code.
This code will help you identify your engine,
specifications, andreplacement parts.
0
your VIN,
the model designation,
paint information, and
a list of all production options and specialequipment.
Be sure thatthis label is not removed
from the vehicle.
Add-on Electrical Equipment
I NOTICE:
Don’t add anything electrical to your Oldsmobile
unless you check with your retailer first. Some
electrical equipment can damage your vehicle and
the damage wouldn’t be covered by your warranty.
Some add-on electrical equipment can keep other
components from working
as they should.
Your vehicle has an air bag system. Before attempting to
add anything electrical to your Oldsmobile, see “Servicing
Your Air Bag-Equipped Oldsmobile” in the Index.
Fuses and Circuit Breakers
The wiring circuitsin your vehicle are protected from
short circuits by combination
a
of fuses and circuit
breakers. This greatly reduces the chance of damage
caused by electricalproblems.
Left Side Fuse Panel
The left side fuse panel is located tothe left of the
steering wheel, under the instrument panel.
1
2
4
1
Snap off the cover to revealthe fuses. You’ll find afuse
puller clipped to the inside
of the cover. Place the wide
end of the fuse puller over the plastic end of the fuse.
Squeeze the ends over the fuse and pull it out.
Spare fuses are locatedin the slots labeled “Spare”on
the following chart.
6
7
1
8
9
A
1 “ O 0 0 I]
Look atthe silver-colored band insidethe fuse. If the
band is broken or melted, replacethe fuse. Be sure you
replace a badfuse with a newone of the correct amp
rating.
When finished, replace the
cover and pinch the release
levers again tounlock the panel. Pressit back up into
place:
6-53
I
Position
1
2
3
4
5
1A
2A
3A
4A
SA
6A
7A
8A
9A
1B
2B
3B
4B
5B
6B
7B
8B
9B
1c
2c
6-54
Circuitry
Circuit Breaker-Power Windows
Not Used
Power Seats
Not Used
Not Used
Start-up Signal-Air Bag
Spare
Not Used
Interior Lamps
Ignition (Run), Automatic A/C Control, Base Cluster
Courtesy Lamps, Power Mirrors
Not Used
Not Used
Cigar Lighter
Turn Signal, Back-up Lamps, Cornering Lamps,
Brake-Transaxle Shift Interlock
Spare
Not Used
Not Used
Anti-Lock Brake System
Brake and Hazard Lamps
Not Used
Not Used
Electronic Level Control
Air Bag
SDare
Position
3c
4c
5c
6C
7c
8C
9c
1D
2D
3D
4D
5D
6D
7D
8D
9D
1E
2E *
3E
4E
SE
L
6E
7E
8E
9E
Circuitry
Not Used
Not Used
Cooling Fans, Transaxle
Parking Lamps
Not Used
Not Used
(Battery) Chime, Radio, Cluster
Ignition (RdCrank), Chime, Cluster
Spare
Heater Mirror
Not Used
Base A/C
Fog Lamps
Not Used
Radio
Not Used
Auxiliary Outlet(s)
Not Used
Ignition (Off/Unlock)
Not Used
Not Used
Not Used
Not Used
Wipers, Washer
Rear Defog
Right Side Fuse Panel
Additional fuses are locatedin the relay center, onthe
far right side, below theinstrument panel. You must
remove the sound insulator onthe right side of the
passenger foot well to replacethese fuses.
n o
no0
o n
no0
Replacing these fusesis difficult. We recommend that
you see your retailerif you need one replaced.
Position Circuitry
1
POSITIONS
0 nJl0 0
. Door Locks
nun
0 0 o n
no0
2PowerAntenna,LockSwitch,TrunkRelease
Horns
3
Used
Not
4
5
Cruise
Control,
Misc.
Engines
Controls
6
Fuel Pump
7
Injectors
8
Powertrain
Control
Module,
PASS-Key%
9
A/C Programmer
10
Used
Not
11'
Not Used
12
Not Used
000
r---------I
FUSE
I
POSITIONS
I
I
000
I
I
I
I
I
I
I
I
I
I
I
I
I
I
I
I
.
I
I
I
I
I
I
~
6-55
MaxifuseDXelay Center
Windshield Wipers
To check the fuses in this underhood
fuse center, turn
the two knobs 114 turn counterclockwiseand loosen the
The windshield wiper motoris protected byan internal
circuit breaker and fuse
a in theleft side fuse panel. If
metal wing nut on thepassenger side of the cover. Then
the motor overheatsdue to heavy snow, etc., the wiper
remove the cover.The inside of the cover has a chart
will stop until the motor cools.
If the overload is caused
that explains the features and controls governed by each by some electrical problem, haveit fixed.
fuse and relay.
Headlamp Wiring
The headlamp wiringis protected by a circuit
breaker in
the wiring harness. An electrical overload will cause
the
lamps to go on andoff, or in some cases to
remain off. If
this happens, have your
headlamp system checked right
away.
Power Windows and Power Seats
Circuit breakersin the fuse panel protect the power
windows and power seats. When the current load
toois
heavy, the circuit breaker opens and closes, protecting
the circuit until the problem is fixed.
Capacities and Specifications for Code K (L36) and Code 1 (L67)
Automatic Transaxle AT (Overdrive)
When draining or replacing torque convertel; more fluid may be needed.
Pan Removal and Replacement
................................
6.16.5 quarts
L
10.4
11 quarts
L
After Complete Overhaul . . . . . . . . . . . . . . . . . . . . . . . . . . . . . . . . . . . . .
CoolingSystem . . . . . . . . . . . . . . . . . . . . . . . . . . . . . . . . . . . . . . . . . . . . . . quarts 13
12.3 L
Refrigerant (R=134a),Air Conditioning . . . . . . . . . . . . . . . . . . . . . . . . .
2.0 pounds
0.9 kg
Not all airconditioning refrigerants are the same. I f the air conditioning system in yourvehicle needs refrigerant, be sure the
proper refrigerunt is used. I f you ’re not sure, ask your Oldsmobile retailer. For additional information, see your “Warranty
and Owner Assistance Information booklet.
Enginecrankcase . . . . . . . . . . . . . . . . . . . . . . . . . . . . . . . . . . . . . . . . . . .
4.75
5 quarts
L
Oil change withfilter change
FuelTank . . . . . . . . . . . . . . . . . . . . . . . . . . . . . . . . . . . . . . . . . . . . . . . . . gallons
.
18
68 L
Power Steering
PumpOnly . . . . . . . . . . . . . . . . . . . . . . . . . . . . . . . . . . . . . . . . . . . . . . . .
1 pint
0.5 L
1.5 pints
CompleteSystem . . . . . . . . . . . . . . . . . . . . . . . . . . . . . . . . . . . . . . . . . . .
0.7 L
Tire Pressures
See Tire-Loading Information labelon driver’s door
100 lb-ft
140 Nom
WheelNutTorque . . . . . . . . . . . . . . . . . . . . . . . . . . . . . . . . . . . . . . . . . .
”
NOTE: All capacities are approximate. When adding,
be sure to fill to the appropriate level, as recommendedin this
manual.
6-57
Engine Specifications
3800 Series II Engine (L36)
VIN Engine Code . . . . . . . . . . . . . . . . . . . . . . . . . .
Type ....................................
Displacement . . . . . . . . . . . . . . . . . . . . . . . . . . . . .
Compression Ratio . . . . . . . . , . . . . . . . . . . . . . . . .
Firingorder ..............................
Thermostat Temperature Specification . . . . . . . . . .
3800 Supercharged Engine (L67)
VIN Engine Code . . . . . . . . . . . . . . . . . . . . . . . . . .
Type ....................................
Displacement . . . . . . . . . . . . . . . . . . . . . . . . . . . . .
Compression Ratio . . . . . . . . . . . . . . . . . . . . . . . . .
Firingorder . . . . . . . . . . . . . . . . . . . . . . . . . . . . . .
Thermostat Temperature Specification . . . . . . . . . .
K
V6
3.8 Liters
9.4: 1
1-6-5-4-3-2
195°F (91OC)
1
V6
3.8 Liters
8.5: 1
1-6-5-4-3-2
195°F (91"C)
Normal Maintenance Replacement Parts
Air Cleaner Element . . . . . . . . . . . . . . . . . . . . . . . . . AC Type A- 1096C
Engine Oil Filter . . . . . . . . . . . . . . . . . . . . . . . . . . . . AC Type PF-47
Remote Lock Control Battery (2) . . . . . . . . . . . . . . . 2016
Spark Plugs (L36) Engine . . . . . . . . . . . . . . . . . . . . . AC Type 41-606
,
,
Spark Plugs (L67) Engine . . . . . . . . . . . . . . . . . . . . .
6-58
I
Gap: 0.060 inch (1.52mm)
AC Type 41-601
Gap: 0.060 inch (1.52 mm)
BULB
BULB
Coulering Lamps (Optional) ..........................
Front Parking Lamps ................................
Front Turn Signal Lamps .............................
Halogen Headlamps
LowBeam ........................................
HighBeam ........................................
Eront Sidemarker Lamps .............................
2057
2057NA
2057NA
MESSAGES
FRONT PARK LAMP OUT
FRONT TURN LAMP OUT
Rear
Back-up Lamps ....................................
License Plate Lamp .................................
Center E&-Mounted Stoplight .......................
Rear Sidemarker L a p s .............................
stop/Taillamps . . . . . . . . . . . . . . . . . .#. . . . . . . . . . . . . . . . . . .
RearTumSignal ...................................
TrunkLamp .......................................
2057
194
1156
194
2057
2057
93
BACK-UP LAMP OUT
TAIL LAMP OUT
GENTEX STOP LAMP OUT
REAR TAIL LAMP OUT
TAIL LAMP OUT
REAR LAMP OUT
Replacement Bulbs
INSIDE LAMPS ...........................
BULB
Overhead
Front Overhead Lamps ........................
906
Rear Overhead Lamps ........................
906
Visor Vanity Lamps .........................
7065
Doors
Front Courtesy Lamps .........................
74
Rear CourtesyNarning Lamps . . . . . . . . . . . . . . . . . . 194
Instrument Panel
IP Sound Insulator Panel (Lower Floor Lighting) . . . 168
Glove Compartment Lamp .....................
194
Ashtray Lamp ...............................
194
6-60
Air Conditioning Refrigerants
Not all air conditioning refrigerants are the same.
If the
air conditioning system in your vehicle needs
refrigerant, be sure the proper refrigerant is used.
If
you’re not sure, ask your
Oldsmobile retailer. For
additional information,see your “Warranty and Owner
Assistance Information” booklet.
IMPORTANT:
KEEP ENGINE OIL
AT THE, PROPER
',LEVELAND CHANGE AS
RECOMMENDED
This section covers the maintenance required for your
Oldsmobile. Your vehicle needs these services to retain
its
safety, dependability and emission control performance.
GM
Introduction
Your Vehicle and the Environment
Proper vehiclemaintenance not only helps to keep your
vehicle in goodworking condition, but also helps the
environment. All recommended maintenance procedures
are important. Improper vehicle maintenance or the
removal of important components can significantly
affect the qualityof the air we breathe. Improper fluid
levels or even the wrong tire inflationcan increase the
level of emissions from your vehicle. To help protect our
environment, and tohelp keep your vehiclein good
condition, pleasemaintain your vehicle properly.
Have you purchased the GM Protection Plan? The Plan
supplements your new vehicle warranties. See your
Oldsmobile retailer for details.
7-1
How This Section is Organized
The remainder of this sectionis divided intofive parts:
I
i
‘j
“Part A: Scheduled Maintenance Services”shows
what to have done.and how often. Someof these
services can be complex,so unless you are technically
qualified and have the necessary equipment, you should
letyourretailer’sservicedepartment or another
qualified service center do these
jobs.
If you are skilled enough to
do some work on your
vehicle, you will probably want to get the service
information GM publishes. See “Service Publications”
in the Index.
“Part B: Owner Checks and Services”tells you what
should be checked whenever you stop fuel.
for It also
explains whatyou can easilydo to help keep your
vehicle in good condition.
“Part C: Periodic Maintenance Inspections”
explains
important inspections that your Oldsmobile retailer’s
service departmentor another qualified service center
should perform.
“Part D: Recommended Fluids and Lubricants”
lists
some productsGM recomends to help keep your
vehicle properly maintained. These products, or their
equivalents, should be used whether you do the work
yourself or haveit done.
“Part E: Maintenance Record”provides a place for
you to record the maintenance performed on your
vehicle. Whenever any maintenance
is performed, be
sure to writeit down in this part. This will help you
determine when your next maintenance should be done.
In addition,it is a good idea to keep your maintenance
receipts. They may be needed
to qualify your vehiclefor
warranty repairs.
The proper fluids and lubricants touse are listed in
Part D. Make sure whoever services your vehicle uses
these. All parts shouldbe replaced and all necessary
repairs done before you oranyone else drives the
Using Your Maintenance Schedule
vehicle.
We at General Motors want to help you keep your vehicle
These schedules arefor vehicles that:
in good working condition. But we don’t know exactly
0 carry passengers and cargo within recommended
how you’ll driveit. You may drive very short distances
limits. You will find theselimits on your vehicle’s
only a few times a week.
Or you may drive long
Tire-Loading Information label. See “Loading Your
distances all the time in very hot, dusty weather.
You may
Vehicle” in the Index.
use your vehiclein making deliveries. Oryou may drive
it to work,to do errands or in many other ways.
0 are driven onreasonable road surfaces within legal
Part A: Scheduled Maintenance
Services
Because of all the different wayspeople use their GM
vehicles, maintenance needs vary. You may even need
more frequent checks and replacements than you’ll find
in the schedules in this section. So please read this
section and note how you drive. If you
have any
questions on how to
keep your vehicle in good
condition, see your Oldsmobile retailer.
This part tells youthe maintenance services youshould
have done and when you should schedule them. If you
go to your retailer for your service needs, you’ll know
that GM-trained and supported service people will
perform the work using genuine GM parts.
driving limits.
0
use the recommended unleaded fuel. See “Fuel” in
the Index.
Selecting the Right Schedule
First you’llneed to decide which of the two schedulesis
right for your vehicle. Here’s how to
decide which
schedule to follow:
7-3
Maintenance Schedule
I Schedule I Definition
Intervals II Schedule
Follow MaintenanceSchedule I if any one of these is
true for your vehicle:
Most trips are less than5 to 10 miles (8 to 16 km).
This is particularlyimportant when outside
temperatures are below freezing.
0
Most trips include extensive idling (such as frequent
driving in stop andgo traffic).
Most trips are through dusty areas.
You frequently tow a trailer or use a carrier on top
of
your vehicle.
Schedule I should alsobe followed if the vehicleis used
for delivery service, police, taxi, or other commercial
application.
I
Every 3,000 Miles (5 000 km) or 3 Months,
Whichever Occurs First
Engine Oil and Filter Change
Every 6,000 Miles (10 000 km) or 6 months,
Whichever Occurs First
Chassis Lubrication
At 6,000 Miles (10 000 km) Then Every
12,000 Miles (25 000 km)
Tire Rotation
Every 15,000 Miles (25 000 km)
Air Cleaner Filter Inspection, if driving
in dusty conditions
Every 30,000 Miles (50 000 km)
Air Cleaner Filter Replacement
Spark Plug Replacement
Spark Plug Wire Inspection
Fuel Tank, Cap and Lines Inspection
Engine Accessory Drive Belt Inspection
(or every24 months, whichever occursfirst)
24 months,
Cooling System Service (or every
whichever occursfirst)
Supercharger Oil Check (or every 36 months,
whichever occurs first) (3.8L Code1 engine only)
Every 50,000 Miles (83 000 km)
Automatic Transaxle Service (severe conditions)
-
Maintenance Schedule
Follow ScheduleI1 only if none of the conditionsfrom
Schedule I is true.
Every 7,500 Miles(12 500 km)
Engine Oil and Filter Change (or every
12 months,
whichever occursfirst)
Chassis Lubrication (or every12 months, whichever
occurs first)
At 7,500 Miles (12 500 km)Then Every
15,000 Miles(25 000 km)
Tire Rotation
Every 30,000 Miles (50000 km)
Engine Accessory Drive Belt Inspection
(or every24 months, whichever occurs first)
Cooling System Service (or every 24 months,
whichever occursfirst)
Spark Plug Replacement
Spark Plug Wire Inspection
Supercharger Oil Check(3.8L Code 1 Engine Only)
Air Cleaner Filter Replacement
Fuel Tank, Cap and Lines Inspection
Every 50,000 Miles(83 000 km)
Automatic Transaxle Service (severe conditions)
-
7-5
1 I
I
I
MaintenanceSchedule I
I
I
The services shown in this schedule up to 100,000 miles
(166 000 km)should be performed after 100,000 miles
(166 000 km) at thesame intervals.
Footnotes
The U.S. Environmental Protection Agencyor the
California Air Resources Board has determined that the
failure to perform this maintenance item will not nullify
the emission warrantyor limit recall liability prior to the
completion of vehicle useful life. We, however, urge that
all recommended maintenance services be performed at
the indicated intervals andthe maintenance be recorded.
* If your
vehicle hasan Engine OilLife Monitor, the
monitor will show you when to change the oil
-usually between 3,000 miles ( 5 000 km) and 7,500 miles
(12 500 km) since your last oil change. Under severe
conditions the indicator may comeon before
3,000 miles ( 5 000 km). Never drive your vehicle
more than 7,500 miles (12 500 km)or 12months
without an oil change.
The system won’t detect dust in the
oil. So if you
drive in a dusty area be sureto change your oil every
3,000 miles (5 000 Ism) or sooner if theCHANGE OIL
light comeson. Remember to reset the Oil Life Monitor
when the oil has been changed.For more information,
see “Engine Oil Life Monitor”
in the Index.
I
MaintenanceSchedule I
I
3,000 Miles (5 000 km)
6,000 Miles (10 000 km)
17 Change engine oil and filter (or
0Change engine oil and filter (or every
every
3 months, whichever occurs first).
An Emission Control Sewice. *
DATE
ACTUAL MILEAGE
SERVICED BY:
3 months, whichever occurs first).
An Emission Control Sewice. *
0Lubricate the suspension and steering
linkage. Lubricate the transaxle shift
linkage, parking brake guides and
underbody contact points (or every
6 months, whichever occursfirst).
0Rotate tires. See “Tire Inspection and
Rotation” in the Index for proper rotation
pattern and additional information.
I
DATE
ACTUAL MILEAGE
SERVICED BY:
7-7
I
MaintenanceSchedule I
1
9,000 Miles (15 000 km)
12,000 Miles (20 000 km)
0Change engine oil and filter (or every
0Change engine oil and filter (or every
3 months, whichever occurs first).
An Emission Control Service. *
3 months, whichever occurs first).
An Emission Control Service. *
0Lubricate the suspension and steering
linkage. Lubricate the transaxle shift
linkage, parking brake guides and
underbody contact points (or every
6 months, whichever occursfirst).
DATE
ACTUAL
MILEAGE
SERVICED
BY:
DATE
ACTUAL
MILEAGE
SERVICED
-
BY:
I
MaintenanceSchedule I
I
15,000 Miles (25 000 km)
18,000 Miles (30 000 km)
Cl Change engine oil and filter (or
0Change engine oil and filter (or every
every
3 months, whichever occurs first).
An Emission Control Service. *
0Inspect air cleaner filter if you are driving
in dusty conditions. Replace filter if
necessary. An Emission Control Service.
DATE
ACTUAL
MILEAGE
SERVICED
BY:
3 months, whichever occurs first).
An Emission Control Sewice. *
Lubricate the suspension and steering
linkage. Lubricate the transaxle shift
linkage, parking brake guides and
underbody contact points (or every
6 months, whichever occurs first).
0Rotate tires. See “Tire Inspection and
Rotation” in the Index for proper rotation
pattern and additional information.
DATE
ACTUAL
MILEAGE
SERVICED
BY:
I MaintenanceSchedule21,000 Miles (35 000 km)
I
Change engineoil and filter (or every
3 months, whichever occurs first).
An Emission Control Service. *
24,000 Miles (40 000 k n )
Change engine oil and filter (or every
3 months, whichever occursfirst).
An Emission Control Service. *
0Lubricate the suspension and steering
linkage. Lubricate the transaxle shift
linkage, parking brake guides and
underbody contact points (or every
6 months, whichever occursfirst).
I
I
DATE
ACTUAL
MILEAGE
SERVICED
7-10
I
BY:
I
MaintenanceSchedule I
I
27,000 Miles (45 000 km)
30,000 Miles (50 000 km)
0Change engine oil and filter (or every
0Change engine oil and filter (or every
3 months, whichever occurs first).
An Emission Control Sewice. *
DATE
ACTUAL MILEAGE
SERVICED BY:
3 months, whichever occurs first).
An Emission Control Service. *
0Lubricate the suspension and steering
linkage. Lubricate the transaxle shift
linkage, parking brake guides and
underbody contact points (or every
6 months, whichever occurs first).
0Inspect engine accessory drive belt (or
every 24 months, whichever occurs first).
0Drain, flush and refill cooling system (or
every 24 months, whichever occurs first).
See “Engine Coolant” in the Index for what
to use. Inspect hoses. Clean radiator,
(Continued)
7-11
Maintenance ScheduleI
30,000 Miles (50 000 km) (Continued)
condenser, ressure cap and neck. Pressure
cap.
test thecoo ing system and pressure
An Emission Control Service.
0Replace spark plugs.An Emission
Control Service.
0Inspect spark plug wires.An Emission
Control Service.
0Replace air cleaner filter. Replacefilter
more often under dusty conditions.
An Emission Control Service.
0Inspect fuel tank, cap and lines for damage
or leaks. Inspect fuel cap gasket for any
damage. Replaceparts as needed.
An Emission Control Service. T
P
7-12
0For Superchargedengines only: Check the
supercharger oil level and addoil as needed
(or every 36 months, whichever occurs
first). See “Recommended Fluids and
Lubricants” in thissection.
An Emission Control Service. -f0Rotate tires. See “Tire Inspection and
Rotation” in the Index for proper rotation
pattern and additional information.
DATE
ACTUAL
MILEAGE
SERVICED
BY
I
MaintenanceSchedule I
I
36,000 Miles (60 000 km)
33,000 Miles (55 000 km)
0Change engine oil and filter (or every
Change engine oil and filter (or every
3 months, whichever occurs first).
An Emission Control Service. *
I
DATE
ACTUAL
MILEAGE
SERVICED
3 months, whichever occursfirst).
An Emission Control Service. *
0Lubricate the suspension and steering
linkage. Lubricate the transaxle shift
linkage, parking brake guides and
underbody contact points (or every
6 months, whichever occurs first).
BY:
DATE
ACTUAL MILEAGE
SERVICED BY:
7-13
I
MaintenanceSchedule I
I
39,000 Miles (65 000 km)
42,000 Miles (70 000 km)
0Change engineoil and filter (or every
Change engine oil and filter (or every
3 months, whichever occursfirst).
An Emission Control Service. *
0Lubricate the suspension and steering
linkage. Lubricate the transaxle shift
linkage, parking brakeguides and
underbody contact points (or every
6 months, whichever occursfirst).
0Rotate tires. See “Tire Inspection and
Rotation” in the Index for proper rotation
pattern and additional information.
3 months, whichever occursfirst).
An Emission Control Service. *
I
I
DATE
ACTUAL
MILEAGE
SERVICED
7-14
I
BY:
DATE
ACTUAL
MILEAGE
SERVICED
BY
I
MaintenanceSchedule I
I
45,000 Miles (75 000 km)
48,000 Miles (80 000 km)
c]Change engine oil and filter (or every
3 months, whichever occurs first).
Change engine oil and filter (or every
3 months, whichever occurs first).
An Emission Control Service. *
0Lubricate the suspension and steering
linkage. Lubricate the transaxle shift
linkage, parking brake guides and
underbody contact points (or every
6 months, whichever occurs first).
An Emission Control Service. *
Inspect air cleaner filter if you are driving
in dusty conditions. Replace filter if
necessary. An Emission Control Service.
c
DATE SERVICED
ACTUAL MILEAGE
BY:
ACTUAL MILEAGE
DATE SERVICED
BY:
7-15
'
-
Maintenance Schedule I
I
'
50,000 Miles (83 000 km)
51,000 Miles (85 000 km)
0Change automatic transaxle fluid and filter
0Change engine oil and filter (or every
if the vehicle is mainly driven under one or
more of these conditions:
- In heavy city traffic where the outside
temperature regularly reaches 90 O F
(32°C) or higher.
- In hilly or mountainous terrain.
- When doing frequent trailer towing.
- Uses such as found in taxi, police or
delivery service.
Ifyou do not use your vehicle under any of
these conditions, the fluid and filter do not
require changing.
3 months,. whicheveroccurs first).
An Emission Control Service. *
DATE
ACTUAL
MILEAGE
DATE
ACTUAL
MILEAGE
SERVICED
7-16
1
BY:
I
MaintenanceSchedule I
I
54,000 Miles (90 000 km)
57,000 Miles (95 000 km)
0Change engine oil and filter (or every
0Change engine oil and filter (or every
3 months, whichever occurs first).
An Emission Control Service. *
CI Lubricate the suspension and steering
linkage. Lubricate the transaxle shift
linkage, parking brake guides and
und‘erbody contact points (or every
6 months, whichever occurs first).
0Rotate tires. See “Tire Inspection and
Rotation” in the Index for proper rotation
pattern and additional information.
DATE
ACTUAL MILEAGE
SERVICED BY:
3 months, whichever occurs first).
An Emission Control Service. *
BY:
ACTUAL MILEAGE SERVICED
DATE
7-17
,I
!
Maintenance Schedule I
1
60,000 Miles (100 000 km)
0Change engine oil and filter (or every
3 months, whichever occursfirst).
An Emission Control Service. *
Lubricate the suspension and steering
linkage. Lubricate the transaxle shift
linkage, parking brake guides and
I
underbody contact points (orevery
6 months,whicheveroccurs first).
0Inspect engine accessory drive belt (or
I
every 24 months, whichever occursfirst).
An Emission Control Service.
0Drain, flush and refill cooling- system
(or
every 24 months, whichever occurs
first).
See “Engine Coolant” in the Index for what
to use. Inspect hoses. Clean radiator,
condenser, pressurecap and neck. Pressure
test the cooling system and pressure
cap.
An Emission Control Service.
0Replace spark plugs.An Emission
Control Service.
i 7-18
~
~
~
~
~
0Inspect spark plu wires. An Emission
f
Control Service.
0Replace air cleaner filter. Replacefilter
more often under dustyconditions.
An Emission Control Sewice.
0Inspect fuel tank, cap and lines for damage
or leaks. Inspect fuel cap gasket for any
damage. Replace parts as needed.
An Emission Control Service.
0For superchargedengines only: Check the
supercharger oil level and add oil as needed
(or every 36 months, whichever occurs
first). See “Recommended Fluids and
Lubricants” in this section.An Emission
Control Service. T
DATE
ACTUAL
MILEAGE
SERVICED BY:
I MaintenanceSchedule I I
63,000 Miles (105 000 km)
66,000 Miles (110 000 km)
0Change engine oil and filter (or every
0Change engine oil and filter (or every
3 months, whichever occurs first).
An Emission Control Service. *
DATE
ACTUAL
MILEAGE
3 months, whichever occurs first).
An Emission Control Service. *
0Lubricate the suspension and steering
linkage. Lubricate the transaxle shift
linkage, parking brake guides and
underbody contact points (or every
6 months, whichever occursfirst).
0Rotate tires. See “Tire Inspection and
Rotation” in the Index for proper rotation
pattern and additional information.
1-
DATE
1
I
ACTUAL MILEAGE
I
SERVICED BY:
I
7-19
I
I
I
MaintenanceSchedule I
I
69,000 Miles (115 000 km)
CI Change engine oil and filter (or every
3 months, whichever occurs first).
An Emission Control Service. *
DATE
ACTUAL
MILEAGE
I
SERVICED BY:
72,000 Miles (120 000 km)
17 Change engine oil and filter (or
every
3 months,. whicheveroccurs first).
An Emission Control Service. *
Lubricate the suspension and steering
linkage. Lubricate thetransaxle shift
linkage, parking brake guides and
underbody contact points (or every
6 months, whichever occurs first).
DATE
ACTUAL
MILEAGE
SERVICED BY:
Maintenance Schedule I
81,000 Miles (135000 km)'
Change engine oil and filter (or every
3 months, whichever occursfirst).
An Emission Control Service, *
84,000 Miles (140 000 km)
I
MaintenanceSchedule I
I
87,000 Miles (145 000 km)
90,000 Miles (150 000 km)
0Change engine oil and filter (or every
Change engine oil and filter (or every
3 months, whichever occurs first).
An Emission Control Sewice. *
0Lubricate the suspension and steering
linkage. Lubricate the transaxle shift
linkage, parking brake guides and
underbody contact points (or every
6 months, whichever occursfirst).
Inspect engine accessory drive belt (or
every 24 months, whichever occurs first).
Drain, flush and refill cooling system (or
every 24 months, whichever occurs first).
See “Engine Coolant’’ inthe Index for what
to use. Inspect hoses. Clean radiator,
(Continued)
3 months, whichever occurs first).
An Emission Control Service. *
I
ACTUAL MILEAGE SERVICED
BY
7-23
I Maintenance Schedule I
90,000 Miles (150 000 km) (Continued)
condenser, ressure cap and neck. Pressure
test the coo ng system and pressure cap.
An Emission Control Service.
0Replace spark plugs. An Emission
Control Service.
0Inspect spark plugwires. An Emission
Control Service.
0Replace air cleaner filter. Replace filter
more often under dusty conditions.
An Emission Control Service.
Inspect fuel tank, cap and lines for damage
or leaks. Inspect fuel cap gasket for any
damage. Replaceparts as needed.
An Emission Control Service.
!i
7-24
O’For supercharged engines only: Checkthe
supercharger oil level and add oil as needed
(or every 36 months). See “Recommended
Fluids and Lubricants”in tlvs section.
An Emission Control Sewice.
0Rotate tires. See “Tire Inspection and
Rotation” in the Indexfor proper rotation
pattern and additionalinformation.
I
MaintenanceSchedule I
I
93,000 Miles (155 000 km)
Change engine oil and filter (or every
3 months, whichever occurs first).
An Emission Control Service. *
96,000 Miles (160 000 km)
0Change engine oil and filter (or every
3 months, whichever occurs first).
An Emission Control Service. *
0Lubricate the suspension and steering
linkage. Lubricate the transaxle shift
linkage, parking brake guides and
underbody contact points (or every
6 months, whichever occursfirst).
DATE
ACTUAL MILEAGE SERVICED BY:
7-25
I
MaintenanceSchedule I
I
99,000 Miles (165 000 km)
100,000 Miles (166 000 km)
0Change engine oil and filter (or every
17'Change automatic transaxle fluid and filter
3 months, whichever occurs first).
An Emission Control Service. *
'
,
if the vehicle is mainly driven under one or
more of these conditions:
In heavy city traffic where the outside
temperature regularlyreaches 90 OF
(32O C) or higher.
In hilly or mountainous terrain.
When doingfrequent trailer towing.
Uses such as found in taxi, police or
delivery service.
I f you do not use your vehicle under anyof
these conditions, thefluid and filter do not
require changing.
I
DATE
ACTUAL
MILEAGE
SERVICED
7
BY:
1
Maintenance Schedule I1
Maintenance ScheduleI1
I
. <--
W Change engine oil and filter
(or every
9 2 months, whichever occursfirst),
.
DATE
ACTUAL MILEAGE
SERVICED BY:
DATE
BE
ACTUALMILEAGESERVICED
~~
I
I
1- MaintenanceSchedule. 11. I
22,500 Miles (37 500 km)
30,000 Miles (50 000 km)
I7 Change engine oil and filter (or every
0Change engine oil and filter (or every
12 months, whichever occurs first).
An Emission Control Sewice. *
0Lubricate the suspension and steering
linkage. Lubricate the transaxle shift
linkage, parkmg brake guides and
underbody contact points (or every
12 months, whichever occurs first).
0Rotate tires. See “Tire Inspection and
Rotation” in the Index for proper rotation
pattern and additional information.
12 months, whichever occurs first).
An Emission Control Sewice. *
0Lubricate the suspension and steering
linkage. Lubricate the transaxle shift
linkage, parkng brake guides and
underbody contact points (or every
12 months, whichever occurs first).
0Inspect engine accessory drive belt (or
every 24 months, whicheveroccurs first).
(Continued)
DATE
ACTUAL MILEAGE SERVICED B Y
7-29
I
Maintenance Schedule I1
30,000 Miles (50000 km) (Continued)
Drain, flush andrefill cooling system (or
every 24 months, whichever occursfirst).
See “Engine Coolant” in the Index for what
to use. Inspect hoses. Clean radiator,
condenser, pressurecap and neck. Pressure
test the coolingsystem and pressure cap.
An Emission Control Service.
0Replace sparkplugs. An Emission
Control Service.
0Inspect spark plug wires.An Emission
Control Service.
0Replace air cleaner filter. An Emission
Control Service.
O‘Inspectfuel tank, cap andlines for damage
or leaks. Inspect fuel cap gasket for any
damage. Replace partsas needed.
An Emission Control Service.
0For supercharged engines only: Check the
supercharger oillevel and add oil as needed
(or every 36 months, whichever occurs
first). See “Recommended Fluids and
Lubricants” in thissection. An Emission
Control Service.
DATE
ACTUAL
MILEAGE
SERVICED
BY
L
I
45,000 Miles (75000 km)
Maintenance Schedule I1
m
m
37,500 Miles (62 500 km)
0Change engine oil and filter (or every
0Change engine oil and filter (or every
12 months, whichever occurs first).
An Emission Control Service. *
0Lubricate the suspension and steering
linkage. Lubricate the transaxle shift
linkage, parkmg brake guides and
underbody contact points (or every
12 months, whichever occursfirst).
Rotate tires. See “Tire Inspection and
Rotation” in the Index for proper rotation
pattern and additional information.
DATE SERVICED
ACTUAL MILEAGE
BY
12 months, whichever occurs first).
An Emission Control Service. *
Lubricate the suspension and steering
linkage. Lubricate the transaxle shift
linkage, parking brake guides and
underbody contact points (or every
12 months, whichever occursfirst).
DATE
ACTUAL MILEAGE SERVICED B Y
7-31
I
I
Maintenance Schedule I1
60,000 Miles (100 000 km)
0Change engine oil and filter (or every
12 months, whichever occurs first).
An Emission Control Service. *
0Lubricate the suspension and steering
linkage. Lubricate the transaxle shift
linkage, parking brake guides and
underbody contact points (or every
12 months, whichever occurs first).
0For supercharged engines only: Check the
supercharger oil level and add oil as needed
(0;every 36 months, whichever occurs
first). See “Recommended Fluids and
Lubricants” in this section. An Emission
Control Service. f
0Inspect engine accessory drive belt (or
every 24 months, whichever occurs first).
0Drain, flush and refill cooling system (or
every 24 months, whichever occurs first).
See “Engine Coolant” in the Index for what
to use. Inspect hoses. Clean radiator,
condenser, pressure cap and neck. Pressure
test the cooling system andpressure cap.
An Emission Control Service.
0Replace spark plugs. An Emission
Control Service.
0Inspect spark plug wires.An Emission
Control Service.
0Replace air cleaner filter. An Emission
Control Service.
0Inspect fuel tank, cap and lines for damage
or leaks. Inspect fuel cap gasket for any
damage. Replace parts as needed.
An Emission Control Service. f
DATE
ACTUAL
MILEAGE
SERVICED
BY:
7-33
1 Maintenance Schedule I1
.
,
r
67,500 Miles (112 500 km)
75,000 Miles (125 000 km)
Change engine oil and filter (or every
12 months, whichever occursfirst).
An Emission Control Service. *
Lubricate the suspension and steering
linkage. Lubricate the transaxle shift
linkage, parking brake guides and
underbody contact points (or every
12 months, whichever occursfirst).
Rotate tires. See “Tire Inspection and
Rotation” in the Index for proper rotation
pattern and additional information.
DATE
ACTUAL
MILEAGE
SERVICED
7-34
BY:
0Change engine oil and filter (or every
12 months, whichever occurs first).
An Emission Control Service. *
Lubricate the suspension and steering
linkage. Lubricate thetransaxle shift
linkage, parking brakeguides and
underbody contact points (or every
12 months, whichever occurs first).
ACTUALMILEAGESERVICED
BY:
I
MaintenanceSchedule.11
1
82,500 Miles (137 500 km)
90,000 Miles (150 000 km)
0Change engine oil and filter (or every
0Change engine oil and filter (or every
12 months, whichever occurs first).
An Emission Control Service. *
0Lubricate the suspension and steering
linkage. Lubricate the transaxle shift
linkage, parking brake guides and
underbody contact points (or every
12 months, whichever occurs first).
0Rotate tires. See “Tire Inspection and
Rotation” in the Index for proper rotation
pattern and additional information.
12 months, whichever occurs first).
An Emission Control Service. *
Cl Lubricate the suspension and steering
linkage. Lubricate the transaxle shift
linkage, parking brake guides and
underbody contact points (or every
12 months, whichever occurs first).
0Inspect engine accessory drive belt (or
every 24 months, whichever occurs first).
(Continued)
DATE
ACTUAL MILEAGE
SERVICED BY:
7-35
Maintenance ScheduleI1
90,000 Miles ( I S 0 000 km) (Continued)
CI Drain, flush andrefill cooling system (or
every 24 months, whichever occursfirst).
See “Engine Coolant” in the Index for what
to use. Inspecthoses. Clean radiator,
condenser, pressure cap and neck. Pressure
test the cooling system and pressure cap.
An Emission Control Service.
0Replace spark plugs. An Emission
Control Service.
0Inspect spark plug wires.An Emission
Control Service. T
Replace air cleaner filter. An Emission
Control Sewice.
0Inspect fuel tank, cap and lines. Inspect fuel
cap gasket for any damage. Replace parts as
needed. An Emission Control Service.
0For supercharged engines only: Check the
supercharger oil level and add oil as needed
(or every 36 months, whichever occurs
first). See “Recommended Fluids and
Lubricants” in this section. An Emission
Control Service.
DATE
ACTUAL
MILEAGE
SERVICED
BY:
I -Maintenance
‘ScheduleI1 1
rn
~~
97,500 Miles (162 500 km)
100,000 Miles (146 000 km)
I7 Change engine oil and filter (or every
17 Change automatic transaxle fluid and filter
12 months, whichever occurs first).
An Emission Control Service. *
0Lubricate the suspension and steering
linkage. Lubricate the transaxle shift
linkage, parking brake guides and
underbody contact points (or every
12 months, whichever occurs first).
0Rotate tires. See “Tire Inspection and
Rotation” in the Index for proper rotation
pattern and additional information.
DATE
ACTUAL
MILEAGE
SERVICED
if the vehicle is mainly driven under one or
more of these conditions:
- In heavy city traffic wherethe outside
temperature regularly reaches 90 O F
(32 O C) or higher.
- In hilly or mountainous terrain.
- When doing frequent trailer towing.
- Uses such as found in taxi, police or
delivery service.
If you do not useyour vehicle under anyof
these conditions, thefluid and filter do not
require changing.
BY:
7-37
Part B: Owner Checks and Services
Windshield Washer Fluid Level
Listed below are owner checks and services which
should be performed at the intervals specified to help
ensure the safety, dependability and emission control
performance of your vehicle.
Check the windshield washer fluid level
in the
windshield washer tank and add the proper fluid
if
necessary. See “Windshield Washer Fluid” in
the Index
for further details.
Be sure any necessary repairs are completed at once.
At Least Once a Month
Whenever any fluids or lubricants are added to your
vehicle, make sure they are the proper ones, as shown inTire Inflation
Part D.
Check tire inflation. Make sure tires are inflatedtheto
pressures
specified on the Tire-Loading Information
At Each Fuel Fill
label located on the rear
edge of the driver’s door. See
It is importantfor you or a service station attendant to
“Tires” in the Index for further details.
p e f o r these
m underhood checks at each fuel fill.
Cassette Deck
Engine Oil Level
Clean cassette deck. Cleaning should be done every
Check theengine oil level and add the proper
oil if
50 hours of tape play. See “Audio Systems” in theIndex
necessary. See “Engine Oil”in the Index for further
for further details.
details.
Power Antenna
Engine Coolant Level
Clean power antenna mast.See “Audio Systems” in the
Check theengine coolant level and add the proper
Index for further details.
coolant mix if necessary. See “Coolant” in the Index for
further details.
:
....
At Least Once a Year
Key Lock Cylinders
Lubricate the key lock cylinders with thelubricant
specified in Part D.
.
I
Parking Brake and Automatic Transaxle
PARK (P)
Mechanism Check
Park on afairly steep hill, with the vehicle facing
downhill. Keeping yourfoot on the regular brake, set the
parking brake.
To check the parking brake: With theengine running
and transaxlein NEUTRAL (N), slowly remove foot
pressure from the regular brake pedal. Do this until
the vehicle is held bythe parking brake only.
To check the PARK (P) mechanism’s holding ability:
Shift to PARK (P). Then release all brakes.
Underbody Flushing
At leastevery spring, use plain water to
flush any
corrosive materialsfrom the underbody. Takecare to
clean thoroughly any areas where mud and other debris
can collect.
7-41
Part C: Periodic Maintenance
Inspections
Listed below are inspections and services which should
be performed at least twice a year (for instance, each
spring and fall).You should let yourGM retailer’s service
department or other qualified service center
do these jobs.
Make sure any necessary repairs are completed at once.
R~L
traintSystems
NOW and then, make sure all your belts, buckles, latch
plates, retractors, anchorages and reminder systems are
working properly. Lookfor any loose parts or damage.
If you see anything that might keep a restraint system
from doing its job, have it repaired.
Steering, Suspension and
1
Front-Wheel-Drive Axle Boot and Sea
Inspection
Inspect the front and rear suspension and steering
system for damaged, loose or missing parts, signs
of
wear, or lack of lubrication. Inspect the power steering
lines and hosesfor proper hookup, binding, leaks,
cracks, chafing, etc. Clean and then inspect the drive
axle boot seals for damage, tears
or leakage. Replace
seals if necessary.
7-42 -
Exhaust System Inspection
Inspect the complete exhaust system. Inspect the body
near the exhaust system. Lookfor broken, damaged,
missing or out-of-position parts as well as open seams,
holes, loose connections, or other conditions which
could cause a heat build-up
in the floor pan or could let
exhaust fumes into thevehic1e:See “Engine Exhaust” in
the Index.
Throttle Linkage Inspection
Inspect the throttle linkage for interference or binding,
and for damaged or missing parts. Replace parts as
needed. Accelerator and cruise control cables should not
be lubrica.. 1.
Brake System Inspection
Inspect the complete system. Inspect brake lines and
hoses for proper hookup, binding, leaks, cracks, chafing,
etc. Inspect disc brake pads
for wear and rotors for
surface condition. Also inspect drum brake linings for
wear and cracks. Inspect other brake parts, including
drums, wheel cylinders, calipers, parking brake, etc.
Check parking brake adjustment.You may need to have
your brakes inspected more oftenif your driving habits
or conditions result in frequent braking.
GM retder.
7-43
USAGE
FLUIDLUBRICANT
Supercharger Oil (GMPart
No. 12345982). See “Supercharger
Oil” in the Index.
Supercharger
~
~~
~
Automatic
Transaxle Shift
Linkage
Engine oil.
Floor Shift
Linkage
Engine oil.
Chassis
Lubrication
Chassis lubricant (GM Part
No. 1052497 or equivalent) or
lubricant meetingrequirements of
NLGI Grade 2, Category LB or
GC-LB.
Windshield
Washer Solvent
GM Optikleenw Washer So: :nt
(GM Part No. 1051515) or
equivalent.
USAGE
Hood Latch
Assembly
FLUIDLUBRICANT
a. Pivots and
Spring
Anchor
a. Engine oil.
b. Release Pawl
b. Chassis lubricant (GM Part
No. 1052497 or equivalent) or
lubricant meeting requirements
of NLGI Grade 2, Category LB
or GC-LB.
Hood and Door
Hinges, Fuel
Filler Door
Hinge, Rear
Compartment
Lid Hinges
Engine oil or LubriplateLubricant
(GM Part No. 1050109).
Weatherstrip
Conditioning
Dielectric Silicone Grease (GM
Part No. 12345579 or equivalent).
See “Replacement Parts”in the Index for recommended
replacement filters, valves and spark plugs.
7-44
Part E: Maintenance Record
After the scheduled servicesare performed, recordthe
date, odometer reading and who performed
the service
in the boxes providedafter the maintenance interval.
Any additional informationfrom “Owner Checks and
Services” or “Periodic Maintenance” can be addedon
the following record pages. Also, you should retain
all
maintenance receipts. Your owner informationportfolio
is a convenient place to store them.
Maintenance Record
I
I
I
I
SERVICED
READING
DATE
7-46
ODOMETER
I
I
BY
I
I
MAINTENANCE
PERFORMED
II I I
rn
Section 8 Customer Assistance Information
Here you will find out how to contact Oldsmobile
if you
need assistance. This section also tells you how to obtain
service publications and how to report any safety
defects.
This section includes information on: The Customer
Satisfaction Procedure, Customer Assistance for
Hearing or Speech Impaired,BBB Auto Line Alternative Dispute Resolution Program, Reporting
Safety Defects, Roadside Assistance, and Service and
Owner Publications.
Customer Satisfaction Procedure
Your satisfaction and goodwill are important to your
retailer and Oldsmobile. Normally, any concern with the
sales transaction or the operation of your vehicle will be
resolved by your retailer’sSales or Service
Departments. Sometimes, however, despite the best
intentions of all concerned, misunderstandings can
occur. If your concern has not been resolved
to your
satisfaction, the following steps shouldbe taken:
STEP ONE -- Discuss your concern with a member
of
retailer management. Normally, concerns can be quickly
resolved at that level. If the matter has already been
reviewed with the Sales, Service, or Parts Manager,
contact the ownerof the retailer or the General Manager.
STEP TWO -- If after contacting a memberof retailer
management, it appears your concern cannotbe resolved
by the retailer without further help, contact the
Oldsmobile Customer Assistance Network by calling
1-800-442-6537. In Canada, contact GMof Canada
Customer Assistance Centerin Oshawa by calling
1-800-263-3777 (English) or 1-800-263-7854 (French).
In Mexico, call (525) 254-3777. In Puerto Rico, call
1-800-496-9992 (English) or 1-800-496-9993
(Spanish). In theU.S. Virgin Islands, call
1-800-496-9994. In other overseas locations, contact
GM North American Export Salesin Canada by calling
1-905-644-41 12.
8-1
For prompt assistance, pleasehave the following
information available to give the Customer Assistance
Representative:
Your name, address, home and business telephone
numbers
Vehicle Identification Number (This is available
from the vehicle registrationor title, orthe plate at
the left top of the instrument panel and visible
through the windshield.)
0
Retailer name and location
Vehicle delivery date and present mileage
Nature of concern
We encourage you to call the toll-free number listed
previously in order to give your inquiry prompt
attention. However,if you wish to writeOldsmobile,
write to:
United States
Customer Assistance Representative
Oldsmobile Central Office
920 Townsend Street
P.O. Box 30095
Lansing, MI 48909
8-2
Canada
Customer Assistance Center
. General Motorsof Canada Limited
1908 Colonel Sam Drive
Oshawa, OntarioL1H 8P7
Refer to your Warranty and Owner Assistance
Information bookletfor addresses of Canadian andGM
Overseas offices.
When contacting Oldsmobile, please remember that
your concern will likely be resolved in the retail facility,
using the retailer's facilities,equipment and personnel.
That is why we suggest youfollow Step One firstif you
have a concern.
Customer Assistancefor the Hearing
or Speech Impaired(TDD)
To assist customers whohave hearing difficulties,
Oldsmobile has installed special TDD
(Telecommunication Devicesfor the Deaf) equipment at
its Customer Assistance Center. Any hearing or speech
impaired customer who has access to a TDD
or a
conventional teletypewriter("TY) can communicate
with Oldsmobileby dialing: 1-800-TDD-OLDS. (TDD
users in Canada can dial 1-800-263-3830.)
GM Participation in BBB AUTO
LINE - Alternative Dispute
Resolution Program*
*This program may notbe available in all states,
depending on state law. Canadian owners refer to your
Warranty andOwner Assistance Information booklet.
General Motors reservesthe right to change eligibility
limitations and/or to discontinueits participation in this
program.
Both Oldsmobile and yourOldsmobile retailer are
committed to making sure youare completely satisfied
with your new vehicle. Our experience has shown that,
if a situation ariseswhere you feel your concern has not
been adequately addressed, theCustomer Satisfaction
Procedure described earlierin this sectionis very
successful.
There may be instances where an impartial third-party
can assist in arriving at a solution to
a disagreement
regarding vehicle repairs or interpretation
of the New
Vehicle Limited Warranty. To assistin resolving these
disagreements, Oldsmobile voluntarily participatesin
BBB AUTO LINE.
BBB AUTOLINE is an out-of-courtprogram
administered by the Better Business Bureau system to
settle disputes betweencustomers and automobile
manufacturers. This program is availablefree of charge
to customers who currently ownor lease a GM vehicle.
If you are not satisfied afterfollowing the Customer
Satisfaction Procedure,you may contactthe BBB using
the toll-free telephone number, or write them at
the
following address:
BBB AUTOLINE
Council of Better Business Bureaus
4200 Wilson Boulevard
Suite 800
Arlington, VA 22203
Telephone: 1-800-955-5100
To file a claim, you will
be asked toprovide your name
(VIN),
and address, your Vehicle Identification Number
and a statementof the nature of your complaint.
Eligibility is limited by vehicleage and mileage, and
other factors.
We prefer you utilizethe Customer Satisfaction
Procedure before you resort to AUTO
LINE, but you
may contactthe BBB at any time.The BBB will attempt
to resolve thecomplaint serving as an intermediary
between you and Oldsmobile. If this mediation
is
unsuccessful, aninformal hearing will be scheduled
where eligiblecustomers may present their case to an
impartial third-party arbitrator.
The arbitrator willmake a decision which you may
accept or reject. If you accept
the decision, GM will be
bound by that decision.The entire dispute resolution
procedure should ordinarily take about forty days from
the time you file a claim until a decision is made.
Some state laws may require you to use this
program
before filing aclaim with a state-run arbitration program
or in the courts. For further information, contact
the
BBB at 1-800-955-5100 or the Oldsmobile Customer
A stanceNetworkat1-800-442-6537.
REPORTING SAFETY DEFECTS
TO THE UNITEDSTATES
GOVERNMENT
If you believe that your vehicle has a defect which could
cause a crash or couldcause injury or death, you should
immediately inform the National Highway Traffic
Safety Administration (NHTSA),in addition to
notifying General Motors.
If NHTSA receives sirnilar complaints,it may open an
investigation, andif it finds that a safety defect exists in
a group of vehicles, it may order a recall and remedy
campaign. However, NHTSAcannot become involved
in individual problems between you,
your retailer, or
General Motors.
To contact NHTSA, you may either call the Auto Safety
Hotline toll-free at 1-800-424-9393 (or366-0123 in the
Washington, D.C. area) or write to:
NHTSA, U.S. Department of Transportation
Washington, D.C. 20590
You can also obtain other information about motor
vehicle safety from the Hotline.
O
A
REPORTING SAFETY DEFECTS
TO THE CANADIAN
GOVERNMENT
If you live inCanada, and you believe that your vehicle
has a safety defect, youshould immediately notify
Transport Canada, in addition to notifying General
Motors of Canada Limited. You may write to:
Transport Canada
Box 8880
Ottawa, Ontario K1G 3J2.
REPORTING SAFETY DEFECTS
TO GENERAL MOTORS
In addition to notifying NHTSA (or Transport
Canada)
in a situation like this, we certainly hope you’ll notify
us. Please call us at 1-800-442-6537, or write:
Oldsmobile Customer Assistance Network
P.O. Box 30095
Lansing, MI 48909
In Canada, please callus at 1-800-263-3777 (English)
or 1-800-263-7854 (French). Or, write:
General Motors of Canada Limited
Customer Assistance Center
1908 Colonel Sam Drive
Oshawa, Ontario L1H 8P7
8-5
Oldsmobile Roadside Assistance
Program Features and Benefits
The Oldsmobile Roadside Assistance program means
help is just a toll-free call away -- 24 hours a day,
365 days a year.
Courteous and capable Customer Assistance Advisors
are on-callto provide you with prompt assistance.
24-Hour Oldsmobile Roadside Assistance
Telephone Number
1-800-442-OLDS (6537)is the one number to call for
assistance in the United States. Trained Customer
Assistance Advisors, on-callto render assistance to
Oldsmobile drivers,can dispatch roadside assistance and
towing service, locate the nearest Oldsmobile retail
facility, take your request
for an Oldsmobile
computerized trip routing or simply answer any
questions the Oldsmobile driver may have about the
coverage provided by your Oldsmobile Roadside
Assistance Program. TheOldsmobile Roadside
Assistance number is fully staffed and operational
24 hours a day,365 days a year.
8-6
Who Is Covered?
Oldsmobile Roadside Assistance covers all 1995
Oidsmobile vehicles.*
Coverage is for the Oldsmobile vehicle,regardless
of the driver, and is concurrent with
the
Bumper-to-Bumper warranty period.
Oldsmobile reservesthe right tolimit services or
reimbursement toan owner or driver when
in
Oldsmobile’sjudgement the claims become excessive
in frequency or typeof occurrence.
*Vehicles soldin Canada have a separate roadside
assistance program, as described next in this section.
Canadian Roadside Assistance
Vehick mrchased in Canada have an extensive
roadsiae assistance program accessible from anywhere
in Canada or the United States. Please refer to the
separate brochure provided by
the retailer or call
1-800-268-6800 for emergency services.
~
Service and Owner Publications
Service Bulletins
Service manuals, service bulletins, owner’s manuals and
other serviceliterature are available forpurchase for all
current and many past model GeneralMotors vehicles.
Service bulletins covering various subjects are regularly
sent to all General Motors dealershipshetail facilities.
GM monitors product performance in the field. When
service methods are found which promote better service
on GM vehicles, bulletins are created to help the
technician perform better service. Service bulletins may
involve any number of vehicles. Some will describe
inexpensive service, others will describe expensive
service. Some will advise
of new or unexpected
conditions, and others may help avoid future costly
repairs. Service bulletins are meant for qualified
technicians. In some cases they refer to service manuals,
specialized tools, equipment and safety procedures
necessary to service the vehicle. Since these bulletins are
issued throughout the model year and beyond, an index is
required and published quarterlyto help identify specific
bulletins. Subscriptions are available.
You can order an
index at the toll-free numbers listed previously, or ask a
GM dealerhetailer to see an index or individual bulletin.
Toll-free telephone numbers for ordering information:
United States 1-800-551-4123
Canada 1-800-668-5539
Service Manuals
Service manuals contain diagnostic and repair
information for all chassis and body systems. They may
be useful for owners who wish to gain a greater
understanding of their vehicle. Theyare also useful for
owners with the appropriateskill level or training who
wish to perform “do-it-yourself” service. These are
authentic General Motors service manuals meant for
professional, qualified technicians.
Owner Publications
Owner’s manuals, warranty folders and various owner
assistance bookletsprovide owners with general
operation andmaintenance information.
a-7
I
1
NOTES
8-8
-
NOTES
8-9
NOTES
8-10
NOTES
8-11
NOTES
1
Section 9 Index
Accessory Power Outlet .........................
2-47
Adding
Automatic Transaxle Fluid .....................
6-23
6-29
BrakeFluid .................................
ElectricalEquipment . . . . . . . . . . . . . . . 2.15.3.26.6.52
6-25
Engine Coolant ..............................
6-15
Engine Oil ...................................
6-27
Power Steering Fluid .........................
3-26
SoundEquipment ............................
6-20
Supercharger Oil . . . . . . . . . . . . . . . . . . . . . . . . . . . . .
Windshield Washer Fluid . . . . . . . . . . . . . . . . . 2.31.6.27
1-16
AirBag .......................................
1-20
How Does it Restrain .........................
1.18
How it Works . . . . . . . . . . . . . . . . . . . . . . . . . . . . . . .
1-18
Location ...................................
Problem Message ............................
2-75
1.17.2.57
ReadinessLight ........................
1-21
Servicing ...................................
1-16
System .....................................
1.19
What Makes it Inflate .........................
What Will You See After it Inflates . . . . . . . . . . . . . . 1-20
1- 19
When Should it Inflate ........................
6-18
Aircleaner ....................................
Air Conditioning (Automatic Electronic Climate Control) 3-7
Air Conditioning (Four Season Climate Control) . . . . . . . 3-2
Alignment and Balance. Tires .....................
6-41
Aluminum Wheels. Cleaning ......................
6-49
Antenna. Fixed Mast ............................
3-28
3-29
Antenna. Power Mast Care .......................
6-23
Antifreeze . . . . . . . . . . . . . . . . . . . . . . . . . . . . . . . . . . . . .
6-25
Adding ....................................
6-24
Checking . . . . . . . . . . . . . . . . . . . . . . . . . . . . . . . . . . .
4-6
Anti-Lock . . . . . . . . . . . . . . . . . . . . . . . . . . . . . . . . . . . . .
Anti-Lock Brake System Warning Light. . . . . . . . . 2.59.4.6
4-6
Anti-LockBrakes ...............................
3-22
Anti-Theft Feature. CD Player ....................
3-22
Anti-Theft Feature. Theftlock .....................
6-44
Appearancecare ...............................
6-51
Appearance Care and Materials ....................
2-45
Armrest. Front Storage ...........................
2-46
Armrest. Rear Storage ...........................
2-46
Ashtrays . . . . . . . . . . . . . . . . . . . . . . . . . . . . . . . . . . . . . .
Audio System, Steering Wheel Touch Controls . . . . . . . 3-25
3-10
Audio Systems . . . . . . . . . . . . . . . . . . . . . . . . . . . . . . . . .
Automatic Electronic Climate Control . . . . . . . . . . . . . . . . 3-3
3-4
Automatic Mode ..............................
3-5
Controls .....................................
3-6
Directional Controls ...........................
3-4
ManualMode ................................
Automatic Overdrive Position .....................
2-19
2-17
AutomaticTransaxle . . . . . . . . . . . . . . . . . . . . . . . . . . . .
Automatic Overdrive Position . . . . . . . . . . . . . . . . . . 2-19
2-20
First Gear (1) Position ........................
2-18
Neutral (N) Position ..........................
9-1
Park (P) Position .............................
2-17
Reverse(R)Position ..........................
2-18
2-19
Second Gear (2) Position ......................
Shifting . . . . . . . . . . . . . . . . . . . . . . . . . . . . . . . . . . . .2-17
Third Gear (3) Position. . . . . . . . . . . . . . . . . . . . . . . . 2-19
6-21
Automatic Transaxle Fluid ..........................
6-23
Adding ....................................
6-2 1
Checking ...................................
Average Fuel Economy Function. . . . . . . . . . . . . . . . . . .2-71
4-34
Brakes. Trailer .................................
4-5
Braking ........................................
4-9
Braking. In Emergencies ..........................
2-12
Break-In. New Vehicle ..........................
BTSI (Brake Transaxle Shift Interlock). . . . . . . . . 2.24.7.40
Bulb Replacement ..................................
Headlamps .................................
6-32
Taillamps ...................................
6-34
6-59
Bulb Replacement Chart .........................
Battery .......................................
6-31
Replacement. Remote Lock Control . . . . . . . . . . . . . . . 2-8
6-3 1
Replacement. Vehicle .........................
VoltageFunction .............................
2-72
Warning Light ............................... 2-66
5-2. 5-4
Warnings .................................
BBB Auto Line .................................
8-3
Belt, Engine Accessory ..........................
6- 11
Belt. Engine Accessory (Supercharged Engine
L67) . . . . 6-13
4-26
Blizzard ......................................
6-28
Brake ........................................
6-3 1
Adjustment .................................
Fluid.Adding ...............................
6-29
6-28
MasterCylinder .............................
Parking ....................................
2-20
PedalTravel ................................
6-31
6-3 1
System Parts. Replacing .......................
System Warning Light ........................
2-58
4-34
Trailer .....................................
Transaxle Shift Interlock. . . . . . . . . . . . . . . . . . 2-24. 7-40
6-30
Wear ......................................
4-6
Brakes. Anti-Lock ...............................
Canadian and Export Messages.
2-76
Driver Information Center.......................
8-6
Canadian Roadside Assistance......................
6-57
Capacities and Specifications ......................
Carbon Monoxide . .... . . . . . . . . . . . . . . . . 2.25.4.27. 4.33
3-24
Cassette Tape Errors.............................
3-15
Cassette Tape Player ............................
3-27
Cassette Tape Player Care ........................
3-24
CDErrors .....................................
3-20
CDPlayer .....................................
3-22
CD Player Anti-Theft Feature .....................
1-23
Center Passenger Position ........................
4-29
CertificatiodTire Label ..........................
4-34
Chains.Safety .................................
6-43
Chains.Tire ....................................
2-73
Change Oil Now Message ........................
2-72
Change Oil Soon Message ........................
5-19
Changing a Flat Tire.............................
2-75
Check Charge System Message ....................
2-63
Check Engine Light .............................
2-66
Check Oil Level Light ...........................
9-2
.
640
6-50
2-74
2-38
. 5-2
. 8-4
. 4-1
. 3-7
.-3-3
. 3-2
. 3-1
2-76
3-16
2-3
. 2-4
2-68
2-69
. 1-9
4-36
.............. ............. ....
city . . . . . . . . . ...................... ......
~
....................................
19
-1
Dm~ken. . . . . . . . . . . . . . . . . . . . . . . . . . . . . . . . . . . . . . . .
Freeway... . . . . . . . . . . . . . . . . . . . . . . . . . . . . . . .
4-20
Engineoil . . . . . . . . . . . . . . . . . . . . . . . . . . . . . . . . . . . . 6-14
6-15
Adding . . . . . . . . . . . . . . . . . . . . . . . . . . . . . . . . . . . .
6-16
Additives . . . . . . . . . . . . . . . . . . . . . . . . . . . . . . . . . . .
6-15
Checking . . . . . . . . . . . . . . . . . . . . . . . . . . . . . . . . . . .
6-14
Light . . . . . . . . . . . . . . . . . . . . . . . . . . . . . . . . . . . . . .
2-64
Pressure Warning Light .......................
6-15
What Kind to Use . . . . . . . . . . . . . . . . . . . . . . . . . . . .
6-17
What to do with Used Oil ......................
6-17
When to Change . . . . . . . . . . . . . . . . . . . . . . . . . . . . .
6-5
Ethanol(InFue1) . . . . . . . . . . . . . . . . . . . . . . . . . . . . . . . .
Expectant Mothers. Use of Safety Belts . . . . . . . . . . . . . 1-22
Extended Idling with Automatic Electronic
3-8
Climate Control . . . . . . . . . . . . . . . . . . . . . . . . . . . . . . . .
1-43
Extender. Safety Belt . . . . . . . . . . . . . . . . . . . . . . . . . . . .
Language
Fabric Cleaning . . . . . . . . . . . . . . . . . . . . . . . . . . . . . . .
6-45
6-6
FillingYourTank . . . . . . . . . . . . . . . . . . . . . . . . . . . . . . . .
Filter
6-18
Aircleaner . . . . . . . . . . . . . . . . . . . . . . . . . . . . . . . . .
6-17
.Engineoil ..................................
Finishcare . . . . . . . . . . . . . . . . . . . . . . . . . . . . . . . . . . . .
6-48
6-50
FinishDamage . . . . . . . . . . . . . . . . . . . . . . . . . . . . . . . . .
First Gear (1) Position . . . . . . . . . . . . . . . . . . . . . . . . . . .
2-20
3-28
FixedMastAntenna . . . . . . . . . . . . . . . . . . . . . . . . . . . . .
2-29
Flash-To-Pass Feature . . . . . . . . . . . . . . . . . . . . . . . . . . .
5-1
Flashers, Hazard Warning . . . . . . . . . . . . . . . . . . . . . . . . .
Flat Tire, Changing . . . . . . . . . . . . . . . . . . . . . . . . . . . . .
5-19
7-43
Fluids and Lubricants . . . . . . . . . . . . . . . . . . . . . . . . . . . .
6-6
Foreign Countries, Fuel . . . . . . . . . . . . . . . . . . . . . . . . . . .
Four Season Climate Control. . . . . . . . . . .Flashers
. . . . . . . . . . .Warning
. 3-1..
. . . . . . . . . . . . . . . . . . . . . . . . . . . 11
French
Front Storage Armrest . . . . . . . . . . . . . . . . . . . . . . . . . . .
2-45
Front wingHookup . . . . . . . . . . . . . . . . . . . . . . . . . . . .
5-9
Fuel
6-6
FillingYourTank .............................
Gage (Electronic Cluster) ......................
2-68
Gage (Std and LSS Clusters) . . . . . . . . . . . . . . . . . . . 2-67
6-6
In Foreign Countries ...........................
2-70
RangeFunction . . . . . . . . . . . . . . . . . . . . . . . . . . . . . .
2-70
Used Function . . . . . . . . . . . . . . . . . . . . . . . . . . . . . . .
3800 Series IIEngine . . . . . . . . . . . . . . . . . . . . . . . . . . 6-3
3800 Supercharged Engine ......................
6-4
Fuse Panel, Left Side . . . . . . . . . . . . . . . . . . . . . . . . . . . .
6-53
6-55
Fuse Panel, Right Side . . . . . . . . . . . . . . . . . . . . . . . . . . .
6-53
Fuses and Circuit Breakers . . . . . . . . . . . . . . . . . . . . . . .
G a g e . Engine Coolant Temperature
(Electronic Cluster) . . . . . . . . . . . . . . . . . . . . . . . . . . . .
Gage. Engine Coolant Temperature
(Std and LSS Clusters) . . . . . . . . . . . . . . . . . . . . . . . . .
Gage. Fuel (Electronic Cluster) ....................
Gage. Fuel (Std and LSS Clusters) . . . . . . . . . . . . . . . . .
Gasolines for Cleaner Air . . . . . . . . . . . . . . . . . . . . . . . . .
GAWR (Gross Axle Weight Rating) . . . . . . . . . . . . . . . .
GearPositions . . . . . . . . . . . . . . . . . . . . . . . . . . . . . . . . .
Glass.Cleaning . . . . . . . . . . . . . . . . . . . . . . . . . . . . . . . .
GloveBox . . . . . . . . . . . . . . . . . . . . . . . . . . . . . . . . . . . . .
GVWR (Gross Vehicle Weight Rating) . . . . . . . . . . . . . .
2-62
2-61
2-68
2-67
6-5
4-29
2-17
6-47
2-9
4-29
Halogen Bulbs ................................
6-32
..........................
Hazard
5-1
HeadRestraints . . . . . . . . . . . . . . . . . . . . . . . . . . . . . . . . .
1-4
Headlamp High-Low Beam Changer . . . . . . . . . . . . . . . 2-29
Y
9-5
Headlamp.Wiring ..............................
6-56
2-35
Headlamps ....................................
6-32
Headlamps. Bulb Replacement ....................
Hearing or Speech Impaired. Customer Assistance . . . . . . 8-2
High Beam Lamps. How to Change . . . . . . . . . . . . . . . . 2-29
Highway Hypnosis . . . . . . . . . . . . . . . . . . . . . . . . . . . . . . 4-22
Hill andMoGntain Roads . . . . . . . . . . . . . . . . . . . . . . . . . 4-22
Hitches. Trailer ........................
. . . . . . . . . 4-33
Hood Release ......................... Tire
. . . . . . . . . . 6-9
Horn ................................
. . . . . . . . . 2-27
Hot...Stop Engine Message . . . . . . . . . . . . . .. . . . . . . . . 2-69
Hydroplaning ......................... . . . . . . . . . 4-18
Idling. Extended (with Automatic Electronic
ClimateControl) ..................... . . . . . . . . . . 3-8
If You’re Stuck In Sand. Mud. Iceor Snow . . . . . . . . . . 5-28
Ignition Key Positions . . . . . . . . . . . . . . . . . . . . . . . . . . . 2-13
. . . . . . . . . 2-13
Ignition Switch ........................
. . . . . . . . . 2-10
Ignition. Key In The ....................
Illuminated Entry System. . . . . . . . . . . . . . . .. . . . . . . . . . 2-6
Inside Manual Daymight Rearview Mirror . . . . . . . . . . . 2-40
Inspections
. . . . . . . . . 7-42
Brake System ......................
. . . . . . . . . 7-42
Exhaust Systems ....................
Restraint Systems . . . . . . . . . . . . . . . . . . . . . . . . . . . . 7-42
Steering. Suspension and Front-Wheel-Drive
7-42
AxleBootandSeal .........................
Throttle Linkage .............................
7-42
Instantaneous Fuel Economy Function . . . . . . . . . . . . . . 2-71
2-5 1
Instrument Panel (LSS) ..........................
Instmment Panel (Royale) ........................
2-48
Instrument Panel Cluster .........................
2-52
2-52
Electronic ..................................
LSS .......................................
2-52
2-52
Standard ...................................
Instrument Panel Intensity Control . . . . . . . . . . . . . . . . .2-36
6-47
Instrument Panel. Cleaning .......................
....................................
JJump
ack.
Starting ...................................
5-19
5-2
K e y Lock Cylinders ............................
7-39
2-14
Key Reminder Warning ..........................
Keys . . . . . . . . . . . . . . . . . . . . . . . . . . . . . . . . . . . . . . . . . . 2-1
2-37
L a m p s On Reminder ...........................
2-28
Lane Change Indicator ...........................
Larger Children. Safety Belt Use . . . . . . . . . . . . . . . . . . . 1-40
2-6
Leaving Your Vehicle .............................
Leaving Your Vehicle With the Engine Running . . . . . . . 2-23
2-36
Light Sensor. Twilight Sentinel ....................
2-36
Light Warning System ...........................
Lights
1.17. 2.57
Air Bag Readiness ......................
Anti-Lock Brake System Warning . . . . . . . . . . . 2.59.4.6
2-66
BatteryWarning .............................
Brake System Warning ........................
2-58
2-63
CheckEngine ...............................
2-66
Check Oil Level Warning ......................
Engine Coolant Temperature (Electronic Cluster) . . . 2-62
. 2-61
Engine Coolant Temperature (Std and LSS Clusters)
Engine Coolant Temperature Warning . . . . . . . . . . . . 2-63
2-66
Engine0il ..................................
Engine Oil Pressure Warning . . . . . . . . . . . . . . . . . . . 2-64
2-64
LowCoolant ................................
2-64
Low Washer Fluid Warning ....................
OilLevelWarning ...........................
2-66
......................... 2-64
Oil P r e s s ~ Warning
e
1-5, 2-57
Safety Belt Reminder .....................
4-8
TractionActive ...............................
Traction Control System Active . . . . . . . . . . . . . . . . . 2-60
Traction Control System Warning . . . . . . . . . . . . . . . 2-59
4-8
Traction Off Warning ..........................
2-46
Lighter . . . . . . . . . . . . . . . . . . . . . . . . . . . . . . . . . . . . . . .
4-28
Loading YourVehicle ...........................
Locks
2-3
Door .......................................
2-3
PowerDoor ..................................
Programmable Automatic Door . . . . . . . . . . . . . . . . . . 2-4
2-5
Rear Door Security ............................
7-40
Steering Column .............................
T r ~ n k. . . . . . . . . . . . . . . . . . . . . . . . . . . . . . . . . . . . . . .
2-8
4-14
LossofControl ................................
Low Beam Lamp Out Message ....................
2-75
2-69
Low Brake Fluid Message ........................
Low Coolant Warning Light or Message. . . . . . . . . . . . . 2-63
LowFuelLight . . . . . . . . . . . . . . . . . . . . . . . . . . . . . . . .
2-67
2-69
Low Pres Stop Engine ...........................
Low Washer Fluid Warning Light . . . . . . . . . . . . . . . . . . 2-64
7-43
Lubricants and Fluids ............................
Lubrication,Body ..............................
7-39
Maintenance Record ...........................
7-45
7-1
Maintenance Schedule ............................
7-38
Owner Checks and Services ....................
Periodic Maintenance Inspections . . . . . . . . . . . . . . . 7-42
Recommended Fluids and Lubricants . . . . . . . . . . . . 7-43
7-6
Schedule I ...................................
7-4
Schedule I Definition ..........................
7-27
ScheduleII .................................
7-5
Schedule 11 Definition ..........................
Scheduled Maintenance Services . . . . . . . . . . . . . . . . . 7-3
Maintenance. Normal Replacement Parts . . . . . . . . . . . . 6-58
6-50
Maintenance. Underbody .........................
Maintenance. When Trailer Towing. . . . . . . . . . . . . . . . . 4-37
Malfunction Indicator Lamp (Check Engine Light) . . . . 2-63
1-1
ManualFrontSeat ...............................
Manual Remote ControlMrror ....................
2-42
6-56
MaxifuseRelay Center ...........................
6-5
Methanol (In Fuel) ...............................
2-40
Mirrors . . . . . . . . . . . . . . . . . . . . . . . . . . . . . . . . . . . . . . .
2-42
ConvexOutside .............................
Electrochromic Daymight Rearview with Compass . 2-40
Inside Manual Daymight Rearview . . . . . . . . . . . . . . 2-40
2-42
Manual Remote Control .......................
2-43
Power Remote Control ........................
Monitored SystemsOK Message . . . . . . . . . . . . . . . . . . . 2-69
6-5
MTBE (In Fuel) . . . . . . . . . . . . . . . . . . . . . . . . . . . . . . . . .
N e t . Convenience ..............................
Neutral (N)Position .............................
New Vehicle “Break-In” .........................
Nightvision ...................................
2-43
2-18
2-12
4-16
9-7
.
.
Odometer (Electronic and LSS Clusters) . . . . . . . . . . . 2-55
2-54
Odometer (Standard Cluster) ......................
2-55
Odometer. Tamper Resistant ......................
Odometer. Trip (Electronic and LSS Clusters) . . . . . . . . 2-55
Odometer. Trip (Standard Cluster) . . . . . . . . . . . . . . . . . .2-54
4- 12
Off-Road Recovery .............................
Oil
6- 14
Engine .....................................
2-66
Level Warning Light ..........................
2-66
Level Warning Message .......................
2-72
LifeIndicator ...............................
2-75
Lvl Sys Prob Message ........................
2-75
Pres Sender Prob Message .....................
2-72
Pressure Function ............................
2-64
Pressure Warning Light .......................
6-20
Supercharger ................................
Ordering
8-7
Owner Publications ............................
8-7
Service Bulletins ..............................
8-7
ServiceManuals ..............................
3-9
Outlets.Rear . . . . . . . . . . . . . . . . . . . . . . . . . . . . . . . . . . .
Overdrive Position. Automatic Transaxle . . . . . . . . . . . . 2- 19
5- 11
Overheated Engine ..............................
7-38
Owner Checks and Services.......................
8-7
Owner Publications. Ordering ......................
P a i n t Spotting. Chemical ........................
Park (P) Position ...............................
Park (P). Shifting Into ...........................
Park (P). Shifting Out of .........................
Parking
AtNight ...................................
6-50
2-17
2-21
2-24
2-10
Lots .......................................
2-10
On Hills While Towing a Trailer . . . . . . . . . . . . . . . . 4-36
Over Things That Burn . . . . . . . . . . . . . . . . . . . . . . . . 2-25
2-20
ParkingBrake ..................................
Parking Brake and Automatic Transaxle
7-41
Mechanismcheck .............................
2-21
Parking Brake Set Message .......................
2-11
PASS-KeyII ..................................
3-8
Passenger Temperature Control .....................
Passing .......................................
4-12
2-75
Passkey System Prob Message ....................
Periodic Maintenance Inspections . . . . . . . . . . . . . . . . . .7-42
3-29
Power Antenna .................................
2-3
Power Door Locks ...............................
2-47
Power Outlet. Accessory .........................
2-43
Power Remote Control Mirrors ....................
1-2
Powerseat .....................................
4-9
Powersteering ..................................
6-26
Power Steering Fluid ............................
Adding ....................................
6-27
6-27
Checking ...................................
2-9
Power Trunk Release .............................
Power Windows ................................
2-27
2-14
Power. Retained Accessory .......................
1-22
Pregnancy. Use of Safety Belts ....................
5-1
Problems on the Road ............................
Programmable Automatic Door Locks . . . . . . . . . . . . . . . 2-4
8-7
Publications. Service and Owner ....................
5. 16
Radiator . . . . . . . . . . . . . . . . . . . . . . . . . . . . . . . . . . . . .
Radiator Pressure Cap ...........................
6-26
Radio Reception. Understanding . . . . . . . . . . . . . . . . . . . 3-25
Radios
A
" Stereo ..............................
3-11
A
" Stereo Radio. ATC Cassette Tape Player . . . 3-13
A
" Stereo Radio. ATC. Cassette Tape and
Compact Disc Player ........................
3-17
4-17
Rain. Driving In ................................
ReadingLamps ....................................
Front ......................................
2-39
2-39
Rear . . . . . . . . . . . . . . . . . . . . . . . . . . . . . . . . . . . . . . .
Rear Door Ajar Message .........................
2-75
Rear Door Security Locks .........................
2-5
3-9
Rear Outlets . . . . . . . . . . . . . . . . . . . . . . . . . . . . . . . . . . . .
Rear Safety Belt Comfort Guides . . . . . . . . . . . . . . . . . . 1-27
1-24
Rear Seat Outside Position........................
1-24
Rear Seat Passengers ............................
2-46
Rear Storage Armrest ............................
RearTowingHookup ............................
5-10
Rear Window Defogger (Automatic Electronic Climate
Control) ......................................
3-7
Rear Window Defogger (Four Season Climate Control). . 3-3
Rearview Mirror
Electrochromic Daymight with Compass . . . . . . . . . 2-40
2-40
Inside Manual Daymight ......................
Reclining Front Seatbacks .........................
1-3
Recommended Fluids and Lubricants ............... 7-43
2-4
Reminder, Door Open ............................
Remote Lock Control ............................. 2-6
2-8
Battery Replacement ...........................
MatchingTransmitters .........................
2-7
Operation ...................................
2-7
ReplacementBulbs .............................
6-59
Replacement Parts ..............................
6-58
6-42
Replacement,Wheel ............................
1-43
Replacing Safety Belts ...........................
Replacing Seat and Restraint System Parts After a Crash 1-43
Reset Button. Driver Information Center
. . . . . . . . . . . . . 2-70
Restraints. Checking Your . . . . . . . . . . . . . . . . . . . . . . . . 1-43
1-31
Restraints. Child ................................
1-4
Restraints. Head .................................
Restraints. Replacing Parts After a Crash . . . . . . . . . . . . 1-43
2-14
Retained Accessory Power ........................
2-18
Reverse (R) Position ............................
1-23
Right Front Passenger Position ....................
8-6
Roadside Assistance ..............................
8-6
Roadside Assistance. Canadian .....................
5-28
Rocking YourVehicle ...........................
6-38
Rotation. Tire ..................................
Safety Belt Extender ............................
1-43
Safety Belt Reminder Light . . . . . . . . . . . . . . . . . . . 1.5.2.57
1-9
SafetyBelts ....................................
Adults ......................................
1-9
Care of ....................................
6-47
1-23
Center Passenger Position......................
Driver Position ...............................
1-9
Extender ................................... l-43
How to Wear Properly.........................
1-9
Incorrect Usage . . . . . . . . . . . . . . . 1-12,13,14,15,41, 42
LapBelt ................................... l-23
Lap-Shoulder ...............................
1-10
1-8
Questions People Ask ..........................
1-27
Rear Comfort Guides .........................
Rear Seat Outside Passenger Positions. . . . . . . . . . . . 1-24
Rear Seat Passengers .......................... 1-24
1-43
Replacing After a Crash .......................
Right Front Passenger Position. . . . . . . . . . . . . . . . . . . 1-23
9-9
Shoulder Belt Height Adjuster. . . . . . . . . . . . . . . . . . 1.11
1-29
Use by Children .............................
1-40
Use by Larger Children........................
Use by Smaller Children and Babies ............. 1-29
1-22
Use During Regnancy ........................
1-5
WhyTheyWork ..............................
4-34
Safety Chains ..................................
Safety Defects
8-5
Reporting to General Motors ....................
Reporting to the Canadian Government ............ 8-4
Reporting to the United States Government. . . . . . . . . 8-4
iii
Safety Warnings and Symbols .......................
7-3
Scheduled Maintenance Services....................
Seat.Power . . . . . . . . . . . . . . . . . . . . . . . . . . . . . . . . . . . . 1-2
Seats .......................................... 1-1
ManualFront ................................
1-1
1-3
Reclining Front ...............................
1-33
Securing a Child Restraint .....................
. Seats and Restraint Systems........................
1-1
. Seats and Seat Controls...........................
1- 1
SecondGear(2) ................................
2-19
. Security System (PASS-Key1
1)....................
2- 11
6- 1
Service ........................................
..Service and Appearance Care ......................
6-1
8-7
-Service and Owner Publications ....................
8-7
Service Bulletins, Ordering ........................
.Service Manuals. Ordering ........................
8-7
-Service Parts Identification Label . . . . . . . . . . . . . . . . . . 6-52
Service Work. Doing Your Own . . . . . . . . . . . . . . . . . . . . 6-2
..ServicingYour Air Bag-Equipped Oldsmobile . . . . . . . . 1-21
6-50
;Sheet Metal Damage ............................
Shift Lever. Console .............................
2-23
:Shift Lever. Steering Column . . . . . . . . . . . . . . . . . . . . . 2-21
2-21
;Shifting Into Park (P) ............................
9-10
.$
+. ....t
w
..
....
.........
i .
Shifting Out of Park (P) .......................... 2-24
2-17
Shifting. Automatic Transaxle .....................
.....................
1.11
Shoulder Belt Height Adjuster
Signaling Turns ................................
2-28
Skidding . . . . . . . . . . . . . . . . . . . . . . . . . . . . . . . . . . . . . . 4-14
3-26
Sound Equipment. Adding ........................
Spare Tire. Compact . . . . . . . . . . . . . . . . . . . . . . . . . . . . . 5-27
Speedometer (Electronic Cluster) . . . . . . . . . . . . . . . . . . 2-53
Speedometer (Std andLSS Clusters) ................ 2-53
6-45
Stains. Cleaning ................................
2-14
Starting Your Engine ............................
Stem. If Corning From Your Engine ............... 5-11
4-9
Steering .......................................
4-10
Steering In Emergencies .........................
7-40
Steering Column Lock ...........................
2-21
Steering Column Shift Lever ......................
Steering Wheel Touch Controls
Audiosystem ...............................
3-25
ClimateControl . . . . . . . . . . . . . . . . . . . . . . . . . . . . . . 3-9
Steering Wheel. Tilt .............................
2-27
Steering.Power ................................. 4-9
Steering. Tips . . . . . . . . . . . . . . . . . . . . . . . . . . . . . . . . . . . 4-9
6-31
Storage. Of Your Vehicle ..........................
2-44
Storage. Sunglasses .............................
Stuck. HYouAre . . . . . . . . . . . . . . . . . . . . . . . . . . . . . . . 5-28
Sunvisors ....................................
2-44
2-44
Sunglasses Storage ..............................
Supercharged Engine. 3800(L67) .................. 6-12
Supercharger Oil . . . . . . . . . . . . . . . . . . . . . . . . . . . . . . . 6-20
6-20Checking ...................................
6-20
What Kind to Use ............................
WhenToAdd . . . . . . . . . . . . . . . . . . . . . . . . . . . . . . . 6-20
Supplemental Restraint System (SRS). . . . . . . . . . . . . . . 1-16
Symbols. Vehicle . . . . . . . . . . . . . . . . . . . . . . . . . . . . . . . . . . v
Tachometer (Engine EPM) Function . . . . . . . . . . . . . . . 2-72
2-56
Tachometer (LSS Cluster) ........................
6-34
Taillamps. Bulb Replacement .....................
2-55
Tamper Resistant Odometer .......................
TapePlayer ....................................
3-15
TapePlayerCare ...............................
3-27
3-8
Temperature Control. Passenger ....................
Theft .......................................... 2-9
3-22
Theftlock Feature ...............................
6-26
Thermostat ....................................
2-19
Third Gear (3) Position ..........................
2-27
Tilt Steering Wheel .............................
3-10
Time. Setting the ...............................
6-43
Tire Chains ....................................
6-38
Tire Inspection and Rotation ......................
TireLoading ...................................
4-28
6-36
Tires .........................................
Alignment and Balance........................
6-41
6-39
BuyingNew ................................
5-19
Changing a Flat ..............................
6-37
Inflation ....................................
6-38
Inspection and Rotation .......................
Spare. Compact ..............................
5-27
6-40
Temperature ................................
6-40
Traction . . . . . . . . . . . . . . . . . . . . . . . . . . . . . . . . . . . .
6-40
Treadwear ..................................
Uniform Quality Grading ......................
6-40
6-39
Wear Indicators ..............................
Wheel Replacement ..........................
6-42
1-32
TopStrap . . . . . . . . . . . . . . . . . . . . . . . . . . . . . . . . . . . . .
TorqueLock . . . . . . . . . . . . . . . . . . . . . . . . . . . . . . . . . . .
2-24
5-26, 6-57
Torque, Wheel Nut .........................
4-30
TowingaTrailer .................................
Towing Your Vehicle .............................
5-7
5-9
Front .......................................
Rear .......................................
5-10
Traction Active Light .............................
4-8
4-8
Traction Active Message ..........................
4-7
Traction Control System ..........................
Traction ControlSystem Active Light . . . . . . . . . . . . . . . 2-60
Traction Control System Active Message . . . . . . . . . . . . 2-60
Traction Control System Warning Light . . . . . . . . . . . . . 2-59
4-8
Traction Off Warning Light ........................
TrailerTongue Weight ...........................
4-32
Trailer Towing
Brakes .....................................
4-34
4-36
Driving on Grades ............................
4-34
Driving with a Trailer .........................
4-33
Hitches ....................................
4-37
Maintenance ................................
4-36
ParkingonHills .............................
4-34
Safety Chains ...............................
Total Weight on Your Vehicle’s Tires . . . . . . . . . . . . . 4-33
4-30
Towing a Trailer .............................
Turnsignals ................................ 4-36
4-32
Weight of a Trailer ...........................
Transaxle Fluid, Automatic .......................
6-21
Trip Functions Reset Message .....................
2-70
Trip Odometer (Electronic and LSS Clusters). . . . . . . . . 2-55
Trip Odometer (Standard Cluster) . . . . . . . . . . . . . . . . . . 2-54
.................... 4-21
Trip, Before Leaving on a Long
TmnkLock . . . . . . . . . . . . . . . . . . . . . . . . . . . . . . . . . . . . .
2-8
2-9
Trunk Release, Power ............................
2-9
Trunk Security Override ...........................
Turn Signal and Lane Change Indicator . . . . . . . . . . . . . 2-28
2-75
Turn Signal On Message .........................
9-11
Turn SignallMultifunction Lever . . . . . . . . . . . . . . . . . . . 2-28
Turn Signals When Towing a Trailer . . . . . . . . . . . . . . . .4-36
2-36
TwilightSentinel ...............................
2-36
Twilight Sentinel. Light Sensor ....................
underbody Maintenance ........................
6-50
Vehicle Damage Warnings .........................
iv
6-52
Vehicle Identification Number .....................
4-28
Vehicle Loading ................................
6-31
VehicleStorage ................................
iv
Vehicle Symbols . . . . . . . . . . . . . . . . . . . . . . . . . . . . . . . . . .
Vehicle System Diagnostics Display . . . . . . . . . . . . . . . . 2-75
Vehicle. Control of a ............................. 4-4
2-6
Vehicle. Leaving Your ............................
Ventilation System. Flow-Through . . . . . . . . . . . . . . . . . 3-10
3- 10
Ventilation Tips . . . . . . . . . . . . . . . . . . . . . . . . . . . . . . . .
Vision.Night . . . . . . . . . . . . . . . . . . . . . . . . . . . . . . . . . . 4-16
2-45
Visors Vanity Mirrors . . . . . . . . . . . . . . . . . . . . . . . . . . . .
2-44
Visors. Sun . . . . . . . . . . . . . . . . . . . . . . . . . . . . . . . . . . . .
9-12
w a r n i n g Devices ...................................5-2
Warning Flashers, Hazard .........................
5-1
Warning Lights, Gages and Indicators. . . . . . . . . . . . . . . 2-56
2-64
Washer Fluid Message ............................
6-48
Washing Your Vehicle ...........................
Water. Driving Through Deep Standing . . . . . . . . . . . . . 2-15
6-50
Weatherstrips ..................................
5-26. 6-57
Wheel Nut Torque .........................
6-42
Wheel Replacement .............................
6-43
Wheel Replacement. Used ........................
2-27
Windows.Power ................................
2-3 1. 6-27
Windshield Washer Fluid ....................
2-31
Windshield Washers .............................
Windshield Wiper. Blade Replacement . . . . . . . . . . . . . . 6-35
Windshield Wiper. Circuit Breaker . . . . . . . . . . . . . . . . . 6-56
2-30
Windshield Wipers ..............................
4-24
Winter. Driving in ..............................
6-56
Wiring.Headlamp ..............................
5-7
WreckerTowing .................................
-
.. . .