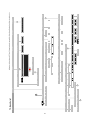
1
SERVICEANLEITUNG SERVICE MANUAL SL 155 230-98287.047 Connect ID 40 DR+ Art.-Nr. 51463 Connect ID 46 DR+ Art.-Nr. 51464 Inhaltsverzeichnis Index Sicherheitshinweise . . . . . . . . . . . . . . . . . 3 Security advice . . . . . . . . . . . . . . . . . . . 3 Service Loewe Connect ID - TV: . . . . . . . . . . 4 Service Loewe Connect ID - TV: . . . . . . . . . . 4 Entfernen und Montage des Lautsprechergitters . . 5 Disassembly a. assembly of the loudspeaker grille . 5 Entfernen und Montage der Rückwand . . . . . . 6 Disassembly and assembly of the rear panel . . . . 6 Aus-/Einbau der Baugruppen . . . . . . . . . . . 7 Removal / installation of components . . . . . . . 7 Entfernen Frontrahmen u. Ausbau Display . . . . . 9 Removal of front frame a. disassembly of display . 9 Einbau Frontrahmen und Display . . . . . . . . . 14 Installation of front frame and display . . . . . . . 14 Verkabelung Connect ID . . . . . . . . . . . . . 16 Wiring diagram Connect ID . . . . . . . . . . . . 16 Steckerbelegung Basicboard / Signalboard . . . . 24 Pin Description Basicboard / Signalboard . . . . . 24 Service Mode Befehle . . . . . . . . . . . . . . . 28 Service Mode instructions . . . . . . . . . . . . . 28 Option Bytes Tabelle . . . . . . . . . . . . . . . 29 Option Bytes chart . . . . . . . . . . . . . . . . 29 Service Menü SL155 (LCD) . . . . . . . . . . . . 33 Service menu SL155 (LCD) . . . . . . . . . . . . . 33 TV Menü SL 155 (LCD). . . . . . . . . . . . . . 36 TV menu SL155 (LCD) . . . . . . . . . . . . . . . 36 Baugruppenübersicht . . . . . . . . . . . . . . . 55 Overview of components . . . . . . . . . . . . . 55 Technische Daten Connect ID . . . . . . . . . . . 56 Technical data Connect ID . . . . . . . . . . . . 56 3D FAQs . . . . . . . . . . . . . . . . . . . . . 68 3D FAQs . . . . . . . . . . . . . . . . . . . . . 68 LOEWE Auslandsvertretungen . . . . . . . . . . . 72 LOEWE foreign representations . . . . . . . . . . 72 2 D GB Note on electrostatic shielding Hinweis zum Schutz gegen Elektrostatik 1.Elektrostatisch gesicherte MOS-Arbeitsplätze. Der Umgang mit gegen Elektrostatik empfindlichen Bauteilen muss an einem elektrostatisch gesicherten MOSArbeitsplatz erfolgen. Ein elektrostatisch gesicherter MOSArbeitsplatz erdet über Entladungswiderstände sämtliche leitende Materialien einschließlich der Person. Nichtleiter werden durch Luftionisation entladen. Die Integration von Lötkolben und Messgeräten in den gesicherten MOS-Arbeitsplatz ist nur mit Trenntrafo in jedem der verwendeten Geräte möglich. Die Messgeräte-Massen werden ebenfalls mit Entladungswiderständen geerdet. 1.Electrostatically shielded MOS workstations Components sensitive to electrostatic discharge must be handled at workstation with electrostatic shielding. An electrostatically shielded MOS workstation is fitted with discharge resistor which earth all conductive materials, including the technician working there. Dielectrics are discharged by air ionisation. The use of soldering irons and measuring equipment at shielded workstation is only possible in conjunction with isolating transformer in each of the devices used. Measuring equipment chassis are also earthed with discharge resistors. 2. Gesicherte Verpackung durch leitfähige Materialien. Zum Schutz gegen Elektrostatik werden elektrisch leitende Kunststoffe für Verpackung und Transportmittel verwendet. Leitende Kunststoffe gibt es als schwarze oder transparente Schutzbeutel, Schaumstoff, Folien und als Behälter. Empfindliche Bauteile dürfen nur am gesicherten MOS-Arbeitsplatz aus der Verpackung entfernt bzw. verpackt werden. 2. Shielded packaging using conductive materials To protect against electrostatic charges, electrically conductive plastics are used for packaging and transport purposes. Conductive plastics are available in the form of transparent protective bags, foam plastic, film sheeting or containers. Sensitive components requiring the use of protective packaging must only be packed and unpacked at shielded workstations. Sicherheitshinweise/Vorschriften Safety warnings/regulations 1.Instandsetzungen, Änderungen und Prüfung netzbetriebener elektronischer Geräte und deren Zubehör dürfen nur von fachkundigen Personen ausgeführt werden. 2.Es gelten die Vorschriften und Sicherheitshinweise nach VDE 0701, Teil 200, und die Vorschriften und Sicherheitshinweise des jeweiligen Landes! 3.VDE 0701, Teil 200, beinhaltet Vorschriften zur Instandsetzung, Änderung und Prüfung netzbetriebener elektronischer Geräte und deren Zubehör. 4.Vor der Auslieferung des Geräts muss eine Sichtprüfung des Geräts und der Anschlussleitungen (und soweit vorhanden, des Schutzleiters), und die Messung des Isolationswiderstandes und des Ersatz-Ableitstromes nach VDE 0701, Teil 200, durchgeführt werden. Der niederohmige Durchgang des Schutzleiters ist durch Messung laut Vorschrift VDE 0701, Teil 1, nachzuweisen. 5.Die Vorschriften des jeweiligen Landes sind zusätzlich zu beachten. 6. Bauteile mit dem Symbol gekennzeichnet, dürfen nur durch Originalteile ersetzt werden. 1. The repair, modification and testing of mains-operated electronic devices and their accessories must only be performed by qualified persons. 2. It is necessary to follow the regulations and safety warnings to VDE 0701, part 200, as well as the regulations and safety warnings applicable in the country concerned. 3. VDE 0701, Part 2, contains regulations on the repair, modification and testing of mains-operated electronic devices and their accessories. 4. Before delivery, the device and the connecting leads (including any protective earth conductor fitted) must undergo visual inspection, and the insulation resistance and the equivalent leakage current must be measured according to VDE 0701, part 200. The low-resistance continuity of the protective earth conductor must be verified by measurement to VDE regulation 0701, part 1. 5. The regulations of the country concerned must also be observed. 6. Only genuine parts must be used for replacing components marked with the symbol . 3 Service Loewe TV FÜR DIE WERKSTATT FOR THE WORKSHOP • Connect 40 DR+ Service Loewe ID Connect ID 40/46 • Connect ID 46 DR+ 1. Entfernen und Montage des Lautsprechergitters • 2. Entfernen und Montage der Rückwand • 3. Aus-/Einbau der Baugruppen • 4. Entfernen Frontrahmen und Ausbau Display • Frontrahmen und Display 5. Einbau • Achtung! Service Loewe Connect ID 40/46 1. Disassembly a. assembly of the loudspeaker grille 2. Disassembly and assembly of the rear panel 3. Removal / installation of components 4. Removal of front frame and disassembly of display 5. Installation of front frame and display Vermeiden Sie Schäden durch elektrostatische Aufladung! Beachten Sie den Umgang mit MOS-Bauteilen! Wichtig: Achten Sie beim Arbeiten mit dem Connect ID auf eine saubere und staubfreie Arbeitsumgebung! Gehen Sie äußerst behutsam mit den Oberflächen der einzelnen Komponenten um und tragen Sie bei den Arbeiten am Connect ID die im Rahmen des Loewe Premiumservice angebotenen Handschuhe, um Kratzer oder andere Beschädigungen der Oberflächen und Stoffbespannung des Lautsprechergitters zu vermeiden. Für das servicefreundlichere Handling bei bestimmten Aufstelllösungen empfehlen wir die Verwendung des Service Stand für Compose mit der Artikelnummer 90437960; zu beziehen über den Loewe Ersatzteildienst, in Kombination mit dem Adapter Rack CID mit der Artikelnummer 71357T00, der über den Loewe Vertrieb bezogen werden kann. Attention! Avoid damage from electrostatic charging! Handle MOS components properly! Important: Ensure that your working environment is clean and free of dust when working with the Connect ID. Be very careful with the surfaces of the individual components and be sure to wear the gloves included in Loewe Premium Service, when working with the Connect ID to avoid scratches or other damages to the surface and fabric lining of the loudspeaker grille. To facilitate servicing in some set-up situations, we recommend using the Service Stand for Compose with the article number 90437960, which can be ordered from Loewe Spare Parts Service, in combination with the Adapter Rack CID with the article number 71357T00, which can be ordered from Loewe Sales. 4 1. Entfernen und Montage des Lautsprechergitters Disassembly and assembly of loudspeaker grille Connect ID 40/46 Ziehen Sie den Netzstecker! Entfernen Sie die Anschlussleitungen vom TV-Gerät. Lösen und entfernen Sie, entsprechend des TV-Gerätemodels, die auf der entsprechenden Skizze mit Pfeilen markierten Schrauben. Pull out the mains plug! Remove the connecting leads from the TV set. Loosen and remove the screws marked by arrows in the appropriate sketch according to the TV set model. 1.1. Entfernen des Lautsprechergitters Das Lautsprechergitter ist über Rückwandschrauben mit dem Frontrahmen befestigt. Entfernen Sie die vier untersten Torxschrauben der Größte T20 wie in Abb.1 mit Pfeilen gekennzeichnet. 1.1. Disassembly of the loudspeaker grille The loudspeaker grille is fixed to the front frame using rear panel screws. Remove the four lowest T20 Torx screws as shown by the arrows in fig 1. Abb. 1 / Fig. 1 5 Schieben Sie vorsichtig das Lautsprechergitter nach unten und lösen Sie das Gitter aus den Kunststoffverankerungen, siehe Pfeile in Abb. 2. Im Anschluss entfernen Sie den Kabelbaum vom Bedienteil, siehe Pfeil in Abb. 3. Carefully slide the loudspeaker grille down and remove the grille from the plastic casing, see arrows in fig. 2. Then remove the cable harness from the control unit, see arrow in fig. 3. 1.2. Montage Lautsprechergitter Im Vorfeld muss der Kontaktschaum mit der Bestellnummer 35149.051 auf dem Lautsprechergitter aufgeklebt werden. Siehe Position des Kontaktschaums in Abb. 4. Verschrauben Sie das Bedienteil mit zwei Torxschrauben der Größe T20, siehe Pfeile Abb. 5. Verkabeln Sie das Bedienteil und schieben das Lautsprechergitter vorsichtig von unten in den Frontrahmen. Achten Sie darauf, dass keine Rastnase verkantet und vorsteht. 1.2. Assembly of loudspeaker grille Before assembly, the contact foam with the order number 35149.051 must be attached to the loudspeaker grille. See position of the contact foam in fig. 4 Screw on the control unit using two T20 Torx screws, see arrows fig. 5. Wire the control unit and carefully slide the loudspeaker grille into the front frame from below. Make sure that no catches are twisted or protruding. 2. Entfernen und Montage der Rückwand Die Rückwand ist mit sieben Torx-Schrauben mit der Größe T20 befestigt. Entfernen Sie die Schrauben und ziehen die Rückwand etwas nach hinten und lösen Sie komplett vom Frontrahmen, siehe Pfeile in Abb. 1. Die Montage erfolgt in umgekehrter Reihenfolge. 2. Disassembly and assembly of the rear panel The rear panel is fixed on with seven T20 Torx screws. Remove the screws, pull the rear panel back slightly and remove it completely from the front frame, see arrows in fig. 1. To assemble, follow the instructions above in reverse order. Abb. 2 / Fig.2 Abb. 4 / Fig.4 Oben Abb. 3 / Fig. 3 Abb.5 / Fig. 5 Oben 6 3. Aus-/Einbau der Baugruppen 3.1. Aus-/Einbau Basic-Board Entfernen Sie die Kabelverbindungen W1000, W1002, W1004, W1006, W1007 und W1009 (nur bei DR+ Geräten). Die Lage der Kabelverbindungen finden Sie im angefügten Verdrahtungsplan. Das Basic-Board ist mit vier Torxschrauben der Größe T10 mit dem Chassisträger befestigt, siehe Pfeile in Abb.6. Die Montage erfolgt in umgekehrter Reihenfolge. 3. Removal / installation of components 3.1. Removal / installation of basic board Remove the cable connections W1000, W1002, W1004, W1006, W1007 and W1009 (only with DR+ devices). The position of the cables can be found in attached wiring plan. The basic board is fixed to the chassis support with four T10 Torx screws, see arrows in fig. 6. To assemble, follow the instructions above in reverse order. Abb. 6 / Fig. 6 7 3.2. Aus-/Einbau Signal-Board Das Signal-Board ist mit sieben Torxschrauben mit der Größe T10 und vier Sechskantschrauben mit dem Chassisträger verbunden, siehe Pfeile in Abb 7. Folgende Kabelverbindungen müssen gelöst werden: W1013, W1025, W 1032, W1033, W1135 und W1035 (nur bei DR+ Geräten). Die Lage der Kabelverbindungen finden Sie im angefügten Verdrahtungsplan. Die Montage erfolgt in umgekehrter Reihenfolge. Achtung: Bei der Montage der Baugruppe ist darauf zu achten, dass die kurze Schraube an der Position mit grauem Pfeil in Abb. 7 verschraubt wird. 3.2. Removal / installation of signal board The signal board is fixed to the chassis support with seven T10 Torx screws and four hexagon screws, see arrows in fig. 7. The following cable connections must be disconnected: W1013, W1025, W1032, W1033, W1135 and W1035 (only with DR+ devices). The position of the cables can be found in attached wiring plan. To assemble, follow the instructions above in reverse order. Attention: When assembling the component, make sure that the short screw is screwed in at the position with the grey arrow in fig. 7. Abb. 7 / Fig. 7 8 4. Entfernen Frontrahmen und Ausbau Display 4.1. Ausbau Frontrahmen Entfernen Sie das Lautsprechergitter und die Rückwand, wie in den Punkten 1 und 2 beschrieben. Legen Sie zunächst das Gerät mit der Displayfläche nach unten, achten Sie auf eine saubere und weiche Unterlage, um Schäden am Display zu verhindern. Entfernen Sie die beiden Lautsprecherboxen. Lösen Sie jeweils die beiden Kabelbäume zu den TV-Lautsprechern und Lautsprecherboxen, siehe schwarze Pfeile Abb. 8 und Abb. 9. Die Boxen sind im Frontrahmen eingerastet und jeweils mit einer Torxschraube in der Größe T20 mit dem Chassisträger befestigt, siehe weiße Pfeile in Abb. 8 und Abb. 9. 4. Removal of front frame and disassembly of display 4.1. Removal of front frame Remove the loudspeaker grille and the rear panel as described in points 1 and 2. Firstly, place the device with the display facing down and make sure the surface below is clean and soft to avoid damage to the display. Remove both loudspeaker boxes. Disconnect each of the two cable harnesses from both the TV loudspeakers and loudspeaker boxes, see black arrows fig. 8 and fig. 9. The boxes are locked into the front frame and each is fixed onto the chassis support with one T20 Torx screw, see white arrows in fig. 8 and fig. 9. Abb. 8 / Fig. 8 Abb. 9 / Fig. 9 Abb. 10 / Fig. 10 Abb. 11 / Fig. 11 Entfernen Sie im Anschluss die Abdeckung des Netzschalters, die mit zwei Torxschrauben der Größe T20 befestigt ist, siehe Abb. 10. Lösen des Netzschalters aus dem Frontrahmen, siehe Abb. 11. Then remove the mains switch cover, which is fixed on with two T20 Torx screws, see fig. 10. Remove the mains switch from the front frame, see fig. 11. 9 Empfehlenswert ist es jetzt, dass Gerät auf den Tischfuß oder Servicefuß zu stellen. Dadurch haben Sie eine bessere Möglichkeit, den Frontrahmen vom Panel zu lösen. Um den Frontrahmen zu entfernen, muss der Rahmen vorsichtig vom Display mittels Abziehwerkzeug entfernt werden. Das Abziehwerkzeug ist unter der Artikelnummer 90427973 über den Loewe Ersatzteildienst zu beziehen. It is now recommended to place the device on the table foot or service foot. This will make it easier to disconnect the front frame from the panel. In order to remove the front frame, the frame must be carefully removed from the display using an extraction tool. The extraction tool can be ordered under the article number 90427973 from Loewe Spare Parts Service. Drücken Sie vorsichtig den Frontrahmen nach vorne, um mit dem Abziehwerkzeug zwischen Display und Rahmen zu kommen und setzen Sie das Abziehwerkzeug sehr vorsichtig an. Beginnen Sie in der oberen rechten Ecke und arbeiten Sie gegen den Uhrzeigersinn, siehe Abb. 12. Durch die Hebelkraft können Sie den Rahmen vom Display entfernen. Gehen Sie hierbei Stück für Stück sehr vorsichtig vor und unterstützen Sie das Ablösen der Front durch zusätzliches drücken des Frontrahmens vom Display. Bewegen Sie das Abziehwerkzeug im oberen und unteren Bereich nur nach rechts und links, siehe Abb. 13. Carefully push the front frame forwards until you are able to position the extraction tool between the display and the frame and very carefully apply the extraction tool. Start in the upper left corner and continue counter clockwise, see fig. 12. You can remove the frame from the display using the leverage. Proceed with this carefully and bit by bit and support the process of removing the front by pushing the front frame further from the display. Only move the extraction tool left and right in the upper and lower areas, see fig. 13. Abb. 12 / Fig. 12 Abb. 13 / Fig. 13 An den Seiten des Displays muss das Werkzeug auf und ab bewegt werden. Gehen Sie hierbei nur in sehr kleinen Teilbereichen vor und unterstützen Sie bei größerem Widerstand das Ablösen durch größeren Druck mit der anderen Hand auf den Frontrahmen. The tool must be moved up and down at the sides of the display. Only do this in very small sections and support the process in case of higher resistance by applying greater pressure to the front frame using your other hand. Abb. 14 / Fig. 14 Wenn Sie den Frontrahmen vom Display komplett gelöst haben, entfernen Sie die beiden TV-Lautsprecher, diese sind mit jeweils vier Torxschrauben der Größe T10 im Frontrahmen befestigt, siehe Abb. 14. Once you have completely removed the front frame from the display, remove both TV loudspeakers. These are each fixed to the front frame with four T10 Torx screws, see fig. 14. 10 4.2. Ausbau Display Führen Sie zunächst alle Schritte wie in Punkt 4.1 beschrieben durch. Legen Sie im Anschluss das Gerät mit der Displayfläche nach unten und achten Sie auf eine saubere und weiche Unterlage, um Schäden am Display zu verhindern. Zum Ausbau des Chassisträgers muss im Vorfeld das Signal-Board entfernt werden. Siehe Punkt 3.2. Das Trägerblech ist mit sechs Torxschrauben mit dem Display verschraubt. In Abb. 15 sind vier Torxschrauben mit der Größe T20 mit weißen Pfeilen markiert, zwei Torxschrauben mit der Größe T10 mit schwarzen Pfeilen. 4.2. Disassembly of display First carry out all the steps described in point 4.1. Then place the device with the display facing down and make sure the surface below is clean and soft, to avoid damage to the display. To remove the chassis support, the signal board must be disassembled first. See point 3.2. The supporting plate is screwed to the display with six Torx screws. In fig. 15, four T20 Torx screws are marked with white arrows and two T10 Torx screws are marked with black arrows. Abb. 15 / Fig. 15 11 Lösen sie im Anschluss die in Abb. 16 mit Pfeilen markierten Kabelverbindungen. Then disconnect the cable connections marked with arrows in fig. 16. Abb. 16 / Fig. 16 Abb. 17 / Fig. 17 Achten Sie beim Abheben des Trägerblechs auf die Kabelverbindung für die Backlights zum Display unterhalb des Trägers, siehe Abb. 17. When lifting off the supporting plate, be careful of the cable connection for the backlights to the display underneath the support, see fig. 17. 12 Entfernen Sie das WLAN-Modul von Display und die verklebten Kabelbäume, siehe Abb. 18. Remove the WLAN module and stuck cable harnesses from the display, see fig. 18. Abb. 18 / Fig. 18 13 5. Einbau Frontrahmen und Display 5.1. Einbau Frontrahmen Legen Sie den neuen Rahmen mit der Frontfläche nach unten auf eine saubere und weiche Unterlage, um Schäden am Rahmen zu verhindern. Entfernen Sie die Reste der Klebestreifen vom Display, bevor Sie dieses wieder verwenden. Entfernen Sie die Folie der doppelseitigen Klebebänder, die bereits im Frontrahmen verklebt sind, siehe Abb. 19. Positionieren Sie das Display in den Frontrahmen, setzen Sie am besten oben an der Kante an, siehe Abb. 20. Führen Sie im Anschluss die Schritte in umgekehrter Reihenfolge wie unter Punkt 4.1 durch. 5. Installation of front frame and display 5.1. Installation of front frame Place the new frame with the front facing downwards onto a clean and soft surface in order to prevent damage to the frame. Remove the rest of the adhesive strips from the display before using it again. Remove the film of the double-sided adhesive tapes, which are already stuck to the front frame, see fig. 19. Position the display in the front frame and preferably start at the top edge, see fig. 20. Then carry out the steps under point 4.1 in reverse order. Abb 19 / Fig. 19 Abb 20 / Fig. 20 14 5.2. Einbau Display Wenn Sie den alten Frontrahmen verwenden können, entfernen Sie die Reste der Klebebänder . Bringen Sie die neuen Klebestreifen (Art.-Nr. 90456996) am Frontrahmen an und achten Sie darauf, dass keine Überlappungen entstehen. Nächste Schritte siehe unter Punkt 5.1. Verkabeln Sie das neue Display wie in Abb. 18 unter Punkt 4.2, bevor Sie den Chassisträger montieren. Führen Sie im Anschluss die Schritte in umgekehrter Reihenfolge wie unter Punkt 4.2 durch. 5.2. Installation of display If you can still use the old front frame, remove the rest of the adhesive tapes. Attach the new adhesive strips (article number 90456996) to the front frame and make sure there is no overlapping. Next steps see under point 5.1. Wire the new display as in fig.18 under point 4.2 before mounting the chassis support. Then carry out the steps under point 4.2 in reverse order. 15 71046.058 rot 71366 L WLAN 2.4/5 GHz 71306.001 Festplatte Hard disc 2.5z 500 GB 34123.070 71139.002 70941.002 Basic-Board 40z 71298.051 71343.001 W1000 2pol. rot nat W1007 4pol. W1006 4pol. W1009 15/2 pol. Netzschalter Main switch 35187 71345.051 71381.001 71383.051 W1001 W1031 ~230V W1003 LED Backlight 70782.002 71046.059 W1002 W1032 51pol. 71006.001 W1004 7pol. 70233.055 Bedieneinheit Control Unit 71701.063 W5031 W2503 W1035 41pol. W1006 71339.001 W1033 W2504 LCD 3DLE 100 FHD 71249.001 W1005 Verdrahtungsplan / Wiring diagram Connect ID 40 DR+ W1002 W1004 30pol. 7/15pol. W1028 W1025 11pol. W1013 W1000 16 70587.003 W1009 R 71366 nat W1008 9pol. W1135 W7001 40pol. 40pol. W7000 A7000 W1030 Signal-Board 71295.050 W6821 W6831 W6701 W6711 W6501 W2502 W2501 W6001 Kartenleser Double PCM CIA 34974 W6721 17 Connect ID 40 DR+ rot 71366 L 71046.058 Netzschalter Main switch 35187 Basic-Board 40z 71298.051 71343.001 W1006 4pol. rot nat W1007 4pol. W1000 2pol. W1009 71345.051 WLAN 2.4/5 GHz 71306.001 71383.051 ~230V 71381.001 W1003 LED Backlight 70782.002 71046.059 W1004 41pol. W1002 W1033 51pol. 71006.001 W1032 71339.001 70233.055 W2504 Bedieneinheit Control Unit 71945.063 W5031 W1006 W2503 W1035 LCD 3DLE 100 FHD 71249.001 W1005 W1001 W1031 Verdrahtungsplan / Wiring diagram Connect ID 40 W1002 W1004 30pol. 7/15pol. W1028 W1025 11pol. W1013 W1000 18 70587.003 W1009 R 71366 nat W1008 9pol. W1135 40pol. W7001 40pol. A7000 W7000 W1030 Signal-Board 71295.051 W6821 W6831 W6701 W6711 W6501 W2502 W2501 W6001 Kartenleser Double PCM CIA 34974 W6721 19 Connect ID 40 DR nat 70601.001 71046.053 71046.054 WLAN 2.4/5 GHz 71306.001 rot 71366 L 71046.058 Festplatte Hard disc 2.5z 500 GB 34123.070 71139.002 70941.002 Basic-Board 46z 71298.052 71343.001 W1000 2pol. W1006 4pol. rot nat W1007 4pol. W1009 15/2pol. Netzschalter Main switch 35187 71345.051 71381.001 71383.051 W1001 W1031 ~230V W1003 LED Backlight 70782.002 71046.059 W1002 W1032 51pol. 71006.001 W1004 7pol. 70233.055 W2504 Bedieneinheit Control Unit 71701.063 W5031 W2503 W1035 41pol. W1006 71339.001 W1033 W1009 R 71366 nat W1008 9pol. W1135 W7001 40pol. 40pol. W7000 A7000 W1030 Signal-Board 71295.050 W6821 W6831 W6701 W6711 W6501 W2502 W2501 W6001 Kartenleser Double PCM CIA 34974 W6721 W1017 W1023 70587.003 W1030 W1001 Audio Interface AudioLink 70627.051 W1000 W1003 W1039 LCD 3DLE 100 FHD 71251.001 W1005 W1022 W1027 70657.052 Verdrahtungsplan / Wiring diagram Connect ID 46 DR+ W1002 W1004 30pol. 7/15pol. W1028 W1025 11pol. W1013 W1000 20 W1012 21 Connect ID 46 DR+ rot 71366 L 71046.058 Netzschalter Main switch 35187 Basic-Board 40z 71298.052 71343.001 W1006 4pol. rot nat W1007 4pol. W1009 W1000 2pol. 71345.051 WLAN 2.4/5 GHz 71306.001 71383.051 ~230V 71381.001 W1003 LED Backlight 70782.002 71046.059 W1002 W1032 51pol. 71006.001 W1004 41pol. W1033 71339.001 70233.055 W2504 Bedieneinheit Control Unit 71945.063 W5031 W1006 W2503 W1035 LCD 3DLE 100 FHD 71251.001 W1005 W1001 W1031 Verdrahtungsplan / Wiring diagram Connect ID 46 W1002 W1004 30pol. 7/15pol. W1028 W1025 11pol. W1013 W1000 22 70587.003 W1009 R 71366 nat W1008 9pol. W1135 40pol. W7001 40pol. W7000 A7000 W1030 Signal-Board 71295.051 W6821 W6831 W6701 W6711 W6501 W2502 W2501 W6001 Kartenleser Double PCM CIA 34974 W6721 23 Connect ID 46 Steckerbelegung / Pin description Basicboard 71298.xxx W1000 1/2 Netzspannung, main voltage - 175V-264V W1002 zum/to Panel 1 2 3 4 5 6 7 8 9 10 11 12 13 14 15 PWM1_DIM, W1004 PIN 19 U_LED_Anode - 69V-110V abhängig von Panelgröße, depent of panel size n.b., n.c. K_LED1 - Uss ca. U_LED_Anode/2 n.b., n.c. U_LED_Anode - 69V-110V abhängig von Panelgröße, depent of panel size n.b., n.c. K_LED2 - Uss ca. U_LED_Anode/2 n.b., n.c. U_LED_Anode - 69V-110V abhängig von Panelgröße, depent of panel size n.b., n.c. K_LED3 - Uss ca. U_LED_Anode/2 n.b., n.c. U_LED_Anode - 69V-110V abhängig von Panelgröße, depent of panel size n.b., n.c. K_LED4 - Uss ca. U_LED_Anode/2 PWM2_DIM, W1004 PIN 17 W1004 zum/to Signalboard W1013 1 2 3 4 5 6 7 8 9 10 11 12 13 14 15 16 17 18 19 20 U5SB - 5,0V-5,3V hoher Kontrast, high contrast on/off - ca. 0V = on, ca. 5V = off GND GND U3.3 - 3,3V-3,45V U3.3 - 3,3V-3,45V U5 - 4,95-5,25V U5 - 4,95-5,25V GND GND U12 - 11,2V-12,2V U12 - 11,2V-12,2V U12 - 11,2V-12,2V U12 - 11,2V-12,2V GND GND PWM2_DIM - 3,3Vss , 3,3Vpp GND PWM1_DIM - 3,3Vss , 3,3Vpp Festplatte ein/aus, hard disc on/off - 3,3V = on, 0V = off . . 24 niedriger Kontrast, low contrast 2D 3D Steckerbelegung / Pin description Basicboard 71298.xxx 21 22 23 24 25 26 GND GND SPDIF - ca. 1,2Vss, 1,2Vpp U24 - 24,0V-25,0V I2C-SDA - 3,3Vss, 3,3Vpp Mute - 3,3V = Mute, 0V = Ton/sound aktiv während Ein-/ Ausschaltphase, active during switch on/off 27 28 ISC-SCL - 3,3Vss, 3,3Vpp Reset - 3,3V = normal, 0V = Reset 29 30 2D/3D - ca. 5V = 2D, 0V = 3D GND kurzer Impuls nach Einschalten, short impulse after switch on W1006 Lautsprecher rechts/ speaker right 1 2 3 4 W1007 Lautsprecher links/ speaker left 1 2 3 4 Lautsprecher, speaker Lautsprecher, speaker Basslautsprecher, bass speaker Basslautsprecher, bass speaker W1009 zur Festplatte/ to hard disc 1 2 GND 5V - schaltbar, switchable 25 Lautsprecher, speaker Lautsprecher, speaker Basslautsprecher, bass speaker Basslautsprecher, bass speaker Steckerbelegung / Pin description Signalboard 71295.xxx W1013 zum/to Basicboard W1004 Belegung identisch zu W1004 Basicboard / same pin description like W1004 Basicboard W1025 zur Bedieneinheit / to operating unit 1 2 3 4 5 6 7 8 9 GND KEY2 - 5V = keine Taste/no key, 3,6V = + Taste/key +, 3,0V = - Taste/key -, 2,4V = beide Tasten/both keys OPC_Sensor - 0V = dunkel/dark, 3,3V = hell/bright KEY1 - 5V = keine Taste/no key, 3,6V = M Taste/key M, 3,0V = R Taste/key R, 2,4V = beide Tasten/both keys LED G/Y - 0V = orange, 3,3V = rot/red, 5V = grün/green LED R/B - 0V = rot/red , 5V = orange oder grün/ orange or green RSIG U5SB - 5,0V-5,3V LED DR W (nur Geräte mit DR+, devices with DR+ only) - 0V = weiss an/white on, 5V = weiss aus/white off 10 11 3D LED DR R/G (nur Geräte mit DR+, devices with DR+ only) - ca. 5V = grün/green, 0V = rot/red, 3,3V = aus/off W1035 zur Festplatte/ to hard disc 1 2 3 4 5 6 7 W1135 zum/to WLAN 1 2 3 4 5 6 7 8 9 GND SATA_TXP SATA_TXN GND SATA_RXN SATA_RXP GND 26 TXP TXN RXP U5 - 4,95-5,25V U5 - 4,95-5,25V RXN GND GND GND Steckerbelegung / Pin description Signalboard 71295.xxx W1032 zum/to Panel 1 2 3 4 5 6 7 8 10 11 12 13 14 15 16 17 18 19 20 21 22 23 24 25 26 27 28 29 30 31 32 33 34 35 36 37 38 39 40 41 42 43 44 45 46 47 48 49 50 51 W1033 zum/to Panel 1 2 3 4 5 6 7 8 9 10 11 12 13 14 15 16 17 18 19 20 21 22 23 24 25 26 27 28 29 30 31 32 33 34 35 36 37 38 39 40 41 VDD Panel - U12 geschalten, U12 switchable VDD Panel - U12 geschalten, U12 switchable VDD Panel - U12 geschalten, U12 switchable VDD Panel - U12 geschalten, U12 switchable VDD Panel - U12 geschalten, U12 switchable GND GND GND GND SYA_TXP_(E) SYA_TXN_(E) SYA_TXP_(D) SYA_TXN_(D) GND SYA_CLKP SYA_CLKN GND SYA_TXP_(C) SYA_TXN_(C) SYA_TXP_(B) SYA_TXN_(B) SYA_TXP_(A) SYA_TXN_(A) n.c. n.c. SXA_TXP_(E) SXA_TXN_(E) SXA_TXP_(D) SXA_TXN_(D) GND SXA_CLKP SXA_CLKN GND SXA_ZXP_(C) SXA_TXN_(C) SXA_TXP_(B) SXA_TXN_(B) SXA_TXP_(A) SXA_TXN_(A) GND 3D_Sync in INV_DIM PAN_DIM LVDS_OPTION n.c. n.c. 3D_Sync Out n.c. n.c. 3D_Enable 27 GND GND SYB_TXP_(E) SYB_TXN_(E) SYB_TXP_(D) SYB_TXN_(D) GND SYB_CLKP SYB_CLKN GND SYB_TXP_(C) SYB_TXN_(C) SYB_TXP_(B) SYB_TXN_(B) SYB_TXP_(A) SYB_TXN_(A) GND GND SXB_TXP_(E) SXB_TXN_(E) SXB_TXP_(D) SXB_TXN_(D) GND SXB_CLKP SXB_CLKN GND SXB_TXP_(C) SXB_TXN_(C) SXB_TXP_(B) SXB_TXN_(B) SXB_TXP_(A) SXB_TXN_(A) GND n.c. n.c. n.c. VDD Panel - U12 geschalten, U12 switchable VDD Panel - U12 geschalten, U12 switchable VDD Panel - U12 geschalten, U12 switchable VDD Panel - U12 geschalten, U12 switchable VDD Panel - U12 geschalten, U12 switchable Anordnung der SERVICE-Mode-Befehle auf der Fernbedienung Arrangement of the SERVICE mode commands on the remote control Arrangement des instructions du mode SERVICE sur la télécommande Ordine dei comandi nel "modo di SERVIZIO" sul telecomando Disposición de los comandos del modo SERVICIO en el mando a distancia Rangschikking van de SERVICE-mode-functie's op de afstandsbediening Einschalten TV-Service-Mode *) Switching to TV Service mode *) Enclenchement du mode Service TV *) Inserimento modi di servizio TV *) Modo SERVICE de encendido del televisor *) TV service mode inschakelen *) Service-Mode AUS/Off/Arrêt/Spento/Apagado/Uit Zurück in den TV-Betrieb Return to TV operation mode Retour au mode TV Ritorna su TV Vuelta al funcionamento como televisor Terug naar TV-weergave Auswahl der Abgleichfunktionen Calling of the alignment functions Selection des fontions de réglage Selezione delle funzioni di taratura Selección de las funciones de ajuste Afstemmingsfunties kiezen Abgleich der angewählten Funktionen Alignment of the function called Réglage de la fonction selectionée Regolazione della funzione selezionata Comprobación de las funciones seleccionadas Geselecteerde funties afstemmen Abgleichwert abspeichern Storing of alignment value in memory Memorisation de la valeur reglée Memorizzazione dei valori di taratura Memorización del valor de ajuste Afstemmingswaarde opslaan *) Entrare nella modalità "Service-Mode" Premere di seguito il tasto "M" o della ghiera posta sul televisore. A questo punto togliere le dita dai pulsanti e attendere che il diodo led diventi verde, di seguito comparirà sul televisore il menu del "ServiceMode", e il tasto del telecomando per circa 1 secondo finche il diodo led della ghiera non diventa arancione. *) Einstieg in den Service-Mode Funktionstaste "M" oder auf der Ortsbedienung 1 mal drücken, anschließend auf der Fernbedienung wiederholt die Pfeil-Rechts-Taste (innerer Ring) drücken, bis Anzeige "Service" markiert ist und innerhalb von 1 Sekunde Taste "Menu" auf der Fernbedienung. *) Acceso a modo de Servicio Pulse una vez el botón "M" o del panel frontal. Luego pulse la flecha derecha del cursor en el mando a distancia (anillo interno) hasta que la palabra "Servicio" se muestre en pantalla y dentro del siguiente segundo pulse "Menu" en el mando a distancia. *) Entering Service Mode On the local control press funtion key "M" or 1 times, afterwards press repeated the Right-Arrow-Button (inner ring) on the remote control, until indication "Service" will be marked and within a second press button "Menu" on the remote control. *) Overschakelen op de service-mode Functietoets "M" of op de tv-bediening één maal indrukken. Aansluitend op de afstandsbediening de pijl naar rechts toets (binnenste ring) drukken, tot de aanduiding "service" op het scherm staat. Aansluitend binnen de seconde op de "menu" toets op de afstandsbediening drukken. *) Appel du Mode Service Appuyer une fois sur la Touche "M" ou du panneau de commande du téléviseur. Puis appuyer plusieurs fois sur le curseur vers la droite (bouton intérieure à l'anneau), afin de faire apparaitre l'indication "Service", et, dans la seconde, sur la touche "Menu" de la télécommande. 28 29 Ja yes ein on Backlight Dimmung for contrast LCN Sortierung LCN Sorting 3 Byte 7 Schnell fast Reaktionszeit auf FB-Befehle Reaction time of remote orders 6 1 Ja yes Einschaltvorhang Curtain at switch on 4 Byte 6 DVB/Videotext DVB/teletext Zeitsynchronisierung time synchronisation 2 Schnell fast 0-Pakete 0-packet Mute digitaler Tonausgang Mute of digital audio output 7 Automatische Filmerkennung Auto Movie Detection Möglich possible Spannungsversorgung DVB-T Antenne Power supply DVB-T antenna 4 4 Ein on Automatische Bildformatumschaltung Automatic movie detection 3 Byte 4 16:9 Panorama Modus Panorama Mode 1 Zugelassen approved Aus off HDMI Receiver schaltet ab, wenn kein HDMI aktiv HDMI receiver switch off if no HDMI active 7 Bildformat (Standardwerte) Picture ratio (standard values) Ein on IIC-Steuerung über Audio-Link IIC control via Audio-Link 4 0 Ein on „0“ Dynamische Backlightdimmung in FPGA Dynamic backlight dimming in FPGA Bedeutung Meaning 2 Bit-Nr. No. Byte 3 Byte 2 Byte 1 Byte 0 Abgleichfunktion Aligment function Optionbytes TV für den Service / Option bytes TV for service Aus off Nein no Langsam slow Gesperrt blocked Langsam slow Nein no Aus off Auf Low low level Aus off Aus off 14:9 Ein on Aus off Aus off „1“ 0 0 1 0 0 0 0 0 0 0 0 0 0 0 Einstellung ab Werk Adjusted in the factory 30 Byte 11 Byte 10 Byte 9 Byte 8 Abgleichfunktion Aligment function Nicht benutzt not used Nicht zugelassen not allowed On Flashen alter Software Flashing old software CEC Communication 2 6 Möglich possible Programmwechsel in Übersicht Program table switch 1 Fernbedienung R28 Remote control 28 Ja yes HDMI Mute Audio und Video HDMI mute audio and video 0 7 Ja yes Ausschaltbefehl über Digital Link Plus Switch off command via Digital Link Plus 5 Nein no Ja yes Einschaltvorhang Curtain at switch on 3 Korrektur MSP-Register (Ton Luxemburg) Check MSP standard registers (audio Luxemburg) DVB/Videotext DVB/teletext Zeitsynchronisierung time synchronisation 1 4 aus off „0“ Image+ Last Memory Bedeutung Meaning 6 Bit-Nr. No. Optionbytes TV für den Service / Option bytes TV for service Off Zugelassen allowed Benutzt used Ja yes Nicht möglich impossible Nein no Nein no Nein no Aus off Ein on „1“ 0 0 0 0 0 0 0 0 0 0 Einstellung ab Werk Adjusted in the factory 31 Byte 5 Byte 4 Byte 0 Abgleichfunktion Aligment function Ja Immer 1.2 V yes always 1.2 V Nein Reduzuieren auf 1.0 V no reduced to 1.0 V Sofort zugelassen immediately allowed On-id, s-id Aus off Normal normal Speichern gleicher Sender bei manueller Suche Save same services in manuel search Meldungen CI-Modul nach Programmwechsel Messages from CI module after program change DVB-T Programme erkennen an DVB-T service identified by Decoder Fehler anzeigen im Servicemode Display decoding errors in servicemode Fehlerkorrektur Error recovery 0 3 0 3 4 „1“ Löschen delete Selektiert im Menü selected about menu Normal normal Zu beiden to both CI Konfiguration CI configuration Transportstrom zu CI-Slot schalten Switch transport stream to CI slot 6 7 Aus nach Programmwechsel set to non after next program change Ein on On-id, s-id, ts-id Nach 10s zugelassen allowed after 10s Ja yes Nein no „0“ SATA Partition beim Start löschen Delete SATA partition on start Bedeutung Meaning 4 Bit-Nr. No. Optionbytes DVB für den Service / Option bytes DVB for service 0 0 0 0 0 0 0 0 Einstellung ab Werk Adjusted in the factory Internetradio Musik (Internet) Media Net USB-Stick Video -Podcasts Media Net 32 + TV MENU TV nein 50 Radio 11 OK OK OK XX : XX Spielzeit : MENU ? 1 2 3 4 DKULTUR DLF DRadio Wissen Bayern 1 AUDIO DIGITAL IN AUDIO IN HDMI3 HDMI2 HDMI1 AVS AV SENDERÜBERSICHT Radiomenü Stichwortverzeichnis Service 5 6 7 8 9 10 11 12 13 14 15 16 Bayern 2 BAYERN 3 BR-KLASSIK B5 aktuell BAYERN plus on 3- radio BR Verkehr B5 plus hr 1 hr 2 hr 3 hr 4 OK OK MENU OK Menüsprache Energieeffizienz Ausstattung des TV Erstinbetriebnahme wiederholen * Anschlüsse AUDIO DIGITAL IN/OUT (SPDIF) AUDIO LINK (analog)* STICHWORTVERZEICHNIS OK MENU Bilder Musik Videos XXXXXXXXXXX xxxxxx xxxxxx xxxxxx xxxxxx xxxxxx : : Mediacenter FRITZ! Mediaser ver Test-PC: Schulung OK NAS-CS Twonky Media Mediacenter NAS-CS: Ready NAS MEDIA HOME Tagesschau Alle Themen Favoriten Empfehlungen MEDIA NET Alle Medien-Menü Servicemenü Digital-Recorder-Menü MENU innerhalb 1s Mediacenter FP-Twonky abhängig von der Ausstattung des TV's, des Softwarestandes und vom gewählten Sender können Menüpunkte entfallen oder verändert sein 16:9 Zoom DR-Archiv 16:9 PC +/- Sender HDMI3 Internetradio HDMI2 Media Net Media Home DVB-Radio MENU OK Recent Activity Musikeinrichtungen Länder XX . XX / XX . XX XXXXXX Buzz Empfohlene Sender Favoriten Genre Hinzugefügte Radiostationen Local XXXXXXXXX Länder Neue Sender Populäre Sender INTERNETRADIO OK XXXXXXX XXXXXXX XX : XX XXXXXXXXX Spezifischer Standby- Modus RADIO DIGITAL DVB- Radio Interpret : DR+Streaming TV MEDIA PORTAL MEDIA HDMI1 16:9 TV Bildformat 4:3 Zoom Kontrast 4:3 PC oder PC IN ASSIST AVS 4:3 TV 18 Helligkeit TV- ABSCHALTUNG OK AV Lautstärke RADIO DIGITAL Internetradio Video AV-Auswahl TV-Menü MENU Radio Betriebsart R Radiomenü - M Übersicht xxxx xxxx :ss 33 Module: ac3 Module: alarm Module: appl Module: aud_bsp Module: aud_map Module audio Module aV Module aVlink Module barley Module blank Module block_ctrl Module browserdb SL155 PV 8.8.0.0 Vx.xx.x y y y-mm-dd hh:mm:ss Sxxxxx-x D:xxxh P:xxxh R:xxxh xxx xxxx xxxx Vx.x xxxxx_xxx Vx.x xxxxx_ xxx Vxx.xx Boot:xxx Chip:xxxxxx Vx.x.x Vx.x.x yyy-mm-dd Vx CPLD Vx CiFPGA 0xxx xx Vx.xxx Prod:0xxxxxx 1 0 0 1 Bit 1 Bit 0 Option byte 0 0 1 Bit 2 Start Video OK Adjust ADC adjustment Option bytes Colour 90 Sound 0 0 1 Bit 3 0 0 Red Green Green 0 1 Bit 4 0 1 Bit 5 Option byte 2 Red 0 Red 100 0 Blue 0 1 Bit 6 0 1 Bit 7 0 000 Blue Option byte 11 Green 0 Blue Stop Black Start Erase Flash White off on Digital Link HD functionality 4800 9600 8 bit no parity 28800 8 bit parity odd parity 19200 off AMX 9 bit 115200 2 stopbits Record Quality Video Stopbits 1 stopbit Parity even parity Mode 0-9 Port settings 36 KHz DR Start Stop Start Save to Flash Stop Start Stop Start Load from Flash Stop Stop Stop Stop DVB Stop Station list Start Stop Start Start OK Start Stop Start XML export to USB Stop Reset update date on off POS setup CEC System Audio Mode Stop Copy from USB Sound projector Miscellaneous Copy to USB EPG Copy from USB Start Start Copy to USB Start Start Clear DB Stop Delete disk Record Demo Video Record Quality Video Record Media Video 2400 Baudrate 00 - 9 IR-Link modulator frequency on RS232 automatic fixed to assigned Audio Input HDMI2/DVI HDMI2 sound DVB RC subsystem Center volume Other adjustments Colour gain Colour offset Colour factor Luma max Subcontrast Calibrate Option byte 1 OK Exceptions Debug level : default Debug level : default Debug level : ERROR Debug level : default Debug level : default Debug level : ERROR Debug level : default Debug level : ERROR Debug level : default Debug level : default Debug level : default Debug level : default Debug Levels Servicemenü Seite 1 / Service Menu Page 1 SYSTEM DATA Chassis Software Package TV application software version TV EAROM Code Operating time Flash erase cylces EDID-HDMI data versions Firmware Auxiliary processor Firmware Feature processor Firmware FRC version DVB boot software version DVB application software version DVB EAROM code CPLD and CiFPGA version MSP-M version OK System data abhängig von der Ausstattung des TV's, des Softwarestandes und vom gewählten Sender können Menüpunkte entfallen oder verändert sein dependent on the integrated features of TV set, of software version and on the selected station menu points can be cancelled or be changed 34 xxxxxx xxxxxx xxxxxx Article Nr. xxxxx.xxxx Serial Nr. xxxx 0 E-6 0(0) 00,0 dB CBER Packet error C/N 0 E-5 0 (0) article nr serial produced mac address chassis hardware id hardware cmp SYSTEM INFO OK /mnt / config deleted. You should rebort the TV now SUCCESS OK 000000.000 0000 yyyy/mm/dd 00:00:00:00:00:00 SL155 0.0.0.0 0.0.0.0 Miscellaneous update display Engine (type 0 = xxxxxxxxx) Engine (type 1 = xxxxxxxxx) Engine (type 2 = xxxxxxxxx) MULTI MEDIA ENGINE OK VIDEO DEBLOCKING OK Info OK OK IP Address: xxx.xxx.xxx.xxx Subnetmask: xxx.xxx.xxx.xxx NETWORK ADAPTER SETTINGS MAC Address: xx:xx:xx:xx:xx:xx Show current interface configuration Show DNS resolver Ping Loewe.de Power-Cycle WiFi module Write WiFi-AP-scan to USB Allow WiFi config from outside Factory-reset of WiFi module`s config. Delete network config from flash. Logging : < off > <- NETWORK - MAIN Off On Delete CI slot configuration. Delete CI+ authentication contexts. VOD factory reset. OK Delete / mnt / config COMMON INTERFACE ______________ 0 xxxxxx ______________ 0 xxxxxx(xxxx) xxxxxxx 0 ______________ xxxxxxxxxxxxx Subtitling pid compos_page_id ancillary_page_id 0 0 xxxxxx xx.xxxxxx MHz / x.xxxxxx MHz VBER Packet error Art.Nr. xxxxx.xx OK SUBTITLE INFO VBI TTX INFO _______________ VBI pid VBI reinsertion _______________ TTX pid TTX extraction TTX subtitles Process packets _______________ PTS values OK Epg Info PCR pid PCR glitches PCR status System clock / delta OK System Info save TV data to USB LAST CRASH INFORMATION EPG Video Deblocking MultiMediaEngine Network DR OK Com. Interface xxxxxxxxxxxxxxxxxx OK Exception Info RS232 FSAL Media List USB Devise List Perform USB Power-Cycle OK Mass Storage DVB Info Digital Link HD functionality MASSSTORAGE-MAIN Subtitle Info OK DVB PCR INFO 0 0:0 000x000@xxHz 000x000@xxHz Off 0 000 0 xxxxxx xxxxxx on OK VBI/TTX Info 00000000 KHz DRXK3926 locked! (0)! 00000 KSymbol Identity 0x03 00-xxx No lock 0 0 MHz 00 IQ normal Video pid Format Input Format Output Format Macrovision Data Error Decoding Error Sync Error Video status Decoder Synchronisation OK Sound more modules..... Debug level: default Debug level: default Debug level: ERROR - Ubi 0 Info Ubi 1 Info PCR Info Module: ac3 Module: alarm Module: appl - Frequency Datarate Modulation Bandwith Level Inversion STV903 locked! (0) Identity 0x30 Roll off xxpct No lock x OK Debug Levels DEBUG LEVEL-TOTAL 171 MODULES (Page 1 of 15) VIDEO INFO AUX OK Video Info Aux Other adjustments 00000000 KHz 00000 KSym 0/0 xxxxxxx xxxxxxx 00dB µV 00,0 dB 0 xxxxxx xxxxxx 0 kbps 0 Hz xxxx xxxx 0/0 0 0/0 xxxxxx OK Tuner 2 Info Colour Frequency Symbolrate Viterbi rate Inversion LNC-Band Level C/N Audio PID Format Stereo Mode Bitrate Sampling Frequency PCM Sync SPDIF Sync PCM/SPDIF Sync Errors Parser Underflow PCM/SPDIF Underflow Audio state AUDIO INFO 0 0:0 000x000@xxHz 000x000@xxHz Off 0 000 0 xxxxxx xxxxxx xxxxxx on 0.000000 MBit/s OK Audio Info Video TUNER 2 INFO - DVBC Video pid Format Input Format Output Format Macrovision Data Error Decoding Error Sync Error Video status CI status Decoder Synchronisation Bitrate OK Video Info Main VIDEO INFO MAIN Tuner 1 Info Option bytes Other adjustments Exceptions abhängig von der Ausstattung des TV's, des Softwarestandes und vom gewählten Sender können Menüpunkte entfallen oder verändert sein dependent on the integrated features of TV set, of software version and on the selected station menu points can be cancelled or be changed TUNER 1 INFO - DVBS/S2 OK Debug Levels Option bytes System data Servicemenü Seite 2 / Service Menu Page 2 35 Option bytes Video 1 0 1 0 1 0 0 1 Bit 3 Bit 2 Bit 1 Bit 0 0 1 Bit 4 0 1 Bit 5 0 1 Bit 6 Option byte 11 0 0 1 Bit 2 0 1 Bit 3 Option byte 1 Option bytes Video 0 1 Bit 7 0 0 1 Bit 5 0 1 Bit 6 0 Sound 0 1 Bit 7 OK Satellite Frequency Polarisation Symbol rate SSU TRANSPONDER yes RS232 DVB Info Digital Link HD functionality ASTRA 19,2°E 00000MHz xxxxxxxxx 00000 SSU transponder DVB Digital Link HD functionality RS232 DR DR EPG EPG Miscellaneous Miscellaneous abhängig von der Ausstattung des TV's, des Softwarestandes und vom gewählten Sender können Menüpunkte entfallen oder verändert sein dependent on the integrated features of TV set, of software version and on the selected station menu points can be cancelled or be changed no DVB Sound Delete prog.-list Other adjustments Other adjustments Option byte 11 Colour Fundamental volume radio 1 Bit 4 0 Fundamental volume TV AC3 1 0 0 1 Bit 1 Bit 0 Option byte 0 Exceptions Fundamental volume TV PCM Option byte 1 0 VCXO Other adjustments Debug Levels Option byte 0 Option bytes System data Other adjustments Option byte 2 Colour Servicemenü Seite 3 / Service Menu Page 3 System data 36 (5) ein A 18 Kontrast 3 2 1 16 OK Premium-Mode Shop Mode OK Sprache normal 11 intensiv Farbtemperatur aus Ton 1 3 Helligkeit soft ein aus mittel 99 30 aus hoch ein aus Demo ein Image + Active Auto-Dimmung - Raum OK 0 50 aus ein Loudness aus ein Balance 0ms aus aus aus 4:3 PC ein Auto-Format 16:9 Zoom 4:3 TV ein OK weitere ... 4:3 Zoom Bildformat ein autom. Spracherkennung Ton-Bild-Synchronisation Filmglättung (DMM) 0 16:9 TV 16:9 PC Auto-Dimmung-Video (VBD+) 0 Lautstärkeanpassung für aktuellen Sender weitere ... Max. Einschaltlautstärke 0 Tiefen persönlicher Filmklang Höhen 05 min (0 - 60) OK CA - Modul CA - Modul : NDS KDG CI + Modul Einstellungen Aufnahme-Nachlaufzeit Kopfh.-Lautst. 00 min (0 - 15) Aufnahme-Vorlaufzeit Anschlüsse Digitale Rauschreduktion (DNC) Ton 1+2 Schärfe Ton 2 0 Tiefen persönlicher Musikklang Kopieren Max. Lautstärke Höhen Pop Vormerkung AV-Ausgangston 0 Klassik Tonanpassung Von Hand OK Aufnahme xx dd.mm hh:mm-hh.mm ---------- ------------------------ Über Teletext aus OK Timerübersicht Aufnahme abhängig von der Ausstattung des TV's, des Softwarestandes und vom gewählten Sender können Menüpunkte entfallen oder verändert sein Timerübersicht Lautst.-Automatik Über EPG Aufnahme-Assistent Farbintensität Ton Voreinstellungen (HD digital) persönliche Werte (HD digital) (4) Hörmodus Bildanpassung optimal 3D Modus 3D- >2D Home Mode aus 2D- >3D 3D Bild TV-Menü Seite 1 37 OK OK OK OK ja 100 Hz nein ja Subwoofer anschließen OK nein TV-Lautsprecher nur bei vollständig OK Externer Lautsprecher 100 Hz Centerlautsprecher anschließen nein Surroundlautsprecher anschließen Externe Lautsprecher 100 Hz OK OK 3,0m Abstand zum Centerlautsprecher 3,0m Abstand zum Subwoofer 2,0m OK Übertragung starten 0dB 0dB 0° 180° Subwoofer-Phase OK Rauschen rotiert 0dB 0dB 0dB 0dB * nicht bei AVS nein ja nein nein ja zu AV zu AVS Sonstiges CA - Modul zu HDMI2/DVI HDMI3 HDMI2 HDMI1 PC IN AVS AV VIDEO zu HDMI3/DVI zu PC IN SPIEL-MODUS SETZEN FÜR EINGÄNGE ... OK Spielemodus Set Top Box Digitalen Audioeingang zuordnen zu HDMI1/DVI TV-Ferneinschaltung per Digital Link anderes Gerät kein Gerät DVD-Spieler DVD-Recorder Videorecorder Sat-Receiver Digital Link Plus Decoder Lautsprecherpegel anpassen 0 dB nur bei vollständig Abstand zum rechten Surroundlautsprecher OK Abstand zum linken Surroundlautsprecher 4,0m Abstand zum rechten Frontlautsprecher OK 2,0m OK 4,0m Abstand zum linken Frontlautsprecher OK vollständig nur Anschlüsse nur Entfernungen nur Pegel Einrichtung/Änderung des Lautsprechersystems OK Frontlautsprecher anschließen ja OK SIGNALART AN AVx OK Autom.-VHS/SVHS VHS/8mm SVHS/Hi8 Automatik-FBAS/YC FBAS YC RGB* OK An AVS Gerät am Anschl. AV Einstellungen Schaltspannung an AV zulassen AV-NORM AN AVx OK OK An AV Signalart Automatisch PAL SECAM NTSC NTSC-V PAL60 PAL-M PAL-N An AVS An AV AV-Norm AV-Anschluss-Einstellungen Anschlüsse abhängig von der Ausstattung des TV's, des Softwarestandes und vom gewählten Sender können Menüpunkte entfallen oder verändert sein Lautsprechersystem Einrichtung/Änderung Rücksetzen auf Werkswerte OK Antenne DVB Aufnahme TV-Lautsprecher nein OK Surround-Verstärker OK TV-Lautspr. als Center-Lautspr. Stereoverstärker Verstärkertyp Dolby Digital MPEG dts Stereo (PCM) Tonformate OK nein digitale Tonübertragung ja OK Ton TV-Lautsprecher Lautsprechersystem Hifi/AV-Verstärker Soundprojektor Hifi/AV-Verstärker oder TV-Lautsprecher (umschaltbar) Soundprojektor oder TV-Lautsprecher (umschaltbar) Tonwiedergabe über ... OK Tonkomponenten Bild TV-Menü Seite 2 38 OK ja (5V) Satellitenanlage - Folgende Anlage ist eingestellt: OK 2 | 3 | 4 | 5 | 6 | 7 | 8 1400 | 1516 | 1632 | ..... ja * nicht für alle Anlagen Satellit 1 Satellit 2 9750 MHz 9750 MHz LNC-Frequenzen OK Low Band 9750 MHz Satellit x auswählen ASTRA1 19,2°E ASTRA2 28,2° - --------------------------- Satelliten-Auswahl Manuelle Anmeldung (für Buchse x) 1 1284 nein 000 9750 MHz 10600 MHz 9750 MHz 10600 MHz Satellit 1 Satellit 2 9750 MHz 10600 MHz 9750 MHz 10600 MHz OK Satellit 1 Low Band Satellit 1 High Band Satellit 2 Low Band Satellit 2 High Band LNC-Frequenzen OK Satellit x auswählen ASTRA1 19,2°E ASTRA2 28,2° - --------------------------- Satelliten-Auswahl Satellit 1 Satellit 2 OK Satellit 1 Low Band Satellit 1 High Band Satellit 2 Low Band Satellit 2 High Band : ASTRA1 19,2°E ASTRA2 28,2° - Satellit x auswählen 2 | kein ein Position | aus Option | aus Satelliten-Anlage auswählen Einzel-Satellit 2 Satelliten an 22 kHz Switchbox 2 Satelliten an Tonburst-Schalter Max. 4 Satelliten an DiSEqC-Multischalter andere Gemeinschaftsanlage LNC-Frequenzen OK 1 aus Band Position OK AV-Anschluss-Einstellungen Anschlüsse Übertragungskanal Übertragungsfrequenz PIN-Schutz * PIN festlegen/ändern * OK Satellit 1 Low Band Satellit 1 High Band Satellit 2 Low Band * Satellit 2 High Band * LNC-Frequenzen OK ----------------------------------------------------- Satelliten-Auswahl Satellit 1 Satellit 2 Satellit 3 Satellit 4 Satellit x auswählen --------------------------- * ASTRA1 19,2°E ASTRA2 28,2° - OK Wiederholrate Steuerspannung 13/18V 22kHz Signal Tonburst Satelliten-Auswahl 9750 MHz 10600 MHz 9750 MHz 10600 MHz Anzahl der Satelliten-Antennenleitungen Aufnahme OK OK Low Band High Band 9750 MHz 10600 MHz LNC-Frequenzen OK ja (mit 0/22 kHz) OK ASTRA1 19,2°E ASTRA2 28,2° - High Band nein Sonstiges CA - Modul Einzel-Satellit auswählen OK Einstellungen abhängig von der Ausstattung des TV's, des Softwarestandes und vom gewählten Sender können Menüpunkte entfallen oder verändert sein Nur eine, angeschlossen an Buchse ANT SAT Zwei, angeschlossen an Buchsen ANT SAT und ANT SAT2 Antenne DVB-S OK OK Antenne DVB Satellit 1 Satellit 2 OK : SMART DPA-51 TECHNIROUTER-51 : Sonstige Ton ANTENNENASSISTENT OK Antenne DVB-S DiSEqC-Einkabel-Gemeinschaftsanlage auswählen nein (0V) Versorgungsspannung OK Antenne DVB-T Tonkomponenten Bild TV-Menü Seite 3 39 I NL OK speichern nein Kanalsuche 047.0 MHz keine 6875 6900 64 keine nein Kanalsuche xxxxx xxxxx speichern Signalquelle Kanal Frequenz Bandbreite Name C/N Level BER verschlüsselte Sender Suchverfahren Symbolrate 1 (DVB-S) Symbolrate 2 (DVB.S) SUCHEINSTELLUNG ÄNDERN verschlüsselte Sender Suchverfahren Startfrequenz Netzwerk-ID Symbolrate 1 (DVB-C) Symbolrate 2 (DVB-C) QAM-Modulation 1 QAM-Modulation 2 SUCHEINSTELLUNG ÄNDERN nein Kanalsuche SUCHEINSTELLUNG ÄNDERN SECAM-BG SECAM-L SECAM-DK NTSC NTSC-V PAL60 PAL-M verschlüsselte Sender Suchverfahren I | L | D/K | M | N PAL | SECAM | NTSC-V | PAL60 Sxx OK OK OK nicht im Radiomode Suchlauf Kabel analog Exx xxx.xx MHz -------B/G Autom. nicht im Radiomode Signalquelle Kanal Frequenz Name TV-Norm Farbnorm MANUELL EINSTELLEN Antenne/Kabel (analog) DVB-T DVB-C Satellit 1: ------------------Satellit 2: ------------------Satellit 3: ------------------Satellit 4: ------------------- Signalquelle Italien Niederlande - Automatik-BG Automatik-I Automatik-L Automatik-DK PAL-BG PAL-I PAL-L PAL-DK Österreich Belgien - A B nicht im Radiomode TV-/Farbnorm OK Suche/Aktualisierung starten Gerätestandort OK Sucheinstellungen ändern Suchassistent Zeitdienste Sender Kindersicherung Ton Bild TV-Menü Seite 4 xx xx x E-x Suchlauf DVB-T Exx xxx.xx MHz 7 MHz ja Frequenzsuche 6MHz 8 MHz 6 MHz 1 2 3 4 5 6 7 8 9 10 11 12 13 14 15 16 17 18 19 20 21 22 23 24 speichern xx xx x E-x Suchlauf DVB-C xxx.xx MHz 64 6900 verschieben Sprache sperren speichern xx xx x E-x DVB-S --------------horiz/low xxx.xx MHz xxxxx Suchlauf horiz/high | vert/low | vert/high Favoritenliste umbenennen Sender verschieben alphabetisch / numerisch sortieren Favoritenliste leeren ------------------------------------------------------------------------------------- nächste Favoritenliste 1 2 3 4 5 6 7 8 9 10 11 12 Sender von Favoritenliste erlauben Senderliste automatisch aktualisieren Sonstiges CA - Modul nächste Favoritenliste Favoritenliste leeren ----------------------------- Signalquelle Satellit Band Frequenz Symbolrate Name C/N Level BER 1 2 3 4 0 HDMI3 HDMI2 HDMI1 VGA AVS AV Video Alle Sender OK Einstellungen Energieeffizienz Favoriten auswählen/ändern 128 | 256 | 16 | 32 ------------------------------------------------------------------------------------- Anschlüsse Sender wiederherstellen löschen ------------------------------------------------------------------------------------- SENDER ÄNDERN OK Sender ändern Signalquelle Frequenz QAM-Modulation Symbolrate Name C/N Level BER OK Manuell einstellen 128 | 256 | 16 | 32 16 | 32 | 64 | 128 | 256 ja Frequenzsuche ja Frequenzsuche Aufnahme abhängig von der Ausstattung des TV's, des Softwarestandes und vom gewählten Sender können Menüpunkte entfallen oder verändert sein 40 Geheimnummer nein nein ja täglich ja nein ja nein ja nein ja 1 2 3 4 5 6 7 8 9 10 11 12 alle entsperren alle sperren ------------------------------------------------------------------------------------- 13 14 15 16 17 18 19 20 21 22 23 24 ------------------------------------------------------------------------------------- Aufnahme ja nein 0000 ja Alarm Sa deaktivieren nein TV 30 Untertitel (DVB) OK Sprache D Language GB Langue F - MENÜ-SPRACHE OK Kieli Jezik Jazyk - Sprache FIN SLO SK OK Ersatzsprache Audio (DVB) Alarmlautstärke gewünschte Sprache Menü-Sprache Radio Alarmquelle rücksetzen ja Alarm So Anschlüsse OK Home Mode OK Premium-Mode Energieeffizienz Einstellungen OK Shop Mode Sonstiges CA - Modul abhängig von der Ausstattung des TV's, des Softwarestandes und vom gewählten Sender können Menüpunkte entfallen oder verändert sein Geheimnummer ändern nein Alarm Mo - Fr ja, gesperrt für Personen unter xx Jahren Altersabhängig sperren nein Einmaliger Alarm KINDERSICHERUNG FÜR EINZELNE SENDER OK einzelne Sender sperren Einmalig ausschalten ab jetzt alle Sender sperren OK ???? C Täglich ausschalten Zeitdienste Sender Kindersicherung Ton Bild TV-Menü Seite 5 41 7s Einblenddauer hh:mm:ss Uhrzeit Zeit und Datum Einblendungen unten oben Einblendposition +xx Stunde(n) OK ja Lautstärke nein ja nein Automatische Info dd.mm Beginn Sommerzeit dd.mm.yyyy Datum OK Software - Update starten über Internet Menü vom CA-Modul per USB - Speichermedium Abweichung von Weltzeit Aufnahme Anschlüsse Sprache Energieeffizienz Einstellungen Sonstiges CA - Modul abhängig von der Ausstattung des TV's; des Softwarestandes und vom gewählten Sender können Menüpunkte entfallen oder verändert sein nein aus ein Permanente Zeiteinblendung dd.mm Ende Sommerzeit ja Westeuropäisch Polnisch ja nein Autom. Hinweis nach Umschaltung auf HDMI OK ausführen OK ausführen Griechisch Media Text zuerst Standard Standard - Teletext zuerst DVB-Zeichensatz OK Untertitel ein, für Hörgeschädigte ein Untertitel ein aus Audio-Kommentar aus über neue Software informieren Untertitel aus Untertitelmodus ein ausführen OK CA-Modul: ------- DVB-Einstellungen HbbTV-Modus Startverhalten von HbbTV-Sendern Funktion d. TEXT-Taste Integr. Festplatte prüfen Integr. Festplatte formatieren Ext. Festplatte format. Zeitdienste Kindersicherung Sender Software-Update Ton Bild TV-Menü Seite 6 42 optimale Größe zügig Bilddarstellung Fotoeinstellungen langsam Originalauflösung mittel Bildwechsel Medien-Menü ja übernehmen Aktuelle Einstellungen OK OK OK übernehmen ein, nur drahtgebunden Netzwerkzugang Netzwerkeinstellungen aus OK ein, drahtlos + Bridge-Funktion alle abwechselnd nein Bildeinstellungen übernehmen ein, nur drahtlos ein MENU Fotos automatisch drehen ASSIST Fotoinfo aus oder Bildübergänge MEDIA OK A...Z -> a...z Gerätename Proxyserver verwenden Proxy Server Name Proxy Port Nummer Proxy Server Anmeldung Benutzername Passwort * xxxxxxxx nein xxxxx 000 nein ja ja Rücksetzen auf Werkswerte SONSTIGE NETZWERKEINSTELLUNGEN OK sonstige ... Toneinstellungen ..... Musikeinstellungen Apple iPad (ipad-2.local, 47AB 4851 usw. OK Zugriffserlaubnis für Apps Bildeinstellungen ..... Videoeinstellungen abhängig von der Ausstattung des TV's, des Softwarestandes und vom gewählten Sender können Menüpunkte entfallen oder verändert sein 43 links unten B Sender ein aus sehr hoch hoch C ein nein ja Sortierung 1 2 3 4 0 5 6 7 8 9 10 11 12 13 14 15 16 ------------------------------------------------------------------------------------- OK ------------------------------------------------------------------------------ 0 1 2 3 4 5 6 7 8 9 10 mit Titelbildern ohne Titelbilder nein ja 10 min (01 - 15) ein aus +-30min (00 -60) 11 -------12 -------13 -------14 -------15 -------16 -------17 -------18 -------19 -------20 -------21 -------22 -------- xxx xxx xxx xxx xxx xxx xxx xxx xxx xxx xxx xxx xxx xxx xxx xxx xxx nein ja nein ja ---------------------------------------------- Türkisch 4:3 Integrated hard disk Remote TV´s . . . OK Polnisch 16:9 Speichermedium wählen Griechisch DR+StreamingEinstellungen Russisch Seite übernehmen Standard ------------------------------------ Einstellungen Zeichensatz PERSÖNLICHE TEXT-SEITEN OK OK Aufnahme-Assistent Persönliche Text-Seiten OK Aufdecken MENU UNTERTITELSEITEN OK Untertitelseiten OK Neue Nachr. TEXT Untertitel im DR-Dauerbetrieb Entschlüsselung im aufzeichnen DR-Dauerbetrieb xxx xxx xxx xxx xxx xxx xxx xxx xxx xxx xxx VORSCHAUSEITEN OK Vorschauseiten Senderauswahl alphabetisch/numerisch sortieren ----------------------------- HDMI3 HDMI2 HDMI1 PC IN AVS AV VIDEO SENDERAUSWAHL wie in Senderübersicht zeitlich Bei Vormerkung TV einschalten Teletext-Menü Ansicht DR-Archiv Über ausgeblendete Bereiche informieren Sprungweite Smart Jump Serien-Aufnahmetoleranz mittel standard DR-Dauerbetrieb Aufnahmequalität rechts unten Zeitdienste rechts oben iPIP Funktionalität MENU Standard PIP Position PIP aus Datenerfassung MENU nur diesen markieren ------------------------------------------------------------------------------------- EPG Digital Recorder Menü A Ton Radio-Menü links oben Kleinbild Typ 13 14 15 16 17 18 19 20 21 22 23 24 Favoriten markieren alle markieren ------------------------------------------------------------------------------------- PIP-Menü 1 2 3 4 5 6 7 8 9 10 11 12 SENDERAUSWAHL OK Senderauswahl EPG-Menü abhängig von der Ausstattung des TV's, des Softwarestandes und vom gewählten Sender können Menüpunkte entfallen oder verändert sein 44 + PIP-Modus (Standard) INFO oder END TV-Modus OK + TV-Modus / RadioModus TV-Modus / iPIP INFO TEXT Funktionstasten Detailinfo (Teletext) Sender anspielen Hauptbild / PIP tauschen Hauptbild / PIP aktiv + INFO oder END Sortierung ändern löschen/entschlüsseln bearbeiten/schützen Persönliche Text-Seiten Radio-Modus EPG-Modus Lesezeichen Wiederholen / Wiederholen aus Untertitel TELETEXT-FUNKTIONEN Lesezeichen Programmvorschau (Teletext) Sender wiederherstellen verschieben löschen Favoriten ändern Sender anspielen Senderübersicht Programmvorschau (Teletext) DR-Play Programmvorschau wenn verfügbar wenn verfügbar Detailinfo (Teletext) Standbild PIP Detailinfo PROGRAMMINFO aus xxxxxxxxxxx UNTERTITEL stereo Dolby ........ SPRACHE/TON Sortierung ändern Sender ändern Sender anspielen Favoriten Detailinfo PROGRAMMINFO Programmvorschau Persönliche Text-Seiten letztes Programm Untertitel TELETEXT-FUNKTIONEN DR-Archiv Letzter Sender Bildschirm aus/ein Zu Datum, ..., Themen Aufnahme Sortierung ändern nächste Favoritenliste Favoritenliste leeren Eintrag entschlüsseln Eintrag löschen alle Einträge markieren umbenennen Löschschutz setzen/entfernen Kindersicherung abhängig von der Ausstattung des TV's, des Softwarestandes und vom gewählten Sender können Menüpunkte entfallen oder verändert sein Internetradio Tagesschau Media Net Video podcasts 45 R + TV MENU TV no AV OK OK MENU Buzz by Genre by Location Favourites Local Germany My Added Stations New Stations Popular Stations Recommended Stations INTERNETRADIO OK Playtime : XX : XX Recent Activity Genres Location XX . XX / XX . XX XXXXXX XXXXXXX XX : XX XXXXXXXXX XXXXXXX RADIO DIGITAL DVB radio Artist : DR+Streaming TV HDMI1 Bildformat +/- Station ? MENU HDMI3 DKULTUR DLF DRadio Wissen Bayern 1 AUDIO DIGITAL IN AUDIO IN HDMI3 HDMI2 HDMI1 AVS AV STATION LIST 1 2 3 4 DR archive Radio menu Index Internet radio HDMI2 Media Net Media Home DVB radio MEDIA OK MEDIA PORTAL or PC IN ASSIST AVS Contrast Service 5 6 7 8 9 10 11 12 13 14 15 16 OK Bayern 2 BAYERN 3 BR-KLASSIK B5- aktuell BAYERN plus on 3- radio BR Verkehr B5 plus hr 1 hr 2 hr 3 hr 4 OK OK MENU MENU Menu language Energy efficiency Integrated features Repeat initial installation * Access code Audio commentary Auto dimming - Room INDEX OK MENU Music Other Sources Party Mode XXXXXXXXXXX xxxxxx xxxxxx xxxxxx xxxxxx xxxxxx : : Mediacenter FRITZ! Mediaser ver Test-PC: Schulung OK NAS-CS Twonky Media Mediacenter NAS-CS: Ready NAS MEDIA HOME All Topics Favourites Recommendations MEDIA NET All Media menu Service menu Digital recorder menu MENU within 1s Mediacenter FP-Twonky dependent on the integrated features of TV set, of soft ware version and on the selected station menu points can be cancelled or be changed 4:3 TV 4:3 PC 4:3 Zoom 16:9 TV 16:9 PC 16:9 Zoom 18 Brightness specific Standby-mode HINT OK OK 11 Volume RADIO DIGITAL Internet radio Radio menu Radio Video 50 AV selection TV menu MENU Radio Operating mode - M Overview D on ma ix 46 optimal 3D mode 3D- >2D Premium mode Presettings (HD digital) on (5) A 3 1 16 Shop mode OK 11 normal on soft Colour temperature off Timer list Sound 1 3 99 off OK 0 on Demo off on off on Image + Active Auto dimming - Room Auto dimming - Video (VBD+) off medium high more ... 30 0 Bass off 0 on Balance 0ms on OK more ... 4:3 TV off 4:3 PC on Auto format off 4:3 Zoom Picture format on Auto speech detection Sound-picture synchronisation 16:9 TV 16:9 PC 16:9 Zoom off OK CA module CA module: NDS KDG CI+ Modul Film quality improvement (DMM) Volume adjustment for current station Treble 50 Headphone volume Loudness Settings 05 min (0 - 60) Post-record time Custom film sound 00 min (0 - 15) max. switch on volume 0 Custom music sound Digital Noise Control (DNC) Sound 1+2 Sharpness Sound 2 0 Bass Pop Copy Maximum volume Treble Classical Memo AV output signal 0 Speech Brightness off Sound adjustment Manual OK Recording xx dd.mm hh:mm-hh.mm ---------- ------------------------ OK Pre-record time Connections dependent on the integrated features of TV set, of soft ware version and on the selected station menu points can be cancelled or be changed Recording TIMER LIST Via Teletext Auto volume Via EPG Recording wizard intensive Colur intensity 2 Sound Personal settings (HD digital) 18 Contrast (4) Soundmode Picture adjustment Home Mode off 2D- >3D 3D Picture TV Menu Page 1 47 OK OK OK OK OK OK TV speakers no yes Connect subwoofer no OK Connect centre speaker no complete only OK External speaker 100 Hz yes 100 Hz Connect surround speakers OK OK 3,0m Distance to centre speaker 3,0m Distance to Subwoofer 2,0m Distance to right surround speaker OK Distance to left surround speaker 4,0m Distance to right front speaker 4,0m Distance to left front speaker OK Complete Connections onlye Distances only Levels only 2,0m External speakers 100 Hz OK OK complete only OK Start transmission Digital Link Plus 0dB 0dB 0dB 0dB 0dB 0dB 0° 180° Subwoofer phase OK Noise rotates 0 dB no no no to AV yes to AVS Remote TV switch on via Digital Link Sat receiver Decoder to HDMI2/DVI to HDMI3/DVI to PC IN SET GAMING MODE FOR INPUTS ... HDMI3 HDMI2 HDMI1 PC IN AVS AV VIDEO OK Gaming mode Miscellaneous CA module Device at conn. AV Assign digital audio input Video recorder yes to HDMI1/DVI SetTop Box other equipment no device DVD player DVD recorder *not for AVS SIGNAL TYPE AT AVx OK At AVS Autom.-VHS/SVHS VHS/8mm SVHS/Hi8 Automatic CVBS/YC CVBS YC RGB* OK To AV AV STANDARD AT AVx OK OK Settings Allow switching voltage at AV Automatic PAL SECAM NTSC NTSC-V PAL60 PAL-M PAL-N At AVS To AV AV standard Signal type Connections AV connecting settings Adjust speaker level Reset to factory settings Recording dependent on the integrated features of TV set, of soft ware version and on the selected station menu points can be cancelled or be changed Configuration/modification of speaker system OK Configuration/modification Speaker system OK Antenna DVB Connect front speakers yes OK Sound TV speakers no OK Surround amplifier no TV loudsp. as centre speaker Stereo amplifier Type of amplifier Dolby Digital MPEG dts Stereo (PCM) Sound formats OK yes Digital audio transmission TV speaker Speaker system Hifi/AV amplifier Sound projector Hifi/AV amplifier or TV speakers (switchable) Sound projector or TV speakers (switchable) Sound playback via ... OK Sound components Picture TV Menu Page 2 48 OK yes (5V) Satellite system OK *not for all systems available Satellite 1 Satellite 2 9750 MHz 9750 MHz LNB frequencies 2 | 3 | 4 | 5 | 6 | 7 | 8 1400 | 1516 | 1632 | ..... yes OK Low band 9750 MHz Select satellite x ASTRA1 19,2°E ASTRA2 28,2° - --------------------------- Satellite selection Manual registration (for socket x) 1 1284 no 000 9750 MHz 10600 MHz 9750 MHz 10600 MHz Satellite 1 Satellite 2 9750 MHz 10600 MHz 9750 MHz 10600 MHz OK Satellite 1 Low Band Satellite 1 High Band Satellite 2 Low Band Satellite 2 High Band LNB frequencies OK Select satellite x ASTRA1 19,2°E ASTRA2 28,2° - --------------------------- Satellite selection Satellite 1 Satellite 2 OK Satellite 1 Low Band Satellite 1 High Band Satellite 2 Low Band Satellite 2 High Band : ASTRA1 19,2°E ASTRA2 28,2° - Select satellite x 2 | none on Position | off Option | off Select satellite installation Single satellite 2 satellites on 22kHz switchbox 2 satellites in toneburst switch Ma. 4 satellites on DiSEqC multiswitch other comunal installation OK Settings LNB frequencies OK 1 off Band Position OK AV connecting settings Connections Transmission channel Transmission frequency PIN protection * Define/change PIN * OK Satellite 1 Low Band Satellite 1 High Band Satellite 2 Low Band * Satellite 2 High Band * LNB frequencies OK ----------------------------------------------------- Satellite selection Satellite 1 Satellite 2 Satellite 3 Satellite 4 Select satellite x --------------------------- * ASTRA1 19,2°E ASTRA2 28,2° - OK Repeat rate Control voltage 13/18V 22kHz Signal Toneburst Satellite selection 9750 MHz 10600 MHz 9750 MHz 10600 MHz Number of satellite antenna cables Recording OK Low band High band 9750 MHz 10600 MHz LNB frequencies OK yes (with 0/22 kHz) High band no OK ASTRA1 19,2°E ASTRA2 28,2° - Select single satellite OK Miscellaneous CA module dependent on the integrated features of TV set, of soft ware version and on the selected station menu points can be cancelled or be changed Only one, connected to the ANT SAT socket Two, connected to the ANT SAT and ANT SAT2 socket Antenna DVB-S OK Antenna DVB Satellite 1 Satellite 2 OK : SMART DPA-51 TECHNIROUTER-51 : Other Sound The following system has been set: ANTENNA WIZARD OK Antenna DVB-S Select DiSEqC single cable communal installation no (0V) Supply voltage OK Antenna DVB-T Sound components Picture TV Menu Page 3 49 I NL OK Store SECAM-BG SECAM-L SECAM-DK NTSC NTSC-V PAL60 PAL-M no Channel search 047.0 MHz none 6875 6900 64 none Store xx xx x E-x DVB-T Exx xxx.xx MHz 7 MHz Search OK Change stations 1 2 3 4 5 6 7 8 9 10 11 12 Store xx xx x E-x DVB-C xxx.xx MHz 64 6900 Move Search Restore station Delete ------------------------------------------------------------------------------------- 13 14 15 16 17 18 19 20 21 22 23 24 Language 128 | 256 | 16 | 32 Block Store xx xx x E-x DVB-S --------------horiz/low xxx.xx MHz xxxxx Move station Sort alphabetically/ numerically horiz/high | vert/low | vert/high Rename favourite list Next favourite list Claer favourite list ------------------------------------------------------------------------------------- Search 1 2 3 4 5 6 7 8 9 10 11 12 Stations of My List Allow Next favourite list Clear favourite list ----------------------------- Signal source Satellite Band Frequency Symbol rate Name C/N Level BER 1 2 3 4 0 HDMI3 HDMI2 HDMI1 VGA AVS AV Video All stations OK Miscellaneous CA module Update station list automatically Energy efficiency Settings Select/change favourites ------------------------------------------------------------------------------------- Connections CHANGE STATIONS Signal source Frequency QAM modulation Symbol rate Name C/N Level BER OK Manual adjustment 8 MHz 6 MHz 128 | 256 | 16 | 32 16 | 32 | 64 | 128 | 256 yes Frequency search yes no Channel search Frequency search xxxxx xxxxx Signal source Channel Frequency Bandwidth Name C/N Level BER Scrambled stations Search method Symbol rate 1 (DVB-S) Symbol rate 2 (DVB.S) CHANGE SEARCH SETTINGS Scrambled stations Search method Start frequency Network ID Symbol rate 1 (DVB-C) Symbol rate 2 (DVB-C) QAM modulation 1 QAM modulation 2 Recording dependent on the integrated features of TV set, of soft ware version and on the selected station menu points can be cancelled or be changed yes no Channel search Frequency search CHANGE SEARCH SETTINGS Scrambled stations Search method CHANGE SEARCH SETTINGS I | L | D/K | M | N PAL | SECAM | NTSC-V | PAL60 Sxx OK OK OK not for radio mode Search Cable (analogue) Exx xxx.xx MHz -------B/G Autom. not for radio mode available Signal source Channel Frequency Name TV stand. Col. standard MANUAL ADJUSTMENT Antenna/cable (analogue) DVB-T DVB-C Satellite 1: ------------------Satellite 2: ------------------Satellite 3: ------------------Satellite 4: ------------------- Signal source Italy Netherlands - Automatic BG Automatic II Automatic LL Automatic DK PAL-BG PAL-I PAL-L PAL-DK Austria Belgium - A B not for radio mode TV/colour standard OK Start search/update Location of TV set OK Change search settings Search wizard Timer functions Stations Parental lock Sound Picture TV Menu Page 4 50 no no yes Daily no yes no no 1 2 3 4 5 6 7 8 9 10 11 12 Lock all Unlock all ------------------------------------------------------------------------------------- yes, at 00:00 13 14 15 16 17 18 19 20 21 22 23 24 ------------------------------------------------------------------------------------- Recording yes, at 00:00 no 0000 Deactivate no TV OK Sprache D Language GB Langue F - MENU LANGUAGE OK Subtitle (DVB) 30 Kieli Jezik Jazyk - Settings Language FIN SLO SK OK Home Mode Shop mode Miscellaneous CA module Premium mode Energy efficiency Alternative language Audio (DVB) Wake up signal volume Favoured language Menu language Reset Radio Wake up with yes, at 00:00 Wake up Sun yes, at 00:00 Wake up Sat Connections dependent on the integrated features of TV set, of soft ware version and on the selected station menu points can be cancelled or be changed Change access code no Wake up Mon-Fri yes, no admission to persons under xx years PARENTAL LOCK FOR SINGLE STATIONS OK no One-time alarm Age-related lock yes, at 00:00 Switch off daily Lock single stations yes, at 00:00 Switch off once Immediately Lock all stations OK Access code ???? Timer functions Stations Parental lock Sound Picture TV Menu Page 5 x.x.x.x 51 7 sec bottom top no no yes no Automatic info dd.mm on off dd.mm on Permanent clock display off Polish Standard no Greek Standard teletext first Automatic hint after switch to HDMI yes Connections Feature of the TEXT key Subtitle on, preferred for impaired hearing Western European DVB character set OK End of daylight-saving time Subtitle on off Beginning of daylight-saving time yes on Audio commentary Inform about new software dd.mm.yyyy yes Subtitle off Subtitle mode Via the internet On-screen display time On-screen display position Volume +xx hour(s) Datum OK start software update Deviation from Universal Time hh:mm:ss Time OK Menu from CA module Via USB storage device OK On-screen displays Time and date Software update Recording Energy efficiency Miscellaneous CA module MediaText first OK Activate OK Activate OK Activate Check integrated hard disk Format integrated hard disk Format external hard disk Language Settings dependent on the integrated features of TV set, of soft ware version and on the selected station menu points can be cancelled or be changed CA module: ......... DVB settings Hbb TV mode Start behaviour of Hbb TV stations Timer functions Stations Parental lock Sound Picture TV Menu Page 6 ATION tation manually arch rength xx% rength xx% rength xx% URATION 0.0.0 0.0.0 0.0.0 0.0.0 0.0.0 IGURATION UPnP IGURATION TER ED) ter D 52 Optimum size Fast Picture display Photo settings Slow Original resolution Medium Picture change Media menu OK or ASSIST MENU off yes OK Adopt OK Adopt on ,wireless + bridge function all alternating no on ,wireless only on Adopt OK off current settings OK on ,wired only Network access Network settings A..Z -> a..z Host name Use proxy server Proxy server name Proxy port number Proxy server requires login User name Password * xxxxxxxx no xxxxx 000 no OK Reset to factory settings OTHER NETWORK SETTINGS OK Other Tone settings . . . . . . Music settings yes yes Apple iPad (ipad-2. local, 47AB 4851 usw. OK Access permission for apps Jump distance . . . . . . Video settings dependent on the integrated features of TV set, of soft ware version and on the selected station menu points can be cancelled or be changed Picture crossover Photo info Rotate photos automatically Picture settings MEDIA OK OK 53 Mark favourites Mark all ------------------------------------------------------------------------------------- bottom left B A Timer functions C iPIP bottom right Standard PIP upper right off MENU Functions on no yes ----------------------------- 0 1 2 3 4 on off very high high medium With cover pictures standard yes Without cover pictures no 5 6 7 8 9 10 11 12 13 14 15 16 ------------------------------------------------------------------------------------- 10 min (01 - 15) OK ------------------------------------------------------------------------------ 0 1 2 3 4 5 6 7 8 9 10 xxx xxx xxx xxx xxx xxx xxx xxx xxx xxx xxx PREVIEW PAGES OK Preview pages Station selection Teletext menu 11 -------12 -------13 -------14 -------15 -------16 -------17 -------18 -------19 -------20 -------21 -------22 -------- xxx xxx xxx xxx xxx xxx xxx xxx xxx xxx xxx xxx ---------------------------------------------- Russian Adopt page xxx xxx xxx xxx xxx Standard ------------------------------------ PERSONAL TEXT PAGES OK OK Greek Polish Settings Character set Reveal wizard Recording Personal text pages OK Reveal MENU SUB-TITLES PAGES OK Sub-titles pages OK Newsflash TEXT Turkish on +-30min (00 -60) no yes no yes Remote TV s . . . OK Integrated hard disk OK OK dependent on the integrated features of TV set, of soft ware version and on the selected station menu points can be cancelled or be changed off Descrambling at Record subtitles at Smart jump Serial recording tolerance DR continuous operation DR continuous operation DR+Streaming settings Select memory medium sort alphabetically/numerically HDMI3 HDMI2 HDMI1 PC IN AVS AV VIDEO STATION SELECTION chronologically Sorting corresponding to station list Switch on TV when marked DR continuous operation Recording quality DR archive view Inform about hidden sections Jump distance Digital recorder menu Stations Sound PIP MENU Data capture Mark only this ------------------------------------------------------------------------------------- EPG Position 13 14 15 16 17 18 19 20 21 22 23 24 Radio menu upper left Type PIP menu 1 2 3 4 5 6 7 8 9 10 11 12 STATION SELECTION OK Station selection EPG menu 54 PIP mode (standard) INFO or END + TV mode OK + TV mode / Radio mode TV mode / iPIP INFO TEXT Function keys Personal text pages if available Bookmark Scan stations Personal text pages Last station Subtitles TELETEXT FUNCTIONS Bookmark Programme preview (teletext) Move Restore stations Delete Change favourites Scan stations Station list Programme preview (teletext) Change sorting Delete/descramble Edit/protect Swap main picture / PIP Main picture / PIP active DR play mode Detailed info (Teletext) Programme preview Freeze PIP Detailed info PROGRAMMINFO aus xxxxxxxxxxx SUBTITLES stereo Dolby ........ Sound/language Change sorting Change stations Scan stations if available Detailed info (Teletext) Programme preview Favourites Detailed info PROGRAMMINFO Last station Subtitles TELETEXT FUNCTIONS DR archive Radio mode EPG mode Screen off/on Language/ sound selection Select date, ..., topics Record Change sorting Next favourite list Clear favourites list Descramble entry Delete entry Mark all entries Rename Set delete protection Parental lock dependent on the integrated features of TV set, of soft ware version and on the selected station menu points can be cancelled or be changed 51464 F/G/H/I/J/P/T/U/V/W/Y/Z 84 51464 F/G/H/I/J/P/T/U/V/W/Y/Z 44 51463 F/G/H/I/J/P/T/U/V/W/Y/Z 84 51463 F/G/H/I/J/P/T/U/V/W/Y/Z 44 Art.-Nr. Art. No. Baugruppenübersicht • Components chart Signal Board X 71295 051 051 Basic Board X X X X 71298 052 BAUGRUPPEN • COMPONENTS Connect ID 46 X Connect ID 46 DR+ Connect ID 40 DR+ 050 Connect ID 40 GERÄTE-TYP TV SET TYPE SL155 X 71701 063 71945 063 71249 001 71251 001 Fernbedienung Assist Remote Control Assist 89900 A08 X Festplatte 2.5z 500GB 34123 070 X Modul W-LAN 2.4/5GHz 71306 001 X 080 X X X X Bedieneinheit Control Unit X X X X NACHRÜSTSÄTZE • RETROFIT KIT LCD 3DLE 100 FD Modul DVB-T2 Single X X X X X X X X X 71367 081 Module RJ12/MU/IR-Link X 70493 080 X X X 55 X X X Technische Daten Connect ID 32-46 - 138 - Bedienungsanleitung Technische Daten Allgemeine Daten Typ Connect ID 46 Connect ID 40 Connect ID 32 Artikelnummer 51464xxx 51463xxx 51462xxx Maße für Gerät ohne Fuß (B x H x T) in cm 106,4 x 67,4 x 7,8 93,1 x 59,9 x 7,8 74,7 x 49,4 x 7,7 Gewicht für Gerät ohne Fuß (ca.) in kg 21,9 18,8 13,3 Displaytechnologie Full-HD-LCD mit Edge-LED-Backlight Full-HD-LCD mit Edge-LED-Backlight Bilddiagonale (in cm) / Bildformat 117 / 16:9 101 / 16:9 Auflösung (in Pixel) / Motion Response 1920 x 1080 / 200 1920Hzx 1080 / 200 Hz Kontrastverhältnis (statisch / dynamisch) 6.000 : :11/ 6.000.000 : 1 6.000 : 1 / 6.000.000 178° / 178° Betrachtungswinkel (horizontal / vertikal) Leistungsaufnahme On-Mode max. (W) (Audioleistung 1/8 des Höchstwerts) ohne / mit DR+ Leistungsaufnahme On-Mode Home (W) ohne / mit DR+ Leistungsaufnahme im Stand-by-Betrieb (W) ohne / mit DR+ Leistungsaufnahme bei ausgeschaltetem Gerät (W) 106 / 108 79 / 81 0,37 / 0,37 0 80 / 16:9 178° / 178° 93 / 95 70 / 72 0,37 / 0,37 0 Umgebungstemperatur (Celsius) 5° - 35° 5° – 35° Relative Luftfeuchte (nicht kondensierend) 20 - 80% 20 – 80% 78 / 81 62 / 64 0,37 / 0,37 0 800 - 1114 hPa 2000hPa m (0 über NN)m über NN) 800(0– -1114 – 2000 Luftdruck 56 Technische Daten Connect ID 32-46 - 139 - Bedienungsanleitung Technische Daten Elektrische Daten Signale über PC IN / HDMI Chassisbezeichnung: SL 155 Stromversorgung: 220 V – 240 V/50–60 Hz Tuner: Terr./Kabel: Satellit: VHF/Hyperband/UHF 4 Ebenen: 13/18V/22kHz 16 Ebenen: DiSEqC 1.0 Einkabelsystem: EN 50494 Bereich: Terr./Kabel: Satellit: 45 MHz bis 860 MHz 950 MHz bis 2150 MHz analog: digital: B/G, I, L, D/K, M, N DVB-T/T2 (1, DVB-C DVB-S/S2 Sender-Speicherplätze inkl. AV und Radio: TV-Normen: Audio-Ausgangsleistung (Musik / Sinus): Format 480i60 576i50 480p60 576p50 5000 Farbnormen: Ton-Normen: In der nachfolgenden Tabelle sind die kompatiblen Signale aufgeführt die Ihr TV-Gerät über den PC IN-Anschluss bzw. die HDMI-Anschlüsse (HDMI1, HDMI2, HDMI3) darstellen kann. Stellen Sie das Ausgangssignal an Ihrem PC, HDMI- oder DVI-Gerät so ein, das es mit einem der Signale in der Tabelle übereinstimmt. 720p50 720p60 1080i50 1080i60 1080p24 1080p25 1080p30 1080p50 1080p60 VGA SVGA XGA WXGA SXGA SECAM, PAL, NTSC, NTSC-V, PAL-V (60 Hz) analog: BG, DK, MN: BG, I, DK: L, L1: Mono, Stereo, 2-Ton FM-A2 FM-Nicam AM-Nicam digital: Mono, Stereo, 2-Ton, PCM Dolby Digital Dolby Digital Plus Dolby Virtual Speaker DTS Dolby Digital AAC+ 2 x 20W + 1 x 40W / 2 x 10W + 1 x 20W Teletext: Seitenspeicher: 1) Ausstattungs- und Aufrüstmöglichkeiten (1 Ausstattungs- und Aufrüstmöglichkeiten siehe Seite 144. TOP/FLOF Level 2.5 2000 57 Horizontal 720 720 720 720 1440 1440 1280 1280 1920 1920 1920 1920 1920 1920 1920 640 800 1024 1360 1280 x x x x x x x x x x x x x x x x x x x x x Vertikal 480i 576i 480p 576p 480p 576p 720p 720p 1080i 1080i 1080p 1080p 1080p 1080p 1080p 480 600 768 768 1024 Bildfrequenz 60Hz 50Hz 60Hz 50Hz 60Hz 50Hz 50Hz 60Hz 50Hz 60Hz 24Hz 25Hz 30Hz 50Hz 60Hz 60Hz 60Hz 60Hz 60Hz 60Hz Anschluss PC IN, HDMI PC IN, HDMI PC IN, HDMI PC IN, HDMI HDMI HDMI PC IN, HDMI PC IN, HDMI PC IN, HDMI PC IN, HDMI PC IN, HDMI PC IN, HDMI PC IN, HDMI PC IN, HDMI PC IN, HDMI PC IN, HDMI PC IN, HDMI PC IN, HDMI PC IN, HDMI PC IN, HDMI Technische Daten Connect ID 32-46 Bedienungsanleitung Technische Daten - 140 - Anschlüsse (max. Ausstattung) Bezeichnung Art Funktion / Signal Netzbuchse 220-240 V ~ 50 / 60 Hz HDMI Typ A (3x) D-SUB 15-polig Mini-Scart Video OUT: RJ-45 USB Typ A (2x) Klinke 3,5 mm Cinch (schwarz) Cinch (schwarz) Mini-DIN IEC-Buchse F-Buchse (2x) (1 (1 (2 Ø5L Ø5L Audio OUT: Data I/O: CI-Slot (2x) Common Interface: Mini-DIN 2) Audio IN: Audio OUT: Ethernet / Fast Ethernet: USB 2.0 (max. 500mA): Audio IN: Digital Audio OUT (SPDIF): Digital Audio IN (SPDIF): D-SUB 26-polig RJ12 (1 Mini-DIN (1 Klinke 3,5 mm (1 Klinke 3,5 mm Cinch (weiß/rot) 1) Digital Video/Audio IN (HDMI1, HDMI2, HDMI3): Digital Audio OUT (HDMI1 via HDMI ARC) Video IN: Video IN: Versorgungsspannung Digital-Bild (2 und -Ton PC/STB-Bildsignal (2 Y/C (S-VHS/Hi 8) FBAS (VHS/8 mm) RGB FBAS (VHS/8 mm) Y/C (S-VHS/Hi 8) L/R L/R Netzwerk-Schnittstelle Multimedia-Dateien / Software-Update L/R Digital-Ton Digital-Ton Service/L-Link Antenne analog / Kabel analog / DVB-T/T2 (1 / DVB-C ANT-SAT DVB-S/S2 Multiton Serielle Schnittstelle Drehfußsteuerung (Positionierungsgenauigkeit 1,5°) Anschluss für IR-Sender Steckplatz für CA-Modul Kopfhörer 32–2000 Ohm L (weiß) / R (rot) Y/C (S-VHS/Hi 8) FBAS (VHS/8 mm) Audio IN: Video IN: Ausstattungs- und Aufrüstmöglichkeiten Kompatible Bildsignale Ausstattungs- und Aufrüstmöglichkeiten siehe Seite 144. Kompatible Bildsignale siehe Tabelle auf Seite 139. 58 Technische Daten Connect ID 32-46 - 141 - Bedienungsanleitung Technische Daten MediaHome Unterstützte Dateiformate Bilder: JPEG, PNG, GIF Audio: MP3, M4A (AAC LC), WMA (ohne lossless), FLAC, WAV (PCM) Video: AVI (MPEG-1/2, DivX, XviD, AC3, MP3), WMV (WMV9, VC-1, WMA9, WMA Pro), MP4 (DivX, XviD, H.264/MPEG-4 AVC, AAC LC), MOV (H.264/MPEG-4 AVC, AAC LC), MKV (H.264/MPEG-4 AVC, AC3), FLV (H.264/MPEG-4 AVC, H.263, MP3, AAC LC), MPG (MPEG-1, MPEG Audio), TS/PS (MPEG-2, H.264/MPEG-4 AVC, MPEG2 Audio, AC3), VOB (MPEG-2, MPEG2 Audio, AC3) ➠ DivX bis zu einer Auflösung von 720p ➠ H.264/MPEG-4 AVC bis zum Profil High (Level 4.2) Ethernet (drahtgebundenes Netzwerk) Unterstützte Standards: 10 Mbit/sec Ethernet (10Base-T), 100 Mbit/sec Fast Ethernet (100Base-T) WLAN (drahtloses Netzwerk) Unterstützte Standards: IEEE 802.11b/g/n Verwendeter Frequenzbereich: 2400-2483,5 MHz und 5180-5730 MHz Unterstützte Verschlüsselungsarten: WEP 64 und 128 Bit (ASCII und HEX), WPA PSK, WPA2 AES Mediaserver-Software Sie benötigen für das Abspielen von Multimedia-Inhalten von Geräten in Ihrem Heimnetzwerk eine Mediaserver-Software, die Ihnen entsprechende Dateien zur Verfügung stellt. Die Handhabung einzelner Dateien ist neben den technischen Eigenschaften auch von der verwendeten Mediaserver-Software abhängig. Sie können von unserer Homepage eine Testversion des TwonkyMedia Mediaservers herunterladen. Mit Ihrem TV-Gerät haben Sie gleichzeitig die Möglichkeit erworben, eine kostenlose Lizenz für die zur Zeit verfügbare Version des Twonky Media-Servers zu erhalten. Alternativ dazu können Sie auch andere Media-Server, z.B. den Windows Media Player (WMP) ab Version 11, benutzen. Für die Kommunikation mit dem PC werden bestimmte Port-Adressen der Netzwerkverbindung benötigt. Diese dürfen im Falle einer vorhandenen Firewall nicht blockiert werden, anderenfalls kann es zu schwerwiegenden Verbindungsfehlern kommen. Windows Media Player 11 benötigt die Port-Adressen 1900 und den Block von 10280 bis einschließlich 10284 (alle für UDP) sowie 2869 und 10243 (beide für TCP). Für TwonkyMedia müssen die Port-Adressen 1030, 1900 und 9080 (alle für UDP) sowie 9000 (für TCP) verfügbar sein. Weitere freizuhaltende Ports hängen von Ihrem verwendeten Betriebssystem ab. Wenden Sie sich zur Konfiguration der Firewall an Ihren NetzwerkAdministrator. Unterstützter Heimvernetzungsstandard Universal Plug and Play Audio / Video (UPnP AV) 59 Connect ID 32-46 - 138 - Operating instructions Technical data Technical Data General data Type Connect ID 46 Connect ID 40 Connect ID 32 Article number 51464xxx 51463xxx 51462xxx Dimensions for device without stand (W x H x D) in cm 106.4 x 67.4 x 7.8 93.1 x 59.9 x 7.8 74.7 x 49.4 x 7.7 Weight for device without stand (approx.) in kg 21.9 18.8 13.3 LCD with Edge-LED backlight Full-HD-LCD with Full-HD Edge-LED-Backlight Display technology Screen diagonal (in cm) / Picture format 117 / 16:9 101 / 16:9 80 / 16:9 1920 1920 x 1080 / 200 Hzx 1080 / 200 Hz Resolution (in pixels) / Motion Response 6.000 : 1 / 6.000.000 6,000 ::11/ 6,000,000 : 1 Contrast (static / dynamic) 178° / 178° Viewing angle (horizontal / vertical) Power consumption On-Mode max. (W) (Audio output 1/8 of the maximum value) without / with DR+ Power consumption On-Mode Home (W) without / with DR+ Power consumption in Standby Mode (W) without / with DR+ Power consumption when set is switched off (W) 106 / 108 79 / 81 0.37 / 0.37 0 178° / 178° 93 / 95 70 / 72 0.37 / 0.37 0 Ambient temperature (Celsius) 5° - 35° 5° – 35° Relative humidity (non-condensing) 20 - 80% 20 – 80% 78 / 81 62 / 64 0.37 / 0.37 0 1114 hPa (0 – 2000 above sea level) 800 - 1114 hPa800 (0 –- 2000 m above seamlevel) Air pressure 60 Technical Data Connect ID 32-46 - 139 - Operating instructions Technical data Electrical data Signals via PC IN / HDMI Chassis designation: SL 155 Power supply: Tuner: Range: 220 V – 240 V/50–60 Hz terr./cable: satellite: VHF/hyperband/UHF 4 levels: 13/18V/22kHz 16 levels: DiSEqC 1.0 Single cable system: EN 50494 terr./cable: satellite: 45 MHz to 860 MHz 950 MHz to 2150 MHz analogue: digital: B/G, I, L, D/K, M, N DVB-T/T2 (1, DVB-C DVB-S/S2 Station storage locations incl. AV and radio: TV standards: Format 480i60 576i50 480p60 576p50 5000 Colour standards: Sound standards: The following table lists the compatible signals which your TV set can show via the PC IN connection and the HDMI connections (HDMI1, HDMI2, HDMI3). Set the output signal on your PC, HDMI or DVI device so that it matches one of the signals in the table. 720p50 720p60 1080i50 1080i60 1080p24 1080p25 1080p30 1080p50 1080p60 VGA SVGA XGA WXGA SXGA SECAM, PAL, NTSC, NTSC-V, PAL-V (60 Hz) analogue: BG, DK, MN: BG, I, DK: L, L1: mono, stereo, dual-channel FM-A2 FM-Nicam AM-Nicam digital: mono, stereo, dual-channel, PCM Dolby Digital Dolby Digital Plus Dolby Virtual Speaker DTS Dolby Digital AAC+ Audio output power (music/sine): 2 x 20W + 1 x 40W / 2 x 10W + 1x 20W Teletext: Page memory: 1) (1 TOP/FLOF Level 2.5 2000 Equipment and upgrade options Equipment and upgrade options, see page 144. 61 Horizontal x 720 720 720 720 1440 1440 1280 1280 1920 1920 1920 1920 1920 1920 1920 640 800 1024 1360 1280 x x x x x x x x x x x x x x x x x x x x Vertical 480i 576i 480p 576p 480p 576p 720p 720p 1080i 1080i 1080p 1080p 1080p 1080p 1080p 480 600 768 768 1024 Image frequency 60Hz 50Hz 60Hz 50Hz 60Hz 50Hz 50Hz 60Hz 50Hz 60Hz 24Hz 25Hz 30Hz 50Hz 60Hz 60Hz 60Hz 60Hz 60Hz 60Hz Connection PC IN, HDMI PC IN, HDMI PC IN, HDMI PC IN, HDMI HDMI HDMI PC IN, HDMI PC IN, HDMI PC IN, HDMI PC IN, HDMI PC IN, HDMI PC IN, HDMI PC IN, HDMI PC IN, HDMI PC IN, HDMI PC IN, HDMI PC IN, HDMI PC IN, HDMI PC IN, HDMI PC IN, HDMI Technical Data Connect ID 32-46 - 140 - Operating instructions Technical data Connections (max. equipment) Designation Type Function / Signal Mains socket 220-240V ~ 50/60 Hz HDMI type A (3x) D-SUB 15-pole Mini Scart RJ-45 USB type A (2x) Jack 3,5 mm Cinch (black) Cinch (black) Mini-DIN IEC socket (1 (2 Audio IN: Audio OUT: Ethernet / Fast Ethernet: USB 2.0 (max. 500mA): Audio IN: Digital Audio OUT (SPDIF): Digital Audio IN (SPDIF): Ø5L Ø5L D-SUB 26-pole RJ12 (1 Mini-DIN (1 Jack 3,5 mm (1 Audio OUT: Data I/O: CI slot (2x) Common Interface: Mini-DIN 2) Video OUT: F socket (2x) (1 Jack 3,5 mm Cinch (white/red) 1) Digital Video/Audio IN (HDMI1, HDMI2, HDMI3): Digital Audio OUT (HDMI1 via HDMI ARC): Video IN: Video IN: Audio IN: Video IN: Equipment and upgrade options For compatible picture signals Equipment and upgrade options, see page 144. For compatible picture signals, see table on page 139. 62 Supply voltage Digital video (2 and audio PC/STB video signal (2 Y/C (S-VHS/Hi 8) CVBS (VHS/8 mm) RGB CVBS (VHS/8 mm) Y/C (S-VHS/Hi 8) L/R L/R Network interface Multimedia files/software update L/R Digital audio Digital audio Service/L-Link Antenna analogue / cable analogue / DVB-T/T2 (1 / DVB-C ANT-SAT DVB-S/S2 Multi-sound serial interface Rotating stand control (Positioning accuracy 1.5°) Connection for IR station Slot for CA module Headphones 32–2000 Ohm L (white) / R (red) Y/C (S-VHS/Hi 8) CVBS (VHS/8 mm) Technical Data Connect ID 32-46 Operating instructions Technical data - 141 - MediaHome File formats supported Pictures: JPG, PNG, GIF Audio: MP3, M4A (AAC LC), WMA (without lossless), FLAC, WAV (PCM) Video: AVI (MPEG-1/2, DivX, XviD, AC3, MP3), WMV (WMV9, VC-1, WMA9, WMA Pro), MP4 (DivX, XviD, H.264/MPEG-4 AVC, AAC LC), MOV (H.264/MPEG-4 AVC, AAC LC), MKV (H.264/MPEG-4 AVC, AC3), FLV (H.264/MPEG-4 AVC, H.263, MP3, AAC LC), MPG (MPEG-1, MPEG Audio), TS/PS (MPEG-2, H.264/MPEG-4 AVC, MPEG2 Audio, AC3), VOB (MPEG-2, MPEG2 Audio, AC3) ➠ DivX up to a resolution of 720p ➠ H.264/MPEG-4 AVC up to Profile High (Level 4.2) Ethernet (wired network) Standards supported: 10 Mbit/sec Ethernet (10Base-T), 100 Mbit/sec Fast Ethernet (100Base-T) WLAN (wireless network) Media server software To play multimedia contents from devices in your home network, you require media server software which makes the relevant files available to you. Handling of individual files depends on the technical properties and also on the media server software used. You can download a test version of the TwonkyMedia Mediaserver from our homepage. With your TV set, you have also acquired the option of obtaining a free licence for the currently available version of the Twonky media server. Alternatively, you can also use other media servers, e.g. the Windows Media Player (WMP) from Version 11. For communication with your PC, certain port addresses of the network connection are required. They may not be blocked by a firewall if there is one, otherwise this could cause serious connection errors. Windows Media Player 11 requires the port addresses 1900 and the block of 10280 up to and including 10284 (all for UDP) as well as 2869 and 10243 (both for TCP). For TwonkyMedia the port addresses 1030, 1900 and 9080 (all for UDP) and 9000 (for TCP) must be available. Other ports to be kept free depend on the operating system you are using. Contact your network administrator about configuring the firewall. Standards supported: IEEE 802.11b/g/n Frequency range used: 2400-2483.5 MHz and 5180-5730 MHz Types of encoding that are supported: WEP 64 and 128 Bit (ASCII and HEX), WPA PSK, WPA2 AES Supported home network standard Universal Plug and Play Audio / Video (UPnP AV) 63 64 65 66 67 D 3D FAQs Warum flackert das 3D-Bild mit Brille bei Tageslicht bzw. Lampenlicht? Die Übertragung der Synchronsignale erfolgt durch Infrarot-Signale. Lichtquellen können diese Übertragung stören. Kunstlicht mit Neonröhren bzw. Energiesparlampen haben zudem von Haus aus ein 50Hz-Flackern. Dieses „Eigenflackern“ kann mit der Shutter-Frequenz der Brille interferieren. Bei 3D-Betrieb ist stets ein abgedunkelter Raum zu empfehlen. Wie wird die Brille geladen? Die Brille kann mit jeder gängigen USB-Schnittstelle mittels des mitgelieferten USB-Kabels geladen werden. Auch der Loewe-TV kann im eingeschalteten Zustand als „Ladestation“ dienen. Betriebsdauer per Ladung ca. 30h, die Ladung dauert ca. 2h. Achtung: Das gelieferte USB-Kabel hat nur die Spannungsanschlüsse verbunden – als Datenkabel kann es nicht verwendet werden! Schaltet sich die Brille automatisch nach Gebrauch ab? Ja! Sobald keine IR-Synchron-Impulse mehr empfangen werden, schaltet sich die Brille nach ca. 1Minute automatisch ab. Erkennt der TV 3D-Sendungen automatisch? Ja! Voraussetzung ist, dass im 3D-Menü „automatisch“ aktiviert wurde und dass der Sender dieses Erkennungssignal über das DVB-Empfangssignal sendet. Achtung! Viele Sender unterstützen diese Funktion noch nicht! Kann ich 3D-Sendungen auf DR+ aufnehmen? Ja! 68 Kann das LOEWE DR+streaming auch bei 3D-Aufnahmen genutzt werden? Ja! Warum zeigen die DR+Vorschaubilder von 3D-Aufnahmen ein geteiltes Bild? Die Vorschaubilder werden so dargestellt, wie sie übertragen werden; in diesem Fall Side/Side oder Top/Bottom. Wenn der BluTech 3D über einen Soundprojektor angeschlossen wird, ist kein 3D-Betrieb möglich, wenn der BluTech 3D direkt am TV angeschlossen ist, schon! Die ersten gelieferten Soundprojektoren hatten die CEC-Funktion deaktiviert. Im Menü des Soundprojektors muss diese HDMI-CEC-Funktion eingeschaltet werden. Erst dann werden die 3D-Geräte korrekt im Systemverbund erkannt. Welcher Abstand zwischen Brille und TV sollte nicht überschritten werden? Der Abstand sollte max. 6m betragen. Was sieht das Servicekonzept für die 3D-Brille vor? Tauschkonzept 69 GB 3D FAQs Why a flickering of 3D-Playback is visible by daylight resp. extraneous light? The transmission of synchronization signals is realized by infrared signal. Other illuminants can disturb this transmission. Furthermore some illuminants have innately a 50Hz flickering. This flickering can interfere with the shutter-frequency of the glasses. When operating 3D-Mode a dimmed or dark room is highly recommended. How to charge the glasses? The glasses can be charged by every common USB-interface by use of the accompanying USB cable. The Loewe-TV in on-mode can act as “charging-station”. Operating time per charge ca. 30h. The charging takes ca. 2h. Attention: The accompanying USB-cable is for charging only – data pins are not connected. Does the glasses switch off automatically after use? Yes! As soon as no IR-synchronisation is received anymore the glasses switches off after ca. 1 minute. Does the TV recognize 3D-broadcasts automatically? Yes! It requires the 3D-mode set to “automatic” and the fully support from the broadcaster. Attention: Many Stations do not support this feature yet. Can 3D-broadcasts be recorded on internal disc? Yes! 70 Does Loewe DR+streaming also work with 3D-recordings? Yes! Why do the DR+ thumbnails show a split picture? The thumbnails are displayed as they are been transmitted (side-by-side, top-bottom) When connecting the BluTech 3D via Soundprojector no 3D-mode is possible. When connecting the BluTech 3D directly it works. The first batch of Soundprojectors had deactivated CEC function. Please activate CEC in setup-menu of Soundprojector. First then 3D-devices are recognized correctly. Which distance between glasses and TV may not been exceeded ? The distance shall not exceed 6 meters. Why doesn´t the menu “3D-mode” work? The 3D-modes are only on HD-programs active. On SD-programs they are deactivated. 71 Loewe-Service und Logistik LOEWE OPTA GmbH Service + Logistik Zentrale Kronach 96305 Kronach • Postfach 1554 96317 Kronach • Industriestraße 11 Die wichtigsten Rufnummern der Zentrale Kronach: The most important phone numbers of the Kronach headquarters: Ersatzteilbestellungen: Status von Reparaturen: Support TV Röhre: Support Video/DVD: Support Telekommunikation: Support HiFi: Support TV Plasma, LCD, Rückprojektion: Telefon (0180) 522 1800 (0180) 522 1805 (0180) 522 1801 (0180) 522 1802 (0180) 522 1803 (0180) 522 1804 (0180) 522 1807 Fax (0180) 522 1806 09261) 99 412 (09261) 99 730 (09261) 99 730 (092261) 99 730 (09261) 99 730 (09261) 99 730 Hinweis! Ersatzteilbestellung nur über Service + Logistik / Zentrale 96317 Kronach Note! Spare parts orders only through Service + Logistics / Headquarters in Kronach Loewe Service Übersee • Overseas Ägypten Korea Singapur / Malaysia DB Advanced Communication 237, Ramsis Street Cairo, Egypt Tel. 0020 - 2 6 84 36 79 [email protected] CSI Corporation 2nd Fl. Seki Bldg. #23.2-GA Namsan-Dong, Joong-Gu Seoul, 100 -042 South Korea Tel. 008 22 - 34 46 35 11 Fax 008 22 - 34 46 35 15 [email protected] Atlas Sound & Vision PTE LTD 10 Winstedt Road #01-18 Singapore 227977 Tel. 0065 63 39 09 66 Fax 0065 63 39 31 36 Rechnungsadresse! Australien Audio Products Group 6/67 O‘Riordan St / PO Box 150 Alexandria NSW 2015 / Mascot NSW 1460 AUS Tel. 00 61 / 2 - 96 69 34 77 Fax 00 61 / 2 - 95 78 01 40 [email protected] Französisch Polynesien COVECOLOR P.O. Box 1659 98713 Papeete - Tahiti French Polynesia Tel. 00 689 / 50 66 50 Fax 00 689 / 43 33 75 [email protected] Hongkong / China Galerien und PartnerPlus Kings Tower 28D 111 King Lam Street Kowloon Hong Kong Tel. 008 52 - 23 92 89 88 Fax 008 52 - 23 10 08 08 [email protected] Indien Diplomatic Enclave, Chanakyapuri AV Optima (India) Pvt.Ltd. 18/48, Malcha Marg New Dehli 110 021-only business Tel. 0091-9 87 31 71 795 [email protected] Israel Clear electronic entertainment (2009) Ltd. 13 Noah Mozes St. Agish Ravad Building Tel Aviv 67442 Tel. 00972/3 60 91 100 Fax 00972/3 69 61 795 [email protected] Jordanien Kuwait Südafrika Libanon The Soundlab (PTY) LTD P.O. Box 31952 Kylami 1684 Republik of South Africa Tel. 0027 / 1 14 66 47 00 Fax 0027 / 1 14 66 42 85 [email protected] Digital Technologies SARL Independence Street. P.O. Box 90-720 Beirut Lebanon Tel. 00 9 61 / 1 24 30 00 Fax 00 9 61 / 1 75 32 72 [email protected] Taiwan Minipaks Trading Company Ltd F1, No 12 Ln 133 Chu-Kwang Rd. Panchiao Taiwan R.O.C Tel. 00 886 - 2 2256 0502 Fax 00 886 - 2 2256 3310 [email protected] Marokko Vereinigte Arabische Emirate SOMARA S.A. 377, Rue Mustapha El Maani 20000 Casablanca Morocco Tel. 00 21 22 - 2 22 03 08 Fax 00 21 22 - 2 26 00 06 [email protected] Dubai Audio Centre Sheik Zayed Road P.O. Box 32836 Dubai, UAE Tel. 009 71 - 4 343 14 41 Fax 009 71 - 4 343 77 48 [email protected] Pakistan Zypern Synergy Technologies 7C Aziz Avenue, Canal Bank Gulberg 5 Lahore 54666 Tel. 0092 - 42 111 900 111 Fax 0092 - 42 5 87 19 01 [email protected] HADJIKYRIAKOS & SONS LTD. 121 Prodromos Str. P.O.Box 21587 1511 Nicosia Cyprus Tel. 00357 22 872111 Fax 00357 22 663391 [email protected] Adawliah Universal Electronics Co. P.O. Box 5608 KTW -Safat Tel. 00 9 65 / 4 72 06 31 ext. 279 Fax 00 9 65 / 4 76 18 90 Saudi Arabien Salem Agencies & Services Co. P.O. Box 9720 SA -Jeddah 21413 Tel. 00 9 66 / 2 - 6 65 46 16 Fax 00 9 66 / 2 6 60 78 64 ACCU-TECH Corporation 1-Kharija Al-Ashja ´ai Street Amman - 11191 Jordanien Tel. 00 962 6 465 99 85 Fax 00 962 6 465 01 19 [email protected] 72 Loewe Service / Europa • Europe Benelux Italien Schweden Loewe Opta Benelux NV / SA Uilenbaan 84 B - 2160 Antwerpen Tel. 00 32 / 3-2 70 99 30 Fax 00 32 / 3-2 71 01 08 [email protected] Tel. 00 30 / 2 80 33 94 Fax 00 32 / 32 71 01 08 LOEWE ITALIANA SRL Largo del Perlar, 12 I-37135 Verona (VR) Tel. 0039 - 045 82 51 611 Fax 0039 - 045 82 51 622 E-Mail: je nach Geschäftsbereich Kroatien Kjaerulff 1 AB Ridbanegatan 4 Box 9076 S-200 39 Malmø Tel. 0046 - 4 06 79 74 00 Fax 0046 - 4 06 79 74 01 [email protected] Caspian Ltd. Savska 9 10 000 Zagreb Croatia Tel. 00 385 - 1 4929 683 Fax 00 385 - 1 4929 682 [email protected] Schweiz Telion AG Rütistrasse 26 CH - 8952 Schlieren Tel. 00 41 - 17 32 15 11 Fax 00 41 - 17 30 15 02 [email protected] Lettland Serbien / Montenegro Impuls Group, SIA A.Caka iela 80 Riga, Latvija, LV-1011 Tel. 00 371 - 67 29 29 59 Fax 00 371 - 67 31 05 67 [email protected] AUDIOPHILE HIGH-END DOO MIlentija Popovica 9 11070 Belgrad Tel. 0038 - 11 12 05 2501 (temporarily) Fax 0038 - 11 12 05 2501 (temporarily) [email protected] Litauen Slowakei A Capella Ltd. Ausros Vartu 5 Pasazo skg. Lithuania - 01129 Vilnius Tel. 00370 - 52 12 22 96 Fax 00370 - 52 62 66 81 [email protected] Basys Czech & Slovak S.R.O. Stará Vajnorská 17/A SK - 83104 Bratislava Tel. 00 421 - 2 49 10 66 18 Fax 00 421 - 2 49 10 66 33 [email protected] Malta JADRAN D.D. SEZANA Partizanska cesta 69 SL - 6210 Sežana Tel. 00 3 86 / 57 - 39 12 00 Fax 00 3 86 / 57 - 39 14 60 [email protected] Bulgarien SOFIA AUDIO CENTRE 8 Angel Kanchev St. BG - 1000 Sofia Tel. 00 359 - 29 877 335 Fax 00 359 - 29 817 758 [email protected] Dänemark Kjaerulff 1 A/S C.F. Tietgens Boulevard 19 DK -5220 Odense SØ Tel. 00 45 /66135480 Fax 00 45 / 66135410 [email protected] www.kjaerulff1.com Estland Tedra Trading Oy Kuusemetsa 3 Saue 76506 Estonia Tel. 00 372 / 50 14 817 Fax 00 372 / 67 09 611 [email protected] Finnland Karevox Oy Museokatu 36 00100 Helsinki Finland Tel. 00 358 - 9 44 65 33 Fax 00 358 - 9 44 56 13 Frankreich LOEWE OPTA FRANCE S.A. 13 rue du Dépôt Parc de l‘Europe BP 10010 F -67014 Strasbourg Cédex Tel. 00 33 / 3 - 88 79 72 50 Fax 00 33 / 3 - 88 79 72 59 [email protected] Griechenland EISAGOGIKI EMBORIKI ELLADOS S.A. 321 Mesogion Av. GR - 152 31 Chalandri-Athens Tel.: 00 30 - 210 672 12 00 Fax: 00 30 - 210 674 02 04 [email protected] Grossbritannien / UK Loewe UK Ltd First Floor 237a Kensignton High Street UK - London, W8 6SA Tel. 00 44 / 12 94 315 000 [email protected] GUS LYOVE R.C. Ltd. per. Aptekarsky 4, str.2 105005 Moscow Tel. 07-495 73 07 800 Fax 07-495 73 07 801 mob. phone: 07-903 59 71 541 [email protected] (allg.) Sergey [email protected] Sergey [email protected] Irland - siehe Grossbritannien / UK! Island Breadurnir Ormsson HF Lagmula, 8 128 Reykjavik Iceland Tel. 00 354 - 5 302 800 Fax 00 354 - 5 302 810 Slowenien DONEO CO. LTD 34/36 Danny Cremona Street M -Hamrun, HMR02 Tel. 00 3 56 21 / 22 53 81 Fax 00 3 56 21 / 23 07 35 [email protected] Mazedonien D. T. Kodi Cedomir Kantargiev 21 a 91 000 Skopje Macedonia Tel. 00 389 / 2 31 33 104 Fax 00 389 / 2 32 38 922 [email protected] Norwegen PCE. PREMIUM CONSUMER ELECTRONICS AS Østre Kullerod 5 Norway - 3202 Sandefjord Tel. 00 47 / 33 - 29 30 46 Fax 00 47 / 33 - 44 60 44 [email protected] Österreich Loewe Austria GmbH Parkring 10 Austria - 1010 Wien Tel. 00 43 1 / 22 88 633 - 0 Fax 00 43 1 / 22 88 633 - 90 Polen DSV Sp. z.o.o. S.K.A Plac Kaszubski 8 81-350 Gdynia Tel. 0048 58 / 6 61 28 00 Fax 0048 58 / 6 61 44 70 [email protected] Portugal Mayro Magnetics Portugal, Lda. Rua Professor Henrique de Barros, Ed. Sagres, 20.C P - 2685-338 Prior Velho Tel. 00 3 51 / 21 - 942 78 30 Fax 00 3 51 / 21 - 940 0078 [email protected] Rumänien Avitech Co. SRL 1/II Pipera - Tunari St 077190 Voluntari Ilfov, Romania Tel. 0040 - 21 200 64 64 Fax 0040 - 21 200 64 65 [email protected] 73 Spanien & Kanarische Inseln Gaplasa S.A. Conde de Torroja,25 E - 28022 Madrid Tel. 00 349 / 1 - 7 48 29 60 Fax 00 349 / 1 - 3 29 16 75 [email protected] Spanien / Melilla Eurafric & Telesol SLU c/ Marquess de Montemar. 17 E - 52006 Melilla Box Postal, 366 Tschechische Republik BASYS CS SPOL. S.R.O Sodomkova 8/1478 CZ - 10200 Praha 10 - Hostivar Tel. 00 42 0 / 2 - 34 70 67 00 Fax 00 42 0 / 2 - 34 70 67 01 [email protected] Türkei Enkay Elektronik SAN. ve TiC. LTD. Sti Alemdag Cad. Site Yolu No: 10 81230 Ümraniye / Istanbul Tel. 00 90 / 21 66 34 44 44 Fax 00 90 / 21 66 34 39 88 [email protected] Ungarn Basys Magyarorszagi KFT. Tó park u 9. H - 2045 Törökbálint Tel. 00 36 - 23 - 415 637 / 121 Fax 00 36 - 23 - 415 182 [email protected] Änderungen vorbehalten. Subject to modification. Modification réserves. Con riserva di modifiche. Reservado el derecho a introducir modificaciones. Wijzigingen voorbehouden. 05-2012 Auflage 1