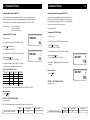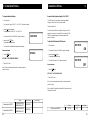
1
5647 488 5/98 USA
Service Manual
Ecomatic HS 2105
Save These Instructions !
TABLE OF CONTENTS
1
Introduction
3-4
2
Mounting Instructions
5-6
3
Testing the Manual Reset High Limit (STB)
7
4
Key Code
8
5
Program Overview and Description of the Installation Level
Entry Process
9-10
6
Installation Entries
7
Display of Heating Curve(s)
31
8
Testing of Relays
32
9
LCD Test
33
10
Total System Reset
34
11
Version Number
35
12
Trouble Shooting Procedures
36
13
Parameter Settings at the Installation Level
37
14
Sensor Curves
38-39
15
Wiring Diagrams
40-46
11-30
1
Introduction
1
Brief Description of Control Operation
The HS2105 is a heating system controller integrating the
functions of space heating on outdoor reset using an outdoor
sensor, priority domestic hot water heating (DHW) of an
indirect fired water heater, periodic operation of a DHW
recirculation pump as well as offering programmable night
setback for customized operation. Optional modules provide
2-stage or dual burner control and outdoor reset control of a
motorized mixing valve for floor heating applications.
Note: Buderus Hydronic Systems, Inc. strongly
recommends the use of a thermostatic valve on the
outlet of the DHW storage tank to prevent scalding
when operating the HS2105 in manual override mode.
Two different control methods can be utilized with respect to
space heating. Parameters listed in bold are set on the control.
Refer to relevant sections in this manual for more details.
Case 1: All heating zones are controlled by on/off
thermostats.
The space heating operates along a heating curve;
figure 1 shows a typical curve. The slope is set by the
“REF TEMP” value; the heating curve can be shifted
up or down with the “OFFSET”. The boiler maintains
temperature within the dashed lines of the burner
differential. The control uses the difference between the
specified “DAY TEMP” and “NIGHT TEMP” values
to compute a lower heating curve for night mode operation.
On a call for DHW, the control can fire the burner up
to the “MAX TEMP 1” setting for maximum recovery.
The control temporarily interrupts pump operation with
the burner running when the boiler water temperature
drops below the “PUMPLOGIC” setting for condensation
protection.
2
200
Heating Curve
(day mode)
MAX TEMP1
180
Ref Temp
Heating Curve
(night mode)
Burner
Differential
160
140
Offset
120
Pump Logic
100
80
60
70
60
50
40
30
20 14 10
0
-10
-20
-30
OUTSIDETEMPERATURE (˚F)
Fig. 1: Typical heating curves for the HS2105 without a room sensor
3
Mounting Instructions
1 Introduction
Case 2: Multiple zones with the main zone on
constant circulation
The heating curve is set in a similar way as in Case 1. A
room sensor is required in the constant circulation zone to
provide room temperature compensation for fine-tuning of
the heating curve. The main zone sets the water temperature
available to all secondary zones. Specified day and night
temperatures on the room sensor are used internally to
compute a heating curve during night mode.
200
Heating Curve
(day mode)
MAX TEMP1
180
2
• Remove the front panel of the boiler.
Room Sensor
Compensation Effect
Ref Temp
Burner
Differential
160
Heating Curve
(night mode)
140
• Only necessary with the G124X, G224E, G234X and G334X
boilers.
Offset
120
100
Pump Logic
Room Sensor
Compensation Effect
80
60
70
60
50
40
30
20 14 10
0
-10
-20
-30
• Remove the two screws and housing from the top of the
Ecomatic.
OUTSIDETEMPERATURE (˚F)
• Insert the two front feet of the control into the holes provided
on the top of the boiler. Then, firmly push down on the rear of
the control until it snaps into place.
Fig. 2: HS2105 heating curve with room sensor adjustment
Case 3 : Multiple Temperatures
The heating curve for the high temperature zone(s)
is set on CIRCUIT 1. CIRCUIT 2 defines the low
temperature heating curve using a motorized mixing valve.
200
180
Ref Temp
Heating Curve Circuit 1
(night mode)
Burner
Differential
160
The HS2105 control positions the mixing valve based
on the outside and supply temperature measured by a strap-on
sensor. Each heating circuit can be equipped with an optional
room sensor.
Heating Curve Circuit 1
(day mode)
MAX TEMP1
• Fasten the control to the boiler jacket using the two screws as
shown.
140
120
Offset
Max Temp2
Ref Temp
Heating Curve Circuit 2
(day mode)
Pump Logic
100
Heating Curve Circuit 2
(night mode)
80
60
70
60
50
40
30
20 14 10
0
-10
-20
-30
• The sensor bundle consists of one thermistor (FK), two
capillaries and a spacer. Mount the sensors per the following
boiler specific instructions. The chrome well is supplied with
the Ecomatic.
OUTSIDETEMPERATURE (˚F)
Fig.3: High and low temperature heating curves; requires module FM241
G115, G205, G305: Replace brass well with chrome Ecomatic well.
The sensor bundle must be fully inserted into the Ecomatic well.
G124X: Unwrap the sensor bundle. Remove spacers from the chrome
well on the boiler. Remove the copper sleeve from one of the capilaries.
Install all 3 probes in with the Honeywell capillary.
G224E/G234X/G334X: The tridicator assembly should be moved to
the supply piping and replaced with the chrome plated Ecomatic well.
The sensor bundle must be inserted into this well.
4
5
2 Mounting Instructions
• Electrical connections must be made according to the wiring
diagram (See pages 40-46).
• All the wires should be routed through the cable raceway at the
rear of the boiler. Rear panel jacket may be modified per local
code. Route the wires on top of the insulation to the back of the
control.
Testing the Manual Reset High Limit (STB)
3
RELAYS
1. Switch the control on
with the main power
switch (I Position).
2. Enter the key code
(See page 8).
3. Turn the dial until “RELAYS”appears in the display.
BURNER ON
4. Press and hold the
button. Turn the dial until
the display shows “BURNER ON”. The burner starts.
Heating pumps will not run during the burner test.
Allow the burner to run until burner shuts off at the
setpoint on the aquastat dial.
• Use the white strain reliefs provided to lock all cables into place
on the back of the control.
o
F
70
5. Remove the black aquastat dial.
180
Aquastat Dial
• Tilt the display to the desired position.
6. Push the green button in with screwdriver or similar
instrument to bypass the adjustable boiler aquastat.
Hold the green button until the STB or manual reset
high limit trips. This happens at approximately 230°F.
• Replace the top housing of the control and fasten the two screws.
The control is ready to be placed into operation.
7. Run circulators to remove excess heat. Then, to reset
the STB, remove the safety nut. Press in the reset
button underneath. This will return the control back
to normal operation.
Green Button
o
F
70
To Resume Normal Operation:
Press the AUT button.
6
Safety Nut
7
4 Key Code
Program Overview
The Installation level consists of a maximum of 12 main menus. Each main menu addresses a specific set of features
of a certain component of the heating system. These features are contained in submenus. Most values are changed at the
submenu level, not at the main menu level.
Key Code
The access to the installation level of the HS2105 control
is protected against unauthorized use by a special key
code. Entry in this level allows you to change settings
described in this manual.
Moving around the Main Menus
+
• The key code allows access to the main menus.
This installation level should only be accessed by a heating
contractor or a trained operator. Entries at this level
identify to the control the different components of the
heating system, specify how these components are to be
operated and set up the proper heating curve(s). These
entries in general do not require any adjustment. Any
adjustments must be performed by a heating contractor
or a trained operator.
AMERICAN
BLR TEMP
CIRCUIT 1
• To access different menus, turn the dial.
• To access a submenu, press and release the
the main menu.
button from
CIRCUIT 1
PERIM-HTG
REF TEMP
REMOTE 1
• To move about that specific submenu and review the specific
entries, turn the dial. Each entry in that specific submenu
appears now in the display as the dial is turned.
Key Code Access P rocedure for access to the
Installation Level
• Press and hold the lower left hand ENTER
button.
• Insert a pointed object into the hole directly
to the right of the ENTER
button.
• Release both buttons. The display reads
“DEUTSCH” (GERMAN).
5
DEUTSCH
• To change the value of a specific entry in the submenu, first get
that entry in the display by turning the dial, then push and
hold the
button. The display shows the specific entry
blinking with its current value. Turn the dial to select the
desired value. Release the
button. This will save the new
value.
+
• To move to the next entry in this specific submenu, turn the dial.
To change the language selection:
• Enter the key code. The word “DEUTSCH”
(GERMAN) appears in the display.
• Press and hold the
button.
• Turn the dial to select the “AMERICAN”
language selection.
Returned to the Standard Display:
• Press the AUT button.
Note: The control resumes automatic operation if no
entries are made for a period of 5 minutes.
• To move back to the main menu, press and release the RETURN
button.
AMERICAN
• To return to the standard display, press and release the AUT button.
Note : The HS2105 control automatically goes back to the standard display if
no entries are made within five minutes.
CIRCUIT 1
PERIM -HTG
Notice:A number of entries will only appear when their corresponding modules are inserted in the control.
These modules and their functions are:
Module FM241:
Mixing valve control module.
Module FM242:
Two stage firing control module.
Module KM271:
Communications module. Currently not available in the U.S.A.
When any of these modules are installed, the HS2105 control automatically recognizes them and releases access to the
corresponding menus, submenus and their entries.
8
9
5 Program Overview
Installation Entries
+
Listing of Entries at the Installation Level
Access to the installation is done using the key code.
Display Read-out
DEUTSCH
Page
8
BLR TEMP
9
FREEZTEMP
BLDG RESP
TWO STAGE*1
MIN MOD*2
MOD TIME*2
PUMPLOGIC
MAX TEMP1
FLUE TEMP*3
CIRCUIT 1
PERIM-HTG
REF TEMP
REMOTE 1
ROOM COMP*4
OASETBACK
OFFSET
CIRCUIT 2
FLOOR-HTG
REF TEMP
DHWPRIOR
MAX TEMP2
REMOTE 2
ROOM COMP*4
OASETBACK
OFFSET
DHWPROD
RECIRPUMP
HTGCURVE 1
HTGCURVE 2
RELAYS
Boiler parameters
11
12
13
14
15
16
17
18
Frost protection temperature
Building heat storage capacity
Burner operation details
Minimum firing rate for a modulating burner *2
Modulation time for full mod burner*2
Water temperature setting for Pumplogic
Maximum electronic high limit for boiler temperature
Flue gas warning temperature*3
19
Heating Zone 1 Installation Parameters (unmixed zone)
19
20-21
25
26
27-28
22
19
19
20-21
23
24
25
26
27-28
22
29
30
31
31
32
BURNER
BURNER 2*1), MOD BNR*2
HTG1 PUMP
HTG2 PUMP
MIX VALVE*5)
DHW PUMP*6)
RECIRPUMP*6)
LCD- TEST
RESET
VERSION
Language selection
33
34
35
Identifies nature of high temp zone (baseboard, radiators etc.)
Reference Temperature for specifying boiler zone reset curve
Room sensor present for unmixed zone yes/no
Room temperature compensation*4
Setback mode selection
Offset, vertical shift of reset curve
Freeze Protection: “FREEZTEMP”
❅
▲
To prevent the heating system from freezing, the control will automatically
permit the heating circulators to run continuously in the night mode when
the outside temperature drops below the “FREEZTEMP” value irrespective
of the selected setback mode.
The factory setting is 41˚F; the range is 0˚F to 50˚F.
To change the FREEZTEMP:
BLR TEMP
• Enter the key code.
• Turn the dial until the word “BLR TEMP” appears in the display.
• Press the
button and release.
The display will show “FREEZTEMP”.
FREEZTEMP
• Press and hold the
button.
The current value of the “FREEZTEMP” is blinking.
˚F
40
• Turn the dial until the desired “FREEZTEMP” value appears in the display.
Heating Zone 2 Installation Parameters (mixed zone)*5
Identifies nature of low temperature mixed zone
Reference Temperature for specifying boiler zone reset curve
DHW priority on mixed zone*6
Maximum electronic high limit for mixed zone
Room sensor present for mixed zone yes/no
Room temperature compensation*4
Setback mode selection
Offset, vertical shift of reset curve
Domestic hot water yes/no
DHW recirculation pump
Heating curve for unmixed zone
Heating curve for mixed zone
Relay test on different system components
Burner Relay
Burner 2 Relay*1), Modulation higher/lower*2)
Boiler zone pump (unmixed heating circuit)
Mixed zone pump (mixed heating circuit)
Mixing valve open/close*5)
Tank charging pump*6)
DHW recirculation pump*6)
LCD test
General system reset to factory settings
Control version number
*1 Applies only with module FM 242 installed and 2 stage burner selected.
*2 Applies only with module FM 242 installed and modulating burner selected.
*3 Applies only with module KM 271.
10
6
*4 Applies only with remote sensor installed.
*5 Applies only with Module FM 241 installed.
*6 Applies only with domestic hot water installed.
Return to the main menu:
• Press the
return.
RETURN TO THE STANDARD DISPL AY:
• Press the AUT button.
Note: The control resumes automatic operation if no entries are made for a
period of five minutes.
Note 1: The “FREEZTEMP” setting is the determining value when using
the “OASETBACK” setback mode. The circulators will not operate in night
mode when the outside temperature exceeds the “FREEZTEMP” value. The
circulators will run constantly for outside temperatures below the
“FREEZTEMP” value.
Note 2: The “FREEZTEMP” setting is also of significance in terms of
pump operation during the night mode when using room sensors. The heating
circulators (on circuits 1 and 2) will stop when the actual room temperature
exceeds the desired night temperature AND the outside temperature exceeds
the “FREEZTEMP” value.
Freeze Protection: “FREEZTEMP”
Range
Factory Setting
0˚F to 50˚F
41˚F
Current Setting
11
Installation Entries
6 Installation Entries
6
Building Type: “BLDG RESP”
Burner Installation: “BURNER”
The type of building in terms of insulating factor, heat storing capacity
and response to outside temperature changes is specified with the
“BLDG RESP” setting.
The burner module FM242 must be installed for this submenu to appear.
The factory setting without the FM242 module is “ONE STAGE”.
However, this setting does not become visible in the display when module
FM242 is not installed.
The HS2105 control uses this setting to respond in a delayed fashion
to changes in outside temperature and relies on the heat storing capacity to
maintain a comfortable temperature level in the building. The settings are
defined as:
1= Buildings with small heat storing capacity and medium levels of
insulation (Wood construction and medium to heavy insulation).
The HS2105 control automatically switches from single stage to two stage
when the FM242 module is inserted. One can select at this point between a
one stage burner, two stage burner (or dual boiler/burner system) or
modulating burner.
2= Buildings with medium heat storing capacity and high levels of
insulation (Brick construction with medium insulation).
Note: In case a two stage burner (or dual boiler system) is
selected, separate burner run times will be displayed.
3= Buildings with high heat storing capacity and high levels of
insulation (Heavy brick construction with good insulation).
To change the “ BURNER” setting:
• Enter the key code.
Note: For areas where rapid changes in outside temperatures occur,
it is recommended to always use setting 1 irrespective of the type of
construction.
• Turn the dial until the word “BLR TEMP” appears in the display.
To change the “BLDG RESP”setting:
• Press the
button and release.
The display will show “FREEZTEMP”.
BLR TEMP
• Enter the key code.
• Turn the dial until the word “TWO STAGE” appears in the display.
• Turn the dial until the word “BLR TEMP” appears in the display.
• Press the
• Press and hold the
button.
The adjustable parameter is blinking.
button and release. The display will show “FREEZTEMP”.
BLDG RESP
• Turn the dial until the word “BLDG RESP” appears in the display.
TWO STAGE
• Turn the dial until the word “MOD BRNR” appears in the
display for a modulating burner.
2
• Press and hold the
button.
The current value of the “BLDG RESP”setting is blinking.
Return to main menu:
• Turn the dial until the desired “BLDG RESP” value appears in the display.
• Press the
Return to main menu:
RETURN TO THE STANDARD DISPLAY
• Press the
BLR TEMP
MOD BRNR
button.
• Press the AUT button.
button.
RETURN TO THE STANDARD DISPLAY
Range
• Press the AUT button.
Freeze Protection: “FREEZTEMP”
12
Range
1,2,3
Factory Setting
2
Current Setting
Burner System without FM242 module
Burner System with FM242 module
1-stage/2-stage/modulating
Factory Setting
1-stage
2-stage
Current Setting
13
Installation Entries
6 Installation Entries
6
Minimum Firing Rate for a Modulating B urner: “MIN MOD”
Modulating Valve Operating Time for the Modulating Burner:
“MOD TIME”
The installation of the burner module FM242 and the selection of a
modulating burner (“MOD BRNR”) are required in order for this
submenu to appear. The minimum firing rate of the burner modulation
is specified in this setting.
The factory setting is 30%.
The installation of the burner module FM242 and the selection of a
modulating burner (“MOD BRNR”) are required in order for this submenu
to appear. The modulating valve operating time is the total time in seconds
required for the modulating burner to go through its full operating range.
To change the “MIN MOD” setting:
The factory setting is 12 seconds.
• Enter the key code.
To change the “MOD TIME” setting:
• Turn the dial until the word “BLR TEMP” appears in the display.
• Enter the key code.
• Press the
button and release.
The display will show “FREEZTEMP”.
• Turn the dial until the word “BLR TEMP” appears in the display.
• Turn the dial until the word “MIN MOD” appears in the display.
• Press the
button and release.
The display will show “FREEZTEMP”.
MIN MOD
30
• Press and hold the
button.
The current value of the “MIN MOD” is blinking.
• Turn the dial until the word “MOD TIME” appears in the display.
• Press and hold the
button.
The current value of the adjustable parameter is blinking.
• Turn the dial until the desired “MIN MOD” value appears in
the display.
MIN MOD
Return to main menu:
• Press the
40
MOD TIME
12
• Turn the dial until the desired valve operating time
“MOD TIME” appears in the display.
MOD TIME
Return to main menu:
button.
• Press the
15
button.
RETURN TO THE STANDARD DISPL AY
• Press the AUT button.
RETURN TO THE STANDARD DISPLAY
• Press the AUT button.
Minimum Modulation “MIN MOD”
14
Range
10% to 60%
Factory Setting
30%
Current Setting
Valve Operating Time “MOD TIME”
Range
5 sec - 60 sec
Factory Setting
12 sec
Current Setting
15
6 Installation Entries
Installation Entries
6
Condensate Protection Feature: “PUMPLOGIC”
Maximum Burner Shut-off Temperature:“MAX TEMP1”
The HS2105 control has a built in feature called “PUMPLOGIC” where the control interrupts circulator
operation when the burner fires into a cold boiler. Once a specified temperature is reached in the boiler, the
pumps are permitted to run. This temperature is adjustable and set with the “PUMPLOGIC” setting.
A maximum temperature is specified above which the electronic boiler sensor
shuts off the burner. This setting is not operative when the control is operating in
the manual mode using the emergency override switch. The adjustable capillary
high limit shuts off the burner in manual override mode.
The factory setting is:
104˚F for a one stage burner
113˚F for a two stage burner
122˚F for a modulating burner
The factory setting is 176˚F.
To change the “MAX TEMP1” setting:
To change the “PUMPLOGIC” setting:
• Enter the key code.
PUMPLOGIC
• Enter the key code.
˚F
104
• Turn the dial until the word “BLR TEMP” appears in the display.
• Press the
button and release.
The display will show “FREEZTEMP”.
• Turn the dial until the word “PUMPLOGIC” appears in the display.
PUMPLOGIC
˚F
Table 1: Minimum “PUMPLOGIC” values
1 - STAGE
104
122
122
104
104
2 - STAGE
N/A
131
131
N/A
122
MAX TEMP1
• Press and hold the
button.
The current value of “MAX TEMP1” is blinking.
Return to main menu:
MODULATING
N/A
131
131
N/A
N/A
• Press the
˚F
176
• Turn the dial until the desired value for “MAX TEMP1” appears in
the display.
• Turn the dial until the desired value for “PUMPLOGIC” appears
in the display. Consult the table below for your boiler model.
Boiler Series
G115,G205, G305
G315
G515
G124X
G234X/G334X
• Press the
button and release.
The display will show “FREEZTEMP”.
• Turn the dial until the word “MAX TEMP1” appears in the display.
130
• Press and hold the
button.
The current value of “PUMPLOGIC” is blinking.
• Turn the dial until the word “BLR TEMP” appears in the display.
MAX TEMP1
button.
˚F
193
RETURN TO THE STANDARD DISPLAY
• Press the AUT button.
Note: The minimum burner shut-off temperature always exceeds the “PUMPLOGIC” value by 9˚F.
Return to main menu:
• Press the
button.
RETURN TO THE STANDARD DISPLAY
• Press the AUT button.
Note: The control resumes automatic operation if no entries are made for a period of five minutes.
Pump Shut-offTemp. “PUMPLOGIC”
16
Range
59-140˚F
Factory Setting
104˚F
Range
Current Setting
Maximum Boiler Shut-offTemperature
158 - 210˚F
Factory Setting
Current Setting
176˚F
17
6 Installation Entries
Installation Entries
6
Heating System Lay-out
Flue Gas Temperature Sensing: “FLUE TEMP ”
The HS2105 control is designed for individual control of two heating circuits with different water temperatures. The
second heating circuit is only possible when the mixing module FM241 has been installed. The nature of each heating
circuit must be specified to the control. For example, baseboard heating on circuit 1 and radiant floor heating on circuit 2.
The HS2105 control needs this information to set the proper curvature for the different heating curves.
Module KM271 must be installed for this submenu to appear. The flue gas
temperature can only be measured and shown in the display when the KM271
module is installed in the HS2105 control. The flue gas temperature can be
viewed in the display.
Circuit 1 Options:
• “PERIM-HTG”
When an ECOKOM communication system and modem is installed, a service
message is transmitted when the flue gas temperature exceeds a preset value. The
boiler will require maintenance. The flue gas sensing capability must be activated
when the KM271 module has been installed.
Circuit 1 operates on a reset curve for perimeter heating
such as baseboard or radiators (Range 86˚F-194˚F).
• “NO SYSTEM”
Circuit 1 follows circuit 2 reset curve. This option
can only be selected when module FM241 is installed.
The boiler operates 9˚F above the circuit 2
CIRCUIT 1
requirements.
The factory setting is “OFF”.
To change the “FLUE TEMP” setting:
Circuit 2 operates on reset curve for perimeter heating
(Range 86˚F-194˚F).
• “FLOOR-HTG”
Circuit 2 operates on a reset curve suitable for radiant floor
heating (Range 86˚F-140˚F).
• “NO SYSTEM”Circuit 2 follows the same reset curve as specified for circuit 1.
• Turn the dial until the word “BLR TEMP” appears in the display.
• Press the
button and release.
The display will show “FREEZTEMP”.
OFF
• Press and hold the
button.
The adjustable parameter is blinking.
• Turn the dial until the desired flue gas temperature is shown in
the display above which a service message would be transmitted.
• Enter the key code.
• Turn the dial until the word “CIRCUIT 1” or “CIRCUIT 2” appears
in the display.
• Press the
FLUE TEMP
˚F
480
Return to main menu:
button and release.
• Press and hold the
CIRCUIT 2
PERIM-HTG
The display will show “PERIM-HTG”.
NO SYSTEM
button. The adjustable parameter is blinking.
• Turn the dial until the desired heating circuit description appears in the
display.
button.
Return to main menu:
RETURN TO THE STANDARD DISPL AY
• Press the
• Press the AUT button.
button.
Note: In case module FM241 is installed, repeat the “Turn the dial” step until the word “CIRCUIT 2” appears in the display.
Repeat the steps above to properly define circuit 2.
Note : The control resumes automatic operation if no entries are made for a period
of 5 minutes.
RETURN TO THE STANDARD DISPLAY
• Press the AUT button.
Flue Gas Temperature “FLUE TEMP”
18
FLOOR-HTG
To change the heating circuit descriptions:
FLUE TEMP
• Turn the dial until the word “FLUE TEMP” “OFF” appears in the display.
• Press the
NO SYSTEM
Circuit 2 Options:
• “PERIM-HTG”
• Enter the key code.
PERIM-HTG
Range
Factory Setting
OFF/120-480˚F
OFF
Current Setting
CIRCUIT 1
CIRCUIT 2
Range
PERIM-HTG/NO SYSTEM
PERIM-HTG/FLOOR-HTG/NO SYSTEM
Factory Setting
PERIM-HTG
FLOOR-HTG
Current Setting
19
6 Installation Entries
Installation Entries
6
Heating Curve Selection: Setting the Reference Temperature
Heating Curve Selection: Setting the “REF TEMP”
The heating curve establishes the relationship between the outside
air and boiler water temperatures. The boiler water is automatically
lowered at warmer outside temperatures and raised at colder outside
temperatures.
The “REF TEMP” setting is adjustable from 86˚F to 194˚F. The slope
of the heating curve changes as the “REF TEMP” value is changed.
REF TEMP
The correct heating curve is determined by the characteristics of the
house (i.e., type of radiation, degree of insulation, heating system
design temperatures, etc.) Baseboard systems are generally designed
to operate at 190˚F on design day. The figure below shows a number of
heating curves for different design temperatures.
˚F
167
The factory setting is 167˚F for “PERIM-HTG” circuits and 113˚F for
“FLOOR-HTG” circuits.
To change the “REF TEMP” settings
REF TEMP
• Enter the key code.
167
• Turn the dial until the word “CIRCUIT 1” or “CIRCUIT 2” appears
in the display.
To select the proper curve, one must always specify the desired water temperature for an outside temperature of 14˚F. The
corresponding water temperature is the “REF TEMP” setting. The HS2105 control then automatically
creates a curve for all outside temperatures.
˚F
• Press the
button and release.
The display will show “PERIM-HTG” or “FLOOR-HTG”.
Heating Curve Adjustments
• Turn the dial until the word “REF TEMP” appears in the display.
The “REF TEMP” fine adjustment should be done based on cold weather performance. Increase the “REF TEMP” value if the
room temperature is too low during cold weather. Decrease the “REF TEMP” setting if overheating tends to occur. Make only
minor adjustments and allow ample time for the system to respond.
REF TEMP
• Turn the dial until the desired value for “REF TEMP” appears in
the display.
Example: “REF TEMP” Selection:
Assume a panel radiator is designed with a
maximum water temperature of 176˚F for a
-20˚F design day. Locate the point where 176˚F
water temperature intersects -20˚F outside
temperature. Draw a curve from this point to the
starting point (68˚). Now enter the chart at the 14˚F
point and move vertically until you intersect your
curve. Now move horizontally
to the left to find your “REF TEMP”. In this case it
would be approximately 142˚F.
• Press and hold the
button.
The current value for “REF TEMP” is blinking.
BOILER
WATER
TEMPERATURE (°F)
0
194
-10
-20
-30
-40
176
167
158
140
Return to main menu:
• Press the
˚F
button.
RETURN TO THE STANDARD DISPLAY
140
122
• Press the AUT button.
104
• Repeat above procedure for “CIRCUIT 2” if module FM241 is installed.
86
Note: The control resumes automatic operation if no entries are made for a period of 5 minutes.
68
68
59
50
41
32
23
14
5
-4
OUTSIDE TEMPERATURE (°F)
-13
-22 -31
-40
Note: In case the maximum design temperature for the radiant floor system exceeds 140˚F, you must select
“PERIM-HTG” for circuit 2 to reach sufficiently high water temperatures.
“REF TEMP” for “PERIM-HTG”
“REF TEMP” for “FLOOR-HTG”
20
Range
Factory Setting
86˚F - 194˚F
86˚F - 140˚F
167˚F
113˚F
Current Setting
21
6 Installation Entries
Installation Entries
6
Vertical Shifting of the Heating Cur ve: “OFFSET”
Domestic Hot Water Priority for Circuit 2 : “DHW PRIOR”
The “OFFSET” entry can be used to parallel shift a heating curve upward or
downward. Every + 1˚F adjustment in the “OFFSET” results in a +2 or +3˚F
increase in water temperature. A maximum upshift in water temperature of
approximately 25 to 30˚F is achieved with the “OFFSET” equal to +9˚F (see
Fig. 1 on page 3).
The HS2105 control automatically grants domestic hot water (DHW) priority over heating circuit 1. In other words, on
a call for domestic hot water, the control temporarily shuts off the circulator for heating circuit 1, fires the burner and
runs the tank circulator.
If Module FM241 is installed in the control, one can select whether to have DHW priority over circuit 2 or to operate
circuit 2 in parallel. If DHW priority over circuit 2 is selected, the mixing valve closes during heating of domestic hot
water. If parallel operation is desired, the mixing valve continues operation and longer DHW heating times can be expected.
The factory setting is 0.
To change the “OFFSET” value:
OFFSET
• Enter the key code.
˚F
0
• Turn the dial until the word “CIRCUIT 1” or “CIRCUIT 2” appears
in the display.
• Press the
button and release.
The display will show “PERIM-HTG” or “FLOOR-HTG”.
To change the “DHW PRIOR” setting:
DHW PRIOR
• Enter the key code.
ON
• Turn the dial until the word “CIRCUIT 2” appears in the display.
• Turn the dial until the word “OFFSET” appears.
OFFSET
• Press and hold the
button.
The current value of “OFFSET” is blinking.
˚F
4
• Turn the dial until the desired value for “OFFSET” is shown in
the display.
• Press the
button and release. The display will show
“NO SYSTEM”, “PERIM-HTG” or “FLOOR-HTG”.
• Turn the dial until the words “DHW PRIOR” “OFF” appear.
• Press and hold the
button. The current value is blinking.
DHW PRIOR
OFF
• Turn the dial until the desired value is shown in the display.
Return to main menu:
• Press the
The factory setting for “DHW PRIOR” is “ON”.
Note: The DHW setting in the main menu must be turned “ON” in
order for the above submenu to appear.
button.
Return to main menu:
RETURN TO THE STANDARD DISPL AY
• Press the
• Press the AUT button.
button.
RETURN TO THE STANDARD DISPL AY
Note: The control resumes automatic operation if no entries are made for a
period of 5 minutes.
• Press the AUT button.
Note: The control resumes automatic operation if no entries are made for a
period of 5 minutes.
“OFFSET” value for Circuit 1
“OFFSET” value for Circuit 2
22
Range
-9˚F - 9˚F
-9˚F - 9˚F
Factory Setting
0˚F
0˚F
Current Setting
“DHW PRIOR” (for Circuit 2 only)
Range
ON/OFF
Factory Setting
ON
Current Setting
23
6 Installation Entries
Installation Entries
6
Room Sensor: “REMOTE ”
The room sensor is an optional indoor temperature sensor which is required when using a constant circulation zone.
A maximum of 2 room sensors can be installed on the system; one for a constant circulation zone for circuit 1 and one
for a constant circulation zone for circuit 2. If no room sensors are installed, the system operates using only outside
temperature as a reference and requires conventional thermostats to control pumps/zone valves.
Maximum Heating Circuit 2 Temperature: “MAX TEMP2”
The maximum temperature in heating circuit 2 is specified in “MAX
TEMP2” and shall not exceed this value.
The factory settings for circuit 2 are:
The room sensor performs a correction or compensation on the boiler water temperature based on the deviation between
the actual and desired room temperature. The room sensor allows setting of day temperature and night setback as well as
remotely overriding the customized heating program. The room sensor also performs a “boost” during transition to day mode.
for “PERIM-HTG” 194˚F
for “FLOOR-HTG” 122˚F
To change the “MAX TEMP2” setting:
•
MAX TEMP2
Enter the key code.
˚F
194
• Turn the dial until the word “CIRCUIT 2” appears in the display.
• Press the
button and release.
The display will show “PERIM-HTG” or “FLOOR-HTG”.
The room sensor selection must be activated for use.
The factory setting is “OFF”.
To activate the room sensor(s):
•
• Turn the dial until the word “MAX TEMP2” appears in the display.
MAX TEMP2
˚F
140
• Press and hold the
button.
The current value of “MAX TEMP2” is blinking.
REMOTE 1
OFF
Enter the key code.
• Turn the dial until the word “CIRCUIT 1” or “CIRCUIT 2” appears in
the display.
REMOTE 1
• Press the
button and release.
The display will show “PERIM-HTG” or “FLOOR-HTG”.
• Turn the dial until the desired value is shown in the display.
• Turn the dial until the word “REMOTE 1” or “REMOTE 2” appears
in the display.
Return to main menu:
• Press and hold the
• Press the
• Turn the dial until the word “ON” appears in the display.
button.
RETURN TO THE STANDARD DISPL AY
Return to main menu:
•
• Press the
Press the AUT button.
ON
button. The adjustable parameter is blinking.
button.
RETURN TO THE STANDARD DISPL AY
Note: The control resumes automatic operation if no entries are made for a
period of 5 minutes.
• Press the AUT button.
NOTICE: If a room sensor is installed on either circuit 1 or circuit 2, then the desired day and night temperatures can only be
set on the room sensor and no longer on the HS2105 control itself. The buttons on the HS2105 itself are no longer functional
for this circuit. Pressing the temperature button on the HS2105 will indicate that a room sensor is installed on the system. The
buttons on the HS2105 apply now only to the heating circuit without a room sensor. The day and night temperatures are set on
the HS2105 only for this circuit.
Max Temperature for Circuit 2 PERIM – HTG
Max Temperature for Circuit 2 FLOOR – HTG
24
Range
Factory Setting
68˚F - 194˚F
68˚F - 140˚F
194˚F
122˚F
Current Setting
Remote Sensor CIRCUIT 1
Remote Sensor CIRCUIT 2
Range
OFF/ON
OFF/ON
Factory Setting
OFF
OFF
Current Setting
25
6 Installation Entries
Installation Entries
6
Adjusting the Room Temperature Compensation: “ROOM COMP”.
Setback Mode Selection
The room sensor compensates for swings in room temperature (i.e. solar gain,
internal heat gain, open windows) by adjusting the water temperature in its
particular zone. The range of compensation is adjustable and limits the effect of
the room sensor on the water temperature.
The HS2105 control contains night setback capability and allows you to select from 4 different types or modes of
night setback for customized operation. These setback modes differ in their operation during setback periods.
The factory setting is 5˚F.
The factory setting is “OASETBACK”.
Note: When “OFF” is selected, the room sensor does not have any effect
on the heating curve where it is placed. The constant circulation pump
continues to operate.
1 Boiler Off (“BLR OFF”)
In this mode the heating system shuts down completely during the
night time as long as the outside temperature exceeds the “FREEZTEMP”
setting. Below the “FREEZTEMP” value, the circulators run in freeze
protection mode. The boiler only fires if the water temperature drops below
41˚F. Again, no room sensors are used when using this setback mode.
Night Setback Options
To change room temperature compensation: “ROOM COMP”:
BLR OFF
• Enter the key code.
• Turn the dial until the words “CIRCUIT 1” or “CIRCUIT 2” appear
in the display.
ROOM COMP
5
• Press the
button and release.
The display will show “PERIM-HTG” or “FLOOR-HTG”.
• Turn the dial until the word “ROOM COMP” appears in the display.
• Press and hold the
button.
The current value of “ROOM COMP” is blinking.
˚F
ROOM COMP
˚F
10
• Turn the dial until the word “OFF” or the desired amount of “ROOM
COMP” appears in the display.
button.
RETURN TO THE STANDARD DISPLAY
• Press the AUT button.
26
SETBACK
RMSETBACK
OASETBACK
Recommended Settings:
Note: The control resumes automatic operation if no entries are made for
a period of 5 minutes.
Room compensation for CIRCUIT 1
Room compensation for CIRCUIT 2
3 Room Setback (“RMSETBACK”)
This setback mode should only be selected when a room sensor is installed and
activated. The system operates to maintain the desired night time temperature
as specified on the room sensor. The circulators will operate continuously when
the outside temperature is below the “FREEZTEMP” setting; the circulators
shut down when the outside temperature is above the “FREEZTEMP” setting
and the actual room temperature exceeds the night time setting.
4 Outside Air Setback (“OASETBACK”)
The heating system (burner and heating circulators) shuts down in
night mode if the outside temperature exceeds the “FREEZTEMP”; if
the outside temperature drops below the “FREEZTEMP”, the heating
system operates on a setback curve. This mode should only be used
on buildings not occupied in the night mode; i.e. commercial and
daytime use only buildings. A room sensor is generally not used in
this application.
Return to main menu:
• Press the
2 General Setback (“SETBACK”)
The heating circulators continue operation in the “SETBACK” mode; the
boiler operates on a lower heating curve and fires the burner as needed. This
mode is generally used when no room sensors are present and individual zones
are controlled by conventional thermostats.
Range
Factory Setting
OFF/ 1 - 18˚F
OFF/ 1 - 18˚F
5˚F
5˚F
Current Setting
Heating circuit with constant circulation zone :
Heating Circuit with ON/OFF thermostats:
Commercial (day use only) buildings:
RMSETBACK
SETBACK
OASETBACK
27
6 Installation Entries
Installation Entries
6
To Change the Setback Mode Setting:
Domestic Hot Water Production Capability: “DHW PROD”
• Enter the key code.
The HS2105 is set up to have an indirect fired water tank installed in
the system. The DHW portion of the control is activated.
• Turn the dial until the word “CIRCUIT 1” or “CIRCUIT 2” appears in the display.
The factory setting is “ON”.
• Press the
button and release.
The display will show “PERIM-HTG” or “FLOOR-HTG”.
• Turn the dial until the word “OASETBACK” appears in the display.
OASETBACK
• Press and hold the
button.
The adjustable parameter is blinking.
To shut off the DHW feature of the HS2105 control:
Return to main menu:
SETBACK
button.
DHW PROD
• Enter the key code.
• Turn the dial until the desired setback mode appears in the display.
• Press the
In case no indirect fired DHW tank is installed in the system, the DHW
production must be shut off. In case the DHW is not turned off, a “DHW
SENSR” error message will appear in the display because the DHW
sensor is not installed.
ON
• Turn the dial until the word “DHW PROD” appears in the display.
• Press and hold the
button.
The adjustable parameter is blinking.
RETURN TO THE STANDARD DISPL AY
DHW PROD
• Turn the dial until the word “OFF” appears in the display.
• Press the AUT button.
OFF
Return to main menu:
Note: The control resumes automatic operation if no entries are made for a
period of 5 minutes.
• Press the
button.
RETURN TO THE STANDARD DISPL AY
• Press the AUT button.
Note: The control resumes automatic operation if no entries are made for a
period of 5 minutes.
Note: In case the DHW capability is activated, a DHW recirculation pump (if
installed) can be controlled.
Range
Factory Setting
Setback Modes for CIRCUIT 1
OASETBACK/SETBACK/
RMSETBACK/BLR OFF
OASETBACK
Setback Modes for CIRCUIT 2
OASETBACK/SETBACK/
RMSETBACK/BLR OFF
OASETBACK
28
Current Setting
DHW Capability “DHW PROD”
Range
OFF / ON
Factory Setting
ON
Current Setting
29
6 Installation Entries
Display of Heating Curves
7
DHW Recirculation Pump “RECIRPUMP”
The current heating curves for circuit 1 and circuit 2 (if module FM241
is installed) can be displayed by showing three water temperatures for each
circuit at outside temperatures of 50˚F, 32˚F and 14˚F based on
current system settings.
The HS2105 can operate a DHW recirculation pump for constant
supply of domestic hot water at faucets. This recirc pump is simultaneously
activated with the DHW production and runs concurrent with day mode
operation for DHW.
To display the heating cur ve for circuit 1 or circuit 2:
This recirculation pump can be set up to operate continuously or
intermittently. This pump is operational when at least one heating
circuit is operating in day mode or when DHW production is in
constant day mode.
3
minutes
ON
3
• Enter the key code.
OFF
1 Hour
• Turn the dial until the word “HTG CURVE 1” or “HTG CURVE 2”
appears in the display.
The recirculation pump operates continuously in the “ON” position.
• Press and hold the
button.
HTG CURVE 1
113
˚F
50
The factory setting is 2.
A setting of 2 means that the recirculation pump runs twice every hour for
a three minute interval. One can select from 1 to 6 intervals per hour for
customized operation.
• The first screen shows the water temperature at 50˚F outside
temperature, turning the dial shows the water temperature at 32˚F
and the third display shows the water temperature at 14˚F outside
temperature. Keep the
button down during these steps.
RECIRPUMP
2
To change the inter val run time for the recirculation pump:
• Enter the key code.
Return to main menu:
• Press the
• Turn the dial until the word “RECIRPUMP” appears in the display.
145
˚F
32
button.
HTG CURVE 1
RECIRPUMP
• Press and hold the
button.
The adjustable parameter is blinking.
HTG CURVE 1
167
4
˚F
14
• Turn the dial until the desired number of intervals per hour, “ON” or
“OFF” appears in the display.
Return to main menu:
RETURN TO THE STANDARD DISPL AY
• Press the
• Press the AUT button.
button.
RETURN TO THE STANDARD DISPLAY
Note: The control resumes automatic operation if no entries are made for a
period of 5 minutes.
• Press the AUT button.
Note: The control resumes automatic operation if no entries are made for
a period of 5 minutes.
DHW Recirculation “RECIRPUMP”
30
Range
OFF /1/2/3/4/5/6/ON
Factory Setting
2
Current Setting
31
8 Testing of Relays
LCD Test
9
Testing of All Relays of the HS2105 Control : “REL AYS”
The switching relays in the HS2105 control can individually be tested with the “RELAYS” test. This test is also
useful to verify that circulators, burner(s) and mixing valve(s) are properly wired to the control. The actual relays
available for testing depend on the modules inserted into the control.
LCD Test:
The following relays can be tested:
•
•
•
•
•
•
•
Burner
Burner Modulation
Circuit 1 Heating Pump
Circuit 2 Heating Pump
Mixing Valve
DHW charging Pump
DHW Recirculation Pump
first stage
open/close
on/off
on/off
open/close
on/off
on/off
One can verify with the LCD test if all digits and displays are
functioning properly:
second stage
• Enter the key code.
• Turn the dial until the word “LCD TEST” appears in the display.
• Press and hold the
To perform the “REL AYS” test:
button.
• Enter the key code.
• Turn the dial to ensure that all digits and symbols
appear correctly in the display.
• Turn the dial until the word “RELAYS” appears in the display.
All digits and symbols must appear fully in the display.
• Press and hold the
RELAYS
button.
• Turn the dial until the display reads “BURNER ON”.
The Burner comes on.
• Release the
button.
If the burner is functioning properly, the burner symbol appears in the display.
BURNER
OFF
• To access and display another relay, turn the dial without pressing
the
button.
• To test this relay, press and hold the
to activate the relay.
button and turn the dial
RETURN TO THE STANDARD DISPL AY
• Press the AUT button.
Note: The control resumes automatic operation if no entries are
made for a period of 5 minutes.
BURNER
All relays can be tested sequentially and the switched status is displayed by an
identifying symbol.
ON
Return to main menu:
• Press the
button.
RETURN TO THE STANDARD DISPL AY
• Press the AUT button.
Note: The control resumes automatic operation if no entries are made for a period of 5 minutes.
32
33
10 Total System Reset
Version Number
11
RESET
An overall system “RESET” returns all parameters back to the original
factory settings.
Version Number
To perform a total system “RESET”:
• Enter the key code.
RESET
The version number is a manufacturer’s identification number that
provides product information regarding the control panel. It is
recommended to write down this version number in case of future
reclamation issues.
• Turn the dial until the word “RESET” appears in the display.
To access the Version Number:
• Press the
button and hold. Continue to hold the
button until all “8” characters disappear in the display.
NOTE: If the
button is released before all “8” characters have
disappeared, no system reset has been performed.
• Enter the key code.
RESET
• Turn the dial until the word “Version” appears in the display
VERSION
211
• Write down the specific version number.
• Release the
button. The “8” characters reappear to signify
that the system reset is complete.
RESET
VERSION NUMBER : ___________________
RETURN TO THE STANDARD DISPLAY
RETURN TO THE STANDARD DISPL AY
• Press the AUT button.
• Press the AUT button.
Note: The control resumes automatic operation if no entries are made
for a period of 5 minutes.
Note: The control resumes automatic operation if no entries are made for a period of
5 minutes.
34
35
12 Trouble Shooting Procedures
The HS2105 has built-in self diagnostics software which continually monitors sensor inputs to ensure that
measured values are within acceptable limits, monitors response of system components and signals descriptive
error messages if these conditions are not met.
Message (ERR)
Meaning
Action
BURNER
Burner lock-out
Check burner and press burner reset.
BLR SENSR
Defective FK sensor
OA SENSOR
DHW SENS
MIX SENSR
REMOTE 1/2
HEATING
DHW
Defective outside air sensor
Defective DHW sensor
Defective mixed circuit sensor (FV)
Non-Responding Room Sensors
Heating system stays cold.
Continued pump logic operation.
DHW stays cold for 2 hours.
Parameter Settings at the Installation Level
Record your specific settings at the installation level on this page for future reference. Observe that not all
entries listed may actually be accessible as it depends on the modules inserted in the HS2105 and the value
of certain parameters.
Parameter
Range
Language
Factory Setting
86˚F - 194˚F
167˚F
Check resistance of FK boiler sensor and
verify with curve.
Reference Temperature FLOOR-HTG*
86˚F - 140˚F
113˚F
Freeze Protection
0˚F - 50˚F
34˚F
Check resistance of OA sensor and
verify with curve.
Room Sensor
OFF / ON
OFF
Room Compensation
OFF / 1 - 18˚F
5˚F
Night Setback Modes
Outside Setback
OASETBACK
Check resistance of FV sensor and verify
with curve.
Check sensor placement and wiring.
Check wiring to room sensor (wire 1 to 1, wire 2 to
2). If lights on room sensor blink, check HK
dial internal on room sensor. Check if room
sensor is activated on HS2105
Turn control OFF/ON.
Check boiler operation.
Check manual high limit reset.
Check tank pump operation and system piping.
These messages are very helpful in troubleshooting the HS2105. The control continues burner and circulator
operation in case of sensor failure to prevent possible freeze-up of the heating system.
Actual Setting
Deutsch
Reference Temperature PERIM-HTG
Check resistance of FB sensor and
verify with curve.
13
Setback
Room Setback
Boiler Off
Maximum Circuit 1 Temperature
158 - 210˚F
176˚F
Maximum Circuit 2 Temperature*
68 - 140˚F
68 - 194˚F
122˚F for FLOOR-HTG
194˚F for PERIM-HTG
Flue Gas Temperature**
OFF/120˚F - 480˚F
OFF
Offset : Vertical Shift of Heating Curve
-9˚F - 9˚F
0˚F
Heating Circuit 1
NO SYSTEM/PERIM-HTG
PERIM-HTG
Heating Circuit 2*
NO SYSTEM/PERIM-HTG
FLOOR-HTG
FLOOR-HTG
DHW Production
ON/OFF
ON
DHW recirculation Pump
OFF/1/2/3/4/6/ON
2
Burner System***
1 stage/2 stage /modulating
ONE-STAGE
Modulation Range***
10% - 60%
30%
Modulating Valve Operating Time***
5 sec. - 60 sec.
12 sec.
Pumplogic (Condensate Protection)
59˚F - 140˚F
104˚F
Building Response
DHW Prior
1/2/3
ON/OFF
2
ON
*Requires Mixing Module FM 241
**Requires Communications Module KM 271
***Requires Burner Module FM 242
36
37
14 Sensor Curves (General)
Sensor Curves
Switch the power off before taking any measurements. Remove sensors from the back of the Ecomatic and measure
the resistance of the cable ends. The curves show mean values and are subject to deviations.
14
Room Temperature Sensor (BF)
Outdoor temperature sensor (FA)
41
5
32
23
14
59
50
41
50
59
68
77
86
Room Temperature (°F)
Outdoor Temperature (˚F)
Boiler, domestic hot water and mixed circuit supply temperature sensors (FK, FB, FV)
Note: The resistance of the room sensor can only be measured when an external sensor is connected to the
EXT terminals in the room sensor. Measure at the EXT terminals with the room sensor disconnected from
the HS2105 control.
68
86
104
122
140
158
176
194
Boiler Water Temperature (˚F)
38
39
15 Wiring Diagrams
40
Wiring Diagrams
15
41
15 Wiring Diagrams
40
Wiring Diagrams
15
41
15 Wiring Diagrams
42
Wiring Diagrams
15
43
15 Wiring Diagrams
42
Wiring Diagrams
15
43
15 Wiring Diagrams
44
Wiring Diagrams
15
45
15 Wiring Diagrams
44
Wiring Diagrams
15
45
15 Wiring Diagrams
46
Notes
47