1
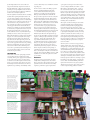
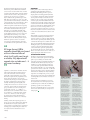
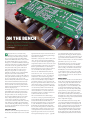
TUTORIAL
ON THE BENCH
Repairing a Neve 51 Series console
– not for the feint hearted.
Text: Rob Squire
Way back in Issue 65, AT editor Andy
Stewart wrote of his joy in discovering the
‘Neve’ tile wedge. These little red wedges became
the go-to device for locking down all the failed
switches in his Mill Studio’s Neve 51 Series console.
In a typical mix he’d often use a good portion of
the bag of 100, for which he’d shelled out the kingly
sum of three bucks. Of course, failed switch latches
weren’t the console’s only problem and over the
next year there’d be many a phone call between
Andy and I about which area of the console to
kick, poke, swap around or re-wire to keep a
semblance of a mixing console operational. Often
these phone calls would conclude with my
suggestion to just grab a couple of solid cardboard
boxes, pull a bunch of channel strips out and shoot
’em over to the workshop for some love and
attention. Finally Andy relented, and as I emerged
from a much needed Christmas/New Year break
the first couple of boxes arrived on the doorstep;
and as is often the case in this caper they arrived
with the requirement that they be back within the
week for a big mix project.
Fortunately, this is one ‘vintage’ console I’ve become
quite familiar with over the years. I have test jigs,
parts and more than a few tricks up my sleeve for
the repair of these consoles, and the process has
become quite streamlined. However, as I’ve made
clear to Andy (and many other Neve 51 Series
console owners over the years), getting these
consoles back to their best is hard, time-consuming
work. They’re not a doddle by any stretch and this
comes at a financial penalty. That bag of red wedges
was going to be looking like an even greater bargain
than it did at the time!
A HISTORY LESSON
The Neve 51 Series was developed in the early 1980s
and was Neve’s first fully IC-based console; a radical
AT 64
departure from the early 10 Series discrete, Class-A
design, which has become the holy grail of vintage
audio hunters everywhere.
Nevertheless, as the glossy brochure for this console
states: “The 51 Series represents the culmination
of 20 years of professional audio equipment design
and production by Neve.” These consoles can sound
great, and depending on the version, can also have
fantastic operational features. As with all largeformat and expensive consoles of this era, each one
was custom built to the client’s specification.
There were two fundamental formats in the 51
Series: the 5104 / 5114 – a four group and stereo
bus layout; and the 5116 / 5106 – an eight group
and dual stereo bus format. Each supported a
couple of variations of input channel with options
for two or four-band EQ, a compressor/limiter/
gate module, and mono or stereo inputs. Beyond
the options presented in the brochure, I’ve also seen
other variations built to order featuring 32 group
buses, a surround panning option for a film studio
console and many variations in the monitoring
control and master section. Some consoles also
came loaded with one (or several) of the 83046
dual-channel compressors, which for a time were
worth more than the console itself.
This console harks from an era when buying a
console was a serious proposition involving serious
money, where the first step was always a dialogue
between the manufacturer and the client as to
their exact requirements before a console was built
to order. This attention to detail was taken even
further in the documentation that arrived with
the console. In amongst the two 6cm thick service
manuals there’s a chapter covering some 30 pages
of actual performance test measurements: every
input and output of the console, noise, distortion,
max output level, frequency response… page after
page of measurements of the very console you’ve
just purchased, and all capped off with a signature
on the last page. These days, you’d be lucky to get 30
pages of basic schematics emailed to you as a PDF,
and none of them would be a record of the technical
performance of your very own console.
In Australia, the 51 Series console was a popular
purchase for many broadcasters. The ABC and
other TV stations owned many; some specified for
music recording, some for film or broadcast tasks.
Naturally these consoles have now been moved
on and many have been scooped up by recording
studios, often for a price that seemed a bargain for
a console with the ‘N’ word on it, and also often in
very poor condition.
HOW IT WORKS
As mentioned, the 51 Series console is an IC-based
design, almost exclusively using the relatively new
(in 1980) 5534 opamp and its dual variation, the
5532. These ICs were specifically developed for
audio applications – low noise, the ability to drive
600Ω, and wide bandwidth. Despite these chips
now being over 30 years old, they’re still regularly
employed in new pro audio equipment. In many
design applications, they’re hard to beat despite
the erroneous view that rattles around many a web
forum that new is always better: ‘Any IC design that
old simply can’t be very good!’ they mutter, and this
leads to rampant IC swapping.
On one hand the broad electronic design of this
console isn’t particularly unusual and many of the
design elements could have come straight out of a
design ‘cookbook’. However, in two particular areas
Neve implemented circuit techniques that were
right out of left field and rarely if ever pursued by
another designer. One of these dealt with a little
known quirk of basic opamp design whereby the
level of high-frequency distortion can be reduced
by the simple addition of one resistor. One can
only presume that many designers aren’t aware of
this effect. Either that, or the bean counters figure
spending one cent per amplifier to shave a fraction
of a percent off the distortion figures at 10kHz isn’t
worth it. Neve certainly thought it was.
The other significant area that has left me scratching
my head when repairing the faulty modules is the
console’s entire grounding system. All good audio
designers understand that ‘ground’ is a relative thing
and relying on it as a reference point for all console
subsections leads to the potential for all sorts of
noise problems. Neve understood grounding: there’s
a whole page in the manual on it that talks about
exactly how to earth the console and its relationship
to all outboard you might attach. However, beyond
the external grounding of the console every subcircuit within the console, every individual mic pre,
each EQ, aux send, etc. has its own local ground.
Rather than attempting to make ground everywhere,
it appears in a console at exactly the same voltage
and with 0Ω between all the points (which is an
impossible task); the myriad ground points are all
connected to the main grounding point with 100Ω
resistors. This approach is known as ‘soft’ grounding,
and if done well, effectively decouples each circuit
subsection from all the others, minimising noise
issues. This is a particularly unusual technique in a
console, and while it achieves its aim, it can make
troubleshooting a bit trickier.
THE DOWNSIDE
The downside to the 5534 opamp employed in the
console is heat. The 5534 is a hungry IC opamp
consuming 4mA of power supply current, and there
are lots of 5534s in a 51 Series console! A typical
36-channel console will dissipate around 500 watts
of heat, so most modest-sized control rooms won’t
need heating in winter! This heat factor is the most
significant issue pertaining to the reliability of these
consoles, and the major cause of failure in a number
of specific parts.
The most obvious of these is the Philips capacitors
that were originally installed throughout the
console, with the dreaded blue axial capacitor
employed as a coupling cap in the signal paths.
Many pro audio manufacturers in the UK and
Europe used these capacitors in the 1980s. Why the
dread? Simply that they don’t last. All electrolytic
capacitors are degraded over time with heat, and
with circuit boards stuffed with 5534 mini radiators
all stacked back-to-back inside the 51 Series channel
modules and only a small space for heat to rise
out around the knobs, it gets pretty damn warm.
I have a couple of 51 Series channel strips in the
workshop at the moment that an owner bought on
the understanding that they’d been recapped in 1998
– i.e., had all the electrolytic capacitors replaced.
Indeed they had. However, the replacement caps
chosen were the same Philips (now BC components)
capacitors, which probably seemed like a good idea
at the time – keeping the original brand. These
caps, which have had less than 10 years of use,
are all knackered and need to be replaced again. I
always use capacitors rated for high temperature
environments, these days they cost the same as
standard temperature range capacitors. Time will
tell how long these will last, but I’m punting on
somewhere in the order of 20 years rather than less
than 10. Fortunately for Andy, his console had been
recapped, and not using the Phillips capacitors. With
very little use since then, the capacitors are still in
good condition.
RECAPPING
Recapping consoles is pretty much a de rigueur
activity in the workshop, however, the 51 Series
has lots of capacitors; far more than in most other
equivalent consoles. The amount of disassembly
required to perform the capacitor replacement
opens up the second big can of worms in these
consoles. All input channel sub-modules – say the
EQ module or the mic/line module – consist of
two circuit boards back-to-back (or is that really
front-to-front?). The boards are interconnected with
flat ribbon-style cables through which power, audio
signals, and switching contacts shoot back and forth
between the two PCBs. The flat cables (or FSPs as the
service manual refers to them) consist of a number
of flat thin strips of metal sandwiched between two
insulating sheets, usually Teflon.
Once again, over time, the heat gets to these FSPs
causing the insulating sheets to fall off, leaving a
bunch of conducting metal strips flapping in the
breeze. Prising a pair of boards apart to replace
capacitors is often the final straw for these FSPs, and
the job of replacing a capacitor or two often leads
to replacing the damaged flat cable. If you’re really
careful not to disturb the cable too much you can
do the capacitor replacement, put the two boards
back together and poke the insulating sheets back
into place, keeping your fingers crossed that the bare
metal strips will stay in place and not conspire to
touch one another.
Over the years I’ve seen all sorts of approaches to
dealing with the cables. From ripping them out
and replacing each strip with a group of individual
insulated wires, to tricks with masking tape, glue
and wishful thinking holding it all together. The
best solution is to simply replace the FSP with a
new one and these are still readily available. What’s
more, they’re now made using a much more robust
and heatproof insulating sheet. Problem is, they’re
hideously expensive and time consuming to replace.
Depending on the client’s budget, sometimes I’ll
resort to tricks and wishful thinking rather than
replace them if I reckon we can get away with it.
The biggest issue (at least to the console’s operator)
is the no longer latching pushbutton switches.
The dreaded ribbon-style
cables ferry power, audio
signals and switching
contacts. These flat
cables (or FSPs as the
service manual refers to
them) consist of a number
of flat thin strips of metal
sandwiched between two
insulating sheets, usually
Teflon. Most are degraded
and pose a major threat to
the console’s reliability.
Sealed pots are difficult
to clean, but there’s a cap
on the back that can be
removed permanently,
which allows cleaning
sprays in to do their job.
Broken dialstat switches
have been the greatest
bugbear for 51 Series
Neve console owners for
years – until now. They’re
available once again (for
a price) and Rob’s also
repairs them brilliantly
– Ed.
AT 65
The dialstat switch has already received special
mention in a previous OTB article and when it
comes to Neve consoles from the 1980s, it’s hard
to mention the brand without cursing the dialstat
switch in the same sentence. These push-button
switches are in some ways very cool things –
they’re small and take up minimal space on the
PCB. They can be made as two, four, six or eight
poles, and either mounted directly to a PCB or off
a front panel with wires soldered directly to them.
The internal switch contacts are silver plated,
which is the premier switch material, surpassing
gold for its electrical properties. However, there’s
no free lunch and these switches have proven
themselves to be particularly unreliable both
mechanically and electrically as they age. While
proving highly resistant to corrosion, silver does
quite readily tarnish, forming a coat of silver
sulphide out of those freely available in the air.
And of course, in the olden days when everyone
chuffed on cigarettes over the console, there
was even more sulphur hanging around ready
to tarnish all those silver pins. Tarnish (or silver
²
All large-format 1980s
consoles should be purchased
with an informed idea of
what it will really cost to get
a reliable, fully operational
console into a studio and… it
will never be cheap
³
sulphate) is a semiconductor and there are times
when it turns these dialstat switches into fuzz
boxes, with each switch contact increasingly
looking like a diode rather than a piece of wire.
This leads to signals that are just plain distorted,
and in certain circumstances non-existent!
Sometimes they’ll only pass an audio signal when
the level is particularly ‘hot’, whereupon they
suddenly ‘break through’ and magically start
working. I know of at least one 51 Series console
owner who, before starting work each day, fires
up a special ProTools session consisting of 24
tracks of full-scale tone – i.e., +24dBu or so –
that he blasts down each channel of the console
for 10 minutes or so (with the monitors turned
off of course). This does wonders for zapping
the switches and ensuring that there’ll be no
little intermittencies or fuzz boxes on that day’s
mixing.
Cleaning switches, like replacing capacitors, is
also de rigueur on the workshop bench, although
the dialstat switch is very fussy about which
contact cleaner is used. Many of the conventional
cleaning sprays actually damage the switch and
I’ve only found one brand that can be used
reliably.
AT 66
SEEING RED
Harking back to those red tile wedges, the most
significant problem with dialstat switches is
the failing of the latching pin. This is a piece of
shaped plastic not much bigger than fly shit that
is responsible for keeping the switch locked in the
‘down’ position. In Andy’s console this was issue
number one. Not too many years ago the dialstat
switch was pretty much unobtainable and I recall
standing around at an AES conference with a bunch
of studio techs from the UK and USA trading ideas
about how to deal with non-latching dialstats. It was
the bane of our console servicing existence – not
only are these switches found in Neve consoles, but
they’re also everywhere on SSL 4000 and 6000 Series
consoles. On a 48-channel SSL 4000 there are 1728
of them!
Then suddenly a couple of years back, the dialstat
switch became available again, and while it was
expensive, at least you could get it. Better than that
I was also able to purchase just the latching pin and
so shelled out and bought 1000 of them. After some
time spent experimenting with cleaning techniques,
I finally put in place a procedure that enabled me
to remove a switch, de-tarnish and clean all the
contacts, lubricate it, replace the pesky latching
pin, and end up with an ‘as new’ switch. This takes
time of course, but it saves about 50% of the cost of
simply replacing the switch with a new one.
CONSOLE OR MILLSTONE?
The Neve 51, despite being IC-based and having
lots and lots of electrolytic capacitors in the signal
path, is a great sounding console. But all this
prerequisite servicing work and the attendant costs
can make the faint-hearted shy away. The point
of all this is to be aware that large-format 1980s
consoles should be purchased with an informed
idea of what it will really cost to get a reliable, fully
operational console into a studio and… it will never
be cheap. The purchase price is only the beginning.
And let’s face it, reliability is the key here. Having
a big name console might look good on your gear
list, but unless it works and you feel confident using
it, it will quickly become a millstone around your
creative neck.
I’ve been employed to refurbish lots of consoles
but only twice have I ever been employed to write
a technical report for a client who was thinking of
purchasing a specific console. Why is that?
It’s no fun contemplating the true cost of restoring
an old console, but it’s vital if you ever expect it to
work properly.
THE MILL’S 51 SERIES
Andy Stewart: I’ve had
the Neve 51 Series
for a few years now
and even though it
sounds great, it’s
unreliability has been
a pain in the arse in
the last 12 months.
There haven’t been
major issues with the
console, just lots of
small ones, and almost
all of them directly
or indirectly related
to the reliability of
the dialstat switches.
It’s only now that Rob
and I have fixed half
the channels that the
problems seemingly
related to other issues
have been proven
to be related to the
functionality of these
switches.
Repairing them is
costly, but in the
grand scheme of
things, I’d much rather
fork out the dosh
to have the console
fully operational
than buy yet another
esoteric piece of
outboard gear. For me,
surrounding yourself
with a large pile of
impressive looking but
unreliable analogue
gear is folly. It doesn’t
produce good mixes
or an efficient working
environment. In the
end a setup like that
is really just a pretend
studio where half your
time is spent chasing
down faults.
2010 is the year where
The Mill becomes fully
operational and every
piece of equipment
is restored, sold or
thrown in the bin. It’s
going to be bliss.