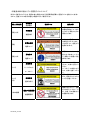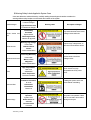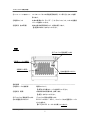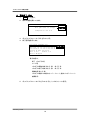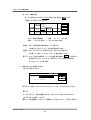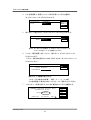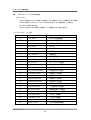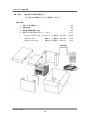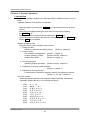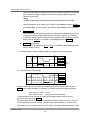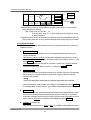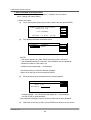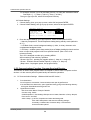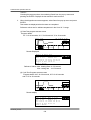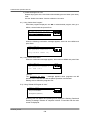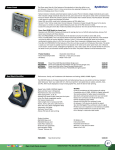
1
TaKaRa PCR
Thermal Cycler DiceTM
Version Ⅲ
Model TP600 / TP650
Gradient
/
Standard
Operation Manual
取扱説明書
お願い
・TaKaRa PCR Thermal Cycler Dice をお使いになる前に、この取扱説明書をよくお読みください。
・本文中の注意事項は必ずお守りください。
・この取扱説明書は、必要なときにすぐ取り出して読めるように、大切に保管しておいてください。
Attention
・Users are recommended to carefully read the contents of this manual before operating
the TaKaRa PCR Thermal Cycler Dice system.
・Carefully observe all special Warnings and Cautions outlined in this manual.
・This manual should be stored for reference in a secure and accessible location.
NOTICE
< Only for US >
Purchase of this instrument conveys a limited non-transferable immunity from suit for the
purchaser’s own internal research and development and applied fields other than human in
vitro diagnostics under one or more of U.S. Patents No. 5,038,852, 5,656,493, 5,333,675,
5,475,610, and 6,703,236 (claims 1-6 only), or corresponding claims in their non-U.S.
counterparts, owned by Applera Corporation. No right is conveyed expressly, by implication or
by estoppel under any other patent claim, including under U.S. Patent No. 6,814,934, which
claims thermal cycler apparatus and systems capable of real-time detection. Further
information on purchasing licenses may be obtained by contacting the Director of Licensing,
Applied Biosystems, 850 Lincoln Centre Drive, Foster City, California 94404, USA.
Applied Biosystems does not guarantee the performance of this instrument.
< Outside US >
Purchase of this instrument conveys a limited non-transferable immunity from suit for the
purchaser’s own internal research and development and applied fields other than human in
vitro diagnostics under one or more of U.S. Patents No. 5,038,852, 5,656,493, 5,333,675,
5,475,610, and 6,703,236 (claims 1-6 only), or corresponding claims in their non-U.S.
counterparts, owned by Applera Corporation. No right is conveyed expressly, by implication or
by estoppel under any other patent claim. Further information on purchasing licenses may be
obtained by contacting the Director of Licensing, Applied Biosystems, 850 Lincoln Centre Drive,
Foster City, California 94404, USA.
Applied Biosystems does not guarantee the performance of this instrument.
TaKaRa理化学機器の安全上のご注意
●ご使用の前にこのパンフレットをよくお読みのうえ、正しくお使いください。
●お読みになった後は、使用時にいつでも見ることのできる場所に保管してください。
はじめに
TaKaRa 理化学機器製品は、すべて研究用途を目的として販売しております。
専門家の方以外は使用しないでください。
また、製品の仕様、外観は、改良のため予告なしに変更されることがありますので、あらかじめ
ご了承願います。
保証と責任
製品の保証内容、修理等に関しては、製品に貼付される保証書の内容をよくお読みください。
製品の安全には万全を期しておりますが、もしも製品の安全に関してご質問がある場合は、
すぐに機器販売代理店もしくは下記までご連絡ください。
タカラバイオ株式会社
東日本販売課
TEL 03-3271-8553、FAX 03-3271-7282
〒103-8232 東京都中央区日本橋2丁目15-10
西日本販売課
TEL 077-543-7297、FAX 077-543-7293
〒520-2193 滋賀県大津市瀬田三丁目4番1号
機器販売課
TEL 077-567-9261、FAX 077-565-6995
〒525-0055 滋賀県草津市野路町2257番地
ご使用上(安全および危険防止)の注意事項
(1)危険表示について
製品本体や取扱説明書には、製品を安全にお使いいただき、お客様や他の人々への危害や財産への損
害を未然に防止するために、様々な警告表示を行っています。
下記に示すマークの内容をよくご理解いただいたうえで、本文をお読みください。
!
警告
この表示を無視して誤った取り扱いをすると、
重大な事故を引き起こす可能性があります。
!
注意
この表示を無視して誤った取扱いをすると、
事故を引き起こす可能性があります。
TD3010JE_v3.00D
(2)TaKaRa 理化学機器 全般に関する注意事項
TaKaRa 理化学機器を使用する際には、製品の性能を確保し、危険を防止するために、
下記の注意が必要です。よくお読みのうえ、正しくご使用ください。
【設置場所に関する注意】
火災・感電等の原因となるため、下記の注意を守って設置してください。
● ぐらついた台の上や傾いた所など不安定な場所には置かないでください。
! 警告
● 万一、製品を落としたり、破損した場合は、まず本体および本体に接続されて
いる周辺機器の電源スイッチを切り、電源プラグをコンセントから抜いてくださ
い。
● 通気孔があるものは、製品の通気孔をふさがないでください。通気孔をふさぐ
と内部に熱がこもり、やけどや火災の危険があります。
● 湿気やほこりの多い場所に置かないでください。
また、振動のある場所には置かないでください。
! 注意
● 直射日光の当たる場所、温度の高い所に置かないでください。
内部の温度が上がり、やけどや火災の原因となることがあります。
● 製品の上に物を置かないでください。
● 研究施設、もしくはそれに準ずる施設以外の場所には設置しないでください。
【電気的な注意】
電源を必要とする理化学機器類は、火災・感電等の防止のため、下記の注意を守ってください。
● 表示された電源電圧以外の電圧では使用しないでください。
! 警告
● 電源コードを傷つけたり、破損したり、加工したり、無理に曲げたり、ねじった
りしないでください。
また、コードに物をのせたり、加熱したり、無理に引っ張ったりしないでくださ
い。
● 漏電による感電防止のため、製品本体は必ず接地してください。
TD3010JE_v3.00D
! 警告
● 製品をコンセントに接続する前に、製品に表示されている定格電力が、コンセ
ントの電源容量を超えないことを必ず確認してください。複数の機器を接続す
る場合は、接続する機器の消費電力の合計が、電源容量を超えないよう注
意してください。
● 製品本体および電源コードには高電圧がかかります。内部に金属類や燃え
やすいものなどを差し込んだり、濡れた手で触れたりしないでください。火災、
感電の危険があります。
● 製品を移動させる場合は、必ず電源プラグをコンセントから抜き、外部機器と
接続しているケーブルを外してから行ってください。
! 注意
● お手入れの際は、安全のため電源プラグをコンセントから抜いて行ってくださ
い。
【その他の注意事項】
火災・感電等の原因となるため、下記の注意を守ってください。
● 金属類や燃えやすいものなどの異物を、製品の開口部から内部に差し込ん
だり入れたりしないでください。
! 警告
● 製品のカバーを外したり、製品を改造したりしないでください。
● 製品を分解したり、内部に触れたりしないでください。
● 万一、煙が出ている、異臭がするなど異常状態が発生した場合は、すぐに操
作を停止し、電源を切り、その後必ず電源プラグをコンセントから抜いてくださ
い。
異常状態がおさまるのを待ってから、機器販売代理店または弊社にご連絡く
ださい。
● 製品の内部に異物や水が入った場合は、すぐに操作を停止し、電源を切り、
その後必ず電源プラグをコンセントから抜いてから機器販売代理店または弊
社までにご連絡ください。
● 本機には乗らないでください。
! 注意
TD3010JE_v3.00D
● 本機を、分解しないでください。
(3)製品本体に貼付している警告ラベルについて
安全にご使用いただくため、製品本体に危険に対する注意事項を記載した警告ラベルを貼付してありま
すので、警告ラベルの表示内容をご確認のうえご使用ください。
発生しうる危険
警告表示
危険個所
分解厳禁
感電・火災
装置内部
高電圧注意
感電
電源コード
接地厳守
感電・火災
電源コード
高温注意
やけど
ヒートブロック
ヒートカバー
やけど
火災
設置注意
危険内容
分解しないで下さい。分解
時電気回路をショートさせ
たりすると、漏電や火災の
原因となります。
本体および電源コードに
は高電圧がかかります。
ご注意下さい。感電する
危険があります。
感電防止のため、この装
置は必ず接地して下さ
い。漏電により感電する危
険があります。
ヒートブロックは高温にな
るため、火傷に注意して
下さい。
ヒートカバーは高温になる
ため、火傷に注意して下さ
い。
過熱の危険性があります
ので、通気孔をふさがな
いように設置して下さい。
通気孔部分
運転中開放厳禁
人体の損傷
装置開閉部
TD3010JE_v3.00D
表示ラベル
運転中は必ずカバーを閉
めて使用して下さい。け
が、火傷、目の損傷など
の危険があります。
表示ラベルのシンボルの意味
危険・注意を表わす。
禁止を表わす。
説明書きに従うこと。
(4)電気的シンボル表示
電源スイッチ ON状態
電源スイッチ OFF状態
無断転載、転写複製についてのご注意
本書の内容を無断で複製、転写することは禁止されています。
Copyright TAKARA BIO INC.
Printed in Japan
本書の複写複製、および内容の一部転載などについてのお問い合わせは下記にお願いします。
〒520-2193
滋賀県大津市瀬田三丁目4番1号
タカラバイオ株式会社 営業部
Tel. 077-543-7231
TD3010JE_v3.00D
Precautions for Using TaKaRa Scientific Instruments
● Users are recommended to carefully read the content of this manual before operating the TaKaRa PCR
Thermal Cycler Dice system.
● After familiarizing themselves with the information in this manual, users are recommended to store it in
secure and convenient location from which it is always available for reference
Introduction
All Takara scientific instruments are sold strictly for use in research applications and should not be
used by those who are not experts in this field.
Due to ongoing improvements, product specifications and the external appearance are subject to
change without prior notification.
Warranty and Responsibilities
Refer to the Warranty card included with this product for detailed description of the Warranty
conditions and period.
This product is designed to ultimate safety standards. Nevertheless, should any safety-related issues
arise, users are requested to immediately contact the nearest sales agent.
Precautions (safety and accident prevention) for System Use
(1)Danger Warnings
The various messages and labels provided on the product itself and in the various manuals are
designed to ensure the system is operated safely to prevent personal injury or damage to property.
Users are strongly recommended to read and observe the warnings included with the symbols
shown below.
! WARNING
Warnings indicate incorrect system operation and
handling procedures that can lead to serious
accidents.
! CAUTION
Cautions indicate incorrect system operation and
handling procedures that can lead to accidents.
TD3010JE_v3.00D
(2)General Precautions Regarding Takara Scientific Instruments
It is important to observe the various precautions described below to ensure optimum system
performance and prevent accidents before they happen. Ensure safe and correct system operation
by carefully reading the precautions.
【Precautions for Installation Location】
Observe the following precautions in order to prevent fires and electrical shocks.
! WARNING
! CAUTION
● Do not install the system on an unstable or sloped foundation or any
other location subject unstable conditions.
● If the system tips over or falls, immediately turn off power to the
system and all connected devices and disconnect the power supply
cables.
● Avoid blocking the paths to any air vents included on the product.
Blocked air vents can lead to internal overheating that may result in
physical burns or fire.
● Avoid installing the system in locations subject to dust or strong
vibrations.
● Avoid installing in locations subject to direct sunlight and wide
temperature fluctuations as this may result in internal overheating and
may cause physical burns or fire.
● Do not place objects on top of the system.
● Do not install the system in locations other than research institutions or
related facilities.
【Electrical Precautions】
Observe the following precautions when using electrically powered scientific instruments in order to
prevent electric shocks and fires.
! WARNING
● Avoid operating system with power sources that do not conform to
system power supply specifications.
● Avoid sharply twisting, altering, marking or otherwise damaging the
power supply cable. Avoid applying stress to, heating or placing
objects on the power cable.
● Always ground the system to prevent electric shocks due to leakage
current.
TD3010JE_v3.00D
! WARNING
● Be sure to compare system power supply requirements with the rated
power capacity of the power source to ensure system current
requirements do not exceed power socket capacity. Confirm that the
total power requirements of all connected equipment do not exceed
the rated power supply capacity of the common power source.
● The system body and power supply cable are subject to high voltage
levels(The maximum voltage is a line voltage AC100V〜240V). Avoid
inserting metal or flammable objects inside the system or handling it
with wet hands, as this can result in electric shock and/or other
dangers.
! CAUTION
● When moving the system, be sure to first disconnect the power cable
as well as any peripheral devices.
● Be sure to disconnect the power cable prior to cleaning or servicing
the system.
【Other precautions】
Observe the following precautions in order to prevent electric shocks and fires.
! WARNING
● Avoid inserting metal objects, flammable materials or other foreign
objects into the various openings on the system case.
● Never remove the system cover or attempt to alter it in anyway.
● Avoid disassembling or making any direct contact with internal parts of
the system.
● Should noxious fumes smoke or other abnormal signs appear,
immediately terminate operation, turn off system power and
disconnect the power cable.
Wait until conditions stabilize before contacting the nearest sales
agent or the company technical support line.
● Should water or other foreign matter enter the system, immediately
terminate operation, turn off system power and disconnect the power
cable.
Wait until conditions stabilize before contacting the nearest sales
agent or the company technical support line.
! CAUTION
TD3010JE_v3.00D
● Do not sit on the system.
● Do not disassemble the system
(3)Warning Safety Labels Applied to System Case
Users are advised to avoid accidents by carefully reading the warnings and cautions contained on
warning stickers at key locations on the interior and exterior of the system.
Warning Type
Location of Danger
Possible Danger
Warning Label
Description of Danger
Type d’Avertissement
Localisation du Danger
Never disassemble system, as this
Disassembly
may lead to electrical short-circuits,
Prohibited
leakage current and/or fire.
Electric shocks and
System Interior
fires
Démontage Interdit
Intérieur de l’Appareil
Electric shocks
Warning! High Voltage
Power cable
Attention! Haute
tension
Cordon d’alimentation
Electrical shocks and
fires
Grounding Mandatory
Power cable
Mise à la Terre
Obligatoire
Cordon d’alimentation
High Temperatures
Heat cover
& Heat block
Haute Température
Couvercle Chauffant
Burns
Burns and fires
Installation Precaution
Air vents
Précautions
d’Installation
Prises d’air
Personal injury
Do not Open When in
Operation
System cover
Ne Pas Ouvrir en
cours de
fonctionnement
Couvercle
TD3010JE_v3.00D
The case and power cable are
subject to high voltage levels, so
take care to avoid electric shocks.
Always ground the system to
prevent electric shock from
leakage current.
Avoid touching the heat cover,
which reaches very high
temperatures and may cause
burns.
Be sure not to block air vents when
installing the system, as this can
cause internal overheating.
Be sure to close the cover while
the system is in operation. Failure
to do so can lead to burns and/or
damage to the eyes.
This symbol means caution or warning.
This symbol means an action is prohibited.
This symbol means an instruction must be followed.
(4) Electrical Symbols
The symbols shown on this page are adapted to the TaKaRa PCR Thermal Cycler Dice. Read the
explanations and make sure you understand what the symbols mean before you interact with the
instrument in any way.
This symbol indicates the on position of the main power switch.
This symbol indicates the off position of the main power switch.
Precautions against Transferring or Copying Content of This Document
The content of this document cannot be transferred or copied without the express permission of the
copyright holder.
Copyright holder: TAKARA BIO INC.
Printed in Japan
Contact TAKARA BIO INC.
TAKARA BIO INC.
SETA3-4-1, OTSU, SHIGA, 520-2193, JAPAN
Tel : + 81-77-543-7247
Fax : + 81-77-543-9254
http://www.takara-bio.com
Technical Inquiries (Contact) : http://www.takara-bio.co.jp/english/contact/inquiry_form.htm
TD3010JE_v3.00D
TP600/TP650 取扱説明書
---
目次
---
TaKaRa 理化学機器の安全上のご注意
目次
1 ページ
1章
概要
2 ページ
2章
設置要項
1.設置条件
3 ページ
2.据付
4 ページ
3.移動
4 ページ
3章
各部の名称と機能
6 ページ
4章
操作説明
1.はじめに
5章
9 ペ−ジ
2.電源の投入
10 ページ
3.プログラム運転の開始
11 ページ
4.運転終了、中止
16 ページ
5.プログラム新規作成
17 ページ
6.既存プログラム編集、保存
23 ペ−ジ
7.ユーザ名選択、登録
28 ページ
8.リンク機能
34 ページ
自己診断機能 その他ツール
1.ヒストリー 履歴の保存
38 ページ
2.セッティング 日時の設定 装置の初期設定
39 ページ
3.データ通信 プログラムの送受信
41 ページ
4.自己診断機能 テスト運転プログラム
44 ページ
5.消去機能 保存ユーザ名、プログラムの削除
47 ページ
6章
トラブルシューティングと日常点検
50 ペ−ジ
7章
仕様
54 ページ
付属1
梱包図および標準付属品リスト
55 ページ
付属2
消耗品リスト
56 ページ
付属3
修理依頼書および安全確認書
58 ページ
TD3010JE_v3.00D
1
TP600/TP650 取扱説明書
● 1章
概要
TaKaRa PCR Thermal Cycler Dice®
製品コード TP600
・・・ GRADIENT
グラジエント・モデル
製品コード TP650
・・・ STANDARD スタンダード・モデル
この度は TaKaRa PCR Thermal Cycler Dice®を購入いただき、誠に有り難うございます。
このたび開発したサーマルサイクラー ダイス バージョンⅢ の特徴を紹介します。
■TP600 グラジエント(Gradient)
サーマルサイクラーTP600 は、温度条件を設定する各ステップで、サンプルブロックの左
端列と右端列の間で最大 20℃の温度勾配を設定することができるグラジエント機能を
搭載しています。そのため、一度の実験で反応条件の最適化を行うことが可能で、多機
能・高性能な装置をより安価にご提供致します。
<温度勾配設定機能>
z
アニーリング温度の検討が可能なグラジエント機能
■TP600 グラジエント(Gradient) /TP650 スタンダード(Standard)
2機種共通の特徴として、本装置はコントロールパネル&ディスプレイ一体型の角度可
変型ウイングパネルの採用により、設置場所を選ばないコンパクト&スタイリッシュボデ
ィとなっています。また、操作性を簡単にするためポップアップメニュー方式を採用し、表
示の見やすさと相まって、非常に使いやすくなっています。
バージョンⅡから「スロープ機能」を搭載、さらにバージョンⅢになりプログラムの「リンク
機能」が新たに搭載され、また記憶領域をアップしました。以下特長を示します。
<多機能&イージーオペレーション>
z
操作の簡単なスライド&レバー式リッド
z
可動式コントロールパネルの採用により、見やすく操作が簡単
z
グラフィカルな表示画面から容易にプログラミングが可能
z
ポップアップメニュー、携帯電話式英数字入力により、操作が簡単
z
Long PCR に適したエクステンションタイム機能
z
タッチダウン PCR が可能なエクステンション Temp 機能
z
設定温度までの到達時間を任意に入力可能なスロープ機能
z
同一プログラム名の後に連続番号を入れることで、複数のプログラムを
連続運転できるリンク機能。
z
プリセットプロトコールにより、PCR を容易に開始
z
当社の旧機種と互換性をもたせた温度昇降特性モードを搭載
z
前面と側面吸気、後方排気により、装置間の熱干渉の低減
<イージーメンテナンス>
z
PC との接続により、データのバックアップ、転送が可能
z
運転履歴、エラー履歴を自動的に保存
TD3010JE_v3.00D
2
TP600/TP650 取扱説明書
●2章
設置要項
1.設置条件
本装置の性能を十分に発揮し、長期間安定してご使用いただくために、次の点を満足
するような設置場所を選定ください。
この条件を満足しない場所に設置しての使用は、装置の故障や誤動作の原因となりま
す。また、これらの条件に起因する性能上の劣化や、機構上の損傷に対する修理また
は部品交換を行う場合、保証の対象外となりますのでご注意ください。
1.
ホコリが少ない場所に設置ください。
2.
腐食性のガスや可燃性ガスの漂う場所は避けてください。
3.
強い振動あるいは微弱でも継続的な振動の起こる場所は避けてください。
4.
直射日光の当たる場所は避けてください。
5.
強力な磁場、電場および高周波などを発生する電気機器からは、できるだけ
遠ざけて設置して下さい。また、近くに電動機や変圧器などのノイズを発生す
る機器がない場所に設置してください。
6.
仕様にある装置重量に耐える、丈夫でかつ水平が保てる場所に設置してくだ
さい。
7.
使用環境の温度(周囲温度 15℃〜30℃)、湿度(相対湿度 20%〜80%RH)内
で使用して下さい。
8.
温度変化の激しい場所、空調機器の風が当たるような場所および急激な温度
変化によって結露する可能性のある場所は避けてください。
9.
装置側面の通気孔(2カ所)と前面および背面の通気孔(それぞれ 1 ヵ所)は塞
がないでください。
10. 動作中には十分な換気が行える場所に設置してください。
11. コールドルームでは使用しないでください。
12. 装置の消費電力(周波数、電圧、電流)が十分供給できるコンセントのある場
所に設置してください。
13. リッドハンドル、コントロールパネルに手をかけて製品を移動しないでください。
部品の破損の原因となります。また、部品の破損により製品が落下した場合
にはケガの原因となります。
TD3010JE_v3.00D
3
TP600/TP650 取扱説明書
2.据 付
以下の手順に従って、据付を行ってください。
(1) 装置本体の電源スイッチがOFFになっていることを確認する。
(2) 電源コード本体側プラグを本体背面に接続する。
(3) 電源コードのACコンセント側プラグを電源コンセントに接続する。
本装置は、AC100V〜240V 50/60Hz で正しく動作します。
また、コンセントは必ず接地端子付き3P タイプを使用してください。
! 注意
人体への感電・電撃等の事故を防ぐために必ず接地付きコンセント
を使用し、安全を確保してください。
(4) 装置の電源を入れる。
(5) ディスプレイに以下の画面が表示され、入力待ち状態となります。
Select User
C oo m
mm
m oo nn >>
<< C
Name
<TaKaRa>
MENU
OK
New
Edit
Cancel
【NOTE】購入時は、<Common>、<TaKaRa>のみの表示となります。
3.移動
据付後に装置を移動する場合には、次の通りに行ってください。
● 同じ施設内で移動する場合
本装置を同一施設内で移動させる場合には、以下の注意事項を守ってください。
(1) 移動前には装置を清掃し、サンプルブロックにチューブやプレート等が残っていな
いようにしてください。
(2) 本装置は精密機器ですので、移動中に衝撃を与えないようにしてください。
(3) 装置を持ち運ぶ時は、装置両側面を両手でかかえるようにして持ち上げてくださ
い。
(4) 新しい設置場所は、「2章 1.設置条件」の要件を満足する場所としてください。
(5) 新しい場所への据付は、「2章 2.据付」の指示に従って実行してください。
TD3010JE_v3.00D
4
TP600/TP650 取扱説明書
● 遠隔地へ移送する場合
本装置を遠隔地へ移送する場合には、装置を清掃した後、購入時の梱包箱に梱
包してください。
保証期間内であっても、梱包が不十分な事による輸送中の事故に対しては補償し
かねることがありますのでご注意ください。
移送先での再据付については、本章に従って行ってください。
■ 国際安全規定
本装置は次の規格、指令に適合しています。
CSA、
UL、
CE、 RoHS
CSA
UL
CE
RoHS
: カナダ標準規格
: UL 規格
: EU 指令適合マーク
: EU 規制 ローズ(RoHS)指令
Canada Standard Association
Under Laboratories
Communaute’ Europe’enne
特定有害物質使用制限指令
Restriction of the use of the certain Hazardous
Substances in electrical and electronic equipment
TD3010JE_v3.00D
5
TP600/TP650 取扱説明書
● 3章 各部の名称と機能
正面
①リッドハンドル
スライドする時は
開いてご使用ください。
②リッド
③サンプルブロック
④ディスプレイ
⑤キーパッド
⑥コントロールパネル
⑦通気孔(前面)
⑧コンパネ解除レバー
上に押すとロックが解除
されます。
各部説明
⑩通気孔(左右両側)
⑨電源スイッチ
ON(|)、OFF(○)
―――――――――――――――――――――――――――――――――――
①リッドハンドル
スライドするときは上にあげてご使用ください。
【注意】リッドハンドルを持って本体を持ち上げないでください。
②リッド
反応チューブおよび反応プレート上部を加熱し蒸発を防ぎます。
【注意】内部は熱くなります(最高 110℃)。指を入れないでください。
③サンプルブロック
反応チューブおよび反応プレートを置きます。
【注意】熱くなります(最高100℃)。火傷に注意してください。
④ディスプレイ
状態を表示します。
⑤キーパッド
プログラムを入力するときに使用します。
⑥コントロールパネル
4段階にパネル角度が調整できます。
⑦通気孔(前面)
本体内部冷却用開口部です。外気を吸引します。
TD3010JE_v3.00D
6
TP600/TP650 取扱説明書
⑧コントロールパネル解除レバー コントロールパネルの角度変更時使用。上に押し込むとロックを解
除します。
⑨電源スイッチ
本体の電源を ON(○)-OFF(|)するメインスイッチ。10A の過電流
ブレーカを兼ねています。
⑩通気孔(左右両側)
本体内部冷却用開口部です。外気を吸引します。
【注意】開口部はふさがないでください。
背面
⑬ディスプレイ濃度変更つまみ
⑪電源ケーブル接続部
⑫通気孔(背面)
⑭外部通信用コネクター
RS232C
各部説明
――――――――――――――――――――――――――――――――――
⑪電源ケーブル接続部
電源コンセント。
【注意】必ず付属のケーブルを使用してください。
⑫通気孔(背面)
本体内部冷却用開口部。排気します。
【注意】ふさがないでください。
⑬ディスプレイ濃度変更つまみ
ディスプレイ濃度を調整します。
⑭外部通信用コネクター
RS232C コネクター(9ピン)。コンピュータとの通信用ケーブル
をつなぎます。
【NOTE】RS232C ケーブルは付属していません。
TD3010JE_v3.00D
7
TP600/TP650 取扱説明書
キーパッド
英数字 キー
STOP キー
運転を中止または終了
する時に使用します。
MENU キー
ポップアップメニューの表示、
非表示の切替えに使用します。
また、画面スリープの時にキーを
押すと表示が復帰します。
CE キー
入力をクリアーする時
に使用します。
POWER ランプ
電源スイッチが ON の時点灯
します。
ENTER キー
入力、操作を確定
する時に使用します。
リッド部
リッド
リッドハンドル
リッドヒーター
TD3010JE_v3.00D
8
矢印 キー
カーソル、ページの
移動をおこないます。
TP600/TP650 取扱説明書
● 4章 操作説明
1.はじめに
・ この操作説明は、TP600 および TP650 について説明しています。
TP650 には、グラジエント機能が付いていません。
・ 操作の基本は「ポップアップメニュー」
機能画面の選択、確定(OK)、キャンセル(Cancel)などの基本操作は、
ポップアップメニューで行います。基本操作は、 MENU キーを押すとポップアップ
メニューが表示されます。矢印キーで選択し、 ENTER キーを押すことで実行しま
す。ポップアップメニューの表示を消す場合は MENU キーをもう一度押します。
本説明書では、以上の操作表現を 『ポップアップメニューで選択、Enter する』 と
記述します。また、 ENTER キー、 CE キーでポップアップメニューを飛び越えて
の操作も一部可能です。
・ プログラム作成の流れ
操作の流れを示します。
1 初期設定
↓日時や表示方法を設定します。 5章(2項)
2 プログラム作成します
↓ユーザ選択、登録
4章(7項)
↓プログラム作成
4章(5項、6項)
↓リンク機能
4章(8項)
3 運転開始
↓プログラム運転
4章(2項、3項)
4 運転終了、中止
4章(4項)
↓
5 保守、ツール
点検、診断、バックアップ、消去 5章(1項、4項、3項、5項)
・ キー入力の方法
英数字キーは、複数の文字を割り付けています。押すごとに変化します。
0キー:
1キー:
2キー:
3キー:
4キー:
5キー:
6キー:
7キー:
8キー:
9キー:
&, /, ( , ), 0
スペース, -, ”, #, 1
A, B, C, a, b, c, 2
D, E, F, d, e, f, 3
G, H, I, g, h, I, 4
J, K, L, j, k, l, 5
M, N, O, m, n, o, 6
P, Q, R, S, p, q, r, s, 7
T, U, V, t, u, v, 8
W, X, Y, Z, w, x, y, z, 9
TD3010JE_v3.00D
9
TP600/TP650 取扱説明書
2. 電源の投入
使用電源は、AC100V〜240V、50・60Hz 切り換えなしで使用できます。
消費電力は、490VA です。100V で使用する場合は電流が4.9A になります。
【注意】 使用する電源容量を確認ください。
【注意】 電源プラグはコンセントにしっかり奥まで差し込んでください。
1. 電源スイッチを押します。
ピピーとブザー音がして、ユーザ選択画面が表示されます。
希望するユーザ名を矢印キーで選択し、ポップアップメニューの OK を Enter する。
Select User
C oo m
mm
m oo nn >>
<< C
Jiro
Name
<TaKaRa>
Sabro
MENU
OK
New
Edit
Cancel
【NOTE】 ポップアップメニューがアクティブ状態(反転表示がある時)のときは、
ユーザ選択の矢印キーが機能しません。 MENU
キーを押し反転表示を消してから
矢印キーでユーザ選択してください。
2. 選択したユーザにパスワードが設定してある場合は、パスワードの確認画面が表示
されます。
【NOTE】 (Common) と (TaKaRa) というユーザ名があらかじめ登録されていますが、
パスワードは設定されていません。
Save
User
User
Password
MENU
OK
Cancel
Jiro
****
【NOTE】 パスワードが設定されているユーザの場合のみ表示されます。
パスワードが設定されていない場合は、確認画面がスキップして、トップスクリーンが
表示されます。
【NOTE】 パスワードを忘れてしまった時、あるいは知らないとき、MENU から Cancel を選び、
Enter すると、(Common)ユーザとして、3のトップメニューに入ることができます。
TD3010JE_v3.00D
10
TP600/TP650 取扱説明書
3. パスワード入力後、OK を Enter するとトップスクリーンが表示されます。
すべての操作はこのトップスクリーンから行います。
TaKaRa Thermal Cycler
TP600 Ver.3.xx
User
05/02/14
DIce
( Common )
12:00:00
25.0 ℃
MENU
R
RU
UN
N
New
Edit
Tools
User
【NOTE】
・(TaKaRa)ユーザーへは、プログラムの保存、ユーザ名の変更はできません。
・(TaKaRa)ユーザには、あらかじめ TaKaRa の標準プロトコルが登録されています。
プログラムの詳細は32ページをご参照ください。
3. プログラム運転の開始
運転するプログラムが、まだ作成されてない場合は、
「5.プログラム新規作成」 または、「6.既存プログラムから新規作成、編集」 から
お始めください。
1. トップスクリーンからポップアップメニューの RUN を選択し ENTER キーを押します。
TaKaRa Thermal Cycler
TP600 Ver.3.xx
User
05/02/14
Dice
( Common )
12:00:00
MENU
R
RU
UN
N
New
Edit
Tools
User
25.0 ℃
2. ユーザ選択画面から入ったユーザ・ファイルに登録されているプログラム名が表示
されます。
運転させたいプログラムを矢印キーで選択する。ENTER キーを押す(MENU キーを
押しポップアップメニューから Start を選んで ENTER キーを押しても可能)。
Program
Name
RT
PCR
Cycle seq
TaKaRa Taq
Touch Down
Stored
PCR
TD3010JE_v3.00D
11
05/04/01
05/04/02
05/04/02
05/04/02
MENU
S t a rr tt
View
User
Sort
Cancel
①
②
TP600/TP650 取扱説明書
【NOTE】ポップアップメニューが表示されていると、プログラム選択の矢印キーが働きません。
一度 MENU キーを押して、ポップアップメニューを消してから、矢印キーで
プログラムを選択してください。
【NOTE】 ポップアップメニューの他の機能
① プログラム内容を確認したい場合
ポップアップメニューから Veiw を選び、Enter する。
0
1
0
2
0
3
0 0
4 5
0
6
0
7
0
8
0
9
1
0
1
1
1
2
1
3
1
4
1
5
1
6
1
7
1
8
1
9
2
0
2
1
2
2
2
3
2
4
2
5
2
6
2
7
2
8
2
9
3
0
3
1
3
2
3
3
3
4
3
5
3
6
3
7
3
8
3
9
1 T e mp
3 T e mp
2 5 Cy c
5 T e mp
9 4 . 0
9 4 . 0
5 5 . 0
7 2 . 0
7 2 . 0
4 . 0
6 T i me
5 : 0 0
0 : 3 0
0 : 3 0
0 : 3 0
7 : 0 0
∞
1
2 T e mp
4
0
1 Cy c
2
3
4
② プログラム名を並び替えたい場合
ポップアップメニューから Sort を選び、Enter する。
0
1
1
0
2
0
3
0
4
0
5
0
6
0
7
0
8
0
9
Se l e c t
1
0
1
1
1
2
1
3
1
4
Sor t
1
5
1
6
1
7
1
8
1
9
2
0
2
1
2
2
2
3
2
4
2
5
2
6
2
7
2
8
2
9
I t e m
2
3
0
3
1
3
2
3
3
3
4
3
5
3
6
3
7
3
8
3
9
4
0
M ENU
OK
3
Pr ogr a m
n a me
4
Da t e
of
s t or e d
5
Da t e
of
l a s t
Ca n c e l
u s e d
6
並び替えの種類を選択します。
・Program name : プログラム名の順番(ASCII コード順)
・Date of stored : 保存日順
・Date of last used: 使用日順
ポップアップメニューから OK を Enter する。
TD3010JE_v3.00D
12
TP600/TP650 取扱説明書
3. 反応条件を選択、または入力します。
Select
Reaction
Mode
Mode
1 (1 - 5)
Container
1 (1.Thin
Volume
5 0 μl ( 5 -
2.Thick)
1 5 0 μl )
MENU
OK
Cancel
プログラム名にリンク機能を入れた場合には、以下の表示になります。
Select
Reaction
Mode
Mode
1 (1 - 5)
Container
1 (1.Thin
2.Thick)
Volume
5 0 μl ( 5 - 1 5 0 μl )
Link
1 (1.Yes
2.No)
MENU
OK
Cancel
4行目に「Link」の選択が表示されます。
「1.Yes」: リンク機能を利用してプログラムを連続して稼動させる場合。
「2.No」 : このプログラムだけ単独で走らせる場合。
詳細は、リンク機能(34P)を参照ください。
・Mode 温度昇降スピードを5パターン用意しています。
1: 温度制御能力を最適化させた条件で運転します。
通常はこのモードでのご使用をおすすめします。
2: 温度制御能力を Mode1より高めにチューニングしています。
TaKaRa PCR Thermal Cycler SP と互換性をとっています。
ただし、完全一致ではありません。
3: コンプレッサ使用機に合わせた制御能力で運転します。
TaKaRa PCR Thermal Cycler MP と互換性をとっています。
ただし、完全一致ではありません。
4: アンダーシュートを少し犠牲にして、スピードアップを優先しました。
5: 最速モード
TaKaRa PCR Thermal Cycler PP の Normal Mode と互換性を
とっています。ただし、完全一致ではありません。
・Container ( 1.Thin 2.Thick ) 使用容器の厚みで選択してください。
肉薄チューブの場合「1.Thin」を選んでください。
TaKaRa Micro PCR Tube (製品コード 9047)、もしくは
0.2ml Hi-Thbe Dome Cap (製品コード NJ200) は、肉薄チューブです。
TD3010JE_v3.00D
13
TP600/TP650 取扱説明書
・Volume
5 − 150μl
反応量を入力ください(通常 100μl以下で使用します)。
【NOTE】 この情報は、プログラムごとに設定を記憶します。
【NOTE】 各設定条件は、プログラムをスタートした時点で記憶されます。
4. ポップアップメニューから OK を選択し、ENTER キーを押してください。
5. プログラムのパターンが画面表示されます。
この時点では、まだプログラムはスタートしていません。
○拡張データの設定がない時
0
1
0
2
0
3
0 0
4 5
0
6
0
7
1 T a K aR a
0
8
0
9
1
0
1
1
1
2
1
3
1
4
1
5
1
6
1
7
1
8
1
9
2
0
2
1
2
2
2
3
2
4
2
5
2
6
2
7
2
8
2
9
3
0
3
1
3
2
3
3
3
4
3
5
3
6
R e ma i n i n g
Ta q
2
3
7
3
8
3
9
4
0
1 : 2 7
M ENU
3
St a r t
Ca n c e l
4
5 T e mp
6 T i me
9 4 . 0
9 4 . 0
5 5 . 0
7 2 . 0
7 2 . 0
4 . 0
5 : 0 0
0 : 3 0
0 : 3 0
0 : 3 0
7 : 0 0
∞
□拡張データが設定されている時
0
1
0
2
0
3
0
4
0
5
0
6
0
7
0
8
1 T a K aR a
0
9
1
0
1
1
1
2
1
3
1
4
1
5
1
6
1
7
1
8
1
9
2
0
2
1
2
2
2
3
2
4
2
5
Ta q
2
6
2
7
2
8
2
9
3
0
3
1
3
2
3
3
3
4
3
5
R e ma i n i n g
2
3
6
3
7
3
8
3
9
4
0
1 : 2 7
M ENU
3
T e mp
9 4 . 0
9 4 . 0
5 5 . 0
0 . 0
0 . 0
0 . 0
0 . 0
5 : 0 0
0 : 3 0
0 : 3 0
0 : 3 0
7 : 0 0
∞
0 : 0 0
0 : 0 0
- 0 : 0 5
Pa us e
0 : 0 0
0 : 0 0
4 Ex
5 T i me
6 Ex
St a r t
7 2 . 0
4 . 0
Ca n c e l
0 . 0
0 . 0
7 2 . 0
拡張データ(Extention)が表示される。
【NOTE】 『拡張モード』とは、温度、時間の増減、一時停止、グラジエントなどの
設定ができる機能です。
【NOTE】 プログラム名は、16文字まで登録可能ですが、パターン画面上は
12文字までの表示となります。
6. ポップアップメニューから Start を選択し、Enter キーを押します。
プログラムがスタートする。
運転中画面
0
1
0
2
0
3
0 0
4 5
0
6
1 T a K aR a
0
7
0
8
0
9
1
0
Ta q
1
1
1
2
1
3
1
4
1
5
1
6
1
7
1
8
1
9
Cy c
2
0
2
1
2
2
2
3
1 / 2 5
2
4
2
5
2
6
2
7
2
8
2
9
3
0
3
1
3
2
3
3
3
4
R e ma i n i n g
3
5
3
6
3
7
3
8
3
9
1: 2 2
2
M ENU
3
Pa us e
①
②
I nf o
HOT!
Temp
4
5 T e mp
9 4 . 0
9 4 . 0
5 5 . 0
7 2 . 0
7 2 . 0
4 . 0
6 T i me
5 : 0 0
0 : 1 5
0 : 3 0
0 : 3 0
7 : 0 0
∞
TD3010JE_v3.00D
14
4
0
TP600/TP650 取扱説明書
・温度移動中表示:
グラフ斜め線点滅
・温度到達表示:
水平線点滅
・ブロック温度表示:
グラフ面に表示
・高温注意:
ブロック温度が50℃以上のとき「Temp」「HOT!」と交互表示
・進行中のステップ時間: カウントダウン
・∞表示:
連続運転(99:99と入力する)
【NOTE】
プログラムをスタートするため、ポップアップメニューで Start を選択し、Enter してもリッドが十分加
熱していないと、”Lid is warming up. xx.x℃”メッセージが出てスタートしません。
リッドが108℃以上になった時点で自動的にスタートします。
① 運転中に一時停止を行う時
ポップアップメニューから Pause を選んで、Enter キーを押す。
0 0 0 0 0 0 0 0 0 1 1 1 1 1 1 1 1 1 1 2 2 2 2 2 2 2 2 2 2 3 3 3 3 3 3 3 3 3 3 4
1 2 3 4 5 6 7 8 9 0 1 2 3 4 5 6 7 8 9 0 1 2 3 4 5 6 7 8 9 0 1 2 3 4 5 6 7 8 9 0
1 T a K aR a
Taq
Cy c
1/ 25
R e ma i n i n g
94. 0
2
1: 2 2
NU
MMEE N
U
PPR
aaeuusssueeme
Info
3
4
5 T e mp
94. 0
94. 0
55. 0
72. 0
72. 0
4. 0
6 T i me
5: 00
0: 15
0: 30
0: 30
7: 00
∞
再開は、ポップアップメニューから、Resume を Enter する。
0
1
0
2
0
3
0 0
4 5
0
6
1 T a K aR a
0
7
0
8
0
9
1
0
Ta q
1
1
1
2
1
3
1
4
1
5
1
6
1
7
1
8
Cy c
1
9
2
0
2
1
2
2
2
3
2
4
2
5
1 / 2 5
2
6
2
7
2
8
2
9
3
0
3
1
3
2
3
3
9 4 . 0
2
3
4
3
5
R e ma i n i n g
3
6
3
7
3
8
3
9
4
0
1: 2 2
M ENU
3
R e s u me
4
5 T e mp
6 T i me
9 4 . 0
9 4 . 0
5 5 . 0
7 2 . 0
7 2 . 0
4 . 0
5 : 0 0
0 : 1 5
0 : 3 0
0 : 3 0
7 : 0 0
∞
② 運転中、プログラム内容を確認する場合
運転中画面から、ポップアップメニューで Info を Enter する。
Program
InformatIon
U s e r : <C o m m o n>
Program:TaKaRa_Taq
Mode:1
Thin
5 0 μl
Run Started
at
09:47:12
Run will end at 09:54:32
MENU
OK
OK
05/02/20
05/02/20
元に戻るときは、ポップアップメニューから OK を Enter する。
TD3010JE_v3.00D
15
TP600/TP650 取扱説明書
4. 運転終了、中止
1.
Stop キーを押す。
2. 停止の確認を聞いてきます。
0
1
0
2
0
3
0
4
0
5
0
6
0
7
0
8
0
9
1
0
1
1
1
2
1
3
1
4
1
5
1
6
1
7
1
8
1
9
2
0
2
1
2
2
2
3
2
4
2
5
2
6
2
7
2
8
2
9
3
0
3
1
3
2
3
3
C on f i r ma t i o n
1
3
4
3
5
3
6
3
7
3
8
3
9
4
0
M ENU
2
OK
Ar e
3
y ou
s ur e
t o
s t op?
Ca n c e l
4
T e mp e r a t u r e
5
5 4 . 6
o
C
6
3. ポップアップメニューから OK を Enter する。
4. 終了画面を表示します。
0
1
0
2
0
3
0
4
0
5
0
6
0
7
0
8
0
9
1
0
1
1
1
2
1
3
1
4
1
5
1
6
1
7
1
8
2
0
2
1
2
2
2
3
2
4
2
5
2
6
2
7
2
8
2
9
3
0
1
Fi ni s he d
2
U s e r : ( C o mmo n )
3
St a r t e d
a t
1 4 : 1 4 : 2 3
0 3 / 0 1 / 1 5
4
F i n i sh e d
a t
1 4 : 33 : 4 1
0 3 / 0 1 / 1 5
5
Le ngt h
Ov e r
6
T a Ka Ra
1
9
of
0 . 0
o
Ru n
C
Ta q
3
1
3
2
3
3
3
4
3
5
3
6
3
7
3
8
3
9
4
0
M ENU
OK
0 0 : 1 9 : 1 8
Und e r 0 . 3
o
C
Re s u l t : St op p e d
表示内容は、
終了 プログラム名
ユーザ名
プログラム開始時刻(時:分:秒) ・年/月/日
プログラム終了時刻(時:分:秒) ・年/月/日
稼動時間(時:分:秒)
プログラム動作中の最大オーバーシュート、最大アンダーシュート
結果表示
5. ポップアップメニューの OK を Enter すると、トップスクリーンに戻る。
TD3010JE_v3.00D
16
TP600/TP650 取扱説明書
5. プログラム新規作成
プログラムを新たに作成します。トップスクリーンから基本パターンを編集して、プログラ
ムを作成し、プログラム名をつけて登録します。登録せずに、プログラムを走らせること
も可能です。プログラム編集、登録はポップアップメニューの「MENU1」を、登録せずに
スタートするには「MENU2」に矢印キーの左右で切り替えて RUN します。
1. トップスクリーンで、ポップアップメニューから New を Enter する。
TaKaRa Thermal Cycler
TP600 Ver.3.xx
User
05/04/20
Dice
( Common )
12:00:00
MENU
RUN
New
N
ew
Edit
Tools
User
25.0 ℃
2. プログラム新規作成画面に変わり、セグメント(Temp 数)、数値を編集して新規プロ
グラムを作成する。
1パターン1セグメント
1 パターン3セグメント
1Temp3Temp
Temp
Time
94.0
5:00
94.0
0:30
25cyc
55.0
0:30
2 T e mMENU
p
1
SSaavvee
Insert
Delete
More
72.0
7 2C
. 0a n c e l
0:30
7:00
語句説明:
セグメントとは、最小の区切りであり、1個の温度設定である。
パターンとは、セグメントの1個もしくは複数個のひとまとまりである。
数値の入力方法
・カーソルの移動は矢印キーで行う。
・温度(Temp)、時間(Time)、サイクル数(Cyc)は、数値入力後 Enter
または矢印キーを押す。
・温度入力は、数字を入力する。94.0℃の設定は「940」と入力する。
温度設定範囲: 4.0〜99.9℃
・時間入力は、数字を入力する。1分30秒設定は「0130」と入力する。
時間設定範囲: 00:01(1秒)〜99:59(99分59秒)
99:99で 連続(∞)運転
・サイクル数は1から最大99まで入力可能。
TD3010JE_v3.00D
17
TP600/TP650 取扱説明書
パターン、セグメントの追加、削除方法
・各パターンの先頭セグメント位置(図の 「1 Temp 」の「1」「94.0」「5:00」、「3
Temp」の「3」「94.0」「0:30」)にカーソルがある場合)は、ポップアップメニューから
「Insert」/「Delete」を押すとパターンの追加/削除ができる。
1Temp3Temp
Temp
94.0
Time 10:00
94.0
0:30
25cyc
55.0
0:30
2Tem
p
MENU
1
72.0
1:00
S a vv ee
Insert
Delete
More
7 2 C. 0a n c e l
5:00
・カーソルがパターンの先頭以外(図のパターン「3 Temp 25Cyc」の場合
「55.0/0:30」「72.0/0:30」)にあるとき、ポップアップメニューから「Insert」/「Delete」を
押すとセグメントの追加/削除ができる。
1Temp3Temp
Temp
94.0
Time 10:00
94.0
0:30
25cyc
55.0
0:30
MENU 2
Run
Cancel
2 T e mMENU
p
1
72.0
1:00
S a vv e
Insert
Delete
More
7 2C
. 0a n c e l
5:00
矢印キー
で切り替え
・パターンの中で、セグメント数の変更は、パターンの頭の Temp 数値(1〜9)を
入力し Enter を押すと変更が可能。パターンの最後のセグメントから変更される。
1 プログラム中最大セグメント数(Temp 数): 12
【NOTE】 セグメント(Temp 数)7以上では6セグメント(Temp 数)の
プログラム2本分の記憶容量が必要となる
【NOTE】 ポップアップメニューで、「MENU2」となっている場合は、
左右の矢印キーを押して、「MENU1」に切り替えてください。
もう一度押すと、「MENU2」になります。
□ 拡張モードを使用
拡張モードには、次の4機能の設定が可能です。
・ エクステンション(Extension)設定
サイクル数が増すごとに温度、時間の増減を設定する。
温度エクステンションは、拡張モードでカーソルが Temp Ex 位置にあるとき、
数値入力。プラス・マイナスの変更は、MENU / +(−) /ENTER。
時間エクステンションは、カーソルが Time Ex 位置にあるとき、数値入力。
プラス・マイナスの変更は、MENU / +(−) /ENTER。
TD3010JE_v3.00D
18
TP600/TP650 取扱説明書
・ 一時停止 (Pause) 設定
設定したセグメントに移行した時点で、一時停止となり、設定したセグメントを
実行する場合は、MENU/Resume を Enter する。
【注意】 設定されたセグメントを実行した後で一時停止するものではない。
拡張モードでカーソルが Time Ex 位置にあるとき、MENU/Pause/ENTER。
Pause の解除は、再度 MENU/Pause/ENTER で行う。
・ グラジエント温度設定 (TP650 には、グラジエント機能なし)
拡張モードでカーソルが Temp もしくは Time 位置にあるとき
MENU/Grad/ENTER で設定。
・ スロープ設定
温度の上昇、下降する速度を任意に設定する。目的温度と目的温度に達
するまでの時間を入力することにより、温度変化の傾きが設定され、それに
沿って直線的に温度制御を行う。
カーソルが Temp EX 位置にあるとき、MENU/Slope/ENTER で設定する。
① 拡張モードに入る。 ポップアップメニューから More を Enter する。
1Temp3Temp
Temp
94.0
Time 10:00
99 44 .. 00
0:30
25cyc
55.0
0:30
2 T e mMENU
p
1
SS aa vvee
Insert
Delete
More
72.0
7 2C
. 0a n c e l
1:00
5:00
② エクステンションおよび一時停止の設定
1 Te m p
Temp
94.0
Ex
0.0
Time 10:00
Ex
0:00
3 Te m p
94.0
0.5
0:30
0:00
25cyc
2 Te m MENU
p 1 c 1y c
55.0
0.0
0:30
- -05: :0050
Save
+
72.0 −
-4 . 0
0 .P0a u 0
s .e0
5 : 0C0a n c∞
el
0:00 0:00
72.0
0.0
1:00
Pause
カーソルが温度(Temp)、時間(Time) の下「Ex」にあるとき、増減数を入力、
Enter を押し、ポップアップメニューから 増(+)、減(-) を選んで、Enter する。
温度拡張・減少 Ex 最大: ±9.9℃
時間拡張・減少 Ex 最大: ±9:59(9分59秒)
一時停止設定は、設定をかけるセグメントの Time Ex にカーソルを移動させて、
ポップアップメニューから Pause を選び Enter する。
TD3010JE_v3.00D
19
TP600/TP650 取扱説明書
例として、上図のプログラム(55℃30秒設定で、1サイクルごと設定時間を5秒づ
つ減少させる、55℃のセグメント終了後、72℃に移った時点でポーズをかけるプ
ログラム)の入力方法は、
1)矢印キーで設定位置をアクティブ(反転表示)にする。
2)数値キー 「5」を入力する。
3)MENU キーを押し、ポップアップメニューから矢印キーで(−)を選択する。
4)ENTER キーを押す。
5)矢印キーで設定位置をアクティブ(反転表示)にする。
6)MENU キーを押し、ポップアップメニューから矢印キーで(Pause)を選択。
7)ENTER キーを押す。
1 Te m p
3 Te m p
25cyc
Temp
94.0
Ex
0.0
Time 10:00
Ex
0:00
94.0
0.5
0:30
0:00
55.0
0.0
0:30
- -05: :0050
1)
2 Te m MENU
p 1 c 1y c
Save
+
72.0
72.0 −
-4 . 0
0.0
0 .P0a u s0 e. 0
1:00
5 : 0C0a n c ∞
el
Pause
0:00 0:00
3)
6)
5)7)
【NOTE】 ・エクステンションの解除は、 CE
・Pause を解除する場合は、 CE
キー、もしくは「0」を入力する。
キー、もしくは再度(Pause) を
設定すれば解除される。
【NOTE】 時間減少設定にて5秒ごと減少していくが、1秒以下にはならない。
【NOTE】 カーソルの位置により、ポップアップメニューの内容が異なります
・カーソルが Temp、Time のときは、ポップアップメニューに
Save、Insert、Delete、Gradient の表示になります。
・カーソルが Temp Ex のときは、Save、+、−、Slope、Cancel の表示になります。
・カーソルが Time Ex のときは、Save、+、−、Pause、Cancel 表示になります。
TP650
MENU 1
Save
Insert
Delete
Cancel
MENU 1
Save
+
Slope
Cancel
TP600
MENU 1
Save
Insert
Delete
Grad
Cancel
TD3010JE_v3.00D
20
MENU 1
Save
+
Pause
Cancel
TP600/TP650 取扱説明書
③ グラジエント温度設定 (TP650 にはグラジエント機能なし)
カーソルが温度(Temp)、もしくは時間(Time)にあるとき、ポップアップメニュー
から Grad を Enter する。
1 Te m p
3 Te m p
Temp
94.0
Ex
0.0
Time 10:00
Ex
0:00
25cyc
94.0
0.5
0:30
0:00
2 Te mMpE N
1c
U y1 c
55.0
0.0
0:30
0:00
72.0
0.0
0:30
0:00
Save
Insert
7 2 .D0 e l e4 t. e0
0 .G0 r a 0d.. 0
5 : 0C0a n c ∞e l
0:00 0:00
グラジエント温度設定画面になります。
Gradient
Setting
(01)45.0
(04)49.0
(07)56.2
(10)63.0
(02)46.0
(05)51.4
(08)58.6
(11)64.0
MENU1
O
OK
K
Clear
(03)47.0
(06)53.8
(09)61.0
(12)65.0
グラジエント温度は(01:ブロック左端)に低い温度、(12:ブロック右端)に
高い温度を設定する。
設定位置(01)(12)のカーソル移動は、上下の矢印キーを押す。
設定温度範囲: 40.0 〜 75.0℃
温度差
:
6.0 〜 20.0℃
【注意】 ・設定温度および設定幅を超えると、制御温度が不安定になります。
・(02)〜(11)の温度は、計算した近似値を表示します。
・温度ステップは、温度の自動増減は不可。
ポップアップメニューの OK を Enter する。
グラジエント表示は、左端温度は Temp 欄、右端温度は Temp の Ex 欄に
G を頭につけて表示されます。
ポップアップメニューから Save を Enter する。
1 Te m p
Temp
94.0
Ex
0.0
Time 10:00
Ex
0:00
3 Te m p
25cyc
94.0 G45.0
0.5 G65.0
0:30
0:30
0:00
0:00
TD3010JE_v3.00D
21
2 Te mMpE N
1c
U y1 c
72.0
0.0
0:30
0:00
Save
Insert
7 2 .D0 e l e4 t. e0
0 .G0 r a 0
d.. 0
5 : 0C0a n c ∞e l
0:00 0:00
TP600/TP650 取扱説明書
④ スロープ機能設定
カーソルを設定ステップの Temp EX 位置におき、MENU/Slope/Enter
で設定する。表示が「Slope」となる。
3 Te m p
Temp
94.0
Ex
0.0
Time 10:00
Ex
0:00
1cyc
MENU 1
Save
+
−
PSaluospe
e
Cancel
37.0
37.0
Slope
0.0
60:00 15:00
0:00
0:00
スロープ設定可能範囲
温度: 30.0 〜 99.9℃
時間: 1:30(1分30秒) 〜 99:59(99分59秒)
【注意】 スロープ設定時間の最小値は、1 分30秒です。
この値以下で入力しても「1:30」の設定値となります。
【注意】 スロープとグラジエントの設定は、同一行内にはできません。
行を変えて、設定してください。ただし、行数は最大12です。
【NOTE】 スロープ設定の解除は、カーソルを指定欄に移動し、 CE キーを押すか、
再度 MENU/Slope で Enter キーを押すと、スロープ設定が解除され
ディフォルト「0.0」に戻ります。
3. 新規プログラムの保存をします。
プログラム名を入力する。
3
7
1
Sa v e
Pr o gr a m
a s
Pr og r a m
T a Ka Ra
Ta q
4
5
Us e r
3
9
4
0
M ENU
2
3
3
8
( C o mmo n )
Sa v e As
Us e r
Ca n c e l
6
ENTER キーを押す。あるいは、ポップアップメニューから SaveAs を Enter する。
【NOTE】
ユーザプログラム: 最大記憶数は6Temp プログラムで、最大200プログラム。
プログラム名 文字数: 16文字
最大ユーザ名登録数: 22ユーザ、登録済ユーザ名<Common>、<TaKaRa>をのぞく。
TD3010JE_v3.00D
22
TP600/TP650 取扱説明書
【Note】
ユーザ名<TaKaRa>フォルダー内には、新規プログラムが登録できません。
ポップアップメニューで Save および、SaveAs 機能が無効になり、- - - 表示となり
ます。他のユーザ名に変更してください。
Save
Program
Pr o g r a m
TaKaRa
MENU
-- -- -- -User
Cancel
Taq
User(TaKaRa)
6. 既存プログラム編集、保存
既存プログラムを編集して新たな名前を付ける(新規作成)、もしくは同一名前で保存
(編集)します。編集後プログラムを登録しなくても、ランすることでできます。
1. トップスクリーン画面で、ポップアップメニューから Edit を Enter する。
TaKaRa Thermal Cycler
TP600 Ver.3.xx
User
05/04/20
Dice
( Common )
12:00:00
MENU
RUN
New
E dd ii tt
E
Tools
User
25.0 ℃
2. ユーザ名の中にあるプログラムリストが表示されます。
編集したいプログラムを矢印キーで選択する。ENTER キーを押すか、ポップアップ
メニューから Edit を Enter する。
Program
Name
TaKaRa Taq
Cycle Seq
Touch Down
PCR
Stored
05/04/01
05/04/01
05/04/01
TD3010JE_v3.00D
23
MENU
1 1 : 3 0 :E
0d
0it
1 1 : 3 1 :V0 i0e w
12:00:U
0 0s e r
Sort
Cancel
TP600/TP650 取扱説明書
既存プログラムが表示され、セグメント(Temp 数)、数値を編集します。
・カーソルの移動は矢印キーで行う。
・温度(Temp)、時間(Time)、サイクル数(Cyc)は、数値入力後 Enter または矢印キーを
押す。
温度設定値: 4.0〜99.9℃
時間設定値: 00:01(1秒)〜99:59(99分59秒)
99:99で 連続(∞)運転
サイクル数: 最大99
・各パターンの先頭セグメント位置(下図の 「1 Temp 」の「1」「94.0」「5:00」、
「3 Temp」の「3」「94.0」「0:30」)にカーソルがある場合)は、ポップアップメニューから
「Insert」/「Delete」を押すとパターンの追加/削除ができる。
1Temp3Temp
Temp
Time
94.0
5:00
94.0
0:30
25cyc
55.0
0:30
2Tem
p
MENU
1
72.0
1:00
SSaavvee
Insert
Delete
More
7 2C
. 0a n c e l
5:00
・カーソルがパターンの先頭以外(図のパターン「3 Temp 25Cyc」の場合「55.0/0:30」
「72.0/0:30」)にあるとき、ポップアップメニューから「Insert」/「Delete」を押すとセグメン
トの追加/削除ができる。
1Temp3Temp
Temp
Time
94.0
5:00
94.0
0:30
25cyc
55.0
0:30
2Tem
p
MENU
1
72.0
1:00
SSaavvee
Insert
Delete
More
7 2C
. 0a n c e l
5:00
・パターンの中で、セグメント数の変更は、パターンの頭の Temp 数値(1〜9)を
入力し Enter を押すと変更が可能。パターンの最後のセグメントから変更される。
1 プログラム中最大セグメント数(Temp 数): 12
□ 拡張モードを使用
(18P〜22P 参照)
拡張機能には、次の4種設定が可能です。
・ エクステンション(Extension)設定
サイクル数を増すごと温度、時間の増減 (Extension) 設定をする:
増減量は、カーソルが温度、時間の Ex 位置で数値入力。増減の選択は
ポップアップメニューから(+、−)を Enter する。
TD3010JE_v3.00D
24
TP600/TP650 取扱説明書
・ 一時停止 (Pause) 設定
拡張モードでカーソルが、Time Ex 位置でポップアップメニューから(Pause)
を Enter する。
・ グラジエント温度設定 (TP650 には、本機能なし)
拡張モードでポップアップメニューから(Grad)を Enter する。
・ スロープ設定
拡張モードでカーソルが Temp Ex 位置にあるとき、MENU/Slope/を選択し、
ENTER で設定する。
① 拡張モードに入る。ポップアップメニューから More を Enter する。
1Temp3Temp
Temp
Time
94.0
5:00
99 44 .. 00
0:30
25cyc
55.0
0:30
2Tem
p
MENU
1
72.0
1:00
Save
Insert
Delete
More
7 2C
. 0a n c e l
5:00
② エクステンションおよび一時停止の設定
1 Te m p
Temp
Ex
Time
Ex
94.0
0.0
5:00
0:00
3 Te m p
94.0
0.5
0:30
0:00
25cyc
2 Te m MENU
p 1 c 1y c
55.0
0.0
0:30
- -05: :0050
Save
+
72.0 ー
4.0
−
0P
. 0a u s0 e. 0
5:C
0 0a n c ∞
el
0:00 0:00
72.0
0.0
1:00
Pause
カーソルが温度(Temp)、時間(Time) の下「Ex」にあるとき、増減数を入力、
Enter を押し、ポップアップメニューから 増(+)、減(-) を選んで、Enter する。
温度拡張 Ex 最大: ±9.9℃
時間拡張 Ex 最大: ±9:59
【NOTE】
エクステンションの解除は、「0」を入力する。
Pause を解除する場合は、再度 Pause を設定すれば解除される。
一時停止設定は、設定をかけるセグメントの Time Ex にカーソルを移動させて、
ポップアップメニューから Pause を選び Enter する。
【注意】一時停止は、設定したセグメントに移行した時点となる。
設定したセグメントを実行した後で一時停止にするものではない。
Pause の解除は、再度 MENU/Pause/ENTER で行う。
TD3010JE_v3.00D
25
TP600/TP650 取扱説明書
【NOTE】
・カーソルが Temp、Time のときは、ポップアップメニューに
Insert、Delete、Gradient の表示になります。
・カーソルが Temp Ex のときは、+、−、 Slope の表示になります。
・カーソルが Time Ex のときは、+、−、 Pause の表示になります。
③ グラジエント温度設定 (TP650 には、グラジエント機能なし)
カーソルが温度(Temp) にあるとき、ポップアップメニューから Grad を Enter する。
1 Te m p
Temp
94.0
Ex
0.0
Time 10:00
Ex
0:00
3 Te m p
25cyc
94.0
0.5
0:30
0:00
55.0
0.0
0:30
0:00
2 Te mMpE N
1c
U y1 c
72.0
0.0
0:30
0:00
Save
Insert
7 2 .D0 e l e4 t. e0
0 .G0 r a 0d.. 0
5 : 0C0a n c ∞e l
0:00 0:00
グラジエント温度設定画面になります。
Gradient
(01)45.0
(04)49.0
(07)56.2
(10)63.0
Setting
(02)46.0
(05)51.4
(08)58.6
(11)64.0
(03)47.0
(06)53.8
(09)61.0
(12)65.0
MENU1
O
OK
K
Clear
グラジエント温度は(01:ブロック左端)に低い温度、(12:ブロック右端)に
高い温度を設定します。
設定位置(01)(12)のカーソル移動は、上下の矢印キーを押す。
設定温度範囲: 40.0 〜 75.0℃
温度差
:
6.0 〜 20.0℃
【注意】 ・設定温度および設定幅を超えると、制御温度が不安定になります。
・(02)〜(11)の温度は、計算した近似値を表示します。
・温度ステップは、温度の自動増減は不可。
ポップアップメニューの OK を Enter します。
グラジエント表示は、左端温度は Temp 欄、右端温度は Temp の Ex 欄に
G を頭につけて表示されます。
ポップアップメニューから Save を Enter します。
TD3010JE_v3.00D
26
TP600/TP650 取扱説明書
④ スロープ機能設定
カーソルを設定ステップの Temp EX 位置におき、MENU/Slope/Enter
で設定する。表示が「Slope」となる。
3 Te m p
Temp
94.0
Ex
0.0
Time 10:00
Ex
0:00
1cyc
MENU 1
Save
+
−
PSal uo spee
Cancel
37.0
37.0
Slope
0.0
60:00 15:00
0:00
0:00
スロープ設定可能範囲
温度: 30.0℃ 〜 99.9℃
時間: 1:30(1分30秒) 〜 99:59(99分59秒)
【注意】 スロープ設定時間の最小値は、1 分30秒です。
この値以下で入力しても「1:30」の設定値となります。
【注意】 スロープとグラジエントの設定は、同一行内にはできません。
行を変えて、設定してください。ただし、行数は最大12です。
【NOTE】 スロープ設定の解除は、カーソルを指定欄に移動し、CE キーを押すか、
再度 MENU/Slope で Enter キーを押すと、スロープ設定が解除され
デフォルト「0.0」に戻ります。
3. 編集プログラムの保存
保存方法は、3種類あります。
1)編集プログラムを同じ名前で編集プログラムを保存する。
→ 名前を変えず、上書き保存
- - (Save)
2)編集プログラムを新たな名前で保存し、以前のプログラムは消す。
→ 異なる名前を入力、上書き保存- - (Save)
3)編集プログラムを新たな名前で保存し、以前のプログラムを残しておく。
→ 異なる名前を入力、新規保存 - - (SaveAs)
ポップアップメニューから Save を選択し、Enter する。
Temp
Ex
Time
Ex
1 Te m p
3 Te m p
25cyc
94.0
0.0
5:00
0:00
94.0
0.5
0:30
0:00
55.0
0.0
0:30
-5:00
TD3010JE_v3.00D
27
2 Te m p
1 c 1y c
MENU
SSaavvee
+
72.0
72.0 ー
4.0
0.0
0 .P0a u 0s .e0
1:00
5 : 0C0a n c ∞
el
Pause
0:00 0:00
TP600/TP650 取扱説明書
3
7
1
Sa v e
Pr o gr a m
Pr og r a m
Us e r
4
0
T a Ka Ra
Save 上書き保存
Sa v e
Ta q
Sa v e As
4
5
3
9
M ENU
2
3
3
8
SaveAs 新規保存
Us e r
( C o mmo n )
Ca nc e l
6
1)編集プログラムを同じ名前で編集プログラムを保存する。
名前をそのまま変更せず、Enter する。もしくは、ポップアップメニューから
Save を選択して、Enter する。上書き保存となる。
2)編集プログラムを新たな名前で保存する。以前のプログラムは消す。
新たな名前を入力する。そのまま Enter するか、もしくはポップアップメニュー
から Save を選択して、Enter する。以前のプログラムは、残らない。
3)編集プログラムを新たな名前で保存する。以前のプログラムは、そのまま残す。
新たな名前を入力する。ポップアップメニューから SaveAs を選択して、Enter
する。以前のプログラムは、そのまま残る。
【NOTE】 名前を変更せず、SaveAs を選択して Enter すると、「Change Program Name」
のメッセージが現れ、プログラム名の変更を要求します。新たな名前を入力しください。
【NOTE】
ユーザ名が<TaKaRa>の場合は、Save / SaveAs とも、保存はできません。
ポップアップメニューから User で、他のユーザ名に変更して保存して下さい。
【NOTE】
ユーザプログラム: 最大記憶数は6Temp プログラムで、最大200プログラム。
プログラム名 文字数 : 16文字
最大ユーザ名登録数 : 22ユーザ
登録済ユーザ名<Common><TaKaRa>は、含まない。
7. ユーザ名選択、登録
プログラムを収めるには「ユーザ名」を登録して、その中に保存する。ここでは、
「ユーザ名の選択」「新規ユーザ名登録」「既存ユーザ名変更」を説明します。
7−1 (ユーザ名の選択)
1.
トップスクリーンからポップアップメニューで User を Enter する。
TaKaRa Thermal Cycler
TP600 Ver.3.xx
User
05/04/20
Dice
( Common )
12:00:00
TD3010JE_v3.00D
28
25.0 ℃
MENU
RUN
New
Edit
Tools
U
U ss ee rr
TP600/TP650 取扱説明書
2.
ユーザ名の選択画面にて、矢印キーで希望のユーザ名を選択する。
ポップアップメニューから OK を Enter する。
Select User
<Common>
JJ ii rr o
o
Name
<TaKaRa>
Sabro
MENU
OK
K
O
New
Edit
Cancel
【NOTE】
・電源投入時はこのスクリーンから始まります。
・初期設定ユーザ名<Common><TaKaRa>が登録されています。
・最大ユーザ名登録数: 22件
・最大ユーザ名文字数: 10文字
3.
パスワードの確認画面となる。登録パスワードを入力する。
Password
User
MENU
OK
Cancel
Jiro
Password
入力値は数字 : 0 〜 9。 画面には * で表示される。
入力値を間違った場合はCEキーでクリアーして、再度入力してください。
【NOTE】パスワードが設定されていない場合は、この画面は現れない。
4.
ポップアップメニューから OK を Enter して、トップスクリーンに戻る。
7−2 (新規ユーザ名の登録)
1.
トップスクリーンからポップアップメニューで User を Enter する。
TaKaRa Thermal Cycler
TP600 Ver.3.xx
User
05/05/05
2.
Dice
( Common )
12:00:00
25.0 ℃
MENU
RUN
New
Edit
Tools
U
U ss ee rr
ポップアップメニューから New を Enter する。
Select User
C oo m
mm
m oo m
n >>
<< C
Name
<TaKaRa>
TD3010JE_v3.00D
29
MENU
OK
New
Edit
Cancel
TP600/TP650 取扱説明書
3.
新規ユーザ名を入力し、Enter する。または、ポップアップメニューで SaveAs を
Enter する。
Save
User
as
User
4.
MENU
O
K As
Save
Cancel
J
S iarkou r a
パスワード入力画面になる。必要なら、パスワードを入力する。
(パスワードを設定しない場合は、何も入力せずポップアップメニューで
OK を Enter する。)
パスワード入力値および桁数 : 数字 0 〜 9 (1〜6桁)
画面には、入力数値が表示される。
入力値を間違った場合はCEキーでクリアーして、再度入力してください
7−3 (既存ユーザ名の変更)
1.
トップスクリーンからポップアップメニューで User を Enter する。
TaKaRa Thermal Cycler
TP600 Ver.3.xx
User
05/05/05
2.
Dice
(Common)
12:00:00
25.0 ℃
MENU
RUN
New
Edit
Tools
U
U ss ee rr
変更したいユーザ名を選択して、ポップアップメニューから OK を Enter する。
Select User
<Common>
Jiro
Name
<TaKaRa>
Sabro
MENU
OK
New
Edit
Cancel
パスワードが設定されているときは、パスワードを聞いてきます。
パスワードを入力後、ポップアップメニューで OK を Enter してください。
トップスクリーンに戻ります。
3.
User 名が、変更したいユーザ名になっていることを確認して、
ポップアップメニューから User を選択、Enter する。
TaKaRa Thermal Cycler
TP600 Ver.3.xx
User
05/05/05
Dice
(Sabro)
12:00:00
TD3010JE_v3.00D
30
25.0 ℃
MENU
RUN
New
Edit
Tools
U
U ss ee rr
TP600/TP650 取扱説明書
4.
User 選択画面で、変更したいユーザ名が反転していることを確認し、
ポップアップメニューから Edit を Enter する。
Select User
<Common>
Jiro
5.
Name
<TaKaRa>
Sabro
MENU
OK
New
E
E dd ii tt
Cancel
新たなユーザ名を入力し、ポップアップメニューの Save を Enter する。
Save
User
User
MENU
O
S aK v e
Cancel
Sakura
【NOTE】 同一名がすでに登録されているときは「 Same User Name ! 」の
メッセージがでます。ユーザ名を変更してください。
6.
パスワード設定画面になる。パスワードを入力して、ポップアップメニューの
OK を Enter する。
(パスワード設定の必要がないときは、何も入力せず、ポップアップメニューで
OK を Enter する。)
Save
User
User
Password
MENU
OK
Cancel
Sakura
****
画面には、入力数値が表示される。
パスワード入力値および桁数 : 数字 0 〜 9 (1〜6桁)
入力値を間違った場合はCEキーでクリアーして、再度入力してください。
7.
トップスクリーンが表示される。User 名が変更されていることを確認する。
TaKaRa Thermal Cycler
TP600 Ver.3.xx
User
05/01/01
(Sakura
12:00:00
TD3010JE_v3.00D
31
Dice
)
25.0 ℃
MENU
RUN
New
Edit
Tools
U
U ss ee rr
TP600/TP650 取扱説明書
【NOTE】
キーの機能、入力文字の割付は以下通りです。
User 名 文字編集機能
・上矢印キー:スペース挿入
・下矢印キー:バックスペース
・左矢印キー:カーソル左移動
・右矢印キー:カーソル右移動
・文字入力キー
0キー:&,/,(,),0
1キー:スペース,-,”,#,1
2キー:A,B,C,a,b,c,2
3キー:D,E,F,d,e,f,3
4キー:G,H,I,g,h,I,4
5キー:J,K,L,j,k,l,5
6キー:M,N,O,m,n,o,6
7キー:P,Q,R,S,p,q,r,s,7
8キー:T,U,V,t,u,v,8
9キー:W,X,Y,Z,w,x,y,z,9
数値入力欄の場合は数字のみ入力可能。
【NOTE】
ユーザ名<TaKaRa>フォルダー内には、プリセットプロトコールが
8プログラム登録されています。このフォルダー内のプログラムは、変更、削除はできま
せん。< 1Kbp, < 5Kbp, <10Kbp, >10Kbp の4プログラムが、ターゲットの長さにあわせた
PCR プログラムです。後の4プログラムは、TaKaRa キットの反応用プロトコールです。
*プリセットプロトコール
1. < 1Kbp(〜1Kbp 用) 94℃ 30sec, 55℃ 30sec, 72℃ 1min を 30cycles
→4℃連続(∞)運転
2. < 5Kbp(〜5Kbp 用) 94℃ 30sec, 55℃ 30sec, 72℃ 5min を 30cycles
→4℃連続(∞)運転
3. <10Kbp(〜10Kbp 用) 98℃ 10sec, 68℃ 10min を 30cycles→4℃連続(∞)運転
4. >10Kbp (10Kbp 以上用) 98℃ 10sec, 68℃ 15min を 30cycles
→4℃連続(∞)運転
TD3010JE_v3.00D
32
TP600/TP650 取扱説明書
5. BcaBEST RNA
30℃/1分、30℃→65℃/15分、65℃/20分
6. Differential(DD)
94℃/30秒、40℃/1分、40℃→72℃/2分、72℃/30秒
7. Mutagenesis
94℃/10分、94℃→37℃/60分、37℃/15分
8. siRNA(double)
95℃/1分、70℃/1分、70℃→37℃/60分、37℃/∞
TD3010JE_v3.00D
33
TP600/TP650 取扱説明書
8. リンク機能
リンク機能とは、作成したプログラムを複数個連続して稼動させることができます。
Dice では、ひとつのプログラムで最大12セグメントが入力できますが、それ以上の
長いプログラムを走らせたい場合、複数のプログラムを連続して走らすことで可能
となります。
リンク機能の設定は、プログラム名に「#」+「1桁の数字」を入れることで、数字の
番号順にプログラムを連続して実行します。
各モジュールを作成して、必要モジュールをつなぎ合わせるといった使用方法には
適してないかもしれません。
リンクプログラムの作成
同じプログラム名の後に「#」「1桁の数字」を続けて入力する。
例: PLANT̲TEST#1
PLANT̲TEST#2
プログラム#1〜#4まで順番に実行します。
PLANT̲TEST#3
PLANT̲TEST#4
【NOTE】 リンク機能のプログラム名+「#」「1桁数字」の以降の文字は、
リンク機能に影響しません。
(例) LINK#1
LINK#2Long
LINK#1 から開始すると、
LINK#3Short
LINK#4 まで連続で実行する。
LINK#4
【注意】 「1桁数字」は重複してつけないで下さい。
「1桁数字」まで同じ名前で以降の文字だけ異なるプログラム名の作成・保存は可能で
す。しかしリンク運転した場合どちらのプログラムを選択するかはメモリー番地の小さ
い方が優先されます。作成順、名前順とは限りませんので、混乱を避けるため重複は
避けてください。
どちらの運転になるかは、
メモリー内の保存場所に依存する。
(例)作成プログラム
LINK#1
LINK#1
LINK#1
LINK#2
LINK#2
LINK#2Long
LINK#2Long
LINK#3Short
LINK#3Short
LINK#3Short
LINK#4
LINK#4
LINK#4
TD3010JE_v3.00D
34
TP600/TP650 取扱説明書
リンクプログラムの運転方法
1.
作成したプログラムのユーザ名から、トップスクリーンに移り、MENU キーを押
し、ポップアップメニューの RUN を選択し ENTER キーを押す。
(例)ユーザ名<Common>の中にプログラム作成の時
Select User
C oo m
mm
m oo m
n >>
<< C
Jiro
Name
<TaKaRa>
Sabro
MENU
OK
K
O
New
Edit
Cancel
MENU、OK で Enter する。
TaKaRa Thermal Cycler
TP600 Ver.3.xx
User
05/05/05
2.
Dice
( Common )
12:00:00
MENU
RU
UN
N
R
New
Edit
Tools
User
25.0 ℃
始まりのプログラムを選択する。
例: PLANT̲TEST#1
PLANT̲TEST#2
プログラム#1〜#4まで順番に実行します。
PLANT̲TEST#3
PLANT̲TEST#4
ここでは、「PLANT̲TEST#1」を選び、OK を Enter する。
3.
ポップアップメニューから Start を Enter して、「Select Reaction Mode」に移る。
Select
Reaction
Mode
Mode
1 (1 - 5)
Container
1 (1.Thin
2.Thick)
Volume
5 0 μl ( 5 - 1 5 0 μl )
Link
1 (1.Yes
2.No)
4.
MENU
OK
Cancel
条件を選び、反応容量を入力後
画面4行目の Link 設定が、「1」になっていることを確認して、
MENU の OK を Enter する。
TD3010JE_v3.00D
35
TP600/TP650 取扱説明書
5.
続けて、MENU/Start を Enter するとプログラム「PLANT̲TEST#1」がスタート
する。
「PLANT̲TEST#1」 終了後、自動的に「PLANT̲TEST#2」が開始、
その後「PLANT̲TEST#3」「PLANT̲TEST#4」と実行して終了する。
【NOTE】 連番のプログラムの途中からスタートすることも可能です。
たとえば、開始プログラムを「PLANT̲TEST#2」から始めると、
その後「PLANT̲TEST#3」「PLANT̲TEST#4」と実行して終了する。
【NOTE】 1桁目の数字が不連続の場合は、連番まで実行して終了します。
例: 以下の場合、TEST#1からスタートさせると、
TEST#2を実行して終了する。
TEST#1
開始
TEST#2
終了
TEST#4
TEST#5
リンク用に作成したプログラムを単独で実行する場合
リンク用に作成したプログラムをそれだけ単独で実行させることも可能です。
1.
プログラム名を選択し、MENU の Start を Enter して、
「Select Reaction Mode」に移る。
2.
Link 「2」 を入力し、MENU/OK を Enter する。
Select
Reaction
Mode
Mode
1 (1 - 5)
Container
1 (1.Thin
2.Thick)
Volume
5 0 μl ( 5 - 1 5 0 μl )
Link
2 (1.Yes
2.No)
MENU
OK
Cancel
Link 「2 (No)」を入力すると、
リンク機能が解除される。
3.
MENU/Start を Enter するとそのプログラムが実行され、終了する。
TD3010JE_v3.00D
36
TP600/TP650 取扱説明書
【NOTE】 リンク運転時の画面表示について。
1)運転中の画面
プログラムタイトルは、実行中のプログラム名を表示します。
Remaining time は、実行中のプログラム単体の残り時間を表します。
Info 表示は、実行中のプログラム単体の開始時刻と終了予定時刻を表します。
2)終了画面 Finished
リンク運転終了時の Finished 画面には、最後に実行したプログラム名と、
そのプログラムの運転開始時刻、終了時刻、および運転時間が表示されます。
3)履歴画面 History
プログラム名は
プログラムの「#」より前のプログラム名と「#開始番号」-「#終了番号」
となります。
(例) LINK#1
LINK#1から運転すると、終了後履歴記録は、
LINK#2Long
LINK#1-#4 と表示します。
LINK#3Short
LINK#4
History
2/2
User:<Common>
Program:LINK#1-#4
Mode :1
T h i n 5 0 μl
Started at
11:50:10
FInIshed at
15:28:15
05/01/21
05/01/21
【NOTE】 履歴記録を見るには、トップスクリーンから、ポップアップメニューの Tools を Enter
します。その後 History を選択し、ポップアップメニューで OK を Enter します。
(38P. 「1.ヒストリー(History) 履歴の保存」を参照)
スタート時刻は最初のプログラムの開始時刻を表示します。
終了時刻は、最後のプログラムの終了時刻を表示します。
TD3010JE_v3.00D
37
TP600/TP650 取扱説明書
● 5章 自己診断機能 その他ツール (Tools)
ツールメニューの中には次の機能があります。
1) ヒストリー(History) 履歴記録
2) セッティング(Setting) 日時の設定。装置の初期設定。
3) データ通信(PC Communication) プログラムの送受信
4) 自己診断機能(Diagnosis) テスト運転プログラム
5) 消去機能(Delete User Data) 保存ユーザ名、プログラムの削除
ツールに入るには、
トップスクリーンから、ポップアップメニューの Tools を Enter します。
TaKaRa Thermal Cycler
TP600 Ver.3.xx
User
05/05/05
Dice
( C o m m on )
12:00:00
MENU
RUN
New
Edit
T oo oo ll ss
T
User
25.0 ℃
ツールメニューが表示されます。項目を選択して、ポップアップメニューで OK を
Enter します。
Select
Tools
MENU
OK
OK
Svc
Cancel
History
Setting
PC Communication
Diagnosis
Reserved
Delete User Data
以下の項目は、ツールメニュー(Select Tools)からポップアップメニューで
OK を Enter したところから、説明しています。
1. ヒストリー(History) 履歴の保存
History は、最後に実行したプログラムの運転記録を記憶します。
新たにプログラムを実行すると過去データは消去され、最新データに更新されます。
1. History を選択し、ポップアップメニューで OK を Enter します。
0 0 0 0 0
1 2 3 4 5
0 0 0 0 1 1 1 1 1 1 1
6 7 8 9 0 1 2 3 4 5 6
1
Hi s t o r y
3
U s e r : ( C o mmo n )
P r o g r m: T a K a R a
4
Ty pe : 1
5
St a r t e d
Po we r
6
1 1 1 2 2 2 2 2 2 2 2 2 2 3 3 3 3 3 3 3 3
7 8 9 0 1 2 3 4 5 6 7 8 9 0 1 2 3 4 5 6 7
3 / 4
Tube
M ENU
OK
イベント表示
Ta q
50 u l
a t
1 5 : 0 7 : 5 9
0 2 / 1 1 / 2 6
Fa i l e d
1 5 : 2 5 : 3 1
0 2 / 1 1 / 2 6
1 5 : 3 1 : 5 4
0 2 / 1 1 / 2 6
Re c o v e r e d
a t
3 3 4
8 9 0
TD3010JE_v3.00D
38
この画面では4件中
3件を表示している。
TP600/TP650 取扱説明書
・上段の History 右横の数字は、記録した履歴件数を示します。
画面の例では、4件中3件目まで表示したことを示します。
【注意】ページ数を表すものではありません。
・続きの履歴を表示するには、ポップアップメニューを消してから
下矢印キー ▼ を押すか、 MENU キーを2度押しして、表示させます。
【注意】 ヒストリー画面で History 横の分数の分母が4以上のときは、
次の画面にも表示しています。忘れず見てください。
【NOTE】 記憶可能イベント数: 最大40件
リンク運転時の履歴表示
・ プログラム名は、
『プログラムの「#」より前のプログラム名』+『「#開始番号」-「#終了番号」』
となります。
(例) LINK̲#1
LINK̲#1から運転すると、終了後履歴記録は、
LINK̲#2Long
LINK̲#1-#4 と表示します。
LINK̲#3Short
LINK̲#4
History
2/2
User:<Common>
Program:LINK#1-#4
Mode :1
T h i n 5 0 μl
Started at
11:50:10
FInIshed at
15:28:15
05/05/21
05/05/21
・ スタート時刻は最初のプログラムの開始時刻を表示します。
・ 終了時刻は、最後のプログラムの終了時刻を表示します。
2. セッティング(Setting) 日時の設定。装置の初期設定
Setting は、日付、時間の設定、装置のスタンバイ温度の設定、表示画面の色反転とスリープ
時間の設定、ブザー音の設定ができます。
2−1 (日付・時間の設定)
1. Setting を選択し、ポップアップメニューで OK を Enter します。
2. Date & Time を選択し、ポップアップメニューで OK を Enter します。
0
1
1
0
2
0
3
0
4
0
5
0
6
0
7
0
8
0
9
1
0
1
1
1
2
1
3
1
4
1
5
1
6
1
7
1
8
1
9
2
0
2
1
Se t t i ng
2
3
2
4
2
5
2
6
2
7
2
8
2
9
3
0
3
1
3
2
3
3
3
4
3
5
3
6
3
7
3 3
8 9
M ENU
3
OK
Da t e
4
2
2
&
De f a u l t
T i me
Ca n c e l
Se t t i n g
5
6
TD3010JE_v3.00D
39
4
0
TP600/TP650 取扱説明書
3. 日付のスタイル、日付、時間を入力して、ポップアップメニューで OK を Enter します。
0
1
0
2
0 0
3 4
0
5
0
6
0
7
0
8
0
9
1
0
1
1
1
2
1
3
1
4
1
5
1
Da t e
T i me
3
Da t e
St y l e
4
Da t e
0 3 / 0 1 / 1 5
5
T i me
1 4 : 1 5 : 0 0
1
6
1
7
1
8
1
9
2
0
2
1
2
2
2
3
2
4
2
5
2
6
2
7
2
8
2
9
3
0
3
1
3
2
3
3
3
4
3
5
3
6
3
7
3
8
3
9
4
0
M ENU
OK
( 1 . Y / M/ D
2 . M/ D / Y
3 . D / M/ Y )
Ca n c e l
6
たとえば、2003年 1 月15日 14時15分00秒 を設定するには、
Date Style = 「1」、 Date = 「030115」、 Time = 「141500」
と入力します。続いてポップアップメニューで OK を Enter します。
2−2 (初期設定)
1. Setting を選択し、ポップアップメニューで OK を Enter します。
2. Default Setting を選択し、ポップアップメニューで OK を Enter します。
0
1
0
2
0 0
3 4
0
5
0
6
0 0
7 8
0
9
1
0
1
1
1
2
1
3
1
4
1
5
1
6
1
7
1
8
1
9
2
0
2
1
2
2
1
De f a u l t
3
St a n d- by
T e mp e r a t u r e
L CD
Ba c k
Co l o r
4
L CD
Sl e e p
5
Bu z z e r : Ke y
2
3
2
4
2
5
2
6
2
7
2
8
2
9
o
C
3
0
3
1
3
2
Se t t i ng
Pa d
Bu z z e r : F i n i s h e d
3
3
3
4
3
5
3
6
3
7
3
8
3
9
4
0
M ENU
2 5 . 0
1
OK
( 1 . B l u e 2 . Wh i t e )
Ca nc e l
( 1 . 3 0 mi n 2 . N o )
1
( 1 . Ye s
2 . No)
1
( 1 . Ye s
2 . No)
1
6
3. 希望の設定を入力し、ポップアップメニューで OK を Enter します。
・Stand-by Temperature: 待機中のブロック温度の設定(初期設定 25℃)。
・LCD Back Color: 画面背景の色設定(1:青、2:白)。文字色は背景と逆。
・LCD Sleep: プログラム運転中でないとき、キー操作がなければ、画面の
バックライト照明を消灯する。(1:30分後消灯、 2:消灯しない)
【NOTE】 ・ 消灯しているとき、MENU キーを押せば点灯します。
・ その他のキーは応答しません。
・Buzzer : Key Pad: キーを押すたびにブザーを(1:鳴らす、 2:止める)。
・Buzzer : Finished: プログラム終了時ブザーを(1:鳴らす、 2:止める)。
(ブザー音:プログラムポーズは3回、終了時は6回鳴ります。)
TD3010JE_v3.00D
40
TP600/TP650 取扱説明書
3. データ通信(PC Communication) プログラムの送受信
プログラムデータをコンピュータに保存、またはコンピュータから装置に送ります。
プログラムのバックアップや転送に使用ください。
3−1 コンピュータ(PC)の通信設定 ( Windows® 2000, XP の場合 )
1. スタートボタンから
プログラム>アクセサリ>通信>ハイパーターミナル
で起動する。
(スタートメニューに登録されていない場合は、
C:\Program Files\Windows NT\hypertrm.exe)
2. ハイパーターミナル画面から
新しい接続 名前 :
(例)TaKaRa
接続の設定 接続方法 :
COM1
COM1 のプロパティ ポートの設定 :
ビット/秒 9600、 データビット 8、パリティ なし、
ストップビット 1、 フロー制御 Xon/Xoff
ASCII 設定 : ファイル>プロパティ>設定 から ASCII 設定ボタンを押して、
ASCII 設定の画面に入り、その画面で、
ディレイ(行) 2ミリ秒、 ディレイ(文字) 2ミリ秒
とセットします。その他のチェックははずします。
受信の場合: 転送>テキストのキャプチャ>保存ファイル名を指定して開始ボタンを押す。
送信の場合: 転送>テキストファイルの送信>送信ファイルを選択。
【お断り】 RS232C 用 9 ピン D-sub クロスタイプのケーブルが必要です。
ケーブルは付属していません。
3−2 プログラムをコンピュータに転送 ( Dice → PC )
1. PC Communication を選択し、ポップアップメニューで OK を Enter する。
Select Tools
HIstory
Setting
PC Communication
Diagnosis
Reserved
Delete User Data
TD3010JE_v3.00D
41
MENU
OK
OK
Svc
Cancel
TP600/TP650 取扱説明書
2. Send a program to PC を選択し、ポップアップメニューで OK を Enter する。
PC
Communication
Send a Program to pc
Receive a Program from
pc
MENU
OK
OK
Cancel
3. プログラムリストが表示されます。
送信プログラムを選択し、ポップアップメニューで Send を Enter する。
Cycle
Seg
Program
Name
Stored
RT PCR
Cycle Seg
TaKaRa Taq
Touch Down PCR
03/04/01
03/04/01
05/04/01
03/04/01
MENU
Send
OK
User
Sort
Cancel
4. PC 側のハイパーターミナルの操作を行います。
転送>テキストのキャプチャ>保存ファイル名を指定、 開始ボタンを押す。
5. プログラムを送信する。
ポップアップメニューで Start を Enter する。
Progress
Send
a
program
Program
Name
<
to
MENU
Start
OK
Cancel
pc
TaKaRa
Taq
Finished.
終われば、Finished. のメッセ-ジが表示されます。
6. ポップアップメニューで Cancel / Enter を3回繰り返し、トップスクリーンに戻る。
(
CE キーを3回押しても、トップスクリーンに戻れます。)
3−3 プログラムをコンピュータから送信 ( PC → Dice )
1. Tools を Enter する。PC Communication を選択し、ポップアップメニューで OK を
Enter する。
Select Tools
History
Setting
PC Communication
Diagnosis
Reserved
Delete User Data
TD3010JE_v3.00D
42
MENU
OK
OK
Svc
Cancel
TP600/TP650 取扱説明書
2. Receive a Program from PC を選択し、ポップアップメニューで OK を Enter する。
PC
Communication
Send a Program to
Receive a Program
pc
from
MENU
OK
OK
Cancel
pc
3. プログラム受信画面になります。
ポップアップメニューで Start を Enter する。
Receiving … が表示されていることを確認します。
Progress
Receive
a
program
Receiving...
from
pc.
MENU
Start
OK
Cancel
...
4. PC 側ハイパーターミナルの操作を行う。
転送>テキストファイルの送信>送信ファイルを選択して、
PC からプログラムを送信する。
5. 受信が完了すると、受信したプログラム内容が表示される。
ポップアップメニューで OK を Enter する。
1Temp
3Temp
Temp
94.0
Time 10:00
25Cyc
94.0
0:30
55.0
0:30
2Temp
MENU
SOt K
art
Cancel
72.0
0:30
72.0
5:00
4.0
∞
6. 名前を付けて保存する。
Save
Program
Program
User
as
TaKaRa
Taq
(Common)
MENU
S
aveAs
OK
User
Cancel
【NOTE】 名前を付けて保存の方法は、
「 4章5項3 新規プログラムの保存 」 を参照ください
TD3010JE_v3.00D
43
TP600/TP650 取扱説明書
4. 自己診断機能(Diagnosis) テスト運転プログラム
自己診断テストを行います。
PCR 反応がうまくいかない場合、本装置の機能が正常か否かの判断が可能です。また、定
期的に診断することで、装置の状態が把握できます。
診断項目は次の4種類あります。
① Rate Test
加熱速度、冷却速度をテストします。
② Cycle Test
サイクル時間と制御安定性をテストします。
③ Up Down Test
4℃までの冷却時間を測定します。
④ Gradation Test (TP650 には、グラジエントテスト機能なし)
グラジエント温度を観測します。
テスト開始前に、スタンバイ温度が25℃に設定してあることを確認してください。
1.
Diagnosis を選択し、ポップアップメニューで OK を Enter します。
0
1
0
2
0
3
0
4
0
5
0
6
0
7
0
8
0
9
1
0
1
1
1
2
1
Se l e c t
3
Hi s t o r y
4
PC
5
D i a gnos i s
1
3
1
4
1
5
1
6
1
7
1
8
1
9
2
0
2
1
2
2
2
3
2
4
2
5
2
6
2
7
2
8
2
9
3
0
3
1
3
2
3
3
Tool s
3
4
3
5
3
6
3
7
3 3
8 9
4
0
M ENU
OK
Se t t i ng
Sv c
C o mmu n i c a t i o n
Ca n c e l
Re s e r v e d
De l e t e
6
2.
Us e r
Da t a
テスト項目が表示されます。
実行したいテスト項目を選択し、ポップアップメニューから OK を Enter します。
0
1
1
0
2
0 0
3 4
0
5
0
6
0 0
7 8
Se l f
0
9
1
0
1
1
1
2
1
3
1
4
1
5
1
6
1
7
1
8
1
9
2
0
2
1
2
2
2
3
2
4
2
5
2
6
2
7
2
8
2
9
3
0
3
1
D i a gnos i s
3
2
3
3
3
4
3
5
3
6
3
7
3
8
3
9
4
0
M ENU
3
OK
Ra t e
4
Cy c l e
5
Up
T e s t
Do wn
Gr a d .
Re s u l t
T es t
Ca n c e l
Te s t
Te s t
6
【NOTE】 テスト項目を選択して、ポップアップメニューから Result を Enter すると、
テスト項目ごとの最後に行った結果を表示します。
3.
プログラム実行画面が現れ、ポップアップメニューから Start を Enter する。
テストプログラム終了後、結果が表示されます。
【注意】 基準値は周囲温度が20〜23℃の場合です。
TD3010JE_v3.00D
44
TP600/TP650 取扱説明書
① RateTest プログラム実行画面
プログラム内容: 25℃30秒、94℃30秒、40℃30秒
0
1
0
2
0
3
0 0
4 5
0
6
1 Ra t e
0
7
0
8
0
9
1
0
1
1
1
2
1
3
1
4
1
5
1
6
1
7
1
8
1
9
2
0
2
1
2
2
2
3
2
4
2
5
Te s t
2
6
2
7
2
8
2
9
3
0
3
1
3
2
3
3
3
4
3
5
R e ma i n i n g
2
3
6
3
7
3
8
3
9
4
0
0 : 0 2
M ENU
3
St a r t
Ca n c e l
4
5 T e mp
6 T i me
2 5 . 0
9 4 . 0
4 0 . 0
0 : 3 0
0 : 3 0
0 : 3 0
0
1
結果が表示
0
2
0 0
3 4
0
5
0
6
0
7
0
8
0
9
1
0
1
1
1
2
of
1
3
1
4
1
5
1
6
1
7
Ra t e
1
8
1
9
2
0
2
1
2
2
2
3
2
4
2
5
2
6
2
7
2
8
1
Re s u l t
3
He a t
3 . 1
o
C/ s
Co o l
2 . 1
o
C/ s
Ov e r
0 . 1
o
C
Un d e r 0 . 4
o
C
4
St a r t e d
5
Fi ni s e d
a t
a t
Le ng t h
of
2
9
3
0
3
1
3
2
3
3
3
4
Te s t
3
6
3
7
3 3
8 9
4
0
3
7
3 3
8 9
M ENU
OK
1 5 : 4 7 : 2 1
0 3 / 01 / 1 5
1 5 : 5 0 : 5 2
0 3 / 01 / 1 5
Ru n
3
5
0 0 : 0 3 : 3 1
R e s u l t : N o r ma l
6
基準値: 最大加熱速度(Heat Rate) > 3.0℃/秒 以上
最大冷却速度(Cool Rate) > 2.0℃/秒 以上
② Cycle Test プログラム実行画面
プログラム内容: 94℃30秒、55℃30秒、72℃30秒
0
1
0
2
0
3
0 0
4 5
1 Cy c l e
0
6
0
7
0
8
0
9
1
0
1
1
1
2
1
3
1
4
1
5
1
6
1
7
1
8
1
9
2
0
2
1
2
2
2
3
2
4
2
5
2
6
2
7
2
8
2
9
3
0
3
1
3
2
3
3
3
4
R e ma i n i n g
Te s t
3
6
3
7
3
8
3
9
4
0
0 : 0 2
2
M ENU
3
St a r t
Ca n c e l
4
5 T e mp
6 T i me
3
5
9 4 . 0
5 5 . 0
4 0 . 0
0 : 3 0
0 : 3 0
0 : 3 0
結果が表示
0
1
0
2
0 0
3 4
0
5
0
6
0
7
1
Re s u l t
3
He a t
Ov e r
0
8
1
0
3 . 0
o
0 . 2
o
4
St a r t e d
5
Fi ni s e d
Le ng t h
6
0
9
1
1
of
1
3
1
4
1
5
1
6
2
4
2
5
2 . 1
o
C/ s
Un d e r 0 . 4
o
Cy c l e
C/ s
C
a t
a t
of
1
2
1
7
1
8
1
9
2
0
2
1
2
2
2
3
2
6
Co o l
C
0 3 / 01 / 1 5
1 5 : 4 2 : 3 9
0 3 / 01 / 1 5
Ru n
0 0 : 0 3 : 3 0
アンダーシュート < 0.5℃ 以下
45
2
9
1 5 : 3 9 : 0 9
基準値: オーバーシュート < 0.5℃ 以下
TD3010JE_v3.00D
2
8
3
0
3
1
3
2
3
3
3
4
3
5
3
6
M ENU
R e s u l t : N o r ma l
サイクル時間
2
7
Te s t
< 4分以下
OK
4
0
TP600/TP650 取扱説明書
③ Up Down Test プログラム実行画面
プログラム内容: 98℃1分、4℃1分
0
1
0
2
0
3
1 Up
0 0
4 5
0
6
0
7
0
8
Do wn
0
9
1
0
1
1
1
2
1
3
1
4
1
5
1
6
1
7
1
8
1
9
2
0
2
1
2
2
2
3
2
4
2
5
2
6
2
7
2
8
2
9
3
0
3
1
3
2
3
3
3
4
3
5
R e ma i n i n g
Te s t
3
6
3
7
3
8
3
9
4
0
0 : 0 2
2
M ENU
3
St a r t
Ca n c e l
4
5 T e mp
6 T i me
9 8 . 0
4 . 0
1 : 0 0
1 : 0 0
0
1
結果を表示
0
2
0 0
3 4
0
5
0
6
0
7
0
8
0
9
1
Re s u l t
3
He a t
Ov e r
4
St a r t e d
1
0
1
2
1
3
1
4
1
5
1
6
1
7
1
8
1
9
2
4
2
5
1 . 4
o
C/ s
Und e r 0 . 3
o
C
Up
3 . 2
o
C/ s
Coo l
0 . 2
o
C
a t
Fi ni s e d
5
1
1
of
Le ng t h
a t
of
2
0
Do wn
2
1
2
2
2
3
2
6
2
7
2
8
2
9
3
0
3
2
3
3
3
4
3
5
3
6
3
7
3 3
8 9
4
0
M ENU
OK
1 5 : 5 9 : 2 3
0 3 / 01 / 1 5
1 6 : 0 5 : 4 9
0 3 / 01 / 1 5
Ru n
3
1
Te s t
0 0 : 0 6 : 2 6
R e s u l t : N o r ma l
6
基準値: サイクル終了時間 < 10分以下
④ Gradient プログラムの実行画面(TP650にはこのテストプログラムなし)
プログラム内容: 94℃30秒、G50/G60 5分、72℃1分
0
1
0
2
0
3
0
4
0
5
0
6
0
7
1 Gr a d.
0
8
0
9
1
0
1
1
1
2
1
3
1
4
1
5
1
6
1
7
1
8
1
9
2
0
2
1
2
2
2
3
2
4
2
5
2
6
2
7
2
8
2
9
3
0
3
1
3
2
3
3
3
4
3
5
3
6
R e ma i n i n g
T e s t
2
3
7
3
8
3
9
4
0
0 : 0 7
M ENU
3
St a r t
T e mp
9 4 . 0
G5 0 . 0
7 2 . 0
0 . 0
G6 0 . 0
0 . 0
0 : 3 0
5 : 0 0
1 : 0 0
0 : 0 0
0 : 0 0
0 : 0 0
4 Ex
5 T i me
6 Ex
Ca n c e l
グラジエント制御中はメニューに、Grad. 項目が表示され、各列の温度を観測できます。
グラジエント温度で、タイマーがカウントを開始し、2〜3分後に、ポップアップメニューで
Grad.をOKしますと、観測画面が表示されます。(保存はされません。)
3
7
1
Gr a d i e n t
T e mp e r a t u r e
3
8
3
9
4
0
M ENU
2
OK
3
( 0 1 ) 4 9 . 8
( 0 2 ) 5 0 . 5
4
( 0 4 ) 5 1 . 8
( 0 5 ) 5 3 . 0
( 0 3 ) 5 0 . 9
( 0 6 ) 5 4 . 2
5
( 0 7 ) 5 5 . 4
( 0 8 ) 5 6 . 6
( 0 9 ) 5 7 . 9
( 1 0 ) 5 8 . 9
( 1 1 ) 5 9 . 4
( 1 2 ) 6 0 . 1
6
0
1
結果を表示
サンプルブロックの
中央部の温度です。
0 0
3 4
0
5
0
6
0
7
1
Re s u l t
3
He a t
Ov e r
4
5
0
8
0
9
1
0
o
0 . 2
o
St a r t e d
Fi ni s e d
1
1
of
3 . 1
Le ng t h
6
基準値:
0
2
1
3
1
4
1
5
1
6
2
4
2
5
2 . 0
o
C/ s
Un d e r 0 . 5
o
Gr a d.
C/ s
C
a t
a t
of
1
2
1
7
1
8
1
9
2
0
2
1
2
2
2
3
2
6
2
7
2
8
2
9
3
1
3
2
3
3
T e s t
Co o l
OK
C
0 3 / 01 / 1 5
1 6 : 3 1 :0 5
0 3 / 01 / 1 5
0 0 : 0 9 : 2 3
R e s u l t : N o r ma l
タイマーがカウントを開始し、2〜3分後に、±1℃ 以内
ポップアップメニューから OK を Enter して、トップスクリーンに戻る。
TD3010JE_v3.00D
46
3
4
3
5
3
6
3
7
M ENU
1 6 : 2 1 :4 2
Ru n
3
0
3 3
8 9
4
0
TP600/TP650 取扱説明書
5. 消去機能(Delete User Data) 保存ユーザ名、プログラムの削除
ユーザ名およびユーザプログラムの削除を行います。
プログラム削除の場合は、1個づつ消す機能と、対象ユーザ名内の全てのプログラムを
一括消去する機能とがあります。一括消去の場合は、ユーザ名は残ります。不要な場合は、
ユーザ名消去「Delete User Name」を使用してください。
手順としては、
①消去対象のユーザ名に入る。
②ポップアップメニューから「Tools」に入り、Select Tools 画面で「Delete User Data」を
選択、Delete User Data 画面に入る。
③必要機能を選び、対象プログラムもしくは対象ユーザ名を消去する。
1. MENU 画面から▼で、User を選択し Enter する。
TaKaRa Thermal Cycler
TP600 Ver.3.xx
User
05/05/05
Dice
(Common)
12:00:00
MENU
RUN
New
Edit
Tools
U
U sseerr
25.0 ℃
Select User Name 画面で、対象ユーザ名を選び、OK を Enter する。
2. ポップアップメニューから「Tools」を選択し、Enter を押し、Select Tools 画面に入る。
TaKaRa Thermal Cycler
TP600 Ver.3.xx
User
05/05/05
Dice
( C o m m on )
12:00:00
MENU
RUN
New
Edit
T
T oo oo llss
User
25.0 ℃
3. Delete User Data を選択し、ポップアップメニューで OK を Enter します。
Select
Tools
H
H ii ss tt oo rr yy
Setting
PC Communication
Diagnosis
Reserved
Delete User Data
TD3010JE_v3.00D
47
MENU
OK
OK
Svc
Cancel
TP600/TP650 取扱説明書
4. Delete User Data 画面から、希望の機能を選択する。
Delete
User
Data
MENU
O
OK
K
Cancel
History
Delete User Program
Delete User Name
Delete All Program in
User
Delete User Data 画面の機能は、
① Delete User Program
対象ユーザ名の中のプログラムを1個づつ消去します。
② Delete User Name
対象ユーザ名を消去します。
ただし、ユーザ名の中にプログラムが残っていると、Programs exist ! のメッセージが
表示され、消去できません。
先に、ユーザフォルダー内のプログラムの消去を行って下さい。
③ Delete All Program in User
対象ユーザ名の中の、全てのプログラムを消去します。
ユーザ名は、残ります。ユーザ名の消去は、「Delete User Name」で行います。
5. 消去を実行する。
①【 Delete User Program 】
対象ユーザ名の中のプログラムが表示されます。消去したいプログラムを▼▲で選択し、
ポップアップメニューの Delete を Enter します。
0
1
0
2
0 0
3 4
0
5
0
6
0
7
0
8
0
9
1
0
1
1
Pr o gr a m
1
1
2
1
3
1
4
1
5
1
6
1
7
1
8
1
9
N a me
Cy c l e
4
T a Ka Ra
5
Tou c h
2
1
2
2
2
3
2
4
2
5
2
6
2
7
2
8
2
9
3
0
3
1
3
2
3
3
3
4
St or e d
2 ▲ M y A p p 6 7 8 90 1 2 4 5 6
3
2
0
3
7
3 3
8 9
4
0
De l e t e
0 3 / 0 4 / 0 1
Ta q
3
6
M ENU
0 3 / 0 4 / 0 1
Se g
3
5
Ca n c e l
0 5 / 0 4 / 0 1
Do wn
PCR
0 3 / 0 4 / 0 1
6
確認メッセージが出ます。ポップアップメニューの OK を Enter します。
0
1
1
0
2
0 0
3 4
0
5
0
6
0
7
0
8
0
9
1
0
1
1
1
2
1
3
1
4
1
5
1
6
1
7
1
8
1
9
2
0
2
1
2
2
2
3
2
4
2
5
2
6
C o n f i r ma t i o n
2
8
2
9
3
0
3
1
3
2
3
3
3
4
3
5
3
6
3
7
3
8
M ENU
3
OK
Ar e
y ou
s ur e
t o
de l e t e
Pr o gr a m
N a me
T a Ka Ra
4
5
2
7
6
TD3010JE_v3.00D
48
Ta q
?
Ca n c e l
3
9
4
0
TP600/TP650 取扱説明書
消去操作を止めるときは、Cancel を Enter する。
②【 Delete User Name の場合 】
確認メッセージが出ます。ポップアップメニューで OK を Enter する。
C o n f i r m a t i o n
Are you sure to delete?
M E N U
O K
C a n c e l
User Name Ichiro
【NOTE】 ユーザ名の中に、プログラムが存在している場合は、
「Programs exist ! 」の表示が出ます。中の全てのプログラムを
消去した後で、ユーザ名を消してください。
③【 Delete All Program in User の場合 】
C o n f i r m a t i o n
Are you sure to delete?
M E N U
O K
C a n c e l
All Program in (Common)
ポップアップメニューで OK を Enter する。
Seek and Erasing メッセージが点滅し、15秒くらいで消去を完了後、トップスクリーン
に戻ります。
TD3010JE_v3.00D
49
TP600/TP650 取扱説明書
6章
トラブルシューティングと日常点検
エラーについて
プログラム実行中にエラーが発生した場合は、エラー内容が History に記録され、終了画面
の Result 項目に See history メッセージが表示されます。ポーズ操作を行った場合も
See history が表示されます。
スタンバイ状態でエラーを検出した場合は、トップ画面にエラー表示されます。
1.イベント・エラー コード表
イベント・エラー#
メッセージ
意味
0
Started at
プログラム運転開始
1
Finished at
プログラム運転終了
2
Stopped at
プログラム運転のユーザストップ
3
Paused at
ポーズ
4
Resumed at
ポーズ解除
5
Power failed at
停電発生
6
Recovered at
停電回復
7
Heat rate
加熱速度異常
8
Cool rate
冷却速度異常
9
Over shoot
オーバーシュート異常
10
Under shoot
アンダーシュート異常
11
Center Sensor Open
中央温度センサ断線
12
Center Sensor Short
中央温度センサ短絡
13
Left Sensor Open
左温度センサ断線
14
Left Sensor Short
左温度センサ短絡
15
Right Sensor Open
右温度センサ断線
16
Right Sensor Short
右温度センサ短絡
17
Lid Sensor Open
リッド温度センサ断線
18
Lid Sensor Short
リッド温度センサ短絡
19
HS Sensor Open
放熱板温度センサ断線
20
HS Sensor Short
放熱板温度センサ短絡
21
Fan Motor Open
ファンモータ断線
22
Fan Motor Short
ファンモータ短絡
23
Lid control
リッド温度制御異常
24
Block control
ブロック温度制御異常
** 複数のエラーが同時に発生していてもいずれかの 1 エラーのみ表示します。
TD3010JE_v3.00D
50
TP600/TP650 取扱説明書
2.トラブルシューティング
症状
原因
対策
電源スイッチを入れても全く動作しない。
電源が供給されていない。
電源ケーブルの本体側とコンセント側
ディスプレイも表示されない。
電源ケーブルが本体、またはコンセントに
の接続を確認ください。
しっかり入っていない。
電源コンセントに電気が供給されていな
設備電源を確認ください。
い。
電源スイッチを入れても、スイッチがOFF
本体内部の電気回路の異常。
直ちに電源ケーブルを抜いて、修理依
してしまう。
(電源スイッチは過電流ブレーカを兼ねて
頼をしてください。
います。)
温度の上昇、降下レートが遅すぎる。
電源スイッチの不良。
電源スイッチ交換。
使用環境温度が不適当。
使用環境温度を20〜23℃で、自己診
断テストを行ってください。範囲外のと
きは、修理依頼をしてください。
サイクル時間が長すぎる。
電子冷却素子の故障。
修理依頼をしてください。
使用環境温度が不適当。
使用環境温度を20〜23℃で、自己診
断テストを行ってください。範囲外のと
きは、修理依頼をしてください。
電子冷却素子の故障。
修理依頼をしてください。
温度センサの不良。
自 己 診 断 テ ス ト の 結 果 表 示 に 「 See
本体電源投入後すぐのため、リッドヒーター
10分間以上ウオーミングアップしてか
operation manual」の表示がある
加熱時間が加わり、テスト時間が規定値以
ら、再度診断テストを行ってください。
上に長くなった。
キー入力音が全くしない。
ブザー設定が No になっている。
ツールメニューの Default Setting でブ
ザー音の設定を確認してください。
キースイッチまたは配線不良。
スイッチ基板の交換。修理を依頼してく
ださい。
画面表示が消える。
スリープ設定が「30 分後消灯」になってい
MENU キーを押して解除する。スリープ
て節電モードに切り替わった。
設定が不要なら Default Setting で LCD
Sleep を No にする。
ツールメニューの Default Setting で
LDC Sleep の設定を確認してください。
バックライトの不良。
部品の交換が必要。修理を依頼してく
LCDの不良。
ださい。
ディスプレイ回路の故障
TD3010JE_v3.00D
51
TP600/TP650 取扱説明書
症状
原因
画面表示が見づらい。
対策
LCD 濃度の調整ずれ。
ディスプレイ濃度変更つまみで最適な
表示に調整してください。
リッドがしまらない。
リッドヒーターとサンプルブロック間に異物
異物を取り除いてください。
が入っている。
リッドヒーターが温まらない。
リッドのロック機構が故障
リッドの分解修理。
電源スイッチを入れた直後。
リッドヒーターが温まるまで 3〜4 分お
待ちください。
エラー番号表示がでた。
ヒーターまたは、安全ヒューズの断線
部品交換が必要。
エラーコード表をご覧ください。
表示された内容を確認の上、必要に応
じて修理をご依頼ください。
お困りのとき、修理等の依頼は機器販売代理店、もしくはタカラバイオ㈱各販売課までご連絡ください。
東日本販売課
TEL 03-3271-8553、FAX 03-3271-7282
西日本販売課
TEL 077-543-7297、 FAX 077-543-7293
停電時の動作について
プログラム運転途中で停電が発生した場合、再び通電されると、停電時停止した状態か
らの運転を始めます。停電時間が長い場合は、リッドヒーターが所定の温度まで加温後、
運転を再開します。
夜間等作業者が不在中に運転が終了した場合には、以下の方法で停電等の異常が発
生していないか確認して下さい。
1.運転終了画面
Finished
ABC
Test
U s e r : <C o m m o n>
Started at
09:47:12
05/01/20
Finished at
09:54:32
05/01/20
Length of Run
00:07:20
Over
0.0 ℃
Under
0.2 ℃
Result : Power failed
MENU
OK
OK
Power failed : 運転中に停電があったことを示します。
Normal
: 正常終了時
Stopped
: 運転を途中で強制終了した時
TD3010JE_v3.00D
52
TP600/TP650 取扱説明書
2.停電時の History 表示
History
記録件数6件のうち、最初の3件を表示
3/6
U s e r : <C o m m o n>
Program:ABC test
Mode:1
Thin
5 0 μl
Started at
09:47:12
Power Failed
09:50:34
Recovered at 09:50:37
History
停電した時刻を表示
復帰した時刻を表示
記録件数6件のうち、最後の6件目まで表示
6/6
Power Failed
Recovered at
Stopped at
05/01/20
05/01/20
05/01/20
10:25:10
10:28:32
11:47:12
05/01/20
05/01/20
05/01/20
停電した時刻を表示
復帰した時刻を表示
複数回停電した場合や他にエラーがあった場合は、時間順に履歴を表示します。
(履歴記録件数は最大40件)
【注意】 新たなプログラムを実行すると、最終終了したプログラムの運転履歴
(History)は消去されます。
【NOTE】 エラー表示(Error#数字)は、本章の「1.イベント・エラー コード表」
をご覧下さい。
3.日常点検
装置の機能を維持するために、1週間に1度を目安に、次の点検、清掃を行ってください。
•
通気孔(前後左右)の清掃。
本装置は、反応ブロック、電気回路など空気での冷却が必要です。通気孔に汚れがた
まらないよう、布などで拭き掃除を行ってください。ほこりがひどい時は、歯ブラシなどで
取り除いてください。
•
リッド、本体の清掃。
装置の外面を、中性洗剤を少ししみ込ませた布で拭いたあと、乾拭きしてください。
•
リッドの滑りを確認する。レールに、ごみ、ほこりがあれば拭き取る。
リッドレールは乾拭きするだけで結構です。注油の必要は、ありません。
•
除菌するには、10%ブリーチで拭いて、そのまま10分間放置後、70%アルコールで同
じ個所を拭く。最後は乾拭きして表面を乾燥させる。
TD3010JE_v3.00D
53
TP600/TP650 取扱説明書
● 7章
仕様
(*)性能仕様は使用環境が20℃〜23℃での仕様です。
TaKaRa PCR Thermal Cycler Dice®
品名
型式
使用環境
TP600 (Gradient)
TP650 (Standard)
周囲温度 : 15℃ 〜 30℃
湿 度
:
温度精度(*)
20 〜
80 %RH
±0.5℃ (30.0℃〜99.9℃)
±2.0℃ ( 4.0℃〜15.0℃)
温度均一性(*)
±0.5℃(30.0℃〜99.9℃)
温度設定範囲
4.0℃ 〜 99.9℃ (0.1℃単位)
時間設定範囲
1sec 〜 99min59sec 、 ∞ (9999で設定)
表示・入力部角度設定
垂直〜70度 4ポジション
使用チューブ、プレート
0.2mL チューブ 96本
96穴マイクロプレート (12x 8列)
PCR 反応量設定
プログラム容量
5μL 〜 150μL
ユーザ名登録数:最大22 ((Common)、(TaKaRa)を除く)
プログラム数: 最大200
リッド温度
設定20.0℃〜99.9℃のとき約110℃保持
設定4.0℃〜19.9℃のとき約40℃保持
付加機能
スロープ機能、プログラムリンク機能、履歴保存機能
自己診断機能、PC との通信機能(RS-232)
グラジエント温度設定
グラジエント機能
グラジエント機能 無し
40.0℃〜75.0℃ (温度差 6.0℃〜20.0℃)
安全装置
電
源
: スイッチ兼用過電流ブレーカ (10A)
リッドヒーター
: 温度ヒューズ(169℃)
反応ブロック放熱板 : サーマルガード(85℃)
使用電源
AC 100V〜240V 50・60HZ、 490VA
バックアップ電池
リチウム電池 CR2032 (3V)
寸法
260(W) ×345(D)×260(H) mm
重量
11.5kg
適合安全規格
S/N D-5001 以上
S/N E-1001 以上
CAN/CSA-C22.2 No.10101.1-92, No.1010.1B-97
UL Std No.61010A-1
EN61000-6-3-1:2001, EN61000-6-1-1:2001, EN61010-1:2001
RoHS 指令対応
S/N D-6051 以上
DIRECTIVE 2002/95/EC
TD3010JE_v3.00D
54
S/N E-1301 以上
TP600/TP650 取扱説明書
● 付属1
梱包図および標準付属品リスト
以下のものが同梱されていることを確認してください。
標準付属品
1.
3極プラグ付き電源コード
1本
2.
取扱説明書
1冊
3.
保証書(取扱説明書に付属)
1枚
4.
お試し用 TaKaRa 純正 PCR チューブ セット
1セット
0.2ml Hi-Tube Dome Cap シングルチューブ (製品コード NJ200 )
100 本
0.2ml Hi-8-Tube
8連チューブ (製品コード NJ300 )
12 本
0.2ml Hi-8-Dome Cap
8連キャップ (製品コード NJ301 )
12 本
取扱説明書
チューブセット
電源コード
TD3010JE_v3.00D
55
TP600/TP650 取扱説明書
● 付属2
消耗品リスト
消耗品リスト(チューブ類)
製品コード
製品名
個数/箱
0.2 ml シングルチューブ
NJ200
0.2ml Hi-Tube Dome Cap
1,000 本
NJ201
0.2ml Hi-Tube Dome Cap Recovery
1,000 本
NJ202
0.2ml Hi-Tube Flat Cap
1,000 本
NJ203
0.2ml Hi-Tube Flat Cap Recovery
1,000 本
0.2 ml 8連チューブ&キャップ
NJ300
0.2ml Hi-8-Tube (8連チューブ)
125 本
NJ301
0.2ml Hi-8-Dome Cap (8連キャップ)
125 本
NJ302
0.2ml Hi-8-Flat Cap (8連キャップ)
125 本
0.2 ml プレート&キャップ
NJ111
TaKaRa 96 well PCR Hi-Plate ( 12 x 8、96穴プレート)
NJ811
TaKaRa PCR Hi-Caps (8連キャップ)
TD3010JE_v.3.00D
56
50 枚
120 本
TP600/TP650 取扱説明書
消耗品リスト(PCR 関連酵素類)
製品コード
製品名
容量
RR001A
250 U
TaKaRa Ex Taq
RR001B
RR001C
®
1,000 U(250 U×4)
(B×3)
3,000 U
RR01AM
250 U
RR01BM
(AM×4)
RR01CM
(AM×12)
RR006A
RR006B
(A×4)
RR002A
RR002B
(A×4)
RR02AG
RR02BG
(AG×4)
RR042A
RR042B
(A×4)
®
TaKaRa Ex Taq (Mg
2+
free Buffer)
1,000 U
3,000 U
TaKaRa Ex Taq® Hot Start Version
250 U
1,000 U
125 U
TaKaRa LA Taq®
500 U
125 U
TaKaRa LA Taq® with GC Buffer
500 U
125 U
TaKaRa LA Taq® Hot Start Version
500 U
R001A
250 U
TaKaRa TaqTM
R001B
R001C
1,000 U(250 U×4)
(B×3)
3,000 U
R001AM
250 U
R001BM
(AM×4)
R001CM
(AM×12)
R007A
R007B
(A×4)
RR070A
RR070B
(A×4)
TaKaRa TaqTM Hot Start Version
SpeedSTAR® HS DNA Polymerase
TM
Premix Taq (TaKaRa Taq Version)(500μl×6 本)
®
PerfectShot Ex Taq(Loading dye mix)
RR005A
9002A
(A×4)
R010A
(A×4)
R050A
R050B
free Buffer 添付)
(A×4)
R045A
R040A
1,000 U
3,000 U
®
R004A
R010B
TaKaRa Taq (Mg
2+
Premix Taq®(Ex TaqTM Version)(500μl×6 本)
RR003A
9002B
TM
250 U
1,000 U
250 U
1,000 U
120 回(50μl PCR)
120 回(50μl PCR)
25 μl×48 本
250 U
Taq Antibody
1,000 U
PrimeSTAR® HS DNA Polymerase
PrimeSTAR® GXL DNA Polymerase
250 U
1,000 U
250 U
1,000 U
®
100 回
®
100 回
PrimeSTAR MAX DNA Polymerase
PrimeSTAR HS(Premix)
詳細はタカラバイオ総合カタログまたは弊社ウェブカタログ(http://www.takara-bio.co.jp/)をご覧ください。
TD3010JE_v.3.00D
57
TP600/650 取扱説明書
● 付属3
(コピーしてご使用ください)
修理依頼書および安全確認書
タカラバイオ㈱ 宛
東日本販売課
TEL 03-3271-8553、 FAX 03-3271-7282
西日本販売課
TEL 077-543-7297、 FAX 077-543-7293
製品名: TaKaRa PCR Thermal Cycler Dice®
Model: TP600 / TP650
依頼日:
製造番号(Serial No)
ご依頼者
連絡先:(TEL、Email 等)
ご芳名
所属名
住 所
依頼内容:
(状況)
本装置の修理またはメンテナンスを依頼されるときは、故障状況と安全確認項目に記入をお願
いします。安全確認は、本装置にかかわるすべての人およびその場所の安全確保を目的としてい
ます。本装置が汚染されている場合は、事前にお客様で除染をお願いします。
◆◆◆◆◆◆◆◆◆◆◆◆◆◆◆◆◆◆◆◆◆◆◆◆◆◆◆◆◆◆◆◆◆◆◆◆◆◆◆◆◆◆◆◆◆◆◆◆◆◆
1.ご使用の試料(
)
・病原性:《 □なし、 □可能性あり、 □あり 》 ・毒性:《 □なし、 □可能性あり、□あり 》
・放射性物質:《 □ 使用なし、 □使用:核種(
)》
2.本装置の汚染状況
□汚染なし、 □除染済み、 □汚染の可能性あり
○本装置は汚染からは安全であることを確認します。
○危険性があります。具体的な安全対策方法、除染は以下のとおりです。
日付
年
月
所属
日
確認者(自筆)
◆◆◆◆◆◆◆◆◆◆◆◆◆◆◆◆◆◆◆◆◆◆◆◆◆◆◆◆◆◆◆◆◆◆◆◆◆◆◆◆◆◆◆◆◆◆◆◆◆◆
! 警告
この安全確認書は修理、メンテナンス等を実施する場合、対象機器の安全性
についてお客様に発行していただき、汚染から関係する皆様の安全確保を目
的としております。お手数ですが、ご協力お願いいたします。
*安全確認書が発行いただけない場合、メンテナンス等をお断りする場合があります。
TD3010JE_v3.00D
58
TP600/TP650 Operation Manual
TABLE OF CONTENTS
page
Precautions for Using TaKaRa Scientific Instruments
Table of Contents
--- 59
Chapter 1:
Overview
--- 60
Chapter 2:
Installation Requirements & Maintenance
--- 61
1. Installation Conditions
--- 61
2. Installation
--- 62
3. Moving the System
--- 62
4. Maintenance
--- 63
Chapter 3:
Names of Parts and Their Functions
--- 64
Chapter 4:
System Operation
--- 67
1. Introduction
--- 67
2. Turning on System Power
--- 68
3. Starting a System Operation Program
--- 69
4. Terminating or Aborting Operation
--- 73
5. Creating New Program
--- 74
6. Editing and Saving Existing Program
--- 80
7. User Selection and Registration
--- 86
8. Link Function
--- 92
Diagnosis Functions and Other Tools
--- 96
1. History Function: History of Events
--- 96
2. Settings Function: Time, Date and System Default
--- 97
3.
PC Communications Function: Program Send and Receive
--- 98
4.
Diagnosis Function: Running Operation Testing Programs
Chapter 5:
--- 101
5. Delete User Data Function
--- 105
Chapter 6:
Troubleshooting
--- 107
Chapter 7:
Specifications
--- 110
Appendix 1:
Accessories list and packing
--- 111
List of Supplies (PCR Enzymes)
--- 112
Appendix 2:
Application 1-4
--- 113
Appendix 3:
Servicing Request and Safety Check
--- 119
TD3010JE_v3.00D
59
TP600/TP650 Operation Manual
Chapter 1: Overview
TaKaRa PCR Thermal Cycler DiceTM
TaKaRa Code: TP600
Gradient model
TP650
Standard model
Thank you for purchasing the TaKaRa PCR Thermal Cycler DiceTM system.
Until now, conducting polymerase chain reactions (PCRs) involved repeating
experiments several times in order to achieve optimum reaction conditions for amplifying
the test target.
TP600 Main Feature
The newly developed PCR Thermal Cycler DiceTM (TP600) system is equipped with a
gradient function that enables the user to set a maximum 20ºC temperature gradient
between the left and right rows in the sample block at each temperature condition setting
step. This has made it possible to optimize the reaction conditions for a single test and
thereby design a new high-performance, functionally enhanced system at a lower cost.
< Enhanced Functionality and Ease-of-Operation >
z Gradient function enables consideration of annealing temperatures.
TP600/TP650 Features
The control panel and display units are integrated in a variable-angle wing panel
configuration, enabling the creation of a more compact and stylish system that can be
installed almost anywhere.
< Enhanced Functionality and Ease-of-Operation >
z Easy-to-operate slide and lever type lid.
z New variable-angle control panel enhances visibility and
ease-of-operation.
z Graphic display makes programming the system much easier.
z Simpler operation through combination of pop-up menus and mobile
phone-type alphanumeric character input pad.
z Extended time functions ideally suited to long PCR.
z Extended Temp function that makes touchdown PCR possible.
z Slop function (Dice version 2 and up)
z Link function that chain any User Programs and run. (Dice version 3)
z 8 types of preset protocol that make starting PCR easier.
z Modes that ensure compatibility (temperature rise characteristics) with
earlier Takara Thermal Cycler models.
z Air intake vents on the front and sides and exhaust vents on the rear that
reduce heat-based interference with other equipment.
< Ease-of-Maintenance >
z System firmware updates and data backup can be performed easily
through connection to personal computer.
z Automatic creation of operating history and error logs.
TD3010JE_V3.00
60
TP600/TP650 Operation Manual
Chapter 2: Installation Requirements and Maintenance
1. Installation Conditions
To ensure optimum performance and long and stable product life, observe the
following precautions when selecting an installation location.
Note that installing the system in a location that does not meet the requirements
listed below can result in malfunctions and/or system breakdown. Replacement of
components and system repairs for any deterioration in performance or damage
caused by failure to adhere to the following conditions will not be covered by
warranty.
1.
2.
3.
4.
5.
6.
7.
8.
9.
10.
11.
12.
13.
Install system in a comparatively dust-free location.
Avoid locations subject to corrosive or flammable gases.
Avoid locations subject to either strong shocks or continuing low levels of
vibration.
Install the system away from direct sunlight.
Install the system as far away as possible from electrical equipment that
generates strong magnetic fields, electrical fields and high frequencies. Avoid
locations near equipment that generate noise caused by electrical motors and
transformers.
Choose a flat location capable of withstanding the design weight of the system.
The installation environment must be within 15 to 30ºC temperature range and
a 20 to 80% relative humidity range.
Avoid locations subject to sharp temperature fluctuations, exhaust from
air-conditioning systems and condensation caused by sharp humidity
fluctuations.
Avoid blocking air vents located on the right and left sides, front and rear of the
system.
Choose an operating location with good ventilation.
Do not operate the system in a cold room.
Select a room that can provide sufficient power (frequency, voltage and current)
for system operation.
Do not attempt to move the system while holding it by the lid handle or the
control panel, as this can damage to key components. Doing so can also result
in personal injury due to part breakage resulting in the system falling down.
<Environmental Conditions>
This equipment is designed to be safe under the following conditions (based on the
IEC 61010-1):
1.
2.
3.
4.
5.
6.
Indoor use
Altitude up to 2000 m
Ambient temperature (Operating environment): 15ºC to 35ºC
Humidity range: 20% to 80% relative humidity
Supply voltage fluctuations not to exceed ±10% of the nominal voltage.
Other supply voltage fluctuations as stated by the manufacturer
TD3010JE_V3.00
61
TP600/TP650 Operation Manual
7.
8.
Transient over-voltages according to Installation Categories (Over-voltage
Categories) II; For mains supply the minimum and normal category is II;
Pollution degree 2 in accordance with IEC 60664-3.
2. Installation
Use the following procedures when installing system.
1.
2.
3.
Confirm that the system power switch is set to off.
Connect the system side of the power cable to the power connector on the rear
of the system.
Plug the AC power plug of the cable into a power outlet.
The system is designed to operate normally with a 100 to 240 V AC, 50/60Hz
power line.
Make sure that the power outlet is designed for a 3-pronged plug with ground
line.
In the interests of safety, and avoiding electric shocks, be sure to
connect the system to a properly grounded power outlet.
! CAUTION
4.
5.
Turn on the system power.
The following input prompt screen appears as soon as power is applied.
0
1
0
2
0
3
0
4
0
5
0
6
0
7
0
8
0
9
1
0
1
Se l e c t
2
( C o mmo n )
3
J i r o
1
1
1
2
1
3
Us e r
1
4
1
5
1
6
1
7
1
8
1
9
2
0
2
1
2
2
N a me
2
3
2
4
2
5
2
6
2
7
2
8
2
9
3
0
3
1
3
2
3
3
3
4
3
5
3
6
3
7
3
8
3
9
4
0
M ENU
( T a Ka Ra )
OK
Ne w
4
Edi t
Ca n c e l
5
6
3. Moving the System
Follow the procedures described below when moving the system to a new location
after it has been installed.
● New Location Within the Same Site
Follow the precautions listed below when moving the system to a new location
within the same site.
1. Thoroughly clean the system and make sure that there are no tubes or plates
remaining in the sample block.
2. Avoid any shock during movement that can affect the operation of this highly
sophisticated system.
3. When lifting and carrying the system, be sure to place one hand on either side of
the system and lift and carry in a balanced way.
4. Make sure that the new location conforms to the installation requirements
TD3010JE_V3.00
62
TP600/TP650 Operation Manual
described in section “1. Installation Conditions” in Chapter 2.
5. Follow the installation procedures outlined in section “2. Installation” in
Chapter 2.
● Moving to a New Site
When moving the system to a new site, clean it carefully and repack it in the
packaging in which it was delivered.
Note that damage sustained by the system during transport due to improper
packaging will not be covered by Warranty even if the Warranty period is still valid.
Follow the instructions provided in this chapter when reinstalling the system at the
new location.
4. Maintenance
Be careful especially of the following point before beginning maintenance check.
1.
2.
3.
Especially the maintenance work without directions of operation should surely
turn off a power supply switch for safety.
Warn to spill neither water nor a reagent to mechanism parts and electric parts.
Moreover, please place neither detergent nor medicine on equipment.
Please do not touch with a hand other than the appointed place.
● Routine maintenance work
1.
Please clean a main part periodically and suitably.
2.
Wipe all outside surfaces of the equipment with a diluted neutral detergent
solution.
When a liquid is spilt, please wipe off a sample block circumference part as
early as possible.
Since dust is easy to collect, please clean a sample block frequently. If dust and
garbage adhere to a sample block, a temperature control performance will fall
and temperature homogeneity will also become bad simultaneously.
Please check it that the air hole of the back of equipment, the left and
right-hand side is not closed. Please wipe off, when dust has adhered.
3.
4.
5.
! CAUTION
Neither strong alkali, high-concentration alcohol nor use of the
organic solvent can be performed. It becomes the cause of
breakage, such as discoloration, deterioration, and a crack.
TD3010JE_V3.00
63
TP600/TP650 Operation Manual
Chapter 3 : Names of Parts and Their Functions
Front View
(1) Lid Handle
For sliding use with
lid open.
(2) Lid
(3) Sample Block
(4) Display
(5) Key-Pad
(6) Control Panel
(7) Air Vents (Front)
(8) Control Panel Release Lever
Pressing upward releases lock.
General Description
(1) Lid Handle:
(9) Power Switch
(10) Air Vents
ON(|), OFF(○)
(Left and Right Sides)
――――――――――――――――――――――――――――――
Be sure to perform sliding operations with the lid open.
<Caution> Do not lift the unit using the lid handle.
(2) Lid:
The lid is designed to protect against evaporation resulting from
heating of the reaction tube and reaction plate.
<Caution> Avoid inserting fingers as the interior of the unit
reaches very high temperatures (up to 110ºC).
(3) Sample Block:
Section of the unit in which sample tubes and plates are placed.
<Caution> Do not touch the block as it reaches temperatures up
to 110 ºC.
(4) Display:
Displays current status of the various system features and
functions.
TD3010JE_v3.00D
64
TP600/TP650 Operation Manual
(5) Key-Pad:
Used to enter the various programs.
(6) Control Panel:
Enables adjustment of various angles (gradients).
(7) Air Vents ( Front ):
Openings used to cool the interior of the unit.
(8) Control Panel Release Lever: Used for changing the angle of the control panel. Pressing
upward releases lock.
(9) Power Switch:
Power switch is equipped with circuit breaker.
(10) Air Vents, R and L :
Openings used to cool the interior of the unit.
<Caution> Do not block any of the air vents.
Rear View
(13) Brightness Adjust Knob
(11) Power Cable connector
(12) Air Vent (rear)
(14) Communications
Port Connector
General Description
――――――――――――――――――――――――――――――
(11) Power Cable Connector: Socket for power cable.
<Caution> Make sure to use the power cable provided with
the unit.
(12) Air Vent (rear):
Openings used to cool the interior of the unit.
<Caution> Do not to block any of the air vents.
(13) Brightness Adjust Knob: Used to adjust display brightness.
(14) Communications Port Connector:
RS232C connector( 9Pin) used to link unit to computer.
<NOTE> The RS232C cable not included as standard
accessory.
TD3010JE_v3.00D
65
TP600/TP650 Operation Manual
Key-Pad
Alphanumeric
STOP Key
Used to abort or
stop system
operations.
MENU Key
Switches pop-up menus on/off.
Wakes up display from LCD
sleep mode.
CE Key
Used to clear
any entered
information.
Power L ED
Lights up when the
power is on.
ENTER Key
Used to fix any entered
information and
selecting functions.
Arrow Keys
Used to move cursor and
move between pages.
Lid Section
Lid Handle
Lid
Lid Heater
TD3010JE_v3.00D
66
TP600/TP650 Operation Manual
Chapter 4: System Operation
1. Introduction
* This system operation explains both TP600 and TP650. Gradient Function is only for
TP600.
* Operation Based on Pop-up Menu Configuration
Operation begins by pressing the MENU key, which displays the pop-up menu
screens.
Menu items are highlighted using the arrow keys and selected by pressing
the ENTER key.
Pop-up menus can be closed by simply pressing the MENU key.
A part of operation to which the pop-up menu is jumped over with the ENTER key
and the CE key is possible.
* System Operational Flow
The basic flow of system operation is shown below.
1. Settings function
Selection of date/time and display format. (Section 2, Chapter 5)
2. Program design
User selection and registration (Section 7, Chapter 4)
Program creating or editing
(Sections 5 and 6, Chapter 4)
Program link function
(Section 8, Chapter 4)
3. Launching program
Operating program procedure. (Sections 2 and 3, Chapter 4)
4. Terminating or Aborting system operation
(Section 4, Chapter 4)
5. Maintenance and System tools
For description of inspection, diagnosis, backup and deletion procedures.
(Sections 1, 4, 3 and 5, Chapter 5)
* Key Entry System
Notes that alphanumeric keys are assigned multiple characters, selectable by
repeatedly pressing the key to cycle through the options.
0 key:
1 key:
2 key:
3 key:
4 key:
5 key:
6 key:
7 key:
8 key:
9 key:
&, /, (, ), 0
space, -, ”, #, 1
A, B, C, a, b, c, 2
D, E, F, d, e, f, 3
G, H, I, g, h, I, 4
J, K, L, j, k, l, 5
M, N, O, m, n, o, 6
P, Q, R, S, p, q, r, s, 7
T, U, V, t, u, v, 8
W, X, Y, Z, w, x, y, z, 9
TD3010JE_v3.00D
67
TP600/TP650 Operation Manual
2. Turning On the Power
The TP600/TP650 uses a 100V AC to 240V AC (non-switched), 50/60 Hz power line.
Electric power is 490 VA and rated current is 4.9A when operating at 100 V.
【Note】 Be sure to check local power line specifications prior to connecting the
system.
【Note】 Make sure that the power plug is inserted snugly into the power outlet.
1. Turn on the power switch.
The beeper sounds twice and the select-User-Name screen appear.
Using arrow keys, select the User Name, and push the MENU key.
Select User Name
C oo m
mm
m oo nn >>
<TaKaRa>
<< C
Jiro
Sabro
MENU
OK
New
Edit
Cancel
【Note】 When the pop up menu is active, the arrow key does not function.
2. The following password prompt screen appears if a password has been registered for
the selected user.
Note that “Common” and “TaKaRa” have been pre-registered (default) user names that
have not been assigned passwords.
Save User
User
Password
MENU
OK
Cancel
Jiro
****
【Note】
The above screen appears only when the username has been assigned a password. If
not, the screen is skipped and the main system screen appears.
【Note】
When forget password, select “Cancel” from the MENU and . It is possible to go to the
main system screen of 2-3 as “common” user.
3. After input the correct password, displays the main system screen shown below.
All system operation begins with this screen.
TaKaRa Thermal Cycler DIce
TP600 Ver.3.xx
U s e r ( Common )
05/02/14
12:00:00
TD3010JE_v3.00D
68
25.0 ℃
MENU
RU
UN
N
R
New
Edit
Tools
User
TP600/TP650 Operation Manual
【Note】
* Users who do not possess a password or have forgotten theirs may simply go to
MENU, select Cancel and press ENTER. This logs the user onto the system as a
Common user and displays the main system screen (described in step 3).
* Users logged on as TaKaRa are not able to perform program save operations or
change username.
* There are eight standard protocols registered for the TaKaRa user name. Their
program names are “< 1Kbp”, “< 5Kbp”, “< 10Kbp” and “>10Kbp”,”Mutagenesis“,
”siRNA(double)“,”Differential(DD)“,”BcaBEST RNA“.
(See “Chapter 4: 【Note】Preset Protocols” on page 90)
3. Starting a System Operation Program
If a system operation program does not yet exist, begin by going to section “5. Creating New
Programs” or “6. Editing and Saving Existing Programs.”
1. With the main screen displayed, press the
menu and press ENTER .
MENU
key, select Run from the pop-up
TaKaRa Thermal Cycler Dice
TP600 Ver.3.xx
U s e r ( Common )
05/02/14
12:00:00
MENU
R
RU
UN
N
New
Edit
Tools
User
25.0 ℃
2. This displays the names of programs registered to the user chosen from the Select
user screen.
Use the arrow keys to select the desired program, press the MENU key, then go to
pop-up menu, select Start and press ENTER.
Program Name
Stored
RT PCR
Cycle seq
TaKaRa Taq
Touch Down PCR
05/04/01
05/04/02
05/04/02
05/04/02
MENU
S tt aa rr tt
View
User
Sort
Cancel
①
②
【Note】
When the pop up menu is active, the arrow key does not function. Press MENU
key to disappear the pop up menu and select program by Using arrow key.
【Note】
Other functions in pop up menu
(1) Checking Program Information
To confirm the program information, select View from the pop-up menu and press
ENTER.
TD3010JE_v3.00D
69
TP600/TP650 Operation Manual
0
1
0
2
0
3
0 0
4 5
0
6
0
7
0
8
0
9
1
0
1
1
1
2
1
3
1
4
1
5
1
6
1
7
1
8
1
9
2
0
2
1
2
2
2
3
2
4
2
5
2
6
2
7
2
8
2
9
3
0
3
1
3
2
3
3
3
4
3
5
3
6
3
7
3
8
3
9
1 T e mp
3 T e mp
2 5 Cy c
5 T e mp
9 4 . 0
9 4 . 0
5 5 . 0
7 2 . 0
7 2 . 0
4 . 0
6 T i me
5 : 0 0
0 : 3 0
0 : 3 0
0 : 3 0
7 : 0 0
∞
1
2 T e mp
4
0
1 Cy c
2
3
4
(2) Sorting Program Names
To change program name order, select Sort and press ENTER.
0
1
1
0
2
0
3
0
4
0
5
0
6
0
7
0
8
0
9
Se l e c t
1
0
1
1
1
2
1
3
1
4
So r t
1
5
1
6
1
7
1
8
1
9
2
0
2
1
2
2
2
3
2
4
2
5
2
6
2
7
2
8
2
9
3
0
I t e m
3
1
3
2
3
3
3
4
3
5
3
6
3
7
3
8
3
9
4
0
M ENU
2
OK
3
Pr o g r a m
n a me
4
Da t e
o f
s t o r e d
5
Da t e
o f
l a s t
Ca n c e l
u s e d
6
Select from the following sort options.
・Program name: sorts alphabetically by name (in ASCII code)
・Date saved: sorts in order of date saved
・Date last used: sorts in order of date used
Then go to pop-up menu, select OK and ENTER key.
3. Select or directly Reaction mode.
Select Reaction
Mode
Mode
1 (1 - 5)
Container 1 (1.Thin 2.Thick)
Volume
5 0 μl ( 5 - 1 5 0 μl )
MENU
OK
Cancel
When the program that adds the link function is selected, it becomes the following
displays.
Select Reaction
Mode
1
Container 1
Volume
50
Link
1
Mode
(1 - 5)
(1.Thin 2.Thick)
μl ( 5 - 1 5 0 μl )
(1.Yes 2.No)
MENU
OK
Cancel
Link: Select 1 or 2 for Link function.
[1.Yes]: When operating the program by using the link function.
[2.No]: When operating only one program.
Please refer to the paragraph of the link function for details.
TD3010JE_v3.00D
70
TP600/TP650 Operation Manual
* Mode 1: Enables system operation with maximum temperature control.
Recommended for normal operation.
2: Enables system operation with high temperature control.
Compatible with TaKaRa PCR Thermal Cycler SP operation.
3: Enables temperature control compatible with linked compressor unit.
Compatible with TaKaRa PCR Thermal Cycler MP operation.
4: Fast speed turning for disregarding overshoot temperature.
5: Enables system operation with high temperature control.
Semi-Compatible with TaKaRa PCR Thermal Cycler PP normal mode
operation.
Mode performance outlook:
Ramp Speed: Hi 5 > 4> 1 > 2 >3 Low
* Container (1.Tube 2.Plate) Select desired container.
TaKaRa PCR Tube of 0.2ml Hi-Tube with Dome Cap (Code NJ200) is a thin-wall
type tube. Select “1” when using this tube.
* Volume 5 -150 micro litter: Select reaction volume (Usually, below 100micro litter)
【Note】 The above information settings are saved separately for each program. When
the program is started, each setting condition is memorized.
4. Select OK from the pop-up menu and press ENTER.
5. This displays the program pattern screens shown below.
Note that the patterns show a program that has not yet started.
Extension Data Not Selected
0
1
0
2
0
3
0 0
4 5
0
6
0
7
1 T a K aR a
0
8
0
9
1
0
1
1
1
2
1
3
1
4
1
5
1
6
1
7
1
8
1
9
2
0
2
1
2
2
2
3
2
4
2
5
2
6
2
7
2
8
2
9
3
0
3
1
3
2
3
3
3
4
3
5
3
6
R e ma i n i n g
Ta q
2
3
7
3
8
3
9
4
0
1 : 2 7
M ENU
3
St a r t
Ca n c e l
4
5 T e mp
6 T i me
9 4 . 0
9 4 . 0
5 5 . 0
7 2 . 0
7 2 . 0
4 . 0
5 : 0 0
0 : 3 0
0 : 3 0
0 : 3 0
7 : 0 0
∞
Extension Data Selected
0
1
0
2
0
3
0
4
0
5
0
6
1 T a K aR a
0
7
0
8
0
9
1
0
1
1
1
2
1
3
1
4
1
5
1
6
1
7
1
8
1
9
2
0
2
1
Ta q
2
2
2
3
2
4
2
5
2
6
2
7
2
8
2
9
3
0
3
1
3
2
3
3
3
4
R e ma i n i n g
2
3
5
3
6
3
7
3
8
3
9
4
0
1 : 2 7
M ENU
3
T e mp
4 Ex
5 T i me
6 Ex
9 4 . 0
9 4 . 0
5 5 . 0
7 2 . 0
St a r t
7 2 . 0
4 . 0
Ca n c e l
0 . 0
0 . 0
0 . 0
0 . 0
0 . 0
0 . 0
5 : 0 0
0 : 3 0
0 : 3 0
0 : 3 0
7 : 0 0
∞
0 : 0 0
0 : 0 0
- 0 : 0 5
Pa us e
0 : 0 0
0 : 0 0
Extension data shown here
TD3010JE_v3.00D
71
TP600/TP650 Operation Manual
【Note】
The Extension mode allows the user to temperature, time increments/decrements,
pause and gradient settings.
【Note】
Program names are registered using up to 16 characters, however, the pattern
screens can only display 12 characters.
6. Go to the pop-up menu, select Start and press ENTER.
This starts the program.
Program-Operating Screen
0
1
0
2
0
3
0 0
4 5
0
6
0
7
1 T a K aR a
HOT!
Temp
0
8
0
9
1
0
1
1
1
2
1
3
1
4
Ta q
1
5
1
6
1
7
1
8
1
9
Cy c
2
0
2
1
2
2
2
3
2
4
2
5
2
6
2
7
2
8
2
9
3
0
3
1
3
2
3
3
3
4
3
5
R e ma i n i n g
1 / 2 5
3
6
3
7
3
8
3
9
4
0
1: 2 2
2
M ENU
3
Pa us e
①
②
I nf o
4
5 T e mp
9 4 . 0
9 4 . 0
5 5 . 0
7 2 . 0
7 2 . 0
4 . 0
6 T i me
5 : 0 0
0 : 1 5
0 : 3 0
0 : 3 0
7 : 0 0
∞
Changing-temperature:
diagonal line section of graph flashes.
Stabilized-temperature:
horizontal line flashes.
Temperature indication:
“HOT ! “ is flashing when over 50 °C.
Time remaining for current step: counts down
Definition of ∞:
continuous operation ( 99:99)
【Note】
The “Lid is warming up xx.x °C” message appears if it has not reached 108°C over
temperature. The System starts as soon as the lid is warm.
(1) Pausing When System Operation
Go to pop-up menu, select Pause and press ENTER.
0 0 0 0 0 0 0 0 0 1 1 1 1 1 1 1 1 1 1 2 2 2 2 2 2 2 2 2 2 3 3 3 3 3 3 3 3 3 3 4
1 2 3 4 5 6 7 8 9 0 1 2 3 4 5 6 7 8 9 0 1 2 3 4 5 6 7 8 9 0 1 2 3 4 5 6 7 8 9 0
1 T a K aR a
Taq
Cy c
1/ 25
R e ma i n i n g
94. 0
2
1: 2 2
M
MEENNUU
PPeaasuuussme
ee
R
3
Info
4
5 T e mp
94. 0
94. 0
55. 0
72. 0
72. 0
4. 0
6 T i me
5: 00
0: 15
0: 30
0: 30
7: 00
∞
To resume system operation, select resume from the pop-up menu and
press ENTER.
0
1
0
2
0
3
0 0
4 5
0
6
1 T a K aR a
0
7
0
8
0
9
1
0
Ta q
1
1
1
2
1
3
1
4
1
5
1
6
1
7
1
8
Cy c
1
9
2
0
2
1
2
2
2
3
1 / 2 5
2
4
2
5
2
6
2
7
2
8
2
9
3
0
3
1
3
2
3
3
9 4 . 0
2
3
4
R e ma i n i n g
3
5
3
6
3
7
3
8
3
9
1: 2 2
M ENU
3
R e s u me
4
5 T e mp
6 T i me
9 4 . 0
9 4 . 0
5 5 . 0
7 2 . 0
7 2 . 0
4 . 0
5 : 0 0
0 : 1 5
0 : 3 0
0 : 3 0
7 : 0 0
∞
TD3010JE_v3.00D
72
4
0
TP600/TP650 Operation Manual
(2) Viewing Program Information During Operation
While program is running, go to pop-up menu, select Info and press ENTER.
Program InformatIon
MENU
OK
OK
U s e r : <C o m m o n>
Program:TaKaRa_Taq
Mode:1
Thin
5 0 μl
Run Started at
09:47:12
Run will end at
09:54:32
05/02/20
05/02/20
To close Info screen, go to pop-up menu, select OK and press ENTER.
4. Terminating or Aborting Operation
1. Press Stop key.
2. This displays the following confirmation screen.
0
1
0
2
0
3
0
4
0
5
0
6
0
7
0
8
0
9
1
0
1
1
1
2
1
3
1
4
1
5
1
6
1
7
1
8
1
9
2
0
2
1
2
2
2
3
2
4
2
5
2
6
2
7
2
8
2
9
3
0
3
1
3
2
3
3
C on f i r ma t i o n
1
Ar e
3
6
3
7
3
8
3
9
4
0
y ou
s ur e
t o
OK
s t op?
Ca n c e l
4
T e mp e r a t u r e
5
3
5
M ENU
2
3
3
4
5 4 . 6
o
C
6
3. Go to the pop-up menu, select OK and press ENTER.
4. This displays the following termination screen.
0
1
0
2
0
3
0
4
0
5
0
6
0
7
0
8
0
9
1
0
1
1
1
2
1
3
1
4
1
5
1
6
1
7
1
8
2
0
2
1
2
2
2
3
2
4
2
5
2
6
2
7
2
8
2
9
3
0
F i n i s he d
2
U s e r : ( C o mmo n )
3
St a r t e d
a t
1 4 : 1 4 : 2 3
0 3 / 0 1 / 1 5
4
F i n i sh e d
a t
1 4 : 33 : 4 1
0 3 / 0 1 / 1 5
5
L e n g t h
Ov e r
6
T a Ka Ra
1
9
1
o f
0 . 0
o
Ru n
C
T a q
3
1
3
2
3
3
3
4
3
5
3
6
3
7
3
8
3
9
4
0
M ENU
OK
0 0 : 1 9 : 1 8
Un d e r 0 . 3
o
C
Re s u l t : St op p e d
Explanation of content of display
Status Program Name
User Name
Program beginning time (hour: minute: second) and the date.
Program end time (hour: minute: second) and the date.
Operation time(hour: minute: second)
The maximum overshoot and maximum undershoot program's operating
Result
5. Going to the pop-up menu and selecting OK again displays the main program screen.
TD3010JE_v3.00D
73
TP600/TP650 Operation Manual
5. Creating New Program
New programs are created by going to the top screen selecting and editing a basic
program pattern (format), then assigning it a name. When creating a new program from an
existing user file or simply editing the file, refer to the instructions provided in section 7,
“User Selection and Registration.”
1. From the main program screen, go to the pop-up menu, select New and press ENTER.
TaKaRa Thermal Cycler Dice
TP600 Ver.3.xx
U s e r ( Common )
05/04/20
12:00:00
MENU
RUN
New
N
ew
Edit
Tools
User
25.0 ℃
2. This displays the New Program screen. Programs are created by editing segments
(Temp count) and numerical values.
1 segment / pattern
3 segments / pattern
1Temp3Temp 25cyc
Temp
Time
94.0
5:00
94.0
0:30
55.0
0:30
2 T e m pMENU 1
SSaavvee
Insert
Delete
More
72.0
7 2 . 0C a n c e l
0:30
7:00
Definitions of Terms
Segment: Represents the smallest unit which is equivalent to 1 Temp unit.
Pattern: Represents a combination of segments for which numerical values are
continuously set.
Procedure for setting Values
Use arrow keys to move cursor.
Press ENTER or an arrow key after input numerical values of temperature (Temp), time
(time) and cycle count (Cyc).
Temperature using numerals: For example, for 94.0°C, “940”.
Temperature setting range:
4.0 to 99.9°C
Time using numerals:
For example, for 1 minute and 30 seconds, “0130”.
Time setting range:
00:01 (s) to 99:59 (99 minutes, 59 seconds);
when operating in continuous (∞), “9999”.
Cycle count:
1 to 99
TD3010JE_v3.00D
74
TP600/TP650 Operation Manual
Procedure for Inserting/Deleting Patterns and Segments
・ Patterns can be inserted or deleted by placing the cursor on the pattern start position
(Example: placing cursor on “1”, “94.0” or “10:00” of “1 Temp” or “3”, “94.0” or “0:30” of “3
Temp”) and selecting Insert/Delete from the pop-up menu.
1Temp3Temp 25cyc
Temp
94.0
Time 10:00
94.0
0:30
55.0
0:30
2 T e m pMENU 1
72.0
1:00
SSaavvee
Insert
Delete
More
7 2 . 0C a n c e l
5:00
* Segments can be inserted or deleted by placing cursor anywhere except the pattern
start position (Example: placing cursor on “55.0/0:30” or “72.0/1:00” for “3 Temp 25 Cyc”
on the screen below) and selecting Insert/Delete from the pop-up menu.
1Temp3Temp 25cyc
Temp
94.0
Time 10:00
94.0
0:30
55.0
0:30
2 T e m pMENU 1
72.0
1:00
S a vv ee
Insert
Delete
More
7 2 . 0C a n c e l
5:00
MENU 2
Run
Cancel
arrow key
Switch
* Segment (Temp) count in pattern is modified by inputting a new value (1 to 9) in the first
Temp position in pattern and pressing .
Max. segment (Temp) count per program: 12
【Note】 Using a segment (Temp) count of 7 or more requires the double memory
capacity as two 6-segment (Temp) programs.)
【Note】 When the pop-up menu is "MENU2", it is possible to switch to "MENU1" by
pushing a right and left arrow key.
Using Extension Mode
Extension mode provides the following functions. But model TP650 does not have the
Gradient Function.
z
Extension Settings
Temperature and time settings must be increased/decreased each time cycle
count is increased.
Temperature extension setting is changed by enabling Extension mode, moving
the cursor to the TempEX position and input a value. Go to MENU, select “+/-“ and
press ENTER.
Time extension setting is changed by moving the cursor to the TimeEX position
and input a value. Go to MENU, select “+/-“ and press ENTER.
z
Pause Setting
TD3010JE_v3.00D
75
TP600/TP650 Operation Manual
With Pause activated, the program pauses when operation moves to the selected
pause segment. Program operation is resumed by going to MENU, selecting
Resume and pressing.
【Note】
Pause is not designed to activate after the selected segment has been executed.
With the Extension mode enabled, go to MENU, select Pause and press ENTER
to activate Pause. To cancel pause, go to MENU, select Pause and press again.
z
Slope Setting
This is used to set the desired temperature heating/cooling speed setting. Do this
by setting the desired target temperature and ramp time settings. The resulting
temperature change slope will then be used to perform linear temperature control.
Move cursor to TempEX, go to MENU, select Slope and press ENTER.
z
Gradient (TP600 only)
With the cursor positioned on Temp or Time, go to MENU, select Grad and press
Enter to select a setting.
(1) Enable Extension mode by selecting More from pop-up menu and pressing .
1Temp3Temp 25cyc
Temp
94.0
Time 10:00
99 44 .. 00
0:30
55.0
0:30
2 T e m pM E N U
SSaavvee
Insert
Delete
More
72.0
7 2 . 0C a n c e l
1:00
5:00
(2) Extension and Pause Settings
1 Te m p 3 Te m p 2 5 c y c
Temp
94.0
Ex
0.0
Time 10:00
Ex
0:00
94.0
0.5
0:30
0:00
55.0
0.0
0:30
-- 0 : 0 5
2 Te m p MENU
1 c y c1
Save
+
72.0
7 2 . 0 4−
-. 0
0.0
0 . 0P a0u.s0e
1:00
5 : 0 0C a n∞c e l
Pause
0:00 0:00
Position cursor at the “Ex” line below the Temp or Time lines, desired value and press
ENTER. Then select increase (+), decrease (-) or Pause from pop-up menu and press
again.
Max. temp. Ex value: ±9.9°C
Max. time Ex value: ±9:59 (9 minutes 59 seconds)
Pause setting by moving cursor to TimeEx of the target segment, select Pause in
pop-up-up menu and press ENTER.
The figure below shows an example of a program setting procedure using 55°C and 30 s
as the temperature and time settings, with Time setting decremented by 5 s each cycle.
The Pause is set for activation when the 55°C segment is completed and operation moves
TD3010JE_v3.00D
76
TP600/TP650 Operation Manual
to 72°C.
Procedure
1) Use the arrow keys to activate (highlight) the selected position.
2) Use numerical pad keys to “5”.
3) Press MENU key to display pop-up menu then use arrow key to select (-).
4) Press ENTER key.
5) Use the arrow keys to activate (highlight) the selected position.
6) Press MENU key to display pop-up menu then use arrow key to select (Pause).
7) Press ENTER key.
1 Te m p 3 Te m p 2 5 c y c
Temp
94.0
Ex
0.0
Time 10:00
Ex
0:00
94.0
0.5
0:30
0:00
2 Te m p MENU
1cyc
1
55.0
0.0
0:30
-0:05
1)
Save
+
7 2 . 0 4−
-. 0
0 . 0P a 0u .s0e
5 : 0 0C a n∞
cel
0:00 0:00
72.0
0.0
1:00
Pause
3)
6)
5)7)
【Note】
The extension setting can be canceled by pushing CE key or entering “0”.
The Pause setting can be canceled by pushing CE key or going to MENU and
selecting Pause again.
【Note】 Decreases every five seconds but It doesn't become less than one second.
【Note】 Pop-up menu content varies according to cursor position.
-The pop-up displays Save, Insert and Delete when the cursor is positioned at
Temp or Time.
- Save, +, -, Slope and Cancel are displayed when positioned at TempEx.
- Save, +, -, Pause and Cancel when positioned at TimeEx.
TP650
MENU 1
Save
+
Slope
Cancel
TP600
MENU 1
Save
Insert
Delete
MENU 1
Save
Insert
Delete
Grad
Cancel
Cancel
MENU 1
Save
+
Pause
Cancel
(3) Slope Function Settings
With the cursor placed on TempEx, go to MENU, select Slope and press ENTER.
This displays the following Slope screen.
0
1
0
2
0
3
0
4
0
5
0
6
0
7
0
8
0
9
3 T e mp
1
1
0
1
1
1
2
1
3
1
4
1
5
1
6
1
7
1
8
1
9
2
0
2
1
1 Cy c
2
2
2
3
2
4
2
5
2
6
2
7
2
8
2
9
3
0
3
1
3
2
3
3
3
4
3
5
3
6
3
7
3
8
M ENU
2
Sa v e
3
T e mp
9 4 . 0
3 7 . 0
3 7 . 0
0 . 0
Sl ope
0 . 0
5 T i me 1 0 : 0 0
0 : 0 0
6 Ex
6 0 : 0 0
1 5 : 0 0
0 : 0 0
0 : 0 0
4 Ex
Slope Setting Range
TD3010JE_v3.00D
77
+
Sl ope
Ca nc e l
3
9
4
0
TP600/TP650 Operation Manual
Temperature: 30.0 to 99.9°C
Time: 1:30 (1 minute 30 seconds) to 99:59 (99 minutes 59 seconds)
【Note】 The Minimum Time Setting for Slope is 1 min and 30 s. Any setting shorter
than the minimum setting will automatically be adjusted to this value.
【Note】 The Slope setting is canceled by moving the cursor to the designated position
and pressing the CE key or going to MENU, selecting Slope and pressing
again. These steps reset the current slope setting to its default value (0.0).
(4) Gradient Function Settings (only for TP600)
With the cursor positioned on Temp or Time, go to MENU, select Grad and press
ENTER to select a setting. It becomes Gradient temperature setting screen.
1 Te m p 3 Te m p 2 5 c y c
Temp
94.0
Ex
0.0
Time 10:00
Ex
0:00
94.0
0.5
0:30
0:00
55.0
0.0
0:30
0:00
2 Te mMpE N
1c
U y1c
72.0
0.0
0:30
0:00
Save
Insert
7 2 . 0D e4l e
. 0t e
0 . 0G
0
G rr a
a .d.
d.0
5 : 0 0C a n∞c e l
0:00 0:00
It becomes Gradient temperature setting screen.
Gradient
Setting
(01)45.0
(02)46.0
(03)47.0
(04)49.0
(07)56.2
(10)63.0
(05)51.4
(08)58.6
(11)64.0
(06)53.8
(09)61.0
(12)65.0
MENU1
OK
K
O
Clear
the low-temperature setting at position (01:The left end of a block) and the
high-temperature setting at position (12: The right end of a block).
Temperature setting range: 40.0 to 75.0 °C
Temperature difference:
6.0 to 20.0 °C
【Note】
* Exceeding the temperature settings or the temperature setting range may
destabilize controlled temperature.
* The temperature values for (02) to (11) are calculated values.
* Temperatures cannot be automatically incremented/decremented for each step.
Go to pop-up menu, select OK and press ENTER.
When displaying the temperature gradient, the left temperature is shown on the
Temp line and the right temperature (beginning with G) on the Temp Ex line.
Go to pop-up menu, select Save and press ENTER.
TD3010JE_v3.00D
78
TP600/TP650 Operation Manual
1 Te m p 3 Te m p 2 5 c y c
Temp
94.0
Ex
0.0
Time 10:00
Ex
0:00
94.0
0.5
0:30
0:00
G45.0
G65.0
0:30
0:00
2 Te m pM E1Nc U
y c1
72.0
0.0
0:30
0:00
Save
Insert
7 2 . 0D e l4e. t0e
0 . 0G r a0d.
.0
5:0C
0 a n∞
cel
0:00 0:00
3. Save the newly created program.
Entering program name.
3
7
1
Sa v e
Pr o gr a m
a s
Pr og r a m
T a Ka Ra
Ta q
4
5
Us e r
3
9
4
0
M ENU
2
3
3
8
Sa v e As
Us e r
Ca n c e l
( C o mmo n )
6
Go to pop-up menu, select SaveAs and press ENTER.
【Note】
User-created programs: maximum memory capacity for programs (6-Temp size) is 200
Program name character: Maximum 16
Max. number of registered users 22 excluding pre-registered <Common> and
<TaKaRa> usernames.
【Note】
New programs cannot be registered to the TaKaRa folder, as the Save and SaveAs
functions are disabled (blanked out as ---) in the pop-up menu. Select User in the
pop-up menu and save the program under a different username.
Save Program
Pr o g r a m
TaKaRa
Taq
User(TaKaRa)
TD3010JE_v3.00D
79
MENU
-- -- -- -User
Cancel
TP600/TP650 Operation Manual
6. Editing and Saving Existing Programs
Existing programs can be saved under a new name (newly created program) or under the
same name (edited program).
1. Go to the top screen, select Edit and press ENTER.
TaKaRa Thermal Cycler Dice
TP600 Ver.3.xx
U s e r ( Common )
05/04/20
12:00:00
MENU
RUN
New
E dd ii tt
Tools
User
25.0 ℃
2. This displays a list of programs registered to the User.
Choose the program to be edited, select Edit in the pop-up menu and press ENTER.
Program Name
TaKaRa Taq
Cycle Seq
Stored
05/04/01
05/04/01
T o u c h D o w n PCR
05/04/01
MENU
11:30:00
Edit
11:31:00
View
1 2 : 0 0 : 0U0s e r
Sort
Cancel
This displays the existing program and enables editing of the segment (Temp count)
and numerical values.
Use the arrow keys to move the cursor.
* Press or an arrow key after setting temperature (Temp), cycle count (Cyc) and
numerical values.
Temperature setting:
4.0 to 99.9 °C
Time settings:
00:01(1 second) to 99:59(99minutes 59seconds)
99:99 (when operating in continuous (∞))
Cycle count::
maximum 99
* Blocks can be inserted or deleted by going to the start position (Example: placing
cursor on “1” of “1 Temp” block) and selecting Insert/Delete from the pop-up menu.
1Temp3Temp 25cyc
Temp
Time
94.0
5:00
94.0
0:30
55.0
0:30
2 T e mMENU
p
1
SSaavvee
Insert
Delete
More
72.0
7 2 . 0C a n c e l
1:00
5:00
* Segments can be inserted or deleted by placing cursor anywhere except the
pattern start position (Example: placing cursor on “55.0/0:30” or “72.0/1:00” for “3
Temp 25 Cyc” on the screen below) and selecting Insert/Delete from the pop-up
menu.
TD3010JE_v3.00D
80
TP600/TP650 Operation Manual
1Temp3Temp 25cyc
Temp
94.0
Time 10:00
94.0
0:30
55.0
0:30
72.0
1:00
2 T e m MENU
p
1
SS aa vvee
Insert
Delete
More
7 2 . 0C a n c e l
5:00
MENU 2
Run
Cancel
arrow key
Switch
* Pattern (Temp) count can be modified by inputting a new value (1 to 9) at the first
Temp position and pressing.
Max. Temp count per program: 12
(Using a Temp count of 7 or more requires as much memory as two
6-Temp programs.)
* Segments (Temp count) can be added or deleted by selecting Insert/Delete from the
pop-up menu while the cursor is positioned anywhere except at the start of a block.
Using Extension Mode
Extension mode provides the following functions but model TP650 does not have the
Gradient Function.
z
Extension Settings
Temperature and time settings must be increased/decreased each time cycle
count is increased.
Temperature extension setting is changed by enabling Extension mode, moving
the cursor to the TempEX position and input a value. Go to MENU, select “+/-“ and
press ENTER.
Time extension setting is changed by moving the cursor to the TimeEX position
and input a value. Go to MENU, select “+/-“ and press ENTER.
z
Pause setting
With Pause activated, the program pauses when operation moves to the selected
pause segment. Program operation is resumed by going to MENU, selecting
Resume and pressing
【Note】
Pause is not designed to activate after the selected segment has been executed.
With the Extension mode enabled, go to MENU, select Pause and press ENTER
to activate Pause. To cancel pause, go to MENU, select Pause and press again.
z
Slope Setting
This is used to set the desired temperature heating/cooling speed setting. Do this
by setting the desired target temperature and ramp time settings. The resulting
temperature change slope will then be used to perform linear temperature control.
Move cursor to TempEX, go to MENU, select Slope and press ENTER.
z
Gradient (TP600 only)
With the cursor positioned on Temp or Time, go to MENU, select Grad and press
TD3010JE_v3.00D
81
TP600/TP650 Operation Manual
Enter to select a setting.
(1) Enable Extension mode by selecting More from pop-up menu and pressing .
1Temp3Temp 25cyc
Temp
94.0
Time 10:00
99 44 .. 00
0:30
55.0
0:30
72.0
1:00
2 T e mM
pE N U
SS aa vvee
Insert
Delete
More
7 2 . 0C a n c e l
5:00
(2) Extension and Pause Settings
1 Te m p 3 Te m p 2 5 c y c
Temp
94.0
Ex
0.0
Time 10:00
Ex
0:00
94.0
0.5
0:30
0:00
2 Te m MENU
p 1 c1y c
55.0
72.0
0.0
0.0
0:30
1:00
0:00
5 Pause
-5
Save
+
7 2 . 0 4−
-. 0
0 . 0P a 0u .s0e
5 : 0 0C a n∞
cel
0:00 0:00
Position cursor at the “Ex” line below the Temp or Time lines, desired value and press .
ENTER. Then select increase (+), decrease (-) or Pause from pop-up menu and press
again.
Max. temp. Ex value: ±9.9°C
Max. time Ex value: ±9:59 (9 minutes 59 seconds)
Pause setting by moving cursor to TimeEx of the target segment, select Pause in
pop-up-up menu and press ENTER.
The figure below shows an example of a program setting procedure using 55°C and 30 s
as the temperature and time settings, with Time setting decremented by 5 s each cycle.
The Pause is set for activation when the 55°C segment is completed and operation moves
to 72°C.
Procedure
1) Use the arrow keys to activate (highlight) the selected position.
2) Use numerical pad keys to “5”.
3) Press MENU key to display pop-up menu then use arrow key to select (-).
4) Press ENTER key.
5) Use the arrow keys to activate (highlight) the selected position.
6) Press MENU key to display pop-up menu then use arrow key to select (Pause).
7) Press ENTER key.
1 Te m p 3 Te m p 2 5 c y c
Temp
94.0
Ex
0.0
Time 10:00
Ex
0:00
94.0
0.5
0:30
0:00
1)
55.0
72.0
0.0
0.0
0:30
1:00
0:00
5 Pause
-5
5) 7)
TD3010JE_v3.00D
82
2 Te m M
p E1NcUy c
Save
+
7 2 . 0 4−
-. 0
0 . 0P a 0u .s0e
5 : 0 0C a n∞
cel
0:00 0:00
3)
6)
TP600/TP650 Operation Manual
【Note】 The extension setting can be canceled by pushing CE key or entering
“0” ,and the Pause setting is cancelled by going to MENU and selecting
Pause again.
【Note】 Pop-up menu content varies according to cursor position.
-The pop-up displays Save, Insert and Delete when the cursor is positioned
at Temp or Time.
- Save, +, -, Slope and Cancel are displayed when positioned at TempEx.
- Save, +, -, Pause and Cancel when positioned at TimeEx.
TP650
MENU 1
Save
+
Slope
Cancel
TP600
MENU 1
Save
Insert
Delete
MENU 1
Save
Insert
Delete
Grad
Cancel
Cancel
MENU 1
Save
+
Pause
Cancel
(3) Slope Function Settings
With the cursor placed on TempEx, go to MENU, select Slope and press ENTER.
This displays the following Slope screen.
0
1
0
2
0
3
0
4
0
5
0
6
0
7
0
8
0
9
1
0
1
1
3 T e mp
1
1
2
1
3
1
4
1
5
1
6
1
7
1
8
1
9
2
0
2
1
2
2
2
3
2
4
2
5
2
6
2
7
2
8
2
9
3
0
1 Cy c
3
1
3
2
3
3
3
4
3
5
3
6
3
7
3
8
3
9
4
0
M ENU
2
Sa v e
3
T e mp
9 4 . 0
3 7 . 0
3 7 . 0
0 . 0
Sl ope
0 . 0
5 T i me 1 0 : 0 0
0 : 0 0
6 Ex
6 0 : 0 0
1 5 : 0 0
0 : 0 0
0 : 0 0
4 Ex
+
Sl ope
Ca nc e l
Slope Setting Range
Temperature: 30.0 to 99.9°C
Time: 1:30 (1 minute 30 seconds) to 99:59 (99 minutes 59 seconds)
【Note】 The Minimum Time Setting for Slope is 1 min and 30 s. Any setting shorter
than the minimum setting will automatically be adjusted to this value.
【Note】 The Slope setting is canceled by moving the cursor to the designated position
and pressing the CE key or going to MENU, selecting Slope and pressing
again. These steps reset the current slope setting to its default value (0.0).
(4) Gradient Function Settings (only for TP600)
¥With the cursor positioned on Temp or Time, go to MENU, select Grad and press
ENTER to select a setting. It becomes Gradient temperature setting screen.
1 Te m p 3 Te m p 2 5 c y c
Temp
94.0
Ex
0.0
Time 10:00
Ex
0:00
94.0
0.5
0:30
0:00
55.0.072.0
0.0
0.0
0:30
0:30
0:00
0:00
TD3010JE_v3.00D
83
2 Te mMpE N
1 cUy1c
Save
Insert
7 2 . 0 D e4 l. e0 t e
0 . 0G r 0a .d.0
5 : 0 0C a n∞c e l
0:00 0:00
TP600/TP650 Operation Manual
It becomes Gradient temperature setting screen.
Gradient
Setting
(01)45.0
(04)49.0
(07)56.2
(10)63.0
(02)46.0
(05)51.4
(08)58.6
(11)64.0
MENU1
OK
Clear
(03)47.0
(06)53.8
(09)61.0
(12)65.0
the low-temperature setting at position (01:The left end of a block) and the
high-temperature setting at position (12: The right end of a block).
Temperature setting range: 40.0 to 75.0 °C
Temperature difference:
6.0 to 20.0 °C
【Note】
* Exceeding the temperature settings or the temperature setting range may
destabilize controlled temperature.
* The temperature values for (02) to (11) are calculated values.
* Temperatures cannot be automatically incremented/decremented for each step.
Go to pop-up menu, select OK and press ENTER.
When displaying the temperature gradient, the left temperature is shown on the
Temp line and the right temperature (beginning with G) on the Temp Ex line.
Go to pop-up menu, select Save and press ENTER.
0
1
0
2
0
3
0 0
4 5
0
6
0 0
7 8
0
9
1
0
1 T e mp
1
1
1
1
2
1
3
1
4
1
5
1
6
3 T e mp
1
7
1
8
1
9
2
0
2
1
2
2
2
3
2
4
2
5
2
6
2
7
2
8
2 5 Cy c
2
9
3
0
3
1
3
2
3
3
3
4
3
5
3
6
3
7
3
8
3
9
4
0
2 T e m pMENU
1 Cy c
M E N U1
2
Sa v e
3
T e mp
9 4 . 0
9 4 . 0
G4 5 . 0
7 2 . 0
0 . 0
0 . 5
G6 5 . 0
0 . 0
5 T i me 1 0 : 0 0
0 : 3 0
0 : 3 0
0 : 3 0
6 Ex
0 : 0 0
- 0 : 0 5
Pa us e
4 Ex
0 : 0 0
I n
7 2 . 0
De
0 . 0
Gr
5 : 0 0
Ca
0 : 0 0
s e r
4
l e t
0
a d .
t
. 0
e
. 0
∞
nc e l
0 : 0 0
3. Saving an Editing Program.
There are two procedures for saving an existing program.
1) Saving the edited program under the existing name. (Save)*1
2) Saving the edited program under a new program name. (Save)*2
3) Saving the edited program under a new program name. (SaveAs)*3
Go to pop-up menu, select Save/SaveAs and press ENTER.
1 Te m p 3 Te m p 2 5 c y c
Temp
Ex
Time
Ex
94.0
0.0
5:00
0:00
94.0
0.5
0:30
0:00
55.0
0.0
0:30
-5:00
TD3010JE_v3.00D
84
2 Te m MENU
p 1 c 1y c
SSaavvee
72.0
0.0
1:00
Pause
+
7 2 . 0 4- . 0
0 . 0P a 0u .s0e
5 : 0 0C a n∞
cel
0:00 0:00
TP600/TP650 Operation Manual
3
7
1
Sa v e
Pr o gr a m
M ENU
2
3
Pr og r a m
T a Ka Ra
Sa v e
Ta q
Sa v e As
4
5
Us e r
3
8
3
9
4
0
Save
SaveAs
Us e r
( C o mmo n )
Ca nc e l
6
*1) Press ENTER under the existing name. Or select Save from the pop-up menu and
press ENTER. :Overwrite (Save)
*2) Press ENTER under the new name. Or select Save from the pop-up menu and
press ENTER. :Saved but the former program is erased.
*3) Press ENTER under the new name. Or select SaveAs from the pop-up menu and
press ENTER. :The former program remain.
【Note】 The message of "Change Program Name" appears when SaveAs is selected
without changing the name and is done, and the program name change is
demanded. Please input a new name.
【Note】 Programs cannot be saved to the TaKaRa username using the Save or
SaveAs functions. Select User from the pop-up menu and save the program
under a different username.
【Note】 User-created programs: maximum memory capacity for programs (6-Temp
size) is 200.
Program name character: Maximum 16.
Maximum number of registered users 22 excluding pre-registered <Common>
and <TaKaRa> usernames.
TD3010JE_v3.00D
85
TP600/TP650 Operation Manual
7. User Selection and Registration
Options include 1. Select user-name (User), 2. Register new user (New)
and 3. Change user name (Editor).
1. Select user-name
(1) Go to main system screen pop-up menu, select User and press ENTER.
TaKaRa Thermal Cycler Dice
TP600 Ver.3.xx
U s e r ( Common )
05/04/20
(2)
12:00:00
2 5 . 0 ºC
MENU
RUN
New
Edit
Tools
U
U ss ee rr
This displays the Select Username screen
Select User Name
<Common>
<TaKaRa>
JJi ir roo
Sabro
MENU
O
OK
K
New
Edit
Cancel
<NOTE>
* This screen appears at system startup when the power is turned on.
* The defaulted usernames <Common> and <TaKaRa> are pre-registered.
* Maximum number of user-names: 22
* Maximum user-name length: 10 characters
Use the arrow keys to select the desired username.
Select OK on the pop-up menu and press ENTER.
(3)
Enter password when the password entry screen appears.
Password
User
MENU
OK
Cancel
Jiro
Password
Password length: 0 to 9 characters that appear as “*” when entered
Use the CE key to clear password:
If the password is mistyped, use the CE key to clear and re-enter password.
(4)
Select OK on the pop-up menu, press ENTER and return to the top screen.
TD3010JE_v3.00
86
TP600/TP650 Operation Manual
2. Registering New User
(1)
Go to main system screen pop-up menu, select User and press ENTER.
TaKaRa Thermal Cycler Dice
TP600 Ver.3.xx
U s e r ( Common )
05/04/20
(2)
12:00:00
Select New on the pop-up menu and press ENTER.
Select User Name
<Common>
(3)
<TaKaRa>
MENU
OK
New
Edit
Cancel
Enter the new user name, go to pop-up menu, select Save As and press ENTER.
Save User as
User
(4)
2 5 . 0 ºC
MENU
RUN
New
Edit
Tools
U
U ss ee rr
SJ ai rkou r a
MENU
O
K As
Save
Cancel
Enter the password if necessary.
Password
User
MENU
O
OK
K
Cancel
Jiro
Password
Enter password.
Password characters and length: numbers 0 to 9 ( 1 to 6 digits )
This displays the entered numbers on the screen.
If the numbers are mistyped, use the CE key to clear and re-enter password.
To avoid registering a password, simply leave the field blank, select OK from
the pop-up menu and press ENTER.
TD3010JE_v3.00
87
TP600/TP650 Operation Manual
3. Changing Existing Username
(1)
Go to pop-up menu, select User and press ENTER.
TaKaRa Thermal Cycler Dice
TP600 Ver.3.xx
User (Common)
05/05/05
(2)
12:00:00
25.0 ℃
MENU
RUN
New
Edit
Tools
U ss ee rr
U
Select the user name to be changed, go to pop-up menu, select OK and press
ENTER.
Select User Name
<Common>
<TaKaRa>
Jiro
SSaabbr roo
MENU
OK
K
O
New
Edit
Cancel
When the password is set, the password is demanded. Enter password when the
password entry screen appears and return to the top screen.
(3)
Confirm the user name you desired. Go to pop-up menu, select User and press
ENTER.
TaKaRa Thermal Cycler Dice
TP600 Ver.3.xx
User (Sabro)
05/05/05
(4)
12:00:00
confirm the user name that wants to change reverses by the User selection
screen. Go to pop-up menu, select Edit and press ENTER.
Select User Name
<Common>
<TaKaRa>
Sabro
Jiro
(5)
25.0 ℃
MENU
RUN
New
Edit
Tools
U ss ee rr
U
MENU
OK
New
E dd ii tt
E
Cancel
Enter a new use name. Go to pop-up menu, select Save and press ENTER.
Save User
User
Sakura
TD3010JE_v3.00
88
MENU
S aK v e
O
Cancel
TP600/TP650 Operation Manual
(6)
Enter password when the password entry screen appears. Select OK on the
pop-up menu, press ENTER and return to the top screen.
Save User
User
Password
MENU
OK
Cancel
Sakura
****
Password characters and length:
numbers 0 to 9 (1 to 6 digits )
This displays the entered numbers on the screen.
Use the CE key to clear password:
If numbers are mistyped, use the CE key to clear and re-enter password.
To avoid registering a password, simply leave the field blank, select OK from the
pop-up menu and press ENTER.
To confirm the User name was changed, main system screen is displayed.
TaKaRa Thermal Cycler Dice
TP600 Ver.3.xx
User (Sakura )
05/01/01
12:00:00
2 5 . 0 ºC
<NOTE>
Username Edit Functions
・Up arrow key:insert space
・Down arrow key:backspace
・Left arrow key:cursor left
・Right arrow key:cursor right
・Character input keys
0 key: &,/,(,),0
1 key: Space,-,”,#,1
2 key: A,B,C,a,b,c,2
3 key: D,E,F,d,e,f,3
4 key: G,H,I,g,h,I,4
5 key: J,K,L,j,k,l,5
6 key: M,N,O,m,n,o,6
7 key: P,Q,R,S,p,q,r,s,7
8 key: T,U,V,t,u,v,8
9 key: W,X,Y,Z,w,x,y,z,9
Enter only numbers for number fields.
TD3010JE_v3.00
89
MENU
RUN
New
Edit
Tools
U
U ss ee rr
TP600/TP650 Operation Manual
<NOTE>
* Pre-registered user-names <Common> and <TaKaRa> may not be changed.
* The following protocols are registered to the <TaKaRa> folder: “< 1Kbp”, “< 5Kbp”, “<
10Kbp”, “>10Kbp”,” Mutagenesis”,” siRNA(double)”,” Differential(DD)” and “BcaBEST
RNA”.
* Preset Protocols: These consist of programs (preset protocols) programmed for use
according to the length of the target.
< 1 Kbp:
< 5 Kbp:
< 10 Kbp:
> 10 Kbp:
(up to 1 Kbp) 94ºC for 30 s, 55ºC for 30 s and 72ºC for 1min at 30 cycles,→4ºC/∞
(up to 5 Kbp) 94ºC for 30 s, 55ºC for 30 s, 72ºC for 5min at 30 cycles,→4ºC/∞
(up to 10 Kbp) 98ºC for 10 s and 68ºC for 10 min at 30 cycles,→4ºC/∞
(more than 10 Kbp) 98ºC 10 s and 68ºC 15 min at 30 cycles,→4ºC/∞
* Preset Protocols(with Slope function: See next page.):
Mutagenesis: 94ºC/10min, 94ºC→37ºC/60min and 37ºC/15min< 1 Kbp
siRNA(double): 95ºC/1min, 70ºC/1min, 70ºC→37ºC/60min and 37ºC/∞
Differential(DD): 94ºC/30s, 40ºC/1min, 40ºC→72ºC/2min and 72ºC/30s
BcaBEST RNA: 30ºC/1min, 30ºC→65ºC/15min and 65ºC/20min
TD3010JE_v3.00
90
TP600/TP650 Operation Manual
Mutagenesis
94ºC/10min, 94ºC→37ºC/60min and 37ºC/15min
siRNA(double)
95ºC/1min 70ºC/1min, 70ºC→37ºC/60min and 37ºC/∞
Differential(DD)
94ºC/30s, 40ºC/1min, 40ºC→72ºC/2min and 72ºC/30s
BcaBEST RNA
30ºC/1min, 30ºC→65ºC/15min and 65ºC/20min
TD3010JE_v3.00
91
TP600/TP650 Operation Manual
8. Link Function
The Link function is used to execute multiple programs consecutively. The Cycler Dice
is capable of inputting a maximum of 12 segments with one program. Users wishing to
execute even larger programs have the option of running multiple programs
consecutively.
Program names are assigned the “#” symbol followed by a single digit number. The
Link function executes programs consecutively in the order of the assigned numbers.
The Cycler Dice is not optimally suited to operating in a modular configuration in which
the required modules are linked together.
Creating Link Programs
A single program name is assigned the “#” symbol followed by single digit numbers
at the end.
Example: PLANT_TEST#1
PLANT_TEST#2
Programs numbered #1 to#4
PLANT_TEST#3
will be executed in that order.
PLANT_TEST#4
【Note】 The Link function ignores all numbers except the first digit following the
“#” symbol.
(Example) LINK#1
LINK#2Long Execution commences with
LINK#3Short Program #1 and continues to #4.
LINK#4
【Note】 Avoid Program Names with Same First Digit
Although possible to save programs to the system that have the same first digit
after the “#” symbol if they have differing subsequent digits, they will be regarded
as identical by the Link function. They will be executed in the order of their system
memory addresses, rather than when created or how named, resulting in
confusion.
Order of execution depends on location in
memory.
Example: Program Names
LINK#1
LINK#2
LINK#2Long
LINK#3Short
LINK#4
TD3010JE_v3.00
92
LINK#1
LINK#1
LINK#2
LINK#2Long
LINK#3Short
LINK#3Short
LINK#4
LINK#4
TP600/TP650 Operation Manual
Link Function Program Execution Procedure
1. Go from program username screen to main screen and press MENU. Then select
Run from pop-up menu and press ENTER.
Example: Program Created for Username <Common>
Select User Name
C oo m
mm
m oo m
n >>
<TaKaRa>
<< C
Jiro
Sabro
MENU
OK
K
O
New
Edit
Cancel
In MENU select OK and press ENTER.
TaKaRa Thermal Cycler
Dice mini
TP100 Ver.x.xx
U s e r ( Common )
05/01/01
12:00:00
MENU
R
RU
UN
N
New
Edit
Tools
User
2 5 . 0 ºC
2.
Select first program.
Example: PLANT_TEST#1
PLANT_TEST#2
PLANT_TEST#3
PLANT_TEST#4
Programs numbered #1 to #4 will be executed in that order.
Select “PLANT_TEST#1”, go to OK and press ENTER.
3.
Go to pop-up menu, select Start and press ENTER to display Select Reaction
Mode screen.
Select Reaction
Mode
1
Container 1
Volume
50
Link
1
Mode
(1-3)
(1.Thin 2.Thick)
μl ( 5 - 1 5 0 μl )
(1.Yes 2.No)
MENU
OK
Cancel
4.
Enter desired reaction settings, confirm “1” is selected for Link field (line 4) then
choose OK in MENU and press ENTER.
5.
Next, go to MENU, select Start and press ENTER to start execution of program
PLANT_TEST#1.
Execution of PLANT_TEST#2 begins automatically as PLANT_TEST#1
completes.
Execution continues with PLANT_TEST#3 and PLANT_TEST#4 and
terminates
TD3010JE_v3.00
93
TP600/TP650 Operation Manual
【Note】Execution can skip the beginning programs and start with PLANT_TEST#2, for
example, and continue through PLANT_TEST#3 and PLANT_TEST#4.
【Note】If a gap occurs in the order, execution terminates with the last program before
the gap.
Example: Execution that begins with TEST#1 terminates with TEST#2.
TEST#1
TEST#2
TEST#4
TEST#5
Start
Stop
Executing Programs Intended for Link Function Individually
Programs created specifically for Link execution can also be executed separately.
1. Select program name, go to MENU, select Start and Press ENTER to display the
Select Reaction Mode screen.
2. Enter “2” for Link then select OK in MENU and press ENTER.
Select Reaction
Mode
1
Container 1
Volume
50
Link
2
Mode
(1-3)
(1.Thin 2.Thick)
μl ( 5 - 1 5 0 μl )
(1.Yes 2.No)
MENU
OK
K
O
Cancel
Selecting "2. No” for Link
cancels the Link function.
3.
Going to MENU, selecting Start and pressing ENTER executes the program until
it is finished.
【Note】 Display on running with Link function.
1) Program Execution Screen
Program Title displays name of program in progress. Remaining Time indicates
time remaining for execution of current program and Info displays the starting
time and expected finishing time of current program in progress.
2) Finished Program Screen
The Finished screen appears program name, program execution starting and
completion time and length of run-time of the only last program.
3) Program History Screen
Finished program name is comprised of the name before the "#" and [#starting
program number] – [#finishing program number].
TD3010JE_v3.00
94
TP600/TP650 Operation Manual
Example:
LINK#1
LINK#2 Long
LINK#3 Short
LINK#4
When the Link programs finished History screen registered a
program name as “LINK#1 - #4 ”.
History
2/2
User:<Common>
Program:LINK#1-#4
Mode :1
T h i n 5 0 μl
Started at
11:50:10
FInIshed at
15:28:15
05/01/21
05/01/21
【Note】To view the program history, go to the main system screen, select Tools
from the pop-up MENU and press ENTER. Next, select History then choose
OK in the MENU and press ENTER.
(Refer to section "1. Saving History")
“Started at” indicates the time that the first program commenced and "Finished at" the time the last
program was completed.
TD3010JE_v3.00
95
TP600/TP650 Operation Manual
Chapter 5: Diagnosis Functions and Other Tools
The following functions are provided in the Tools menu.
1) History: records history of activity
2) Settings: enters time and date and system default settings.
3) PC communications: sends and receives programs
4) Diagnosis: runs operation testing programs
5) Delete user data: deletes saved usernames and programs
Selecting Tool Menu
Go to main system screen pop-up menu, select Tools and press ENTER.
0
1
0
2
0
3
0
4
0
5
0
6
0
7
0 0
8 9
1
0
1
1
1
2
1
3
1
4
1
5
1
6
1
7
1
8
1
9
2
0
2
1
2
2
2
3
2
4
2
5
2
6
2
7
2
8
2
9
3
0
3
1
3
2
3
3
1
3
4
3
5
3
6
3
7
3
8
3
9
4
0
M ENU
T a Ka Ra
2
T h e r ma l
T P6 0 0
3
Cy c l e r
Di c e
Ru n
Ve r . X. XX
Ne w
4
Us e r
5
0 3 / 0 1 / 1 5
6
Edi t
( C o mmo n )
Tool s
1 2 : 5 7 : 3 1
2 5 . 0
o
Us e r
C
Choose desired item from the displayed Select Tools menu, select OK from the pop-up
menu and press ENTER.
0
1
0
2
0
3
0
4
0
5
0
6
0
7
0
8
0
9
1
0
1
1
1
Se l e c t
3
Hi s t o r y
4
PC
5
D i a gnos i s
1
2
1
3
1
4
1
5
1
6
1
7
1
8
1
9
2
0
2
1
2
2
2
3
2
4
2
5
2
6
2
7
2
8
2
9
3
0
3
1
3
2
Tool s
3
3
3
4
3
5
3
6
3
7
3 3
8 9
4
0
M ENU
OK
Se t t i ng
Sv c
C o mmu n i c a t i o n
Ca n c e l
Re s e r v e d
De l e t e
6
Us e r
Da t a
<NOTE>
The descriptions of the various functions provided below assume that they have
already been selected from the Select Tools menu (by selecting OK in pop-up menu
and pressing ENTER).
1. History Function: History of Events
The History function records a log of activity for the most recently executed program.
Executing a new program updates the history log by overwriting previous data.
Select History, choose OK from the pop-up menu and press ENTER.
0 0 0 0 0
1 2 3 4 5
0 0 0 0 1 1 1 1 1 1 1
6 7 8 9 0 1 2 3 4 5 6
1
Hi s t o r y
3
U s e r : ( C o mmo n )
4
Ty pe : 1
3 / 4
P r o g r m: T a K a R a
5
6
Tube
St a r t e d
Po we r
1 1 1 2 2 2 2 2 2 2 2 2 2 3 3 3 3 3 3 3 3
7 8 9 0 1 2 3 4 5 6 7 8 9 0 1 2 3 4 5 6 7
M ENU
OK
Displays events:
Ta q
50 u l
a t
1 5 : 0 7 : 5 9
0 2 / 1 1 / 2 6
Fa i l e d
1 5 : 2 5 : 3 1
0 2 / 1 1 / 2 6
1 5 : 3 1 : 5 4
0 2 / 1 1 / 2 6
Re c o v e r e d
a t
3 3 4
8 9 0
Showing 3 of the
past 4 events.
The number of recorded events is shown to the right of “History” on the top line.
The example shown on screen indicates that information is displayed for 3 of the past 4
events (and does not indicate page count). More events can be viewed by pressing the
Down arrow key.
Maximum recorded events: 40
TD3010JE_v3.00D
96
TP600/TP650 Operation Manual
<NOTE>
To display the history of continuation, the pop-up menu is erased and Push down arrow key
or pushing the MENU key twice.
When the denominator of the fraction on the History side is four or more on the history
screen, the history is displayed on the following screen. Please do not forget and look.
<NOTE>
History display when link function is used
(example)
LINK̲#1
LINK̲#2Long
LINK̲#3Short
LINK̲#4
The history record is displayed as LINK̲#1-#4 when running from LINK̲#1 to LINK̲#4.
History
2/2
User:<Common>
Program:LINK#1-#4
Mode :1
T h i n 5 0 μl
Started at
11:50:10
Finished at
15:28:15
05/05/21
05/05/21
・The start time of the first program is displayed as start time.
・The finish time of the last program is displayed as a finish time.
2. Settings Function: Time, Date and System Default
The Settings function includes time, date, system standby temperature, display screen color and
highlighting, system sleep time and sound settings.
2-1 Time and Date Settings
1. Choose Setting, then go to pop-up menu, select OK and press ENTER.
2. Choose Date & Time, then go to pop-up menu, select OK and press ENTER.
0
1
0
2
0
3
0
4
0
5
0
6
0
7
0
8
0
9
1
0
1
1
1
2
1
3
1
4
1
5
1
6
1
7
1
8
1
9
2
0
2
1
2
2
2
3
2
4
2
5
2
6
2
7
2
8
2
9
3
0
3
1
3
2
3
3
Se t t i ng
1
3
4
3
5
3
6
3
7
3 3
8 9
4
0
M ENU
3
OK
Da t e
&
T i me
De f a u l t
4
Ca n c e l
Se t t i n g
5
6
3.
Enter display format and date/time settings, then go to pop-up menu, select OK and
press ENTER.
0
1
0
2
0 0
3 4
0
5
0
6
0
7
0
8
0
9
1
0
1
1
1
2
1
3
1
4
1
5
1
Da t e
T i me
3
Da t e
St y l e
4
Da t e
0 3 / 0 1 / 1 5
5
T i me
1 4 : 1 5 : 0 0
( 1 . Y / M/ D
1
6
1
7
1
8
1
9
2
0
2
1
2
2
2
3
2
4
2
5
2
6
2
7
2
8
2
9
3
0
3
1
3
2
3
3
3
4
3
5
3
6
3
7
3
8
M ENU
OK
2 . M/ D / Y
6
TD3010JE_v3.00D
97
3 . D / M/ Y )
Ca n c e l
3
9
4
0
TP600/TP650 Operation Manual
For example, the time (14:15:00) and date (January 15, 2003) are entered as follows.
Date Style = [ 1 ]、Date = [ 030115 ]、Time = [ 141500 ]
Then go to pop-up menu, select OK and press Enter key.
2-2 Default Settings
1. Choose Setting, then go to pop-up menu, select OK and press ENTER.
2. Choose Default Setting, then go to pop-up menu, select OK and press ENTER.
0
1
0
2
0 0
3 4
0
5
0
6
0 0
7 8
0
9
1
0
1
1
1
2
1
3
1
4
1
5
1
6
1
7
1
8
1
9
2
0
2
1
2
2
1
De f a u l t
3
St a n d- by
T e mp e r a t u r e
L CD
Ba c k
Co l o r
4
L CD
Sl e e p
5
Bu z z e r : Ke y
2
3
2
4
2
5
2
6
2
7
2
8
2
9
o
C
3
0
3
1
3
2
Se t t i ng
Pa d
Bu z z e r : F i n i s h e d
3
3
3
4
3
5
3
6
3
7
3
8
3
9
4
0
M ENU
2 5 . 0
1
OK
( 1 . B l u e 2 . Wh i t e )
Ca nc e l
( 1 . 3 0 mi n 2 . N o )
1
( 1 . Ye s
2 . No)
1
( 1 . Ye s
2 . No)
1
6
3. Enter the desired settings, go to pop-up menu, select OK and press ENTER.
* Stand-by Temperature: block temperature setting during standby mode (default is
25 °C)
* LCD Back Color: screen background settings (1: blue, 2: white), character color
complements background color
* LCD Sleep: enables system sleep mode (shuts off display backlight) when there has
been no input while program is idle for a specified interval. (after 1:30 or 2:00
minutes:seconds)
The LCD is designed to wake up by pressing MENU.
Will not wake up with other key operation.
* Buzzer: Key Pad: pressing key toggles options (1: beep on, 2: beep off).
* Buzzer : Finished: selects between options (1: beep on, 2: beep off)
(Beep count: 3 at program pause, 6 at program finish)
3. PC Communications Function: Program Send and Receive
This function is used to save program data to a computer or send it from a computer to other
devices. It is also used to perform system backup and transfer operations.
3-1 PC Communication Settings (Windows 2000 and XP Version)
1.
2.
From Start Menu
Go to Programs, Accessories, Communications and open HyperTerminal.
If not included in the Start menu, open HyperTerminal by going to the following directory:
C:/Program Files/Windows NT/hypertrm.exe
HyperTerminal Screen
New Connection Name: Example: TaKaRa
Connect using: COM1
COM1Properties Æ Port Settings: Bits per second: 9600, Data bits: 8, Parity: Stop bit,
Flow control : Xon/Xoff
ASCII I Setup : go to File, Properties and select the Settings tab.
Click ASCII Setup button and enter the following settings:
Line delay: 2 milliseconds, Character delay: 0 milli seconds
Uncheck all other options.
TD3010JE_v3.00D
98
TP600/TP650 Operation Manual
When Receiving: go to Transfer and select Capture text, then specify file name and
click the Start button.
When sending: go to Transfer , select Send Text File and select the send file name.
<Important Notes>
The RS232C cable with 9-pin D-sub connector required for this feature is not included as a standard
accessory.
3-2 Transferring a Program to Computer (Dice→PC)
1. Choose PC Communication, go to pop-up menu, select OK and press ENTER.
Select Tools
MENU
OK
OK
Svc
Cancel
History
Setting
PC Communication
Diagnosis
Reserved
Delete User Data
2.
Choose Send a program to PC, go to pop-up menu, select OK and press ENTER.
PC Communication
Send a Program to pc
MENU
OK
OK
Cancel
Receive a Program from pc
3.
This displays the program list.
Choose program to send, go to pop-up menu, select OK and press ENTER.
Program Name Stored
RT PCR
Cycle Seg
TaKaRa Taq
Touch Down PCR
03/04/01
03/04/01
05/04/01
03/04/01
MENU
S
end
OK
User
Sort
Cancel
4.
On the PC, use HyperTerminal.
In the HyperTerminal screen, to go to Transfer and select Capture, then save the file by
clicking the Start button.
For a description of the PC settings, refer to “PC Communications Settings.”
5.
Transfer the desired program.
Progress
Send a program to pc
Program Name < TaKaRa Taq
MENU
S
tart
OK
Cancel
Finished.
Go to pop-up menu, select Start and press ENTER.
The “Finished” message appears when transfer is complete.
Select Cancel from the pop-up menu, then press ENTER to be returned to the main
TD3010JE_v3.00D
99
TP600/TP650 Operation Manual
menu screen.
3-3 Transferring Programs From a Computer (PC→Dice)
1. Choose PC Communication, go to pop-up menu, select OK and press ENTER.
Select Tools
MENU
OK
OK
Svc
Cancel
HIstory
Setting
PC Communication
Diagnosis
Reserved
Delete User Data
2.
Choose Receive a Program from PC, go to the pop-up menu, select OK and press
ENTER.
PC Communication
MENU
OK
OK
Cancel
Send a Program to pc
Receive a Program from pc
3.
This displays the Receive a Program screen.
Go to pop-up menu, select Start and press ENTER.
Confirm that the “Receiving …” message appears.
Progress
MENU
OK
Start
Cancel
Receive a program from pc.
Receiving...
4.
...
On the PC, use HyperTerminal.
Go to Transfer, choose Send Text File and select the send file name.
Send the program from the PC to Dice.
<NOTE> For the correct PC transmission settings, refer to “PC Communication
Settings” in section 3-1, “Transferring a Program to a Computer.”
5.
Information for the received program is displayed when the process is completed.
1Temp
Temp
94.0
Time 10:00
3Temp 25Cyc
94.0
0:30
55.0
0:30
2Temp
MENU
S tKa r t
O
Cancel
72.0
0:30
Go to pop-up menu, select OK and press ENTER.
TD3010JE_v3.00D
100
72.0
5:00
4.0
∞
TP600/TP650 Operation Manual
6.
Save program under new file name.
Save Program as
MENU
OK
S
a veAs
User
Cancel
Program TaKaRa Taq
User
(Common)
<NOTE> For a description of the file saving procedure, refer to “3. Saving New
Programs” in section 5 of Chapter 4.
4. Diagnosis Function: Running Operation Testing Programs
This function performs self-diagnosis tests.
These tests are used to check whether the system is operating normally when errors occur in
PCR reactions.
The Diagnosis function performs the following four tests.
(1) Rate Test
Tests heating and cooling rates.
(2) Cycle Test
Tests cycle times and stability of control operations.
(3) Up-Down Test
Measures time required to cool down to 4 °C.
(4) Gradient Test (model TP600 only)
Measures gradient temperatures.
Confirm that standby temperature is set at 25ºC prior to commencing tests.
1.
Choose Diagnosis, go to pop-up menu, select OK and press ENTER.
0 0 0 0 0 0 0 0 0 1 1 1 1 1 1 1 1 1 1 2 2 2 2 2 2 2 2 2 2 3 3 3 3 3 3 3 3
1 2 3 4 5 6 7 8 9 0 1 2 3 4 5 6 7 8 9 0 1 2 3 4 5 6 7 8 9 0 1 2 3 4 5 6 7
1
Se l e c t
3
Hi s t o r y
Tool s
4
PC
5
D i a gnos i s
3 3 4
8 9 0
M ENU
OK
Se t t i ng
Sv c
C o mmu n i c a t i o n
Ca n c e l
Re s e r v e d
De l e t e
6
2.
Us e r
Da t a
This displays a list of self-diagnosis tests.
Choose the desired test item, then go to pop-up menu, select OK and press ENTER.
0 0 0 0 0 0 0 0 0 1 1 1 1 1 1 1 1 1 1 2 2 2 2 2 2 2 2 2 2 3 3 3 3 3 3 3 3 3 3 4
1 2 3 4 5 6 7 8 9 0 1 2 3 4 5 6 7 8 9 0 1 2 3 4 5 6 7 8 9 0 1 2 3 4 5 6 7 8 9 0
1
Se l f
D i a gnos i s
M ENU
3
OK
Ra t e
4
Cy c l e
5
Up
Te s t
D o wn
Gr a d .
Re s u l t
T es t
Ca n c e l
Tes t
Te s t
6
TD3010JE_v3.00D
101
TP600/TP650 Operation Manual
<NOTE>
Choosing the target test item, then selecting Result from the pop-up menu and
pressing the ENTER. Displays the last results for each test item.
3.
When the diagnosis test screen appears, select Start from pop-up menu and press
ENTER.
Test results are displayed when the tests are completed.
Reference values are for ambient temperature in the 20 to 23 °C range.
(1) Rate Test program execute screen
Program details:
25 °C for 30 seconds, 94 °C for 30s and 40 °C for 30 seconds.
0 0 0 0 0
1 2 3 4 5
0 0 0 0 1 1 1 1 1 1 1
6 7 8 9 0 1 2 3 4 5 6
1 Cy c l e
1 1 1 2 2 2 2 2 2 2 2 2 2 3 3 3 3 3 3 3 3 3 3 4
7 8 9 0 1 2 3 4 5 6 7 8 9 0 1 2 3 4 5 6 7 8 9 0
Te s t
R e ma i n i n g
2
0 : 0 2
M ENU
3
St a r t
Ca n c e l
4
5 T e mp
6 T i me
9 4 . 0
5 5 . 0
4 0 . 0
0 : 3 0
0 : 3 0
0 : 3 0
Results Displayed
0
1
0
2
0 0
3 4
0
5
0
6
0
7
0
8
0
9
1
0
1
1
of
1
2
1
3
1
4
1
5
1
6
1
8
1
9
2
0
2
1
2
2
2
3
2
4
2
5
2
6
2
7
1
Re s u l t
3
He a t
3 . 1
o
C/ s
Co o l
2 . 1
o
C/ s
Ov e r
0 . 1
o
C
Un d e r 0 . 4
o
C
St a r t e d
4
a t
Fi ni s e d
5
Le ng t h
Ra t e
1
7
a t
of
2
8
2
9
3
1
3
2
3
3
Te s t
3
4
3
5
3
6
3
7
3 3
8 9
4
0
M ENU
OK
1 5 : 4 7 : 2 1
0 3 / 01 / 1 5
1 5 : 5 0 : 5 2
0 3 / 01 / 1 5
Ru n
3
0
0 0 : 0 3 : 3 1
R e s u l t : N o r ma l
6
Reference Values: Max. Heating Rate >3.0°C/second
Max. cooling rate >2.0°C/second
(2) Cycle Test Program execute screen
Program details: 94°C for 30 seconds, 55°C for 30 seconds
and 72°C for 30 seconds.
0 0 0 0 0
1 2 3 4 5
1 Ra t e
0 0 0 0 1 1 1 1 1 1 1
6 7 8 9 0 1 2 3 4 5 6
1 1 1 2 2 2 2 2 2 2 2 2 2 3 3 3 3 3 3 3 3 3 3 4
7 8 9 0 1 2 3 4 5 6 7 8 9 0 1 2 3 4 5 6 7 8 9 0
R e ma i n i n g
Te s t
2
0 : 0 2
M ENU
3
St a r t
Ca n c e l
4
5 T e mp
2 5 . 0
9 4 . 0
4 0 . 0
6 T i me
0 : 3 0
0 : 3 0
0 : 3 0
Results display
0
1
0
2
0 0
3 4
0
5
0
6
0
7
1
Re s u l t
3
He a t
Ov e r
4
5
0
9
1
0
o
0 . 2
o
St a r t e d
Fi ni s e d
1
1
of
3 . 0
Le ng t h
6
0
8
1
3
1
4
1
5
1
6
2
4
2
5
2 . 1
o
C/ s
Un d e r 0 . 4
o
Cy c l e
C/ s
C
a t
a t
of
1
2
1
7
1
8
1
9
2
0
2
1
2
2
2
3
2
6
2
7
2
8
2
9
Te s t
Co o l
C
0 3 / 01 / 1 5
1 5 : 4 2 : 3 9
0 3 / 01 / 1 5
R e s u l t : N o r ma l
TD3010JE_v3.00D
102
3
1
3
2
3
3
3
4
3
5
3
6
3
7
M ENU
1 5 : 3 9 : 0 9
Ru n
3
0
0 0 : 0 3 : 3 0
OK
3 3
8 9
4
0
TP600/TP650 Operation Manual
Reference Value: overshoot < 0.5°C
undershoot < 0.5 °C
cycle time < 4 minutes
(3) Up-Down Test program executes cream
Program Details: 98 °C for 1 minute and 4 °C for 1 minute.
0
1
0
2
0
3
1 Up
0 0
4 5
0
6
0
7
0
8
0
9
Do wn
1
0
1
1
1
2
1
3
1
4
1
5
1
6
1
7
1
8
1
9
2
0
2
1
2
2
2
3
2
4
2
5
2
6
2
7
2
8
2
9
3
0
3
1
3
2
3
3
3
4
3
5
R e ma i n i n g
Te s t
2
3
6
3
7
3
8
3
9
4
0
0 : 0 2
M ENU
3
St a r t
Ca n c e l
4
5 T e mp
6 T i me
9 8 . 0
4 . 0
1 : 0 0
1 : 0 0
Results displayed
0
1
0
2
0 0
3 4
0
5
0
6
0
7
0
8
0
9
1
0
1
1
1
2
1
3
1
4
of
Up
1
5
1
6
1
7
1
8
1
9
2
1
2
2
2
3
2
4
2
5
2
6
2
7
1
3
He a t
3 . 2
o
C/ s
Coo l
1 . 4
o
C/ s
Ov e r
0 . 2
o
C
Und e r 0 . 3
o
C
St a r t e d
4
a t
Fi ni s e d
5
Le ng t h
a t
of
Do wn
2
0
Re s u l t
2
8
2
9
3
0
3
2
3
3
3
4
3
5
3
6
3
7
3 3
8 9
4
0
M ENU
OK
1 5 : 5 9 : 2 3
0 3 / 01 / 1 5
1 6 : 0 5 : 4 9
0 3 / 01 / 1 5
Ru n
3
1
Te s t
0 0 : 0 6 : 2 6
R e s u l t : N o r ma l
6
Reference Value: cycle finish time <10 min
(4) Gradient program test (model TP600 only)
Program Details: 94 °C for 30 seconds, G50/G60 for 5 min and 72 °C for 1 minute.
0
1
0
2
0
3
0
4
0
5
1 Gr a d.
0
6
0
7
0
8
0
9
1
0
1
1
1
2
1
3
1
4
1
5
1
6
1
7
1
8
1
9
2
0
2
1
2
2
2
3
2
4
2
5
2
6
2
7
2
8
2
9
3
0
3
1
3
2
3
3
3
4
R e ma i n i n g
T e s t
2
3
5
3
6
3
7
3
8
3
9
4
0
0 : 0 7
M ENU
3
St a r t
T e mp
4 Ex
5 T i me
6 Ex
9 4 . 0
G5 0 . 0
7 2 . 0
0 . 0
G6 0 . 0
0 . 0
0 : 3 0
5 : 0 0
1 : 0 0
0 : 0 0
0 : 0 0
0 : 0 0
Ca n c e l
Gradient items are displayed in the menu during gradient control, enabling monitoring
of the temperatures in each row.
After the timer has counted for 2 or 3 min during the gradient temperature program,
selecting OK for Grad from the pop-up menu displays the following monitoring screen.
(This will not be saved.)
3
7
1
Gr a d i e n t
T e mp e r a t u r e
M ENU
2
OK
3
( 0 1 ) 4 9 . 8
( 0 2 ) 5 0 . 5
4
( 0 4 ) 5 1 . 8
( 0 5 ) 5 3 . 0
( 0 3 ) 5 0 . 9
( 0 6 ) 5 4 . 2
5
( 0 7 ) 5 5 . 4
( 0 8 ) 5 6 . 6
( 0 9 ) 5 7 . 9
( 1 0 ) 5 8 . 9
( 1 1 ) 5 9 . 4
( 1 2 ) 6 0 . 1
6
Results are displayed at the center of the sample block.
TD3010JE_v3.00D
103
3
8
3
9
4
0
TP600/TP650 Operation Manual
0
1
0
2
0 0
3 4
0
5
0
6
0
7
0
8
0
9
1
0
1
Re s u l t
3
He a t
3 . 1
o
Ov e r
0 . 2
o
4
5
St a r t e d
Fi ni s e d
Le ng t h
6
1
1
of
1
3
1
4
1
5
1
6
Gr a d.
1
7
1
8
1
9
2
0
2
1
2
2
2
3
2
4
2
5
C/ s
2
7
2
8
2
9
2 . 0
o
C
Un d e r 0 . 5
o
3
1
3
2
3
3
3
4
3
5
3
6
3
7
3 3
8 9
4
0
OK
C
1 6 : 2 1 :4 2
0 3 / 01 / 1 5
1 6 : 3 1 :0 5
0 3 / 01 / 1 5
Ru n
3
0
M ENU
Co o l
a t
2
6
T e s t
C/ s
a t
of
1
2
0 0 : 0 9 : 2 3
R e s u l t : N o r ma l
Reference value: < +/- 1 °C by 2 to 3 minutes after Timer begins.
Select OK from pop-up screen and press ENTER key to return to the main system
screen.
TD3010JE_v3.00D
104
TP600/TP650 Operation Manual
5. Delete User Data Function
This function deletes a username, a user program and all programs in a Use folder.
Users can now delete all programs in the User folder with one stroke, instead of having to go to
the folder and delete each program separately. Note that the User folder (user name) is not
deleted. A User name can be deleted using the “Delete User Name” function.
Procedure
1. Go to the User folder to be deleted.
① From the main screen, go to MENU, select User and press Enter.
② Select the user name to be deleted, and then go to MENU, choose OK and
press Enter to move to the desired folder. The User folder in this example is
named <Common>.
2.
Use ▼ to select Tools from MENU and press Enter to display the Select Tools
screen.
0
1
0
2
0
3
0
4
0
5
0
6
0
7
0 0
8 9
1
0
1
1
1
2
1
3
1
4
1
5
1
6
1
7
1
8
1
9
2
0
2
1
2
2
2
3
2
4
2
5
2
6
2
7
2
8
2
9
3
0
3
1
3
2
3
3
1
3
5
3
6
3
7
3
8
3
9
4
0
M ENU
T a Ka Ra
2
T h e r ma l
T P6 0 0
3
Cy c l e r
Di c e
Ru n
Ve r . X. XX
Ne w
4
Us e r
5
0 3 / 0 1 / 1 5
6
3.
3
4
Edi t
( C o mmo n )
Tool s
1 2 : 5 7 : 3 1
2 5 . 0
o
Us e r
C
In Select Tools, select Delete User Data, choose OK from MENU and press Enter to
move to the Delete User Data screen.
0
1
0
2
0 0
3 4
0
5
0
6
0
7
0
8
0
9
1
0
1
1
1
2
1
3
1
4
1
5
1
6
1
7
1
8
1
9
2
0
2
1
2
2
2
3
2
4
2
5
2
6
2
7
2
8
2
9
3
0
3
1
3
2
3
3
Tool s
3
4
3
5
1
Se l e c t
3
Hi s t o r y
OK
Se t t i ng
Sv c
4
PC
5
D i a gnos i s
6
De l e t e
3
6
3
7
3 3
8 9
4
0
M ENU
C o mmu n i c a t i o n
Ca n c e l
Re s e r v e d
4.
Us e r
Da t a
Select the desired function from the Delete User Data screen.
0
1
1
0
2
0 0
3 4
0
5
0
6
0
7
0
8
De l e t e
0
9
1
0
1
1
1
2
1
3
Us e r
1
4
1
5
1
6
1
7
1
8
1
9
2
0
2
1
2
2
Da t a
5
2
4
2
5
2
6
2
7
2
8
2
9
3
0
3
1
3
2
3
3
3
4
3
5
3
6
3
7
3 3
8 9
4
0
M ENU
3
4
2
3
OK
De l e a
t eUser
U sProgram
e r
Pr ogr
Delete
De l e a
t eUse
U Name
s e r
N a me
Delete
a m
Ca n c e l
Delete All Program in User
6
Delete User Data provides the following functions.
1) Delete User Program
Deletes an individual program in the user folder.
2) Delete User Name
Deletes a user name.
Note that the “Programs exist!” message appears when there are programs
remaining in the user folder. All programs in the user folder must be deleted
before deleting a user name.
TD3010JE_v3.00D
105
TP600/TP650 Operation Manual
3) Delete All Program in User
Deletes all programs in the user folder without deleting the user folder (user name)
itself.
Use the “Delete User Name” function to delete a user name.
5-1) Using “Delete User Program”
With folder programs displayed, use ▼▲ to select desired program, then go to
MENU, choose Delete and press Enter.
0
1
0
2
0 0
3 4
0
5
0
6
0
7
0
8
0
9
1
0
1
1
Pr o gr a m
1
1
2
1
3
1
4
1
5
1
6
1
7
1
8
1
9
2
0
N a me
2 ▲ M y A p p 6 7 8 90 1 2 4 5 6
3
Cy c l e
4
T a Ka Ra
5
Tou c h
2
1
2
2
2
3
2
4
2
5
2
6
2
7
2
8
2
9
3
0
3
1
3
2
3
3
3
4
St or e d
3
7
3 3
8 9
4
0
De l e t e
0 3 / 0 4 / 0 1
Ta q
3
6
M ENU
0 3 / 0 4 / 0 1
Se g
3
5
Ca n c e l
0 5 / 0 4 / 0 1
Do wn
PCR
0 3 / 0 4 / 0 1
6
When the following confirmation message appears, select OK from MENU and
press Enter.
0
1
0
2
0 0
3 4
0
5
0
6
0
7
0
8
0
9
1
0
1
1
1
2
1
3
1
4
1
5
1
6
1
7
1
8
1
9
2
0
2
1
2
2
2
3
2
4
2
5
2
6
2
7
2
8
2
9
3
0
3
1
3
2
3
3
3
4
C o n f i r ma t i o n
1
3
5
3
6
3
7
3
8
3
9
4
0
M ENU
3
OK
Ar e
y ou
s ur e
t o
de l e t e
Pr o gr a m
N a me
T a Ka Ra
?
Ca n c e l
4
5
Ta q
6
5-2) Using “Delete User Name”
When the confirmation message appears, select OK from MENU and press Enter.
0
1
0
2
0
3
0
4
0
5
0
6
0
7
0
8
0
9
1
0
1
1
1
2
1
3
1
4
1
5
1
6
1
7
1
8
1
9
2
0
2
1
2
2
2
3
2
4
2
5
2
6
2
7
2
8
2
9
3
0
3
1
3
2
3
3
3
4
C o n f i r ma t i o n
1
3
5
3
6
3
7
3
8
3
9
4
0
M ENU
3
OK
Ar e
y ou
s ur e
t o
de l e t e
?
Ca n c e l
4
Us e r
5
N a me
I c hi r o
6
<NOTE>
The “Programs are exist! ” message appears when programs are still
present in the username file and the delete operation is terminated.
Making sure to delete the programs first.
5-3) Using “Delete All Program in User”
0
1
1
0
2
0
3
0
4
0
5
0
6
0
7
0
8
0
9
1
0
1
1
1
2
1
3
1
4
1
5
1
6
1
7
1
8
1
9
2
0
2
1
2
2
2
3
2
4
2
5
2
6
C o n f i r ma t i o n
2
7
2
8
2
9
3
0
3
1
3
2
3
3
3
4
3
5
3
6
3
7
3
8
3
9
4
0
M ENU
3
OK
A r eyou
y o
u stoudelete?
r e t o
Are
sure
de l e t e
?
Ca n c e l
4
5
U s Program
e r
N a min
e (Common)
I c hi r o
All
6
Selecting OK from MENU and pressing Enter displays the flashing “Seek and
Erasing” message. Deletion is complete in about 15 seconds and the main
screen is displayed.
TD3010JE_v3.00D
106
TP600/TP650 Operation Manual
Chapter 6: Troubleshooting
Any errors that occur during system operation are logged in the system History.
The “See History message” is displayed under Result in the system-closing screen.
(The “See History message” is also displayed when the system is paused.)
Error messages are displayed on the main system screen when errors are detected during
standby mode.
1.Events and Error Code Table
Event #
Message
Description
0
Started at
Indicates program start time.
1
Finished at
Indicates program finish time.
2
Stopped at
Indicates time program stopped by user.
3
Paused at
Indicates time of system pause.
4
Resumed at
Indicates time system operation resumed.
5
Power failed at
Indicates time of system power failure.
6
Recovered at
Indicates time of recovery from system power failure.
Errors #
7
Heat rate
Indicates abnormal heating rate.
8
Cool rate
Indicates abnormal cooling rate.
9
Over shoot
Indicates overshooting error.
10
Under shoot
Indicates undershooting error.
11
Center Sensor Open
Indicates disconnected center sensor.
12
Center Sensor Short
Indicates short in center sensor.
13
Left Sensor Open
Indicates disconnected left sensor.
14
Left Sensor Short
Indicates short in left sensor.
15
Right Sensor Open
Indicates disconnected right sensor.
16
Right Sensor Short
Indicates short in right sensor.
17
Lid Sensor Open
Indicates disconnected Lid sensor.
18
Lid Sensor Short
Indicates short in Lid sensor.
19
HS Sensor Open
Indicates disconnected HS sensor.
20
HS Sensor Short
Indicates short in HS sensor.
21
Fan Motor Open
Indicates disconnected fan motor.
22
Fan Motor Short
Indicates short in fan motor.
23
Lid control
Indicates lid temperature control error.
24
Block control
Indicates block temperature control error.
** Note that only one error is displayed at a time, even if several occur simultaneously.
TD3010JE_v3.00D
107
TP600/TP650 Operation Manual
2.Troubleshooting
Symptom
System fails to operate and
display is off even when
power is applied.
Cause
Action
Power is not coming to the
system.
* Power supply cable is not
properly plugged into the socket.
* Power is not coming to the
socket.
* Check power cable
connections on system and
power outlet sides.
* Check installation facility
power supply.
Power switch stays off even
when turned on.
Fault in internal system circuitry.
(Note that power switch includes
an over current breaker.)
Immediately disconnect the
power cable and have the
system serviced.
Heating and cooling rates
are abnormally low.
* Operating environment
temperature may be unsuitable.
Operate the system in a
temperature environment of 2
to 23˚C and run self-diagnosis
tests.
If outside rated performance,
have the system serviced.
* Electronic cooling element may
be damaged.
Cycle time is too long.
* Operating environment
temperature may be unsuitable.
* Electronic cooling element may
be damaged.
* Faulty temperature sensor.
Operate the system in a
temperature environment of 2
to 23˚C and run self-diagnosis
tests.
If outside rated performance,
have the system serviced.
The “See operation manual”
message is displayed as the
self-diagnosis test result.
This is due to running the test
before lid-heating time is up.
Therefore, the time required to
complete the test exceeded the
allowable time.
Allow system to warm up for at
least 10 minutes, then rerun
the test.
The normal key entry sound
is absent.
* Beeper setting may currently be
“no”.
* Faulty keys or keypad wiring.
Go to Default Setting in Tool
Menu and check the key entry
sound setting.
The display goes off.
* LCD sleep setting may be set to
“30 min”.
* Faulty backlight.
* Faulty LCD.
Go to Default Setting in Tool
Menu and check LCD sleep
setting.
Display is too dark (too light). Backlight brightness not adjusted
properly.
Go to rear of display and
adjust Display Brightness
Knob.
Lid will not close.
Foreign matter, between lid
heater and sample block.
* Faulty lid lock mechanism.
Remove the foreign object or
matter.
Error number appears.
Refer to list of error codes.
Confirm the nature of the error
and request system servicing
as required.
TD3010JE_v3.00D
108
TP600/TP650 Operation Manual
Power failure
Operation will be resumed from the stopped state and a program will be ended.
When a heated lid becomes by power failure below in a predetermined temperature,
resume operation after warming a heated lid to an appropriate temperature
When you operate in your absence at night and an experiment is completed,
Please check the following method whether abnormalities have occurred.
1. Operation End Screen Display
Finished
AB C T e s t
U s e r : <C o m m o n>
Started at
09:47:12 05/01/20
Finished at
09:54:32 05/01/20
Length of Run
00:07:20
O v e r 0 . 0 ºC
U n d e r 0 . 2 ºC
Result : Power failed
MENU
OK
OK
Power Failed: It is shown during operation that there was a power failure.
At the time of a normal end: It is stopped when Normal and operation are stopped on
the way,
2. History Display (/MENU/Tools => History: See page of 96)
History
Three events of total six events.
3/6
U s e r : <C o m m o n>
Program:ABC test
Mode:1
Thin
5 0 μl
Started at
09:47:12
Power Failed
09:50:34
Recovered at
09:50:37
History
6/6
Power Failed
Recovered at
Stopped at
05/01/20
05/01/20
05/01/20
The first time of stop.
The first time of restart.
Last events of total six events.
10:25:10
10:28:32
11:47:12
05/01/20
05/01/20
05/01/20
The second time of power
stopped.
The second time of power
recovered.
When the electric current is cut off two or more times, and others have an error, it
indicates by a history at the order of time. (A maximum of 40 events)
【Attention】 If a program is newly performed, History at the time of the past operation
will be eliminated.
【Note】 Please refer to the page 107 of an Operation manual about 「Events and Error
Code Table」.
TD3010JE_v3.00D
109
TP600/TP650 Operation Manual
Chapter 7: Specifications
TaKaRa PCR Thermal Cycler DiceTM
TP600 Gradient model
TP650 Standard model
Operating environment
Ambient temperature: 15 ºC to 30 ºC
Humidity: 20 to 80%RH
Temperature accuracy (*)
+/- 0.5ºC (30.0 ºC to 99.9 ºC)
+/- 2.0ºC (4.0 ºC to 15.0 ºC)
Temperature uniformity (*)
+/- 0.5º (30.0 ºC to 99.9 ºC)
Temperature setting range
4.0 ºC to 99.9 ºC
1 second to 99minites 59seconds, ∞ (Input “9999”)
Time setting range
Display/entry panel unit angle
4 positions from perpendicular to 70 ºC
Tubes and plates
0.2 mL X 96 tubes
96-well micro-plate: (12 X 8 rows)
PCR reaction volume setting
5 micro liter to 150 micro liter
Program capacity
User-names: max. 22 (excluding “Common” and “TaKaRa”)
Number of programs: max. 200
Lid temperature
Approx. 110 ºC for the 20.0 ºC to 99.9 ºC range
Approx. 40 ºC for the 4.0 ºC to 19.9 ºC range
Added functions
Gradient function (only TP600)
History function
Diagnosis function
PC communications (RS-232)
(PC transmission software not provided)
Gradient temperature setting
40.0 ºC to 75.0 ºC (temp. difference: 6.0 ºC to 20.0 ºC)
Safety devices
Power switch with 10A over-current breaker
Lid Heater temperature fuse
Thermal guard for reaction block heater plate
Power source
100 to 240V AC, 50/60 Hz, 490VA
Dimensions
260(W) x 345(D) x 260(H) mm
Weight
11.5 kg
Battery**
CR2032
Conformity standard
CAN/CSA-C22.2 No.10101.1-92, No.1010.1B-97
UL Std No.61010A-1
EN61000-6-3-1:2001, EN61000-6-1-1:2001, EN61010-1:2001
CE: The unit with CE mark complies with EC directives
89/336/EEC, 93/68/EEC and 73/23/EEC.
Product name
Model No.
RoHS
TP600 model S/N D-6051 and over, TP650 model S/N E-1301 and over
DIRECTIVE 2002/95/EC the restriction of the use of certain
hazardous substances in electrical and electronic equipment.
(*) Performance specifications apply when system is operated in the 20ºC to 23ºC temperature range.
(**) Please request exchange of a lithium battery from a service engineer.
TD3010JE_V3.00
110
TP600TP650 Operation Manual
Appendix 1
Confirm that the following items are included in the system package when delivered
Accessories list and packing
Standard Accessories
1.
Power cable
2.
Operation Manual (booklet)
3.
Warranty sheet (Included Operation manual)
4.
0.2 ml Hi-Tube Dome Cap (NJ200)
5.
0.2 ml Hi-8-Tube (NJ300)
6.
0.2 ml Hi-8-Dome Cap (NJ301)
Quantity
1
1
1
100
12
12
Operation manual
Tube set
Power cable
TaKaRa Supplied PCR tubes (Option)
Cat.#
NJ200
NJ201
NJ202
NJ203
NJ300
NJ301
NJ302
NJ111
NJ811
Product name
0.2 ml Hi-Tube Dome Cap
0.2 ml Hi-Tube Dome Cap Recovery
0.2 ml Hi-Tube Flat Cap
0.2 ml Hi-Tube Flat Cap Recovery
0.2 ml Hi-8-Tube
0.2 ml Hi-8-Dome Cap
0.2 ml Hi-8-Flat Cap
TaKaRa 96 well PCR Hi-Plate
TaKaRa PCR Hi-Caps (8chains)
TD3010JE_v3.00D
111
Size
1,000 tubes
1,000 tubes
1,000 tubes
1,000 tubes
125 strips
125 strips
125 strips
50plates(12×8 well/sheet)
8×120 tubes
TP600TP650 Operation Manual
List of Supplies(PCR Enzymes)
Cat.#
Product Name
RR001A
250 U
TM
TaKaRa Ex Taq
RR001B
RR001C
1,000 U(250 U×4)
(B×3)
3,000 U
RR01AM
250 U
RR01BM
(AM×4)
RR01CM
(AM×12)
RR006A
RR006B
(A×4)
TM
2+
TaKaRa Ex Taq (Mg
free Buffer)
TaKaRa Ex TaqTM Hot Start Version
TaKaRa LA Taq
TM
free Buffer)
125 U
plus Buffer)
250 U
RR02AG
TaKaRa LA TaqTM with GC Buffer
(Mg
TaKaRa LA TaqTM Hot Start Version
R001A
TaKaRa TaqTM
(B×3)
(AM×4)
R001CM
(AM×12)
R007A
(A×4)
RR070A
3,000 U
(A×4)
TM
2+
TaKaRa Taq (with Mg
free Buffer)
TaKaRa TaqTM Hot Start Version
SpeedSTARTM HS DNA Polymerase
Premix TaqTM(Ex TaqTM Version)(500μl×6)
R004A
Premix TaqTM(TaKaRa TaqTM Version)(500μl×6)
RR005A
PerfectShotTM Ex Taq(Loading dye mix)
9002A
(A×4)
R010A
R010B
(A×4)
R040A
1,000 U
3,000 U
RR003A
9002B
500 U
250 U
R001BM
RR070B
125 U
1,000 U(250 U×4)
R001AM
R007B
125 U
250 U
R001B
R001C
1,000 U
2+
(Mg
TaKaRa LA Taq
(A×4)
250 U
2+
RR002M
RR042A
1,000 U
3,000 U
TM
RR002A
RR042B
Size
250 U
1,000 U
250 U
1,000 U
120 PCR reaction
(50μl PCR)
120 PCR reaction
(50μl PCR)
25 μl×48 tubes
250 U
Taq Antibody
1,000 U
PrimeSTAR® HS DNA Polymerase
®
PrimeSTAR HS(Premix)
250 U
1,000 U
500μl×5
For more detailed information, refer to the Takara Bio general catalog or check for online catalog at our website
(http://www.takara-bio.com) or ( http://www.takara-bio.co.jp)
TD3010JE_v3.00D
112
TP600/TP650 Operation Manual
Appendix 2
Application 1
Gradient PCR Using the TaKaRa PCR Thermal Cycler DiceTM(TP600) System
8-kbp amplification performed in 2 or 3 steps using λ DNA template
(Reaction Mix)
0.25 μl
TaKaRa Ex Taq (5 units/μl)
10×Ex Taq buffer
5 μl
dNTP Mixture (2.5 mM each)
4 μl
Primer 1 (20 μM)
0.5 μl
Primer 2 (20 μM)
0.5 μl
λ DNA (0.5 ng/μl)
1 μl
38.75 μl
Sterilized water
50 μl
Total volume
(PCR Conditions)
・ 2 step
98ºC
10 sec
52 to 72ºC
5 min
30 cycles
(Gradient temperature of 20ºC)
Gradient
・ 3 step
98ºC
10 sec
45 to 65ºC
30 sec
(Gradient temperature: 20ºC)
72ºC
30 cycles
5 min
TD3010JE_v3.00D
113
TP600/TP650 Operation Manual
(Results)
・ Results for 2-step PCR
2 step PCR annealing / extension
temperature
M 52℃
72℃ M
(gradient)
M : λHind III marker
Higher
annealing/extension
temperatures
result
in
reduced
low-molecular
nonspecific amplification and increased amplification of the target amplicon.
・Results for 3-step PCR
M 45℃
3 step PCR annealing / extension
temperature
65℃ M
(gradient)
M : λHind III marker
Higher annealing/extension temperatures give reduced low-molecular nonspecific
amplification and increased amplification of the target amplicon.
TD3010JE_v3.00D
114
TP600/TP650 Operation Manual
Application 2
One-Step RT-PCR
The performance of TaKaRa PCR Thermal Cycler DiceTM (Cat.# TP600) was evaluated
through One Step RNA PCR by using TaKaRa One Step RNA PCR Kit (Cat.# RR024A) in
comparison with TaKaRa PCR Thermal Cycler SP. RT-PCR was performed in two
conditions :
- In the presence of AMV RTase XL in the reaction mixture.
- Without AMV RTase XL in the reaction mixture.
(Reaction Mix)
5 μl
10×One Step RNA PCR Buffer
10 μl
25mM MgCl2
dNTP Mixture (10 mM each)
5 μl
RNase inhibitor(40 U/µl)
1 μl
AMV RTase XL (5 U/µl) or DEPC treated water
1 μl
AMV Optimized Taq(5 U/µl)
1 μl
Control F-1primer 1 (20 µM)
1 μl
Control R-1primer 2 (20 µM)
1 μl
Positive Control RNA
1 μl
RNase Free H2O
24 μl
Total volume
50 μl
(PCR Conditions)
M
1
2
M
1
2
(Result)
50ºC 15 min(RT reaction)
94ºC
Lane.
2 min(inactivation of RTase)
1. RTase(-)
94ºC 30 sec
60ºC 30 sec
72ºC 1.5 min
Sample
30 cycles
2. RTase(+)
PCR
M. 100 bp DNA Ladder
(reaction)
Dice Lane 1:E6
Dice
SP
Dice Lane 2:E7
(TP600)
(TP400)
After the reaction was completed, a portion of reaction was applied for agarose gel
electrophoresis. In both cases using TaKaRa PCR Thermal Cycler DiceTM (Cat.# TP600)
and TaKaRa PCR Thermal Cycler SP, control reaction product 462 bp was detected only
under the existance of RTase (+).
TD3010JE_v3.00D
115
TP600/TP650 Operation Manual
Application 3
Comparison of 8-kbp λDNA Region Amplification for TaKaRa PCR Thermal Cycler
DiceTM vs SP
z Evaluation target: Compare differences in 8-kbp
λDNA region amplification
Dice (TP600)
between TaKaRa PCR Thermal
Cycler DiceTM (TP600) and
Row A
TaKaRa PCR Thermal Cycler
SP.
Row B
z Reaction tube: TaKaRa Micro PCR Tube (Cat.# 9047)
z Reaction mode: 2 (Selected at PCR Thermal Cycler
TM
Dice
Row C
reaction time)
Row D
z Reaction volume: 50 μl
<Reaction Mix>
<PCR Conditions>
1 x PCR Buffer
94ºC 30 seconds, 65ºC 10 min at
Row E
30 cycles
Row F
200μM dNTP mixture
Row G
10 μM each primer
1 ng λDNA
Row H
1.25 U TaKaRa Taq (Cat.# R001A)
up to 50 μl
All 96 wells were used for the Dice (TP600) reaction.
Random samples were placed 3 per row for the SP
reaction.
After the PCR reaction, 1% Agarose gel electrophoresis
was performed using 5 μl of reaction mixture.
<Result>
Dice (TP600) samples amplified nicely in all wells with
hardly any inconsistencies, indicating reactivity equal to
or better than the SP (TP400).
TD3010JE_v3.00D
116
SP (TP400)
TP600/TP650 Operation Manual
Application 4
Comparison of 35-kbp λDNA Region Amplification for TaKaRa PCR Thermal Cycler
DiceTM vs SP
z Evaluation target : Compare differences in 35-kbp λDNA region
amplification between TaKaRa PCR Thermal Cycler DiceTM
(TP600) and TaKaRa PCR Thermal Cycler SP. TaKaRa LA
Taq(Cat.# RR002A) was used for the reaction.
z Reaction tube:
TaKaRa Micro PCR Tube (Cat.# 9047)
z Reaction mode 2:
Selected at TaKaRa PCR Thermal Cycler DiceTM MODE 2.
z Reaction volume:
50 μl(with addition of 25 pg template/50 μl)
z PCR conditions:
94ºC 1 min, (98ºC 10 s, 68ºC 15 min) 30 cycles, 72ºC 10 min
z After reaction:
1% Agarose gel electrophoresis was performed using 5 μl of
reaction mixture.
TD3010JE_v3.00D
117
TP600/TP650 Operation Manual
TaKaRa SP
TaKaRa PCR Thermal Cycler Dice
A
B
M
1
2
3
4
5
6
7
8
9
1
2
3
4
5
6
7
8
9
10
1
2
3
4
5
6
7
8
9
1
1
2
2
3
3
M
1
10
4
4
5
5
6
6
7
7
8
8
9
9
10
10
6
7
12
M
1
6
7
12
M
1
6
11
12
M
1
12
7
M
12
M
12
M
G
H
11
M
E
F
11
12
C
D
11
G
H
M
12
E
F
M
11
C
D
M
10
A
B
6
7
12
A
B
Dice reaction locations
C
SP reaction locations
D
E
F
G
H
TD3010JE_v3.00D
118
TP600/TP650 Operation Manual
Appendix 3
(Please copy and use this page)
Servicing Request and Safety Check
Attention: Distributor of Takara Bio Inc.
Model: TP600 / TP650
Product Name: TaKaRa PCR Thermal Cycler DiceTM
Date of request:
Serial No
Requested by
Contacts: (Telephone, Email)
Name
Company/Institute name
Address
Details of request:
(Current status)
Customers are requested to provide the following information on the type of the function and any
safety considerations. Safety check covers all personnel involved in using the system, as well as
safety of the location in which the system was operated. If contaminated, the customer is requested
to decontaminate the system prior to servicing.
1. Material in use(
)
・Pathogenicity:《 □none, □possibly, □yes 》 ・Toxicity:《 □none, □possibly, □yes 》
・Radioactive substances:《 □ not used, □used:nuclide(
)》
2. System contamination status
□no contamination, □decontaminated、 □possibly contaminated
○ This is to confirm that the system is free of contamination.
○ This is to confirm that there is risk of contamination and that specific safety measures and
decontamination procedures were implemented.
Date (year/month/day):
Company/Institution
/
/
Witness by(signature)
! WARNING
This Safety Confirmation Form shall be presented as a statement of the safety of the
equipment to be serviced by customers requesting servicing and maintenance work. We
request your cooperation as it is designed to ensure the safety of all those who come into
contact with the system.
* Note that we may decline to perform servicing and maintenance work if we do not receive the
Safety Confirmation Form.
TD3010JE_v3.00D
119
保 証 書
Warranty Card
®
このたびは、TaKaRa PCR Thermal Cycler Dice ( Model TP600/TP650 ) をお買い上げ頂き有難うご
ざいます。お客様の正常なご使用状態のもとで万一故障した場合、本書記載内容に従い、故障個所の修理を
させて頂きます。
下記保証期間内に故障した場合には、本書ご提示の上、弊社もしくはお買い上げの販売代理店に本保証書
を添えてお申し込み下さい。
Thank you for purchasing the TaKaRa PCR Thermal Cycler DiceTM Model TP600/TP650.
In case of malfunctions that occur despite correct operation on the part of the customer, Takara Bio Inc.
shall repair the system in accordance with the conditions listed in this Warranty.
Customers may have their device repaired by presenting this Warranty to a Takara Bio Inc. sales agent
or at a Takara Bio Inc. service location within the period listed below.
保 証 期 間
Warranty Period
1 year
品 名 形 式
Product Name
TaKaRa PCR Thermal Cycler DiceTM ( Model TP600/TP650 )
製 造 番 号
Serial Number
購入年月日
Date of installed
ご住所 〒
Address & Postal code
所属名
Name of Company/Institute
お 客 様 名
Customer details
部署名
Department Name
TEL
FAX
ご芳名
Personal Name
E-mail
1 保証書期間内でも次のような場合には有料修理となります。
(a) 使用上の誤り、または改造や不当な修理による故障または損傷。
(b) お買い上げ後の据付場所の移動、落下、引越し、輸送等による故障または損傷
(c) 火災、地震、落雷、その他の天災地変、公害や異常電圧等による故障または損傷。
(d) 本書の提出がない場合。
(e) 本書にお買い上げ年月日、お客様の記入のない場合あるいは字句を書き換えられた場合。
(f) 故障の原因が本機以外にある場合で改善を要するとき。
(g) 故障の原因が消耗品類で交換が必要な場合。
2 本機器を指定外の機器と接続して使用した場合に、発生する事故については責任を負いません。
3 ご転居の場合は事前に弊社、もしくはお買い上げの販売代理店のご相談下さい。
4 本書は再発行いたしませんので紛失しないように大切に保管して下さい。
1 The following repairs shall be subject to a fee, even during the warranty period.
(a) Malfunctions resulting from incorrect operating procedures, customer repairs or renovations.
(b) Repairs resulting from moving the system to a different location on site, moving it to a new site, dropping or transporting the system.
(c) Malfunction or damage resulting from an act of God (including earthquakes or lightning), pollution or abnormally high
voltage input.
(d) In cases of failure to produce this warranty card.
(e) In cases where the customer has failed to fill in the date of purchase or has altered the information on the warranty card.
(f) In cases where the cause of the malfunction does not originate in the product itself and improvements are required.
(g) In cases where causes the malfunction originates in system supplies that need to be replaced.
2 Takara Bio Inc. shall not be responsible for malfunctions for accidents that occur when the product is connected and used with
equipment not recommended by the company.
3 Be sure to consult with Takara Bio Inc. or the place of purchase prior to moving the product.
4 Store this Warranty card in a safe location, as it cannot be reissued.
●この保証書は本書に明示した期間、条件のもとにおいて無償修理をお約束するものです。
保証期間経過後の修理等についてご不明の場合は、弊社もしくはお買い上げの販売代理店にお問い合わせください。
●この保証書に押印なき場合は無効となります。
* This Warranty covers repairs that shall be made at no cost to the customer for the period listed above.
For information on the cost of repairs after the Warranty period , please to consult with a Takara Bio Inc. branch or local sales agent.
* If there is no the TaKaRa's seal in this warranty card, this warranty is invalid.
タカラバイオ株式会社
営業部
TAKARA BIO INC.
〒520−2193
滋賀県大津市瀬田三丁目 4−1
Seta 3-4-1, Otsu, Shiga 520-2193, Japan
販売代理店
Sales Agent
ホームページ http://www.takara-bio.co.jp
東日本販売課
〒103-8232 東京都中央区日本橋2丁目15-10
TEL 03-3271-8553 FAX 03-3271-7282
西日本販売課
〒520-2193 滋賀県大津市瀬田3丁目4-1
TEL 077-543-7297 FAX 077-543-7293
機器販売課
〒525-0055 滋賀県草津市野路町2257
TEL 077-567-9261 FAX 077-565-6995
営業部
〒520-2193 滋賀県大津市瀬田3丁目4-1
TEL 077-543-7231 FAX 077-543-9254
SETA3-4-1, OTSU, SHIGA, 520-2193
URL: http://www.takara-bio.com
2009. 01. 3