1
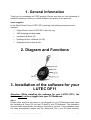
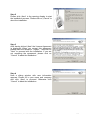
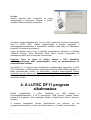
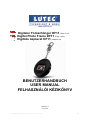
www.LUTEC.eu
Digitaler Fotoanhänger DF11 (Seite 2-12)
Digital Photo Frame DF11 (Page 13-23)
Digitális képkeret DF11 (Oldal 24-34)
BENUTZERHANDBUCH
USER MANUAL
FELHASZNÁLÓI KÉZIKÖNYV
VERSION 1.5
2007/10/25
LUTEC Manual DF11_06 11 2007 final 11/6/2007 8:53 AM
1/34
Benutzerhandbuch
Inhaltsverzeichnis
1. Allgemeines………………………………………………………………………………3
2. Gesamtansicht und Funktionen………………………………………………………3
3. Installation der Software für den LUTEC DF11…………………………………….3
4. Nutzung der Software für den LUTEC DF11…………...…………………………...6
5. Funktionen des LUTEC DF11………………………………………………………….8
6. Technische Spezifikationen..………………………………………………………...10
7. Wichtige Hinweise……………………………………………………………………..10
8. Konformitätserklärung…………………………………………………………..……12
9. Sonstiges……………………………………………………………………………..…12
© Alle Rechte vorbehalten.
Die in diesem Handbuch erwähnten Marken sind eingetragene Warenzeichen der jeweiligen Hersteller.
Dieses Handbuch darf ohne schriftliche Genehmigung des Urhebers in keiner Form vervielfältigt werden.
Alle in diesem Benutzerhandbuch genannten Marken sind Eigentum ihrer jeweiligen Besitzer.
LUTEC Manual DF11_06 11 2007 final 11/6/2007 8:53 AM
2/34
1. Allgemeines
Vielen Dank, dass Sie sich für ein LUTEC Produkt entschieden haben! Ganz sicher
werden Sie - wie viele Tausende zufriedener Kunden vor Ihnen - von der Qualität
unseres Produktes begeistert sein.
Lieferumfang
Im Lieferumfang des Digitalen Fotoanhängers LUTEC DF11 ist folgendes Zubehör:
enthalten:
Digitaler Fotoanhänger LUTEC DF11 mit Schlüsselanhänger
USB Lade- und Datenkabel
Installations- & Treiber-CD
Mehrsprachige Bedienungsanleitung (auf CD)
Mehrsprachiger Quick Start Guide
2. Gesamtansicht und Funktionen
3. Installation der Software für den
LUTEC DF11
Achtung: Wenn Sie die Software für den LUTEC DF11 installieren,
darf das Gerät nicht an einen PC/Notebook angeschlossen sein.
Schritt 1
Vergewissern Sie sich, dass das Gerät nicht mit Ihrem PC verbunden ist und legen
Sie die Installations- & Treiber CD in das CD-ROM Laufwerk Ihres PCs/Laptops ein.
Der Installations-Prozess startet über die Autorun-Funktion automatisch. Sollte die
Installation nicht automatisch beginnen, starten Sie bitte die Datei „Setup.exe“ in
dem CD-ROM Verzeichnis.
LUTEC Manual DF11_06 11 2007 final 11/6/2007 8:53 AM
3/34
Schritt 2
Im Eröffnungsbildschirm klicken Sie bitte auf
„Next“, um den Installations-Prozess zu
beginnen. Klicken Sie auf „Cancel“, um den
Installationsvorgang abzubrechen.
Schritt 3
Nachdem Sie auf „Next“ geklickt haben,
erscheinen
die
Lizenzbedingungen
in
englischer Sprache. Wenn Sie mit den
Bedingungen einverstanden sind, markieren
Sie bitte den Satz „I agree…“ und klicken Sie
auf „Next“ um mit der Installation
fortzufahren. Sollten Sie damit nicht
einverstanden sein, klicken Sie „Cancel“, um
die Installation abzubrechen.
Schritt 4
Es erscheint ein Fenster mit den
Nutzerinformationen. Tragen Sie Ihren
Namen bzw. Ihre Firma ein und klicken Sie
auf „Next“ um fortzufahren. Andernfalls
klicken Sie auf „Cancel“, um die Installation
abzubrechen.
LUTEC Manual DF11_06 11 2007 final 11/6/2007 8:53 AM
4/34
Schritt 5
Im folgenden Fenster können Sie den
Installationsort für die Software festlegen.
Drücken
Sie
„Change“
um
den
Installationsort Ihrer Wahl festzulegen.
Drücken Sie anschließen wieder „Next“ um
fortzufahren,
oder
„Cancel“
um
die
Installation abzubrechen.
Schritt 6
In dem nun erscheinenden Fenster, haben
Sie die Möglichkeit, den Ordner, in dem die
Icons erstellt werden, nach Ihren Wünschen
umzubenennen. Klicken Sie wieder auf
„Next“ um fortzufahren, oder auf „Cancel“ um
die Installation abzubrechen.
Schritt 7
Im folgenden Fenster erscheinen alle von
Ihnen soeben gewählten Einstellungen.
Sollten Sie eine Einstellung ändern wollen,
klicken Sie auf „Back“ um zu den vorherigen
Fenstern zu kommen. Klicken Sie auf „Next“,
um die Installation zu beginnen.
LUTEC Manual DF11_06 11 2007 final 11/6/2007 8:53 AM
5/34
Schritt 8
Nach erfolgreichem Abschluss der Installation,
erscheint der letzte Dialogbildschirm, in dem
Sie durch einen Klick auf „Finish“, die
Installation abschließen.
Nachdem die Software installiert ist und der interne Akku völlig aufgeladen ist,
können Sie Ihren LUTEC DF11 benutzen. Schließen Sie hierzu den Digitalen
Fotoanhänger mit dem beigefügten USB Daten- und Ladekabel an Ihren
PC/Notebook an und starten Sie die Software.
Bitte beachten Sie, dass das Gerät automatisch in den zuvor gewählten Foto- bzw.
Slide Show Modus umschaltet, sobald Sie 10 Sekunden keine Eingabe gemacht
haben.
Achtung: Ziehen Sie den DF11 niemals während des Downloadvorgangs aus
dem USB-Port Ihres PC/Laptops, da es sonst zum Absturz des Systems und
Datenverlust kommen kann.
Zum Aufladen des 3.7V eingebauten Lithium Ionen Akkus, schließen Sie Ihren
LUTEC DF11 einfach mit dem USB-Kabel an den USB Anschluss Ihres
PC/Notebook an. Der Ladevorgang startet automatisch. Um eine optimale
Lebensdauer des Akkus zu erreichen, sollte beim ersten Laden das Gerät 10
Stunden angeschlossen bleiben. Die reguläre Ladezeit beträgt 2,5 Stunden. Wir
empfehlen Ihnen, das Gerät nicht länger als 3 Stunden laden zu lassen.
4. Nutzung der Software für den
LUTEC DF11
Nachdem Sie den DF11 mit dem USB-Kabel an Ihren PC/Laptop angeschlossen
haben, erscheint auf dem Bildschirm des DF11 die Anzeige „USB Connect“. Starten
Sie nun die Software-Anwendung durch einen Doppelklick auf das Symbol „Digital
Photo Frame“ auf Ihrem Desktop.
Die Benutzeroberfläche der Software ist übersichtlich aufgebaut und besteht aus
sechs Bereichen, die in der folgenden Abbildung mit den Buchstaben A bis F
gekennzeichnet sind.
LUTEC Manual DF11_06 11 2007 final 11/6/2007 8:53 AM
6/34
A
B
C
D
E
F
Menuführung
Auswahl und Anzeige des Quellordners für die zu übertragenden Dateien
Vorschaufenster für die in D und E ausgewählten Bilder
Zeigt die im Ordner unter B vorhandenen Bilder, die über die Pfeilsymbole in
den Bereich E verschoben werden können
Zeigt die Bilder an, die auf den DF 11 verschoben werden können
Darstellung des unter B ausgewählten Quellpfades. Die Zahlen auf der
rechten Seite stellen Folgendes dar: Anzahl der Bilder im Bereich E/Anzahl
der Bilder im Speicher des DF11/Anzahl der Bilder, die noch auf dem DF11
gespeichert werden können.
Bitte beachten Sie: Um ausgewählte Bilder in den Bereich E zu übertragen bzw.
wieder zu verschieben, nutzen Sie bitte die Pfeilsymbole links neben dem Bereich E.
Erklärung der Menubefehle
Append/
Hinzufügen
Überträgt die Bilder im Bereich E in den Speicher des DF11;
Nach Fertigstellung erscheint die Meldung „Completed“, die Sie
mit „OK“ bestätigen müssen.
Overlay/
Überschreiben
Überschreibt die im Speicher des DF11 vorhandenen Bilder mit
den Bildern im Bereich E; Nach Fertigstellung erscheint die
Meldung „Completed“, die Sie mit „OK“ bestätigen müssen.
Save/
Speichert die im Bereich E befindlichen Bildern im Quellordner,
LUTEC Manual DF11_06 11 2007 final 11/6/2007 8:53 AM
7/34
Speichern
der unter F angezeigt wird; Nach Fertigstellung erscheint die
Meldung „Completed“, die Sie mit „OK“ bestätigen müssen.
Edit/
Bearbeiten
Ermöglicht, die Bearbeitung (Drehen, Zoomen) des von Ihnen
angewählten Bildes; Nach Fertigstellung erscheint die
Meldung „Completed“, die Sie mit „OK“ bestätigen müssen.
Lantern Slide/
Dia-Show
Startet eine Dia-Show mit den Bildern, die sich in dem von Ihnen
angewählten Ordner auf Ihrem PC/Laptop befinden
About/
Über
Zeigt Informationen über den DF11 und den Hersteller an
Achtung: Ziehen Sie den DF11 niemals während des Downloadvorgangs aus
dem USB-Port Ihres PC/Laptops, da es sonst zum Absturz des Systems und
Datenverlust kommen kann.
5. Funktionen des LUTEC DF11
1. Wiederaufladen des eingebauten 3.7V Akkus
Achtung: Vor dem ersten Gebrauch des LUTEC DF11, sollte das Gerät 10 Stunden
geladen werden. Die reguläre Ladezeit beträgt ansonsten 2,5 Stunden.
Um die Lebensdauer des Akkus nicht zu beeinträchtigen, raten wir Ihnen,
das Gerät nicht länger als 3 Stunden laden zu lassen. Wird das Gerät
längere Zeit nicht genutzt, kann sich die der Ladestatus des Akkus verschlechtern.
Ihr DF11 verfügt über einen eingebauten 3.7V Lithium Ionen Akku, den Sie mit Hilfe
des beigefügten USB Daten- und Ladekabels einfach wieder aufladen können.
Sobald Sie das Gerät mit dem USB-Kabel an einen PC/Notebook angeschlossen
haben, erscheint der Hinweis „USB Connect“ auf dem Display. Ihr Digitaler
Fotoanhänger wird nun automatisch geladen.
2. Ein-/Ausschalten
Drücken Sie den „Menu/Power Key“ für 2 Sekunden, um den DF 11 einzuschalten.
Drücken Sie den „Menu/Power Key“ ebenfalls für 2 Sekunden, um den DF11 wieder
auszuschalten.
3. Bilder anzeigen
Um die gespeichert Bilder zu sehen, drücken Sie die Tasten „Up Key“ und „Down
Key“. So können Sie zwischen den gespeicherten Bildern hin- und herschalten.
4. Uhr-Modus
Wenn Sie den „Down Key“ für 2 Sekunden drücken, schaltet der DF11 auf den UhrModus um. Es erscheint das Datum mit der aktuellen Uhrzeit. Drücken Sie den
„Down Key“ erneut für 2 Sekunden, um wieder in den Bilder-Modus zu wechseln.
Achtung: Wie Sie die Uhrzeit und das Datum ändern können, erfahren Sie unter
Punkt 11.
LUTEC Manual DF11_06 11 2007 final 11/6/2007 8:53 AM
8/34
5. Slide Show Einstellungen
Drücken Sie auf die „Menu/Power Key“ Taste und wählen Sie mit den „Up Key“
„Down Key“ Tasten den Punkt „Slide Time“ und bestätigen Sie die Wahl mit der
„Menu/Power Key“ Taste. Nun können Sie mit den beiden Pfeiltasten die
Darstellungslänge der einzelnen Bilder im Slide Show Modus bestimmen. Bei 0
Sekunden wird der Modus ausgeschaltet. Sie können zwischen einer Zeitspanne von
1 -60 Sekunden wählen. Bestätigen Sie Ihre Auswahl bitte mit der „Menu/Power Key“
Taste.
6. Automatisches Abschalten
Drücken Sie die „Menu/Power Key“ Taste und wählen Sie mit den Pfeiltasten den
Punkt „Sleep Time“ und bestätigen Sie die Wahl mit der „Menu/Power Key“ Taste..
Hier können Sie eine Zeit festlegen, nach der sich der DF11 automatisch abschaltet.
Bei 0 Minuten wird der Modus ausgeschaltet. Sie können zwischen einer Zeitspanne
von 1-60 Minuten wählen. Bestätigen Sie Ihre Auswahl bitte mit der „Menu/Power
Key“ Taste.
7. Bild löschen
Drücken Sie die „Menu/Power Key“ Taste und wählen Sie mit den Pfeiltasten den
Punkt „Delete One“ und bestätigen Sie die Wahl mit der „Menu/Power Key“ Taste..
Mit den Pfeiltasten können Sie nun das Bild auswählen, dass gelöscht werden soll.
Durch das Drücken der „Menu/Power Key“ Taste wird das Bild gelöscht.
Achtung: Es erfolgt keine weitere Bestätigungsabfrage, ob das Bild gelöscht werden
soll. Drücken Sie die „Menu/Power Key“ Taste nur, wenn Sie sich absolut sicher sind.
8. Nummer des Bildes an-/ausschalten
Die Anzeige, der Nummer des Bildes ist voreingestellt. Um die Anzeige
auszublenden, drücken Sie die „Menu/Power Key“ Taste und wählen Sie mit den
Pfeiltasten den Punkt „Function“ und bestätigen Sie die Wahl mit der „Menu/Power
Key“ Taste. Hier können Sie nun bei dem Punkt „Show Num“ entscheiden, ob bei der
Darstellung der Bilder die Gesamtzahl und die Nummer des gerade angezeigten
Fotos angezeigt werden soll. Mit Drücken der „Menu/Power Key Taste“ schalten Sie
die Funktion ein bzw. aus.
9. Kontrast des Bildes ändern
Drücken Sie die „Menu/Power Key“ Taste und wählen Sie mit den Pfeiltasten den
Punkt „Function“ und bestätigen Sie die Wahl mit der „Menu/Power Key“ Taste.
Gehen Sie mit den Pfeiltasten auf den Punkt „Contrast“ und bestätigen Sie Ihre Wahl
mit der „Menu/Power Key“ Taste. Wählen Sie nun auf einer Skala von 0 (dunkel) – 20
(hell), wie stark der Kontrast des Bildes sein soll und bestätigen Sie Ihre Auswahl mit
der „Menu/Power Key“ Taste.
10. Alle Bilder löschen
Drücken Sie die „Menu/Power Key“ Taste und wählen Sie mit den Pfeiltasten den
Punkt „Function“ und bestätigen Sie die Wahl mit der „Menu/Power Key“ Taste.
Gehen Sie mit den Pfeiltasten auf den Punkt „Delete All“ und bestätigen Sie Ihre
Auswahl mit der „Menu/Power Key“ Taste. Die Bestätigungsabfrage „Delete?“
erscheint. Bestätigen Sie diese mit der „Menu/Power Key“ Taste, um alle Fotos aus
dem Speicher zu löschen. Sollten Sie 10 Sekunden lang keine Taste drücken,
verschwindet die Anzeige automatisch und kein Bild wird gelöscht.
LUTEC Manual DF11_06 11 2007 final 11/6/2007 8:53 AM
9/34
11. Datum und Uhrzeit einstellen
Drücken Sie die „Menu/Power Key“ Taste und wählen Sie mit den Pfeiltasten den
Punkt „Function“ und bestätigen Sie die Wahl mit der „Menu/Power Key“ Taste.
Gehen Sie mit dem Pfeiltasten auf den Punkt „Set clock“ und bestätigen Sie Ihre
Auswahl mit der „Menu/Power Key Taste“. Stellen Sie nun in den Zifferfeldern
zunächst das Datum in dem Format Jahreszahl/Monat/Tag ein und bestätigen Sie
jede Auswahl mit der „Menu/Power Key“ Taste. Die Uhrzeit stellen Sie auf die gleich
Art in dem Format Stunde/Minute/Sekunde ein. Sobald Sie die letzte Zahl bestätigt
haben, können Sie nun noch wählen, ob Sie in den Uhrzeitmodus (Clock On)
wechseln wollen oder nicht (Clock Off). Mit der „Menu/Power Key“ Taste, gelangen
Sie wieder in den von Ihnen gewünschten Modus.
6. Technische Spezifikationen
Produkt
Digitaler Fotoanhänger LUTEC DF11
Bildschirm
1.1 Zoll CSTN LCD Bildschirm
Interne Speicherkapazität
8MB
Anzahl speicherbarer
Bilder
Bis zu 70 Bilder
Unterstützte Bildformate
jpg, bmp, gif, ico
Bildauflösung
96 x 64 Pixel
Automatisches
Abschalten
Frei wählbar zwischen 01 – 60 Minuten
USB-Schnittstelle
USB 1.1 Schnittstelle
Abmessungen (LxBxH)
55 x 45 x 20,5 mm
Gewicht
30g
Stromversorgung
Eingebauter 3.7V Lithium Ionen Akku
Unterstützte
Betriebssysteme
Microsoft® Windows 2000, XP und VISTA
7. Wichtige Hinweise
7.1 Garantie
Wir gewähren 36 Monate Garantie.
Vielen Dank, dass Sie sich für ein LUTEC Produkt entschieden haben! Ganz sicher
werden Sie - wie viele Tausende zufriedener Kunden vor Ihnen - von der Qualität
unseres Produktes begeistert sein.
LUTEC Manual DF11_06 11 2007 final 11/6/2007 8:53 AM
10/34
Garantieerklärung / Bedingung
1. Die Garantie beträgt 36 Monate und beginnt mit dem Verkaufsdatum an den
Endverbraucher. Das Kaufdatum und der Gerätetyp sind durch eine maschinelle
erstellte Kaufquittung zu belegen. Bitte bewahren Sie Ihren Kaufbeleg daher für
die Dauer der Garantie auf, da er Vorraussetzung für eventuelle Reklamation ist.
2. Innerhalb der Garantiezeit werden alle Mängel, wahlweise durch den Hersteller,
entweder durch Instandsetzung, Austausch mangelhafter Teile oder im
Austausch behoben. Die Ausführung der Garantieleistung bewirkt weder eine
Verlängerung noch einen Neubeginn der Garantiezeit.
3. Eine Garantieleistung entfällt für Schäden oder Mängel die durch unsachgemäße
Handhabung / Bedienung oder durch Manipulation / äußere Einwirkung (Sturz,
Schlag, Wasser, Staub, Verschmutzung oder Bruch) herbeigeführt wurden.
Verschleißteile (z.B. die Akkus) sind von der Garantie ausgenommen.
7.2 Lösung technische Probleme
1) Handbuch:
Lesen Sie dieses Handbuch sorgfältig durch.
2) Webpage:
Unter www.LUTEC.eu können Sie sich über häufig gestellte Fragen, aktuellste
Kompatibilitätslisten etc. informieren
3) Endkunden-Hotline:
Sie können uns per Email unter [email protected] erreichen.
Sollten Sie telefonische Unterstützung benötigen, so steht Ihnen unsere EndkundenHotline von Montag-Freitag von 9:00 bis 18:00 zu Verfügung.
Endkunden-Hotline: aus Deutschland: 0180 5 – 14 00 13* *: EURO 0,14/ Min.
aus Österreich: 08 20 – 50 08 02* *: EURO 0,145/ Min.
Bitte beachten Sie, dass die Preise für Anrufe aus dem Mobilfunknetz abweichen
können. Preisinformationen für Anrufe aus dem Mobilfunknetz erhalten Sie von Ihrem
Netzbetreiber.
4) Direct Exchange:
Wenn Ihnen die Hotline mitteilt, dass Ihre Stereo Lautsprecher ausgetauscht werden
muss, bekommen Sie von der Hotline eine Autorisierungsnummer (RMA-Nr.)
mitgeteilt. Bitte senden Sie Ihr Gerät unter Angabe dieser RMA-Nr. inkl. Zubehör und
einer Kopie des Kaufbelegs an unser Service-Center. Sie erhalten dann umgehend
einen Austausch von uns.
LUTEC Manual DF11_06 11 2007 final 11/6/2007 8:53 AM
11/34
Service-Center:
Einsendungen an unser Service-Center sind nur nach Autorisierung durch unsere
Hotline unter Angabe der RMA-Nr. möglich, ansonsten kann die Rücksendung nicht
angenommen werden.
Schiffer Service GmbH
c/o Lutec RMA-Nr. : xxx (hier bitte die von der Hotline genannte RMA
Nr. eintragen)
Industriestr. 16
D-52134 Herzogenrath-Kohlscheid
8. Konformitätserklärung
Das Produkt wurde getestet und entspricht den wesentlichen Schutzanforderungen
gemäß Richtlinie des Rates in Annäherung an die Gesetze der Mitgliedstaaten
bezüglich der EMV-Produktstandards EN 55022 und EN 55024.
9. Sonstiges
Bitte beachten Sie, dass leere Batterien Sondermüll sind und besonders entsorgt
werden müssen.
Bitte beachten Sie ferner, dass auch das Gerät selber und im Lieferumfang
befindliche Kabel sowie das Netzteil an den dafür vorgesehen Stellen kostenlos
abgegeben werden können und dann fachgerecht entsorgt werden.
Bitte helfen auch Sie Ihre und unsere Umwelt zu schützen!
Weitere Informationen über LUTEC finden Sie unter www.LUTEC.eu.
LUTEC ist eine eingetragene Marke der META New Media GmbH, Auf der Borg 2b,
D-59494 Soest.
Alle Angaben ohne Gewähr.
Druckfehler, technische Änderungen, Abbildungs- und Farbänderungen sind
ausdrücklich vorbehalten.
LUTEC Manual DF11_06 11 2007 final 11/6/2007 8:53 AM
12/34
User Manual
Content
1. General Information..……………………………………………………………….…14
2. Diagram and Functions……………………………………………………………....14
3. Installation of the software for your LUTEC DF11…………………………….....14
4. Use of the software of your LUTEC DF11……………...………………………….17
5. Functions of your LUTEC DF11……………………………………………………..19
6. Technical Specifications…....…………………………………………………..……21
7. Important Information.………………………………………………………………...21
8. Declaration of Conformity…………………………………………..………………..23
9. Other Information……….……………………………………………………………...23
LUTEC Manual DF11_06 11 2007 final 11/6/2007 8:53 AM
13/34
1. General Information
Thank you for purchasing a LUTEC product! We are sure that you, like thousands of
satisfied customers before you, will be thrilled by the quality of our products.
Items supplied
In the Digital Photo Frame LUTEC DF11 package, the following accessories are
supplied:
Digital Photo Frame LUTEC DF11 with key ring
USB charging and data cable
Installation & Driver CD
Multilingual User`s Manual (on CD)
Multilingual Quick Start Guide
2. Diagram and Functions
3. Installation of the software for your
LUTEC DF11
Attention: While installing the software for your LUTEC DF11, the
device must not be plugged into your PC/Notebook.
Step 1
Please make sure that the device is not plugged into your PC/Notebook and insert
the Installation & Driver CD into the CD drive of your PC/Notebook. The installation
process starts automatically according to the autorun function. If the installation does
not starts automatically, please start the „Setup.exe” file in your CD drive directory.
LUTEC Manual DF11_06 11 2007 final 11/6/2007 8:53 AM
14/34
Step 2
Please click „Next“ in the opening display to start
the installation process. Please click on „Cancel“ to
abort the installation.
Step 3
After having clicked „Next“ the Licence Agreement
is displayed. When you accept this agreement
please mark the sentence “I agree...” and click on
“Next” to proceed with the installation. If you are
not accepting the agreement, please click on
“Cancel” to abort the installation.
Step 4
Now a dialog window with user information
appears. Please fill in your name and company
and click „Next“ to proceed. Otherwise click
“Cancel” to abort the installation.
LUTEC Manual DF11_06 11 2007 final 11/6/2007 8:53 AM
15/34
Step 5
Now you can choose the directory where the
software will be installed. Please click “Change” to
choose the right directory for the installation.
Afterwards please click on “Next” to proceed or click
on “Cancel” to abort the installation.
Step 6
In the following dialog window you can rename the
folder in which the icons are created. Afterwards
click on “Next” to proceed or click on “Cancel” to
abort the installation.
Step 7
Now all settings you have made so far are
displayed. If you want to change one setting, please
click on “Back” to get the dialog windows before.
Please click on “Next” to start the installation.
LUTEC Manual DF11_06 11 2007 final 11/6/2007 8:53 AM
16/34
Step 8
After the successful conclusion of the installation,
the last dialog window appears. Please click on
“Finish” to exit the installation.
After the software has been installed successfully and the internal rechargeable
battery is fully charged, you can use your LUTEC DF11. Plug the device with the
supplied USB data and charging cable into your PC/Notebook and run the software.
Please notice that the device automatically switches into the previously chosen photo
or slide show mode, as long as you have not made an input for 10 seconds.
Attention: Do not unplug the DF11 from the USB Port of your PC/Notebook
during the download process because it can cause an abnormal system end or
the loss of data.
To charge the internal 3.7V Lithium Ion rechargeable battery, please plug the LUTEC
DF11 with the USB cable into the USB Port of your PC/Notebook. The charging
process starts automatically. To ensure an optimal endurance for the rechargeable
battery, the device should be plugged for 10 hours before the first use. The usual
charging time is 2,5 hours. We recommend not to charge the device more than 3
hours.
4. Use of the software of your
LUTEC DF11
After having plugged the DF11 with the USB cable to your PC/Notebook, the display
of the DF11 signalizes „USB Connect“. Please run the software with a double-click on
the icon “Digital Photo Frame” on your desktop.
The user interface of the software is clearly arranged and contains 6 areas which are
marked with the letters A – F in the following figure.
LUTEC Manual DF11_06 11 2007 final 11/6/2007 8:53 AM
17/34
A
B
C
D
E
F
Menu navigation
Choice and Display of the selected source folder
Preview window for pictures which are selected in D and E
Shows pictures which are saved in the folder showed under B and
which can be scrolled by the arrow symbols to the area E
Shows pictures that can be scrolled to the DF11
Displays the folder which has been selected under B. The numbers on the
right side show the following: Quantity of pictures in the area E/Quantity of
pictures stored in the memory of the DF11/Quantity of pictures which can be
furthermore stored in the memory of the DF11
Please notice: To scroll chosen pictures to the area E and back, please use the
arrow icons on the left side of area E.
Explanation of the menu commands
Append
Appends the pictures into the memory of the DF11; after finishing
the notice “Completed” appears which you have to confirm with
“OK”
Overlay
Overlays the pictures which are stored in the memory of the
DF11; after finishing the notice “Completed” appears which you
have to confirm with “OK”
LUTEC Manual DF11_06 11 2007 final 11/6/2007 8:53 AM
18/34
Save
Saves the pictures in area E in the source folder which is shown
in area F; after finishing the notice “Completed” appears which
you have to confirm with “OK”
Edit
Enables you to edit (revolve, zoom) the marked picture; after
finishing the notice “Completed” appears which you have to
confirm with “OK”
Lantern Slide
Starts a lantern slide with the pictures which are saved in your
chosen folder on your PC/Notebook
About
Gives you information about the DF11 and the manufacturer
Attention: Do not unplug the DF11 from the USB Port of your PC/Notebook
during the download process because it can cause an abnormal system end or
the loss of data.
5. Functions of your LUTEC DF11
1. Recharging of the internal 3.7V rechargeable battery
Attention: To ensure an optimal endurance for the rechargeable battery, the device
should be plugged for 10 hours before the first use. The usual charging
time is 2,5 hours. We recommend not to charge the device more than 3
hours. If you don`t use the device for a longer time the charging status of
the rechargeable battery may degrade.
Your DF11 contains an internal 3.7 Lithium Ion rechargeable battery which can be
charged with the supplied USB data and charging cable. After having plugged the
DF11 with the USB cable to your PC/Notebook, the display of the DF11 signalizes
„USB Connect“. Your Digital Photo Frame will be charged automatically.
2. Turn On/Off
Press the „Menu/Power“ key for 2 seconds to turn the DF11 on. Press the
“Menu/Power” key for 2 seconds again to turn the DF11 off.
3. Show pictures
To see the saved pictures, press the „Up” key and “Down” key. Thus you can switch
between the saved pictures.
4. Clock Mode
By pressing the „Down“ key for 2 seconds, the DF11 switches into the clock mode.
The date with the actual time appears. Press the “Down” key for 2 seconds again to
switch into the picture mode again.
Attention: How to change the time and the date, is described under point 11.
5. Slide Show Settings
Press the „Menu/Power“ key and choose with the „Up“ and „Down“ key the command
LUTEC Manual DF11_06 11 2007 final 11/6/2007 8:53 AM
19/34
„Slide Time“. Confirm your choice with the “Menu/Power” key. Now you can choose
the length of the display of one picture by using the “Up” and “Down” key. By
choosing “0” the mode will turn off. You have the choice between 1 – 60 seconds for
each picture. Please confirm your choice with the “Menu/Power”key.
6. Automatic turning off
Press the „Menu/Power“ key and choose the command „Sleep Time“ with the „Up“
and „Down“ key. Confirm your choice with the “Menu/Power” key. Now you can
choose the time until the DF11 turns off automatical. By choosing “0” the mode will
turn off. You have the choice between 1 – 60 minutes. Please confirm your choice
with the “Menu/Power”key.
7. Delete a picture
Press the „Menu/Power“ key and choose the command „Delete One“ with the „Up“
and „Down“ key. Confirm your choice with the “Menu/Power” key. Now you can
choose the picture which shall be deleted with the „Up“ and „Down“ key. By pressing
the “Menu/Power” key, the chosen picture will be deleted.
Attention: There won`t be a further confirmation inquiry for deleting the picture.
Please press the “Menu/Power” key only when you are really sure.
8. Number of the picture turn on/off
The display of the number of the picture is preset. To remove this preset, please
press the “Menu/Power” key and choose the command “Function” with the “Up” and
“Down” key. Confirm your choice with the “Menu/Power” key. Now you can choose
the command “Show Num” where you can decide whether the total number of
pictures and the number of the shown picture shall be displayed. By pressing the
“Menu/Power” key the function will be turned on/off.
9. Change the contrast of one picture
Press the “Menu/Power” key and choose the command “Function” with the “Up” and
“Down” key. Confirm your choice with the “Menu/Power” key. Select the command
“Contrast” with the “Up” and “Down” key and confirm your choice with the
“Menu/Power” key. You have the choice on a scale from 0 (dark) – 20 (bright). Please
confirm your choice with the “Menu/Power” key.
10. Delete all pictures
Press the “Menu/Power” key and choose the command “Function” with the “Up” and
“Down” key. Confirm your choice with the “Menu/Power” key. Select the command
“Delete All” with the “Up” and “Down” key and confirm your choice with the
“Menu/Power” key. The confirmation inquiry “Delete?” appears. Confirm this inquiry
by pressing the “Menu/Power” key when you really want to delete all pictures in the
internal memory of the device. If you don`t press a key for longer than 10 seconds,
the inquiry removes and no picture will be deleted.
11. Set date and time
Press the “Menu/Power” key and choose the command “Function” with the “Up” and
“Down” key. Confirm your choice with the “Menu/Power” key. Select the command
“Set Clock” with the “Up” and “Down” key and confirm your choice with the
“Menu/Power” key. First you can choose the correct date with the format
year/month/day. Please confirm every setting by pressing the “Menu/Power” key. The
same way you can choose the correct time with the format hour/minute/second.
LUTEC Manual DF11_06 11 2007 final 11/6/2007 8:53 AM
20/34
When you have confirmed the last number you can choose if you want to switch into
clock mode (Clock On) or not (Clock Off). With the “Menu/Power” key you can switch
into your favored mode.
6. Technical Specifications
Product
Digital Photo Frame LUTEC DF11
Display
1.1 inch CSTN LCD display
Internal Memory
8MB
Quantity of storable
pictures
Up to 70
Supported File formats
jpg, bmp, gif, ico
Display resolution
96 x 64 Pixel
Automatical turning off
Chossable between 01 – 60 minutes
USB interface
USB 1.1 interface
Dimensions (LxBxH)
55 x 45 x 20,5 mm
Weight
30g
Electrical Power supply
Supported operating
systems
Internal 3.7V Lithium Ion rechargeable battery
Microsoft® Windows 2000, XP and VISTA
7. Important Information
7.1 LUTEC service
We offer you a warranty period of 36 months.
We are pleased that you have decided in favour of a LUTEC product! Certainly you
will be enthusiastic about the quality of our product like thousands of satisfied
customers before you.
Warranty / conditions
1. The warranty period is 36 months and begins with the sale to the end user. The
receipt must clearly list the date of purchase and the type of device. In addition,
the receipt must be machine printed. Keep the purchase receipt for the entire
warranty period, since it is required for all warranty claims.
2. During the warranty period, all defects shall be adjusted or replaced at the
manufacturer’s expense, either by repairing or replacing the defective part or the
LUTEC Manual DF11_06 11 2007 final 11/6/2007 8:53 AM
21/34
entire device. Work carried out under warranty does neither extend the warranty
period nor does it start a new warranty period.
3. The manufacturer reserves the right to void any warranty claim for damages or
defects due to misuse, abuse or external impact (falling down, impact, ingress of
water, dust, contamination or break). Wearing parts (e. g. rechargeable batteries)
are excluded from warranty.
7.2 Technical Support
Do you need further information? Please use the following four sources of
information:
1. Manual
Read this Manual carefully.
2. Webpage
You can find further information about this and other LUTEC products on the
webpage www.LUTEC.eu.
3. End customer Support
LUTEC offers a free of charge Email support. You can get in contact to us by the mail
adress [email protected]
4. Direct Exchange
When the Email support tells you that your device has to be exchanged you will get
an authorisation number (RMA number). Please send the device with the RMA
number incl. all accessories and a copy of your proof of purchase to our service
center. Afterwards your device will be exchanged.
In event of a service circumstance please contact:
In case you are not satisfied with a LUTEC product or you need further information
please catch up on our homepage www.LUTEC.eu and contact afterwards our service
team.
By this way you will get a competent support/advice and in case of a necessary
exchange you will get your RMA number.
The adress of our service center is
(Transmittals are only accepted when you got a valid RMA number!!!!)
Schiffer Service GmbH
Industriestraße 16
D-52134 Herzogenrath-Kohlscheid
Germany
LUTEC Manual DF11_06 11 2007 final 11/6/2007 8:53 AM
22/34
8. Declaration of Conformity
The product has been tested and conforms with the fundamental requirements for
protection in accordance with the guidelines of the council together with the laws of
the member states with regards to the EMV Product standards EN 55022 and EN
55024.
9. Other Information
Please recycle batteries correctly.
Furthermore, please be aware that the product itself and the USB cable supplied with
it can be disposed of free-of-charge at designated sites where it will be disposed of
correctly.
Please help to protect your and our environment!
You can find more information about LUTEC at www.LUTEC.eu.
LUTEC is a registered trademark of META New Media GmbH, Auf der Borg 2b, D59494 Soest.
We accept no liability for any information contained herein. We reserve the right to
make typing errors, technical modifications and diagram revisions.
LUTEC Manual DF11_06 11 2007 final 11/6/2007 8:53 AM
23/34
Felhasználói Kézikönyv
Tartalomjegyzék
1. Általános rész………………………………………………………………………..…25
2. Teljes nézet és funkciók........... ……………………………………………………..25
3. Programtelepítés a LUTEC DF11 készülékre ………..…………………………...25
4. A LUTEC DF11 program alkalmazása ……..…………...………………………….28
5. A LUTEC DF11 funkciói …………........……………………………………………...30
6. Mőszaki specifikáció.............………………………………………………………...32
7. Fontos tudnivalók ...…………………………………………………………………..32
8. Megfelelıségi nyilatkozat .…………………………………………………………..33
9. Egyebek………………………………………………………………………………....34
LUTEC Manual DF11_06 11 2007 final 11/6/2007 8:53 AM
24/34
1. Általános rész
Köszönjük, hogy egy Lutec terméket választott! Egész biztos, hogy Önt is meggyızi
termékünk kitőnı minısége ugyanúgy, mint több ezer más elégedett vásárlónkat.
A csomag tartalma
LUTEC DF11 digitális képkeretet és tartozékai:
LUTEC DF11 digitális képkeret kulcstartóval
USB töltı- és adatkábel
Telepítı és driver CD
Többnyelvő használati utasítás (Cd-én)
Többnyelvő Quickstart guide
2. Teljes nézet és funkciók
3. Programtelepítés a LUTEC DF11
készülékre
Figyelem: Amikor telepíti a programot LUTEC DF11 készülékére, a
készülék nem lehet összekötve a számítógéppel/notebookkal.
1. lépés
Gyızıdjön meg róla, hogy a készülék nincs összekötve a számítógéppel, és
helyezze be a telepítı és driver CD-t számítógépje/laptopja CD lemezmeghajtójába.
Az autorun funkció automatikusan indítja a telepítési folyamatot. Ha nem indulna el
automatikusan a telepítési folyamat, indítsa el a „Setup.exe“ fájl futtatását a CD-ROM
könyvtárban.
LUTEC Manual DF11_06 11 2007 final 11/6/2007 8:53 AM
25/34
2. lépés
Amikor megjelenik a programtelepítés indítás a
képernyın, kattintson a „Next” utasításra, ha el akarja
indítani a telepítést. Kattintson a „Cancel” utasításra,
ha nem kívánja folytatni a telepítést.
3. lépés
Ha rákattintott a „Next” utasításra, megjelennek a
licencfeltételek angol nyelven. Ha elfogadja ezeket
a feltételeket, jelölje meg az „I agree…“ mondatot,
és kattintson a „Next” utasításra a telepítés
folytatásához. Ha nem fogadja el a feltételeket,
kattintson a „Cancel” utasításra a telepítés
befejezéséhez.
4. lépés
Megjelenik egy ablak a felhasználói adatokkal. Írja
be a nevét, illetve a cégnevet, és kattintson a „Next”
utasításra a telepítés folytatásához. Ellenkezı
esetben kattintson a „Cancel” utasításra a telepítés
befejezéséhez.
LUTEC Manual DF11_06 11 2007 final 11/6/2007 8:53 AM
26/34
5. lépés
A következı ablakban beállíthatja, hogy a telepített
program hova kerüljön. Kattintson a „Change”
utasításra
a
kiválasztott
telepítési
hely
beállításához. Ezt követıen kattintson újból a „Next”
utasításra a telepítés folytatásához, illetve a
„Cancel” utasításra a telepítés befejezéséhez.
6. lépés
A most megjelenı ablakban lehetısége van tetszés
szerint átnevezni azt a könyvtárat, mely az elıállított
ikonokat tartalmazza. Kattintson újból a „Next”
utasításra a telepítés folytatásához, illetve a
„Cancel” utasításra a telepítés befejezéséhez.
7. lépés
Az itt következı ablakban megjelenik valamennyi
Ön által kijelölt beállítás. Amennyiben meg kívánja
változtatni a beállítások valamelyikét, kattintson a
„Back” utasításra, hogy visszaléphessen az elızı
ablakba. Kattintson a „Next” utasításra a telepítés
indításához.
LUTEC Manual DF11_06 11 2007 final 11/6/2007 8:53 AM
27/34
8. lépés
Sikeres telepítés után megjelenik az utolsó
dialógusablak a képernyın, melyben a „Finish”
utasításra kattintva befejezi a telepítést.
A program sikeres telepítése után, és ha az akku teljesen fel van töltve, használatra
kész a LUTEC DF11. Ehhez csatlakoztassa a digitális képkeretet a
számítógéphez/notebookhoz a tartozékként mellékelt USB adat- és töltıkábelen
keresztül, és indítsa el a programot.
Vegye figyelembe kérjük, hogy a készülék automatikusan átkapcsol az elızıleg
választott fénykép, illetve diavetítés (Slide Show) módra, amennyiben 10
másodpercen belül nem ad meg más funkciómódot.
Figyelem: Soha ne húzza ki letöltés közben a DF11 készüléket
számítógépje/laptopja USB csatlakozójából, mivel ez rendszerhibához és
adatvesztéshez vezethet.
A beépített 3,7 V lítium-ion akku feltöltéséhez csatlakoztassa egyszerően LUTEC
DF11 készülékét az USB kábellel a számítógép/notebook USB csatlakozóporthoz. A
töltés automatikusan elindul. Az akkumulátor optimális élettartamának elérése
érdekében az elsı alkalommal 10 órán keresztül kell tölteni a készüléket. A rendes
töltési idı 2,5 óra. Azt tanácsoljuk, hogy ne hagyja 3 óránál hosszabb ideig a
készüléket a töltın.
4. A LUTEC DF11 program
alkalmazása
Miután
csatlakoztatta
a
DF11
készüléket
az
USB
kábellel
a
számítógéphez/laptophoz, a DF11 képernyıjén „USB Connect“ kijelzés látható.
Indítsa el a programot, ehhez kattintson kétszer a „Digital Photo Frame“ ikonra az
asztalon.
A program felhasználói felülete áttekinthetıen van felépítve, és hat
programtartományból áll, melyek a következı ábrán A – F betővel vannak jelölve.
LUTEC Manual DF11_06 11 2007 final 11/6/2007 8:53 AM
28/34
A
B
C
D
E
F
Menüvezérlés
Forráskönyvtár kijelölése és jelzése az átmásolandó adatbázishoz
Megtekintı ablak a D és E bető alatt kiválasztott képekhez
Mutatja a B alatti könyvtárban levı képeket, melyeket a nyíljellel át lehet
helyezni az E tartományba.
Mutatja a képeket, amelyek áthelyezhetık a DF 11 készülékre.
A B pont alatt kijelölt forráskönyvtárat mutatja. A jobb oldalon levı számok a
következıt jelentik: a képek száma az E tartományon belül / képek száma a
DF11 memóriatárban / képszám, ami még elmenthetı a DF11 készülékre.
Kérjük, vegye figyelembe: A kijelölt képek átviteléhez az E tartományba, illetve
újbóli áthelyezéshez, használja az E tartomány mellett balra levı nyíljelet.
Magyarázat a menüpontokhoz
Append/
Hozzáadás
Overlay/
Felülírás
Az E tartományon belül található képek átvitele a DF11
memóriatárába;
Elkészítés után a „Completed“ kijelzés látható, amit jóvá kell
hagyni az „OK”-ra kattintva.
Átírja a DF11 memóriatárában található képeket az
E tartományban levı képekkel; elkészítés után a „Completed“,
kijelzés látható, amit jóvá kell hagyni az „OK”-ra kattintva.
LUTEC Manual DF11_06 11 2007 final 11/6/2007 8:53 AM
29/34
Save/
Mentés
Elmenti az E tartományban található képeket a forráskönyvtárba,
ami az F alatt látható; elkészítés után a „Completed“, kijelzés
látható, amit jóvá kell hagyni az „OK”-ra kattintva.
Edit/
Szerkesztés
Lehetıvé teszi az Ön által kijelölt képek szerkesztését (elfordítás,
nagyítás/kicsinyítés); elkészítés után a „Completed“, kijelzés
látható, amit jóvá kell hagyni az „OK”-ra kattintva.
Elindítja a diavetítést azokkal a képekkel, melyek az Ön
által kijelölt könyvtárban vannak a számítógépén/laptopján.
Lantern Slide/
Diavetítés
About/
Tájékoztató
Információ a DF11 készülékrıl és a gyártóról
Figyelem: Soha ne húzza ki letöltés közben a DF11 készüléket
számítógépje/laptopja USB csatlakozójából, mivel ez rendszerhibához és
adatvesztéshez vezethet.
5. A LUTEC DF11 funkciói
1. A beépített 3,7 V akkumulátor újratöltése
Figyelem: Elsı használat elıtt a LUTEC DF11 készüléket 10 órán keresztül kell
tölteni. A rendes töltésidı egyébként 2,5 óra.
Annak érdekében, hogy ne csökkenjen az akkumulátor élettartama,
azt tanácsoljuk, hogy ne hagyja 3 óránál hosszabb ideig a készüléket
a töltın Ha hosszabb ideig nem használja a készüléket, rosszabbodhat
az akkuk töltésállapota.
DF11 készüléke fel van szerelve egy beépített 3,7 V lítium-ion akkumulátorral, ami
egyszerően újratölthetı a tartozékként mellékelt USB adat- és töltıkábel
segítségével. Mihelyt csatlakoztatta a készüléket az USB kábellel a
számítógéphez/notebookhoz, megjelenik a képernyın az „USB Connect“ kijelzés. A
digitális képkeret automatikusan tölteni kezd.
2. Be- és kikapcsolás
Nyomja le 2 másodpercre a „Menu/Power Key“ gombot a DF11 készülék
bekapcsolásához. A DF11 kikapcsolásához nyomja le szintén 2 másodpercre a
„Menu/Power Key“ gombot.
3. Képmegjelenítés
Az elmentett képek megjelenítéséhez nyomja le az „Up Key“ és a „Down Key“
gombot. Ezekkel a gombokkal ide-oda tud váltani a képek között.
4. Óra üzemmód
Ha 2 másodpercre lenyomja a „Down Key“ gombot, átkapcsol a DF11 óra
üzemmódra. Megjelenik a dátum és a pillanatnyi pontos idı. Nyomja le újból 2
másodpercre a „Down Key“ gombot, ha vissza kíván lépni a kép üzemmódba.
Figyelem: A 11.pont alatt ismertetjük, hogyan tudja beállítani a pontos idıt és a
dátumot.
LUTEC Manual DF11_06 11 2007 final 11/6/2007 8:53 AM
30/34
5. Diavetítés (Slide Show) beállítások
Nyomja le a „Menu/Power Key“ gombot, és jelölje ki az Up Key“ „Down Key“
gombokkal a „Slide Time“ menüpontot. Hagyja jóvá a kijelölést a „Menu/Power Key“
gombbal. Ezután beállíthatja a képek egyenkénti megjelenítési idejét a diavetítési
üzemmódban a két nyílgomb segítségével. 0 másodpercnél kikapcsol ez az
üzemmód. 1 – 60 másodperc közti idıtartamot választhat. Hagyja jóvá a kijelölést a
„Menu/Power Key“ gombbal.
6. Automatikus kikapcsolás
Nyomja le a „Menu/Power Key“ gombot, és jelölje ki a nyílgombokkal a „Sleep Time“
üzemmódot. Hagyja jóvá a kijelölést a „Menu/Power Key“ gombbal. Itt beállíthatja azt
az idıt, ami után automatikusan kikapcsol DF 11 készüléke. 0 percnél kikapcsol ez
az üzemmód. 1 – 60 perc közti idıtartamot választhat. Hagyja jóvá a kijelölést a
„Menu/Power Key“ gombbal.
7. Kép törlése
Nyomja le a „Menu/Power Key“ gombot, és jelölje ki a nyílgombokkal a „Delete One“
üzemmódot. Hagyja jóvá a kijelölést a „Menu/Power Key“ gombbal. A nyílgombokkal
kijelölheti azt a képet, amit törölni kíván. A „Menu/Power Key“ gombot lenyomva tudja
törölni a képet.
Figyelem: Nem jelenik meg további kérdés, hogy jóvá hagyja-e a kép törlését. Csak
akkor nyomja le a „Menu/Power Key“ gombot, ha teljesen biztosan törölni kívánja a
képet.
8. A kép sorszámának be- és kikapcsolása
A képsorszám kijelzés elıre be van állítva. A kijelzés elrejtéséhez nyomja le a
„Menu/Power Key“ gombot, és jelölje ki a nyílgombokkal a „Function“ menüpontot.
Hagyja jóvá a kijelölést a „Menu/Power Key“ gombbal. A „Show Num“ pont alatt
beállíthatja, hogy a képernyın látható legyen-e a teljes képszám és az éppen
megjelenített kép sorszáma. A „Menu/Power Key“ gombot lenyomva tudja ezt a
funkciót be- és kikapcsolni.
9. Képkontraszt megváltoztatása
Nyomja le a „Menu/Power Key“ gombot, és jelölje ki a nyílgombokkal a „Function“
menüpontot. Hagyja jóvá a kijelölést a „Menu/Power Key“ gombbal. Lépjen a
nyílgombokkal a „Contrast“ menüpontra, és hagyja jóvá a kijelölést a „Menu/Power
Key“ gombbal. Válassza ki a 0 (sötét) – 20 (világos) skálán, hogy milyen erıs legyen
a kép kontrasztja, és hagyja jóvá a kijelölést a „Menu/Power Key“ gombbal.
10. Minden kép törlése
Nyomja le a „Menu/Power Key“ gombot, és jelölje ki a nyílgombokkal a „Function“
menüpontot. Hagyja jóvá a kijelölést a „Menu/Power Key“ gombbal. Lépjen a
nyílgombokkal a „Delete All“ menüpontra, és hagyja jóvá a kijelölést a „Menu/Power
Key“ gombbal. Megjelenik a jóváhagyás utáni kérdés „Delete?“. Hagyja jóvá a
választást a „Menu/Power Key“ gombbal, és az összes fényképet törli a memóriából.
Ha 10 másodpercig nem nyomja le egyik gombot sem, automatikusan eltőnik a
kijelzés, és egy kép sem lesz törölve.
11. Dátum és pontos idı beállítása
Nyomja le a „Menu/Power Key“ gombot, és jelölje ki a nyílgombokkal a „Function“
menüpontot. Hagyja jóvá a kijelölést a „Menu/Power Key“ gombbal. Lépjen a
LUTEC Manual DF11_06 11 2007 final 11/6/2007 8:53 AM
31/34
nyílgombokkal a „Set clock“ menüpontra, és hagyja jóvá a kijelölést a „Menu/Power
Key“ gombbal. Elıször állítsa be a dátumot a számkijelzın év/hónap/nap
formátumban, és hagyja jóvá a beállítást a „Menu/Power Key“ gombbal. A pontos idı
ugyanígy kell beállítani óra/perc/másodperc formátumban. Mihelyt az utolsó számot
is jóváhagyta, kiválaszthatja hogy átvált-e idı üzemmódra (Clock On), vagy nem
(Clock Off). A „Menu/Power Key“ gombbal visszatér az Ön által kiválasztott
üzemmódba.
6. Mőszaki specifikáció
Termék
Digitális képkeret LUTEC DF11
Képernyı
1.1 coll CSTN LCD képernyı
Belsı
memóriateljesítmény
8MB
Elmenthetı képek száma
maximum 70 kép
Támogatott képformátum
jpg, bmp, gif, ico
Képfelbontás
96 x 64 pixel
Automatikus kikapcsolás
tetszés szerint választható 01 – 60 perc között
USB csatlakozóport
USB 1.1 csatlakozóport
Méret (H.xSz.xM.)
55 x 45 x 20,5 mm
Súly
30g
Áramellátás
beépített 3.7V lítium-ion akkumulátor
Támogatott operációs
rendszer
Microsoft® Windows 2000, XP és VISTA
7. Fontos tudnivalók
7.1
LUTEC szerviz
A garancia idıtartama 36 hónap.
Nagyon köszönjük, hogy LUTEC terméket vásárolt! Ön is csatlakozhat a több ezer
ügyfélhez, akik elégedettek a termék minıségével.
Garancianyilatkozat / Feltétel
1. A garancia 36 hónapig érvényes, a végfelhasználó vásárlásának napjától
érvényes. A vásárlás dátumát és a készülék típusát gépileg kiállított vásárlási
bizonylattal kell igazolni. Kérjük, ırizze meg a vásárlási bizonylatot a garancia
teljes ideje alatt, mivel ez feltétele az esetleges reklamációnak.
LUTEC Manual DF11_06 11 2007 final 11/6/2007 8:53 AM
32/34
2. A garanciaidın belül a gyártó választása szerint vagy helyreállítja a
hiányosságot, vagy kicseréli a hibás részeket ill. a teljes készüléket. A garanciális
teljesítésekkel a garancia ideje nem növekszik ill. nem indul újra.
3. Szakszerőtlen kezelés vagy külsı behatás (leesés, ütés, folyadék, por,
szennyezıdés vagy törés) miatt keletkezı károk vagy hibák megszőntetik a
garancia érvényességét. A kopó részek (pl. akkumulátorok) nem tartoznak a
garancia hatálya alá.
1) Kézikönyv:
Gondosan olvassa el a mellékelt kézikönyvet.
2) Weboldal:
A www.lutec.eu címen információkat talál a gyakran feltett kérdésekrıl, aktuális
kompatibilitási lehetıségekrıl stb.
3) Végfelhasználó támogatás:
A következı e-mail címen érhet el bennünket: [email protected].
4) Közvetlen csere:
Ha forródrót szolgálatunk arról értesíti, hogy a termék cserére szorul, forródrót
szolgálatunktól jóváhagyási számot kap (RMA szám). Kérjük, a készüléket az RMA
szám megadásával, a tartozékokkal és a vásárlást igazoló nyugta fénymásolatával
együtt küldje meg szervizközpontunkba. Ezt követıen haladéktalanul megküldjük
önnek a cserekészüléket.
Végfelhasználói e-mail cím: [email protected]
Szervizközpont:
A szervizközpontba történı beküldés csak a Hotline központ felhatalmazása után
lehetséges, az RMA szám megadásával, egyéb esetben a küldeményt nem fogadjuk
el.
Schiffer Service GmbH
c/o Lutec RMA-Nr. : xxx (ide írja be a gyorssegélytıl kapott RMA
számot)
Industriestr. 16
D-52134 Herzogenrath-Kohlscheid
8. Megfelelıségi nyilatkozat
A termék a Tanács Irányelvei fontosabb védelmi elıírásai szerint lett tesztelve, és
megfelel azoknak. A Tagországok törvényi harmonizációjára vonatkozó EU Tanács
Irányelvek szerint megfelel a következı szabványok elıírásainak: EMV
termékszabványoknak EN 55022 és EN 55024.
LUTEC Manual DF11_06 11 2007 final 11/6/2007 8:53 AM
33/34
9. Egyebek
Kérjük, vegye figyelembe, hogy a lemerült elemek USB veszélyes hulladékok.
Kérjük, ne feledkezzen meg arról sem, hogy magát a készüléket, és a szállítási
terjedelembe tartozó kábelt, hálózati tápegységet ingyenesen leadhatja az arra a
célra létesített Állomáson, ahol azután gondoskodnak azok szakszerő
hulladékkezelésérıl.
Kérjük, segítsen Ön is az Ön és a mi környezetünk megóvásában!
A LUTEC-rıl további információkat találhat a www.LUTEC.eu honlapon.
LUTEC a META New Media GmbH, Auf der Borg 2b, D-59494 Soest bejegyzett
terméke.
Az adatokért nem vállalunk garanciát.
Az elızetes bejelentés nélküli adatváltoztatás, nyomtatási
adatváltoztatás, kép-változtatások jogát nyomatékosan fenntartjuk.
LUTEC Manual DF11_06 11 2007 final 11/6/2007 8:53 AM
hiba,
mőszaki
34/34