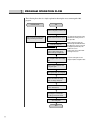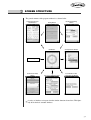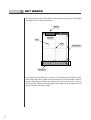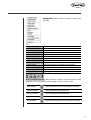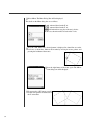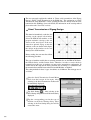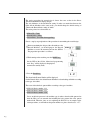
1
SSPDA USER MANUAL
SSPDA-O/1.0
MEE-050217
lity
a
u
tQ
Besst Pricevice
Be st Ser
Be
1. Thank you for purchasing our product. Based on the rich expertise and
experience accumulated in industrial sewing machine production, SUNSTAR
will manufacture industrial sewing machines, which deliver more diverse
functions, high performance, powerful operation, enhanced durability, and
more sophisticated design to meet a number of user’s needs.
2. Please read this user’s manual thoroughly before using the machine. Make
sure to properly use the machine to enjoy its full performance.
3. The specifications of the machine are subject to change, aimed to enhance
product performance, without prior notice.
4. This product is designed, manufactured, and sold as an industrial sewing
machine. It should not be used for other than industrial purpose.
R
CONTENTS
1. BEFORE USE
1) Main Components --------------------------------------------------------------------------------------7
When Connecting the PDA to the PC ----------------------------------------------------------7
When Connecting the PDA to the Bartack Series --------------------------------------------7
When Connecting the PDA to the KM-2070P Series----------------------------------------8
Configuration of PDA / CF Memory Card / Expansion Pack -------------------------------8
Connection of between PDA and PC (When Installation or Active Sync.) (View from the front)------9
Connection of between PDA and PC (When Installation or Active Sync.) (View from the back)------9
Connection of between PDA and Operation Box (When Data Transmission) ---------10
2) Accessories ---------------------------------------------------------------------------------------------10
3) Setup-----------------------------------------------------------------------------------------------------11
4) System Requirements ---------------------------------------------------------------------------------11
5) SSPDA Program Installation ------------------------------------------------------------------------12
Before Installing the Program ------------------------------------------------------------------12
Installing the Program --------------------------------------------------------------------------12
2. Start
1) Introduction---------------------------------------------------------------------------------------------17
2) Starting and Ending the Program -------------------------------------------------------------------17
3) Caution when Using the Program-------------------------------------------------------------------19
3. Program Functions
1) Program Operation Flow -----------------------------------------------------------------------------22
2) Screen Structure ---------------------------------------------------------------------------------------23
3) Edit Window -------------------------------------------------------------------------------------------24
4) Menu ----------------------------------------------------------------------------------------------------25
5) Menu Bar& Toolbar-----------------------------------------------------------------------------------26
4. Data Structure
1) Configuration Data ------------------------------------------------------------------------------------36
2) Sewing Data--------------------------------------------------------------------------------------------37
3) Jump Data ----------------------------------------------------------------------------------------------38
4) Sequence of Structure Configuration and Sewing Data -----------------------------------------38
5) Selection of Components Using the Stylus--------------------------------------------------------39
5. Creating Data
1) Creating New Data ------------------------------------------------------------------------------------41
2) Creating Configuration and Sewing Data----------------------------------------------------------42
Creating Configuration Data -------------------------------------------------------------------42
Creating Sewing Data ---------------------------------------------------------------------------46
Creating a Mechanical Control Related Command-----------------------------------------49
6. Edit Function
1) Editing of Configuration Data -----------------------------------------------------------------------56
Editing with Stylus-------------------------------------------------------------------------------56
Editing with PDA Navigation Buttons--------------------------------------------------------59
Editing with Keyboard Input Data-------------------------------------------------------------60
2) Edit of Sewing Data-----------------------------------------------------------------------------------61
Editing with Stylus-------------------------------------------------------------------------------61
Editing with Cursor Key in the PDA----------------------------------------------------------61
Editing with Keyboard Input Data-------------------------------------------------------------61
Editing According to Order of Stitch Creation ----------------------------------------------62
7. Data Management
1) Other Useful Functions -------------------------------------------------------------------------------66
Edit Tool-------------------------------------------------------------------------------------------66
View Tool -----------------------------------------------------------------------------------------70
Data Tool ------------------------------------------------------------------------------------------80
Stitch Data Tool ----------------------------------------------------------------------------------83
Sewing Data Tool --------------------------------------------------------------------------------89
Automatic Point (Snap to Grid) Function ----------------------------------------------------97
Sewing Data Selection Range Setting --------------------------------------------------------98
Stitch Point Layout-------------------------------------------------------------------------------99
Embroidery Design Changing Function ----------------------------------------------------101
8. Design Data Serial Transmission
1) Design Transmission to the KM-2070P ----------------------------------------------------------105
Direct Transmission of Zigzag Design ------------------------------------------------------106
Rom.zig Data Transmission-------------------------------------------------------------------110
2) Design Transmission to the Bartack Series-------------------------------------------------------111
9. Pattern Data Input/Output
1) Saving / Opening Files-------------------------------------------------------------------------------116
Saving Files--------------------------------------------------------------------------------------116
Saving Data Code File for 2070P ------------------------------------------------------------117
Opening Files------------------------------------------------------------------------------------118
Before Use
Before starting setup of programs and components, please verify the following items.
Main Components
When connecting the PDA to the PC
The connection between the PDA and the PC provides a mutual data exchanging
function. This type of connection is called Active Sync. The picture below shows a
simple connection. For a detailed connection method, please refer to the PDA manual.
When Connecting the PDA to the Bartack Series
The following connection shows the structure of the connection to the Bartack Series
Machine using the PDA when downloading designs.
When Connecting the PDA to the KM-2070P Series
The next connection shows the structure of the connection to the KM-2070P Series
Machine using the PDA when downloading designs.
Configuration of PDA / CF Memory Card / Expansion Pack
In case of PDA supports CF II Type CF Memory Card, you can insert CF Memory Card
directly to PDA without CF Expansion Pack.
Connection of between PDA and PC (When Installation
or Active Sync.)
Connection of between PDA and PC (When Installation
or Active Sync.)
Connection of between PDA and Operation Box (When
Data Transmission)
Accessories
Installing CD
Instruction Manual
CF-Memory Card
Refer PDA instruction Manual for further detail.
Memory card could change to SD-Memory card
depending on type of PDA
CF Card Expansion Pack
PDA that supports CF II Type Memory Card
does not offer Expansion Pack
USB and RS-232C Cable
Specification of Cable is slightly different
depending on type of PDA.
Wireless Module (Optional): Will be provided in the future
Set Up
Connect the RS_232C(9 Pin) Port of the provided cable to the receiving port of the
Machine OP.
Then connect the other end of the cable to the Sync. Port located at the bottom of the
PDA Cable. Insert the connector until it makes a clicking sound. (Please refer to the
PDA Manual).
System Requirements
Before using the PDA, the PDA systems must meet the following requirements.
PDA OS
Microsoft Windows for Pocket PC or Higher
Color
256 or higher
Main Memory
32MB or higher
ROM
16M or higher
Display
240 320 Pixels or higher
Interface
IrDA(Wireless) or RS-232C
Expansion Pack
Expansion pack to insert a CF Card
SunStar Re-command PDA
HP Series 3800,3900,5000 Series or Higher
SSPDA Program Installation
Before Installing the program
Before installing the SSPDA, the user must check whether the PDA has been
properly inserted in the cradle.
Execute the ActiveSync CD included inside the PDA case and install the ActiveSync
Program on your PC.(For details, refer to the manual you will find along with the
ActiveSync CD).
Please check if the CF Card has been properly inserted in the PDA (When started, the
CF Card is automatically installed on the PDA).
Installing the program
Insert the SSPDA-Install CD into your computer and execute “Windows Explorer.”
Execute “Setup.exe” from Disk 1.
You will see the InstallShield Wizard window. Click on “Next”.
You will see the software licence agreement window. Click “Yes” to continue.
Extract the files on your computer.
Move the files installed in your computer to the PDA.
Installation is in progress
You will see the InstallShield Wizard window. Click on “Finish”.
The newly installed program will be saved in “Mobile Device
Storage Card
SSPDA”. If it is saved this way, the program has been installed successfully.
<If the program has been successfully installed, the menu “SSPDA-1.0” will be created
on the main menu>
Start
Introduction
This user manual is an electronic sewing machine input device program for PDAs
related to pattern, backtack and zigzag. Its purpose is to enable easier making, editing
and managing of sewing data for the user. This manual is an official user manual that
demonstrates from program installation to overall PDA use. The user must read this
manual before use.
Starting and Ending the Program
After installing the SSPDA Program in the PDA using the CF Memory, the SSPDA
program can be started. The first figure below shows the first window of the PDA.
(Please, refer to Program Installation).
(Note: the first window can vary depending on the type of PDA model). If you tap the
flag-shaped icon on the top left you will see the installed programs. Around the middle
of the installed program you can see the SSPDA Icon. If you tap on it, the program will
be executed.
The program can be executed by tapping the SSPDA icon as shown in the figure
above or by tapping directly on the file in the folder where the program has actually
been installed.
When you execute the SSPDA program, it will display a Start Dialog box as the one
shown in the figure on the below. Start the program by tapping on New Data .
In order to end the program, save the file and select Exit or tap the Close button on
the top right of the window. If you finished the program by tapping the Close button,
the program will not be seen, but will actually not have ended entirely. To end the
program completely, you must tap Exit on the File Menu.
Caution when Using the Program
The following section contains very important cautionary words that must always be
followed when using this program. Program users must read this section and be fully
aware of it.
Before using the SSPDA, the user must fully understand the functions of the PDA.
The PDA and the computer have different parts in their functions. Therefore, the user
must fully understand the provided method of use and read the manual.
In the program, the configuration data such as circles cannot adjust their size
asymmetrically. If the user enlarges them by entering different values in the X and Y
axis for the enlarge/reduce function, the values of both axis always apply
symmetrically and therefore are created in the same size. But in the case of
asymmetrical enlargement or reduction of the sewing data that includes the
configuration data, you can apply asymmetrical enlargement and reduction by
removing the configuration data and forming its properties to Point Stitch.
It is recommended not to create sewing data that surpasses 1,000 stitches. Because the
CPU performance of the PDA System is remarkably slower than that of the standard
PC, the PDA shows a slowing tendency when creating a large quantity of stitches.
Although the program can produce up to 30,000 stitches, when creating more than
1,000 stitches, the program may slow down and occasionally stop. In order to reduce
the slowness in these cases, select Stick Off on the View Tool Bar in the menu shown
below.
The battery of the PDA should be recharged periodically. If the battery is completely
discharged, all the data in the memory of the PDA may be erased. For this reason, the
user must be aware of the battery charge status and recharge regularly to avoid the
battery from being discharged. Please refer the PDA manual for more details.
When using the Zoom In/Zoom Out tool
,
a messagebox will pop up when there is a problem with the
Enlarge/Reduce function and the user will not be able to enlarge any
further. Do not enlarge or reduce unnecessarily. Please be aware that
if you continue to enlarge, you may lose the data displayed on your
screen. Zoom Out to reduce the size. If you reduce the data so as to make the data hardly
visible, the program may stop altogether.
To carry out each function, always select the configuration data or sewing data that
you want to apply. When selecting data, the configuration data will always appear in
blue, and the sewing data will appear in red. If you wish to use a data function, even if
it is automatically selected and the data appears in red or blue, we recommend you to
select it and click the stylus once more.
Program Function
PROGRAM OPERATION FLOW
The following flow chart is a simple explanation showing the most common path of this
program.
Create New Data
Edit
Open the sewing data you wish to edit.
Select sewing size according to the
sewing machine type and model.
Set the machine model to be used.
Select the sewing size.
The defined sewing machine model
determines the sewing area size of
the output data.
On the sewing area setting, the
defined length and width determines
the editing area on the screen. It will
be displayed symmetrically in the
middle of the screen.
Set various initial values from the
sewing condition setting and set
again according to the application.
Set the values such as stitch width
and length to be used.
Create the sewing data by entering
the configuration data or/and sewing
data.
Create the sewing data in order
using the inputted configuration data.
Edit the created configuration and
sewing data again.
Set the length and width of the sewing data.
Apply the sewing attribute codes
such as the bartack and overlap
stitch, according to its purpose.
Apply the mechanical control codes
such as Trim and Stop.
Serial transmission of sewing data
after setting the communication
according to the machine model.
Save sewing data
End
SCREEN STRUCTURE
The general structure of the program windows is as shown below.
Sewing Parameter Input
Default Window
Starting Window
Machine Model Setting
Window
Edit Window
Sewing Data Save Window
Data conversion establishment window
Insert Machine Control
Command Code Window
End of Program
Communication Setup
Window
A variety of windows exist apart from the window functions shown here. This figure
only shows the basic structure windows.
EDIT WINDOW
The following figure shows all the GUI and edit windows of the program. All the input
and edit processes are done in this window.
Status Bar
Edit Window
Cursor
Starting
Edit Size Frame
Menu Tool Bar
If you tap the stylus on Menu Tool, you will see a message that tells you the name of the
menu toolbar. Select the tools that can be entered, then tap on the edit window and enter
the data. Depending on the dialog box operation, you can use the program to create or
edit sewing data. (The message on the upper status bar displays the coordinate value of
the actual location of the cursor pointer).
Menu
The menu bar structure includes the following functions. The menu bar includes each
individual toolbar and constitutes all the functions of the program. For a detailed
explanation, please refer to the following toolbars
Menu Bar and Tool Bar
The menu bar and toolbar offer a diversity of functions. Among them, the toolbar offers
convenient and easy-to-use functions for the user.
File menu : Offers input and output file-related functions.
New
Open
Save
Save Zigzag Code
Open Image
Move Image
Delete Image
Embroidery Conversion
Pattern to Bartack
Thumbnail View
About
Exit
Starts a new pattern
Reads the saved file data
Saves the edited file on the screen
Saves the Zigzag Code in a text file.
Reads the BMP Image file.
Moves the Image
Deletes the Image.
Converts an Embroidery file to a Pattern file.
Converts a Pattern file to a Bartack file.
Displays saved file list.
Explains about the SPDA.
Ends the program
Setting Menu : Offers functions related to setting when
punching
Machine Setting
Sewing Setting
Select Control
Stitch Layout
Grid Setting
Snap to Grid
Absolute/Relative
Ruler
Navigator
Point Quantity
X-Y Coordinate Value
Information
Key Input
Sets the sewing field according to machine model types.
Sets the sewing field according to the user’s option
Sets the area for automatic selection of the sewing data
Allows conversion of sewing data created in the edit window to diverse forms
Shows the grid line in the sewing field
Automatically inputs the point to where the grid line overlaps
Shows the absolute coordinate and the relative coordinate of the inputted point
Shows a ruler on the top and left side of the sewing field
Shows a minimized edit window on the bottom right.
Shows the quantity of configuration data input points
Shows the inputted data point coordinate value
Shows the information of the existing data on the edit window
Do data generation by keyboard entry value and edit
Serial Communication Bar : Offers functions in which you can transmit the created
design data to the correspondent machine through a wireless system or cable.
Serial Setting
Sets the communication port for each type of device model
Download Zigzag
Offers download of zigzag design data
Download Bartack
Offers download of bartack design data
Wireless Comm.
Offers wireless download of design data
Upload Design
Uploads the design data saved in the machine to the PDA
Edit tool bar : It offers diverse types of easy-to-use functions for entering data in the
current sewing field. It offers Zoom In/Zoom Out functions when enlarging or reducing
the screen that displays the current sewing field. Also you can move the enlarged sewing
field freely using the Hand Tool.
Undo
Executes a previously executed command again
Copy
Copies the selected data
Paste
Pastes the copied data to any place in the Edit window.
Hand Tool
Allows user to freely move the enlarged sewing field by tapping on the Zoom In key
Zoom In
Expands the Sewing Field
Zoom Out
Reduces the Sewing field
Zoom All
Shows the field adjusted to the size of the sewing field
Delete All
Deletes all the data on the Edit window
Info
Shows the information of the created data
View Tool Bar : It offers functions that change the selected configuration data and
sewing data into different shapes.
Enlarge/Reduce
Enlarges/Reduces the selected data
Rotation
Rotates the selected data
Move
Moves the selected data
Mirror
Reverses the selected data
Sewing Range
Shows the range of the sewing data
Measurement
Measures the distance between two stitch points
2-Step Stitch
Creates stitches between two stitches
Stitch On
Makes all the hidden stitch points visible
Stitch Off
Hides all the stitch points on the screen
Grid Line
Creates the grid line on the Edit window
Data Tool Bar : It offers functions for entering configuration data in order to create the
frame of the sewing data. It is formed by functions such as entering normal lines, arcs,
polygons, circles, splines and closed splines which allow you to create a variety of
shapes. This toolbar also provides functions for creating or editing data in general such
as Insert, Delete, Move which allow you to edit one point of the created configuration
data. The Divide, Offset, Delete functions allow you to divide the configuration data.
Input Line
Creates a straight line by entering 2 or more point data.
Input Arc
Creates an arc by imputing 3 points
Input Polygon
Creates a polygon by inputting 3 or more point data
Input Circle
Creates a circle by inputting 3 points
Input Spline
Creates a spline by inputting 2 or more point data.
Input Closed Spline
Creates a closed spline by inputting 3 or more point data
Add Point
Adds one point of configuration data
Delete Point
Deletes one point of configuration data
Move Point
Moves one point of configuration data
Divide Element
Divides elements of the selected configuration data
Offset Element
Creates and positions the configuration data at regular intervals
Delete Configuration Data
Deletes the selected configuration data
Stitch Data ToolBar : The function of the Stitch Data Toolbar is to create the actual
sewing data based on the previously entered configuration data. It provides the Point
Stitching function for entering one stitch at a time, the Normal Stitching function for
creating normal sewing data, the Zigzag Stitching function for creating zigzag shapes,
the Reverse Stitching function for creating many reverse stitches on the created sewing
data, the Multi Stitching function for creating many sewing data at once, and finally the
Delete function for deleting the created sewing data. All these processes can be
accomplished only when configuration data or the sewing data that you wish to apply is
selected. Apart from these functions, the toolbar provides the Edit function.
Point Stitching
Inputs the sewing data of one stitch using the mouse pointer
Normal Stitching
Creates the sewing data using the selected configuration data
Zigzag Stitching
Creates the zigzag sewing data using the configuration data
Reverse Stitching
Multi Stitching
Creates the reverse sewing data according to the number of times
it has created stitches using the selected configuration data
Creates the sewing data according to the designated offset and the number of times it
has been designated using the configuration data or the sewing data
Sewing Deletion
Deletes the selected sewing data
Stitch Point Addition
Inserts one stitch of the sewing data on the selected sewing data.
Stitch Point Deletion
Deletes one stitch of the sewing data on the selected sewing data.
Stitch Point Move
Moves one stitch of the sewing data on the selected sewing data.
Stitch Join
Connects a stitch data between two selected sewing data
Sewing Speed
Gives speed to the selected sewing data
Sewing Division
Separates the selected sewing data
Sewing Data Tool : This tool changes the attributes of the created sewing data. The
Sewing Direction Change function changes the direction of the created sewing data back
and forth. The Sewing Order Change function switches the order of 2 sewing data that
exist in the front and back. The Sewing Attribute Change function changes the attribute
from Normal Stitching to Zigzag Stitching and Zigzag Stitching to Normal Stitching.
While changing the attribute, you can also change the length between stitches and the
width of the stitch. With the Sewing Length Change function, you can change the pitch
and length according to the type of created sewing data. The Sewing Speed Change
function changes the speed of the created sewing data. (It is provided on the upgrade
function). The BackTack function defines the number of stitches based on the start and
end of the stitch from the created sewing data and provides a function that creates more
stitches based on the defined number and criteria. The Overlap function adds the number
of stitches on the sewing data by creating the defined number of stitches by making the
created end point the starting point, and defining the number of stitch on the created
sewing data. Therefore the end of the sewing data is created again as the end of the
added stitch. Apart from this, the machine related control command functions are as
follows. The Second Origin Code enables the user to set any point other than the starting
point to be the second starting point.
The Machine Stop Code enables the user to insert a stop code on any sewing location
and make the machine stop temporarily. The Trimming Code enables the user to insert a
thread trimming function on any part of the created sewing data. The Machine Delete
Code discards any machine related inputted function codes. And last of all, the
Trimming All Code function automatically adds a thread trimming code to the last part
of each sewing data.
Direction Change
Switches the sewing start order of the created sewing data
Order Change
Changes the order of two selected sewing data
Attribute Change
Changes the attribute type of the selected sewing data
Pitch Change
Changes the length and width of the stitch on the selected sewing data
Speed Change
Determines the sewing speed of the selected sewing data
BackTack
Inserts the BackTack code in the selected sewing data
Overlap
Inserts the Overlap code in the selected sewing data
Second Origin
Inserts the second Origin point code in the place of your choice of the sewing field
Machine Stop
Inserts a machine stop code in the place of your choice in the sewing field
Thread Trimming
Inserts a Trimming code in the place of your choice in the sewing field
Clamp Inversion
Insert an invert / no invert code in the selected sewing field.
Machine Control Delete
Discards the machine related code on the selected sewing field
All Trimming
Inserts a trimming code on all the sewing data
Replay Toolbar : This tool displays the created configuration data and the order of the
sewing data (When editing: it displays the order of the created sewing data point.).
First Pointer
Selects the group of the first data (Edit: moves to the first point)
Previous Pointer
Selects the group of the previous data (Edit: moves to the previous point)
Next Pointer
Selects the group of the next data (Edit: moves to the next point)
Last Pointer
Selects the group of the last data (Edit: moves to the last point)
Data
Structure
Data can be classified into various groups. First, there is configuration data, which is the
basis for creating sewing data such as normal lines, arcs, circles, polygons and splines.
Second is the machine related commands that can incorporate the previously created
sewing data and the configuration data based on this created sewing data. The following
figure is an example of simple data and its details and explanations.
Edit Frame Size
Normal Arc
Sewing Stitching
Point Sewing Stitching
Machine Control
Command Stop
Configuration Arc Data
Jump
+X axis
Coordinate
Origin
Zigzag Circle
Sewing Stitching
Mechanical Control
Command Trim
Configuration
Circle Data
Configuration Splin Data
Edit Frame Size
[ Data Creation ]
Reference : Point form of sewing data created present with upside picture is taking
Cross Point form. You can change in "Stitch point layout" of setting menu to change this
form. Actuality basic setting value is taking circle point form of round form.
Configuration Data
As previously explained, configuration data is the basic data needed in order to create
sewing data. In another words, the sewing data is created in base of this type of data. The
types of configuration data are as follows:
Normal Line
Polygon
Arc
Circle
Spline
Closed Spline
If you select any of the buttons from the configuration data
function and then tap the stylus on the sewing field creating a configuration data, the
configuration data will be displayed in blue dots and lines. In another words, it will
display the currently selected configuration data. If you are creating a different
configuration data, the previously selected configuration data will change from blue to
gray, and the presently created configuration data will be set and appear in blue. As you
can see in the figure above (the data creation figure), the blue line is the currently
selected configuration data and shows the configuration data with the spline attributes.
The shape of the joint part of the configuration data will always be in
the shape of a blue circle.
Sewing Data
Sewing data can be classified into 3 types. First is point stitching, the second is sewing
data created based on configuration data and the third is the machine related control
command data that can be applied with the created sewing data.
Point Stitching
Stitching created based on
configuration data
Machine Command
Control Stitching
The first type of sewing data shown above is point stitching. Point stitching allows the
user to enter the stitch data one at a time. The second type of data is sewing data created
from the configuration data. As shown in the figure above, it displays the creation of a
sewing data of zigzag stitching based on the configuration data of a spline. The third is a
machine related command control. The commands are, Second Original Point, Machine
Pause, Sewing Data Trimming at Optional Place and Clamp Apply/Release. The figure
above shows the commands for Machine Pause and Clamp Apply/Release and
Trimming. As you can see from the figure, the machine related commands are indicated
in the text form. The machine stop is indicated as “Stop”, Left side clamp and Right side
clamp as “Clamp-L / Clamp-R”, and the trimming command as “Trim”. Although is not
shown in the figure, the Second Original Point is indicated as “2-Origin”.
Jump Data
If two different sewing data exist, a jump data always exists between them and it is
automatically created.
As the created data in the figure above, in the case of creating a sewing data, the jump
data is always automatically created from the origin point. As you can see, the jump data
is created in every section of the sewing data. If a sewing data is deleted, the jump data is
also automatically deleted. Between the erased sewing data, a new jump data will be
created again and it will be adjusted according to the sewing data in the front and back.
The jump data cannot be edited and will always appear in a gray dotted line.
Sequence of Structure Configuration and Sewing Data
The order of the sewing data is created independently to the order of the configuration
data. In another words, the created sewing data is always created in a definite order and
the configuration data that is related to the sewing data connects to the sewing data
independently to this order. For example, let’s say 4 configuration data are created as in
the picture on the left and let’s say the configuration data are indicated with the number
1, 2, 3 and 4 and the sewing data with [1],[2],[3],[4]. If you create a sewing data by
selecting configuration data [4], the created sewing data will be sewing data [1].
Therefore the sewing data [1] will include the configuration data [4]. Also, when recreating the sewing data using the configuration data [3], this will automatically connect
a jump with sewing data [1] creating the sewing data [2] and configuration data [3] will
connect with sewing data [2]. If the sewing data using all the configuration data is
created, the sewing data will be created in the order of the shape shown in the figure
above. In order to view this kind of created order select the Replay Tool on the toolbar.
Selection of Components using the Stylus
Selection of data using the stylus is very simple. Because the configuration data and the
sewing data are both independent, if you click each data separately it will display the
selected data on the screen.
The configuration data will be shown in blue and the sewing data in red.
On the sewing field, the stylus icon will be displayed in the shape of a
cross. If you tap on the function button, and hold the pen on the tool bar
that you want to select, the selected tool bar will sunk
in at the
bottom of the menu tool bar. In order to select the sewing data and the configuration data
existing in the sewing field, you should select the joint part of the data. Of course, when
it is a sewing data, it will not be the joint part but each stitch data. The selected joint of
the configuration data will be indicated with a blue circle, the configuration data in blue
letters, the sewing data in red and the needle data in black. The basic principle of the
selection of the sewing data and the configuration data is that the range of the
joint point in order to select the configuration data and the sewing data are -3
pixel ~ +3 pixel horizontally and -3 pixel ~ +3 pixel vertically. However,
please be aware that if there are 2 data in a 1 mm space, the point on the side may be
selected and not the point that one wishes.
PDA special quality, an electron pen may do discomfort a little than mouse
manufacturing of PC
Creating Data
Whole function explanation for following contents explains with pattern machine
Creating New Data
1) New Pattern Creation
Before creating the configuration data or the sewing data you should create a new editing
field. There are two ways to create it, the first method is by pressing the New Data button
on the Start Dialog generated when you first execute the
program.
The second method of creating is by pressing the New Button
on the File Menu Bar.
If you press the New Button when using either the first or second method, the following
Dialog Box will pop up. The explanation of the Dialog Box is as follows:
Machine Type : The type of machine to be used is selected.
Machine Model : The model of the machine is set.
Sewing size : Once the machine model is set, the edit field or the sewing field will be indicated.
If you press the “OK” button, the program edit screen will
change as in the figure on the side, and you will be able to
start work.
Creating of Configuration and Sewing Data
Data input can be done by selecting the tools you wish to use from the sub-toolbar. The
following is a step-by-step explanation of the configuration data and sewing data
creating process.
Creating Configuration Data
1. Entering data using the Stylus
Spline Input
Select the function button of the shape you wish to create using the electronic pen.
When the button is selected the button will sink in.
Tap the stylus to the place you wish on the sewing field. The cursor will be displayed
in the shape of a cross
.
If you tap the place you wish to enter the data with the stylus, a dot
will appear.
Because the current selected configuration data type is a spline, if you continue to
enter, the entered points will be displayed on the screen.
To save the entered data, tap and hold
the stylus to the PDA screen for more
than 2~3 seconds or press one of the
four button on the PDA shown on the
right side figure. The moment you press
the button you will see the application
dialog window. (Be aware that the
buttons may vary for every type of
PDA).
This application dialog window contains three types of buttons.
First is the Release Button. This button applies the results
entered until now.
Second is the Cancel Button. This button cancels the results
that have been entered until now.
Third is the Exit Button. This button returns the entered
results to the present state.
Therefore, if you press the Release button, it will show a
spline being created, the selected spline button in the lower
part of the toolbar will be released and sink in. It will remain
in the current set spline state.
If you want to cancel the data that was being entered, as in number , press any of
the 4 buttons in the front panel of the PDA. When the application dialog box is
displayed, press the Cancel button.
Line Input
For steps
, the directions are identical to that of
the Spline Input. But in the case of spline number , if
you continue to enter data, only the point will be
displayed. But in the case of a line, if you enter 2 or more
dots, they will be automatically connected. The other applicable functions are the same
as the functions of spline numbers
.
Arc / Circle Input
For steps
, the directions are identical to the steps mentioned above. Because the
arc and the circle are composed of three points, up to two dots will be displayed in
dots as the creation process of the Spline. But when you enter the third dot, each dot will
be connected by a line, which will create the Arc/Circle.
Polygon Input
Inputting a polygon is the same as inputting a line.
The only difference is that the Polygon is a closed
loop, and in order to finish the input you must
click the right button of the mouse to input the
first point and the last point, which will connect
automatically.
Closed Spline Input
The steps are basically the same as in the
creation of the spline. The only difference is
that if you press the right button as the final
step, it will create the closed spline the same
way it creates a polygon.
The next figure demonstrates the various created configuration data.
2. Input using the Navigation buttons
Data input with the PDA navigation
buttons is the same as that with the
stylus. The only difference is that the
buttons of the PDA’s Navigation Panel
in the PDA will be used instead of the
stylus. In the picture on the side you can
see a PDA that provides the navigation
keys. (For you reference, the navigation
buttons may have different shapes and applications according to the type of models).
Instead of entering data by tapping and holding the stylus on the screen, the data is
entered by pressing the center part of the navigation buttons. As a simple example for
data input, select the Configuration Data Function Button of the type that you prefer or
select the Point Stitching Button to directly input the sewing data. Once it is selected, if
you move the navigation buttons of the PDA, the cursor of the coordinates will also
move. You can enter the data by placing the cursor in the exact position and pressing the
center of the PDA navigation buttons. The unit of the cursor movement using the
navigation buttons is 1 pixel (0.1mm). If you want to close the application, you can close
by pressing any of the navigation buttons. The data input by navigation buttons is very
useful for meticulous jobs such as editing stitches.
3. Input Using the Keyboard Number Keys
The third input method to tap the
input function button
on the toolbar and then select
keyboard input from the setting
menu.
The keyboard input dialog will
be displayed as the one on the
side. Enter the coordinate values
you wish on the X axis and Y
axis. If you then press the
“Create” button, you will see the
data being inputted. After entering the data the input function button of the toolbar will
remain in the selected state. If you want to input another data, you can enter it by
selecting the keyboard input from the Setting Menu. If you press any of the 4
applications buttons of the PDA, the application message box will be displayed. Then
press the Apply button. Exit by pressing the Apply button of the Apply dialog. For your
reference, editing with the keyboard number keys is very useful when doing detailed
work.
3. Creating Sewing Data
This section introduces methods to create sewing data. The methods to create sewing
data are much simpler than that of the previously explained configuration data. This is
because we are creating new data based on an already created configuration data. The
data creation method can be divided into 2 kinds. The first method is the Point Stitching
Method where the user enters new data directly to the screen and the second method
allows the user to create data based on an already existing configuration data.
Point Stitching
The Point Stitching Method uses the same method of entering configuration data as that
of the previously explained method. The only difference is that when entering point
stitch data for the first time, it will automatically create a jump with the origin point. No
matter what kind of sewing data attribute is found, a jump will automatically be created
with the origin point when sewing data is created for the first time.
Select the Point Stitching button as in the figure above. (If you select as in the picture,
the button will sink in)
In order to enter the data, you can enter by
tapping the stylus on the place you wish. (You can
continue entering data until you finish the Point
Stitching)
To close an application, tap the PDA
screen for 2~3 seconds or press any of the
4 application buttons on the PDA
indicated on the figure on the right. The
moment you press the buttons, an
application dialog window will be
displayed. (Note: the buttons may vary
depending on the type of PDA)
This application dialog window has 3 kinds of
First is the Release Button. This button applies the
results entered until now.
Second is the Cancel Button. This button cancels the
results that have been entered until now.
Third is the Exit Button. This button returns the entered
results to the present state.
Therefore, if you press the Release button, it will show a
spline being created, the selected spline button in the
lower part of the toolbar will be released and the current
spline shape will remain.
If you want to cancel the data, press any of the 4 application buttons in the front panel
of the PDA. When you see the application dialog box, press the Cancel button.
Another method to cancel entered data is to use the navigation buttons keys
of the PDA and the number keys of the PDA.
There are two sewing data created based on configuration data. The first is the creation
of the Normal Stitching dialog and second is the creation of the Zigzag Stitching dialog.
Normal Stitching
The configuration data must be created on the
edit field. (For more information about the
creation of configuration data, please refer to the
previous pages on “Creating Configuration data”)
Select any configuration data from the created
configuration data. As the figure shows, when
selecting among various configuration data, the
selected configuration data will be displayed in
blue and the rest of the configuration data will be
displayed in gray.
Select the Normal Stitching button
Stitch Data Toolbar.
on the
After selecting this button, the regular Stitch
Dialog Box will be displayed. There are two
places for entering data on this box. The first is for
entering the Stitch Length and the second is for
entering the Sewing Speed. Note that the sewing
speed will not be applied yet.
By pressing the “OK” Button, as in the next
figure, you will see the sewing data with line
attributes based on the normal line configuration
data being created.
To create a different sewing data, you can repeat
the points
mentioned before.
The figure below shows an actually created sewing data in order to help understand
about parameters.
Stitch Length(pitch)
Zigzag Stitching
The method for zigzag stitching is the same as that for creating normal stitches. The
only difference is that instead of selecting the “Normal Stitching” button, you must
select the ZigZag Stitching button
.
Once you select this button, a “Zigzag Stitch
Dialog” box will appear as in the next figure.
As this figure shows, you can see a more
complicated input box than that of a normal stitch.
First you must enter the width of the created data.
Then you must enter the stitch length (pitch), which
is the same as on the normal stitch. Apart from these
selection buttons is the Start Direction Setting
button, which creates the direction for the zigzag
stitches. However, the speed related input box
cannot be applied yet.
If you press the “OK” button you will see
following sewing data with zigzag shapes being
created.
The following picture shows the actually created zigzag shape sewing data in order to
help you understand about the parameter.
Left
Zigzag Width
Right
Zigzag Length (pitch)
Creating a Mechanical Control Related Command
Mechanical control commands are those that affect the machine directly. The creation
process of these commands is very simple and the creation order is as follows.
Second Origin Control Command
The function command to set the second origin does not select the sewing data
but has the function of applying on any determined place in the sewing field.
There are two types of data entering. The first is entering data for the first time without
sewing related data and the second is entering data based on already created sewing data.
On the former, the second point of origin will be created on the place where data has
been entered and a Jump will be created automatically from the actual origin point.
On the latter, if you input the second point of origin in any determined place, the second
point of origin will be created with a jump between the first sewing data created from the
actual point of origin taken as the basis. A new jump will be automatically created
connecting both sides with the second point of origin.
Next, we will explain about the latter case or the method of creating the second point of
origin.
Before creating a machine related command, there must be a sewing data. (Please
refer to “ Creating sewing data”).
Select the Second Origin button
sink in.
in the Sewing toolbar. The selected button will
Place the stylus on any determined place to
enter the second Origin on the edit field
and tap the stylus. You will see a red dot as
the one shown on this next figure.
If you then press the function button on the PDA,
you will see the Release application dialog box.
Select the Release button. Then the Second Origin
Dialog Box will be displayed again.
When creating the second origin, press the “OK”
Button. If you do not wish to make a second origin,
select the “Cancel “ Button.
On the next picture you can see the created
Second Origin. You will see the words “2Origin” in red in the place where it is created.
For a detail explanation about the Second Origin please refer to the Machine Manual.
Thread Trimming Command
Before creating the Trimming Command, there must be a sewing data. (Please refer
to “Creating Sewing Data”)
Select the Trim Button
on the Machine Toolbar. The selected button will sink in.
Place the stylus on any determined place of the created sewing data and then tap it.
As shown in the picture, the darker portion is an enlarged image. The blue dot is the
selected joint.
In order to finish the input, tap and hold the stylus to the screen for 2~3 second or
press any of the 4 application buttons in the front panel of the PDA. The Apply
Dialog Box will be displayed. Tap on the Apply button. Then, the Trim Dialog Box
will be displayed as in the next picture.
Tap the “OK” Button if you want to insert the trim command, or press the “Cancel”
button if you want to cancel.
The following picture includes the Trim Command. The “Trim” command will be
displayed in blue letters.
Machine Stop Control Command /
Clamp Inversion Command
Apart from this, the Machine Stop and the Lamp Inversion button function can be
created with in the same way as for the Trim function. The Machine Stop command is
indicated in blue letters as “Stop.” The Clamp Apply/Release can be selected in two
modes: right and left side. This is displayed as “Clamp-L/Clamp-R.” The above picture
displays all the created machine related commands.
Delete Machine Control Command
This command has the function of deleting all the created Mechanical Control
Commands. In order to delete the created machine control commands, use the same
method used for deleting one stitch data. If you select the sewing data of the place that
you are planning to delete after selecting the machine command delete button, the
selected data will appear in blue. If you press any of the 4 application buttons, the Apply
Message Box will appear and ask if you wish to delete.
Before deleting the mechanical control command, select the button Delete Machine
Control Command
from the Sewing data toolbar.
With the stylus, select the joint of the sewing data
where the mechanical control command is found
that you wish to delete. The figure on the side
shows the Trim function being selected. The
selected joint will be displayed in a blue. (This
figure shows the same pattern process that was
used previously).
If you press any of the 4 application buttons, the
Application message box will be displayed. Press
the Apply button. Then the following dialog box
will be displayed again. There will be 2 types of
radio buttons on the box. The first is “Specified”
and the second is “All”. The first one deletes the
currently selected Mechanical Control commands
and the second one deletes all the Mechanical
Control Command that exist on the current edit
field.
All Thread Trimming Command
This function is provided to make it easier and more convenient for the user to work. It is
a function that automatically creates the trims at the end section where the jump connects
with the sewing data, without inserting the trim one by one at the end of the sewing data.
In order to apply this function you must save the current work. (Before saving it is
convenient to apply this function for the last time.) The function order is as follows.
Based on created sewing data, select the “All Thread Trimming Command” Button
from the “Sewing Data Toolbar”. The selected button will sink in.
If you press any of the 4 application buttons, the
following Application Message Box will appear.
Press the apply button. Then the following dialog
box will be displayed again. It will ask if you wish
to automatically insert the thread trimming.
Press the “OK” Button. The Dialog Box will
disappear and there will be no change on the
sewing data from the screen.
Select the Save function that is on the top left side of the file menu. The save dialog
box will be displayed. In this dialog box you can choose “Save” in order to save the
created design or cancel to discard the created design. If you cancel it, you will be
able to see the Thread Trimming automatically added.
Edit Function
There are three editing methods. First, there is a method using the stylus. The
second method uses the Navigation buttons. And the third method uses the
keyboard input value. You can change the data and points of the configuration data
and sewing data by using the Insert, Delete and Move functions.
Please remember that in order to apply the edit function, the
configuration data and sewing data must be within the editing field
Also, select correctly data that wish to apply to do of edit
Editing of Configuration Data
Editing with the Stylus
Editing with the stylus can be carried out by using the
Configuration Toolbar.
Add Configuration Point
: Configuration data without sewing data
Let’s say there is a data as the one shown on the
side. The currently existing configuration data
(the Normal Line) appears in blue, and the
other data (the Spline) will appear in gray.
Select the Configuration Point Addition button
on the Toolbar (the button will sink in when it
is selected).
Select the configuration data piece you wish to
add with the stylus. In the figure, the 4th joint
of the Normal Line has been selected. The
selected joint appears in red.
.
Tap the stylus on the area you wish to add and
hold it. You will see the entered data added to
the area you first selected.
To apply the selection, press the four
application buttons in the front panel of the
PDA and you will see a message box appear.
Press on the application message. While
pressing it, you will see the entered point that
was last added and the previously selected
configuration point’s next point automatically
connect.
: Configuration data that includes sewing data
Select a configuration data with an already
existing sewing data (Normal Spline Stitch).
Steps
are the same as above.
To apply the selection, press the four buttons in
the front panel of the PDA and you will see a
message box appear. Tap on the application
message. While tapping it, you will see the
entered point that was added last and the
previously selected configuration data’s next
point automatically connect and then create a
sewing data again.
When inserting a configuration data, if it includes a sewing data. the coexisting sewing data will automatically change when and the selected
configuration data uses the Add / Delete / Move functions,
Delete Configuration Point
: A configuration data without sewing data carries out work based on the
previously created data.
Select the Delete Configuration Point button
button will sink in when selected).
on the Configuration Tool Bar (the
Select the configuration data area you wish to
delete with the stylus. The selected area will
appear in red.
To apply the selection, press the four application
buttons in the front panel of the PDA and you
will see a message box appear. Tap on the
application message. While tapping it, you will
see the selected piece deleted. Therefore, the
selected piece will disappear and you will see a
straight line form again between the two
existing points on each side.
The configuration data delete function, unlike the insert function, cannot delete
continuously. However, it can select and delete one point at a time.
: For configuration data that includes sewing data
The method to delete the configuration data points
that include sewing data is the same as that
mentioned above. However, when deleting the
configuration point, sewing data can be created
again based on the deleted type of configuration
data. The next figure shows a configuration data
with one deleted point. Please compare with the
figure above.
Move Configuration Point
: For configuration data without sewing data
Select the Move Configuration Point button
in when selected).
on the toolbar. (the button will sink
Select the configuration data piece you wish to
move. The selected piece will appear in red.
Move the stylus and tap it on the place you wish
to move the configuration data to. Then you will
see the selected configuration data has been
moved to the place you have tapped. The
transferred joint is shown with a red dot.
If you wish to move the dot to another point, repeat steps
it to other points.
and
and you can move
To apply the selection, press the four application buttons in the front panel of the PDA
and you will see a message box appear. Tap on the application message.
: Configuration data that includes sewing data
The method to move the point of configuration data that includes sewing data is the
same as the method explained above. However, when moving a configuration data, you
can create new sewing data based on the moved configuration data. This is an example
of a moved configuration data.
Before moving
After moving
Editing with PDA Navigation Buttons
Editing with the PDA navigation buttons is similar
to editing with the stylus. However, the only
difference is that instead of tapping with the stylus,
you must press on the “center button of the PDA’s
navigation buttons” and you need to move the
cursor on the screen with the “PDA navigation
buttons”. To finish, you must simultaneously press
the four application buttons in the front panel.
Select the function button (Insert, Delete, Move) you wish to edit from the Toolbar.
Move the cross-shaped cursor point to the editing area and press the “PDA Direction
Key. You will see the cursor point move when you press the up, down, left, and right
keys.
Put the cursor point on the configuration data piece you want to apply to and press the
“center button of the PDA’s direction key” and the configuration data piece will be
selected.
Use the function keys you need (Insert, Delete or Move) and then press the “center
button of the PDA’s navigation buttons” and the selection will be applied.
To finish, simultaneously press the four application buttons in the front panel.
However, this program does not support continuous data insertion using the
PDA Navigation buttons like it does with the stylus.
Editing with Keyboard Input Data
Editing based upon the keyboard input value is also similar to the method applied before.
This method only supports the function of inserting and moving.
Add Configuration Data Joint.
Select Addition of Configuration Data Joint
from the Configuration Data Toolbar.
Select the Configuration Data Joint you wish to insert. (It
doesn’t matter if you use the stylus or the Keyboard
Navigation Keys). The selected joint of the configuration
data will be displayed in red.
Select Keyboard Input from the Setting Menu.
A dialog box will be displayed as the one shown here.
Enter the coordinate values of configuration data
point you wish to add using the Keyboard Input box
at the bottom of the menu.
If you press the “Create” button, the value of the
inputted coordinates will be added.
Edit of Sewing Data
Editing the sewing data can be done using the same method as
that when editing configuration data. Just like the configuration
data, there are three editing methods. The following figures are
related to buttons used for sewing data editing.
Editing with Stylus
Editing the Needle Entry Point
: This is a step-by-step explanation of needle insertion with sewing data
entered with point stitching.
Select the “Needle Entry Point Edition”
button from the Tool Bar.
Select the sewing data piece you wish to edit
with the electronic pen. In the figure, we have
selected the fifth piece of the point stitching. The
selected piece appears in blue.
Move the cursor point and continuously tap the
stylus on the area you wish to add. You will see
the additional data being added to the selected
piece.
To apply the selection, press the four application
buttons in the front panel of the PDA and you
will see a message box appear. Tap on the apply
message. When you tap on it, you will see the
last entered point and the previously selected
configuration data point automatically connect
Editing with Cursor Key in the PDA
Editing with Keyboard Input Data
Explanations on these two editing methods are omitted.
For editing sewing data that includes configuration data, please keep in mind
that if the configuration data changes after editing the sewing data, the
sewing data will be recreated according to the changed configuration data.
The most ideal sewing data creating method is to first create a configuration
data or sewing data with the design you want. Create and edit a sewing data
that matches the actual design you want to apply and to instruct the various
sewing related attributes and then proceed to make the final design.
Create configuration data
Edit configuration data
Edit sewing data and change attributes
Create sewing data
Save
Editing According to Order of Stitch
This function indicates the order of the sewing point of each stitch, and provides a stitch
editing function.
Let’s say the following sewing data has been created.
The following can be done to indicate the created
sewing point order
Select the Move or Delete button to move
or delete the sewing data for one stitch.
The selected button will sink in as shown
in the figure.
After selecting the function button, select the pertinent sewing data stitch. The
selected sewing data stitch will be indicated with a red dot as shown in the following
figure.
The enlarged figure is
shown here.
Use the Replay button on the toolbar to go back one stitch
from the current selected stitch.
Select the Rewind button on the Replay toolbar.
On the following figure, you can see that the
stitch has moved one stitch from the currently
selected sewing data stitch.
Next we will show you the steps to move to the last stitch in the selected sewing data.
Select and tap on the last point function button on the replay toolbar.
In this figure, you can see the currently selected
sewing data’s stitch being moved to the last point.
This time, tap on the start pointer function button of the Replay toolbar and move it to
the starting point of the currently selected sewing data. If you tap the function button,
the point will move to the currently selected sewing data’s starting point. If you tap on
it twice, the point will move to the previous sewing data’s starting point.
Next, we will move the currently selected stitch
to the next stitch. Tap on the Next Point button
of the Replay toolbar. You will see the point has
moved to the next stitch as the figure shows.
And finally, you can move the selected sewing
data to the location of your choice by moving
and tapping the electronic pen. The moved
sewing data point looks like the following
figure.
Stitch editing using the Replay Toolbar can only be used with the Move and
Delete buttons of the stitch data. The method is the same as that when using
the stylus. The advantage of this method is that it allows you to edit while
looking at the stitch data creation order.
Data
Management
The data management related functions are useful when managing
configuration or sewing data.
Other Useful Functions
Edit Tool
Undo
The Undo function returns a new function to the previous function. For instance, this
function can be applied when editing designs such as the one below.
Using the Stitch Point Deletion function, you can delete the Stitch Point such as shown
in the figure below. Apply the Undo function found in the edit tool. After application,
you can see that the deleted point has returned to the previous position.
Before applying the Undo function
After applying the Undo function
Copy and Paste
The functions we saw on the previous pages are functions we use generally. These
functions are supported in most programs such as graphic programs or word document
programs. This program also provides easy methods to use these functions.
In the edit field you will find configuration data and sewing data that look as the
figure on the side. Select the configuration data that you wish to copy. In this
example, we will select the circle.
Tap on the copy button in the tool bar. If you copy it, the selected configuration data
will have a dotted outline around the area you selected.
Move and tap the stylus on the area you wish to paste the circle to. You will see a
small circle on the area you selected to paste the circle.
Tap on the Paste button on the Edit Tool bar
You will see a circle configuration data pasted as the figure below
Now you will see the pasting of a selected point stitch sewing data. The steps to the
pasting process are the same as the ones for the configuration data of the circle we
saw above.
Hand Tool
: The Hand Tool is a very useful tool when you see edit the data or when
you see the front /back, left/right side of the data.
Let’s say that the displayed figure has been enlarged with the Zoom In function. (The
Hand Tool can only be used when the displayed figure has been enlarged)
Select the Hand Tool. The Hand Tool will sunk in.
Move the electronic pen to the area you wish to edit.
Move the electronic pen as you press on it. You will see the displayed figure move to
the movement of the pen.
Zoom In
: The Zoom In tool is used for enlarging the figure on the screen.
Select Zoom In.
Place the stylus on the part of the edit field you wish to enlarge.
If you press the left button of the mouse, the figure
on the screen will enlarge from the point you
pressed.
Another way to enlarge the screen is to hold and drag
the left button of the mouse while pressing the area
you wish to enlarge. You will see a dotted
rectangular area drawn on the screen. If you release
the left button of the mouse, the dotted rectangular
area will become enlarged.
Zoom Out
: the Zoom Out tool is used for reducing the figure on the screen.
Select Zoom Out.
Place the stylus on the part of the edit field you wish
to reduce.
When you place the stylus on the place you wish to
reduce, the figure on the screen will reduce from the
point you have tapped.
Zoom All
: the Zoom All tool shows the screen adjusted to the edit field.
Select Zoom All
The enlarged or reduced screen will be displayed
after being adjusted to the edit screen.
View Tool
Enlarge/Reduce, Rotate, Move, Mirror
You can apply the Enlarge/Reduce, Rotate, Move and Reverse functions into all the
configuration data or sewing data. If a sewing data exists in the configuration data after
applying the Enlarge/Reduce, Rotate, Move and Mirror functions based on the
configuration data, it acquires the same changed effect as the one acquired when creating
the sewing data again. However, if only sewing data like Point Stitching exist, the
sewing data will be applied regardless of the configuration data.
The “Whole Pattern” function does not apply in the entire data that contains the
configuration and sewing data.
Enlargement / Reduction
: This tool enlarges or reduces the selected configuration data and sewing data
Select the configuration data and the sewing data you
wish to enlarge or reduce.
Select Enlarge/Reduce. After selecting it, you will see the enlarge/reduce dialog box.
The functions of the dialog box are as follows.
Enlargement/Reduction of whole pattern : this
applies to all patterns regardless of the selected
configuration data and sewing data.
Enlargement/Reduction of specified elements
(range) : this applies to the selected configuration
data or the sewing data.
X-Range : defines the enlargement/reduction
range of the X axis.
Y-Range : defines the enlargement/reduction
range of the Y axis.
The range unit used as a standard is 100. If the
number is 120, this means that 20% is enlarged. If
the number is 80, it means that 20% is reduced.
Increase / Decrease of number of stitches :
enlarges/reduces the number of stitches.
Increase / Decrease stitch length : enlarges / reduces the distance between stitches.
No (Origin or center) : enlarges/reduces the selected configuration data or the sewing
data around its center.
Yes : enlarges or reduces data based on the choice of the user.
Press the “OK” button. It enlarges the configuration data
and the sewing data.
Data reduction is done with the same method.
Rotation
: this function rotates the selected configuration data and the sewing data.
Select the configuration data and the sewing data you
wish to rotate.
Select the Rotate button. The Rotate dialog box will
be displayed. The selected pattern will be displayed in
a dotted line set on the total size area as shown in the
figure.
The details on the Rotation dialog box are as follows.
Rotation of whole pattern : rotates the whole pattern.
Rotation of Specified elements(range) : rotates the
selected sewing data or the configuration data.
Angle : Enters the angle to be rotated
No(Origin or center) : rotates based on the selected
data.
Yes : rotates based on an optional place of the user’s
choice.
Enter 30 degrees for the rotation angle and press the
“OK” button.
The rotated selected pattern will be displayed.
When the rotation function is applied only to the
selected sewing data only, if the rotation angle is
1 degree, the data will become distorted. In order
to stop this type of problem from occurring, first
create the sewing data based on the configuration data. Then, if you select to
rotate using the method to re-create sewing data after rotating the
configuration data, it will prevent data distortion.
Move
: this tool moves the selected configuration data and sewing data
Select the configuration data and the sewing data you wish to move.
Select the Move button. The Move dialog box will be displayed. The selected pattern
is displayed in a dotted line set on the total size area as shown on the following figure.
The details on the Move dialog box are as follows.
Parallel move of whole pattern : moves the whole pattern.
Parallel move of Specified elements(range) : only
moves the selected configuration data or sewing data.
X : Enter the movement unit on the X axis
Y : Enter the movement unit on the Y axis.
Enter 1 on the X axis and 1 on the Y axis. Then press the “OK” Button.
You will see the selected pattern move.
Mirror
: this tool mirrors the selected configuration data and the sewing data.
Select the configuration data and the sewing data you wish to mirror.
Select Mirror. The Mirror Dialog Box will be displayed.
The details on the Mirror dialog box are as follows.
X axis : mirrored based on the X axis.
Y axis : mirrored based on the Y axis.
Point :will mirror from any place of the user’s choice.
In this case, the mirror effect is based on the Y axis.
Press the “OK” Button. The selected pattern is displayed in a dotted line set on the
total area as shown here. Indicate the marker by moving the mouse pointer and
pressing the left button of the mouse.
Press the right button of the mouse again. The Mirror
Point dialog box will be displayed.
If you press the “OK” button, you will
see the same patterns created based on
the Y axis marker.
Min-Max. Sewing Range
: this tool displays the maximum and minimum range of the sewing data
on the edit screen.
First of all, the sewing data must exist on the edit screen.
Select Sewing Range from the View menu.
The Sewing Range dialog box will be displayed. On the
Sewing Range dialog box you will easily see the
minimum and maximum range of the sewing data.
Measurement (Point to Point)
: this tool is for measuring the distance between 2 stitch points.
Select “Measure” from the View Menu. The selected button will sink in.
With the stylus, select the first joint of the sewing data you
wish to measure on the edit screen. The selected joint will be
displayed in a black circle.
Next, select the second joint. The
selected joint also will be
displayed in a black circle.
When it is displayed as on the figure above, if you press any of the application
buttons on the PDA, the application message box will be displayed. Then press the
apply button. The selected black circle will disappear and the measurement value of
the distance between 2 stitches measured of the Stitch Length item will be displayed
on the middle of the screen.
Creation of 2-Step Stitch
: this tool adds an extra stitch in the space between 2 stitches. This can be
applied to any stitch including the existing zigzag or normal stitch.
The order of application is as follows:
Step 1 : Create a zigzag or normal stitch sewing data on the edit screen.
This explanation uses the zigzag stitch as an example. The next figure shows the normal
zigzag stitch before applying the 2-step stitch.
Step 2: Select and apply the 2-Step Stitch from the View Menu. You will see a stitch
created with an additional stitch between
two zigzag stitches.
Note : In cases such as the one above, apply the 2-Step Stitch on the zigzag containing
configuration data. When moving the joint of the configuration data, the zigzag data will be
created again according to the changed configuration data. Therefore, the 2-Step Stitch
that was applied on the existing stitch will disappear. Don’t forget this point. If there is a
point stitch without a configuration data, you will not be able to modify it like the
configuration data.
View Data Joint (Stitch On)
The Stitch Point is shown on the edit screen.
Hide the Data Joint (Stitch Off)
The Stitch Point is not shown on the edit screen.
The PDA has a characteristic of operating slowly when it displays large quantities of
stitches. Therefore, if a design has many stitches, use the Stitch Off function to process
them more quickly.
Grid Line Indication (Grid Line)
The Grid tool shows the screen in grids set by the user. This is a very useful function
when entering or editing data. The default distance setting is 2 by 2 mm (width and
height).
Select Grid.
After selecting this button, a grid of 2 mm squares will be displayed on the edit screen
as shown here.
Follow the following procedure to change the Grid Line.
Select the Set Menu item that on the menu bar at the bottom of the program and
select Grid Setting from the middle of the menu.
The Grid Setting dialog box will be displayed. Enter the setting value on the
horizontal and vertical axis input box. If you press the “OK” button, the Grid Line
will be displayed according to the entered value.
View of Data Order (Stitch Replay)
Refer to the Edit section based on the stitch creation order of the Sewing Data section.
Data Information (Info)
This tool shows information on the selected configuration data and sewing data. The
next figure shows the information on the selected data.
If see on lower column exclusively in information of sewing data, there is "Jump stitch
number" Jump and stitch number denote needle number that is transmitted in case of
transmit data to actuality bartack machine. Only, attribute of data must be "Point
Stitching"
Data Tool
Configuration Element Division
: this tool divides the data based on the joint of the selected configuration data.
Select Configuration Element Division. The selected button will sink in.
Select the joint of the configuration data you wish to divide.
The selected configuration data joint part will be displayed with a red cross-shaped
point.
If you press the 4 applications buttons of the PDA,
the application message box will be displayed. Then
press the apply button. The following dialog box will
be displayed again. It will then ask whether you wish
to divide the Configuration Element.
Press the “OK” button. You will see the selected configuration data being divided.
If it is a closed curve (Polygon, Circle, Closed Spline), you must select the
joint of the configuration data as 2 points.
Offset
: this tool creates a new configuration data defining the interval and the
number of times the selected configuration data has been created.
Select Offset. The selected button will sink in.
Select the configuration data. The selected configuration data will be displayed in blue.
If you press the 4 applications buttons of the PDA, the application message box will
be displayed. Then press the apply button.
The Offset dialog box is created. In the Dialog Box
you will find the following 3 input boxes. The first
box determines what will be the time interval when
creating the configuration data. The second box
determines the direction for creation. And the third
and last box is for entering how many times you
want to create data.
If you finished entering the data on the corresponding box,
press the “OK” Button. You will see the configuration data
being created based on the set value.
Configuration Data Deletion
This is a function for deleting the selected configuration data. If the configuration data
includes the sewing data, you can choose to either erase only the configuration data or
the configuration data and the sewing data altogether. If not, the configuration data will
be immediately deleted.
Select Delete Configuration Data. The
selected button will sink in.
Select the configuration data you wish to
delete.
If you press any of the 4 application buttons of the
PDA, the application message box will be displayed.
Then press the apply button. The Delete dialog box
will be displayed. There are two radio buttons that
you can choose in the box. The first button is for
deleting all the sewing data and the configuration
data. The second button is for deleting only the
configuration data.
Select the configuration data radio button.
Press the “OK” button. The configuration
data is deleted, leaving only the sewing
data.
Please be aware that the attribute of the sewing data existing on the
configuration data of the Arc was the Arc Stitching. But after deleting the
configuration data, it will change to a Point Stitching attribute.
Stitch Data Tool
Reverse Stitching
: this tool reversely creates the sewing data again.
Select the Configuration Data
Select the Reverse Stitching function Button. A dialog box will be created.
As shown on the next figure, there are many kinds of
input boxes. The first input box sets the number of
Reverse Stitches.
The second input box is for entering data when selecting
the Regular Stitch button.
This means that it will make the reverse stitches in
regular stitches. The input box is for entering the value
for the distance between stitches.
The second input box sets the type of zigzag stitch.
Each input box is for entering the distance between
stitches and the width; the last 2 radio buttons are for
determining the starting direction for creating zigzag
patterns. The current dialog box is the basic standard
dialog box.
Press the “OK” button. You will see the sewing data being created on the edit screen.
Although the sewing data has been created, because you cannot verify if the reverse
was also created, you can verify it by moving the configuration data using the Move
function. The figure on the side shows the data created in the reverse side between the
moved data and the existing data underneath when moved.
Multi Sewing
: the Multi Sewing function is similar to the previously explained Reverse
Stitching function. The Multi Sewing function does not create the reverse stitches, but it
can create many equally shaped sewing data.
Select the configuration data.
Then the Multi Sewing Dialog Box will be created.
As you can see in the dialog box, there are many
types of input boxes. The first box, or Multi-Sewing
Offset input box, is the offset value for setting the
distance when creating data. The second box sets the
Offset Direction. The third input box is for setting the
number of times of creation. Next is the type of
sewing. There are 2 types of stitches explained in
here. These are the regular stitch and the zigzag
stitch. Currently the zigzag button has been selected.
Press the “OK” button. After 3 configuration data are created, the zigzag box will be
created. (This cannot be seen on the screen).
After setting the value of the zigzag dialog box, press the “OK” button. Then you will
see the sewing data with zigzag stitches being created.
Stitch Data Deletion
:this tool deletes the selected sewing data.
Select the sewing data. The selected sewing data will be indicated in a red line.
If you press any of the 4 application buttons of the
PDA, the application message box will be displayed.
Press the apply button. Then a new dialog box will
be displayed.
Press the “OK” Button. The selected sewing data will be deleted.
Stitch Join
: this tool joins the space between the Stitches that contain a jump.
Select the Stitch Join button.
Select the first Point Stitching Data exactly.
If you press any of the 4 application buttons of
the PDA, the application message box will be
displayed. Press the apply button.
Select the second Point Stitching Data.
If you press any of the 4 application buttons of the
PDA the application message box will be
displayed. Press the Apply button. After pressing
the button the Point Join dialog box will be
immediately displayed.
Press the “OK” button. You will see that the space
between the Jump will be joined with a Point Stitch.
Setting the Sewing Data Needle Speed. (Needle Speed Setting)
:This function, on the sewing data created currently, set the speed by type of the user
optional interval. If the speed on the sewing data is not set, the sewing speed will be set
according to the speed of the machine. And if the speed is set in an optional section, it
will first sew with the set speed.
Step 1 : First of all, you will see a rectangular-shaped normal stitch design on the edit
screen as the one in the following figure.
Step 2 : Press the “Sewing Data Needle Speed Setting” button on the sewing edit toolbar
on the left. The selected button will sink in.
Step 3 : With the stylus, tap an optional place of the sewing data point in order to set the
Sewing Data Speed.
Press any of the 4 application buttons of
the PDA. The Apply message box will
be displayed. Then press the Apply
button. You will see the letters “SP”
word in blue. In the first created “SP”,
the code that represents the starting
speed of the sewing data is entered..
Step 4 : Again, you must enter the code to set the end of sewing data setting speed.
Tap any place of the sewing data to inform the end of the speed setting.
You will see a red dot again. Press any of the 4 application buttons of the PDA. The
application message box will be displayed. Then press the Apply button. The letters
“SP” in blue will be created again in that place. Then the “User Sewing Data Speed
Setting” dialog box will be displayed.
Step 5: Enter the sewing speed of your choice on the
“Sewing Speed Changing Value” of the “User Sewing
Data Speed Setting” dialog box. After setting the speed,
press the “Yes” Button. The dialog Box will disappear
and the speed will be set. If you press the Cancel button
the indication of the “SP” speed that was set based on
the sewing data will disappear.
The next figure represents the set speed.
Sewing Element Division
: this tool divides the selected sewing data.
Select the Sewing Element Division button
Select the joint of the sewing data that you wish to divide. The selected joint will be
displayed in blue.
Press any of the 4 application buttons of the PDA.
The application message box will be displayed. Then
press the Apply button.
The Stitch Division dialog box will be displayed.
Press the “OK” Button. You will see the selected
sewing data been divided.
Sewing Data Tool
Sewing Direction Change
: Select the Sewing Direction Change button.
Tap on Sewing Direction Change.
Select the sewing data you wish to change.
Press any of the 4 application buttons of the PDA. The application message box will
be displayed. Then press the Apply button. The Direction Change dialog box will be
displayed.
Press the “OK” Button. You will see the direction change for the sewing data.
Sewing Order Change
: this tool changes the sewing data creation order.
Select the Sewing Order Change button.
Select the first sewing data you
wish to change.
Press any of the 4 application
buttons of the PDA. The
application message box will be
displayed. Then press the Apply
button.
Select the second sewing data to be
change.
Press any of the 4 application buttons of the PDA.
The application message box will be displayed. Then
press the Apply button. The Sewing Order Change
dialog box will be displayed
Press the “OK” Button. You will
see the sewing data order been
changed.
The order of selection of the Sewing Order Change must be selected
according to the created sewing data order. In another words, if the order of
sewing data no.1 and the sewing data no 2, or the order of sewing data no. 5
and the sewing data no.6 are not correct, then the order change function
cannot be applied.
Sewing Attribute Change
Select the sewing data you wish to change.
Select the Sewing Attribute Change button.
The Attribute dialog box will be displayed on the dialog box, you will see the
attribute buttons that can be changed. The first button is the regular stitch button and
the second is the zigzag button. Because we are currently changing the regular stitch
into zigzag stitch, we are selecting the zigzag stitch.
After pressing the zigzag stitch button, the zigzag
dialog box will be displayed. Enter the values on the
box.
Tap the “OK” button. You will see the sewing data attributes have been changed.
Sewing Length Change
Select the sewing data you wish to change.
Tap on Sewing Length Change.
The Length Change dialog box will be displayed. On
the dialog box there are 2 input boxes. The first box
determines the width of the zigzag stitch and second
box determines the length of the zigzag stitch. The
third box is set as a default.
Select the “OK” Button. You will see the sewing data
has been changed.
If the sewing data is a regular stitch, the
Sewing Length Change Regular dialog box will
be displayed.
Sewing Data Stitching Speed Change (Sewing Speed Change)
: This function allows the user to change and set the sewing speed for any
place of the user’s choice.
Step1 :
Click the Sewing Data Stitch Speed Change button from the Sewing Data Toolbar.
The selected button will sink in.
Step2:
Tap to select the “SP” point of the speed setting mark
applied in any place you wish to change. When the
point is selected, the “User Sewing Stitch Speed
Change” dialog box will be displayed. This will be
automatically displayed if the selected sewing point has
the speed setting mark. If it does not have it, the dialog
box will not be displayed.
When selecting the Sewing data stitch speed change,
the “Sewing Data Stitch Speed Change” dialog box will
be displayed even if you select either the start point
mark or end point mark.
Select the speed that you wish once more. Then press
the “Yes” button.
Note: Please be aware that if you press “NO” on the dialog box in order to cancel the
speed setting when changing the stitch speed, all the currently set sewing data stitch
speed setting will be deleted. The same also applies to the sewing data stitch speed
setting function.
BackTack Sewing
: Apply the backtack function on the selected sewing data.
Select the first sewing data to be changed.
Select the Backtack Sewing button.
The Backtack dialog box will be displayed. On the
box you will see several input boxes and selection
buttons. The first input box defines the number of
Backtack stitches to be applied. The default value is
indicated as 4. The second box represents the
location to enter data when inserting the backtack
stitches. The 3 choices are the beginning, end and
both. The third box defines the type of input method
for the backtack stitches. This box determines if you
are going to insert backtack stitches only one time or
twice. The last input box is for entering the sewing
speed. (This input data will not be applied yet)
Tap the “OK” button. Then you will see that the
backtack data has been inserted in the existing sewing
data.
However, you will not be able to know whether the
backtack data was entered in an exact place or whether
the exact number of backtack stitches were entered. For
this reason, in order to verify if it was inserted correctly,
you can move the stitches as shown on the next figure.In
the figure, four backtack stitches were inserted on both
sides.
Overlap Sewing
: apply the Overlap function on the selected sewing data
Select the first sewing data you wish to change.
Select the Overlap Sewing button.
The Overlap dialog box will be displayed. You will
find only one input box. This box is for entering how
many more stitch you will overlap. The default value
is four stitches.
Select the “OK” Button. Another four stitch will be
overlapped on the sewing data.
Even though if you used the Overlap function, you cannot verify it because the stitch
is overlapped. Therefore, in order to verify this, move the last created stitch. You will
then see if the sewing data has been overlapped. The following picture shows the
verification of the overlap by moving a stitch.
Automatic Point (Snap to Grid) function.
: The Snap to Grip function is very handy when entering data through the Grid Line
Indication. In other words, the inputted point on the grid line intersecting location is
automatically moved and inputted to the nearest intersecting point. The figure below
shows the setting of the Grid Line to automatic point and the input of the point at an
optional place of the user’s choice. If the optional point was entered as shown on the
figure below, the point can be moved to any of the four directions from the inputted
optional point. The inputted point on the grid line intersecting location is automatically
moved and inputted to the nearest intersecting point among them. The figure below
shows the Snap to Grid with the automatically inputted points.
The instructions for this function are as follows.
Step 1 : Select “Grid Setting” from the Set Menu.
If you select it, you will see following “Grid Setting” dialog
box.
Select “Grid Line View” from the dialog box after
setting the horizontal and vertical size of the grids. If
you press the “OK” button, you will see the grid line
displayed on the screen.
Step 2 : Set the “Snap to Grid (Automatic Point)” item again
from the Set Menu. As explained before, the reason for this type
of setting is so that the points inputted where the grid line
intersects can be inputted and moved automatically to the
closest intersecting point.
Step 3 : If you input the data on the edit screen by tapping the
Configuration Data Function button or the User Stitch Input
button according to the design you wish to make now, the point
will be inputted after automatically moving to the closest
location where the grid line intersects.
Reference Note: Even if you change the width of the grid line, the “ Snap to
Grid(Automatic point)” function will be applied equally. The “Snap to Grid” function
can also be applied when editing. The same method is applied for moving the
configuration data, adding joint of configuration data and moving the sewing data.
If you want to terminate the “Automatic Point” function, select “Snap to Grid” from
the Set Menu once more.
Sewing data selection range setting.
This function sets the range for selecting the data
automatically when selecting the sewing data.
Select “Sewing data selection range setting” from the
Set Menu.
After selecting this button, the following dialog box
will be displayed. The current set value is a default
value.
Sewing data selection range :
If you increase this value range, the sewing data selection range will also expand.
Therefore, even if you click the mouse point near the sewing data, the sewing data will
be automatically selected. On the contrary, if you set a small value range, you must
select a more accurate sewing data in order for it to be selected.
Sewing Joint (Point) Selection Range :
The “Sewing point selection range setting value”
has a similar function to that of the “Sewing data
selection range”. Except that this function is to
select the Sewing Joint (Point).
If you increase the setting value, then the closest
point is selected.
0
1
2
3
4
Sewing Point
Selection Range
As you can see from the figure on you side, the
range of the sewing point can be selected
automatically according to the set value. The
user must appropriately set it according to the
usage method.
When doing detailed editing work, if the values
of the range of selection of sewing data and the
sewing joint are all set to “0”, you can input and
edit the point exactly.
Stitch Point Layout
The user can use this function to convert the shape of the sewing data created on the edit
screen into diverse shapes.
Select “Stitch Point Layout Setting” from the “Set Menu”.
After selecting, the “Stitch Point Layout” dialog box will be
displayed as shown on the following figure.
Types of Stitch Point :
You can set two types of stitch point with this setting.
First, the cross point represents a cross-shaped point.
This is set as the first default value.
The second is the circle point. The point shape will be
displayed in a round shape.
Stitch Point Size :
Set the size of the stitch point. The smaller the value
number, the smaller the point size will be. This can be a
useful function when editing complex data. However,
when the size is set to ‘0’, the point shape will not be
displayed.
Stitch Line Size : Sets the stitch point and the width of the line between points.
Stitch Point Color : Sets the color of the stitch point
Stitch Line Color : Sets the color of the stitch point and the line between point.
Standard line setting / re-setting : Sets and resets the central line on the Edit Screen.
Jump Line setting / resetting : Sets and resets the jump data that exists on the Edit
Screen.
Return to First value : Resets to the original default value, all the values set above.
OK Button : Apply the above set value.
Cancel Button : Exits from the “Stitch Point Layout Setting” dialog box.
[ Cross Point Setting ]
[ Circle Point Setting ]
Embroidery Design Changing Function
: this function changes the Sunstar’s *.sst files and the *.dst files of TAJIMA Embroidery
design file to pattern files. On the current SSPDA, up to 30,000 embroidery design
stitches can be converted, displayed or saved. However, please keep in mind that,
because it is a PDA, if the data exceeds 1,000 stitches, the program may slow down
considerably.
The embroidery design change function is as follows.
Step 1: Select “Embroidery Call Function” from the Image
Punching Menu.
After selecting it, the “Embroidery File Call “ dialog box will
be immediately displayed as shown in the figure.
Step 2 : Select the name and type of file you wish to create in
the “Embroidery File Call” dialog box and select the
embroidery file you wish to convert by tapping on the “Open”
button. Select the embroidery file you wish to change.
The explanation of each item is as follows.
Creating a file name : this item deals with naming
embroidery files that have been converted to pattern
files.
Open embroidery file : this item opens the embroidery
file to be converted.
Embroidery file type : this item selects the type of
embroidery file you wish to convert.
On the figure above, the Tajima file was selected.
Yes Button : If you press this button, the embroidery
file will change to a pattern file.
After setting the above items, select the “Open
embroidery file”.
Step 3 : The Open Dialog box allows you to select the
embroidery file you wish to open and convert. Select
and tap the embroidery file you wish to convert.
The Open Dialog Box will disappear and the
“Embroidery Call dialog box will be displayed.
Step 4 : Now, in order to actually convert it, tap the
“Yes” button from the “Embroidery Call” dialog box.
The dialog box will disappear leaving everything
unchanged.
The baby file that changed into a pattern file from a real
embroidery file has been created in the original
embroidery design folder.
Step 5 : Select the converted pattern file with the Open
button from the upper part of the menu and open the
“baby” pattern file.
Tap the Open button.
You will see the converted embroidery file in a pattern
file on the screen as seen on the figure below.
Note : The following are things you must know about converting embroidery designs.
First of all, because the concept of embroidery and patterns are little different, you
may have problems when sewing just as it is by changing the existing embroidery file
to pattern files. This type of problem occurs because since the design itself is made
for the embroidery design it may not be correctly sewn in the pattern due to the
thickness of the thread, the needle, the conditions of the fabric material and the
design’s stitch width, etc. Also, because of the characteristics of the embroidery code,
when converting a complicated embroidery design, without functions such as thread
trimming, these designs cannot be created or changed in an optional place. As shown
on the figure above, the trimming function can be created automatically at the end of
the design, but it cannot be created in the middle of the design. In this case, you can
insert trimming by inserting the Automatic Trim function. Please remember these
instructions and begin sewing after changing the embroidery designs to pattern
designs.
Design Data
Serial
Transmission
The next function explains the process for transmitting the sewing design done on
the PDA to each corresponding machine.
Design Transmission to the KM-2070P
Transmitting the 2070P zigzag design made by the user and transmitting the ROM Data
“ROM.zig” file to the KM-2070P machine using the serial transmission tool.
The next figure shows the general configuration flow chart of the “ Direct Serial
Transmission of the zigzag design and the serial transmission of the ROM data.”
Design Transmission Flow Chart
Direct transmission
of design entered
on the screen
Start
Open data file
Create a new edit
window
Read data to be
edited
Create adesign of
user's choice
Determine sewing size
of user's choice
Edit design
Change all the data to
the point stitch attributes
Direct transmission
ROM.zig File
Transmission of
design using a serial
transmission program
Save design
Zigzag input data
list (*.txt file)
Design data
( Shard SSP
pattern file )
Zigzag serial
transmission data
( ROM.zig file )
The next paragraph explains the method of “Direct serial transmission of the Zigzag
Design” and the “Serial Transmission of the ROM data”. The explanation on “Serial
Transmission of the ROM data” is done assuming that the user already made the serial
transmission file (ROM.zig) for model 2070P. (For information on the creating method
please refer to the “Save Data” section).
Direct Transmission of Zigzag Design.
This function immediately sends the data
existing on the current edit window.
Select the KM-2070P machine on the
program and make a design as the one
shown on the next figure. If the user
entered an optional zigzag on the edit
windows as the one shown in this figure,
the design on the window can be sent
directly to the 2070P machine.
Before sending, the user must first follow
the following procedure.
The type of machine models that can currently transmit data are the KM-2070P Series,
the Bartack Series and the Pattern Series. Therefore, in order to receive the data
transmission on this type of machine you must set the transmission configuration. In
another words, this step must be done to transmit data according to a standard because
the transmission standards between the PDA and the Machine are defined.
The setting methods for these 3 types of machines are all different. The setting process is
as follows.
Select the Serial Transmission Control Menu
Tool from the bottom of the menu. After
selecting it, the Serial Transmission Toolbar will
be immediately displayed.
Tap Serial Setting
. After selecting it, the
Serial Setting dialog window will be immediately
displayed.
Tap the corresponding port for the type of
machine on the Serial Setting dialog. After
selecting it, the Port Setting dialog box will be
created once more.
On this next figure, you will see an item named Baud
on the Port Setting dialog. This item sets the
transmission system that allows the transmission
using a singular mode between the PDA and the
Machine.
The default setting is 57600.
The setting values for each machine are:
1. KM-2070P: 57600
2. Bartack Series: 38400
3. Pattern Series: (Provided when Upgrading)
Because the default value is 57600, you can leave the
default state as it is when applying it to the KM2070O. If the machine is different, be sure to set the value according to the type of
machine. Exit by pressing the “OK” button.
Next, connect the PDA serial transmission cable and the 2070P Operation Box you are
currently using. (For information about the connecting method, please refer to the Main
Components section).
Once the cable is connected, you can check if the
communication setting between the PDA and the
Machine is correct.
As you can see on the next figure, you can check by
tapping on “Port Checking”. If the Communication
Port is installed successfully after tapping it, you will
see the message “successfully connected”.
Before sending the serial data, be sure to carry out the
above verifying procedure.
Next is a step-by-step explanation of the process for the transmission of an actual design.
First of all, before transmitting the design on the edit windows to the 2070P machine,
you must prepare it so that the 2070P machine can receive the transmission from the
SSPDA. The preparation procedure is as follows.
1. While the machine is turned on, simultaneously press
the “N1” and “+” keys.
When it stops after thread trimming, the abbreviated
programming term “Prog” will be displayed on the
indicator.
2. Press the N2 Key.
The ROM Pattern Number and the Pattern Shape
Number will be displayed on the indicator (For example:
The figure 9-01 may be displayed differently).
3. Select the number of the Pattern Shape to be
downloaded using the + and - keys.
(Ex: 9-09)
The numbers of the pattern shapes that can be entered [Select the Pattern Number]
range between 1 ~ 99. In this example, the design
number 9-09 will be downloaded.
4. Press the N1 Key.
When the “Down” message blinks, you will hear a “beep
beep” sound from the speaker.
If steps 1 through 4 are carried out, it is ready to receive the transmission from the
SSPDA.
In order to do the actual transmission to the machine model 2070P, you must tap on
“Zigzag Direct Transmission” which you will find in the Serial Transmission Toolbar.
If the data transmission does not experience any problems, you will not hear the
“beep beep” sound. Instead you will hear a long “beeping”sound only once. Then the
word “END” will be displayed in the OP Box of the 2070P Machine. After that, it
will indicate the transmitted pattern number. If the message “successfully
transmitted” was displayed but the transmission was not carried out, you can transmit
it again by pressing the transmission button.
If you wish to sew the design that was inputted, press
the, PARA/SET Key and return to the sewing mode.
The amplitude will be displayed on the indicator.
Press the PARA/SET Key once more.
The amplitude on the indicator will first blink and then
stop.
Press the ROM Pattern Key.
Select the Transmitted Pattern that you are planning to
sew using the +/- keys.
Press the PARA/SET key once more.
If the amplitude is displayed on the indicator, you can
start sewing.
ROM.zig data Transmission
Connect the serial transmission cable to the PDA and to the 2070P Dial Operation Box
that you are currently using. (For information about the connection, please refer to the
“Main Components”section)
Before transmission, set the machine model 2070P to a transmission mode ready to
receive data as the “Zigzag Direct Transmission” section mentioned above.
Select the Transmission Control Menu Tool from the bottom of the menu. After
selecting it, the Serial Communication Toolbar will be displayed.
Tap on Serial Setting
. After tapping it, the
Serial Setting dialog box will be displayed.
For port setting, in order to set the Serial
Communication, please refer to section
of the
“Direct Transmission Method” explained above.
After setting the Transmission Port, press the “Load
ROM_Zig Data” button to read the “ROM.Zig” file
that will be used for transmission. If you press the
button, the following “Open” dialog box will be
displayed.
The ROM.zig file will be read. (Note: the file
extension will not be displayed on the PDA).
Finally, send the selected Zigzag Extension design to
the Machine Model 2070P by pressing the “Send to
Data COM” button. After sending the data, the
displayed data on the 2070P Machine OP Box will
be the same as that displayed “Zigzag Direct
Transmission Method” section. If the transmission
was successful, the message “Successfully
Transmitted ” will be displayed.
Design Transmission to the Bartack Series Machine
The user will send the created Bartack Design File to the Bartack machine using the
Serial Transmission Tool. The following chart shows the general flow of the “Direct
Serial Transmission of Designs”.
Design Transmission Flow Chart
Start
Open data file
Create a new edit
window
Read data to be
edited
Create design of
user's choice
Determine sewing size
of user's choice
design editting
Direct transmission
Direct transmission of
design entered on the
screen
Save the design
Design data
( Shared SSP
pattern file)
OP : Connect the Serial Cable
Important! Convert all the attributes of the sewing data to the user's stitch attributes (or
point stitching) before transmitting the design. (Use Data Attribute Change from the
Sewing Data Tool)
The setting procedure for transmission is almost the same as that for the Direct
Transmission Method for Zigzag designs.
The only difference is the transmission setting. In order to transmit data between the
PDA and the Machine on the same mode, you should change the default setting of
57600 to the Bartack Series setting of 38400.
The setting values for each machine are:
1. KM-2070P : 57600
2. Bartack Series : 38400
3. Pattern Series : (Provided when upgrading)
Next is a step-by-step explanation of the procedure for transmitting the actual design.
Before transmitting the design of the edit window to the
Bartack Machine, you should prepare the Bartack
Machine to receive the transmission from the SSPDA.
The preparation procedure is as follows:
POWER
1. While turning on the machine, press the RESET key
On the LED of the OP, the abbreviated programming
term “Prog” will be displayed, changing into
transmission stand-by mode.
2. Press the Ready key.
The downloaded Pattern Number will be displayed.
On the Bartack Series, the default Pattern Number for downloading will differ according
to the type of machine.
The reason is that the basic pattern differs according to the type of machine.
1. SPS-1201 Series: number 1~32
2. SPS-1202 Series: number 1~33
3. SPS-1254 Series: number 1~56
Just as on the basic pattern of each machine type, in order to download the pattern data
from the PDA, you can transmit data including the basic pattern data to the pattern
number field. Therefore, since we are explaining the SPS-1254 as an example on the
current procedure, we will indicate the pattern number we plan to download as “r-57”.
3. Select the Pattern Number you plan to download using
the + and - keys. The pattern numbers you can
download are from 57 to 99. (SPS-1254)
4. Press the Ready Key.
The LED of the OP will display the message “doUn”.
If steps 1 through 4 are carried out, it is ready to receive
the transmission data from the SSPDA.
In order to do the actual transmission, you can transmit
to the SPS-1254 Machine by clicking the “Backtack
Direct Transmission Button” from the Serial
Transmission Tool Bar. If the transmission does not
experience any problems, you will hear a “beep” sound
and the word “END” will be displayed on the LED of
the OP Box. If the size of the design is larger than 256
bytes but smaller than 512 bytes, you will hear two
“beep” sounds. This is because the data is transmitted
divided into two 256 byte units. Therefore it “beeps”
twice because it is transmitting twice. If the size of the
design is larger than that, it will beep according to the
size of the design.
Press the Reset key.
The selected Pattern Number is displayed. If you wish to
receive a design from another pattern number repeat
steps 3~4.
Press the Select key
Based on the currently selected pattern number, it will
change to sewing mode.
You can start sewing by pressing on the pedal.
Note !!
The quantity of stitches that can be transmitted to the machine after entering the design
data is defined in the current Backtack series,
The maximum quantity of stitches the design can transmit to the machine are as follows.
1. SPS-1201 Series : 500 stitches
2. SPS-1202 Series : 500 stitches
3. SPS-1254 Series : 1000 stitches
As mentioned above, please take into account the maximum quantity of stitches each
machine can transmit when transmitting a design.
Important!! The program may occasionally stop during transmission due to an incorrect
transmission setting. In this case, start the program again by resetting the PDA. (Refer to
the PDA instruction manual).
Pattern Data
Input / Output
The Save/Open button saves newly inputted patterns or allows the user to open
previously saved pattern data.
Saving / Opening File
Saving File:
: This tool saves all the currently entered data in the edit field.
If you have currently made design pattern such as
the ones shown above in the edit field select the
data to be saved from the File Menu in order to save
it.
After selecting it, the Save dialog box will be
immediately displayed. Assign the saving path and
the location of the memory where it will be saved.
Then write the “Tree” file name to be saved and tap
on “Save”.
In order to verify if the file has been saved, use the
Open tool and select the folder where you have
saved the file and verify it.
Saving Data Code File for 2070P.
In order to save the code value file for the machine model 2070P, you must first save the
file. If you don’t, you won’t be able to save the file for the machine model 2070P. The
file will be saved in text or “*.txt”. If you have saved with the method mentioned above,
three files will actually have been saved on the “KM-2070P”folder.
The saved files are as follows:
Tree.ssp
Design File. (Can also be used for patterns)
Tree.txt
This is the Input Data List file only for model 2070P
(Cannot be applied on the KM-2070 Model)
ROM.zig
This is the Serial Transmission Data file only for the 2070P Model
By tapping twice on the Tree.txt file, you can view the
file list.
With this file list, the user can enter the design into the
2070P Machine.
Store the name of extension as * .SSP at data
archiving, If you want to read the data in SSPDA after
make design data to use PC SSP program.
Only recognizes extension file that is in SSPDA
Opening Files
: This tool reads the pattern files saved and displays them on the edit window.
Select File Open from the File Menu.
After selecting it, the File Open dialog box will be immediately displayed.
Select the saved “Tree” File by tapping the stylus. The saved pattern will be displayed
again in the edit window. If you wish to amend the saved data, tap on “Stitch Data
Tool” to amend the displayed data on the edit field and save it again.