1
A
PageWriterTM 2000
User’s Manual
Motorola, Inc. makes no representations or warranties with respect to the contents or use of this manual and specifically
disclaims any warranties, express or implied, of merchantability or fitness for any specific purpose. Further, Motorola, Inc.
reserves the right to revise this publication and to make any modifications to its content, at any time, without obligation to
notify any party, person, or entity of such revisions or changes.
© 1997, 1998 Motorola, Inc. All Rights Reserved.
FLEX Programmable Products and Applications Division
3301 Quantum Boulevard
Boynton Beach, FL 33426-8622
Printed in the United States of America (9804)
T, Motorola, PageWriter, and FLEX are trademarks or registered trademarks of Motorola, Inc.
All other brand or corporate names are trademarks of their respective owners.
MOTOROLA LICENSE AGREEMENT
IMPORTANT-READ CAREFULLY:This license agreement is a legal agreement
between you and Motorola, which includes computer software and associated media and
printed materials, and may include “online” or electronic documentation (“SOFTWARE”).
By installing, copying or using the SOFTWARE, you agree to be bound by the terms of
this license agreement. If you do not agree with the terms of this license agreement,
promptly return the unused SOFTWARE to the place from which you obtained it for a full
refund.
The copyrights laws and international copyright treaties, as well as other intellectual
property laws and treaties, protect this SOFTWARE.
1. You may install and use one copy of this SOFTWARE on a single computer. The
SOFTWARE may not be used by more than two (2) processors at any one time on the
single computer running the SOFTWARE.
2. You may not reverse engineer, decompile or disassemble the SOFTWARE.
3. The SOFTWARE is licensed as a single product. Its components may not be separated
for use on more than one computer.
4. You may not rent or lease the SOFTWARE.
5. You may transfer your rights under this license, provided you retain no copies, you
transfer all of the SOFTWARE (including all component parts, the media, and printed
materials and this license agreement) and the recipient agrees to the terms of this license.
6. If you fail to comply with the terms of this license, Motorola may terminate this license
agreement, without prejudice to any other rights that Motorola may have. In such event,
you must destroy all copies of the SOFTWARE and all of its component parts.
7. Motorola owns all title and copyrights in and to the SOFTWARE and any copies of the
SOFTWARE. Copyright laws and international treaties protect the SOFTWARE.
However, you may either (1) make one copy of the SOFTWARE for backup or archival
purposes or (2) install the SOFTWARE on a single computer provided that you keep the
original solely for backup or archival purposes. You may not copy the printed materials
accompanying the SOFTWARE.
8. The SOFTWARE and documentation are provided with RESTRICTED RIGHTS. Use,
duplication, or disclosure by the Government is subject to restrictions set forth in
subparagraph (c)(1)(ii) of the Rights in Technical Data and Computer software clause at
DFARS 252.227-7013 or subparagraphs (c)(1) and (c)(2) of the Commercial Computer
Software-Restricted Rights at 48CFR 52.227-19, as applicable. Themanufacturer is
Motorola, Inc., 3301 Quantum Blvd., Boynton Beach, FL 33426-8622.
9. You agree that you will not export or re-export the SOFTWARE to any country, person,
entity or end users subject to U.S. export restrictions. You warrant that your export
privileges have not been suspended, revoked or denied by the U.S. Bureau of Export
Administration or any other federal agency.
Contents
Welcome..............................................................................1
Using This Manual.............................................................2
Conventions................................................................................. 2
Finding Help................................................................................ 3
Getting Started...................................................................3
What’s in the Box?...................................................................... 3
Paging Service Instructions.......................................................... 4
How Your PageWriter 2000 Works.................................5
The Flip ....................................................................................... 5
The Home Screen........................................................................ 5
The Keyboard.............................................................................. 8
The Battery and Charger............................................................ 10
The Infrared Port....................................................................... 15
The Holster................................................................................ 16
System Setup.....................................................................17
Turning On and Off Your PagerWriter 2000............................. 17
Configuring Your PageWriter 2000........................................... 18
Setting the Date and Time.......................................................... 20
Assigning Alert Modes.............................................................. 21
Assigning Alert Types............................................................... 22
Addresses..................................................................22
Entering Addresses.................................................................... 22
Editing Addresses...................................................................... 24
Deleting Addresses.................................................................... 25
Write .........................................................................26
Writing Messages...................................................................... 26
Adding Quick Text.................................................................... 27
Attaching Message Replies........................................................ 27
Saving Your Message to the Sent Folder................................... 28
Appending Your Signature........................................................ 28
Scheduling a Delayed Send....................................................... 28
Filing a Message Draft............................................................... 29
Setting a Reminder Alarm.......................................................... 29
Read ..........................................................................30
Reading Incoming Messages..................................................... 30
Sending Responses.................................................................... 31
Forwarding Messages................................................................ 32
Contents
v
Filing Messages.......................................................................... 32
Deleting Messages..................................................................... 33
Managing the Message Area......................................................33
Customize.................................................................42
Viewing System Status...............................................................42
Enabling and Disabling Alerts and Alarms................................43
Setting Up Internet Fax Service.................................................43
Customizing the User Interface..................................................44
Customizing Message Features..................................................45
Maintaining Inboxes, Folders, and Applications........................47
FLEX PC Partner....................................................48
Introducing FLEX PC Partner....................................................48
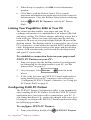
Installing FLEX PC Partner on Your PC................................... 49
Linking Your PageWriter 2000 to Your PC...............................50
Configuring FLEX PC Partner...................................................50
Using the PC Partner Shell.........................................................51
Managing Your Address Book...................................................52
Managing Your Messages..........................................................62
Installing and Removing Applications....................................... 64
Backing-up and Restoring Information...................................... 65
Checking Memory Usage on Your PageWriter2000.................67
Updating the FLEX OS on Your PageWriter 2000....................68
Uninstalling FLEX PC Partner...................................................68
Memory Management System........................................68
Proper Care and Cleaning..............................................70
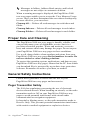
General Safety Instructions............................................70
Pager Transmitter Safety............................................................70
Battery Safety............................................................................. 71
Battery Charger Safety...............................................................71
Agency Approvals...................................................................... 72
Patent Information...........................................................72
PageWriter 2000 Specifications......................................72
Commonly Asked Questions...........................................73
PageWriter 2000........................................................................ 73
Messaging..................................................................................75
Battery and Charger................................................................... 78
FLEX PC Partner....................................................................... 79
Index..................................................................................81
vi
PageWriterTM 2000 User’s Manual
Welcome
TM
Congratulations! Your new Motorola PageWriter
2000
personal two-way pager is about to change the way you
communicate. With features such as wireless, two-way paging
and user-upgradeable system software and applications, your
PageWriter 2000 pager places you in control of your personal
communications. You can now send messages, control incoming
messages, and customize the device with applications that you
select.
This pocket message center features a QWERTY keyboard and
high-resolution graphics display. It enables you to communicate
wirelessly with Internet email addresses, fax machines, and
other pagers, yet is small enough to comfortably wear on your
belt or fit in your pocket.
TM
The PageWriter 2000 two-way pager uses FLEX
Operating
System (FLEX OS), Motorola’s new open-standard operating
TM
system for messaging products, and FLEX
Protocol for Twoway Paging, Motorola’s high-speed two-way paging technology.
The built-in suite of software applications includes:
Read — Read incoming messages, including personal, service
bureau, and reminder messages.
Write — Create and send messages to another pager, an email
address, or a fax machine without searching for a phone.
Receive and respond to messages from the same device.
Addresses — Store your personal directory of names, phone
numbers, email addresses, and related information.
Customize — Use set-and-forget functions to customize your
preferences such as message text size, unread message alerts
(on/off), and date/time formats.
Set Time — Quickly adjust the time or date to reflect your
movement between time zones or seasonal changes such as
Daylight Savings Time.
Radio Mode — Set your transmission mode to accommodate
your environment. Your PageWriter 2000 two-way pager
accommodates the special requirements of hospital or medical
facilities and airline travel.
Partner — Keep all your records in sync using Motorola’s
FLEXTM PC Partner connectivity software. Update the Address
Book on your computer by transferring your Address Book files
from your PageWriter 2000 two-way pager to your personal
Welcome
1
computer. Also, changes made to your Address Book on your
computer can be transferred back to your pager.
Finally, everything you need in a two-way, customizable paging
device! Life just got easier. Consolidate your communications
onto one device — yourall-in-one PageWriter 2000 two-way
pager from Motorola.
The efficiency and affordability of a pager…
The convenience of full text response.
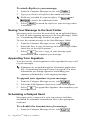
Using This Manual
Conventions
This manual uses several conventions to differentiate between
command and key access on your PageWriter 2000 two-way
pager and your personal computer (PC).Specific conventions
are also used to highlight additional helpful information in the
form of tips, notes, and cautions.Before you begin, please refer
to the following conventions:
On the PageWriter 2000 Two-way Pager
,
Bold Text
2
Icons represent each application on the
PageWriter 2000 menu wheel.
White buttons identify command
buttons that appear on the screen.
Gray keys identify PageWriter 2000
keyboard keys.
Two keys means to press the first key,
release, then press the second key. Do
not hold down
or
while
pressing the next key.
Bold Text indicates text to select on
the PageWriter 2000 screen or to type
into a field.
Means to press the NavDiscTM (left,
right, up, down) to movewithin a field
(text field, list field, button field).
Means to press
to move between
fields (list field to button field).
PageWriterTM 2000 User’s Manual
“Select”
Means to highlight a list item,
application icon, or command button,
then press
.
On the PC
Icons represent each application in the
Address Book PC Partner Shell.
E
Bold Text
Icons represent menu options that can
be selected from the menu bar.
Shadowed keys indicate PC keyboard
keys.
Bold text indicates menu options or
command buttons to select or text to
type into a field.
Additional Information
TIP
CAUTION
Identifies actions you can perform to
increase your ease of use and efficiency.
Provides further information about the
procedural step or feature.
Identifies actions that can cause loss of
data or damage to the product.
Finding Help
We welcome your suggestions on how we can improve our
products and want to hear about any problems you may be
experiencing. To contact us about suggestions or concerns, or
for more information about the PageWriter 2000 two-way pager,
its accessories, or other Motorola products, call:
1-800-548-9954
Or, visit our website:
http://www.paging.mot.com/PageWriter
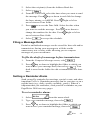
Getting Started
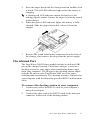
What’s in the Box?
Your new PageWriter 2000 two-way pager comes with one of
two accessory kits. The Deluxe Accessory Kit provides an
infrared interface in the docking station and connectivity
software. In the box, you will find:
Getting Started
3
1
1
1
*
PageWriter 2000
NiMH Battery
Holster
Product Literature (User’s Manual, Quick Reference Card,
Registration Card)
Plus
1 Deluxe Accessory Kit
1 Deluxe Charger Base/Docking Station
1 120 Vac Transformer
1 RS232 Null Modem Serial Cable
4 FLEX PC Partner Connectivity Software Disks
-or1 Standard Accessory Kit
1 Standard Charger Base
1 120 Vac Transformer
PageWriter 2000
Product Literature
Holster
Battery Charger
Transformer
Battery
RS232 Cable
FLEX PC Partner
Disks
Paging Service Instructions
To begin paging service, contact your paging service provider
for activation instructions. Your PIN number and the phone
number of the paging service can be found in the literature
provided by the paging service. Use this manual for devicespecific operating instructions.
4
PageWriterTM 2000 User’s Manual
How Your PageWriter 2000 Works
The PageWriter 2000 two-way pager’s lightweight, wearable
design allows you to open the flip and read your messages while
the pager is still in the belt holster. Audio and vibrate alerts
notify you of incoming and waiting messages. The keyboard
provides text entry capabilities that allow you to send full text
messages. All this is combined with the ability to add
applications, upgrade current applications, and, with the infrared
interface in Motorola’s Deluxe model, upload and download
information to and from your computer.
TIP The PageWriter 2000 two-way pager displays a blank
screen to conserve energy during periods of inactivity. Press
any key to awaken the pager.
The Flip
The front flip on the PageWriter 2000 two-way pager houses
and protects its LCD screen and antennae. Opening the flip
awakens the pager, while closing the flip puts the screen into
sleep mode. When in sleep mode, your PageWriter 2000 twoway pager continues to work for you. It receives and stores
incoming messages for access at your convenience. You can set
audible, vibrating, or silent alerts to notify you when messages
are received.
The Home Screen
Date & Time
Applications
Menu
Wheel
Alert
Mode
Transmission
Status
Status
Icons
The Home screen’s menu wheel provides quick access to both
pre-loaded applications and those you add yourself.Press the
How Your PageWriter 2000 Works
5
NavDiscTM
up or down to highlight an application.
in the same direction and the wheel
Continue pressing
spins in that direction to display the next three applications.
TIP To select an application from the menu wheel without
scrolling through the menu, press the first letter of the
application’s name. The menu wheel spins to the first
application beginning with the selected letter. These are
called shortcuts. Shortcuts also work on menu lists such as
your Message Area mailbox list.
If more than one application or more than one list entry
starts with the same letter, the shortcut takes you to the first
occurrence of the letter. Press the letter again and the
shortcut takes you to the next occurrence of the letter.
The Home screen also provides at a glance the basic status of
your PageWriter 2000 two-way pager, including:
Date and Time — Always displays the date and time for your
convenience; select the Set Time application from the menu
wheel to change the date or time; select the Customize
application from the menu wheel to change the format for the
date or time.
Alert Mode — Displays the current alert mode. Alert modes
override or enhance the assigned alert types. For more
information, see “Assigning Alert Modes” on page 21. To set
specific alerts, see “Assigning Alert Types” on page 22.
Loud — Enables all audible alerts to the loud volume.
Soft — Enables all audible alerts to the soft volume.
Vibrate — Enables all alerts to vibrate without
changing the individual alert settings.
Silent — Disables the alerts without changing the
settings. Select Loud or Soft to enable the alert settings
at the preferred volume.
Battery Gauge — Displays a four-level graphic indicator of the
remaining power in the rechargeable battery.
Full — Approximately at full charge.
2/3 — Approximately at two-thirds capacity.
1/3 — Approximately at one-third capacity.
Low Cell — Almost drained of charge.
6
PageWriterTM 2000 User’s Manual
Status Line — On the menu wheel, displays the in-range/outof-range transmission status (Basic Service, Full Service, or
Storing Messages); for more information, see T
“ o set the
transmission mode” on page 19.
On application screens, explains the function of the highlighted
button or special status icon.
Special Status Icons— Displays graphic indicators for the
following conditions:
New Message Waiting — Unread messages are in one
or more inboxes.
Send/Receive — Full Service coverage. Two-way
messaging; turns on the transmitter and receiver.
Receive Only — Basic Service coverage. One-way
messaging; turns on only the receiver.
Off — Storing Messages coverage. You have manually
turned off the transmitter and receiver. See
“Configuring Your PageWriter 2000” on page 18 for
information on turning the transmitter and receiver back
on.
Out of Range — Your pager is too far from a
transmitter to receive messages.
Memory Low — Available memory is running low;
older messages will be automatically deleted to free
memory for new messages. For more information, see
“Memory Management System” on page 68.
Alt — Alt mode is turned on; the next key pressed will
indicate an Alt-mode function. For more information,
see “Alt-mode Functions” on page 10.
Shift — Shift mode is turned on; the next letter will be
capitalized, or the next control key pressed will indicate
a Shift-mode function. For more information, see
“Shift-mode Functions” on page 10.
Caps Lock — Caps Lock setting is turned on; all letters
will be capitalized.
How Your PageWriter 2000 Works
7
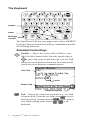
The Keyboard
NavDisc
Select
Backlight/
Contrast
The PageWriter 2000 two-way pager comes with a QWERTY
keyboard. Special control keys and key combinations provide
the following functions.
Standard Control Keys
NavDisc — Moves the cursor within a field (i.e., text
field, list field, button field). Press the outside edge of
to move the cursor in that direction. In a text field,
moves the cursor between characters. In a button field,
scrolls the cursor between command options.
Text Field
Cursor
Button Field
Additional Options
Tab — Moves the cursor between fields (e.g., text field
to button field). From the text field, press
to access
the button field. Continue pressing
to cycle back to
your initial starting point, or press
,
to tab
backward.
8
PageWriterTM 2000 User’s Manual
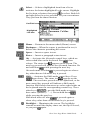
Select — Selects a highlighted item from a list or
activates the button highlighted by the cursor. Highlight
the list item or button, then press
to select. Both left
and right Select keys are provided for your convenience.
They perform the same function.
List Field
Highlighted
List Item
Home — Returns to the menu wheel (Home) screen.
Backspace —When the cursor is positioned in text, it
deletes the character preceding the cursor.
Space — Inserts a space in text.
Enter — Inserts a paragraph return in text.
Alt — Activates the Alt-mode control keys, which are
color-coded blue on the keyboard. Press , then
release. The status icon
appears on the screen. The
next key pressed will indicate the Alt-mode function. Do
not hold down
while pressing the next key.
Alt mode turns off when
is pressed again or when a
key other than an Alt-mode key is pressed.
Shift — Activates the Shift-mode control keys. Press
then release. The status icon
appears on the
screen. The next letter pressed will be capitalized, or the
next control key pressed will indicate a Shift-mode
function. Shift-mode characters are color-coded white on
the keyboard near the corresponding control key. Three
other keys (
) provide Shift-mode access to
three more symbols (/ ′ - ). Do not hold down
while pressing the next key.
Shift mode turns off when
is pressed again or
when a key other than a Shift-mode key is pressed.
Backlight — Illuminates the screen. The backlight
remains on until the display times out, the flip is closed,
or you press again.
How Your PageWriter 2000 Works
9
Alt-mode Functions
+
Contrast — Adjusts the contrast; the difference between
the lightest and darkest areas on the display. Press ,
then hold down . The contrast value will progress to
extreme light or dark, then reverse. Release when you
see the desired contrast setting.
Cancel — Cancels the input for the current screen and
returns to the previous screen.
Off — Turns off the pager. When the pager is off, press
any key to turn it back on.
Caps Lock — Activates Caps Lock. Each letter pressed is
capitalized until
,
is pressed again.
,
,
,
,
Symbols — Activates the Symbols key. Fifteen (15)
additional symbols can be used. Press ,
to view
the Symbols screen, then press the key that corresponds to
the symbol you want to add to your message. The original
screen reappears with the symbol added to your text.
,
1
+
2
=
3
-
4
<
5
>
6
^
7
&
8
“
9
;
0
\
a
[
b
]
c
{
d
}
e
|
BackTab — Reverses the direction of
press.
for one key
Shift-mode Functions
Thirteen symbols are available using the Shift mode. The white
symbols next to the row of number keys plus three other keys
(
) are used by pressing
, then the corresponding
key.
1
!
2
@
3
#
4
$
5
%
6
:
7
8
*
9
(
0
)
?
/
,
′
.
-
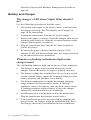
The Battery and Charger
Motorola batteries and chargers are made from the highestquality materials available. The battery and charger included
with the PageWriter 2000 two-way pager come with a one year
10
PageWriterTM 2000 User’s Manual
warranty and should provide good performance well beyond the
initial warranty period. However, rechargeable batteries do not
last forever. At some point, batteries wear out and must be
replaced. If your battery’s performance has degraded (e.g., the
battery’s charge lasts only half as long as when it was new), you
should consider replacing your battery with a new Motorola
factory-assured battery. Batteries, as well as any other Motorola
PageWriter 2000 accessory, can be purchased through your
dealer, or by calling Motorola direct at 1-800-548-9954.
TIP Before leaving on a trip, make sure the battery and any
extra batteries are fully charged. All rechargeable batteries
experience self-discharge, meaning that a small amount of
energy discharges everyday as a battery sits on the shelf.
Recharging the batteries to full charge should take an hour
or less per battery.
Recharging can be accomplished by placing your
PageWriter 2000 two-way pager in the charger or by
removing the battery and placing only the battery in the
charger. For optimum performance, use the recommended
Motorola charger.
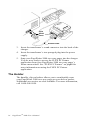
To remove the battery for charging:
1.
2.
Hold the pager face down.
Place your thumb on the arrow in the center of the battery
door. Press down and slide the battery door away from the
center of the pager.
How Your PageWriter 2000 Works
11
3.
Lift the battery door away from the pager.
Battery Door
Lift Tab
4.
Using the white lift tab, lift the battery from the battery
compartment.
To recharge the battery outside of the pager:
1.
Insert the transformer’s round connector into the back of the
charger.
Two-pronged
Transformer
Plug
Round
Transformer
Connector
Battery
Compartment
2.
3.
12
Insert the transformer’s two-pronged plug into any standard
120 Vac power supply outlet.
Place the 3.6 V NiMH battery in the charger’s battery
compartment by aligning the positive (+) and negative (-)
markings on the battery with those on the charger.
PageWriterTM 2000 User’s Manual
4.
5.
Press the battery firmly into place. The lit red LED
indicator light means that the battery is charging.
A flashing red LED indicator means the battery is not
making a good contact. Ensure the battery is properly
seated in the charger.
When the green LED indicator becomes lit, the battery is
fully charged. Slide your finger or thumb underneath the
battery from the front of the charger and lift the battery out.
TIP Leaving the battery in the charger after the LED turns green
keeps the battery fully charged until removed. Keep your
spare battery fully charged by leaving it in your plugged-in
charger.
6.
Remove the round transformer connector from the back of
the charger, then remove the two-pronged transformer plug
from the power supply.
To replace the battery:
1.
2.
3.
Match the positive (+) marking on the fresh battery with the
two (2) contact side of the pager’s battery compartment and
the negative (-) marking with the one (1) contact side of the
battery compartment.
Insert the battery into the battery compartment at an angle
toward the outer edge of the pager, then press the battery
down into place.
Ensure the lift tab is underneath, not on top of, the battery.
The tab is designed to help lift the battery out of the
compartment during battery removal.
Fold the protruding lift tab down on top of the battery, then
slide the battery door back into place. An audible click can
be heard when the door is securely closed.
How Your PageWriter 2000 Works
13
To recharge the battery without removing it from
the pager:
1.
Insert the transformer’s round connector into the connector
on the back of the charger.
Two-prong
Transformer Plug
Round
Transformer
Connector
2.
3.
4.
Insert the transformer’s two-pronged plug into any standard
120 Vac power supply outlet.
Hold the pager face up over the charger.
Position the pager with the Motorola logo on the same side
as the charger’s red and green LED indicators.
The battery can be charged separately or while it is in the
pager. The charger is intentionally designed so that you
cannot place both the extra battery and the pager in the
charger at the same time.
Logo
Indicators
14
PageWriterTM 2000 User’s Manual
5.
6.
7.
Press the pager down into the charger until an audible click
is heard. The red LED indicator light means the battery is
charging.
A flashing red LED indicator means the battery is not
making a good contact. Ensure the pager is properly seated
in the charger.
When the green LED indicator lights, the battery is fully
charged. Slide the pager forward to release it from the
charger.
Remove the round transformer connector from the back of
the charger, then remove the plug from the power supply.
The Infrared Port
The PageWriter 2000 Deluxe model includes an infrared (IR)
port in the charger housing. The Deluxe charger is used as a
docking station for your pager when transferring data to and
from your computer. The IR port in the docking station aligns
with the IR port on your PageWriter 2000 two-way pager,
enabling data transmission. The docking station is connected to
your computer with the Motorola-provided RS232 null modem
cable.
To connect the docking station to your computer:
1.
2.
Connect one end of the RS232 cable to your computer’s
nine-pin serial port.
Connect the other end of the RS232 cable to the nine-pin
connector in the back of the docking station.
How Your PageWriter 2000 Works
15
9-pin
Serial
Ports
RS232 Cable
3.
4.
5.
Insert the transformer’s round connector into the back of the
charger.
Insert the transformer’s two-pronged plug into the power
supply.
Snap your PageWriter 2000 two-way pager into the charger.
You are now ready to access the FLEX PC Partner
application from your PageWriter 2000 two-way pager’s
Home menu wheel. See “FLEX PC Partner” on page48 for
more information on using the FLEX PC Partner
application.
The Holster
The durable, clip-on holster allows you to comfortably wear
your PageWriter 2000 two-way pager on your belt or pocket.
Additional accessories are also available. For more information,
call 1-800-548-9954.
16
PageWriterTM 2000 User’s Manual
System Setup
Your PageWriter 2000 two-way pager comes pre-configured
and ready for use. Features are available that allow you to reconfigure your pager to more closely reflect your lifestyle, set
the date and time, and select the alert modes and types. For
information on customizing other features, see “Customize” on
page 42.
Turning On and Off Your PagerWriter 2000
The rechargeable battery in your PageWriter 2000 two-way
pager allows you to leave your pager turned on 24 hours a day
and, depending upon usage, can sustain operation for
approximately a week before requiring a recharge. However,
your PageWriter 2000 two-way pager works much like your
computer. Periodically turning off your pager assists in clearing
the random-access memory (RAM) and can help optimize your
pager’s performance. Turning off your pager at night will also
lengthen the time of your battery’s charge.
TIP Incoming messages are stored by the paging service until
your pager is turned back on and ready to receive messages.
Turn your pager off at night when you do not want to
receive messages, and place the pager in the plugged-in
charger so it will be fully charged and ready for use in the
morning.
To turn on your pager:
Press any key.
To turn off your pager:
Press
,
.
-orSelect
from the menu wheel.
To reset your pager:
Turn off your pager as indicated in the previous procedure, then
press any key to turn the pager back on.
-or-
System Setup
17
1.
2.
Hold the pager face down.
Place your thumb on the arrow in the center of the battery
door. Press down and slide the battery door away from the
center of the pager.
3.
Lift the battery door away from the pager.
Reset Button
Lift Tab
4.
5.
Using a pen or other small pointed object, press the reset
button.
Fold the protruding lift tab down on top of the battery, then
slide the battery door back into place. An audible click can
be heard when the door is securely closed.
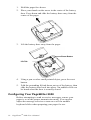
Configuring Your PageWriter 2000
Before attempting to send or receive messages, ensure your
pager is set to the proper transmission mode. You can also
adjust the message text size or turn on or off the audible
keyboard clicks when preparing your pager for use.
18
PageWriterTM 2000 User’s Manual
To set the transmission mode:
from the menu wheel.
1.
Select
2.
Select the transmission mode:
Send/Receive Full Service coverage. Turns on
the receiver and transmitter for two-way message
transmission. Messages can be sent and received
from your pager.
Receive Only Basic Service coverage. Turns on
only the receiver for one-way message transmission.
Messages can be received but not sent from your
pager.
Off Storing Messages. Turns off the transmitter
and receiver. Messages cannot be sent or received.
TIP
Receive Only is recommended for hospital
environments. Outbound transmissions can affect medical
devices. Set your PageWriter 2000 two-way pager to
Receive Only when in hospital or medical facilities.
Off is recommended for airline travel. Radio
transmissions can interfere with flight navigation and
communications. Follow FAA regulations. Turn off the
transmitter while on airplanes.
3.
Select
to return to the main screen.
When the pager is in Off mode, messages are retained by
the paging service until you change modes (Send/Receive
or Receive Only).
TIP Off mode does not turn off your pager. It turns off the radio
frequency (RF) transmission. You can still use the
applications on your pager to update your Address Book,
schedule reminders to yourself, or compose messages to be
sent at a later time.
TIP When moving to another zone, reset your pager back to Full
Service Send/Receive mode until you receive your first
page, then you can put the pager back into Receive Only
mode. This allows you to tell the service provider where to
find your pager. Zones are defined by the paging service
provider, but in general, a major metropolitan area counts
as a zone (e.g., the greater Chicago area is one zone).
System Setup
19
To change the message text size:
1.
2.
from the menu wheel.
Select
Press
then press
up or down to highlightMessage Text,
to toggle between:
[Now NORMAL] Displays message text in the standard
font size.
3.
[Now LARGE] Displays message text in a larger font
size.
Press
to access the button field, then select
to
accept the changes and return to the menu wheel.
To turn on/off the audible keyboard click:
1.
Select
from the menu wheel.
2.
Press
3.
Press
to access the button field, then select
accept the changes and return to the menu wheel.
up or down to highlightKey Clicks, then press
to toggle between [Now ON] and [Now OFF].
to
Setting the Date and Time
Although your new PageWriter 2000 two-way pager comes preconfigured, you might need to set the correct date and time when
you first receive your pager. Through the Set Time application,
you can also reset the date and time to reflect your movement
between time zones and for seasonal changes, such as Daylight
Savings Time.
To set the date/time:
1.
Select
2.
From the Time field, press
from the menu wheel.
up or down in each field to
change the hour, minute, or AM/PM. Press
to move between Time fields.
3.
4.
20
Press
to access the Date field, then press
right or left
up or
down to change the numbers for the date. Press
right
or left to move between Date fields.
to access the button field, then select
to
Press
accept the changes and return to the menu wheel.
PageWriterTM 2000 User’s Manual
To select the date format:
1.
2.
from the menu wheel.
Select
Press
then press
up or down to highlightDate Format,
to cycle between:
[Now DD/MM/YY] Displays day/month/year format.
[Now YY/MM/DD] Displays year/month/day format.
3.
[Now MM/DD/YY] Displays month/day/year format.
to access the button field, then select
to
Press
accept the changes and return to the menu wheel.
To select the time format:
1.
2.
3.
Select
Press
from the menu wheel.
up or down to highlightTime Format,
then press
to toggle between [Now AM/PM] and
[Now 24 hr].
Press
to access the button field, then select
accept the changes and return to the menu wheel.
to
Assigning Alert Modes
Four alert modes are available from the Home screen that
quickly and easily override the alerts without changing the
settings. They include Loud, Soft, Vibrate, and Silent. The alert
modes allow you to increase the volume of the alert when you
are in a noisy environment, decrease the volume for normal
environments, substitute vibration when no sound is desired, and
turn off the alerts for environments where any alert is
inappropriate.
To select an alert mode:
1.
From the Home screen, press
the alert mode icon.
2.
Press
to cycle to the desired alert mode.
3.
Press
change.
to exit the alert mode icon and accept the
to the right to highlight
System Setup
21
Assigning Alert Types
Different alert types can be assigned to the inboxes that receive
your messages. This allows you to identify by sound the type of
message you are receiving. An alert type can be set for each of
the alert modes. If an audible alert mode (Loud or Soft) is
selected from the Home screen, the alert you assigned on the Set
Alert Screen will notify you of incoming messages.
To select an alert type:
from the menu wheel.
1.
Select
2.
up or down to highlight the inbox for which you
Press
are assigning an alert type, then select
.
3.
Select
4.
Press
Press
to bypass the Edit Inbox screen.
left or right to scroll through the alert options.
to move between alert mode fields.
TIP Press
5.
to sample the alert.
Select
to accept the changes and return to the
Message Area screen.
Addresses
The PageWriter 2000 two-way pager contains an address book
for storing the address information of each person or group you
might want to contact. You can include the type of pager and its
PIN, an email address, a fax number, home and work phone
numbers, and even miscellaneous notes for each address entry.
When you are ready to send a message, each person or group
will have an address entry for each type of address you have
identified, such as two-way pager or email.
Group names are indicated in the list of Address Book
Entries with the label GROUP.
Up to 25 members can be added to each group.
Entering Addresses
The Address Book contains addresses for individuals as well as
for groups of individuals. Group addresses allow you to
compose and send one message which is transmitted to each
member of the group.
22
PageWriterTM 2000 User’s Manual
TIP You can force address names to appear in a position in the
Address Book that you find convenient. For example,
prefacing group names with a space forces all the groups to
appear at the top of the list. Using an underscore instead
forces the names to the bottom of the list.
To add an individual:
1.
Select
from the menu wheel.
2.
3.
Select New Individual Entry.
In the Name field, type the name for the entry as it should
appear in the Address Book (e.g., Cody, Catherine).
The Address Book sorts address entries alphabetically
based on the first letter in the address name. Type the last
name first if you want to find addresses for individuals by
their last name.
4.
In the Carrier field, press
left or right to scroll through
the paging service providers. Highlight the name of your
carrier, then press
to move to the next field.
If the paging carrier of the addressee is accessible from
your paging carrier,
appears next to the Pager field. If
the envelope does not appear, the Enter PIN field allows
you to store the pager information for reference only.
5.
6.
7.
8.
9.
In the Pager field, press
left or right to scroll through
the pager types. Highlight the pager type, then press
to
move to the next field.
Enter the individual’s PIN and/or fax number.
provides access to additional information about the
PIN for the selected pager type.
Select
, to access a supplemental screen where you
can enter other address information, such as email address,
home phone number, work phone number, and fax number.
Select
, then type any additional information in the
Notes text field.
Select
to return to the Address Book Entries
screen.
To add a group:
1.
Select
from the menu wheel.
Addresses
23
2.
3.
Select New Group Entry.
In the Name field, type the name for the group as it should
appear in the Address Book (e.g., Sales Team), then select
.
4.
Select the individuals to add to the group.
TIP Press
up or down to highlight an address entry,
then press
to select the entry.
appears next to each
entry selected. Press
again to de-select an entry, as
required. When you are finished selecting group members,
to access the button field.
press
5.
Select
to accept the changes and return to the
Address Book Entries screen.
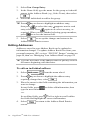
Editing Addresses
Addresses saved in your Address Book can be updated as
information changes. To update Address Book files from your
personal computer (PC), review “FLEX PC Partner” starting on
page 48, then see “Managing Your Address Book” on page 54.
TIP Type the first letter of the address name to quickly scroll to
the names beginning with that letter.
To edit an individual address:
1.
Select
2.
Press
up or down to highlight the address entry
requiring change then, select
.
3.
Place the cursor in the field containing the information you
want to change.
In text fields, press
to delete old information, then
type the new information.
-or-
4.
24
from the menu wheel.
In scrolling fields, press
left or right to scroll within
the fields and highlight the correct information.
Select
to return to the Address Book Entries
screen.
PageWriterTM 2000 User’s Manual
To change the name of a group:
1.
Select
2.
Press
up or down to highlight the name of the group
you want to change.
From the group addresses screen, select
.
3.
4.
5.
from the menu wheel.
From the Change Group Name screen, press
to delete
the current name, then type the new name.
Select
to accept the change and return to the group
addresses screen.
To change the group’s membership:
1.
Select
2.
up or down to highlight the name of the group to
Press
which you are adding or deleting members, then select
.
3.
From the group addresses screen, select the entries from the
Address Book to add to or remove from the group’s
membership.
TIP Press
from the menu wheel.
up or down to highlight an address entry,
then press
to select the entry.
appears next to each
again to de-select an entry, as
entry selected. Press
required. When you have finished selecting group members,
press
to access the button field.
TIP Remember! Deleting a member from a group will not delete
the individual member’s address from the Address Book.
After deleting a member from a group address, delete the
individual address, as needed.
4.
Select
to accept the changes and return to the
Address Book Entries screen.
Deleting Addresses
A well maintained Address Book provides quick access to the
addresses you need. Delete addresses for individuals that you no
longer contact or for groups that no longer exist.
Addresses
25
TIP Remember! Deleting group addresses will not delete the
individual member addresses. After deleting a group
address, delete the individual addresses, as needed.
The deletion of addresses cannot be undone.
To delete an address:
1.
Select
from the menu wheel.
2.
Press
up or down to highlight the Address Book entry,
the select
.
3.
at the confirmation screen to delete the
Select
address and return to the Address Book Entries screen.
Write
The Write application enables you to compose messages using
the QWERTY keyboard, insert Quick Text, and append your
signature. You can also choose to send your messages at a later
time, file the messages in folders prior to sending, and even
place reminder alerts on messages. Messages can be sent to
other two-way pagers, one-way pagers, email addresses, and fax
numbers by selecting the appropriate address. See Entering
“
Addresses” on page 22 for more information on creating address
entries.
Writing Messages
The QWERTY keyboard provides a familiar key layout,
enabling you to quickly type and send your message. For
information on Alt-mode keys and Symbols, see Alt-mode
“
Functions” on page 10. For information on Shift-mode keys, see
“Shift-mode Functions” on page 10.
To write a message:
1.
Select
2.
Type your message, then press
field.
Select
.
3.
26
PageWriterTM 2000 User’s Manual
from the menu wheel.
to access the button
4.
Select the recipient(s) from the Address Book list.
TIP Each recipient can have more than one entry. Select the
recipient by the type of messaging device receiving the
message (e.g., two-way pager, one-way pager, email, fax).
TIP Before sending messages to fax addresses, use the
Customize application to record the Internet email address
for your Internet fax service.
TIP When selecting an entry, press
an address entry, then press
up or down to highlight
to select the entry.
appears next to each entry selected. Press
again to deselect an entry, as required. When you have finished
to access
selecting recipients for your message, press
the button field.
TIP Press
,
from the Address Book list to return to the
message and continue editing.
5.
Select
to send your message.
Adding Quick Text
The Quick Text feature enables you to quickly add frequently
used text to your messages. This saves time and key strokes
when composing a message. See “Customizing Message
Features” on page 45 for information on composing your own
Quick Text through the Customize application.
To add Quick Text to your message:
1.
From the Compose Message screen, select
2.
Press
.
up or down to highlight the desired text,
then press
. The Quick Text appears in your message
on the Compose Message screen, ready for you to complete
your message.
Attaching Message Replies
When sending a message to a two-way pager that returns canned
text responses, your PageWriter 2000 two-way pager allows you
to provide a selection of replies to your message. Messages
typed in the Replies fields will be available to the person
receiving your message. Rather than selecting the canned
messages available on their pager, they can select one of the
customized replies you have provided.
Write
27
To attach Replies to your message:
.
1.
From the Compose Message screen, select
2.
Type your choices of replies in the numbered fields.
Fields are provided for sixteen replies. Use
to access the additional fields.
3.
Select
it transmits.
and
to attach the replies to your message when
Saving Your Message to the Sent Folder
Messages can be saved to the sent folder on an individual basis.
To save all your outgoing messages to the Sent Messages folder,
see “Customizing Message Features” on page 45.
To save the current message to the Sent Messages folder:
1. From the Compose Message screen, select
.
2.
3.
Select the Save a copy of message in Sent Messages folder
check box so the check appears.
Select
to save a copy of your message upon
transmission, then complete your message.
Appending Your Signature
Your previously created signature can be appended to any or all
of your messages.
Signatures are created through the Customize application.
See “Customizing Message Features” on page 45, for more
information on creating signatures and adding your
signature automatically to all outgoing messages.
To append your signature to your message:
1.
From the Compose Message screen, select
.
2.
3.
Select the Add Signature check box so the check appears.
to append the signature, then complete your
Select
message.
Scheduling a Delayed Send
Messages can be composed at your convenience and then
scheduled for automatic transmission later at the appropriate
send time.
To schedule the transmission of a message:
1.
28
From the Compose Message screen, select
PageWriterTM 2000 User’s Manual
.
2.
3.
4.
Select the recipient(s) from the Address Book list.
Select
.
From the Time field, select the time when you want to send
the message. Press
5.
up or down in each field to change
the hour, minute, or AM/PM. Press
right or left to
move between Time fields.
Press
to access the Date field. Select the date when
you want to send the message. Press
6.
up or down to
change the numbers for the date. Press
move between Date fields.
Select
to accept the schedule.
right or left to
Filing a Message Draft
Partial or unfinished messages can be stored for later edit and/or
transmission. Saving your messages to a folder avoids
unnecessary text re-entry while allowing you to compose
messages at your convenience.
To file the draft of a message before transmission:
1.
From the Compose Message screen, select
2.
Press
up or down to highlight the folder to which you
want to save your message draft, then select
. Your
draft is saved to the folder for edit or transmission at a later
time.
.
Setting a Reminder Alarm
Send yourself a reminder for meetings, special events, and other
important To Do’s. Reminder messages can be sent once or on a
regular basis (e.g., daily, weekly, monthly, yearly). When it’s
important that you remember, send yourself a reminder on your
PageWriter 2000 two-way pager.
To set a reminder alarm:
1.
Select
2.
Type your reminder message, then select
3.
Press
up or down to highlight the folder to which you
want to save your reminder message, then select
.
from the menu wheel.
.
Write
29
4.
From the Time field, select the time when you want the
alarm to remind you. Press
5.
up or down in each field to
change the hour, minute, or AM/PM. Press
right or left
to move between Time fields.
Press
to access the Date field. Select the date when
you want the alarm to remind you. Press
up or
down to change the numbers for the date. Press
or left to move between Date fields.
6.
7.
8.
right
Press
to access the alert frequency field. Press
up
or down to highlight how often you want this message to
remind you, then press
.
Press
to access the button field, then select
to
accept the schedule.
Select
. At the scheduled time, your reminder
message is sent to you.
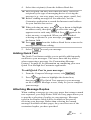
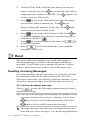
Read
The Read application enables you to read and respond to
incoming messages, forward or file messages, and delete
messages. It also allows you to manage the inboxes, folders,
Outbox, and Trashcan accessible from the Message Area.
Reading Incoming Messages
Incoming messages can be read as they are received or held in
the appropriate inbox to be read at a later time. The New
Messages screen takes you directly to the new message, or you
can access unread messages from the Message Area screen.
To read an incoming message:
Select
at the New Messages announcement screen to
display the message.
TIP The top of the Message screen displays the quantity of new
messages waiting to be read (e.g., Message 1 of 4). Press
down or up to scroll within the message text. Press
right or left to scroll between the messages.
Messages that have already been read cannot be accessed
from this list of new messages. Use the Read application to
30
PageWriterTM 2000 User’s Manual
view previously read messages. See the next procedure for
viewing messages from the Message Area screen.
To read a message from the Message Area screen:
1.
Select
2.
Select the inbox containing the message.
3.
indicates an inbox containing at least one unread
messages.
indicates an inbox that contains only messages that have
already been read.
Select the message.
4.
from the menu wheel.
indicates a new, unread message.
indicates that you have already read the message.
indicates messages with alarms.
Select
to return to the Messages list, or press
to return to the menu wheel.
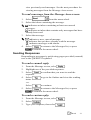
Sending Responses
Responding to messages is quick using pager-provided (canned)
text or the QWERTY keyboard.
To send a canned reply:
1.
From the Message screen, select
.
2.
3.
4.
Highlight one of the provided responses.
Select
to confirm that you want to send the
response.
Select
to go to the Outbox and view the sending
status.
-orSelect
to continue.
5.
Select
to return to the Messages list, or press
to return to the menu wheel.
To send a custom reply:
1.
From the Message screen, select
2.
Select
3.
Type your response, then select
.
.
.
Read
31
4.
5.
Select
status.
-orSelect
Select
to go to the Outbox and view the sending
to continue.
to return to the Messages list, or press
to return to the menu wheel.
Forwarding Messages
Your PageWriter 2000 two-way pager enables you to share your
received messages without retyping them. Simply forward the
message to an address in your Address Book.
To forward a message:
1.
From the Message screen, select
.
TIP Press
to access the button field, then
through the options.
to scroll
2.
Type a forwarding note if desired, then select
3.
From the Choose Recipients screen, select the recipient(s),
then select
.
TIP When selecting an entry, press
an address entry, then press
.
up or down to highlight
to select the entry.
appears next to each entry selected. Press
again to deselect an entry, as required. When you have finished
selecting recipients for your message, press
to access
the button field.
4.
5.
Select
status.
-orSelect
Select
to go to the Outbox and view the sending
to continue.
to return to the Messages list, or press
to return to the menu wheel.
Filing Messages
Messages that have been read can be saved to a folder. For more
information on creating folders, see “Folders” on page 37.
To save a message to a folder:
1.
32
From the Message screen, select
PageWriterTM 2000 User’s Manual
.
TIP Press
to access the button field, then
through the options.
to scroll
2.
Press
up or down to highlight the folder to which you
.
want to save your message, then select
3.
Select
to return to the Messages list, or press
to return to the menu wheel.
Deleting Messages
Messages can be deleted from either the Messages list or the
Message screen. Deleted messages are moved to the Trashcan,
where they are permanently erased when the Trashcan is
emptied. For more information, see “Trashcan” on page 41.
To delete a message from the Messages list:
From the Messages list, press
up or down to highlight the
message you want to delete, then select
. The message
is deleted.
To delete a message from the open Message screen:
From the Message screen, select
deleted.
. The message is
Managing the Message Area
The Message Area contains four types of mailboxes:
Inboxes
Folders
Outbox
Trashcan
Inboxes
Inboxes are mailboxes that receive incoming messages
transmitted to your PageWriter 2000 two-way pager. Three
types of inboxes automatically organize the messages for you:
Main Inbox, information services, and personal.
The Main Inbox receives general messages that are sent to your
pager. You can set message alerts and assign a cleanup schedule
to help maintain the contents, however, the Main Inbox cannot
be renamed, have routing rules assigned, nor be deleted.
Routing rules are specific keywords or text strings that your
PageWriter 2000 two-way pager looks for in incoming
Read
33
messages. You can identify keywords or text strings for
each information service inbox or personal inbox. When
keywords or text strings are found, the message is placed in
the appropriate inbox.
Information services inboxes receive subscriber messages, such
as world news, financial updates, and sports scores. Information
services inboxes can only be created, renamed, or deleted by the
information service provider. Changing information service
inboxes requires a software change that is completed over-theair (OTA) or at a service center by the service provider.
Personal inboxes are inboxes that you can create to receive
specific types of messages. Incoming messages are
automatically routed to your personal inboxes based upon the
routing rules you assigned for each inbox. You can create,
rename, or delete personal inboxes at any time.
To create a personal inbox:
1.
Select
from the menu wheel.
TIP Press
to access the button field, then
through the options.
2.
Select
3.
4.
Type the name of the new inbox in the Name field.
Type specific text that your pager will look for in incoming
messages. Messages containing one or more of these strings
will automatically be placed in this inbox.
to accept the changes and return to the
Select
Message Area screen.
-orSelect
to continue configuring the new inbox.
5.
6.
Press
alerts.
TIP Press
7.
34
to scroll
.
left or right in each alert mode field to select the
to sample the alert.
Select
to accept the changes and return to the
Message Area screen.
-orSelect
to continue configuring the inbox.
PageWriterTM 2000 User’s Manual
8.
Select the cleanup option:
No Cleanup Keeps all messages.
Number of Messages Keeps the most recent messages
up to the number of messages indicated.
Age of Messages Keeps the messages that have been in
the inbox fewer days than the number of days indicated.
9. If the automatic cleanup is selected, type the maximum
number of days the message is retained in the folder before
it is deleted, or the maximum number of messages retained
before the oldest message is deleted.
Cleanup runs nightly deleting only read messages and those
without alarms.
10. Select
to accept the changes and return to the
Message Area screen.
To rename a personal inbox:
1.
Select
2.
up or down to highlight the inbox you want to
Press
rename, then select
.
3.
to delete the current name, then type the new
Press
name.
Select
to accept the changes and return to the
Message Area screen.
4.
from the menu wheel.
To assign routing rules:
from the menu wheel.
1.
Select
2.
Press
up or down to highlight the inbox requiring
.
routing rules, then select
3.
Type specific text that your pager will look for in incoming
messages. Messages containing one or more of these text
strings will automatically be placed in this inbox.
Do not use the same text for more than one inbox.
Select
to accept the changes and return to the
Message Area screen.
4.
To set the alert type for an inbox:
1.
Select
from the menu wheel.
Read
35
2.
Press
up or down to highlight the inbox requiring a
new alert type, then select
.
3.
Select
4.
Press
alerts.
TIP Press
5.
from the Edit Inbox screen.
left or right in each alert mode field to select the
to sample the alert.
Select
to accept the changes and return to the
Message Area screen.
To clean up an inbox:
1.
Select
from the menu wheel.
2.
up or down to highlight the inbox you want to
Press
clean up, then select
.
Cleanup deletes only read messages and those without
alarms.
To assign a cleanup schedule to an inbox:
1.
Select
from the menu wheel.
2.
up or down to highlight the inbox requiring a
Press
cleanup schedule, then select
.
3.
Select
from the Edit Inbox screen.
4.
Select
from the Set Alerts screen.
5.
Select the cleanup option:
No Cleanup Keeps all messages.
Number of Messages Keeps the most recent messages
up to the number of messages indicated.
6.
36
Age of Messages Keeps the messages that have been in
the inbox fewer days than the number of days indicated.
If the automatic cleanup is selected, type the maximum
number of days the message is retained in the folder before
it is deleted, or the maximum number of messages retained
before the oldest message is deleted.
Cleanup runs nightly, deleting only read messages and those
without alarms.
PageWriterTM 2000 User’s Manual
7.
Select
to accept the changes and return to the
Message Area screen.
To delete a personal inbox:
1.
Select
2.
up or down to highlight the inbox you want to
Press
delete, then select
.
from the menu wheel.
TIP All unread or alarmed messages in an inbox must be read,
deleted, or disabled before the inbox can be deleted.
3.
Select
at the confirmation screen to delete the
inbox and return to the Message Area screen.
Folders
Folders are used to store messages that have already been read
or created by you. The two folder types are system and personal.
System folders are folders that are standard on every PageWriter
2000 two-way pager. They include the Drafts Folder and the
Sent Messages Folder. You cannot create, rename, or delete a
system folder; however, you can set the cleanup parameters.
Personal folders are folders that you can create, rename, and
delete.
To add a personal folder:
1.
Select
from the menu wheel.
2.
Select
3.
4.
Type the name of the new folder in the Name field.
Select
to accept the changes and return to the
Message Area screen.
-orSelect
to continue configuring the new folder.
5.
Select the cleanup option:
6.
.
No Cleanup Keeps all messages.
Age of Messages Keeps the messages that have been in
the inbox fewer days than the number of days indicated.
If the automatic cleanup is selected, type the maximum
number of days the message is retained in the folder before
Read
37
7.
it is deleted, or the maximum number of messages retained
before the oldest message is deleted.
Cleanup runs nightly, deleting only read messages and those
without alarms.
Select
to accept the changes and return to the
Message Area screen.
To rename a personal folder:
1.
Select
2.
Press
up or down to highlight the folder you want to
.
rename, then select
3.
Press
to delete the current name, then type the new
name.
to accept the changes and return to the
Select
Message Area screen.
4.
from the menu wheel.
To view the messages in a folder:
1.
2.
Select
Press
from the menu wheel.
up or down to highlight the folder you want to
view, then press
3.
4.
. A list of messages appears.
indicates messages with alarms.
Select the message you want to view.
Select
to return to the list of messages, or press
to return to the menu wheel.
To clean up a folder:
1.
Select
from the menu wheel.
2.
Press
up or down to highlight the folder you want to
.
clean up, then select
Cleanup deletes only read messages and those without
alarms from the folder.
To assign a cleanup schedule to a folder:
38
1.
Select
2.
Press
up or down to highlight the folder requiring a
cleanup schedule, then select
.
PageWriterTM 2000 User’s Manual
from the menu wheel.
3.
Select
from the Edit Folder screen.
4.
Select the cleanup option:
No Cleanup Keeps all messages.
5.
6.
Age of Messages Keeps the messages that have been in
the inbox fewer days than the number of days indicated.
If the automatic cleanup is selected, type the maximum
number of days the message is retained in the folder before
it is deleted, or the maximum number of messages retained
before the oldest message is deleted.
Cleanup runs nightly, deleting only read messages and those
without alarms.
Select
to accept the changes and return to the
Message Area screen.
To delete a personal folder:
1.
Select
from the menu wheel.
2.
Press
up or down to highlight the folder you want to
delete, then select
.
3.
at the confirmation message to delete the
Select
folder and return to the Message Area screen.
TIP All alarmed messages in a folder must be disabled before
the folder can be deleted.
Outbox
The Outbox serves two purposes. It provides a transmission
status log for messages sent within the past day and acts as a
holding area for unsent messages. The messages are categorized
into six types. Select
to display the Outbox icon
descriptions:
Sending in progress
Sent successfully
Message in queue
Transmitter not on
Delayed send message
Sending failed
Read
39
Due to the message transmission process, the transmission status
can alternate between Message in queue and Sending in
progress before attaining Sent successfully status.
To cancel outgoing messages in the Outbox:
1.
Select
2.
Select
3.
Press
up or down to highlight the unsent message you
want to cancel, then select
.
4.
5.
from the menu wheel.
Outbox.
Only unsent messages can be canceled.
Select
at the confirmation screen.
Select
press
to return to the Message Area screen, or
to return to the menu wheel.
To resend messages from the Outbox:
1.
Select
2.
Select
3.
Press
up or down to highlight the message you want to
resend, then select
.
4.
from the menu wheel.
Outbox.
Only messages that have already been sent ( ) or messages
that failed to transmit ( ) can be resent.
Select
to return to the Message Area screen, or
press
to return to the menu wheel.
To view message information:
Select
2.
Select
3.
Press
up or down to highlight the message of interest,
then select
. The message, replies to the message,
and the addresses the message and replies were sent to
displays.
Select
.
4.
5.
40
from the menu wheel.
1.
Select
press
Outbox.
to return to the Message Area screen, or
to return to the menu wheel.
PageWriterTM 2000 User’s Manual
To forward messages from the Outbox:
1.
Select
2.
Select
3.
Press
from the menu wheel.
Outbox.
up or down to highlight the message you want to
forward, then press
.
4.
Select
.
5.
Type a note to accompany the message being forwarded,
then select:
to forward to an address.
6.
Select the address to which the message will be sent, then
select
.
7.
Select
status.
-orSelect
to go to the Outbox and view the sending
8.
Select
.
9.
Select
press
to forward to a folder.
to continue.
to return to the Message Area screen, or
to return to the menu wheel.
Trashcan
Messages can be restored from the Trashcan until the Trashcan
is emptied. The Trashcan is emptied upon your request, when
memory is running low, and each night. See Memory
“
Management System” on page 68 for more information.
To restore a message from the Trashcan:
1.
Select
from the menu wheel.
2.
Select
3.
Press
up or down to highlight the message you want to
restore, then select
.
4.
Press
up or down to highlight the folder to which you
want to move the message, then select
.
5.
Select
press
Trashcan.
to return to the Message Area screen, or
to return to the menu wheel.
Read
41
To empty the Trashcan:
from the menu wheel.
1.
Select
2.
3.
Select
Select
4.
Select
at the confirmation screen to delete the
messages from the Trashcan.
to return to the Message Area screen, or
Select
press
to return to the menu wheel.
5.
Trashcan.
.
Customize
The Customize application provides a variety of features that
allow you to configure your PageWriter 2000 two-way pager to
suit your needs.
Viewing System Status
Information available through the Customize application
includes system information, memory usage, and owner
information.
To view system information:
1.
Select
2.
Select About PageWriter to view version, model, and
operating system information. A list of applications and
their installation dates is also provided.
Select
to return to the Customize screen, or press
to return to the menu wheel.
3.
from the menu wheel.
To view memory usage:
from the menu wheel.
1.
Select
2.
Select Memory Usage to view the amount and total percent
of memory in use.
Select
to return to the Customize screen, or press
to return to the menu wheel.
3.
To view owner information:
42
1.
Select
2.
Select Owner Informationto view your information.
PageWriterTM 2000 User’s Manual
from the menu wheel.
TIP The information on this screen can be edited. Simply delete
any existing information and type the new information.
3.
Select
to accept any changes to the owner
information and return to the Customize screen, or press
to return to the menu wheel and discard any changes.
Enabling and Disabling Alerts and Alarms
The Unread Message Alert feature indicates that you have
messages that were not read at the time they arrived and
continue to be unread. Using the same alerts you selected for the
inbox receiving the message, the Customize application allows
you to turn on or off the Unread Message Alert feature, as well
as the LED alarms.
To enable/disable the unread message alert:
1.
Select
from the menu wheel.
2.
Press
up or down to highlightUnread Msg Alert, then
press
to toggle between [Now ON] and [Now OFF].
3.
Select
to return to the Customize screen.
To enable/disable LED alarms:
1.
Select
2.
Press
then press
OFF].
3.
Select
from the menu wheel.
up or down to highlightLED Alarms,
to toggle between [Now ON] and [Now
to return to the Customize screen.
Setting Up Internet Fax Service
Before you can send fax messages you must first identify the
email address of the Internet fax service you intend to use.
Through the Customize application, record the email address of
your Internet fax service. When you are ready to send a fax,
simply select the fax address from the Address Book for the
person you want to contact.
To set up an Internet fax service:
1.
Select
from the menu wheel.
Customize
43
2.
3.
Select Internet Fax Service.
Type the email address for the fax service.
4.
Do not enter the fax number or “@” sign.
Select
to return to the Customize screen.
Customizing the User Interface
The Customize application enables you to adjust your
PageWriter 2000 two-way pager to reflect your preferences.
Adjust the contrast level and message text size, select the date
and time formats, and even turn off or on the key clicks.
To use the contrast calibration guide:
1.
Select
2.
Press
, then hold down . Watch the Calibration Guide
to see how the shades of black, gray, and white are affected
by your contrast selection.
Continue holding down. The contrast adjustment will
automatically reverse when it reaches extreme light and
extreme dark contrasts. Release when the desired
contrast level is reached.
3.
from the menu wheel.
To select message text size:
1.
Select
2.
Press
then press
from the menu wheel.
up or down to highlightMessage Text,
to toggle between:
[Now NORMAL] Displays all message text in the
standard font size.
3.
[Now LARGE] Displays all message text in a larger
font size.
Select
to accept the changes and return to the
Customize screen.
To select the date format:
1.
Select
2.
Press
then press
from the menu wheel.
up or down to highlightDate Format,
to cycle between:
[Now DD/MM/YY] Displays day/month/year format.
44
PageWriterTM 2000 User’s Manual
[Now YY/MM/DD] Displays year/month/day format.
3.
[Now MM/DD/YY] Displays month/day/year format.
Select
to accept the change and return to the
Customize screen.
To select the time format:
1.
2.
Select
Press
from the menu wheel.
up or down to highlightTime Format,
then press
to toggle between [Now AM/PM] and
[Now 24 hr].
3.
Select
to accept the change and return to the
Customize screen.
To turn on/off the key clicks:
1.
Select
from the menu wheel.
2.
Press
3.
to accept the change and return to the
Select
Customize screen.
up or down to highlightKey Clicks, then press
to toggle between [Now ON] and [Now OFF].
Customizing Message Features
Your PageWriter 2000 two-way pager’s messaging features
enable you to:
•
Automatically save a copy of each message you send.
•
Create a signature for your messages then automatically
append the signature to each message you send.
•
Create and store frequently used text for inclusion in future
messages.
To automatically save a copy of outgoing messages:
from the menu wheel.
1.
Select
2.
3.
Select Send Options.
Select Save a copy when sent(check appears in box).
This feature automatically stores copies of all sent messages
in the Sent Messages Folder.
Customize
45
TIP Automatically saving copies of all sent messages consumes
available memory. Instead, use the Outbox to review the
message contents of all sent messages and to view message
transmission status. For efficient memory usage, copy only
selected messages by selecting
from the Outbox
screen. See “To forward messages from the Outbox” on
page 41 for more information.
4.
Select
to accept the change and return to the
Customize screen.
To create a signature:
from the menu wheel.
1.
Select
2.
3.
Select Send Options.
Select the Signature text box, then type your message
signature.
Select
to accept the change and return to the
Customize screen.
4.
To automatically append your signature to each
message you send:
1.
Select
from the menu wheel.
2.
3.
Select Send Options.
Select Add Signature when sent(check appears in box).
TIP Signatures can be appended to individual messages through
the Write application. See “Saving Your Message to the
Sent Folder
Messages can be saved to the sent folder on an individual basis.
To save all your outgoing messages to the Sent Messages folder,
see “Customizing Message Features” on page45.
To save the current message to the Sent Messages folder:
1. From the Compose Message screen, select
.
2.
3.
Select the Save a copy of message in Sent Messages folder
check box so the check appears.
Select
to save a copy of your message upon
transmission, then complete your message.
Appending Your Signature” on page 28 for more information.
46
PageWriterTM 2000 User’s Manual
4.
5.
If you have not created a signature, type your message
signature in the Signature text box.
Select
to accept the change and return to the
Customize screen.
To create Quick Text:
1.
Select
2.
3.
4.
5.
Select Edit Quick Text.
Select Add New Quick Text.
Type your Quick Text message of up to 100 characters.
Select
to accept the change and return to the
Quick Text screen.
Select
to return to the Customize screen.
6.
from the menu wheel.
To edit Quick Text:
1.
Select
2.
Select Edit Quick Text.
3.
Press
up or down to highlight the text requiring
changes, then select
.
4.
to delete existing text, then type your new
Press
message.
Select
to accept the change and return to the
Quick Text screen.
Select
to return to the Customize screen.
5.
6.
from the menu wheel.
Maintaining Inboxes, Folders, and Applications
Maintenance features such as Cleanup and Delete Applications
enable you to remove unwanted messages or applications from
your pager. To schedule the cleanup feature, see “To assign a
cleanup schedule to an inbox” on page36, or “To assign a
cleanup schedule to a folder” on page 38.
To clean up all inboxes and folders:
1.
Select
from the menu wheel.
2.
3.
Select Cleanup.
Select the mailboxes to be cleaned:
Customize
47
All Deletes all read messages stored in both folders and
inboxes that have no alarms set.
Folders Deletes all read messages stored in folders.
4.
Inboxes Deletes all read messages stored in inboxes.
Messages deleted in the cleanup process are not stored in
the Trashcan. They are permanently deleted and cannot be
recovered.
Select
to delete the messages and return to the
Customize screen.
To delete applications:
1.
Select
2.
Select Delete Applications.
from the menu wheel.
3.
Press
up or down to highlight the application requiring
deletion, then select
.
4.
at the confirmation screen to delete the
Select
application and return to the Customize screen.
FLEX PC Partner
Introducing FLEX PC Partner
The FLEX™ Partner application enables you to transfer
information between your personal computer (PC) and your
PageWriter 2000 two-way pager. The application enables you to
manage the following common information management tasks:
•
Adding information to your Address Book on your PC, then
updating the Address Book on your pager
•
Copying information from your pager to your PC (as a
backup or for editing purposes)
•
Copying information from your PC to your pager
•
Printing all messages stored on your pager
•
Copying all messages stored on your pager to your PC
•
Installing a new application on your pager
• Updating the operating system on your pager
The FLEX PC Partner application handles the various
information transfers and related operations with small
component programs. The Partner applets, orpartlets, are
accessed from a control panel known as theShell.
48
PageWriterTM 2000 User’s Manual
PC Hardware Requirements
In order to connect properly with your pager, your PC must
meet the following minimum requirements:
•
IBM-compatible 486SX 66 MHz processor or greater
•
16 MB RAM
•
7 MB of available storage on the computer's hard drive
•
VGA monitor with 640x480 resolution
•
Deluxe PageWriter 2000 charger to supply infrared
connection
PC Software Requirements
Windows 95 or 3.x must already be installed on your PC.
FLEX PC Partner Online Help
Online Help is accessible by pressinga on your PC keyboard
at any time while in the FLEX PC Partner application. Clicking
the Help button on a FLEX PC Partner dialog box brings up
context-specific help.
Installing FLEX PC Partner on Your PC
The FLEX PC Partner application includes a setup program that
automatically copies the program files to the appropriate folders
on your PC. Setup creates the folders for you if they don't
already exist.
To install FLEX PC Partner on your PC:
1.
2.
3.
4.
Insert FLEX PC Partner Disk 1 into the disk drive on your
PC.
From the Windows 95 taskbar, clickStart, then Run.
-orFrom Windows 3.x Program Manager, click theFile menu,
then Run.
Select or type A:\SETUP.EXE. (If the disk is in a drive
other than A:, substitute the appropriate drive letter.) Press
E.
Follow the prompts. Typically, you will want to accept the
option on each screen that Setup has already selected (the
default).
FLEX PC Partner
49
5.
6.
7.
When Setup is complete, clickOK at each information
window.
Click Yes to read the Release Notes. They contain
important information that might not have made it into the
documentation. Close the Release Notes before continuing.
Select
Shell.
FLEX PC Partner to start the PC Partner
Linking Your PageWriter 2000 to Your PC
The connection that enables your pager and your PC to
exchange information is a combination of an infrared (IR) link
and direct cabling. The Deluxe charger, ordocking station, has a
built-in IR port. When you snap your pager into the docking
station the IR port on your pager aligns with the IR port on the
docking station. The docking station is connected to one of your
PC's serial ports via the Motorola-supplied RS232 null modem
cable. Information passes between your pager and the docking
station via IR transmissions, and between the docking station
and your PC via the cable.
To establish a connection between your pager and
FLEX PC Partner on your PC:
1.
Snap your pager into the docking station. For information
on connecting the docking station to your PC, see The
“
Infrared Port” on page 15.
2.
On your pager, select
from the menu
wheel.
If this is the first time the FLEX PC Partner application is
being installed on your PC continue to the next section,
“Configuring FLEX PC Partner”. Otherwise, see “Using the
PC Partner Shell” on page 51.
3.
Configuring FLEX PC Partner
The FLEX PC Partner Configuration utility is run immediately
after installing FLEX PC Partner. It tells the FLEX PC Partner
application how your pager will be connecting to your PC. If
you change hardware (e.g., replace the charger with a new type
of charger) reconfigure the FLEX PC Partner application using
the following procedure.
To configure FLEX PC Partner:
1.
50
From your desktop, double-click
PageWriterTM 2000 User’s Manual
FLEX PC Partner.
-orFrom the Windows 95 taskbar, clickStart, then point to
FLEX PC Partner and click
2.
3.
4.
5.
FLEX PC Partner.
From the PC Partner Shell, double-click
Partner
Configuration.
From the FLEX PC Partner Configuration dialog box,
select the appropriate serial port.
If the port selection is not correct, an error message appears
(“No IR devices found”).
In the Adapter list box, select the appropriate adapter.
Click OK. If this is not the first time FLEX PC Partner has
been configured to your PC, clickYes to save your choices
and close the FLEX PC Partner Configuration partlet.
Using the PC Partner Shell
The FLEX PC Partner application consists of individual
component applications accessible from the FLEX PC Partner
Shell, known as partlets. Since each partlet operates
independently, they can be used in any order. Except as noted
below, you must establish a connection between your pager and
your PC in order to open a partlet.
The following partlets are currently available:
•
•
•
•
•
•
•
Address Book (does not require connection to pager)
Memory Usage
Message Manager (does not require connection to pager)
Backup Utility
Restore Utility
Application Manager
Partner Configuration
To open the FLEX PC Partner Shell:
From your desktop, double-click
FLEX PC Partner.
FLEX PC Partner
51
-orFrom the Windows 95 taskbar, clickStart, then point to FLEX
PC Partner and click
FLEX PC Partner.
To open a FLEX PC Partner partlet from the Shell:
1.
Double-click the partlet's icon.
TIP Right-clicking an icon also displays a pop-up menu you can
use to open a partlet.
2.
If the FLEX PC Partner Connect dialog box appears, click
Connect.
To determine a partlet's version:
1.
2.
From the FLEX PC Partner Shell, click the partlet's icon.
From the File menu, clickProperties. The partlet’s version
number displays.
TIP Right-clicking an icon also displays the File menu.
Managing Your Address Book
The FLEX PC Partner Address Book enables you to transfer the
Address Book information from your PageWriter 2000 two-way
pager to your PC. You can then conveniently view and edit
name and address information on your PC and send the revised
information back to your pager.
Address Book management includes:
52
•
Transferring Address Book information between your pager
and your PC
•
Managing your Address Book files on your PC
•
Managing Address Book entries for individuals
•
Managing Address Book entries for groups
•
Printing Address Book information
PageWriterTM 2000 User’s Manual
Transferring Address Book Information
The FLEX PC Partner application enables you to you transfer
your Address Book information from your pager to your PC
where it can be easily edited or stored as a backup file. Edited
Address Book files should be transferred back to your pager to
synchronize your PC and pager Address Books.
Files saved to your PC use an .ADR extension. Information
in .ADR files can be edited through the FLEX PC Partner
Address Book partlet.
To transfer your Address Book information from
your pager to your PC:
1.
Snap your pager into the docking station.
2.
On your pager, select
wheel, then select
3.
from the menu
.
Paging functions are temporarily suspended while your
pager is connected to your PC. Incoming messages will be
retained by the paging service provider until your pager is
disconnected from your PC.
On your PC, open the FLEX PC Partner Shell, then doubleclick
Address Book.
4.
Click
, or from the File menu, clickGet From Pager.
5.
Click Connect. Status messages on your PC screen notify
you of the progress of the transfer. When the transfer is
complete, the Address Book is updated on your PC.
You can now add, edit, or delete Address Book information
on your PC. After editing Address Book information on
your PC, you can save it to a file on your PC or send the
information back to your pager to update the Address Book
on your pager.
TIP When you select Get From Pager, the currently open
Address Book on your PC is replaced by the Address Book
being transferred from your pager. Before transferring the
file, save the Address Book on your PC to another file
name.
TIP To merge Address Books, ensure the Address Books are
saved as separate .ADR file names, then merge them using
the Import/Merge menu command. See T
“ o merge two
FLEX PC Partner
53
Address Book files on your PC” on page 56 for instructions
on merging two Address Book files.
6.
Click
, or from the File menu, clickSave.
7.
Select the file location, type the name for the new Address
Book file, then clickSave.
To transfer your Address Book information from
your PC to your pager:
1.
Snap your pager into the docking station.
2.
On your pager, select
wheel, then select
3.
from the menu
.
On your PC, open the FLEX PC Partner Shell, then doubleclick
Address Book.
4.
Click
, or from the File menu, clickOpen.
5.
Select or type the name of the .ADR file you want to
transfer, then clickOpen.
6.
Click
7.
Click Connect. Status messages on your PC screen notify
you of the progress of the transfer.
, or from the File menu, clickSend To Pager.
TIP If you have made changes to the Address Book on your
pager that are not included in the Address Book on your PC
and you do not want to lose the changes, transfer the
Address Book on your pager to your PC. Save the file to a
different .ADR name, then merge the file with the Address
Book on your PC. Send the final merged Address Book to
your pager.
8.
On your pager, select
.
Your paging functions are suspended while a connection
exists between your pager and PC. When you have finished
transferring data, select
to re-enable the send
and receive functions.
Managing Address Book Files
Managing your Address Book files comprises creating, saving,
opening, merging, importing and deleting the files.
54
PageWriterTM 2000 User’s Manual
Your pager does not need to be connected to your PC to
perform the following procedures, unless noted otherwise.
TIP Delete .ADR files that you no longer need.
To create an Address Book file on your PC:
1.
On your PC, open the FLEX PC Partner Shell, then doubleclick
2.
3.
Address Book.
Click
, or from the File menu, clickNew. If an
existing Address Book file is open, FLEX PC Partner
prompts you to save your changes before closing it.
A blank Address Book appears, ready for you to enter new
addresses and create new groups.
Upon completing entries in your new Address Book, click
,or select the File menu, then clickSave.
4.
Select the file location, type the name for the new Address
Book file, then clickSave.
To save an open Address Book file on your PC:
With the Address Book file open, click
, or from the File
menu, click Save.
If this Address Book file has not been saved already, FLEX PC
Partner prompts you for a file name. Type the file name, then
click OK.
To save an open Address Book file under a new
name:
1.
2.
From the File menu, clickSave As.
Select the file location, type the new name for the Address
Book file, then clickSave.
You do not need to type the file extension. The FLEX PC
Partner application automatically appends the .ADR default
extension.
To open an Address Book file on your PC:
1.
On your PC, open the FLEX PC Partner Shell, then doubleclick
Address Book.
FLEX PC Partner
55
2.
Click
, or from the File menu, clickOpen.
3.
Select the Address Book (.ADR) file you want to open, then
click Open. Once the desired Address Book file is open,
you can add, edit, or delete address entries or group entries.
To merge two Address Book files on your PC:
1.
On your PC, open the FLEX PC Partner Shell, then doubleclick
Address Book.
2.
Click
, or from the File menu, clickOpen.
3.
Select the Address Book (.ADR) file you want to open, then
click Open.
TIP The second Address Book file you select will merge into
the first Address Book file. You might want to save a copy
of the first file prior to performing the merge.
4.
5.
6.
The Import/Merge command does not merge Address Book
groups.
From the File menu, clickImport/Merge.
Select or type the name of the second Address Book file to
be merged, then clickOpen.
Click
, or from the File menu, clickSave.
To import Address Books from other PC-based
applications:
1.
On your PC, open the FLEX PC Partner Shell, then double-
2.
click
Address Book.
From the File menu, clickImport/Merge.
3.
This menu command merges files into the currently open
Address Book file.
Select or type the name of the file to be merged into the
Address Book, then clickOpen.
The Import/Merge command does not merge Address Book
groups.
TIP Import/Merge supports .CSV, .VCF, and .ADR files for
merging. Import files that are of the same format as those
created by the Export command on the File menu. These
files can be edited in database and spreadsheet programs
56
PageWriterTM 2000 User’s Manual
that use comma-delimited text. The Import/Merge
command does not merge Address Book groups.
4.
Click
, or from the File menu, clickSave.
To delete an Address Book file from your PC:
From Windows Explorer or File Manager, highlight the .ADR
file you want to delete, then pressD.
Managing Addresses of Individuals
Use the Individual menu on the Address Book main screen to
add, edit, or delete individuals.
Your pager does not need to be connected to your PC to
perform the following procedures.
Remember! Performing the following procedures affects
only the Address Book on your PC. To update the Address
Book on your pager, see “Transferring Address Book
Information” on page 54.
To add an individual to the Address Book on your
PC:
1.
2.
On your PC, open the FLEX PC Partner Shell, then doubleclick
Address Book.
Open the appropriate Address Book file. For more
information, see “Managing Address Book Files” on
page 52 for instructions on opening a file.
3.
Click
, or from the Individual menu, clickNew.
4.
In the Name field, type the name for the entry as it should
appear in the Address Book (e.g., Cody, Catherine).
TIP The Address Book sorts address entries alphabetically
based on the first letter in the address name. Type the last
name first if you want to find addresses for individuals by
their last name.
5.
6.
In the Pager Type field, select the pager type.
Type the individual’s PIN for their pager.
The label and carrier-specific PIN entry instructions for this
field are determined by the selected pager type.
FLEX PC Partner
57
7.
8.
9.
Type other address information, such as fax number, home
phone number, work phone number, email address, or your
personal notes.
Click OK.
The new entry appears in the address list.
indicates the address is for an individual. Information
for the highlighted entry appears below the address list.
To edit an individual's information in the Address
Book on your PC:
1.
2.
3.
4.
On your PC, open the FLEX PC Partner Shell, then doubleclick
Address Book.
Open the appropriate Address Book file. For more
information, see “Managing Address Book Files” on
page 52 for instructions on opening a file.
Highlight the entry you want to edit, then click
from the Individual menu, clickEdit.
Edit the individual’s information.
, or
TIP Use the arrow keys to move the cursorwithin a field in the
upper pane. Use T to move the cursor between fields.
5.
The Notes field holds up to 100 characters. Once you have
reached the 100-character limit, existing characters must be
deleted before more characters can be added.
Click OK.
To delete an individual from the Address Book on
your PC:
1.
2.
3.
4.
58
On your PC, open the FLEX PC Partner Shell, then doubleclick
Address Book.
Open the appropriate Address Book file. For more
information, see “Managing Address Book Files” on
page 52 for instructions on opening a file.
Highlight the entry you want to delete, then click
from the Individual menu, clickDelete.
Click Yes at the confirmation screen.
PageWriterTM 2000 User’s Manual
, or
Managing Addresses of Groups
A group address is a collection of individual addresses
associated to one name in your Address Book. When you send a
message to a group, the message goes to all members of the
group without having to select each member individually. An
individual in your Address Book can be a member of several
groups.
Use the Group menu on the Address Book main screen to add,
edit, or delete groups.
Your pager does not need to be connected to your PC to
perform the following procedures.
Remember! Performing the following procedures affects
only the Address Book on your PC. To update the Address
Book on your pager, see “Transferring Address Book
Information” on page 54.
To add a group to the Address Book on your PC:
1.
2.
On your PC, open the FLEX PC Partner Shell, then doubleclick
Address Book.
Open the appropriate Address Book file. For more
information, see “Managing Address Book Files” on
page 52 for instructions on opening a file.
3.
Click
4.
In the Group Name field, type the name for the group as it
should appear in the Address Book (e.g., Sales Team).
, or from the Group menu, clickNew.
TIP You can force address names to appear in a position in the
Address Book that you find convenient. For example,
prefacing group names with a space forces all the groups to
appear at the top of the list. Using an underscore instead
forces the names to the bottom of the list.
5.
In the Available Addresses list on the left, select the
addresses you want to add to the group, then clickAdd.
The selected addresses appear in the Group Members list on
the right.
TIP To select a series of addresses,highlight the first address,
hold down S, then left click the mouse button on the
last address. To select multiple addresses that are not in a
FLEX PC Partner
59
series, highlight the first address, hold downC while you
left click the mouse button on each additional address.
6.
When you have finished adding all the addresses for this
group, click OK. The new group appears in the address list
on the Address Book main screen.
indicates the address is for a group. The addresses
assigned to this group are listed below the address list.
To add addresses to a group in the Address Book on
your PC:
1.
2.
3.
4.
On your PC, open the FLEX PC Partner Shell, then doubleclick
Address Book.
Open the appropriate Address Book file. For more
information, see “Managing Address Book Files” on
page 52 for instructions on opening a file.
Highlight the group you want to edit, then click
, or
from the Group menu, clickEdit.
In the Available Addresses list, select the address(es) to be
added.
TIP To select a series of addresses,highlight the first address,
hold down S, then left click the mouse button on the
last address. To select multiple addresses that are not in a
series, highlight the first address, hold downC while you
left click the mouse button on each additional address.
5.
6.
Click Add.
Click OK.
To remove addresses from a group in the Address
Book on your PC:
1.
2.
3.
On your PC, open the FLEX PC Partner Shell, then doubleclick
Address Book.
Open the appropriate Address Book file. For more
information, see “Managing Address Book Files” on page
52 for instructions on opening a file.
Highlight the name of the group you want to remove
addresses from, then click
menu, click Edit.
60
PageWriterTM 2000 User’s Manual
, or from the Individual
4.
5.
6.
In the Group Members list, select the address(es) to be
removed.
Click Remove.
Click OK.
To delete a group from the Address Book on your
PC:
1.
On your PC, open the FLEX PC Partner Shell, then double-
3.
click
Address Book.
Open the appropriate Address Book file. For more
information, see “Managing Address Book Files” on
page 52 for instructions on opening a file.
Highlight the name of the group you want to delete.
4.
Click
2.
, or from the Group menu, clickDelete, or press
D.
5.
Click Yes at the confirmation screen to delete the group.
This procedure deletes only the group name. It does not
delete the individual members of the group. To delete the
individual members, see “Managing Addresses of
Individuals” on page 57.
Printing Address Book Information
The FLEX PC Partner application enables you to check or reset
the printer setting, then preview the printed Address Book
information prior to printing the selection.
To set up a FLEX PC Partner printer:
1.
On your PC, open the FLEX PC Partner Shell, then doubleclick
2.
3.
4.
5.
Address Book.
Open an Address Book file. For more information, see
“Managing Address Book Files” on page 52 for instructions
on opening a file.
From the File menu, clickPrint Setup.
In the Print Setup dialog box, select the appropriate printer
settings. For more information, see your printer’s user’s
manual.
Click OK.
FLEX PC Partner
61
To preview your printed Address Book information:
1.
On your PC, open the FLEX PC Partner Shell, then doubleclick
2.
3.
4.
Address Book.
Open the Address Book file you want to view. For more
information, see “Managing Address Book Files” on
page 52 for instructions on opening a file.
From the File menu, clickPrint Preview. For more
information, see your printer’s user’s manual.
Click Close to close the preview window.
To print your Address Book information:
1.
On your PC, open the FLEX PC Partner Shell, then doubleclick
Address Book.
2.
Open the Address Book file you want to print. For more
information, see “Managing Address Book Files” on
page 52 for instructions on opening a file.
3.
Click
4.
In the Print dialog box, select the appropriate settings. For
more information, see your printer’s user’s manual.
Click OK.
5.
, or from the File menu, clickPrint.
Managing Your Messages
FLEX PC Partner’s Message Manager partlet transfers messages
from your pager to your PC so you can view, print, copy, or
store the messages on your PC.
To transfer messages from your pager to your PC:
1.
Snap your pager into the docking station.
2.
On your pager, select
wheel, then select
3.
On your PC, open the FLEX PC Partner Shell, then doubleclick
4.
5.
62
from the menu
.
Message Manager.
Click
, or from the File menu, clickGet Messages
From Pager.
Click Connect.
The text on the status bar reflects the progress of the
transfer as the messages are retrieved from your pager.
PageWriterTM 2000 User’s Manual
When the transfer is complete, the status bar displays
Ready, and the retrieved messages appear on the screen.
, or from the File menu, clickSave As.
6.
Click
7.
Select the file location, type the name for the message file,
then click Save.
To read messages previously stored on your PC:
1.
On your PC, open the FLEX PC Partner Shell, then doubleclick
Message Manager.
2.
Click
, or from the File menu, clickOpen.
3.
Select the message (.PWM) file, then clickOpen.
To print messages:
1.
Transfer from your pager to your PC the messages you want
to print. For more information, see “To transfer messages
from your pager to your PC” on page 62.
2.
Click
, or from the File menu, clickPrint. The
messages print using your default printer settings.
Print Setup enables you to change printer options. For more
information, see your printer’s user’s manual.
To copy text from a message to another PC
application:
1.
2.
3.
4.
Transfer the messages from your pager to your PC. For
more information, see “To transfer messages from your
pager to your PC” on page 62.
In the Mailbox list, select the mailbox in which the desired
message is stored.
In the Messages list, select the desired message.
In the Message Text pane, highlight the text you want to
copy.
5.
Click
6.
7.
8.
Start the application into which you want to paste the text.
Position the cursor where you want to paste the text.
From the Edit menu, clickPaste to paste the message text at
the location of the cursor.
, or from the Edit menu, clickCopy.
FLEX PC Partner
63
Text cannot be pasted into or deleted from an existing
message.
To save messages to your PC:
1.
3.
Transfer the messages from your pager to your PC. For
more information, see “To transfer messages from your
pager to your PC” on page 62.
In the Mailbox list, select the mailbox in which the desired
message is stored.
In the Messages list, select the desired message.
4.
Click
5.
Select the file location, type the file name for the
message(s) to be saved, then clickSave.
2.
, or from the File menu, clickSave As.
Installing and Removing Applications
FLEX PC Partner’s Application Manager enables you to add
new applications to your PageWriter 2000 two-way pager, or to
remove applications that you no longer use. It also displays the
creation date of any applications installed on your pager.
TIP Before adding or removing applications from your
PageWriter 2000 two-way pager, perform a backup of the
data.
To install a new application on your pager:
1.
Snap your pager into the docking station.
2.
On your pager, select
wheel, then select
3.
On your PC, open the FLEX PC Partner Shell, then doubleclick
4.
5.
6.
7.
8.
64
from the menu
.
Application Manager.
Click Connect.
If the new application is on a diskette, insert the diskette
into the appropriate diskette drive.
Click Install New Application.
Select the application file to be installed.
Click Open. A message appears when the installation is
complete, and the new application is included in the list on
the Application Manager.
PageWriterTM 2000 User’s Manual
9.
Click Exit.
To remove an application from your pager:
1.
Snap your pager into the docking station.
2.
On your pager, select
wheel, then select
3.
4.
5.
from the menu
.
On your PC, open the FLEX PC Partner Shell, then doubleclick
Application Manager.
Select the application to be removed, then clickRemove
Application.
Core applications cannot be removed.
Click Exit.
FLEX PC Partner
65
Backing-up and Restoring Information
The FLEX PC Partner Backup partlet enables you to copy the
data from your pager to your PC. The data that is backed up
includes your messages, your Address Book information, and
your pager's applications.
Use the Restore partlet to copy your pager data stored on your
PC back to your pager.
Caution
The Restore operation overwrites any existing data on your
pager.
To copy data from your pager to your PC for
backup:
1.
Snap your pager into the charger.
2.
On your pager, select
wheel, then select
3.
4.
5.
6.
7.
from the menu
.
On your PC, open the FLEX PC Partner Shell, then doubleclick
Backup Utility.
At the initial screen, clickNext.
At the Select Backup File screen, select a destination for the
file containing the saved information, then clickNext.
A default FLEX PC Partner folder is provided, however,
you can change its filename and location.
Click Connect to start the backup.
File transfer may take several minutes, depending upon how
much data you have on your pager.
At the success screen, clickOK to close FLEX PC Partner
and drop the connection to your pager.
To restore data to your pager from your PC:
1.
Snap your pager into the docking station.
2.
On your pager, select
wheel, then select
3.
On your PC, open the FLEX PC Partner Shell, then doubleclick
4.
66
from the menu
.
Restore Utility.
At the initial screen, clickNext.
PageWriterTM 2000 User’s Manual
5.
6.
At the Select Backup File screen, select the file containing
the saved information you want to restore to your pager,
then click Next.
Click Connect to start the restore.
Caution
All data on your pager (saved messages, Address Book entries,
and applications) is deleted and replaced by the version of the
data that was restored from your PC. This means that if you
made changes to your Address Book on your pager after the last
backup to your PC, you will lose those changes during this
restore.
7.
When the confirmation message appears, clickOK.
Checking Memory Usage on Your PageWriter 2000
The FLEX PC Partner Memory Usage partlet enables you to
monitor the allocation of persistent storage on your pager. When
the Memory Usage partlet indicates that the free memory on
your pager is getting low, you can increase the free memory
level by deleting old messages or applications.
The memory usage levels refer topersistent flash storage
(analogous to the hard drive on your PC) rather than
volatile memory (RAM). The Memory Usage partlet does
not monitor RAM.
To check memory usage on your pager:
1.
Snap your pager into the charger.
2.
On your pager, select
wheel, then select
3.
On your PC, open the FLEX PC Partner Shell, double-click
from the menu
.
Memory Usage.
TIP If you add or delete information from your pager while
Memory Usage is open, clickRefresh to update the
memory usage information.
4.
Click Exit.
FLEX PC Partner
67
Updating the FLEX OS on Your PageWriter 2000
The FLEX PC Partner System Update partlet enables you to
copy an updated operating system from your PC to your pager.
To update the operating system on your pager:
1.
Snap your pager into the charger.
2.
from the menu
On your pager, select
wheel, then select
.
On your PC, open the Partner Shell, double-click
3.
System Update.
4.
5.
6.
7.
8.
At the initial screen, clickNext.
At the Choose Operating System Image screen, type or
select the name of the file containing the new operating
system, then clickNext.
If you click Next at this screen, then discover you have
selected the wrong file, you will have an opportunity to
come back to this screen to make a different selection.
At the Choose Update Type screen, select the appropriate
radio button to indicate whether your pager is operating
normally or not.
Click Update.
At the success screen, clickOK to close Partner and drop
the connection between your PC and your pager.
Your pager automatically boots (in the charger) with the
new operating system.
Uninstalling FLEX PC Partner
1.
From the Windows 95 taskbar, clickStart, then point to
FLEX PC Partner and click
2.
Uninstall Partner.
Click Yes at the confirmation screen to delete FLEX PC
Partner and all of its components.
Memory Management System
The PageWriter 2000 internal memory management system
automatically performs maintenance tasks. These tasks ensure
sufficient memory is available to receive incoming messages and
68
PageWriterTM 2000 User’s Manual
to support your processing requirements. To maximize memory
efficiency, messages are deleted in the following order:
Messages deleted during the cleanup process are not moved
to the Trashcan; they are permanently deleted.
Unread and alarmed messages are deleted from inboxes that
contain 250 messages or if the Number of Messages
cleanup option is selected and the limit for the number of
messages has been reached.
Trashcan — Automatically configured to empty each night at
midnight (you may specify the cleanup of inboxes, folders, and
the Outbox, as well); midnight cleanup deletes messages placed
in the Trashcan 24 to 48 hours earlier. Messages placed in the
Trashcan within the last 24 hours are deleted at midnight the
next day. The Trashcan is the first folder the system empties
when memory space is required (deleting as many messages as
necessary to make room for incoming messages).
Outbox — Deletes all sent/unsaved messages from the
transmission area of the Outbox starting with the oldest message
first. The transmission status is retained but the text of each
message is deleted.
Main Inbox —Deletes all read messages from the Main Inbox
starting with the oldest message first.
Personal Inboxes — Deletes all read messages from personal
inboxes starting with the oldest message first.
Information Services Inboxes— Deletes all read messages
from each information service inbox starting with the oldest
message first.
Reminders and Alarmed Messages— Deletes any alarmed
inbox message or Reminder where the alarm has already gone
off; messages are deleted in the following order:
1. Main inbox
2. Personal inboxes
3. Information Services inboxes
4. Reminders
Alarmed messages that are set for periodic alarm (e.g. the alarm
goes off every week) will not be deleted.
Unread Messages — If memory space isstill needed, deletes
unread messages from the inboxes in the order described above.
General Safety Instructions
69
Messages in folders, Address Book entries, and locked
messages are not subject to automatic deletion.
When a warning message is displayed, the PageWriter 2000
two-way pager enables you to access the View Memory Usage
screen. Once you have determined the area where cleanup may
be most effective, you can select:
Cleanup All Deletes all read messages in each inbox and
folder.
Cleanup Inboxes Deletes all read messages in each inbox.
Cleanup Folders Deletes all read messages in each folder.
Proper Care and Cleaning
The PageWriter 2000 two-way pager is durable, reliable, and
can provide many years of dependable service, but it is a
precision electronic product. Water and moisture, excessive
heat, and extreme shock may damage the pager. Do not expose
your PageWriter 2000 two-way pager to these conditions.
Use a soft, damp cloth to clean smudges and grime from your
PageWriter 2000 two-way pager.Do not immerse in water. Do
not use alcohol or other cleaning solutions.
To protect the operating system, applications, and data on your
PageWriter 2000 two-way pager, ensure that the PC from which
you download files is protected by up-to-date virus protection
software. Remember to archive your data, as needed.
General Safety Instructions
Follow these guidelines to ensure the safe use of your
PageWriter 2000 two-way pager and accessories.
Pager Transmitter Safety
The FAA has regulations concerning the use of electronic
devices aboard aircraft. When boarding an aircraft, set the radio
transmitter mode to Off on your PageWriter 2000 two-way
pager to avoid potential interference with aircraft radio
communication or navigation equipment.
In hospital or blasting zones, set the radio transmitter mode to
Receive Only. This prevents potential transmission interference
with sensitive medical equipment or explosives devices.
70
PageWriterTM 2000 User’s Manual
Battery Safety
•
Do not dispose of the rechargeable NiMH battery in fire.
Batteries can explode when exposed to fire.
•
To prevent injury or burns, do not allow metal objects to
contact or short circuit the battery terminals.
•
Recharge the Motorola 3.6 V NiMH battery (PTNN4005A)
only with the recommended Motorola battery charger
(PTYN4042A or PTYN4043A with transformer
PTYN4057A). Charging this battery by any other method
or with a product not approved by Motorola may cause
damage to the battery.
Do not charge batteries other than Motorola’s 3.6 V NiMH
battery (PTNN4005A) in the Motorola battery charger
(PTYN4042A or PTYN4043A with transformer
PTYN4057A). Charging other batteries can cause those
batteries to burst or explode, resulting in personal injury or
property damage.
•
Battery Charger Safety
•
•
•
•
Do not expose the charger to rain or snow.
Use of an attachment not recommended or sold by Motorola
may result in a risk of fire, electric shock, or injury to
persons.
Make sure the cord is located where it will not be stepped
on, tripped over, pinched, or subjected to damage or stress.
If you need to use an extension cord, make sure:
−
•
•
the pins on the plug of the extension cord are the same
number, size, and shape as those on the plug of the
charger;
− the extension cord is properly wired and in good
electrical condition; and
− the cord size is 18AWG for lengths up to 100 feet and
16AWG for lengths up to 150 feet.
Do not operate the charger with a damaged cord,
transformer block, or prongs; replace them immediately.
Do not operate the charger if it has been damaged in any
way; take it to a qualified service technician.
PageWriter 2000 Specifications
71
•
•
•
Do not disassemble the charger; if service or repair is
required, call Motorola at 1-800-548-9954. Incorrect
reassembly can result in a risk of electrical shock or fire.
Maximum ambient temperature around the power supply
must not exceed 40°C (104°F).
Keep battery contacts clean. Do not allow dirt or sticky
substances to accumulate on the contacts. If you need to
clean the contacts, unplug the charger to reduce the risk of
electrical shock. Use a slightly dampened cloth to clean the
contacts. Let the contacts dry before plugging the charger
into an AC outlet. Do not immerse in water.
Agency Approvals
The PageWriter 2000 two-way pager has been approved for use
by the Federal Communications Commissions (FCC) and
Underwriters’ Laboratories, Inc. (UL). The charger/docking
station has been FCC approved and the transformer has been UL
approved.
Patent Information
This product is manufactured under one or more Motorola U.S.
Patents. A partial listing of these patents is provided inside the
battery compartment. Other patents covering this product are
pending.
PageWriter 2000 Specifications
Physical Dimensions
Size
Weight (w/battery)
Volume
Graphics Display
1/8 VGA
Message Area
Power
72
PageWriterTM 2000 User’s Manual
3.75 x 2.85 x 1.2 in
95 x 72 x 29 mm
6.7 oz
190 g
3
9.3 in
153 cc
16 lines x 30 characters
240 x 160 pixels
4-level gray scale
EL backlighting
9 lines x 27 characters
Main Battery Pack
Charge Time
Backup Cell
Battery Life
Clock Retention Time
w/main battery removed
Max. Sound Pressure Level (at 12 inches)
Memory
Total Memory
1 MB Flash
256 KB RAM
3.6 V NiMH
1 hr
rechargeable
>7 days
15 min
72 dB
1.25 MB
Environment
Operating Temperature
32° to 122°F
0° to +50°C
Storage Temperature
14° to 149°F
-10° to +65°C
Electrostatic Discharge (no permanent damage)
15kV
Commonly Asked Questions
Your PageWriter 2000 two-way pager is a dynamic messaging
device. It monitors and processes your communications even
when you are busy with other things. The following questions
reflect situations that may occur and are organized into four
categories:
•
•
•
•
PageWriter 2000
Messaging
Battery and Charger
FLEX PC Partner
PageWriter 2000
Why won’t my pager power up?
Your PageWriter 2000 two-way pager might not be accessing
the power it requires.
•
•
Make sure you have a battery in the battery compartment. If
not, insert a fresh battery.
Make sure the battery is inserted properly. Check that the +
marking on the battery is positioned on the two-contact side
of the battery compartment. Press the battery into the
compartment to ensure the battery is seated properly. For
more information, see “To replace the battery” on page 13.
PageWriter 2000 Specifications
73
•
•
Recharge the battery or insert a fresh battery.
If the front LED lights when you replace the battery and the
screen is still blank, your screen’s contrast may be too light.
Adjust the contrast. See “My screen is too dark (or too
light). How do I change it?”.
My screen is too dark (or too light). How do I
change it?
You can quickly change the contrast by pressing , then
holding down until reaching the desired contrast. Your
PageWriter 2000 two-way pager also has a built-in calibration
guide to help you select the best contrast level. For more
information, see “To use the contrast calibration guide” on page
44.
Periodically, the date and time are incorrect. What
causes this?
The clock will maintain its accuracy for about an hour after the
battery has been totally drained of power. To retain date and
time accuracy, replace the battery, as needed. During extended
periods of non-use (i.e., overnight), place your pager in the
plugged-in charger so the battery will be fully charged in the
morning. While using your pager, an extra battery can be kept in
the plugged-in charger until needed.
The charger is intentionally designed so that you cannot
place both the extra battery and the pager in the charger at
the same time.
My pager is acting funny. What’s wrong?
The amount of random access memory (RAM) available on your
pager constrains the number of processes that can run at any
given time. Symptoms of Low RAM status include:
•
menu wheel won’t spin
•
time and date disappear from the screen
•
all inbox and folder message counts display zero
•
Customize list box is empty
•
text box is empty when attempting to forward a message
• nightly cleanup failed to run
These symptoms allow the pager to conserve RAM use. Reset
your pager to correct the Low RAM status (turn your pager off,
then back on again). To avoid a Low RAM status, turn off your
pager at night when it is not being used.
74
PageWriterTM 2000 User’s Manual
An Out-of-RAM status will cause the pager to reset itself.
Deleting my old messages did not help the Low
Memory status. What should I do?
Messages that are deleted from folders are held in the Trashcan
until the Trashcan is emptied. A cleanup schedule is assigned to
empty the Trashcan. When you delete messages from inboxes
and folders to alleviate overuse of memory, you are only shifting
memory use from one file storage area to another. After deleting
messages, you must empty the Trashcan to free the memory for
use (see “To empty the Trashcan” on page 42).
Messaging
Why don’t I receive messages?
Situations that will prevent you from receiving messages
include:
•
Your pager’s radio mode may be set to Off. From the Home
screen, the status line will display “Storing Messages”.
Reset your transmission mode to Send/Receive or Receive
Only. For information on resetting you transmission mode,
see “To set the transmission mode” on page 19.
•
Your pager might be out of range of the nearest transmitter.
Check the icon in the lower right corner of the Home
screen. If you are out of range, your messages will be
transmitted when you are back within transmission range.
Why does the Home screen status line read “Basic
Service” when the radio mode is set to
Send/Receive?
If you have just inserted a new battery or just disconnected the
pager from your PC, it can take a few minutes before you have
“Full Service” access. Your pager reregisters with the service
provider after any suspension in service. Also, if you are on the
perimeter of the transmission range, you might only have
message reception capabilities.
Why does the Home screen status line read “Storing
Messages”?
When your pager loses access to your service provider’s paging
network, your messages are stored by the paging network until
Commonly Asked Questions
75
your pager is ready to receive the messages. Reasons why your
pager might be unable to receive messages include:
•
You have manually turned off transmission to your pager.
This occurs by setting the transmission mode to Off (see
“To set the transmission mode” on page 19), or by turning
off the pager (see “To turn off your pager” on page 17).
•
The pager may be in Low Memory status. To prevent lost
incoming messages, transmission is turned off. Delete old
messages from inboxes and folders, then empty the
Trashcan to increase the available memory. For more
information, see “Deleting Messages” on page 33, and “To
empty the Trashcan” on page 42).
•
The battery might be too low to support two-way
transmission. Replace or recharge the battery.
Why don’t I get alerted for incoming messages?
Your pager alerts might be set to silent. Alerts can be silenced in
two ways:
•
From the menu wheel, check to see if the pager is set to
Silent mode. If so, change the mode to Loud, Soft, or
Vibrate. For more information, see “To select an alert
mode” on page 21.
•
Check the alert setting for each of your inboxes. If they are
set to silent, reset the alerts. For more information, see To
“
select an alert type” on page 22.
If you are actively using the pager’s keyboard when
receiving a message, your keystrokes can cancel a
message’s alert before you hear or feel the alert.
Why do I keep getting reminder alerts?
Reminder alerts notify you of unread messages waiting in your
inbox. Check each of your inboxes (Main, Information Service,
Personal) for unread messages. Read the messages or disable the
unread message alert. For more information, see To
“
enable/disable the unread message alert” on page 43.
Why does my pager keep alerting me to the same
message?
Your PageWriter 2000 two-way pager sometimes receives
garbled messages from the paging service provider. If you have
read a garbled message and checked theAlert for improved
msg? box, your pager will update the message when a less
garbled version is received from the paging service provider.
76
PageWriterTM 2000 User’s Manual
Your pager then alerts you to the change. If the updated version
also contains garbled text, your pager will accept additional
updates and notify you of each change.
If you have chosen not to be alerted, but have not deleted the
message, your pager will update the message without notifying
you.
If you have deleted a garbled message, you will not receive a
new message alert for any improved message transmissions.
Why are my incoming messages placed in the
wrong inbox?
Two situations can cause a message to be placed in the wrong
inbox:
•
The text string you identified as your filter when setting up
the routing rules for your inbox might be too common. Any
message containing the text string you indicated will be
directed to the inbox using that filter. Detailed message
filters will help limit misrouted messages.
•
If more than one inbox is assigned the same filter (text
string), the incoming message is sent to the first inbox that
contains the matching text string. Check the filters for each
inbox. See “To assign routing rules” on page 35.
Why does the sending of my messages fail?
Ensure that you have Full Service transmission. Reset the
transmission mode or, if you are out of transmission range, wait
until you are back in transmission range. Select Resend from the
Outbox to send your message.
Why are messages disappearing from my inboxes
and folders?
Messages are removed from inboxes and folders under two
conditions:
•
If you do not set a cleanup schedule for your inboxes and
folders, the auto-cleanup feature uses a default time frame
of 5 days. Cleanup rules can be set for both inboxes and
folders through the Read application. For more information,
see “To assign a cleanup schedule to an inbox” on page 36,
or “To assign a cleanup schedule to a folder” on page 38.
•
When your pager has reached Low Memory status, the
oldest read messages are deleted to free available memory
for incoming messages. The order in which messages are
Commonly Asked Questions
77
deleted is discussed in “Memory Management System” on
page 68.
Battery and Charger
The charger’s LED doesn’t light. What should I
do?
Use the following procedure to find the cause:
1. Check that your pager, or the battery alone, is inserted into
the charger correctly. See “The Battery and Charger” on
page 10 for instructions.
2. Unplug the transformer from the AC power supply.
3. Remove the pager (or battery) from the charger, then use an
ordinary pencil eraser to clean the six metal contacts on the
charger and the pager (or battery).
4. Plug the transformer back into the AC power supply to
restore the power.
5. Re-insert the pager or battery into the charger. If the
charger’s LED still does not light, have the charger checked
by an authorized service technician.
What does a flashing red indicator light on the
charger mean?
The red flashing indicator light can mean one of four situations:
78
•
The battery or pager may be seated improperly in the
charger. Ensure the battery or pager is properly inserted.
•
The battery voltage has remained low for too long a period
of time and the battery cannot be recharged. Dispose of the
battery properly and purchase a new battery.
•
The battery temperature is outside the normal charging
range. Remove the battery and re-insert. If flashing
continues, remove the battery, wait one hour, and re-insert.
If flashing continues replace battery or have the charger
checked by an authorized service technician.
•
Insufficient power is being delivered by the transformer.
Plug the transformer into another power source.
•
If the insufficient power is not corrected by changing the
power source, the charger might be malfunctioning. Have
the charger checked by an authorized service technician.
PageWriterTM 2000 User’s Manual
I just inserted a fresh battery, but it only lasted
2 days. Why?
When your PageWriter 2000 two-way pager is set to two-way
transmission but is not receiving Full Service (i.e., you are out
of range), the pager continues to attempt to reestablish
communication with the network. This acts as a continuous
drain on the battery. Whenever you leave a two-way coverage
zone, set the radio mode to One-way or Off to preserve the
battery.
FLEX PC Partner
Why can’t I establish a connection between my
pager and my PC via the infrared interface?
Check the following before re-attempting to establish a
connection:
•
Make sure you have opened the FLEX PC Partner
application on your pager and selected
.
•
Make sure your pager is placed properly in the docking
station and that the RS232 cable and transformer are
properly connected. For more information see T
“ o connect
the docking station to your computer” on page 15.
•
Make sure the communications port on your PC is correctly
set. For more information, see “To configure FLEX PC
Partner” on page 50.
What caused my application installation to fail?
The pager may be in a Low RAM status or you may be
attempting to load an application that is close in size to the
available RAM. Remove the pager from the charger. Reset the
pager by turning it off then back on again. Rerun the installation
program.
Partner stopped working during a download and is
unresponsive. What should I do?
The battery might be drained of power. Replace or recharge the
battery, and restart the Partner download.
Commonly Asked Questions
79
80
PageWriterTM 2000 User’s Manual
Index
A
accessories, 16
Deluxe Accessories Kit, 4
Standard Accessories Kit, 4
activation, 4
adapter, 51
Address Book, 22, 53
add a group, 24, 60
add an individual, 23, 58
create file on PC, 56
delete entries, 26, 60
delete files, 58
edit an individual's address, 24
edit group membership, 25
edit group name, 25
edit on PC, 59
file management, 56
forcing position in list to top or
bottom, 23, 61
import files, 57
import files from other PC-based
applications, 57
merge files, 57
open file on PC, 57
print, 63
save file on PC, 56
save file with new name, 56
transfer data from pager to PC,
54
transfer data from PC to pager,
55
Addresses
application overview, 1
ADR files, 54
airline travel, 19
alarmed messages
memory management, 70
alarms, 44. See also alerts
enable/disable, 44
reminder, 29
alert modes, 21
icon, 6
overview, 6
shut off alerts, 6
alert types, 22, 36
alerts, 44. See also alarms
unread message, 44
Alt-mode functions, 10
Alt key, 9
applications
delete, 49
Home screen, 5
install on pager, 65
menu wheel, 5
B
Backlight key, 9
Backspace key, 9
backup, 67
Backup Utility, 67
Basic Service coverage, 19
icon, 7
battery, 10
icon, 7
insert into pager, 13
recharge outside of pager, 12
recharge while in pager, 14
remove, 11
safety instructions, 72
battery charger. See charger
battery gauge
overview, 7
book conventions, 2
C
cancel outgoing messages, 40
canned text. See Quick Text
attach replies for addressee, 27
care and cleaning of pager, 71
charger, 10
docking station, 15
safety instructions, 72
Cleanup, 48
folders, 39, 71
inboxes, 71
schedule, folders, 39
Cleanup All
memory management, 71
Cleanup Folders
Index
81
memory management, 71
Cleanup Inboxes, 36
memory management, 71
configuration
FLEX PC Partner, 51
infrared port, 51
pager, 18
port settings, PC, 51
connect pager to PC, 15, 51
contrast
adjust, 10, 45
calibration guide, 45
icon, 10
control keys, 8
conventions, 2
copy
data from pager to PC, 67
data from PC to pager, 67
message text, 65
outgoing messages, 46
create
Address Book file, 56
folders, 38
Quick Text, 48
signature, 47
Customize, 43
application overview, 1
D
date
format, 21, 45
overview, 6
set, 20
delayed send, 29
delete
Address Book entries, 26, 60
Address Book files, 58
applications, 49
applications from pager, 66
folders, 40
group’s address, 62
inboxes, 37
docking station, 15
draft messages, 29
E
edit
individual’s address, 59
82
PageWriterTM 2000 User’s Manual
Quick Text, 48
email
create addresses, 22
individual, 58
send messages to an email
address, 26
empty the Trashcan, 42
Enter key, 9
environmental restrictions, 19
F
FAQs, 74
fax
create addresses, 22, 58
send messages to a fax machine,
26, 44
service, 44
features, 1
files
backup, 67
FLEX PC Partner
application overview, 1
configure, 51
installation, 50
online help, 50
open partlets, 53
program description and
instructions, 49
FLEX PC Partner Shell
open the shell, 53
overview, 52
partlets, 52
right-click menu, 53
flip, 5
folders, 37
assign cleanup schedule, 39
clean up, 39, 48
create, 38
delete, 40
rename, 38
save a message, 28, 33, 47
view messages, 39
forward messages, 32, 41
Full Service coverage, 19
icon, 7
G
Get From Pager, 54
group
add members, 24, 61
create, 24, 60
delete, 62
delete members, 62
members list, 60
rename, 25, 60
H
hardware
requirements, PC, 50
update configuration, 51
help
FAQs, 74
Internet address, 3
product support, 3
technical support, 3
holster, 16
home
Home key, 9
phone number, 58
screen, 5
hospital environments, 19
I
icons
alert mode, 6
battery gauge, 7
new message waiting, 7
one-way transmission, 7
special status, 7
transmitter off, 7
two-way transmission, 7
import
Address Book files, 57
Address Book files from other
PC-based applications, 57
inboxes, 34
assign cleanup schedule, 36
assign routing rules, 36
clean up, 36, 48
create, 34
delete, 37
memory management, 69
rename, 35
set alert types, 36
Information Services inboxes
memory management, 70
infrared port, 15
configure, 51
connect pager to PC, 51
connection, 51
insert battery, 13
installation
FLEX PC Partner, 50
new applications on pager, 65
Internet address, 3
IR. See infrared port
IR port, 15
K
key click, 20, 46
keyboard, 8
control keys, 8
NavDisc, 8
Select keys, 9
L
LCD screen, 5
LED alarms, 44
M
Main Inbox
memory management, 70
maximum characters allowed, 58,
59
memory
management, 69
usage level, 43, 68
memory management
alarmed messages, 70
Cleanup All, 71
Cleanup Folders, 71
Cleanup Inboxes, 71
Information Services inboxes,
70
Main Inbox, 70
Outbox, 70
personal inboxes, 70
Index
83
reminders, 70
Trashcan, 70
unread messages, 70
menu wheel, 5
merge Address Book files, 57
Message Area, 33
messages
cancel, 40
canned responses, 27, 31
cleanup schedule, 35
copy text, 65
custom responses, 32
delete, 33
details, 41
drafts, 29
forward, 32, 41
print, 64
read on the pager, 30
read on the PC, 64
reply, 31
resend, 41
restore, 42
save copy of sent message, 28,
46, 47
save on the PC, 65
schedule send, 29
signature, 28
text size, 45
transfer from pager to PC, 64
write, 26
MPSHELL.EXE, 53
N
NavDisc, 5, 8
navigation
NavDisc, 8
Select keys, 9
Tab key, 8
notes, 58
O
one-way transmission
icon, 7
operating system. See system
Outbox, 40
cancel outgoing messages, 40
forward messages, 41
memory management, 70
84
PageWriterTM 2000 User’s Manual
resend messages, 41
view message information, 41
overview, 1
FLEX PC Partner Shell, 52
PageWriter 2000, 5
owner information, 43
P
pager
care and cleaning, 71
configure, 18
features overview, 5
PIN, 58
reset, 17
specifications, 73
type, 58
virus protection, 71
paging service, activate, 4
partlets, 52
open, 53
PC Partner
program description and
instructions, 49–69
personal inboxes. See inboxes
PIN
from paging service, 4
port settings, 51
power. See charger
off, 10, 17
on, 17
print preview, 63
printer setup, 63
printing
Address Book information, 63
messages, 64
preview, 63
setting up printer, 63
product support, 3
Q
Quick Text
add to message, 27
create, 48
edit, 48
R
Radio Mode
application overview, 1
set, 19
Read, 30
application overview, 1
read messages
on the pager, 30
on the PC, 64
recharge battery, 12, 14
reminder alarm, 29
reminders
memory management, 70
remove
applications from pager, 66
group’s address, 62
individual’s address, 60
remove battery, 11
rename
folders, 38
replies, attaching, 27
reply to messages, 31
resend messages, 41
reset pager, 17, 19, 75
restoration, 67
restore messages, 42
Restore Utility, 67
restrictions
environmental, 19
right-click menu, 53
routing rules, 34, 36
rules, message routing, 34
S
safety instructions, 71
save
Address Book files, 56
messages on the pager, 33
messages on the PC, 65
Select keys, 9
Send To Pager, 55
service activation, 4
Set Time
application overview, 1
shell. See FLEX PC Partner Shell
Shift-mode functions, 10
Shift key, 9
shortcuts, 6
shut off alerts, Silent mode, 6
signature, 28
append to messages, 47
create, 47
sleep mode, 5
software requirements, PC, 50
Space key, 9
specifications
PageWriter 2000, 73
status line, 7
Storing Messages coverage, 7, 19
symbols, 10
system
information, 43
setup, 17
status, 43
update, 69
T
Tab key, 8
technical support, 3
text size, 20, 45
time
format, 21, 46
overview, 6
set, 20
transfer
Address Book data from pager
to PC, 54
Address Book data from PC to
pager, 55
Address Book information, 54
messages, 64
transmission
icons, 7
set mode, 19
status, 7
status log, 40
zones, 19
transmitter
OFF icon, 7
restrictions, 19
safety instructions, 71
Trashcan, 33, 42
empty, 42
memory management, 70
restore messages, 42
troubleshooting, 74
battery and charger, 79
FLEX PC Partner, 80
messaging, 76
PageWriter 2000 pager, 74
Index
85
two-way transmission
icon, 7
U
uninstall. See also delete
applications
FLEX PC Partner, 69
unread messages
alert, 44
memory management, 70
update
FLEX OS, 69
hardware, 51
PageWriter 2000 applications,
43
view message information, 41
virus protection, 71
W
web address, 3
work phone, 58
Write, 26
application overview, 1
email, 26
fax, 26
message, 26
Quick Text, 27
V
version number
FLEX Operating System, 43
FLEX PC Partner partlets, 53
86
PageWriterTM 2000 User’s Manual
Z
zones, 19
ONE (1) YEAR STANDARD LIMITED WARRANTY
AND PROVISIONS (U.S.A. ONLY)
Motorola warrants the pager against defects in material and workmanship under normal
use and service for the period of time specified below. This express warranty is extended
by Motorola, 1500 Gateway Blvd., Boynton Beach, Florida 33426 to the original end user
purchaser only and is not assignable or transferable to any other party.
This warranty sets forth the full extent of MOTOROLA’s responsibilities regarding the
pager. Repair, replacement, or refund of the purchase price, at MOTOROLA’s option, is
the exclusive remedy. THIS WARRANTY IS GIVEN IN LIEU OF ALL OTHER
WARRANTIES, EXPRESS OR IMPLIED, INCLUDING WITHOUT LIMITATION,
IMPLIED WARRANTIES OF MERCHANTABILITY AND FITNESS FOR A
PARTICULAR PURPOSE. THIS WARRANTY IS LIMITED TO THE DURATION
CHOSEN. IN NO EVENT SHALL MOTOROLA BE LIABLE FOR DAMAGES IN
EXCESS OF THE PURCHASE PRICE OF THE MOTOROLA PAGER, FOR ANY LOSS
OF USE, LOSS OF TIME, INCONVENIENCE, COMMERCIAL LOSS, LOST PROFITS
OR SAVINGS OR OTHER INCIDENTAL, SPECIAL OR CONSEQUENTIAL
DAMAGES ARISING OUT OF THE USE OR INABILITY TO USE SUCH PRODUCT,
TO THE FULL EXTENT SUCH MAY BE DISCLAIMED BY LAW.
Motorola pagers are shipped from the factory with a standard limited warranty of one (1)
year on parts and labor from date of purchase by the original end user purchaser, based on
proof of purchase. In the event of defect, malfunction, or failure to conform to
specifications during the warranty period, Motorola, at its option, will either repair, replace
or refund the purchase price of the pager. Repair, at Motorola’s option, may include the
replacement of parts or boards with functionally equivalent reconditioned or new parts or
boards. Replaced parts and boards are warranted for the balance of the original warranty
period.
All parts and boards removed in the replacement process shall become the property of
Motorola. This warranty does not cover defects, malfunctions, performance failures or
damages to the unit resulting from use in other than its normal and customary manner,
misuse, accident or neglect, the use of non-conforming parts, or improper alterations or
repairs. This warranty does not cover wear and tear on covers or housings, nor the coverage
or range over which the pager will receive signals.
For information on how to receive service on Motorola pagers or covered accessories,
call 1-800-548-9954 or 1-800-793-7834 (TTY).
Pager warranty will be VOID if any of the following conditions occur:
•
Pagers that are incomplete such as those in which boards or components are missing
and/or incompatible.
•
Pagers whose serial numbers do not match on the boards, or pagers in which the
board serial numbers don’t match the housing.
•
Pagers that have been opened by, or had work performed by, anyone other than a
Motorola authorized pager service center.
•
Pagers received with non-conforming or non-Motorola housings or parts.
Flat rate repair fees apply to pagers and accessories not covered under warranty.
STATE LAW RIGHTS
SOME STATES DO NOT ALLOW THE EXCLUSION OR LIMITATION OF
INCIDENTAL OR CONSEQUENTIAL DAMAGES, OR LIMITATION ON HOW LONG
AN IMPLIED WARRANTY LASTS, THEREFORE THE ABOVE LIMITATIONS OR
EXCLUSIONS MAY NOT APPLY. This warranty gives you specific legal rights and you
may also have other rights which vary from state to state.