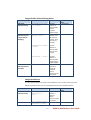
1
DSEK-10
(Digital Signage Evaluation Kit)
User Guide
WinMate Communication INC.
1 DSEK-10 Media Player User Guide
Revision History
Version
Date
1.0
2010.04.15
Note
First Version
Package List
Before using this Digital Signage Evaluation Kit, please make sure that all the items listed
below are present in your package
1. Box (Packaging)
2. DSEK-10 Media Player
3. Microsoft Windows
Embedded Standard 7 120day Evaluation Toolkit DVD
( not to be available until end of
May)
4. 1x DVD for WES 7 OS
recovery
5. 1x CD for DSEK-10 hardware
device drivers , user guide
and platform technology
brief
6. 1x Lockable Power Supply
100-240 Vac / 12Vdc, 80W
7. OEM solution briefs
2 DSEK-10 Media Player User Guide
Make sure that all of the items listed above are present. Do not attempt to apply power to
the system if there is damage to any of its components.
FCC Statement
This device complies with part 15 FCC rules. Operation is subject to the following
:
two conditions
•
This device may not cause harmful interference.
•
This device must accept any interference received including interference that may
cause undesired operation.
This equipment has been tested and found to comply with the limits for a class "a"
digital device, pursuant to part 15 of the FCC rules. These limits are designed to provide
reasonable protection against harmful interference when the equipment is operated in a
commercial environment. This equipment generates, uses, and can radiate radio
frequency energy and, if not installed and used in accordance with the instruction
manual, may cause harmful interference to radio communications. Operation of this
equipment in a residential area is likely to cause harmful interference in which case the
user will be required to correct the interference at him own expense.
3 DSEK-10 Media Player User Guide
Copyright Notice
ALL RIGHTS RESERVED. No part of this document may be reproduced, copied, translated,
or transmitted in any form or by any means, electronic or mechanical, for any purpose,
without the prior written permission of the original manufacturer.
Trademark Acknowledgement
Brand and product names are trademarks or registered trademarks of their respective
owners.
Disclaimer
We reserve the right to make changes, without notice, to any product, including circuits
and/or software described or contained in this manual in order to improve design
and/or performance. We assume no responsibility or liability for the use of the
described product(s), conveys no license or title under any patent, copyright, or masks
work rights to these products, and makes no representations or warranties that these
products are free from patent, copyright, or mask work right infringement, unless
otherwise specified. Applications that are described in this manual are for illustration
purposes only. We Communication Inc. makes no representation or warranty that such
application will be suitable for the specified use without further testing or modification.
Warranty
We warrant that each of its products will be free from material and workmanship
defects for a period of one year from the invoice date. If the customer discovers a defect,
We will, at its option, repair or replace the defective product at no charge to the
customer, provided it is returned during the warranty period of one year, with
transportation charges prepaid. The returned product must be properly packaged in it’s
original packaging to obtain warranty service.
If the serial number and the product shipping data differ by over 30 days, the inwarranty service will be made according to the shipping date. In the serial numbers the
third and fourth two digits give the year of manufacture, and the fifth digit means the
month (e. g., with A for October, B for November and C for December).
For example, the serial number 1W07Axxxxxxxx means October of year 2007.
4 DSEK-10 Media Player User Guide
Customer Service
We provide service guide for any problem as follow steps
: First, contact with your
distributor, sales representative, or our customer service center for technical support if
you need additional assistance. You may have the following information ready before
you call
:
•
Product serial number
•
Peripheral attachments
•
Software (OS, version, application software, etc.)
•
Description of complete problem
•
The exact wording of any error messages
In addition, free technical support is available from our engineers every business day.
We are always ready to give advice on application requirements or specific information
on the installation and operation of any of our products. Please do not hesitate to call or
e-mail us.
Safety Precautions
•
Warning!
Always completely disconnect the power cord from your chassis whenever you
work with the hardware. Do not make connections while the power is on.
Sensitive electronic components can be damaged by sudden power surges.
Only experienced electronics personnel should open the Player chassis.
•
Caution!
Always ground yourself to remove any static charge before touching the CPU
card. Modern electronic devices are very sensitive to static electric charges. As
a safety precaution, use a grounding wrist strap at all times. Place all electronic
components in a static-dissipative surface or static-shielded bag when they are
not in the chassis.
5 DSEK-10 Media Player User Guide
Safety and Warranty
1. Please read these safety instructions carefully.
2. Please keep this user's manual for later reference.
3. Please disconnect this equipment from any AC outlet before cleaning. Do not use
liquid or spray detergents for cleaning. Use a damp cloth.
4. For pluggable equipment, the power outlet must be installed near the equipment
and must be easily accessible.
5. Keep this equipment away from humidity.
6. Put this equipment on a reliable surface during installation. Dropping it or letting it
fall could cause damage.
7. The openings on the enclosure are for air convection. Protect the equipment from
overheating. DO NOT COVER THE OPENINGS.
8. Make sure the voltage of the power source is correct before connecting the
equipment to the power outlet.
9. Position the power cord so that people cannot step on it. Do not place anything over
the power cord.
10. All cautions and warnings on the equipment should be noted.
11. If the equipment is not used for a long time, disconnect it from the power source to
avoid damage by transient over-voltage.
12. Never pour any liquid into an opening. This could cause fire or electrical shock.
13. Never open the equipment. For safety reasons, only qualified service personnel
should open the equipment.
14. If any of the following situations arises, get the equipment checked by service
personnel:
A.
The power cord or plug is damaged.
B.
Liquid has penetrated into the equipment.
C.
The equipment has been exposed to moisture.
D.
The equipment does not work well, or you cannot get it to work according
to the user’s manual.
E.
The equipment has been dropped and damaged.
F.
The equipment has obvious signs of breakage.
6 DSEK-10 Media Player User Guide
15. Do not leave this equipment in an uncontrolled environment where the storage
temperature is below -20° C (-4°F) or above 60° C (140° F). It may damage the
equipment.
7 DSEK-10 Media Player User Guide
Table of Contents
1.
2.
GENERAL INFORMATION.................................................................................................. 12
1.1
Introduction................................................................................................... 12
1.2
Feature .......................................................................................................... 13
1.2.1
Feature I Ultra Compact .............................................................................. 13
1.2.2
Feature II External Fan .................................................................................. 13
1.2.3
Feature III Service Window ........................................................................... 14
1.2.4
Feature IV VESA Mount Bracket (Optional) .................................................. 14
1.3
DSEK-10 MEDIA PLAYER Specifications ......................................................... 15
1.4
DSEK-10 Function Block................................................................................. 16
1.5
DSEK-10 Application ...................................................................................... 17
Getting Started ................................................................................................................. 18
2.1
Input / Output Devices .................................................................................. 18
2.2
Starting the MEDIA PLAYER........................................................................... 19
2.3
2.2.1
Required Peripherals .................................................................................... 19
2.2.2
Power Up/Power Down................................................................................. 19
Shutting Down the MEDIA PLAYER................................................................ 20
3
Window Embedded Standard 7 First Boot ....................................................................... 21
4
BIOS SETUP ....................................................................................................................... 22
5
4.1
BIOS Introduction .......................................................................................... 22
4.2
BIOS Setup..................................................................................................... 22
4.3
Main BIOS Setup............................................................................................ 23
4.4
Advanced Settings ......................................................................................... 24
4.5
Chipset Settings............................................................................................. 39
4.6
Boot Settings ................................................................................................. 43
4.7
Security Settings............................................................................................ 44
4.8
Save & Exit Settings ....................................................................................... 45
Building a custom operating system using Windows Embedded Standard 7.................. 47
5.1
Introduction................................................................................................... 47
8 DSEK-10 Media Player User Guide
5.2
Related Windows 7 Documentation ............................................................. 47
5.3
Minimum Device Hardware Requirements................................................... 47
5.4
Install Windows Embedded Standard 7 Toolkit ............................................ 48
5.4.1
5.5
Create a Utility Drive ..................................................................................... 50
5.5.1
Make Your Utility Disk Bootable ................................................................... 50
5.5.2
Add Image Builder Wizard to Your Utility Disk.............................................. 51
5.6
6
Create a Windows Preinstallation Environment Utility Drive (Optional)...... 51
5.6.1
Create a Windows PE Utility Disk with Image Configuration Editor ............. 52
5.6.2
Create a Custom Windows PE Image ............................................................ 52
Build Windows Embedded Standard 7 Images ................................................................ 53
6.1
7
Open Windows Embedded Standard 7 Toolkit Help..................................... 49
Build a Windows Embedded Standard 7 Image with Image Builder Wizard 53
6.1.1
Build a Digital Signage Image with Embedded Enabling Features ................ 53
6.1.2
Build an Image with Embedded Core Only.................................................... 57
6.2
Build a Windows Embedded Standard 7 Image Using Image Configuration
Editor
57
6.2.1
Build a Digital Signage Image with Custom Settings ..................................... 57
6.2.2
Add Update Packages to a Distribution Share (Optional) ............................. 61
6.2.3
Add Third-Party Software (Optional) ............................................................ 62
6.2.4
Run a Custom Script (Optional)..................................................................... 63
6.2.5
Add Third-Party Drivers (Optional)................................................................ 65
6.2.6
Make Your Install Fully Unattended (Optional) ............................................ 65
6.2.7
Create Image Builder Wizard Disk from Answer File (optional).................... 74
Deploy an Image............................................................................................................... 75
7.1
Prepare and Capture an Image for Deployment ........................................... 75
7.1.1
Sysprep the Image......................................................................................... 75
7.1.2
Capture the Image Into a Windows Image (.wim) File.................................. 76
7.2
Deploy an Image Using ImageX..................................................................... 76
7.2.1
Prepare your Destination Device .................................................................. 77
7.2.2
Apply an Image to Your Device’s Hard Drive................................................. 78
9 DSEK-10 Media Player User Guide
7.2.3
7.3
8.
Deploy an Image Using Image Builder Wizard .............................................. 79
7.3.1
Start Image Builder Wizard with your Image ................................................ 79
7.3.2
Customize a Captured Image ........................................................................ 82
Service an Image............................................................................................................... 84
8.1
Service an Image with Image Configuration Editor and DISM ...................... 84
8.1.1
Create a Configuration Set using Image Configuration Editor ...................... 84
8.1.2
Install using your Configuration Set .............................................................. 85
8.1.3
Test your image ............................................................................................. 88
8.2
9.
Shut Down the Destination Device ............................................................... 79
Service an Image with DISM.......................................................................... 88
8.2.1
Mount your image......................................................................................... 88
8.2.2
Add sample packages .................................................................................... 88
8.2.3
Adding a Package Using DISM ....................................................................... 89
8.2.4
Unmount and Commit Changes .................................................................... 89
8.2.5
Redeploy and Verify ...................................................................................... 89
8.2.6
Add a Language Pack (optional) .................................................................... 90
8.3
Install Updates with WUSA ........................................................................... 90
8.4
Service an Image with Package Scanner ....................................................... 91
8.4.1
Package Enumeration.................................................................................... 91
8.4.2
Find Applicable Updates................................................................................ 92
8.4.3
Scavenging..................................................................................................... 92
Additional Windows Embedded Standard 7 Labs ............................................................ 94
9.1
Suppress OOBE.............................................................................................. 94
9.1.1
Create an Answer File.................................................................................... 94
9.1.2
Using your answer file with Image Builder Wizard ....................................... 95
9.2
Using a Custom Shell and Custom Branding ................................................. 95
9.2.1
Hide boot screens.......................................................................................... 96
9.2.2
Use Shell Launcher ........................................................................................ 96
9.2.3
Remove Windows branding .......................................................................... 96
9.2.4
Replace the startup screen background image............................................. 97
10 DSEK-10 Media Player User Guide
9.2.5
9.3
Add Message Blockers................................................................................... 98
Build a USB bootable Windows Embedded 2011 image............................. 101
9.3.1
Install from Image Builder Wizard directly to UFD :.................................... 101
9.3.2
Install from Image Builder Wizard to Hard Drive, ImageX to UFD: ............. 102
9.4
Create Custom Templates for IBW.............................................................. 105
9.4.1
Creating Templates ..................................................................................... 105
9.4.2
Using Custom Templates in IBW ................................................................. 106
10. Services/ Updates........................................................................................................... 107
10.1
DSEK-10 Official website ............................................................................. 107
10.2
Company information ................................................................................. 107
10.3
User Support Information ........................................................................... 107
10.3.1 Professional support ................................................................................... 107
10.3.2 Standard support......................................................................................... 108
11 DSEK-10 Media Player User Guide
1. GENERAL INFORMATION
1.1
Introduction
The MEDIA PLAYER is designed to satisfy most in the digital signage and industrial
market, such as Shopping Mall, Education and Transportation. It’s a PC-based system
with DDR3 SDRAM, VGA, DVI-D, HDMI and Display Port controller, and on-board Gbit
Ethernet. DSEK-10 integrates one Mini-Card (PCIe) slot and one PCIEx4 slot for
expandability (Communication/Discrete Graphics). It is a compact design to meet the
demanding performance requirements of today’s Digital Signage applications.
DSEK-10 Media Player
12 DSEK-10 Media Player User Guide
1.2 Feature
1.2.1 Feature I Ultra Compact
186mm
125 mm
55mm
1.2.2 Feature II External Fan
13 DSEK-10 Media Player User Guide
1.2.3 Feature III Service Window
1.2.4 Feature IV VESA Mount Bracket (Optional)
14 DSEK-10 Media Player User Guide
1.3 DSEK-10 MEDIA PLAYER Specifications
System Specification
Processor
Intel® Core™ i5 Processor (520M)
System Chipset
Mobile Intel® QM57 Express Chipset
System Memory
2 x 2GB SO-DIMM DDR3 1066MT/s
System Storage
SATA 2.5 Hard Disk
BIOS
AMI 4Mbit SPI Flash
Graphic Chipset
Integrated Graphics
Ethernet
Intel® 82577LM Gigabit Ethernet
Audio
Realtek ALC 888 codec
USB
4 x USB ports, USB 2.0 Compliant
Wireless
WiFi / Bluetooth
Operating System
Microsoft Windows Embedded Standard 7
I/O Connectors
Rear Panel External I/Os
1 x RJ-45 (10/100/1000 Mbps)
1 x VGA
1 x HDMI
1 x DVI-D
1 x Display Port
2 x USB
Front Panel External I/Os
2 x USB
1 x Power / SSD LED
1 x Reset / Power on Button
1 x Line-in / Line-out / Mic-in
Mechanical Specification
Construction
Aluminum housing
Mounting
VESA Mounting
Dimension
184 x 50 x 125 mm (W x H x D)
Environmental Specification
Operation Temperature
0~40°C
Operating Humidity
30%~90% ( non-condensing, RH )
15 DSEK-10 Media Player User Guide
1.4 DSEK-10 Function Block
16 DSEK-10 Media Player User Guide
1.5 DSEK-10 Application
17 DSEK-10 Media Player User Guide
2. Getting Started
2.1 Input / Output Devices
The following figure shows the I/O arrangement of DSEK-10 Media Player. The backside
of the chassis contains most of the connectors. DSEK-10 Media Player has three types.
DSEK-10 MEDIA PLAYER
18 DSEK-10 Media Player User Guide
2.2 Starting the MEDIA PLAYER
The following sections summarize the necessary hardware and power-on instructions for
the DSEK-10 Media Player.
2.2.1 Required Peripherals
External USB interface DVD player (not included)
USB interface Keyboard and Mouse (not included)
External display (not included)
2.2.2 Power Up/Power Down
Steps to be completed by the user
1 Connect a USB keyboard in one of the USB connectors.
2 Connect a USB mouse in one of the USB connectors.
3 Connect a external monitor to one of the Multi-Display IO as below:
VGA port, DVI-D port, HDMI port, Display port.
4 Choose the right AC plug for your electrical outlets. Connect it to the 12V AC/DC
adapter. Plug in the AC-DC adapter.
Steps to power-up the DSEK-10 Media Player
1 Press the power-button located at the front panel of chassis.
2 As the system boots, press Del to enter the EFI firmware setup
3 Check time, date, and configuration settings and change if necessary.
4 Press F10 to save and exit the EFI firmware setup.
Steps to Power-down the DSEK-10 Media Player
There are three options for powering-down the DSEK-10 Media Player:
1 Use OS-controlled shutdown through the menu (or equivalent).
2 Press the power-button at the front panel of chassis to begin power-down.
3 If the system is hung, it is possible to asynchronously shut the system down by
pressing the power-button continuously for 4 seconds.
Caution: We do not recommend powering down the board by removing power to the DC
power supply or disconnecting the DC input from the board.
19 DSEK-10 Media Player User Guide
2.3 Shutting Down the MEDIA PLAYER
There is only one way we recommend that users can shut down the DSEK-10. Without
“Start” in Microsoft Windows Embedded Standard 7 operating system, users can only
simultaneously press the <Ctrl>, <Alt> and <Delete> keys, and then the screen will show
like below:
Then, users can click the red button on the lower ride side. The media player will shut
down soon.
Caution: We do not recommend that users directly press power button for the purpose
of shutting down. The behavior might damage the machine.
20 DSEK-10 Media Player User Guide
3 Window Embedded Standard 7 First Boot
When first powering on your DSEK device, a video will begin playing automatically.
This video shows a demonstration of the Intel® Intelligent Digital Signage Proof of Concept,
powered by Microsoft Windows Embedded Standard 7. The Proof of Concept was
introduced at the National Retail Federation conference in January 2010, and was designed
to stimulate new ways for businesses to increase profitability, engage customers, and collect
business intelligence through digital signage.
The Proof of Concept video demonstrates much of what can be accomplished with the
combined power of the Intel® Core™ i7 processor and the Microsoft Windows Embedded
Standard 7 operating system. After viewing the video, you can download the Windows
Embedded Standard Toolkit from http://www.microsoft.com/windowsembedded/enus/products/westandard/futureversion.mspx and begin building your own Digital Sign using
section 5 of this document, “Building a custom operating system using Windows Embedded
Standard 7”.
21 DSEK-10 Media Player User Guide
4 BIOS SETUP
4.1 BIOS Introduction
The BIOS (Basic Input/Output System) installed in your computer system’s ROM supports Intel
processors. The BIOS provides critical low-level support for a standard device such as disk drives,
serial ports and parallel ports. It also password protection as well as special support for detailed finetuning of the chipset controlling the entire system.
4.2 BIOS Setup
The BIOS provides a Setup utility program for specifying the system configurations and settings. The
BIOS ROM of the system stores the Setup utility. When you turn on the computer, the BIOS is
immediately activated. Pressing the <Del> key immediately allows you to enter the Setup utility. If
you are a little bit late pressing the <Del> key, POST (Power On Self Test) will continue with its test
routines, thus preventing you from invoking the Setup. If you still wish to enter Setup, restart the
system by pressing the”Reset” button or simultaneously pressing the <Ctrl>, <Alt> and <Delete> keys.
You can also restart by turning the system Off and back On again. The following message will appear
on the screen:
Press <DEL> to Enter Setup
In general, you press the arrow keys to highlight items, <Enter> to select, the <PgUp> and <PgDn>
keys to change entries, <F1> for help and <Esc> to quit.
When you enter the Setup utility, the Main Menu screen will appear on the screen. The Main Menu
allows you to select from various setup functions and exit choices.
22
DSEK-10 Media Player User Guide
4.3 Main BIOS Setup
This setup allows you to record some basic hardware configurations in your computer system and set
the system clock.
Note: If the system cannot boot after making and saving system changes with Setup, the AMI BIOS supports
an override to the CMOS settings that resets your system to its default.
Warning: It is strongly recommended that you avoid making any changes to the chipset defaults. These
defaults have been carefully chosen by both AMI and your system manufacturer to provide the absolute
maximum performance and reliability. Changing the defaults could cause the system to become unstable
and crash in some cases.
System Language
Choose the system default language.
System Date
Set the Date. Use Tab to switch between Data elements.
System Time
Set the Time. Use Tab to switch between Data elements.
23
DSEK-10 Media Player User Guide
4.4 Advanced Settings
This section allows you to configure and improve your system and allows you to set up some system
features according to your preference.
Launch PXE OpROM
Enable or Disable Boot Option for Legacy Network Devices.
Launch Storage OpROM
Enable or Disable Boot Option for Legacy Mass Storage Devices with Option ROM.
► Wake up event setting
Enable/Disable Wake up event.
► Intel TDT(AT-p) Configurations
Disabling TDT Allow user to login to platform. This is strictly for testing only.
This does not disable TDT Services in ME.
► Intelligent Power Sharing
Intelligent Power Sharing configuration menu.
NOTE: DTS must be enabled for Power Sharing to function.
► MXM 3.0/Hybrid Graphics
Enable/Disable the MXM 3.0 support..
24
DSEK-10 Media Player User Guide
PCI Subsystem Settings
This section allows you to configure the PCI, PCI-X and PCI Express settings.
PCI ROM Priority
In case of multiple Option ROMs (Legacy and EFI Compatible), specifies what
PCI Option ROM to launch.
PCI Latency Timer
Value to be programmed into PCI Latency Timer Register.
VGA Palette Snoop
Enables or Disables VGA Palette Registers Snooping.
PERR# Generation
Enables or Disables PCI Device to Generate PERR#.
SERR# Generation
Enables or Disables PCI Device to Generate SERR#.
Relaxed Ordering
Enables or Disables PCI Express Device Relaxed Ordering.
Extended Tag
If ENABLED allows Device to use 8-bit Tag field as a requester.
25
DSEK-10 Media Player User Guide
No Snoop
Enables or Disables PCI Express Device No Snoop option.
Maximum Payload
Set Maximum Payload of PCI Express Device or allow System BIOS to select the value.
Maximum Read Request
Launches (Enabled/Disabled) the boot option for legacy network devices.
PCI Express Link Settings
Set Maximum Read Request Size of PCI Express Device or allow System BIOS to select the value.
ASPM Support
Set the ASPM Level:
Force L0 – Force all links to L0 State
AUTO – BIOS auto configure
DISABLE – Disables ASPM
Extended Synch
If ENABLED allows generation of Extended Synchronization patterns.
26
DSEK-10 Media Player User Guide
ACPI Settings
Enabled ACPI Auto Configuration
Enables or Disables BIOS ACPI Auto Configuration.
Enable Hibernation
Enables or Disables System ability to Hibernate (OS/S4 Sleep State). This option may be not effective
with some OS.
ACPI Sleep State
Select the highest ACPI sleep state the system will enter, when the SUSPEND button is pressed.
Trusted Computing
TPM Support
Enables or Disables TPM support. O.S. will not show TPM. Reset of platform is required.
27
DSEK-10 Media Player User Guide
Wake up event settings
Wake system with Fixed Time
Enables or Disables System wake on alarm event. When enabled, System will wake on the hr::min::
sec specified.
Wake on Ring
The options are Disabled and Enabled.
Wake on PME
The options are Disabled and Enabled.
28
DSEK-10 Media Player User Guide
CPU Configuration
This section shows the CPU configuration parameters.
Hyper-threading
Enabled for Windows XP and Linux (OS optimized for Hyper-Threading
Technology) and Disabled for other OS (OS not optimized for Hyper-Threading Technology). When
Disabled, only one thread per enabled core is enabled.
Active Processor Cores
Number of cores to enable in each processor package.
Limit CPUID Maximum
Disabled for Windows XP.
Execute Disable Bit
XD can prevent certain classes of malicious buffer overflow attacks when combined with a supporting
OS (Windows Server 2003 SP1, Windows XP SP2,
SuSE Linux 9.2, Re33dHat Enterprise 3 Update 3.)
Hardware Prefetcher
To turn on/off the MLC streamer prefetcher.
Adjacent Cache Line Prefetch
To turn on/off prefetching of adjacent cache lines.
Intel Virtualization Technology
29
DSEK-10 Media Player User Guide
When enabled, a VMM can utilize the additional hardware capabilities provided by Vanderpool
Technology.
Power Technology
Enable the power management features.
TDC Limit / TDP Limit
Turbo-XE Mode Processor TDC Limit in 1/8 A granularity. 0 means using the factory-configured value.
SATA Configuration
SATA Devices Configuration.
SATA Mode
(1) IDE Mode.
(2) AHCI Mode.
(3) RAID Mode.
Serial-ATA Controller
Enable / Disable Serial ATA Controller.
Thermal Configuration
30
DSEK-10 Media Player User Guide
ME SMBus Thermal Reporting
Enable/Disable ME SMBus Thermal Reporting Configuration.
PPEC
Processor Power Error Correction.
PTL
Processor Temperature Limit.
MMGPC
Max Memory Power Clamp.
MPPC
Max Processor Power Clamp.
MPCP
Max Processor Core Power Clamp.
PTA
PCH Temperature Adjust.
PTA_OFFSET
PCH offset for calculating PCH temperature.
MGTA
MCH/GfX Temperature Adjust.
31
DSEK-10 Media Player User Guide
MGTA_OFFSET
MCH/GfX offset for calculating MCH/GfX Temperature.
MCH Temp Read
MCH Temperature Read Enable.
PCH Temp Read
PCH Temperature Read Enable.
CPU Energy Read
CPU Energy Read Enable.
CPU Temp Read
CPU Temperature Read Enable.
Thermal Data Reporting
Thermal Data Reporting Enable.
Alert Enable Lock
Lock all Alert Enable settings.
32
DSEK-10 Media Player User Guide
Intel IGD SWSCI OpRegion
DVMT/FIXED Memory
Select DVMT/FIXED Mode Memory size used by Internal Graphics Device.
Options are 128MB, 256MB and Maximum.
IGD – Boot Type
Select the Video Device which will be activated during POST. This has no effect if external graphics
present. Options are VBIOS Default, CRT, LFP, CRT+LFP, EFP and CRT+EFP.
Active LFP
Select the Active LFP Configuration.
No LVDS: VBIOS does not enable LVDS.
Int-LVDS: VBIOS enables LVDS driver by Integrated encoder.
SDVO LVDS : VBIOS enables LVDS driver by SDVO encoder.
eDP: LVDS Driven by Int-DisplayPort encoder.
Panel Scaling
Select the LCD panel scaling option used by the Internal Graphics Device.
Options are Auto, Force Scaling, Off and Maintain Aspect Ratio.
Backlight Control
Back Light Control Setting. Options are PWM Inverted, PWM Nrmal, GMBus
Inverted and GMBus Normal.
BIA Control
Options are VBIOS Default, Disabled and Level 1/2/3/4/5.
33
DSEK-10 Media Player User Guide
Spread Spectrum Clock Chip
The default setting is Off. Other options are:
Hardware: Spread is controlled by chip.
Software: Spread is controlled by BIOS.
ALS Support
Enabled or Disabled. Valid only for ACPI.
Legacy = ALS Support through the IGD INT10 function.
ACPI = ALS suport through an ACPI ALS driver.
Gfx Low Power Mode
Enabled or Disabled. This option is applicable for SFF only.
Intel TDT(AT-p) Configurations
TDT
Enable/Disable TDT in BIOS for testing only.
TDT Recovery
Set the number of times Recovery attempted will be allowed.
34
DSEK-10 Media Player User Guide
Intel TXT(LT) Configuration
Intel TXT (LT) Support
Enable/Disable Intel Trusted Execution Technology Support.
USB Configuration
Legacy USB Support
Enables Legacy USB support.
AUTO option disables legacy support if no USB devices are connected.
DISABLE option will keep USB devices available only for EFI applications.
EHCI Hand-off
Enabled/Disabled. This is a workaround for Oses without EHCI hand-off
support. The EHCI ownership change should be claimed by EHCI driver.
Device Reset Timeout
USB mass storage device Start Unit command timeout.
Options are: 10 sec / 20 sec / 30 sec / 40 sec.
35
DSEK-10 Media Player User Guide
Super IO Configuration
.
Serial Port Configuration
Set Parameters of Serial Ports. User can Enable/Disable the serial port and
Select an optimal settings for the Super IO Device.
Power Failure
Options are:
Keep last state
Bypass mode
Always on
Always off (default)
H/W Monitor
36
DSEK-10 Media Player User Guide
Temperatures/Voltages
These fields are the parameters of the hardware monitoring function feature of the motherboard.
The values are read-only values as monitored by the system and show the PC health status.
Fan1/Fan2 Smart Fan Control
This field enables or disables the smart fan feature. At a certain temperature, the fan starts turning.
Once the temperature drops to a certain level, it stops turning again.
AMT Configuration
AMT
Options are Enabled and Disabled.
Unconfigure AMT/ME
Perform AMT/ME unconfigure without password operation.
WatchDog Timer
Enable/Disable WatchDog Timer.
Serial Port Console Redirection
37
DSEK-10 Media Player User Guide
Console Redirection
Console Redirection Enable/Disable.
Terminal Type
VT-UTF8 is the preferred terminal type for out-of-band management. The next
best choice is VT100+ and then VT100.
Intel ME Subsystem
This section allows you to configure the PCI settings.
ME Version
Launches (Enabled/Disabled) the boot option for legacy network devices.
ME Subsystem
Launches (Enabled/Disabled) the boot option for legacy network devices.
End of Post Message
Launches (Enabled/Disabled) the boot option for legacy network devices.
Execute ME8x
38
DSEK-10 Media Player User Guide
Launches (Enabled/Disabled) the boot option for legacy network devices.
4.5 Chipset Settings
This section allows you to configure and improve your system and
allows you to set up some system features according to your preference.
Enable CSID
By default, this item is disabled. Enable Compatible Revision ID.
North Bridge
This item shows the North Bridge Parameters.
South Bridge
This item shows the South Bridge Parameters.
ME Subsystem
This item shows the ME Subsystem Parameters.
North Bridge
39
DSEK-10 Media Player User Guide
This section allows you to configure the North Bridge Chipset.
Low MMIO Align
Low MMIO resources align at 64MB/1024MB.
Initiate Graphic Adapter
Select which graphics controller to use as the primary boot device.
Options are IGD, PCI/IGD, PCI/PEG, PEG/IGD, PEG/PCI and SG.
Graphics Turbo IMON Current
Graphics turbo IMON current values supported (14-31).
VT-d
VT-d Enable/Disable.
PCI Express Compliance Mode
PCI Express Compliance Mode Enable/Disable.
PCI Express Port
Options are Disabled, Enabled and Auto.
IGD Memory
IGD Share Memory Size. Options are Disable, 32M, 64M and 128M.
PAVP Mode
Select PAVP Mode used by Internal Graphics Device. Options are Disabled and
40
DSEK-10 Media Player User Guide
Enabled.
PEG Force Gen1
PCI Express Port Force Gen1. Options are Disabled and
SB Chipset Configuration
This section allows you to configure the South Bridge Chipset.
SMBus Controller
SMBus Controller help.
GbE Controller
This is constantly enabled.
Wake on LAN from S5
Wake on LAN from S5 help.
Restore AC Power Loss
Options are Power Off, Power On and Last State.
SLP_S4 Assertion Stretch Enable
Select a minimum assertion width of the SLP_S4# signal.
Audio Configuration
41
DSEK-10 Media Player User Guide
The Audio Configuration settings Enable/Disable the Azalia HD Audio and the
Azalia internal HDMI codec.
High Precision Event Timer Configuration
Enable/or Disable the High Precision Event Timer.
PCI Express Ports Configuration
Enable or Disable the PCI Express Ports in the Chipset.
USB Configuration
Enable/Disable All USB Devices, USB 2.0 (EHCI) Support and RMH
Support. The setting of AUTO on RMH Support Enable RMH support
on Ibex Peak B0 Stepping.
42
DSEK-10 Media Player User Guide
4.6 Boot Settings
This section allows you to configure the boot settings according to your preference.
Quiet Boot
Enables/Disables Quiet Boot option.
Fast Boot
Enables/Disables boot with initialization of a minimal set of devices required to
launch active boot option. Has no effect for BBS boot options.
Setup Prompt Timeout
Number of seconds to wait for setup activation key.
65535(0xFFFF) means indefinite waiting.
Bootup NumLock State
Select the keyboard NumLock state.
GateA20 Active
UPON REQUEST – GA20 can be disabled using BIOS services.
ALWAYS – do not allow disabling GA20; this option is useful when any RT code is executed above
1MB.
Option ROM Messages
Set display mode for Option ROM. Options are Force BIOS and Keep Current.
Interrupt 19 Canture
Enable: Allows Option ROMs to trap Int 19.
43
DSEK-10 Media Player User Guide
Boot Option Priorities
Sets the system boot order.
Hard Drive BBS Priorities
Set the order of the legacy devices in this group.
4.7 Security Settings
This section allows you to configure and improve your system and allows you to set up some system
features according to your preference.
Administrator Password
Set Setup Administrator Password.
User Password
Set User Password.
44
DSEK-10 Media Player User Guide
4.8 Save & Exit Settings
Save Changes and Exit
Exit system setup after saving the changes.
Disacard Changes and Exit
Exit system setup without saving any changes.
Save Changes and Reset
Reset the system after saving the changes.
Discard Changes and Reset
Reset system setup without saving any changes.
Save Changes
Save Changes done so far to any of the setup options.
Discard Changes
Discard Changes done so far to any of the setup options.
Restore Defaults
Restore/Load Defaults values for all the setup options.
Save as User Defaults
Save the changes done so far as User Defaults.
Restore User Defaults
45
DSEK-10 Media Player User Guide
Restore the User Defaults to all the setup options.
Boot Override
Pressing ENTER causes the system to enter the OS.
Launch EFI Shell from filesystem device
Attempts to Launch EFI Shell application (Shellx64.efi) from one of the available filesystem devices.
Reset System with ME disable Mode
ME will run into the temporary disable mode.
46
DSEK-10 Media Player User Guide
5 Building a custom operating system using Windows
Embedded Standard 7
5.1 Introduction
Welcome to Windows Embedded Standard 7. This chapter is a guide to help you use and evaluate
Windows Embedded Standard 7. In addition to preparation steps, such as toolkit installation, this
manual includes labs for key scenarios such as building an image, deploying an image and servicing an
image.
The labs are most easily followed in the order presented. You can also chose labs individually based
on your interests and previous experience with Windows Embedded, but please note that several lab
scenarios assume you have the output of an earlier lab scenario.
5.2 Related Windows 7 Documentation
Windows Embedded Standard 7 is based on Windows 7; therefore much of the Windows 7
documentation can be used as reference material.
•
Windows 7 Automated Installation Kit (Windows AIK) online documentation
http://www.microsoft.com/downloads/details.aspx?FamilyID=f1bae135-4190-4d7c-b19319123141edaa&displaylang=en
•
Windows 7 Technical Library on Microsoft TechNet http://technet.microsoft.com/enus/library/dd349342.aspx
•
Windows Developer Center for Windows 7 http://msdn.microsoft.com/enus/windows/dd433113.aspx
5.3 Minimum Device Hardware Requirements
Your DSEK device well exceeds the minimum hardware requirements for Standard 7 and is designed
to provide the best possible Digital Signage experience. If using other hardware for Standard 7, your
device must have the following minimum hardware:
•
1 GHz x86 or amd64 processor
47
DSEK-10 Media Player User Guide
•
1 GB of flash or hard drive space (4 GB recommended)
•
512 MB of RAM (1 GB recommended for amd64 devices)
•
900 MHz CPU or equivalent
•
At least one of the following bootable media types:
•
Bootable DVD-ROM drive
•
Bootable USB 2.0 port and a USB Flash Drive (UFD) with 4 GB free space, or access to a local
network
•
BIOS supporting Windows Preinstallation Environment (Windows PE) 3.0
•
Minimum hardware requirements, particularly RAM requirements, may be greater depending on
the size and type of feature packages selected.
5.4 Install Windows Embedded Standard 7 Toolkit
You can install Windows Embedded Standard 7 Toolkit on your development computer from a DVD or
from setup files downloaded from Microsoft Connect.
1.
•
Run Setup.exe
If you have the Windows Embedded Standard 7 Toolkit DVD, installation should begin when
you insert the DVD into the DVD drive. If it doesn’t start automatically, the Setup.exe file can
be found at:
<DVD Drive>:\Setup.exe.
2.
•
On the Setup Type page, do one of the following:
To install the tools and distribution share to the default location, select Complete. The
default locations are:
• 32-bit operating system: [System Drive]:\Program Files\Windows Embedded Standard 7
• 64-bit operating system: [System Drive]:\Program Files(x86)\Windows Embedded
Standard 7
•
3.
To install the tools and distribution share to a different location, select Custom.
Follow the instructions in the installation wizard to complete the installation process.
48
DSEK-10 Media Player User Guide
5.4.1
Open Windows Embedded Standard 7 Toolkit Help
The Windows Embedded Standard 7 Toolkit Help contains more detailed information on many
of the topics and steps contained in this manual.
To access the Windows Embedded Standard 7 Toolkit Help:
1.
Start Image Configuration Editor on your development computer
• From the Start menu, click Programs, click Windows Embedded Standard 7, and then
click Image Configuration Editor.
2.
On the toolbar, click the Help icon to launch Help.
49
DSEK-10 Media Player User Guide
5.5 Create a Utility Drive
The DSEK device is able to boot from either an external USB DVD drive, or via a bootable USB flash
drive. You can use the x86 Windows Embedded Standard 7 DVD and an external USB DVD drive to
install the OS image directly to your device.
Otherwise you can create a bootable USB drive by using the DiskPart tool and then loading the USB
Drive with Image Builder Wizard (IBW) or Windows Preinstallation Environment (WinPE). Diskpart
supports the partitioning and formatting of a USB Flash Device (UFD) as a bootable device. A USB
drive with a minimum of 4 GB is recommended for a utility drive loaded with Image Builder Wizard.
5.5.1
Make Your Utility Disk Bootable
1.
Attach your USB drive to your development computer.
2.
From a Windows Vista, Windows 7 or Windows Preinstallation (Windows PE) 3.0
environment, run the DiskPart tool by typing the following at a command prompt:
Diskpart
Note:
The version of the DiskPart tool provided by Windows Vista, Windows 7 and Windows PE
2.0, 2.1 and 3.0 supports the partitioning and formatting of a UFD as a bootable device.
Previous versions of the DiskPart tool, including the version provided by Windows XP, do
not fully support partitioning and formatting a UFD to be bootable and should not be
used.
3.
Use the DiskPart tool to determine the disk number and device size to be used for the
next step by typing the following at the DiskPart prompt:
list disk
4.
Use the DiskPart tool to partition and format the drive and make it bootable. At the
DiskPart prompt, type the following, replacing <disk_number> with the disk number of
the USB drive:
50
DSEK-10 Media Player User Guide
select
clean
create
select
active
format
assign
exit
disk <disk_number>
part pri
part 1
fs=ntfs quick
Your USB drive is now bootable.
5.5.2
Add Image Builder Wizard to Your Utility Disk
The Image Builder Wizard disks provide the ability to quickly generate a new IBW disk in the
event IBW has been serviced or new packages have been added to the distribution share.
To generate an Image Builder Wizard Disk:
1.
Start Image Configuration Editor on your development computer
• From the Start menu, select Programs, select Windows Embedded Standard 7, then
select Image Configuration Editor.
2.
On the Tools menu, select Media Creation, then select Create IBW Image with full
Distribution Share
3.
Enter the desired distribution share to be copied.
4.
Select your USB drive as the target folder.
5.
Select the desired disk architecture.
6.
Click OK.
5.6 Create a Windows Preinstallation Environment Utility
Drive (Optional)
In some instances, you may want to create a utility disk that includes the Windows Preinstallation
Environment (Windows PE). Windows PE is a lightweight version of Windows used mainly for
deployment. You may prefer to use Windows PE instead of Image Builder Wizard if your USB drive is
smaller than 2 GB, if you have space limitations on your device or if your device requires custom
drivers that you will install on a custom version of Windows PE.
51
DSEK-10 Media Player User Guide
5.6.1
Create a Windows PE Utility Disk with Image Configuration Editor
The Windows PE Utility Disk feature of the Media Creation tool in Image Configuration Editor
provides the ability to quickly generate a Windows PE disk for gathering information about
your target device or for deploying an image using Image Builder Wizard. The generated disk
includes TAP.exe, ImageX and Package Scanner.
To generate a Windows PE utility disk:
1.
Create a bootable utility disk (section 1.6.1 above).
2.
Start Image Configuration Editor on your development computer
• From the Start menu, select Programs, select Windows Embedded Standard 7, then
select Image Configuration Editor.
3.
On the Tools menu, select Media Creation, then select Create Windows PE Image.
4.
Enter a target folder on your development computer to which the binaries will be copied.
5.
Select the desired disk architecture.
6.
Click OK.
7.
Copy the contents of the ISO sub-folder from the target folder on your development
computer to the root directory of your bootable utility disk.
5.6.2
Create a Custom Windows PE Image
See the topic “Create a Custom Windows PE Image” in the Windows Embedded Standard 7
Toolkit Help for more information about creating a custom Windows PE Image and gathering
other files to add to the bootable USB drive you created in section 1.6.1.
52
DSEK-10 Media Player User Guide
6 Build Windows Embedded Standard 7 Images
6.1 Build a Windows Embedded Standard 7 Image with
Image Builder Wizard
Image Builder Wizard (IBW) is a tool you can use to create, configure and install Windows Embedded
Standard 7 on your device. The wizard runs directly on your device and guides you through a set of
configuration choices. After you make your selections, the wizard creates and installs Windows
Embedded Standard 7 onto the device. You can further customize the installation or you can capture
it to an image file and deploy it to other devices.
In this lab, you will use IBW on your device to create different Windows Embedded Standard 7 images.
You can follow the steps provided in this lab to create the following variations:
•
An image that can be used for a digital sign device.
•
A “minboot” image that contains only the base packages (referred to as Embedded Core).
6.1.1
Build a Digital Signage Image with Embedded
Enabling Features
To build a digital signage image using IBW:
1.
Start Image Builder Wizard on your device by either:
• Start the wizard from your Windows Embedded Standard 7 DVD, your ISO image, or the
USB drive prepared in section 1.6
• Boot your device into Windows PE and run setup.exe from another location (USB drive,
network share, etc.).
Note:
Image Builder Wizard will setup and install Windows Embedded Standard 7. It’s
important to make sure you are running the wizard on your device itself and not on
your development computer.
2.
On the first page, select Build an Image
53
DSEK-10 Media Player User Guide
This option starts IBW and allows you to choose packages, drivers and languages to
include in your image. You can optionally start from a template.
3.
Accept the End User License Agreement (EULA).
4.
The Choose the way you want to build your image page allows you to start from a
template or from a blank configuration. In this exercise, select the Digital Signage
template and click Next.
5.
Select a language, time and currency format and keyboard or input method to install on
the final image. These selections are for the primary language of your image. You can
add additional languages later. Click Next to continue.
6.
The Summary of Drivers and Features page shows a summary of the drivers to be
installed, detected devices and feature packages in your template. Check the Modify
Drivers and Modify Features checkboxes and click Next.
54
DSEK-10 Media Player User Guide
7.
On the Find and Select Drivers page, choose one of the following options and click Next
to continue:
• The Automatically detect devices option detects the drivers on your device and
attempts to find drivers for them.
• The Choose a PMQ option makes it possible for you to import a device list from a
previously generated PMQ file. As with Windows Embedded XP, TAP.exe is used to
generate this PMQ file.
• The Do not select additional drivers option includes only the drivers in Embedded Core.
Your image will still be bootable but drivers for non-boot-critical devices may not be
installed.
8.
The Confirm drivers to be installed page shows drivers that will be installed as well as
the devices that were detected on your computer for which we do not have drivers. Click
Browse if you want to add custom drivers. Click Next to continue.
9.
On the Please select Feature Packagesto include in your image page you can add
additional features to your configuration. Because you started from the Digital Signage
template, several packages have been preselected for you. Choose any additional
packages you wish to include.
10.
Determine which type of write filters you want to use for your digital sign and select the
appropriate feature packages.
To use File Based Write Filter (FBWF) and Registry Filter, select:
• Embedded Enabling Features\File Based Write Filter (FBWF)
• Embedded Enabling Features\Registry Filter
OR
To use Enhanced Write Filter (EWF), Hibernate Once Resume Many (HORM) and Registry
Filter, select:
• Embedded Enabling Features\Enhanced Write Filter with HORM
• Embedded Enabling Features\Registry Filter
• Boot Environments\Enhanced Write Filter Boot Environment
55
DSEK-10 Media Player User Guide
Note:
Although EWF can be used without HORM, using HORM requires EWF.
Adding EWF in IBW (without an answer file) will configure all existing volumes to be
protected in RAM-REG mode; however EWF will be disabled for all of them.
11.
Click the Resolve Dependencies button. If a pop-up window asks you to choose between
multiple packages, make the following selections:
a. If you are installing HORM, select Embedded Windows 7 Boot Environment, otherwise
select the Windows 7 Boot Environment.
•
Select Windows Embedded Standard Startup Screens.
•
Select Windows Explorer.
•
Select Standard Windows USB Stack.
b. Resolve all other dependencies, then click Done. Click Next to continue.
12.
The Summary of Drivers and Features page gives you a final overview of packages and
drivers to be installed. If you are satisfied with your selections, click Next.
13.
Select the disk or partition where you would like to install the image, then click Next to
begin installation and set up of the customized Windows Embedded Standard 7 image on
your device.
14.
To enable Embedded Enabling Features after installation is complete, open a command
prompt on your device and run the following commands:
• For FBWF and Registry Filter:
fbwfmgr /enable
fbwfmrg /addvolume c:
• For EWF, HORM and Registry Filter:
ewfmgr c: -enable
ewfmgr c: -activatehorm
15.
Once HORM has been activated, it should be tested:
a. Reboot so that EWF is enabled.
b. Start Internet Explorer
c. Enable hibernation by typing the following at a command prompt:
powercfg –h on
d. Reboot and device should resume from hibernation.
56
DSEK-10 Media Player User Guide
e. Make changes and reboot your device again
f. Verify your device state returns to that of step d above and that the changes made in
step e were not retained.
6.1.2
Build an Image with Embedded Core Only
A Windows Embedded Standard 7 image that contains just the Embedded Core package is
described as a “minboot” image.
To build an Embedded Core (eCore) image using Image Builder Wizard, follow the steps in
section 2.1.1 Build a Digital Signage Image with Embedded Enabling Features with the
following changes:
1.
At step 4, choose the Minimum Configuration template
2.
Complete steps 10 and 15 only if you want to enable write filters.
6.2 Build a Windows Embedded Standard 7 Image Using
Image Configuration Editor
6.2.1
Build a Digital Signage Image with Custom Settings
1.
Start Image Configuration Editor on your development computer.
• From the Start menu, selectPrograms, selectWindows Embedded Standard 7, then
selectImage Configuration Editor.
2.
On the File menu, select Distribution Share, then navigate to the desired distribution
share. The default distribution share locations are:
• On a development computer running a 32-bit operating system:
•
x86 distribution share: C:\Program Files\Windows Embedded Standard 7\DS
•
amd64 distribution share: C:\Program Files\Windows Embedded Standard 7\DS64
• On a development computer running a 64-bit operating system:
•
x86 distribution share: C:\Program Files(x86)\Windows Embedded Standard 7\DS
•
amd64 distribution share: C:\Program Files(x86)\Windows Embedded Standard
7\DS64
57
DSEK-10 Media Player User Guide
On the File menu, click New Answer File. By default, the Embedded Edition package is
3.
added to this new answer file. This is the Embedded Core package.
4.
Add Driver Packages
a. On the File menu, click Import then select Import PMQ to add device drivers using a
PMQ file. In the Messages pane, in the Import PMQ tab, you can review the results of
mapping the devices in a PMQ file to driver packages.
•
Successfully mapped devices will be listed. To view the package in the answer file
that the device was mapped to, double-click the device name.
•
The warning icons denote devices that were not mapped to driver packages. If
you need support for these devices, see section 2.2.3
Note:
For more information on how to generate a PMQ file, refer to the Windows
Embedded Standard 7 Help topic “How to Generate a .PMQFile Using Target
Analyzer”.
b. In the Distribution Share pane, under Packages/Driver, you can add additional driver
packages. Double-click any driver package (leaf node in the tree) to add it to your
answer file.
Add Feature Packages
5.
a. In the Distribution Share pane, expand the Packages/FeaturePack node.
b. Expand the Browsers/Internet Explorer 8 node, right-click on Internet Explorer 8 Browser and select Add
to Answer File.
c. Expand the Graphics and Multimedia node, right-click on Windows Media Player 12 and select Add to
Answer File.
d. Expand the Remote Connections node, right-click on Remote Desktop Connection and select Add to
Answer File.
6.
Determine which type of write filters you want to use for your digital sign. In the
Distribution Share pane, under Packages/FeaturesPack, right-click on the appropriate
feature packages and select Add to Answer File.
To use File Based Write Filter (FBWF) and Registry Filter, select:
• Embedded Enabling Features\File Based Write Filter (FBWF)
58
DSEK-10 Media Player User Guide
• Embedded Enabling Features\Registry Filter
OR
To use Enhanced Write Filter (EWF), Hibernate Once Resume Many (HORM) and Registry
Filter, select:
• Embedded Enabling Features\Enhanced Write Filter with HORM
• Embedded Enabling Features\Registry Filter
• Boot Environments\Enhanced Write Filter Boot Environment
Note:
Although EWF can be used without HORM, using HORM requires EWF.
Adding EWF in IBW (without an answer file) will configure all existing volumes to
be protected in RAM-REG mode; however EWF will be disabled for all of them.
7.
To add language packs, in the Distribution Share pane, expand the
Packages/LanguagePack/en-US node. Right-click the English (US) Language Pack
package and select Add to Answer File. Add additional language packs the same way.
8.
To change Internet Explorer 8 settings:
a. In the Answer File pane, click on the Internet Explorer 8 Browser package.
b. In the Settings pane, change Filter View to “4 Specialize”.
c. In the Settings pane, click on the Value column to update the value for each of the
following settings:
d. Set Home_Page to www.microsoft.com/embedded
e. Set IEWelcomeMsg to false
f. Save your answer file.
You have now changed the way Internet Explorer behaves by using Image Configuration
Editor’s settings UI. You can change additional settings in your answer file the same way.
9.
To resolve dependencies, from the Validate menu, select Add Required Packages.
a. If there are any errors listed in the Validation tab of the Messages pane that state
“Dependencies of the source package are not satisfied,” double-click the error
59
DSEK-10 Media Player User Guide
message and use the Resolve Dependencies dialogue box to satisfy all required
package dependencies.
•
If you are asked to choose between two USB stacks, choose “Bootable Windows
USB Stack” only if you are using the USB Boot Embedded Enabling Feature and
enabling a USB bootable image (see section 5.3). Otherwise choose “Standard
Windows USB Stack.”
•
If you are asked to choose between two boot environment packages, choose
“Enhanced Write Filter Boot Environment” if you are installing HORM with EWF.
Otherwise choose “Windows Boot Environment”.
b. Warnings that state “Optional Dependencies exist for the source package” are
acceptable and may be ignored.
c. Continue until all required dependencies are resolved.
Note:
For more information on the three validation options, refer to Windows
Embedded Standard 7 Help’s topic “Validating an Answer File in Image
Configuration Editor”.
10.
Use the answer file you just created to install the digital signage image on your device:
a. Boot your device into Image Builder Wizard using the DVD or utility disk you created in
section 1.6.
b. On the Build an Image / Deploy an Answer File or WIM page, select Deploy an Answer
File or WIM.
c. In the browse to file dialog box, browse to your answer file and click Open.
Note:
You can use this answer file to create a configuration set. A configuration set is a
folder that contains the packages, applications, images and drivers used in an
answer file. Image Builder Wizard uses the configuration set and the answer file to
build or modify an installation. For more information, see the Help documentation
that was installed with Windows Embedded Standard 7.
11.
To enable Embedded Enabling Features after installation is complete, open a command
prompt on your device and run the following commands:
• For FBWF and Registry Filter:
60
DSEK-10 Media Player User Guide
fbwfmgr /enable
fbwfmrg /addvolume c:
• For EWF, HORM and Registry Filter:
ewfmgr c: -enable
ewfmgr c: -activatehorm
12.
Once HORM has been activated, it should be tested:
a. Reboot so that EWF is enabled.
b. Start Internet Explorer
c. Enable hibernation by typing the following at a command prompt:
powercfg –h on
d. Reboot and device should resume from hibernation.
e. Make changes and reboot your device again
f. Verify that your device state returns to that of step d above and that changes made in
step e were not retained.
6.2.2
Add Update Packages to a Distribution Share (Optional)
You can use the ImportPackage feature of Image Configuration Editor to import update
packages into an existing Distribution Share. Both cabinet (CAB) files and Microsoft Update
Standalone Package (MSU) files can be imported.
61
DSEK-10 Media Player User Guide
You can use the sample packages that were included with the pre-release build of Windows
Embedded Standard 7 Toolkit, found under the \Updates folder of the Image Builder Wizard
DVD appropriate to your architecture. For more information about which updates are available,
see section 4.2.2.
6.3.2.1 To use the Import Package feature in Image Configuration Editor:
1.
Open Image Configuration Editor on your development computer.
•
On the Start menu, select Programs, select Windows Embedded Standard 7,
then select Image Configuration Editor.
2.
On the File menu, click on Import, then click on Import Package(s).
3.
In the Select Packages to Import dialog box, navigate to the file you want to import and
click Open.
6.3.2.2 To Import Packages from a command prompt:
4.
Open a command prompt window and navigate to: C:\Program Files\Windows
Embedded Standard 7\Tools\Image Configuration Editor
5.
At the command prompt, type the following command to add the update package to the
32-bit distribution share:
run importpackage <updatepackage> C:\Program
Files\Windows Embedded Standard 7\DS
Note:
If your development computer is running a 64-bit operating system, the paths
listed above will instead be under the C:\Program Files (x86)\ directory.
6.2.3
Add Third-Party Software (Optional)
The recommended way to add custom files to an Windows Embedded Standard 7 runtime is by
using Image Configuration Editor and the $OEM$ Folder.
Files placed in the $OEM$ Folder will be automatically copied to the embedded device during
installation. The folder and file hierarchy will be preserved on the embedded device as you
define it in the $OEM$ Folder. Details of the format of an $OEM$ Folder can be found in the
Windows Embedded Standard 7 Help under “Understanding Distribution Shares and
Configuration Sets.”
62
DSEK-10 Media Player User Guide
Image Configuration Editor supports the management of multiple $OEM$ Folders in a
distribution share. The folder hierarchy underneath “..\DS\$OEM$ Folders” determines how
folders will be displayed in the Image Configuration Editor UI.
6.3.3.1 Create an $OEM$ Folder:
1.
Right-click the distribution share path in the Distribution pane, then select Explore
Distribution Share.
2.
Navigate to the $OEM$ Folders directory and add a new sub-folder called MyApplication.
3.
Under MyApplication, add a new sub-folder called $OEM$.
4.
Under the $OEM$ folder you just created, add additional subfolders and files as
necessary. For example, to deliver the file “foo.exe” to the root of the install partition,
the full path should be: “..\DS\$OEM$ Folders\MyApplication\$OEM$\$1\foo.exe”
Note:
You can also refer to the Microsoft Technet article, Designing a Distribution Share,
for additional information on the structure and parameters available for use with
the $OEM$ Folder.
6.3.3.2 Add an $OEM$ Folder to an Answer File:
6.2.4
1.
Expand the $OEM$ Folders node in the Distribution Share pane.
2.
Right-click the MyApplication folder and select Insert OEM Folders Path.
Run a Custom Script (Optional)
To run a custom script during the installation process, you use the Synchronous command in
Image Configuration Editor. You can use the Synchronous command to start the installation of
an application, start a program on first boot, or to perform more advanced operations.
For example, the following steps will guide you through the process of finding a package that
contains a specific file - in this example it’s regedit.exe - and then using a .reg file to modify
your registry.
6.3.4.1 Use Image Configuration Editor to search for the package that
contains the file regedit.exe:
1.
Open Image Configuration Editor on your development computer
63
DSEK-10 Media Player User Guide
•
From the Start menu, select Programs, select Windows Embedded Standard 7,
then select Image Configuration Editor.
2.
On the Edit menu, click Find.
3.
In the Look In group, select Distribution Share. Clear any other options.
4.
In the Options group, select Search file names in packages. Clear the other options.
5.
In the Find what box, type “regedit.exe” and click Find.
6.
When the search is complete, look for regedit.exe in the Value column. It should be
listed with a Path of System Management Utilities/Files.
7.
Double-click that row and the package that contains regedit.exe is now displayed and
selected in the Distribution Share pane.
8.
Right-click on this package and select Add to Answer File.
6.3.4.2 Modify your registry using the Synchronous command:
1.
On the Insert menu, click Synchronous Command, then select Pass 7 oobeSystem.
2.
In the Enter a Command Line text box, enter the following:
cmd /c REGEDIT /s %windir%\mykeys.reg
64
DSEK-10 Media Player User Guide
3.
Click OK
Note:
Follow the instructions in section 2.2.3 to create an $OEM$ Folder and add the
$OEM$ Folder to an answer file to add the .reg file to your answer file.
6.2.5
Add Third-Party Drivers (Optional)
You can add device drivers during several phases of installation. To add third-party drivers
using Image Builder Wizard with an answer file, you must include a device-driver path in an
answer file.
To select and add a device-driver path to an answer file:
1.
Open Image Configuration Editor with a Distribution Share and an answer file.
2.
From the Insert menu, select Driver Path, then choose the configuration pass in which
you want to install the driver (Windows PE for boot-critical drivers).
Note:
For more information on configuration passes, refer to the Windows Embedded
Standard 7 Help topics “How Configuration Passes Work” and “Image Builder
Configuration Passes”.
3.
Navigate to the folder containing the inf-type drivers you wish to include and click Open.
4.
The Answer File pane now shows that the selected driver path is added to the answer
file.
Note:
You can also right-click the Out-of-Box Drivers folder or any subfolder in the
Distribution Share pane and select Add to Answer File to add the path to the
Answer File pane.
6.2.6
Make Your Install Fully Unattended (Optional)
A fully unattended install is an installation that requires no user input after Image Builder
Wizard is started with an answer file. To achieve a fully unattended installation, Image
Configuration Editor must be used to create an answer file that provides all the information
necessary for both the Image Builder Wizard and out-of-box experience (OOBE) processes. The
following two sections guide you through the process of providing this information in Image
Configuration Editor.
65
DSEK-10 Media Player User Guide
Note:
It is helpful to create an answer file with only the necessary settings and save that
answer file with the name Fully_Unattend.xml. Then every time you create a new
Windows Embedded Standard 7 configuration, start by loading the
Fully_Unattended.xml and saving it as a different answer file (for example:
Working.xml). By creating this Fully_Unattend.xml answer file, you can always
start with it and then add the packages and customizations you want for a specific
Standard 7 runtime.
6.3.6.1 Suppress Image Builder Wizard Dialogs
You must include certain settings in your answer file to prevent the Image Builder Wizard
user interface (UI) from being displayed. The default behavior of Image Builder Wizard is
to display the UI if any of the required settings are incorrect or not available.
In some cases there are multiple ways to configure your unattended installation; which
way you choose depends on your build and installation preferences. The following tables
describe only the minimum required settings to perform an unattended installation on a
device with a single partition. All the settings are found in sub-nodes of the
Product/Operating System/Foundation Core/Windows Embedded Edition node packages.
To update the settings:
1.
Click on the package that contains the setting in the Answer File pane.
2.
Change Filter View By to the configuration pass shown for each setting in the following
table.
3.
Click on the Value column and enter the example value for each setting.
Note:
The settings described in this document refer to a setup that has only one system
partition. Unattended setup and deployment can be achieved on systems with
multiple volumes and partitions, but the installation partition/volume will need to
be specified using the Setup/ImageInstall/OSImage/InstalllTo SMI setting.
The settings listed in these tables do not include their architecture abbreviation
suffix in order to simplify the presentation. The suffix will appear as either “_x86”
or “_amd64”, depending on the Distribution Share selected for your device’s
architecture.
Image Builder Wizard Language and Locale Settings
SETTING
VALUE
DESCRIPTION
Microsoft-
InputLocale = “en-
Specifies the
66
CONFIGURATION
PASS
1 windows PE
DSEK-10 Media Player User Guide
WindowsInternationalCore-WinPE
US”
default
language to use
on the installed
OS.
Specifies the
default
language to use
during Standard
7 setup. During
installation,
Standard 7
setup displays
installation
progress in the
selected
language.
UILanguage = “enUS”
67
DSEK-10 Media Player User Guide
Image Builder Wizard Dialog Boxes
SETTING
VALUE
DESCRIPTION
MicrosoftWindows-Setup
ShowTemplateSelect
ion = false
MicrosoftWindows-Setup |
Target Analysis
Mapping
RunTargetAnalysisM
apping = True
Specifies
whether to
show the IBW
feature
template
selection page.
Specifies
whether to run
TAP.exe and
map the .pmq
file to driver
packages.
ShowImportDriverUI
= False
WillShowUI = False
MicrosoftWindows-Setup |
UserData
AcceptEULA = True
CONFIGURATION
PASS
1 windowsPE
1 windowsPE
Specifies
whether to
show the IBW
Import Driver
UI page.
Specifies
whether to
show the IBW
Target Analysis
Mapping pages.
Specifies
whether to
accept the
Microsoft
License
Software Terms
during IBW
1 windowsPE
Image Installation
You must specify where you intend to install Windows. You can either specify the exact
Disk ID and Partition ID or you can install Windows to the first available partition.
SETTING
VALUE
DESCRIPTION
MicrosoftWindows-Setup
CreateSeparateSyst
emPartition =
false
Microsoft-
InstallToAvailable
Partition = true
Specifies
whether a
separate
system
partition should
be created
Installs
68
CONFIGURATION
PASS
1 windowsPE
1 windowsPE
DSEK-10 Media Player User Guide
Windows-Setup |
ImageInstall
MicrosoftWindows-Setup
|ImageInstall
|OSImage
|InstallTo
Standard 7 to
the first
available
partition.
NOTE: Cannot
be used in
conjunction
with MicrosoftWindowsSetup |
ImageInstall |
OSImage |
InstallTo shown
below.
Specifies the
disk and
partition to
install Standard
7 on.
NOTE: Cannot
be used in
conjunction
with MicrosoftWindowsSetup |
ImageInstall
shown above.
DiskID = 0
PartitionID = 1
1 windowsPE
6.3.6.2 Suppress OOBE
The Windows out-of-box experience (OOBE) or “Windows Welcome” is part of the setup
UI that appears at the final stage of the setup process, or on first boot after a captured
image is deployed. This UI element is run online (booting from the target device) and is a
stand-alone application that runs when an image is set up with Image Builder Wizard or
deployed from a sysprepped .WIM file. In the OOBE UI, an end-user can configure certain
personalization settings, such as naming the computer, creating a user account, setting
date and time, time zone, and so on. Many of these settings may not be applicable in
embedded scenarios, and, therefore, you may wish to suppress the OOBE UI during setup.
In this lab, we suppress the OOBE UI that appears at the end of setup. Suppression of the
OOBE UI is accomplished by providing the necessary information to the setup/OOBE
process by using a properly populated answer file.
Some key points that you should consider when suppressing the OOBE UI are user account
creation, EULA acceptance, and the product key. Although all the settings used in this
section are required to suppress the OOBE UI, these settings — in particular — are
69
DSEK-10 Media Player User Guide
required for your system to be usable. If you omit any of these settings from your answer
file, not only will the OOBE UI appear, but your system might possibly be unusable.
Note:
The settings listed in these tables do not include their architecture abbreviation suffix in
order to simplify the presentation. The suffix will appear as either “_x86” or “_amd64”,
depending on the Distribution Share selected for your device’s architecture.
70
DSEK-10 Media Player User Guide
OOBE Dialog Box Settings
SETTING
VALUE
DESCRIPTION
MicrosoftWindows-Setup |
UserData
MicrosoftWindows-ShellSetup
AcceptEula = true
Specifies the
acceptance of
the EULA.
Specifies the
name of the
computer to
apply to the
Standard 7
installation.
Using an
asterisk will
assign a
random name.
ComputerName =
“*”
Specifies the
product key to
use for
activation. Note
that all zeros
may be used –
“00000-0000000000-0000000000”.
Specifies the
default input
locale of the
Standard 7
installation.
ProductKey =
<product key>
MicrosoftWindowsInternational-Core
InputLocale =
“en-US”
CONFIGURATION
PASS
1 windows PE
4 Specialize
7 oobeSystem
Specifies the
default system
locale of the
Standard 7
installation.
SystemLocale =
“en-US”
UILanguage = “enUS”
Specifies the
default UI
language of the
Standard 7
installation.
UserLocale = “enUS”
Specifies the
default user
locale of the
Standard 7
installation
71
DSEK-10 Media Player User Guide
MicrosoftWindows-ShellSetup | OOBE
Example: “enUS”
Suppresses the
display of the
Microsoft
Software
License Terms
page..
HideEULAPage =
true
ProtectYourPC = 3
7 oobeSystem
Specifies the
protection level
of the Standard
7 installation.
HideWirelessSetup
inOOBE = true
Hides the
Wireless
Network
selection page.
NetworkLocation =
“Work”
Specifies the
location of the
device.
TimeZone =
“Pacific Standard
Time”
Specifies the
time zone of
the device.
MicrosoftWindows-ShellSetup |
UserAccounts
Right-click to
insert a new user
account.
MicrosoftWindows-ShellSetup |
UserAccounts |
LocalAccount
Name = <Name>
Specifies the
user accounts
to create on the
Standard 7
installation.
There must be
at least one
user account
created in the
answer file or it
will not be
possible to log
into the system
Specifies a valid
account name
not already
present in your
image.
7 oobeSystem
7 oobeSystem
Specifies a
display name
for the user
account.
DisplayName =
<Display Name>
72
DSEK-10 Media Player User Guide
MicrosoftWindows-ShellSetup |
UserAccounts |
LocalAccount |
Password
MicrosoftWindows-ShellSetup |
UserAccounts |
AdministratorPass
word
MicrosoftWindows-CoreSettings
value =
<password>
Specifies a
password for
the user
account.
7 oobeSystem
value =
<password>
Specifies a
password for
the
administrator
account.
7 oobeSystem
HideEvaluationWar
ning = 1
Suppresses the
display of the
evaluation
warning
7 oobeSystem
AutoLogon Settings
Although not actually part of the OOBE suppression, the following settings enable
AutoLogon which may be desired for some automation scenarios.
SETTING
VALUE
DESCRIPTION
MicrosoftWindows-ShellSetup | AutoLogon
Enabled = true
Enables
Autologon.
Username =
<autologon
account name>
MicrosoftWindows-ShellSetup | AutoLogon
| Password
LogonCount = 9999
PlainText = false
Value =
<encrypted
password string>
Specifies the
account that
will be
automatically
logged on.
Specifies the
number of
times someone
can autologon
to the device.
CONFIGURATION
PASS
7 oobeSystem
7 oobeSystem
Specifies
whether the
Autologon
password is
hidden in the
unattended
answer file.
Specifies the
encrypted
password for
the autologon
73
DSEK-10 Media Player User Guide
account.
6.2.7
Create Image Builder Wizard Disk from Answer File (optional)
The Media Creation tool in Image Configuration Editor includes an IBW Disk from Answer File
option that allows you to quickly deploy an image with a specified configuration. This option
creates an IBW disk and a configuration set so that, when booting from this disk, IBW will
automatically consume the provided answer file and install that configuration on the target
device.
To generate an Image Builder Wizard Disk from an Answer File:
1.
Create a bootable utility disk (see section 1.6.1 above).
2.
In the Tools menu, select Media Creation, then select Create IBW Disk from Answerfile.
3.
Enter the desired answer file to be copied, select the utility disk as the target folder and
click OK.
4.
Attach the disk to your device and reboot to run setup and install your image, making
sure your device boots to this disk.
74
DSEK-10 Media Player User Guide
7
Deploy an Image
In Section 2 you developed a Windows Embedded Standard 7 image using Image Builder Wizard and/or
Image Configuration Editor and then installed it on your reference device. In this section you will learn how
to prepare, capture and deploy that image to additional devices.
7.1 Prepare and Capture an Image for Deployment
7.1.1 Sysprep the Image
You can use the Sysprep tool with other deployment tools to install the Windows Embedded
Standard 7 operating system onto new hardware. Sysprep prepares a computer for disk
imaging or delivery to a customer by configuring the device to create a new computer security
identifier (SDI) when the computer is restarted. In addition, Sysprep cleans up user-specific and
device-specific settings and data that must not be copied to a destination device. This process
is called “generalization.”
To prepare a device for disk imaging:
1.
Start with the device on which you already installed a Windows Embedded Standard 7
image. (For more information about building an image, see Section 2.)
2.
Open a command prompt and run the following command. This will remove all device
and user-specific information from the image, and shut down the device.
sysprep /generalize /shutdown
3.
[Optional]You can also use an answer file with Sysprep by adding the /unattend
command.
sysprep /generalize /shutdown /unattend:<file_path>
Note:
Sysprep can be found on your device in the folder \Windows\System32\Sysprep. You may
need to navigate to the root directory or to the Sysprep sub-folder to run Sysprep.
For additional sysprep command line options, refer to the Windows Embedded Standard 7
Toolkit Help.
75
DSEK-10 Media Player User Guide
7.1.2
Capture the Image Into a Windows Image (.wim) File
Now that you have a generalized Standard 7 image installed on your device, you can use
ImageX to capture it into a .wim file so you can deploy it to other devices.
To create a .wim file:
1.
On your device, do one of the following:
• Boot into Image Builder Wizard from your utility disk or the Windows Embedded
Standard 7 DVD and open a command prompt by either:
•
On the Build an Image/Deploy an Answer File or WIM page, press Shift + F10.
•
On the Build an Image/Deploy an Answer File or WIM page, select Launch
WinPE Command Prompt.
• Boot into Windows PE from your utility disk.
2.
If necessary, connect to your network share or the media share that you want to copy
your captured image to. For example, the following command will connect you to a
network share located at \\mycomputer\images with the user “mydomain\user” and a
password of “password.”
net use * \\mycomputer\images /USER:mydomain\user password
3.
Capture the image using ImageX. You can do this by entering the following command,
where C: is the drive you want to capture andZ:\Mydevice.wim is the location where you
want to save your Windows Image file.
imagex /capture C: Z:\mydevice.wim “Drive C” /verify
4.
You can also compress the captured image to reduce the size of the image. For example:
imagex /capture /compress maximum C: Z:\mydevice.wim “Drive
C” /verify
Note:
For more information about running ImageX, refer to the Windows Embedded Standard 7
Toolkit Help.
7.2 Deploy an Image Using ImageX
In this lab, you will deploy your Windows Embedded Standard 7 image onto a device by using ImageX
and Windows PE. To do so, you must first format the hard drive of the destination device with two
partitions, apply the image to the second partition, then run BCDBoot to reconfigure the BCD store.
76
DSEK-10 Media Player User Guide
7.2.1
Prepare your Destination Device
To begin this deployment, you will need to boot your destination device and prepare the hard
drive by using Windows PE and DiskPart. If you do not have a separate destination device, you
can reuse your reference device as the destination device.
To prepare the hard drive:
1.
On your device, do one of the following:
• Boot into Image Builder Wizard from your utility disk or the Windows Embedded
Standard 7 DVD and open a command prompt by either:
•
On the Build an Image/Deploy an Answer File or WIM page, press Shift + F10.
•
On the Build an Image/Deploy an Answer File or WIM page, select Launch
WinPE Command Prompt.
• Boot into Windows PE from your utility disk.
Note:
You may need to override the boot order to boot from the utility disk or CD/DVD-ROM
drive. During initial boot, select the appropriate function key to override the boot order.
2.
Run the DiskPart tool by typing the following at the command prompt:
diskpart
77
DSEK-10 Media Player User Guide
3.
Use the DiskPart tool to determine the disk number and device size to be used for the
next step:
list disk
4.
Use the DiskPart tool to partition and format the drive and make it bootable. At the
DiskPart prompt, type the following, replacing <disk_number> with the disk number of
the drive you wish to use. Although multiple partitions may be used, the following
example creates a single partition in order to keep the lab exercise as simple as possible.
select
clean
create
select
active
format
assign
exit
disk <disk number>
part pri
part 1
fs=ntfs quick
letter = C
Note:
You can also script this process by saving these commands to a text file. To run the script
from a command prompt, type:
diskpart /s <scriptname.txt>
7.2.2
Apply an Image to Your Device’s Hard Drive
Next you apply your Standard 7 image to your device’s hard drive. After it is applied, you need
to run the BCDBoot tool to configure the boot partition.
To apply your image and run BCDBoot:
1.
Connect the USB drive that contains your saved Windows Embedded Standard 7 image
to your device. Apply the image to the hard drive by using ImageX by typing the
command below at a command prompt. In the example below <drive1> refers to the
drive where ImageX can be found and <drive2> refers to the drive where your Standard
7 image WIM can be found:
<drive1>:\imagex.exe /apply <drive2>:\images\myimage.wim 1
C:
2.
From the command prompt, run BCDBoot to update the BCD store. For example:
bcdboot.exe C:\windows /s C:
78
DSEK-10 Media Player User Guide
7.2.3
Shut Down the Destination Device
Now that your Windows Embedded Standard 7 image is deployed, you can shut down the
device by using the wpeutil shutdown option in Windows PE. From the Windows PE command
prompt, type:
wpeutil shutdown
7.3 Deploy an Image Using Image Builder Wizard
After capturing a custom image to a .wim file by using ImageX, you can deploy this image by using
Image Builder Wizard. Using this method, you can create customized setup disks that deploy the
preconfigured image easily and quickly to your devices.
7.3.1
Start Image Builder Wizard with your Image
Choose one of the following four methods to start Image Builder Wizard with your image.
7.3.1.1 Use the Deploy an Answer File or WIM button:
1.
Boot your device into Image Builder Wizard using the Windows Embedded Standard 7
DVD or the utility disk you created in section 1.6.
2.
On the Build an Image/Deploy an Answer File or WIM page, select Deploy an Answer
File or WIM.
3.
Browse to your WIM file and click Open.
7.3.1.2 Use the /installfrom Switch:
1.
Do one of the following:
•
Boot into Image Builder Wizard from your utility disk and open a command
prompt by either
• On the Build an Image/Deploy an Answer File or WIM page, press Shift + F10.
• On the Build an Image/Deploy an Answer File or WIM page, select Launch
WinPE Command Prompt.
•
2.
Boot into Windows PE from your utility disk.
Navigate to the directory that contains setup.exe
•
If you are booting from your Image Builder Wizard disk, look in <drive>:\sources
79
DSEK-10 Media Player User Guide
•
If you are booting from a Windows PE disk, make sure you can access your Image
Builder Wizard files from either a network location or a USB drive. Navigate to
that location and find setup.exe in the sources folder.
3.
Type the following at the command prompt:
setup.exe /installfrom:<drive>:\mydevice.wim
7.3.1.3 Use the InstallFrom Unattend Setting:
1.
Use Image Configuration Editor to configure the InstallFrom setting under Windows
Embedded Edition/Setup/ImageInstall/OSImage
a.
The Path setting is the location of your custom image WIM file.
b.
You may enter Domain, Username and Password settings under Credentials if the
path to your WIM is a network location.
c.
2.
Save your changes to an answer file.
Using the answer file you just created, do one of the following:
•
Boot into Image Builder Wizard from your utility disk. On the Build an
Image/Deploy an Answer File or WIM page, press Shift + F10 to open a
command prompt.
•
Boot into Windows PE from your utility disk.
80
DSEK-10 Media Player User Guide
3.
Navigate to the directory that contains setup.exe
•
If you are booting from your Image Builder Wizard disk, look in <drive>:\sources
•
If you are booting from a Windows PE disk, make sure you can access your Image
Builder Wizard files from either a network location or a USB drive. Navigate to
that location and find setup.exe in the sources folder.
4.
Type the following at a command prompt:
setup.exe /unattend:<path_to_your_answer_file>
7.3.1.4 Replace the install.wim on Image Builder Wizard Media
1.
Do one of the following:
•
Follow the steps in section 1.6 to create an Image Builder Wizard USB drive.
•
Copy all files from the Image Builder Wizard DVD to a folder on your development
computer.
Note:
In steps 2 through 6 below, E:\ refers to the root of your Image Builder Wizard files.
2.
Make a backup copy of the install.wim file in E:\Sources
3.
Copy mydevice.wim to E:\sources
4.
Rename E:\sources\mydevice.wim to E:\sources\install.wim
5.
If E:\ is your USB drive, you can use this drive to boot into Image Builder Wizard and
automatically use your custom image as the default image to install.
6.
If E:\ is your folder of files copied from your Image Builder Wizard DVD, you will need to
create an ISO from these files to turn it back into a DVD. Example:
oscdimg –n –m –b”C:\Program Files\Windows Embedded
Standard 7\Tools\PETools\x86\boot\etfsboot.com” E:\
C:\MyNewIBWDisk.iso
You may need to change this command to point to etfsboot.com correctly based on
your installation directory and device architecture.
81
DSEK-10 Media Player User Guide
7.3.2
Customize a Captured Image
In addition to simply deploying custom images with Image Builder Wizard, you can also apply
answer files and add additional languages to your custom image.
7.3.2.1 Add a language:
1.
Choose one of the methods in section 3.3.1 to start Image Builder Wizard with your
image.
2.
When prompted to choose a language, select the language you would like to add. If the
language was not already added to your image, it will be added. The selected language
will also be set to the default system language.
82
DSEK-10 Media Player User Guide
7.3.2.2 Apply an Answer File
1.
Do one of the following:
•
Boot into Image Builder Wizard from your utility disk and open a command
prompt by either:
• On the Build an Image/Deploy an Answer File or WIM page, press Shift + F10.
• On the Build an Image/Deploy an Answer File or WIM page, select Launch
WinPE Command Prompt.
•
2.
Boot into Windows PE from your utility disk.
Navigate to the directory that contains setup.exe.
•
If you are booting from your Image Builder Wizard disk, look in <disk>:\sources.
•
If you are booting from a Windows PE disk, make sure that you can access your
Image Builder Wizard files from either a network location or USB drive. Navigate
to that location and find setup.exe in the \sources folder.
3.
Type the following at the command prompt where z:\mydevice.wim and
y:\myanswerfile.xml refer to the names and locations of your files:
setup.exe /installfrom:Z:\mydevice.wim /unattend:Y:\myanswerfile.xml
83
DSEK-10 Media Player User Guide
8.
Service an Image
8.1 Service an Image with Image Configuration Editor and
DISM
This lab consists of two procedures in which you apply updates to a Windows Embedded Standard 7
image by using Image Configuration Editor and Deployment Image Servicing and Management (DISM).
DISM is a command line tool that installs, uninstalls, configures and updates features and packages.
In the first section, you will create a configuration set using Image Configuration Editor. Then you will
install the updates by choosing either online or offline commands.
In order to complete this lab, you must have a bootable device with a custom image already installed.
Using the image you installed in sections 2.1.1 or 2.2.1.
8.1.1
Create a Configuration Set using Image Configuration Editor
1.
Open Image Configuration Editor, select your Distribution Share, and open an existing
answer file or create a new answer file.
Notes:
If you are creating a new image, ensure that the Embedded Core package
(Product\Operating System\Foundation Core\ Embedded Edition) is in you answer file.
This package is added by default when you create a new answer file.
If you are adding a package to an existing image, remove the Embedded Core package
from your answer file.
2.
Select one or more packages to add to your existing image (for example, Windows Media
Player found under Graphics and Multimedia).
3.
[optional] Add the driver packages needed by your device in one of two ways:
• Manually add driver packages from the Distribution Share Packages\Driver category.
• Use a .pmq file by clicking File and then Import PMQ.
4.
Resolve dependencies by:
84
DSEK-10 Media Player User Guide
a.
Selecting Validate and then selecting Add Required Packages.
b.
If there are any errors on the Validation tab of the Messages pane that read
“Dependencies of the source package are not satisfied”, double-click the error
message and use the Resolve Dependencies dialog box to satisfy all required
package dependencies.
•
If you are asked to choose between two USB stacks, choose “Bootable Windows
USB Stack” only if you are using the USB Boot EEF and enabling a USB bootable
image (see section 5.3). Otherwise, choose “Standard Windows USB Stack”.
•
If you are asked to choose between two boot environment packages, choose
“Embedded Windows 7 Boot Environment” only if you are installing HORM with
EWF. Otherwise, choose “Windows 7 Boot Environment”.
c.
There may also be additional warnings to resolve.
d.
Repeat steps a through c until no dependency errors exist.
5.
Create a configuration set by selecting Tools and then selecting Create Configuration Set.
6.
Select the target folder for you configuration set. This is the temporary location that will
be used to create your configuration set (for example, C:\myCS).
7.
[optional] You can also use an $OEM$ folder (see section 2.2.3).
8.
Click OK.
9.
When you see the “Config set created successfully” message, click OK.
10.
Your configuration set is now available at the target folder you specified.
11.
You can also save the answer file for future use:
a. Select File then select Save Answer File
b. Enter a location and click Save.
8.1.2
Install using your Configuration Set
After you have created your configuration set, you can choose whether to install it online or
offline.
8.1.2.1 Online Installation
Note:
For the CTP1 build, online installation is not available. Please continue on to Option 2:
85
DSEK-10 Media Player User Guide
Offline Installation to complete this exercise.
In this step, you apply your Configuration Set Unattend created in Section 4.1.1 to your
online image.
To apply your configuration set:
1.
Boot your device.
2.
From a command prompt on your device, apply the AutoUnattend.xml file created by
Image Configuration Editor. Replace <file_path> with the drive letter, folder, and file
name of the configuration set that you created in section 4.1.1 above.
DISM /online /Apply-unattend:<file_path>
3.
Verify that the packages were added to the image by using the DISM /Get-Packages
command. /Get-Packages does not return a list of .msu packages; instead, it shows the
corresponding .cab package.
DISM /online /Get-packages
8.1.2.2 Offline Installation
If you choose the offline installation method, you can also choose whether to create a new
image based on an existing image using Image Builder Wizard, or you can use DISM to
apply your changes directly to an existing image.
If you are creating a new image with a configuration set, you can use Image Builder Wizard
to consume the answer file in the configuration set. Use the steps outlined in this section
to point Image Builder Wizard to an answer file. Be sure that you point Image Builder
Wizard to your configuration set answer file (AutoUnattend.xml) and that the
configuration set payload (the AutoUnattend_Files folder) is at the same location as the
configuration set answer file.
8.1.2.2.1
To create a new image using Image Builder Wizard:
After you have created your configuration set in Image Configuration Editor, save the
folder in a location accessible by Image Builder Wizard along with your existing image
and Setup.exe (IBW). This could be a network share, a USB drive, or a floppy drive,
depending on the hardware you are installing on.
1.
Boot into IBW on your device using the DVD or the utility disk you created in
section 1.6.
86
DSEK-10 Media Player User Guide
2.
On the Build an Image/Deploy an Answer File or WIM page, select Deploy an
Answer File or WIM.
3.
In the browse to file dialog box, browse to your answer file and click Open.
Note:
If you stored your answer file on a network drive you will need to access it from
Windows PE by first mapping a network drive by using the “wpeinit” and “net use”
commands. Wpeinit initializes basic WinPE functions like networking. Please run
wpeinit first, then wait approximately 1 minute before continuing.
Example:
wpeinit
net use z: \\MyNetworkShareLocation
8.1.2.2.2
To use DISM to apply an update to an existing image:
Use DISM to mount the .wim file that you created in step 3.1.:
1.
Similar to ImageX, you use DISM to mount and unmount images for the purposes
of offline servicing. From the command prompt, type:
MD C:\TAP\Mount
DISM /Mount-Wim /Wimfile:E:\images\myimage.wim
/index:1 /Mountdir:C:\TAP\Mount
2.
From a command prompt on your technician computer, apply the Autounattend
created by Image Configuration Editor. Replace <file_path> with the drive letter,
folder, and file name of the configuration set you created in step 5 of the section
4.1.1.
DISM /image:C:\TAP\Mount /Apply-unattend:<file_path>
3.
Verify that the packages were added to the image by using the DISM /GetPackages command. /Get-Packages does not return a list of .msu packages;
instead, it shows the corresponding .cab package.
DISM /image:C:\TAP\Mount /Get-packages
4.
Unmount and commit the changes to the image. From the command prompt,
type:
DISM /unmount-wim /Mountdir:C:\TAP\Mount /commit
87
DSEK-10 Media Player User Guide
8.1.3
Test your image
In this step, you redeploy your updated image and verify your updates.
To test your image:
1.
Deploy your updated image from your USB drive. (Also see section 3, Deploy an Image)
2.
When the image is applied, remove all media (CD-ROM, USB hard drive, or floppy disk)
and restart the computer.
3.
Verify your updates. Depending on which updates you selected, you can verify from the
OS that they were installed and are operating correctly.
8.2 Service an Image with DISM
In this lab, you update an existing image by using Deployment Image Servicing and Management
(DISM). DISM supports updating both an offline image (.wim) and a subset of functions for updating
an online image. DISM.exe is copied to your development computer as part of the Windows
Embedded Studio installation and can be found in C:\Program Files\Windows Embedded
Studio\Tools\.
8.2.1
Mount your image
In this step, you will use DISM to mount the image you captured in step 3.1 Prepare and
Capture an Image. Similar to ImageX, you can use DISM to mount and unmount images for
offline servicing.
To mount an image using DISM, open a command prompt and type:
MD C:\TAP\Mount
DISM /Mount-Wim /WimFile:E:\images\myimage.wim /index:1
/Mountdir:C:\TAP\Mount
8.2.2
Add sample packages
In this step, select two sample packages to add to your existing image offline. The following
sample packages are included with the Windows Embedded DVD in the \Updates folder.
Update Packages for 32-bit Configurations
KB
600000
600001
600002
Feature set (Parent Package)
WinEmb-Accessibility
WinEmb-IE-Core
WinEmb-MediaPlayer
Component
Microsoft-Windows-accessibilitycpl
Microsoft-Windows-IE-Behaviors
Microsoft-Windows-MediaPlayer-
88
DSEK-10 Media Player User Guide
600003
600004
600005
600006
600007
autoplay
1394.inf
WinEmb-INF-EmbeddedCore-DriversPackage
Microsoft-Windows-EmbeddedFeatures-Package
WinEmb-usbboot
WinEmb-usb
WinEmb-Shell-Basic
Microsoft-Windows-WBioSrvc
embedded-usbstor.inf
usbstor.inf
Microsoft-Windows-notepad
Update packages for 64-bit configurations
KB
400000
400001
400002
400003
400004
400005
400006
400007
Feature set (Parent Package)
WinEmb-Accessibility
WinEmb-IE-Core
WinEmb-MediaPlayer
WinEmb-INF-EmbeddedCore-Drivers-Package
Microsoft-Windows-Embedded-Features-Package
WinEmb-usbboot
WinEmb-usb
WinEmb-Shell-Basic
8.2.3
Component
Microsoft-Windows-accessibilitycpl
Microsoft-Windows-IE-Behaviors
Microsoft-Windows-MediaPlayer-autoplay
1394.inf
Microsoft-Windows-WBioSrvc
embedded-usbstor.inf
usbstor.inf
Microsoft-Windows-notepad
Adding a Package Using DISM
1.
From a command prompt on your device, add two sample packages to your mounted
image by using the DISM /Add-Package command. For example:
DISM /image:C:\TAP\Mount /Add-Package
/PackagePath:D:\Updates\KB600000\V1.001\WinEmb6.1-KB600000x86.cab
2.
Verify that the packages were added to the image by using the DISM /Get-Packages
command. /Get-Packages does not return a list of .msu packages; instead, it shows the
corresponding .cab package. For example:
DISM /image:C:\TAP\Mount /Get-packages
8.2.4
Unmount and Commit Changes
In this step, you will unmount and commit the changes to the image. From the command
prompt, type:
DISM /unmount-wim /Mountdir:C:\TAP\Mount /commit
8.2.5
Redeploy and Verify
In this step, you will redeploy your updated image and verify that the updates were installed.
1.
Deploy your updated image from your USB drive (see section 3 Deploy an Image).
89
DSEK-10 Media Player User Guide
2.
When the image is applied, remove all media (CD-ROM, USB hard drive, or floppy disk)
and restart the computer.
3.
Use DISM to verify that the updates were installed.
DISM /online /get-packages
8.2.6
Add a Language Pack (optional)
If your manufacturing process dictates adding language support during deployment, you can
add the appropriate language packs by using the DISM /Add-package options. In this step, you
will add a language pack to your base Windows Embedded Standard 7 image.
1.
Make a copy of your base image so it is preserved. For example:
Copy E:\images\myimage.wim E:\images\myimage_lab.wim
2.
From a command prompt on your device, mount the image to a directory:
DISM /Mount-Wim /WimFile:E:\images\myimage_lab.wim /Index:1
/mountdir:C:\TAP\Mount
3.
Add a language package to your image offline by using DISM /Add-Package command.
This example adds a language pack from the \Windows Embedded
Studio\DS\Packages\LanguagePack.
DISM /image:C:\TAP\Mount /Add-Package
/PackagePath:C:\Program Files\Windows Embedded Standard
7\DS\Packages\LanguagePack\x86~Microsoft-Windows-EmbeddedLanguagePack-Package~ZH-CN~~~6.1.7053.0~1.0\LP.CAB
4.
Verify that the language pack was added to the image by using the DISM /Get-Intl
command. For example:
DISM /image:C:\TAP\Mount /Get-Intl
5.
Unmount and commit the changes:
DISM /unmount-Wim /MountDir:C:\TAP\Mount /Commit
8.3 Install Updates with WUSA
Note:
For the CTP1 build, WUSA cannot be used to install updates. Please skip this exercise.
To install updates using the Windows Update Standalone Installer (WUSA), you have to add the
WinEmb-Servicing-WUSA Feature Set to your image.
90
DSEK-10 Media Player User Guide
Copy the updates (in .msu format) that you want to install to your device. Sample updates can be
found on the DVD in the \Updates folder. After the update file is copied to your device, you can
either simply double-click the .msu file or use the WUSA command-line options to install the update:
wusa.exe d:\WinEmb6.0-KB934307-x86.msu /quiet
8.4 Service an Image with Package Scanner
Package Scanner is a command-line application that helps to service Windows Embedded Standard 7
devices. You can find the version of Package Scanner (Pkgscn.exe) for use on an x86 runtime in the
C:\Program Files\Windows Embedded Standard Quebec\Tools\Image Configuration Editor\ directory
(or in the directory where you installed Image Configuration Editor). You can find the version of
Package Scanner (Pkgscn.exe) for use on an amd64 runtime in the C:\Program Files (x86)\Windows
Embedded Standard 7\Tools\x64 Apps\Apps\ directory. You must run the version of Packages
Scanner appropriate to the architecture of the image.
Runpkgscn.exe /?at a command prompt for a full list of command line options.
Package Scanner can be run offline or online against WES2011 images. By using the /Image: option,
you can point Package Scanner to the root of an offline WES2011 installation (for example, if you
attached the WES2011 device’s hard disk to your development computer, or mounted the .wim file).
Running Package Scanner without the /Image: option scans WES2011 images online. If you would like
to run Package Scanner online, run CopyPkgScn.cmd from your Image Configuration Editor folder. If
you are running as administrator, double-clicking CopyPkgScn will create a pkgscn folder, which you
may copy to your target device. Running CopyPkgScn from a command prompt allows you to specify
a target directory. The following examples assume Package Scanner is run online on the WES2011
image. Use /Image:D:\ (where D:\ is the location of your offline WES2011 image) to run Package
Scanner offline.
Note:
If your development computer is running a 64-bit operating system, the paths listed above will
instead be under the C:\Program Files (x86)\ directory.
8.4.1
Package Enumeration
Package Scanner can list the packages installed in an image by using the /Get-Packages
command. This command is useful for determining what packages are in your image, and what
updates have been applied. By using the /ConfigSetDir: option in addition to /Get-Packages
you can save the list of installed packages into an answer file in a configuration set.
Example:
91
DSEK-10 Media Player User Guide
PkgScn.exe /Get-Packages /ConfigSetDir:E:\configset
8.4.2
Find Applicable Updates
Using the /Find-Updates command, Package Scanner can query your image and a folder
containing update packages. Package Scanner will determine which updates are applicable to
your image.
Use the /PackagePath: option to specify the folder of updates to scan (a directory for you to
test with is included in the Updates folder on your Image Builder Wizard x86 and amd64 DVDs).
Use the /ConfigSetDir option to create a configuration set from the applicable updates.
Example:
PkgScn.exe /Find-Updates /PackagagePath:F:\Updates
/ConfigSetDir:E:\configset
You can then use DISM to apply this configuration set to your device by using the following
command from your Windows Embedded Standard 7 runtime image:
Dism.exe /online /applyunattended:E:\ConfigSet\autounattend.xml
8.4.3
Scavenging
Note:
For CTP2, scavenging is not available as the functionality is being revised. Please skip this
step.
Scavenging refers to the removal of packages on your image that are no longer being used. You
can use the scavenging feature of PackageScanner to prevent unwanted files from reducing
the free disk space on your device over time.
For example, scavenging might be useful if you were to install an update KB12345 which
updates notepad.exe to version 2.1. Later, you install update KB12346, which updates
notepad.exe to version 2.2. Notepad.exe version 2.1 still exists on your device so that if you
want to roll back to version 2.1, nothing will break. However, if you stay with version 2.2,
version 2.1 still takes up disk space.
To try out scavenging, install two versions of an update. A directory of sample version 1 and 2
updates for you to test with is included in the Updates folder on your Image Builder Wizard x86
and amd64 DVDs. You’ll need to use DISM to first install version 1 of the update, then install
version 2 of the update.
You can use the following DISM command to install updates.
dism.exe /online /add-package /packagepath:D:\Updates\
\KB600000\V1.001\WinEmb6.1-KB600000-x86.cab
92
DSEK-10 Media Player User Guide
Install the first version of the update and then install the second version. Once both updates
are installed, if you run the following command, you will find that both packages are installed,
although the version 1 package is listed as superseded:
Dism.exe /online /get-packages
Now run:
Pkgscn.exe /Find-Scavenge /ConfigSetDir:e:\configset
Package Scanner will detect that version 1 of the update is not being used and is therefore
eligible for scavenging. The configuration set created with the /ConfigSetDir option contains an
answer file that tells DISM to remove the unused packages.
You can apply the answer file using DISM by running the following command from your
runtime image:
Dism.exe /online /apply-unattend:e:\ConfigSet\Autounattend.xml
93
DSEK-10 Media Player User Guide
9.
Additional Windows Embedded Standard 7 Labs
9.1 Suppress OOBE
The Windows out-of-box experience (OOBE) or “Windows Welcome” is part of the setup UI that
appears at the final stage of the setup process, or on first boot after a captured image is deployed.
This UI element is run online (booting from the target device) and is a stand-alone application that
runs when an image is set up with Image Builder Wizard or deployed from a sysprepped .WIM file. In
the OOBE UI, an end user can configure certain personalization settings, such as naming the
computer, creating a user account, setting date and time, time zone, and so on. Many of these
settings may not be applicable in embedded scenarios, and, therefore, you may wish to suppress the
OOBE UI during setup.
In this lab, we suppress the OOBE UI that appears at the end of setup. Suppression of the OOBE UI is
accomplished by providing the necessary information to the setup/OOBE process by using a properly
populated answer file.
Some key points that you should consider when suppressing the OOBE UI are user account creation,
EULA acceptance, and the product key. Although all the settings used in this section are required to
suppress the OOBE UI, these settings — in particular — are required for your system to be usable. If
you omit any of these settings from your answer file, not only will the OOBE UI appear, but your
system might possibly be unusable.
9.1.1
Create an Answer File
Create an answer file that contains all the settings required to suppress OOBE UI:
1.
Launch the Image Configuration Editor and create a new answer file or open an existing
one.
2.
Add the Embedded Core package to your answer file if you do not already have it.
3.
Optional: Add any other feature-sets and packages to your answer file that you need.
4.
Click on the package that contains the setting in the Answer File pane.
5.
Change Filter View By to the configuration pass shown for each setting in the following
table.
6.
Click on the Value column and enter the example value for each setting.
94
DSEK-10 Media Player User Guide
7.
When all the settings have been updated, save the file in a location accessible by Image
Builder Wizard. This could be a network share, a USB drive, or a floppy disk, depending
on the hardware you are installing on.
9.1.2
Using your answer file with Image Builder Wizard
You can now use the answer file you created in the last step to suppress OOBE. When setup
runs the oobeSystem pass, the OOBE UI should be suppressed because as all the information
required by the OOBE UI is provided by the answer file. Note that there are several ways of
deploying an image beyond the one listed below. See Section 3 for more information.
To use your answer file with Image Builder Wizard:
1.
Boot into IBW on your device using the DVD or the utility disk you created in section 1.6.
2.
On the Build an Image/Deploy an Answer File or WIM page, select Deploy an Answer
File or WIM.
3.
In the browse to file dialog box, browse to your answer file and click Open.
Note:
If you stored your answer file on a network drive you will need to access it from Windows PE
by first mapping a network drive by using the “wpeinit” and “net use” commands. Wpeinit
initializes basic WinPE functions like networking. Please run wpeinit first, then wait
approximately 1 minute before continuing.
Example:
wpeinit
net use z: \\MyNetworkShareLocation
9.2 Using a Custom Shell and Custom Branding
This section describes how to create a custom shell experience using all of the custom shell
components. Each of these components can be used separately or in any combination. With custom
shell you can:
•
Hide boot screens
•
Use Shell Launcher to reference a custom shell
•
Remove Windows branding from startup screens
•
Replace the background image for the startup screens
95
DSEK-10 Media Player User Guide
•
Add message blockers
9.2.1
Hide boot screens
The kernel screens shown during startup and resume from hibernation can be suppressed by
adding the package Hide Boot Screens to your runtime using Image Configuration Editor or
Image Builder Wizard.
9.2.2
Use Shell Launcher
9.2.2.1 To use Image Configuration Editor to reference a custom shell
(preferred method):
1.
Determine which package(s), if any, your shell needs, and select those packages.
2.
Select Command Prompt with Custom Shell as your shell.
3.
Place your shell in the appropriate $OEM$ folder. (Refer to section 2.2.3 for additional
$OEM$ folder information or Microsoft TechNet article Designing a Distribution Share.)
4.
Add the Shell Launcher component to the offline phase
5.
Set the CustomShell setting to run your shell application.
6.
If necessary, update setupcomplete.cmd. (See Microsoft TechNet article Add a Custom
Script to Windows Setup.)
9.2.2.2 To use Image Builder Wizard to reference a custom shell:
1.
Determine which package(s), if any, your shell needs, and select those packages.
2.
Select Command Shell as your shell.
3.
Update setupcomplete.cmd to modify the HKLM\Software\Microsoft\Windows
Embedded\EEF\Shell Launcher value to include the name of your shell, using WMI.
There is no Image Builder Wizard mechanism to modify unattend.xml. (See Microsoft
TechNet article Add a Custom Script to Windows Setup.)
4.
Place your shell in the appropriate $OEM$ folder. (Refer to section 2.2.3 for additional
$OEM$ folder information or Microsoft TechNet article Designing a Distribution Share.)
9.2.3
Remove Windows branding
There are two packages available for branding the startup screens:
•
Windows Embedded Standard Startup Screens – shows the Windows Embedded Standard
logo.
96
DSEK-10 Media Player User Guide
•
Unbranded Startup Screens – shows no logo.
To remove the Windows branding, select the Unbranded Startup Screens package.
9.2.4
Replace the startup screen background image
This step allows you to replace the background image for the startup screens. This, combined
with the step above, allows you to rebrand the startup to your custom requirements.
1.
Add the Custom Logon Desktop Background Images package.
2.
Use the path setting to point to a directory containing one or more of the files listed
below.
3.
File names must be:
• backgroundDefault.jpg
• background768×1280.jpg
• background900×1440.jpg
• background960×1280.jpg
• background1024×1280.jpg
• background1280×1024.jpg
• background1024×768.jpg
• background1280×960.jpg
• background1600×1200.jpg
• background1440×900.jpg
• background1920×1200.jpg
• background1280×768.jpg
• background1360×768.jpg
Note:
You do not need to supply all the files. BackgroundDefault.jpg will be used if the
corresponding resolution file is not available. The file MUST be less than 256kb. Providing the
image file that matches your video resolution will improve the system performance.
4.
Use Image Configuration Editor to create a configuration set or an IBW disk from the
answer file.
97
DSEK-10 Media Player User Guide
5.
9.2.5
Deploy using the configuration set or answer file.
Add Message Blockers
Windows Embedded Standard 7 has two different message blocking options. They can be used
separately or in unison.
9.2.5.1 Message Box Default Reply
This component will automatically respond to all message boxes using their default
response. It is identical to the WES component (see MSDN Windows Embedded Standard
library article Message Box Default Reply for more information). Message Box Default
Reply is only supported for x86 systems.
9.2.5.2 Dialog Filter
This component allows you to define windows based on a set of parameters (Process
name, Window Title, Dialog Type, list of buttons). For each window you can choose which
button is used to dismiss the window. This component requires you to know which
windows you want to block.
To create the configuration file, we have provided a Dialog Filter Editor that is installed on
your development computer with the Windows Embedded Standard 7 Toolkit. The editor
can be used to create a configuration file on any Windows 7 or Windows Embedded
Standard 7 machines. To use it on your runtime, you will need to copy the application to
the runtime. The files are located in the Windows Embedded Standard
7\EmbeddedSDK\bin directory. Be sure you copy the en-US directory along with the
executable.
The Dialog Filter Service is able to process windows as they are created and, in some cases,
before they are completely initialized. While this helps eliminate flicker on the device
display, in some cases the Dialog Filter Service may see different window information (title,
class, process or button list) than what is visible on the screen and the Dialog Filter Editor.
Most commonly, “Untitled –“ may not be inserted into the window title before the Dialog
Filter attempts to close the window. This appears mainly with applications that use
documents and place the name in the title (such as Notepad).
If, for any reason, a window does not close as expected, open the log file as described
below. This will provide the XML required to filter a window and which can be compared
with the XML created by the Dialog Filter Editor.
98
DSEK-10 Media Player User Guide
9.2.5.3 Log File Method
The Windows event log can be used to get the XML data necessary for the configuration
file. The configuration file is located at
ProgramData\Microsoft\DialogFilter\ConfigurationList.xml.
To use the log, you must do the following:
1.
Run the event viewer (eventvwr.exe)
2.
Go to Applications and Services Log/Microsoft/Windows/Dialog Filter/Operational
3.
Enable the log (either in the right window pane or by using the right mouse button on
the Operational directory).
From this point on the Dialog Filter will log all windows it finds to the operational log. The
information will include an XML snippet that can be copied to the configuration file.
An example is:
<?xml version="1.0" encoding="UTF-8"?>
<CL:dialogs xmlns:CL="urn:Dialogs">
<dialog>
<ProcessImageName>notepad.exe</ProcessImageName>
<Title>Untitled - Notepad</Title>
<Class>Notepad</Class>
<Buttons>
<Button>Line up</Button>
<Button>Line down</Button>
<Button>Column left</Button>
<Button>Column right</Button>
<Button>Minimize</Button>
<Button>Maximize</Button>
<Button>Close</Button>
</Buttons>
<Actions>
<Action>Close</Action>
</Actions>
</dialog>
</CL:dialogs>
9.2.5.4 To Add Message Blockers:
1.
Add Message Box Default Reply (see MSDN Windows Embedded Standard library article
Message Box Default Reply).
2.
Add Dialog Filter
99
DSEK-10 Media Player User Guide
3.
Use the path setting in Image Configuration Editor to point to a configuration file. The
file must be named ConfigurationList.xml.
•
If you use Image Builder Wizard, install with Image Configuration Editor without a
configuration set, or do not provide a configuration file, you can manually place
the file in the directory \ProgramData\Microsoft\DialogFilter\ on the device
runtime. The file must be named ConfigurationList.xml.
Note:
The XML file must be saved in Unicode format. This can be done using Notepad if you
choose the save as option and choose utf-8.
100
DSEK-10 Media Player User Guide
9.3 Build a USB bootable Windows Embedded 2011 image
USB Boot is an Embedded Enabling Feature (EEF) that you can use to boot a Windows Embedded
2011 image from a USB Flash drive (UFD), such as a USB thumb drive or USB key, instead of the
device hard drive. Choose one of the two options below for building a USB bootable image with
Image Builder Wizard. Although slightly more complicated, the second option will run faster.
9.3.1
Install from Image Builder Wizard directly to UFD :
1.
Make sure the USB drive you want to install to is plugged into the device that is currently
running Image Builder Wizard. Also, make sure there are no files on the USB drive that
you need because they may be lost during setup.
2.
Run Image Builder Wizard from your chosen source (network share, DVD, or utility disk).
3.
Continue through the wizard.
4.
On the Please select Feature Packages to include in your image page:
a. Under Embedded Enabling Features select Bootable Windows USB Stack.
b. Add any additional packages you wish to include.
c. Click the Resolve button and resolve all dependency issues.
•
If asked to choose between Standard Windows USB Stack and Bootable Windows
USB Stack make sure you leave only Bootable Windows USB Stack checked.
•
Continue resolving dependencies until complete.
5.
Make certain the UFD is plugged into the device, then select Next to continue.
6.
On the target drive selection screen, select the UFD target, partition and format it, then
continue the installation process.
7.
Allow setup to complete.
8.
If this UFD will be deployed to another machine, follow the SysPrep instructions in
section 3.1.1.
Note:
If you are using a UFD with WinPE to run IBW and your install target is a second UFD, after
the file copy and when the reboot happens, remove the WinPE UFD from the system to
prevent it from rebooting back into setup.
101
DSEK-10 Media Player User Guide
9.3.2
Install from Image Builder Wizard to Hard Drive, ImageX to
UFD:
1.
Run Image Builder Wizard from your chosen source (network share, DVD, or utility disk).
2.
Continue through the wizard.
3.
On the Please select Feature Packages to include in your image page:
a. Under Embedded Enabling Features select Bootable Windows USB Stack.
b. Add any additional packages you wish to include.
102
DSEK-10 Media Player User Guide
c. Click the Resolve button and resolve all dependency issues.
•
If asked to choose between Standard Windows USB Stack and Bootable Windows
USB Stack make sure you leave only Bootable Windows USB Stack checked.
•
4.
Continue resolving dependencies until complete.
On the drive selection screen, select the first partition on the target drive, using the GUI
tools to partition and format the drive as appropriate.
5.
If this image will be deployed to another machine, follow the SysPrep instructions in step
3.1.1.
6.
Capture the sysprepped image to a .wim file with the following command:
imagex /capture <src><dst> “<name>”
7.
Insert the destination UFD.
8.
Run Diskpart by doing the following:
a.
From a Windows Vista, Windows 7 or Windows Preinstallation (Windows PE) 3.0
environment, run the DiskPart tool by typing the following at a command prompt:
diskpart
Note:
The version of the DiskPart tool provided by Windows Vista, Windows 7 and
Windows PE 2.0, 2.1 and 3.0 supports the partitioning and formatting of a UFD
as a bootable device. Previous versions of the DiskPart tool, including the
version provided by Windows XP, do not fully support partitioning and
formatting a UFD to be bootable and should not be used.
b.
Use the DiskPart tool to determine the disk number and device size to be used for
the next step by typing the following at the DiskPart prompt:
list disk
c.
Use the DiskPart tool to partition and format the drive and make it bootable. At
the DiskPart prompt, type the following, replacing <disk_number> with the disk
number of the USB drive:
select
clean
create
select
active
format
disk <disk_number>
part pri
part 1
quick fs=ntfs label=embedded
103
DSEK-10 Media Player User Guide
assign
exit
9.
Apply the image to the UFD by using ImageX with the following command:
imagex /apply <src> 1 <dst>
10.
After the image is applied, insert the UFD into the target hardware.
11.
Boot the computer, making certain the BIOS settings are set to boot to a USB device first.
12.
Allow setup to complete.
104
DSEK-10 Media Player User Guide
9.4 Create Custom Templates for IBW
9.4.1
Creating Templates
In addition to the templates created by Microsoft, IBW supports user-created templates.
Templates are essentially just answer files that contain no settings. You can create your own
templates using Image Configuration Editor.
1.
Start Image Configuration Editor.
2.
On the File menu, select New Answer File.
3.
Add desired feature packages to your answer file.
• It is recommended that you not add any driver or language packages to your template.
These can be added in IBW.
4.
On theValidate menu, selectAdd Required Packages.
• While you may also choose Add Required and Optional Packages, this makes removing
packages from a template in IBW more difficult, as there are many more
dependencies between optional packages.
5.
In the Messages pane, you may see warnings and errors.
a.
Click on each error and resolve feature package conflicts by selecting or
deselecting packages.
b.
6.
Review warnings and resolve appropriately.
Remove unnecessary language packages (optional). Resolving dependencies may have
added a language package to your template. As mentioned above, this is not necessary
for IBW templates, as languages will be added by IBW automatically. If you leave the
language package in the template, this language will be in every configuration built with
IBW, no matter what the user selected.
7.
a.
Delete any language packages that were added.
b.
On theValidatemenu, select Validate Only.
c.
Ensure that the language package is the only missing dependency.
Save your template.
105
DSEK-10 Media Player User Guide
9.4.2
Using Custom Templates in IBW
Once you have created a custom template, you need to make it available to IBW. Choose one
of two options:
Use the Browse to template button in IBW’s Choose the way you want to build your
1.
image page.
OR
2.
Put your template in IBW’s Distribution Share
d.
IBW searches for templates in DS\Templates\IBW
e.
If you have created a bootable IBW USB disk, you can easily put your custom
templates in this folder to have IBW detect and make them available.
106
DSEK-10 Media Player User Guide
10. Services/ Updates
10.1 DSEK-10 Official website
The relevant information about DSEK-10 including the latest news and downloads will be presented
in the website below:
http://www.winmate.com.tw/DigitalSignage/DSEK-10.htm
Please go there to obtain further details of DSEK-10.
10.2 Company information
Winmate Communication Inc.
9F, No.111-6, Shin- De Rd,. San- Chung City Taipei 241, Taiwan, R.O.C.
Tel: 886-2-8511-0288
Fax: 886-2-8511-0211
Contact us: [email protected]
Distributor and more products:
Please refer to our website: www.winmate.com.tw
10.3 User Support Information
10.3.1 Professional support
1. Telephone
2. Email to our Sales Representative
3. Online
107
DSEK-10 Media Player User Guide
Please go to the official website http://www.winmate.com.tw/DigitalSignage/DSEK-10.htm , click
“support” category and fill your contact information in the columns. Then, we will contact with you.
4. Video Conference
5. Senior Project Manager Consulting
6. Pre-booked 1 day training in Supplier (excluding transportation/lodge/ meal fee)
10.3.2 Standard support
2. Email to our Sales Representative
108
DSEK-10 Media Player User Guide