1
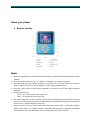
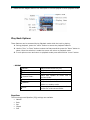
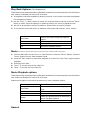
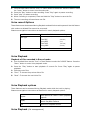
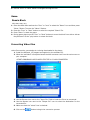
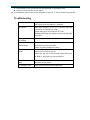
User’s Manual
Quick guide
Declaration
Thanks for purchasing the Laser V-Mate personal media player. This manual contains detailed
information and instructions to help get the most out of your digital MP4 player.
Please read this manual carefully before using your new player.
Notice:
Please switch on the player before charging (Push the ON/OFF switch to “on”). This player
cannot be charged with the ON/OFF switch in the “off” position.
The player is charging when connected to an active USB port charging should take 3 to 4
hours when fully flat.
When connecting to the computer for file transfer please leave the ON/OFF switch in the “off”
position to conserve the battery.
For short periods Press and hold the “play” button for longer than 3 seconds to suspend the
player. The player is started again by the same method and you will be returned to the last
used screen.
Please switch off the power if not using the player for long periods.
Do not use this player in extreme hot, cold, dusty or wet environments or drop the player.
Images shown in this manual may vary slightly from actual product.
Please respect the Copyright laws in your area.
Know your player
Exterior and Key
Music
1. Insert the earphones into the socket as shown above or sound will be played through internal
speaker.
2. Move the power switch to the “on” position. If already “on” please see step 3.
3. Press and hold the “play” button to power on, use the “Prev” or “Next” Button to select the
“Music” feature. Press the “menu” button to enter music playback mode.
4. Press the “Play” button to start music playback of current file. Press “Play” again to pause
playback.
5. Choosing music files:
“Prev”: To choose the previous music file.
“Next”: To choose the next music file.
6. This player supports “*.LRC” lyric files. Lyrics may be displayed isochronously while playing
music. Lyric files must be in the same folder as the music file and have the same name as the
music file e.g. Track1.MP3 and Track1.LRC
7. Volume control: Press the “VOL” button and then shortly press “VOL-“, to decrease volume;
shortly press “VOL+” to increase volume. The display will go revert to playback mode after
a few seconds from the last button press or by pressing the “Menu” button.
8. Please see the diagram below for a description of icons displayed in Music playback mode.
Play Back Options
These features can be accessed during Playback mode while the track is playing.
1. During playback, press the “menu” button to access the playback features.
2. Use the “Prev” or “Next” button to select the feature and the press the “Menu” button to
select. Once the selection is made the screen will return to playback mode.
3. To exit options menu and return to playback mode press and hold the “menu” button.
○ REPEAT
Normal
Plays current music file only.
Repeat One
Repeats current music file.
Folder
Plays all music files in current folder.
Repeat Folder
Plays and repeats all music files in
current folder.
Repeat All
Plays and repeat all music files.
Random
Plays all the music files in the current
folder in a random order.
Intro
Plays only the first 10 second of each
music file in the current folder.
Equaliser
The following preset Equaliser (EQ) settings are available
• Natural
• Rock
• Pop
• Classic
• Soft
• Jazz
• DBB
Use the “Menu” button to select the required EQ setting.
1. Press “next” to choose “Equaliser”
2. Press “Menu” to enter “Equaliser”
3. Press “next” to choose, shortly press “Menu” to confirm.
4. When selection is made the display will return to playback mode.
SRS WOW.
The following SRS WOW settings are available.
SRS WOW
User settings
(Select as per listening requirements)
Disable SRS WOW
Turns SRS WOW on
SRS 3D
TruBass
Focus
Exit (returns to previous menu)
Turns SRS WOW feature off
Tempo rate
Adjust the playback speed of music files.
1. Press the “Menu” Button to select option.
2. Use the “Prev” and “Next” buttons to adjust the playback speed. “0” being normal
playback speed.
3. When the required speed has been selected, press the “Play” button to return to play back
mode. All music playback will be played at selected speed until reset.
Replay (A-B mode)
Allows a portion of a track to be repeated.
1. Selected during playback you will be returned to the playback screen. The “A” of the “A-B”
icon will flash. At the start of the part of the track to be repeated press the “Next” Button.
2. Wait for the end of the part of the track to be repeated and press the “Next” button.
3. The playback will start again at the point set on step 1 and continue to the point set in step
three and will repeat as many times as set in Replay Times. (See below).
4. When the selection has been repeated the set number of times, playback will return to
normal waiting for the next repeat selection to be marked.
5. Press the “Menu” button to cancel and resume normal playback.
Replay times
Set the number of times, from 1 to 10, selection is replayed when Replay mode is selected.
Replay Gap
Sets the gap between selection replay when Replay mode is used.
Exit
Returns to previous Screen.
Play Back Options
(File Management)
These features can be accessed during Playback mode while the track is paused. Use this feature
with caution as deleted files cannot be recovered.
1. In playback mode when playback is paused, press the “menu” button to access the playback
file management feature.
2. Use the “Prev” or “Next” button to select the required feature and the press the “Menu”
button to select. Once the selection is made the screen will return to playback mode.
3. You will be prompted to confirm file deletion. Please follow on screen prompts.
4. To exit options menu and return to playback mode press and hold the “menu” button.
Movie
Local folder
Choose the folder containing required
tracks.
Delete
Delete current file.
Delete All
Deletes all files in current folder.
Exit
Returns to Playback screen
(this feature requires video files to be converted prior to being transferred to player)
1. From the Main Menu use the “Prev” or “Next” Button to select the “Movie” feature. Press the
“menu” button to enter Video playback mode.
2. Press the “Play” button to start video playback of current file. Press “Play” again to pause
playback.
3. Choosing music files:
4. “Prev”: To choose the previous video file.
5. “Next”: To choose the next Video file.
Movie Playback options
These features can be accessed during Playback mode while the track is paused. Use this feature
with caution as deleted files cannot be recovered.
Please use navigation instructions as described in music playback options.
Record
RF setting (option)
Enable/Disable
Local folder
Choose the folder containing required
files.
Delete
Delete current file.
Delete All
Deletes all files in current folder.
Repeat
Please see Repeat options as described in
Music Play Back features
Exit
Returns to Playback screen
1. From the Main Menu use the “Prev” or “Next” Button to select the “Record” feature. Press
the “menu” button to enter Voice Record mode.
2. Press the “Play” button to start recording. Press “Play” again to pause recording.
3. Press “play” to restart recording.
4. When recording is completed, Press and hold the “Play” button to save the file.
5. The next recording will saved as a new file.
Voice record Options
These features can be accessed during Playback mode while the track is paused. Use this feature
with caution as deleted files cannot be recovered.
Please use navigation instructions as described in music playback options.
Local folder
Choose the folder to save recording.
REC Type
Select recording setting to best suite your needs
Fine REC
Long REC
Fine VOR
Long VOR
Exit
(32K WAV)
(ACT)
(32K VOR)
(8k VOR)
Returns to Record screen
Voice Playback
Playback of files recorded in Record mode.
1. Form the Main Menu use the “Prev” or “Next” Button to select the “VOICE” feature. Press the
“Menu” button to enter Voice playback mode.
2. Press the “Play” button to start playback of current file. Press “Play” again to pause
playback.
3. Choosing voice files:
4. “Prev”: To choose the previous Voice file.
5. “Next”: To choose the next Voice file.
Voice Playback options
These features can be accessed during Playback mode while the track is playing.
Please use navigation instructions as described in music playback options.
Repeat
See options as listed in Music playback
options.
Replay
Please see replay options as described in
Music Play Back features
Exit
Returns to Playback screen
Voice Playback (file management)
These features can be accessed during Playback mode while the track is paused. Use this feature
with caution as deleted files cannot be recovered.
Please use navigation instructions as described in music playback options.
Local folder
Choose the folder containing required
files.
Delete
Delete current file.
Delete All
Deletes all files in current folder.
Exit
Returns to Playback screen
FM Radio
This feature requires the earphone to be fitted to the player. The radio will not work without them
connected. No sound will be heard through internal speaker.
1. Enter the main menu
2. Press “next” to select “FM Radio” mode
3. Press “Menu” to enter FM mode
4. Automatic search:
Press and hold Prev” or “next” for two seconds, the player will search in the required direction
and will stop when a station is found; if you want to stop researching, press “Prev” or “next”.
5. Store the stations searched
Shortly press “Menu” to enter sub menu.
Shortly press “Menu” again to store it
FM Radio (options)
These options can be accessed while FM radio feature is running. Press the “Menu” button to
access these features
Save
Save Current Station
Record
Records Current station in Voice record
mode. Starts in “pause” press “play” to start recording
Delete
Delete current saved station
Auto Search
Automatically searches for stations
Normal Band
Selects normal FM radio band
Japan Band
Selects FM radio Band as used in Japan
Exit
Returns to FM Radio Screen
Photo
This feature displays Jpeg and BMP files that are stored on the player.
Enter the Main Menu and use the “Prev” or “next” to select the Photo icon and then press “Menu.”
For file management press the “Menu” Button before selecting a file.
The following options are available.
Local folder
Choose the folder containing required
files.
PlaySet
Manual
Auto
Delete File
Deletes current file
Delete All
Deletes all files in current folder.
Exit
Returns to previous screen.
Display Pictures
Select the file to be displayed by using the “prev” or “next” button and then press “play” button
to view the picture. Navigation to different folder is as described in previous areas of this
manual. Use the “Prev or “Next” Button to display the previous or next file in the current folder.
Setup
1. Enter the Main Menu and use the “Prev” or “next” to select the “Setup” icon and then press
“Menu.” To enter the main Setup menu
2. Press the “Prev” or “Next” button to select the required option.
3. Press “Menu” to enter the option.
Introduction of each item of appendix
System Time
Set the date and time to date stamp recordings
LCD set
Set delay for the screen to turn its self of after
last key press 0=disabled.
Language
Set Required language for display. 21 choices.
Power off
Set time for play to auto turn off. 0 = Disabled
Replay mode
Set the working condition of replay process
Online mode
The item of “different space” function (software
required. Feature may not be available)
Memory info
Check the storage space currently used.
Firmware Version
Display the player’s Firmware edition
Firmware Upgrade
Specially for Firmware upgrading
Exit
Exit the present interface
E-book
1. Enter the Main Menu and use the “Prev” or “next” to select the “E-Book” icon and then press
“Menu.” Button To enter the “E-Book feature.
2. Press the “Prev” or “Next” button to select the required E-book file.
3. Press “Menu” to display the file.
4. Use the “Prev” or “Next” button to navigate through the file.
Game.
Russia Block
NB: Game may vary
1. Enter the Main Menu and use the “Prev” or “next” to select the “Game” icon and then press
“Menu.” Button To enter the “Game” feature.
2. Press the “Prev” or “Next” button to select the required “Game” file.
3. Press “Menu” to start the game.
4. During game player use the “Prev” or “Next” buttons to move the block from side to side as
they descend. Us the “play button to rotate the block
Converting Video files
Video files must be converted prior to being downloaded to the player.
1. Install the MP3set4_15 program as supplied on the software CD.
2. When the instillation is complete launch the AMV converter tool from the main menu on
your computer.
>START>PROGRAMS>MP3 PLAYER UTILITIES 4.15>AMV CONVERTOR.
3. Use the Browse icon next to the “Input File” field to locate the file to be converted.
4. Use the Browse icon next to the “Output file” icon to select the destination for the
converted file.
5. Make sure that the “select” box is checked.
6. Click on the
button to begin the conversion process.
7. The progress of the conversion will be displayed is the Status field.
8. Copy the converted file to the player.
For more detailed instructions on this program, Press the “F” key to launch the help file.
Troubleshooting
No Power
Make sure you have switched the player on.
And ensure that the battery is charged
No Sound
Make sure volume is not on 0 position and the
connection to earphone is valid.
Please make sure the earphone is clean.
Damaged MP3 files may appear to play but generate
no sound.
Strange characters
on display
Make sure you have chosen the correct language.
FM
has
performance
Change location to ensure good reception.
Earphone must be connected.
Switch off power appliance nearby
Cannot
Music
bad
Download
Check USB cable, and make sure the player is
properly connected to the PC.
Check files are the correct format. Music files must
be WMA or MP3 with no copy protection.
Video files will not
play
Ensure that video files have been converted prior to
download to the player.
For support visit
http://laserco.com.au/downloads.htm