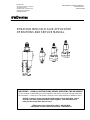
1
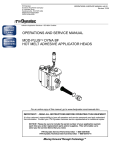
ITW Dynatec
An Illinois Tool Works Company
31 Volunteer Drive
Hendersonville, TN 37075 USA
Telephone 615.824.3634
FAX 615.264.5222
OPERATIONS & SERVICE MANUAL
Manual # 10-17
Revised 6/1/04
Adhesive Application Solutions • ISO 9001 Certified
DYNACOLD MINI COLD GLUE APPLICATOR
OPERATIONS AND SERVICE MANUAL
IMPORTANT ! - READ ALL INSTRUCTIONS BEFORE OPERATING THIS EQUIPMENT
It is the customer’s responsibility to have all operators and service personnel read and understand
this information. Contact your ITW Dynatec customer service representative for additional copies.
NOTICE! Please be sure to include the serial number of your application system
each time you order replacement parts and/or supplies. This will enable us to
send you the correct items that you need.
ITW Dynatec Service Parts Direct Dial: 1-800-538-9540
ITW Dynatec Technical Service Direct Dial: 1-800-654-6711
Page ii
Revised 3/96
ITW Dynatec
An Illinois Tool Works Company
ITW Dynatec c. 1996
DYNAMINI ASU Manual #20-25
ITW Dynatec c. 2001
DYNACOLD MINI APPLICATOR Manual #10-17
Page iii
Revised 3/01
Table of Contents
Product description . . . . . . . . . . . . . . . . . . . . . . . . . . . . . . . . . . . . . . . . . . . . . 1 - 1
Usage . . . . . . . . . . . . . . . . . . . . . . . . . . . . . . . . . . . . . . . . . . . . . . . . . . . . . . . . . . . . . . . . . . . . .
Description . . . . . . . . . . . . . . . . . . . . . . . . . . . . . . . . . . . . . . . . . . . . . . . . . . . . . . . . . . . . . . . . .
Technical data . . . . . . . . . . . . . . . . . . . . . . . . . . . . . . . . . . . . . . . . . . . . . . . . . . . . . . . . . . . . . .
Dimensions . . . . . . . . . . . . . . . . . . . . . . . . . . . . . . . . . . . . . . . . . . . . . . . . . . . . . . . . . . . . . . . . .
Connection example . . . . . . . . . . . . . . . . . . . . . . . . . . . . . . . . . . . . . . . . . . . . . . . . . . . . . . . . .
1-1
1-1
1-1
1-3
1-4
Installation . . . . . . . . . . . . . . . . . . . . . . . . . . . . . . . . . . . . . . . . . . . . . . . . . . . . . 2 - 1
Install application head . . . . . . . . . . . . . . . . . . . . . . . . . . . . . . . . . . . . . . . . . . . . . . . . . . . . . . .
Connect material hose . . . . . . . . . . . . . . . . . . . . . . . . . . . . . . . . . . . . . . . . . . . . . . . . . . . . . . .
Connect the air hose for the shutter device (option) . . . . . . . . . . . . . . . . . . . . . . . . . . . . . .
Connect pattern control equipment . . . . . . . . . . . . . . . . . . . . . . . . . . . . . . . . . . . . . . . . . . . .
Installing the shutter device on the DynaCold Mini with seat nozzle . . . . . . . . . . . . . . . .
Installing the shutter device on the DynaCold Mini with flanged nozzle . . . . . . . . . . . . . .
2-1
2-1
2-2
2-2
2-3
2-3
Setup . . . . . . . . . . . . . . . . . . . . . . . . . . . . . . . . . . . . . . . . . . . . . . . . . . . . . . . . . . 3 - 1
Setup . . . . . . . . . . . . . . . . . . . . . . . . . . . . . . . . . . . . . . . . . . . . . . . . . . . . . . . . . . . . . . . . . . . . . .
Install nozzles . . . . . . . . . . . . . . . . . . . . . . . . . . . . . . . . . . . . . . . . . . . . . . . . . . . . . . . . . . . . . .
Install nozzle in DynaCold Mini with seat nozzle . . . . . . . . . . . . . . . . . . . . . . . . . . . . . . . . . . . . . . .
Install nozzle in DynaCold Mini with flanged nozzle . . . . . . . . . . . . . . . . . . . . . . . . . . . . . . . . . . . . .
Install nozzle in DynaCold Mini with contact nozzle . . . . . . . . . . . . . . . . . . . . . . . . . . . . . . . . . . . . .
Install nozzle plate in DynaCold Mini with nozzle plate . . . . . . . . . . . . . . . . . . . . . . . . . . . . . . . . . .
Install nozzles in DynaCold Mini with nozzle plate and screw-in nozzles . . . . . . . . . . . . . . . . . . .
Adjust the paper guide bracket (option) . . . . . . . . . . . . . . . . . . . . . . . . . . . . . . . . . . . . . . . . .
3-1
3-1
3-1
3-2
3-3
3-3
3-4
3-5
Maintenance and servicing . . . . . . . . . . . . . . . . . . . . . . . . . . . . . . . . . . . . . . 4 - 1
Clean nozzles and nozzle plates . . . . . . . . . . . . . . . . . . . . . . . . . . . . . . . . . . . . . . . . . . . . . .
Purge the application head . . . . . . . . . . . . . . . . . . . . . . . . . . . . . . . . . . . . . . . . . . . . . . . . . . .
Remove and replace the needle and needle seat . . . . . . . . . . . . . . . . . . . . . . . . . . . . . . . .
DynaCold Mini with seat nozzle . . . . . . . . . . . . . . . . . . . . . . . . . . . . . . . . . . . . . . . . . . . . . . . . . . . . .
DynaCold Mini with flanged nozzle or contact nozzle . . . . . . . . . . . . . . . . . . . . . . . . . . . . . . . . . . .
DynaCold Mini with nozzle plate . . . . . . . . . . . . . . . . . . . . . . . . . . . . . . . . . . . . . . . . . . . . . . . . . . . . .
Clean the shutter device . . . . . . . . . . . . . . . . . . . . . . . . . . . . . . . . . . . . . . . . . . . . . . . . . . . . .
Check and replace magnet coil . . . . . . . . . . . . . . . . . . . . . . . . . . . . . . . . . . . . . . . . . . . . . . . .
4-1
4-1
4-2
4-2
4-3
4-4
4-5
4-6
Troubleshooting . . . . . . . . . . . . . . . . . . . . . . . . . . . . . . . . . . . . . . . . . . . . . . . . 5 - 1
cont.
Page iv
Revised 3/01
ITW Dynatec c. 2001
DYNACOLD MINI APPLICATOR Manual #10-17
Replacement parts . . . . . . . . . . . . . . . . . . . . . . . . . . . . . . . . . . . . . . . . . . . . . . 6 - 1
DynaCold Mini with complete seat nozzle . . . . . . . . . . . . . . . . . . . . . . . . . . . . . . . . . . . . . . . 6 - 1
DynaCold Mini with flanged or contact nozzle . . . . . . . . . . . . . . . . . . . . . . . . . . . . . . . . . . . 6 - 2
DynaCold Mini for nozzle plate . . . . . . . . . . . . . . . . . . . . . . . . . . . . . . . . . . . . . . . . . . . . . . . . 6 - 3
DynaCold Mini application module . . . . . . . . . . . . . . . . . . . . . . . . . . . . . . . . . . . . . . . . . . . . . 6 - 4
Seat nozzle repair kits . . . . . . . . . . . . . . . . . . . . . . . . . . . . . . . . . . . . . . . . . . . . . . . . . . . . . . . 6 - 5
Flanged and contact nozzle repair kit . . . . . . . . . . . . . . . . . . . . . . . . . . . . . . . . . . . . . . . . . . 6 - 6
Flanged and contact nozzle repair kit (used with 14mm hex union nut) . . . . . . . . . . . . . 6 - 7
Nozzle plate repair kit . . . . . . . . . . . . . . . . . . . . . . . . . . . . . . . . . . . . . . . . . . . . . . . . . . . . . . . . 6 - 8
Fitting for nozzle plate . . . . . . . . . . . . . . . . . . . . . . . . . . . . . . . . . . . . . . . . . . . . . . . . . . . . . . . 6 - 9
Shutter Device for DynaCold Mini with seat and flanged nozzle (option) . . . . . . . . . . . . 6 - 10
Replacement parts . . . . . . . . . . . . . . . . . . . . . . . . . . . . . . . . . . . . . . . . . . . . . . . . . . . . . . . . . . 6 - 11
Paper guide bracket for DynaCold Mini with seat or flanged nozzle (option) . . . . . . . . . 6 - 12
Accessories . . . . . . . . . . . . . . . . . . . . . . . . . . . . . . . . . . . . . . . . . . . . . . . . . . . . 7 - 1
Seat nozzles . . . . . . . . . . . . . . . . . . . . . . . . . . . . . . . . . . . . . . . . . . . . . . . . . . . . . . . . . . . . . . . .
Single orifice flanged nozzles for DynaCold Mini for flanged and contact nozzle . . . . .
Single orifice contact nozzles for DynaCold Mini for flanged and contact nozzle . . . . . .
Dual orifice flanged nozzles for DynaCold Mini for flanged and contact nozzle . . . . . . .
Dual orifice contact nozzle . . . . . . . . . . . . . . . . . . . . . . . . . . . . . . . . . . . . . . . . . . . . . . . . . . . .
Nozzle plates for contact application . . . . . . . . . . . . . . . . . . . . . . . . . . . . . . . . . . . . . . . . . . .
Nozzle plates for screw--in nozzles . . . . . . . . . . . . . . . . . . . . . . . . . . . . . . . . . . . . . . . . . . . .
Screw--in nozzles . . . . . . . . . . . . . . . . . . . . . . . . . . . . . . . . . . . . . . . . . . . . . . . . . . . . . . . . . . .
Nozzle cleaning kit . . . . . . . . . . . . . . . . . . . . . . . . . . . . . . . . . . . . . . . . . . . . . . . . . . . . . . . . . .
High--pressure material hoses . . . . . . . . . . . . . . . . . . . . . . . . . . . . . . . . . . . . . . . . . . . . . . . .
High pressure manifold . . . . . . . . . . . . . . . . . . . . . . . . . . . . . . . . . . . . . . . . . . . . . . . . . . . . . .
Shut--off unit for high and low pressure . . . . . . . . . . . . . . . . . . . . . . . . . . . . . . . . . . . . . . . . .
Mounting for DynaCold Mini . . . . . . . . . . . . . . . . . . . . . . . . . . . . . . . . . . . . . . . . . . . . . . . . . .
DynaCold Mini initialization cable . . . . . . . . . . . . . . . . . . . . . . . . . . . . . . . . . . . . . . . . . . . . . .
Accessories for Shutter Device . . . . . . . . . . . . . . . . . . . . . . . . . . . . . . . . . . . . . . . . . . . . . . . .
7-1
7-1
7-2
7-3
7-4
7-5
7-6
7-6
7-6
7-7
7-8
7-8
7-9
7-9
7-9
Decommissioning, packaging and transportation . . . . . . . . . . . . . . . . . . 8 - 1
Temporary decommissioning . . . . . . . . . . . . . . . . . . . . . . . . . . . . . . . . . . . . . . . . . . . . . . . . . .
Permanent decommissioning and disposal . . . . . . . . . . . . . . . . . . . . . . . . . . . . . . . . . . . . .
8-1
8-1
Manual Modifications . . . . . . . . . . . . . . . . . . . . . . . . . . . . . . . . . . . . . . . . . . . . 9 - 1
Page 1-- 1
Revised 3/01
ITW Dynatec c. 2001
DYNACOLD MINI APPLICATOR Manual #10-17
Product description
Usage
The DynaCold Mini application head is designed for applying mono and co--polymer
synthetic resyn adhesives. ITW Dynatec should be consulted prior to using any other
materials.
Description
The DynaCold Mini series electric application heads are suitable for applying cold glue
on various substrates. Depending on the design of the nozzle, the glue can be applied
without contact or via nozzle contact with the substrate. Various gluing patterns: dots,
stripes and beads are possible. DynaCold Mini with non--contact nozzles can be optionally equipped with shutter device, which prevents the glue in the nozzles from drying
during periods of inactivity.
All models can be used in low and high--pressure systems. The modular design provides easy maintenance. The ”straight through” flow with no dynamic seals assures
reliability and durability. A large variety of nozzles and nozzle plates enables a multitude
of applications. The 360˚ rotation of the magnetic coil offer the flexibility to meet varying
installation requirements.
Technical data
Application type
Gluing pattern
Design of the nozzle
DynaCold Mini
with seat
nozzle
DynaCold Mini
with flanged
nozzle
DynaCold Mini
with contact
nozzle
DynaCold Mini
with contact
nozzle plate
DynaCold Mini
with non--contact nozzle
plate
Non--contact
Non--contact
Contact
Contact
Non--contact
stripe
stripe
Flanged nozzle
Contact--Nozzle
plate
bead
bead
Seat nozzle
Flanged nozzle
bead
Nozzle plate
with screw--in
nozzles
Number of orifices
1
1 -- 2
1 -- 2
1 -- 10 *
1 -- 5 *
Material viscosity
1 -- 3000 mPas
1 -- 3000 mPas
1 -- 6000 mPas
1 -- 6000 mPas
1 -- 3000 mPas
Material pressure
Cycle rate
Operating voltage
Max. 30 bar
Max. 500/s
24 V DC + overexcitation
Electrical output
9W
Noise emission
< 70 dB(A)
* Special design also possible at the request of the customer.
Page 1-- 2
Revised 3/01
ITW Dynatec c. 2001
DYNACOLD MINI APPLICATOR Manual #10-17
DynaCold Mini with
seat nozzle
DynaCold Mini with
contact nozzle plate
DynaCold Mini with
flanged nozzle
DynaCold Mini with
contact nozzle
DynaCold Mini with non-contact nozzle plate
Page 1-- 3
Revised 3/01
ITW Dynatec c. 2001
DYNACOLD MINI APPLICATOR Manual #10-17
Dimensions
DynaCold Mini with
flanged nozzle
DynaCold Mini with
seat nozzle
DynaCold Mini
with nozzle plate
All dimensions in mm
DynaCold Mini with flanged
nozzle and shutter device
DynaCold Mini with
contact nozzle
DynaCold Mini with nozzle plate
and screw--in nozzles
Page 1-- 4
Revised 3/01
ITW Dynatec c. 2001
DYNACOLD MINI APPLICATOR Manual #10-17
Connection example
OptionHigh--pressure hose DN6, up to 4m long and
max. 2 application heads
High--pressure hose DN10 from 4m long
High--pressure hoses DN6
G3/8--G3/8
Option
High--pressure hose DN10 on connection
of more than 2 application heads
G1/4--G3/8
Example: Cold glue piston
pump DY 2080
G3/8--G1/4
Double nipple
Seal
High--pressure hoses DN6
Page 2-- 1
Revised 3/01
ITW Dynatec c. 2001
DYNACOLD MINI APPLICATOR Manual #10-17
Installation
Warning!
The following work must only be performed by trained and authorized personnel. Observe the general safety instructions.
Install application head
Warning!
In order to obtain optimum operation, the application head must be installed
securely and free of vibrations.
1. Fasten the application head to the ITW
Dynatec mounting bracket (Art. No.:
73.50000.735) with four M 4 x 10 screws or with
other M 4 fastening screws if a different mounting
is used.
Fastening Orifices
Connect material hose
1. Screw the threaded connection (1) of the material hose hand--tight onto the material hose connection (2).
2. Use an open--ended 17mm wrench to tighten
the threaded connection of the material hose
(1), and counterhold the material hose connection (2) with a second open--ended 17mm
wrench. Note: The material hose connection (2)
must be counterheld under all circumstances,
the applicator may otherwise become damaged.
(1)
(2)
Page 2-- 2
Revised 3/01
ITW Dynatec c. 2001
DYNACOLD MINI APPLICATOR Manual #10-17
Connect the air hose for the shutter device (option)
1. Connect the air hose cap (1) to the shutter device plug--in nipple (2).
2. Connect the other end of the air hose to the
pneumatic accessory for activating the shutter
(see Chapter entitled “Accessories”).
(2)
(1)
Connect pattern control equipment
1. Connect the pattern control system drive output
cable to the DynaCold Mini application head. The
application head--side of the factory--supplied
drive output cable is equipped with a suitable
plug.
If a connection cable without a pre--installed plug
is used, proceed as follows:
(2)
(1)
1. Unscrew the plug’s fastening screw (1) with a
cross--point screwdriver, and remove the plug.
2. Unscrew the strain relief mechanism (2).
3. Pull the plug insert (3) out.
4. Insert a prepared initialization lead through the
strain relief nut and through the cable passage.
5. Connect the leads according to the adjacent
schematic.
6. Reassemble the electrical insert into the plug,
and tighten the strain relief nut (2).
7. Place the plug onto the contacts, and secure it
with the fastening screw (1).
+ (--)
-- (+)
(3)
Page 2-- 3
Revised 3/01
ITW Dynatec c. 2001
DYNACOLD MINI APPLICATOR Manual #10-17
Installing the shutter device on the DynaCold Mini with seat nozzle
(3)
(4)
1. Position the shutter device (1) onto the axial conduit (2) beneath the magnet coil (3) and screw
this on hand--tight with the two screws (4).
(2)
(1)
2. Push the shutter device against the stop edge of
the magnet coil (3) and screw this on tightly with
a 3mm hex wrench .
(3)
Installing the shutter device on the DynaCold Mini with flanged nozzle
1. Position the spacer (1) onto the axial conduit (2)
beneath the magnet coil and screw this on tightly
with the two M4x10 socket head screws (3) 3mm.
2. Position the shutter device (4) onto the axial conduit (2) beneath the spacer (1) and screw this on
hand--tight with the two M4x10 socket head
screws (3).
(1)
(2)
3. Push the shutter device against the stop edge of
the spacer and screw this on tightly with a 3mm
hex wrench.
(4)
(3)
(4)
Page 2-- 4
Revised 3/01
ITW Dynatec c. 2001
DYNACOLD MINI APPLICATOR Manual #10-17
ITW Dynatec c. 2001
DYNACOLD MINI APPLICATOR Manual #10-17
Page 3-- 1
Revised 3/01
Setup
Warning!
The following work must only be performed by trained and authorized personnel. Observe the general safety instructions.
Setup
Note!
The system may contain production-related lubricants. In order to remove
these, the application head must first be operated for a few minutes without
nozzle(s). This avoids possible nozzle blockages.
1. Place a glue collecting vessel beneath the application head(s).
Warning, high pressure!
Danger of injury. The adhesive is under
pressure. Wear eye protection.
2. Initiate a manual purge of the applicator via the
pattern control equipment .
3. Allow the glue to flow until no further air bubbles
or debris is visible.
4. Discontinue the manual purge.
Install nozzles
1. Render the application head pressure and voltage-free.
Install nozzle in DynaCold Mini with seat nozzle
In the case of this application head, the nozzle is already installed on delivery.
Note!
The nozzle and needle are provided as a
matched set. Proper function can only be
guaranteed in this manner. These components must therefore only be replaced
as a set.
Page 3-- 2
Revised 3/01
ITW Dynatec c. 2001
DYNACOLD MINI APPLICATOR Manual #10-17
Install nozzle in DynaCold Mini with flanged nozzle
1. Unscrew the paper guide bracket device (if fitted)
from the application head with a hex wrench 3
mm.
2. If shutter device is fitted:
Insert a hex wrench 2 mm or a round rod with a
maximum diameter of 2 mm into the drill hole (1)
of the slide (2) and press the locking pin in.
(1)
(2)
3. In this case, push the slide (2) backwards as
shown in the figure. The slide can be left in this
position or removed.
(2)
4. Position the nozzle (3) into the union nut (4) as
shown in the Figure.
(3)
(5)
5. Screw the union nut (4) to the needle seat (5),
and tighten it with an open-ended wrench 19 mm.
6. Insert the slide into the slot of the shutter device
and push it into its original position until the locking pin audibly engages.
(4)
(4)
Page 3-- 3
Revised 3/01
ITW Dynatec c. 2001
DYNACOLD MINI APPLICATOR Manual #10-17
Install nozzle in DynaCold Mini with contact nozzle
1. Position the nozzle (1) into the union nut (2) as
shown in the Figure.
(1)
(3)
2. Screw the union nut (2) to the needle seat (3),
and tighten this with an open-ended wrench 19
mm. In this case, align the nozzle at the face of
the wrench with a open-ended wrench 10 mm.
Direction of
material
flow
(2)
(2)
(1)
Install nozzle plate in DynaCold Mini with nozzle plate
1. Unscrew the four fastening screws of the nozzle
plate (1) with a hex wrench 3 mm.
(3)
2. Position the nozzle plate (2) onto the nozzle
plate mounting block (3).
3. Screw the nozzle plate (2) to the nozzle plate
mounting block (3) with the four fastening screws
(1).
Direction of
material
flow
(2)
(1)
Page 3-- 4
Revised 3/01
ITW Dynatec c. 2001
DYNACOLD MINI APPLICATOR Manual #10-17
Install nozzles in DynaCold Mini with nozzle plate and screw-in nozzles
1. Unscrew the four fastening screws (1) from the
fitting with a hex wrench 3 mm.
2. Position the nozzle plate (2) onto the nozzle plate
mounting block (3).
(3)
(2)
3. Screw the nozzle plate (2) onto the mounting
block (3) with the four hex screws.
(1)
4. Install the screw-in nozzles (4) into the nozzle
plate (2), and tighten these with an open-ended
wrench 6 mm.
(2)
(4)
ITW Dynatec c. 2001
DYNACOLD MINI APPLICATOR Manual #10-17
Page 3-- 5
Revised 3/01
Adjust the paper guide bracket (option)
1. Adjust the application head with the desired
nozzle distance to the substrate.
2. Loosen the four fastening screws (1) with a hex
wrench 3 mm, and move the paper guide bracket
to the desired position.
Note!
The substrate must be freely moveable
beneath the paper guide bracket.
3. Tighten the four fastening screws (1) with a hex
wrench 3 mm.
(1)
Page 3-- 6
Revised 3/01
ITW Dynatec c. 2001
DYNACOLD MINI APPLICATOR Manual #10-17
Page 4-- 1
Revised 3/01
ITW Dynatec c. 2001
DYNACOLD MINI APPLICATOR Manual #10-17
Maintenance and servicing
Warning!
The following work must only be performed by trained and authorized personnel. Observe the general safety instructions.
No fixed intervals of time are prescribed for DynaCold Mini application head maintenance. The frequency of the maintenance operations depends on the level of glue soiling and the duration of application head usage.
Clean nozzles and nozzle plates
1. Render the application head pressure and voltage--free. Secure it against reactivation. Loosen
the electrical plug’s central screw, and remove
the plug from the applicator.
Nozzle cleaning kit
see Chapter entitled “Accessories”
2. Remove the nozzle or nozzle plate. Proceed in
the reverse sequence to that described in “Install
nozzles” in Chapter 3
3. Clean the nozzle or nozzle plate with warm water. If severely soiled, warm water with a small
amount of dishwashing liquid may be used.
Nozzle cleaning kits are available from ITW Dynatec as an option .
Purge the application head
Following a long period of operation, dirt may collect inside the application heads. This
may lead to applicator malfunctions. The heads should therefore, be regularly rinsed
with water.
1. Remove the glue from the glue delivery system and replace it with warm (not hot)
water.
2. Unscrew the nozzle/nozzle plate from the application head.
3. Place a collecting vessel beneath the application head.
4. Switch the system on and allow the water to flow through until all glue is flushed
from the system.
5. Switch the system off again once all of the water has flowed through.
6. Screw a clean nozzle/nozzle plate onto the application head. The system can now
be operated with cold glue.
Page 4-- 2
Revised 3/01
ITW Dynatec c. 2001
DYNACOLD MINI APPLICATOR Manual #10-17
Remove and replace the needle and needle seat
Note!
1
The needle and needle seat or the needle and the seat nozzle are supplied
as matched sets. Proper function can only be guaranteed in this manner.
These components must therefore only be replaced as a set.
Render the application head pressure and voltage--free. Secure it against reactivation. Unscrew the plug’s central screw, and remove the electrical connector from the
applicator.
DynaCold Mini with seat nozzle
1. Unscrew the paper guide bracket (if fitted) from
the application head with an hex wrench 3 mm.
2. If a shutter device is fitted:
Insert an hex wrench 2 mm or a round rod with a
maximum diameter of 2 mm into the drill hole (1)
of the slide (2) and press the locking pin in.
(1)
(2)
3. In this case, push the slide (2) backwards as
shown in the Figure. The slide can be left in this
position or removed.
4. Unscrew the seat nozzle (3) from the axial conduit (4) with an open--ended wrench 17 mm.
(2)
5. Pull the needle/armature assembly and spring (5)
out.
Note!
The seat nozzle and the needle/armature
assembly are matched sets. Proper function can only be guaranteed in this manner. These components must therefore
only be replaced as a set.
(4)
(5)
6. Replace the seat nozzle (3), the O--ring (6) and
the needle/armature assembly with spring (5).
7. Assembly is carried out in the reverse sequence.
(3)
(6)
Page 4-- 3
Revised 3/01
ITW Dynatec c. 2001
DYNACOLD MINI APPLICATOR Manual #10-17
DynaCold Mini with flanged nozzle or contact nozzle
1. Unscrew the paper guide bracket (if fitted) from
the application head with an hex wrench 3 mm.
2. If shutter device is fitted:
Insert an hex wrench 2 mm or a round rod with a
maximum diameter of 2 mm into the drill hole (1)
of the slide (2) and press the locking pin in.
(1)
(2)
3. In this case, push the slide (2) backwards as
shown in the Figure. The slide can be left in this
position or removed.
(2)
4. Unscrew the union nut (3) with an open--ended
wrench 19 mm. Remove the union nut (3) with
the nozzle (4).
5. Unscrew the needle seat (5) from the axial conduit (6) with an open--ended wrench 17 mm.
6. Pull the neddle/armature assembly and spring (7)
out.
Note!
(6)
The needle seat and neddle armature assembly are a matched set. Proper function can only be guaranteed in this manner. These components must therefore
only be replaced as a set.
(7)
(8)
7. Replace the needle seat (5), the o--ring (8) and
the needle/armature assembly and spring (7).
8. Assembly is carried out in the reverse sequence.
(5)
(4)
(3)
Page 4-- 4
Revised 3/01
ITW Dynatec c. 2001
DYNACOLD MINI APPLICATOR Manual #10-17
DynaCold Mini with nozzle plate
1. Remove the nozzle plate. Proceed in the reverse
sequence to that described in “Install nozzle
plate” in Chapter 2.
2. Unscrew the two locking plate (2) fastening
screws (1) with an hex wrench 3 mm.
(1)
3. Remove the locking plate (2).
4. Pull the nozzle plate mounting block (3) downwards.
(2)
(4)
(3)
5. Unscrew the needle seat (4) from the axial conduit with an open--ended wrench 17 mm.
6. Pull out the neddle/armature assembly and
spring (5) .
Note!
The needle seat and the needle/armature
assembly are a matched set. Proper
function can only be guaranteed in this
manner. These components must therefore only be replaced as a set.
5. Replace the needle/armature assembly and
spring (5), needle seat (4) and o--rings.
6. Assembly is carried out in the reverse sequence.
Note!
Grease the O--rings with silicone grease.
This facilitates installation.
(5)
(4)
Page 4-- 5
Revised 3/01
ITW Dynatec c. 2001
DYNACOLD MINI APPLICATOR Manual #10-17
Clean the shutter device
1. Insert an hex wrench 2 mm or a round rod with a
maximum diameter of 2 mm into the drill hole (1)
of the slide (2) and press the locking pin in.
2. In this case, push the slide (2) backwards as
shown in the Figure. The slide can be removed.
(1)
(2)
3. Clean the slide with warm water. If severely
soiled, warm water with a small amount of dishwashing liquid may be used. The nozzle sealing
can be removed and cleaned or replaced.
4. Assembly is carried out in the reverse sequence.
(2)
Page 4-- 6
Revised 3/01
ITW Dynatec c. 2001
DYNACOLD MINI APPLICATOR Manual #10-17
Check and replace magnet coil
1. Render the pump and the application head pressure and voltage--free. Secure these against
reactivation. Unscrew the plug’s central screw,
and remove the electrical plug.
R = (63 ¦ 3,5) Ω
2. Measure the resistance of the coil. At room temperature, the electrical resistance should be (63
¦ 3,5) Ω.
3. Replace the magnet coil if its resistance does not
lie within this range.
Warning, high pressure!
Danger of injury. The adhesive is under
pressure. Wear eye protection.
Note!
In certain cases, the material hose may
still be under pressure. Particular caution
should therefore be exercised!
(1)
2. Unscrew the connection nipple (1) with an open-ended wrench 19 mm.
3. Unscrew the milled nut (2) by hand. If necessary,
use an open--ended wrench 17 mm.
4. Pull the magnet coil (3) upwards.
5. Replace the magnet coil (3). It may be installed
so either side the coil is up.
6. Assembly is carried out in the reverse sequence.
Note!
Do not overtighten the milled nut (2) as
this may result in damage to the axial
conduit. The magnet coil (3) is secured
the axial conduit (4) with the milled nut.
Note!
Top or bottom of coil may be reversed.
360 ˚
or
90 ˚
(2)
(3)
ITW Dynatec c. 2001
DYNACOLD MINI APPLICATOR Manual #10-17
Page 5-- 1
Revised 3/01
Troubleshooting
This Chapter contains a description of possible malfunctions, the causes of these malfunctions and possible solutions. Obvious defects such as mechanical damage or damaged electrical leads or pneumatic lines are not dealt with. These faults should be detected and repaired during the regular inspection of the system.
Check all electrical and pneumatic connections. Check whether the air pressure is set
to proper operating values, and whether the proper supply voltage is available. Also
check whether the glue reservoir contains glue.
Malfunction
No glue flow
Cause
No glue in the tank
Nozzle blocked
Plug loose
Initialization voltage not
available
Coil defective
Material hose blocked
Glue emerges from the
nozzle
l when
h application
li ti
head is closed
Dirt in the needle seat
Needle seat worn out
Spring broken
Note!
Remedy
Fill glue tank
Clean nozzle
Screw plug on securely
Check pattern controll output for 170 V overexcitation
Replace coil
Rinse material hose and replace if necessary
Clean needle seat
Replace needle seat and
needle
Replace spring
The Chapter entitled Maintenance and Servicing contains instructions on
how to remove and disassemble individual components.
Page 5-- 2
Revised 3/01
ITW Dynatec c. 2001
DYNACOLD MINI APPLICATOR Manual #10-17
Page 6-- 1
Revised 4/04
ITW Dynatec c. 2001
DYNACOLD MINI APPLICATOR Manual #10-17
Replacement parts
DynaCold Mini with complete seat nozzle
1
3
2
Option
Option
Item
Art. No.
1
70.06304.725 or 108123
DynaCold Mini with seat nozzle ∅ 0.25 mm, 1/2 UNF Fluid Ftg.
108130
DynaCold Mini with seat nozzle ∅ 0.25 mm, 1/8 NPT Fluid Ftg.
70.06304.730 or 108124
DynaCold Mini with seat nozzle ∅ 0.30 mm, 1/2 UNF Fluid Ftg.
108131
DynaCold Mini with seat nozzle ∅ 0.30 mm, 1/8 NPT Fluid Ftg.
70.06304.740 or 108125
DynaCold Mini with seat nozzle ∅ 0.40 mm, 1/2 UNF Fluid Ftg.
108132
DynaCold Mini with seat nozzle ∅ 0.40 mm, 1/8 NPT Fluid Ftg.
70.06304.750 or 180126
DynaCold Mini with seat nozzle ∅ 0.50 mm, 1/2 UNF Fluid Ftg.
108133
DynaCold Mini with seat nozzle ∅ 0.50 mm, 1/8 NPT Fluid Ftg.
1
1
1
Article
2
70.60000.702
Complete paper guide bracket (option)
3
70.06000.703
Complete shutter device (option)
Page 6-- 2
Revised 4/04
ITW Dynatec c. 2001
DYNACOLD MINI APPLICATOR Manual #10-17
DynaCold Mini with flanged or contact nozzle
1a
1
3
4a
2
Option
4
Option
Item
Art. No.
Article
1
70.06304.701
or 108122
1a
111158
2
70.60000.702
Complete paper guide bracket (option for DynaCold Mini with flanged
nozzle)
3
70.06000.703
Complete shutter device (option for DynaCold Mini with flanged nozzle)
4
70.00100.170
Union nut, 19mm hex
4a
75.00000.109
Union Nut, 14mm hex
DynaCold Mini for flanged or contact nozzles using 19mm hex union nut
(nozzles must be ordered separately. See Chapter titled Accessories)
DynaCold Mini for flanged nozzles using 14mm hex union nut (nozzles must
be ordered separately, see chapter titled Accessories)
Page 6-- 3
Revised 4/04
ITW Dynatec c. 2001
DYNACOLD MINI APPLICATOR Manual #10-17
DynaCold Mini for nozzle plate
1
Item
Art. No.
1
70.06304.702
Article
DynaCold Mini for nozzle plate (nozzle plates must be ordered separately.
See Chapter entitled Accessories.)
Page 6-- 4
Revised 4/04
ITW Dynatec c. 2001
DYNACOLD MINI APPLICATOR Manual #10-17
DynaCold Mini application module
4a
Item
Art. No.
1
2
3
4
4a
70.06000.701
70.04000.331
05.54110.005
70.04000.332
70.04000.341
70.04000.342
Note!
Article
Complete application module
Axial conduit
Magnet coil
Milled nut
Connection nipple, 1/2 UNF thread
Connection union, 1/8 NPT
A
Quantity
1
1
1
1
1
1
The spare parts marked with this symbol A are wear parts. In order to avoid
longer down-times, we recommend that you keep a small stock of these
wear parts.
ITW Dynatec c. 2001
DYNACOLD MINI APPLICATOR Manual #10-17
Page 6-- 5
Revised 4/04
Seat nozzle repair kits
Item
Art. No.
Quantity
Article
70.06000.725
Seat nozzle repair kit ∅ 0.25 mm, complete
A*
1
70.06000.730
Seat nozzle repair kit ∅ 0.30 mm, complete
A*
1
70.06000.740
Seat nozzle repair kit ∅ 0.40 mm, complete
A*
1
70.06000.750
Seat nozzle repair kit ∅ 0.50 mm, complete
A*
1
3
04.11009.098
Pressure spring
A
1
5
06.00925.012
O--ring
A
1
* According to the nozzle diameter which is used.
Note!
The spare parts marked with this symbol A are wear parts. In order to avoid
longer down-times, we recommend that you keep a small stock of these
wear parts.
Note!
Repair kits include all items shown.
Needle/armature assembly and seat nozzles only sold in matched sets.
Page 6-- 6
Revised 4/04
ITW Dynatec c. 2001
DYNACOLD MINI APPLICATOR Manual #10-17
Flanged and contact nozzle repair kit (used with 19mm hex union nut)
Item
Art. No.
Quantity
Article
70.06000.704
Flanged and contact nozzle repair kit (incl. item 3 and 5)
A
1
3
04.11009.098
Pressure spring
A
1
5
06.00925.012
O-ring
A
1
ITW Dynatec c. 2001
DYNACOLD MINI APPLICATOR Manual #10-17
Page 6-- 7
Revised 4/04
Flanged and contact nozzle repair kit (used with 14mm hex union nut)
Item
Art. No.
Quantity
Article
70.06000.707
Flanged nozzle repair kit (incl. item 3 and 5)
A
1
04.11009.098
Pressure Spring
A
1
06.00925.012
O-ring
A
1
Note!
The spare parts marked with this symbol A are wear parts. In order to avoid
longer down-times, we recommend that you keep a small stock of these
wear parts.
Note!
Repair kits include all items shown.
Needle/armature assembly and seat nozzles only sold in matched sets.
Page 6-- 8
Revised 4/04
ITW Dynatec c. 2001
DYNACOLD MINI APPLICATOR Manual #10-17
Nozzle plate repair kit
Item
Art. No.
Quantity
Article
70.06000.705
Nozzle plate repair kit (incl. item. 3, 5 and 7)
A
1
3
04.11009.098
Pressure spring
A
1
5
06.00925.012
O--ring
A
1
7
06.01000.001
O--ring
A
1
Note!
The spare parts marked with this symbol A are wear parts. In order to avoid
longer down-times, we recommend that you keep a small stock of these
wear parts.
Note!
Repair kits include all items shown.
Needle/armature assembly and seat nozzles only sold in matched sets.
ITW Dynatec c. 2001
DYNACOLD MINI APPLICATOR Manual #10-17
Page 6-- 9
Revised 4/04
Fitting for nozzle plate
Item
Art. No.
Quantity
Article
70.06000.706
Fitting for nozzle plate, complete
1
1
06.04000.136
Locking plate
1
2
06.04000.137
Nozzle plate mounting block
1
3
00.10410.912
Socket head cap screw M4x10 SST
2
4
00.10408.912
Socket head cap screw M4x8 SST
4
5
06.00368.007
O-ring
Note!
A
1
The spare parts marked with this symbol A are wear parts. In order to avoid
longer down-times, we recommend that you keep a small stock of these
wear parts.
Page 6-- 10
Revised 4/04
ITW Dynatec c. 2001
DYNACOLD MINI APPLICATOR Manual #10-17
Shutter Device for DynaCold Mini with seat and flanged nozzle
(option)
Item
Art. No.
Quantity
Article
70.06000.703
Shutter Device, complete
1
70.06000.713
Complete slide
1
a
70.04000.336
Slide
1
b
70.04000.339
Pressure plate
1
c
70.04000.131
Gasket
d
00.10304.963
Countersunk screw
1
e
03.21506.325
Parallel pin
4
2
70.04000.335
Housing
1
3
70.04000.337
Piston
1
4
70.04000.338
Piston
1
6
04.10325.041
Pressure spring
1
7
07.00500.106
Connection nipple M 5
1
7a
340-012
Connection nipple, 1/8 tube (must be ordered separately).
1
8
05.93070.001
Closure cap Pg 7
1
9
04.11080.159
Pressure spring
A
1
12
06.00607.010
O-ring
A
1
13
00.10412.912
Socket head cap screw
4
14
00.80404.913
Set screw
1
15
70.04000.344
Spacer block
1
1
Note!
A
1
The spare parts marked with this symbol A are wear parts. In order to avoid
longer down-times, we recommend that you keep a small stock of these
wear parts.
Page 6-- 11
Revised 4/04
ITW Dynatec c. 2001
DYNACOLD MINI APPLICATOR Manual #10-17
7a
Page 6-- 12
Revised 4/04
ITW Dynatec c. 2001
DYNACOLD MINI APPLICATOR Manual #10-17
Paper guide bracket for DynaCold Mini with seat or flanged nozzle
(option)
Item
Art. No.
Article
Quantity
70.06000.702
Paper guide bracket, complete
1
1
70.06000.101
Paper guide bracket
1
2
00.10408.912
Socket head cap screw M4x10 SST
4
3
02.00430.125
Washer, Flat M4 SST
4
ITW Dynatec c. 2001
DYNACOLD MINI APPLICATOR Manual #10-17
Page 7-- 1
Revised 4/04
Accessories
Seat nozzles
Note!
The nozzle and the needle/armature assembly are matched sets. Proper
function can only be guaranteed in this manner. These components should
therefore only be replaced as a set.
Seat nozzle repair kits can be found in Chapter 5, Replacement Parts.
Single orifice flanged nozzles for DynaCold Mini with 19mm hex union
nut.
Part No.
Description
91.00020.102 Flanged nozzle ∅ 0.20 mm
91.00025.102 Flanged nozzle ∅ 0.25 mm
91.00030.102 Flanged nozzle ∅ 0.30 mm
91.00035.102 Flanged nozzle ∅ 0.35 mm
91.00040.102 Flanged nozzle ∅ 0.40 mm
91.00045.102 Flanged nozzle ∅ 0.45 mm
91.00050.102 Flanged nozzle ∅ 0.50 mm
91.00060.102 Flanged nozzle ∅ 0.60 mm
91.00070.102 Flanged nozzle ∅ 0.70 mm
91.00080.102 Flanged nozzle ∅ 0.80 mm
91.00100.102 Flanged nozzle ∅ 1.00 mm
91.00120.102 Flanged nozzle ∅ 1.30 mm
91.00150.102 Flanged nozzle ∅ 1.50 mm
Single orifice flanged nozzles for DynaCold Mini with 14mm hex union
nut (used only with PN 111158)
Part No.
Description
91.01030.120 Flanged nozzle ∅ 0.30 mm
91.01040.120 Flanged nozzle ∅ 0.40 mm
91.01050.120 Flanged nozzle ∅ 0.50 mm
Page 7-- 2
Revised 3/01
ITW Dynatec c. 2001
DYNACOLD MINI APPLICATOR Manual #10-17
Single orifice contact nozzles for DynaCold Mini with 19mm hex union
nut (10mm width)
Art. No.
Article
93.02030.108 Contact nozzle (0.2 mm groove depth) ∅ 0.30 mm
93.02035.108 Contact nozzle (0.2 mm groove depth) ∅ 0.35 mm
93.02040.108 Contact nozzle (0.2 mm groove depth) ∅ 0.40 mm
93.02045.108 Contact nozzle (0.2 mm groove depth) ∅ 0.45 mm
93.02050.108 Contact nozzle (0.2 mm groove depth) ∅ 0.50 mm
93.02060.108 Contact nozzle (0.2 mm groove depth) ∅ 0.60 mm
93.02070.108 Contact nozzle (0.2 mm groove depth) ∅ 0.70 mm
93.02090.108 Contact nozzle (0.2 mm groove depth) ∅ 1.00 mm
93.06030.108 Contact nozzle (0.6 mm groove depth) ∅ 0.30 mm
93.06035.108 Contact nozzle (0.6 mm groove depth) ∅ 0.35 mm
93.06040.108 Contact nozzle (0.6 mm groove depth) ∅ 0.40 mm
93.06045.108 Contact nozzle (0.6 mm groove depth) ∅ 0.45 mm
93.06050.108 Contact nozzle (0.6 mm groove depth) ∅ 0.50 mm
93.06060.108 Contact nozzle (0.6 mm groove depth) ∅ 0.60 mm
93.06070.108 Contact nozzle (0.6 mm groove depth) ∅ 0.70 mm
93.06090.108 Contact nozzle (0.6 mm groove depth) ∅ 1.00 mm
Single orifice contact nozzles for DynaCold Mini with 19mm hex union
nut (6mm width)
Part No.
Description
93.02030.106 Contact nozzle (0.20 mm groove Depth) ∅ 0.30mm
93.02035.106 Contact nozzle (0.20 mm groove Depth) ∅ 0.35mm
93.02040.106 Contact nozzle (0.20 mm groove Depth) ∅ 0.40mm
93.02050.106 Contact nozzle (0.20 mm groove Depth) ∅ 0.50mm
Page 7-- 3
Revised 4/04
ITW Dynatec c. 2001
DYNACOLD MINI APPLICATOR Manual #10-17
Dual orifice flanged nozzles for DynaCold Mini with 19mm hex union nut.
∅
(
92.00330.101 Dual orifice flanged nozzle
0.30 mm
30°
92.00335.101 Dual orifice flanged nozzle
0.35 mm
30°
92.00340.101 Dual orifice flanged nozzle
0.40 mm
30°
92.00345.101 Dual orifice flanged nozzle
0.45 mm
30°
92.00350.101 Dual orifice flanged nozzle
0.50 mm
30°
92.00360.101 Dual orifice flanged nozzle
0.60 mm
30°
92.00370.101 Dual orifice flanged nozzle
0.70 mm
30°
∅
(
92.00430.101 Dual orifice flanged nozzle
0.30 mm
45°
92.00435.101 Dual orifice flanged nozzle
0.35 mm
45°
92.00440.101 Dual orifice flanged nozzle
0.40 mm
45°
92.00445.101 Dual orifice flanged nozzle
0.45 mm
45°
92.00450.101 Dual orifice flanged nozzle
0.50 mm
45°
92.00460.101 Dual orifice flanged nozzle
0.60 mm
45°
92.00470.101 Dual orifice flanged nozzle
0.70 mm
45°
92.00480.101 Dual orifice flanged nozzle
0.80 mm
45°
92.00490.101 Dual orifice flanged nozzle
0.90 mm
45°
∅
(
92.00630.101 Dual orifice flanged nozzle
0.30 mm
60°
92.00635.101 Dual orifice flanged nozzle
0.35 mm
60°
92.00640.101 Dual orifice flanged nozzle
0.40 mm
60°
92.00645.101 Dual orifice flanged nozzle
0.45 mm
60°
92.00650.101 Dual orifice flanged nozzle
0.50 mm
60°
92.00660.101 Dual orifice flanged nozzle
0.60 mm
60°
92.00670.101 Dual orifice flanged nozzle
0.70 mm
60°
Art.-Nr.
Art. No.
Art. No.
Article
Article
Article
Page 7-- 4
Revised 3/01
ITW Dynatec c. 2001
DYNACOLD MINI APPLICATOR Manual #10-17
Dual orifice contact nozzle for DynaCold Mini with 19mm hex union nut.
∅
On center
separation
Groove
depth
94.02330.101 Dual orifice contact nozzle
0.30 mm
3 mm
0,2 mm
94.02335.101 Dual orifice contact nozzle
0.35 mm
3 mm
0,2 mm
94.02340.101 Dual orifice contact nozzle
0.40 mm
3 mm
0,2 mm
94.02360.101 Dual orifice contact nozzle
0.60 mm
3 mm
0,2 mm
94.02365.101 Dual orifice contact nozzle
0.65 mm
3 mm
0,2 mm
Art.-Nr.
Art.-Nr.
Article
Article
∅
94.02830.101 Dual orifice contact nozzle
0.30 mm
8 mm
0,2 mm
94.02840.101 Dual orifice contact nozzle
0.40 mm
8 mm
0,2 mm
Page 7-- 5
Revised 4/04
ITW Dynatec c. 2001
DYNACOLD MINI APPLICATOR Manual #10-17
Nozzle plates for contact application
The nozzle plates are individually manufactured according to your wishes. The basic
area of the nozzle plate is 45 x 32 mm. The number and the diameter of the drill holes
may vary. The following drawing shows these options:
45
Depression to DIN 74 for pan head screw M4 -- DIN 912
35
5
5
2.5 min.
D
B1
7
A1
For a nozzle plate order, we
require the data specified in
the drawing. Copy this page,
and please enter these data
into the Table below.
T
12
A2
The article (part) number is composed of the following data:
70. x x x 32 x x x
A3
An
n Number of drill holes
D Diameter of the nozzle drill hole
Nozzle
plate 1
Number of drill holes
n
Diameter of the drill hole
D
Groove depth
T
Distance 1 to tear edge
B1
Distance 2 to tear edge
B2
Distance to drill hole 1
A1
Distance to drill hole 2
A2
Distance to drill hole 3
A3
Distance to drill hole 4
A4
Distance to drill hole 5
A5
Distance to drill hole 6
A6
Distance to drill hole 7
A7
Distance to drill hole 8
A8
Distance to drill hole 9
A9
Distance to drill hole 10
A10
Distance to drill hole 11
A11
Article number
Nozzle
plate 2
Internal number (left blank)
T Groove depth
Nozzle
plate 3
Nozzle
plate 4
Nozzle
plate 5
Page 7-- 6
Revised 3/01
ITW Dynatec c. 2001
DYNACOLD MINI APPLICATOR Manual #10-17
Nozzle plates for screw--in nozzles
The nozzle plates are individually manufactured according to your wishes. The basic
area of the nozzle plate is 45 x 32 mm. The number of screw--in nozzles may vary.
45
Depression to DIN 74 for pan head screw M4 -- DIN 912
35
5
5
Screw--in nozzles
Art. No.
Article
91.60000.125
Screw--in nozzle SS ∅ 0.25 mm
91.60000.103
Screw--in nozzle SS ∅ 0.30 mm
91.60000.113
Screw--in nozzle SS ∅ 0.35 mm
91.60000.104
Screw--in nozzle SS ∅ 0.40 mm
91.60000.105
Screw--in nozzle SS ∅ 0.50 mm
91.60000.106
Screw--in nozzle SS ∅ 0.60 mm
91.60000.109
Screw--in nozzle SS ∅ 0.70 mm
91.60000.108
Screw--in nozzle SS ∅ 0.80 mm
91.60000.107
Screw--in nozzle SS ∅ 1.00 mm
91.60000.110
Screw--in nozzle SS ∅ 1.50 mm
Nozzle cleaning kit
Item
Art. No.
1
09.39000.001
2
2
2
2
2
09.39000.015
09.39000.020
09.39000.025
09.39000.030
09.39000.035
Article
Universal nozzle cleaning kit up to ∅
0.40 mm
Nozzle cleaning kit ∅ 0.15 mm
Nozzle cleaning kit ∅ 0.20 mm
Nozzle cleaning kit ∅ 0.25 mm
Nozzle cleaning kit ∅ 0.30 mm
Nozzle cleaning kit ∅ 0.35 mm
Quantity
12
units
6 units
6 units
6 units
6 units
6 units
1
2
Page 7-- 7
Revised 4/04
ITW Dynatec c. 2001
DYNACOLD MINI APPLICATOR Manual #10-17
High--pressure material hoses
High--pressure hose DN6, up to 4m long and max. 2
application heads
High--pressure hose DN10 from 4m long
High--pressure hoses DN6
G3/8--G3/8
Option
High--pressure hose DN10 on connection
of more than 2 application heads
G1/4--G3/8
G3/8--G1/4
Double nipple
High--pressure hoses DN6
Gasket
High--pressure hoses DN6
Length
Art. No.
0.2
30.00002.727
0.5
30.00002.729
1.0
30.00002.730
2.0
30.00002.721
3.0
30.00002.731
4.0
30.00002.722
5.0
30.00002.732
6.0
30.00002.728
7.0
30.00002.736
8.0
30.00002.726
10.0
30.00002.733
15.0
30.00002.735
SW16 SW14
10/6
UNF1/2 20G
High--pressure hoses DN10
Length
Art. No.
3.0
30.00002.743
4.0
30.00002.744
5.0
30.00002.745
6.0
30.00002.746
10.0
30.00002.750
SW22 SW17
G3/8
15/10
Page 7-- 8
Revised 3/01
ITW Dynatec c. 2001
DYNACOLD MINI APPLICATOR Manual #10-17
For this hose, two double nipples G1/4--G3/8 Art. No. 07.01438.101 and two gaskets Art. No.
02.11350.001 are required.
High pressure manifold
Number of application
heads
2
30.00002.752
3
30.00002.753
Number of application
heads
4
Art. No.
30.00002.754
5
30.00002.755
6
30.00002.756
Number of application
heads
7
Art. No.
30.00002.757
8
30.00002.758
2--fold
Art. No.
3--fold
6--fold
4--fold
7--fold
Shut--off unit for high and low pressure
Art. No.
30.00004.701
Article
Complete shut--off unit
5--fold
8--fold
Page 7-- 9
Revised 4/04
ITW Dynatec c. 2001
DYNACOLD MINI APPLICATOR Manual #10-17
Mounting for DynaCold Mini
Item
Art. No.
Article
73.50000.735
Fast Adjust Bracket, with M8-1.25 thread for sensor mounting.
73.50000.736
Fast Adjust Bracket with /16-24 thread for sensor mounting.
DynaCold Mini initialization cable
Art. No.
Article
05.02104.616 Complete DynaCold Mini initialization cable, 5 m
05.02104.618 Complete DynaCold Mini initialization cable, 10 m
Accessories for Shutter Device
5
0
6
bar
1
6
2
3
4
Pattern control unit
7
For multiple applications
8
Item
Art. No.
1
07.81106.702
Air filter/regulator unit
2
70.04000.709
3/2--port solenoid valve with accessories
3
05.02104.605
Solenoid valve initialization cable
4
07.08014.701
Quick connect air tubing
5
07.00600.117
Threaded connection
6
07.00600.117
Threaded connection
7
07.08014.701
Air manifold, 8 outputs
8
07.92200.001
2/2--port valve, manually--actuated
Article
Page 7-- 10
Revised 3/01
ITW Dynatec c. 2001
DYNACOLD MINI APPLICATOR Manual #10-17
ITW Dynatec c. 2001
DYNACOLD MINI APPLICATOR Manual #10-17
Page 8-- 1
Revised 3/01
Decommissioning, packaging and transportation
Temporary decommissioning
1. Rinse the application heads with water.
2. Relieve residual pressure.
3. Render the application heads pressure and voltage--free.
4. Remove all glue residues and clean the nozzle/nozzle plate.
5. Remove all air and glue hoses and all electrical leads.
6. Fit all open threaded connections with sealing plugs or dust caps.
7. Package the application heads so that they are protected against corrosion.
8. Store the application heads so that they are protected against damage.
Permanent decommissioning and disposal
1. Switch the application heads off.
2. Relieve residual pressure.
3. Remove all glue residues.
4. Remove all air and glue hoses and all electrical leads.
5. Disassemble the application heads into mechanical and electrical components.
6. Dispose of the components for recycling.
Page 8-- 2
Revised 3/01
ITW Dynatec c. 2001
DYNACOLD MINI APPLICATOR Manual #10-17
ITW Dynatec c. 2001
DYNACOLD MINI APPLICATOR Manual #10-17
Manual Modifications
Operating instructions drawn up: 9/00
Operating instructions modified:
Date
3/01
Page
complete
Page 9-- 1
Revised 3/01
Page 9-- 2
Revised 3/01
ITW Dynatec c. 2001
DYNACOLD MINI APPLICATOR Manual #10-17