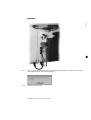
1
connect® engine
management
user manual
User manual for the connect software and courseware for automotive education on
engine management.
Version
3.0
Nuenen, the Netherlands, October 2000
Electude
Both the software and the manual may be amended by Electude without any form of notification.
All rights reserved. Nothing from this publication may be reproduced, stored in a computerized data file or published in any form or any way, whether electronic, mechanical, of by
photocopying, photography or any other means without prior written permission from
Electude.
Safety
The measuring tasks on the ignition, described in the software, shall only be carried out
when the high voltage cables and any distributor caps are correctly fitted and connected.
Only then is there no danger of high voltage contact. Moving parts are covered by protective caps. The distributor cap provides this protective cover in the distributor. Measuring
tasks must not be carried out without this protection.
© Electude, 1997-2000
connect® is a registered trademark of Electude
Adobe and Acrobat are trademarks of Adobe Systems Incorporated.
Novell and Netware are registered trademarks of Novell Inc.
Microsoft, Windows and MS-DOS are registered trademarks of Microsoft Corporation.
Windows NT is a trademark of Microsoft Corporation.
Pentium is a trademark of Intel Corporation.
Limited Guarantee
Electude guarantees that (a) the software will essentially operate in accordance with the relevant manuals for 90
days after the date of receipt and (b) the hardware supplied by Electude will exhibit no defects with regard to material and workmanship in normal use for a period of one year after the date of receipt.Electude offers no other guarantee, either explicit or implicit with regard to the software, the relevant manuals and the hardware.
Under no circumstances is Electude liable for loss (including compensation for loss of profits, business stoppage, loss of business information or other similar loss) arising due to the use of or any impediment to the use
of this Electude product, even if Electude has been informed of the risk of such loss.
Contents
Contents
iii
iii
Introduction
Quick start
1
1
3
Installation
5
1.1
System requirements
5
1.2
Connect installation program
Installation on a network
2
Start menu
9
2.1
Student mode
9
2.2
Tutor mode
10
3
Manager
13
3.1
System overview
14
c o nne c t en gin e m a n a ge me n t u se r m a n ua l
7
6
3.2
License
15
3.3
Settings
17
General
17
Communication
Database
User
iv
18
20
24
3.4
Password for Tutor mode
3.5
Clone License
4
CBT program
4.1
Structure
4.2
Learning objectives
4.3
Logging in
4.4
The overview of the engine management system
4.5
The overview of the control system
4.6
The component instructions
25
28
30
Screen layout
Toolbox
27
27
The control unit
4.7
24
33
36
38
39
39
White sheets containing theory
42
Light yellow sheets containing questions
Grey answer box
Feedback field
44
46
4.8
Skipping questions
4.9
Creating screenshots
Edit menu
Printing
46
46
47
47
Saving to the assessment database
c o nne c t e n gin e m a n a gem e n t u se r m a n ua l
47
43
31
5
Student results
5.1
How does the Student results program work?
5.2
Student file management
Editing groups
5.3
49
49
51
51
Editing student accounts
52
Viewing students' results
54
Selecting a topic
55
Refreshing of the results display
55
The meaning of the diagrams (CBT program)
56
The meaning of the diagrams (assessment database)
Other data
59
Deleting results
59
Printing out results
5.4
Backup copies
6
Panels
6.1
Power supply
Fuses
59
v
59
61
61
62
Power supply to panels
Ignition lock
6.2
Connectors
58
62
62
62
Metering sockets
62
SIM connections
62
RS232-connector
64
6.3
Safety
65
6.4
Measuring equipment
65
c o nne c t en gin e m a n a ge me n t u se r m a n ua l
A
Appendices
A.1
Screen settings in Windows
67
A.2
Number format in Windows
70
A.3
Troubleshooting
Database
67
71
72
Communications
73
Password for Tutor mode
A.4
Configuration files
A.5
Security in Windows 95
List of Figures
Index
vi
73
74
76
77
81
End user license agreement for Electude Software
c o nne c t e n gin e m a n a gem e n t u se r m a n ua l
86
Introduction
Connect engine management is a modular courseware system for automotive
training. It comprises panels with the components of different engine management systems and relevant computer-based training (CBT) programs for the personal computer.
Because of the modular structure of the system, the panels can be used to simulate 9 engine management systems. The panels required for the various engine
management systems are shown in table 0-1.
Software installation is described in Chapter 1. Chapter 2 describes the Start menu,
which is used to start all Connect programs. Chapter 3 looks at the Manager application, which can be used to customize the software settings. The Tutorial
program is examined in Chapter 4. Chapter 5 looks at the Tutor program, which
can be used to view the students' results. The last Chapter deals with the system
hardware: the panels.
c o nne c t en gin e m a n a ge me n t u se r m a n ua l
1
2
c o nne c t e n gin e m a n a gem e n t u se r m a n ua l
•
•
•
•
•
•
•
•
•
Motronic 2.8
Motronic ML 4.1
•
•
•
Fenix 3B
GM Multec SPI
•
Motronic MP 5.1
airflow meter
mass airflow meter
MAP sensor
air temperature sensor
engine temperature sensor
Hall sensor
magnetic pickup
magnetic pickup & Hall reference
oxygen sensor
heated oxygen sensor
detonation sensor
vehicle speed sensor
throttle position sensor
idle & wide open throttle switch
throttle body (Mono-Motronic)
throttle body (Multec)
injectors
canister purge solenoid
fuel pump (low pressure)
fuel pump (high pressure)
ignition coil
DIS coil
idle speed control valve 1
idle speed control valve 2
Digifant
engine management systems
Motronic 1.3
Mono-Motronic
TABLE 0-1
Overview of the Connect panels and
Weber/Marelli G6
•
•
•
•
•
•
•
•
•
•
•
•
•
•
•
•
•
•
•
•
•
•
•
•
•
•
•
•
•
•
•
•
•
•
•
•
•
•
•
•
•
•
•
•
•
•
•
•
•
•
•
•
•
•
•
•
•
•
•
•
•
•
•
•
•
•
•
•
•
•
•
•
•
•
•
Quick start
Follow these steps to use the Connect system for the first time.
• Install the software as described in Chapter 1. For this you will need the
installation CD-ROM.
• Start the Connect Start menu. When no license key was entered on
previous use, the license wizard will appear. This wizard will enable the
engine management systems you have bought in the Start menu. See
Section License in Chapter Manager, page 15.
• Start a CBT program by selecting an engine management system in the
Connect Start menu. Make sure the control unit is connected to the
computer, see Chapter Panels, page 61. You log in the CBT program with
the name ‘s1’. For more information on the CBT program, see Chapter
CBT program, page 27.
• Once you have completed the CBT program, you can view the results for
the session in the Student results program by selecting student ‘s1’ from
group ‘g1’. You can then immediately create new student accounts. (See
Chapter Student results, page 49.)
c o nne c t en gin e m a n a ge me n t u se r m a n ua l
3
4
c o nne c t e n gin e m a n a gem e n t u se r m a n ua l
Installation
Before you can use the Connect system, the software must first be installed on the
hard disk of your computer. For this you need:
• the installation CD-ROM;
• a computer which meets the system requirements.
1.1
System requirements
The requirements for the computer are as follows:
• Pentium or better processor;
• minimum 16 MB RAM;
• Windows 3.x or Windows 95, screen setting minimum 800x600 with
256 colors;
• SVGA graphics cards and monitor;
• a (Windows compatible) mouse;
• approximately 60 MB free hard disk space, depending on the version
you install;
c o nne c t en gin e m a n a ge me n t u se r m a n ua l
1 Installation
1
5
• a CD-ROM player.
The following are recommended:
• 32 MB RAM;
• a 16-bit sound card.
1.2
Connect installation program
This program helps you to install the CBT program. Questions and instructions
appear on the screen during installation. If you answer these questions and carry
out the instructions, the CBT program will be installed for you.
The CD-ROM must be in the player to start the installation program. The way in
which you start the installation program depends on the version of Windows used.
• Windows 3.x
From Program management in the File menu, select the Start option.
Click in the dialog window on the Browse button and select the drive in
which the CD-ROM is located. Select the program SETUP.EXE.
6
FIGURE 1-1
Starting the installation program in Windows 3.x
c o nne c t e n gin e m a n a gem e n t u se r m a n ua l
• Windows 95 & 98
If the CD-ROM drive is autoplay compliant, the question whether you
want to start the installation program will automatically appear on the
screen. Otherwise you should click in the Control Panel on the Add/
Remove Programs icon and then on the Install button in the Add/Remove
Programs properties window on the Install/Uninstall tab. The Figure 1-2
window then appears on the screen. Click on Next and the installation
program will be detected on the CD-ROM.
1 Installation
7
FIGURE 1-2
Installation on a
network
Starting the installation program in Windows 95 & 98
If you have purchased various control units and the computers on which you want
to install the software are connected to a network, you can use the CBT program
in a network situation.
The installation CD-ROM can be shared on the network. The installation program
can then be started in this shared directory.
To share the student data on the network, one of the computers has to be used as
a server and the others as clients. For more detailed information on this topic, see
Section Database in Chapter Manager, page 20.
Installation on a server
The directory (usually C:\CONNECT\DATABASE or C:\Program Files\Connect\Database) in which the database files are installed remains the same. The
c o nne c t en gin e m a n a ge me n t u se r m a n ua l
database is then on a local hard disk. To share the database files, select the option
yes when asked.
Installation on a client
The directory in which the database files are installed needs to be changed. Now
select the shared server directory (e.g. Y:\CONNECT\DATABASE or Y:\Program
Files\Connect\Database if the server C drive is linked to the client as Y drive) for
the database files directory. Then type in a unique name for the client computer.
This name is used to register the client with the server.
8
c o nne c t e n gin e m a n a gem e n t u se r m a n ua l
Start menu
From the Connect Start menu the student can start a CBT program for a specific
engine management system. The tutor can also start all the Connect programs
from the Start menu.
2.1
Student mode
Students can select one of the engine management systems from the Start menu
by clicking once on a button. The CBT program for the selected system is then
started. For more information, see the Chapter CBT program, page 27. When a CBT
program starts, the Start menu disappears. When the CBT program is terminated,
the Start menu is displayed again.
The appropriate buttons will be greyed out if an engine management system is not
registered. In Figure 2-1 all the engine management systems have been registered
apart from Motronic MP5.1. See Section License in Chapter Manager, page 15 for
more information.
c o nne c t en gin e m a n a ge me n t u se r m a n ua l
2 Start menu
2
9
FIGURE 2-1
The Start menu in student mode
10
2.2
Tutor mode
For the tutor, the Start menu has a menu bar, with which different programs can
be started. The tutor can access the Tutor mode by pressing F2. Access should be
protected by a password. This password should be entered in the Manager (see
Section Password for Tutor mode in Chapter Manager, page 24). The window shown
in Figure 2-2 is not displayed, until a password has been entered. The password
can be entered in this window.
FIGURE 2-2
Window for access to Tutor mode
c o nne c t e n gin e m a n a gem e n t u se r m a n ua l
The tutor can select the following options from the Program menu in the menu bar
(see Figure 2-3):
2 Start menu
11
FIGURE 2-3
The Start menu in Tutor mode
• Manager
This option starts the Manager (see Chapter Manager, page 13.).
• Student results
This option starts the Student results program (see Chapter Student
results, page 49.).
• Diagnostics wizard
This option starts the program to create a diagnostics file (see Appendix
Troubleshooting, page 71.).
• Run…
Selecting this option brings up a standard Windows dialog window
which can be used to start programs.
• Program manager (only in Windows 3.x)
Starts Windows’ Program manager.
c o nne c t en gin e m a n a ge me n t u se r m a n ua l
• Explorer (only in Windows 95 & 98)
Starts Windows Explorer.
Errors may occur if a Connect program is running (for example the Student results
program) and a second Connect program is started (for example a CBT program).
This is because the Connect database settings are such that only a limited number
of files can be opened at the same time. This gives a higher program speed. By
increasing the settings MaxTables and MaxFiles in the WIN.INI file, these errors
can be prevented but there will be a slight loss of performance. For more information on the settings in the WIN.INI file, see Appendix Troubleshooting, page 71.
12
All programs on the hard disk should be started from an application like Program
manager. This means these programs are open to unauthorized use. Protection of
the Start menu with a password offers better program protection against unauthorized use than, for example Program manager. The program can be configured as
Windows Shell to start Windows without Program manager (or in Windows 95 &
98 without Taskbar) and to start the Connect Start menu directly. For this the
SYSTEM.INI file must be modified (see Appendix Configuration files, page 74.). For
more information on protection, see Section Backup copies in Chapter Student
results, page 59 and Appendix Security in Windows 95, page 76.
c o nne c t e n gin e m a n a gem e n t u se r m a n ua l
The Connect CBT program is modular. In total there are 25 different panels with
components which are linked to around 40 modules in the CBT program and a further 17 modules dealing with the role of the control unit in the injection, ignition
and idle control systems in the 9 available engine management systems. The user
can access these engine management systems by means of registration codes.
The Connect system also has various settings, for example for working in a network situation.
You can use the Manager program to handle all these options and settings. The
core of this program is the system overview. This overview is a matrix, in which you
can see which panels are required in which engine management system.
You can start the Manager by:
• selecting Manager from the Connect Start menu;
• (in Windows 3.x), by double clicking on the Manager icon in Program
manager;
• (in Windows 95) by selecting Manager from Programs on the Taskbar.
c o nne c t en gin e m a n a ge me n t u se r m a n ua l
Manager
Manager
3
3
13
3.1
System overview
The system overview is a table, in which the available engine management systems are displayed horizontally and the panels are displayed vertically.
Not every combination of panel and engine management system occurs. Each
engine management system only makes use of a number of panels. The panels
used in an engine management system are specified in the overview with blue, red
and green bullets. The color of the bullets indicates which control system the component is used in. So you can see for example in the diagram that the "airflow
meter" panel is required for the Motronic ML4.1. injection and ignition control systems.
14
FIGURE 3-1
System overview
c o nne c t e n gin e m a n a gem e n t u se r m a n ua l
3
All the relevant panels have to be present and the engine management system has
to be registered before a CBT program for an engine management system can be
used (see the Section License, page 15). The CBT program for the system must also
be installed on the computer.
Manager
When an engine management system is installed, the background of the name of
the system is white. When a system has been purchased and registered, the relevant column is also white. So you can see from Figure 3-1 that Motronic 1.3, ML4.1,
MP5.1 and GM Multec SPI have been installed. However the Motronic MP5.1
system is not registered: the seventh column is still grey. The Motronic MP5.1
engine management system first has to be registered before the relevant CBT program can be started.
3.2
License
To prepare Connect for use, the license code for the systems purchased and the
control unit connected to the PC are required.
An installation is registered by selecting the menu item License from the Options
menu. The License wizard then appears (see Figure 3-2).
FIGURE 3-2
The License wizard
This wizard now asks for the license key for the control unit.
The license wizard appears automatically if the program is started and no engine
management systems are available yet. The license wizard will start the communic o nne c t en gin e m a n a ge me n t u se r m a n ua l
15
cation wizard when the communication port is not specified. (see Section Communication, page 18)
After this registration procedure the system is ready for use. In the system overview, the relevant columns are white. In the Start menu the buttons which starts
the CBT program, are enabled.
There are two options in the pop-up menu for registered engine management systems. Selecting the Send data option displays a window with which engine man-
16
FIGURE 3-3
The transfer of engine management data
agement system data can be transferred to the control unit. The control unit will
then boot the selected system without the CBT program having to be started.
If the wiring diagram option is selected, a system circuit diagram is displayed, see
Figure 3-4. The sub-diagrams for the injection, ignition and idle control systems
c o nne c t e n gin e m a n a gem e n t u se r m a n ua l
3
can be viewed and printed separately or in combination. Also note the panel wiring
at the ignition lock terminals.
Manager
FIGURE 3-4
The circuit diagram of an engine management system
17
3.3
Settings
From the Options menu (see Figure 3-1), select the option Settings to open the Settings dialog box. There are four tabs in this dialog box.
General
FIGURE 3-5
The General tab
This tab shows the various settings relating to the CBT program (see Figure 3-5).
• Panels setup
A student will frequently fail to complete a section of the CBT program
in one session. When this student starts this program again to continue,
a number of connections between the panels and the Connect control
unit will have to be restored. The connections which have to be restored
depend on the way in which the panels are arranged.
You use this setting to indicate how the Connect system panels are
araanged. (See also Section The overview of the control system in Chapter
CBT program, page 33.)
In the case of a fixed setup with wiring the student is not asked anything.
The CBT program assumes that all the connections are in place.
c o nne c t en gin e m a n a ge me n t u se r m a n ua l
In the case of a fixed setup without wiring the CBT program assumes that
all the panels are available, the power supply is connected to the panels
and the ignition lock is wired. The student then only has to restore the
test lead connections established previously.
In the case of the no fixed arrangement option, the student has to specify
which panels are available. The student is then instructed to connect the
power supply to the panels and to restore all the test lead connections.
This option is particularly useful if more than one computer is being
used for the Connect CBT program and the panels can be interchanged
between the different configurations.
For more information on wiring the ignition lock, see Section Ignition
lock in Chapter Panels, page 62.
• Sound
If your computer has a sound card, you can use this option to specify
whether the CBT program should use sound. The explanatory voice
requires a 16-bit sound card and the Microsoft ADPCM compression
codec. For this, audio compression must be installed in Windows Setup
in Windows 95 or higher. The other sounds can also be heard with 8-bit
sound cards.
18
• Language
If multiple languages are installed, one of the installed languages can be
selected from the list. All the Connect programs will then use this
language.
Communication
The computer uses a serial port to communicate with the control unit. This tab can
be used to specify the communication port used (see Figure 3-6). If there are prob-
c o nne c t e n gin e m a n a gem e n t u se r m a n ua l
3
lems with the transfer of the engine management data to the control unit, you
could try to reduce the speed settings.
Manager
19
FIGURE 3-6
The Communication tab
If there are problems with communication, the Communication wizard can be
started by clicking on the wizard button. The window shown in Figure 3-7 is displayed on the screen. The Communication wizard helps you configure communications step by step. First the communication port connected to the control unit is
detected. Then communication is tested. Any communication errors occurring are
c o nne c t en gin e m a n a ge me n t u se r m a n ua l
displayed. If there are problems with data transfer, the speed can be changed and
communication is tested again.
FIGURE 3-7
Database
20
The Communication wizard
The Connect engine management software has an integrated database. This database stores the students results as well as other data. The location of the database
files and the stored student results can be entered using the options on this tab.
The selection of the way in which data is stored depends on the computer(s) on
which you install the software. There are three different scenarios:
• one standalone computer Figure 3-8
database
with student
data
• a network with more than one computer (Figure 3-9)
computer with tutor module &
CBT program
FIGURE 3-8
A standalone computer
c o nne c t e n gin e m a n a gem e n t u se r m a n ua l
client with tutor
module and / or
CBT program
3
client with tutor
module and / or
CBT program
Manager
• various computers without a network (Figure 3-10)
network
database
with student
data
client with tutor
module and / or
CBT program
FIGURE 3-9
client with tutor
module and / or
CBT program
21
A network situation
database
without
student data
computer with
CBT program
FIGURE 3-10
server with tutor
module and / or
CBT program
diskette with
one student’s
data
database
with student
data
computer with tutor
module (and CBT
program, if required)
diskette with
one student’s
data
database
without
student data
computer with
CBT program
Various computers without a network, on which the student data is exchanged by diskette
c o nne c t en gin e m a n a ge me n t u se r m a n ua l
If you install the software on one computer, the data must be stored on the hard
disk of this computer. The setting for this is: local drive and standalone computer
(see Figure 3-11a).
There is only one central database in a network. The computer on which this database is stored operates as the server. The other machines are clients. A program on
the client computer can only be started, if this computer has access to the database on the server. This means that the server must always give the clients access
to the database.
22
a
FIGURE 3-11
b
a
Typical tab settings for a database for a standalone computer
b
Typical tab settings for a database for a network server
The database can be used on a network no matter which network software is being
used. The database can be installed on peer-to-peer networks (e.g. Windows For
Workgroups or Windows 95 & 98) and on client-server networks (e.g. Netware, TCPIP). The only requirement for the network is that the directory in which the data is
stored is shared on the network. On the clients, the path to this network directory
must be specified in the File location field.
c o nne c t e n gin e m a n a gem e n t u se r m a n ua l
3
Figure 3-11b shows a typical server configuration. Figure 3-12a shows a typical client
configuration. In this example the server shares its local C drive as the network
source and is linked to the client with this network source under the drive letter 'Y'.
Consult your network software documentation for connecting network sources.
Manager
23
a
FIGURE 3-12
b
a
Typical tab settings for a database for a network client
b
Typical tab settings for a database for more than one computer without a network
If the computers are not connected to a network, the data can be gathered by
giving each student a diskette on which his or her data is stored. The setting for
this is disk drive (see Figure 3-12b). The drive letter used by the CBT program to
copy the data is specified in the relevant field. For more information on exporting
to and importing from diskettes, see Section Student file management in Chapter
Student results, page 51.
The File location field contains the path to the database. The files are always on the
computer hard disk, unless the network drive option has been selected. The path
must then always refer to a location on a network drive.
The name to be filled in on this tab is the name of the computer. In a network this
name is used to register the computer in the database. The name given must be
c o nne c t en gin e m a n a ge me n t u se r m a n ua l
unique. When a student is working on the computer, this name appears in the Student results program. See Section Viewing students' results in Chapter Student
results, page 54.
User
24
FIGURE 3-13
The User tab
User data can be amended on the last tab. The name of the user and the distributor always appear on the start screen and in the Help About dialog box.
The serial number can be found on the rear of the control unit. This number
should be quoted in all orders so that the correct registration codes can be sent.
The data on the distributor from whom you purchased this product is in the
bottom section of the screen. Contact your distributor for support.
3.4
Password for Tutor mode
The user must type in a password to access Tutor mode in the Start menu or to
start the tutor programs directly. The first time the software is installed no pass-
c o nne c t e n gin e m a n a gem e n t u se r m a n ua l
3.5
3
word is entered. The password can be entered in the Manager from the Options
menu by selecting the Enter password option. You will then be prompted twice for
the new password. For problems with the password, see also Appendix Troubleshooting, page 71.
Manager
Clone License
A low-cost clone license can be obtained, to run the engine management systems
bought for a control unit, on a second control unit.
During installation and running the license wizard the first control unit (the control unit with the license key) is connected all computers that are used.
Then all other control units are used on the computer need to be licensed as a
clone. Click Clone License in the Options menu to do this. The license wizard then
appears on screen.
When the new control unit is connected to the computer and the next button has
been clicked, computer starts communicating with the control unit. Finally the
clone license key is asked.
After this procedure both control units can be used. Repeat the procedure for every
new control unit.
c o nne c t en gin e m a n a ge me n t u se r m a n ua l
25
26
c o nne c t e n gin e m a n a gem e n t u se r m a n ua l
There is a training program for each Connect engine management system. These
various programs can be started up from the Connect Start menu (see Chapter ,
page 9.). Each program comprises practical measurement exercises and theory
based on an engine management system. The Connect system panels form the
basis for the practical work. The exercises and the theory are not supplied on paper
but in the form of computer-based training (CBT).
4.1
CBT program
CBT program
4
4
Structure
Each CBT program has a hierarchical structure consisting of three levels. This
structure is illustrated in Figure 4-1. The program opens with an overview of the
total engine management system. Three different control systems can be selected
from this overview: the injection, ignition and idle control systems. Each control
c o nne c t en gin e m a n a ge me n t u se r m a n ua l
27
system comprises a number of components. The same components can occur in
more than one control system.
level 1
engine
management
level 2
injection
control
ignition
control
idle control
control unit
control unit
control unit
actuator
actuator
actuator
actuator
sensor
sensor
sensor
sensor
sensor
sensor
level 3
28
FIGURE 4-1
The structure of the CBT program
4.2
Learning objectives
The Connect system CBT programs have been developed to achieve specific
learning objectives. The learning objectives relating to the components of an
engine management system can be divided into the following groups:
1
What is the component made of, what does it look like, where is it fitted and
how does it work?’
These are the aspects of the component which are dealt with in the theory and
exercises on the component. The student starts this instruction by clicking on
the relevant component.
2
‘What is the function of the component in the process and what is the relationship between the components?'
These are aspects of the component which are dealt with in the theory and exercises on the control unit. The student starts this instruction by clicking on the
c o nne c t e n gin e m a n a gem e n t u se r m a n ua l
After carrying out the practical tasks, students are able:
• to identify the components in the engine management system in question;
4
control unit.
CBT program
• to name the components in an engine management system;
• to divide an engine management system into the three control system
systems;
• to name the components which are part of the injection control system;
• to name the components which are part of the ignition control system;
• to name the components which are part of the idle control system;
• to categorize the components of the engine management system as
sensors, control unit and actuators;
• to connect the components to the control unit;
• to explain how the most important sensors and actuators work;
• to specify the effect of a component on the process.
• to explain the waveform of the voltage at the relevant terminals of the
engine management system;
• to use Ohm's Law when detecting errors in sub-circuits in an engine
management system;
• to check the operation of sensors and actuators using an oscilloscope;
• to draw the block diagrams of the control systems;
• to distinguish the feedback sensors from the other sensors;
• to understand the concepts of desired value (Xo) and actual value (X)
and be able to explain them;
• to predict the control action ( Y) of a control system as a consequence
of the difference between the set-point and actual values;
• to explain the control strategy of the various control systems.
c o nne c t en gin e m a n a ge me n t u se r m a n ua l
29
4.3
FIGURE 4-2
30
Logging in
The Login training program dialog window
When an engine management system is selected from the Start menu, the Login
training program (Figure 4-2) window is displayed. The student is asked to type in
his name and password. If the student's password is not known, a second window
is displayed in which confirmation of the password is requested. The student must
retain the selected password for subsequent sessions. If a student should forget
his password, the tutor can delete this password in the Student results program.
For more information, see Section Student file management in Chapter Student
results, page 51.
Once the password and name have been checked, the CBT program is initialized.
On screen the various operations which have to be executed are displayed on the
introduction screen.
If the CBT program has been installed on more than one computer, without a network, the student data are copied from diskettes. For more information, see Section Database in Chapter Manager, page 20. The student is then asked to insert his
diskette in the diskette drive before he can login. The diskette drive is configured
in the Manager. The data are then copied from diskette. The CBT program asks for
the diskette again when the student quits the program. The results of the session
are then copied to diskette again. For instructions on creating student diskettes
and importing the results into the central database, see Section Editing student
accounts in Chapter Student results, page 52.
c o nne c t e n gin e m a n a gem e n t u se r m a n ua l
The overview of the engine management system
Once a student has logged in successfully and the CBT program has been initialized, the overview of the selected engine management system (Figure 4-3) is displayed. All the components of the engine management system can be seen in the
overview. Press a key or mouse button to clear the introduction window.
4
4.4
CBT program
31
FIGURE 4-3
The overview of an engine management system at the start of the CBT program
The student must ensure that the engine management system will work by creating the three engine management control systems (see Figure 4-3). When the
student has completed this task and finished the CBT program, the engine man-
c o nne c t en gin e m a n a ge me n t u se r m a n ua l
agement system panels operate as they do in a car. The operation of the system is
then displayed on the screen (see Figure 4-4).
32
FIGURE 4-4
The overview of the completed and operating system
When the student goes on to the next question a certificate appears in the screen
with a list of students who have completed the system (Figure 4-5).
When a student clicks on the injector, the spark plug or the idle actuator, he
'zooms' in on the injection, ignition or idle control system respectively. The complete engine management system only operates when all the control systems have
been completed.
FIGURE 4-5
The certificate which is displayed
when the CBT program has been
completed.
c o nne c t e n gin e m a n a gem e n t u se r m a n ua l
The overview of the control system
Each engine management system is split into three control systems. Each control
system forms a complete unit within the CBT program.
4
4.5
CBT program
The instruction on a control system has a fixed structure. The screen displays an
overview of just those components which are part of the control system. First the
student is asked to identify the control unit, the actuators and the sensors. Then a
base plate for a block diagram appears at the bottom of the screen. The student is
asked to complete the block diagram (see Figure 4-6). For this the components
must be connected up to each other correctly using the soldering iron (see Section
Toolbox, page 39). Before the student can do this, he must first obtain the components by working through the instructions on each component. These instructions
are accessed by clicking on the component in the overview (see Section The component instructions, page 36).
When a student has obtained all the components, he can move them out of the
toolbox to the block diagram by dragging them with the mouse (holding the left
mouse button down). The student can check whether the control unit he has constructed works by starting the 'engine' with the ignition lock. If the engine does not
start, this indicates that the task has not been completed. If the engine starts, the
task has been completed. The start sound indicates whether the task has been
completed correctly.
When the block diagram has been completed correctly by the student, the control
system will work as it would in the actual engine management system. For this the
actuators have to be 'soldered' to the outlet terminals and the sensors to the inlet
terminals of the control unit icon. The actuators must be included in the process
to be automated. Also for most control systems, the control circuit in the block diagram has to be closed by inserting the correct sensor in the process and establishing feedback to the control unit. In Figure 4-6 for example, the oxygen sensor
is located to the right of the 'process' block and connected to the control unit.
As a reward, the current status of the actuators and sensors is shown in the overview and the appropriate engine noise is heard.
c o nne c t en gin e m a n a ge me n t u se r m a n ua l
33
FIGURE 4-6
34
The overview of the GM Multec SPI injection control system
In the last white sheet (see also Section White sheets containing theory, page 42) for
the control system, instead of the block diagram, all the relevant meters are displayed and the student can see all the connections to the control system in operation and verify them by changing the sensor settings.
If a student selects a control system containing components which he has previously connected, the circuit diagram of the control system appears on the screen.
In this diagram the student can see how he can connect components again, so
that he does not have to go through all the lessons on these components. The
tutor can select how this diagram is presented, when the student starts on the control system. The following three options are available:
• fixed setup with wiring
This configuration is suitable for computers in which the same set of
panels is always used (which together form an engine management
system). The CBT program assumes that the components are already
connected. The student is then not asked to restore component connections which he has already made.
c o nne c t e n gin e m a n a gem e n t u se r m a n ua l
4
• fixed setup without wiring
This configuration is suitable for computers in which the same panels
are always used. The CBT program assumes that the SIM connections
(see also Section SIM connections in Chapter Panels, page 62.) have
already been established by the tutor and the power supply to the panels
is already connected. The student is asked to restore previously established test-lead connections.
CBT program
35
FIGURE 4-7
Circuit diagram for the fixed setup without wiring configuration
• no fixed setup
This configuration is suitable when the same panels and components
are shared by several computers. This situation occurs when for
example four computers are using the CBT program with just three
panels with a coolant temperature sensor.
Before continuing, the student is asked to specify which panels he has
(see Figure 4-8). He is then instructed to connect the earth and +12 V
busbar on the available panels and to establish the necessary SIM
connections. Finally the student is asked to reconnect any previously
connected signal wires (with test leads in appropriate colours) using the
circuit diagram. The student cannot continue with the control system
until these three stages have been completed.
The CBT program then assumes that the panels have been connected in
c o nne c t en gin e m a n a ge me n t u se r m a n ua l
accordance with the circuit diagram and that the panels which have not
been selected are not available. For more detailed information, see
Section General in Chapter Manager, page 17.
36
FIGURE 4-8
4.6
Circuit diagram for the no fixed setup configuration
The component instructions
The theory on components is dealt with in a fixed order. First the function of the
component is explained and the location of the component is shown (see for
example Figure 4-9). Then the operation of the component is explained using a
cutaway view. The electrical aspects of the component are dealt with using the diagram symbol (see for example Figure 4-10). The student connects the component
step by step and the circuit diagram grows. There are then measurement exercises
and an explanation of the component signal. For some components there are then
details of the role of the component in the process. Once a student has completed
the exercises on a component, the icon for the component appears in the toolbox.
c o nne c t e n gin e m a n a gem e n t u se r m a n ua l
4
CBT program
FIGURE 4-9
Overview of the location of the idle stepper motor
37
FIGURE 4-10
Cutaway view of the fuel pump (high pressure)
c o nne c t en gin e m a n a ge me n t u se r m a n ua l
The control unit
The control unit is a special component in every control system. The information
on the control unit is therefore different for each control system.
In the lesson on the control unit, all the links between the status of the sensors
and the actuator drives are dealt with one by one. The control system is explained
in this way using the exercises.
In order to complete the instruction on the control unit, all the panels which are
part of the control unit must be connected, so that all the measurement exercises
can be carried out. Depending on the configurations described earlier in this
chapter, the CBT program checks whether a specific component has been connected. If the fixed setup with wiring option has been selected, the student can
always continue with the lesson on the control unit: the CBT program assumes
that all the connections are in place. For the other two options, the student himself
must have connected the panels. The CBT program assumes that the component
is connected if the component is displayed in the circuit diagram when the student
starts on the control system or if all the connections have been established in the
lesson on the component.
38
FIGURE 4-11
The screen showing the lesson on the Motronic ML 4.1 injection control unit.
c o nne c t e n gin e m a n a gem e n t u se r m a n ua l
4
If the feedback from a lesson on the control unit appears as: ‘The injectors are not
connected’, this means that the student has not made all the necessary connections in the lesson on the injectors. The student can solve this problem by navigating through the lesson on the injectors (see Section Toolbox, page 39) and
carrying out the exercises there until the injectors are connected. The student can
then complete the lesson on the control unit without having completed the lesson
on the injectors.
CBT program
At the end of the lesson on the control unit, the student is given the control unit
in the toolbox.
4.7
Screen layout
The theory and exercises are displayed on the computer screen. The layout of the
screen is fixed, so that the same type of information is always found in the same
place (Figure 4-12). Figures, graphs and tables on the topic of the instruction can
be found in the left hand grey section of the screen. A number of standard elements are always found on the dark-grey background pattern on the right and top
of the screen.
Toolbox
The toolbox contains standard tools and components. The standard tools are light
grey and are always shown in the toolbox. Components have a dark grey background. A student ‘win’ a component before the icon for the component appears
in the toolbox.
• circuit diagram
The circuit diagram shows how the components of the selected control
system are connected to the control unit at any given time. The circuit
diagram takes into account the student's progress. When a student
starts on a control system for the second time, the circuit diagram automatically appears as it was when the student left the control system (see
Figure 4-7 and 4-8). The exact display of the diagram in the window
depends on the panels setup settings. For further details of this configuration, see Section General in Chapter Manager, page 17.
c o nne c t en gin e m a n a ge me n t u se r m a n ua l
39
toolbox
space for figures,
graphs and tables
topic
white sheets with text
and explanation which
have yet to be read
white sheets which
have already been
read
light yellow sheets
showing tasks which
still have to be
completed
light yellow sheets
which have been
completed
feedback on an
answer given
40
various meters, showing
process values
FIGURE 4-12
Screen layout
FIGURE 4-13
The toolbox
new attempt button
answer
• Question mark
The student can use the question mark to get help on sections of the
screen. When you click on the icon, a window appears (Figure 4-14) with
an explanation and the cursor changes to an arrow with a question
mark. The explanation in the window relates to the section of the screen
indicated by the student with the cursor.
• Elevator
The student can use the arrow in the toolbox to "take the elevator" to the
next level (see Figure 4-1). So a student can go up from a component to
the selected control system and from there higher up to the engine
c o nne c t e n gin e m a n a gem e n t u se r m a n ua l
4
CBT program
FIGURE 4-14
The Help window
management overview. If the student returns later to the component,
the white and the light yellow sheets where he was when he took the
elevator, reappear. In the engine management overview (the highest
level) the arrow changes into an exit sign, by means of which the student
can quit the program.
• Calculator
In many tasks the student is asked to make a calculation. All these calculations can be made with this calculator. The calculator can be operated
with the mouse or the keyboard. The calculator can be terminated by
closing the window.
FIGURE 4-15
The calculator
• Magnifying glass
Sometimes the student is asked to find a component or to point to a
specific part. The magnifying glass must be used for this. Click on the
icon to change the cursor into a magnifying glass. A part can be indicated by clicking on it with the magnifying glass.
c o nne c t en gin e m a n a ge me n t u se r m a n ua l
41
The magnifying glass can be replaced by clicking on the toolbox or by
holding down the right mouse button.
• Soldering iron
The student can use the soldering iron to connect the components on
the base plate by drawing a line between them. This is how the student
draws the block diagram of the control system.
• Pressure gauge
In some questions the student is asked to measure the pressure in a
pipe. This can be done by dragging the icon from the toolbox to the
required place.
White sheets
containing theory
42
FIGURE 4-16
White sheet with text and explanation
The theory is presented on the large white sheets (see Figure 4-16). These sheets
can be turned over when all the relevant tasks (the light yellow sheets) have been
carried out. When the cursor moves over a sheet which can be turned over, a blue
arrow appears on the right side of the pile. Click on the sheet and it will move to
the right to the pile which is almost off the screen. You can browse through this
pile of sheets which have been turned over by clicking on it.
FIGURE 4-17
Yellow memo sheet with extra
explanation
There are sometimes red words in the theory. The student can click on these words
for more information about the word. A yellow post-it memo then appears below
c o nne c t e n gin e m a n a gem e n t u se r m a n ua l
the red word, with the information. This yellow memo disappears again when you
click on it (see Figure 4-17).
FIGURE 4-18
4
Light yellow sheets
containing questions
CBT program
Light yellow sheet with a question or task
A pile of yellow sheets can be seen underneath the sheet containing the theory.
Only when all these sheets have been turned over can the white sheet to which
these questions relate be turned over. A question can be turned over if a blue arrow
appears when the cursor is moved over the sheet. Once a sheet is turned over, the
sheet moves onto the yellow pile on the right, in the same way as the white sheets
containing theory. You can return to the previous question by clicking on the pile
on the right.
Some question sheets can only be turned over if the question has been answered
correctly. These questions are considered to be mandatory in the CBT program.
With other questions the student can continue even if the answer given is incorrect. If the student makes a second attempt at such a question, this is registered.
For more information on second answer attempts also see Section Viewing students' results in Chapter Student results, page 54.
Some question sheets are light green. These are special questions which a student
must answer if he answered the previous (yellow) question incorrectly. The green
questions are actually sub-questions relating to the previous main question, which
an advanced student omits by answering the main question correctly. The relative
importance of all sub-questions is always less than the importance of the main
question.
For more information on the importance of the questions, see also Section The
meaning of the diagrams (CBT program) in Chapter Student results, page 56.
c o nne c t en gin e m a n a ge me n t u se r m a n ua l
43
Grey answer box
Below the yellow answer sheets there is often a grey box containing possible
answers. The following types are possible:
FIGURE 4-19
Multiple choice question with one correct answer
• Multiple choice questions with one correct answer
When a student clicks on an answer, he receives immediate feedback on
the answer given.
44
FIGURE 4-20
Multiple choice questions with several correct answers
• Multiple choice questions with several correct answers
The student only obtains feedback by clicking on the check button.
FIGURE 4-21
Multiple choice questions with figures
• Multiple choice questions with figures
Different figures are displayed on the screen, from which the student
must make a choice.
c o nne c t e n gin e m a n a gem e n t u se r m a n ua l
4
CBT program
FIGURE 4-22
Open question
• Open question
in the case of open questions, a field appears in which the student can
type the answer. Behind this field is often the unit in which the answer
must be given. The way in which the CBT program interprets numerical
answers depends on the number format settings in Windows. For more
information on these settings, see Appendix Number format in Windows,
page 70.
The answer is assessed when the student presses Enter or clicks on the
Check answer button.
45
FIGURE 4-23
Setting questions
• Setting questions
In this type of question, the student is asked to set something to a
specific value. When the student thinks the correct value has been
reached, he can click on the Check setting button.
When a question has been answered, the grey box moves to the left, to make space
for the feedback field. If the question has been answered incorrectly or the task has
been carried out incorrectly, a Try again button appears above the grey box. When
the student clicks on this button, the box moves back to its former position and
the student can have a second attempt.
c o nne c t en gin e m a n a ge me n t u se r m a n ua l
Feedback field
FIGURE 4-24
Feedback field
A blue feedback field appears below the yellow question sheets when the student
gives a correct answer. If the question is answered incorrectly or the task is carried
out incorrectly, this field is red.
4.8
Skipping questions
Difficult questions can be marked. These questions then do not have to be
answered. The student then immediately gets the blue arrow to skip the question.
46
FIGURE 4-25
Marking a question to skip it.
To allow questions to be marked, the CBT program must be started from Tutor
mode (by pressing F2 in the Start menu, see Section Tutor mode in Chapter Start
menu, page 10.). The right mouse button then has to be clicked on the relevant
question. The Skip question option then appears on the screen. If this option is
selected, the question can be skipped from that point on. Marked questions can
be deleted by clicking on the right mouse button once again. The Skip question
option then appears on the screen preceded by a tick. The marker is removed by
selecting this option.
The question markers are stored in the Skip Questions section of the CONNECT.INI file in the Windows directory. If Connect is installed on several PCs, the
markers can be taken from another PC by copying this section to CONNECT.INI
on the PC in question.
4.9
Creating screenshots
You can use the PrintScreen key on the keyboard to create screenshots of the CBT
program. The window Connect screenshots then appears.
c o nne c t e n gin e m a n a gem e n t u se r m a n ua l
These operations can be performed on the image:
• selecting
A rectangular part of the image can be selected
• hiding
Rectangles and ellipses of the image can be erased
4
Edit menu
CBT program
• marking
Part of the image can be marked with a yellow rectangle of ellipse.
• adding text
Text can be inserted by clicking on a location in the image and entering
the text.
Printing
Saving to the
assessment database
The selected part of the image can be printed on the default printer. The default
printer can be selected in the Print Setup dialog box.
The selected part of the image can be saved to the private assessment database.
The ConTest program is required for this option.
This function is only available if the CBT program is started in tutor mode (enter
tutor mode by pressing F2 in the start menu, see Section Tutor mode in Chapter
Start menu, page 10.)
When you create images for the assessment database, it is best to set the screen
to 256 colors to increase performance and reduce memory (Appendix Screen settings in Windows, page 67.)
c o nne c t en gin e m a n a ge me n t u se r m a n ua l
47
48
c o nne c t e n gin e m a n a gem e n t u se r m a n ua l
The Student results program is the application with which you manage student
administration. Creation of new student accounts, grouping students, viewing the
results of a student for a specific component or the average class score for an
engine management system are some of the options using the Student results
program.
5.1
Student results
Student results
5
5
How does the Student results program work?
Connect engine management has an integrated database in which the students'
answers and other information is recorded. This database is used by the various
CBT programs. In this way the database ensures that a student starting the CBT
program a second time can continue from the same point where he left off.
The Student results program uses the answers recorded in the database to calculate the students' results. All the operations in Student results are directly linked
to the Connect database.
c o nne c t en gin e m a n a ge me n t u se r m a n ua l
49
The Student results screen comprises three sections (Figure 5-1). At the top is an
overview of the groups and students. The middle section contains an overview of
the CBT program topics: engine management systems and components. In the
bottom section of the screen are the results of the selected student(s) for the
selected topic. At the very bottom of the screen is a help field for the section of the
screen in which the cursor is located.
Menubar
List of groups. When a group
is selected from this list, the
students in the group are
displayed.
Old groups can be hidden
to keep the list of groups
concise.
List of components in
the selected regulator.
This field shows the
selected group or
student.
List of engine management
systems installed.
50
List of control systems
in the selected engine
management system.
The total time a student
spends on the tutorial
program. The average
for groups.
If the results are
displayed continuously,
the bar charts are
refreshed when the topic
or student changes. In a
network situation the
charts are also updated
when a student gives an
answer.
Indicates whether the
selected student is
currently active on a
computer in the network.
In the case of groups,
the number of active
students is shown.
A brief explanation of the section of the
screen where the cursor is currently
located.
FIGURE 5-1
List of students from the selected group.
One student can be selected from this list.
This field shows the
selected topic
The Student results screen
c o nne c t e n gin e m a n a gem e n t u se r m a n ua l
The results of the selected student for the selected
topic are shown in bar charts for 5 categories.
5
Operations can be carried out by clicking on buttons on the screen or by selecting
the relevant option in the menu. In Figure 5-2 an overview of this menu is displayed.
Student results
FIGURE 5-2
5.2
The Student results program menu
Student file management
In the top section of the screen you can manage the student file. Students are
divided into groups. The left field contains the list of groups. If you select a group
from this list, all the students in this group appear in the right field. You can edit
the student file at two levels: groups and students.
Editing groups
The following operations can be carried out on groups, by clicking on the relevant
button below the list of groups or selecting the option from the Group menu:
• Creating a new group
• Editing an existing group
• Deleting an existing group
If a new group is created or an existing group edited, a window appears in which
you can specify the characteristics of the group (see Figure 5-3). The name of the
group is given in the yellow field.
You can see from the box whether or not a group is marked as old. An old group
can be hidden in the list of groups, by deselecting the show old groups option (see
Figure 5-4). This can be used to make the list of groups more concise, just showing
current groups, without having to delete the old groups.
When an existing group is deleted, all the students in the group and their results
are also deleted.
c o nne c t en gin e m a n a ge me n t u se r m a n ua l
51
FIGURE 5-3
Dialog box for editing or creating a group
FIGURE 5-4
Old groups can be hidden to keep the list short (see Figure
52
Editing student
accounts
5-1)
The following operations can be carried out on student accounts:
• Creating a new student account
• Editing an existing student account
• Deleting an existing student account
• Exporting student data to diskette
• Importing student data from diskette
• Moving an existing student to a different group
By clicking on the buttons below the list of students or selecting the relevant
option from the Student menu, you can create a new student account, edit the data
in an existing student account or delete a student and his results.
When a new student account is created or an existing student account is edited, a
window appears showing the student's data (see Figure 5-5). You can type in the
name of the student in the top yellow field. Student names must be unique: it is
c o nne c t e n gin e m a n a gem e n t u se r m a n ua l
FIGURE 5-5
5
therefore not possible to create two students with the same name. When spelling
names, upper and lower case letters must be taken into account (by the student
as well). The first part of the specified name is used in the CBT program to address
the student.
Student results
Dialog box for editing or creating student accounts
Each student also has a personal password, which he chooses. This password
cannot be retrieved from the database. Only the tutor can delete an existing password, for example if a student forgets his password. When a student enters his
password it is displayed as asterisks in the bottom yellow field. If no password is
known for a student, the CBT program asks the student for a new password the
first time he logs in. See also Section Logging in in Chapter CBT program, page 30.
Students can only be moved to other groups by dragging them to the relevant
group. You can do this by clicking the left mouse button on the name of the student and keeping the mouse button pressed down as you move the cursor to the
required group. Release the mouse button above a group to move the student to
this group.
Exporting student data to diskette is only necessary if the CBT program is installed
on several computers which are not on a network. One of these computers then
holds the central database of student data. A diskette containing personal data is
then created for each student. When a student starts the CBT program, this data
diskette is requested. At the end of the lesson the student's results are again
written to diskette. The tutor can import the data back from the diskette submitted. You can export and import student data by selecting the option in the Stuc o nne c t en gin e m a n a ge me n t u se r m a n ua l
53
dent menu. A student's data can be copied to diskette by selecting the student and
a
FIGURE 5-6
b
a
Dialog box for exporting student data
b
Dialog box for importing student data
54
selecting Export to diskette from the Student menu. In the dialog box which then
appears (see Figure 5-6) you can if necessary specify the diskette drive to which the
data must be copied. Ensure that the diskette is in the diskette drive before continuing. Click on the Start button for the program to start copying the data. The
Import from diskette option is selected to import a student's data. The drive in
which the data is located can be changed in the dialog box. Press Start to have the
program search for the student's data on diskette and copy it to the central database. For more information on the use of several computers, see also Section
Database in Chapter Manager, page 20.
5.3
Viewing students' results
To view the results of a student or group group of students, the required student
or group must be selected by clicking on their name in the list. The selected group
or student is displayed in the bottom part of the screen in the Results of: field.
c o nne c t e n gin e m a n a gem e n t u se r m a n ua l
A topic must also be selected in the central section of the screen. The topics are
arranged hierarchically. At the top of the hierarchy are the engine management systems. These are displayed in the left field. When an engine management system is
selected, the three associated control systems appear in the central field. Select a
control system and the components which are part of the selected system are displayed in the right field. One part can be selected each time from the list of components.
5
Selecting a topic
Student results
When ConTest is installed (Setup.exe in the directory ConTest on the CD-ROM)
there also is an option to display the results of the tests.
The selected topic is also displayed in the results about field below the field containing the selected student.
Refreshing of the
results display
When the continuously refresh results option is selected, the results are displayed
immediately during selection of the topic and the student. If, for example, the student 'John Smith' is selected, the tutor can, as it were, 'zoom in' on John's results
for the magnetic pickup by successively:
• selecting ‘Motronic ML 4.1’ (John's average performance for all the
components of all the control systems in Motronic ML 4.1 are then
displayed);
• selecting 'injection' (the results for all components which are part of the
injection control system are then displayed);
• selecting the ‘magnetic pickup’ (see Figure 5-7).
In this way the tutor can quickly assess any problem areas for a specific student.
In the same way the tutor can view the group average and 'zoom in' on different
students.
c o nne c t en gin e m a n a ge me n t u se r m a n ua l
55
a
FIGURE 5-7
56
AFBEELDING 5-8
Displaying a network computer
b
a
Zooming in on the results for the magnetic pickup
b
Zooming out to the group average
In a network, the results are also continuously updated, without the tutor changing
topic or student, if the student in question is working at the time on a different
computer. It is possible to see whether a student is active or not in the field behind
the selected student. The name of the computer being used is then displayed in
that field (see Figure 5-8). When a group is selected, the number of students in the
group who are active in the network appears in this field. For more information on
configuring a network database, see Section Database in Chapter Manager, page
20.
Refreshing results may take longer on a slower computer. The tutor can change
selection more quickly by deselecting the continuously refresh results option and
then see the results by clicking on the refresh button.
The meaning of the
diagrams (CBT
program)
The results are displayed in five bar charts. Each chart relates to a specific category
of task. In the CBT program every task the student has to carry out is classed in
one of these five categories:
• Ohm's law
All questions and tasks relating to the calculation of voltage, current and
resistance come under this category.
c o nne c t e n gin e m a n a gem e n t u se r m a n ua l
• Equipment control
If the skill of operation of the multimeter is being assessed, for example,
the question is included in this category.
5
• Lenz's law
This type of question covers induction and coil behavior.
Student results
• Knowledge of components
These are questions which relate to the identification of components
and the naming of parts.
• System insight
In this sort of task, the relationships between sensors, control unit and
actuators play a role..
statistics for second
attempt
statistics for first
attempt
percentage still to be
answered
percentage aswered
incorrectly
percentage answered
correctly
average achieved by
guessing
FIGURE 5-9
Statistics by category
The height of the bar charts indicates the relative importance of the various categories within the selected topic. This does not just relate to the number of tasks
but also the importance assigned to the question in the CBT program. Essential
c o nne c t en gin e m a n a ge me n t u se r m a n ua l
57
questions have a higher value than trivial questions
The blue bar in each chart shows the importance of tasks correctly carried out (see
Figure 5-9). The red bar above shows the percentage of errors. The remaining
space in the chart shows the tasks not (yet) carried out. The horizontal line in the
chart shows the statistical average for the tasks carried out. This average indicates
what might be expected if a student guessed everything.
Each bar chart comprises a first and second attempt, shown as 1 and 2. Because
Connect engine management is a training program (not an assessment program),
if the student carries out a task incorrectly, he is allowed to have a second attempt.
The height of the chart for the second attempt therefore depends on the number
of errors made (the red bar) on the first attempt.
The meaning of the
diagrams (assessment
database)
Assessments that are submitted in ConTest can be viewed in the Student results
program, by selecting test in the subject section of the screen. The tutor can zoom
in on the student's results in the same way as when reviewing the CBT results.
The test results are displayed in a bar chart, like the one shown in Figure 5-10.
58
FIGURE 5-10
Test results
This example shows that 10 tests have been submitted. When a group of students
has been selected, this chart indicates there are two students in the group that
have scored an 8 (a number between 7.5 and 8.5 on a scale between 1 and 10).
When a single student has been selected, this bar chart indicates the student has
scored an 8 for two of the ten tests he has submitted.
c o nne c t e n gin e m a n a gem e n t u se r m a n ua l
In the results it is always indicated whether the selected topic has been completed
by the student or group. Completed is only displayed for a group when all the students have completed the topic.
Student results
Other data
The total time spent by the student in hours and minutes is shown for each student. For groups this time is the average for all the students in the group.
5
Deleting results
All a student's results can be deleted by deleting the student account. However it
is possible to delete the results of one student for one component or one test by
selecting the relevant student and the relevant component or test and then
clicking on the delete button. This can be useful if you want a student repeat a component and you want to assess the results.
Printing out results
The results of a group or student for a selected topic can be printed out by clicking
on the print button or selecting the option in the Results menu. The results are then
printed out on the selected paper format on the default printer. On the sheet of
paper is the name of the establishment or school (see User Settings in the Manager
chapter), the group (and, where appropriate, the student), the topic and the bar
chart of the results.
The default printer and the printer configuration can be changed with the File, Print
setup menu option.
5.4
Backup copies
The student data and results are stored in a number of files in the directory \CONNECT\DATABASE. The CBT program must have access to this directory to record
the students' results. If you are using simple network software or if there is no network, the data in this directory is generally very poorly protected. Various products
are available commercially for the protection of computers. See Appendix Security
in Windows 95, page 76. for protection options in Windows 95. To ensure that the
results are not lost, you can make backup copies and store them in a safe directory
or on diskette.
c o nne c t en gin e m a n a ge me n t u se r m a n ua l
59
You can make a backup copy by selecting the Backup option from the File menu. A
dialog box then appears, from which a directory can be selected. The copies of the
database files are placed in this directory. Click on the OK button to copy the files.
If the database files are corrupted, you can restore the copies by going into the File
menu and selecting Restore. You then have to enter in the dialog box the directory
in which the copy is located. The Student results program will not start up if the
database files are badly corrupted or even missing. The backup copy can then be
restored manually in the \CONNECT\DATABASE directory. The following files
should be copied to this directory from the directory in which the backup copy is
located:
• ANTWOORD.*
• GROEP.*
• INSTRUCT.*
• STUDENT.*
When ConTest is installed, the TOETS.* files need to be restored as well.
60
c o nne c t e n gin e m a n a gem e n t u se r m a n ua l
To complete the CBT on a component, you have to have a panel with the relevant
component.
Each panel has terminals for the power supply and sockets for the signal connections. The panels are printed with symbols which are used in the circuit diagrams
of the engine management systems.
6.1
Power supply
The Connect system operates on a 12 volt direct voltage. The supply source should
be able to supply peak currents of 20 amps. A stabilized power source or an accumulator battery are recommended. The power supply should be connected to the
red (positive) and black (negative) cables on the control unit. Only these terminals
protect the Connect system against short circuiting and pole reversal.
A message will appear on the screen in the tutorial program if the supply voltage
is too low.
c o nne c t en gin e m a n a ge me n t u se r m a n ua l
Panels
Panels
6
6
61
Fuses
Fuses are fitted on the control unit (10 amps inert). The guarantee for the Connect
system is invalidated if a higher value fuse is used.
Power supply to panels
All the Connect panels can be supplied with power via the red sockets at the top
and the black sockets at the bottom of the control unit panel. Both the earth terminals and the positive supply terminals of all the panels are connected to these.
As shown in the circuit diagram printed on the panel of the control unit, the red
sockets are linked to the ignition lock. The power supply to the panels can now be
switched on and off using the ignition position.
Ignition lock
The ignition lock fitted on the control unit panel is not directly linked to the control
unit like all the other engine management system components. The connections
between the ignition lock and control unit should therefore be established by the
tutor or student as shown in the engine management system diagram (for more
information on this diagram, see Section System overview in Chapter Manager,
page 14 and Section The overview of the control system in Chapter CBT program,
page 33). In Figure 6-1 the ignition lock wiring is shown.
62
6.2
Connectors
Metering sockets
The connections between system components can be established using cables
with 4 mm plugs. The electronic circuits in the control unit are protected against
faulty connections. If a short circuit occurs, notification of this is given on screen
when the tutorial program is in use (see Figure 6-2).
SIM connections
As well as the connections with the 4 mm plugs, there are three other connections
to simulate engine behavior. The simulation cables are used to establish a connection between the control unit and various panels. The simulation connections are
as follows:
c o nne c t e n gin e m a n a gem e n t u se r m a n ua l
6
Panels
63
FIGURE 6-1
The control unit panel with wired ignition lock, connected SIM cables and RS232-connection. The panel on the
left is supplied by means of the connected test leads.
FIGURE 6-2
Notification of short circuits
c o nne c t en gin e m a n a ge me n t u se r m a n ua l
• SIM1 for the oxygen sensors
This simulation connection can be used to simulate a closed control
circuit in the injection control system.
The oxygen signal simulated using the connection can be changed by
the student using the lean-rich switch on the oxygen sensor panel.
• SIM2 for the engine speed (magnetic pickup and Hall sensor)
This connection is used to simulate a closed control circuit in the idle
control system when the control unit detects a closed throttle.
Measuring tasks can also be conditioned using this simulation connection.
The engine speed can usually be specified using a potentiometer on the
panel with the magnetic pickup or Hall sensor. When the control unit
issues a signal via the simulation cable, the engine speed cannot be
adjusted with the potentiometer on the panel with the magnetic pickup
or Hall sensor. On the panel this is visible from the LED above the SIM
connector.
64
• SIM3 for the detonation sensor
This is used in some engine management systems to simulate closed
loop in the ignition control system.
RS232-connector
The link between the control unit and the computer is an RS232 connection. Most
PCs have one 9-pole and one 25-pole male sub D connector for serial communication. Refer to your computer manual if you have any doubts about the RS232 connectors. For more information on configuring serial communication in the
software, see Section Communication in Chapter Manager, page 18.
The RS 232-cable supplied with the control unit is a standard cable with 9-pole sub
D connectors. There are various adapters available commercially if this cable is not
adequate.
c o nne c t e n gin e m a n a gem e n t u se r m a n ua l
Safety
Measuring tasks should only be carried out on the ignition when the high voltage
cables and any distributor caps are fitted and connected correctly. Only then is
there no danger of high voltage contact.
6
6.3
Panels
Moving parts are covered by protective caps. The distributor cap provides this protective cover in the distributor. Measuring tasks must not be carried out without
this protection.
6.4
Measuring equipment
In the measuring tasks students are asked to measure voltage, resistance and ignition angles. The following measuring equipment is required for this:
• a multimeter (for measuring voltage and resistance),
• a 2-channel digital memory oscilloscope,
• a timing light (if necessary in the ignition control system),
• vacuum pump (required on the MAP sensor panel).
c o nne c t en gin e m a n a ge me n t u se r m a n ua l
65
66
c o nne c t e n gin e m a n a gem e n t u se r m a n ua l
These appendices (with the exception of the first two: Screen settings in Windows
and Number format in Windows) are intended for expert Windows users.
A.1
Screen settings in Windows
A screen resolution of minimum 800x600x256 colors (small fonts) is required for
the Connect system. The standard Windows setting is however VGA (640x480x16
colors). If your current screen setting is not adequate, the screen driver program
should be modified. You can obtain a diskette for this from your graphics card supplier or use an SVGA driver program supplied with your version of Windows. The
procedure for this is described in general terms below. For further information,
consult your Windows documentation and your graphics card manual.
• Windows 3.1
A standard SVGA driver is not (usually) supplied with Windows 3.1. You
can modify the driver by starting Windows Setup. Select the option
Change system settings from the menu and a window will be displayed, in
which you can select a different driver from the Display: field. If the
c o nne c t en gin e m a n a ge me n t u se r m a n ua l
Appendices
Appendices
67
program you require is not in the list, select Other display (OEM diskette
required).... The diskette with the supplier's driver (Original Equipment
Manufacturer) or an update of the standard SVGA drivers then has to be
placed in the diskette drive (see Figure A--1 and A--2). These updates are
available from Microsoft and can be obtained on various CD-ROMs,
bulletin boards and through the Internet.
a
FIGURE A-1
68
b
a
Selecting Other screen (OEM diskette required) in Windows Setup
b
Selecting correct OEM driver (800x600x256 Small)
• Windows 3.11
The ‘Super VGA 800x600, 256 colors, small fonts)’ driver is supplied as
standard in Windows 3.11. This driver functions for most graphics cards.
This program can be selected from the standard list in Windows Setup
(see Figure A--2). Setup then asks for various Windows installation
diskettes. For some graphics cards (for example graphics accelerators)
you should use a different driver, usually supplied with the card.
FIGURE A-2
Selecting the correct driver in Windows 3.11
c o nne c t e n gin e m a n a gem e n t u se r m a n ua l
• Windows 95 & 98
There are drivers for most graphics cards in Windows 95 & 98. You can
select these in the Control panel by clicking on the Display icon and
clicking on the Change display type button on the Settings tab. The
Adapter type can then be changed by clicking on the Change button. You
will then see a list, from which you can select the graphics card manufacturer. The list next to it shows the different Models. ‘Super VGA’ can
be selected using the manufacturer '[Standard display types]’ (see
Figure A--3). The screen then must be configured as shown in Figure A-3: 256 colors, 800 by 600 pixels, small fonts.
Appendices
69
a
FIGURE A-3
a
Changing the display type in Windows 95
b
Screen settings in Windows 95 & 98
b
If there are problems with the selected driver, Windows may not start up correctly,
because the graphics cards is not being driven correctly by the computer. You can
then restore the old settings as follows:
• Windows 3.x
At the DOS prompt go to the Windows directory (usually CD
WINDOWS) and type in SETUP. Use the arrow keys to reselect the old
driver (usually VGA) under 'Display'.
c o nne c t en gin e m a n a ge me n t u se r m a n ua l
• Windows 95 & 98
Hold the F8-key down as you start up the computer. The Windows
startup menu appears on the screen. If you select the "Safe mode"
option, Windows starts in standard VGA mode. The old setting can then
be restored in the Control Panel.
A.2
Number format in Windows
The way in which the CBT program interprets the numbers typed in by the student
in open questions depends on the number format settings in Windows. The
number 1,000 is interpreted as 1 when the comma is set as the decimal delimiter
and as 1000 when the comma is set as the thousands separator.
70
The CBT program interprets a thousands separator as a decimal delimiter if the
student does not type in three numbers after it. Similarly the number 1,5 is understood as 1½, even if the full stop is set as the decimal delimiter and the comma as
the thousands separator.
The settings should be changed as follows in the Windows Control Panel
(depending on which version of Windows you have):
• Windows 3.x
Click on the International icon in the Windows 3.x Control panel to display
the International window. Click in this window on the Number format
button, to open up the screen for setting the required format (see Figure
A--4a).
• Windows 95 & 98
In Windows 95 & 98 the Regional Settings icon should be selected in the
Control Panel. The required configuration can be selected on the Number
tab in the Regional Settings Properties dialog box (see Figure A--4b).
c o nne c t e n gin e m a n a gem e n t u se r m a n ua l
Appendices
a
FIGURE A-4
A.3
a
Number format in Windows 3.x
b
Number format in Windows 95 & 98
b
Troubleshooting
This appendix describes solutions for the most common errors.
If the errors cannot be solved as described below, the Diagnostics wizard can be
started. In the Start menu, the Diagnostics wizard option can be selected from the
Program menu. If the nature of the problem is such that the Start menu cannot be
started up, the diagnostics wizard can also be started directly:
C:\CONNECT\BIN\CONDIAG.EXE.
FIGURE A-5
Diagnostics wizard
c o nne c t en gin e m a n a ge me n t u se r m a n ua l
71
The screen shown in Figure A--5 then appears. Once Diagnostics have been carried
out, the diagnostic data can be saved on diskette. This diskette can then be sent
to the distributor for further analysis of the problem.
Below are solutions for simple errors which may occur.
Database
ERROR MESSAGE
The Paradox files cannot be shared. SHARE.EXE is probably not loaded. Add the line
'SHARE' to the AUTOEXEC.BAT file.
This error occurs when the SHARE.EXE program is not loaded in Windows 3.1
without network software. This program ensures that several programs can access
the same files at the same time. Add the line:
SHARE
after the PATH line in the AUTOEXEC.BAT file.
ERROR MESSAGE
72
Multiple PDOXUSRS.NET files found. Check the setting in the WIN.INI file under
[Paradox Engine] and delete the surplus PDOXUSRS.NET files.
Connect engine management uses the Paradox Engine. This means that the
PDOXUSRS.NET file is used in the directory as specified with the NET-PATH in
WIN.INI in the [Paradox Engine] section (see also Appendix Configuration files,
page 74.). This file keeps account of which users have logged on to the network
database. The engine also uses the PARADOX.LCK and PDOXUSRS.LCK files,
which are included in every directory in which a database file is opened (usually
c:\connect\database and c:\connect\database\nld). These files refer to the central
PDOXUSRS.NET file.
If the Network drive option is selected (see Section Database in Chapter Manager,
page 20.) NET-PATH must refer to a network server directory.
If there are multiple PDOXUSRS.NET files or references to multiple PDOXUSRS.NET files in the PARADOX.LCK and PDOXUSRS.LCK files, the above error
will occur when the software is started.
c o nne c t e n gin e m a n a gem e n t u se r m a n ua l
Check the value of NET-PATH in [Paradox Engine] in WIN.INI. Delete all PDOXUSRS.NET, PARADOX.LCK and PDOXUSRS.LCK files.
Appendices
ERROR MESSAGE
Close all other applications which use the Paradox Engine or increase the value of
MaxTables and MaxFiles in the WIN.INI file.
The Paradox engine has a maximum number of files which can be opened (see
also Appendix Configuration files, page 74.). This maximum is specified in the
WIN.INI file. If multiple programs are opened at the same time (for example the
CBT program and Student results) this maximum may be exceeded. Close all other
Connect programs or other programs which use the Paradox Engine. If necessary
increase the value for MaxTables and MaxFiles in WIN.INI
Communications
Problems with communications between the control unit and the computer can
generally be solved with the Communications wizard (see Section Communication
in Chapter Manager, page 18.) Make sure that no other programs which use the
communication ports are active, check that the control unit is connected by means
of the correct serial cable and that the control unit is connected to a 12 V power
supply. A serial port which can communicate at 9600 baud is always required for
successful communication with the control unit. If there are still problems after
using the Communication wizard, the following advice may be useful.
• Try other equipment (for example mouse or modem) on the communication port which is causing the problem. If the problems persist, there
is probably a hardware problem or an IRQ conflict.
• Check that the serial cable is operating and if necessary try a different
serial cable.
• Try to communicate with the control unit using a different computer.
Password for Tutor
mode
If you forget the Tutor mode password or the password is changed by someone
else, it will not be possible to start up some Connect programs.
c o nne c t en gin e m a n a ge me n t u se r m a n ua l
73
In the CONNECT.INI file in the Windows directory the line
suPwd= ...
can be deleted in the [User] section. The password is then deleted.
A.4
Configuration files
Connect engine management uses the following configuration files:
• the Windows Registry (only Windows 95 or higher)
• SYSTEM.INI
• WIN.INI
• ASYM.INI
• CONNECT.INI
74
These files can be found in the Windows directory, with the exception of the
ASYM.INI file in Windows 95 or higher: the location of ASYM.INI is then specified
in the Windows Registry. The settings which are important for the correct operation of Connect are described below for each file.
The Windows Registry
HKEY_LOCAL_MACHINE\SOFTWARE\Microsoft\Windows\CurrentVersion\App Paths\TB60.EXE =
C:\CONNECT\BIN\TB60.EXE
This key in the Registry specifies the location of the ASYM.INI file.
SYSTEM.INI
[boot]
shell=explorer.exe or progman.exe
[mci]
Animation1=mciaap.drv
change in c:\connect\bin\conshell.exe if you want to start up the
Connect system directly, without program manager or explorer.
driver for animations, set in Control Panel
WIN.INI
[mci extensions]
flc=Animation1
fli=Animation1
links FLC files to the MCI ‘Animation1’ device
links FLI files to the MCI ‘Animation1’ device
[Fonts]
StoneElectricBold=C:\CONNECT\BIN\CONBLD.FON
c o nne c t e n gin e m a n a gem e n t u se r m a n ua l
StoneElectric=C:\CONNECT\BIN\CONNRM.FON
fonts which are used in the Connect software
[Paradox Engine]
SwapSize=128
MaxTables=20
MaxFiles=20
UserName=PXEngine
NetNamePath=C:\
ShareLocal=No
Appendices
maximum size of swap buffer used
maximum number of tables which can be open simultaneously
maximum number of files which can be opened simultaneously
user name: must be unique when used in a network context
refers to the network server path
only yes on the network server
ASYM.INI
[ToolBook Load Information]
TB60=c:\connect\bin\tb60run.exe
starts Toolbook II when Connect is started
[Registered Apps]
TB60=c:\connect\bin,6.1,United States
registers Toolbook II
CONNECT.INI
Most of the settings in this file can be modified using the Manager.
[Path]
Binary=d:\connect\bin
Database=d:\connect\database\
Temporary=d:\connect\database\temp
Media=d:\connect\media
program directory
database directory
directory for temporary database files
directory with animations and sound
[Settings]
Language=ENG
Commport=COM1
Commspeed=1024
AskReconnect=0
Sound=1
LangSound=1
ExportDB=0
ExportDrive=a
SkipECU=0
default language (English = ENG)
default communications port
communications speed
code for configuring panel arrangement (0,1,2)
other sounds (0 = off, 1 = on)
explanatory voice-over (0 = off, 1 = on)
configuring student data storage: diskette
diskette drive for import and export data
configuring control unit in block diagram
[User]
This section contains user data, the license key and possible clone license keys.
[skipQuestions]
This section contains references to questions which can be skipped by the student. The tutor can specify these
questions. For more information, see Section Skipping questions in Chapter CBT program, page 46.
c o nne c t en gin e m a n a ge me n t u se r m a n ua l
75
A.5
Security in Windows 95
The Windows 95 startup menu, which is usually available by pressing F8 while
starting up the computer, can be deselected so that students cannot start up in
MS-DOS mode by adding the line Bootkeys=0’ to the [Options] section in the
MSDOS.SYS file in the root directory. Also the CMOS settings can be used to prevent the computer being started from diskette. Access to the CMOS settings can
be protected with a password.
You can use the System policy editor (POLEDIT.EXE) to restrict the rights of users
in Windows 95. Access to system settings and the network can be refused. Elements of the user interface, such as Run.. in the Start or My Computer menu on
the desktop can be removed. Even better protection is achieved by only allowing
users to start up specific programs.
User profiles are a useful resource in system management application. These can
be installed using the 'Security' tab in the User option in the Control Panel.
76
If further security is required, the database can be placed on a Windows NT server
for example. It is for example possible to protect the directory with the database,
so that the files in the directory cannot be deleted. A Windows NT or Netware
server also makes it possible to share network sources at 'user level’, thereby
offering more security options.
For more information on this topic, see the Windows 95 Resource Kit and the Windows NT Resource Kit.
c o nne c t e n gin e m a n a gem e n t u se r m a n ua l
List of Figures
List of Figures
1
Installation
77
5
1-1
Starting the installation program in Windows 3.x
6
1-2
Starting the installation program in Windows 95 & 98
2
Start menu
2-1
The Start menu in student mode
2-2
Window for access to Tutor mode
2-3
The Start menu in Tutor mode
3
Manager
3-1
System overview
3-2
The License wizard
3-3
The transfer of engine management data
3-4
The circuit diagram of an engine management system
3-5
3-6
The General tab 17
The Communication tab
7
9
10
10
11
13
14
15
19
c o nne c t en gin e m a n a ge me n t u se r m a n ua l
16
17
3-7
The Communication wizard
3-8
3-9
A standalone computer 20
A network situation 21
20
3-10 Various computers without a network, on which the student data is exchanged by diskette 21
3-11
a
b
Typical tab settings for a database for a standalone computer
Typical tab settings for a database for a network server 22
3-12 a Typical tab settings for a database for a network client
b Typical tab settings for a database for more than one computer without
a network 23
78
3-13
The User tab
4
CBT program
4-1
The structure of the CBT program
4-2
The Login training program dialog window
4-3
The overview of an engine management system at the start of the CBT
program 31
4-4
The overview of the completed and operating system
4-5
The certificate which is displayed when the CBT program has been
completed. 32
4-6
The overview of the GM Multec SPI injection control system
4-7
Circuit diagram for the fixed setup without wiring configuration
4-8
Circuit diagram for the no fixed setup configuration
36
4-9
Overview of the location of the idle stepper motor
37
24
27
28
30
4-10 Cutaway view of the fuel pump (high pressure)
4-11
32
34
35
37
The screen showing the lesson on the Motronic ML 4.1 injection control
unit. 38
4-12 Screen layout
4-13 The toolbox
40
40
4-14 The Help window
4-15 The calculator
41
41
c o nne c t e n gin e m a n a gem e n t u se r m a n ua l
42
List of Figures
4-16 White sheet with text and explanation
4-17 Yellow memo sheet with extra explanation 42
4-18 Light yellow sheet with a question or task 43
4-19 Multiple choice question with one correct answer
44
4-20 Multiple choice questions with several correct answers
4-21 Multiple choice questions with figures
4-22 Open question
44
45
4-23 Setting questions
4-24 Feedback field
44
45
46
4-25 Marking a question to skip it.
46
5
Student results
49
5-1
The Student results screen
5-2
The Student results program menu
5-3
Dialog box for editing or creating a group
5-4
Old groups can be hidden to keep the list short (see Figure 5-1)
5-5
Dialog box for editing or creating student accounts
5-6
a Dialog box for exporting student data
b Dialog box for importing student data
50
51
52
79
53
54
5-7
a Zooming in on the results for the magnetic pickup
b Zooming out to the group average 56
5-8
5-9
Displaying a network computer
Statistics by category 57
5-10 Test results
52
56
58
6
Panels
61
6-1
The control unit panel with wired ignition lock, connected SIM cables and
RS232-connection. The panel on the left is supplied by means of the connected test leads. 63
6-2
Notification of short circuits
c o nne c t en gin e m a n a ge me n t u se r m a n ua l
63
A
Appendices
1-1
a Selecting Other screen (OEM diskette required) in Windows Setup
b Selecting correct OEM driver (800x600x256 Small) 68
1-2
Selecting the correct driver in Windows 3.11
1-3
a Changing the display type in Windows 95
b Screen settings in Windows 95 & 98 69
1-4
a Number format in Windows 3.x
b Number format in Windows 95 & 98
1-5
67
Diagnostics wizard
71
80
c o nne c t e n gin e m a n a gem e n t u se r m a n ua l
71
68
A
Animation 74, 75
Answer recording 43, 49
Arrangement 62
B
Block diagram 33, 34
C
Circuit diagram 34, 36, 38, 39, 62
Client 7
Communications 18
Communications wizard 19
ConTest 47, 55, 58, 60
D
Database 20, 30, 49, 51, 54, 59, 72
Diskette with student data 23, 30, 53
Display settings 67
c o nne c t en gin e m a n a ge me n t u se r m a n ua l
Index
Index
81
I
Ignition lock 18, 33, 62
L
Language 18, 75
Learning objectives 28
N
Network 7, 20, 56, 59, 72, 75, 76
P
Panels setup 34, 35, 39
Password (student) 30, 53
Password (tutor) 10, 24
Power supply 35
Printing 17, 47, 59
Protection 12
82
R
Registration wizard 15
S
Security 24, 59
Serial communications 63, 64, 73
Server 75
Short circuit 62
SIM connection 35, 62, 63
Sound 18, 33
Student 23, 30, 51
Supply 61
Support 24
T
Toolbox 36, 39
Troubleshooting 71
V
View the results of a student 54
c o nne c t e n gin e m a n a gem e n t u se r m a n ua l
W
Windows 45
Windows 3.x 6, 11, 67
Windows 95 76
Windows 95 & 98 7, 12, 18, 22, 69, 74
Windows for Workgroups 22
Wiring 17
Wizard
diagnostics 71
Index
83
c o nne c t en gin e m a n a ge me n t u se r m a n ua l
84
c o nne c t e n gin e m a n a gem e n t u se r m a n ua l
85
c o nne c t en gin e m a n a ge me n t u se r m a n ua l
End user license agreement for Electude Software
IT IS IMPORTANT THAT YOU READ THIS AGREEMENT CAREFULLY BEFORE OPENING THE CD PACKAGING OR TRYING TO USE THE SOFTWARE.
Software license
Use
86
Decompiling and disassembling
and ‘reverse engineering’
Rental and loan
Transfer of software
Termination
Copyright
The agreement is a legal agreement between you (individual or body corporate) and Electude with regard to
Connect Engine Management.
Connect Engine Management comprises computer software and related media and printed or electronic documentation, hereafter referred to as software and panels with control units and engine management components,
hereafter referred to as hardware. By opening the packaging or installing, copying or otherwise using the software,
you agree to be bound by the terms of this agreement. If you do not agree with the terms of this agreement, you
should return the unused product immediately to the place of origin.
The software is protected by copyright laws and international copyright agreements, as well as by other intellectual property laws and agreements.The software is licensed not sold.
You may install this software on more than one computer provided that the tutorial software is only used in
conjunction with hardware manufactured by Electude.This hardware includes the Connect control unit and all
panels with engine management components.
You may not decompile or disassemble the software or try in any other way to find the source code.
You may not rent, loan or lease out the software.
You may permanently assign all your rights under the terms of this agreement, provided that you do not retain
any copies of the software, transfer the entire software product (including all components, media, documentation and upgrades and this agreement. If the software is an upgrade, any transfer must include all previous
versions of the software.
Notwithstanding all other rights, Electude may terminate this agreement if you fail to comply with the terms of
the agreement.
Ownership of and copyright in the software (including, but not restricted to, all figures, photos, animations,
video, audio, music, text and applications in the software), the accompanying documentation and all copies of
the software are vested in Electude or its suppliers (Parts ©Asymetrix Corporation, all rights reserved).
The software is protected by copyright laws and international copyright agreements. You should therefore treat
the software in the same way as any material subject to copyright, except that you may either make one copy,
exclusively for back-up or archive purposes or you may install the software on more than one computer provided
that you retain the original exclusively for back-up or archive purposes. You may not copy the accompanying
documentation.
connect® engine management, copyright © 1995-1999 Electude, all rights reserved. Connect is a registered
trademark of Electude.
Parts copyright © 1990-1998 Asymetrix Corporation, all rights reserved
Acrobat® Reader, copyright © 1987-1996 Adobe Systems Incorporated, all rights reserved. Adobe and Acrobat
are trademarks of Adobe Systems Incorporated.
c o nne c t e n gin e m a n a gem e n t u se r m a n ua l