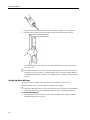
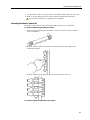
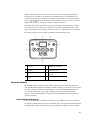
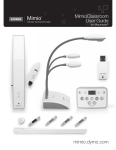
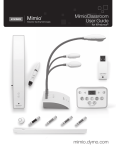
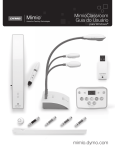
1
MimioClassroom
User Guide
For Mac
mimio.com
© 2013 Mimio. All rights reserved. Revised 7/18/2013.
No part of this document or the software may be reproduced or transmitted in any form
or by any means or translated into another language without the prior written consent
of Mimio.
Mimio, MimioClassroom, MimioTeach, MimioCapture, MimioVote, MimioView,
MimioHub, MimioPad, MimioMobile, MimioProjector, and MimioStudio are registered
marks in the United States and other countries. All other trademarks are the property of
their respective holders.
Apple, iPad, iPhone, iPod touch and App Store are trademarks of Apple Inc., registered
in the U.S. and other countries.
Android and Google Play are trademarks of Google Inc.
Contents
About MimioClassroom
1
MimioStudio
1
MimioTeach
1
Mimio Interactive
2
MimioCapture
2
Mimio Capture Kit
2
MimioVote
2
MimioView
2
MimioPad (Model Number: ICD07)
2
MimioPad (Model Number: RCK-M01)
2
MimioMobile
3
MimioProjector
3
Minimum System Requirements
3
Using this Guide
3
MimioStudio
7
About MimioStudio
7
About MimioStudio Notebook
7
About MimioStudio Tools
7
About MimioStudio Gallery
9
Getting Started with MimioStudio
9
Accessing MimioStudio Notebook
9
Accessing MimioStudio Tools
10
Accessing MimioStudio Gallery
10
Using MimioStudio Notebook
10
Working with Pages
11
Creating an Activity
14
Creating an Activity - Step 1: Define
14
Creating an Activity - Step 2: Select
14
Creating an Activity - Step 3: Refine
15
Creating an Activity - Step 4: Review
16
Working with an Activity
17
Writing an Objective
17
Attaching Files
Using MimioStudio Tools
Creating Objects
18
18
18
iii
Manipulating Objects
21
Adding Actions to Objects
25
Adding Animations to Objects
26
Using MimioStudio Gallery
Importing Gallery Items into a Notebook
28
Customizing the Content of the Gallery
28
Exporting a Gallery Folder to a Gallery File
29
Working with Saved Annotation Snapshots
30
Viewing Screen Annotation Snapshots
30
Renaming an Annotation Snapshot
30
Adding Keywords to an Annotation Snapshot
30
Searching for an Annotation Snapshot
31
Importing an Annotation Snapshot
31
Pasting an Annotation Snapshot Into Another Application
31
Printing Annotation Snapshots
31
Deleting Annotation Snapshots
31
Delivering Interactive Notebook Lessons and Presentations
32
Using Fullscreen View
32
Navigating Through a Presentation
32
Working with Multimedia Objects
32
MimioTeach
35
What's Included
35
About MimioTeach
35
Status Lights
About MimioStudio Tools
Getting Started
36
37
39
Setting Up the MimioTeach Stylus
39
Setting Up the MimioTeach Bar
39
Setting Up Interactive Mode
41
Projecting Your Desktop
41
Calibrating Interactive Mode
42
Using MimioTeach
42
Using the MimioTeach Stylus
43
Focusing Attention Using the Reveal and Spotlight Tools
43
Using the Reveal Tool
43
Using the Spotlight Tool
44
Marking Up the Display Using Screen Annotations
Enabling Screen Annotation Mode
iv
27
45
45
Annotating the Screen Using MimioStudio Tools
46
Clearing All Annotations from the Display
48
Inserting Text Into an Application Using MimioStudio Text Tools
49
Using the On-Screen Keyboard
49
Using Writing Pad
49
Using Gesture Recognition
50
Using the Web Browser and Calculator Tools
51
Recording Desktop Actions and Audio in Interactive Mode
51
Caring for MimioTeach
51
Cleaning MimioTeach
51
Inserting the Batteries
51
Mounting MimioTeach to a Non-Magnetic Whiteboard
52
Mimio Interactive
55
What's Included
55
About Mimio Interactive
55
Status Lights
56
About Mimio Wireless
57
Status Lights
58
About MimioStudio Tools
Getting Started
59
61
Setting Up the Mimio Interactive Mouse
61
Setting Up the Mimio Interactive Bar
61
Setting Up Mimio Wireless
62
Setting Up Interactive Mode
64
Projecting Your Desktop
64
Calibrating Interactive Mode
65
Using Mimio Interactive
66
Using the Mimio Interactive Mouse
66
Focusing Attention Using the Reveal and Spotlight Tools
66
Using the Reveal Tool
66
Using the Spotlight Tool
67
Marking Up the Display Using Screen Annotations
68
Enabling Screen Annotation Mode
68
Annotating the Screen Using MimioStudio Tools
69
Clearing All Annotations from the Display
71
Inserting Text Into an Application Using MimioStudio Text Tools
72
Using the On-Screen Keyboard
72
Using Writing Pad
72
v
Using Gesture Recognition
Using the Web Browser and Calculator Tools
74
Recording Desktop Actions and Audio in Interactive Mode
74
Caring for Mimio Interactive
74
Cleaning Mimio Interactive
74
Inserting the Batteries
74
Mounting Mimio Interactive Permanently
75
MimioCapture (Model Number: ICD10)
77
What's Included
77
About MimioCapture
78
Status Lights
78
About MimioStudio Notebook
Getting Started
78
79
Setting Up the MimioCapture Charging Tray
79
Setting Up the Pen Holder
79
Setting Up the MimioCapture Pens
80
Setting Up the MimioCapture Eraser
81
Charging the Pens and Eraser
82
Setting Up MimioStudio Notebook for Capture
82
Setting the Whiteboard Size
82
Starting Ink Capture Mode
83
Using MimioCapture
83
Capturing Digital Ink
83
Writing and Drawing Digital Ink
83
Adding and Copying Notebook Pages
84
Caring for MimioCapture
85
Cleaning MimioCapture
85
Mounting the Pen Holder to a Non-Magnetic Whiteboard
85
MimioCapture (Model Number: ICD04)
89
What's Included
89
About MimioCapture
89
Status Lights
90
About MimioStudio Notebook
Getting Started
vi
73
90
90
Setting Up the MimioCapture Tray
91
Setting Up the MimioCapture Pens
92
Setting Up the MimioCapture Eraser
93
Charging the Pens and Eraser
94
Setting Up MimioStudio Notebook for Capture
94
Setting the Whiteboard Size
94
Starting Ink Capture Mode
95
Using MimioCapture
95
Capturing Digital Ink
95
Writing and Drawing Digital Ink
95
Adding, Copying, and Printing Notebook Pages
96
Using the MimioCapture Bar to Add, Copy, and Print Notebook Pages
96
Using the MimioTeach Bar to Add and Copy Notebook Pages
97
Caring for MimioCapture
97
Cleaning MimioCapture
97
Mounting MimioCapture to a Non-Magnetic Whiteboard
98
Mimio Capture Kit
99
What's Included
99
About Mimio Capture Kit
99
About MimioStudio Notebook
Getting Started
100
100
Setting Up the Mimio Capture Kit Pens
100
Setting Up the Mimio Capture Kit Eraser
102
Setting Up MimioStudio Notebook for Capture
103
Setting the Whiteboard Size
103
Starting Ink Capture Mode
103
Using Mimio Capture Kit
104
Capturing Digital Ink
104
Writing and Drawing Digital Ink
104
Adding, Copying, and Printing Notebook Pages
105
Downloading Digital Ink
106
Caring for Mimio Capture Kit
106
Cleaning the Mimio Capture Kit
106
Mounting the Mimio Capture Kit
107
MimioVote
109
What's Included
109
About MimioVote
109
About the MimioVote Station
109
About the MimioVote Units
110
About the Software
111
About MimioStudio Notebook
111
About the Vote Toolbar
112
vii
About MimioStudio Quick Vote
112
About MimioStudio Gradebook
112
Getting Started
Setting Up MimioVote
114
Adding a Second MimioVote System
115
Using MimioStudio Gradebook
116
Setting Up the Gradebook
116
Creating a Class
116
Adding Students
116
Importing a List of Students
117
Adding Activities
117
Modifying the Gradebook
118
Editing Student Information
118
Removing a Student
118
Editing Activities
118
Editing Questions
119
Editing Student Responses
119
Grading Essay Questions
119
Generating Reports
120
Exporting a List of Students
120
Archiving Classes
120
Exporting Results
121
Opening Archived Classes
121
Creating MimioVote Activities
121
Creating Activities in Notebook
122
Modifying Question Objects
123
Importing Standard Assessments
123
Printing Activities
123
Using the MimioVote Unit
124
Answering Questions
124
Answering Questions for Teacher-Led Activities
124
Answering Questions for Self-Paced Activities
124
Requesting Help
viii
114
125
Using the Vote Toolbar
125
Taking Attendance
125
Using the Timer
125
Conducting Activities
125
Conducting a Teacher-Led Activity
126
Asking Questions Using Quick Vote
126
Conducting a Self-Paced Activity
127
Viewing Question Results
127
Viewing Activity Results
127
Viewing a List of Students that Have Not Responded
128
Viewing Requests for Help
Caring For MimioVote
128
128
Cleaning MimioVote
128
Storing MimioVote
129
MimioView
131
What's Included
131
About MimioView
132
Status Lights
About MimioStudio View
Getting Started
132
133
133
Installing MimioView
133
Opening the View Window
134
Closing the View Window
134
Using MimioView
Displaying an Image
134
134
Displaying a Document
134
Displaying an Object
135
Displaying a Microscope Slide
135
Freezing the Image
135
Adjusting the Image
136
Rotating the Image
136
Zooming the Image
136
Adjusting the Settings
137
Annotating an Image
Clearing All Annotations from the Image
137
138
Transferring an Image
138
Recording Video
139
Turning Off the Lamps
139
Caring For MimioView
139
Cleaning MimioView
139
Mounting MimioView Permanently
139
MimioPad (Model Number: ICD07)
141
What's Included
141
About MimioPad
142
ix
Status Light
About the Feature Indicators
Getting Started
142
143
Charging the MimioPad
143
Configuring MimioPad
143
Replacing the MimioPad Battery
144
Using MimioPad
144
Using the Shortcut Keys
144
Using MimioStudio Collaborate
144
Maximizing a Workspace
145
Sharing Control
145
Pairing an Additional MimioPad with the MimioHub
145
Replacing the Lanyard with the Pen Tip
146
MimioPad (Model Number: RCK-M01)
147
What's Included
147
About MimioPad
148
About the Feature Indicators
149
Getting Started
149
Setting Up the MimioPad
149
Charging the Battery
150
Setting Up the Pen
150
Configuring MimioPad
150
Using MimioPad
151
Using the Shortcut Keys
151
Changing the Pen Tip
151
Pairing an Additional MimioPad with the Wireless Receiver
152
MimioMobile
153
Getting Started
153
Installing the Software
153
Connecting Mobile Devices
154
Connecting a Teacher Mobile Device
154
Connecting Student Mobile Devices
154
Using History Connect
155
Using Manual Connect
156
Using MimioMobile
x
142
156
Using the Shortcut Keys
156
Using Class Manager
157
Using MimioStudio Collaborate
157
Maximizing a Workspace
158
Using the Collaborate Toolbar
158
Sharing Control
158
Using MimioStudio Vote
158
MimioProjector
159
What's Included
159
About MimioProjector
160
About the Control Panel
162
About the Remote Control
163
About the Connection Ports
165
Getting Started
Connecting the Projector
165
166
Connecting to a Computer
167
Connecting to a Video Source
168
Setting Up the Remote Control
169
Turning On the Power
170
Turning Off the Power
171
Status Lights
172
Adjusting the Projected Image
173
Resizing the Projected Image
173
Focusing the Projected Image
173
Changing the Projector Settings
173
Navigating the Projector Menu
174
Adjusting the 3D Settings
177
3D
177
3D Invert
177
3D Format
177
1080p @24
177
Adjusting the Interactive Settings
178
Adjusting the Options
178
Logo
178
Logo Capture
179
Auto Source
179
Input
179
Auto Power Off
179
Lamp Setting
179
Dynamic Black
180
High Altitude
180
xi
Filters Remind
180
Information
181
Adjusting the Picture
181
Color Mode
181
Wall Color
181
Brightness
181
Contrast
181
Sharpness
181
Saturation
182
Hue
182
Gamma
182
Color Temperature
182
Color Space
182
Adjusting the Screen
182
Aspect Ratio
182
Phase
183
Clock
183
Horizontal Position
183
Vertical Position
183
Digital Zoom
183
Vertical Keystone
183
Ceiling Mount
183
Adjusting the General Settings
Language
184
Menu Location
184
Closed Caption
184
VGA OUT (Standby)
184
Auto Screen (12V Out)
184
Test Pattern
185
Security
185
Reset
185
Adjusting the Volume
186
Mute
186
Volume
186
Microphone Volume
186
Caring for MimioProjector
xii
184
186
Replacing the Remote Control Battery
186
Replacing the Lamp
187
Cleaning the Dust Filters
188
Getting Help
General Troubleshooting
189
189
Projector stops responding to all controls
189
Lamp burns out or makes a popping sound
190
Image Troubleshooting
190
No image is displayed
190
A partial, scrolling, or incorrect image is displayed
190
The notebook computer display is not displaying an image
190
Image is unstable or flickering
191
Image has vertical flickering bar
191
Image is out of focus
191
Image is stretched when displaying 16:9 DVD image
191
Image is too small or too large
191
Image is displayed with slanted sides
191
Image is reversed
191
3D Troubleshooting
191
A blurry double image is displayed
191
Two images are displayed side-by-side
192
Image not displayed in 3D
192
Sound Troubleshooting
192
Remote Control Troubleshooting
192
Compatibility Modes
VGA Analog
193
193
PC Signal
193
Extended Wide Timing
194
Component Signal
195
HDMI Digital
196
PC Signal
196
Extended Wide Timing
197
Video Signal
198
HDMI 1.4a Mandatory 3D Timing - Video Signal
198
Technical and Environmental Information
Usage Notice
199
199
Warnings
199
Precautions
199
Regulation & Safety Notices
200
FCC Notice
200
Operating Conditions
201
Projector Mount Safety Notices
201
xiii
xiv
MimioStudio Recorder
203
Using MimioStudio Recorder
203
Recording a Presentation
203
Customizing MimioStudio
205
Adjusting the Classroom Devices Preferences
205
Adjusting MimioStudio Gradebook Preferences
206
Adjusting the Ink Capture Preferences
206
Adjusting the Interactive Preferences
208
General Preferences
208
Actions and Commands Preferences
208
Adjusting the Language Preferences
208
Adjusting MimioStudio Notebook Preferences
209
General Preferences
209
Ink Capture Preferences
209
Adjusting MimioStudio Recorder Preferences
210
Adjusting the Tablet Devices Preferences
210
Adjusting the Mobile Preferences
210
Adjusting the Vote Preferences
210
Getting Help
213
Updating the Software
213
Troubleshooting
213
Contacting Mimio
213
Technical and Environmental Information
215
Environmental Information
215
Safety Precautions for Lithium-Ion Rechargeable Batteries
215
Documentation Feedback
216
Chapter 1
About MimioClassroom
MimioClassroom is a suite of tools for capturing, creating, and presenting information.
The following MimioClassroom components are described in this User Guide:
n
MimioStudio
n
MimioTeach
n
Mimio Interactive
n
MimioCapture
n
Mimio Capture Kit
n
MimioVote
n
MimioView
n
MimioPad (Model Number ICD07)
n
MimioPad (Model Number RCK-M01)
n
MimioMobile
n
MimioProjector
MimioStudio
MimioStudio software includes all of the tools you need to make the most out of your
MimioClassroom devices. You can also use the MimioStudio software without a
MimioClassroom device to prepare presentations and manipulate previously created content.
MimioStudio Notebook provides a multi-page workspace for creating lessons and
presentations. Using the MimioStudio Notebook is very similar to using other word
processing or presentation software applications.
MimioStudio Notebook provides multiple authoring and editing tools for creating almost
any type of content. You can use Notebook with MimioStudio Tools to create a variety of
objects including text boxes, freehand writing and drawing, lines, arrows, and many basic
shapes. Images can be imported into a Notebook, both as objects and as background images.
MimioTeach
Using MimioTeach with a projector, you can deliver lessons and presentations directly from
your whiteboard. Using MimioStudio Interactive mode, you control the movement of the
cursor on your screen with the MimioTeach stylus, much like you would with a mouse at
your computer.
1
About MimioClassroom
Mimio Interactive
Using Mimio Interactive with a projector, you can deliver lessons and presentations directly
from your whiteboard. Using MimioStudio Interactive mode, you control the movement of
the cursor on your screen with the Mimio Interactive Mouse, much like you would with a
mouse at your computer.
MimioCapture
MimioCapture is used with a MimioTeach-enabled whiteboard to record notes and drawings
from your whiteboard. Using MimioStudio Ink Capture mode, you make notes and drawings
on your whiteboard using the MimioCapture pens. Your notes are automatically captured in
a MimioStudio Notebook.
Mimio Capture Kit
Mimio Capture Kit is used with a Mimio Interactive-enabled whiteboard to record notes and
drawings from your whiteboard. Using MimioStudio Ink Capture mode, you make notes and
drawings on your whiteboard using the Mimio Capture Kit pens. Your notes are
automatically captured in a MimioStudio Notebook.
MimioVote
MimioVote is a wireless, interactive, student response system. Using MimioVote, you can
easily and quickly gather student responses. This quick feedback from students allows you
to make sure each student is keeping up and adjust your lesson accordingly.
MimioView
MimioView works seamlessly with MimioStudio software to display documents, threedimensional objects, and microscope slides for your entire class to view. You can use
MimioView to display still images or live video.
MimioPad (Model Number: ICD07)
MimioPad is a 2.4 GHz wireless pad. To configure MimioPad for use, install the
MimioStudio software and plug the MimioPad into your computer using the included USB
cable or connect the MimioPad to your computer wirelessly using the MimioHub. Once
connected, you can use the MimioPad from anywhere in the room to interact with your
computer. No additional configuration is required.
MimioPad (Model Number: RCK-M01)
MimioPad is a 2.4 GHz wireless pad. To configure MimioPad for use, install the
MimioStudio software and plug the wireless receiver into your computer. Once connected,
you can use the MimioPad from anywhere in the room to interact with your computer. No
additional configuration is required.
2
MimioMobile
MimioMobile
Using the MimioMobile app on a mobile device, teachers and students can collaborate
using interactive whiteboard lessons. The MimioMobile app can be used alone with
MimioStudio software or in conjunction with MimioTeach interactive system and other
MimioClassroom products.
The MimioMobile app is available for the following devices:
n
iPad® 2 or later, running iOS 5 or later
n
iPhone® 4 or later, running iOS 5 or later
n
iPod touch® 4th generation or later, running iOS 5 or later
n
Mobile device running Android™ 3.0 (Honeycomb) or later
MimioMobile can be used by both students and teachers. Teachers can pass desktop control
to any student mobile device and initiate group activities so that all students with a mobile
device can simultaneously participate in an activity. Students can also use a mobile device
with MimioMobile in place of a MimioVote unit.
Mobile devices with the MimioMobile app can be used in conjunction with the new
MimioPad tablet.
MimioProjector
Using MimioProjector and a conventional dry erase board, you can bring interactive
teaching into your classroom. MimioProjector easily connects to your computer and can be
used as an interactive projector along with the interactive pens or alone as a non-interactive,
conventional projector.
Minimum System Requirements
The minimum system requirements for MimioStudio are:
n
Intel® 1 GHz processor
n
Mac OS X 10.6 or later
n
512 MB RAM minimum (1 GB RAM recommended)
n
250 MB free disk space (English), 350 MB free disk space (International)
n
Internet connection to download and activate the software
n
Available USB port (required to use a MimioClassroom device)
Using this Guide
This User Guide includes information for using the different MimioClassroom components.
Depending on the types of MimioClassroom devices you have, some sections of this User
Guide may not apply to you.
The following table provides a summary of the contents.
3
About MimioClassroom
4
User Guide Chapter
Description
About MimioClassroom
This chapter gives an overview of the MimioClassroom products,
including MimioStudio software, MimioTeach, MimioCapture,
MimioVote, and MimioView.
MimioStudio
This chapter describes how to work with MimioStudio Notebook,
Tools, and Gallery to create and deliver lessons and other
presentations.
MimioTeach
This chapter describes how to set up and use MimioTeach with your
whiteboard and a projector. This chapter also describes how to use
MimioStudio in Interactive mode.
Mimio Interactive
This chapter describes how to set up and use Mimio Interactive with
your whiteboard and a projector. This chapter also describes how to
use MimioStudio in Interactive mode.
MimioCapture
(Model Number: ICD10)
This chapter describes how to set up and use MimioCapture model
number ICD10. Included in this chapter are instructions for capturing
notes and drawings from a MimioTeach-enabled whiteboard as digital
ink using MimioCapture.
MimioCapture
(Model Number: ICD04)
This chapter describes how to set up and use MimioCapture model
number ICD04. Included in this chapter are instructions for capturing
notes and drawings from a MimioTeach-enabled whiteboard as digital
ink using MimioCapture.
Mimio Capture Kit
This chapter describes how to set up and use Mimio Capture Kit.
Included in this chapter are instructions for capturing notes and
drawings from a Mimio Interactive-enabled whiteboard as digital ink
using Mimio Capture Kit
MimioVote
This chapter describes how to set up and use MimioVote. Included in
this chapter are instructions for creating and conducting MimioVote
activities, as well as information about setting up and using
MimioStudio Gradebook to save student grades and information.
MimioView
This chapter describes how to set up and use MimioView. Included in
this chapter are instructions for displaying and annotating images in
the MimioStudio View window.
MimioPad
Model Number: ICD07
This chapter describes how to set up and use MimioPad model
number ICD07.
MimioPad
Model Number: RCK-M01
This chapter describes how to set up and use MimioPad model
number RCK-M01.
MimioMobile
This chapter describes how to set up and use MimioMobile.
Using this Guide
User Guide Chapter
Description
MimioProjector
This chapter describes how to set up and use MimioProjector.
Using MimioStudio Recorder
This chapter describes how to use MimioStudio Recorder to create
movies (with audio) of your presentations.
Customizing MimioStudio
This chapter describes how to customize the features of the
MimioStudio software and the MimioClassroom devices.
Getting Help
This chapter gives troubleshooting information for some common
problems, describes how to check for and install MimioStudio
software updates, and describes how to contact Technical Support.
Technical and Environmental
Information
This chapter contains technical, certification, and safety information
for the MimioClassroom products.
5
This page intentionally left blank for double-sided printing.
6
Chapter 2
MimioStudio
MimioStudio software includes all of the tools you need to make the most out of your
MimioClassroom devices. You can also use the MimioStudio software without a
MimioClassroom device to prepare presentations and manipulate previously created content.
About MimioStudio
The following are the three main MimioStudio software applications that are used to create
and present information.
n
MimioStudio Notebook
n
MimioStudio Tools
n
MimioStudio Gallery
For information about other MimioStudio applications, see the chapters of this User
Guide that describe the MimioClassroom devices that you have.
MimioStudio Notebook provides a multi-page workspace for creating lessons and
presentations. Using the MimioStudio Notebook is very similar to using other word
processing or presentation software applications.
MimioStudio Notebook provides multiple authoring and editing tools for creating almost
any type of content. You can use Notebook with MimioStudio Tools to create a variety of
objects including text boxes, freehand writing and drawing, lines, arrows, and many basic
shapes. Images can be imported into a Notebook, both as objects and as background images.
About MimioStudio Notebook
You can create and present information with MimioStudio Notebook. Using Notebook is
very similar to using other word processing or presentation software. Content created in
Notebook can be saved as Mimio INK files or a variety of other file formats including
HTML, JPEG, PNG, GIF, BMP, TIF, JP2, PICT, PSD, SGI, IWB, and PDF.
You can use Tab View to view a list of files that are attached to a Notebook or to view a
thumbnail of each page in a Notebook.
About MimioStudio Tools
MimioStudio Tools provides a comprehensive set of interactive tools and resources to create
and present information. MimioStudio Tools is used to modify MimioStudio Notebook
pages and to make screen annotations on the whiteboard.
The following table describes the major components of MimioStudio Tools.
7
MimioStudio
Selection tool
Zoom
Pen
Brush
Text
Highlighter
Line
Arrow End
Arrow Start
Arrow Both
Rectangle
Ellipse
Triangle
Right Triangle
Five Pointed Star
Hexagon
Pentagon
Shape Recognition
Eraser
Insert file
Screen clipping
Color picker
More colors
Object Fill
Outline and Fill color
Thickness slider
Color palette
Solid Line
Dash Line
Square Dot Line
Transparency
Gallery
Applications (see below)
Right-click
Interactive
Mouse
Screen Annotation
From the Applications tool, you can access the following:
Reveal
Spotlight
Text Tools
Class Manager
Control
Quick Collaborate
Quick Vote
Recorder
View
Calculator
Web Browser
MimioStudio Tools has two views: a fully expanded view, for easy access to all features,
and a compressed view, which takes up less space on the screen.
To compress and expand MimioStudio Tools
8
Getting Started with MimioStudio
Double-click
at the top of the MimioStudio Tools toolbar.
About MimioStudio Gallery
MimioStudio Gallery contains elements that can be used to create your lessons and
presentations, such as images, templates, movies, and previously created lessons.
MimioStudio Gallery also contains Screen Annotation snapshots and Collaborate pages.
You can customize the Gallery by adding your own elements.
MimioStudio Gallery consists of the following four main folders:
n
Screen Annotations - contains all saved Screen Annotation snapshots.
n
Imported Content Packs - contains any imported content that you have not yet added
to the Gallery folder.
n
Questions and Results - contains a variety of objects for use with MimioVote.
n
Gallery - contains a number of different folders used to categorize items, such as
Geography, Mathematics, and so on.
n
Collaborative Sessions - contains all saved Collaborate pages.
The Gallery folder and each of the Gallery subfolders can contain five different types of
objects:
n
Images - Images include pictures and graphics.
n
Templates - Templates include backgrounds and predefined page layouts.
n
Multimedia - Multimedia objects include movies, animation, and sound.
n
Questions and Results - Questions and Results include objects for creating and
displaying the results of MimioVote activities.
This section of the Gallery does not appear until you move objects from the
Questions and Results folder to the Gallery folder or a Gallery subfolder.
n
Lessons - Lessons include lessons created using MimioStudio Notebook and imported
documents. You can create your own lessons or import lessons created by someone else.
Getting Started with MimioStudio
After installing MimioStudio, MimioStudio Notebook and MimioStudio Tools open on
your desktop.
Once MimioStudio is installed and a MimioClassroom device is connected, a license
key is available in the About MimioStudio dialog box. You can use this license key to
activate MimioStudio on your home computer as long as a MimioClassroom device is
connected to your school computer.
You can access many of the features in MimioStudio in several ways; from the menu bar,
the MimioStudio Tools buttons, and the right-click menus. The available features change
depending on what you are doing in the software. Be sure to explore the right-click menu
options as you work with MimioStudio.
Accessing MimioStudio Notebook
Several ways to access MimioStudio Notebook are shown in the following table.
9
MimioStudio
To start from the
Do this
Dock
Click
in the Dock.
Menu bar
Click
, and then choose
Notebook.
Accessing MimioStudio Tools
Several ways to access MimioStudio Tools are shown in the following table.
To start from the
Do this
Dock
Click
in the Dock
Menu bar
Click
, and then choose
Tools.
Do one of the following:
MimioStudio Notebook
n
n
Click on the status bar.
Choose MimioStudio Tools from the Tools menu.
MimioTeach
Press the Launch button, , on the MimioTeach bar, and then click
Tools in the Launch window.
Mimio Interactive
Press the New page button,
, on the Mimio Interactive bar.
Accessing MimioStudio Gallery
Several ways to access MimioStudio Gallery are shown in the following table.
To start from
Do this
MimioStudio Tools
Click
MimioStudio Notebook
Do one of the following:
n
n
on the MimioStudio Tools toolbar.
Click on the status bar.
Choose Gallery from the Insert menu.
Using MimioStudio Notebook
You can create and present information with MimioStudio Notebook. Using Notebook is
very similar to using other word processing or presentation software. Content created in
Notebook can be saved as Mimio INK files or a variety of other file formats including
HTML, JPEG, PNG, GIF, BMP, TIF, JP2, PICT, PSD, SGI, IWB, and PDF.
You can use Tab View to view a list of files that are attached to a Notebook or to view a
thumbnail of each page in a Notebook.
To open an existing Notebook
10
Using MimioStudio Notebook
1. Start MimioStudio Notebook and click .
2. From the Open dialog box, navigate to and select the file to open and click Open.
To save a Notebook
1. Click the Save button, .
2. From the Save As dialog box, enter a name for your file in the Save As box.
3. Choose the desired format from the File Format list.
4. Click Save.
When saving in a format other than INK, the Page Selection dialog box appears.
5. From the Page Selection dialog box, do the following:
l
Select the pages to save under Page Selection.
l
Choose a size for the images from the Size list.
6. Click OK.
Working with Pages
Each lesson or presentation created in MimioStudio Notebook consists of a series of pages.
Pages can be viewed, presented, and edited in the main Notebook window or in Full Screen
view. You can view a thumbnail of each page in a Notebook using the Thumbnails pane in
the Tab View.
You can insert new pages, import pages from another Notebook, delete pages, and reorder
pages. You can also change the size of a page, change the background of a page, and add
transition effects between pages in your Notebook.
To insert a new page
Do one of the following:
l
Click the New Page button,
.
l
(Capture mode only) Press the New Page button, , on your MimioCapture tray.
To select a page
1. In the Tab View, click to display the Thumbnails pane.
2. Do one of the following:
l
To select multiple pages, press Command and select each page.
l
To select multiple pages that are close to each other, drag a selection rectangle over
the pages to select.
l
To select a range of pages, select the first page, and then press SHIFT and select
the last page.
l
To select all pages, choose Select All from the Edit menu.
To insert a duplicate of an existing page
1. In the Tab View, click , and then select the page to duplicate.
2. Do one of the following:
l
Choose Duplicate Page from the Insert menu.
l
(Capture mode only) Press the Copy Page button,
, on your MimioCapture tray.
To delete a page
11
MimioStudio
1. In the Tab View, click , and then select the page to delete.
2. Click the Delete button, .
To import a page from another Notebook
1. In the Tab View of the source Notebook, click and then select the page to import.
2. Click the Copy button,
.
3. Select the location in the target Notebook to insert the page.
4. Click the Paste button, .
You can also import pages by dragging the pages from the source Notebook to the
target Notebook.
To insert the desktop as a new page
1. From MimioStudio Tools, click the Screen Clipping button,
The desktop is displayed with a transparent mask.
.
2. Click
.
The desktop is inserted as a new page in the Notebook.
To change the page size
1. Choose Page Setup from the File menu.
The Page Setup dialog box appears.
2. Do one of the following:
l
From the Page Size list, choose any of the available display or device sizes.
l
From the Page Size list, choose Custom, and then enter the desired valued into the
Width and Height boxes.
3. From the Apply To list, choose one of the following:
l
Current Page to apply the page size to the current page only.
This option is not available if more than one page is selected in the Tab View.
l
Selected Pages to apply the page size to the selected pages.
This option is only available if more than one page is selected in the Tab View.
l
Whole Document to apply the page size to all of the pages in the Notebook.
4. (Optional) Do one of the following:
l
To apply the page size to all new pages, select the All new pages check box.
This option is only available if no MimioTeach device is connected.
l
To apply the page size to all new pages and the currently connected device, select
the The connected device check box.
This option is only available if a MimioTeach device is connected.
5. Click OK to apply your changes.
To change the background color of a page
1. Choose Background from the Insert menu.
2. From the Background dialog box, click Color.
3. From the Color dialog box, select a color, and then click OK.
4. From the Apply To list, select the pages to apply the background color to.
12
Using MimioStudio Notebook
5. To apply the background color to all new pages, select the All new pages check box.
6. Click OK to apply your changes.
To change the background image of a page
1. Choose Background from the Insert menu.
2. From the Background dialog box, click Image.
3. From the Open dialog box, navigate to and select the image file that you want to use as
your background.
4. Click Open.
The image is displayed in the Preview area.
You can also import an image from another application or from the MimioStudio
Gallery to use as a background. To do this, select the image and drag to the
Preview area.
5. Select the display mode for the new background from the Mode list.
Mode
Result
Place
The image is placed in the top left corner of the page and is not resized.
Stretch
The image is resized to fill the entire page.
Tile
The image is tiled repeatedly to fill the entire page and is not resized.
Center
The image is placed in the center of the page and is not resized.
6. From the Apply To list, select the pages to apply the background to.
7. To apply the background to all new pages, select the All new pages check box.
8. Click OK to apply your changes.
To add a transition effect between pages
1. Choose Page Transition from the Insert menu.
The Page Transition dialog box appears.
2. From the Transitions list, select the transition to apply.
3. From the Apply To list, select the pages to apply the transition to.
4. To apply the transition to all new pages, select the All new pages check box.
5. Click OK.
To sort pages
1. In the Tab View, click
2. Select the pages to sort.
to display the Thumbnails pane.
3. Drag the selected pages to the desired location.
To print a page
1. In the Tab View, click
to display the Thumbnails pane.
2. Select the pages to print.
3. Click the Print button, .
The Print dialog box appears.
4. Click Print.
13
MimioStudio
To print the current page in Ink Capture mode, press the Print Page button,
MimioCapture tray.
, on your
Creating an Activity
MimioStudio Notebook includes a wizard that you can use to quickly create and insert an
activity into your Notebook.
The wizard guides you through the following steps to create and insert an activity:
n
Step 1: Define - Define the subject, grade level, and template for the activity.
n
Step 2: Select - Select the topic and categories for the activity, and when to show
students the correct answers.
n
Step 3: Refine - Refine the items available in the activity. You can also choose to
display items as images or text.
n
Step 4: Review - Review the activity and enter a student-focused objective.
To start the wizard
1. Open a new or existing Notebook.
2. Choose New Activity from the Insert menu.
The wizard starts.
3. Follow the instructions in the wizard.
4. When finished, click Finish to insert the activity as a new page in the MimioStudio
Notebook.
Creating an Activity - Step 1: Define
When you create an activity using the wizard, you define the subject, grade level, and
template for the activity.
To define the activity
1. Under Subject, select a subject for the activity.
2. Under Grade Level, select the grade level of the students that will participate in the
activity.
3. Under Template, select a template for the activity.
4. Click Next.
Next, you select the topic and categories for the activity.
Creating an Activity - Step 2: Select
Once you have completed Step 1, you must select the topic and categories for the activity.
The topic and categories available depend on the subject and grade level you selected. The
number of categories that you need to choose depends on the template you selected.
You also select when to reveal the correct answers to your students.
To select the topic, categories, and when to show answers
1. Select a topic for the activity from the Topic list.
2. Select a category from each of the categories lists.
The categories available depend on the topic you selected.
14
Using MimioStudio Notebook
3. Select one of the following from the Reveal answers list:
l
Immediately following a student response to show if the student response is correct
or incorrect immediately following each response.
Select this option when students are acquiring new skills. Providing feedback
after each response allows you to explain to the students why a response is
incorrect immediately after an error is made.
l
When I choose the check answers item to show the correct and incorrect answers
only when you click the check answers item in the activity.
Select this option when students have already acquired skills. Providing
feedback after all responses are given allows you to test the students to see if
they can complete the entire activity on their own.
4. Click Next to go to the next page of the wizard.
Creating an Activity - Step 3: Refine
Once you have completed Step 1 and Step 2, the wizard automatically generates the choice
pool for the activity. The choice pool contains the set of available items students will use to
complete the activity.
Optionally, you can further refine your activity in the following ways:
n
Change the state of items in the library to always include or exclude from the choice
pool.
n
Display items as images or text. (Not available for all items.)
n
Increase or decrease the number of items available in the choice pool.
n
Change the number of items belonging to each category in the choice pool.
n
Update the choice pool with new items from the library.
Refining the activity is optional. To skip this page of the wizard and move on to the
next page, click Next.
Selecting Items to Include or Exclude
You can choose to always include or always exclude items from the activity. The following
table describes the available states for each item.
Always include item in choice pool.
Never include item in choice pool.
No mark
Randomly include item in choice pool.
To select items to always include or exclude from the activity
1. Under Library, select the item that you want to always include or exclude.
2. Click one of the following:
l
Include to always include the item in the choice pool.
Exclude to never include the item in the choice pool.
The state of the item is updated in the library.
l
15
MimioStudio
To clear the include or exclude state for an item
1. Select the included or excluded item.
2. Click Clear.
The state of the item is updated in the library.
Displaying Items as Images or Text
You can choose to display the items in the activity as images or as text.
To display items as images or text
Select one of the following from the Display Type list:
l
Text to display all items in the library and the choice pool as text.
l
Image to display all items in the library and the choice pool as images. (Not
available for all items.)
Changing Choice Categories
The number of items in the choice pool that belong to each category is determined
automatically. You can replace some of the items in the choice pool with items from a
different category so that the choice pool contains more choices from one category and
fewer from another.
The maximum number of items available in the choice pool is 20. You can increase or
decrease the number of items in the choice pool by adding or removing items.
To change an item in the choice pool
1. Under Choice Pool, select the item or empty position to change.
2. Do one of the following:
l
To replace or add an item, click the desired category for the new item.
l
To remove the item and leave the position empty, click Empty.
Updating the Choice Pool
You can update the choice pool at any time.
To update the choice pool
Click
Update.
Creating an Activity - Step 4: Review
You can review the activity before inserting the activity into your Notebook. You can also
enter a student-focused objective for your activity.
To review the activity and enter an objective
1. Review the activity.
If necessary, click Back to return to the previous pages of the wizard and make any
desired changes.
2. Enter an objective in the Objective box.
For information about writing a student-focused objective, see Writing an Objective.
16
Using MimioStudio Notebook
3. Click Finish.
The activity is inserted as a new page in the MimioStudio Notebook.
Working with an Activity
Once the activity is inserted as a new page in the MimioStudio Notebook, you have several
options for working with the activity.
The following table describes the options available for working with your activity.
Reset Answers
Resets the activity and moves all answers back to the answer pool.
Check Answers
Indicates the correct and incorrect answers.
Solve
Moves all answers to the correct location in the activity.
Edit
Opens the wizard. From the wizard, you can edit the activity.
Update Choices
Updates the choices in the answer pool.
To select an option for working with your activity, click
To display the objective for the activity, click
Writing an Objective
.
.
Writing an Objective
The purpose of the objective is to communicate expectations clearly so that the teacher and
the students have a shared understanding of the performance standards by which the student
will be evaluated. Remember that a good student-focused objective includes the following
four parts:
n
Actor - The person who will complete the task (for example, the student)
n
Intent - The targeted category of performance (for example, identify birds and reptiles)
n
Indicator - The observable and measurable behavior that reflects the intent (for
example, dragging and dropping)
n
Outcome - The product that is to be evaluated (for example, images sorted into
columns)
Example: The student will identify birds and reptiles by dragging the images from the
choice pool into the corresponding columns.
Optionally, you can include the following fifth part in an objective:
n
Criterion - The level of performance that is targeted for mastery. This may be stated as
accuracy and/or rate.
Examples:
l
The student will identify birds and reptiles by dragging the images from the choice
pool into the corresponding columns with 90% accuracy.
l
The student will identify birds and reptiles by dragging the images from the choice
pool into the corresponding columns, with at least 9 out of 10 correct in less than
one minute.
17
MimioStudio
Attaching Files
You can attach any type of file to a MimioStudio Notebook. Once a file is attached to the
Notebook, you can quickly open the file directly from within MimioStudio Notebook.
To attach a file to a Notebook
1. In the Tab View, click
to display the File Attachment pane.
2. On your computer, navigate to and select the file to attach to the Notebook.
3. Drag the file to the File Attachment pane.
The file is attached to the Notebook.
To open an attached file
1. In the Tab View, click
to display the File Attachment pane.
2. Double-click the file to open.
Using MimioStudio Tools
Using MimioStudio Tools, you can create a wide variety of objects on any MimioStudio
Notebook page, including lines, shapes, and freehand drawing and writing.
See Accessing MimioStudio Tools for information on accessing MimioStudio Tools.
Creating Objects
MimioStudio Tools provides tools for inserting freehand writing or drawing into your
MimioStudio Notebook, as well as lines, arrows, basic shapes, and formatted text. You can
also import images and multimedia objects, or insert a clipping of your screen into your
Notebook using Tools.
Once you select a drawing tool, that tool remains selected until you select a different
drawing tool or the selection tool.
To use the freehand pen
1. Click the Pen button, .
2. (Optional) To adjust the line width, drag the Thickness slider.
3. (Optional) To adjust the line color, do one of the following:
l
Select a color from the Color Palette.
l
Click
, and then select a color from the Color dialog box.
Click
, and then select a color from the desktop.
4. (Optional) To adjust the transparency of the line, click the Transparency button,
and then choose a transparency percentage.
l
5. Place the cursor where you want the ink stroke to start on the page.
6. Drag the cursor to draw ink strokes.
To use the freehand brush
1. Click the Brush button,
.
2. (Optional) To adjust the line width, drag the Thickness slider.
18
,
Using MimioStudio Tools
3. (Optional) To adjust the line color, do one of the following:
l
Select a color from the Color Palette.
l
Click
, and then select a color from the Color dialog box.
Click
, and then select a color from the desktop.
4. (Optional) To adjust the transparency of the line, click the Transparency button,
and then choose a transparency percentage.
l
,
5. Place the cursor where you want the brush stroke to start on the page.
6. Drag the cursor to draw brush strokes.
To highlight a portion of the display
1. Click the Highlighter button, .
2. (Optional) To adjust the highlighter width, drag the Thickness slider.
3. (Optional) To change the color, do one of the following:
l
Select a color from the Color Palette.
l
Click
, and then select a color from the Color dialog box.
Click
, and then select a color from the desktop.
4. Place the cursor where you want the highlight stroke to start on the page.
l
5. Drag the cursor over the area you want to highlight.
To erase ink and highlighting
1. Click the Eraser button, .
2. (Optional) To adjust the eraser width, drag the Thickness slider.
3. Drag the cursor over the ink or highlighter strokes you want to erase.
To add a line or shape
1. Click the line type or shape you want to add.
2. (Optional) To adjust the line or outline width, drag the Thickness slider.
3. (Optional) To change the line or outline color, select the Outline Color box, and then
do one of the following:
l
Select a color from the Color Palette.
l
Click
, and then select a color from the Color dialog box.
Click
, and then select a color from the desktop.
4. (Optional) To adjust the fill color, select the Fill Color box, and then do one of the
following:
l
l
Select a color from the Color Palette.
l
Click
, and then select a color from the Color dialog box.
l
Click
, and then select a color from the desktop.
5. To change the line or outline style, click
l
Solid
Dash
l
Square Dot
l
and choose one of the following:
19
MimioStudio
6. (Optional) To adjust the transparency of the line or shape, click the Transparency
button, , and then choose a transparency percentage.
7. Place the cursor where you want the line or shape to start on the page.
8. Drag the cursor to draw the line or shape.
To add formatted text
1. Click the Text button, .
2. Place the cursor where you want the text to start on the page.
For a fixed width text box, place the cursor where you want the text box to start on the
page and then drag to the desired width.
3. Select a font style, size, color, and an alignment option for the text.
4. Enter text in the text box.
To draw a shape
1. Click the Shape Recognition button,
.
2. (Optional) To adjust the outline width, drag the Thickness slider.
3. (Optional) To change the outline color, select the Outline Color box, and then do one
of the following:
l
Select a color from the Color Palette.
l
Click
, and then select a color from the Color dialog box.
Click
, and then select a color from the desktop.
4. (Optional) To adjust the fill color, select the Fill Color box, and then do one of the
following:
l
l
Select a color from the Color Palette.
l
Click
, and then select a color from the Color dialog box.
l
Click
, and then select a color from the desktop.
5. To change the line or outline style, click
l
l
and choose one of the following:
Solid
Dash
l
Square Dot
6. (Optional) To adjust the transparency of the shape, click the Transparency button,
and then choose a transparency percentage.
7. Place the cursor where you want the shape to start on the page.
8. Drag the cursor to draw the shape.
The Shape Recognition tool can be used to draw circles, ellipses, triangles, rectangles,
squares, and lines.
To import a picture, multimedia object, or document
1. Do one of the following:
l
From MimioStudio Tools, click
, and then choose
Insert File.
From MimioStudio Notebook, choose
File from the Insert menu.
2. From the Open dialog box, select the file to import.
l
20
,
Using MimioStudio Tools
3. Click Open.
The image or object is displayed on the Notebook page.
You can also copy and paste images from another application, or drag images from
another application into Notebook.
To insert a screen clipping
1. From MimioStudio Tools, click the Screen Clipping button,
.
The desktop is displayed with a transparent mask.
2. Do one of the following:
l
Click
to insert a rectangular screen clipping.
l
Click
to insert an elliptical screen clipping.
l
Click
to insert a free-form screen clipping.
To insert the entire desktop as a new page in the Notebook, click
3. Drag the cursor to select the area to capture.
.
The selected area is inserted in the Notebook page.
Manipulating Objects
Objects on a page can be moved, rotated, copied, deleted, locked, and have their properties
adjusted.
To select an object
1. From MimioStudio Tools, click the Selection button,
2. Do one of the following:
.
l
Click the object to select.
l
To select multiple objects, press Command and select each object.
l
To select multiple objects that are close to each other, drag a selection rectangle
over the objects to select.
l
To select all objects on a page, choose Select All from the Edit menu.
To move an object
1. Select the object to move.
2. Position the cursor over the object.
The cursor changes to the move cursor,
.
21
MimioStudio
3. Drag the object to the desired location.
To resize an object
1. Select the object to resize.
A frame is displayed around the object.
2. Position the cursor over one of the white sizing handles.
The cursor changes to the resize cursor,
3. Drag the cursor to resize the object.
.
To constrain object proportions during resizing, right-click the object and choose Fixed
Aspect Ratio.
To rotate an object
1. Select the object to rotate.
A frame is displayed around the object.
2. Position the cursor over the green rotation handle.
The cursor changes to the rotation cursor,
3. Drag the cursor to rotate the object.
.
To snap to one of the predefined 45° increments, move the rotate cursor and release
22
Using MimioStudio Tools
over the predefined rotation anchor point.
To lock the position and properties of an object
1. Select the object to lock.
2. From the Format menu, point to Locking, and then choose Lock.
A locked object cannot be selected.
To unlock an object
From the Format menu, point to Locking, and then choose Unlock All.
Objects can only be unlocked collectively; you cannot unlock individual objects.
To delete an object
1. Select the object to delete.
2. Drag the object to the trash can,
.
To reorder objects
1. Select the object to reorder.
2. Choose Order from the Format menu.
3. Choose how to order the object.
Option
Action
Front
Brings the selected object to the front of the order.
Back
Sends the selected object to the back of the order.
Forward
Steps the object forward in the order, by one.
Backward
Steps the object backward in the order, by one.
To group objects
1. Select the objects to group.
2. From the Format menu, point to Grouping, and then choose
Group.
To ungroup objects
1. Select the objects to ungroup.
2. From the Format menu, point to Grouping, and then choose
Ungroup.
To edit object properties
23
MimioStudio
1. Select the object to edit.
2. To adjust the line or outline width, drag the Thickness slider.
3. To adjust the color, select the Outline Color box or the Fill Color box, and then do one
of the following:
l
Select a color from the Color Palette.
l
Click
, and then select a color from the Color dialog box.
l
Click
, and then select a color from the desktop.
4. To change the line or outline style, click
l
Solid
Dash
l
Square Dot
l
and choose one of the following:
5. To adjust the transparency, click the Transparency button,
transparency percentage.
, and then choose a
To change the fill color of an object
1. From MimioStudio Tools, click the Object Fill button,
2. Do one of the following:
l
Select a color from the Color Palette.
l
Click
.
, and then select a color from the Color dialog box.
Click
, and then select a color from the desktop.
3. Click the object to change the fill color for.
l
To change the fill color for an object that currently has no fill color, click the object
border.
To edit text
1. Double-click the text box.
2. Select the text to adjust, or enter new text.
3. Adjust the font style, size, color, or alignment.
To import an object from another Notebook page
1. Select the object to import from the source Notebook page.
2. Click the Copy button, .
3. Navigate to the target Notebook page.
4. Click the Paste button, .
You can also import an object by dragging the object from the source page to the target
page.
To convert ink to text
1. Select the objects to convert.
All selected objects are combined into one text object.
2. Do one of the following:
l
Right-click, and then choose
l
Choose
To convert ink to shapes
24
Recognize Text.
Recognize Text from the Tools menu.
Using MimioStudio Tools
1. Select the objects to convert.
2. Do one of the following:
l
Right-click, and then choose
l
Choose
Recognize Shapes.
Recognize Shapes.from the Tools menu.
To snap objects to grid
1. Choose
Grid from the View menu.
The Grid dialog box appears.
2. To force objects to snap to grid, select the Snap objects to grid check box.
3. To allow objects to snap to angles, select the Snap objects to angles check box.
4. To adjust the spacing between grid snap locations, enter the desired value into the
Spacing box.
5. To display a grid on the screen, select the Display grid on screen check box.
6. To make the grid settings permanent for each new MimioStudio Notebook, select the
Set as default for all new documents check box.
7. Click OK.
Adding Actions to Objects
Objects can have actions associated with them. You can associate an action with any object
that you create or import into a MimioStudio Notebook; you cannot add an action to a
template or background.
You can choose to perform the associated action each time you click the object or each time
you drag the object.
You can associate two different actions with a single object. For example, you can
choose to launch a hyperlink when you click an object and clone the object when you
drag the object. However, you cannot associate two different hyperlinks or two different
sounds with the same object.
There are three types of actions that you can associate with objects:
n
Launch Hyperlink - opens a file, a web page, or a different page within a Notebook.
n
Clone - creates a copy of the object on the Notebook page.
n
Play Sound - plays a sound file.
To add a hyperlink to an object
1. Select the object to add the hyperlink to.
2. Choose Hyperlink from the Insert menu.
The Action Settings dialog box appears.
3. Select one of the following from the Action list:
l
On Click - to launch the hyperlink each time the object is clicked.
l
On Drag - to launch the hyperlink each time the object is dragged.
4. Select Launch Hyperlink from the Feature list.
5. Select Existing file or Web Page from the Link To list.
Alternately, select a page from within the current Notebook from the Link To list.
6. Enter a file name or web address to link to in the Address box.
25
MimioStudio
Alternately, click Browse to search for a file to link to.
7. Click OK to add the hyperlink to the object.
To add cloning to an object
1. Select the object to add the clone action to.
2. Choose Action Settings from the Insert menu.
The Action Settings dialog box appears.
3. Select one of the following from the Action list:
l
On Click - to create a copy of the object each time the object is clicked
l
On Drag - to create a copy of the object each time the object is dragged
4. Select Clone from the Feature list, and then click OK.
You can also add the clone action to an object by choosing Clone from the Insert
menu. By default, a copy of the object is created whenever you drag the object.
To add a sound to an object
1. Select the object to link the sound file to.
2. Choose Action Settings from the Insert menu.
The Action Settings dialog box appears.
3. Select one of the following from the Action list:
l
On Click - to play the sound file each time the object is clicked
l
On Drag - to play the sound file each time the object is dragged
4. Select Play Sound from the Feature list.
5. Click Load.
The Open dialog box appears.
6. Navigate to and select the sound file to link to the object, and then click Open.
7. Click OK in the Action Settings dialog box.
To remove an action from an object
1. Select the object with the action to remove.
2. Choose Action Settings from the Insert menu.
The Action Settings dialog box appears.
3. Choose None from the Feature list, and then click OK.
Adding Animations to Objects
Objects can have animations associated with them. You can associate an animation with
any object that you create or import into a MimioStudio Notebook; you cannot add an
animation to a template or background.
You can choose to perform the associated animation each time you click the object or each
time the page containing the object is displayed.
To add an animation to an object
1. Select the object to add the animation to.
2. Choose Animate from the Insert menu.
The Animation Settings dialog box appears.
3. Select the desired animation from the Animations list.
26
Using MimioStudio Gallery
4. Select one of the following from the Start list:
l
When the object is clicked - to start the animation when the object is clicked.
l
When the page is entered - to start the animation each time the page containing the
object is displayed.
5. If available, select one of the following from the Triggers list:
l
Default
l
Results
l
Notes
6. Click OK to close the dialog box and save your settings.
To remove an animation from an object
1. Select the object with the animation to remove.
2. Choose Animate from the Insert menu.
The Animation Settings dialog box appears.
3. Select None from the Animations list, and then click OK.
Using MimioStudio Gallery
MimioStudio Gallery consists of the following four main folders:
n
Screen Annotations - contains all saved Screen Annotation snapshots.
n
Imported Content Packs - contains any imported content that you have not yet added
to the Gallery folder.
n
Questions and Results - contains a variety of objects for use with MimioVote.
n
Gallery - contains a number of different folders used to categorize items, such as
Geography, Mathematics, and so on.
n
Collaborative Sessions - contains all saved Collaborate pages.
The Gallery folder and each of the Gallery subfolders can contain five different types of
objects:
n
Images - Images include pictures and graphics.
n
Templates - Templates include backgrounds and predefined page layouts.
n
Multimedia - Multimedia objects include movies, animation, and sound.
n
Questions and Results - Questions and Results include objects for creating and
displaying the results of MimioVote activities.
This section of the Gallery does not appear until you move objects from the
Questions and Results folder to the Gallery folder or a Gallery subfolder.
n
Lessons - Lessons include lessons created using MimioStudio Notebook and imported
documents. You can create your own lessons or import lessons created by someone else.
See Accessing MimioStudio Gallery for information on accessing MimioStudio Gallery.
To navigate MimioStudio Gallery
Click any folder to view the available items in that folder.
Click the arrow next to a Gallery folder to see any subfolders that are contained in that
Gallery folder.
To select a Gallery item
27
MimioStudio
1. Navigate to the Gallery folder that contains the item you want to select.
2. Do one of the following:
l
Click the Gallery item to select.
l
To select multiple items, press Command and select each item.
l
To select multiple items that are close to each other, drag a selection rectangle over
the items to select.
l
To select a range of items, select the first item, and then press SHIFT and select
the last item.
l
To select all items, right-click, and then choose Select All.
Importing Gallery Items into a Notebook
You can import any Gallery item into a MimioStudio Notebook to add to your presentation.
To import a Gallery item into a Notebook
1. Select the image, template, multimedia item, questions and results object, or lesson to
import.
2. Drag the item into the Notebook.
You can also import items by double-clicking or by copying and pasting the items into
a Notebook.
Customizing the Content of the Gallery
The MimioStudio Gallery is fully expandable and modifiable, so you can add your own
folders, pictures, templates, multimedia items, and lessons.
You can also add Microsoft Word, PowerPoint, and PDF documents to the Gallery. All
imported documents are placed in the Lessons section of the MimioStudio Gallery
MimioStudio does not support network or shared galleries.
To import a Gallery folder from a Gallery file
1. Click the Import Content Pack button, .
2. From the Open dialog box, navigate to and select the Gallery file to import.
3. Click Open.
The contents of the Gallery file are added to the Imported Content Packs folder in
MimioStudio Gallery.
4. Review the imported content and make any desired changes.
5. To move the content to the Gallery folder, right-click the folder to move and then
choose Install.
The content is moved to the Gallery folder.
To add a new Gallery folder
1. Select the main Gallery folder or a Gallery subfolder to add the new folder to.
2. Click the New Folder button, .
The Item Information dialog box appears.
3. Enter a name for the new folder in the Name box.
4. (Optional) Enter a keyword in the Keywords box to make the new folder searchable
28
Using MimioStudio Gallery
from the Gallery search bar.
5. Click OK.
To add a new item to a folder
1. Select the folder to add the item to.
2. Click the Insert File button, .
3. From the Open dialog box, navigate to and select the file to import.
4. Click Open.
The item is inserted in the appropriate area of the Gallery folder.
You can also add new items by selecting one or more items, and then dragging and
dropping or copying and pasting them into a Gallery folder.
To create a template from a Notebook image
1. Right-click and drag the image into the Gallery.
The right-click menu appears.
2. Choose Insert as template.
To copy an existing Gallery item
1. Select the Gallery item to copy.
2. Click the Copy button, .
3. Select a Gallery folder to insert the new item into.
4. Click the Paste button, .
The item is inserted in the appropriate area of the Gallery folder.
To delete a Gallery item
1. Select the Gallery item to delete.
2. Click the Delete button, .
A delete confirmation dialog box appears.
3. Click Yes.
To find similar Gallery items
1. Right-click the Gallery item, and then choose Open Folder.
2. If the item is contained in more than one folder, choose the folder to open.
The folder containing the selected item opens in MimioStudio Gallery.
Exporting a Gallery Folder to a Gallery File
Entire Gallery folders can be exported and imported into the MimioStudio Gallery as
Gallery (MCF) files. You can then share Galleries that you have created with other
MimioStudio users.
MimioStudio does not support network or shared galleries.
To export a Gallery folder to a Gallery file
1. Select the Gallery folder to export.
2. Click the Export Content Pack button, .
3. From the Save As dialog box, enter a name for the file in the Save As box.
4. Select a location to save the file to.
5. Click Save.
29
MimioStudio
Working with Saved Annotation Snapshots
MimioStudio automatically saves a snapshot of the annotated screen each time you exit
Screen Annotation mode. These snapshots are saved in the Screen Annotations folder in
MimioStudio Gallery.
For information about creating Screen Annotation snapshots, see Marking Up the Display
Using Screen Annotations.
Viewing Screen Annotation Snapshots
You can view your saved screen annotations from the Screen Annotations folder in
MimioStudio Gallery.
To view Screen Annotation snapshots
1. Start MimioStudio Gallery.
2. Select the Screen Annotations folder.
To select a snapshot
Do one of the following:
l
Click on the snapshot to select.
l
To select multiple snapshots, press Command and select each snapshot.
l
To select multiple snapshots that are close to each other, drag a selection rectangle
over the snapshots.
l
To select a range of snapshots, select the first snapshot and then press SHIFT and
select the last snapshot.
l
To select all snapshots, right-click, and then choose Select All.
Renaming an Annotation Snapshot
Screen Annotation snapshots are saved in chronological order, using the date and time that
the snapshot was created as the name of the snapshot. You can rename a snapshot any time
after it has been saved.
To rename a snapshot
1. Select the snapshot to rename.
2. Right-click and choose Properties.
3. Enter a name for the snapshot in the Name box and click OK.
Adding Keywords to an Annotation Snapshot
You can add keywords to any snapshot so that you can use the search bar in MimioStudio
Gallery to find that snapshot later.
To add keywords to a snapshot
1. Select the snapshot to add keywords to.
2. Right-click and choose Properties.
3. Enter each keyword on a separate line in the Keywords box and click OK.
30
Working with Saved Annotation Snapshots
Searching for an Annotation Snapshot
You can search for a specific snapshot using the search bar in MimioStudio Gallery. You
can search for a snapshot using a keyword or part of the snapshot name.
To search for a specific snapshot
1. Select the Screen Annotations folder in the Gallery.
2. Enter text to search for in the Search box.
All snapshots associated with the text appear in the preview area of the Gallery.
Importing an Annotation Snapshot
You can import a snapshot into an open Notebook.
To import a snapshot
1. Open a MimioStudio Notebook.
2. Select the snapshot to import.
3. Drag the selected snapshot into the target Notebook.
Pasting an Annotation Snapshot Into Another Application
Annotation snapshots can be used in other applications such as Microsoft Word or
PowerPoint.
To paste a snapshot into another application
1. Select the snapshot to copy.
2. Click the Copy button, .
3. Navigate to the target application.
4. Right-click, and then choose Paste.
Alternatively, you can drag the selected snapshot into the target application.
Printing Annotation Snapshots
You can print a snapshot directly from the Screen Annotations folder in MimioStudio
Gallery.
To print a snapshot
1. Select the snapshot to print.
2. Right-click and choose Print.
Deleting Annotation Snapshots
You can delete snapshots from the Screen Annotations folder.
To delete a snapshot
1. Select the snapshot to delete.
2. Click the Delete button, .
A delete confirmation dialog box appears.
3. Click Yes.
31
MimioStudio
Delivering Interactive Notebook Lessons and Presentations
MimioStudio Notebook can be used to deliver lessons and presentations that were created
in or imported into a MimioStudio Notebook.
Using Fullscreen View
For presenting information, the Fullscreen view can be used to fill the entire screen with the
current page.
The MimioStudio Notebook standard toolbar and all MimioStudio Tools are available in
Fullscreen view.
To access the Fullscreen view
Click the Fullscreen button, .
The current page fills the entire screen and the MimioStudio Notebook standard toolbar
remains visible.
Navigating Through a Presentation
To navigate through a Notebook presentation
Use the MimioStudio Notebook standard toolbar to navigate through the Notebook
presentation.
Button
Action
Use this button to enter or exit the Fullscreen view.
Use this button to insert a new page
Use this button to return to the previous page in the Notebook.
Use this button to advance to the next page in the Notebook.
Working with Multimedia Objects
You can play, pause, fast forward, and rewind movie, animation, and sound objects you
added to your presentation.
To play video or audio
Click anywhere on the movie, animation, or sound object to play.
To show and hide the video and audio controls
1. While the video or audio is playing, click once anywhere on the object to view the
object controls.
2. Click the object again to hide the controls.
To pause, fast forward, or rewind video or audio
32
Delivering Interactive Notebook Lessons and Presentations
Do one of the following:
l
To pause the video or audio, click .
To fast forward the video or audio, drag the slider to the right.
l
To rewind the video or audio, drag the slider to the left.
l
33
This page intentionally left blank for double-sided printing.
34
Chapter 3
MimioTeach
Using MimioTeach with a projector, you can deliver lessons and presentations directly from
your whiteboard. Using MimioStudio Interactive mode, you control the movement of the
cursor on your screen with the MimioTeach stylus, much like you would with a mouse at
your computer.
What's Included
The MimioTeach package contains the following items:
1
MimioTeach bar
4
USB cable
2
USB power adapter
5
Mounting plates
3
MimioHub
6
MimioTeach stylus
If you are missing any of the items above, contact Customer Support.
About MimioTeach
You can use the MimioTeach bar and stylus in MimioStudio Interactive mode to deliver
lessons and presentations.
You can also use the MimioTeach bar with MimioCapture to capture notes from your
whiteboard into MimioStudio Notebook. For more information about using MimioTeach
with MimioCapture, see MimioCapture.
35
MimioTeach
The following figure shows the major components of the MimioTeach.
1
Start Tools (button B)
5
USB/Power connector
2
Hover/Right-click (button A)
6
Launch
3
MimioHub dock
7
Calibrate
4
Power/Status light
Status Lights
The status light visually shows the status of the MimioTeach bar.
36
Off
Not receiving power; USB/power cable is not connected or MimioTeach is turned
off.
Solid Green
MimioTeach is connected and receiving power; MimioStudio software is running.
Flashing Green
MimioTeach is connected or connecting, and receiving power; MimioStudio
software is not running.
Solid Amber
MimioTeach cannot find an available MimioHub.
Flashing Amber
MimioTeach is searching for an available MimioHub.
About MimioStudio Tools
With the various presentation tools found in MimioStudio Tools you can focus your
audience on a specific area of the screen by displaying only certain parts of the screen. You
can also annotate the screen with the drawing tools available in MimioStudio Tools using
the Screen Annotation feature.
For more information about MimioStudio Tools, see Marking Up the Display Using Screen
Annotations.
37
MimioTeach
The following table describes the major components of MimioStudio Tools.
Selection tool
Zoom
Pen
Brush
Text
Highlighter
Line
Arrow End
Arrow Start
Arrow Both
Rectangle
Ellipse
Triangle
Right Triangle
Five Pointed Star
Hexagon
Pentagon
Shape Recognition
Eraser
Insert file
Screen clipping
Color picker
More colors
Object Fill
Outline and Fill color
Thickness slider
Color palette
Solid Line
Dash Line
Square Dot Line
Transparency
Gallery
Applications (see below)
Right-click
Interactive
Mouse
Screen Annotation
From the Applications tool, you can access the following:
Reveal
Spotlight
Text Tools
38
Class Manager
Control
Quick Collaborate
Quick Vote
Recorder
View
Calculator
Web Browser
Getting Started
Getting Started
Review the following topics to install and start using your MimioTeach.
n
Setting Up the MimioTeach Stylus
n
Setting Up the MimioTeach Bar
n
Setting Up Interactive Mode
Setting Up the MimioTeach Stylus
The MimioTeach stylus is powered by a rechargeable lithium-ion battery. The battery
recharges whenever the stylus is docked on the MimioTeach bar.
To set up the MimioTeach stylus
1. Turn the top of the stylus counter-clockwise to separate the top from the body of the
stylus.
2. Remove the plastic strip from the stylus.
3. Replace the top onto the body of the stylus and turn clockwise to attach.
Setting Up the MimioTeach Bar
The MimioTeach bar comes pre-linked to the included MimioHub. You can also use this
MimioHub to connect other MimioClassroom devices to your computer, such as
MimioVote.
39
MimioTeach
When not in use, the MimioHub can be stored in the MimioHub dock on the back of
the MimioTeach bar.
MimioTeach is powered using the included USB cable and power adapter.
Optionally, MimioTeach can be powered using three AAA batteries. For information
about using batteries to power the MimioTeach bar, see Inserting the Batteries.
To set up the MimioTeach bar
1. Plug the USB cable into the USB port on the power adapter.
2. Plug the other end of the USB cable into the USB port on the MimioTeach bar.
3. Plug the power adapter into a power outlet.
4. Place the MimioTeach bar along the left edge of the whiteboard as shown.
40
Getting Started
The MimioTeach bar attaches securely to any magnetic whiteboard. See Mounting
MimioTeach to a Non-Magnetic Whiteboard for information about mounting the bar to
a non-magnetic whiteboard.
5. Plug the MimioHub into an available USB port on your computer.
If you do not want to connect the MimioTeach bar to your computer wirelessly, you
can link the bar to your computer using the included USB cable without the power
adapter. The bar will be powered by USB through your computer.
Setting Up Interactive Mode
Using MimioStudio Interactive mode, you can deliver lessons and presentations directly
from your whiteboard.
To use Interactive mode you need a projector, a MimioTeach-enabled whiteboard, and a
MimioTeach stylus. Combined, these devices make for a powerful tool for delivering lessons
and presentations.
Projecting Your Desktop
If you are presenting from a MimioStudio Notebook or another application, such as a
PowerPoint presentation, you can open the application before or after Interactive mode is
enabled and calibrated.
To start Interactive mode
1. Project your desktop image onto your whiteboard.
Refer to your projector’s documentation for instructions on how to project your desktop
image.
2. Adjust the projected image to have a 2-inch to 3-inch buffer between the edge of your
projection and your MimioTeach.
41
MimioTeach
3. Click the MimioTeach stylus anywhere on the whiteboard.
Interactive mode starts and the calibration screen appears.
To exit Interactive mode
Do one of the following:
l
Press the Interactive button,
l
Start MimioStudio Tools, click Interactive , and then click Exit.
Start MimioStudio Preferences, select Interactive, and then click Disable.
l
, twice on the MimioTeach bar.
See Customizing MimioStudio for information on how to access MimioStudio
Preferences.
Calibrating Interactive Mode
Each time Interactive mode is enabled, you are prompted to calibrate using the MimioTeach
stylus.
When using a permanently installed whiteboard and projector, you do not need to
recalibrate Interactive mode after the first session. See Adjusting the Interactive Preferences.
To calibrate Interactive mode
1. If the calibration screen does not appear when you start Interactive mode, do one of the
following:
l
Press the Interactive button,
l
Start MimioStudio Tools, click the Interactive button,
Recalibrate.
, on your MimioTeach bar.
l
Start MimioStudio Preferences, select Interactive, and then click Calibrate.
, and then click
2. Press the MimioTeach stylus down on the whiteboard at the center of each of the nine
calibration targets.
Make sure to hold the stylus perpendicular to the writing surface as you click.
The calibration target disappears and the next calibration target appears.
When the calibration screen disappears, Interactive mode is enabled.
Using MimioTeach
You can use the MimioTeach bar and stylus in MimioStudio Interactive mode to deliver
lessons and presentations. In MimioStudio Interactive mode, you control the movement of
42
Using MimioTeach
the cursor on your screen with the MimioTeach stylus, much like you would with a mouse
at your computer.
You can also use the various presentation tools found in MimioStudio Tools to focus your
audience on a specific area of the screen by displaying only certain parts of the screen. And,
you can annotate the screen with the drawing tools available in MimioStudio Tools using
the Screen Annotation feature.
Using the MimioTeach Stylus
In Interactive mode, the MimioTeach stylus can be used to control your desktop and interact
with applications on your computer from your whiteboard.
The following table describes how to use the MimioTeach stylus to control your desktop
from the whiteboard.
To execute
Do this
Left mouse click
Click in the projected area at the desired location with the tip of the stylus.
Double left mouse
click
Quickly click twice in the projected area at the desired location with the tip of
the stylus.
Right mouse click
Press the B button on the stylus, and then click in the projected area at the
desired location with the tip of the stylus.
Hover
1. Hold the stylus at the desired location, staying as close to the whiteboard
as possible without touching it.
2. Press the B button on the stylus.
3. Move the stylus to the desired location.
4. Release the B button on the stylus.
To change the functions of the MimioTeach stylus buttons, see Adjusting the Interactive
Preferences.
Focusing Attention Using the Reveal and Spotlight Tools
The Reveal tool and the Spotlight tool help you to focus your audience on a specific area of
the screen by keeping parts of the screen hidden.
Using the Reveal Tool
The Reveal tool creates a shade that you can raise, lower, move left, and move right over
the screen image, as if you are moving a shade up, down, or across the screen. You can then
expose bullet points or other information progressively.
43
MimioTeach
To use the Reveal tool
Do one of the following:
l
From MimioStudio Tools, click the Applications button,
Reveal.
l
(Interactive mode only) Press the Launch button,
then click
Reveal in the Launch window.
, and then choose
, on the MimioTeach bar, and
To adjust the revealed area
Click inside the shaded area and drag down, up, left, or right to reveal more or less of
the displayed area.
To adjust the transparency of the Reveal tool
1. Click , and then point to Transparent.
2. From the Transparent list, choose a percentage.
A transparency of 0% means that the shaded area will be completely opaque.
Using the Spotlight Tool
The Spotlight tool masks the entire screen except for a small area, the spotlight. You can
then focus audience attention on a specific area of the screen. The spotlight area can be
reshaped, resized, and moved around the screen.
44
Using MimioTeach
To use the Spotlight tool
1. Do one of the following:
l
From MimioStudio Tools, click the Applications button,
Spotlight.
, and then choose
(Interactive mode only) Press the Launch button, , on the MimioTeach bar, and
then click
Spotlight in the Launch window.
2. Click the shaded area outside of the spotlight border and drag the spotlight to
the desired location.
l
To adjust the shape of the spotlight
1. Click , and then point to Shape.
2. From the Shape list, choose a shape for the spotlight.
To resize the spotlight
1. Click , and then point to Size.
2. From the Size list, choose a spotlight size.
You can also resize the spotlight by dragging the colored border of the spotlight until
the spotlight is the desired size.
To adjust the spotlight transparency
1. Click , and then point to Transparent.
2. From the Transparent list, choose a transparency percentage.
A transparency of 0% means that the shaded area will be completely opaque.
Marking Up the Display Using Screen Annotations
Screen Annotation mode allows you to annotate applications, web pages, and images. When
in Annotation mode, a green border with a faded edge appears around your desktop.
When you exit from Screen Annotation mode, all annotations are cleared from the
whiteboard and automatically archived in the Screen Annotations folder in MimioStudio
Gallery.
Enabling Screen Annotation Mode
To enable Screen Annotation mode
45
MimioTeach
1. Do one of the following
l
From MimioStudio Tools, click the Screen Annotation button,
current desktop image.
, to freeze your
(Interactive mode Only) Press the Launch button, , on the MimioTeach bar, and
then click
Screen Annotation in the Launch window.
A green border with a faded edge appears around your desktop.
l
2. Annotate the screen using MimioStudio Tools.
All object, drawing, and manipulation features in MimioStudio Tools are available in
Screen Annotation mode.
To exit Screen Annotation mode
Do one of the following:
l
From MimioStudio Tools, click the Mouse button,
, to “unfreeze” the screen.
l
(Interactive mode only) Press the Launch button, , on the MimioTeach bar, and
then click
Screen Annotation in the Launch window.
To disable the Annotation mode border
1. Click on the menu bar and choose
Preferences.
2. Select
Notebook from the MimioStudio Preferences dialog box.
3. Under General, clear the Enable fullscreen border (Screen Annotation only) check
box.
4. Click OK to save the preferences.
Annotating the Screen Using MimioStudio Tools
MimioStudio Tools are used to annotate the screen. All object, drawing, and manipulation
features in MimioStudio Tools are available in Screen Annotation mode.
Once you select a drawing tool, that tool remains selected until you select a different
drawing tool or the selection tool.
See Manipulating Objects for a complete description of manipulating objects.
All of the functions and features of the MimioStudio drawing tools that are available in
MimioStudio Notebook are available in Screen Annotation mode.
To use the freehand pen
1. Click the Pen button, .
2. (Optional) To adjust the line width, drag the Thickness slider.
3. (Optional) To adjust the line color, do one of the following:
l
Select a color from the Color Palette.
l
Click
, and then select a color from the Color dialog box.
Click
, and then select a color from the desktop.
4. (Optional) To adjust the transparency of the line, click the Transparency button,
and then choose a transparency percentage.
l
5. Place the cursor where you want the ink stroke to start on the page.
6. Drag the cursor to draw ink strokes.
To use the freehand brush
46
,
Using MimioTeach
1. Click the Brush button,
.
2. (Optional) To adjust the line width, drag the Thickness slider.
3. (Optional) To adjust the line color, do one of the following:
l
Select a color from the Color Palette.
l
Click
, and then select a color from the Color dialog box.
Click
, and then select a color from the desktop.
4. (Optional) To adjust the transparency of the line, click the Transparency button,
and then choose a transparency percentage.
l
,
5. Place the cursor where you want the brush stroke to start on the page.
6. Drag the cursor to draw brush strokes.
To highlight a portion of the display
1. Click the Highlighter button, .
2. (Optional) To adjust the highlighter width, drag the Thickness slider.
3. (Optional) To change the color, do one of the following:
l
Select a color from the Color Palette.
l
Click
, and then select a color from the Color dialog box.
l Click
, and then select a color from the desktop.
4. Place the cursor where you want the highlight stroke to start on the page.
5. Drag the cursor over the area you want to highlight.
To erase ink and highlighting
1. Click the Eraser button, .
2. (Optional) To adjust the eraser width, drag the Thickness slider.
3. Drag the cursor over the ink or highlighter strokes you want to erase.
To add a line or shape
1. Click the line type or shape you want to add.
2. (Optional) To adjust the line or outline width, drag the Thickness slider.
3. (Optional) To change the line or outline color, select the Outline Color box, and then
do one of the following:
l
Select a color from the Color Palette.
l
Click
, and then select a color from the Color dialog box.
l Click
, and then select a color from the desktop.
4. (Optional) To adjust the fill color, select the Fill Color box, and then do one of the
following:
l
Select a color from the Color Palette.
l
Click
, and then select a color from the Color dialog box.
l
Click
, and then select a color from the desktop.
5. To change the line or outline style, click
l
l
and choose one of the following:
Solid
Dash
47
MimioTeach
Square Dot
6. (Optional) To adjust the transparency of the line or shape, click the Transparency
button, , and then choose a transparency percentage.
7. Place the cursor where you want the line or shape to start on the page.
l
8. Drag the cursor to draw the line or shape.
To add formatted text
1. Click the Text button, .
2. Place the cursor where you want the text to start on the page.
For a fixed width text box, place the cursor where you want the text box to start on the
page and then drag to the desired width.
3. Select a font style, size, color, and an alignment option for the text.
4. Enter text in the text box.
To draw a shape
1. Click the Shape Recognition button,
.
2. (Optional) To adjust the outline width, drag the Thickness slider.
3. (Optional) To change the outline color, select the Outline Color box, and then do one
of the following:
l
Select a color from the Color Palette.
l
Click
, and then select a color from the Color dialog box.
l Click
, and then select a color from the desktop.
4. (Optional) To adjust the fill color, select the Fill Color box, and then do one of the
following:
l
Select a color from the Color Palette.
l
Click
, and then select a color from the Color dialog box.
l
Click
, and then select a color from the desktop.
5. To change the line or outline style, click
l
Solid
Dash
l
Square Dot
l
and choose one of the following:
6. (Optional) To adjust the transparency of the shape, click the Transparency button,
and then choose a transparency percentage.
,
7. Place the cursor where you want the shape to start on the page.
8. Drag the cursor to draw the shape.
The Shape Recognition tool can be used to draw circles, ellipses, triangles, rectangles,
squares, and lines.
Clearing All Annotations from the Display
When you exit Screen Annotation mode, all annotations are cleared from the display and all
annotations are automatically preserved as a snapshot of the display. See Working with
Saved Annotation Snapshots for information about reviewing and using the snapshots.
48
Using MimioTeach
Inserting Text Into an Application Using MimioStudio Text Tools
You can enter text into any text-entry box or page using the MimioStudio Text Tools. The
Text Tool has two modes for entering text:
n
On-Screen Keyboard allows you to enter text through an on-screen keyboard
application.
n
Writing Pad allows you to enter text through a small on-screen writing pad. Your
handwriting is automatically converted into text and input into the current application.
In addition, Writing Pad also supports gesture recognition, which allows handwritten
shortcuts to be automatically recognized as commonly used keys.
Gesture recognition is only supported on Intel-based systems.
To access MimioStudio Text Tools
1. From MimioStudio Tools, click the Applications button,
Tools.
, and then choose
Text
2. Click the Text Tools icon or on the menu bar.
3. Choose the Text Tool that you want to use.
l
Keyboard to enable the On-Screen Keyboard.
l
Writing Pad to enable Writing Pad.
To disable MimioStudio Text Tools
Do one of the following:
l
Click the Text Tools icon
selected Text Tool.
or
on the menu bar, and then choose the currently
l
From MimioStudio Tools, click the Applications button,
Text Tools.
, and then choose
Using the On-Screen Keyboard
You can enter text into any application using the On-Screen Keyboard.
To use the On-Screen Keyboard
1. Start the On-Screen Keyboard.
2. Click in the text-entry box or on the page where you want to enter the text.
3. Using your mouse or MimioTeach stylus, press the virtual keys on the on-screen
keyboard.
The text is entered into the text-entry box or on the page that you selected.
Using Writing Pad
With Writing Pad you can enter text through a small on-screen writing pad using the
MimioTeach stylus while in Interactive mode. You can also use Writing Pad with your
mouse or other input device from your computer.
To use Writing Pad
1. Start Writing Pad.
The on-screen writing pad appears.
2. Click in the text-entry box or on the page where you want to enter the text.
49
MimioTeach
3. Using your mouse or MimioTeach stylus, write within the yellow space of the onscreen writing pad.
Your handwriting is automatically converted to text and entered into the textentry box or on the page that you selected.
4. Use the on-screen buttons for commonly used keys.
Button
Description
Backspace
Enter
Tab
Space
Writing Pad also supports gesture recognition for commonly used keys. See Using Gesture
Recognition.
Using Gesture Recognition
With gesture recognition, handwritten shortcuts are automatically recognized as commonly
used keys. Writing Pad supports gesture recognition.
Gesture recognition is only supported on Intel-based systems.
The following table describes how to use gestures to perform common functions.
To press
Do this
Backspace
Draw a line from right to left.
Enter
Draw a connected line from top to bottom
and then from right to left.
Tab
Space bar
50
Draw a connected line from bottom to top
and then from left to right.
Draw a connected line from top to bottom
and then from left to right.
Caring for MimioTeach
Using the Web Browser and Calculator Tools
MimioStudio Tools includes shortcuts for accessing a Web browser and a calculator.
To use the tools
1. Start MimioStudio Tools.
2. Click the Applications button,
following tools:
l
Calculator
l
Web Browser
, choose More Tools, and then choose one of the
Recording Desktop Actions and Audio in Interactive Mode
Using MimioStudio Recorder, you can record your interactions into an MP4 movie file,
with or without audio. See Using MimioStudio Recorder for more information on how to
use MimioStudio Recorder.
Caring for MimioTeach
Review the following topics for information about cleaning, inserting the batteries, and
permanently mounting your MimioTeach.
n
Cleaning MimioTeach
n
Inserting the Batteries
n
Mounting MimioTeach to a Non-Magnetic Whiteboard
Cleaning MimioTeach
MimioTeach is designed to give you long and trouble-free service while requiring very little
maintenance.
You can easily clean your MimioTeach using the following items:
n
Lint-free cloth.
n
Isopropyl alcohol, diluted dishwashing detergent, or diluted glass cleaner.
If you use glass cleaner, make sure it does not contain ammonia.
To clean the MimioTeach bar and stylus
1. Disconnect the USB cable from the MimioTeach bar.
2. Use the lint-free cloth to wipe the exterior of the MimioTeach bar and stylus.
3. Remove dirt and smudges with one of the cleaning solutions mentioned above.
Avoid using liquids on any exposed charging contacts. Do not allow liquid into
any openings on the equipment.
4. Reconnect the USB cable.
Inserting the Batteries
MimioTeach is powered using the included USB cable and power adapter. Optionally,
MimioTeach can be powered using three AAA batteries.
To insert the batteries
51
MimioTeach
1. Press down and slide off the battery compartment cover.
2. Insert three AAA batteries into the battery compartment.
3. Replace the battery compartment cover.
Remove the batteries if the MimioTeach bar will not be used for a long period of time.
Mounting MimioTeach to a Non-Magnetic Whiteboard
The MimioTeach bar attaches securely to any magnetic whiteboard. If you do not have a
magnetic whiteboard, you can mount the MimioTeach bar to your whiteboard using the
included metal plates.
If you are installing both MimioTeach and MimioCapture, you must mount
MimioCapture before mounting MimioTeach. This will ensure proper placement of the
MimioTeach bar. See Mounting MimioCapture to a Non-Magnetic Whiteboard for
information on mounting MimioCapture.
To mount MimioTeach to a non-magnetic whiteboard
1. Place the metal plates against the back of the MimioTeach bar as shown.
Make sure that the recess on each plate is inserted into the recess on the back of the
MimioTeach bar.
2. Remove the paper backing from the adhesive strips to expose the adhesive.
52
Caring for MimioTeach
3. Press the MimioTeach bar firmly along the left edge of the whiteboard as shown.
53
This page intentionally left blank for double-sided printing.
54
Chapter 4
Mimio Interactive
Using Mimio Interactive with a projector, you can deliver lessons and presentations directly
from your whiteboard. Using MimioStudio Interactive mode, you control the movement of
the cursor on your screen with the Mimio Interactive Mouse, much like you would with a
mouse at your computer.
What's Included
The Mimio Interactive package contains the following items:
1
Mimio Interactive bar
4
Mimio mouse
2
Mounting brackets
5
AA battery
3
USB cable
If you are missing any of the items above, contact Customer Support.
About Mimio Interactive
You can use the Mimio Interactive bar and mouse in MimioStudio Interactive mode to
deliver lessons and presentations.
You can also use the Mimio Interactive bar with Mimio Capture Kit to capture notes from
your whiteboard into MimioStudio Notebook. For more information about using Mimio
55
Mimio Interactive
Interactive with Mimio Capture Kit, see Mimio Capture Kit.
The following figure shows the major components of Mimio Interactive.
1
A button (right-click)
7
Print page (Spotlight tool)
2
B button (hover)
8
Resize window (Reveal tool)
3
Power button/status light
9
Interactive
4
Learning button
10
Data transmission status light
5
New page (MimioStudio Tools)
11
Memory status light
6
Copy page (Annotation mode)
Status Lights
The status lights visually show the status of the Mimio Interactive bar.
Power Status Lights
Off
56
Not receiving power; USB/power cable is not connected, batteries need replaced,
or Mimio Interactive is turned off.
Solid Green
Mimio Interactive is receiving power.
Solid Amber
Mimio Interactive is receiving power; one to five hours of battery life remaining.
Flashing Amber
Mimio Interactive is receiving power; less than one hour of battery life remaining.
Data Transmission Status Lights
Off
Mimio Capture Kit pen or Mimio Interactive mouse is not in use.
Solid Green
Mimio Capture Kit pen or Mimio Interactive mouse is in use.
Solid Amber
Mimio Capture Kit pen or Mimio Interactive mouse battery is low.
Memory Status Lights
Off
Mimio Interactive bar memory is empty.
Flashing Green
Data is being downloaded from the Mimio Interactive bar to your computer.
Solid Green
Mimio Interactive bar memory is less than 80% full.
Solid Amber
Mimio Interactive bar memory is between 80% and 90% full.
Flashing Amber
Mimio Interactive bar memory is over 90% full.
About Mimio Wireless
You can use the Mimio Wireless module and wireless receiver to connect the Mimio
Interactive bar wirelessly to your computer.
The following figure shows the major components of Mimio Wireless.
57
Mimio Interactive
1
Power button/status light
6
Resize window (Reveal tool)
2
Learning button
7
Interactive
3
New page (MimioStudio Tools)
8
Link status light
4
Copy page (Annotation mode)
9
Data transmission status light
5
Print page (Spotlight tool)
Status Lights
The status lights visually show the status of the Mimio Interactive bar.
Power Status Lights
Off
Not receiving power; USB/power cable is not connected, batteries need
replaced, or Mimio Interactive is turned off.
Solid Green
Mimio Interactive is receiving power.
Solid Amber
Mimio Interactive is receiving power; one to five hours of battery life
remaining.
Flashing Amber
Mimio Interactive is receiving power; less than one hour of battery life
remaining.
Link Status Lights
58
Solid Green
Mimio Interactive is connected to the wireless receiver.
Flashing Green
Mimio Interactive is establishing a connection to the wireless receiver.
Solid Amber
Mimio Interactive cannot find an available wireless receiver.
Data Transmission Status Lights
Flashing Green
(slowly)
Mimio Capture Kit pen or Mimio Interactive mouse is not in use.
Flashing Green
(quickly)
Mimio Capture Kit pen or Mimio Interactive mouse is in use.
Solid Amber
Mimio Capture Kit pen or Mimio Interactive mouse battery is low.
About MimioStudio Tools
With the various presentation tools found in MimioStudio Tools you can focus your
audience on a specific area of the screen by displaying only certain parts of the screen. You
can also annotate the screen with the drawing tools available in MimioStudio Tools using
the Screen Annotation feature.
For more information about MimioStudio Tools, see Marking Up the Display Using Screen
Annotations.
59
Mimio Interactive
The following table describes the major components of MimioStudio Tools.
Selection tool
Zoom
Pen
Brush
Text
Highlighter
Line
Arrow End
Arrow Start
Arrow Both
Rectangle
Ellipse
Triangle
Right Triangle
Five Pointed Star
Hexagon
Pentagon
Shape Recognition
Eraser
Insert file
Screen clipping
Color picker
More colors
Object Fill
Outline and Fill color
Thickness slider
Color palette
Solid Line
Dash Line
Square Dot Line
Transparency
Gallery
Applications (see below)
Right-click
Interactive
Mouse
Screen Annotation
From the Applications tool, you can access the following:
Reveal
Spotlight
Text Tools
60
Class Manager
Control
Quick Collaborate
Quick Vote
Recorder
View
Calculator
Web Browser
Getting Started
Getting Started
Review the following topics to install and start using your Mimio Interactive.
n
Setting Up the Mimio InteractiveMouse
n
Setting Up the Mimio Interactive Bar
n
Setting Up Mimio Wireless
n
Setting Up Interactive Mode
Setting Up the Mimio Interactive Mouse
The Mimio Interactive Mouse is powered by one AA battery.
To set up the Mimio Interactive Mouse
1. Press down and slide off the battery compartment cover.
2. Insert one AA battery into the battery compartment.
3. Replace the battery compartment cover.
Setting Up the Mimio Interactive Bar
Mimio Interactive is powered through your computer using the included USB cable.
Optionally, Mimio Interactive can be powered using four AA batteries. For information
about using batteries to power the Mimio Interactive bar, see Inserting the Batteries.
To set up the Mimio Interactive bar
1. Unfold the Mimio Interactive bar.
2. Plug the USB cable into the USB port on the Mimio Interactive bar.
61
Mimio Interactive
3. Plug the other end of the USB cable into an available USB port on your computer.
4. Place the Mimio Interactive bar along the left edge of the whiteboard as shown.
The Mimio Interactive bar attaches to any whiteboard using the suction cups on the
back of the bar.
If the Mimio Interactive bar will be used for extended periods of time or will be used
repeatedly in any one location, you should mount the bar using the included brackets.
See Mounting the Mimio Capture Kit for information about mounting the bar using the
brackets.
Setting Up Mimio Wireless
The Mimio Wireless module comes pre-linked to the included wireless receiver.
Mimio Interactive bar is powered using the included power adapter.
Optionally, Mimio Interactive can be powered using four AA batteries. For information
about using batteries to power the Mimio Interactive bar, see Inserting the Batteries.
To set up Mimio Wireless
1. Press the release button on the back of the Mimio Interactive bar, and then slide the
linkUSB module down to remove.
62
Getting Started
2. Slide the Mimio Wireless module onto the Mimio Interactive bar.
3. Plug the power adapter into the power connector on the bottom of the Mimio
Interactive bar.
4. Plug the other end of the power adapter into a power outlet.
5. Place the Mimio Interactive bar along the left edge of the whiteboard as shown.
63
Mimio Interactive
The Mimio Interactive bar attaches to any whiteboard using the suction cups on the
back of the bar.
6. Plug the wireless receiver into an available USB port on your computer.
If the Mimio Interactive bar will be used for extended periods of time or will be
used repeatedly in any one location, you should mount the bar using the included
brackets. See Mounting the Mimio Capture Kit for information about mounting the
bar using the brackets.
Setting Up Interactive Mode
Using MimioStudio Interactive mode, you can deliver lessons and presentations directly
from your whiteboard.
To use Interactive mode you need a projector, a Mimio Interactive-enabled whiteboard, and
a Mimio Interactive Mouse. Combined, these devices make for a powerful tool for
delivering lessons and presentations.
Projecting Your Desktop
If you are presenting from a MimioStudio Notebook or another application, such as a
PowerPoint presentation, you can open the application before or after Interactive mode is
enabled and calibrated.
To start Interactive mode
64
Getting Started
1. Project your desktop image onto your whiteboard.
Refer to your projector’s documentation for instructions on how to project your desktop
image.
2. Adjust the projected image to have a 2-inch to 3-inch buffer between the edge of your
projection and your Mimio Interactive.
3. Click the Mimio Interactive Mouse anywhere on the whiteboard.
Interactive mode starts and the calibration screen appears.
To exit Interactive mode
Do one of the following:
l
Press the Interactive button,
l
Start MimioStudio Tools, click Interactive , and then click Exit.
Start MimioStudio Preferences, select Interactive, and then click Disable.
l
, twice on the Mimio Interactive bar.
See Customizing MimioStudio for information on how to access MimioStudio
Preferences.
Calibrating Interactive Mode
Each time Interactive mode is enabled, you are prompted to calibrate using the Mimio
Interactive Mouse.
When using a permanently installed whiteboard and projector, you do not need to
recalibrate Interactive mode after the first session. See Adjusting the Interactive Preferences.
To calibrate Interactive mode
1. If the calibration screen does not appear when you start Interactive mode, do one of the
following:
l
Press the Interactive button,
, on your Mimio Interactive bar.
l
Start MimioStudio Tools, click the Interactive button,
Recalibrate.
l
Start MimioStudio Preferences, select Interactive, and then click Calibrate.
, and then click
2. Press the Mimio Interactive Mouse down on the whiteboard at the center of each of the
nine calibration targets.
Make sure to hold the stylus perpendicular to the writing surface as you click.
The calibration target disappears and the next calibration target appears.
When the calibration screen disappears, Interactive mode is enabled.
65
Mimio Interactive
Using Mimio Interactive
You can use the Mimio Interactive bar and stylus in MimioStudio Interactive mode to
deliver lessons and presentations. In MimioStudio Interactive mode, you control the
movement of the cursor on your screen with the Mimio Interactive Mouse, much like you
would with a mouse at your computer.
You can also use the various presentation tools found in MimioStudio Tools to focus your
audience on a specific area of the screen by displaying only certain parts of the screen. And,
you can annotate the screen with the drawing tools available in MimioStudio Tools using
the Screen Annotation feature.
Using the Mimio Interactive Mouse
In Interactive mode, the Mimio Interactive Mouse can be used to control your desktop and
interact with applications on your computer from your whiteboard.
The following table describes how to use the Mimio Interactive Mouse to control your
desktop from the whiteboard.
To execute
Do this
Left mouse click
Click in the projected area at the desired location with the tip of the Mimio
Interactive Mouse.
Double left mouse
click
Quickly click twice in the projected area at the desired location with the tip of
the Mimio Interactive Mouse.
1. Hold the Mimio Interactive Mouse at the desired location, staying as close to
Right mouse click
the whiteboard as possible without touching it.
2. Press the A (concave) button on the Mimio Interactive Mouse.
Hover
1. Hold the Mimio Interactive Mouse at the desired location, staying as
close to the whiteboard as possible without touching it.
2. Press the B (convex) button on the Mimio Interactive Mouse.
3. Move the Mimio Interactive Mouse to the desired location.
4. Release the B button on the Mimio Interactive Mouse.
To change the functions of the Mimio Interactive Mouse buttons, see Adjusting the
Interactive Preferences.
Focusing Attention Using the Reveal and Spotlight Tools
The Reveal tool and the Spotlight tool help you to focus your audience on a specific area of
the screen by keeping parts of the screen hidden.
Using the Reveal Tool
The Reveal tool creates a shade that you can raise, lower, move left, and move right over
the screen image, as if you are moving a shade up, down, or across the screen. You can then
expose bullet points or other information progressively.
66
Using Mimio Interactive
To use the Reveal tool
Do one of the following:
l
From MimioStudio Tools, click the Applications button,
Reveal.
l
(Interactive mode only) Press the Resize window button,
Interactive bar.
, and then choose
, on the Mimio
To adjust the revealed area
Click inside the shaded area and drag down, up, left, or right to reveal more or less of
the displayed area.
To adjust the transparency of the Reveal tool
1. Click , and then point to Transparent.
2. From the Transparent list, choose a percentage.
A transparency of 0% means that the shaded area will be completely opaque.
Using the Spotlight Tool
The Spotlight tool masks the entire screen except for a small area, the spotlight. You can
then focus audience attention on a specific area of the screen. The spotlight area can be
reshaped, resized, and moved around the screen.
67
Mimio Interactive
To use the Spotlight tool
1. Do one of the following:
l
From MimioStudio Tools, click the Applications button,
Spotlight.
l
(Interactive mode only) Press the Print page button,
bar.
, and then choose
, on the Mimio Interactive
2. Click the shaded area outside of the spotlight border and drag the spotlight to
the desired location.
To adjust the shape of the spotlight
1. Click , and then point to Shape.
2. From the Shape list, choose a shape for the spotlight.
To resize the spotlight
1. Click , and then point to Size.
2. From the Size list, choose a spotlight size.
You can also resize the spotlight by dragging the colored border of the spotlight until
the spotlight is the desired size.
To adjust the spotlight transparency
1. Click , and then point to Transparent.
2. From the Transparent list, choose a transparency percentage.
A transparency of 0% means that the shaded area will be completely opaque.
Marking Up the Display Using Screen Annotations
Screen Annotation mode allows you to annotate applications, web pages, and images. When
in Annotation mode, a green border with a faded edge appears around your desktop.
When you exit from Screen Annotation mode, all annotations are cleared from the
whiteboard and automatically archived in the Screen Annotations folder in MimioStudio
Gallery.
Enabling Screen Annotation Mode
To enable Screen Annotation mode
68
Using Mimio Interactive
1. Do one of the following
l
From MimioStudio Tools, click the Screen Annotation button,
current desktop image.
l
(Interactive mode Only) Press the Copy page button,
Interactive bar.
, to freeze your
, on the Mimio
A green border with a faded edge appears around your desktop.
2. Annotate the screen using MimioStudio Tools.
All object, drawing, and manipulation features in MimioStudio Tools are available in
Screen Annotation mode.
To exit Screen Annotation mode
Do one of the following:
l
From MimioStudio Tools, click the Mouse button,
l
(Interactive mode Only) Press the Copy page button,
Interactive bar.
, to “unfreeze” the screen.
, on the Mimio
To disable the Annotation mode border
1. Click on the menu bar and choose
Preferences.
2. Select
Notebook from the MimioStudio Preferences dialog box.
3. Under General, clear the Enable fullscreen border (Screen Annotation only) check
box.
4. Click OK to save the preferences.
Annotating the Screen Using MimioStudio Tools
MimioStudio Tools are used to annotate the screen. All object, drawing, and manipulation
features in MimioStudio Tools are available in Screen Annotation mode.
Once you select a drawing tool, that tool remains selected until you select a different
drawing tool or the selection tool.
See Manipulating Objects for a complete description of manipulating objects.
All of the functions and features of the MimioStudio drawing tools that are available in
MimioStudio Notebook are available in Screen Annotation mode.
To use the freehand pen
1. Click the Pen button, .
2. (Optional) To adjust the line width, drag the Thickness slider.
3. (Optional) To adjust the line color, do one of the following:
l
Select a color from the Color Palette.
l
Click
, and then select a color from the Color dialog box.
Click
, and then select a color from the desktop.
4. (Optional) To adjust the transparency of the line, click the Transparency button,
and then choose a transparency percentage.
l
,
5. Place the cursor where you want the ink stroke to start on the page.
6. Drag the cursor to draw ink strokes.
To use the freehand brush
69
Mimio Interactive
1. Click the Brush button,
.
2. (Optional) To adjust the line width, drag the Thickness slider.
3. (Optional) To adjust the line color, do one of the following:
l
Select a color from the Color Palette.
l
Click
, and then select a color from the Color dialog box.
Click
, and then select a color from the desktop.
4. (Optional) To adjust the transparency of the line, click the Transparency button,
and then choose a transparency percentage.
l
,
5. Place the cursor where you want the brush stroke to start on the page.
6. Drag the cursor to draw brush strokes.
To highlight a portion of the display
1. Click the Highlighter button, .
2. (Optional) To adjust the highlighter width, drag the Thickness slider.
3. (Optional) To change the color, do one of the following:
l
Select a color from the Color Palette.
l
Click
, and then select a color from the Color dialog box.
l Click
, and then select a color from the desktop.
4. Place the cursor where you want the highlight stroke to start on the page.
5. Drag the cursor over the area you want to highlight.
To erase ink and highlighting
1. Click the Eraser button, .
2. (Optional) To adjust the eraser width, drag the Thickness slider.
3. Drag the cursor over the ink or highlighter strokes you want to erase.
To add a line or shape
1. Click the line type or shape you want to add.
2. (Optional) To adjust the line or outline width, drag the Thickness slider.
3. (Optional) To change the line or outline color, select the Outline Color box, and then
do one of the following:
l
Select a color from the Color Palette.
l
Click
, and then select a color from the Color dialog box.
l Click
, and then select a color from the desktop.
4. (Optional) To adjust the fill color, select the Fill Color box, and then do one of the
following:
l
Select a color from the Color Palette.
l
Click
, and then select a color from the Color dialog box.
l
Click
, and then select a color from the desktop.
5. To change the line or outline style, click
l
l
70
Solid
Dash
and choose one of the following:
Using Mimio Interactive
Square Dot
6. (Optional) To adjust the transparency of the line or shape, click the Transparency
button, , and then choose a transparency percentage.
7. Place the cursor where you want the line or shape to start on the page.
l
8. Drag the cursor to draw the line or shape.
To add formatted text
1. Click the Text button, .
2. Place the cursor where you want the text to start on the page.
For a fixed width text box, place the cursor where you want the text box to start on the
page and then drag to the desired width.
3. Select a font style, size, color, and an alignment option for the text.
4. Enter text in the text box.
To draw a shape
1. Click the Shape Recognition button,
.
2. (Optional) To adjust the outline width, drag the Thickness slider.
3. (Optional) To change the outline color, select the Outline Color box, and then do one
of the following:
l
Select a color from the Color Palette.
l
Click
, and then select a color from the Color dialog box.
l Click
, and then select a color from the desktop.
4. (Optional) To adjust the fill color, select the Fill Color box, and then do one of the
following:
l
Select a color from the Color Palette.
l
Click
, and then select a color from the Color dialog box.
l
Click
, and then select a color from the desktop.
5. To change the line or outline style, click
l
Solid
Dash
l
Square Dot
l
and choose one of the following:
6. (Optional) To adjust the transparency of the shape, click the Transparency button,
and then choose a transparency percentage.
,
7. Place the cursor where you want the shape to start on the page.
8. Drag the cursor to draw the shape.
The Shape Recognition tool can be used to draw circles, ellipses, triangles, rectangles,
squares, and lines.
Clearing All Annotations from the Display
When you exit Screen Annotation mode, all annotations are cleared from the display and all
annotations are automatically preserved as a snapshot of the display. See Working with
Saved Annotation Snapshots for information about reviewing and using the snapshots.
71
Mimio Interactive
Inserting Text Into an Application Using MimioStudio Text Tools
You can enter text into any text-entry box or page using the MimioStudio Text Tools. The
Text Tool has two modes for entering text:
n
On-Screen Keyboard allows you to enter text through an on-screen keyboard
application.
n
Writing Pad allows you to enter text through a small on-screen writing pad. Your
handwriting is automatically converted into text and input into the current application.
In addition, Writing Pad also supportsgesture recognition, which allows handwritten
shortcuts to be automatically recognized as commonly used keys.
Gesture recognition is only supported on Intel-based systems.
To access MimioStudio Text Tools
1. From MimioStudio Tools, click the Applications button,
Tools.
, and then choose
Text
2. Click the Text Tools icon or on the menu bar.
3. Choose the Text Tool that you want to use.
l
Keyboard to enable the On-Screen Keyboard.
l
Writing Pad to enable Writing Pad.
To disable MimioStudio Text Tools
Do one of the following:
l
Click the Text Tools icon
selected Text Tool.
or
on the menu bar, and then choose the currently
l
From MimioStudio Tools, click the Applications button,
Text Tools.
, and then choose
Using the On-Screen Keyboard
You can enter text into any application using the On-Screen Keyboard.
To use the On-Screen Keyboard
1. Start the On-Screen Keyboard.
2. Click in the text-entry box or on the page where you want to enter the text.
3. Using your mouse or Mimio Interactive Mouse, press the virtual keys on the on-screen
keyboard.
The text is entered into the text-entry box or on the page that you selected.
Using Writing Pad
With Writing Pad you can enter text through a small on-screen writing pad using the Mimio
Interactive Mouse while in Interactive mode. You can also use Writing Pad with your
mouse or other input device from your computer.
To use Writing Pad
1. Start Writing Pad.
The on-screen writing pad appears.
2. Click in the text-entry box or on the page where you want to enter the text.
72
Using Mimio Interactive
3. Using your mouse or Mimio Interactive Mouse, write within the yellow space of
the on-screen writing pad.
Your handwriting is automatically converted to text and entered into the textentry box or on the page that you selected.
4. Use the on-screen buttons for commonly used keys.
Button
Description
Backspace
Enter
Tab
Space
Writing Pad also supports gesture recognition for commonly used keys. See Using Gesture
Recognition.
Using Gesture Recognition
With gesture recognition, handwritten shortcuts are automatically recognized as commonly
used keys. Writing Pad supports gesture recognition.
Gesture recognition is only supported on Intel-based systems.
The following table describes how to use gestures to perform common functions.
To press
Do this
Backspace
Draw a line from right to left.
Enter
Draw a connected line from top to bottom
and then from right to left.
Tab
Space bar
Draw a connected line from bottom to top
and then from left to right.
Draw a connected line from top to bottom
and then from left to right.
73
Mimio Interactive
Using the Web Browser and Calculator Tools
MimioStudio Tools includes shortcuts for accessing a Web browser and a calculator.
To use the tools
1. Start MimioStudio Tools.
2. Click the Applications button,
following tools:
l
Calculator
l
Web Browser
, choose More Tools, and then choose one of the
Recording Desktop Actions and Audio in Interactive Mode
Using MimioStudio Recorder, you can record your interactions into an MP4 movie file,
with or without audio. See Using MimioStudio Recorder for more information on how to
use MimioStudio Recorder.
Caring for Mimio Interactive
Review the following topics for information about cleaning, inserting the batteries, and
permanently mounting your Mimio Interactive.
n
Cleaning Mimio Interactive
n
Inserting the Batteries
n
Mounting Mimio Interactive Permanently
Cleaning Mimio Interactive
Mimio Interactiveis designed to give you long and trouble-free service while requiring very
little maintenance.
You can easily clean your Mimio Interactive using the following items:
n
Lint-free cloth.
n
Isopropyl alcohol, diluted dishwashing detergent, or diluted glass cleaner.
If you use glass cleaner, make sure it does not contain ammonia.
To clean the Mimio Interactive bar and Mouse
1. If necessary, disconnect the USB cable from the Mimio Interactive bar.
2. Use the lint-free cloth to wipe the exterior of the Mimio Interactive bar and Mouse.
3. Remove dirt and smudges with one of the cleaning solutions mentioned above.
Avoid using liquids on any exposed charging contacts. Do not allow liquid into
any openings on the equipment.
4. Reconnect the USB cable.
Inserting the Batteries
Mimio Interactiveis powered using the included USB cable and power adapter. Optionally,
Mimio Interactive can be powered using four AA batteries.
To insert the batteries
74
Caring for Mimio Interactive
1. Press down and slide off the battery compartment cover.
2. Insert four AA batteries into the battery compartment.
3. Replace the battery compartment cover.
Remove the batteries if the Mimio Interactive bar will not be used for a long period of
time.
Mounting Mimio Interactive Permanently
The Mimio Interactive bar attaches to any whiteboard using the suction cups on the back of
the bar. If the Mimio Interactive bar will be used for extended periods of time or will be
used repeatedly in any one location, you should mount the bar using the included brackets.
To mount Mimio Interactive permanently
1. Snap the mounting brackets over the suction cups on the back of the Mimio Interactive
bar.
Make sure that the brackets clip into the recesses on the sides of the Mimio Interactive
bar.
2. Remove the paper backing from the adhesive strips to expose the adhesive.
3. Press the Mimio Interactive bar firmly along the top left edge of the whiteboard as
75
Mimio Interactive
shown.
76
Chapter 5
MimioCapture
(Model Number: ICD10)
MimioCapture is used with a MimioTeach-enabled whiteboard to record notes and drawings
from your whiteboard. Using MimioStudio Ink Capture mode, you make notes and drawings
on your whiteboard using the MimioCapture pens. Your notes are automatically captured in
a MimioStudio Notebook.
What's Included
The MimioCapture package contains the following items:
1
MimioCapture charging tray
4
MimioCapture eraser
2
MimioCapture pens (4)
5
Expo dry erase markers (4)
3
Mounting plates
6
Magnetic pen holder
If you are missing any of the items above, contact Customer Support.
77
MimioCapture (Model Number: ICD10)
About MimioCapture
MimioCapture includes four pens and one eraser for making notes on your MimioTeachenabled whiteboard. The MimioCapture charging tray is used to charge the pens and eraser.
The MimioCapture pen holder attaches to your whiteboard and is used to store the pens and
eraser.
The following figure shows the major components of MimioCapture.
1
Power cord
4
MimioCapture pens
2
MimioCapture charging tray
5
Status lights
3
MimioCapture eraser
6
Magnetic pen holder
Status Lights
The status lights visually show the status of each MimioCapture pen and the MimioCapture
eraser.
Off
The MimioCapture pen or eraser is not receiving power. The status light is off when
the pen or eraser is in use.
Amber
The MimioCapture pen or eraser has a low battery. The battery should be recharged.
Solid Green
The MimioCapture pen or eraser is charging.
About MimioStudio Notebook
As you make notes on your whiteboard using MimioCapture, you can automatically save
those notes into MimioStudio Notebook. Once the information is in Notebook, you can
save the Notebook as a MimioStudio INK file or a variety of other formats.
For more information about using MimioStudio Notebook, see Working with MimioStudio .
78
Getting Started
Getting Started
MimioCapture seamlessly integrates with your MimioTeach and MimioStudio software.
Before you can begin capturing digital ink, you must first set up your MimioCapture pens,
MimioCapture eraser, and MimioStudio Notebook.
Setting Up the MimioCapture Charging Tray
The MimioCapture charging tray is powered through your computer. Optionally, the
MimioCapture charging tray can be powered using a USB power adapter.
To connect the power
1. Place the charging tray on a flat surface..
2. Plug the power cord into an available USB port on your computer.
Setting Up the Pen Holder
The MimioCapture pen holder holds the MimioCapture pens and eraser for easy access. The
pen holder attaches securely to any magnetic whiteboard.
To mount pen holder to a magnetic whiteboard
1. Place the pen holder in the desired location on the whiteboard as shown.
The MimioCapture pen holder attaches securely to any magnetic whiteboard. See
Mounting the Pen Holder to a Non-Magnetic Whiteboard for information about
mounting the pen holder to a non-magnetic whiteboard.
79
MimioCapture (Model Number: ICD10)
2. Place the MimioCapture pens and eraser in the pen holder as shown.
Setting Up the MimioCapture Pens
MimioCapture comes with four colored MimioCapture pens and four Expo® dry erase
markers. Before you can start using MimioCapture, you must first set up your MimioCapture
Pens.
The MimioCapture pens are each powered by a rechargeable lithium-ion battery. The pens
charge whenever they are docked on the MimioCapture charging tray.
To set up the MimioCapture pens
1. Pull the plastic strip from the top part of the pen to activate the rechargeable battery.
2. Press the button on the side of the pen and pull the top part of the pen from the pen
body.
3. Insert a colored Expo® dry erase marker into the matching colored pen body.
80
Getting Started
4. Replace the top part of the pen onto the pen body.
5. Place the pen cap onto the pen.
Setting Up the MimioCapture Eraser
The MimioCapture eraser is powered by a rechargeable lithium-ion battery. The eraser
charges whenever the eraser is docked on the MimioCapture charging tray.
To set up the MimioCapture eraser
Pull the plastic strip from the top part of the eraser to activate the rechargeable battery.
81
MimioCapture (Model Number: ICD10)
Charging the Pens and Eraser
The MimioCapture pens and MimioCapture eraser recharge quickly whenever they are
docked on the MimioCapture charging tray.
Charge the pens and eraser for a full 24 hours before using for the first time.
To charge the pens and eraser
Place each pen and the eraser into the appropriate part of the MimioCapture charging
tray.
The status lights turn solid green when the pen or eraser is charging.
Setting Up MimioStudio Notebook for Capture
To begin capturing digital ink, you must first do the following:
n
Set the size of your whiteboard in MimioStudio Preferences.
n
Start MimioStudio Ink Capture mode.
Setting the Whiteboard Size
Before you begin capturing digital ink, you must first set the size of your whiteboard in
MimioStudio Preferences. The default size is 96 inches by 48 inches.
To set the whiteboard size for a MimioCapture device
1. Click , and then choose
Preferences.
The MimioStudio Preferences dialog box appears.
2. Click
Ink Capture.
3. If you have more than one MimioTeach bar connected to your computer, choose the
device to change the size for from the Device list.
4. Do one of the following:
82
l
Choose a size from the Surface Size list.
l
Choose Custom from the Surface Size list and enter the desired values into the
Width and Height boxes.
Using MimioCapture
l
Click Auto Size and touch a MimioCapture pen to the whiteboard at the location
shown in the Auto Size dialog box.
Starting Ink Capture Mode
Using MimioStudio Ink Capture mode, you can make notes on your whiteboard and
instantaneously capture them into a MimioStudio Notebook.
To start Ink Capture mode
Touch the tip of any MimioCapture pen to the whiteboard.
A new Notebook opens automatically for capturing your notes.
Using MimioCapture
MimioCapture can be used along with MimioTeach, without a projector, to record notes and
drawings from your whiteboard. This is called capturing digital ink.
Capturing Digital Ink
When using Ink Capture mode, your notes are automatically captured in a MimioStudio
Notebook. You can use the buttons on the MimioTeach bar to insert a new Notebook page
or insert a copy of the current page into Notebook.
To capture digital ink
1. If your MimioTeach bar is not on, turn on your MimioTeach bar.
2. Write or draw on your whiteboard using the MimioCapture pens.
A new Notebook automatically opens on the connected computer and begins capturing
digital ink.
3. Add and copy pages as desired using the buttons on the MimioTeach bar.
Writing and Drawing Digital Ink
In Ink Capture mode, the MimioCapture pens and the MimioCapture eraser are used to draw
and erase ink on your whiteboard.
By default, the color recorded matches the color of the MimioCapture pen, regardless of the
color of the marker that is inserted.
The MimioTeach stylus is for use with Interactive mode only. The stylus does not work
with Ink Capture mode.
To draw digital ink
1. Choose one of the colored MimioCapture pens.
2. Draw on the whiteboard with the pen.
Keep the pen within 15 degrees of its perpendicular position to the whiteboard to
83
MimioCapture (Model Number: ICD10)
ensure that the data is accurately captured.
To erase digital ink
Erase the ink from the whiteboard using the MimioCapture eraser.
Keep the eraser surface flat against the whiteboard to ensure that the data is accurately
erased.
Adding and Copying Notebook Pages
Using the Launch button on the MimioTeach bar, you can insert a new Notebook page or
insert a copy of the current page into Notebook.
The following figure shows the Launch button on the MimioTeach bar.
To add a page
1. Press the Launch button, , on the MimioTeach bar.
The MimioTeach bar beeps and a new page is added to the Notebook.
To copy a page
84
Caring for MimioCapture
1. Press and hold the Launch button, , on the MimioTeach bar.
2. When you hear two beeps, release the button.
A copy of the current page is added to the Notebook.
Caring for MimioCapture
Review the following topics for information about cleaning MimioCapture and mounting
the MimioCapture pen holder to a non-magnetic whiteboard.
n
Cleaning MimioCapture
n
Mounting the Pen Holder to a Non-Magnetic Whiteboard
Cleaning MimioCapture
MimioCapture is designed to give you long and trouble-free service, while requiring very
little maintenance.
You can easily clean your MimioCapture using the following items:
n
Lint-free cloth.
n
Isopropyl alcohol, diluted dishwashing detergent, or diluted glass cleaner.
If you use glass cleaner, make sure it does not contain ammonia.
To clean the MimioCapture
1. Disconnect the charging tray power cable.
2. Use the lint-free cloth to wipe the exterior of the MimioCapture charging tray, pen
holder, pens, and eraser.
3. Remove dirt and smudges with one of the cleaning solutions mentioned above.
Avoid using liquids on any exposed charging contacts. Do not allow liquid into
any openings on the equipment.
4. Reconnect the power cable.
Mounting the Pen Holder to a Non-Magnetic Whiteboard
The MimioCapture pen holder attaches securely to any magnetic whiteboard. If you do not
have a magnetic whiteboard, you can mount the MimioCapture pen holder to your
whiteboard using the included metal plates.
To mount pen holder to a non-magnetic whiteboard
85
MimioCapture (Model Number: ICD10)
1. Place the metal plates against the back of the pen holder as shown.
Make sure that the recess on each plate is inserted into the recess on the back of the
pen holder.
2. Remove the paper backing from the adhesive strips to expose the adhesive.
3. Press the pen holder firmly against the whiteboard as shown and hold for 20 seconds.
4. Remove the pen holder from the whiteboard.
The metal plates remain attached to the whiteboard.
5. Press each plate firmly against the whiteboard for 30 seconds.
86
Caring for MimioCapture
6. Let stand for at least one hour, and then place the pen holder on the magnetic plates as
shown.
7. Place the MimioCapture pens and eraser in the pen holder as shown.
87
This page intentionally left blank for double-sided printing.
88
Chapter 6
MimioCapture
(Model Number: ICD04)
MimioCapture is used with a MimioTeach-enabled whiteboard to record notes and drawings
from your whiteboard. Using MimioStudio Ink Capture mode, you make notes and drawings
on your whiteboard using the MimioCapture pens. Your notes are automatically captured in
a MimioStudio Notebook.
What's Included
The MimioCapture package contains the following items:
1
MimioCapture tray
4
Mounting plates
2
Expo dry erase markers (4)
5
Connector bar
3
MimioCapture pens (4)
6
MimioCapture eraser
If you are missing any of the items above, contact Customer Support.
About MimioCapture
MimioCapture includes four pens and one eraser for making notes on your MimioTeachenabled whiteboard. The MimioCapture tray is used to store and charge the pens and eraser.
89
MimioCapture (Model Number: ICD04)
You can also perform some common actions using the buttons on the MimioCapture tray.
The following figure shows the major components of MimioCapture.
1
Connector bar port
4
Capture buttons
2
MimioCapture eraser
5
Status lights
3
MimioCapture pens
6
Charging tray
Status Lights
The status lights visually show the status of each MimioCapture pen and the MimioCapture
eraser.
Off
The MimioCapture pen or eraser is not receiving power. The status light is off when
the pen or eraser is in use.
Amber
The MimioCapture pen or eraser has a low battery. The battery should be recharged.
Solid Green
The MimioCapture pen or eraser is charging.
About MimioStudio Notebook
As you make notes on your whiteboard using MimioCapture, you can automatically save
those notes into MimioStudio Notebook. Once the information is in Notebook, you can
save the Notebook as a MimioStudio INK file or a variety of other formats.
For more information about using MimioStudio Notebook, see Working with MimioStudio
Notebook.
Getting Started
MimioCapture links directly to your MimioTeach for seamless integration with
MimioStudio software. Before you can begin capturing digital ink, you must first set up
90
Getting Started
your MimioCapture tray, MimioCapture pens, MimioCapture eraser, and MimioStudio
Notebook.
Setting Up the MimioCapture Tray
The MimioCapture tray is powered using the USB cable and power adapter that were
included with your MimioTeach. The MimioTeach bar connects to the MimioCapture tray
using the connector bar that was included with your MimioCapture.
To connect
1. Remove the MimioTeach bar from the whiteboard.
2. Unplug the USB cable from the MimioTeach bar.
3. Plug the USB cable into the USB port on the MimioCapture tray.
4. Place the MimioCapture tray along the bottom-left edge of the whiteboard as shown.
The MimioCapture tray attaches securely to any magnetic whiteboard. See Mounting
MimioCapture to a Non-Magnetic Whiteboard for information about mounting the tray
to a non-magnetic whiteboard.
5. Connect the connector bar to the MimioCapture tray as shown.
91
MimioCapture (Model Number: ICD04)
6. Connect the other end of the connector bar to the MimioTeach bar as shown.
7. Reattach the MimioTeach bar along the left side of the whiteboard.
Setting Up the MimioCapture Pens
MimioCapture comes with four colored MimioCapture pens and four Expo® dry erase
markers. Before you can start using MimioCapture, you must first set up your MimioCapture
Pens.
The MimioCapture pens are each powered by a rechargeable lithium-ion battery. The pens
charge whenever they are docked on the MimioCapture tray.
To set up the MimioCapture pens
1. Pull the plastic strip from the top part of the pen to activate the rechargeable battery.
2. Press the button on the side of the pen and pull the top part of the pen from the pen
body.
92
Getting Started
3. Insert a colored Expo® dry erase marker into the matching colored pen body.
4. Replace the top part of the pen onto the pen body.
5. Place the pen cap onto the pen.
Setting Up the MimioCapture Eraser
The MimioCapture eraser is powered by a rechargeable lithium-ion battery. The eraser
charges whenever the eraser is docked on the MimioCapture tray.
To set up the MimioCapture eraser
93
MimioCapture (Model Number: ICD04)
Pull the plastic strip from the top part of the eraser to activate the rechargeable battery.
Charging the Pens and Eraser
The MimioCapture pens and MimioCapture eraser recharge quickly whenever they are
docked on the MimioCapture tray.
To charge the pens and eraser
Place each pen and the eraser into the appropriate part of the MimioCapture tray.
The status lights turn solid green when the pen or eraser is charging.
Setting Up MimioStudio Notebook for Capture
To begin capturing digital ink, you must first do the following:
n
Set the size of your whiteboard in MimioStudio Preferences.
n
Start MimioStudio Ink Capture mode.
Setting the Whiteboard Size
Before you begin capturing digital ink, you must first set the size of your whiteboard in
MimioStudio Preferences. The default size is 96 inches by 48 inches.
To set the whiteboard size for a MimioCapture device
1. Click , and then choose
Preferences.
The MimioStudio Preferences dialog box appears.
2. Click
Ink Capture.
3. If you have more than one MimioTeach bar connected to your computer, choose the
device to change the size for from the Device list.
4. Do one of the following:
94
l
Choose a size from the Surface Size list.
l
Choose Custom from the Surface Size list and enter the desired values into the
Width and Height boxes.
Using MimioCapture
l
Click Auto Size and touch a MimioCapture pen to the whiteboard at the location
shown in the Auto Size dialog box.
Starting Ink Capture Mode
Using MimioStudio Ink Capture mode, you can make notes on your whiteboard and
instantaneously capture them into a MimioStudio Notebook.
To start Ink Capture mode
Touch the tip of any MimioCapture pen to the whiteboard.
A new Notebook opens automatically for capturing your notes.
Using MimioCapture
MimioCapture can be used along with MimioTeach, without a projector, to record notes and
drawings from your whiteboard. This is called capturing digital ink.
Capturing Digital Ink
When using Ink Capture mode, your notes are automatically captured in a MimioStudio
Notebook. You can use the buttons on the MimioCapture tray to insert a new Notebook
page, insert a copy of the current page into Notebook, or print the current Notebook page.
To capture digital ink
1. If your MimioTeach bar is not on, turn on your MimioTeach bar.
2. Write or draw on your whiteboard using the MimioCapture pens.
A new Notebook automatically opens on the connected computer and begins capturing
digital ink.
3. Add, copy, and print pages as desired using the buttons on the MimioCapture tray.
Writing and Drawing Digital Ink
In Ink Capture mode, the MimioCapture pens and the MimioCapture eraser are used to draw
and erase ink on your whiteboard.
By default, the color recorded matches the color of the MimioCapture pen, regardless of the
color of the marker that is inserted.
The MimioTeach stylus is for use with Interactive mode only. The stylus does not work
with Ink Capture mode.
To draw digital ink
1. Choose one of the colored MimioCapture pens.
2. Draw on the whiteboard with the pen.
Keep the pen within 15 degrees of its perpendicular position to the whiteboard to
95
MimioCapture (Model Number: ICD04)
ensure that the data is accurately captured.
To erase digital ink
Erase the ink from the whiteboard using the MimioCapture eraser.
Keep the eraser surface flat against the whiteboard to ensure that the data is accurately
erased.
Adding, Copying, and Printing Notebook Pages
When using MimioStudio in Capture mode, you can insert a new Notebook page, insert a
copy of the current page into Notebook, or print the current Notebook page.
Using the MimioCapture Bar to Add, Copy, and Print Notebook Pages
The buttons on the MimioCapture tray can be used to easily access features directly from
your whiteboard. Using the buttons on the MimioCapture tray, you can insert a new
Notebook page, insert a copy of the current page into Notebook, or print the current
Notebook page.
The following figure shows the MimioCapture tray buttons.
The following table describes the functions of the MimioCapture tray buttons.
96
New page
Inserts a new page into MimioStudio Notebook.
Copy page
Inserts a duplicate of the current page into MimioStudio
Notebook.
Print page
Prints the current page.
Caring for MimioCapture
Using the MimioTeach Bar to Add and Copy Notebook Pages
Using the Launch button on the MimioTeach bar, you can insert a new Notebook page or
insert a copy of the current page into Notebook.
The following figure shows the Launch button on the MimioTeach bar.
To add a page
1. Press the Launch button, , on the MimioTeach bar.
The MimioTeach bar beeps and a new page is added to the Notebook.
To copy a page
1. Press and hold the Launch button, , on the MimioTeach bar.
2. When you hear two beeps, release the button.
A copy of the current page is added to the Notebook.
Caring for MimioCapture
Review the following topics for information about cleaning, storing, and mounting your
MimioCapture to a non-magnetic whiteboard.
n
Cleaning MimioCapture
n
Mounting MimioCapture to a Non-Magnetic Whiteboard
Cleaning MimioCapture
MimioCapture is designed to give you long and trouble-free service, while requiring very
little maintenance.
You can easily clean your MimioCapture using the following items:
97
MimioCapture (Model Number: ICD04)
n
Lint-free cloth.
n
Isopropyl alcohol, diluted dishwashing detergent, or diluted glass cleaner.
If you use glass cleaner, make sure it does not contain ammonia.
To clean the MimioCapture
1. Disconnect the power cable and the connector bar.
2. Use the lint-free cloth to wipe the exterior of the MimioCapture tray, pens, and eraser.
3. Remove dirt and smudges with one of the cleaning solutions mentioned above.
Avoid using liquids on any exposed charging contacts. Do not allow liquid into
any openings on the equipment.
4. Reconnect the power cable and the connector bar.
Mounting MimioCapture to a Non-Magnetic Whiteboard
The MimioCapture tray attaches securely to any magnetic whiteboard. If you do not have a
magnetic whiteboard, you can mount the MimioCapture tray to your whiteboard using the
included metal plates.
To mount MimioCapture to a non-magnetic whiteboard
1. Place the metal plates against the back of the MimioCapture tray as shown.
Make sure that the recess on each plate is inserted into the recess on the back of the
MimioCapture tray.
2. Remove the paper backing from the adhesive strips to expose the adhesive.
3. Press the MimioCapture tray firmly along the bottom-left edge of the whiteboard as
shown.
98
Chapter 7
Mimio Capture Kit
Mimio Capture Kit is used with a Mimio Interactive-enabled whiteboard to record notes and
drawings from your whiteboard. Using MimioStudio Ink Capture mode, you make notes and
drawings on your whiteboard using the Mimio Capture Kit pens. Your notes are
automatically captured in a MimioStudio Notebook.
What's Included
The Mimio Capture Kit package contains the following items:
1
Mimio Capture Kit pens (4)
6
Mimio Capture Kit pen holder
2
Mimio Capture Kit eraser
7
Mimio Capture Kit eraser holder
3
Expo markers (4)
8
N-Cell batteries (4)
4
Color caps (8)
9
AAA battery
5
Mimio Capture Kit pen caps (4)
If you are missing any of the items above, contact Customer Support.
About Mimio Capture Kit
Mimio Capture Kit includes four pens and one eraser for making notes on your Mimio
Interactive-enabled whiteboard. The pen holder and eraser holder are used to store the pens
99
Mimio Capture Kit
and eraser.
The following figure shows the major components of Mimio Capture Kit.
1
Mimio Capture Kit eraser
3
Mimio Capture Kit pens
2
Mimio Capture Kit eraser holder
4
Mimio Capture Kit pen holder
About MimioStudio Notebook
As you make notes on your whiteboard using Mimio Capture Kit, you can automatically
save those notes into MimioStudio Notebook. Once the information is in Notebook, you
can save the Notebook as a MimioStudio INK file or a variety of other formats.
Your Mimio Interactive bar can capture and store ink while disconnected from your
computer. See Downloading Digital Ink for more information about capturing and
downloading digital ink for an offline session.
For more information about using MimioStudio Notebook, see Working with MimioStudio
Notebook.
Getting Started
Mimio Capture Kit links directly to your Mimio Interactive for seamless integration with
MimioStudio software. Before you can begin capturing digital ink, you must first set up
your Mimio Capture Kit pens, Mimio Capture Kit eraser, and MimioStudio Notebook.
Setting Up the Mimio Capture Kit Pens
Mimio Capture Kit comes with four Mimio Capture Kit pens, four Expo® dry erase markers,
and eight color caps. Before you can start using Mimio Capture Kit, you must first set up
your Mimio Capture Kit pens.
The Mimio Capture Kit pens are each powered by one N-cell battery.
To set up the Mimio Capture Kit pens
1. Gently turn and pull the top part of the Mimio Capture Kit pen to separate the top part
of the pen from the pen body.
100
Getting Started
2. Press the colored nodes on each side of the pen and pull to remove the color cap.
3. Insert one N-cell battery into the Mimio Capture Kit pen.
4. Replace the color cap making sure to align the spring on the color cap with the battery.
5. Insert an Expo® dry erase marker that matches the color of the color cap into the pen
body.
6. Align the arrow on the pen body with the arrow on the top part of the pen.
101
Mimio Capture Kit
7. Push the two parts of the pen together, and then twist to lock in place.
8. Place the pen cap onto the pen.
Setting Up the Mimio Capture Kit Eraser
The Mimio Capture Kit eraser is powered by one AAA battery.
To set up the Mimio Capture Kit eraser
1. Lightly press both sides of the eraser and lift to remove the battery compartment cover.
2. Insert the battery into the battery compartment.
102
Getting Started
3. Replace the battery compartment cover.
Setting Up MimioStudio Notebook for Capture
To begin capturing digital ink, you must first do the following:
n
Set the size of your whiteboard in MimioStudio Preferences.
n
Start MimioStudio Ink Capture mode.
Setting the Whiteboard Size
Before you begin capturing digital ink, you must first set the size of your whiteboard in
MimioStudio Preferences. The default size is 96 inches by 48 inches.
To set the whiteboard size for a Mimio Interactive device
1. Click , and then choose
Preferences.
The MimioStudio Preferences dialog box appears.
2. Click
Ink Capture.
3. If you have more than one Mimio Interactive bar connected to your computer, choose
the device to change the size for from the Device list.
4. Do one of the following:
l
Choose a size from the Surface Size list.
l
Choose Custom from the Surface Size list and enter the desired values into the
Width and Height boxes.
l
Click Auto Size and touch a Mimio Capture Kit pen to the whiteboard at the
location shown in the Auto Size dialog box.
Starting Ink Capture Mode
Using MimioStudio Ink Capture mode, you can make notes on your whiteboard and
instantaneously capture them into a MimioStudio Notebook.
Your Mimio Interactive bar can capture and store ink while disconnected from your
computer. However, you need to supply power to your Mimio Interactive bar using
batteries or a wall adapter. See Downloading Digital Ink for more information about
capturing and downloading digital ink for an offline session.
103
Mimio Capture Kit
To start Ink Capture mode
Touch the tip of any Mimio Capture Kit pen to the whiteboard.
A new Notebook opens automatically for capturing your notes.
Using Mimio Capture Kit
Mimio Capture Kit can be used along with Mimio Interactive, without a projector, to record
notes and drawings from your whiteboard. This is called capturing digital ink.
Capturing Digital Ink
When using Ink Capture mode, your notes are automatically captured in a MimioStudio
Notebook. You can use the buttons on the Mimio Interactive bar to insert a new Notebook
page, insert a copy of the current page into Notebook, or print the current Notebook page.
Your Mimio Interactive bar can capture and store ink while disconnected from your
computer. See Downloading Digital Ink for more information about capturing and
downloading digital ink for an offline session.
To capture digital ink
1. If your Mimio Interactive bar is not on, turn on your Mimio Interactive bar.
2. Write or draw on your whiteboard using the Mimio Capture Kit pens.
A new Notebook automatically opens on the connected computer and begins capturing
digital ink.
3. Add, copy, and print pages as desired using the buttons on the Mimio Interactive bar.
Writing and Drawing Digital Ink
In Ink Capture mode, the Mimio Capture Kit pens and the Mimio Capture Kit eraser are
used to draw and erase ink on your whiteboard.
By default, the color recorded matches the color of the color cap on the Mimio Capture Kit
pen, regardless of the color of the marker that is inserted.
The Mimio Interactive Mouse is for use with Interactive mode only. The Mouse does
not work with Ink Capture mode.
To draw digital ink
1. Choose one of the Mimio Capture Kit pens.
2. Draw on the whiteboard with the pen.
Keep the pen within 15 degrees of its perpendicular position to the whiteboard to
104
Using Mimio Capture Kit
ensure that the data is accurately captured.
To erase digital ink
Erase the ink from the whiteboard using the Mimio Capture Kit eraser.
Keep the eraser surface flat against the whiteboard to ensure that the data is accurately
erased.
Adding, Copying, and Printing Notebook Pages
When using Ink Capture mode, the buttons on the Mimio Interactive bar can be used to
easily access features directly from your whiteboard. Using the buttons on the Mimio
Interactive bar, you can insert a new Notebook page, insert a copy of the current page into
Notebook, or print the current Notebook page.
The following figure shows the Mimio Interactive bar buttons.
The following table describes the functions of the Mimio Interactive bar buttons.
105
Mimio Capture Kit
New page
Inserts a new page into MimioStudio Notebook.
Copy page
Inserts a duplicate of the current page into MimioStudio
Notebook.
Print page
Prints the current page.
Resize window
Minimizes or Maximizes the MimioStudio Notebook window.
Interactive
Exits Ink Capture mode and starts Interactive mode.
Downloading Digital Ink
You can use your Mimio Interactive bar to record and save Digital Ink even when not
connected to your computer. You can then download the Digital Ink to MimioStudio
Notebook for printing, distributing, or editing.
When your Mimio Interactive bar is not connected to your computer through the USB
cable, the Mimio Interactive bar must be powered by batteries or a power adapter.
To download digital ink
1. Connect the Mimio Interactive bar to your computer.
2. Do one of the following:
l
If configured to automatically download digital ink (default), open a new
MimioStudio Notebook.
The ink download process begins automatically.
l
If configured to manually download digital ink, open a new MimioStudio Notebook
and double-click
Download Ink on the status bar.
Caring for Mimio Capture Kit
Review the following topics for information about cleaning, storing, and mounting your
Mimio Capture Kit.
n
Cleaning the Mimio Capture Kit
n
Mounting the Mimio Capture Kit
Cleaning the Mimio Capture Kit
Mimio Capture Kit is designed to give you long and trouble-free service, while requiring
very little maintenance.
You can easily clean your Mimio Capture Kit using the following items:
n
Lint-free cloth.
n
Isopropyl alcohol, diluted dishwashing detergent, or diluted glass cleaner.
If you use glass cleaner, make sure it does not contain ammonia.
To clean the Mimio Capture Kit
106
Caring for Mimio Capture Kit
1. Use the lint-free cloth to wipe the exterior of the Mimio Capture Kit pens, and eraser.
2. Remove dirt and smudges with one of the cleaning solutions mentioned above.
Do not allow liquid into any openings on the equipment.
Mounting the Mimio Capture Kit
The Mimio Capture Kit pen and eraser holders attach securely to any whiteboard.
To mount the Mimio Capture Kit pen holder
1. Remove the paper backing from the adhesive strips on the back of the pen holder to
expose the adhesive.
2. Hold the Mimio Capture Kit pen holder vertically, and press firmly against the
whiteboard as shown.
3. Insert the Mimio Capture Kit pens into the pen holder when not in use.
To mount the Mimio Capture Kit eraser holder
107
Mimio Capture Kit
1. Remove the paper backing from the adhesive strips on the back of the eraser holder to
expose the adhesive.
2. Press the Mimio Capture Kit eraser holder firmly against the whiteboard as shown.
3. Insert the Mimio Capture Kit eraser into the eraser holder when not in use.
108
Chapter 8
MimioVote
MimioVote is a wireless, interactive, student response system. Using MimioVote, you can
easily and quickly gather student responses. This quick feedback from students allows you
to make sure each student is keeping up and adjust your lesson accordingly.
What's Included
The MimioVote package contains the following items:
1
Carrying case
4
MimioVote unit (24 or 32)
2
Power cable
5
Charging station
3
MimioHub
If you are missing any of the items above, contact Customer Support.
About MimioVote
Your MimioVote system comes with a charging station and either 24 or 32 MimioVote
units. You can combine two MimioVote systems for a total of up to 64 units.
About the MimioVote Station
The MimioVote station is used to recharge and store all of your MimioVote units.
109
MimioVote
You can place any MimioVote unit into any slot on the MimioVote station. The number
assigned to each unit is automatically determined by the number of the slot that the unit is
inserted into. There is no need to match a particular unit to a particular slot on the
MimioVote station. Once a unit is inserted into the MimioVote station, the unit number
appears in the unit display.
The following figure shows the major components of the MimioVote station.
1
MimioVote unit slot
2
Status light
3
Power connector
Status Lights
The status light visually shows the status of the MimioVote station.
Off
Not receiving power; Power cable is not
connected.
Solid Green
MimioVote is connected and receiving power;
MimioStudio software is running.
Flashing Green
MimioVote is connected or connecting, and
receiving power; MimioStudio software is not
running.
Solid Amber
MimioVote cannot find an available MimioHub.
Flashing Amber
MimioVote is searching for an available
MimioHub.
About the MimioVote Units
The MimioVote system includes either 24 or 32 MimioVote units. The MimioVote units
slide into the MimioVote station to recharge or to store.
110
When conducting activities, the buttons on the MimioVote unit light up depending on
what answers are available to the student. The available answers are determined by the
teacher when the question is created. For example, if the question is a True/False question,
only the and buttons are illuminated on the MimioVote unit. The A, B, C, D, and E
buttons will not light up and will not register a response if pressed.
By default, each button on the MimioVote unit is illuminated with a different color light.
You can choose to turn off the colors and have all the buttons illuminated with a white
light. For information about changing the button colors, see Adjusting the Vote Preferences.
The following figure shows the major components of the MimioVote unit.
1
Previous
5
Multiple choice buttons
2
Display
6
True/False buttons
3
Next
7
Submit
4
Help
About the Software
MimioStudio software includes several features especially for use with your MimioVote
system. MimioStudio Notebook and Gallery include everything you need to create activities
to conduct with your students. The MimioStudio Vote Toolbar and MimioStudio Quick
Vote include all the tools you need for conducting activities and gathering student
responses. And, the MimioStudio Gradebook stores the information and results for all of
your class activities.
About MimioStudio Notebook
You can use MimioStudio Notebook to create any type of MimioVote activity. Activities
are created by adding question objects to Notebook pages. The Questions and Results folder
in MimioStudio Gallery includes a wide variety of pre-designed question objects to make
111
MimioVote
creating activities in Notebook quick and easy.
For more information about using MimioStudio Notebook and Gallery, see About
MimioStudio.
About the Vote Toolbar
The Vote Toolbar includes all the tools you need for taking attendance, conducting class
activities, gathering student responses, and viewing results. The Vote Toolbar is available in
MimioStudio Notebook.
The following table describes the major features of the Vote Toolbar in MimioStudio
Notebook.
Choose Class
Select class
Number responded
Take attendance
View help requests
Start/stop polling
Start self-paced activity
View results
Print self-paced activity
Timer display
About MimioStudio Quick Vote
You can use MimioStudio Quick Vote to ask questions that are not a part of a
NotebookMimioVote activity. You can use Quick Vote to add a question at any time
during a Teacher-Led activity.
The following table describes the major features of MimioStudio Quick Vote.
Choose Class
Select class
Timer display
Take attendance
Number responded
Select question type
and start/stop polling
View help requests
View results
Settings
About MimioStudio Gradebook
MimioStudio Gradebook stores the results for all of your class activities. Student responses
gathered using the MimioVote system are automatically saved to the Gradebook along with
complete information for each question. You can also manually add activities that were not
conducted using the MimioVote system, making it easy to keep all your grades in one
location.
The following views are available in Gradebook, giving you easy access to the information
you want to view:
112
All Classes View
The All Classes view displays a list of all of your saved classes, the number of students in
each class, and the average grade for all students in the class.
The All Classes view is displayed when no class is selected.
Date View
The Date view displays a list of all students in the selected class and all dates on which any
activities were conducted. Each date column shows the average grade for each student, for
all activities that were conducted on that date.
From the Date view, you can also view the Class pane. The Class pane displays the name of
the class, number of students in the class, and the number of activities that have been
conducted with the selected class.
The Date view is displayed when a class is selected.
Activity View
The Activity view displays a list of all students in the selected class. The Attendance
column shows the attendance status for each student on the selected date. The activity
columns show the grade that each student received for each activity conducted on the
selected date.
From the Activity view, you can also view the Activity pane. The Activity pane displays
the name of the activity, activity type, total number of question, and the weight of the
activity.
The Activity view is displayed when a class and date are selected.
Activity Detail View
The Activity Detail view displays a list of all students in the selected class. The Average
column shows the grade for each student for the selected activity. Each question column
shows the response that each student provided.
The response icon indicates the student response or the question type.
Multiple choice
True/Yes
False/No
Numeric
Short Answer
Essay
The color of the response icon indicates the status of the student response.
113
MimioVote
Correct
Incorrect
Partially
Correct
Opinion
Ungraded
The Activity pane displays the name, type, and weight of the selected activity.
From the Activity Detail view, you can also view the Question pane and the Student
Response pane. The Question pane displays the question text, the available and correct
answers, the question snapshot, and the question weight. The Student Response Pane
displays the student name and the student response for the selected question.
The Activity Detail view is displayed when a class, date, and activity are selected.
In addition, you can view the Student pane from Date view, Activity view, or Activity
Detail view. The Student pane displays the name, student ID number, MimioVote unit
number, and address for the selected student.
Getting Started
Setting up the MimioVote system is quick and easy. You can link your MimioVote system
to your computer using the included MimioHub. Or, if you have MimioTeach, you can link
the MimioVote system to your computer using the MimioHub that you already have
installed.
Setting Up MimioVote
Once you have installed the MimioStudio software on your computer, you can quickly set
up MimioVote.
Each MimioVote unit is powered by a rechargeable lithium-ion battery. The battery
recharges whenever the unit is docked in the MimioVote station. Charging the battery
for the first time will take approximately six hours; when fully discharged, recharging
the battery will take approximately twelve hours.
To set up MimioVote
1. Pull the plastic strip from each MimioVote unit to activate the rechargeable battery.
2. Insert each MimioVote unit into a slot on the MimioVote station.
114
Getting Started
3. Plug the power cord into the power connector on the back of the MimioVote station.
4. Plug the other end of the power cord into a power outlet.
5. Plug the MimioHub into an available USB port on your computer.
If you already have a MimioHub installed on your computer, a dialog box appears
asking if you want to connect the MimioHub to the MimioVote system. Click Yes
to link the MimioVote system to your existing MimioHub.
Adding a Second MimioVote System
Each MimioVote system includes either 24 or 32 MimioVote units. For larger classes, you
can combine two MimioVote systems for a total of up to 64 units.
You can use the same MimioHub to connect all of your MimioClassroom devices to
your computer.
To add a second MimioVote system
115
MimioVote
1. Set up the MimioVote station and units as described in Setting Up MimioVote.
Once the power is connected to the MimioVote system, the previously installed
MimioHub will detect the new system.
2. When prompted by the software, click Yes to connect the new system to the
MimioHub.
The second system is connected to your computer and the appropriate numbers are
assigned to each MimioVote unit automatically.
If you do not see the prompt, or you want to connect the system at a later time, see
Adjusting the Classroom Devices Preferences for information about connecting
available devices to your computer.
Using MimioStudio Gradebook
You can use MimioStudio Gradebook to store information for all of your classes, students,
and class activities. Student responses gathered using the MimioVote system are
automatically saved to the Gradebook along with complete information for each question.
You can also manually add activities that were not conducted using the MimioVote system,
making it easy to keep all your grades in one location.
Several ways to access MimioStudio Gradebook are shown in the following table.
To start from the
Do this
Dock
Click
in the Dock.
Menu bar
Click
, and then choose
Gradebook.
Setting Up the Gradebook
Before you begin using your MimioVote system to conduct activities, you must first set up
MimioStudio Gradebook. You can add as many classes as you want to Gradebook, and then
add students to each of your classes.
Creating a Class
You can create as many classes as you want in Gradebook. Once you have created a class,
you can add students to the class by manually entering all student names and information,
or you can import a list of students.
To create a class
1. Click on the Gradebook toolbar.
The Add Class dialog box appears.
2. Enter a name for the class in the Name box, and then click Add.
The class is added to your class list.
Adding Students
The number of students you can have in each class depends on the number of MimioVote
units you have. You can combine two MimioVote systems for up to 64 units.
116
Using MimioStudio Gradebook
Each student that you add to a class is automatically assigned a MimioVote unit number.
To add a student to a class
1. Select the class to add a student to.
2. Click on the Gradebook toolbar.
The Add Student dialog box appears.
3. Enter the name, student ID number, and address for the student.
The MimioVote handset ID is assigned automatically.
4. Click Add.
The student is added to the class.
Importing a List of Students
You can add students to a class manually by entering all student names and information, or
you can import an existing list of students into a class.
You can import students from a Unicode text file (TXT) or a Comma separated value file
(CSV). Each student must have at least a first or last name assigned to them in order to be
imported.
The following fields are supported for importing into Gradebook.
n
n
n
n
n
n
StudentID
FirstName
MiddleName
LastName
Gender
Birthdate
n
n
n
n
n
Address
City
State
Zipcode
Country
Each student that you add to a class is automatically assigned a MimioVote unit number.
To import a class list
1. In Gradebook, select the class you want to import the student list into.
2. From the File menu, choose Import, and then choose Students.
The Open dialog box appears.
3. Navigate to and select the file you want to import, and then click Open.
The students are added to the selected class.
Adding Activities
You can keep track of all of your student scores using Gradebook. Scores for all MimioVote
activities are automatically saved to the Gradebook. You can also manually enter activities
that were not performed using MimioVote.
To add an activity
1. Select the class to add the activity to.
2. Click on the Gradebook toolbar.
3. In the Add Activity dialog box, do the following:
a. Enter a name for the activity in the Name box.
b. Choose the type of activity to add from the Type list.
117
MimioVote
c. Choose the month, date, and year that the activity was performed.
d. Enter the number of points the activity is worth in the Points box.
e. Click Add.
The activity is added and displayed in the Gradebook.
4. Enter a grade for each student in the Average column.
Modifying the Gradebook
You can modify the information in the MimioStudio Gradebook in the following ways:
n
Editing Student Information
n
Removing a Student
n
Editing Activities
n
Editing Questions
n
Editing Student Responses
n
Grading Essay Questions
Editing Student Information
You can edit any information for an existing student, including the student name, student
ID number, MimioVote unit ID number, and address.
To edit student information
1. Select the student to edit.
2. Click
Edit Student on the Student pane.
The Edit Student dialog box appears.
3. Make any desired changes to the student information.
4. Click OK to save your changes.
Removing a Student
You can delete a student from a class at any time. Deleting a student permanently removes
the student from the class and removes all of their activity results from the Gradebook.
To remove a student from a class
1. Select the class that contains the student you want to remove.
2. Select the student to remove.
3. Choose Delete from the Edit menu.
4. Follow the instructions in the Confirm Delete dialog box, and then click OK.
The selected student and all information for the selected student is permanently deleted
from the Gradebook.
Editing Activities
You can edit the name, type, and weight for an activity at any time.
To edit an activity
1. Select the activity to edit.
2. Click
118
Edit Activity on the Activity pane.
Using MimioStudio Gradebook
The Edit Activity dialog box appears.
3. In the Edit Activity dialog box, you can do any of the following:
l
Enter a new name for the activity in the Name box.
l
Choose a different activity type from the Type list.
l
Enter a new weight for the activity in the Weight box.
4. Click OK to save your changes.
Editing Questions
Each time you stop polling for a question, a copy of the question, along with the correct
answer, is saved to the Gradebook. You can edit the question text, correct answer, question
type, and question weight at any time in Gradebook.
For example, if the answer that was selected as the correct answer in the question object is
incorrect, you can change the answer in the Gradebook to automatically update the student
scores.
Changing the answer for a question in the Gradebook does not automatically change
the answer in the question object in Notebook. To change the answer for subsequent
activities, you must make the correction to the question object in Notebook.
To edit a question
1. Select the question to edit.
2. Click
Edit Question on the Question pane.
3. In the Edit Question dialog box, you can do any of the following:
l
Edit the question or answer text under Question Information.
l
Click the button to the left of the correct answer to change the correct answer for the
question.
l
Choose a different question type from the Type list.
l
Enter a new weight for the question in the Weight box.
4. Click OK to save your changes.
Editing Student Responses
You can edit a student response to any question in a completed activity.
To edit a student response
1. Select the response to edit.
2. Click
Edit Student Response on the Student Response pane.
The Edit Student Response dialog box appears.
3. In the Response box, edit the student response as needed.
4. Click OK to save your changes.
Grading Essay Questions
You can enter a grade for an essay question in a completed activity.
To grade an essay question
1. Select the essay question to grade.
2. Click
119
MimioVote
Edit Student Response on the Student Response pane.
The Edit Student Response dialog box appears.
3. Under Score Student Response, do one of the following:
l
Drag the Score slider to adjust the score for the essay question.
l
Enter a score for the essay question in the Score box.
4. Click OK to save your changes.
Generating Reports
You can generate a variety of reports from MimioStudio Gradebook. Reports are generated
as HTML files and are displayed in your default Web browser.
You can generate the following types of reports:
n
Class Grade Report- a grade report for all students in the selected class
n
Class Activity Report - a detailed report for the selected activity
n
Student Summary Report- a summary report of all activities for the selected student
n
Student Activity Report - a detailed report for all selected activities for the selected
student
You can generate reports from the Class, Activity, and Student panes in Gradebook or from
the Report menu.
Exporting a List of Students
You can export a list of students from any class you have saved in Gradebook to a Unicode
tab-delimited text file (TXT).
To export a list of students
1. Display the class that contains the students you want to export.
2. From the File menu, choose Export, and then choose Students.
The Export Students dialog box appears.
3. Select Export student information, and then click OK.
The Save As dialog box appears.
4. Enter a name for the file in the File name box, and then click Save.
5. Enter a name for the file in the Save as box, and then click Save.
Archiving Classes
You can archive your classes by exporting a class to a MimioStudio Gradebook Archive
(MVA) file. The archive file contains all student, activity, and results information. You can
use this file to backup your classes or to move classes from one Gradebook to another.
To archive a class
1. From the File menu, choose Export, and then choose Class.
The Export Class dialog box appears.
2. Select Export class information, and then click OK.
The Save As dialog box appears.
120
Creating MimioVote Activities
3. Enter a name for the archive file in the File name box, and then click Save.
4. Enter a name for the archive file in the Save as box, and then click Save
Exporting Results
You can export class and activity results from the Gradebook to a Unicode tab-delimited
text file (TXT) or Comma separated values file (CSV) for use in another application. You
can export the following information:
n
Class results - includes the class average for each student in the selected class.
n
Class and activity results - includes the class average for each student as well as the
grade each student received for each activity
n
Activity results - includes the grade for each student for the selected activity.
To export class results
1. From the File menu, choose Export, and then choose Class.
The Export Class dialog box appears.
2. Select Export class results, and then click OK.
The Save As dialog box appears.
3. Enter a name for the file in the Save as box, and then click Save.
To export class and activity results
1. From the File menu, choose Export, and then choose Class.
The Export Class dialog box appears.
2. Select Export class and activity results, and then click OK.
The Save As dialog box appears.
3. Enter a name for the file in the Save as box, and then click Save.
To export activity results
1. From the File menu, choose Export, and then choose Activity.
The Export Activity dialog box appears.
2. Select Export activity and question results, and then click OK.
The Save As dialog box appears.
3. Enter a name for the file in the Save as box, and then click Save.
Opening Archived Classes
You can open your archived class files at any time by importing the archive (MVD) file
into the Gradebook. Once imported, all classes in the archive file will appear along with
your current classes in the Gradebook.
To open archived classes
1. Choose Import Classes from the File menu.
The Open dialog box appears.
2. Navigate to and select the archive file to import, and then click Open.
Creating MimioVote Activities
You can create MimioVote activities in MimioStudio Notebook.
121
MimioVote
You can also use MimioStudio Quick Vote to ask questions that you did not
previously create in Notebook.
You can add the following types of questions to your activity:
n
TF - True/False, Yes/No, or Agree/Disagree
n
AB - Multiple choice, two possible answers
n
ABC - Multiple choice, three possible answers
n
ABCD - Multiple choice, four possible answers
n
ABCDE - Multiple choice, five possible answers
n
Numeric - One or more numeric answers (compatible with MimioMobile only)
n
Short Answer - One or more alpha-numeric short answers (compatible with
MimioMobile only)
n
Essay - A single alpha-numeric answer (compatible with MimioMobile only)
Creating Activities in Notebook
You can use MimioStudio Notebook to create any type of MimioVote activity. Activities
are created by adding question objects to Notebook pages. The Questions and Results folder
in MimioStudio Gallery includes a wide variety of pre-designed question objects to make
creating activities in Notebook quick and easy.
Each question object contains a single question, and each question must be on a
separate Notebook page.
Once you've added a question object to an activity, you can customize the object properties
to change the appearance or behavior of the question object.
To create an activity in Notebook
1. Open a new or existing Notebook.
2. In MimioStudio Gallery, click the arrow next to the Questions and Results folder, and
then select the Questions folder.
3. Drag the desired question object from the Gallery into the Notebook.
Only one question object can be placed on each Notebook page.
4. Enter the question text in the Question box.
5. Do one of the following:
l
For a multiple choice question, enter an answer choice for the question in each of
the Answer boxes.
l
For a numeric question, enter a numeric answer for the question in the Answer box.
If there is more than one possible answer, separate each answer with a
carriage return.
l
For a short answer question, enter an alpha-numeric answer for the question in the
Answer box.
If there is more than one possible answer, separate each answer with a
carriage return.
l
For an essay question, you can choose to enter an example answer, a note, or no
answer in the Answer box.
6. If applicable, select the correct answer.
122
Creating MimioVote Activities
7. To add another question to the activity, do the following:
a. Click to add a new page to the Notebook.
b. Repeat steps 3-6 to add a question to the new page.
Modifying Question Objects
MimioStudio Gallery includes a variety of pre-designed question objects for creating
MimioVote activities. Once you add a question object to a Notebook page, you can use the
question objects as is or you can choose to change the properties of the question object.
You can change the question type, animation for correct answers, and question weight.
To modify a question object
1. Click at the bottom-right of the question object you want to modify.
The question object properties appear.
2. In the question object properties, you can do any of the following:
l
To change the question type, select an available question type.
l
To change the correct answer animation, select an available animation.
To change the weight of the question, enter the weight for the question in the
weight, , box.
l To change the number of correct answers required for a numeric or short answer
question, enter the number of correct answers required in the number of correct
answers required, , box.
3. Click to save your changes and display the question object.
l
Importing Standard Assessments
You can import standard assessments into MimioStudio Notebook for use with MimioVote.
Only files that have been exported from ExamView® as Blackboard® (6.0-7.0) format can be
imported into Notebook.
For information about installing ExamView®, and downloading and exporting
ExamView® files, see the ExamView® documentation.
To import a standard assessment
1. Start MimioStudio Notebook, and then click
The Open dialog box appears.
.
2. Navigate to and select the file to import, and then click Open.
The file is imported and displayed in Notebook.
Printing Activities
You can print an activity from Notebook to use as a self-paced activity. Normally, when
you print a Notebook presentation, each page of the Notebook prints on a separate page.
However, you can choose to print the activity so that multiple questions appear on a single
page.
When you choose to print an activity, an HTML file is created from the Notebook
activity. The HTML file contains all question and answer text, but no images. You can
choose to print or save the HTML file.
123
MimioVote
To print an activity
1. Open the activity to print.
2. Do one of the following:
l
l
Click on the Vote Toolbar.
Choose Print Test from the File menu.
The Select Class dialog box appears.
3. Select the class to print the activity for from the Class list, and then click OK.
The activity is displayed as an HTML file in your default Web browser.
4. Choose Print from the File menu.
The Print dialog box appears.
5. Click Print.
Using the MimioVote Unit
Each MimioVote unit is assigned to one student per class. Students should use their
assigned MimioVote unit each time an activity is conducted.
Students can also use a mobile device with MimioMobile to participate in an activity.
For more information about MimioMobile, see MimioMobile.
By default, each button on the MimioVote unit is illuminated with a different color light.
You can choose to turn off the colors and have all the buttons illuminated with a white
light. For information about changing the button colors, see Adjusting the Vote Preferences.
Answering Questions
Depending on the type of question being asked, the appropriate buttons are illuminated on
the MimioVote unit.
For example, when polling is started for a True/False question, only the
and
buttons
are illuminated on each MimioVote unit. The A, B, C, D, and E buttons are not illuminated
and will not register a response if pressed.
Answering Questions for Teacher-Led Activities
For teacher-led activities, questions are answered one at a time as they are displayed.
To answer a question
Press the button on the MimioVote unit that corresponds to the correct answer for the
displayed question.
Answering Questions for Self-Paced Activities
For self-paced activities, questions can be answered in any order. The current question
number is displayed on the MimioVote unit. For each question, the available answer
buttons are illuminated, as well as the next and previous buttons.
To answer questions in a Self-Paced activity
1. Press the button on the MimioVote unit that corresponds to the correct answer for the
first question.
124
Using the Vote Toolbar
The unit automatically advances to the next question. The current question number
appears in the unit display.
2. Repeat step 1 for each remaining question in the activity.
You can change your answer to any question at anytime before submitting your
answers. Use
and to move through the questions and review or change any
answers as desired. The currently selected answer button flashes.
3. When all questions in the activity have been answered, press
.
You must answer every question before submitting the activity. The
become available until all questions have been answered.
button will not
Requesting Help
A student can request help or request to ask a question at anytime using the MimioVote
unit.
To request help
Press
on the MimioVote unit.
For information about viewing help requests, see Viewing Requests for Help.
Using the Vote Toolbar
The Vote Toolbar includes all the tools you need for taking attendance, conducting class
activities, gathering student responses, and viewing results.
Taking Attendance
You can quickly take attendance and record the results using MimioVote.
To take attendance
1. Select the class to take attendance for from the Class list.
2. Click on the Vote Toolbar.
A list of all students in the selected class is displayed in the Attendance window.
As each student indicates that they are present, the icon for that student is illuminated.
A student indicates they are present by pressing
on their MimioVote unit.
3. Close the Attendance window to stop taking attendance and save the results to the
Gradebook.
Using the Timer
The timer on the Vote Toolbar displays the amount of time that has passed since you started
polling.
The timer automatically starts each time you start polling and automatically stops each
time you stop polling.
Conducting Activities
Using MimioVote, you can perform teacher-led or self-paced activities. Review the
following topics for information about conducting activities.
125
MimioVote
n
Conducting a Teacher-Led Activity
n
Asking Questions Using Quick Vote
n
Conducting a Self-Paced Activity
n
Viewing Question Results
n
Viewing Session Results
n
Viewing a List of Students that Have Not Responded
Conducting a Teacher-Led Activity
Once you have created an activity in Notebook,you can perform the activity with your
class. When performing a Teacher-Led activity, the questions are displayed one at a time for
the students.
You can ask questions that you did not previously create in Notebook at any time
during a Teacher-Led activity using MimioStudio Quick Vote
To conduct a teacher-led activity
1. Open the Notebook presentation that contains the activity you want to conduct.
2. Select the class that will participate in the activity from the Class list.
3. Display the first question for the class.
4. Click on the Vote Toolbar to start polling for the question.
In Notebook, you can also start and stop polling directly from the question object
by clicking .
When all students have responded, polling for the question stops and the results are
saved to the Gradebook.
5. To stop polling for a question before all students have responded, click
.
Polling stops and the results are saved to the Gradebook.
6. Repeat steps 4-6 for each remaining question in the activity.
7. When all questions in the activity have been answered, close the presentation and the
Vote Toolbar to stop the activity.
Asking Questions Using Quick Vote
Using the MimioStudio Quick Vote, you can ask questions that you did not previously
create in Notebook at any time during a Teacher-Led activity.
To ask a question using Quick Vote
1. Do one of the following to start Quick Vote:
l
Click
, and then choose
Quick Vote
(Interactive mode Only) Press the Launch button, , on the MimioTeach bar, and
then click
Quick Vote.
2. Select the class that will participate in the activity from the Class list.
l
3. Click , and then choose the question type to start polling for the question.
When all students have responded, polling for the question stops.
4. To stop polling for a question before all students have responded, click
5. Click the letter that corresponds to the correct answer for the question.
126
.
Using the Vote Toolbar
The results for the current question are saved to the Gradebook along with a screen
shot.
Conducting a Self-Paced Activity
Once you have created an activity in Notebook,you can perform the activity with your
class. When performing a Self-Paced activity, each student must have a printed copy of all
questions in the activity. For information about printing activities, see Printing Activities.
To conduct a self-paced activity
1. Open the Notebook presentation that contains the activity you want to conduct.
2. Select the class that will participate in the activity from the Class list.
3. Click .
The Self-Paced Test window appears.
4. (Optional) Use the
and
buttons to set the timer.
The timer displays the amount of time left for the activity.
If you do not set the timer, the timer displays the amount of time that has passed
since polling started.
5. Click
to start polling for all questions.
Each student can move through the questions at their own pace using the
buttons on their MimioVote unit.
and
When all students have submitted their responses or when the timer runs out, polling
for the activity stops and the results are saved to the Gradebook.
6. To stop polling for an activity before all students have submitted their response or
before the timer runs out, click .
All results for the activity are saved to the Gradebook.
Viewing Question Results
You can instantly view the results for a question as soon as you stop polling. There are a
variety of ways to view the results for a question.
To view the result for a question
1. Click , and then choose Question Results.
The Question Results window appears.
2. To modify the appearance of the results, click .
You can change the type and colors of the graph shown. You can also choose to
show the number or percentage of correct answers.
3. Click
to save your changes and view the results.
Viewing Activity Results
You can instantly view the results for an activity as soon as you stop polling. There are a
variety of ways to view the results for an activity.
To view the result for an activity
1. Click , and then choose Activity Results.
The Activity Results window appears.
127
MimioVote
2. To modify the appearance of the results, click .
3. Click to save your changes and view the results.
Viewing a List of Students that Have Not Responded
While you are polling a class, the number of students that have responded to the current
question is displayed on the Vote Toolbar. You can quickly view a list of all students that
have not yet responded.
To view a list of students that have not responded
Click on the Vote Toolbar.
A list of students that have not yet responded is displayed in a separate window.
Viewing Requests for Help
Using their MimioVote unit, a student can request help or request to ask a question at
anytime. For information on using the MimioVote unit to request help, see Requesting
Help.
You can quickly view a list of all students that have requested help.
To view students requesting help
1. Click on the Vote Toolbar. A list of students that have requested help is displayed in a separate window.
2. Click the icon for a student to remove that student from the list.
Caring For MimioVote
Review the following topics for information about cleaning and storing your MimioVote
system.
n
Cleaning MimioVote
n
Storing MimioVote
Cleaning MimioVote
The MimioVote is designed to give you long and trouble-free service, while requiring very
little maintenance.
You can easily clean your MimioVote using the following items:
n
Lint-free cloth.
n
Isopropyl alcohol, diluted dishwashing detergent, or diluted glass cleaner.
If you use glass cleaner, make sure it does not contain ammonia.
To clean the MimioVote station and units
1. Disconnect the power cable.
2. Use the lint-free cloth to wipe the exterior of the MimioVote station and each
MimioVote unit.
3. Remove dirt and smudges with one of the cleaning solutions mentioned above.
Avoid using liquids on any exposed charging contacts. Do not allow liquid into
any openings on the equipment.
128
Caring For MimioVote
4. Reconnect the Power cable.
Storing MimioVote
The MimioVote system comes with a carrying case for your MimioVote station and
MimioVote units. You can use this case to transport the system and to safely store your
MimioVote system when not in use.
129
This page intentionally left blank for double-sided printing.
130
Chapter 9
MimioView
MimioView works seamlessly with MimioStudio software to display documents, threedimensional objects, and microscope slides for your entire class to view. You can use
MimioView to display still images or live video.
What's Included
The MimioView package contains the following items:
1
Microscope adapter
2
MimioView document camera
3
USB cable
If you are missing any of the items above, contact Customer Support.
131
MimioView
About MimioView
You can use the MimioView camera to display documents, three-dimensional objects, and
microscope slides.
The MimioView camera and lamps are each attached to the MimioView base by a flexible,
gooseneck. This allows you to precisely position the camera and each lamp for the best
possible view of the object you are displaying.
The following figure shows the major components of the MimioView camera.
1
Camera head
5
View button
2
Auto focus
6
Status light
3
LED lamps
7
Kennsington lock slot
4
Auto tune, Rotate, and Freeze buttons
8
Micro-B USB port
Status Lights
The status light visually shows the status of the MimioView camera.
Off
Not receiving power; USB cable is not connected or computer is turned off.
Solid Green
MimioView is connected and receiving power; MimioStudio software is
running.
Flashing Green
132
MimioView is connected and receiving power; MimioStudio software is not
running.
Getting Started
About MimioStudio View
The View window displays the image captured by the MimioView camera. From the View
window, you can rotate or zoom the image, mark up the image using MimioStudio Tools,
adjust the contrast and brightness settings, freeze the image, and so on.
The following table describes the major features of the MimioStudio View window.
Lamps on/off
Copy selected portion of image
Auto tune
Zoom in
Adjust brightness and contrast
Zoom out
Rotate counter-clockwise 90 degrees
Zoom to fit window
Rotate clockwise 90 degrees
Open MimioStudio Tools
Freeze/Unfreeze image
Record live image
Clear all markups
View full screen
Getting Started
Review the following topics to install and start using MimioView.
n
Installing MimioView
n
Opening the View Window
n
Closing the View Window
Installing MimioView
Once you have installed the MimioStudio software on your computer, you can quickly
install MimioView.
To install MimioView
1. Remove the protective covering from the MimioView camera lens.
2. Plug the USB cable into the Micro-B USB port on the back of the camera base.
133
MimioView
3. Connect the other end of the USB cable into an available USB port on your computer.
Opening the View Window
When you press the View button on the MimioView, the camera and lamps turn on and the
MimioStudio View window opens automatically.
To open the View window
Press on the MimioView base.
The MimioStudio View window opens and the camera and lamps turn on.
Closing the View Window
You can close the MimioStudio View window from the View window or directly from the
MimioView camera.
To close the View window
Do one of the following:
l
Close the MimioStudio View window.
The camera and lamps turn off automatically.
l
Press on the camera base.
The camera and lamps turn off and the MimioStudio View window closes.
Using MimioView
You can use MimioView to display a still image or live video of documents, threedimensional objects, or microscope slides. You can also use MimioStudio Tools to mark up
the still image or live video displayed in the View window; you can then save the image to
a Notebook or the Gallery for later use.
Displaying an Image
You can use MimioView to display a still image or live video of documents, threedimensional objects, or microscope slides.
Displaying a Document
You can use MimioView to display a document, book, or other two-dimensional object.
To display a document
134
Using MimioView
1. Place the document under the MimioView camera.
2. Adjust the camera head so that the desired image is displayed in the View window.
3. Adjust the lamps to light the document as desired.
4. Press
on the MimioView base.
Displaying an Object
Using MimioView, you can display a three-dimensional object. The camera and lamps are
each attached to the MimioView base by a flexible, gooseneck. This allows you to precisely
position the camera and lamps for the best possible view of the object you are displaying.
To display a three-dimensional object
1. Place the object under the MimioView camera.
2. Adjust the camera head so that the desired image is displayed in the View window.
3. (Optional) Press to rotate the image to the desired orientation.
4. Adjust the lamps to light the object as desired.
5. Press
on the MimioView base.
Displaying a Microscope Slide
Using the included microscope adapter, you can display an image from a microscope with
the MimioView camera.
The microscope adapter can be used with a 28 mm microscope eyepiece.
To display a microscope slide
1. Set up the microscope so that you have the desired view through the microscope
eyepiece.
2. Twist and lock the microscope adapter onto the MimioView camera head.
3. Slowly and carefully slide the other end of the microscope adapter onto the microscope
eyepiece.
Use caution to make sure that the image stays in focus while attaching the
microscope adapter.
The image from the microscope is displayed in the View window.
4. Make any adjustments necessary to the microscope to adjust the image.
5. Press
on the MimioView base.
Freezing