1
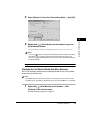
Canon LPR2
User's Guide
Please read this guide before operating this equipment.
After you finish reading this guide, store it in a safe place for future reference.
ENG
Canon LPR2
User's Guide
How This Manual Is Organized
Chapter 1
Getting Started
Chapter 2
Using Canon LPR2
Chapter 3
Using the Print Monitor
Chapter 4
Appendix
Includes the index.
Considerable effort has been made to ensure that this manual is free of inaccuracies and omissions. However, as we are constantly improving our
products, if you need an exact specification, please contact Canon.
Contents
Preface . . . . . . . . . . . . . . . . . . . . . . . . . . . . . . . . . . . . . . . . . . . . . . . . . . . . . . . . . . v
How To Use This Manual . . . . . . . . . . . . . . . . . . . . . . . . . . . . . . . . . . . . . . . . . . . . v
Symbols Used in This Manual . . . . . . . . . . . . . . . . . . . . . . . . . . . . . . . . . . . . . . v
Buttons Used in This Manual . . . . . . . . . . . . . . . . . . . . . . . . . . . . . . . . . . . . . . . v
Displays Used in This Manual . . . . . . . . . . . . . . . . . . . . . . . . . . . . . . . . . . . . . . vi
Abbreviations Used in This Manual . . . . . . . . . . . . . . . . . . . . . . . . . . . . . . . . . . vi
Legal Notices . . . . . . . . . . . . . . . . . . . . . . . . . . . . . . . . . . . . . . . . . . . . . . . . . . . .
Trademarks . . . . . . . . . . . . . . . . . . . . . . . . . . . . . . . . . . . . . . . . . . . . . . . . . . .
Copyright . . . . . . . . . . . . . . . . . . . . . . . . . . . . . . . . . . . . . . . . . . . . . . . . . . . . .
Disclaimers. . . . . . . . . . . . . . . . . . . . . . . . . . . . . . . . . . . . . . . . . . . . . . . . . . . .
Chapter 1
vii
vii
vii
vii
Getting Started
Canon LPR2 Features . . . . . . . . . . . . . . . . . . . . . . . . . . . . . . . . . . . . . . . . . . . . .1-2
System Requirements . . . . . . . . . . . . . . . . . . . . . . . . . . . . . . . . . . . . . . . . . . . . .1-3
Chapter 2
Using Canon LPR2
Installing Canon LPR2. . . . . . . . . . . . . . . . . . . . . . . . . . . . . . . . . . . . . . . . . . . . .2-2
Uninstalling Canon LPR2 . . . . . . . . . . . . . . . . . . . . . . . . . . . . . . . . . . . . . . . . . .2-5
Connecting to a Printer . . . . . . . . . . . . . . . . . . . . . . . . . . . . . . . . . . . . . . . . . . . .2-7
Chapter 3
Using the Print Monitor
Print Monitor Operations. . . . . . . . . . . . . . . . . . . . . . . . . . . . . . . . . . . . . . . . . . .3-2
Changing the Print Monitor Display Mode . . . . . . . . . . . . . . . . . . . . . . . . . . . .3-2
Displaying the Print Monitor Window At All Times . . . . . . . . . . . . . . . . . . .3-2
Displaying the Print Monitor Window Only When Necessary. . . . . . . . . . .3-3
Operating Jobs . . . . . . . . . . . . . . . . . . . . . . . . . . . . . . . . . . . . . . . . . . . . . . . . .3-4
Chapter 4
Appendix
Index . . . . . . . . . . . . . . . . . . . . . . . . . . . . . . . . . . . . . . . . . . . . . . . . . . . . . . . . . . .4-2
iv
Preface
Thank you for selecting this Canon product. Please read this manual thoroughly before
operating this product in order to familiarize yourself with its capabilities, and to make the
most of its many functions. After reading this manual, store it in a safe place for future
reference.
How To Use This Manual
Symbols Used in This Manual
The following symbols are used in this manual to explain procedures, restrictions,
handling precautions, and instructions that should be observed for safety.
IMPORTANT Indicates operational requirements and restrictions. Be sure to read
these items carefully in order to operate the product correctly, and to
avoid damage to the product.
NOTE
Indicates a clarification of an operation, or contains additional
explanations for a procedure. Reading these notes is highly
recommended.
Buttons Used in This Manual
The following symbols and button names are a few examples of how buttons to be
pressed are expressed in this manual:
• Buttons
on Computer Operation Screens: [Button Name]
Examples:
[OK]
[Remove]
v
Displays Used in This Manual
Screen shots of computer operation screens used in this manual may differ from
the ones you actually see, depending on the operating system and the model or
options that come with your machine.
The buttons which you should press are marked with a
, as shown below.
When multiple buttons can be pressed, they are highlighted and mentioned in the
order in which they should be pressed.
6
From [Available ports types], select [Canon LPR 2.0] ➞ click
[New Port].
Click these buttons for
operation.
Abbreviations Used in This Manual
In this manual, product names and model names are abbreviated as follows:
Microsoft® Windows® 98 operating system:
Windows 98
Microsoft® Windows® Millennium Edition operating system: Windows Me
vi
Microsoft® Windows NT® operating system:
Windows NT
Microsoft®
Windows®
2000 operating system:
Windows 2000
Microsoft®
Windows®
XP operating system:
Windows XP
Microsoft® Windows Server™ 2003 operating system:
Windows Server 2003
Microsoft® Windows® operating system:
Windows
Legal Notices
Trademarks
Canon and the Canon logo are trademarks of Canon Inc.
Microsoft, Windows, and Windows NT are registered trademarks of Microsoft
Corporation in the United States and other countries.
Windows Server is a trademark of Microsoft Corporation in the United States and
other countries.
Other product and company names herein may be the trademarks of their
respective owners.
Copyright
Copyright 2005 by Canon Inc. All rights reserved.
No part of this publication may be reproduced or transmitted in any form or by any
means, electronic or mechanical, including photocopying and recording, or by any
information storage or retrieval system without the prior written permission of
Canon Inc.
Disclaimers
The information in this document is subject to change without notice.
CANON INC. MAKES NO WARRANTY OF ANY KIND WITH REGARD TO THIS
MATERIAL, EITHER EXPRESS OR IMPLIED, EXCEPT AS PROVIDED HEREIN,
INCLUDING WITHOUT LIMITATION, THEREOF, WARRANTIES AS TO
MARKETABILITY, MERCHANTABILITY, FITNESS FOR A PARTICULAR
PURPOSE OF USE OR AGAINST INFRINGEMENT OF ANY PATENT. CANON
INC. SHALL NOT BE LIABLE FOR ANY DIRECT, INCIDENTAL, OR
CONSEQUENTIAL DAMAGES OF ANY NATURE, OR LOSSES OR EXPENSES
RESULTING FROM THE USE OF THIS MATERIAL.
vii
viii
Getting Started
1
CHAPTER
This chapter explains the features of Canon LPR2, the system requirements, and other
requirements that need to be met before starting Canon LPR2.
Canon LPR2 Features . . . . . . . . . . . . . . . . . . . . . . . . . . . . . . . . . . . . . . . . . . . . . . . . . . . 1-2
System Requirements . . . . . . . . . . . . . . . . . . . . . . . . . . . . . . . . . . . . . . . . . . . . . . . . . . . 1-3
1-1
Canon LPR2 Features
Canon LPR2 is a utility that facilitates printing over a TCP/IP network. Built into the
print architecture of Windows, it realizes network printing by communicating with a
Windows print application on a print server using the LPR, RAW, or IPP print
protocol.
Getting Started
1
Canon LPR2 enhances the function of the Canon LPR Port Utility 1.31 to monitor
printers and print jobs.
Canon LPR2 has the following features:
■ Multiport Support
Canon LPR2 supports the following print protocols:
• LPR
• IPP
• RAW
■ Print Monitor (Viewer)
The Print Monitor allows you to check the status of printers registered with Canon LPR2,
and monitor the progress of print jobs.
NOTE
• Canon LPR2 uses the TCP/IP protocol for communications between the computer and
printers. Also, Canon LPR2 uses print applications that support LPR/IPP/RAW. Other
types of network protocols or print applications are not supported.
• Some devices do not support some types of print applications.
1-2
Canon LPR2 Features
System Requirements
Canon LPR2 is confirmed to work in the following systems:
1
Systems
Getting Started
• Operating
- Microsoft Windows 98
- Microsoft Windows Me
- Microsoft Windows NT Workstation 4.0
- Microsoft Windows NT Server 4.0
- Microsoft Windows 2000 Server
- Microsoft Windows 2000 Professional
- Microsoft Windows XP Professional
- Microsoft Windows XP Home Edition
- Microsoft Windows Server 2003 Standard Edition
• Computer
Requirements
- Computers able to run the operating systems listed above.
• Memory
Requirements
- Enough memory for normal operation of the above operating systems.
• Network
Protocol
- TCP/IP
IMPORTANT
If you are using Windows NT, install Service Pack 4 or later.
System Requirements
1-3
Getting Started
1
1-4
System Requirements
Using Canon LPR2
2
CHAPTER
This chapter describes the instructions for installing and uninstalling Canon LPR2 and how to
connect to a printer.
Installing Canon LPR2 . . . . . . . . . . . . . . . . . . . . . . . . . . . . . . . . . . . . . . . . . . . . . . . . . . . 2-2
Uninstalling Canon LPR2 . . . . . . . . . . . . . . . . . . . . . . . . . . . . . . . . . . . . . . . . . . . . . . . . . 2-5
Connecting to a Printer . . . . . . . . . . . . . . . . . . . . . . . . . . . . . . . . . . . . . . . . . . . . . . . . . . . 2-7
2-1
Installing Canon LPR2
Follow the procedure below to install Canon LPR2.
IMPORTANT
• With Windows NT/2000/XP/Server 2003, you need to log on as a user with administrator
access privileges before installing the utility.
• Close all application software before installation.
• If LPR Port Utility 1.31 or LPR LE is installed, you can install Canon LPR2 without
uninstalling either of them.
• Items displayed on the screen and procedures may slightly differ according to the
operating system you are using.
Using Canon LPR2
2
1
Double-click [Setup] on the installation disk.
This can be [Setup.exe] on some systems.
The installation program starts.
The [Canon LPR2 Setup] window is displayed.
2
If you install for the first time, click [Next].
If Canon LPR2 is already installed and you want to install an additional
application component, select [Modify] ➞ click [Next] ➞ proceed to step 4.
The [License Agreement] window is displayed.
2-2
Installing Canon LPR2
3
Read the software license agreement carefully. If you agree to
the terms, select [I accept the terms in the license agreement]
➞ click [Next].
Using Canon LPR2
2
4
Select the application components you want to install ➞ click
[Next].
Installing Canon LPR2
2-3
You can select from the following application components:
• [Print Monitor]
Install the Print Monitor to check the status of printers and print jobs.
• [Additional port]
Select [Additional port] to use the following print protocols, other than LPR.
- IPP
- RAW
The installation starts and the necessary files are copied.
NOTE
You cannot cancel the installation once it starts.
Using Canon LPR2
2
5
When the installation is complete, follow the instructions on
the screen to restart the computer.
NOTE
After installing the Print Monitor, [
The installation of Canon LPR2 is complete.
2-4
Installing Canon LPR2
] (Print Monitor) appears on the taskbar.
Uninstalling Canon LPR2
If you no longer need Canon LPR2, follow the procedure below to uninstall it.
1
Close the Print Monitor.
2
If Canon LPR2 is set to a printer port, change the port.
❑ On the [Start] menu, point to [Settings] ➞ click [Printers].
The [Printers] dialog box is displayed.
NOTE
• If you are using Windows XP Professional/Server 2003, on the [Start] menu, click
[Printers and Faxes].
• If you are using Windows XP Home Edition, on the [Start] menu, click [Control
Panel] ➞ [Printers and Other Hardware] ➞ [Printers and Faxes].
❑ Right-click the printer icon ➞ click [Properties].
The printer properties dialog box is displayed.
❑ Click the [Ports] tab to display the [Ports] sheet.
NOTE
If you are using Windows 98/Me, click the [Details] tab to display the [Details]
sheet.
❑ Set the port to be used for printing to a port other than Canon LPR2 ➞ click
[OK].
NOTE
Canon LPR2 takes the form "xxx.xx.xx.xxx@lp" (such as "123.45.67.890@lp").
Uninstalling Canon LPR2
2-5
2
Using Canon LPR2
IMPORTANT
• With Windows NT/2000/XP/Server 2003, you need to log on as a user with administrator
access privileges before uninstalling the utility.
• Items displayed on the screen and procedures may slightly differ according to the
operating system you are using.
3
On the [Start] menu, point to [Settings] ➞ click [Control Panel]
➞ double-click [Add/Remove Programs].
4
Select [Canon LPR2] from the list ➞ click [Change/Remove].
The installation program starts.
The [Canon LPR2 Setup] window is displayed.
2
Using Canon LPR2
5
Select [Remove] ➞ click [Next].
The uninstallation of Canon LPR2 starts.
NOTE
You can also uninstall individual application components as follows:
1 Select [Modify] in the [Canon LPR2 Setup] window ➞ click [Next].
2 Deselect the check boxes of the application component(s) that you want to
uninstall ➞ click [Next].
The uninstallation of Canon LPR2 is complete.
2-6
Uninstalling Canon LPR2
Connecting to a Printer
After installing Canon LPR2, you need to configure the port settings to use a printer
on a TCP/IP network.
IMPORTANT
Items displayed on the screen and procedures may slightly differ according to the
operating system you are using.
Using Canon LPR2
1
2
Install the printer driver.
Install the printer driver as a local printer (printer not on the network).
NOTE
See the manual provided with the printer for instructions on how to install the
printer driver.
2
On the [Start] menu, point to [Settings] ➞ click [Printers].
The [Printers] dialog box is displayed.
NOTE
• If you are using Windows XP Professional/Server 2003, on the [Start] menu, click
[Printers and Faxes].
• If you are using Windows XP Home Edition, on the [Start] menu, click [Control
Panel] ➞ [Printers and Other Hardware] ➞ [Printers and Faxes].
3
In the [Printers] folder, right-click the printer icon for an
installed printer ➞ click [Properties].
The printer properties dialog box is displayed.
Connecting to a Printer
2-7
4
Click the [Ports] tab to display the [Ports] sheet ➞ click [Add
Port].
Using Canon LPR2
2
The [Printer Ports] dialog box is displayed.
NOTE
If you are using Windows 98/Me, click the [Details] tab to display the [Details] sheet
➞ click [Add Port]; the [Add Port] dialog box is displayed.
5
From [Available port types], select [Canon LPR 2.0] ➞ click
[New Port].
NOTE
If you are using Windows 98/Me, select [Other] in the [Add Port] dialog box ➞
select [Canon LPR 2.0] ➞ click [OK].
2-8
Connecting to a Printer
Set the port to add.
● If you want to set LPR:
❑ Select [LPR] from [Protocol].
2
Using Canon LPR2
6
❑ Click [Discover].
The [Select Printer] dialog box is displayed.
❑ Select a printer ➞ click [OK].
The selected printer's IP address or host name is set for [IP Address or Host
Name].
IMPORTANT
If you are using Windows XP Service Pack 2, not all printers shown in the [Select
Printer] dialog box may be displayed. In this case, enter the target printer's IP
address or host name manually.
NOTE
You can also manually set the printer's IP address or host name.
Connecting to a Printer
2-9
❑ Click [Get].
The selected printer's print queue name (logical printer name) is set for [LPR
Queue Name].
IMPORTANT
The print queue name and the action of each queue vary according to the type of
printer or network board. For details, see the manuals provided with the printer or
network board.
NOTE
You can manually set the printer's print queue name.
2
Using Canon LPR2
❑ Confirm the settings ➞ click [OK] to close the [Add Port] dialog box.
● If you want to set IPP:
❑ Select [IPP] from [Protocol].
❑ Click [Discover].
The [Select Printer] dialog box is displayed.
❑ Select a printer ➞ click [OK].
The selected printer's URL is set for [Printer URL].
IMPORTANT
• If you are using Windows XP Service Pack 2, not all printers shown in the [Select
Printer] dialog box may be displayed. In this case, enter the target printer's URL
manually.
• The printer's URL varies according to the type of printer or network board. For
details, see the manuals provided with the printer or network board.
NOTE
You can also manually set the printer's URL.
❑ Confirm the settings ➞ click [OK] to close the [Add Port] dialog box.
2-10
Connecting to a Printer
● If you want to set RAW:
❑ Select [RAW] from [Protocol].
Using Canon LPR2
2
❑ Click [Discover].
The [Select Printer] dialog box is displayed.
❑ Select a printer ➞ click [OK].
The selected printer's IP address or host name is set for [IP Address or Host
Name].
IMPORTANT
If you are using Windows XP Service Pack 2, not all printers shown in the [Select
Printer] dialog box may be displayed. In this case, enter the target printer's IP
address or host name manually.
NOTE
You can also manually set the printer's IP address or host name.
❑ Confirm the settings ➞ click [OK] to close the [Add Port] dialog box.
7
8
9
Click [Close] to close the [Printer Ports] dialog box.
In the printer properties dialog box, click [Apply] to apply the
settings.
Click [OK] to close the printer properties dialog box.
The port settings are configured.
Connecting to a Printer
2-11
Using Canon LPR2
2
2-12
Connecting to a Printer
Using the Print Monitor
3
CHAPTER
This chapter describes how to use the Print Monitor.
Print Monitor Operations. . . . . . . . . . . . . . . . . . . . . . . . . . . . . . . . . . . . . . . . . . . . . . . . . . 3-2
Changing the Print Monitor Display Mode . . . . . . . . . . . . . . . . . . . . . . . . . . . . . . . . . . . . . . . . . .3-2
Operating Jobs. . . . . . . . . . . . . . . . . . . . . . . . . . . . . . . . . . . . . . . . . . . . . . . . . . . . . . . . . . . . . . .3-4
3-1
Print Monitor Operations
The Print Monitor enables you to check the status of printers registered with Canon
LPR2, and monitor the progress of print jobs.
Using the Print Monitor
3
IMPORTANT
• To use the Print Monitor, you must first install it. (See "Installing Canon LPR2," on p. 2-2.)
• If the Print Monitor is installed, [
] (Print Monitor) appears on the taskbar.
Changing the Print Monitor Display Mode
By default, the [Print Monitor] window opens automatically when print data is
transmitted, and then closes approximately two seconds after the end of the
transmission. You can change the [Print Monitor] window display mode, if
necessary.
Displaying the Print Monitor Window At All Times
1
Right-click [ ] (Print Monitor) on the taskbar ➞ click
[Options] on the shortcut menu.
The [Option Settings] dialog box is displayed.
3-2
Print Monitor Operations
2
Select [Display in Front when Transmitting Data] ➞ click [OK].
3
Double-click [ ] (Print Monitor) on the taskbar to open the
[Print Monitor] window.
If the [Print Monitor] window is already displayed, this step is not necessary.
NOTE
If you click [ ] (Close) to close the [Print Monitor] window, it will only open when
print data is sent to a printer, and close when data transmission ends. This is
because closing the [Print Monitor] window manually returns the display settings to
the default settings.
The [Print Monitor] window will now be displayed at all times.
Displaying the Print Monitor Window Only When Necessary
You can set the display mode of the [Print Monitor] window so that it stays hidden
except when you need to see it.
NOTE
This display mode is useful if you only want to record the job list. If you do not need to
record the job list, click [Exit] on the [View] menu to close the Print Monitor, or uninstall it.
1
Right-click [ ] (Print Monitor) on the taskbar ➞ click
[Options] on the shortcut menu.
The [Option Settings] dialog box is displayed.
Print Monitor Operations
3-3
Using the Print Monitor
3
2
Deselect [Display in Front when Transmitting Data] ➞ click
[OK].
Using the Print Monitor
3
3
Click [
] (Close) to close the [Print Monitor] window.
If the [Print Monitor] window is already closed, this step is not necessary.
NOTE
When you want to display the [Print Monitor] window, double-click [
Monitor) on the taskbar.
] (Print
The [Print Monitor] window will only appear when necessary.
Operating Jobs
The Print Monitor enables you to monitor the job status, but does not enable you to
perform job operations.
To perform job operations, you can use a link from the Print Monitor to a screen that
enables you to perform job operations, as described below.
1
Select the link for the print job according to where it is being
processed.
● If there are still jobs in the Windows spooler:
❑ Right-click the [Print Monitor] window ➞ select [Display Job List] on the
shortcut menu.
The job list of the selected printer is displayed.
3-4
Print Monitor Operations
● If the jobs have already been sent to the printer:
❑ Right-click the [Print Monitor] window ➞ select [Display Web Link] on the
shortcut menu.
If there is a Web server included in the selected printer, your Web browser
opens.
Use the screen that is displayed to perform job operations.
3
Using the Print Monitor
2
Print Monitor Operations
3-5
Using the Print Monitor
3
3-6
Print Monitor Operations
Appendix
4
CHAPTER
This chapter includes the index.
Index . . . . . . . . . . . . . . . . . . . . . . . . . . . . . . . . . . . . . . . . . . . . . . . . . . . . . . . . . . . . . . . . . 4-2
4-1
Index
C
S
Canon LPR2 Features, 1-2
Connecting to a Printer, 2-7
System Requirements, 1-3
U
D
Appendix
4
Uninstalling Canon LPR2, 2-5
Displaying the Print Monitor Window At All Times,
3-2
Displaying the Print Monitor Window Only When
Necessary, 3-3
I
Installing Canon LPR2, 2-2
O
Operating Jobs, 3-4
P
Print Monitor Display Mode, 3-2
Displaying the Print Monitor Window At All
Times, 3-2
Displaying the Print Monitor Window Only
When Necessary, 3-3
Print Monitor Operations, 3-2
Changing the Print Monitor Display Mode, 3-2
Operating Jobs, 3-4
4-2
Index
CANON INC.
30-2, Shimomaruko 3-chome, Ohta-ku, Tokyo 146-8501, Japan
CANON U.S.A., INC.
One Canon Plaza, Lake Success, NY 11042, U.S.A.
CANON CANADA INC.
6390 Dixie Road Mississauga, Ontario L5T 1P7, Canada
CANON EUROPA N.V.
Bovenkerkerweg 59-61 1185 XB Amstelveen, The Netherlands
CANON FRANCE S.A.S.
17, quai du President Paul Doumer 92414 Courbevoie Cedex, France
CANON COMMUNICATION & IMAGE FRANCE S.A.S. (Pour les utilisateurs de l imprimante laser uniquement)
12, rue de l Industrie 92414 Courbevoie Cedex, France
CANON (U.K.) LTD.
Woodhatch, Reigate, Surrey, RH2 8BF, United Kingdom
CANON DEUTSCHLAND GmbH
Europark Fichtenhain A10, 47807 Krefeld, Germany
CANON ITALIA S.p.A.
Via Milano, 8 20097 San Donato Milanese (MI) Italy
CANON LATIN AMERICA, INC.
703 Waterford Way, Suite 400, Miami, Florida 33126 U.S.A.
CANON AUSTRALIA PTY. LTD
1 Thomas Holt Drive, North Ryde, Sydney, N.S.W. 2113, Australia
CANON CHINA CO., LTD
15F, North Tower, Beijing Kerry Centre, 1 Guang Hua Road, Chao Yang District, 100020, Beijing, China
CANON SINGAPORE PTE. LTD.
1 HarbourFront Avenue #04-01 Keppel Bay Tower, Singapore 098632
CANON HONGKONG CO., LTD
19/F., The Metropolis Tower, 10 Metropolis Drive, Hunghom, Kowloon, Hong Kong
FA7-8681 (000)
© CANON INC. 2005