1
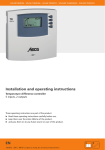
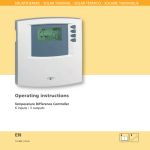
SOLARTHERMIE - SOLAR THERMAL - SOLAR TÉRMICO - SOLAIRE THERMIQUE - SOLARE TERMICO Installation and operating instructions Temperaturedifferencecontroller 6 inputs, 3 outputs, integrated data logger for SD card These operating instructions are part of the product. Read these operating instructions carefully before use, keep them over the entire lifetime of the product, and pass them on to any future owner or user of this product. EN 77.775 | Z0 | 08.10 | Subject to change due to technical improvements! EN Content 1 1.1 1.2 1.3 1.4 1.5 1.6 2 3 3.1 3.2 3.3 4 4.1 4.2 4.3 4.4 4.5 5 5.1 5.2 5.3 5.4 5.5 6 6.1 6.2 6.3 7 7.1 7.2 7.3 7.4 7.5 7.6 7.7 7.8 Safety.....................................................................................4 Proper usage............................................................................. 4 Dangers during assembly and commissioning.......................... 4 Detecting faults........................................................................ 5 Hot water temperature............................................................. 5 Disposal.................................................................................... 5 Exclusion of liability.................................................................. 5 Case overview.......................................................................6 About this manual................................................................7 Applicability.............................................................................. 7 Users......................................................................................... 7 Description of symbols............................................................. 7 Installation ...........................................................................8 Opening/closing the housing.................................................... 8 Assembly................................................................................... 9 Electrical connection............................................................... 10 Dismantling............................................................................ 11 Terminal diagram ................................................................... 12 Commissioning...................................................................16 Setting the language ............................................................. 16 Setting the time and date....................................................... 16 Setting the automatic summer time....................................... 16 Setting the system group................................................. 17 Setting the system.................................................................. 17 Modes of operation............................................................18 "OFF" mode............................................................................. 18 "Automatic" mode................................................................... 18 "Manual" mode....................................................................... 18 Settings...............................................................................19 Time/date................................................................................ 19 Systems................................................................................... 22 Functions................................................................................ 62 Parameters.............................................................................. 81 Storage priority....................................................................... 83 Language................................................................................ 84 Factory settings....................................................................... 84 Set season . ............................................................................ 84 727.775 | 08.10 EN 8 8.1 8.2 8.3 9 Automatic mode.................................................................85 Status display.......................................................................... 86 Temperature sensor min/max display...................................... 86 Operating hours display for pumps and switching valves...... 86 Data logger.........................................................................87 9.1 Handling the SD card.............................................................. 87 9.2 Display screen......................................................................... 87 9.3 Formating............................................................................... 88 9.4 Data evaluation....................................................................... 89 10 Service.................................................................................90 11 Fault finding........................................................................90 11.1 Causes of problems................................................................ 90 11.2 Pt1000 temperature sensor values......................................... 92 12 Information windows.........................................................93 13 Plausibility indices...............................................................97 14 Legal guarantee..................................................................98 15 Technical data......................................................................99 15.1 Performance data................................................................... 99 15.2 Parameter settings................................................................ 100 15.3 Parameter values for functions ............................................ 102 16 Notes.................................................................................107 Product information EC declaration of conformity "This product conforms to the applicable European directives with regard to its design and its operating behaviour. This conformity has been verified. Further information in this regard can be obtained from your dealer." 727.775| 08.10 EN 1 Safety 1.1 Proper usage The temperature difference controller (hereinafter referred to as controller) is an independently installed electronic temperature controller for on-surface installation, and may only be used for controlling solar thermal systems within the permissible ambient conditions (see chapter 15 "Technical data"). The controller must not be operated in the following environments: • outdoors • in damp rooms • in rooms where highly flammable gas mixtures can occur • in rooms in which the operation of electrical and electronic components may cause dangers to arise 1.2 Dangers during assembly and commissioning The following dangers exist during installation/commissioning of the controller and during operation (in case of installation errors): • risk of death by electrocution • risk of fire due to short-circuit • damage to any of the constructional fire safety measures present in the building due to incorrectly installed cables • damage to the controller and the connected devices due to improper ambient conditions, inappropriate power supply and the connection of prohibited devices, faulty devices, or devices not included in the device specifications, as well as incorrect assembly or installation NOTE Observe the controller's type plate! Therefore, all safety regulations apply when working on the mains supply. Only electricians may perform work that requires opening the controller (such as electrical connection work). When laying cables, ensure that no damage occurs to any of the constructional fire safety measures present in the building. Make sure that the permissible ambient conditions at the installation site are not exceeded (see chap- ter 15 "Technical data"). Be sure to comply with the specified ingress protection. Labels and markings applied in the factory may not be altered, removed or rendered unreadable. Before connecting the device, make sure that the power supply matches the specifications on the type plate. Make sure that all devices which are connected to the controller conform to the technical data of the controller. Secure the device against unintentional start-up. All work on an open controller must be performed with the mains supply removed. Protect the controller against overloading and short-circuiting. 4 77.775 | 08.10 EN 1.3 Detecting faults Check the display regularly. In case of faults, isolate the cause (see chapter 11.1 "Causes of problems"). As soon as it becomes evident that safe operation is no longer guaranteed (e.g. visible damage), remove the device from the mains supply immediately. Have trained professional personnel remedy the fault. 1.4 Hot water temperature In order to limit the hot water temperature to 60 °C at the outlets, a hot water mixer must be installed. 1.5 Disposal Dispose of the controller in accordance with the regional regulations. 1.6 Exclusion of liability The manufacturer can neither monitor the compliance with this manual nor the conditions and methods during the installation, operation, usage and maintenance of the controller. Improper installation of the system may result in damage to property and, as a result, to bodily injury. Therefore, the manufacturer assumes no responsibility and liability for loss, damage or costs which result from or are in any way related to incorrect installation, improper operation, incorrect execution of installation work and incorrect usage and maintenance. Similarly, we assume no responsibility for patent right or other right infringements of third parties caused by usage of this controller. The manufacturer reserves the right to make changes to the product, technical data or installation and operating instructions without prior notice. 727.775| 08.10 EN 2 Case overview Display Display for controller operation and system settings Operating switch The following modes of operation can be selected: Operating buttons Arrow up for scrolling up through the menus - Manual for commissioning and testing for function SET button confirmation or activation of a value - Automatic for automatic operation ESC button escape key - Off for switching off the outputs Arrow down for scrolling down through the menus Manual Automatic Off SD card Fuses (see chapter 15) Replacement fuses (see chapter 15) Power connection Outputs Inputs Strain relief RS232 and RS485 interface, alarm output, Direct Sensor output 727.775 | 08.10 EN 3 About this manual 3.1 Applicability This manual describes the installation, commissioning, operation, maintenance and dismantling of the temperature differential controller for solar thermal energy systems. When installing the remaining components, e.g. solar collectors, pump assemblies, storage units, pumps and switching valves, be sure to observe the appropriate installation instructions provided by each manufacturer. 3.2 Users Installation, commissioning, maintenance and dismantling of the controller may only be performed by trained professional personnel. Before commissioning, the controller must be professionally assembled and installed by professional personnel in accordance with the applicable regional and transregional regulations as well as the safety instructions and general instructions within these installation and operating instructions. The professional personnel must be familiar with these operating instructions. The controller is maintenance-free. Use the controller only after first thoroughly reading and understanding these operating instructions and the safety instructions. Adhere to all safety instructions and consult professional personnel in the event of any ambiguities. This device is not intended for persons (or children) with physical, sensory, or mental disabilities, or who have inadequate experience and knowledge, unless they are instructed in the use of the device, and initially supervised, by a person responsible for their safety. Children should not be left alone with the device, to ensure that they do not play with it. 3.3 Description of symbols 3.3.1 The structure of the warning notices SIGNAL WORD Type, source and consequences of the danger! Measures for avoiding danger. 3.3.2 Danger levels in warning notices Danger level DANGER WARNING CAUTION CAUTION 3.3.3 Likelihood of occurrence Consequences resulting from non-compliance Imminent threat of danger Death, serious bodily injury Possible threat of danger Death, serious bodily injury Possible threat of danger Minor bodily injury Possible threat of danger Property damage Note NOTE Note on easier and safer working habits. Measures for easier and safer working habits. 727.775| 08.10 EN 3.3.4 Other symbols and markings Symbol ✓ • Emphasis on issue at hand : : Meaning Condition for action Call to action Result of action List Emphasis on issue at hand SET: Press „Arrow up/down“ for scrolling. Press „Arrow down“ for scrolling through the menu or to adjust a value. Press „Arrow up“ for scrolling through the menu or to adjust a value. Press „SET“ button to confirm or activate a value. ESC: Press „ESC“ button to cancel. : 4 Installation 4.1 Opening/closing the housing DANGER Risk of death by electrocution! Remove the controller from the power supply before opening the case. Make sure that the power supply cannot be unintentionally switched back on. Do not damage the case. Only switch the power supply back on after the case has been closed. The upper case is connected to the lower case by two latches, and fastened with a screw. 4.1.1 Opening the case Loosen the screw and remove the upper case in an upwards direc- tion. 4.1.2 Closing the case Place the upper case over the lower case at an angle. Insert the latches into the recesses of the lower case. Pivot the upper case down and feed the operating buttons through the matching holes. Fasten the case tightly with the screw. Operating buttons Latch Upper casing Lower case Screw 727.775 | 08.10 EN 4.2 Assembly WARNING Risk of electrical shock and fire if mounted in a damp environment! Only mount the controller in an area where the ingress protection is sufficient (see chapter 15 "Technical data"). 4.2.1 Mounting the controller CAUTION Risk of injury and damage to the case when drilling! Do not use the case as a drilling template. Choose a suitable installation site. Drill the upper fastening hole. Screw in the screw. Remove the upper case. Hang the case in the recess . Mark the position of the lower fastening holes ,. Remove the case again. Drill the lower fastening holes. Hang the case in recess . Screw the case firmly using the lower fastening holes and . Mount the upper case. 136 155 1 2 3 148 164 727.775| 08.10 EN 4.3 Electrical connection DANGER Risk of death by electrocution! Remove the controller from the power supply before opening the case. Observe all applicable legal guidelines and regulations of the local electricity supplier. NOTE The device is to be connected to the mains by means of a plug with grounding contact, or in the case of a fixed electrical installation, via a disconnection device for complete disconnection in accordance with the installation guidelines. 4.3.1 Preparing the cable feed Depending on how the controller is mounted, the cables may enter the device through the rear of the case or the lower side of the case. 4 4 5 6 5 Feeding the cable through the rear of the case: Remove the plastic flaps from the rear side of the case using an appropriate tool. WARNING Risk of electrical shock and fire due to cables coming loose! Install an external strain relief for the cables. Feeding the cable through the lower side of the case: Use an appropriate tool to cut the plastic flaps at the left and the right and break them out of the case. Fasten cable at position with the provided plastic links. 10 727.775 | 08.10 EN 4.3.2 Connecting the cables If a protective conductor is provided or required for pumps/valves, connect it to the corresponding terminals of the controller. When connecting the protective conductor, observe the following points: - Make sure that the protective conductor is also connected to the controller's mains supply side. - Each terminal may only be connected to a single connecting wire (max 2.5 mm2). The terminal screws are approved for connection of cables as follows: - single wire (solid): ≤ 2.5 mm² - fine strand (with core end sleeves): ≤ 1.5 mm² Only use the original temperature sensors (Pt1000) that are approved for use with the controller. Observe the following points: - The polarity of the temperature sensor contacts is not important. - Do not lay sensor cables close to power cables (minimum separation: 100 mm). - If inductive effects are expected, e.g. from power cables, overhead wires, transformer substations, radio and television devices, amateur radio stations, microwave devices, etc., the sensor cables must be adequately screened. - Sensor cables may be extended to a maximum length of 100 m. If adding extensions to sensor cables, select the following cable cross sections: - 0.75 mm2 up to 50 m long - 1.5 mm2 up to 100 m long Connect the cables in accordance with the terminal diagram (see chapters 4.5 and 7.2) 4.4 Dismantling DANGER Risk of death by electrocution! Remove the controller from the power supply before dismantling it. To dismantle the controller, follow the assembly instructions in the reverse order. 727.775| 08.10 11 EN 4.5 Terminal diagram 4.5.1 Power connection • Please refer to the type plate on the case to determine the type of power supply required • The protective conductor must be connected • Cables conforming to at least type H05 VV-... (NYM…) must be used G1: grid D1: wire bridge G1 N L N R1 N R2 n.c. N L n.c n.c. R3 L n.c. n.c. X 230 V ~ 115 V ~ D1 4.5.2 Connection of the inputs • Inputs 1 - 5: for Pt1000 temperature sensor E1 E2 E3 E4 E5 E6 1 2 3 4 5 6 T1 T2 T3 T4 T5 T6 *) • Input 6: for Pt1000 temperature sensor or pulse generator for recording volume flow (measuring heat quantities) 12 E1: input 1 E2: input 2 E3: input 3 E4: input 4 E5: input 5 E6: input 6 T6 *): T6 or pulse generator 727.775 | 08.10 EN Inputs 1 - 5: temperature recording Inputs 1...5 ϑ T1...T5 Temperature sensor Pt 1000 (polarity irrelevant) Input 6: recording temperatures and pulse values Temperature recording 6 ϑ T6 Pt1000 temperature sensor (polarity irrelevant) Recording pulse values via reed relay 6 Standard: volume flow recording (polarity irrelevant) 727.775| 08.10 Recording pulse values via open collector 6 Special case: volume flow recording (observe polarity, pulse signals up to max. 600 Hz) 13 EN 4.5.3 Connection of outputs R1, R2 and R3 Outputs R1 and R2: • Semiconductor relays (TRIAC), also suitable for RPM control; max. switching current: see type plate CAUTION Avoiding damage and malfunctions When connecting an external relay or contactor, or when connect- ing a pump which has its own electronic RPM control, the controller output's RPM control must be deactivated (see chapter 7.4.3 "Setting the RPM control parameters"). R1 N R1 R2 N R1: output 1 R2: output 2 R3: output 3 D1: wire bridge R3 R2 n.c. N L n.c n.c. R3 L n.c. n.c. X R2 R1 D1 Output R3: switched output or potential-free output • 230 VAC switched output (option: 115 VAC) via electromechanical relay; max. switching current: see type plate; wire bridge must be connected! R1 N R1 R3 R2 N R2 n.c. R1: output 1 R2: output 2 R3: output 3 D1: wire bridge N L n.c n.c. R3 L n.c. n.c. X R3 D1 14 727.775 | 08.10 EN • Potential-free output via electromechanical relay; wire bridge must be removed! DANGER Risk of death by electrocution! In the event of use as a potential-free output, it must be ensured that the connections cannot come into contact with the mains voltage. N R1 N R2 n.c. Rx Tx N L n.c n.c. R3 L n.c. n.c. A Rx Tx B RS485 interface A Rx Tx B T T 5V + T T Rx Tx T 727.775| 08.10 A Rx Direct Sensor (observe the manufacturer’s specifications) Q T T 5V + 5V + T T T Q Q T T T Alarm output, see chapter 15 T T Rx Tx 6 7 8 9 T B T 5V + B D - Sub 9-pin socket (solder side) 5V + T Q T T T Q Rx T 6 7 8 9 T T A B B 1 2 3 4 5 1 2 3 4 5 A A T Q T T Rx Tx B Rx Tx B Rx Tx B RS232 6 interface 7 8 9 A A A 1 2 3 4 5 T 6 7 8 9 T T T 4.5.4RS232 and RS485 interface, alarm output, and Direct Sensor input 1 2 3 4 5 T X T B R3 T A R2 R3 R1 T R1: output 1 R2: output 2 R3: output 3 5V + 15 EN 5 Commissioning Make sure that the installation is finished completely and correctly, and that the switch on the controller is set to "OFF". The display for setting the language appears. 5.1 Setting the language ✓ "Deutsch" flashes in the display. : select a language. SET: confirm the language. [..........] ESC: finish the settings. Display: 6.1 The display for setting the time appears. 5.2 [Deutsch] Setting the time and date ✓ "12:00" flashes in the display. : set the hours. SET: confirm the hours. Display: 1.1 The minutes display flashes. : set the minutes. SET: confirm the minutes. The year flashes. : set the year. SET: confirm the year. The month flashes. : set the month. SET: confirm the month. The day flashes. : set the day. SET: confirm the day. ESC: finish the settings. Display for activating the "automatic summer time change-over" appears. 5.3 Setting the automatic summer time ✓ Display for "automatic summer time change-over" appears. NOTE The controller can also be operated without activating the "automatic summer time change-over". SET: press button. "automatic summer time change-over" is activated. ESC: finish the settings. The display for setting the system group appears. 16 727.775 | 08.10 Automatic summer time change-over (for EU) EN >@ 5.4 Setting the system group NOTE For an overview of systems, see chapter 7.2 "Systems". Display: 2.1 ✓ The first system group (1 storage tank system) appears in the display. [Storage tank] : select a system group. SET: confirm the system group. The display for setting the system appears. 5.5 Setting the system ✓ The first system in the selected system group appears in the display. : selecting a system. SET: confirm the system. Display: 2.1.1 In the display, a small checkmark appears below the item number, which confirms that the system is selected. ESC: exit the settings menu. The commissioning is finished. 727.775| 08.10 17 EN 6 Modes of operation 6.1 "OFF" mode In order to switch off the outputs, slide the operating switch down. A new window appears in the display, which shows "OFF", as 2)) 9HUVLRQ;; 6\VWHP1R; well as the controller software version number and the number of the chosen system. The display is lit with a red background. In "OFF" mode, all outputs (R1, R2, R3) are switched off. off NOTE On delivery from the manufacturer, the switch is set to "OFF". 6.2 "Automatic" mode CAUTION Damage to pump caused by dry operation! The controller may only be set to "Automatic" when the system has been filled. In order to switch the outputs to "Automatic", slide the operating switch to the middle position. The status appears in the display. This mode of operation is the automatic controller mode and must be set for automatic operation. Automatic NOTE During normal system operation, the operating switch should always be set to "Automatic". 6.3 "Manual" mode CAUTION Damage to pump caused by dry operation! The controller may only be set to "Manual" when the system has been filled. When operating the device for the first time, or when testing the function, the controller outputs can be manually switched. In order to switch the outputs manually, slide the operating switch up. The display is backlit in red and a settings window is displayed. : selecting an output. SET: switch the selected output to "on" or "off". ESC: close the settings window. The current recorded values can now also be queried for the purpose of checking. : access measured values. SET: reopen the settings window. 18 727.775 | 08.10 5ĺRQ 5RII 5RII Manual & EN 7 Settings Menu overview, see following double page 7.1 >@ Time/date The time and date can be displayed and adjusted via the "Time/Date" menu item. The automatic summer time change-over can still be activated or deactivated. 7.1.1 Display: 1 Setting the time and date SET: press button for approx. 2 sec. [Time/date] The "Time" menu item is displayed. SET: press button. The current time is displayed. SET: press button to confirm. The hours display flashes after confirmation of the time. : set the hours. SET: press button to confirm. Display: 1.1 The minutes display flashes after confirmation of the hours. : set the minutes. SET: press button to confirm. The year display flashes after confirmation of the minutes. : set the year. SET: press button to confirm. The month display flashes after confirmation of the year. : set the month. SET: press button to confirm. The day display flashes after confirmation of the month. : set the day. SET: confirm the time and date. 7.1.2Activating the automatic summer time change-over : press button. Automatic summer time change-over (for EU) The display for “Automatic summer time change-over (for EU)” appears. ress to activate or deactivate the automatic summer time SET: p change-over. A cross in the control box shows that the automatic summer time change-over is active. ESC: exit the "automatic summer time change-over" submenu. ESC: exit the "Time/Date" menu item. NOTE The controller can also be operated without activating the "automatic summer time change-over". 727.775| 08.10 19 EN Menu overview SET 2 sec ESC Status display Set season The menu item “Set season” is only displayed if a seasonal system has been selected. Time Systems 1 storage tank systems 2 storage tanks systems 3 storage tanks systems Swimming pool systems S torage tank swimming pool systems System 1 System 12 System 21 System 23 System 29 System 2 System 13 System 22 System 24 System 30 System 3 System 14 System 25 System 31 System 4 System 15 System 26 System 32 System 5 System 16 System 27 System 6 System 17 System 28 System 7 System 18 System 8 System 19 System 9 System 20 System 10 System 11 20 727.775 | 08.10 EN Functions Parameters 2 storage tanks swimming pool systems Seasonal systems Circulation Max. temperature storage tank 1 System 33 System 35 Back-up heating Max. temperature storage tank 2 System 34 System 36 Solid fuel boiler Max. temperature storage tank 3 System 37 Quick charge Max. temperature swimming pool System 38 Bypass System 39 Heat quantity System 40 Thermostat Difference thermostat Storage priority Language Factory settings Switch-on temp. difference solar 1 Switch-off temp. difference solar 1 Switch-on temp. difference solar 2 Time function Interval Switch-off temp. difference solar 2 Stagnation reduction Max. collector temperature Holiday/recooling function Min. collector temperature Frost protection Switch-on temperature difference return increase Anti-legionella function Display storage tank top Switch-off temperature difference return increase Data logger Max. temperature loading circuit 1 Alarm output Min. temperature loading circuit 1 Max. temperature loading circuit 2 Min. temperature loading circuit 2 Loading strategy storage tank 1 Loading strategy storage tank 2 Loading strategy storage tank 3 RPM control pump R1 RPM control pump R2 727.775| 08.10 21 EN 7.2 Systems The desired solar energy system can be chosen using the "Systems" submenu. There are a total of 40 different systems to choose from (subdivided into 7 system groups). System group 40 systems Chapter Systems with one storage tank System 1: 1 collector array – 1 storage tank 7.2.1 System 2: 1 collector array – 1 storage tank – heating return increase System 3: 1 collector array – 1 storage tank with external heat exchanger System 4: 1 collector array – 1 storage tank with external heat exchanger – heating return increase System 5: 1 collector array – 1 storage tank with zone loading System 6: 1 collector array – 1 storage tank with zone loading – heating return increase System 7: 1 collector array – 1 storage tank with zone loading and external heat exchanger System 8: 2 collector arrays (east/west roof) – 1 storage tank System 9: 2 collector arrays (east/west roof) – 1 storage tank - heating return increase System 10: 2 collector arrays (east/west roof) - 1 storage tank with external heat exchanger System 11: 2 collector arrays (east/west roof) – 1 storage tank with zone loading Systems with two storage tanks System 12: 1 collector array – 2 storage tanks – intelligent pump control System 13: 1 collector array – 2 storage tanks – heating return increase – intelligent pump control System 14: 1 collector array – 2 storage tanks – intelligent valve control System 15: 1 collector array – 2 storage tanks – heating return increase – intelligent valve control System 16: 1 collector array – 1 storage tank – 1 storage tank with external heat exchanger – intelligent pump control System 17: 1 collector array – 1 storage tank – 1 storage tank with external heat exchanger – intelligent valve control System 18: 1 collector array – 2 storage tanks with external heat exchanger – intelligent pump control System 19: 1 collector array – 2 storage tanks with external heat exchanger – intelligent valve control System 20: 2 collector arrays (east/west roof) – 2 storage tanks 22 727.775 | 08.10 7.2.2 EN System group 40 systems Chapter Systems with three storage tanks System 21: 1 collector array – 3 storage tanks – intelligent pump control System 22: 1 collector array – 3 storage tanks – intelligent valve control 7.2.3 Systems with a swimming pool System 23: 1 collector array – 1 swimming pool 7.2.4 System 24: 1 collector array – 1 swimming pool with external heat exchanger System 25: 1 collector array – 1 swimming pool in stand-alone operation with external heat exchanger System 26: 2 collector arrays (east/west roof) – 1 swimming pool System 27: 2 collector arrays (east/west roof) - 1 swimming pool with external heat exchanger System 28: 2 collector arrays (east/west roof) – 1 swimming pool in stand-alone operation with external heat exchanger Systems with one storage tank and a swimming pool 7.2.5 System 29: 1 collector array – 1 storage tank – 1 swimming pool with external heat exchanger – intelligent pump control System 30: 1 collector array – 1 storage tank – 1 swimming pool with external heat exchanger – intelligent valve control System 31: 1 collector array – 1 storage tank – 1 swimming pool in stand-alone operation with external heat exchanger – intelligent pump control System 32: 1 collector array – 1 storage tank – 1 swimming pool in stand-alone operation with external heat exchanger – intelligent valve control Systems with two System 33: 1 collector array – 2 storage tanks – 1 swimming pool 7.2.6 in stand-alone operation with external heat exchanger storage tanks and a – intelligent pump control swimming pool System 34: 1 collector array – 2 storage tanks – 1 swimming pool in stand-alone operation with external heat exchanger – intelligent valve control Seasonal systems System 35: 1 collector array – 1 storage tank – 1 swimming pool 7.2.7 with external heat exchanger – intelligent pump control System 36: 1 collector array – 1 storage tank – 1 swimming pool with external heat exchanger – intelligent valve control System 37: 1 collector array – 1 storage tank – 1 swimming pool in stand-alone operation with external heat exchanger – intelligent pump control System 38: 1 collector array – 1 storage tank – 1 swimming pool in stand-alone operation with external heat exchanger – intelligent valve control System 39: 1 collector array – 2 storage tanks – 1 swimming pool in stand-alone operation with external heat exchanger – intelligent pump control System 40: 1 collector array – 2 storage tanks – 1 swimming pool in stand-alone operation with external heat exchanger – intelligent valve control 727.775| 08.10 23 EN NOTE Upon selection of a new system, the functions, storage tank priority, and parameters are automatically returned to their factory settings. Check the settings again! >@ Selecting a system SET: press button for approx. 2 sec. : select the menu item "Systems". Display: 2 SET: open the submenu "System groups". [Systems] : select a system group. SET: press button to confirm. : selecting a system. SET: press button to confirm. In the display, a small checkmark appears below the item number, which confirms that the system is selected. ESC: exit the "Systems" menu item. Display example Display example 24 727.775 | 08.10 EN >@ System 1: 1 collector array – 1 storage tank Description of the solar function: the solar circuit pump R1 is switched on as soon as the switch-on temperature difference between the collector array A1 (T1) and the storage tank B1 (T2) is reached. When the switch-off temperature difference between the collector array A1 (T1) and the storage tank B1 (T2) or a safety limit is reached, the solar circuit pump R1 is switched off again. Display: 2.1 [Storage tank] Display: 2.1.1 7.2.1Systems with one storage tank Loading strategy of solar circuit pump R1: in the factory, temperature differential control is chosen as the loading strategy for the storage tank B1. It can be adjusted or changed to target temperature control using the "Parameters" menu (chapter 7.4 "Parameters"). Activating the system: see chapter 7.2 "Selecting a system". Terminal layout N R1 N N R2 n.c. L n.c. n.c. L D1 R1 R3 n.c. n.c. 1 2 3 4 5 6 X T2 L T1 N 230 V~ 115 V~ A1: collector array B1: storage tank D1: wire bridge R1: solar circuit pump T1: collector sensor T2: sensor at bottom of storage tank T1 B1 A1 T2 T2 R1 727.775| 08.10 25 EN System 2: 1 collector array – 1 storage tank – heating return increase Description of the solar function: the solar circuit pump R1 is switched on as soon as the switch-on temperature difference between the collector array A1 (T1) and the storage tank B1 (T2) is reached. When the switch-off temperature difference between the collector array A1 (T1) and the storage tank B1 (T2) or a safety limit is reached, the solar circuit pump R1 is switched off again. Display: 2.1.2 Description of the heating return increase: the 3-way valve R2 in the heating return is switched on (water flows through storage tank) as soon as the switch-on temperature difference between the storage tank B1 (T3) and the heating return (T4) is reached. When the switch-off temperature difference (T3 – T4) is reached, the 3-way valve R2 returns to its initial state. Water does not flow through the storage tank. NOTE When no voltage is on the system, the switching valve R2 must be set in such a manner that water does not flow through the storage tank. Loading strategy of solar circuit pump R1: in the factory, temperature differential control is chosen as the loading strategy for the storage tank B1. It can be adjusted or changed to target temperature control using the "Parameters" menu (chapter 7.4 "Parameters"). Activating the system: see chapter 7.2 "Selecting a system". R1 N L n.c. n.c. L R3 n.c. n.c. D1 R2 R1 230 V~ 115 V~ N R2 n.c. 1 2 3 4 T4 N 5 A1: collector array B1: storage tank D1: wire bridge R1: solar circuit pump R2: switching valve heating return increase T1: collector sensor T2: sensor at bottom of storage tank T3: heating return increase storage tank sensor T4: heating return sensor 6 X T2 L T1 N T3 Terminal layout T1 A1 B1 T3 T4 T2 R1 26 R2 727.775 | 08.10 EN Display: 2.1.3 System 3: 1 collector array – 1 storage tank with external heat exchanger Description of the solar function: the solar circuit pump R2 is switched on as soon as the switch-on temperature difference between the collector array A1 (T1) and the storage tank B1 (T2) is reached. When the switch-off temperature difference or a safety limit is reached, the solar circuit pump R2 switches off. The storage tank loading pump R1 is switched on as soon as the switch-on temperature difference between the external heat exchanger F1 (T3) and the storage tank B1 (T2) is reached. The storage tank is loaded until the switch-off temperature difference between the external heat exchanger F1 (T3) and the storage tank B1 (T2) is reached, or until a safety limit is reached. Loading strategy of storage tank loading pump R1 and solar circuit pump R2: in the factory, target temperature control is chosen as the loading strategy for the storage tank B1. It can be adjusted or changed using the "Parameters" menu (chapter 7.4 "Parameters"). Activating the system: see chapter 7.2 "Selecting a system". Terminal layout R1 N L n.c. n.c. L R3 n.c. n.c. D1 R2 R1 N R2 n.c. 1 2 3 4 5 6 X T3 N T1 L T2 N 230 V~ 115 V~ A1: collector array B1: storage tank D1: wire bridge F1: external heat exchanger R1: storage tank loading pump R2: solar circuit pump T1: collector sensor T2: sensor at bottom of storage tank T3: external heat exchanger sensor T1 A1 B1 F1 T3 T2 R2 727.775| 08.10 R1 27 EN System 4: 1 collector array – 1 storage tank with external heat exchanger – heating return increase Description of the solar function: the solar circuit pump R2 is switched on as soon as the switch-on temperature difference between the collector array A1 (T1) and the storage tank B1 (T2) is reached. When the switch-off temperature difference or a safety limit is reached, the solar circuit pump R2 switches off. The storage tank loading pump R1 is switched on as soon as the switch-on temperature difference between the external heat exchanger F1 (T4) and the storage tank B1 (T2) is reached. The storage tank is loaded until the switch-off temperature difference between the external heat exchanger F1 (T4) and the storage tank B1 (T2) is reached, or until a safety limit is reached. Display: 2.1.4 Description of the heating return increase: the 3-way valve R3 in the heating return is switched on (water flows through storage tank) as soon as the switch-on temperature difference between the storage tank B1 (T3) and the heating return (T5) is reached. When the switch-off temperature difference (T3 – T5) is reached, the 3-way valve R3 returns to its initial state. Water does not flow through the storage tank. NOTE When no voltage is on the system, the switching valve R3 must be set in such a manner that water does not flow through the storage tank. Loading strategy of storage tank loading pump R1 and solar circuit pump R2: in the factory, target temperature control is chosen as the loading strategy for the storage tank B1. It can be adjusted or changed using the "Parameters" menu (chapter 7.4 "Parameters"). Activating the system: see chapter 7.2 "Selecting a system". L n.c. n.c. L R3 n.c. n.c. R2 D1 R1 230 V~ 115 V~ N R2 n.c. 1 2 3 4 5 T4 N T5 R1 A1: collector array B1: storage tank D1: wire bridge F1: external heat exchanger R1: storage tank loading pump R2: solar circuit pump R3: heating return increase switching valve T1: collector sensor T2: sensor at bottom of storage tank T3: heating return increase storage tank sensor T4: external heat exchanger sensor T5: heating return sensor 6 X T2 N T1 L R3 N T3 Terminal layout T1 A1 B1 T3 F1 T4 T2 R2 28 R1 T5 R3 727.775 | 08.10 EN Display: 2.1.5 System 5: 1 collector array – 1 storage tank with zone loading Description of the solar function: the solar circuit pump R1 is switched on as soon as the switch-on temperature difference between the collector array A1 (T1) and the storage tank B1 (T2) is reached. When the switch-off temperature difference between the collector array A1 (T1) and the storage tank B1 (T2) or a safety limit is reached, the solar circuit pump R1 is switched off again. Description of the zone loading: the zone loading valve R2 is switched on (loading of the upper storage tank zone) as soon as the temperature difference between the collector array A1 (T1) and the upper loading zone (T3) has reached the switch-on temperature difference. When the switch-off temperature difference or a safety limit is reached, or the solar circuit pump R1 is switched off, the zone loading valve R2 switches off. NOTE When no voltage is on the system, the switching valve R2 must be set to the lower loading zone (T2). Loading strategy of solar circuit pump R1: in the factory, target temperature control is chosen as the loading strategy for the storage tank B1. It can be adjusted or changed using the "Parameters" menu (chapter 7.4 "Parameters"). Activating the system: see chapter 7.2 "Selecting a system". Terminal layout R1 N N R2 n.c. L n.c. n.c. L R2 D1 R1 R3 n.c. n.c. 1 2 3 4 5 6 X T2 N T3 L T1 N 230 V~ 115 V~ A1: collector array B1: storage tank D1: wire bridge R1: solar circuit pump R2: zone loading switching valve T1: collector sensor T2: sensor at bottom of storage tank T3: storage tank zone loading sensor T1 B1 A1 T3 R2 T2 R1 727.775| 08.10 29 EN System 6: 1 collector array – 1 storage tank with zone loading – heating return increase Description of the solar function: the solar circuit pump R1 is switched on as soon as the switch-on temperature difference between the collector array A1 (T1) and the storage tank B1 (T2) is reached. When the switch-off temperature difference between the collector array A1 (T1) and the storage tank B1 (T2) or a safety limit is reached, the solar circuit pump R1 is switched off again. Display: 2.1.6 Description of the zone loading: the zone loading valve R2 is switched on (loading of the upper storage tank zone) as soon as the temperature difference between the collector array A1 (T1) and the upper loading zone (T3) has reached the switch-on temperature difference. When the switchoff temperature difference or a safety limit is reached, or the solar circuit pump R1 is switched off, the zone loading valve R2 switches off. Description of the heating return increase: the 3-way valve R3 in the heating return is switched on (water flows through storage tank) as soon as the switch-on temperature difference between the storage tank B1 (T4) and the heating return (T5) is reached. When the switch-off temperature difference (T4 – T5) is reached, the 3-way valve R3 returns to its initial state. Water does not flow through the storage tank. NOTE When no voltage is on the system, the switching valve R2 must be set to the lower loading zone (T2). When no voltage is on the system, the switching valve R3 must be set in such a manner that water does not flow through the storage tank. Loading strategy of solar circuit pump R1: in the factory, target temperature control is chosen as the loading strategy for the storage tank B1. It can be adjusted or changed using the "Parameters" menu (chapter 7.4 "Parameters"). Activating the system: see chapter 7.2 "Selecting a system". L n.c. n.c. L R3 n.c. n.c. R2 D1 R1 230 V~ 115 V~ N R2 n.c. 1 2 4 5 T5 N 3 A1: collector array B1: storage tank D1: wire bridge R1: solar circuit pump R2: zone loading switching valve R3: heating return increase switching valve T1: collector sensor T2: sensor at bottom of storage tank T3: storage tank zone loading sensor T4: heating return increase storage tank sensor T5: heating return sensor 6 X T2 R1 T3 N T1 L R3 N T4 Terminal layout T1 B1 A1 T3 T4 R2 T2 R1 30 T5 R3 727.775 | 08.10 EN Display: 2.1.7 System 7: 1 collector array – 1 storage tank with zone loading and external heat exchanger Description of the solar function: the solar circuit pump R2 is switched on as soon as the switch-on temperature difference between the collector array A1 (T1) and the storage tank B1 (T2) is reached. When the switch-off temperature difference or a safety limit is reached, the solar circuit pump R2 switches off. The storage tank loading pump R1 is switched on as soon as the switch-on temperature difference between the external heat exchanger F1 (T4) and the storage tank B1 (T2) is reached. The storage tank is loaded until the switch-off temperature difference between the external heat exchanger F1 (T4) and the storage tank B1 (T2) is reached, or until a safety limit is reached. Description of the zone loading: the zone loading valve R3 is switched on (loading of the upper storage tank zone) as soon as the temperature difference between the external heat exchanger F1 (T4) and the upper loading zone (T3) has reached the switch-on temperature difference. When the switch-off temperature difference or a safety limit is reached, or the storage tank loading pump R1 is switched off, the zone loading valve R3 switches off. NOTE When no voltage is on the system, the switching valve R3 must be set to the lower loading zone (T2). Loading strategy of storage tank loading pump R1 and solar circuit pump R2: in the factory, target temperature control is chosen as the loading strategy for the storage tank B1. It can be adjusted or changed using the "Parameters" menu (chapter 7.4 "Parameters"). Activating the system: see chapter 7.2 "Selecting a system". N L n.c. n.c. L R3 n.c. n.c. 1 R2 2 3 4 5 6 X D1 R1 230 V~ 115 V~ N R2 n.c. T4 R1 T2 N T1 L R3 N T3 Terminal layout A1: collector array B1: storage tank D1: wire bridge F1: external heat exchanger R1: storage tank loading pump R2: solar circuit pump R3: zone loading switching valve T1: collector sensor T2: sensor at bottom of storage tank T3: storage tank zone loading sensor T4: external heat exchanger sensor T1 A1 B1 F1 T4 R3 T3 T2 R2 727.775| 08.10 R1 31 EN System 8: 2 collector arrays (east/west roof) – 1 storage tank Description of the solar function: when the switch-on temperature difference between the storage tank B1 (T3) and one or the other of the collector arrays A1, A2 (T1, T2) is reached, then either solar circuit pump R1 for collector array A1 (T1), or solar circuit pump R2 for collector array A2 (T2) is switched on, depending on where the temperature difference occurs. When the switch-on temperature difference is reached for both collector arrays A1, A2 (T1, T2), then both pumps R1, R2 are switched on. When the switch-off temperature difference between the collector array A1, A2 (T1, T2) and the storage tank B1 (T3) or a safety limit is reached, the solar circuit pumps R1, R2 are switched off again. Display: 2.1.8 Loading strategy of solar circuit pumps R1 and R2: in the factory, temperature differential control is chosen as the loading strategy for the storage tank B1. It can be adjusted or changed to target temperature control using the "Parameters" menu (chapter 7.4 "Parameters"). Activating the system: see chapter 7.2 "Selecting a system". Terminal layout R1 N L n.c. n.c. L R3 n.c. n.c. 1 2 3 4 5 A1: collector array 1 A2: collector array 2 B1: storage tank D1: wire bridge R1: solar circuit pump 1 R2: solar circuit pump 2 T1: collector sensor 1 T2: collector sensor 2 T3: sensor at bottom of storage tank 6 X D1 R2 R1 230 V~ 115 V~ N R2 n.c. T2 N T3 L T1 N T1 T2 A1 A2 B1 R1 R2 T3 T3 32 727.775 | 08.10 EN Display: 2.1.9 System 9: 2 collector arrays (east/west roof) – 1 storage tank – heating return increase Description of the solar function: when the switch-on temperature difference between the storage tank B1 (T3) and one or the other of the collector arrays A1, A2 (T1, T2) is reached, then either solar circuit pump R1 for collector array A1 (T1), or solar circuit pump R2 for collector array A2 (T2) is switched on, depending on where the temperature difference occurs. When the switch-on temperature difference is reached for both collector arrays A1, A2 (T1, T2), then both pumps R1, R2 are switched on. When the switch-off temperature difference between the collector array A1, A2 (T1, T2) and the storage tank B1 (T3) or a safety limit is reached, the solar circuit pumps R1, R2 are switched off again. Description of the heating return increase: the 3-way valve R3 in the heating return is switched on (water flows through storage tank) as soon as the switch-on temperature difference between the storage tank B1 (T4) and the heating return (T5) is reached. When the switch-off temperature difference (T4 – T5) is reached, the 3-way valve R3 returns to its initial state. Water does not flow through the storage tank. NOTE When no voltage is on the system, the switching valve R3 must be set in such a manner that water does not flow through the storage tank. Loading strategy of solar circuit pumps R1 and R2: in the factory, temperature differential control is chosen as the loading strategy for the storage tank B1. It can be adjusted or changed to target temperature control using the "Parameters" menu (chapter 7.4 "Parameters"). Activating the system: see chapter 7.2 "Selecting a system". N R2 n.c. L n.c. n.c. L R3 n.c. n.c. 1 R2 3 4 5 6 X D1 R1 2 T5 N T4 R1 T2 N T1 L R3 N 230 V~ 115 V~ A1: collector array 1 A2: collector array 2 B1: storage tank D1: wire bridge R1: solar circuit pump 1 R2: solar circuit pump 2 R3: heating return increase switching valve T1: collector sensor 1 T2: collector sensor 2 T3: sensor at bottom of storage tank T4: heating return increase storage tank sensor T5: heating return sensor T3 Terminal layout T1 T2 A1 A2 B1 T4 T2 T2 R1 R2 T3 T3 T5 R3 727.775| 08.10 33 EN System 10: 2 collector arrays (east/west roof) – 1 storage tank with external heat exchanger Description of the solar function: when the switch-on temperature difference between the storage tank B1 (T3) and one or the other of the collector arrays A1, A2 (T1, T2) is reached, then either solar circuit pump R1 for collector array A1 (T1), or solar circuit pump R3 for collector array A2 (T2) is switched on, depending on where the temperature difference occurs. When the switch-on temperature difference is reached for both collector arrays A1, A2 (T1, T2), then both pumps R2, R3 are switched on. When the switch-off temperature difference between the collector array A1, A2 (T1, T2) and the storage tank B1 (T3) or a safety limit is reached, the solar circuit pumps R2, R3 are switched off again. Display: 2.1.10 The storage tank loading pump R1 is switched on as soon as the switchon temperature difference between the external heat exchanger F1 (T4) and the storage tank B1 (T3) is reached. The storage tank is loaded until the switch-off temperature difference between the external heat exchanger F1 (T4) and the storage tank B1 (T3) is reached, or until a safety limit is reached. Loading strategy of storage tank loading pump R1 and solar circuit pump R2: in the factory, target temperature control is chosen as the loading strategy for the storage tank B1. It can be adjusted or changed using the "Parameters" menu (chapter 7.4 "Parameters"). Loading strategy of solar circuit pump R3: it is not possible to select whether temperature differential control or target temperature control is to be used as the loading strategy. Solar circuit pump R3 operates according to the switch-on and switch-off temperature difference parameter values. Activating the system: see chapter 7.2 "Selecting a system". N L n.c. n.c. L R3 R2 1 2 3 4 5 A1: collector array 1 A2: collector array 2 B1: storage tank D1: wire bridge F1: external heat exchanger R1: storage tank loading pump R2: solar circuit pump 1 R3: solar circuit pump 2 T1: collector sensor 1 T2: collector sensor 2 T3: sensor at bottom of storage tank T4: external heat exchanger sensor 6 X n.c. n.c. D1 R1 230 V~ 115 V~ N R2 n.c. T4 R1 T2 N T1 L R3 N T3 Terminal layout T1 T2 A1 A2 B1 T2 T2 R2 R3 F1 T4 T3 R1 34 727.775 | 08.10 EN Display: 2.1.11 System 11: 2 collector arrays (east/west roof) – 1 storage tank with zone loading Description of the solar function: when the switch-on temperature difference between the storage tank B1 (T3) and one or the other of the collector arrays A1, A2 (T1, T2) is reached, then either solar circuit pump R1 for collector array A1 (T1), or solar circuit pump R2 for collector array A2 (T2) is switched on, depending on where the temperature difference occurs. When the switch-on temperature difference is reached for both collector arrays A1, A2 (T1, T2), then both pumps R1, R2 are switched on. When the switch-off temperature difference between the collector array A1, A2 (T1, T2) and the storage tank B1 (T3) or a safety limit is reached, the solar circuit pumps R1, R2 are switched off again. Description of the zone loading: the zone loading valve R3 is switched on (loading of the upper storage tank zone) as soon as the temperature difference between the collector array A1, A2 (T1, T2) and the upper loading zone (T4) has reached the switch-on temperature difference. When the switch-off temperature difference or a safety limit is reached, or the solar circuit pump R1, R2 is switched off, the zone loading valve R3 switches off. NOTE When no voltage is on the system, the switching valve R3 must be set to the lower loading zone (T3). Loading strategy of solar circuit pumps R1 and R2: in the factory, target temperature control is chosen as the loading strategy for the storage tank B1. It can be adjusted or changed using the "Parameters" menu (chapter 7.4 "Parameters"). Activating the system: see chapter 7.2 "Selecting a system". N L n.c. n.c. L R3 n.c. n.c. R2 D1 R1 230 V~ 115 V~ N R2 n.c. 1 2 3 4 T4 R1 5 6 X T2 N T1 L R3 N T3 Terminal layout A1: collector array 1 A2: collector array 2 B1: storage tank D1: wire bridge R1: solar circuit pump 1 R2: solar circuit pump 2 R3: zone loading switching valve T1: collector sensor 1 T2: collector sensor 2 T3: sensor at bottom of storage tank T4: storage tank zone loading sensor T1 T2 A1 A2 B1 T2 T2 R1 T4 R2 T3 R3 T3 727.775| 08.10 35 EN 7.2.2System with two storage tanks System 12: 1 collector array – 2 storage tanks – intelligent pump control Description of the solar function: when the switch-on temperature difference between the collector array A1 (T1) and one of the two storage tanks B1, B2 (T2, T3) is reached, the appropriate solar circuit pump R1 or R2 is switched on. Both storage tanks B1, B2 are loaded one after the other, according to the priority control (chapter 7.5 "Storage tank priority"), until either the relevant switch-off temperature difference between the collector array A1 (T1) and storage tanks B1, B2 (T2, T3) is reached, or a safety limit is reached. Loading strategy of solar circuit pumps R1 and R2: in the factory, temperature differential control is chosen as the loading strategy for the storage tanks B1, B2. It can be adjusted or changed to target temperature control using the "Parameters" menu (chapter 7.4 "Parameters"). >@ Display: 2.2 [Storage tank] Display: 2.2.1 Activating the system: see chapter 7.2 "Selecting a system". Terminal layout R1 N L n.c. n.c. L R3 n.c. n.c. D1 R2 R1 230 V~ 115 V~ N R2 n.c. 1 2 3 4 5 6 A1: collector array B1: storage tank 1 B2: storage tank 2 D1: wire bridge R1: solar circuit pump 1 R2: solar circuit pump 2 T1: collector sensor T2: sensor at bottom of storage tank 1 T3: sensor at bottom of storage tank 2 X T2 N T3 L T1 N T1 B1 A1 B2 R1 R2 36 T2 T3 727.775 | 08.10 EN Display: 2.2.2 System 13: 1 collector array – 2 storage tanks – heating return increase – intelligent pump control Description of the solar function: when the switch-on temperature difference between the collector array A1 (T1) and one of the two storage tanks B1, B2 (T2, T3) is reached, the appropriate solar circuit pump R1 or R2 is switched on. Both storage tanks B1, B2 are loaded one after the other, according to the priority control (chapter 7.5 "Storage tank priority"), until either the relevant switch-off temperature difference between the collector array A1 (T1) and storage tanks B1, B2 (T2, T3) is reached, or a safety limit is reached. Description of the heating return increase: the 3-way valve R3 in the heating return is switched on (water flows through storage tank) as soon as the switch-on temperature difference between the storage tank B2 (T4) and the heating return (T5) is reached. When the switch-off temperature difference (T4 – T5) is reached, the 3-way valve R3 returns to its initial state. Water does not flow through the storage tank. NOTE When no voltage is on the system, the switching valve R3 must be set in such a manner that water does not flow through the storage tank. Loading strategy of solar circuit pumps R1 and R2: in the factory, temperature differential control is chosen as the loading strategy for the storage tanks B1, B2. It can be adjusted or changed to target temperature control using the "Parameters" menu (chapter 7.4 "Parameters"). Activating the system: see chapter 7.2 "Selecting a system". N R2 n.c. L n.c. n.c. L R3 n.c. n.c. R2 R1 D1 1 2 3 4 T4 N 5 6 X T5 R1 T3 N T1 L R3 N 230 V~ 115 V~ A1: collector array B1: storage tank 1 B2: storage tank 2 D1: wire bridge R1: solar circuit pump 1 R2: solar circuit pump 2 R3: heating return increase switching valve T1: collector sensor T2: sensor at bottom of storage tank 1 T3: sensor at bottom of storage tank 2 T4: heating return increase storage tank sensor T5: heating return sensor T2 Terminal layout T1 B1 A1 B2 R1 R2 T4 T2 T3 T5 R3 727.775| 08.10 37 EN System 14: 1 collector array – 2 storage tanks – intelligent valve control Description of the solar function: when the switch-on temperature difference between the collector array A1 (T1) and one of the two storage tanks B1, B2 (T2, T3) is exceeded, the solar circuit pump R1 is switched on and the switching valve R2 is set to the correct position depending on the storage tank to be loaded. Both storage tanks B1, B2 are loaded one after the other, according to the priority control (chapter 7.5 "Storage tank priority"), until either the relevant switch-off temperature difference between the collector array A1 (T1) and storage tanks B1, B2 (T2, T3) is reached, or a safety limit is reached. Display: 2.2.3 NOTE When no voltage is on the system, the switching valve R2 must be set to storage tank B1. Loading strategy of solar circuit pump R1: in the factory, temperature differential control is chosen as the loading strategy for the storage tanks B1, B2. It can be adjusted or changed to target temperature control using the "Parameters" menu (chapter 7.4 "Parameters"). Activating the system: see chapter 7.2 "Selecting a system". Terminal layout R1 N L n.c. n.c. L R3 n.c. n.c. D1 R2 R1 230 V~ 115 V~ N R2 n.c. 1 2 3 4 5 A1: collector array B1: storage tank 1 B2: storage tank 2 D1: wire bridge R1: solar circuit pump R2: switching valve T1: collector sensor T2: sensor at bottom of storage tank 1 T3: sensor at bottom of storage tank 2 6 X T2 N T3 L T1 N T1 B1 A1 B2 T2 R1 R2 T3 38 727.775 | 08.10 EN Display: 2.2.4 System 15: 1 collector array – 2 storage tanks – heating return increase – intelligent valve control Description of the solar function: when the switch-on temperature difference between the collector array A1 (T1) and one of the two storage tanks B1, B2 (T2, T3) is exceeded, the solar circuit pump R1 is switched on and the switching valve R2 is set to the correct position depending on the storage tank to be loaded. Both storage tanks B1, B2 are loaded one after the other, according to the priority control (chapter 7.5 "Storage tank priority"), until either the relevant switch-off temperature difference between the collector array A1 (T1) and storage tanks B1, B2 (T2, T3) is reached, or a safety limit is reached. Description of the heating return increase: the 3-way valve R3 in the heating return is switched on (water flows through storage tank) as soon as the switch-on temperature difference between the storage tank B2 (T4) and the heating return (T5) is reached. When the switch-off temperature difference (T4 – T5) is reached, the 3-way valve R3 returns to its initial state. Water does not flow through the storage tank. NOTE When no voltage is on the system, the switching valve R2 must be set to storage tank B1. When no voltage is on the system, the switching valve R3 must be set in such a manner that water does not flow through the storage tank. Loading strategy of solar circuit pump R1: in the factory, temperature differential control is chosen as the loading strategy for the storage tanks (1, 2). It can be adjusted or changed to target temperature control using the "Parameters" menu (chapter 7.4 "Parameters"). Activating the system: see chapter 7.2 "Selecting a system". Terminal layout N N R2 n.c. L R3 n.c. n.c. L n.c. n.c. 1 2 3 T2 R1 T3 4 5 6 X T5 R2 R1 D1 T4 N T1 L R3 N 230 V~ 115 V~ A1: collector array B1: storage tank 1 B2: storage tank 2 D1: wire bridge R1: solar circuit pump 1 R2: switching valve R3: heating return increase switching valve T1: collector sensor T2: sensor at bottom of storage tank 1 T3: sensor at bottom of storage tank 2 T4: heating return increase storage tank sensor T5: heating return sensor T1 B1 A1 B2 T4 T2 R1 R2 T3 T5 R3 727.775| 08.10 39 EN System 16: 1 collector array – 1 storage tank – 1 storage tank with external heat exchanger – intelligent pump control Description of the solar function: when the switch-on temperature difference between the collector array A1 (T1) and one of the two storage tanks B1, B2 (T2, T3) is reached, the appropriate solar circuit pump R2 or R3 is switched on. Both storage tanks B1, B2 are loaded one after the other, according to the priority control (chapter 7.5 "Storage tank priority"), until either the relevant switch-off temperature difference between the collector array A1 (T1) and storage tanks B1, B2 (T2, T3) is reached, or a safety limit is reached. Display: 2.2.5 The storage tank loading pump R1 is switched on as soon as the switchon temperature difference between the external heat exchanger F1 (T4) and the storage tank B2 (T3) is reached. The storage tank is loaded until the switch-off temperature difference between the external heat exchanger F1 (T4) and the storage tank B2 (T3) is reached, or until a safety limit is reached. Loading strategy of solar circuit pump R1: in the factory, target temperature control is chosen as the loading strategy for the storage tank B2. It can be adjusted or changed using the "Parameters" menu (chapter 7.4 "Parameters"). Loading strategy of solar circuit pump R2: in the factory, temperature differential control is chosen as the loading strategy for the storage tank B1. It can be adjusted or changed to target temperature control using the "Parameters" menu (chapter 7.4 "Parameters"). Loading strategy of solar circuit pump R3: it is not possible to select whether temperature differential control or target temperature control is to be used as the loading strategy. Solar circuit pump R3 operates according to the switch-on and switch-off temperature difference parameter values. Activating the system: see chapter 7.2 "Selecting a system". Terminal layout L n.c. n.c. L R3 n.c. n.c. R2 D1 R1 230 V~ 115 V~ N R2 n.c. 1 2 3 4 5 A1: collector array B1: storage tank 1 B2: storage tank 2 D1: wire bridge F1: external