1
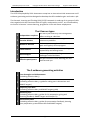
bksbLIVE ® PLTS & Employability Skills Assessment User Guide (Rev.1) PLTS & Employability Skills Assessment User Guide (for bksbLIVE) Published by bksb Limited i2 Centre Hamilton Court Hamilton Way Mansfield NG18 5FB www.bksb.co.uk Copyright © 2013 Vision West Notts College, Mansfield, Nottinghamshire. Trademarks: bksb and bksbLIVE are registered trademarks of bksb Limited and may not be used without written permission. All other trademarks are the property of their respective owners. bksb Limited is not associated with any product or vendor mentioned in this book LIMIT OF LIABILITY/DISCLAIMER OF WARRANTY: THE PUBLISHER AND THE AUTHOR MAKE NO REPRESENTATIONS OR WARRANTIES WITH RESPECT TO THE ACCURACY OR COMPLETENESS OF THE CONTENTS OF THIS WORK AND SPECIFICALLY DISCLAIM ALL WARRANTIES, INCLUDING WITHOUT LIMITATION WARRANTIES OF FITNESS FOR A PARTICULAR PURPOSE. NO WARRANTY MAY BE CREATED OR EXTENDED BY SALES OR PROMOTIONAL MATERIALS. THE ADVICE AND STRATEGIES CONTAINED HEREIN MAY NOT BE SUITABLE FOR EVERY SITUATION. THIS WORK IS SUPPLIED WITH THE UNDERSTANDING THAT THE PUBLISHER IS NOT ENGAGED IN RENDERING LEGAL, ACCOUNTING, OR OTHER PROFESSIONAL SERVICES. IF PROFESSIONAL ASSISTANCE IS REQUIRED, THE SERVICES OF A COMPETENT PROFESSIONAL PERSON SHOULD BE SOUGHT. NEITHER THE PUBLISHER NOR THE AUTHOR SHALL BE LIABLE FOR DAMAGES ARISING HEREFROM. THE FACT THAT AN ORGANIZATION OR WEBSITE IS REFERRED TO IN THIS WORK AS A CITATION AND/OR A POTENTIAL SOURCE OF FURTHER INFORMATION DOES NOT MEAN THAT THE AUTHOR OR THE PUBLISHER ENDORSES THE INFORMATION THE ORGANIZATION OR WEBSITE MAY PROVIDE OR RECOMMENDATIONS IT MAY MAKE. FURTHER, READERS SHOULD BE AWARE THAT INTERNET WEBSITES LISTED IN THIS WORK MAY HAVE CHANGED OR DISAPPEARED BETWEEN WHEN THIS WORK WAS WRITTEN AND WHEN IT IS READ. For general enquiries, sales or technical support, please telephone 01623 413333. bksbLIVE (PLTS) User Guide Copyright © 2013 Vision West Notts College Support: 01623 413333 Contents Introduction ..................................................................................... 2 Creating a desktop shortcut/add bksbLIVE to your favourites........ 4 Understanding user permissions ..................................................... 5 Logging in to bksbLIVE ..................................................................... 5 Overview of the student home page ............................................... 7 How to add a learner to bksbLIVE.................................................... 8 How to add a group to bksbLIVE .................................................... 14 Starting the PLTS Assessment ........................................................ 17 Overview of the assessment interface .......................................... 18 Menu Button .......................................................................... 18 Animation button ....................................................... 18 Styles button .............................................................. 18 Exit activity button ..................................................... 18 Close this menu button .............................................. 18 Progress bar............................................................................ 18 Back/Next button ................................................................... 18 General Information ...................................................................... 19 How long should a PLTS initial assessment take? .................. 19 Timeouts ................................................................................. 19 Error messages ....................................................................... 19 Incomplete PLTS assessments ................................................ 19 Directing a student to answer all questions .......................... 19 Printing the PLTS assessment results ..................................... 20 Returning back to the student home page ............................ 20 PLTS Assessment results page overview........................................ 20 Accessing the PLTS activities .......................................................... 21 Activity 1 – Your Strengths and Achievements ...................... 21 Activity 2 – Employability Skills .............................................. 22 Activity 3 – Improving your Role ............................................ 23 Activity 4 – Producing a CV..................................................... 24 Activity 5 – Presentation Skills ............................................... 25 How to review a learner’s progress ............................................... 27 Shortcuts to common tutor-related activities ............................... 29 [1] bksbLIVE (PLTS) User Guide Copyright © 2013 Vision West Notts College Support: 01623 413333 Introduction The PLTS & Employability Skills Assessment comprises an interactive initial assessment and 5 evidence-generating activities designed to develop the skills needed to gain and retain a job. The Personal, Learning and Thinking Skills (PLTS) framework is made up of six groups of skills that, together with the functional skills of English, mathematics and ICT, are considered key to success in learners’ current learning, progression in life and future employment. The 6 learner types 1 You like to plan and carry out investigations Independent enquirers before arriving at a decision. 2 Creative thinkers You think creatively and find imaginative solutions to problems. 3 Reflective learners You know your strengths and limitations, set goals and regularly review progress. 4 Team workers You work confidently with others, taking responsibility and solving issues. 5 Self-managers You are organised, responding to new challenges with enthusiasm. 6 Effective participators You get involved in issues affecting you and those around you. The 5 evidence-generating activities 1 Your Strengths and Achievements (including reflective diary) 2 Employability Skills (including reflective diary, a guide for taking part in discussions and SMART targets) 3 Improving Your Role (including reflective diary and SMART targets guide) 4 Producing a CV (including reflective diary, guides for CV preparation, giving and receiving feedback, SMART targets and sample CV) 5 Presentation Skills (including reflective diary, guides for presentation feedback, planning your preparation, presentation skills and SMART targets) [2] bksbLIVE (PLTS) User Guide Copyright © 2013 Vision West Notts College Support: 01623 413333 THE LEARNER PROCESS PLTS Initial Assessment The PLTS Initial Assessment has been designed to introduce the learners to the PLTS framework. A series of questions are posed regarding the 37 outcome statements. At the end of the assessment, the results page produces a bar chart showing the individual’s favoured learner type. The 5 evidence-generating activities Following the PLTS Initial Assessment, the learner completes the 5 activities, all of which are based around employability skills. Completion of these 5 individual and group activities will provide: • evidence of the completion of all 37 PLTS outcome statements • evidence for certain units within personal and social development and work skills courses • evidence for functional skills in speaking and listening • development of functional skills in writing • a resource for work placement preparation for diploma students Relevance for Functional Skills Activities 2 will provide evidence for functional skills in speaking and listening at E3/L1/L2, depending on the learner’s contribution to the discussions. Activity 4 covers the standards of functional skills in writing up to L1, depending on the sophistication of the learner’s completed work. Activity 5 will provide evidence for functional skills in speaking and listening at L1/L2, depending on the learner’s presentation skills. All 5 activities are very user-friendly, taking the learner through the process in easy steps. Information links are built in to fully support the learner such as: • • ‘Giving and Receiving Feedback’ ‘How to Prepare a CV’ At the end of each activity, the learner is directed to complete an interactive Reflective Diary in which they record their experiences. Appropriate prompts in the diary help them in this process. IMPORTANT: Reviewing the answers given by a learner Please note that all bksb assessments incorporate the facility for a tutor to review the answers provided by a learner. However, as the PLTS Assessment has no right or wrong answers, it is not useful to review the learner responses. [3] bksbLIVE (PLTS) User Guide Copyright © 2013 Vision West Notts College Support: 01623 413333 Creating a desktop shortcut/add bksbLIVE to your favourites To make it easy for you to access the bksbLIVE assessment platform, it is advised you create a desktop shortcut or browser favourite/bookmark. To create a desktop shortcut (using Internet Explorer) – type the web address provided into the address bar of your web browser and press return on the keyboard to load the bksbLIVE log-in page. Next, click on the icon to the left of the ‘http’ in the address bar with your mouse and drag it onto your desktop. Finally, right-click on the newly-created desktop icon, select ‘Rename’ from the drop-down menu and rename the shortcut to something like ‘bksbLIVE’. To add the log-in page to your web browser favourites – If using Internet Explorer as your preferred web browser, press Ctrl+D on your keyboard to launch the ‘Add a Favourite’ dialog box. Then simply amend the ‘Name’ field to suit your needs (such as ‘bksbLIVE’) and click the ‘Add’ button. The web address will now be saved to your favourites and is accessible via the relevant option in your browser. Note that the Apple Safari and Mozilla Firefox web browsers also support the Ctrl+D keyboard shortcut. Other web browsers may have alternative methods to saving a website to your favourites. Refer to the manual or on-line help for your particular web browser. [4] bksbLIVE (PLTS) User Guide Copyright © 2013 Vision West Notts College Support: 01623 413333 Understanding user Permissions When a user account is created, the user can be configured as an Administrator or Tutor or Student, or can be a combination of these such as Admin/Student, or Tutor/Student or the user can be all three. By default, all users of bksbLIVE have student access. Note that throughout this manual, the terms user, learner or student are interchangeable as any user of the bksbLIVE system is automatically granted student/learner access. Logging-in to bksbLIVE (for the first time) Step 1 - To log-in to bksbLIVE First open a web browser and in the address bar, type the web address supplied to you. Ensure that you use the correct web address assigned to you. Using a search engine to access a bksbLIVE log-in page will be fruitless as your user account details will only apply to your specific account. Step 2 - Log-in to your account On the log-in page, you will see two fields; in the left field, type your username, reference or student ID supplied to you. Note that this field is NOT case sensitive, therefore you can use upper or lower case characters. In the password field, type the password supplied to you. Please note that the password IS case sensitive. Step 3 - Confirm your account A dialog box will appear asking you to confirm this is your account. If the details are correct, select the ‘CONFIRM’ button. If the account is not yours, then select the link ‘This is not my account’ and check your log-in details are correct. [5] bksbLIVE (PLTS) User Guide Copyright © 2013 Vision West Notts College Support: 01623 413333 Step 4 – Change your password If the tick box ‘User must change password on first login’ was ticked when the account was originally created then, after confirming your account, another dialog box may appear asking you to change your password. The ‘old’ password was the one just used to log-in using Step 2. After completing all fields, click the ‘Change Password’ button. Step 5 - Register your e-mail address bksbLIVE incorporates a password and username recovery system should you forget your log-in details. It is highly recommended you enter an e-mail address as this will enable you to recover your log-in details without having to contact bksb support (or administrator if another administrator has been created for your account). If, when your account was created, an e-mail address was NOT entered into the password field, you will be given the option to add an e-mail address at this stage. To register an e-mail address, type an e-mail address into the email field and click the ‘Save email address’ button. If you do not wish to provide an e-mail address, select the hyperlink ‘click here’ to skip this section. If you choose not to enter an e-mail address, a final dialog box will appear warning you that you have chosen not to enter an e-mail address. To continue, select the ’OK’ button or select the ‘Cancel’ button if you would prefer to go back and enter an email address. A user can enter or amend their e-mail address at any time by clicking the ‘View Profile’ button on their student home page. [6] bksbLIVE (PLTS) User Guide Copyright © 2013 Vision West Notts College Support: 01623 413333 Overview of the student home page Once a user has logged in to bksbLIVE, they will always be taken to their student home page. From here, a learner can edit their profile, personalise their avatar, review and reprint past activities and they also access their course(s) from the ‘My Subjects’ section. This avatar can be personalised by the learner. A learner can edit their profile here. All activities undertaken by a learner are displayed here. A learner can edit their avatar here. The courses assigned to the student can be found under the ‘My Subjects’ section. To learn more about the features of the student home page, refer to the guide called bksbLIVE (Taking Assessments) which can be found on the Tutor home page. Guides available on the tutor home page include: bksbLIVE (Overview) bksbLIVE (Admin) bksbLIVE (Tutor) bksbLIVE (Taking Assessments) Additional product guides will be added as they become available. [7] bksbLIVE (PLTS) User Guide Copyright © 2013 Vision West Notts College Support: 01623 413333 How to add a learner to bksbLIVE After logging in as a tutor, select the ‘Add Learner’ tab. ‘Add Learner’ Tab not visible If the ‘Add Learner’ tab is not visible, this means an administrator has configured your bksbLIVE account so that all tutors are unable to set up learners on the system. To add a learner, please consult your administrator. IMPORTANT - READ ME! This product does not offer a group report but instead provides individualised learner results. However, if learners are enrolled on other bksb courses as well, it can be beneficial to add the learners to groups so that you can run group reports for the other courses. Start by creating a group, and then add your learners. ‘Groups’ play a key role in the management and reporting of progress within bksbLIVE. It is therefore very important that you consider setting up your groups FIRST, in advance of adding learners into the system. If you choose not to add a learner to a group, you cannot include that learner in any group reports. Note that you do not have to add a learner to a group during the process outlined below, and can easily add them to a group later. However, the task of managing your learners is very much simplified as they can be added to a group during the third stage of the following account creation process. To create a group, see the section ‘How to add a group to bksbLIVE’ in this guide. If your groups are already created, then you can ignore the alert above. To add a user to your bksbLIVE account comprises a 3-step process requiring Step 1) user details, Step 2) subject/course assignment and Step 3) group assignment. (A) (B) (C) (D) (E) (F) (G) (H) (I) (J) USERNAMES MUST BE UNIQUE! Ensure each learner is given a unique log-in username bksbLIVE relies upon all users of the system (be they an admin, tutor or a learner) being assigned a unique username which is not duplicated. [8] bksbLIVE (PLTS) User Guide Copyright © 2013 Vision West Notts College Support: 01623 413333 (A) Username This is the single most important piece of information when creating an account and it is vital that each student, tutor or administrator is given a UNIQUE identifier to ensure data integrity. Also, dependent upon your company data protection policies, to maintain compliance with the Data Protection Act (where a company must take all reasonable steps to ensure privacy of data), it may be necessary to assign a random code or other reference, rather than simply entering the student’s name and date of birth. (B) First Name Enter the First Name with no apostrophes, accent marks or other unusual characters (e.g. Amélie should be written Amelie without the accent). Note that hyphenated first names (such as Ella-Rose) ARE permissible. Apostrophes, accents and other non-alphanumeric characters in names can cause issues when running reports. (C) Last Name Enter the Last Name, with no apostrophes, accent marks or other unusual characters. (O’Sullivan should be written as OSullivan without the apostrophe). Note that hyphenated surnames (such as Carter-Brown) ARE permissible. Apostrophes, accents and other non-alphanumeric characters in names can cause issues when running reports. (D) Email Adding an e-mail address here serves two purposes. Typing an e-mail address here makes it possible for the student to recover their log-in details should they forget them. If, during the account activation, you have entered an e-mail address and also ticked the box titled ‘Email login details to the learner’, an email containing their log-in details and web address to access the bksbLIVE account will be dispatched to the student upon completion of account activation. A student can add an e-mail address later if necessary via their student home page after logging in. (E) Password By default, if this field is left blank AND the checkbox titled ‘user must change password at next login’ is ticked, then the user is given the generic password of ‘password’ (all lower case) and will be prompted to change it on first log-in. However, if you decide to give the user a specific password, enter the password AND un-tick the box titled ‘user must change password at next login’. Please [9] bksbLIVE (PLTS) User Guide Copyright © 2013 Vision West Notts College Support: 01623 413333 note that passwords are CASE SENSITIVE and should comprise only of alphanumeric characters such as A-Z; a-z or 0-9. (F) Email login details to the learner If, during account activation, you have entered an e-mail address and ticked the checkbox titled ‘Email login details to the learner’, an email with log-in details will be sent to the user upon completion of account activation. (G) D.O.B. This field is optional. If no date of birth is entered, it will default to 01-01-1900 (when the account is viewed by an administrator or tutor) but show ‘NA’ to the student on their home page. (H) User Type If you only have ‘tutor’ permissions assigned to your log-in, then you can only create student logins and do not have permissions to create additional administrators or tutors and the respective checkboxes will be inactive. If you DO have administrator AND tutor permissions, then the checkboxes WILL be active. Please note that when adding a set of tutors, followed by students and administrators, the system may remember the previous setting. For example, in a scenario where you have just added several tutors and are about to add several students, un-tick the tutor box to ensure you do not inadvertently give tutor access to those students. If you do give someone the wrong access rights, it can be easily corrected via the ‘Permissions’ tab when logged in as an administrator. (I) Additional Details In this section, you may see additional fields. Although it is not compulsory for these fields to be completed, these will have been created in order to capture additional user information which may make administration of your account easier. These extra fields are ‘Tags’, created by the administrator under the ‘Settings’ tab. (J) Next button Click the next button to continue with the user account creation. [10] bksbLIVE (PLTS) User Guide Copyright © 2013 Vision West Notts College Support: 01623 413333 Step 2 (of the Add Learner process) – Select Subjects Having entered the learner’s details and selected the ‘Next’ button, step 2 of the process (Select Subjects) is displayed. You are now presented with a screen spilt into two halves; the right-hand panel (‘Selected Subjects’) shows the DEFAULT courses assigned to all students, whereas in the left-hand panel (‘Subject List’) are displayed all of the software you license (including all variations) of the software. The DEFAULT subjects/course is configured by the administrator and will apply to all new learners added to the system. However, should you wish to assign a completely different suite of subjects/courses, these can be modified by logging in as a tutor, searching for the learner and manually amending their account. For more information, refer to the guide ‘bksb (Tutor)’ on the tutor home page. If you are happy with the default course for this learner, then select the ‘next’ button in the lower-right corner of the screen. If, however, you wish to add another subject to a particular learner’s course, simply scroll through the available subjects (in the left-hand panel) until you reach the subject you are looking for. Next, click on the green + symbol adjacent to the subject; the subject will be moved over to the right-hand panel and will now appear on the learner’s homepage when they next log in. If you add a subject in error, simply click on the red X symbol to remove that subject and it will return back to the left-hand panel. [11] bksbLIVE (PLTS) User Guide Copyright © 2013 Vision West Notts College Support: 01623 413333 Step 3 (of the Add Learner process) – Select Groups Once you have selected the ‘next’ button in the lower-right corner of the screen, a new screen (Step 3 – ‘Select Groups’) will be displayed. If at this point you have not created any groups, you may skip the next step and select the ‘done’ button in the bottom-right of the screen. By default, the ‘My Groups’ tab will be highlighted and any groups that were added to your ‘My Groups’ (when the group was created) will automatically appear on the right of the screen. If you do not have any groups assigned to your ‘My Groups’, then no groups will appear. Therefore, select the ‘Simple Group Search’ tab to reveal a search field called ‘Group Name’. Type the name of the group into the search field. You will note that as you type, options that match your search criteria will appear. In the example below, I have only typed the letter ‘m’ but the system has already identified all groups beginning with that letter. Typing more characters will narrow the search criteria further if necessary. Note that when a large number of groups are displayed, it will only show a fraction of the total number. Hyperlinks (1, 2, 3, 4, etc.) will appear underneath the search results to provide access to the remaining groups not displayed. [12] bksbLIVE (PLTS) User Guide Copyright © 2013 Vision West Notts College Support: 01623 413333 Once you have the group(s) displayed, you will note that to the right of each group name is a green + symbol. To add a user to a specific group, click on the green + symbol and the group’s name will be moved to the lower section of the screen called ‘Selected Groups’. Below, you can see that the learner has been added to a group called ‘Motor Vehicle 2012’. If you make a mistake, simply click on the red X on the far right of the screen. The group will be removed and returned back to the list of available groups. Once you have assigned the learner to a group(s), select the ‘Done’ button and you will be returned back to the ‘Add User’ screen. The learner’s account is now created and they can be directed to log in. Learners can belong to more than one group if necessary. Remember, when a learner is removed from a group, they are not lost but merely removed from that group. The learner still exists in the system and may (if assigned to another group) appear elsewhere in a different group. [13] bksbLIVE (PLTS) User Guide Copyright © 2013 Vision West Notts College Support: 01623 413333 How to add a group to bksbLIVE Groups become an important feature when you need to manage learners and run group reports. Although you are unable to run a group report for the PLTS Assessment (because the nature of the software makes it impractical to do so), if the learner has been assigned other software as well, it is strongly recommended you put your learners into groups at the earliest opportunity. IMPORTANT Note that in this section, you are learning to add groups on an individual basis. However, it is possible for administrators to add students (or other administrators/tutors) and groups en masse using the ‘Mass Upload’ tab which is available only to those with administrator permissions. (A) (B) (D) (C) (E) (A) Group ID – Type your group name here, using only alpha-numeric characters (A-Z; a-z; 0-9) and ensure that group names do not exceed 50 characters in length. Do not use apostrophes, the ampersand (&) symbol or accents in group names (e.g. ‘Ian’s Group’ or ‘C&G Hairdressing’) as this will cause problems when you try to run reports. In order to create a group, you only need to complete this field and then you may skip the other parts of the form if not required and click the ‘next’ button in the lower-right corner. (B) Description – If necessary, type a description of your group here. (C) Additional Details – In this section, you may see additional fields. Although it is not compulsory for these fields to be completed, these will have been created [14] bksbLIVE (PLTS) User Guide Copyright © 2013 Vision West Notts College Support: 01623 413333 in order to capture additional user information which may make administration of your account easier. These extra fields are ‘Tags’, created by the administrator. If a tag field exists, your administrator will be able to advise you regarding information to enter into this field. (D) Add this Group to ‘My Groups’ – My Groups are similar in concept to the favourites in your Internet web browser. If you have responsibility for a number of groups, it is very easy to add any group to your personal ‘My Groups’, then, when running reports, it is very easy for you to locate and run reports on those groups of most interest to you. Before discussing the tick box titled ‘Make this Group private’, I will continue with the process of creating a group and adding learners to the group. After adding a group name and possibly adding a description and selecting the ‘My Groups’ tick box, click on the ‘next’ button in the lower-right of the screen. In the next screen, you are now asked to select a learner(s) to add to this newly created group. If you have NO students currently in the system, or wish to add students later, simply skip the remainder of this section by selecting the ‘Done’ button in the lower-right of the screen. Alternatively, if you wish to now add students, continue reading below. Adding Learners to a Group The group is now ready to accept learners. If you wish to add a learner(s), simply search for the learner using their Username, First or Last Name. As you type, you will notice the lower-right pane changes to reflect the learners found in the search. To quickly show all learners, click in a field such as ‘User ID’ and press enter on your keyboard. - [15] bksbLIVE (PLTS) User Guide Copyright © 2013 Vision West Notts College Support: 01623 413333 Once the learner has been identified, select the green + symbol to the right of the learner’s details and they will be removed from the bottom-left pane to the upper pane, ready to be added to the group. If you make a mistake, simply click on the red x symbol to remove the learner from the upper-pane and return them back to the lower-right pane. Repeat this procedure for all learners you wish to add to the group and then select the ‘Done’ button in the bottom-right of the screen and a dialogue box will appear confirming the group creation. (E) Make this Group private – Under normal circumstances, when creating groups, you should leave them open to all tutors in case they need access to the learner data or for running reports. However, there may be occasions where you might need to keep certain learner results private, for example, you may work with ex-offenders and wish to maintain higher than normal levels of security; you may be assessing your own tutors as part of a plan to up-skill them and hence wish to ensure that tutors cannot see other tutors’ results; or you may be assessing your workforce and wish to keep managerial staff results private. In these instances, by selecting the checkbox titled ’Make this Group Private’, the system restricts access to the group to: You ALL administrators, and Any tutors who are given permissions by the administrator to also view the private group. If you select the tick the check box ‘Make this group private…’, a warning box will pop-up to alert you that unless you also add the group to your ‘My Groups’, you will not be able to access the private group. Selecting the ‘OK’ button will automatically enable the check box ‘Add this group to My Groups’. [16] bksbLIVE (PLTS) User Guide Copyright © 2013 Vision West Notts College Support: 01623 413333 Starting the PLTS Assessment On their student home page (in the ‘My Subjects’ area) the course(s) designated to the student by the tutor or administrator can be found. As the course in this example is defined as ‘PLTS’, the learner is directed to take the first element by selecting the hyperlink ‘Take the Initial Assessment’. After a brief moment, the assessment will appear on screen. Once loaded, the learner has access to a number of options such as the facility to change the background and font colours. Note that unlike our other assessments, there is no audio facility. [17] bksbLIVE (PLTS) User Guide Copyright © 2013 Vision West Notts College Support: 01623 413333 Overview of the assessment interface At the bottom of the assessment screen is the user interface. Please note: Unlike other assessments, there is NO audio facility for this assessment. (A) (B) (A) The ‘Menu’ button provides a sub-set of options to assist (C) (A) the student in configuring the assessments to suit their particular needs. Animation – Adjust speed of animation or turn on/off. Styles – Provides a range of options to suit individual needs and preferences, to adjust the colour of the background, fonts (but not size) and buttons. Exit Activity – Exits the assessment. Close This Menu – Closes the Menu. (B) Progress Bar – The progress bar is used to display the student’s progress through the assessment and will update after each question has been answered. Above the progress bar is the description of the current active assessment. Note: when taking certain assessments or resources (e.g. Initial Assessments), the assessment may be divided into segments and the user may notice the progress bar resetting to zero. This is normal and indicates that a segment has been completed. (C) Back / Next Buttons – Select the ‘NEXT’ button to move to the next question. Select the ‘BACK’ button to review answers to previous questions and amend if necessary. [18] bksbLIVE (PLTS) User Guide Copyright © 2013 Vision West Notts College Support: 01623 413333 General information How long should the PLTS Assessment take to complete? There is no specific time limit set for its completion, however it is expected that a student should be able to complete the assessment within 10 to 15 minutes. TIMEOUTS: The bksbLIVE server incorporates timeout limits and, if no activity occurs after a set period of time, the bksbLIVE server automatically logs the student out of the assessment. Students should therefore be encouraged to leave a question unanswered and move on to the next question if they are unable to answer it in a reasonable time frame. ERROR MESSAGES: bksbLIVE has been developed with rigorous error resilience built-in as standard to discourage errors from disrupting active assessments. In the unlikely event that an error message appears during the assessments, students should be instructed to exit their web browser, re-open it and log back in to their bksbLIVE account to continue their assessment. Incomplete PLTS Assessments Answers to each question are automatically registered as the student progresses through the assessment. If the user’s computer crashes, loses power, the student accidentally closes their web browser or the student opts to exit the initial assessment via the relevant option from the Menu bar, they can simply restart the computer and repeat the log-in procedure. Once logged back in to their student home page, they can select the assessment they wish to continue and a dialog box will appear, asking them to either a) continue from where they left off or b) restart from the beginning. Directing the student to answer all questions It is recommended that learners are directed to answer all questions as the assessment is not a test and there are no right or wrong answers. The responses provided by the learner are used to determine their favoured learner type. Completing the PLTS Assessment When the student has reached the end of the initial assessment, the screen (right) will be displayed. Students can view their results by clicking on the ‘Results ’ button at the bottom-right of the screen. [19] bksbLIVE (PLTS) User Guide Copyright © 2013 Vision West Notts College Support: 01623 413333 Printing the PLTS Assessment results page. In the far top-left of the results screen is a ‘Print’ button. Selecting this button will activate the print dialog function, allowing the student to print their results page. If the student opts to leave this page without printing their results, they can reprint any assessment result by selecting it in the ‘Activities’ panel on the student home page. Returning back to the student home page Returning back to the student home page can be achieved by clicking on the ‘Home’ button at the top-left of the results page. The assessment results will now be displayed in the ‘Activities’ panel. Reviewing their individual activities A student can review their activities within bksbLIVE via the ‘Activities’ panel displayed on their student home page. Selecting any assessment result within the panel will reveal the corresponding results page. Once displayed, this can be reprinted if necessary, by selecting the ‘Print’ button in the upper-left of the screen. PLTS Assessment Results Page - overview At the end of the PLTS Assessment, a (printable) report page is displayed containinig information such as: a) b) c) d) Name - The name of the person who took the assessment. Assessment taken - The name of the diagnostic assessment taken. Date of Assessment - The date on which the diagnostic assessment was taken. Time taken to complete - The time taken to complete the diagnostic assessment. e) Favoured learner type - The system generates a bar graph identifying the learner’s results together with a favoured learner type. [20] bksbLIVE (PLTS) User Guide Copyright © 2013 Vision West Notts College Support: 01623 413333 Accessing the PLTS Activities Having completed the PLTS Assessment, from their student home page a student can select the ‘view course’ button to reveal the ‘course progress screen’. On this screen, the assessment results and the links to the 5 main activities which the learner needs to undertake are displayed. Activity 1 – Your Strengths and Achievements This activity has two components, a section for the student to enter information regarding their two best strengths and two main achievements, and a diary section. The learner is offered guidance on how to complete the activity. The learner should complete both sections within the activity and select the ‘Save’ button. [21] bksbLIVE (PLTS) User Guide Copyright © 2013 Vision West Notts College Support: 01623 413333 The learner should then select the ‘Diary’ tab and enter their answers to the questions related to strengths and achievements in the relevant boxes. Once completed, a tutor can enter assessor comments to the diary and mark this activity as complete. See ‘How to review a learner’s progress’ for further information on how to mark off a learner’s work as completed. Activity 2 – Employability Skills This activity has two components, the first involves discussion in small groups to determine the essential skills that employers look for in an employee. A section is provided for the learner to enter a maximum of 8 skills or characteristics and guidance is provided on how to complete this activity. [22] bksbLIVE (PLTS) User Guide Copyright © 2013 Vision West Notts College Support: 01623 413333 The second component is a diary section for the learner to document their individual contributions and how they showed fairness and consideration during the discussions. To assist the learner, advice on taking part in discussions and a guide to setting SMART targets can be found under the ‘Guides’ tab. Once completed, a tutor can enter assessor comments to the diary and mark this activity as complete. See ‘How to review a learner’s progress’ for further information on how to mark off a learner’s work as completed. Activity 3 – Improving Your Role This activity comprises of an individual and group activity together with a diary section. The learner completes a short review (8 statements) of their job role. They should then pair up with a colleague and discuss their roles, sharing ideas and thoughts. Following their discussions, the learners should make any necessary changes to their respective roles. [23] bksbLIVE (PLTS) User Guide Copyright © 2013 Vision West Notts College Support: 01623 413333 After completing Activity 3, the learner should select the ‘Diary’ tab and use the three question prompts to reflect on the improving their role. Note that the third question refers to the use of SMART targets and a guide for this is included under the ‘Guides’ tab (as per the screenshot below). Once completed, a tutor can enter assessor comments to the diary and mark this activity as complete. See ‘How to review a learner’s progress’ for further information on how to mark off a learner’s work as completed. Activity 4 – Producing a CV This activity comprises of three elements; creation of a CV (using an on-screen template), discussion of the completed CV with a colleague and the giving/receiving feedback, and finally, the completion of a diary to reflect on the feedback process. Under the ‘Activity’ tab, the learner is given instructions and directed to select the ‘Guides’ tab to access materials on how to create a CV, an example CV, guidance on giving and receiving feedback and advice on the use of SMART targets. [24] bksbLIVE (PLTS) User Guide Copyright © 2013 Vision West Notts College Support: 01623 413333 After completing the activity section, the learner should team up with a colleague to discuss each other’s CVs and provide constructive feedback. Once completed, a tutor can enter assessor comments to the diary and mark this activity as complete. See ‘How to review a learner’s progress’ for further information on how to mark off a learner’s work as completed. Activity 5 – Presentation Skills This activity comprises of four elements; planning a presentation, the actual presentation, discussion of the completed presentation with a colleague and the giving/receiving feedback and the completion of a diary to reflect on the feedback process. Under the ‘Activity’ tab, the learner is provided with an on-screen presentation planning form to complete. To support this activity (and the feedback process), a number of documents are provided under the ‘Guides’ tab. [25] bksbLIVE (PLTS) User Guide Copyright © 2013 Vision West Notts College Support: 01623 413333 After completing the presentation, the learner can use the ‘Diary’ tab to reflect on the presentation, its content, delivery and how they may have done things differently. Once completed, a tutor can access the diary and leave comments before marking this activity as complete. See ‘How to review a learner’s progress’ for further information on how to mark off a learner’s work as completed. [26] bksbLIVE (PLTS) User Guide Copyright © 2013 Vision West Notts College Support: 01623 413333 How to review a learner’s progress After the learner has entered and saved their comments, a tutor can log in and enter ‘Assessor’ comments. Step 1 – A tutor should first login, then hover the mouse over their name and select ‘Tutor’ from the options available. Step 2 – If the learner’s name is not already displayed on screen, use the search bar to search for the learner. Step 3 – having located the learner, select their name and from the pop-up menu, select ‘Courses’. Step 4 –Select the ‘View Course’ button. The following screen shows a (cropped) version of the student’s course progress page. Displayed at the top of the screen are the learner’s achievements with regards to the PLTS Assessment. Below this is displayed the learner type graph, together with links to the 5 activities the learner should undertake. You will note that once a learner starts to complete a section, the section changes from ‘not attempted’ to a tick symbol and a ‘view’ hyperlink. Selecting the ‘view’ link will take you to the relevant activity from where you can add your own assessor comments. [27] bksbLIVE (PLTS) User Guide Copyright © 2013 Vision West Notts College Support: 01623 413333 Where a section has been fully completed by a learner and tutor, the tutor can select the hyperlink ‘mark as complete’ to signify the topic as finished. Once marked as complete, a tick in a red circle is placed in the activities panel to identify the activity as finished. Should a tutor wish to reverse their decision, they can select the hyperlink ‘remove mark complete’. From the learner’s perspective, a tick and circle are also placed against the activity to indicate it is completed. In addition, as the learner progresses through the activities, they will be demonstrating abilities that comprise the 37 outcomes of the PLTS requirements and these are displayed in a table on the course progress page. Again, the red circle around the tick indicates this activity has been marked as complete by a tutor You will also note the ticks under activity 2. This indicates this activity has been started but not yet marked as complete. Where a letter ‘N’ appears under an activity, this means the activity has not yet been started. [28] bksbLIVE (PLTS) User Guide Copyright © 2013 Vision West Notts College Support: 01623 413333 Shortcuts to common tutor-related activities If not already logged in as a tutor, hover the mouse over your name in the top-right of the screen and select ‘Tutor’ from the drop down list. Once logged in, you will be presented with a screen as per the example below. If you have any learners in a group saved in your ‘My Groups’, these learners will be automatically shown. Alternatively, you can use the unified search box to search for learners, groups and any available workbooks or resources. Once you have identified a learner, selecting their name will reveal a number of options. View/Edit Details – from here, a tutor can edit several pieces of information. These include the Username, First Name, Last Name, E-mail address, Password and Date of Birth. Courses – from here, a tutor can review the modules/courses assigned to a learner and can add or remove them as necessary. Change password – from here, a tutor can change/reset a learner’s password. Groups – from here, a tutor can review the group(s) the learner belongs to and either remove them from a group, or add them to additional groups. View Activities – from here, a tutor can review all of the learner’s activities, reprint a result of an assessment or review the answers provided by the student. Reports – from here, a tutor can run a selection of reports, however the full suite of reports can be accessed via the ‘Reports’ tab at the top of the tutor home page. [29] bksbLIVE (PLTS) User Guide Copyright © 2013 Vision West Notts College [30] Support: 01623 413333