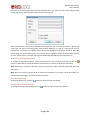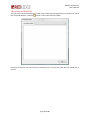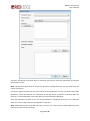
1
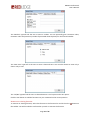
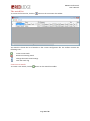
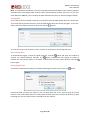
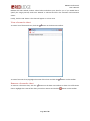
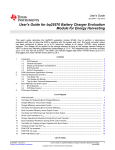
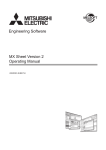
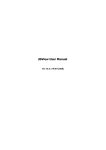
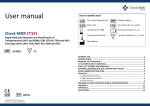
DBView Professional v1.0.8.0 User’s Manual DBView Professional User’s Manual Contents Installation .............................................................................................................................................. 5 Requirements...................................................................................................................................... 5 Installing DBView ................................................................................................................................ 5 Installing Outlook Support for DBView ............................................................................................... 5 Set up ...................................................................................................................................................... 6 Accessing the set up functions............................................................................................................ 6 The connection list .............................................................................................................................. 7 Create a new connection ................................................................................................................ 7 Remove an existing connection ...................................................................................................... 8 View the update log ........................................................................................................................ 8 Change the update log settings ...................................................................................................... 8 Change the configuration file.......................................................................................................... 9 Control access to the configuration file .......................................................................................... 9 The protected fields list .................................................................................................................... 11 The field values list............................................................................................................................ 12 The function list ................................................................................................................................ 13 Create a new function ................................................................................................................... 13 Using fields in a function ............................................................................................................... 15 Remove an existing function......................................................................................................... 16 The watch list .................................................................................................................................... 18 Create a new watch ...................................................................................................................... 18 Remove an existing watch ............................................................................................................ 20 Change the watch email settings .................................................................................................. 20 View the watch log........................................................................................................................ 20 Viewing data ......................................................................................................................................... 21 Opening a data view ......................................................................................................................... 21 The data view .................................................................................................................................... 22 Searching for data ......................................................................................................................... 23 Exporting data ............................................................................................................................... 23 Printing data.................................................................................................................................. 23 Emailing data................................................................................................................................. 23 Sorting data ................................................................................................................................... 24 Auto-refresh data.......................................................................................................................... 24 Page 2 of 35 DBView Professional User’s Manual Analysing the data......................................................................................................................... 24 View and use your search history ................................................................................................. 25 View and use your favourite searches .......................................................................................... 25 Save a favourite search ................................................................................................................. 26 Removing a favourite search ........................................................................................................ 26 Inserting a new record .................................................................................................................. 26 Copying an existing record to a new record ................................................................................. 26 Editing an existing record.............................................................................................................. 26 Removing an existing record......................................................................................................... 26 The watch list .................................................................................................................................... 27 Auto-refresh watches ................................................................................................................... 27 Charts .................................................................................................................................................... 28 Create a new chart ............................................................................................................................ 28 View a favourite chart....................................................................................................................... 29 Remove a favourite chart ................................................................................................................. 29 The chart view................................................................................................................................... 30 Adding a favourite chart ............................................................................................................... 30 Changing the y-axis range ............................................................................................................. 30 Exporting a chart ........................................................................................................................... 31 Printing a chart .............................................................................................................................. 31 Emailing a chart............................................................................................................................. 31 Auto-refresh a chart ...................................................................................................................... 31 Email watch status ................................................................................................................................ 32 Appendix A: Search criteria................................................................................................................... 33 Text fields .......................................................................................................................................... 33 Number and date time fields ............................................................................................................ 33 Boolean (Yes/No) fields..................................................................................................................... 33 Using AND and OR ............................................................................................................................ 34 Appendix B: Version history .................................................................................................................. 35 v1.0.8.0.............................................................................................................................................. 35 v1.0.7.0.............................................................................................................................................. 35 v1.0.6.0.............................................................................................................................................. 35 v1.0.5.0.............................................................................................................................................. 35 v1.0.4.0.............................................................................................................................................. 35 Page 3 of 35 DBView Professional User’s Manual v1.0.3.0.............................................................................................................................................. 35 v1.0.2.0.............................................................................................................................................. 35 v1.0.1.0.............................................................................................................................................. 35 v1.0.0.0.............................................................................................................................................. 35 Page 4 of 35 DBView Professional User’s Manual Installation Your installation media should contain 3 files: “setup.exe”, “DBView .NET Setup.msi” and “vstor.exe”. Requirements DBView requires the Microsoft .NET Framework v2.0 to be installed. It also requires Microsoft Outlook 2003 or later to send emails via Outlook. Installing DBView To install DBView run “setup.exe” and follow the on-screen instructions Installing Outlook Support for DBView To send emails from DBView via Outlook you must install Microsoft Visual Studio Tools for Office Second Edition Runtime. To do this run “vstor.exe” and follow the on-screen instructions. Page 5 of 35 DBView Professional User’s Manual Set up Accessing the set up functions From the menu screen, click the ‘Setup’ button to access the set up functions. This will show the connection list. Note: The ‘Setup’ button won’t be visible if you are not on the list of users permitted to access the setup functions on the current configuration file. See Control access to the configuration file. Note: You will be asked to enter a password if a password has been set on the configuration file. See Control access to the configuration file. Page 6 of 35 DBView Professional User’s Manual The connection list The connection list shows the list of connections in the current configuration file. The toolbar contains the following icons: Create a new connection Remove an existing connection Access the protected fields list Access the field values list Access the function list Access the watch list View the update log Change update log settings Use default configuration file Use remote configuration file Control access to set up functions Create a new connection To create a new connection, click the button on the connection list toolbar. Page 7 of 35 DBView Professional User’s Manual Fill in the server information and the server/authentication type. Fill in the user name and password if using SQL Server authentication. Then click the ‘Next’ button. Select the database, schema and table from the drop down lists. Give the connection a group and name (you can select an existing group from the drop down list, or type in a new group). Choose whether the connection can update and/or delete the database using the tick boxes (if the table chosen does not have a primary key, you won’t be able to update or delete from the table). Finally, click the ‘Finish’ button. The new connection will be saved and added to the connection list. Remove an existing connection To remove an existing connection, select the connection in the connection list and click on the button on the toolbar. You will be asked to confirm that you wish to remove the connection. Note: Removing a connection will also remove any functions and/or watches associated with that connection. Note: Once you confirm that you wish to remove the connection, the action cannot be undone. To add the connection again, see Create a new connection. View the update log To view the update log, click the button on the connection list toolbar. Change the update log settings To change the update log settings, click the button on the connection list toolbar. Page 8 of 35 DBView Professional User’s Manual You can choose to write the update log to a text file, MS SQL Server (2000 or 2005), or not to create an update log. Change the configuration file To use the default configuration file, stored in your windows user profile, click the button on the connection list toolbar. To use a different configuration file, click the button on the connection list toolbar. After you change the configuration file, the connection list will close. Note: Don’t forget that changing the configuration file will change the access settings to those of the new configuration file. Control access to the configuration file To control access to the current configuration file, click the Page 9 of 35 button on the connection list toolbar. DBView Professional User’s Manual To password protect the configuration file, enter a password in the box. If you want to limit access to the configuration file to certain windows users only, type the user names into the box and click the ‘Add’ button. Note: Your own user name is shown at the bottom of the form. Make sure your list of users contains your user name if you want to have permission to change the file in the future. Note: The user name is case-insensitive. Page 10 of 35 DBView Professional User’s Manual The protected fields list You can use the protected fields list to stop certain fields being changed during an update. To access the protected fields list, click the button on the connection list toolbar. Choose a connection name from the first drop down list, and tick the fields that you would like to protect. Page 11 of 35 DBView Professional User’s Manual The field values list You can use the field values list to create a list of predefined values for a given field. To access the field values list, click the button on the connection list toolbar. Choose a connection name from the first drop down list, and a field within that connection from the second. Use the ‘Add’ and ‘Remove’ buttons to create a list of predefined values for the field. Page 12 of 35 DBView Professional User’s Manual The function list To access the function list, click the button on the connection list toolbar. The function list shows the list of functions in the current configuration file. The toolbar contains the following icons: Create a new function Remove an existing function Create a new function To create a new function, click the button on the function list toolbar. Page 13 of 35 DBView Professional User’s Manual Choose a connection name with which to associate the function from the drop down list and give the function a name. Note: The function name must be unique for the entire configuration file, not only unique for the chosen connection. Choose the type of function you wish to create from the drop down list. You can choose either ‘SQL Statement’, which will execute the command on the SQL Server connection associated with the function, or ‘Shell Command’, which will shell (run) the command in Windows. Enter the command you wish to run. You can get DBView to substitute values into your command when it is run by using a field. See Using fields in a function. Note: Make sure that the command you enter is correct. If it is incorrect you could accidentally alter data that you don’t want to change. Page 14 of 35 DBView Professional User’s Manual If you want a user to confirm that they want to run the function when it is selected, enter a confirmation message. If you want to notify a user that the function has completed, enter a completion message. If you want to limit use of the function to certain windows users, type the user names into the box and click the ‘Add’ button. Note: User names are case-insensitive. Using fields in a function To add a field to your command, click the ‘Insert Field’ button. Select the type of field to wish to enter by selecting the appropriate tab across the top of the window. The ‘Data Field’ type will use the value of the selected field for the row that is selected when the function is run. The ‘String’ type will ask the user to enter a string (text). You can optionally give a maximum length of the string. Page 15 of 35 DBView Professional User’s Manual The ‘Number’ type will ask the user to enter a number. You can optionally give a minimum value, maximum value and precision (number of permitted decimal places) for the entered number. The ‘Date Time’ type will as the user to enter a date and time. You can also choose to enter only a date or only a time. The ‘Yes/No’ type will ask the user to choose between a ‘Yes’ option and a ‘No’ option. Click the ‘OK’ button to add the function into your command at the current position. Remove an existing function To remove an existing function, select the function in the function list and click on the the toolbar. You will be asked to confirm that you wish to remove the function. Page 16 of 35 button on DBView Professional User’s Manual Note: Once you confirm that you wish to remove the function, the action cannot be undone. To add the function again, see Create a new function. Page 17 of 35 DBView Professional User’s Manual The watch list To access the function list, click the button on the connection list toolbar. The watch list shows the list of watches in the current configuration file. The toolbar contains the following icons: Create a new watch Remove an existing watch Change the watch email settings View the watch log Create a new watch To create a new watch, click the button on the watch list toolbar. Page 18 of 35 DBView Professional User’s Manual Choose a connection name with which to associate the watch from the drop down list and give the watch a name. Note: The watch name must be unique for the entire configuration file, not only unique for the chosen connection. Choose the function you wish to use on the relevant field. You can choose from average, count, distinct count, max, min, std dev, sum, top and variance. You can choose a field in the table you wish to apply this function to in the drop down list, or type your own by ticking the ‘advanced’ checkbox. You can also type a combination of functions or apply scalar SQL functions, for example add two fields together or use a CASE statement. Note: The result must be a number. If you want to test a text field, use a CASE statement in the advanced field box. For example, to test whether a field named ‘type’ is equal to ‘example’, use the statement CASE WHEN type = ‘example’ THEN 1 ELSE 0 END and test whether the result is equal to 1. Page 19 of 35 DBView Professional User’s Manual You can specify search criteria by choosing a field from the drop down list and typing the search criteria into the box. The search criteria is in the same format as searching in a data view (see Appendix A). You can also type in your own criteria in SQL format by ticking the ‘advanced’ checkbox, for example to compare two different fields, use a SQL scalar function or use an OR operator. To add the search criteria to the list click on the ‘add to search criteria button’. Note: The watch will only use data that matches ALL of the search criteria. If you have selected the ‘top’ function, which uses the top result returned from the database, you can specify a field to order the data by, either ascending or descending, using the drop down lists. Choose the test you wish to apply to the result in the drop down list. You can choose from equal to, greater than, greater than or equal to, less than, less than or equal to or not equal to. Type a value to compare the result to in the value box. Enter the email addresses you would like to send email notifications to in the email box, separated by semicolon (;). Choose whether you would like to send email notifications when test condition is true and/or false by ticking the checkboxes. Click the ‘OK’ button to save the watch. Remove an existing watch To remove an existing watch, select the watch in the watch list and click on the toolbar. You will be asked to confirm that you wish to remove the watch. button on the Note: Once you confirm that you wish to remove the watch, the action cannot be undone. To add the watch again, see Create a new watch. Change the watch email settings To change the watch email settings, click the button on the watch list toolbar. Enter the SMTP server and port to use, and the email address from which to send emails. Click the ‘OK’ button to save your settings. Note: The default port number for an SMTP server is 25. View the watch log To view the watch log, click the button on the watch list toolbar. Page 20 of 35 DBView Professional User’s Manual Viewing data Opening a data view To access the data for a given connection, choose the group from the first drop down box and the connection name from the second. The data view will open. Page 21 of 35 DBView Professional User’s Manual The data view The data view allows you to use data retrieved from a connection. It consists of a search grid (in blue), a data grid (in white/yellow) and a box view. It also contains a toolbar. The toolbar contains the following icons: Start search Stop search Continue search Export data Print data Email data Sort data (server-side) Auto-refresh data Analyse data View favourite charts Create new chart View watch status Show/hide columns View search history View favourite searches Add current search as a favourite Remove current search from favourites Page 22 of 35 DBView Professional User’s Manual Move to first record Move to previous record Move to next record Move to last record Insert new record Copy current record to a new record Update current record Delete current record Accept changes Reject changes The toolbar also contains a drop down list to execute associated functions. Searching for data There are three ways to enter your search criteria. Enter any search criteria for each field by entering it into the blue box beneath the field name in the search grid. Double-click a cell in the data grid to copy its value to the search grid. If there are any predefined search criteria values for the field, you can select one from the drop down list that appears when you enter blue box for the field in the search grid. For more information on how to specify your search criteria, see Appendix A. Once you have entered the search criteria, click the button on the data view toolbar. You will see the number of records currently returned in the bottom-left corner of the data view. To stop the search and see the records currently returned, click the button. If you wish to continue your search, click the button. Note: The search will automatically stop once all records have been returned. Note: Clicking the button will continue the last search, even if you change the search criteria. To search using new search criteria, enter the new criteria into the search grid and click the Exporting data To export the currently retrieved records, click the export the data in the following formats: button. button on the data view toolbar. You can Comma separated values (csv) file: This format is best for importing into database applications. XML spreadsheet (xml) file: This format is best for opening in spreadsheet applications. HTML (html) file: This format is best for viewing and printing. Printing data To print the currently retrieved records, click the button on the data view toolbar. Emailing data To email the currently retrieved records, click the button on the data view toolbar. DBView will open a new message in Microsoft Outlook, and attach the table in HTML format. Page 23 of 35 DBView Professional User’s Manual Note: To email data from DBView, you must have Microsoft Outlook 2003 or later installed, together with Microsoft Visual Studio 2005 Tools for Office Second Edition Runtime (vstor.exe). If you can’t email data from DBView, you can export the data and attach the file to an email message manually. Sorting data To sort the currently retrieved records by a certain field, click the field header above the search grid. To sort the data in the other direction, click the field header above the search grid again. To sort the data at the server before the data is retrieved, click the button. You can sort by up to three fields in order, in either an ascending or descending direction. Auto-refresh data To automatically trigger a search at regular intervals, click the seconds you require between searches. The button and enter the number of button’s background will change to yellow to indicate the auto-refresh feature is activated. To deactivate the auto-refresh feature, click the button again. Analysing the data To perform a mathematical analysis of all data matching the search criteria, click the button. Choose the field you wish you analyse in the top drop down list. If you wish to group by a field, select it in the second drop down list. Finally select whether you want to analyse all the data, or data matching your current search criteria. Click OK to see the analysis. Page 24 of 35 DBView Professional User’s Manual View and use your search history DBView stores your most recent 20 searches in your search history. To see your search history, click the button on the data view toolbar. To re-run one of these searches, double-click on the appropriate line. View and use your favourite searches To view your favourite searches, click the button on the data view toolbar. Page 25 of 35 DBView Professional User’s Manual To re-run one of these searches, double-click on the appropriate line. Save a favourite search To save a favourite search, enter the search criteria into the search grid and click the the data view toolbar. You will have to enter a name for your search. button on Removing a favourite search To remove a favourite search, first run the search (see View and use your favourite searches). Click the button on the data view toolbar to remove the search from your list of favourite searches. Inserting a new record To insert a new record into the table, click the data into the box view. Click the button on the data view toolbar. Enter the new button on the data view toolbar to insert the new record, or the button to cancel. Note: To enter a null value, press Ctrl+0 while editing a box. Copying an existing record to a new record To copy an existing record to a new record, click the edit the data in the box view. Click the or the button on the data view toolbar. You can button on the data view toolbar to insert the new record, button to cancel. Note: Calculated fields, identities and rowguids will not be copied from the existing row, they will be regenerated for the new row. Note: To enter a null value, press Ctrl+0 while editing a box. Editing an existing record To edit an existing record, highlight the record you wish to edit and click the view toolbar. Edit the data in the box view. Click the changes to the record, or the button on the data button on the data view toolbar to save the button to cancel. Note: To enter a null value, press Ctrl+0 while editing a box. Removing an existing record To remove an existing record, highlight the record you wish to remove and click the the data view toolbar. You will be asked to confirm you wish to remove the record. button on Note: Once you confirm that you wish to remove the record, the action cannot be undone. To add the record again, see Inserting a new record. Page 26 of 35 DBView Professional User’s Manual The watch list To view the watch list, click the button on the data view toolbar. For each watch associated with the current connection, you will see a status of or (true), (false) (error). Auto-refresh watches To automatically refresh the status of the watches at regular intervals, click the button and enter the number of seconds you require between refreshes. The button’s background will change to yellow to indicate the auto-refresh feature is activated. To deactivate the auto-refresh feature, click the button again. Page 27 of 35 DBView Professional User’s Manual Charts Create a new chart To create a new chart, click the button on the data view toolbar. In the group by field, enter field you wish to use on the x-axis of the chart, and specify whether you wish to use all the data in the table or data matching the current search criteria. Then choose the field you wish to chart and the function you want to apply to that field. You can choose from count, distinct count, sum, min, max, average, std dev or variance. Note: You will only have the choice of count or distinct count for non-numeric fields. Choose a colour for the series by clicking the ‘Choose Colour’ button, and choose if the data points should be connected by setting the ‘Join Data Points’ checkbox. Finally, click the ‘Add to Chart’ button to add the series to the chart. You can add more series by choosing the chart field, function and colour again and clicking the ‘Add to Chart’ button again. To add a horizontal line to the chart, choose it’s y-axis value and colour, then click the ‘Add to Chart’ button in the ‘Horizontal Lines’ section of the screen. In the ‘Other Information’ section of the screen, fill in the labels for the x-axis and y-axis. If you would like DBView to calculate the range for the y-axis for you, make sure ‘Automatic’ is selected. Page 28 of 35 DBView Professional User’s Manual DBView will select whole number values below and above your data for you. If you would like to specify the range yourself, make sure ‘Manual’ is selected and fill in the minimum and maximum values. Finally, click the ‘OK’ button. The chart will appear in a chart view. View a favourite chart To view a list of favourite charts, click the button on the data view toolbar. To view a favourite chart, highlight the name of the chart and click the button on the toolbar. Remove a favourite chart To remove a favourite chart, click the button on the data view toolbar to show a list of favourite charts. Highlight the name of the chart you wish to remove and click the Page 29 of 35 button on the toolbar. DBView Professional User’s Manual The chart view The chart view toolbar contains the following icons: Add to favourite charts Change y-axis range Export chart Print chart Email chart Auto-refresh chart Adding a favourite chart To add a chart as a favourite chart, click the to enter a name for the chart. Changing the y-axis range To change the y-axis range, click the button on the chart view toolbar. You will be asked button on the chart view toolbar. If you would like DBView to calculate the range for the y-axis for you, make sure ‘Automatic’ is selected. DBView will select whole number values below and above your data for you. If you would like to specify the range yourself, make sure ‘Manual’ is selected and fill in the minimum and Page 30 of 35 DBView Professional User’s Manual maximum values. Click the ‘OK’ button to accept your changes. If the chart was loaded from a favourite chart, these changes are not saved to the favourite chart. Exporting a chart To export a chart, click the (bmp) format. Printing a chart To print a chart, click the button on the chart view toolbar. The chart is exported in bitmap button on the chart view toolbar. Emailing a chart To email the chart, click the button on the chart view toolbar. DBView will open a new message in Microsoft Outlook, and attach the chart in bitmap (bmp) format. Note: To email a chart from DBView, you must have Microsoft Outlook 2003 or later installed, together with Microsoft Visual Studio 2005 Tools for Office Second Edition Runtime (vstor.exe). If you can’t email a chart from DBView, you can export the chart and attach the file to an email message manually. Auto-refresh a chart To automatically redraw a chart at regular intervals, click the seconds you require between redraws. The button and enter the number of button’s background will change to yellow to indicate the auto-refresh feature is activated. To deactivate the auto-refresh feature, click the again. Page 31 of 35 button DBView Professional User’s Manual Email watch status To email the status of all watches according to their email settings, run DBView with the command line parameter /w, i.e. run DBView.exe /w Page 32 of 35 DBView Professional User’s Manual Appendix A: Search criteria Text fields To search for records with a text field equal to a value, enter that value in the search criteria. To search for records with a text field not equal to a value, enter that value in the search criteria preceded by an exclamation mark (!). To search for records with a text field having an empty or null value, enter a question mark (?) in the search criteria. The following wildcard characters are allowed as part of a value: o Text of any length – Use a asterisk (*) o Single character – Use an underscore (_) o Range of values – Use the range of values enclosed in square brackets (e.g. to search for a character from a to e, use [a-e]) Your search criteria cannot be more than 8000 characters in length. Note: The search criteria is case-insensitive. Number and date time fields To search for records with a number or date time field equal to a value, enter that value in the search criteria. To search for records with a number or date time less than or equal to a value, enter that value in the search criteria, preceded by a vertical bar (|). To search for records with a number or date time greater than or equal to a value, enter that value in the search criteria, followed by a vertical bar (|). To search for records with a number or date time within a range, enter the lower and upper limits of the range in the search criteria, separated by a vertical bar (|). To search for records with a number or date time field having a null value, enter a question mark (?) in the search criteria. To search for records with a number or date time field containing certain digits, you can use the following wildcards: o Any sequence of digits – Use a asterisk (*) o Single digit – Use an underscore (_) o Range of digits – Use the range of digits enclosed in square brackets (e.g. to search for a digit from 4 to 7, use [4-7]) Note: When searching for numbers using wildcard characters the decimal place is ignored and should be omitted from your search, e.g. both 1234.5 and 1.2345 would be a match for a search criteria of 123*. Boolean (Yes/No) fields To search for records with a Boolean field equal to true, enter T in the search criteria (you can also enter Y, True, Yes or 1). To search for records with a Boolean field equal to false, enter F in the search criteria (you can also enter N, False, No or 1). Page 33 of 35 DBView Professional User’s Manual To search for records with a Boolean field having a null value, enter a question mark (?) in the search criteria. Note: The search criteria is case-insensitive. Using AND and OR To search for multiple criteria on the same field, you can use the AND (&) and OR (/) characters. You can use brackets to enclose criteria, e.g. to search a text field to values containing the letter e and either the letters s or t, use the search criteria *e*&(*s*/*t*) Page 34 of 35 DBView Professional User’s Manual Appendix B: Version history v1.0.8.0 Added copy record functionality Added protected fields functionality Added main menu status bar v1.0.7.0 Fixed OR searches / ranged searches Notify when invalid search criteria is entered Offer to open exported files v1.0.6.0 Warn if printing or emailing a large amount of data (1000+ rows) Double-click a cell in the data grid to copy its value to the search bar AND and OR searching Added field values functionality Settings file in use is carried over to new versions v1.0.5.0 Fixed bug to allow field names to include spaces. v1.0.4.0 Changed format of date fields to include seconds. v1.0.3.0 Fixed bug when searching fields with a data type of ‘text’. As a result, search criteria cannot be more than 8000 characters in length. v1.0.2.0 Fixed bug when upgrading from v1.0.0.0 to v1.0.2.0. v1.0.1.0 Added version number to the menu screen. Can manually set the range of the y-axis for charts. Remove some x-axis labels for charts to prevent label overlap. History and favourite screens no longer stay open when running search. v1.0.0.0 Initial version. Page 35 of 35