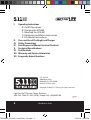
1
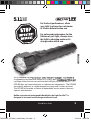
TAC59063_UC3400_UserGuide_510.indd 1
UC3.400 User Guide
For the best performance,
allow your light to charge for
a minimum of 4 hours before
routine use.
For enhanced performance for
the lifetime of your light, always
store the light in charging mode
on its charger when not in use.
5/10/10 4:38 PM
I.
II.
III.
IV.
V.
VI.
VII.
VII.
Operating Instructions
A. On/Off Operations
B. Charging the UC3.400
C. Mounting the UC3.400
D. Hardwiring Installation Instructions
E. AC Adapter Instructions
Care and Use of Flashlight and Charger
Safety Precautions
Safe Disposal of Waste Electrical Products
Technical Specifications
Certifications
Warranty and Service Information
Frequently Asked Questions
5.11 Tactical
4300 Spyres Way
Modesto, CA, USA, 95356
www.511Tactical.com
Copyright © 2010, 5.11 Tactical, All rights reserved
Light For Life™ Service Center Numbers:
USA Call: 1-888-511-4LFL (4535), Europe Call: +46 40 467 388
2
TAC59063_UC3400_UserGuide_510.indd 2
TAC59063
5.10
UC3.400 User Guide
5/10/10 4:38 PM
TAC59063
5.10
For enhanced performance for the
lifetime of your light, always store
the light in charging mode on its
charger when not in use.
ENGLISH
ed
For the best performance, allow
your light to charge for a minimum
of 4 hours before routine use.
Congratulations on your purchase of the UC3.400 Flashlight. The UC3.400 is
a rugged duty flashlight with unique technology. The revolutionary 90 second
recharge allows the user to maximize the flashlights incredible features. The
UC3.400 does not require batteries or replacement components. The UC3.400
consistently performs in a wide temperature range and is water resistant.
The UC3.400 will provide a lifetime of dependable service even in the most
rigorous environments.
Unlike conventional rechargeable flashlights, the Light For Life™ is
designed to be stored on the charger when not in use.
TAC59063_UC3400_UserGuide_510.indd 3
UC3.400 User Guide
3
5/10/10 4:38 PM
I. Operating Instructions
A. On/Off Operations
ENGLISH
The UC3.400 flashlight is operated with a multi-function button.
There are multiple modes of operation with the UC3.400. You may activate the
various modes by pressing the button (I/O) on the flashlight.
Peak – 270 lumens
Standard – 90 lumens
Low Light – 20 lumens
Strobe – 170 lumens
Ramp – 20 to 270 lumens
There are also three different configurations for the button depending on the
type of flashlight purchased. The three different configurations are identified
as P1, P2, and P3.
P1:
1. Peak - from any mode, hold down button and keep it down, release button
and revert to previous mode.
2. Standard - single click.
3. Strobe - double click.
P2:
1. Peak – single click.
2. Ramp – hold button down and keep it down and light will steadily increase
in brightness, release button for desired brightness.
3. Strobe – double click.
P3:
1. Peak – from any mode, hold down button, release button from any mode
4
TAC59063_UC3400_UserGuide_510.indd 4
UC3.400 User Guide
5/10/10 4:38 PM
and flashlight turns off.
2. Standard – single click.
3. Low Light – double click.
Click once from any mode to turn flashlight off.
B. Charging the UC3.400
ENGLISH
The recharging of the UC3.400
flashlight is a simple process of
inserting the flashlight into the
charging unit until it ”snaps” into
place. The blue LED indicator
light on top of the charging unit
will display the recharge cycle
performance. Unlike conventional
flashlights, the Light for Life is designed to be stored in the charger when not
in use, and in no way shortens or negatively affects its run-time or use.
For optimum performance of your UC3.400 flashlight, please:
• Charge the UC3.400 flashlight for 4 hours before routine use.
• Store the UC3.400 flashlight on the charger when not in use.”
The UC3.400 flashlight can be used immediately out of the box using the
standard 90-second charge, however before routine use charge it for 4
hours. The UC3.400 flashlight is designed to be placed on the charger and
stored, while plugged-in, indefinitely with no performance degradation.
In fact, leaving the UC3.400 flashlight stored on its charger will help maintain
its maximum performance. In addition, the charging unit uses very little
battery power once it has completed its charge cycle and the blue light stops
flashing.
TAC59063_UC3400_UserGuide_510.indd 5
UC3.400 User Guide
5
5/10/10 4:38 PM
The low power consumption of the charger will NOT drain your
car’s battery when leaving the flashlight stored in the charger and
connected through the DC plug.
To Charge:
ENGLISH
Insert the tail end (with gold rings) of the UC3.400 flashlight into the charger
unit until it “snaps” into place. Once inserted, the flashlight will immediately
begin its 90 second charge cycle.
The status of the charge is indicated by the blue LED on the charger. The
LED will begin with a slow steady blink and increase its speed until it reaches
a steady illumination at the end of the cycle. This steady blue light indicates
the UC3.400 is fully charged and ready for use.
After the initial charge cycle, there may be brief periods of additional LED
activity. This is perfectly normal as it indicates the ongoing maintenance
of the energy stored in the capacitors. Our FlashPoint® Power Technology
constantly monitors the level of power available in the unit to ensure that
your flashlight is always fully charged and ready for peak performance.
Note: High Temperature Charging
Your flashlight charger has automatic temperature overload protection.
Charging in high temperatures (i.e, 120 degrees Fahrenheit or more) may
temporarily reduce the flashlight runtime slightly.
C. Mounting your Flashlight (Automotive Mounting)
1. Select suitable location for mounting, e.g. the transmission “hump”.
2. Using the attached template, mark and drill 4 – ¼” holes.
3. Secure the back bracket to the mounting location using the screws
provided.
6
TAC59063_UC3400_UserGuide_510.indd 6
UC3.400 User Guide
5/10/10 4:38 PM
ENGLISH
4.Turn the power cord so that it points downward.
5.Remove the flashlight from the charger.
6.Clip the flashlight charger to the mounting bracket by sliding it
upward and toward the mount wall. (Figure 1) Make sure to push
the base of the charger back until the securing tabs click into
place.
7.The charger can be removed from the bracket by inserting a
standard screwdriver blade at the base of the unit and prying the
metal bracket away from the bottom of the charger.
8.Insert the plug into the vehicle’s cigarette lighter or 12V accessory
outlet.
9.The cigarette lighter plug contains a mandatory fuse and ensures
proper polarity with the vehicle’s electrical system. Please
follow the recommended hardwiring installation instructions if
permanently installing the charger in a vehicle. See details below.
D. Hardwiring Installation Instructions
The Light For Life™ charging unit is a sophisticated power management
device. When actively charging the flashlight, there are periods of
moderate current consumption throughout the 90 sec recharge cycle.
In order to ensure reliable operation, all of the connections from the
charger to the vehicle’s 12 volt power source must be solid, secure, and
perform with very low resistance.
Any modification to the charger’s power cord or cigarette plug connector
should be proposed by an engineer well versed in automotive power
distribution systems and their effect on peripheral equipment.
CAUTION: ONLY QUALIFIED SERVICE TECHNICIANS SHOULD
ATTEMPT TO “HARDWIRE” OR PERMANENTLY MOUNT THE
CHARGER UNIT INTO A VEHICLE’S ELECTRICAL SYSTEM
TAC59063_UC3400_UserGuide_510.indd 7
UC3.400 User Guide
7
5/10/10 4:38 PM
The existing cigarette plug connector contains an 8 amp “fast blow” fuse
that must be replaced with an equivalent value if it is ever removed from
the charger’s power cord.
All wire runs should be short as possible and use 14AWG wire.
ENGLISH
All wire terminations should be crimped using only recommended tools
AND SOLDERED to minimize resistance.
• Do not splice into existing ground or power wires.
• Do not share crimp connectors with any other electrical device.
• Do not use multiple butt connectors on a single run of wire.
• The charger positive wire should exist on its own fuse.
• Do not share power with other devices.
Please contact the service team of 5.11 Tactical® at (866) 451-1726 in the
U.S. and Internationally at +46 40 467 388 or an authorized distributor for
authorized hardwire installation procedures and components.
E. AC Adapter Instructions
The 5.11 AC adapter converts the AC power in your home or office to a
direct current (DC) power source required by your Light For LifeTM charging unit. It replaces the 12 Volt DC power that is used when the charger is
connected to the DC outlet or cigarette lighter outlet in your vehicle.
Set Up Instructions
1. Remove the AC power cord from the box and insert the small end of
the dual line cord into the female receptacle on the adapter.
2. Insert the large end of the line cord into your AC power source or
wall outlet.
3. Connect the large female “cigarette plug” on the adapter to the
male plug attached to the flashlight charger.
8
TAC59063_UC3400_UserGuide_510.indd 8
UC3.400 User Guide
5/10/10 4:38 PM
On/Off Operations
The 5.11 AC adapter does not contain a separate on/off switch and will be
fully energized and operational as soon as it is plugged into an AC power
source. You must unplug the AC power cord in order to turn the adapter
off.
II. Care and Use of Flashlight and Charger
ENGLISH
1. Although the flashlight is designed to be water resistant, do not
submerge it in water.
2. Prevent the charger from prolonged or extensive exposure to water.
A wet flashlight from the rain may be placed in the charger, but the
charger needs to be installed in a dry environment.
3. For optimal efficiency it is necessary to periodically inspect and
provide preventative maintenance on the UC3.400 flashlight. If at
any time the light becomes soiled, clean with a soft cloth and mild
detergent.
4. For lens cleaning, use a gentle camera lens cleaner and lens cloth.
Rub gently to remove any fingerprints on the lens.
5. It is imperative that chemicals and harsh abrasives NOT be used.
6. This flashlight is not suitable for use in high pressure environments.
7. DO NOT dismantle flashlight when cleaning.
8. Keep the charging contact holes free of debris.
9. Keep foreign objects out of the charger base.
III. Safety Precautions
DANGER
DO NOT REACH INTO WATER TO RETRIEVE THE CHARGER UNIT OR
ADAPTER IF IT IS STILL PLUGGED IN.
TAC59063_UC3400_UserGuide_510.indd 9
UC3.400 User Guide
9
5/10/10 4:38 PM
WARNING
To reduce the risk of product malfunction and personal injury due to shock
or burns, do not expose the charger unit or adapter to water, liquid, or
excessive condensation.
WARNING
If the charging unit or adapter is saturated by water, liquid, or excessive
condensation, unplug the unit immediately and allow it to dry completely
before plugging it back in and resuming charging.
ENGLISH
CAUTION
The UC3.400 flashlight is not classified as intrinsically safe, meaning it is not
approved for use in hazardous atmospheres. It is important that the UC3.400
flashlight not be used in areas requiring explosion proof lighting.
CAUTION
Make sure the charger unit or adapter is disconnected from any other power
sources when performing any routine cleaning or maintenance. Do not try to
repair the unit, charger or adapter. In case of problems or questions, please
contact the service team of 5.11 Tactical at (866) 451-1726 in the U.S. and
Internationally at +46 40 467 388 or an authorized distributor.
CAUTION
To avoid the risk of fire, electrical shock, or personal injury caused by
improper handling of the charger, do not attempt to use the charger unit to
charge any other flashlight or rechargeable device. Do not use any other
brand of charger with the UC3.400 flashlight.
CAUTION
Do not shine the flashlight directly into the eyes as this may cause severe
damage to eyesight.
10
TAC59063_UC3400_UserGuide_510.indd 10
UC3.400 User Guide
5/10/10 4:38 PM
CAUTION
Although the UC3.400 Flashlight is designed to be splash-proof, full
submersion of the flashlight is not recommended. All use not in conformance
with instructions will void warranty.
CAUTION
Do not attempt to service the flashlight, adapter or charger unit in any way.
Do not insert metal objects into the charger unit or flashlight contact holes;
doing so could result in personal harm or injury and permanent damage to
the unit. All use not in conformance with instructions will void warranty.
CAUTION
V. Safe Disposal of Waste Electrical Products
ENGLISH
In rare instances, radios broadcasting in close proximity to the flashlight may
cause electromagnetic interference with the functionality of the light. If you
experience this, please call 5.11 Tactical at 1-888-511-4LFL (4535) in the U.S.
and +46 40 467 388 in Europe.
If at any time in the future you should need to dispose of this product or any
part of this product, please note that waste electrical products should not be
disposed of with household waste. Please recycle where facilities exist and
check with your local authority for disposal and recycling advice.
VI. Technical Specifications
Product Code: Standard Output:
Peak Output:
Reserve Output:
Strobe:
Low Light:
Ramp: UC3.400
90 lumens (60 min runtime)
270 lumens (15 min runtime)
20 lumens (60 min runtime)
170 lumens (210 min runtime)
20 lumens (300 min runtime)
20-270 lumens (variable runtime)
TAC59063_UC3400_UserGuide_510.indd 11
UC3.400 User Guide
11
5/10/10 4:38 PM
ENGLISH
Ideal Operating
Temperature:
Charge Time: Energy Storage: Capacitor Life: Recharge Life: Fuse Rating: Product Weight: Flashlight Length: Barrel Diameter:
Box Dimensions: -20º C to +40º C
Approx 90 Seconds
Non-Replaceable
500,000 Charges
50,000 Charges
8 Amps
Approx 16oz.
Approx 11.5” length
1.75”
Approx 13” long by 8” wide by 3.75” deep
Product Code: Standard Output:
Input:
Ideal Operating Temperature: AC Adapter
12 VDC @ 5 A, 65W
100-240 VAC 50/60 Hz @ 1.8A
0ºC to +40ºC
VII. Certifications
Conforms to: UL Std. 2089 and UL/ANSI Std. 60950-1
Certified to: CAN/CSA Std. C22.2 60950-1
VIII. Warranty
5.11 Light For Life™ Limited Warranty
5.11, Inc. (“5.11”) warrants each Light for Life™ product (“Product”)
sold by 5.11 or its authorized dealers to be free of defects in materials or
workmanship for as long as you own the Product, or for the maximum period
allowed by the laws of your jurisdiction, if less. Please note, however, that
12
TAC59063_UC3400_UserGuide_510.indd 12
UC3.400 User Guide
5/10/10 4:38 PM
5.11 warrants the chargers for Light for Life™ products for a period of one
year from the date of purchase, but the chargers are otherwise subject to the
same terms and conditions of this warranty.
Exclusions from Coverage
Excluded from coverage under this warranty are the following:
Products purchased other than from 5.11 or from an authorized
5.11 dealer.
Damage resulting from abuse or misuse.
Damage resulting from extended wear and tear.
Damage resulting from tampering or a customer modification.
Damage resulting from exposure to a caustic substance.
Consequential, incidental, indirect, punitive, exemplary, and/or special
damages (although some states in the United States do not allow the
exclusion or limitation of consequential or incidental damages, so this
exclusion might not apply to you).
ENGLISH
•
•
•
•
•
•
THIS WARRANTY IS THE EXCLUSIVE WARRANTY PROVIDED BY 5.11
RELATING TO THE PRODUCT AND, TO THE MAXIMUM EXTENT PERMITTED
BY LAW, 5.11 DISCLAIMS ALL OTHER EXPRESS OR IMPLIED WARRANTIES.
What You Will Need to Do
To return a defective Product for warranty service, please take the following
steps:
• For flashlight technical support or repairs, please go to the 5.11 Light
for Life FAQ section at www.511Tactical.com/lightforlife for locations
and additional information regarding authorized repair centers near
you.
• You may also contact one of our technical support/repair
representatives at the following:
TAC59063_UC3400_UserGuide_510.indd 13
UC3.400 User Guide
13
5/10/10 4:38 PM
USA: 1.888.511.4LFL (4535) or [email protected]
International: +46 40230080 or [email protected]
• Please ship the Product freight prepaid and insured (5.11 assumes no
responsibility for Products during shipment from the customer to our
Warranty Department and shipping charges are not refundable).
If 5.11 determines that the Product is defective, 5.11 will either replace the
Product or repair the Product. All determinations made by 5.11 will be within
5.11’s sole discretion and will be final.
ENGLISH
All returns by 5.11 in the United States will be sent using ground shipping;
shipments being returned to a P.O. Box will be made using U.S. Mail. All
returns to international customers will be sent using standard shipping.
State and International Laws
This warranty gives you specific legal rights, and you may also have other
rights which vary from state to state in the United States and in other
countries.
VIII. Frequently Asked Questions
Q: Why doesn’t my flashlight seem to hold the charge as stated?
Q: Why doesn’t my flashlight have the run time as stated brochure?
Q: Why won’t my flashlight go into “high” mode?
Q: Why is the blue light on the charger only blinking slowly?
A: For best results, it is recommended that the flashlight’s first charge cycle
be for 24 hours. Once this first charge cycle is complete, the flashlight will
perform at its optimum level. It is also recommended for the flashlight to
be periodically placed on the charger for 1 hour. The flashlight maintains
optimum performance when left on the charger when not in use.
14
TAC59063_UC3400_UserGuide_510.indd 14
UC3.400 User Guide
5/10/10 4:38 PM
Q: Why won’t my 12-volt AC adapter work with my charger?
A: Please ensure that your 12-volt AC adapter is rated for a minimum of 7
amps. Many typical AC adapters have ratings of less than 7 amps. Please
see the 5.11 website or contact our customer service team at +1.866.451.1726
to purchase a 5.11 AC adapter.
Q: Why won’t my flashlight charge when my vehicle is not running?
A: Some vehicles are designed to disable the power to the cigarette plug
connector when the ignition is turned off. It is recommended that your
vehicle is started during the 90 second recharge cycle for the flashlight. This
light maintains optimum performance when left on the charger when not in
use.
A: The flashlight maintains optimum performance when left on the charger
when not in use. The flashlight may stay in the charger indefinitely with no
change in longevity.
ENGLISH
Q: May I leave the flashlight on the charger when not in use? Would
this cause any problems with the longevity of the capacitors’ charging
capabilities?
Q: How long does it take for my flashlight to recharge?
A: The flashlight only takes 90 seconds to recharge fully.
Q: How does the flashlight re-charge so fast?
A: The reason the flashlight recharges quickly is because of the unique
characteristics of its capacitors and its patented FlashPoint® Power
Technology. Flashpoint® Power Technology carefully manages the energy
for a very fast charge with no degradation.
Q: Will my car battery go dead if I leave my flashlight plugged in and
charging while the ignition is off?
A: The charging unit uses very little battery power once it has completed its
charge cycle and the blue light stops flashing. The low power consumption
of the charger will not compromise your car’s battery when leaving the
TAC59063_UC3400_UserGuide_510.indd 15
UC3.400 User Guide
15
5/10/10 4:38 PM
flashlight stored in the charger and connected through the DC plug.
Q: How many times may I recharge the flashlight before the capacitors
no longer hold a charge?
A: The flashlight has been designed to recharge over 50,000 times.
Q: What makes the flashlight environmentally friendly?
ENGLISH
A: Because the capacitors contain no heavy metals (they contain mostly
carbon and aluminum), never need to be replaced, and use less energy to
charge, the Light for Life flashlights are the most environmentally-friendly
flashlights on the market. The capacitors will last over 10 years without
replacement, so they won’t be thrown away and add to the 179,000 tons of
U.S. battery waste per year.
Q: How long does the flashlight last without needing to be recharged?
A: The PC3.300 P1 flashlight runs for 45 minutes at 70 lumens, then it
automatically switches to reserve mode for an additional 15 minutes starting
at 25 lumens. In total, it delivers usable light for one hour. The UC3.400
flashlight runs for 1 hour at 90 lumens, then it automatically switches to
reserve mode for an additional 1 hour starting at 25 lumens. In total, it
delivers usable light for 2 hours. See pages 18 & 19 for runtime on P2 and P3
programmed lights.
Q: Why not rate the bulb in watts?
A: The reason we do not rate the bulb in watts is because watts don’t tell
how much light is being emitted. In addition, different LEDs require different
amounts of power (watts) for a given amount of light.
Q: When do you have to replace the capacitors?
A: Never.
Q: How long will the flashlight hold a charge when not in use?
A: When the flashlight is fully charged, it will tend to hold a usable charge
for about two weeks.
16
TAC59063_UC3400_UserGuide_510.indd 16
UC3.400 User Guide
5/10/10 4:38 PM
Q: What is the difference between a battery and a capacitor?
A: Batteries require a chemical reaction to store energy. A capacitor stores
the electrical charge or energy directly. It’s like storing a lightning bolt. Each
time an ordinary battery charges and discharges, it converts electricity into
a chemical bond and vice versa. During each charge the chemicals wear
down and over time, the batteries lose their ability to retain a charge.
Q: Are these lights intrinsically safe or do they have a “Class” or “Div”
rating?
A: The UC3.400 is currently not rated as intrinsically safe.
Q: May the flashlight be used in IDLH atmospheres?
Q: How well do the flashlights work in smoke-filled environments?
A: The flashlights have been designed to penetrate smoke and still provide a
useable halo for flood illumination..
ENGLISH
A: The UC3.400 IS currently not rated to be used in IDLH atmospheres.
IDLH means “immediate danger of life & health,” which is a safety term
for environments that may have reduced oxygen levels and possible toxic
conditions.
Q: What is the weight of the flashlight?
A: The approximate weight of the UC3.400 flashlight is 16 ounces.
Q: Although many products claim to have batteries with no memory
effect, if left on the charger, their batteries may often lose much of their
capacity. Is this true for the Light for Life flashlights?
A: The flashlight may be left on the charger when not in use indefinitely
with no loss in performance. Its capacitor has no “memory” effects. The
flashlight may be recharged anytime throughout its use and there is no loss
of life or performance. Whether you charge it up after every use or drain it
down completely, it’s working like new in 90 seconds.
TAC59063_UC3400_UserGuide_510.indd 17
UC3.400 User Guide
17
5/10/10 4:38 PM
Q: Does the charger automatically detect a full charge and switch to
trickle charge mode or shut down charging all together if no trickle is
required?
A: Our FlashPoint® Power Technology monitors the flashlight’s recharge
requirements to ensure that the flashlight is always “ready to go.” The
charger does not trickle charge. It is either on or off.
Q: What are the physical dimensions of the UC3.400?
A: The UC3.400 is approximately 11.5 inches long, is 2.75 inches wide at
the lens, has a barrel diameter of 1.75 inches, and weighs approximately 16
ounces.
Q: How has the flashlight’s impact resistance been tested?
A: We have validated the structural integrity of the flashlights by performing
many different drop and durability tests. It is designed and built to withstand
the rigors of law enforcement use.
Q: What type of switch comes on the flashlight (e.g., momentary,
strobe, etc.)? How do I engage the multiple modes with the switch?
A: The flashlights are operated with an on/off button pushed similarly to a
computer mouse’s “click.”
There are multiple modes of operation with the flashlight. You may activate
the various modes by pressing the side button on the flashlight.
Modes (depending on the type of configuration):
Standard Output:
Peak Output:
Reserve Output:
Strobe:
Low Light:
Ramp: 90 lumens (60 min runtime)
270 lumens (15 min runtime)
20 lumens (60 min runtime)
170 lumens (210 min runtime)
20 lumens (300 min runtime)
20-270 lumens (variable runtime)
18
TAC59063_UC3400_UserGuide_510.indd 18
UC3.400 User Guide
5/10/10 4:38 PM
There are also three different configurations for the button depending on the
type of flashlight purchased. The three different configurations are identified
as P1, P2, and P3.
P1:
1. Peak - from any mode, hold down button and keep it down, release button
and revert to previous mode.
2. Standard - single click.
3. Strobe - double click.
P2:
1. Peak – single click.
2. Ramp – hold button down and keep it down and light will steadily increase
in brightness; release button when desired brightness is achieved.
3. Strobe - double click.
P3:
1. Peak - from any mode, hold down button, release button from any mode
and flashlight turns off.
2. Standard – single click.
3. Low Light – double click.
Click once from any mode to turn the flashlight off.
Q: Can a traffic wand cone fit on the flashlight?
A: Yes, we have designed a traffic cone accessory specifically for the Light
for Life flashlights. Please visit your local dealer, the 5.11 website, or call
U.S. +1.888.511.4LFL (4535), or International +46 40230080 for additional
information on how to order this accessory.
Q: Are the flashlights available globally or only in the United States?
A: The flashlights are available globally.
TAC59063_UC3400_UserGuide_510.indd 19
UC3.400 User Guide
19
5/10/10 4:38 PM
Q: How does the flashlight function in cold temperatures? What is the
minimum operating temperature? Would extremely cold temperatures
affect any of the other electronics or LEDs?
A: We have tested our flashlights to -20ºC. Because the flashlight does
not use batteries, it can operate without any loss of performance at very
low temperatures. The electronics are not adversely affected by cold
temperatures.
Q: Is the flashlight water resistant and/or water proof? Is it safe to use
in heavy rains?
A: The flashlight is water resistant and it may safely be used in heavy rain. It
is recommended however, that the flashlights not be submerged in water.
Q: May I buy the flashlights with an EU standard charger (e.g., 230 volts
AC), or can I use the charger only in a 120-volt AC network?
A: You can use the flashlight’s charger with either AC adapter – 230 or 120volt AC networks. The flashlight charges in a 12-volt DC car adapter plug or
in a universal AC adapter that plugs into a standard wall socket available for
U.S., U.K., and E.U. sockets.
Q: Is 5.11 planning to make other flashlights with the same technology?
A: We will continue to develop flashlights with unique technologies to meet
our customers’ needs.
Q: Where is the switch located on the flashlight?
A: The switch is located on the side of the flashlight housing.
Q: What kind of darkness penetration can we expect from the
flashlight?
A: The flashlight issues a tightly-focused beam that easily illuminates objects
over 100 yards away. The halo or corona is also effective at illuminating
nearby objects.
20
TAC59063_UC3400_UserGuide_510.indd 20
UC3.400 User Guide
5/10/10 4:38 PM
Q: What does the beam pattern look like on the flashlight?
A: The beam pattern for the flashlight has a focused center beam with a
useful halo or corona.
Q: How does a three-LED beam compare to a single-LED, multiplelumen, tactical light beam?
A: The three LEDs are seen as one tight beam because of how the optics
were designed. You cannot tell the difference between the beam emitted by
the three LEDs in the flashlight, as compared to single-LED flashlights.
Q: Does this flashlight have a dual low-hi setting? I need the ability to
use the low setting to save my night vision, but I need a high-intensity
beam as well.
A: The flashlight has several different modes and different button
configurations/programs available to meet your unique requirements.
There are three different programs: P1, P2, and P3. The P3 program was
specifically designed for low-light situations with the peak output and
standard output available by holding down the button or clicking once,
while a low-light mode is operated by double clicking the button. The lowlight brightness is about 20 lumens and is excellent for reading maps and
documents. An additional lens filter is available in red to protect a user’s
night vision.
Q: What happens if my flashlight breaks?
A: For flashlight technical support or repairs, please go to the 5.11 Light for
Life warranty section at www.511tactical.com/lightforlife for locations and
additional information regarding authorized repair centers near you. You may
also contact one of the following technical support/repair representatives:
U.S.: +1.888.511.4LFL (4535) or [email protected]
International: +46 40230080 or [email protected]
TAC59063_UC3400_UserGuide_510.indd 21
UC3.400 User Guide
21
5/10/10 4:38 PM
Q: Who pays for shipping?
A: For replacement flashlights, 5.11 will pay the shipping costs for the
replacement light and for the current light to be shipped to the repair facility.
Q: How long will it take my flashlight to be repaired?
A: In the event your flashlight needs to be replaced, you will receive your
replacement flashlight within a few days from the time of your call to 5.11.
In the case where your light is to be repaired and returned to you, there is a
week of repair time plus the transportation time each way.
Q: Are there any internal repairs I can undertake myself?
A: Customers should not attempt to perform internal repairs to their
flashlights. Replacement kits are available for user-serviceable parts.
Q: May I use rechargeable batteries in my flashlight?
A: No.
Q: How do I install my car adaptor for the flashlight?
A: Please refer to the User Guide instruction booklet included with your
flashlight.
Q. Can I fly commercial air transportation with these flashlights in my
carry-on bag?
A: Yes. The density of the advanced capacitors is different than batteries,
so you may get an occasional question as you go through the x-ray check in
security. Typically if you turn the flashlight on to demonstrate it’s a working
device and communicate that there are capacitors inside the flashlight
instead of batteries, the security team clears the flashlight for air transit
inside the cabin.
22
TAC59063_UC3400_UserGuide_510.indd 22
UC3.400 User Guide
5/10/10 4:38 PM
TAC59063_UC3400_UserGuide_510.indd 23
UC3.400 User Guide
23
5/10/10 4:38 PM
24
TAC59063_UC3400_UserGuide_510.indd 24
UC3.400 User Guide
5/10/10 4:38 PM
TAC59063_UC3400_UserGuide_510.indd 25
UC3.400 User Guide
25
5/10/10 4:38 PM
26
TAC59063_UC3400_UserGuide_510.indd 26
UC3.400 User Guide
5/10/10 4:38 PM
TAC59063_UC3400_UserGuide_510.indd 27
UC3.400 User Guide
27
5/10/10 4:38 PM
28
TAC59063_UC3400_UserGuide_510.indd 28
UC3.400 User Guide
5/10/10 4:38 PM
TAC59063_UC3400_UserGuide_510.indd 29
UC3.400 User Guide
29
5/10/10 4:38 PM
30
TAC59063_UC3400_UserGuide_510.indd 30
UC3.400 User Guide
5/10/10 4:38 PM
TAC59063_UC3400_UserGuide_510.indd 31
UC3.400 User Guide
31
5/10/10 4:38 PM
32
TAC59063_UC3400_UserGuide_510.indd 32
UC3.400 User Guide
5/10/10 4:38 PM
TAC59063_UC3400_UserGuide_510.indd 33
UC3.400 User Guide
33
5/10/10 4:38 PM
34
TAC59063_UC3400_UserGuide_510.indd 34
UC3.400 User Guide
5/10/10 4:38 PM
TAC59063_UC3400_UserGuide_510.indd 35
UC3.400 User Guide
35
5/10/10 4:38 PM
36
TAC59063_UC3400_UserGuide_510.indd 36
UC3.400 User Guide
5/10/10 4:38 PM
TAC59063_UC3400_UserGuide_510.indd 37
UC3.400 User Guide
37
5/10/10 4:38 PM
38
TAC59063_UC3400_UserGuide_510.indd 38
UC3.400 User Guide
5/10/10 4:38 PM
TAC59063_UC3400_UserGuide_510.indd 39
UC3.400 User Guide
39
5/10/10 4:38 PM
40
TAC59063_UC3400_UserGuide_510.indd 40
UC3.400 User Guide
5/10/10 4:38 PM
TAC59063_UC3400_UserGuide_510.indd 41
UC3.400 User Guide
41
5/10/10 4:38 PM
42
TAC59063_UC3400_UserGuide_510.indd 42
UC3.400 User Guide
5/10/10 4:38 PM
TAC59063_UC3400_UserGuide_510.indd 43
UC3.400 User Guide
43
5/10/10 4:38 PM
44
TAC59063_UC3400_UserGuide_510.indd 44
UC3.400 User Guide
5/10/10 4:38 PM
TAC59063_UC3400_UserGuide_510.indd 45
UC3.400 User Guide
45
5/10/10 4:38 PM
46
TAC59063_UC3400_UserGuide_510.indd 46
UC3.400 User Guide
5/10/10 4:38 PM
TAC59063_UC3400_UserGuide_510.indd 47
UC3.400 User Guide
47
5/10/10 4:38 PM
48
TAC59063_UC3400_UserGuide_510.indd 48
UC3.400 User Guide
5/10/10 4:38 PM