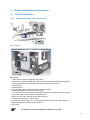
1
Please keep careful! Installation and user`s manual Operating Instructions TAC4 DG + MODBUS RTU Status: 06/2013 Paul Wärmerückgewinnung GmbH August-Horch-Straße 7 08141 Reinsdorf Germany Tel.: +49(0)375 - 303505 - 0 Fax: +49(0)375 - 303505 - 55 Table of contents 0 Preamble ................................................................................................................................. 3 1 Introduction ............................................................................................................................ 3 1.1 Safety ....................................................................................................................................... 3 1.2 Used symbols........................................................................................................................... 3 2 Functionalities of the regulation .......................................................................................... 4 3 Generell maintenance instructions ...................................................................................... 5 3.1 3.1.1 3.1.2 Generell informations ............................................................................................................... 5 Generell schematic of the maxi-series ..................................................................................... 5 Schematic of the T° sensors positioning in the maxi unit ........................................................ 6 3.2 Control panel 3 label located inside the cover ......................................................................... 6 4 Regulation............................................................................................................................... 7 4.1 4.1.1 4.1.2 4.1.2.1 4.1.3 4.1.3.1 4.1.4 Fans working mode .................................................................................................................. 7 CA mode .................................................................................................................................. 7 LS mode ................................................................................................................................... 7 Wiring diagrams ....................................................................................................................... 7 CPs mode ................................................................................................................................ 8 Wiring diagrams ....................................................................................................................... 8 OFF mode ................................................................................................................................ 8 4.2 BYPASS function (freecooling) ................................................................................................ 8 4.3 BOOST function ....................................................................................................................... 9 4.4 Opening / closing of dampers (CT option) at inlet ................................................................... 9 4.5 4.5.1 4.5.2 Heat exchanger antifrost protection system ............................................................................ 9 Protection antifreeze via pulse flow reduction ......................................................................... 9 Antifrosting the heat exchanger with 1pre-heating KWin (option) ......................................... 10 4.6 4.6.1 KWout post heating electrical coil control (option) ................................................................. 11 Wiring diagrams ..................................................................................................................... 11 4.7 4.7.1 Post heating (NV option) regulation ....................................................................................... 12 Wiring diagrams ..................................................................................................................... 12 4.8 Regelation for external coil(s) SAT TAC4 BA/KW option) ..................................................... 14 4.9 Time slots schedules ............................................................................................................. 14 4.10 4.10.1 4.10.2 4.10.3 Alarms .................................................................................................................................... 14 Alarm types ........................................................................................................................... 14 Alarm table ............................................................................................................................. 17 Wiring diagrams ..................................................................................................................... 18 4.11 Plugin the SAT MODBUS satellite ......................................................................................... 18 4.12 Wiring the SAT MODBUS ...................................................................................................... 19 5 Definition of the MODBUS RTU communication .............................................................. 19 5.1 MODBUS protocol ................................................................................................................. 19 5.2 MOBUS frame ........................................................................................................................ 19 5.3 MODBUS exception ............................................................................................................... 20 5.4 MODBUS values .................................................................................................................... 20 5.5 Write cycles limitation ............................................................................................................ 20 1 6 MODBUS map overview ...................................................................................................... 21 7 Use of MODBUS commands ............................................................................................... 21 7.1 MODBUS address.................................................................................................................. 21 7.2 7.2.1 7.2.2 7.2.3 7.2.4 Fans working modes .............................................................................................................. 21 CA mode – airflows are continuously being sent by MODBUS ............................................. 21 CA mode – 3 airflow rates ...................................................................................................... 22 LS mode ................................................................................................................................. 22 CPs mode............................................................................................................................... 22 7.3 Viewing of fan data................................................................................................................. 23 7.4 Viewing temperatures ............................................................................................................ 23 7.5 Pressure alarm ....................................................................................................................... 23 7.6 Fire alarm ............................................................................................................................... 24 7.7 Bypass.................................................................................................................................... 25 7.8 Boost ...................................................................................................................................... 25 7.9 Post-heating – internal coil (NV or KWout option) ................................................................. 25 7.10 Post-heating or cooling – external coil (SAT BA/KW option) ................................................. 25 7.11 Run time and maintenance alarm .......................................................................................... 26 7.12 Operating with time tables...................................................................................................... 26 7.13 Seasonal programming .......................................................................................................... 26 7.14 ADVANCED SETUP .............................................................................................................. 27 8 Use of RC TAC4 remote control ......................................................................................... 27 8.1 Connecting the RC TAC4 to the CB4 TAC4 DG circuit ......................................................... 27 8.2 8.2.1 Open the RC TAC4 casing..................................................................................................... 28 Wiring diagram to connect the RC TAC4 REC to the TAC4 DG circuit ................................. 29 8.3 8.3.1 8.3.2 Use of the RC TAC4 .............................................................................................................. 29 RC TAC4 is master ................................................................................................................ 29 MODBUS is master ................................................................................................................ 29 9 Detailed MODBUS table ....................................................................................................... 29 9.1 General info ............................................................................................................................ 30 9.2 Visualization ........................................................................................................................... 30 9.3 Control .................................................................................................................................... 33 9.4 Alarms .................................................................................................................................... 35 9.5 SETUP parameters ................................................................................................................ 36 9.6 ADVANCED SETUP parameters ........................................................................................... 38 9.7 9.7.1 9.7.2 Time scheduler ....................................................................................................................... 41 Time schedule structure ......................................................................................................... 41 Time scheduler mapping ........................................................................................................ 42 9.8 9.8.1 9.8.2 Season management ............................................................................................................. 43 Season management structure .............................................................................................. 43 Season segment mapping ..................................................................................................... 43 2 0 Preamble PLEASE READ THIS MANUAL CAREFULLY BEFORE INASTALLATION AND COMMISSONING! THIS MANUAL HAS BEEN MADE WITH GREATEST CARE. HOWEVER, NO RIGHTS CAN BE DERIVED THEREFROM. WE RESERVE THE RIGHT AT ANY TIME TO PARTIALLY OR ENTIRELY CHANGE THE CONTENT OF THIS MANUAL WITHOUT PRIOR NOTICE. This manual contains all the best for an assembly plant and a heat recovery unit (HRU) necessary information. The manual also serves as a handbook for installation, maintenance and customer service work. We recommend that any intervention in the appliance installation company should be consulted. Subject of this operating manual is the control unit TAC4 when connected to an external monitoring system communicating in MODBUS via the “SAT MODBUS”. Possible accessories are only described insofar as it is necessary for the appropriate operation. Please see the particular manuals for further information on accessories. If you have any questions that have not been answered or have not been sufficiently answered in this documentation, please contact the company Paul Wärmerückgewinnung GmbH. We will be glad to help you. 1 Introduction 1.1 Safety Please always observe the safety instructions in this operating manual. The non-observance of the safety instructions, warning notices, notes and instructions can lead to injuries or damages to the maxi. • Unless otherwise stated in this operating manual, only an authorised installer is entitled to install, connect, put into operation and maintain the maxi; • The installation of the maxi is to be performed according to the general local building, safety and installation instructions of the corresponding local authorities, of the water works and electric works and other official regulations and directives; • Always follow the safety instructions, warning notices, notes and instructions described in this operating manual; • Please keep this manual during the complete life time of the maxi in proximity to the device; • The instructions for the regular replacement of the filters or the cleaning of the supply and exhaust air valves are to be strictly followed; • The specifications stated in this document may not be changed; • Any modification of the maxi is prohibited; • In order to guarantee that the device will be regularly controlled, it is recommended to conclude a maintenance contract. Your supplier can give you the addresses of authorised installers in your area. 1.2 Used symbols The following symbols are used in this manual: Caution, special note! Risk of: - injury of the user or the installer - damages to the device - impairment of the operation of the device if the instructions are not carried out properly 3 2 Functionalities of the regulation The TAC4 DG controller is mounted in the units of maxi-series. This handbook describes the functionalities of the regulation when connected to an external monitoring system communicating in MODBUS via the “SAT MODBUS” option The TAC4 DG controller provides the following features: • • • • • • • • • • • • Monitoring of the fans (exhaust and supply) in chosen working mode: constant airflow (CA), constant pressure (CPs) or constant airflow linked to 0-10V signal (LS). Management of 6 timeslots. Alarms on defects, setpoints, overpressure. Fire alarm airflow management. BOOST function, allowing to force a pre-set airflow (supply/exhaust), overriding the assigned airflow. Automatic management of the 100% bypass to allow free cooling. Automatic management of inlet dampers (CT). Heat exchanger antifreeze protection system by modulation of airflow or with an intelligent preheat electrical coil (KWin). Postheating management of water coil (NV) or electrical coil (KWout) battery to keep a set temperature constant. Display of the settings and working fans. Analogical output signals of airflow and pressure. Advanced setup. The following option can be combined with TAC4 DG controller : • • • • • RC TAC4 Option: remote control and visualization of the parameters (please refer to TAC4 DG RC TAC4 installation and user’s manual for detailed information) SAT TAC4 BA/KW Option: regulation of 2 external heat exchangers (electrical/water,hot and/or cold). TCP/IP TAC4 MODULE Option: MODBUS TCP/IP communication (please refer to TAC4 DG - MODBUS TCP/IP installation and user’s manual for detailed information). GPRS TAC4 MODULE Option: GPRS Communication (please refer to TAC4 DG - GPRS installation and user’s manual for detailed installation). The SAT3 Option is a Circuit with 2 relays (2 SAT3 can be plugged) (please refer to SAT3 installation and user’s manual for detailed information) - When plugged in position OR1/OR2: status of “Fan On” warning and of “Pressure alarm” warning and/or - When plugged in position OR3/OR4 : status of NV option circulator and of «bypass» The MODBUS RTU Interface has the following functionalities: • • • 4 Configuration of SETUP and ADVANCED SETUP. Visualization of all the parameters. Control operation of the unit (airflows, supply air temperatures, etc…). 3 Generell maintenance instructions 3.1 Generell informations 3.1.1 Generell schematic of the maxi-series 3 Maxi flat-series Maxi-series 1 Main switch for power supply fans and control 2 Main switch for power supply to pre (Kwin) and/or post (Kwout) heating coils (options) 3 Centralized wiring box of the CB4 TAC4 DG circuit (factory pre-wired) 4 Supply fan(s) 5 Exhaust fan(s) 6 Post-heating water or electrical coil (NV or KWout option) 7 Motorized damper at fresh air inlet (CT option) 8 F7 class filter at fresh air inlet (G4- class filter extract air maxi flat right model versions) 9 Pre-heating electrical antifreeze coil (KWin option) 10 Drain pan and drain (maxi flat-series: drain pipe out) 11 Air/Air heat exchanger + bypass 100% 12 G4 filter on extract air (G4- or F7- class filter fresh air maxi flat right model versions) 13 Motorized damper at extract air inlet (option) 14 RC TAC4 All electrical connections made the installer are in 1/2/3. 5 3.1.2 Schematic of the T° sensors positioning in the maxi unit To allow easier identification of the temperature sensors 4 different wire colors are used: - 3.2 6 T1: T2: T3: T4 & T5: black wire white wire blue wire green wire (not at maxi flat-series) Control panel 3 label located inside the cover 4 Regulation 4.1 Fans working mode The various working modes give the user the choice on how the airflow must be modulated according to your application. In all the working modes the supply fan will operate according to the assigned mode and parameters. The airflow of the exhaust fan will then equal to a percentage of the actual airflow of the supply fan (noted %EXT / PUL for ratio between exhaust and supply airflows). The RC TAC4 allows configuration of one of the following 4 modes: 4.1.1 CA mode 3 constant airflow assignments for the supply fan are determined by the user (m³h K1, m³h K2 et m³h K3). 4.1.2 LS mode The assigned supply airflow is a function of a 0-10V linear signal. The user defines the link with 4 parameters: Vmin, Vmax, m³h≡Vmin and m³h≡Vmax, applied to the following diagram. With m³h≡Vmin < or > m³h≡Vmax (positive or negative link). Using the advanced setup, it is possible to stop the fans once the input signal value has reached a certain upper and/or lower limit. 4.1.2.1 Wiring diagrams The pressure sensor is connected to entry K2 of the TAC4 DG circuit. a) Wiring to 1 circuit (*) b) Wiring to several circuits in parallel (*) (*) K2 0-10V signal, maximum impedance allowed: 1500 Ω 7 4.1.3 CPs mode CPs on SUPPLY air : The airflow delivered by the supply fans is automatically modulated to obtain a constant pressure as measured by the pressure sensor in the duct. The exhaust airflow is equals to %EXT/PUL of the supply airflow. CPs on EXHAUST air : The airflow delivered by the exhaust fans is automatically modulated to obtain a constant pressure as measured by the pressure sensor in the duct. The supply airflow is equals to 1/(%EXT/PUL) of the exhaust airflow. 4.1.3.1 Wiring diagrams The pressure sensor is connected to entry K2 of the TAC4 DG circuit. In the case of CPs on supply + exhaust, the pressure sensor on supply side is connected to K2, and on the exhaust side is connected to K3. a) Wiring to 1 circuit (*) b) Wiring to several circuits in parallel (*) (*) K2 0-10V signal, maximum impedance allowed: 1500 Ω 4.1.4 OFF mode It allows to stop the fans. To restart the fans it is required to choose one of the other 3 working modes. 4.2 BYPASS function (freecooling) The counterflow heat exchanger is fitted with a 100% bypass. When the bypass is open fans may: - either continue to function in the same manner and setpoint as when the bypass is closed. - either operate at a fixed exhaust and supply airflow rate. These airflow values can be (re)set via the SETUP ADVANCE. According to inside and outside temperatures, the TAC4 DG control will monitor the opening/closing of the 100% by-pass damper. The by-pass is delivered completely wired and motorized from factory. No wiring or installation is required by the installer. The O.R.4 relay (SAT3 option) of the TAC4 DG circuit indicates the opening / closing of the bypass. Operating description: • Opening of 100% by-pass if all following conditions are met: - Outside T° (sensor T1) < inside T° (sensor T2) – 1°C. - Outside T° (sensor T1) > 15°C - Inside T° (sensor T2) > 22°C. 8 • Closing of 100% by-pass if one of the following conditions is met: - Outside T° (sensor T1) > inside T° (sensor T2). - Outside T° (sensor T1) < 14°C - Inside T° (sensor T2) < 20°C. All these temperature SET values can be modified using ADVANCED SETUP. (*)When the bypass is open, the pressure alarm is deactivated. For the maxi 4002 and maxi 6002 models the maximum airflow when the bypass is open is reduced respectively at 3500 m³/h and 5300 m³/h. For the other models, there is no reduction of the maximum airflow when the bypass is open. Bypass status : 4.3 BOOST function The BOOST function allows forcing a preset airflow overruling all other configurations 4.4 Opening / closing of dampers (CT option) at inlet The opening and closing of (a) damper(s) mounted at both supply and exhaust air inlets are automatically managed by the TAC4 DG regulation. The actual fan startup is delayed to allow prior opening of dampers. When fans are stopped the dampers are closed. 4.5 Heat exchanger antifrost protection system There is a risk of frosting the heat exchanger in the exhaust airflow. Two antifrost protection systems are available: • Supply air volume reduction (less cooling capacity) • Modulation of capacity of an electrical coil located before the inlet air enters the heat exchanger (KWin option) 4.5.1 Protection antifreeze via pulse flow reduction This functionality is built in the standard TAC4 DG and must not be configured by the installer. It is automatically de-activated if an optional KWin pre-heater (see §3.5.2) is installed in the unit. Description: In order to avoid the risk of frosting the heat exchanger, the supply airflow is linked to the temperature value of the exhaust airflow measured after the heat exchanger (sensor T3). 9 • T°(T3) > +3°C: the assigned airflow is as defined by SETUP. • 0°C < T°(T3) < +3°C : the airflow assigned by SETUP is automatically modified as follows: - If CA or LS working mode : the supply airflow will progressively drop down to 33% (AFlow) of the assigned airflow (AFn) - If CPs mode, the assigned pressure will drop to 50% (AFlow) of the assigned pressure (AFn) In these conditions LED AF is ON. • T°(T3) < 0°C : the supply airflow is stopped for as long as T°(T3) < +1°C during 5 minutes. In these conditions LED AF is blinking. All these temperature SET values can be modified using ADVANCED SETUP. Antifreeze diagram: LED AF ON LED AF blinking 4.5.2 Antifrosting the heat exchanger with 1pre-heating KWin (option) If a KWin pre-heating coil is option is installed in the maxi unit the heat exchanger is protected from frosting by a modulating electrical coil assigned to maintain a pre-set temperature at the outlet of the heat exchanger, in the exhaust airflow. The KWin is delivered ready to use from the factory. The default assignment T° after heat exchange is 1°C. If necessary this value can be changed using the ADVANCED SETUP feature. TAC4 DG regulation antifrost functions: • A solid state relay controlled by the TAC4 DG regulation controls the coil’s capacity in function of the assigned T° and of resulting exhaust T°. • The control only allows the heating coil to be operated if the supply fans are in working. This wiring is factory made. • Post-ventilation feature (see advanced setup): If the fans are requested to stop, the R3 relay is opened, and therefore the power supply to the coils is also shut down. The fans continue running for 90 seconds to insure post-ventilation of the electrical coils. • If conditions make that the pre-heating coil KWin does not deliver enough capacity to reach the ‘floor T°’ assignment, and therefore not insuring the anti-frost duty, the control will modulate the in and out airflows as follows: a) If T° < -1°C and T° < (floor T° - 1,5°C), for more than 5 minutes: If CA and LS mode: reduction of in and outgoing airflows to 66% of the assigned airflows. If CPs Mode: reduction to 75% of the assigned pressure. This setup is maintained during 15 minutes, after which the 100% airflow/pressure assignment is reestablished. 10 Actions on RC (if connected) Actions on TAC4 DG circuit Display text LED ALARM LED Pa LED ALARM Relay AL1 AF T° ALARM REDUCED AIRFLOW RED / ON / Relay R2 on SAT3 (O.R.1) / Action fans on LED AF ON Assignment reduction b) If T° < -5°C during 5 minutes the unit is stopped: Actions on RC (if connected) Display text AF T° ALARM STOP FANS Actions on TAC4 DG circuit LED ALARM LED Pa LED ALARM Relay AL1 RED / ON Alarm status Relay R2 on SAT3 (O.R.1) / Action fans on LED AF Blink Stopped Restart is made by resetting (by pressing the RESET knob on TAC4 DG circuit or via the 40250 register). 4.6 KWout post heating electrical coil control (option) The post-heating coil is delivered factory mounted. Its purpose is to keep a constant supply air temperature, using the TAC4 DG regulation. The assigned T° is configured according to the 40425 register. Features provided by the TAC4 DG regulation: • Regulation of static relay of the electric coil in function of assigned supply T° and actual measured supply T°. • To avoid overheating, regulation checks if fans are operating before supplying electric coil. This is factory pre-wired. A post-ventilation of the coil function is available (see advanced configuration): When fans are requested to stop, first the electrical coils are shut down, then the fan operate for 90 seconds (minimum value) before stopping. This feature cools the coils before actually stopping the fans. • It is possible to stop the post heating with an external contact (IN6 - see detail in the § 4.6.1) or via the 40225 register. • Setpoint alarm: see details in section § 4.9.1 and 4.9.2 • Sensor alarms: see details in section § 4.9.1 and 4.9.2 4.6.1 Wiring diagrams • Wiring the supply T° sensor to the TAC DG board: 11 • Possibility to stop the post-heating with an external contact: Contact closed = post-heating OFF Contact open = post-heating ON 4.7 Post heating (NV option) regulation The post heating coil is delivered pre-wired. The 3way valve is delivered unmounted. The NV option on the TAC4 DG regulation allows to maintain a pre-set supply T° constant. The assignment T° is set using the 40425 register. Control features of the TAC4 DG: • Monitoring the 3-way valve to keep assignment T° constant using supplied sensor T° value. • Engaging a relay to start a water circulator (output SAT 3 O.R.3 on i/o module - see § 4.7.1 • Antifrost protection of the water coil based on the value of T4 (T° sensor provided and pre-wired). If value T4 <4°C then the 3 way valve is opened and contact for circulator is closed during 15 minutes. • It is possible to stop the post heating with an external contact (IN6 - see detail in the § 4.7.1) or via the 40225 register. • Setpoint alarm: see details in section § 4.9.1 and 4.9.2 • Sensor alarms: see details in section § 4.9.1 and 4.9.2 4.7.1 Wiring diagrams • 3 ways valve wiring to TAC DG circuit: GND = blue wire NV = red wire VO = brown wire 12 • Wiring of supply air T° sensor to TAC DG circuit: • Switching of a relay to control the circulator (SAT3 O.R.3 relay): • Possibility to stop the post-heating with an external contact: Contact closed = post-heating OFF Contact open = post-heating ON 13 4.8 Regelation for external coil(s) SAT TAC4 BA/KW option) Via option SAT TAC4 BA/KW it is possible to control one or two external (from the unit) heat exchanger(s): • One heating coil • One water cooling coil • One heating/cooling coil (reversible coil) • One heating coil + one cooling coil (separate) • One electrical coil • One electrical coil + one cooling coil SAT TAC4 BA/KW • Controls the coil’s capacity by keeping a supply air temperature constant, equals to the assignment. This assignment can be defined for each coil when configuring the setup. • Controls the water coils antifrost protection • Triggers command for circulator(s) • Cooling/Heating mode control by digital entry. (An extra external system determining in which mode (heat/cool) the coil must operate and delivering the information (free of potential contact) to the SAT TAC4 BA/KW is necessary). • Allows shutting down the coils via digital input. For connections, configuration and user instructions: see installation manual SAT TAC4 BA/KW. 4.9 Time slots schedules The TAC4 DG regulation allows to configure up to 6 time slots per day. For each time slot select: • The exhaust and the supply airflows: - Working mode (CA, LS, CPs or OFF) - CA mode: select the actual exhaust and supply airflow - LS mode: select a % value of the link configured as well as a %age value of the unbalance between exhaust and supply airflows (% exhaust/supply) - CPs mode: select a %age value of the reference pressure as well as a %age value of the unbalance between exhaust and supply airflows (% exhaust/supply) • Bypass status: choose either automatic (see § 3.7) or either «force» the bypass to «open» or «close» for the TSi considered. • If post heating installed (option): set the assignment t° for the supply air for the TSi considered • If post-cooling installed (option) set the assignment t° for the supply air for the TSi considered Seasonal management is also possible : • Force bypass ‘close’ between 2 dates (avoid free cooling in the winter) • Disable the post-heating feature between 2 dates (avoid post heating in the summer) • Disable the post-cooling feature between 2 dates (avoid cooling in the winter) 4.10 Alarms 4.10.1 Alarm types Type 1: Alarm indicating a fan failure. This alarm indicates a failure of fan Fx . This problem is usually caused by the motor. If not the failure can be caused by an internal cable or by the TAC4 DG circuit. See 1 in table below + 40300 register / bit 2-3-4-5 in MODBUS table Type 2: Alarm on the pressure variation (CA- and LS-modes only). This alarm indicates a pre-established pressure level has been reached on fan Fx. Pressure alarm setup in CA- or LS-mode (see § 7.4): 14 See 2 in table below + 40300 register / bit 6-7 in MODBUS table Type 3: Alarm indicating a problem while initializing reference pressure for a pressure alarm. 4 possibilities: - Actual airflow < requested airflow : The requested working point is ‘too high’ (too much pressure) for the maximal available pressure at the requested airflow for this fan. (40302 register / bit 14-15 in MODBUS table) - Actual airflow > requested airflow: the nominal airflow requested to initialize the pressure alarm cannot be reached because the lower limit of the fan’s operating zone has been reached. (40303 register / bit 2-3 in MODBUS table) - Very unstable pressure. (40302 register / bit 12-13 in MODBUS table) - Assigned airflow not reached after 3 minutes. (40303 register / bit 0-1 in MODBUS table) See 3 in table below. Paréf cannot be identified and the fans are stopped. Press RESET using the 40250 register or with the ‘RESET’ key on the TAC4 DG circuit. - If it occurs during initializing an alarm pressure 2 options: 1. No action is taken: the control will operate without pressure alarm 2. Corrective action is taken (change the working point to one well located in the working zone of the fan, by reducing the pressure system, modifying the nominal airflow,… ) and restart the setup operation. - If it occurs during initializing of the assignment pressure in CPs mode : A corrective action must be taken (change the working point to one well located in the working zone of the fan, by reducing the pressure system, modifying the nominal airflow, …) and restart the setup operation. Type 4: Alarm indicating the system cannot fulfill the assignment. The assignment (keeping a certain airflow or a certain pressure constant) cannot be fulfilled because the upper or lower limit of the fan’s working zone has been reached. See 4 in table below + 40301 register / bit 8 to 15 and 40302 register bit 0 to 11. Type 5: Alarm indicating a data failure in the control circuit Crucial data from the circuit board has been lost. Try a TOTAL RESET of the data using the 40251 register. If still not solved send the defect TAC4 DG circuit for reprogramming. See 5 in table below + 40301 register / bit 0-1 Type 6: Fire Alarm. See 6 in table below + 40303 register / bit 7-8 The TAC4 DG control can be connected to an extern fire detection system to : - stop/start the supply/exhaust fans according to fire regulations - set the airflows in case of fire alarms according to fire regulations - allow firemen to overrule the existing setup and start/stop the fans as needed. After a fire alarm it is necessary to perform a RESET via the 40250 register or via the RESET button on the TAC4 DG circuit to return to normal operation The fire alarm and of start/stopping of the fans (supply/exhaust) can be activated by external contacts (see wiring diagram below), or through MODBUS communication (registers 40222, 40226 and 40227) 15 Wiring diagram IN3 - 12V = « fire alarm « contact. The contact can be «normally open» (factory set) or «normally closed» (change setting via register 40510) If alarm activated via IN3 : • IN7 - 12V closed = force start the supply fan(s) at pre-programmed airflow. • IN7 - 12V open = force stop the supply fan(s). • IN8 - 12V closed = force start the exhaust fan(s) at pre-programmed airflow. • IN8 – 12V open = force stop the exhaust fan(s) Registers 40222, 40226 and 40227 can be used instead of IN3, IN7 et IN8. Type 7: Alarm indicating maintenance is expected. (for configuration see “advanced setup) MAINTENANCE ALARM indicates the fan operating time (in hours) has exceeded a certain limit set during the configuration.. STOP FAN: indicates the fan operating time (in hours) has exceeded a certain limit set during the configuration. This alarm stops the fans. See 7 in table below + 40303 register / bit 4-5 Type 8: Alarm indicating a communication breakdown between the TAC4 DG circuit and the RC TAC4. This alarm indicates a communication problem between the 2 modules of the TAC4 DG regulation. It is only displayed on the RC TAC4, not via the MODBUS communication. See 8 in table below. Type 9: Alarm indicating a T° sensor T1/T2/T3 failure. One or more of the T° sensors T1/T2/T3 connected to the TAC4 DG circuit and mounted on heat exchanger is defect or not connected. These sensors are crucial for the by-pass control and the antifrost procedure. After correction of the failure it is necessary to perform a RESET via the 40250 register or via the RESET button on the TAC4 DG circuit. See 9 in table below + 40300 register / bit 8 to 13. Type 10: Alarm indicating failure on T° sensor T4 (only with NV option). It indicates that the T° sensor T4 located on the coil and connected to the TAC4 DG circuit is defect (open or short circuit) or not connected. This sensor is used to avoid frosting of the NV coil. In this case, as a safety measure, the 3 way valve is opened and the contact used to start the circulator is closed. After fixing the failure it is necessary to perform a RESET via the 40250 register or via the RESET button on the TAC4 DG circuit. See 10 in table below + 40300 register / bit 14-15. 16 Type 11: Alarm indicating failure on T° sensor T5 (only with NV option or KWout). It indicates a failure of the T° sensor T5 located in the supply duct and connected to the TAC4 DG circuit (opened or short circuit) or that it is not connected. This sensor is used to regulate the post-heating function. After fixing the failure it is necessary to perform a RESET via the 40250 register or via the RESET button on the TAC4 DG circuit. See 11 in table below + 40301 register / bit 0-1. Type 12: Alarm indicating that the assigned T° cannot be reached (only with NV option or KWout). If the actual T° is lower than the assigned T° for more than 15 minutes with the post-heating fully opened until) See 12 in table below + 40303 register / bit 15. Type 13 and 14: Alarm indicating antifrosting alert (only with KWin option). In certain air T° conditions as measured on the exhaust airflow after the heat recovery, indicating that the KWin has reached its limit, the TAC4 DG control can take over to guarantee the antifrost function. a) Alarm type 13: If T° < assignment T°-1,5°C for more than 5 minutes: supply and exhaust airflow reduction of 33% if CA or LS and of 25% if CPs, for 15 minutes. b) Alarm type 14: If T° < -5°C during 5 minutes, fans are stopped. It is necessary to perform a ‘RESET’ via the 40250 register or press RESET on the TAC4 DG circuit to restart the unit See 13 & 14 in table below + 40303 register / bit 11-12. 4.10.2 Alarm table Type 1 2 3 4 5 6 7 8 9 10 11 12 13 Actions on RC TAC4 (if connected) Display (1) LED LED Pa ALARM Actions on the TAC4 DG circuit LED ALARM AL1 relay Alarm status / Action fans on R2 relay of SAT3 (O.R.1) / LED AF / Stopped Closed / Alarm status / / / / (2) Stopped / / / Alarm status Alarm status Alarm status / / Stopped / / / / Stopped (3) / Alarm status / / / Stopped / / / ALARM FANx PRESSURE ALARM ALARM INIT Pa ALARM CA, LS or CPs DATA ERROR FIRE ALARM ALARM SERVICE Red / ON / Rouge ON Red / ON / / ON Red / ON Red / ON Red / ON FAN STOP SERVICE CB COM ERROR ALARM T° SENSOR 1/2/3 ALARM T° SENSOR 4 ALARM T° SENSOR 5 ALARM POSTHEAT T° TOO LOW AF T° ALARM AIRFLOW REDUCED Red / ON Red / / Red / ON Alarm status / / Stopped Red / ON / / / Red / ON / / / Red / ON Alarm status Alarm status / / / / Red / ON / / ON Reduced airflow 17 14 AF T° ALARM STOP FANS Red / ON Alarm status / Blinking Stopped / = no action (1) detailed text is displayed in successive screens. (2) Unless setup configuration stipulated fans must be stopped in the event of pressure alarm. (3) Stopping of the fans in function of entries IN7 - IN8 and/or the 40226 and 40227 registers. 4.10.3 Wiring diagrams O.R.1 O.R.2 4.11 Plugin the SAT MODBUS satellite The MODBUS RTU communication with the TAC4 DG requires the addition of a satellite circuit (option SAT MODBUS: CID 025006) being used as interface of communication. The assembly must be carried out with the power OFF. A bad positioning of SAT MODBUS on circuit TAC4 DG can fatally damage both circuits! 18 4.12 Wiring the SAT MODBUS a) Wiring one unit b) Network wiring 5 Definition of the MODBUS RTU communication 5.1 MODBUS protocol The TAC4 DG controller uses the communication protocol MODBUS RTU This protocol is based on a master / slave architecture. Each message has the same structure : the frame is made of the slave address, the function code (writing or reading), the data and a numeric test value to test for communication errors (CRC16) Main specifications : • MODBUS RTU protocol (binary) • Physical layer : RS 485- asynchronous. a 3-wire connection with GND is required • Factory default baudrate is 9600. 1200, 4800, 9600 or 19200 are possible. 5.2 MOBUS frame The MODBUS frame is presented in the following way: Start ≥ 3,5 caract. address 1 à 247 Function code 03 – 06 - 16 Data 8 bits CRC 16 bits Stop ≥ 3,5 caract. Controller uses the Modbus RTU time-based framing. The receiver monitors the elapsed time between receipt of characters. If three and one-half character times elapse without a new character this is considered to be the end of frame. The actual end-of-frame detection time is rounded to milliseconds because the system timing is millisecond-based. Address: Possible slave address is 1 to 247. Factory default is 1. 19 Function code: • Supports function code 3 (decimal) for reading multiple holding registers. • Supports function code 6 (decimal) for writing a single holding registers. • Supports function code 16 (decimal) for writing multiple holding registers. Data: Number of databits is fixed to 8. Number of stopbits is fixed to 1 All TAC4 data is in 16-bit modbus holding registers. Modbus coils, discrete inputs or input registers are not used. The modbus communication buffers have a size of 129 bytes. This is sufficient for reading or writing 60 registers at once. Parity: Factory default parity is None CRC-16: The RTU format follows the commands/data with a “cyclic redundancy check” checksum as an error detection mechanism to ensure the reliability of data. In the Modbus.org standard documents, holding register addresses are given a prefix of "4" to distinguish them from other register types. For example, in their documentation a holding register at address 1001 is referred to by "41001". However, the leading "4" is not really part of the address. Also, the Modbus.org standard documents refer to register addresses using "one-based" numbering. However, the addresses that are actually sent in a Modbus command message are "zero-based". For example, to read register 1001, the address that is actually sent in the command message is 1000. 5.3 MODBUS exception The TAC4 modbus protocol may respond with an exception code if the read or write command was invalid. Possible exceptions are: • 01 ILLEGAL FUNCTION: The function code received in the query is not an allowable action for the slave. • 02 ILLEGAL DATA ADDRESS: The data address received in the query is not an allowable address for the slave. Or the combination of data address and transfer length is not allowable. • 03 ILLEGAL DATA VALUE: The master attempted to write a non-allowed value into a register. Which values are allowed may depend on configuration settings of other registers. When a write of multiple registers is executed, the execution stops at the first invalid data address or invalid value. 5.4 MODBUS values All values are signed values. As usual, all modbus words are in big endian byte order. Some registers act as bitmaps with 16 status bits. Some values are 32-bit. They are transferred as two 16-bit registers, first low word, then high word. When reading, the master must combine two 16-bit words into one 32-bit value. With shift: Val32=((((long)HIGH)<<16)|LOW). With math: Val32=HIGH*65536+LOW. For example: Reg1=33041, Reg2=13: Val32=885009. When writing a 32-bit parameter, the controller first buffers the low word. Then, when the high word is written, the 32-bit parameter is updated. This low-word buffer is shared for all 32-bit parameters. 5.5 Write cycles limitation The controller stores all setup parameters and some control parameters in non-volatile EEPROM memory to protect against power failure. This EEPROM memory has an endurance of 100 000 write cycles. Therefore, these parameters should not be changed too often! Writing a parameter with the same value is not a change. Changing a parameter once per hour would result in 8760 writes per year, or 100 000 writes in 11 years. Changing a setup parameter once per minute would result in 100 000 writes in only 69 days! Those parameters are marked as “E1” in the MODBUS map. Some parameters are stored in a nonvolatile RAM memory. Those parameters have no writing limitation and their value is not lost in case of power break. Those parameters are marked as “R” in the MODBUS map. 20 6 MODBUS map overview The TAC4 DG regulation can be entirely monitored by the MODBUS communication. The MODBUS table can thus configure the SETUP, advanced SETUP, the display setup of all parameters and the control of the operation of the unit (airflows and temperatures). The MODBUS table is structured as follows: Registers 40001 … 40020 … 40050 … 40150 … 40200 … 40300 … 40400 … 40500 … 41000… Group General info. Provides general information about the system. Visualization. Shows actual values of a number of setup parameters and u nit parameters (flows, pressures, inputs and outputs). Control. Control speed by different sources. Control of functionalities like bypass, fire alarm, postheating,…). Run initialization of pressure parameters. Control of resets Alarms. Bitmap with alarm flags. Setup parameters. Advanced Setup parameters. Time table configuration parameters. Read/Write Read only Read only Read and write Read only Read and write Read and write Read and write 7 Use of MODBUS commands The MODBUS Communication gives access to all the parameters of the regulation. You will find below the MODBUS registers associated with the principal functionalities of the TAC4 DG regulation. For more details on these registers or for complete information on the parameters accessible via MODBUS, see the complete table in §10. 7.1 MODBUS address Default MODBUS Address of a TAC4 DG circuit is “1”. It is possible to modify this value via an MODBUS command (40543). Only connect to the network TAC4 DG circuits with different addresses. Setup: Description Modification of MODBUS address 7.2 7.2.1 Register 40543 Fans working modes CA mode – airflows are continuously being sent by MODBUS Configuration: Description Set MODBUS as master of airflow control Register 40200 Control: Description Enter supply airflow Enter exhaust airflow Register 40204 40205 21 7.2.2 CA mode – 3 airflow rates Setup: Description Chose CA mode Select Airflow 1 Select Airflow 2 Select Airflow 3 Airflow unbalance ration exhaust/supply Register 40426 40428 40429 40430 40427 Control: Description MODBUS is master of airflow selection position Selection of airflow selection position (OFF, I, II ou III) Register 40200 40201 7.2.3 LS mode Setup: Description Select LS mode Select minimum signal (Vmin) Select maximum signal (Vmax) Select airflow corresponding to Vmin Select airflow corresponding to Vmax Select unbalance ratio exhaust/supply Select reduced airflow for position III. Register 40426 40438 40439 40440 40441 40427 40442 Possibility to stop the fans below a certain voltage threshold Value of the voltage lower threshold Possibility to stop the fans above a certain threshold Value of the voltage upper threshold 40500 40501 40502 40503 Possibility to separately control exhaust (signal on K3) and supply (signal on K2) airflows 40505 Control: Description Set MODBUS as master of ventilation position Select ventilation position (OFF, I or III) 7.2.4 CPs mode Setup: Description Select CPs mode Choice of the flow of regulation (impulse and/or extraction) IF CPs applied to one airflow side, supply or exhaust Select airflow unbalance ration exhaust/supply Select reduced airflow for position III. If manual configuration: Select assignment value to be kept constant If configuration via initialization procedure: Select initialization airflow SI CPs sur 2 flux : pulsion et extraction If manual configuration: Enter setpoint value to be kept constant in the supply airflow Enter setpoint value to be kept constant in the exhaust airflow 22 Register 40200 40201 Register 40426 40443 40427 40442 40446 40254 40446 40449 If configuration via nominal airflow procedure: Enter nominal supply airflow for initialization procedure Enter nominal exhaust airflow for initialization procedure Start initialization procedure and pressure measurement Alarm while initialization procedure of setpoint pressure value Control: Description Set MODBUS as master of ventilation position Select ventilation position (OFF, I ou III) 7.3 Register 40200 40201 Register 40052 40053 40056 40057 40065 40066 40069 40070 40073 40074 40077 40078 40300 - bit 2 to 5 Viewing temperatures Description Inlet Temperature of fresh air (from outside): T1 Inlet Temperature of stale air (from the interior): T2 Exhaust air temperature after heat exchanger (towards outside): T3 Water coil temperature (NV option): T4 Supply air temperature after heat exchanger (towards inside): T5 Hot water coil temperature (BA+ ou BA+/- option): T7 Cold water coil temperature (BA- option) : T8 Temperature sensor alarm 7.5 40256 40302- bit12 to 15 40303- bit 0 to 3 Viewing of fan data Description Operating mode Ventilation Position (OFF, I, II, III) Supply airflow assignement Exhaust airflow assignement Actual airflow on supply fan 1 Actual pressure on supply fan 1 Actual airflow on supply fan 2 Actual pressure on supply fan 2 Actual airflow on exhaust fan 1 Actual pressure on exhaust fan 1 Actual airflow on exhaust fan 2 Actual pressure on exhaust fan 2 Fan failure alarm 7.4 40254 40257 Register 40155 40156 40157 40158 40159 40161 40162 40300 - bit 8 to 15 40301 - bit 0 to 7 Pressure alarm Setup : Description Pressure alarm activation Select delta P for pressure alarm on supply airflow Select delta P for pressure alarm on exhaust airflow Stop the unit if pressure alarm If manual configuration : Select reference airflow to determine pressure alarm threshold on supply side Select reference pressure to determine alarm threshold on supply side Register 40431 40432 40433 40500 40434 40435 23 Select reference airflow to determine pressure alarm threshold on exhaust side Select reference pressure to determine alarm threshold on exhaust side If configuration via initialisation : Select initialization airflow Start initialization procedure to measure pressure Initialization can last for 1 to 3 minutes (according to stabilization of working point).After 1 minute the system will store the fan’s calculated pressure value. The operating mode register (40052) is temporarily set to « 9 » during this initialization phase. 40436 Alarm while initializing pressure setpoint 40302 - bit 12 to 15 40303 - bit 0 to 3 40437 40254 40253 Control: Description Activate « pressure alarm » status Register 40221 Display: Description Reference airflow for pressure alarm supply side Pressure for pressure alarm supply side Reference airflow for pressure alarm exhaust side Pressure for pressure alarm exhaust side Register 40061 40062 40063 40064 Status of pressure alarm on the supply and/or exhaust side(s) Status of external pressure alarm 7.6 40300- bit 6 and 7 40303 - bit 6 Fire alarm Setup: Description Select contact logic (IN3) : normally «open» or «closed» Select action (off/on) in case of fire alarm supply side Select ‘supply’ airflow in case of fire alarm Select action (off/on) in case of fire alarm exhaust side Select ‘exhaust’ airflow in case of fire alarm Register 40510 40226 40511 40227 40512 Control : Description Set fire alarm status Register 40222 Visualization: Description Fire alarm status 24 Register 40303 - bit 7 and 8 7.7 Bypass Setup: Description Select outside temperature threshold to open bypass Select inside temperature threshold to open bypass Force special airflow when bypass open Select supply airflow when bypass open Select exhaust airflow when bypass open Register 40513 40514 40515 40516 40517 Control: Description Force open bypass status (even when conditions not met) Register 40223 Visualization: Description Bypass status Register 40084 7.8 Boost Setup: Description enter BOOST supply airflow rate when activated Enter BOOST exhaust airflow rate when activated Register 40548 40549 Control: Description Force activation of « BOOST » airflow Register 40228 7.9 Post-heating – internal coil (NV or KWout option) Setup: Description Select assignment value for supply air T° Register 40425 Control: Description De-activate post heating function Register 40225 Display: Description Supply air T° assignment If NV option: %age of opening of 3 way valve If KWout option: power %age of KWout coil Supply air temperature (T°5) Antifrost status of internal water coil Register 40059 40172 40187 40159 40083 7.10 Post-heating or cooling – external coil (SAT BA/KW option) Setup : Description Choose external coil type Enter supply airflow setpoint temperature for heating Enter supply airflow setpoint temperature for cooling Register 40550 40425 40447 25 Control: Description Disable post-heating Disable post-cooling Select heating or cooling method Register 40225 40229 40230 Display: Description Actual supply air T° setpoint (cool or heat) If BA+ or BA+/- option : %age opening of 3 way valve If BA- option: %age opening of 3 way valve If KWext option : actual %age of maximum capacity of KW coil Actual Supply ait T°(T°5) Antifrost status of external water coils Register 40059 40174 40175 40188 40159 40088 7.11 Run time and maintenance alarm Setup: Description Activate run time logging Display run time on RC TAC4 Activate maintenance alarm Hour count limit for maintenance alarm Activate maintenance alarm with a fan stop Hour count limit for maintenance alarm with fan stop Register 40534 40535 40536 40537 40539 40540 Control: Description RESET hour count Register 40252 Display: Description Hour count of unit Status of maintenance alarm Register 40081 40303 - bit 4 and 5 7.12 Operating with time tables TAC4 units can operate automatically according to a timetable. The timetable features a 7 days/ 6 timeslots per day programming. For each time slot it is possible to configure the working mode and its different parameters, the supply air T° setpoint (heating and cooling) and the status of the bypass. Setup: Description See MODBUS §10.7 table below Register 41000...41417 Control: Description Enable automatic operation Register 40200 7.13 Seasonal programming 3 features can be en/disabled during certain periods of the year. The bypass, the post-heating and the post-cooling. Configure a time period between 2 dates and enter feature status (i.e. closed position for the Bypass and OFF for the heating or cooling), regardless of the configuration and actual temperature values. 26 Setup: Description Enter time periods for BYPASS: see MODBUS table §10.8 below Enter time periods for post-heating: see MODBUS table §10.8 below Enter time periods for post-cooling: see MODBUS table §10.8 below Register 41800..41803 41804..41807 41808..41811 7.14 ADVANCED SETUP Other parameters and advanced functionalities are accessible via MODBUS. They require a thorough knowledge of the regulation. You can find the details concerning these parameters in the detailed MODBUS table or in document Operating instructions maxi-series available on our www.paul-lueftung.de site. • • • • • • • • • Fans start torque Prevent stop of the fans Configuration of AF (anti-frost) of coils Reaction speed of modifications on post-heating/cooling OUT1 and OUT2 definition In mode CPs: - positive or negative logic - reaction speed of the CPs algorithm Post-ventilation configuration Access code configuration Factory reset 8 Use of RC TAC4 remote control It is possible to connect an RC TAC4 remote control while communicating via MODBUS. The RC could be used in two manners: • RC is master: the RC ensures the configuration, the control of the flows and visualization. • MODBUS is master: the RC only ensures displays the parameters. It will be used mainly for display of information. It is however possible to take control of the system with the RC TAC4 (configuration and control) via entry IN5. 8.1 Connecting the RC TAC4 to the CB4 TAC4 DG circuit The connection between the various circuits is made by a communication bus. Follow these steps to connect the RC TAC4 to the CB4 TAC4 DG: 27 8.2 Open the RC TAC4 casing Using a small screwdriver unlock the 4 pins Remove the cover 2 pins on each side Points for fixation of the casing (spacing = 88mm) RC dimensions = 122 x 66mm RC TAC4 wiring terminals The RC box is class IP20 and cannot be installed outdoors as such. If you wish to install it outdoors (for instance on the maxi unit) you need to fasten inside a proper watertight box. The configuration data is stored in the TAC4 DG circuit. Therefore, unlike the previous generation, the RC does not have to be permanently connected for the regulation to operate properly. 28 8.2.1 Wiring diagram to connect the RC TAC4 REC to the TAC4 DG circuit Cable specifications: • Recommended cable: category 5 shielded twisted pair (FTP) cable with a section of 0,26 … 0,50 mm². Use 1 pair to connect GND and +12V and 1 pair to connect B- and A + • Maximum cable length: 1000 m. • Keep this communication cable at distance from power cables. • If the unit is installed in a location with high electro-mechanical interference levels we strongly advise to connect the shield of the TAC4 DG – RC cable on one side of the ground only. • If the maxi unit is installed outside, select a suitable cable for outdoor application (UV light, …). 8.3 8.3.1 Use of the RC TAC4 RC TAC4 is master The MODBUS Communication does not control the fans (register 40200 = 1, 2 or 3). The RC allows the configuration of the unit, the control of the fans and the display of all the parameters. For more information on its use, refer to: Operating instructions TAC4+RC documentation available on our www.paul-lueftung.de site. 8.3.2 MODBUS is master An RC TAC4 connected to a unit controlled via MODBUS (register 40200 = 1 or 2), can display the parameters of the unit. Control and configuration features are disabled on the RC TAC4. For more information, refer to Operating instructions TAC4+RC (visualization display) documentation available on our www.paul-lueftung.de site. However, it is possible to enable the RC TAC4 control features, by closing the contact between terminals +12V and IN5 on circuit the TAC4 DG. The RC TAC4 standard features are then enabled. For more information on its use, refer to the Operating instructions TAC4+RC documentation: available on our www.paul-lueftung.de site. 9 Detailed MODBUS table Legend : Read/Write R = Read only R/W = Read and Write Register type E1 = Register in EEPROM memory with endurance of 100 000 write cycles R = Register in a non volatile RAM memory 29 9.1 General info Register Read / Write R Type 40003 R E1 40004 R E1 40005 R E1 40006 40007 40008 R R R/W E1 E1 E1 40001 40002 9.2 E1 Magic number to detect a Lemmens product. Two words. First word is 19533, second word is 20051. These are the ASCII values of “LMNS”. If read as a 32-bit value, the value is 1,314,081,869. Product identification code number of the TAC4 regulation (CID) Modbus mapping version. = Major * 100 + minor Example : 100 (major=1, minor=0) Software version, major. The software version number scheme is: major.minor.revision. Leading zeros are not used. Valid versions would be v1.0.0, v1.3.18 or v2.14.6. V1.03.18 would be invalid. Each part can be 0..99, at least. Software version, minor. Software version, revision. Flag indicating that controller has been reset. The modbus master can use this to detect that the controller has reset. Flag can be written to zero by the master. Accepted values 19533, 20051 Unsigned 0..32767 Unsigned 0..32767 0..99 0..99 0..99 0 or 1 Visualization Register Read / Write R Type R E1 40023 R E1 40024 R E1 40052 R E1 40053 R E1 40054 R E1 40055 R E1 40056 R E1 40057 R E1 40058 R E1 40059 R E1 40060 R E1 40061 R E1 40062 R E1 40020 40021 40022 30 Description E1 Description Factory configuration : REC TYPE 32-bit value in 2 words Factory configuration : PREHEAT OPTION 0=OFF, 1=ON-KWin Factory configuration : POSTHEAT OPTION 0=OFF, 1=ON-KWout, 2=ON-NV Factory configuration : CT IN (damper) OPTION 0=NO, 1=YES Current Working Mode 0=OFF, 1=CA, 2=LS, 4=CPs 9=INIT (temporary mode during init of pressure alarm or init of CPs mode) Current speed as stop/low/medium/high 0=STOP, 1=LOW/I, 2=MEDIUM/II, 3=HIGH/III Current setpoint: Range 0..9999 Current Setpoint (SET VAL) unit: 0=m3/h, 1=Pa, 2=0,1V Current setpoint for pulsion fans F1/F2. Can be m3/h, Pa or 0.1V unit. Current setpoint for extraction fans F3/F4 Can be m3/h, Pa or 0.1V unit. Preheat option (KWin): Temperature setpoint, in 0,1 °C units. Range -99..+99 meaning -9,9 .. +9,9°C Heating or cooling option (KWout, NV and SAT BA/KW): Temperature setpoint: in 0,1 °C units. Range 0..+999 meaning 0 .. +99,9°C 0 means supply heating and cooling are OFF. Current Exhaust/Supply ratio (unbalance between exhaust and supply flows) in %: Range 5 .. 999 % Pressure alarm data : Supply: reference flow for pressure alarm, in m3/h Pressure alarm data : Supply: reference pressure for pressure alarm, in Pa Accepted values 32-bit value in 2 words 0 or 1 0, 1 or 2 0 or 1 0, 1, 2 or 4 0, 1, 2 or 3 0..9999 0, 1 or 2 0..max of unit 0..max of unit -99..99 0..999 5..999 0..max of unit 0..max of unit 40063 R E1 40064 R E1 40065 40066 40067 40068 40069 40070 40071 40072 40073 40074 40075 40076 40077 40078 40079 40080 40081 40082 R R R R R R R R R R R R R R R R R E1 E1 E1 E1 E1 E1 E1 E1 E1 E1 E1 E1 E1 E1 E1 E1 E1 40083 R E1 40084 R E1 40085 R E1 40086 R E1 40087 R E1 40088 R E1 40089 R E1 40090 R E1 40150 R E1 Pressure alarm data : Exhaust: reference flow for pressure alarm, in m3/h Pressure alarm data : Exhaust: reference pressure for pressure alarm, in Pa Fan 1 (Supply 1) flow Fan 1 pressure Fan 1 torque. Range : 0..255 (127=50%) Fan 1 RPM Fan 2 (Supply 2) flow Fan 2 pressure Fan 2 torque. Range : 0..255 (127=50%) Fan 2 RPM Fan 3 (Exhaust 1) flow Fan 3 pressure Fan 3 torque. Range : 0..255 (127=50%) Fan 3 RPM Fan 4 (Exhaust 2) flow Fan 4 pressure Fan 4 torque. Range : 0..255 (127=50%) Fan 4 RPM working hours of the unit : RUN TIME: xxxxxx h 32-bit value in 2 words. Antifreeze status : 0=OFF 1=antifreeze of the air-air heat exchanger is activated 2= antifreeze of the warm water heat exchanger is activated Bypass status 0=CLOSED, 1=OPEN CTin option : Damper status 0=CLOSED, 1=OPENING, 2=OPEN post ventilation status 0=NO, 1=active Current control mode: indicates what controls the airflows 1 = FATAL ERROR : Fans are stopped 2 = FIRE ALARM (registers 40511 and 40512) 3 = RC : remote control RC TAC4 4 = EXTERNAL CONTACTS : K1-K2-K3 contacts 5 = TIMESCHEDULER configured by the RC TAC4 6 = TIMESCHEDULER configured by MODBUS or by the GRC 7 = MODBUS register 40201 8 = BYPASS (registers 40516 and 40517) 9 = BOOST (registers 40548 and 40549) 10 = MODBUS registers 40204 and 40205 Antifreeze status of the external exchangers: 0=OFF 1= antifreeze of the water exchanger BA+ or BA+/- is activated 2= antifreeze of the cold water exchanger BA- is activated 3= antifreeze of the warm and cold water exchangers BA+ and BAare activated Current Supply T° heating setpoint, in 0,1 °C units. Range 1..+999 meaning +0,1 .. +99,9°C 0 is supply heating OFF. 1254 m3/h Current Supply T° cooling setpoint, in 0,1 °C units. Range 1..+999 meaning +0,1 .. +99,9°C 0 is supply cooling OFF. Status of digital inputs on the TAC4 DG circuit Bitmap with 1 bit per input. 0=OFF, 1=ON (closed with +12V). Bit 0: K1 Bit 1: K2 (as on/off) Bit 2: K3 (as on/off) Bit 3: IN1 Bit 4: IN2 Bit 5: IN3 0..999 370 Pa 0..max of unit 0..max of unit 0..255 0..6000 0..max of unit 0..max of unit 0..255 0..6000 0..max of unit 0..max of unit 0..255 0..6000 0..max of unit 0..max of unit 0..255 0..6000 0..999999 0, 1 or 2 0 or 1 0, 1 or 2 0 or 1 1..10 0, 1, 2 or 3 0..999 0..16383 31 40152 R E1 40153 R E1 40154 R E1 40155 R E1 40156 R E1 40157 R E1 40158 R E1 40159 R E1 40161 R E1 40162 R E1 40168 R E1 40170 R E1 40171 R E1 32 Bit 6: IN4 Bit 7: IN5 Bit 8: IN6 Bit 9: IN7 Bit 10: IN8 Bit 11: IN9 Bit 12: IN10 Bit 13: IN11 K1 Analog voltage, K1 is a digital input but it is shown here for completeness. 0..100 = 0..10,0V K2 Analog voltage, 0..100 = 0..10,0V K3 Analog voltage, 0..100 = 0..10,0V Temperature T°1, in 0,1°C units. Range -990 .. +990 meaning -99.0 .. +99.0 °C. -999 means open circuit. +999 means short circuit. Temperature T°2, in 0,1°C units. Range -990 .. +990 meaning -99.0 .. +99.0 °C. -999 means open circuit. +999 means short circuit. Temperature T°3, in 0,1°C units. Range -990 .. +990 meaning -99.0 .. +99.0 °C. -999 means open circuit. +999 means short circuit. Temperature T°4, in 0,1°C units. Range -990 .. +990 meaning -99.0 .. +99.0 °C. -999 means open circuit. +999 means short circuit. Temperature T°5, in 0,1°C units. Range -990 .. +990 meaning -99.0 .. +99.0 °C. -999 means open circuit. +999 means short circuit. Temperature T°7, in 0,1°C units. Range -990 . +990 meaning -99.0 .. +99.0 °C. -999 means open circuit. +999 means short circuit. Temperature T°8, in 0,1°C units. Range -990 .. +990 meaning -99.0 .. +99.0 °C. -999 means open circuit. +999 means short circuit. Status of digital outputs on the TAC4 DG circuit (block 0) Bitmap with 1 bit per input. 0=OFF, 1=ON. Bit 0: AL1 alarm, 1=”alarm” Bit 1: BYPASS 1 (0=closed, 1=open) Bit 2: BYPASS 2 (not used always on) Bit 3: CT (0=closed, 1=open) Bit 4: KWin (0=inactive, 1=active) Bit 5: KWout (0=inactive, 1=active) Bit 6: OR1 SAT “pressure alarm” (0=inactive, 1=active) Bit 7: OR2 SAT “fan on” (0=inactive, 1=active) Bit 8: OR3 SAT “water pump NV” (0=inactive, 1=active) Bit 9: OR4 SAT “bypass status” (0=inactive, 1=active) Bit 10: SAT-BA WP (0=inactive, 1=active) Analog output OUT1. Image of the flow or pressure of one fan (to be configured in advanced setup). In 0,1V units, range 0..100 meaning 0,0V .. 10.0V. 0 – 10V = 0 – Max airflow or pressure of the fan Analog output OUT2. Image of the flow or pressure of one fan (to be configured in advanced setup). In 0,1V units, range 0..100 meaning 0,0V .. 10.0V. 0 – 10V = 0 – Max airflow or pressure of the fan 0..100 0..100 0..100 -999..999 -999..999 -999..999 -999..999 -999..999 -999..999 -999..999 0..2047 0..100 0..100 40172 R E1 40174 R E1 40175 R E1 40186 R E1 40187 R E1 40188 R E1 9.3 Analog output OUT4 - NV. Postheat NV option : opening of the 3-ways valve In 0,1V units, range 0..100 meaning 0,0V .. 10.0V. Analog output OUT7. Postheat/cool BA+ or BA+/- option : opening of the 3-ways valve In 0,1V units, range 0..100 meaning 0,0V .. 10.0V. Analog output OUT8. Postcool BA- option : opening of the 3-ways valve In 0,1V units, range 0..100 meaning 0,0V .. 10.0V. output KWin Preheat KWin option : power of the electric coil (%) In % units, range 0..100 meaning 0..100%. output KWout Postheat KWout option : power of the electric coil (%) In % units, range 0..100 meaning 0..100%. output external KW (SAT BA/KW) Postheat SAT KW option : power of the electric coil (%) In % units, range 0..100 meaning 0..100%. 0..100 Description Accepted values 0, 1 or 2 0..100 0..100 0..100 0..100 0..100 Control Register Type 40200 Read / Write R/W 40201 R/W R 40204 R/W R 40205 R/W R 40221 R/W R 40222 R/W R 40223 R/W R 40225 R/W R 40226 R/W R 40227 R/W R 40228 R/W R 40229 R/W R R Selection of the control master (who will determine speed). 0= RC TAC4 determines speed 1=MODBUS determines speed via register 40201 2=TIMETABLE determines airflows (automatic working) 3= MODBUS determines airflows via registers 40204/40205 . . Speed selection via Modbus (only if 40200=1) 0=STOP 1=LOW-pos.I 2=MEDIUM-pos.II 3=HIGH-pos.III . . Supply airflow selection via Modbus (only if 40200=3) Range 0..9999 Exhaust airflow selection via Modbus (only if 40200=3) Range 0..9999 External pressure alarm 0=No alarm 1=Pressure alarm activated Fire alarm 0=No alarm 1=Fire alarm activated Bypass control 0=Bypass auto (based on measured T°1 and T°2) 1=Bypass forced open ON/OFF Postheat: to desactivate the postheating 0=Postheating allowed 1=Postheating not allowed Fire alarm supply airflow 0=Supply fan is stopped in fire alarm 1=Supply fan is running in fire alarm Fire alarm exhaust airflow 0=Exhaust fan is stopped in fire alarm 1=Exhaust fan is running in fire alarm Boost control 0= Boost function not activated 1= Boost function activated ON/OFF Postcool: to desactivate the cooling 0= cooling allowed 1= cooling not allowed 0, 1, 2 or 3 min..max unit + 0 min..max unit + 0 0 or 1 of of 0 or 1 0 or 1 0 or 1 0 or 1 0 or 1 0 or 1 0 or 1 33 40230 R/W R 40250 R/W E1 40251 R/W E1 40252 R/W E1 40253 R/W E1 40254 R/W E1 40256 R/W E1 40257 34 R/W E1 Cooling or heating selection : 0= heating position 1= cooling position RESET Perform a reset to clear pending alarms and resume normal working. Required to recover from fatal alarms. This operation takes about 1 second. The modbus write command will be answered immediately, then the operation will be executed. Modbus commands will not be answered during the operation. Read: always 0. Write: 1 to perform reset. RESET TO FACTORY DEFAULT VALUES. Reset setup and advanced setup parameters to their factory default values. This operation takes about 3 seconds. The modbus write command will be answered immediately, then the operation will be executed. Modbus commands will not be answered during the operation. Read: always 0. Write: 1 to perform reset. RESET RUN TIME Reset run time (working hours) to zero. Read: always 0 Write: 1 to perform reset. Pressure alarm initialization Start the initialization Will be accepted in CA and LS mode only! Initialization is: run with reference flow set in 40254, measure pressure, store reference pressure. Working mode is set to 9 during the initialization. Read: 0=idle, 1=start. Write: 1 to start Pressure initialization Initialization flow 1: Reference flow used for: - CA/LS mode: Pa alarm initialization (supply fan flow) - CPs mode : initialization (supply fan flow if “CPs on SUP” or “CPs on SUP+EXH”, exhaust fan flow if “CPs on EXH”) Range is limited to the minimum and maximum flow of the fans used CPs mode initialization. Start the initialization Will be accepted in CPs mode only! - “CPs on SUP”: run supply with reference flow set in 40254, run exhaust with ratio, measure K2 voltage, store reference voltage. - “CPs on EXH”: run exhaust with reference flow set in 40254, run supply with 1/ratio, measure K2 voltage, store reference voltage. - “CPs on SUP+EXH”: run supply with reference flow set in 40254, run exhaust with reference flow set in 40257, measure K2 voltage for supply, measure K3 voltage for exhaust, store reference voltage. Working mode is set to 9 during the initialization. Read: 0=idle, 1=start. Write: 1 to start Initialization flow 2: Reference flow used for: - CPs mode initialization (exhaust fan flow if “CPs on SUP+EXH”) Range is limited to the minimum and maximum flow of the fans used 0 or 1 0 or 1 0 or 1 0 or 1 0 or 1 min..max unit 0 or 1 of 9.4 Alarms See our Alarm document for more details Register Read / Write Type Alarm bits Alarm flags are bits in holding registers. 1 bit per alarm, 16 alarms per register. Bit is 1 if alarm is active. Read only. Accepted values 40300 R E1 Bit 0: ALARM_PROGRAM_ERROR Bit 1: ALARM_DATA_ERROR Bit 2: ALARM_FAN1 Bit 3: ALARM_FAN2 Bit 4: ALARM_FAN3 Bit 5: ALARM_FAN4 Bit 6: ALARM_PRESSURE_F1 Bit 7: ALARM_PRESSURE_F3 Bit 8: ALARM_T1_OPEN Bit 9: ALARM_T1_SHORT Bit 10: ALARM_T2_OPEN Bit 11: ALARM_T2_SHORT Bit 12: ALARM_T3_OPEN Bit 13: ALARM_T3_SHORT Bit 14: ALARM_T4_OPEN Bit 15: ALARM_T4_SHORT 0..65535 40301 R E1 Bit 0: ALARM_T5_OPEN Bit 1: ALARM_T5_SHORT Bit 2: ALARM_T6_OPEN Bit 3: ALARM_T6_SHORT Bit 4: ALARM_T7_OPEN Bit 5: ALARM_T7_SHORT Bit 6: ALARM_T8_OPEN Bit 7: ALARM_T8_SHORT Bit 8: ALARM_CP_FAN_1_HIGH Bit 9: ALARM_CP_FAN_1_LOW Bit 10: ALARM_CP_FAN_3_HIGH Bit 11: ALARM_CP_FAN_3_LOW Bit 12: ALARM_LS_FAN_1_LOW Bit 13: ALARM_LS_FAN_1_HIGH Bit 14: ALARM_LS_FAN_2_LOW Bit 15: ALARM_LS_FAN_2_HIGH 0..65535 40302 R E1 Bit 0: ALARM_LS_FAN_3_LOW Bit 1: ALARM_LS_FAN_3_HIGH Bit 2: ALARM_LS_FAN_4_LOW Bit 3: ALARM_LS_FAN_4_HIGH Bit 4: ALARM_CA_FAN_1_LOW Bit 5: ALARM_CA_FAN_1_HIGH Bit 6: ALARM_CA_FAN_2_LOW Bit 7: ALARM_CA_FAN_2_HIGH Bit 8: ALARM_CA_FAN_3_LOW Bit 9: ALARM_CA_FAN_3_HIGH Bit 10: ALARM_CA_FAN_4_LOW Bit 11: ALARM_CA_FAN_4_HIGH Bit 12: ALARM_PA_INIT_F1_NOT_STAB Bit 13: ALARM_PA_INIT_F3_NOT_STAB Bit 14: ALARM_PA_INIT_F1_TOO_LOW Bit 15: ALARM_PA_INIT_F3_TOO_LOW 0..65535 35 40303 R E1 Bit 0: ALARM_PA_INIT_F1_NOT_ACHIEVED Bit 1: ALARM_PA_INIT_F3_NOT_ACHIEVED Bit 2: ALARM_PA_INIT_F1_TOO_HIGH Bit 3: ALARM_PA_INIT_F3_TOO_HIGH Bit 4: ALARM_MAINT_WARN Bit 5: ALARM_MAINT_FATAL Bit 6: ALARM_DPA Bit 7: ALARM_FIRE Bit 8: ALARM_END_OF_FIRE_ALARM Bit 9: ALARM_VLOWERVLOW Bit 10: ALARM_VHIGERVHIGH Bit 11: ALARM_PREHEAT_REDUCED Bit 12: ALARM_PREHEAT_STOP Bit 13: ALARM_AF_REDUCED Bit 14: ALARM_AF_STOP Bit 15: ALARM_POSTHEAT_SETPOINT 0..65535 40304 R E1 Bit 0: ALARM_POSTCOOLING_SETPOINT (Supply T° too high) Bit 1 : ALARM_SAT-BA_MODULE (SAT-BA module is configured but does not respond) 0..65535 9.5 SETUP parameters Register Type 40400 Read / Write R/W 40401 R/W E1 40402 R/W E1 40403 R/W E1 40404 R/W E1 40405 R/W E1 40406 R E1 40420 R/W E1 40425 R/W E1 36 E1 Description Current time: seconds (Do not write the time register cyclically, doing so will slow the clock counter) Current time: minutes: (Do not write the time register cyclically, doing so will slow the clock counter) Current time: hours: (Do not write the time register cyclically, doing so will slow the clock counter) Current date: day of month: (Do not write the time register cyclically, doing so will slow the clock counter) Current time: month: 1=January 12=December (Do not write the time register cyclically, doing so will slow the clock counter) Current time: year: (Do not write the time register cyclically, doing so will slow the clock counter) Current time: Day of the week: 0=Monday, 1=Tuesday, 2=Wednesday, 3=Thursday, 4=Friday, 5=Saturday, 6=Sunday. This register is read only! The weekday is automatically calculated when the date changes. Notes on the real time clock: • The range of the clock is 1 jan 2000 .. 31 dec 2099. • The date is validated when written. • Automatic leap year correction. • Automatic Daylight Saving Time (DST) adjustment following EU rules. Adjust +01:00 at 2:00 on the last Sunday in March. Adjust -1:00 at 3:00 at the last Sunday in October. LANGUAGE language on the Remote control RC TAC4 0=GB(English), 1=F(French), 2=D(German), 3=NL(Dutch) Postheat setpoint For NV, KWout, BA+ and KWext options In 0,1 °C units. Range 0..+999 meaning 0 .. +99,9°C 0 is OFF Accepted values 0..59 0..59 0..23 1..31 1..12 2000..2099 0..6 0, 1, 2 or 3 0..999 40426 R/W E1 40427 R/W E1 40428 R/W E1 40429 R/W E1 40430 R/W E1 40431 R/W E1 40432 R/W E1 40433 R/W E1 40434 R/W E1 40435 R/W E1 40436 R/W E1 40437 R/W E1 40438 R/W E1 40439 R/W E1 40440 R/W E1 40441 R/W E1 40442 R/W E1 FANS WORKING MODE 0=OFF : unit is stopped 1=CA : constant airflows 2=LS : airflow linked to 0-10V input signal 4=CPs : constant pressure with sensor 9=INIT (9 is a temporary mode during initialization of pressure for pressure alarm or CPs mode) Exhaust/Supply ratio To create an unbalance between flows Airflow selection For CA mode only: Airflow 1 (K1 – Pos.I) Range 0..9999 Airflow selection For CA mode only: Airflow 2 (K2 – Pos.II) Range 0..9999 Airflow selection For CA mode only: Airflow 3 (K3 – Pos.III) Range 0..9999 Pressure alarm selection For CA and LS mode only: Pressure alarm selection 0=No pressure alarm 1=Pressure alarm selected Pressure alarm data For CA and LS mode only: Pressure offset on supply (increase of pressure) In Pa units Pressure alarm data For CA and LS mode only: Pressure offset on exhaust (increase of pressure) In Pa units Pressure alarm data For CA and LS mode only: Reference flow on supply for pressure alarm In m3/h units Pressure alarm data For CA and LS mode only: Pressure at reference flow on supply. In Pa units Pressure alarm data For CA and LS mode only: Reference flow on exhaust for pressure alarm In m3/h units Pressure alarm data For CA and LS mode only: Pressure at reference flow on exhaust. In Pa units Signal link data For LS mode only: Minimum signal value : Vmin In 0,1V units, 0..100 meaning 0..10,0V Signal link data For LS mode only: Maximum signal value : Vmax In 0,1V units, 0..100 meaning 0..10,0V Signal link data For LS mode only: Airflow at Vmin In m3/h units Signal link data For LS mode only: Airflow at Vmax In m3/h units Sleep mode reduction on K3 For LS, CPf and CPs mode only: reduction in % of the nominal set point In % unit 0..9 5..999 0..max of unit 0..max of unit 0..max of unit 0 or 1 25..999 25..999 min..max unit of 0..max of unit min..max unit of 0..max of unit 0..100 0..100 min..max unit of min..max unit of 1..100 37 40443 R/W E1 40444 R/W E1 40446 R/W E1 40447 R/W E1 40448 R/W E1 40449 R/W E1 9.6 0,1 or 2 min..max unit Type 40500 Read / Write R/W 40501 R/W E1 40502 R/W E1 40503 R/W E1 40504 R/W E1 40505 R/W E1 40506 R/W E1 40507 R/W E1 40508 R/W E1 40509 R/W E1 E1 Description Stop the fans in pressure alarm For CA and LS mode only: 0=NO, 1=YES Stop the fans if signal on K2 is lower than Vlow For LS mode only 0=NO, 1=YES If 40501 is 1, value of Vlow For LS mode only In 0,1V units, range 0..100 meaning 0..10,0V Stop the fans if signal on K2 is higher than Vhigh For LS mode only 0=NO, 1=YES If 40503 is 1, value of Vhigh For LS mode only In 0,1V units, range 0..100 meaning 0..10,0V Signal to control exhaust airflow on K3 For LS mode only 0=NO, 1=YES Reaction speed in CPs mode For CPs mode only Range 10..0 (10=fastest (default value) – 0=slowest) Reaction logic in CPs mode For CPs mode only 0=POSITIVE : airflow increase if Vk2 > set point 1=NEGATIVE : airflow increase if Vk2 < set point Start torque In % unit “FANS OFF” allowed? If 0, the ventilation cannot be stopped (above in alarm) 0=NO, 1=YES of 0..100 0..999 min..max unit 0..100 ADVANCED SETUP parameters Register 38 Control on supply or exhaust selection For CPs mode only: Control pressure on the supply and/or exhaust flow 0=on supply 1=on exhaust 2=on supply and on exhaust Constant pressure data For CPs mode only: Reference flow 1 used for measuring pressure. (supply fan flow if “CPs on SUP” or “CPs on SUP+EXH”, exhaust fan flow if “CPs on EXH”) In m3/h units Constant pressure data For CPs mode only: Reference voltage to keep constant in CPs mode. If CPs on SUP+EXH : reference voltage for Supply flow In 0,1V units, range 0..100 is 0..10.0V. Cooling setpoint For BA- and BA+/- options In 0,1 °C units. Range 0..+999 meaning 0 .. +99,9°C 0 is OFF Constant pressure data For CPs mode only: Reference flow 2 used for measuring pressure. exhaust fan flow if “CPs on SUP+EXH” In m3/h units Constant pressure data For CPs on SUP+EXH only: Reference voltage for exhaust flow to keep constant In 0,1V units, range 0..100 is 0..10.0V. Accepted values 0 or 1 0 or 1 0..100 0 or 1 0..100 0 or 1 0..10 0 or 1 2..98 0 or 1 of 40510 R/W E1 40511 R/W E1 40512 R/W E1 40513 R/W E1 40514 R/W E1 40515 R/W E1 40516 R/W E1 40517 R/W E1 40518 R/W E1 40519 R/W E1 40520 R/W E1 40521 R/W E1 40522 R/W E1 40523 R/W E1 40524 R/W E1 40525 R/W E1 40526 R/W E1 40527 R/W E1 40528 R/W E1 40529 R/W E1 Fire alarm : normally open or closed contact selection 0 = normally open (N.O.) 1 = normally closed (N.C.) Fire alarm : airflow selection airflow for supply In m3/h units Fire alarm : airflow selection airflow for exhaust In m3/h units Bypass data T°1 value (40514 is raised if required to meet the T2 >= (T1+1°C) requirement) In 0,1°C units, Range 50 .. 270 meaning 5.0 .. 27.0 °C Bypass data T°2 value (T2 must be >= (T1+1°C)) In 0,1°C units, Range 60 .. 280 meaning 6.0 .. 28.0 °C Bypass data To force airflows when bypass is open 0=NO, 1=YES Bypass data If 40515 = 1, Supply airflow when bypass is open In m3/h units Bypass data If 40515 = 1, Exhaust airflow when bypass is open In m3/h units KWin option Preheat setpoint of the air-air exchanger antifreeze protection In 0,1°C units, Range -99..99 meaning -9.9 .. +9.9°C Antifreeze air-air exchanger Activation of the antifreeze protection 0=NO, 1=YES Antifreeze air-air exchanger T° LOW (Antifreeze T° HIGH is raised if required to meet the T°HIGH >= (T° LOW +1°C) requirement) In 0,1°C units, Range -10 .. +30 meaning -1 .. +3°C Antifreeze air-air exchanger T° HIGH (T°HIGH must be >= (T° LOW +1°C)) In 0,1°C units, Range 10 .. 50 meaning 1.0 .. 5.0 °C Antifreeze air-air exchanger Allow supply airflow to be stopped if T°3 < T°LOW 0=NO, 1=YES KWin option Preheat KWin PID: PB (Gain = 100/PB) In % units KWin option Preheat KWin PID: Ti In sec. units KWin option Preheat KWin PID: Td In sec. units NV option Postheat NV speed Range 10..1 (10=fastest, 1=slowest) KWout option Postheat KWout PID: PB (Gain = 100/PB) In % units KWout option Postheat KWout PID: Ti In sec. units KWout option Postheat KWout PID: Td In sec. units 0 or 1 min..max unit + 0 of min..max unit + 0 of 50..270 60..280 0 or 1 min..max unit + 0 of min..max unit + 0 of -99..99 0 or 1 -10..30 10..50 0 or 1 1..100 0..9999 0..9999 1..10 1..100 0..9999 0..9999 39 40530 R/W E1 40531 R/W E1 40532 R/W E1 40533 R/W E1 40534 R/W E1 40535 R/W E1 40536 R/W E1 40537 40538 R/W E1 40539 R/W E1 40540 40541 R/W E1 40542 R/W E1 40543 R/W E1 40546 R/W E1 40547 R/W E1 40548 R/W E1 40549 R/W E1 40550 R/W E1 40551 R/W E1 40 Analog output OUT1 Selection of the parameter to be sent on OUT1 0=m3/h F1, 1=Pa F1, 2=m3/h F2, 3=Pa F2, 4=m3/h F3, 5=Pa F3, 6=m3/h F4, 7=Pa F4 Analog output OUT2 Selection of the parameter to be sent on OUT2 0=m3/h F1, 1=Pa F1, 2=m3/h F2, 3=Pa F2, 4=m3/h F3, 5=Pa F3, 6=m3/h F4, 7=Pa F4 Post ventilation Activation of the post-ventilation 0=NO, 1=YES Post ventilation Selection of the post-ventilation time In sec. units Fan run time Activation of the telling of the working hours of the unit 0=NO, 1=YES Fan run time To display the working hours on the RC or GRC TAC4 0=NO, 1=YES Fan run time To activate a "SERVICE alarm" after a predetermined time 0=NO, 1=YES Fan run time Time for the "SERVICE alarm" In hours units 32-bit value in 2 words. Fan run time To stop the fans after a predetermined time 0=NO, 1=YES Fan run time Time to stop the fans in "SERVICE alarm" In hours units 32-bit value in 2 words. To display only the alarms on the RC TAC4 (Airflows, pressures and other parameters are hidden) 0=NO, 1=YES MODBUS configuration Modbus Address of the TAC4 circuit Access code for RC TAC4 To require a code to get access to setup menus 0=NO, 1=YES Access code for RC TAC4 Code selection Boost data Supply airflow when “Boost “ is activated In m3/h units Boost data Exhaust airflow when “Boost “ is activated In m3/h units SAT BA/KW option (external heating or cooling) Selection of the external heating or cooling exchanger : 0 = none 1 = BA + 2 = BA 3 = BA+/BA- (2 exchangers) 4 = BA+/- (1 exchanger for heating and cooling) 5 = KW 6 = KW / BA BA- option Cooling BA- speed Range 10..1 (10=fastest, 1=slowest) 0..7 0..7 0 or 1 0..9999 0 or 1 0 or 1 0 or 1 0 .. 999999 0 or 1 0 .. 999999 0 or 1 1..247 0 or 1 0..9999 min..max unit + 0 of min..max unit + 0 of 0..6 1..10 40552 R/W E1 40553 R/W E1 40554 R/W E1 9.7 BA+ Antifreeze T° threshold: In 0,1°C units. Range 0..+999 meaning 0 .. +99,9°C (BA+ control enters 15min antifreeze cycle if T7 < this threshold and OUT7<3V) BA- Antifreeze T° threshold: In 0,1°C units. Range 0..+999 meaning 0 .. +99,9°C (BA+ control enters 15min antifreeze cycle if T8 < this threshold and OUT8<3V) NV Antifreeze T° threshold: In 0,1°C units. Range 0..+999 meaning 0 .. +99,9°C (BA+ control enters 15min antifreeze cycle if T4 < this threshold and OUT4-NV<3V) 0..999 0..999 0..999 Time scheduler 9.7.1 Time schedule structure Time schedule for 1 week 6 time segments per day Each time segment has 8 parameters (10 registers are provided per time segment) Register Name 41xx0 Start time 41xx1 Workingmode 41xx2 Start/Stop 41xx3 Setpoint 1 Description Starting time of this time segment. Value = (100*hh)+mm 800 (8h00) Value = -1: this time segment is not used Each time segment runs until another time segment starts. Factory default = -1 (time segment not used). Working mode 0=OFF, 1=CA, 2=LS, 4=CPs 0 : Fans stopped 1 : Fans run Factory default = 1 (Run). Not used : always at 1 If 41001=0 (OFF mode) : not used. Accepted values 0..2359 -1 (not used) 0, 1, 2 or 4 1 0..9999 If 41001=1 (CA mode) : setpoint for supply airflow in m3/h units. Range : 0..max of unit. If 41001=2 (LS mode) : Percentage of nominal setpoint (if 40505=1: setpoint only for supply) in % units. Range : 0..100%. 41xx4 Setpoint 2 If 41001=3 (CPs mode) : Percentage of nominal setpoint (if 40443=2: setpoint only for supply) in % units. Range : 0..100%. If 41001=0 (OFF mode) : not used. 0..9999 If 41001=1 (CA mode) : setpoint for exhaust airflow in m3/h units. Range : 0..max of unit. If 41001=2 (LS mode) : if 40505=0 : Exhaust/Supply flow ratio. Range : 5..999%. if 40505=1 : Percentage of nominal setpoint for extraction. Range : 1..100%. in % units. If 41001=3 (CPs mode) : if 40443=0 or 1 : Exhaust/Supply flow ratio. Range : 5..999%. if 40443=2 : Percentage of nominal setpoint for extraction. Range : 1..100%. in % units. 0..999 41 41xx5 T° Setpoint heating 41xx6 T° Setpoint cooling 41xx7 Bypass mode 9.7.2 Postheat setpoint For NV, KWout, BA+ and KWext options In 0,1 °C units. Range 0..+999 meaning 0 .. +99,9°C 0 is OFF Cooling setpoint For BA- and BA+/- options In 0,1 °C units. Range 0..+999 meaning 0 .. +99,9°C 0 is OFF Selection of the bypass status 0=Bypass auto (based on measured T°1 and T°2) 1=Bypass forced to close 2=Bypass forced to open 0, 1 or 2 Time scheduler mapping Register Type 41000..41007 41010..41017 41020..41027 41030..41037 41040..41047 41050..41057 Read / Write R/W R/W R/W R/W R/W R/W E1 E1 E1 E1 E1 E1 Parameters for Monday Time segment 1 Parameters for Monday Time segment 2 Parameters for Monday Time segment 3 Parameters for Monday Time segment 4 Parameters for Monday Time segment 5 Parameters for Monday Time segment 6 41060..41067 41070..41077 41080..41087 41090..41097 41100..41107 41110..41117 R/W R/W R/W R/W R/W R/W E1 E1 E1 E1 E1 E1 Parameters for Tuesday Time segment 1 Parameters for Tuesday Time segment 2 Parameters for Tuesday Time segment 3 Parameters for Tuesday Time segment 4 Parameters for Tuesday Time segment 5 Parameters for Tuesday Time segment 6 41120..41127 41130..41137 41140..41147 41150..41157 41160..41167 41170..41177 R/W R/W R/W R/W R/W R/W E1 E1 E1 E1 E1 E1 Parameters for Wednesday Time segment 1 Parameters for Wednesday Time segment 2 Parameters for Wednesday Time segment 3 Parameters for Wednesday Time segment 4 Parameters for Wednesday Tim esegment 5 Parameters for Wednesday Time segment 6 41180..41187 41190..41197 41200..41207 41210..41217 41220..41227 41230..41237 R/W R/W R/W R/W R/W R/W E1 E1 E1 E1 E1 E1 Parameters for Thursday Time segment 1 Parameters for Thursday Time segment 2 Parameters for Thursday Time segment 3 Parameters for Thursday Time segment 4 Parameters for Thursday Time segment 5 Parameters for Thursday Time segment 6 41240..41247 41250..41257 41260..41267 41270..41277 41280..41287 41290..41297 R/W R/W R/W R/W R/W R/W E1 E1 E1 E1 E1 E1 Parameters for Friday Time segment 1 Parameters for Friday Time segment 2 Parameters for Friday Time segment 3 Parameters for Friday Time segment 4 Parameters for Friday Time segment 5 Parameters for Friday Time segment 6 41300..41307 41310..41317 41320..41327 41330..41337 41340..41347 41350..41357 R/W R/W R/W R/W R/W R/W E1 E1 E1 E1 E1 E1 Parameters for Saturday Time segment 1 Parameters for Saturday Time segment 2 Parameters for Saturday Time segment 3 Parameters for Saturday Time segment 4 Parameters for Saturday Time segment 5 Parameters for Saturday Time segment 6 41360..41367 R/W E1 Parameters for Sunday Time segment 1 42 0..999 Description Accepted values 41370..41377 41380..41387 41390..41397 41400..41407 41410..41417 9.8 R/W R/W R/W R/W R/W E1 E1 E1 E1 E1 Parameters for Sunday Time segment 2 Parameters for Sunday Time segment 3 Parameters for Sunday Time segment 4 Parameters for Sunday Time segment 5 Parameters for Sunday Time segment 6 Season management 9.8.1 Season management structure 3 features can be disabled by the calendar date. Each feature can be disabled for a period between 2 dates: from “Start date” to “End date”. 4 registers are provided to define those 2 dates. Register Name 418xx Start day 418xx+1 Start month 418xx+2 End day 418xx+3 End month Description Accepted values 1..31 Start date for disable of the feature day of the month Start date for disable of the feature month End date for disable of the feature day of the month End date for disable of the feature month 1..12 1..31 1..12 If these 4 registers are configured, the feature is disabled from the start date up to (and including) the end date. Set any of these to 0 to disable seasonal management of this feature. 9.8.2 Season segment mapping Register 41800..41803 Read / Write R/W Type E1 Description Accepted values Season disable of the bypass: 41800: Start date: day-of-month, 1..31 41801: Start date: month, 1..12 41802: End date: day-of-month, 1..12 41803: End date: month, 1..12 41804..41807 R/W E1 Set any of these to 0 to disable seasonal management of the bypass. Season disable of the postheating: For NV, KWout, BA+ and KWext options 41804: Start date: day-of-month, 1..31 41805: Start date: month, 1..12 41806: End date: day-of-month, 1..12 41807: End date: month, 1..12 41808..41811 R/W E1 Set any of these to 0 to disable seasonal management of the postheating. Season disable of the cooling: For BA- and BA+/- options 41808: Start date: day-of-month, 1..31 41809: Start date: month, 1..12 41810: End date: day-of-month, 1..12 41811: End date: month, 1..12 Set any of these to 0 to disable seasonal management of the cooling. As of June 3rd 2013 _____________________________________________________________________________________________ Although we put a lot of care in the making of our documentation, we cannot be held responsible for any error and/or omissions that could have slipped in. 43