1
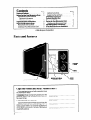
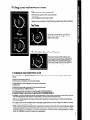
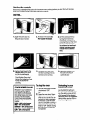
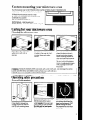
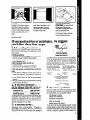
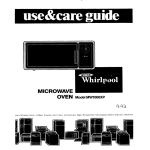
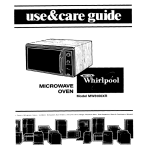
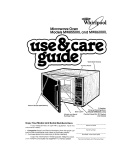
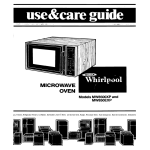
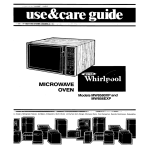
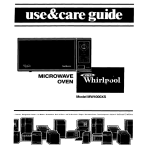
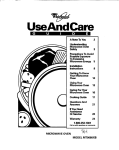
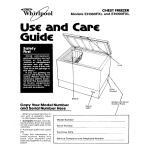
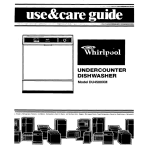
MICROWAVE
Models MW1200XP
MW120EXP
Contents
Page
Page
Park and Features
Before You Use Your Microwave
Oven
Precautions to Avoid Possible
Exposure to Excessive
Microwave
Energy
Important
Safety Instructions
Using Your Microwave
Oven.
Microwave
Oven Controls
Cooking in Your Microwave
Oven
2
3
3
4
5
5
5
01985 Whirlpool
6
7
7
Setting the Controls
Replacing
the Light Bulb
Installation
Instructions
Custom Mounting Your
MicrowaveOven..
Caring for Your Microwave
Oven.
Cleaning the Microwave
Oven
Operating
Safety Precautions.
If You Need Service or Assistance.
z
9
9
11
Corporation
Parts and features
,CONTROL
PANEL
’
LIFT-UP DOOR HANDLE ’
MODEL AND SERIAL
NUMBER PLATE
Copy your Model and Serial Numbers here...
If you need service or call with a question, have
this information
ready:
I. Complete
Model and Serial Numbers (from the
plate just behind the microwave
oven door on
the oven frame).
2. Purchase
date
from sales slip.
Copy this information in these spaces. Keep this
book, your warrantv and sales slip together In a
handy place. There is no warranty registration to
return. Proof-of-purchase
is all that is required for
in-warranty
service.
2
Model
Serial
Number
Number
Purchase
Service
Date
Company
Phone Number
\
VENTS
(Not Shown)
DOOR
LATCH
Fill out and return the “Microwave
Registration
Card” attached
to the oven door. If the card iS
missing, please send the model number of your microwave
oven, with your name and address to...
Whirlpool Corporation
Microwave
Registration
Administrative
Center
2000 U.S. 33 North
Benton Harbor, Michigan
Department
49022
This information
will help us reach
microwave
oven.
you if there is ever a need to pass along
information
about
your
Before you install your microwave oven
Read and carefully follow the REINSTALLATIONINSTRUCTIONS”
found on page 7 of this “Use & Care Guide?
Before you use your microwave oven
Read this “Use & Care Guide” carefully for important
Store in a convenient
place for future use.
use and safety information.
It is your personal
responsibility
and obligation
to be sure your microwave
Has been installed where it is protected
from the elements. The microwave
oven should be at a temperature
above 50°F (10°C) for proper operation.
l Has been
installed on a surface strong enough to support its weight.
l Has been
properly connected
to electrical
supply and grounded.
[See “Installation
Instructions:‘)
l is not used by children
or anyone unable to operate it properly.
l Is properly
maintained.
l Is used only for jobs expected
of a home microwave
oven.
l
PRECAUTIONS TO AVOID
POSSIBLE EXPOSURE TO EXCESSIVE
MICROWAW ENERGY...
DO NOT attempt to operate this oven with the door
open since open-door
operation can result in harmful exoosure to microwave
energy. It is important
not to
defeat or tamper with the
safety interlocks.
DO NOT place any object
between the oven front
face and the door or allow
soil or cleaner residue
to accumulate
on sealing
surfaces.
DO NOT operate the
oven if it is damaged.
It is
particularly
important that
the oven door close
orooerlv and that there is
ho bam’age to the
(1) Door (bent),
(2) Hinges and latches
(broken or loosened),
(3) Door seals and sealing
surfaces.
The microwave
oven
should be checked for
microwave
leakage
by
qualified
service personnel
after a reoair is made.
The oven should not be
adjusted or repaired by
anyone except properly
qualified
service
personnel.
oven:
IMPORTANT
SAFETY INSTRUCTIONS
Microwave
ovens have been used successfully
in homes for a number of years.
They are thoroughly
tested for safe operation
when used properly. However, as
with any appliance,
there are some special installation
and safety precautions
which must be followed
for safe and satisfactory
operation
and to prevent
damage
to the unit.
WARNING -
To reduce the risk of burns, electric shock,
fire, injury to persons or exposure to excessive microwave energy.
1. Read all instructions
before
using
appliance.
2. Read and follow the specific “PRECAUTIONS TO AVOID POSSIBLE EXPOSURE TO
EXCESSIVE MICROWAVE ENERGY” found
on page 3.
3. This appliance
must be grounded. Connect only to properly grounded
outlet. See
“GROUNDING
INSTRUCTIONS”
found on
page 8.
4. Install or locate this appliance
only in
accordance
with the provided
“INSTALLATION INSTRUCTIONS” found on page 7.
5. Some products such as whole eggs and
sealed containers
- for example,
closed
glass jars - may explode
and should not
be heated in this oven.
6. Use this appliance
only for its intended
use as described
in this manual.
7. As with any appliance,
close supervision is necessary when used by children.
8. Do not operate this appliance
if it has a
damaged
cord or plug, if it is not working
properly,
or if it has been damaged
or
dropped.
Electric shock, fire or other hazards may result.
9. This appliance
should be serviced only
by qualified
service
personnel.
Call a
Whirlpool authorized
TECH-CARE’“: Service
Company
for examination,
repair
or
adjustment.
10. Do not cover or block any opening on
the appliance,
for fire may result.
SAVE THESE
11. Do not use outdoors for damage
oven or electric
to the
shock may result.
12. Do not immerse cord or plug in water for
electric shock may result.
13. Keep cord away from heated
for electric shock may result.
surfaces
14. Do not let cord hang over edge of table
or counter for electric shock may result.
15. See door surface cleaning
instructions
on page 9.
16. To reduce the risk of fire in the oven
cavity:
a. Do not overcook food. Carefully attend
appliance
if paper, plastic, or other combustible materials
are placed
inside the
oven to facilitate cooking. Paper can char
or burn, and some plastics can melt if used
when heating
foods,
b. Remove wire twist-ties from paper or
plastic bags before placing bag in oven.
Cooking in metal containers can damage
the oven. So can containers
with hidden
metal (twist-ties, foil-lining, staples, metallic
glaze or trim]. Test dinnerware
or cookware
before using. See page 9.
c. If materials inside the oven should ignite,
keep oven door closed, turn oven off, and
disconnect
the power cord, or shut off
power at the fuse or circuit breaker panel.
17. Read and follow “OPERATING SAFETY
PRECAUTIONS” starting on page 9.
INSTRUCTIONS
I
Using your microwave oven
Microwave oven controls
There are two parts in the control section:
-The Timer
-The Variable Cook Power Control
These will be covered
on the following
pages.
Read them carefully.
The Timer
The Variable Cook Power Control
The Cook Power Control allows you
to choose the Cook Power setting that
best meets your cooking needs. See
the Cook Power Chart for the different
percentages
of cooking powers.
Cooking in your microwave oven
Be sure to read your Cooking Guide packed with your microwave
oven. It contains
about:
l What microwave
energy is
l How food
is cooked by microwave
energy
l What affects
cooking speed and cooking evenness
l Safety
tips
l Utensils to use when
cooking in the microwave
oven
l Cooking
times for different foods
The Cooking Guide will help you get the BESTCOOKING RESULTS.
information
Important
things to remember
to get the BEST COOKING RESULTS.
ALWAYS cook food for the minimum recommended
cooking time. If necessary, add time in one or
two minute periods, then check for doneness to avoid overcooking
the food.
l Stir, turn or rearrange
the food about halfway through the cooking time for most even doneness
with all recipes.
l If a glass cover
is not available,
use waxpaper,
paper towels or Saran’ Wrap. Turn back a corner
to vent steam during cooking.
l When Using
microwave
recipes from cookbooks
or sources other than the Cooking Guide, slightly
longer
cooking times will be needed for those recipes calling for “High” or “Full” cook power, For
eXClmpk3.
add 1 to 2 minutes to a 5 minute cooking time. Cooking times at settings
less than “HIGH”
[such as “MEDIUM”] would not need any adjustment.
l
Setting the controls
Be sure you understand
the basics of microwave
oven cooking
from your Cooking Guide. Follow the directions carefully.
before you start. Start with recipes
DO THIS...
1. Open
the oven door by
lifting the door handle.
2. Put food in the oven. DO
3. Set the cooking time by
turning the Timer Knob
clockwise. To reduce the
cooking time, turn the Timer
Knob counterclockwise.
To set tlmer for less than 1
minute, turn tlmer past 1
minute then to desired
time.
NOT CLOSE THE DOOR.
J
4. Set the Cook Power to the
desired setting from HIGH
to LOW. For best results,
some recipes call for lower
Cook Powers. [See chart
below.) The lower the Cook
Power, the slower the
cooking.
COOK POWER CHART
Recipes in your Cookbook
use Cook Power settings
from HIGH to LOW. Recipes
from other books and magazines may use different
Cook Power percentages.
The following chart may be
helpful:
YIGH - 100% of full power
UED - 70% of full power
DEFROST- 50% of full power
MID-LOW - 40% of full power
XIW - 20% of full power
6
5. Close the door. The oven
will start cooking and you
will hear a fan running.
6.
To stop the oven
1. Turn the Timer Knob
Defrosting in your
microwave oven
clockwise
2. E:en
counter-
to “OFF”
the oven door. Opening the oven door stops the
oven so you can stir, turn, rearrange or add ingredients
to the food. Close the oven
door to complete
cooking. If
you remove the food, set the
timer to “OFF” before closing
the oven door so oven will
not operate.
When the set time is up,
the oven will shut off
automatically.
Use the DEFROST setting to
thaw frozen food before cooking. This setting cooks at 50%
of full power for the desired
defrosting time. For suggested
defrost times, see the chart in
your Cooklng Gulde.
Replacing the light bulb
1.
Unplug
2. Remove
the power
ACCESS
PANEL
cord.
screw on access
panel.
3. Unscrew the light bulb from its socket.
4. Replace
bulb.
bulb with a ISwatt
5. Replace the access panel
Plug in the power cord.
candelabra
base
and screw
6.
Installation
instructions
BEFORE YOU BEGIN, READ THE FOLLOWING INSTRUCTIONS
Installing
COMPLETELY AND CAREFULLY.
your microwave oven
1. Empty the microwave oven and clean inside it
with a soft, damp cloth. Check for damage
such
as misaligned
door, damage
around the door or
dents inside the oven or on the exterior. If there is
any damage,
do not operate the unit until it has
been checked
by an authorized
Whirlpool service technician
and any repair made.
2. Put the oven on a cart, counter, table or shelf
that is strong enough to hold the oven and the
food and utensils you put in it. (The control side 01
the unit is the heavy side. Use care when handling.) The weight of the oven is approximately
33 Ibs. (15.0 kg.).
SIDE
2 inches
3. Db n6t btbck the vent or alr intake
ings on the rear of the oven. Blocking
intake openings can cause damage
oven and poor cooking results. Make
microwave
oven legs are in place to
proper air flow.
openvent or air
to the
sure the
ensure
4. Do not Install the microwave
oven so
that both sides and the top are flush with
walls, shelves or cabinets.
Leave clearance of at least 2 in. (5.08 cm] on the left
side and 1 in. (2.54 cm) on the top and right
side for proper operation.
Do not install the oven next to or over a
conventional
surface unit or in any
area where excessive
heat and steam
are generated.
This could damage
the microwave
oven.
5. Electrical
requirements
Observe all governing
codes and ordinances.
A 120 Volt, 60 Hz, AC only, 15 amp fused electrical
supply is required. (Time-delay
fuse is
recommended.]
It is recommended
that a separate circuit serving only this appliance
be provided.
6.
GROUNDING INSTRUCTIONS
WARNING.
Improper
’ electrical
use of the grounding
shock.
plug can result in a risk of
DO NOT, UNDER ANY CIRCUMSTANCES, REMOVETHE POWER
SUPPLYCORD GROUNDING PRONG.
7. For your personal safety, this appliance
must
be grounded.
In the event of an electrical
short
circuit, grounding
reduces the risk of electric
shock by providing an escape wire forthe electric current. This appliance
is equipped
with a
POWS0
SUPPL”
COPD
GPOUNDING
polarized
3-prong grounding
plug. It must be
plugged
into a correctly
polarized
mating 3wrong grounding
type wall receptacle,
properly installed
and grounded
in accordance
Nith the National
Electrical
Code and local
codes and ordinances.
If a mating wall recepocle is not available
or if you are not sure if the
8. Plug the oven into the proper electrical outlet and put about one cup
(250 mL] of cold water in a alass container in the
oven. Ciose the door, Make sure it latches. Follow the directions on page 6 to set the oven to
COCK for 2 minutes. When the time is up, the
water should be heated.
wall receptacle
is properly
grounded
and
polarized,
have it checked
by a qualified
electrician.
It is the personal responsibility
and obligation
of
the customer to have a properly grounded
and
correctly
polarized
3-prong wall receptacle
installed by a qualified electrician.
Consult a qualified electrician
if the grounding
instructions are not completely
understood, or if
doubt exists as to whether the appliance
is
properly grounded.
It is NOT recommended
to use an extension
cord with your microwave
oven, but if you find
it necessary
to do so temporarily
(until a properly grounded
and polarized
3-prong receptacle is installed),
use only a heavy duty UL listed
3 wire grounding
type extension cord containing
three 16 gauge (minimum)
copper wires. It musl
not be longer than 10 feet (cords longer than 10 feet
may affect the cooking performance
of your microwave oven). The plug on the extension cord
must fit into a 3-prong grounding
type wall receptacle (as shown on this page] and the receptacle
end of the extension cord must accept the 3-prong
grounding
plug of the microwave
oven.
9. This microwave
oven is designed
for use in
the household
only and must not be used for
commercial
Durboses.
. .
DO NOT
remove the door, control panel, or
back cover at any time. The unit is equipped
with high voltage and should not be serviced
unless bv an authorized
WhirlDOOl trained service technician.
SAVE THESE INSTRUCTIONS
Custom mounting your microwave oven
Your microwave
oven is not limited to carts. counters
made easy with kits available
from your dealer.
or tables. Cuslom
installations
are
1. Attach the microwave
oven to a wall.
2. Attach the microwave
oven directly to the
underside of a cabinet.
Ask your dealer for details on...
MKllO(788264) - Wall Mounting Kit
MKIOO (788262) - Under-the-Cabinet
Mounting
Kit
Caring for your microwave oven
Cleaning the microwave oven
Wipe often with warm sudsy
water and a soft cloth or
sponge
For stubborn ~011.boil a cup
of water in the oven for 2 or 3
minutes Steam WIII soften
the SOI!
Be sure to clean the areas
where the door and oven
frame touch when closed.
When cleaning
surfaces of
door and oven that come together on closing the door,
use only mild, non-abrasive
soaps or detergents applied
with a sponge or soft cloth
Rinse well
Caution:
Abrasive cleansers, steel wool pads, grrttY wash cloths. etc , can damage
panel, and the interior and exterior oven surfaces Use a soft cloth or a
sponae with a mild deteraent or spray alass cleaner
Operating
the control
1
safety precautions
General Information
T
FUSE
BOX
A.
If your electric power line
voltage is less than the normal 120 volts, cooking times
may be longer.
To test a dish for safe use, put it
into the oven with a cup of
water beside it. Cook on high
Cook Power for one minute. If
the dish gets hot and water
stays cool do not use it.
If time is left on the timer when
you remove food from the
oven, turn the timer to “OFF”
before closing the door.
This prevents the oven from
operating.
9
NEVERCOOK OR
REHEATA WHOLE EGG.
Steam build-up in whole
eggs may cause them to
burst and burn you, and
possibly damage
the oven.
Slice hard boiled eggs
before heating. In rare
instances, poached
eggs
have been known to
explode. Cover poached
eggs and allow a standing
time of one minute before
cutting into them.
DO NOT heat or store flammable or inflammable
materials in or near the
oven.
ALWAYS use care when
heating liquids or adding
ingredients to heated liquids
Liquids heated in certain
shaped containers may become overheated.
The liquid
may splash out with a loud
noise during or after heating
or when adding ingredients
(instant coffee, etc.).This can
harm the oven and the hot
liquid could burn you. Do not
use such containers to heat
liquids again.
10
allow a child to swing on it
when the door is open. Injury
could result
USE HOT PADS. Microwave
energy does not heat containers, but the hot food
does. You could get burned.
CAUTION: DO NOT use the oven until you have read and understand
damage
to the oven.
If a fire should start in the oven
cavity:
l keep
door closed
l turn oven
off
l disconnect
the power supply
at the cord, fuse or circuit breaker.
NEVERlean on the door or
NEVER remove the stirrer
cover. The plastic cover protects the microwave
stirrer
blade from soil or bending.
ALL precautions
to prevent
DO NOT mount this oven over
a cooktop or range. Damage
to the oven may result.
DO NOT use the oven for
storage. Do not leave paper
products, books or cooking
utensils in the oven when not
in use. Fire may result if someone accidentally
starts the
oven.
Don’t let anything touch the
top of the oven.
Starting a microwave
oven when its empty is not
recommended.
If you experiment, put a container
of water in the oven.
DO NOT OVERCOOK
POTATOES.Fire could result.
At the end of the recommended cooking time they
should be slightly firm.
Wrap in foil and set aside
for 5 minutes. They will finish
cooking while standing.
If you need service or assistance, we suggest
you follow these four steps:
1. Before calling for assistance...
Performance
problems
often result from little
things you can find and fix yourself without tools
of any kind.
If nothing operates:
l Is the oven correctly
plugged
into a live circuit
with the proper voltage? (See page 8.1
l Have
you checked
your home’s main fuses or
circuit breaker box?
If the microwave
oven will not run:
l Is the timer set?
l Is the door
firmly closed and latched?
l Did you follow
the directions exactly?
If the microwave
cooking
times seem too
long:
l Is the
electric
supply to your home low or
lower than normal? Your electric
company
can tell you if the line voltage is low.
l Is the
Cook Power at the recommended
setting?
l Are you allowing
for more time when cooking
more food at one time?
2. If you need assistance?..
Call the Whirlpool
COOL-LINEa service
assistance telephone
number. Dial free from:
Continental
U.S. . . . . . . . . . (800) 253-1301
Michigan
. . . . . . . . . . . . . . . (800) 632-2243
Alaska & Hawaii . . . . . . . . . (800) 253-1121
and talk with one of our trained Consultants. The
Consultant can instruct you on how to obtain
satisfactory operation from your appliance
or, if
service is necessary,
recommend
a qualified
service company
in your area.
3.
If you need service?..
Whirlpool
has a nationwide
network of
franchised
TECH-CARE@ service
Companies.
TECH-CARE service technicians
are trained to
fulfill the product
warranty
and provide
after-
1
warranty service, anywhere in the United States.
To locate TECH-CARE service in your area, call
our COOL-LINE service assistance
telephone
number (see Step 2) or look in your telephone
directory Yellow Pages under:
APPLIANCES-HOUSEHOLDMAJORSERVICE
L REPAIR
nrt
-..
ELECTRICAL
APPLIANCESMAJORREPAIRING
6 PARTS
WHIRLPOOL APPLIANCES
FRANCHISEDTECH
CARESERVICE
WHIRLPOOL APPLIANCES
FRANCHISEDTECH-CARESERVICE
SBRVI(‘6
XYLSERVICECO
123 Mapie
SERVICE
XYZSERVICECO
123Map1e
-....-
CO.Ml?4.VIES
999~9999
(‘O.MPA.VIES
-. 999.9999
OR
WASHING
MACHINES.DRYERS
6 IRONERSSERVICING
WHIRLPOOL APPLIANCES
FRANCHISEOTECH-CARESERVICE
SERVIC‘E
XYZSERVICECO
123 Maple
..-
(‘O.MPAVlES
-...
999.9999
4. If you have a problem%.
Call our COOL-LINE service assistance
telephone number (see Step 2) and talk with one of
our Consultants, or if you prefer, write to:
Mr. Stephen E. Upton
Senior Vice President
Whirlpool Corporation
Administrative
Center
2000 US-33 North
Benton Harbor, Ml 49022
‘If you must call or write, please provide: model
number, serial number, date of purchase, and a
complete
description
of the problem. This information is needed in order to better respond to
your request for assistance.
11
Making your world a little easier.
Part No. 458OlPO1/788360
01985 Whirlpool Corporation
:e Makers
Dishwashers
ButIt-In
Ovens
and Surlace
Unlls
Printed in U.S.A.
Ranges
Microwave
Ovens
Trash Compactors
Room Au Condllmners
Dehumldlllers
Aulomallc
Washers
Clothes
Oryx