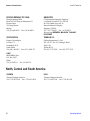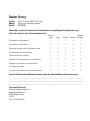
1
HOME
Va l ve Ov en
Operating Manual
Valve Oven Operating Manual
May 2003 Edition
Part Number 317 093 63
© 2003 Thermo Finnigan Italia S.p.A. All rights reserved.
Printed in Italy
Published by ThermoFinnigan Italia S.p.A., Strada Rivoltana, 20090 Rodano - Milan - Italy
Tel: +39 02 95059355 Fax: +39 02 95059388
Printing History: First Edition, released May 1999.
Second Edition, released July 2002
Third Edition, released May 2003
Disclaimer
Technical Information contained in this publication is for reference purposes only and is subject to change without notice. Every effort has
been made to supply complete and accurate information; however, Thermo Finnigan assumes no responsibility and will not be liable for any
errors, omissions, damage, or loss that might result from any use of this manual or the information contained therein (even if this information
is properly followed and problems still arise).
This publication is not part of the Agreement of Sale between Thermo Finnigan and the purchaser of a TRACE™ GC Ultra system. In the
event of any conflict between the provisions of this document and those contained in Thermo Finnigans’s Terms and Conditions, the
provisions of the Terms and Conditions shall govern.
Reference to System Configurations and Specifications supercede all previous information and are subject to change without notice.
Trademarks
TRACE™ is a trademark of Thermo Finnigan Italia S.p.A.. Other brand and product names may be trademarks or registered trademarks of
their respective companies.
Contents
About This Manual..................................................................................................................................v
Overview .................................................................................................................................... v
Conventions Used in This Manual............................................................................................vi
Instrument Markings and Symbols ..........................................................................................vii
Using the TRACE GC Ultra Document Set..............................................................................ix
Chapter 1
Valve Oven Overview......................................................................................................................... 11
Introduction .............................................................................................................................. 12
Options ........................................................................................................................ 13
Installation and Power Requirements....................................................................................... 14
Power Requirements and Voltage Selection............................................................... 15
Valve Oven Components ......................................................................................................... 16
Heated Section ............................................................................................................ 17
Unheated Section ........................................................................................................ 17
Valves.......................................................................................................................... 17
Column........................................................................................................................ 17
Chapter 2
Valve Installation................................................................................................................................ 19
Introduction .............................................................................................................................. 20
Opening the Valve Oven.......................................................................................................... 20
Installing Valves in the Heated Oven....................................................................................... 21
Installing Valves in the Unheated Compartment ..................................................................... 28
Installing Valves in the Valve Box .......................................................................................... 31
Valve Box for up to Six Valves .................................................................................. 31
Valve Box for up to Two Valves ................................................................................ 31
Configuring Valves .................................................................................................................. 32
Gas Sampling Valves .................................................................................................. 32
Switching Valves ........................................................................................................ 32
Chapter 3
Operation............................................................................................................................................ 35
Operating Valves Manually ..................................................................................................... 36
Operating Valves Automatically.............................................................................................. 38
Adding a Gas Sampling Valve Event to the Run Table.............................................. 38
Adding a Gas Switching Valve Event to the Run Table............................................. 40
Operating Manual
iii
Contents
Chapter 4
Troubleshooting .................................................................................................................................43
Leak testing................................................................................................................. 43
Valve Switching ......................................................................................................... 44
Valve Plumbing .......................................................................................................... 45
Appendix A
Customer Communication ...............................................................................................................47
How To Contact Us ................................................................................................................. 47
Europe......................................................................................................................... 47
Africa, Asia and Oceania............................................................................................ 49
North, Central and South America ............................................................................. 50
Reader Survey............................................................................................................. 51
Glossary ................................................................................................................................................ 53
Index...................................................................................................................................................... 59
iv
Operating Manual
About This Manual
Overview
This Valve Oven Operating Manual contains information for operating the Valve
Oven, including Troubleshooting and ordering spare parts.
This manual is organized as follows:
Chapter 1, Valve Oven Overview, provides an overview to TRACE GC Ultra
Valve Oven features and components.
Chapter 2, Valve Installation, provides instructions for installing valves in the
TRACE GC Ultra Valve Oven.
Chapter 3, Operation, presents operating instructions for the TRACE GC Ultra
Valve Oven.
Chapter 4, Troubleshooting, has information to help you find and correct potential
problems when using the TRACE GC Ultra Valve Oven.
Appendix A, Customer Communication, has contact information for
ThermoFinnigan offices worldwide. This appendix also contains a one-page
Reader Survey. Use this survey to give us feedback on this manual and help us
improve the quality of our documentation.
The Glossary is an alphabetical descriptive list of terms common to this industry.
This also includes abbreviations, acronyms, metric prefixes, and symbols.
The Index presents an alphabetical list of key terms and topics in this guide,
including cross references and the corresponding page numbers.
Operating Manual
v
Conventions Used in This Manual
The following symbols and typographical conventions are used throughout this
manual.
Bold
Bold text indicates names of windows, menus, dialog boxes,
buttons, and fields.
Italic
Italic indicates cross references, first references to important
terms defined in the glossary, and special emphasis.
Monospace
Monospace, or Courier, indicates filenames and file paths, or
text the user should enter with the keyboard.
Monospace
Bold
Monospace Bold indicates messages or prompts displayed on
the computer screen or on a digital display.
»
This symbol illustrates menu paths to select, such as
File»Open….
KEY NAME
Bold, uppercase sans serif font indicates the name of a key on
a keyboard or keypad, such as ENTER.
CAUTION
This symbol alerts you to an action or procedure that, if
performed improperly, could damage the instrument.
NOTE
This symbol alerts you to important information related to the
text in the previous paragraph.
This symbol alerts you to an action or procedure that, if
WARNING! performed improperly, could result in damage to the
instrument or possible physical harm to the user. This symbol
may be followed by icons indicating special precautions that
should be taken to avoid injury.
vi
Operating Manual
Instrument Markings and Symbols
The following table explains the symbols used on Thermo Finnigan instruments.
Not all of them are used on the TRACE GC Ultra gas chromatograph and Valve
Oven.
Symbol
Description
Direct Current
Alternating Current
Both direct and alternating current
Three-phase alternating current
3
Earth (ground) terminal
Protective conductor terminal
Frame or chassis terminal
Equipotentiality
On (Supply)
Off (Supply)
Operating Manual
vii
Symbol
Description
Equipment protected throughout by DOUBLE
INSULATION or REINFORCED INSULATION
(Equivalent to Class II of IEC 536)
Instruction manual symbol affixed to product. Indicates
that the user must refer to the manual for specific
Warning or Caution information to avoid personal injury
or damage to the product.
Caution, risk of electric shock
Caution, hot surface
Caution (refer to accompanying documents)
In-position of a bistable push control
Out-position of a bistable push control
viii
Operating Manual
Using the TRACE GC Ultra Document Set
The TRACE GC Ultra Document Set (CD-Rom PN 317 095 00) includes all
manuals in electronic format, and serves as your library for information about the
TRACE hardware and software.
The TRACE GC Ultra Document Set (PN 317 093 00) as paper copy is also
available Furthermore, ThermoFinnigan part numbers (PN) for the paper copy
manuals are provided for each book title.
Site Preparation and Installation Manual (PN 317 091 90)
This manual and diskette describes how to set up a workspace for the TRACE GC
and how to connect the TRACE GC Ultra to the gas supplies and peripheral
devices.
Acceptance Package (PN 317 092 20)
This folder contains required shipping documents and quality report forms.
Getting Started (PN 317 092 30)
This guide contains sequences for checking configuration, installing detectors,
and making a first analysis with the TRACE GC Ultra.
Operating Manual (PN 317 091 70)
This manual provides descriptions of the TRACE GC Ultra hardware and
software and instructions for their use.
UFM Ultra Fast Module Device (PN 317 093 98)
This manual provides descriptions of the TRACE GC Ultra equipped with the
UFM device. and instructions for it use.
Quick Reference Card (PN 317092 40)
This reference card contains guidelines for carrier gas use and injection
sequences.
K-Factor Quick Reference (P/N 317 092 41)
This reference card contains information to interpretate results from a Column
Evaluation.
Operating Manual
ix
Preventive Maintenance Schedule (PN 317 092 80)
This document provides a list of recommended scheduled maintenance and a
year-long log book to record maintenance, observations, supply lists, and service
records.
Maintenance and Troubleshooting Guide (PN 317 091 80)
This manual contains instructions for diagnosing and resolving operational
problems.
Standard Operating Procedures (PN 317 092 00)
This manual contains instructions, operating sequences, and test criteria for final
testing of the TRACE GC Ultra.
Spare Parts Catalog (PN 317 092 10)
This catalog contains a list of spare parts for the TRACE GC Ultra.
x
Operating Manual
Valve Oven Overview
1
This chapter provides an overview to TRACE GC Ultra Valve Oven features and
components.
Chapter at a Glance...
Introduction ..........................................................................................................12
Installation and Power Requirements...................................................................14
Valve Oven Components ......................................................................................16
Operating Manual
11
Chapter 1
Valve Oven Overview
Introduction
Introduction
The TRACE GC Ultra Valve Oven, shown in Figure 1-1, is a temperature
controlled enclosure for mounting up to six (four heated + two unheated)
sampling and/or switching valves, 1/8" OD packed columns and up to eight
needle valves and four pressure regulators.
A large number of applications require this additional space for a correct analysis
setup.
HEATED SAMPLE
TRANSFER LINE
HEATED SAMPLE
TRANSFER LINE
D
H
L
E
I
M
F
J
N
G
K
O
WARNING
USE ONLY THE ORIGINAL
POWER SUPPLY
FOR THIS INSTRUMENTS
POWER
Front View
AIR
800 kPa/120 psi Max
Rear View
Figure 1-1. The Valve Oven
12
Operating Manual
Introduction
Chapter 1
Valve Oven Overview
Options
The type of valve enclosure can be selected among three different options
depending on the analytical requirements.
1. TRACE GC Ultra Valve Oven
It provides an additional isothermal heated zone to accomodate valves and
columns. It consists of an inner heated enclosure and an external unheated
area. The former is designed to house up to four heated valves, restrictors and
1/8” OD packed columns. The latter houses up to two valves and pressure
regulators. This option is therefore particularly suitable for applications such
as natural gas or refinery gas analyses where, together with the GC column
oven, an additional isothermally heated area is required for gas sampling,
column switching, storing or sample cutting valves. It can accommodate up to
four constant pressure regulators, up to eight needle valves, plus front and rear
sample and carrier gas inlets/outlets.
2. TRACE GC Ultra Valve Box for Up to Six Valves
This version is the same as previous option (TRACE GC Ultra Valve Oven)
but without heating elements. It provides an additional cold zone to
accommodate up to four gas sampling/switching valves, up to two valves for
liquid sampling, restrictors and 1/8” OD packed columns.
It is therefore particularly suitable for engineered applications that can be
exploited at ambient temperature, for which multi-column and/or multi-valve
configurations (sampling, switching, storing or heart-cutting) are required.
It can also accomodate up to four constant pressure regulators, up to eight
needle valves, plus front and rear sample and carrier gas inlets/outlets
3. TRACE GC Ultra Valve Box for Up to Two Valves
This version is the same as previous option (TRACE GC Ultra Valve Box for
Up to Six Valves) but can accomodate ONLY up to two valves, thus providing
a customized solution for not highly demanding engineered applications. This
version does not include any electronics; the drivers for the two three-wayvalves controlling the pneumatic actuators are installed on the TRACE GC
Ultra.
It is able to accept restrictors and 1/8“ OD packed columns; it can also
accommodate up to four constant pressure regulators, up to eight needle
valves, plus front and rear sample and carrier gas inlets/outlets.
Operating Manual
13
Chapter 1
Valve Oven Overview
Installation and Power Requirements
When up to two Valco Purged valves are required (e.g. applications with
Pulsed Discharge Detector), this option has to be selected for their housing.
For more informations, refer to Valve Oven Components.
NOTE
When any Valve box (heated or unheated) is configured with valves, these are factory
tested to verify actuation but are NOT plumbed.
Plumbing can be performed upon availability of plumbing diagrams.
Materials needed:
Shop air or bottled air at a pressure of 60–80 psi
Helium, Nitrogen, or other gas depending on your applications
Installation and Power Requirements
The Valve Oven is attached to TRACE GC Ultra and it is factory installed and
configured. On-site installation is related to the gas plumbing defined by the
customer’s application or accompanying diagram.
Figure 1-2. The Valve Oven and the TRACE GC Ultra
14
Operating Manual
Installation and Power Requirements
Chapter 1
Valve Oven Overview
Power Requirements and Voltage Selection
Valve ovens installed by the factory will contain the line voltage selected as noted
by the sales order, 115 V ac or 230 V ac. The line voltage selection can be
changed by relocating a jumper located behind the valve driver electronics (Figure
1-3).
CAUTION
AC line voltage is applied to the valve oven when the main GC is turned on. Turn the
main GC power off before removing the valve oven heaters.
Valve oven power for the 24 V dc solenoid is supplied by an external power
module that plugs into the rear of the valve oven. This power module will accept
input voltage from 106 V ac to 240 V ac. A green light on the front of the valve
oven (Power On Indicator) indicates when the power module is plugged in
(Figure 1-2).
NOTE
Operating Manual
In case of using the TRACE GC Ultra Valve Box for up two valves, any power supply is
necessary since the solenoid valves are activated directly by the TRACE GC Ultra.
15
Chapter 1
Valve Oven Overview
Valve Oven Components
Valve Oven Components
The TRACE GC Ultra Valve Oven consists of four major components as shown in
Figure 1-3.
•
Headed Enclosure
•
Unheated Enclosure
•
Valve
•
Column
5
1
4
3
2
1. Heated Enclosure
4. Valve Driver Electronics
2. Unheated Enclosure
5. Columns
3. Valves
Figure 1-3. TRACE GC Ultra Valve Oven Components
16
Operating Manual
Chapter 1
Valve Oven Overview
Valve Oven Components
Heated Section
The heated enclosure is a temperature controlled (40 to 175 °C) isothermally
heated zone, able to contain the following:
•
up to four (4) valves with associated sample loops
•
up to fifty feet of 1/8” OD stainless steel column with associated clamp and
fixed unions
•
up to eight (8) heated needle valves (restrictors) accessible from the front
•
provisions for sample transfer directly into the heated zone from the front or
rear of the unit
Unheated Section
Unheated enclosures can contain the following:
•
two unheated pneumatic Valco liquid or gas sample injection valves
•
up to four pressure regulators installed on the front of the unit, and one
mounted internally
•
up to six in and out connections for sample loading/vent/flow measurement
Valves
Your TRACE GC Ultra Valve Oven has the following available valves:
•
standard pneumatic Valco rotary valves
•
standard pneumatic Valco rotary valves with purged housing
Column
Although the type of column you use will vary depending on your application, the
TRACE GC Ultra Valve Oven typically uses packed columns. The column
mounting area can accommodate 1/8” OD columns.
Operating Manual
17
Chapter 1
Valve Oven Overview
18
Valve Oven Components
Operating Manual
Valve Installation
2
This chapter provides instructions for installing and configuring valves in the
TRACE GC Ultra Valve Oven.
Chapter at a Glance
Introduction ..........................................................................................................20
Opening the Valve Oven.......................................................................................20
Installing Valves in the Heated Oven ...................................................................21
Installing Valves in the Unheated Compartment ..................................................28
Installing Valves in the Valve Box........................................................................31
Configuring Valves...............................................................................................32
Operating Manual
19
Chapter 2
Valve Installation
Introduction
Introduction
NOTE
Before starting, cool the Valve Oven to 50°C or cooler. Do not turn the GC off.
The heated section of the Valve Oven accepts standard Valco gas actuated valves
with 3-inch standoff. The unheated section will accommodate Valco gas actuated
valves without standoff.
CAUTION
Be careful not to mix actuators with valves that have different numbers of ports, as
the actuator travel for each valve can be different.
Opening the Valve Oven
WARNING! The Valve Oven cover can be very hot. Use caution when removing the heated Valve
Oven cover.
1. Remove the top cover by releasing a single screw on the Valve Oven
compartment rear panel.
2. Slide the panel toward the rear about ½ inch and lift away. This exposes the
heated Valve Oven cover and valve pneumatics.
3. To remove the heated Valve Oven cover, locate the two thumb screws on the
lower edge of the heated Valve Oven cover.
4. Turn these screws counter clockwise (ccw) to release the cover. The cover can
be removed by lifting up and pulling out.
20
Operating Manual
Installing Valves in the Heated Oven
Chapter 2
Valve Installation
Installing Valves in the Heated Oven
Installing valves consists of the following steps:
Step 1. Installing the solenoid
Step 2. Disassembling the valve and actuator
Step 3. Installing the valve and standoff
Step 4. Connecting gas lines from the solenoid to the actuator
Step 5. Installing the actuator to the valve standoff
Step 6. Testing the valve
CAUTION
Turn the actuator gas off before you start these procedures.
Step 1. Installing the Solenoid Valves
1. Locate the solenoid manifold in the rear floor of the valve compartment
(Figure 2-1). The space closest to the rear of the GC is reserved for
pneumatic valve 1, next is valve two, and so on.
A total of 6 pneumatic valves can be installed (up to 4 in the upper
compartment and up to 2 in the lower).
2. Remove the rectangular shaped cap from the manifold using the #0 phillips
screwdriver.
3. Secure the solenoid valve to the underplate using the two screws supplied
with the valve.
CAUTION
Operating Manual
Tighten screws evenly, taking care that the solenoid gasket rests on all surfaces to
prevent leaks
21
Chapter 2
Valve Installation
Installing Valves in the Heated Oven
1
2
3
4
1. Time Event Output Jack
2. Solenoid Manifold
3. Valve 1 Position
4. Valve 2 Position
Figure 2-1. Timed Event Output Jacks, Solenoid Manifold, and Valve Positions
4. Connect the cable from the solenoid valve (Figure 2-4) to the proper timed
event output jack (Figure 2-2) located in the lower rear inside corner of the
valve compartment.
Valve 1 is attached to timed event #8 (TE8), Valve 2 is attached to timed event
#7 (TE7), and so forth (Figure 2-2).
22
Operating Manual
Chapter 2
Valve Installation
Installing Valves in the Heated Oven
TE #1
TE #2
TE #3
TE #4
TE #5
TE #6
TE #7
TE #8
Sensor
Figure 2-2. Timed Event (TE) Output Jacks
Step 2. Disassembling the Valve and Actuator
NOTE
Valves are usually installed starting from the mounting hole closest to the rear of the Valve
Oven.
1. Remove any insulation found in the valve mounting hole. The valve mounting
hole is located in the lower Valve Oven heater block.
2. Inspect the valve and actuator being sure the valve is in the counter clock wise
(ccw) position. The ccw position is when the mechanical stop is in the
position noted in Figure 2-3. If the valve is not in the ccw position, locate the
square nut on the opposite end of the actuator (Figure 2-5).
Operating Manual
23
Chapter 2
Valve Installation
Installing Valves in the Heated Oven
yyyyy
@@
;;
@@@
;;;
@@yyy
;;
yy
@@@
;;;
Clockwise (CW) Position
Counterclockwise (CCW) Position
Mechanical stop
Figure 2-3. Mechanical Stop Positions for both CW and CCW
3. Using a 5/16” or 8mm wrench, rotate the nut to the ccw position (Figure 2-5).
4. Once the valve is in the ccw position, separate the actuator from the valve and
standoff by loosening the allen screw in collar B (Figure 2-5).
CAUTION
Be careful to pull the actuator away from the valve standoff by gripping the standoff
but without rotating the actuator or the valve.
NOTE
Handle the valve and standoff with care so the two pieces do not separate.
5. Remove the collar attached to the valve standoff (collar A, Figure 2-5) by
loosening the screw that secures the collar to the valve standoff. This collar
mounts to the Valve Oven heater block.
Step 3. Installing the Valve and Standoff
1. Locate the desired valve position in the heater block and place the collar over
the hole in the heater block.
2. Secure the collar using two M 4 x10 mm screws. Be sure the 7/64” set screw
in the collar is accessible from the outer edge of the Valve Oven.
24
Operating Manual
Chapter 2
Valve Installation
Installing Valves in the Heated Oven
3. Grip the valve standoff by the standoff only, and slide it through the collar
allowing it to extend into the lower valve compartment.
Step 4. Connecting Gas Lines from the Solenoid Valve o the Actuator
NOTE
Gas lines are much easier to connect to the actuator if the connection is made before the
actuator is assembled to the valve.
1. Locate the 1/8 in. nylon tubing supplied in the Valve Oven kit and cut it into
two equal 12” pieces.
2. Push one of the tube pieces into the lower fitting on the actuator assembly,
making sure it passes through the ferrule in the actuator fitting. Tighten the
nut and ferrule using a 3/8” open end wrench. Use a backup 3/8” open end
wrench on the mating piece that is screwed into the actuator.
3. Place the other end of the tubing into the valve solenoid fitting located on the
outside edge (Figure 2-4) of the solenoid by pushing the tubing firmly into the
fitting. It should automatically seal in place.
1
2
1. Inside Edge Solenoids
2. Outside Edge Solenoids
Figure 2-4. Solenoid Manifold Edges
4. Turn the actuator gas supply on. This line should now be pressurized.
Operating Manual
25
Chapter 2
Valve Installation
Installing Valves in the Heated Oven
5. Verify there are no major leaks in the fittings.
NOTE
Applying pressure to this side of the actuator will ensure that the actuator stays in the ccw
position.
6. Take the other 1/8” piece of nylon tubing and place it in the upper fitting on
the actuator. Be sure the tube passes through the ferrule in the fitting. Tighten
the fitting using the 3/8” open end backup wrench.
7. Connect the opposite end to the solenoid fitting.
NOTE
The tubing can be released from the solenoid by pushing down on the solenoid fitting and
pulling out on the tubing at the same time.
Step 5. Installing the Actuator to the Valve Standoff
1. Carefully fit the actuator into the valve standoff being sure not to rotate the
valve.
2. Once the two square fittings on the actuator and valve are coupled, tighten the
collar on the valve. Be sure this fitting is very tight so the actuator will not
rotate on the valve standoff.
3. Slide the valve and actuator assembly up or down to the desired location and
tighten the upper collar to hold the valve and actuator in place.
26
Operating Manual
Chapter 2
Valve Installation
Installing Valves in the Heated Oven
1. Valve
1
2. Mechanical Stop Valve
3. Valve Standorf
2
3
4. M4 x 10 mm Screws
5
4
5. Collar “A”
6. Collar Set Screws
6
7
7. Heater Plate
8. Collar “B”
8
9. Actuator
10 Square Nut
9
10
Figure 2-5. Installing the actuator to the valve standoff
Step 6. Testing the Valve
1. Configure the valve and rotate it clockwise and counter-clockwise. Refer to
Chapter 3, Operation for more information.
2. Ensure that the valve moves freely in both directions.
3. Refer to Figure 2-3 and inspect the valve stop when the valve is in both
positions to ensure that the stop is at the travel limit on each side.
Operating Manual
27
Chapter 2
Valve Installation
Installing Valves in the Unheated Compartment
Installing Valves in the Unheated Compartment
Unheated valves are installed in the area below the Valve Oven. Unheated valves
do not use a standoff. Valves and actuator assemblies are installed without
removing the actuator from the valve.
Installing valves in the unheated compartment consists of the following steps:
Step 1. Installing the Mounting Bracket
Step 2. Connecting gas lines from the solenoid to the actuator
Step 3. Installing the valve and bracket
CAUTION
Turn the actuator gas off before you start these procedures.
Step 1. Installing the Mounting Bracket
Each unheated valve assembly will require a mounting bracket, included as part of
the liquid valve assembly.
1. Install the bracket to the lower portion of the actuator using two M4 x 10
screws (Figure 2-6).
2. Choose two mounting holes in the bracket that will allow the actuator and the
valve to be oriented in a favorable direction.
Step 2. Connecting Gas Lines from the Solenoid to the Actuator
NOTE
Gas lines are much easier to connect to the actuator if the connection is made before the
valve/actuator and bracket are secured to the floor of the valve enclosure.
1. Locate the 1/8” nylon tubing supplied in the Valve Oven kit and cut it into two
equal 12” pieces.
2. Push one of the tube pieces into the lower fitting on the actuator assembly,
making sure it passes through the ferrule in the actuator fitting. Tighten the
nut and ferrule using a 3/8” open end wrench. Use a backup 3/8” open end
wrench on the mating piece that is screwed into the actuator.
28
Operating Manual
Installing Valves in the Unheated Compartment
Chapter 2
Valve Installation
3. Place the other end of the tubing into the valve solenoid fitting located on the
outside edge of the solenoid by pushing the tubing firmly into the fitting. It
should automatically seal in place.
4. Turn the actuator gas supply on. This line should now be pressurized.
5. Verify there are no noticeable leaks in the fittings.
NOTE
Applying pressure to this side of the actuator will ensure that the valve and actuator rotates
to the ccw position.
6. Take the other 1/8 in piece of nylon tubing and place it in the upper fitting on
the actuator. Be sure the tube passes through the ferrule in the fitting. Tighten
using the 3/8” open end wrench with backup.
7. Connect the opposite end to the inside fitting on the solenoid.
Step 3. Installing the Valve Bracket
Once the gas lines are attached to the actuator and the valves, the actuator and
bracket are ready to be mounted inside the valve compartment.
1. Locate the three sets of mounting holes in the Valve Oven compartment floor.
2. Select the desired set of holes and secure the valve bracket to the holes using
M 4 x 10 screws (Figure 2-6).
NOTE
Operating Manual
Liquid sample valves should be mounted such that the C and P ports are next to the feedthroughs in the Valve Oven.
29
Chapter 2
Valve Installation
Installing Valves in the Unheated Compartment
1
2
3
4
1. Valve
2. Valve Mechanical Stop
3. Collar “A”
4. Actuator
Figure 2-6. Installing an Unheated Compartment Valve
30
Operating Manual
Chapter 2
Valve Installation
Installing Valves in the Valve Box
Installing Valves in the Valve Box
This version of Valve Oven is used when any valves heating is required.
Valve Box for up to Six Valves
This option is analogous to the Valve Oven but without heating elements.
Hence, for the valves installation procedure, follows all the steps described
previously for the heated oven and unheated compartment.
Refer to:
•
Installing Valves in the Heated Oven
•
Installing Valves in the Unheated Compartment
Valve Box for up to Two Valves
This option does not contain any heating elements. Besides, it is designed to
accomodate only up to two valves.It does not include any electronics and the
solenoid valves controlling the valves actuators are droven by the TRACE GC
Ultra.
The solenoid valves are connected to the timed event output located on the Mother
Board of the TRACE GC Ultra.
— Sampling Valve 1 must be connected to J51
— Sampling Valve 2 must be connected to J52
Then, the valves installation follows the same procedure described previously for
the heated oven and unheated compartment.
Refer to:
Operating Manual
•
Installing Valves in the Heated Oven
•
Installing Valves in the Unheated Compartment
31
Chapter 2
Valve Installation
Configuring Valves
Configuring Valves
The valves in the Valve Oven are gas-actuated. The valves are controlled by
solenoid valves that are turned on and off by timed events. Each solenoid valve
uses one timed event. Valve 1 will use timed event # 8, Valve 2 will use timed
event # 7, and so on. Once a valve occupies a timed event, this timed event is
removed from the list of external events that can be added to a run table.
You can configure a valve to be a gas sampling valve or a switching valve.
Gas Sampling Valves
Gas sampling valves have two positions—Load and Inject. These correspond to
the OFF and ON positions, respectively. Gas sampling valves are plumbed so that
counter-clockwise position is Load and the clockwise position is Inject
yyyyy
@@
;;
@@@
;;;
@@yyy
;;
yy
@@@
;;;
Load (OFF) Position
Inject (ON) Position
Mechanical stop
Figure 2-7. Mechanical Stop Positions for Gas Valves
Switching Valves
Switching valves have two positions—On and Off. Switching valves are plumbed
so that the counter-clockwise position is Off and the clockwise position is On.
NOTE
Typically, the valve nearest to the rear of the Valve Oven will be configured as valve 1.
1. Press CONFIG on the TRACE GC Ultra keypad.
32
Operating Manual
Chapter 2
Valve Installation
Configuring Valves
2. Scroll to Valves and press ENTER.
3. Select Valve #1 and press ENTER.
•
If you want valve #1 to be a gas sampling valve, select Gas sampling.
•
If you want valve #1 to be a switching valve, select Switching.
4. Press ENTER.
5. Press CLEAR to return to the Configure Valves menu.
6. Repeat as necessary for the remaining valves in the Valve Oven or valve
compartment.
yyyyy
@@
;;
@@@
;;;
@@yyy
;;
yy
@@@
;;;
Clockwise (CW) Position
Counterclockwise (CCW) Position
Mechanical stop
Figure 2-8. Mechanical Stop Positions for Switching Valves
Operating Manual
33
Chapter 2
Valve Installation
34
Configuring Valves
Operating Manual
Operation
3
This chapter presents operating instructions for the TRACE GC Ultra Valve Oven.
The valves can be operated manually using the keypad on the TRACE GC Ultra,
or automatically using the run table accessed on the TRACE GC Ultra keypad.
Chapter at a Glance...
Operating Valves Manually ..................................................................................36
Operating Valves Automatically...........................................................................38
Operating Manual
35
Chapter 3
Operation
Operating Valves Manually
Operating Valves Manually
1. Press VALVES on the TRACE GC Ultra keypad.
Valves Key
Figure 3-1. The TRACE GC Ultra Keypad, Showing the Valves Key
2. Scroll to the valve you want to operate.
The display may look like this:
VALVES
Inlet Valves
#1 Gas Sample
#2 Switching
•
36
Load <
Off
If the valve is a gas sampling valve, press On to place the valve in the
Inject position or Off to place the valve in the Load position.
Operating Manual
Chapter 3
Operation
Operating Valves Manually
•
If the valve is a switching valve, press On to place the valve in the
clockwise (CW) position or Off to place the valve in counterclockwise
(CCW) position.
The display changes to reflect the current valve state.
•
The default conditions of a switching valve determines which position
(ON or OFF) the valve is in after GC initialization and after a run is
completed. The default conditions can be changed by selecting Switch
vlv defaults from the VALVES menu.
VALVES
#2 Switching
#3 Gas Sample
Switch vlv defaults
•
Operating Manual
Off
Load
Off<
Scroll to the switching valve you wish to change and press On or Off to
enter its new default condition.
37
Chapter 3
Operation
Operating Valves Automatically
Operating Valves Automatically
Press the RUN TABLE key to access the TRACE GC Ultra Run Table display.
You can automatically switch valves by adding the desired valve event to the run
table.
Run Table Key
Figure 3-2. The TRACE GC Ultra Keypad, Showing the Run Table Key
Adding a Gas Sampling Valve Event to the Run Table
1. On the TRACE GC Ultra keypad, press RUN TABLE.
RUN TIME EVENTS
<None>
Add run time event
<
Ext. event defaults
38
Operating Manual
Chapter 3
Operation
Operating Valves Automatically
2. Scroll to Add Run Time Event and press ENTER.
SELECT EVENT to add
Signal
Valve
<
External Event
3. Select Valve and press ENTER.
4. Scroll to the sampling valve that you want to add and press ENTER.
SELECT PARAM to Add
Valve #1
Sampling
Valve #2
Switching
Valve #3
Sampling
<
The following screen appears:
RUN TIME EVENT
Valve #1
Sampling
Inject at
0.00
Inject for
0.00
The Inject at parameter is the time into the run that the sample is to be
injected. The Inject for parameter is the time that the valve remains into the
inject position. After that time, the valve returns to the Load position. If the
Inject for time exceeds the GC run time, the GC will automatically reset the
valve to the Load position at the end of the run.
5. Repeat as necessary for any remaining sampling valves. If you need to edit a
run table entry, select the entry to be edited and press ENTER.
NOTE
Operating Manual
To delete a run table entry, select it and press CLEAR. The TRACE GC Ultra will ask you if
you really want to delete the entry. Press YES.
39
Chapter 3
Operation
Operating Valves Automatically
6. Press CLEAR three times to exit to the Run Event table.
NOTE
Pressing CLEAR within a run table entry will delete that entry. To use CLEAR to back out
of the menu, you must first be out of the run table entries themselves.
Adding a Gas Switching Valve Event to the Run Table
For switching valves, two run time entries are required—one to switch the valves
on and one to switch the valves off.
1. On the TRACE GC Ultra keypad, press RUN TABLE.
2. Scroll to Add run time event and press ENTER.
3. Select Valve and press ENTER.
SELECT PARAM to Add
Valve #1
Sampling
Valve #2
Switching
Valve #3
Sampling
<
4. Scroll to the Switching valve that you want to add and press ENTER.
RUN TIME EVENT
Valve #2
Switching
Run time
0.00
Setpoint
On (Off)
The Run time parameter is the time into the run when the valve switches to the
new position. The Setpoint parameter is the position that the valve will go to at
the selected time. The On value usually designates a clockwise switch and the Off
value designates a counterclockwise switch.
If you want the valve to switch back to its original position at the end of run, then
do not need enter a second run table entry.
40
Operating Manual
Chapter 3
Operation
Operating Valves Automatically
If you want the valve to switch back before the end of run, press CLEAR to return
to the SELECT PARAM to add menu and select the same valve again. Press
ENTER. Type the desired switching time and press ENTER. Select the position the
valve is to return to by selecting ON or OFF and press ENTER. With no run table
entries selected, press CLEAR multiple times to exit to the run event table.
OPERATING PROCEDURE
Heating the Valve Oven
1. On the TRACE GC Ultra keypad, press AUX.
2. Scroll to Temperature Zones and press ENTER.
AUXILIARY ZONE
Valve oven
43
current value
175
target value
3. Enter the target temperature and press ENTER.
NOTE
Operating Manual
Press INFO to determine temperature limits.
41
Chapter 3
Operation
42
Operating Valves Automatically
Operating Manual
Troubleshooting
4
This chapter has information to help you to find and correct potential problems
when using the TRACE GC Ultra Valve Oven.
Chapter at a Glance…
Leak Testing .........................................................................................................43
Valve Switching....................................................................................................44
Valve Plumbing ....................................................................................................45
The most common problem associated with valves and plumbing are leaks, valves
not switching properly, and valves not plumbed correctly.
Leak testing
Leak testing requires studying plumbing diagrams and system configurations.
1. Identify all gas sources leading into the flow path to be leak tested. Determine
if the gas sources are either a common source or if they are at the same bottle
pressure.
2. Be sure all components in the sample path will withstand the pressure being
applied to the system.
3. Be sure all possible gas outlets are blocked. This will require knowing how to
identify the various flow paths throughout the valving system to be sure vents
are blocked or bypassed.
NOTE
Operating Manual
Leak should be detected using an electronic leak detector.
43
Chapter 4
Troubleshooting
Refer to the TRACE operations manual, Chapter 4, Gases and Controls, for leak
test suggestions and the necessary hardware required to pressure check a
plumbing system.
Table 4-1. Leak Testing for Valves
Symptom
Cause
Remedy
Valve leaking between ports
Defective rotor
Replace rotor or valve
Valve leaking around rotor
Valve rotor not seating
properly
Tighten rotor
Rotor Defective
Replace Rotor in valve
Ferrule not seating
Replace ferrule
Leaking out valve ports
Valve Switching
Valco valves contain a rotor that is turned by the actuator. This rotor channels the
gas between the various ports of the valve. If the rotor is not being switched
properly, a flow path may be partially or fully blocked, or leaks may occur
between valve ports.
Each valve contains a mechanical stop that should reach an extreme when the
valve is rotated in the clockwise or counterclockwise direction. Close inspection
of the valve will indicate if the valve is being switched to its limits, Figure 2-4.
Actuator pressure should be 420 Kpa (60psig) to 630 Kpa (90 psig).
Table 4-2. Causes and Remedies for Improper Valve Switching
Cause
Remedy
Low actuator line pressure
Increase line pressure
Solenoid not actuating
Verify timed event is set correctly
Check voltage at solenoid
Replace defective solenoid
44
Operating Manual
Chapter 4
Troubleshooting
Table 4-2. Causes and Remedies for Improper Valve Switching
Cause
Remedy
Actuator leaking
Replace actuator
Valve event not set correctly
Check valve event configuration and event in
the run table
Valve Plumbing
Verify the valve and system plumbing conforms to the appropriate plumbing
diagram for your system setup (See Chapter 3). Trace the plumbing from port to
port to insure all connections are made properly
Operating Manual
45
Chapter 4
Troubleshooting
46
Operating Manual
A
Customer
Communication
This appendix has contact information for Thermo Finnigan offices worldwide.
This appendix also contains a one-page Reader Survey. Use this survey to give us
feedback on this manual and help us improve the quality of our documentation.
How To Contact Us
ThermoFinnigan provides comprehensive technical assistance worldwide and is
dedicated to the quality of our customer relationships and services. Use this list to
contact your local Thermo Finnigan office or affiliate.
Europe
AUSTRIA
BELGIUM
Thermo Finnigan Austria wissenschaftliche Geräte
GmbH
Wehlistrasse 27 b, A-1200, Wien
Tel: 1 33350340 Fax:: 1 333503426
Also serving BULGARIA, CROATIA, CZECH REPUBLIC,
HUNGARY, POLAND, RUMANIA SLOVAKIA, SLOVENIA
Interscience SPRL
Scientific Parc Einstein –Avenue Jean-Etienne Lenoir 2
B-1348 Louvain-la-Neuve
Tel: 010 450025 Fax:010 453080
CIS and formerly USSR Republics
DENMARK
Neolab Moskow Office
1 Y Obidenskiy Per. B. 10 - Office 2 119034 Moscow
Tel: ++ 7 (095) 9264148/70/71
Fax:: ++ 7 (095) 9264514
ThermoFinnigan AB - Sweden
Pyramidbacken 3
SE 14175 Kugens Kurva
Tel: (8) 55646800 Fax: (8) 55646808
Operating Manual
47
Customer Communication
How To Contact Us
FINLAND
FRANCE
Oy G.W. Berg & Co. AB
PO Box 12
Finn 02201 Espoo
Tel: (9) 88664600 Fax: (9) 88664699
ThermoFinnigan France SA
Hightec Sud 12 Avenue des Tropiques – Z.A. de
Courtaboeuf
BP 141 - 91944 Les Ulis Cedex
Tel: (01) 6918 8810 Fax:: (01) 6929 9382
GERMANY
GREECE
Thermo Finnigan APG Gmbh
Boschring 12, 63329 Egelsbach
Tel: (06103) 4080 Fax: (06103) 408 222
Rigas Labs
5, Salaminos Str.
546 26 Thessaloniki - Greece
Tel: (031) 550669/540410 Fax: (031) 550073
IRELAND
ITALY
ThermoFinnigan U.K.
19 Trentham Lake South
Imex Technology Park, Trentham
ST4 8JF, Stoke on Trent, STAFF
Tel: (1782) 645136 Fax: (1782) 645121
Thermo Finnigan Italia S.p.A.
Strada Rivoltana
20090 Rodano (Milan)
Tel: (02) 95059226 Fax: (02) 95059256
NETHERLANDS
NORWAY
Interscience B.V.
Tinstraat 16, Postbus 2148, 4800 CC Breda
Tel: (076) 5411800 Fax: (076) 5420088
IT Instrument Teknikk
Skandinavia A/S – PO Box 14
Grins Naeringspark 1 N-1345 Østerås
Tel: (67) 149303 Fax: (67) 149302
PORTUGAL
SPAIN
Unicam Sistemas Analiticos, Lda.
Estrada da Rocha, 2-A-Sala C
2799-508 Linda A Velha
Tel: (21) 4153740 Fax: (21) 414 2006
Thermo Finnigan – Thermo Instruments S.A.
Avenida Valdelaparra 27
Edifico Alcor – 2a Planta
28108 Alcobendas – Madrid
Tel: (91) 6574930 Fax: (91) 6574937
SWEDEN
SWITZERLAND
ThermoFinnigan AB - Sweden
Pyramidbacken 3
SE 14175 Kugens Kurva
Tel: (8) 55646800 Fax: (8) 55646808
Brechbühler AG
Steinviesenstrasse 3, CH 8952 Schlieren
Tel: (01) 732 3131 Fax: (01) 730 6141
48
Operating Manual
How To Contact Us
Customer Communication
TURKEY
UNITED KINGDOM
Dolunay Teknik Cihazlar Ltd.
Darulaceze Cad. No 43/A
80290 Okmeydani
Istanbul
Tel: (212) 2105435 Fax: (212) 2105434
Thermo Finnigan U.K.
19 Trentham Lake South
Imex Technology Park, Trentham
ST4 8JF, Stoke on Trent, STAFF
Tel: (1782) 645136 Fax: (1782) 645121
Africa, Asia and Oceania
AUSTRALIA
EGYPT
Thermo Finnigan Australia PTY LTD
Unit 14, 38-46 South Street
Rydalmere, NSW 2116
Tel: 02 9898 9000 Fax:: 02 9898 9800
Scientic Services
20, Shehab Street, El Mohandeseen
Dokki, Cairo
Tel: (2) 3600482 Fax:: (2) 3481424
INDIA
ISRAEL
Nulab Equipment Co. Pvt. Ltd.
Labhouse Plot No. F-13
Opp. Seepz, Marol M.I.D.C.
Andheri (East) Mumbay 400 093
Tel: (022) 8376701 Fax:: (022) 8368275
Burgal Analytical Instruments & Software Ltd.
4 Wallenberg Raoul Street
Tel Aviv 69719
Tel: (3) 6490823 Fax: (03) 6490826
JAPAN
JORDAN
Thermo Finnigan K.K.
Nishi-Shinjuku, Toyokuni Building
2-5-8 Hatsudai, Shibuya-ku, Tokyo 151-0061
Tel: (03) 3372 3001 Fax: (03) 3372 7051
Hijaz Electronic & Scientific Supplies Est
P.O. Box 925133
Amman 11110
Tel: (6) 5359761 Fax: (6) 5359761
KOREA
InSung Chromotech Co., Ltd.
LEBANON
InSung Bldg 89-111, Shinjung 2-dong
Yangcheon-Ku – Seoul
Tel: (02) 2644 1991 Fax: (02) 2644 1996
LaboTech Engineering
Ashrafieh, Monot Street, P.O. Box 16
7186 Beirut
Tel: (1) 332707 Fax: (1) 333707
NEW ZEALAND
PAKISTAN
Alphatech Systems Ltd & Co.
P.O. Box 37583 Parnell
Auckland
Tel: (09) 3770392 Fax: (09) 3098514
Total Technology
1st floor, 4-Singhar Centre, 16 Mc Lagan Road
Lahore 54000
Tel: (42) 7236469/7224459 Fax: (42) 7234689
Operating Manual
49
Customer Communication
How To Contact Us
PEOPLES REPUBLIC OF CHINA
SINGAPORE
Finnigan Beijing Office
Room 912-916, Ping-an Mansion no 23
Finance Street
Xi Cheng District
Beijing
Tel: (10) 66210852 Fax: (10) 6610851
CE Instruments Enterprise Singapore
c/o Sintech Scientific S.E.A. Pte Ltd
No. 196 Pandan Loop #02-18
Pantech Industrial Complex
Singapore 128384
Tel: +65 779 0007 Fax: +65 2346252
Also serving INDONESIA, MALAYSIA, THAILAND,
PHILIPPINES
SOUTH AFRICA
TAIWAN R.O.C.
Premier Technologies
P.O Box 173
Northriding 2162
South Africa
Tel: (011) 4661410 Fax: (011) 4661313
E Hong Instruments Co, Ltd.
2FL, No.157, Sec 2, Fu Hsing S. Road
Taipei 106
Taiwan R.O.C.
Tel: (02= 2755 2266 Fax: (02) 2707 7693
U.A.E
BDH Middle East
P.O. Box 28637
Dubai
Tel: (4) 2852211 Fax: (4) 2861331
North, Central and South America
CANADA
U.S.A
Thermo Finnigan Americas
Tel: (732) 981-0390 Fax: (732) 981-0029.
.Thermo Finnigan Americas
Tel: (732) 981-0390 Fax: (732) 981-002
50
Operating Manual
Reader Survey
Product:
Manual:
Part No.:
Valve Oven for TRACE GC Ultra
Valve Oven Operating Manual
317 093 63
Please help us improve the quality of our documentation by completing and returning this survey.
Circle one number for each of the statements below.
Strongly
Agree
Agree
Neutral
Strongly
Disagree Disagree
The manual is well organized.
1
2
3
4
5
The manual is clearly written.
1
2
3
4
5
The manual contains all the information I need.
1
2
3
4
5
The instructions are easy to follow.
1
2
3
4
5
The instructions are complete.
1
2
3
4
5
The technical information is easy to understand.
1
2
3
4
5
Examples of operation are clear and useful.
1
2
3
4
5
The figures are helpful.
1
2
3
4
5
I was able to install the system using this manual.
1
2
3
4
5
If you would like to make additional comments, please do. (Attach additional sheets if necessary.)
________________________________________________________________________________________
________________________________________________________________________________________
________________________________________________________________________________________
Fax or mail this form to:
Thermo Finnigan Italia S.p.A.
Strada Rivoltana km 4
20090 Rodano (MI)
ITALY
Fax: 39 02 95059388
Glossary
This section is an alphabetical descriptive list of terms common to this industry. This also includes
abbreviations, acronyms, metric prefixes, and symbols.
A
A
ampere
ac
alternating current
ADC
analog-to-digital converter
B
b
bit
B
byte (8 b)
baud rate
data transmission speed in events per second
C
ºC
Celsius
CIP
Carriage and Insurance Paid To
cm
centimeter
CPU
central processing unit (of a computer)
CSE
Customer Service Engineer
D
Operating Manual
d
depth
DAC
digital-to-analog converter
dc
direct current
DS
data system
53
Glossary
E
ECD
Electron Capture Detector
EMC
electromagnetic compatibility
ESD
electrostatic discharge
F
ºF
Fahrenheit
FID
Flame Ionization Detector
FOB
Free on Board
FPD
Flame Photometric Detector
ft
foot
G
g
gram
gain
A measure of the ability of an electronic circuit or device to
increase the magnitude of an electronic input parameter.
GC
gas chromatograph
GND
electrical ground
H
54
h
height
h
hour
harmonic
distortion
A high-frequency disturbance that appears as distortion of the
fundamental sine wave.
HOT OC
High Oven Temperature Cold On-Column Injector
HV
high voltage
Operating Manual
Glossary
Hz
hertz (cycles per second)
I
ID
inside diameter
IEC
International Electrotechnical Commission
impulse
See transient
in
inch
I/O
input/output
K
k
kilo (103 or 1024)
K
Kelvin
kg
kilogram
kPa
kilopascal
L
l
length
l
liter
LAN
Local Area Network
lb
pound
LED
light-emitting diode
LVOCI
Large Volume On-Column Injector
LVSL
Large Volume Injector
M
Operating Manual
m
meter (or milli [10-3])
M
mega (106)
55
Glossary
µ
micro (10-6)
MBq
megabecquerel
mCi
millicurie
meniscus
The curved upper surface of a column of liquid.
min
minute
mL
milliliter
mm
millimeter
m/z
mass-to-charge ratio
N
n
nano (10-9)
negative polarity
The inverse of a detector signal polarity.
nm
nanometer
NPD
Nitrogen Phosphorous Detector
O
OCI
On-Column Injector
OD
outside diameter
Ω
ohm
P
56
p
pico (10-12)
Pa
pascal
PCB
printed circuit board
PDD
Pulsed Discharge Detector
PID
Photoionization Detector
Operating Manual
Glossary
PKD
Packed Column Injector
PN
part number
PPKD
Purged Packed Column Injector
psi
pounds per square inch
PTV
Programmable Temperature Vaporizing Injector
R
RAM
random access memory
RF
radio frequency
ROM
read-only memory
RS-232
industry standard for serial communications
S
s
second
S/SL
Split/Splitless Injector
sag
See surge
slow average
A gradual, long-term change in average RMS voltage level,
with typical durations greater than 2 s.
SOP
Standard Operating Procedures
source current
The current needed to ignite a source, such as a detector
lamp.
surge
A sudden change in average RMS voltage level, with typical
duration between 50 µs and 2 s.
T
TCD
Operating Manual
Thermal Conductivity Detector
57
transient
A brief voltage surge of up to several thousand volts, with a
duration of less than 50 µs.
U
UFM
Ultra Fast Module
V
V
volt
V ac
volts, alternating current
V dc
volts, direct current
VGA
Video Graphics Array
W
w
Width
W
Watt
The symbol for a compound unit that is a quotient (for example, degrees Celsius per minute or grams per liter) is
written with a negative exponent with the denominator.
For example:
°C min-1 instead of °C/min
g L-1 instead of g/L
Index
Column 17
Components 16
Configuring Valves 32
Troubleshooting 43
Leak testing 43
Valve plumbing 45
Valve switching 44
G
U
C
Gas Sampling Valves 32
H
Heated Enclosure 17
Installing valves in 21
I
Installation 14
Valves in the Heated Oven 21
Valves in the Unheated Compartment 28
Valves in the Valve Box 31
Installing 28
Installing an unheated compartment valve 30
Installing the actuator to the valve standoff 27
Unheated Enclosure 17
Installing valves 28
V
Valve positions 22
Valves 17
Voltage Selection 15
M
Mechanical Stop Positions 24
Mechanical Stop Positions for Switching Valves 33
O
Operation 35
Adding a Gas Sampling Valve Event to the Run
Table 38
Adding a Gas Switching Valve Event to the Run
Table 40
Heating the Valve Oven 41
Operating valves automatically 38
Operating valves manually 36
Overview 11
P
Power Requirements 15
S
Solenoid Manifold 22
Switching Valves 32
T
Timed Event Output Jacks 22, 23
Operating Manual
59
Index
60
Operating Manual
Figure 1-1.
Figure 1-2.
Figure 1-3.
Figure 2-1.
Figure 2-2.
Figure 2-3.
Figure 2-4.
Figure 2-5.
Figure 2-6.
Figure 2-7.
Figure 2-8.
Figure 3-1.
Figure 3-2.
The Valve Oven............................................................................................................12
The Valve Oven and the TRACE GC Ultra .................................................................14
TRACE GC Ultra Valve Oven Components................................................................16
Timed Event Output Jacks, Solenoid Manifold, and Valve Positions .........................22
Timed Event (TE) Output Jacks ...................................................................................23
Mechanical Stop Positions for both CW and CCW .....................................................24
Solenoid Manifold Edges .............................................................................................25
Installing the actuator to the valve standoff .................................................................27
Installing an Unheated Compartment Valve ................................................................30
Mechanical Stop Positions for Gas Valves ..................................................................32
Mechanical Stop Positions for Switching Valves ........................................................33
The TRACE GC Ultra Keypad, Showing the Valves Key...........................................36
The TRACE GC Ultra Keypad, Showing the Run Table Key .....................................38
Table 4-1.
Table 4-2.
Leak Testing for Valves ...............................................................................................44
Causes and Remedies for Improper Valve Switching ..................................................44