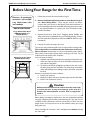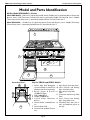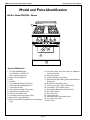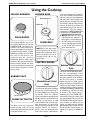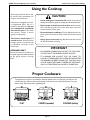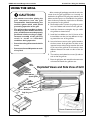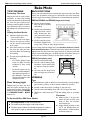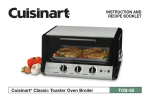
1
Care and Use Manual
✳ ❀
HEATING
HEATING
✳
✳❀
Thermador Professional® Range
FOR RESIDENTIAL USE ONLY
All-Gas Models PRG304
PRG364GL, PRG364GL, PRG366
PRG486GD, PRG486GL, PRG484GG
LE MANUEL DE SOIN ET D’UTILISATION
EN ENGLAIS AVEC ADVERTISSEMENTS EN FRANÇAIS
A Special Message to our Customers
Thank you for selecting the Thermador Professional® Range. We recommend that you take
time to read this entire booklet before using your new appliance for the first time.
The booklet contains suggestions we believe will be helpful, as well as directions for using all
the features of this range. Keep it in a handy place, as it has the answers to questions that
may occur when you start to cook.
Let us know if we can help you. When you write, please include the model and serial numbers of your range.
Sincerely,
The Test Kitchen Consumer Scientists
! WARNING:
▲
If the information in this manual is not followed exactly, a fire or explosion may result causing property
damage, personal injury or death.
FOR YOUR SAFETY
AVERTISSEMENT
✓ Do not store or use gasoline or
other flammable vapors and
liquids in the vicinity of this or
any other appliance.
✓ Ne pas entreposer ni utiliser de
l‘essence ni d’autres vapeurs ou
liquides inflammables dans le
voisinage de l’appareil, ni de tout
autre appareil.
WHAT TO DO IF YOU
SMELL GAS
•
Shut off gas to the appliance.
•
Extinguish any open flame.
•
Open Lid.
•
If odor continues, immediately phone
your gas supplier.
•
If you cannot reach your gas supplier, call
the fire department.
S’IL Y A UNE ODEUR DE
GAZ:
•
Coupez l’admission de gaz de l’appariel.
•
Ènteindre toute flamme nue.
•
Ouvrir le couvercle.
•
Si l’odeur peraiste, appeler immediatement
votre compagnie de gaz ou votre
departement des incendies.
PRG Professional Ranges Care and Use
Table of Contents
If you Smell Gas .................. Inside front cover
Introduction .................................................... 1
Gas Type Verification..................................... 1
Introduction .................................................... 2
SECTION ONE: General Safety Instructions
Safety ..............................................................................3
Precautions ....................................................................4
SECTION TWO: Before You Begin
Before Using Your Range for the First Time ........ 7
SECTION THREE: Description
Model & Parts Identification – PRG484GG .......... 8
Model & Parts Identification – PRG486GD .......... 9
Model & Parts Identification – PRG304 .............. 10
SECTION FOUR: Using the Cooktop
Using the Cooktop ........................................................
Proper Cookware .................................................... 13
Flame Setting Guidelines ......................................... 15
Suggested Flame Settings ........................................ 16
Using the Grill ........................................................... 18
Grill Cooking Chart ................................................. 21
Using the Griddle ..................................................... 23
Griddle Cooking Chart ........................................... 23
SECTION FIVE: Using the Oven
Bake ............................................................................. 24
Convection•Bake ...................................................... 25
Other Uses of Bake ................................................. 26
Setting Broil ............................................................... 27
INTRODUCTION
The Thermador Professional® Ranges are free standing
units available in a number of configurations. Model
PRG304 is equipped with four sealed gas surface
burners, a large capacity gas oven with convection
system and gas infra-red broiler. Models PRG364GD,
PRG364GL, and PRG366 feature a gas cooking surface
with four sealed burners and a griddle, four sealed
burners and a grill or six sealed burners, in addition to
a large capacity gas oven with a convection system and
a gas infra-red broiler. Models PRG484GG,
PRG486GD, and PRG486GL feature a gas cooking
surface with four sealed burners, griddle and grill; six
sealed burners and a griddle; or six sealed burners and
a grill. PRG48 Ranges provide a large gas oven (the
same as used in the PRG36 Ranges) and a secondary gas
oven with broil capability.
GAS TYPE VERIFICATION
Verify the type of gas supplied to the location. Ensure
that the appliance is connected to the type of gas for
which it is certified. All models are certified for use
with natural gas. Field conversion of the appliance for
use with propane gas requires Conversion Kit, P/N 3500-549.
SECTION SIX: Care and Maintenance
Burner Grates and Sealed Burners ...................... 29
Griddle and Grill ....................................................... 30
Range Cleaning Chart .............................................. 31
SECTION SEVEN: Before Calling For Service
Do-It-Yourself Maintenance................................... 35
Before Calling For Service ...................................... 36
Data Rating Plate ...................................................... 36
Warranty ........................................ Inside back cover
IMPORTANT
CAUTION:
All ranges must be installed with a backguard.
Model PRG304 is shipped from the factory with a
standard 9" backguard. For all other models one of
three available backguards must be ordered separately and installed at the back of the range. The
three backguard choices include a Low Back, High
Back Shelf, or Island Trim. Before using the range,
insure that it is equipped with a proper backguard.
Refer to the Installation Instructions accompanying this appliance for more information.
When connecting the unit to propane gas, make
certain the propane gas tank is equipped with its
own high-pressure regulator in addition to the
pressure regulator supplied with the range. The
maximum gas pressure to this appliance
must not exceed 14.0 inches water column
from the propane gas tank to the pressure
regulator.
Page 1
PRG Professional Ranges Care and Use
Introduction
This manual contains important Care and Use information for All-Gas Thermador Professional® Ranges.
When using this manual, it is critical that you know the model number of your range, as some information
will be unique to each All-Gas Range. The model number may be found on the rating plate located on
the range as identified on page 36 of this manual. The charts on the following pages summarize the various
range models and identify the features of each All-Gas Range.
PRG All-Gas Ranges, Featuring a Gas Cooking Surface with
Gas Ovens, with Gas Convection, and Gas Infra-Red Broiler
All-Gas PRG304
All-Gas, 30" wide Range with Four Cooktop Burners
All-Gas PRG364GD
All-Gas, 36" wide Range with Four Cooktop Burners and Griddle
All-Gas PRG364GL
All-Gas, 36" wide Range with Four Cooktop Burners and Grill
All-Gas PRG366
All-Gas, 36" wide Range with Six Cooktop Burners
All-Gas PRG484GG
All-Gas, 48” wide Range with Four Cooktop Burners, Griddle
Grill and 2 ovens (1 large main and 1 small secondary)
All-Gas PRG486GD
All-Gas, 48” wide Range with Six Cooktop Burners,
Griddle and 2 ovens (1 large main and 1 small secondary)
All-Gas PRG486GL
TESTED IN ACCORDANCE
WITH ANSI Z21.1 CURRENT
ISSUE, STANDARD FOR
HOUSEHOLD COOKING
GAS APPLIANCES AND UL
STANDARD 858 CURRENT
ISSUE, HOUSEHOLD ELECTRIC RANGES. IN CANADA
TESTED IN ACCORDANCE
WITH CAN/CGA 1.1 DOMESTIC GAS RANGES, CURRENT ISSUE.
All-Gas, 48” wide Range with Six Cooktop Burners Grill and
2 ovens (1 large main and 1 small secondary)
Check your local building codes
for the proper method of installation. In the absence of local
codes, this unit should be installed in accordance with the
National Fuel Gas Code No.
Z223.1 Current Issue and the
National Electrical Code ANSI/
NFPA No. 70 Current Issue or
the Can - B149 Installation
Codes for Gas Burning Appliances and C22.1 Canadian Electrical Code Part 1.
Page 2
PRG Professional Ranges Care and Use
SECTION ONE: General Safety Instructions
SAFETY
Electrical Requirements and Grounding Instructions
PLEASE READ
CAREFULLY
All-Gas Models:
PRG304, PRG364GD, PRG364GL,
PRG366, PRG484GG, PRG486GD,
PRG486GL
120 volts, 60 Hz., 20 Amp electrical
circuit required.
FOR PERSONAL SAFETY, THIS APPLIANCE
MUST BE CONNECTED
TO
A
PROPERLY
GROUNDED AND POLARIZED ELECTRICAL
POWER SUPPLY.
ALWAYS DISCONNECT THE
ELECTRICAL PLUG FROM THE
WALL RECEPTACLE BEFORE
SERVICING THIS UNIT.
It is recommended that a dedicated
circuit servicing this appliance be
provided.
See Installation Instructions for electrical requirements
and grounding instructions.
CAUTION - ALL MODELS
DO NOT UNDER ANY CIRCUMSTANCES CUT OR
REMOVE THE THIRD (GROUND OR NEUTRAL)
PRONG FROM THE POWER CORD PLUG (ALL-GAS
PRG RANGES).
It is the personal responsibility and obligation of you, the user, to have
this appliance connected to the electrical power supply in accordance
with the National Electrical Code and/or applicable local codes and
ordinances by a qualified electrician.
CAUTION - ALL MODELS
In Case of an Electrical Failure
If for any reason a gas control knob is turned ON and there is no
electric power to operate the electronic igniters on the cooktop
burners, turn OFF the gas control knob and wait 5 minutes
for the gas to dissipate before lighting the cooktop burner manually.
To light the cooktop burners manually, carefully hold a lighted match
to the burner ports and turn the gas control knob to HI. During a
power failure you can use the cooktop burners, but each must be lit
with a match.
DO NOT attempt to light the two left burners manually.
These burners are equipped with the ExtraLow® feature and
cannot be lit manually.
NOTE: For PRG All-Gas Ranges, the gas oven and broiler burners
cannot be lighted manually during a power failure.
Page 3
PRG Professional Ranges Care and Use
Section One: General Safety Instructions
Safety Practices to Avoid Personal Injury
PRECAUTIONS
When properly cared for, your
new Thermador Professional ®
Range has been designed to be a
safe, reliable appliance. However,
use extreme care when using this
restaurant caliber range as this type
of appliance provides intense heat
and can increase the accident potential. When using kitchen appliances, basic safety precautions
must be followed, including the following:
Read this Care and Use Manual
carefully before using your new
range to reduce the risk of fire,
electric shock, or injury to persons.
Insure proper installation and
servicing. Follow the installation
instructions provided with this
product. Have the range installed
and grounded by a qualified technician.
Have the installer show you
where the gas supply shut-off
valve is located so that you know
how and where to turn off the gas
to the range.
If you smell gas, your installer has
not done a proper job of checking
for leaks. If the connections are not
perfectly tight, you can have a small
leak and therefore a faint gas smell.
Finding a gas leak is not a “do-ityourself” procedure. Some leaks
can only be found with the burner
control in the ON position and this
must be done by a qualified service
technician. See Inside Front Cover
regarding gas leaks.
In the event a burner goes out
and gas escapes, open a window
or a door. Do not attempt to use
the cooktop until the gas has had
time to dissipate. Wait at least 5
minutes before using the range.
Do not repair or replace any
part of the appliance unless specifically recommended in this
manual. All other servicing should
be referred to a qualified technician.
Children should not be left
alone or unattended in an area
where appliances are in use.
They should never be allowed to sit
or stand on any part of the appliance.
CAUTION: Do not store
items of interest to children
above the range or at the back
of it. If children should climb onto
the appliance to reach these items,
they could be seriously injured.
Never use any part of the
cooktop or oven for storage.
Flammable materials can
catch fire and plastic items
may melt or ignite.
Do not hang articles from any
part of the appliance or place
anything against the oven.
Some fabrics are quite flammable
and may catch on fire.
If the range is near a window, be
certain the curtains do not
blow over or near the cooktop
burners; they could catch on fire.
DO NOT USE WATER ON
GREASE FIRES. Turn appliance
off and smother fire with baking
soda or use a dry chemical or foamtype extinguisher.
Never let clothing, potholders,
or other flammable materials
come in contact with or too
Page 4
close to any element, burner or
burner grate until it has cooled.
Fabric may ignite and result in personal injury.
Use only dry potholders: moist
or damp potholders on hot surfaces
may cause burns from steam. Do
not use a towel or other bulky cloth
in place of potholders. Do not let
potholders touch hot burners, or
burner grates.
For personal safety, wear
proper apparel. Loose fitting garments or hanging sleeves should
never be worn while using this appliance. Some synthetic fabrics are
highly flammable and should not be
worn while cooking.
Do not use aluminum foil to
line any part of the oven or
cooktop. Use of a foil liner could
result in a shock or fire hazard, or
the obstruction of the flow of combustion and ventilation air. Foil is an
excellent heat insulator and heat
will be trapped beneath it. This will
upset the cooking performance and
can damage the finish of the oven or
the cooktop.
WARNING
TO REDUCE THE RISK
OF TIPPING OF THE
APPLIANCE, IT MUST
BE SECURED BY A
PROPERLY
INSTALLED ANTI-TIP DEVICE. VERIFY THAT THE
ANTI-TIP DEVICE IS ENGAGED
PER INSTALLATION INSTRUCTIONS. (NOTE: ANTI-TIP DEVICE
IS REQUIRED ON ALL 30” AND
36” RANGES.)
PRG Professional Ranges Care and Use
Section One: General Safety Instructions
Safety Practices to Avoid Personal Injury
PRECAUTIONS
Warning: The appliance is for
cooking. Based on safety considerations, never use the oven or
cooktop to warm or heat a room.
Also, such use can damage the
cooktop or oven parts.
Always use utensils that have
flat bottoms, large enough to
cover the burner. The use of undersized utensils could expose a
portion of the flame and may result
in ignition of clothing.
When using the cooktop: DO
NOT TOUCH THE BURNER
GRATES OR THE IMMEDIATE SURROUNDING AREA.
Areas adjacent to the burners may
become hot enough to cause burns.
To minimize burns, ignition of flammable materials and unintentional
spillovers, position handles of
utensils inward so they do not
extend over adjacent work areas,
cooking areas, or the edge of the
cooktop.
Never leave the cooktop unattended when using high flame
settings. Boil overs cause smoking
and greasy spillovers that may ignite. More importantly, if the
burner flames are smothered, unburned gas will escape into the
room. See Inside Front Cover regarding gas leaks.
Only certain types of glass,
heat-proof glass-ceramic, ceramic, earthenware, or other
glazed utensils are suitable for
cooktop use. This type of utensil
may break with sudden temperature changes. Use only on low or
medium heat settings according to
the utensil manufacturer’s directions.
Do not heat unopened food
containers; a buildup of pressure
may cause the container to burst.
During cooking, set the burner
control so that the flame heats
only the bottom of the pan and
does not extend beyond the
bottom of the pan.
Use caution to insure that
drafts like those from forced
air vents or fans do not blow
flammable material toward
the flames or push the flames
so that they extend beyond the
edges of the pot.
Hold the handle of the pan to
prevent movement of the utensil
when stirring or turning food.
DO NOT use pots or pans on
the grill section.
Do not use the grill for cooking
excessively fatty meats or products which promote flare-ups.
The optional cutting board accessory must be removed before operating the grill burner
beneath or burners adjacent to
it.
GREASE IS FLAMMABLE. Let
hot grease cool before attempting
to handle it. Avoid letting grease
deposits collect. Clean after each
use.
For proper lighting and performance of the burners, keep the
igniter ports clean. It is necessary
to clean these when there is a boil
over or when the burner does not
light even though the electronic igniters click. See page 12.
Clean the cooktop with caution. Avoid steam burns; do not
use a wet sponge or cloth to clean
the cooktop while it is hot. Some
cleaners produce noxious fumes if
applied to a hot surface. Follow
directions provided by the cleaner
manufacturer.
Page 5
Be sure all cooktop controls
are turned off and the cooktop is
cool before using any type of aerosol cleaner on or around the
cooktop. The chemical that produces the spraying action could, in
the presence of heat, ignite or
cause metal parts to corrode.
When using the oven: DO NOT
TOUCH THE INTERIOR
SURFACES OF THE OVEN
OR THE EXTERIOR AREA
IMMEDIATELY SURROUNDING THE DOOR. Interior oven
surfaces become hot enough to
cause burns. The heat deflector,
which deflects heat away from the
cooktop and the trim on the top
and sides of the oven door, will also
be hot when the oven is in use.
Place oven racks in desired position while oven is cool. If a rack
must be moved while the oven is
hot, do not let the potholders contact the hot infrared burner.
Use care when opening the
oven door; let hot air or steam
escape before removing or replacing foods.
Do not rub, damage, move or
remove the door gasket. It is
essential for a good seal during
baking.
Be careful not to damage the
screen covering the infra-red
broiler of the gas oven. If the
screen is damaged, air can enter the
distribution box behind the screen,
possibly resulting in an explosion.
In the event that personal
clothing catches fire, DROP
AND ROLL IMMEDIATELY
to extinguish flames.
PRG Professional Ranges Care and Use
Section One: General Safety Instructions
PRECAUTIONS
DO NOT obstruct the flow of combustion or ventilation air.
For safety reasons and to avoid
equipment damage, never sit, stand,
or lean on the oven door.
Service should only be done by
authorized Technicans. Technicians must disconnect the power
supply before servicing this unit.
Clean the ventilator hood and filters above the range frequently so
grease from cooking vapors does
not accumulate on them.
Turn the ventilator OFF in case of
fire or when intentionally “flaming”
liquor or other spirits on the
cooktop. The blower, if in operation, could unsafely spread the
flames.
California Proposition 65
WARNING:
The burning of gas cooking fuel generate some by-products which are
on the list of substances which are
known by the State of California to
cause cancer or reproductive harm.
California law requires businesses
to warn customers of potential exposure to such substances. To minimize exposure to these substances,
always operate this unit according to
the instructions contained in this
booklet and provide good ventilation to the room when cooking with
gas.
SAVE THESE INSTRUCTIONS
BEFORE USING YOUR RANGE FOR THE FIRST TIME,
CHECK THAT YOU HAVE THESE ITEMS:
DESCRIPTION
Oven Racks Large Oven
PRG
304
GD
2**
PRSG
364
GL
PRG
364
PRG
366
GD
PRG
486
GL
PRG
486
GG
PRG
484
2**
2**
2**
2**
2**
2**
2
2
2
Oven Racks 12" Oven
Two-Piece Broil Pan
1
1
1
1
2‡
2‡
2‡
Burner Caps
4
4
4
6
6
6
4
Burner Grates
4
4
4
6
6
6
4
Control Knobs
5
6
6
7
9
9
8
Cast Iron Grill Grate
1
1
1
Stainless Steel Radiant
1
1
1
Steel Griddle
1
1
1
Product Registration Card
1
1
1
1
1
1
1
Backguard
1
*
*
*
*
*
*
Installation Instructions
1
1
1
1
1
1
1
*Backguard must be ordered and shipped separately. It is not included with the range shipment. **One rack
is a special Broil Rack. ‡The aluminum broil pan is for the Secondary Oven; the porcelain & chrome broil
pan is for the Main Oven.
Page 6
PRG Professional Ranges Care and Use
Section Two: Before You Begin
Before Using Your Range for the First Time
Remove all packaging
materials and temporary labels from oven
and cooktop.
RACK POSITIONS
Large All-Gas Main Oven
(PRG304, PRG36 and
PRG48 Models)
3
2
1
2. Record the Model and Serial number as described on Page 36
see “Data Rating Plate.” These may be used for any future
contacts with your servicer or the factory. Enter this information on
the Product Registration Card included with this product; then mail it
to the indicated address to receive your free Thermador Professional® Cookbook.
3. Optional Accessories. Grill Cover, Chopping Board, Griddle, and
other accessories are available from your Thermador Dealer. Contact
the Thermador Parts Department toll-free at 800/735-4327 for more
information.
4. Position the racks correctly in the oven.
All-Gas Secondary Oven
(PRG48 Models only)
3
2
1
1. Check that you have the items listed on Page 6.
The correct rack position depends on the recipe and the cooking mode.
The rack positions are numbered from the bottom of the oven,
like an elevator. Rack position 2 is the most frequently used position.
Place rack(s) in the proper position before turning on the oven. For all
models insert and remove racks as follows:
Insert the racks as follows:
a. Hold the rack with the back rail in the up position towards the rear
of the oven. Slip it into the oven so the rack slides are between the
rack and the rack guides.
b. Tip the front of the rack up slightly as it slides into the oven so that
the safety stops clear the rack slides. The safety stops on the back
of the rack will keep it from sliding out of the oven when it is pulled
forward.
Remove or reposition the racks as follows:
a. Pull the rack forward,
b. Lift the front of the rack up so the safety stops clear the rack slides.
c. Pull the rack forward to remove.
Caution
Aluminum foil should never be used to cover the oven racks
or to line the oven. It may cause damage to the oven if it
touches the infrared broiler or when heat is trapped beneath it.
Before baking or broiling for the first time, the oven and broiler should be
turned on separately to burn off the manufacturing oils. Turn the oven on
to 450˚F. for 20 to 30 minutes; then turn the broiler to "Broil" for same
length of time. You may wish to turn on the ventilator above your range
during this time.
Please read Page 34 in Section 6: Care and Maintenance before cleaning
the oven racks.
Page 7
PRG Professional Ranges Care and Use
Section Three: Description
Model and Parts Identification
All-Gas Model PRG484GG — Shown
Model PRG486GD - Grill, Item 3, replaced by Griddle, Item 4; Griddle, Item 4, replaced by Burner Grates and
Burners, Item 2. Grill Thermostat Control Knob, Item 8, replaced by Griddle Control Knob, Item 9; Griddle
Thermostat Control Knob, Item 9, replaced by Standard Burner Control Knobs, Item 7.
Model PRG486GL - Griddle, Item 4, replaced by Burner Grates and Burners, Item 2. Griddle Thermostat
Control Knob, Item 9, replaced by Standard Burner Control Knobs, Item 7.
1
2
2
6
3
4
7
8
HEATING
✤
5
9
10
11 12 13
16
15
14
Secondary Oven
18
20
21
14
19
17
Key for PRG48 and PRG36 Models
1. 22-inch High Shelf Backguard,
12-inch Low Back, or Island Trim
(Backguard ordered separately)
2. Burner Grates & Burners
(15,000 BTU Each)
21 3. Grill (18,000 BTU)
4. Griddle (15,000 BTU)
22 5. Control Knobs, ExtraLow ®
Burners
6. Control Knobs, Standard Burners
7. Control Knob, Grill
8. Control Knob, Griddle Thermostat
Page 8
9. Light Switch, Secondary Oven
10. Oven Controls and Heating
Light, Secondary Oven
11. Light Switch, Large Main
Oven
12. Convection Switch, Large Main
Oven
13. Oven Control and Heating
Light, Large Main Oven
14. Secondary Oven door (for inside, see additional picture at
the left)
PRG Professional Ranges Care and Use
Section Three: Description
Model and Parts Identification
All-Gas Model PRG364GD — Shown
Model PRG364GL - Griddle, Item 3, replaced by Grill, Item 4, and Griddle Thermostat Control Knob, Item
9, replaced by Grill Control Knob, Item 8.
Model PRG366 - Griddle, Item 3, replaced by Burner Grates and Burners, Item 2, and Griddle Thermostat
Control Knob, Item 9, replaced by Standard Burner Control Knobs, Item 7.
1
2
3
2
HEATING
✤
13
5 11 12 8
6
16
15
17
Key for PRG48 and PRG36 Models (continued)
15. Large Oven Door
16. Viewing Window, Large Oven
17. Kick Panel (Product Rating Label
Located Behind Kick Panel)
18. Broil Burner, Secondary Oven
19. Oven Interior Light: (One in Each
Oven)
20. Oven Racks: (Two in Each Oven)
21. Rack Guides (Removable in Both
Ovens)
22. Oven Door Gasket
23. Convection Fan
24. Thermostat tube
25. Infra-Red Broiler (Large Oven)
26. Convection Fan Cover
27. Door Vents
Large Main Oven
24
25
26
19
22
21
16
27
Page 9
PRG Professional Ranges Care and Use
Section Three: Description
Model and Parts Identification
All-Gas Model PRG304 - Shown
1
2
2
HEATING
✤
5
11 13 12
6
16
15
17
Key for PRG Models
1. 22" High Shelf Backguard,
12" Low Back, or Island Trim
(Each ordered separately)
2. Burner Grates & Burners
3. Grill
4. Griddle
5. Control Knobs, ExtraLow® Burners
6. Control Knobs, Standard Burners
7. Control Knob, Grill
8. Control Knob, Griddle Thermostat
9. Light Switch, Secondary Oven
10. Controls, Secondary Oven
11. Convection Switch, Large Main Oven
12. Light Switch, Large Main Oven
13. Oven Control Knob, Large Main Oven and Heating
Light
14. Secondary Oven door (for inside, see additional
picture at the left)
15. Large Oven Door
16. Viewing Window, Large Oven
17. Kick Panel (Product Rating Label Located Behind
Kick Panel)
18. Broil Burner (Secondary Oven)
19. Oven Interior Light: (One in Each Oven)
20. Oven Racks: (Two in Each Oven)
21. Rack Guides (Removable in Both Ovens)
22. Oven Door Gasket
23. Convection Fan
24. Thermostat tube
25. Infra-Red Broiler (Large Main Oven)
26. Convection Fan Cover
27. Door Vents
Page 10
PRG Professional Ranges Care and Use
Section Four: Using the Cooktop
Using the Cooktop
SEALED BURNERS
BURNER BASE
Burner Base (C)
Notch (B)
SEALED BURNER
Igniter (D)
The cooktop features four or six
gas surface burners, each rated at
15,000 BTU/HR. The burners are
sealed to the metal top frame to
prevent liquid spills from penetrating below the top surface, thereby
facilitating cleaning. On all models,
the two far left burners are
equipped with the exclusive
ExtraLow® feature, which cycles
the flame off and on to achieve the
lowest possible simmer rate. Each
burner is controlled by an individual
control knob connected to a shaft
of a gas valve.
BURNER BASE
NOTE: For safe and proper
burner operation, be sure that
tab (A) on the underside of the
burner cap fits into the corresponding notch (B) on the
burner base.
wise to the HI position. The igniters
at all of the sealed surface burners
will click, then the selected burner
will light. After flame ignition, the
ignitors will stop clicking. The knob
can then be rotated to any position
between HI and LO to achieve the
desired flame height. For the standard burners, the LO setting is
equivalent to 2,200 BTU/HR and HI
is equivalent to 15,000 BTU/HR.
NOTE: Whenever any control knob for the sealed surface burner is turned beyond
the OFF position, the surface
burner indicator light located
on the far left of the control
panel will illuminate.
CONTROL KNOBS
ExtraLow® Burner Control
Knob
BURNER CAPS
Standard Burner Control
Knob
The control knobs for the sealed gas
burners are positioned directly in
front of and below the corresponding burners. There are indicator
Tab (A)
marks located above each knob that
identify whether the knob controls
BURNER CAP POSITION
the front or rear burner. A solid
circle indicates that the knob controls that burner; an open circle
The Burner Cap top is porcelain
indicates that the knob controls the
enamel and has a tab (A) on the opposite burner. To operate a
underside that fits into the notch (B) burner, press the desired control
on the burner base (C).
knob, then rotate it counterclockPage 11
For the two far left ExtraLow® burners, the corresponding control
knobs have additional markings indicating that rotation of the knob below the LO setting is possible.
Within this LO to XLO control
range, the flame is pulsed OFF and
ON for varying lengths of time to
enable simmering, poaching, melting
chocolate and holding cooked foods
at temperature without scorching
or burning. The XLO setting is
equivalent to 375 BTU/HR and is
achieved by cycling the flame ON
for approximately 10 seconds and
OFF for 50 seconds of each minute.
At a position just below the LO
setting, the flame will be ON for
approximately 50 seconds and OFF
for 10 seconds of each minute, resulting in an output of 1,850 BTU/
HR.
PRG Professional Ranges Care and Use
Section Four: Using the Cooktop
Using the Cooktop
THINGS TO CONSIDER
WHEN SETTING AND
ADJUSTING CONTROL
KNOBS
• The type and quantity of the food
will affect which setting to use.
• The size, type and material of
your pan will affect which setting
to use.
• Temperature control will be
more accurate if a lid is used.
• Bring food to a rolling boil; stir
well to be sure all the food is
boiling; cover and reduce the
heat to just below LO.
• Check periodically to see if the
control knob should be turned to
a lower setting.
• When a large pan is used on a
small burner, it may cause the
simmer action to occur mainly in
the center of the pan. When the
food is stirred, the cooler food
near the edges of the pan may
result in an overall temperature
too cool to simmer. If this happens, turn the burner up slightly.
• It is normal to stir food occasionally. This is especially important
when simmering for several
hours. For example: a homemade
spaghetti sauce or beans.
• Adjust control knob to lower
settings in small steps.
• If control is set too low to maintain simmer, bring the food back
to a boil before setting to a higher
simmer setting.
• It is normal not to see simmer
bubbles immediately after the
food has been stirred.
• While the flame is ON there may
be bubbling; there should be at
least steam and a slight quiver of
the liquid's surface.
• Simmer bubbles may not be seen
when the flame has cycled OFF.
until both control knobs are turned
OFF and then turned back on again.
See "What To Do If You Smell Gas,"
inside front cover.
IGNITER
ELECTRONIC IGNITION
The cooktop uses electronic igniters to light the burners. Each burner
has its own igniter that sparks when
any burner is turned on. When the
igniters are clicking (sparking), do
not touch the burners. If a burner
fails to ignite, see "Before Calling for
Service", page 36.
AUTOMATIC
REIGNITION
If any burner flame blows out, the
electronic igniter automatically
sparks on all burners to relight the
flame. Do not touch any burner
while the igniters are clicking.
POWER FAILURE
In the event of a power failure, only
the standard burners can be lighted
manually. It is necessary to light each
standard burner individually.
If the cooktop is being used when
the power failure occurs, turn all the
burner control knobs to the OFF
position. Then the standard burners
can be lighted by holding a match at
the ports and turning the control
knob to the HI position. Wait until
the flame is burning all the way
around the burner cap before adjusting the flame to the desired
height.
The two ExtraLow® burners located on the far left side cannot be
used during a power failure. Be sure
to turn them OFF if a power failure
occurs, as they will not turn back on
Page 12
NOTE: For PRG All-Gas Ranges,
the gas oven and broiler burners
cannot be lighted manually during a
power failure.
The Griddle in all units can not be
used during a power failure..
FLAME HEIGHT
The correct height of the flame
depends on the size and material of
the utensil being used, the food
being cooked and how much liquid
is in the utensil. Here are some basic
rules for selecting the flame height.
• The flame should never extend
beyond the bottom of the pan.
• Utensils which conduct heat
slowly (such as glass-ceramic)
should be used with a low or medium flame unless you are cooking
with a large amount of liquid
BURNER EFFICIENCY and
FLAME CHARACTERISTICS
The burner flame should be blue in
color and stable with no yellow tips,
excessive noise or fluttering. It
should burn completely around the
burner cap.
Foreign particles in the gas line may
cause an orange flame during initial
use. This should disappear with use.
If the flame does not burn evenly
Ports
BURNER CAP
Section Four: Using the Cooktop
PRG Professional Ranges Care and Use
Using the Cooktop
all the way around the burner cap,
be sure the cap is positioned correctly on the burner base.
If the ports are clogged, use a wire,
a straightened paper clip or a
needle to clear the ports. Do not
use a toothpick; it could break
off inside the port. If the condition persists, contact a service
agency for adjustment.
The burner should light in 4
seconds or less. If a burner does
not light, check to see that the cap
is positioned correctly on the
burner base.
CAUTION
•
Foods packaged in aluminum foil should not be placed
directly on the burner grate for cooking: aluminum foil can melt.
•
Plastic, paper and cloth can melt or burn when in contact
with a hot burner grate. Do not let these items come into
contact with the burner grate.
•
Do not allow pans to boil dry. This can damage the pan, the
burner grate, the metal top frame and/or the burner cap and
base.
•
Heavy grates retain heat long after flame has been turned
off. Be careful when removing.
IMPORTANT
RETAINED HEAT
Due to the heavy mass of this professional range, heat will be retained
by the grates, burners, and top
frame.
•
FOR PROPER COMBUSTION DO NOT USE THE COOKTOP WITHOUT THE BURNER GRATES IN PLACE.
•
IT IS NORMAL FOR A SLIGHT “POP” OR “FLASH” TO
OCCUR AT THE BURNER PORTS A FEW SECONDS AFTER
THE BURNER HAS BEEN TURNED OFF. THIS WILL ALSO
OCCUR WHEN THE FLAME IS TURNED OFF AUTOMATICALLY IN THE EXTRALOW® MODE OF OPERATION.
Proper Cookware
Top performance of your new cooktop is directly related to the use of proper pots and pans. An
out-of-shape pan, without a lid, cannot possibly cook with the same speed and evenness as a pan
with a heavy, flat bottom and a good fitting lid.
FLAT
CONVEX (rounded)
Page 13
CONCAVE (hollow)
Section Four: Using the Cooktop
PRG Professional Ranges Care and Use
Proper Cookware
PANS
For best results on the cooktop, we
recommend using Professional
Cookware. This type of utensil can
be found at Resturant Supply Stores.
If using regular cookware on this
cooktop, be very careful if the pans
have plastic handles, as the large
professional size burners could
flame up on the outside of the pan
and melt or bubble the handles.
Cookware should have the
following characteristics:
Balanced Pan
Unbalanced Pan
Use balanced pans that sit level on
the burner grate without tilting
from the weight of the handle.
Match the flame to the bottom diameter of the pan. The flame should
be the same size as the pan or
slightly smaller. Small utensils and
high flames result in energy loss and
increase the potential for burns.
▲ Good heat conductivity
▲ Bottom
diameter
matching the size of the
burner used
▲ Good balance (pan bottom remains level on
burner grate)
Use Lids that fit properly
▲ Smooth, heavy bottom
that does not warp
when hot; provides even
heat
Use lids that fit the cookware
properly to help shorten cooking
time and to allow food to cook in a
minimum amount of liquid on a
lower heat setting.
▲ Proper fitting lid (when
needed for specific
cooking methods)
Do not use cookware with
these characteristics:
▲ Thin bottom
Flat Bottom Wok
▲ Concave bottom when
heated
▲ Convex bottom when
heated
▲ Poor balance (rocks
back from weight of
handle)
Match Flame Size
to Pan Size
Use only a flat bottom wok. A round
bottom wok cannot be used with or
without its support ring. The wok is
unstable without the ring, and the
ring may restrict air to the burners.
Page 14
Use Flat Bottom Pans
Use flat, heavy bottom pans that stay
flat when heated for the best results. Avoid cookware that is
warped, dented, ridged or thin. A
warped or ridged pan receives the
most heat at the point(s) that contact the flame. This can result in
burning or scorching of the food
being prepared.
Heat and cool pans gradually to help
maintain a flat bottom on your
cookware. Do not place pans under
cold water while still hot, unless
recommended by the manufacturer, as they may warp
Section Four: Using the Cooktop
PRG Professional Ranges Care and Use
Proper Cookware
Use canners and stock pots ▲ Allow at least 3/8 inch of air
that have a flat bottom and exspace between the canner overtend no more than 2 inches
hang and the cooktop surface.
beyond the burner grate.
▲ Use the lowest heat setting possible to maintain a boil or pres▲ An oversize canning pot can be
sure.
used with success following
these suggestions.
▲ Use a canner with a dark or dull ▲ Be sure to cover all containers.
finish to reduce heat reflecting
▲ Follow the canning instructions
back to the cooktop surface.
given in a standard cookbook or
▲ Select a canner with a flat botmanufacturer’s instructions
tom, rather than one with a
provided with the canning jars
concave, convex or rippled bot-
Canning Tips:
▲ Use care to prevent burns from
the large amount of steam generated by the canning process.
Look for canners fitting this
description:
▲ Water Bath Canner: Standard
21 to 22-quart canners with an
11 to 12-inch diameter and a 9
to 11-inch depth.
▲ Pressure Canner: Canners vary
in size from 8 to 22 quarts with
8 to 11-inch bottom diameters
and a 6-1/2 to 12-inch depth.
tom.
Flame Setting Chart Guidelines
Use the right size flame for
the cooking job
The Flame Setting Chart, on pages
16 and 17, is to be used as a guide.
Your pans and your manner of
cooking may dictate use of a different setting than what is suggested.
All flame settings were determined using a variety of good
quality, flat bottom pans with
lids (unless the method of cooking
did not require a covered pan). The
flame was matched to the size of the
pan and the method of cooking:
ExtraLow® Burners
How to Use the Chart
The chart is divided into two sections: the food and the flame settings. The flame settings section
shows an initial Start Cooking setting, a second Continue Cooking
setting and/or an ExtraLow ®
Heat setting. There may or may
not be a change between the two
Start Cooking and the Continue
Cooking settings depending on the
food prepared. The ExtraLow®
setting can be either a cooking or a
holding setting.
Guidelines:
1
2
3
4
Medium
All the controls have an infinite
number of heat settings, with no
fixed positions between HI, LO
or XLO. The word (Medium)
and number designations are for
reference only and are guides to
the flame settings referenced in
the chart.
1. The actual flame setting
used to cook is selected
from the range of flame settings given. Whether the
higher or lower setting is
selected depends on the
quality of the pan and the
amount of food.
Page 15
2. Raise or lower the flame setting gradually. Allow time
for the pan and food to adjust to the new setting.
Changes are more satisfactory when the setting is only
changed one or two markings on the control.
Section Four: Using the Cooktop
PRG Professional Ranges Care and Use
Suggested Flame Settings
Before using this chart read page 15
Food
BEVERAGES
Cocoa
BREADS
French Toast, Pancakes,
Grilled Sandwiches
Start Cooking
Continue Cooking
Med. – heat milk, cover
LO – finish heating
Med. – preheat skillet
Med. Lo to Med. –
cook
BUTTER
CEREALS
Cornmeal, Grits,
Oatmeal
XLO – keep warm,
cover*
4 to 3 – allow 5 to 10
minutes to melt
XLO – to hold
HI – cover, bring
water to a boil, add
cereal
Med. Lo to Med. –
finish cooking according
to package directions
CHOCOLATE
DESSERTS
Candy
ExtraLow® Heat
Settings
XLO – to hold, cover*
2 to XLO – allow 10 to
15 minutes to melt
XLO – to hold*
Med. Lo to Med. –
cook following recipe
Med. Lo to Med.
Pudding and Pie Filling
Mix
Med. to Med. Hi – cook
Med. to Med. HI
according to package directions
Pudding
Med. Lo – Bring milk to a boil
3 to 2 – to cook
EGGS
Cooked in Shell
HI – cover, bring water
to a boil, add eggs, cover
XLO – cook 3 to 4
minutes for soft cooked;
or 15 to 20 minutes for
hard cooked
Fried, Scrambled
Med. to Med. Hi – melt
butter, add eggs
Poached
HI – bring water to the
steaming point, add eggs
LO to Med. Lo –
finish cooking
4 to 3 – finish cooking
MEAT, FISH, POULTRY HI – until meat starts to sizzle
Bacon, Sausage Patties
Med. Lo to Med. –
finish cooking
Braising: Swiss Steak,
Pot Roast, Stew Meat
HI – melt fat, then brown on
Med. Hi to HI, add liquid, cover
Quick Frying:
Breakfast Steaks
Med. Hi to HI – preheat skillet
Frying: Chicken
HI – heat oil, then brown on Med. LO – cover, finish cooking
Deep Frying: Shrimp
HI – heat oil
3 to 2 – simmer until
tender
Med. Hi to HI –
fry quickly
Med. Hi to HI – to
maintain temperature
Pan Frying: Lamb Chops, HI – preheat skillet
Thin Steaks, Hamburgers,
Link Sausage
Poaching: Chicken ,
whole or pieces, Fish
XLO – to hold for a
short period*
Med. to Med. HI —
brown meat
HI – Cover, bring
liquids to a boil
4 to 3 – to hold, covered
3 to 2 – to hold, uncovered
2 to 1 – to finish cooking
Page 16
PRG Professional Ranges Care and Use
Section Four: Using the Cooktop
Suggested Flame Settings
Food
Start Cooking
Continue Cooking
ExtraLow® Heat
Settings
Simmering: Stewed
Chicken, Corned Beef,
Tongue, etc.
HI – cover, bring liquid
to a boil
PASTAS: Macaroni,
Noodles, Spaghetti
HI – bring water to a
boil, add pasta
Med. Hi to HI – to
maintain a rolling boil
POPCORN (use a heavy,
flat bottom pan)
HI – cover, heat until
kernels start to pop
Med. to Med. Hi –
finish popping
PRESSURE COOKER
Meat
Med. Hi to HI –
build up pressure
Med. Lo to Med. –
maintain pressure
Vegetables
HI – build up pressure
Med. Lo to Med. –
maintain pressure
RICE
HI – cover, bring water to
a boil, add rice, cover
4 to 2 – cook according to
package directions
XLO – to hold, cover
Med. Hi to HI – cook meat
vegetables, follow recipe
2 to XLO – simmer (2
to 3 to thicken sauce,
uncovered)*
SAUCES
Tomato Base
White, Cream, Bernaise,
Hollandaise
Med. Lo – melt fat,
follow recipe
SOUPS, STOCK
HI – cover, bring liquid
to a boil
VEGETABLES
Fresh
4 to 1 – simmer slowly
LO to Med. Lo –
finish cooking
3 to 2 – simmer
XLO – to hold, cover*
HI – cover, bring water and
vegetables to a boil
Med. Lo to Med. –
cook 10 to 30 minutes,
or until tender
Frozen
HI – cover, bring water
and vegetables to a boil
Med. Lo to Med. –
cook according to
package directions
Deep Frying
HI – heat oil
Med. to Med. Hi –
maintain frying temp.
In Pouch
HI – cover, bring water and
vegetables to a boil
LO to Med. Lo –
cook according to
package directions
Saute
HI – heat oil or melt butter; Med. Lo to Med. –
add vegetables
cook to desired
doneness
Stir Fry
HI – heat oil, add vegetables Med. Hi to HI –
finish cooking
* We recommend that these foods be stirred occasionally.
Page 17
XLO – to hold, cover*
XLO – to hold, cover
PRG Professional Ranges Care and Use
Section Four: Using the Cooktop
Using the Grill
A VENTILATING HOOD of adequate CFM capacity vented to the outside of the house is recommended
for installation ABOVE THE RANGE AND GRILL. For most kitchens with a wall mounted hood, a
certified hood rating of not less than 940 CFM is recommended. The hood must be installed according to
installation instructions furnished with the hood and local building code requirements.
THE GRILL
(Available on some models)
When cooking food on the grill you
will achieve the same flavor as meat
cooked on an outdoor barbecue.
This flavor is actually created by the
fats and juices that are brought to
the surface of the food and caramelized by the intense heat from
the stainless steel radiant.
Most types of foods, steaks, chops,
patties, poultry pieces, etc., cook
somewhat faster on the gas grill
with its constant regulated heat than
on an ordinary charcoal grill.
Your new Thermador Professional®
grill is equipped with an aluminized
steel double U-shaped tube burner
typical of those used in restaurants.
Automatic ignition is used to
eliminate the continuous pilots
found on restaurant grills. The grill
burner is rated at 18,000 BTU/HR.
NOTE: When used with propane gas, a slight pop or flash
may occur at the burner ports
a few seconds after the burner
has been turned off. This usually occurs after the burner
has been on awhile. This is
normal.
AUTOMATIC
REIGNITION
The electronic igniter automatically sparks the burner to
light. DO NOT TOUCH any
burner while the igniters are
sparking.
BURNER EFFICIENCY
AND FLAME
CHARACTERISTICS
The burner flame should be blue in
color and stable with no yellow tips,
excessive noise or lifting. It should
burn completely along both sides of
the burner tube.
An improper gas-air mixture may
cause either a yellow tipped flame
or burner flutter. Have the flame
adjusted by a technician. Foreign
particles in the gas line may cause an
orange flame during initial use. This
will disappear with use.
If the flame is uneven, flutters, makes
excessive noise or lifts, check to see
if the BURNER ports are clogged. If
the ports are clogged, use a wire, a
straightened paper clip or needle to
clear the ports. If the condition
persists, contact a service agency
for adjustment.
Page 18
Grill knob
CONTROL KNOB
The burner control has an infinite
number of heat settings, and there
are no fixed positions on the control
knob between HI and LO. To turn
the burner on, press the control
knob and rotate it counterclockwise
to the LITE position.
Adjust the knob to the desired
heat setting.
PRG Professional Ranges Care and Use
Section Four: Using the Cooktop
USING THE GRILL
CAUTION:
•
•
Use extreme care when placing the
grill components into the grill
compartment. Avoid contacting the
ceramic igniter which could break
preventing operation of the grill.
The grill must be assembled as shown.
The drip tray heat shields must be in
place, and the burner must be properly
positioned relative to the gas supply.
Incorrect assembly of the grill may
result in unsafe or hazardous
conditions during operation.
•
Do not leave the grill unattended while
in use.
•
Do not use charcoal briquettes or coals
of any kind.
Grill
Grate
After removing all packaging materials, check to be
certain that the grill components are correctly assembled in the grill box.The grill grates, stainless steel
radiant and the burner are assembled in the grill box
from the factory. Follow the steps below to assemble
the components in the grill box.
A. Disassemble and/or remove the grill grate, stainless steel Radiant and burner from the grill box.
B. Install the aluminum rectangular drip pan inside
the grill box as shown below.
C. Install the heat deflector in the U Section of the
burner. Make sure that the heat deflector is sloping toward the rear of the grill box.
D. Insert the burner venturi to the orifice located at
the front center of the grill box. The holes at the
opposite burner ends must be seated on the studs
at the rear of the grill box. Then locate the heat
deflector between the studs on sides of the the
grill can.
E.
The stainless steel radiant lies on two (2) studs on
each end of the grill can.
F.
Place the grill grate, with raised food containment
rail oriented towards the grill box rear.
Exploded Views and Side View of Grill
Stainless
Steel Radiant
Spark igniter
Double
U-shaped
burner
Heat
Venturi
Deflector
Drip Pan
Grill
Box
Burner Placement on Supports
Page 19
PRG Professional Ranges Care and Use
Section Four: Using the Cooktop
Using the Grill
COOKING ON THE GRILL
•
•
•
•
•
The burner should light within
approximately 5 seconds.
Preheat grill for 15 minutes.
The hot grill sears the food,
sealing in the juices.The longer
the preheat, the faster the
meat browns and the darker
the brand marks.
Grilling requires high heat for
searing and proper browning.
Most foods are cooked at the
higher heat settings for most
of the cooking time. However,
when grilling large pieces of
meat or poultry, it may be
necessary to turn the heat to
a lower setting after the initial
browning.This cooks the food
through without burning the
outside.
Foods cooked for a long time
or basted with a sugary
marinade many need a lower
heat setting near the end of the
cooking time.
After grilling and the food has
been removed, turn the knob
to HI and burn off any excess
grease which has accumulated
on the stainless steel radiant.
•
Use a brass wire brush, dipped
in hot water, to loosen food
particles from the grate.
•
When the grill has cooled,
clean the drip tray, heat shield
and compartment.
GRILLING SUGGESTIONS
◆ Trim any excess fat from the meat before cooking. Cut slits
in the remaining fat around the edges at 2” (51 mm) intervals.
◆ Brush on basting sauce toward the end of cooking.
◆ Use a spatula or tongs instead of a fork to turn the meat. A
fork punctures the meat and lets the juices run out.
◆ Add seasoning or salt after grilling.
◆ The grill grate has side and rear rails designed to make it
easier to turn with a spatula.
◆ After the juices begin to bubble to the surface, turn the meat
only once. This helps keep the juices in the meat.
◆ Some pieces of meat and poultry cook faster than others.
Move those pieces to the cooler area of the grill until the
rest have finished.
◆ The doneness of meat is affected by the thickness of the cut.
Chefs say it is impossible to have a rare doneness with a thin
cut.
◆ Do not leave the grill unattended while cooking.
HANDLING EXCESSIVE FLARE-UPS
◆ The intense heat needed for grilling may also cause flare-ups
due to grease dripping on the stainless steel radiant.
◆ If flare-ups occur, use a long handled spatula to move the
food to another area of the grill.
◆ Should flare-ups become excessive, remove the food from
the grill and turn off the burner.
◆ Excessive flames occur when cooking meat with extra fat, i.e.
30% ground beef, untrimmed steaks, lamb chops, etc.
◆ Be cautious when turning meat over.
◆ It is important that grilling be supervised at all times.
Page 20
Section Four: Using the Cooktop
PRG Professional Ranges Care and Use
Grill Cooking Chart
FOOD
WEIGHT OR
THICKNESS
CONTROL
SETTING
TOTAL SUGGESTED
COOKING TIME
1/2 to 3/4 inch
Medium
14 to 18 minutes
High
12 to 15 minutes
1 inch
1-1/2 inches
High
10 to 14 minutes
13 to 18 minutes
Medium
(160˚F)
1 inch
1-1/2 inches
Medium to
High
14 to 22 minutes
18 to 27 minutes
Well-Done
(170˚F)
1 inch
1-1/2 inches
Medium
Medium
22 to 32 minutes
27 to 37 minutes
High
1-1/2 inches
12 to 15 minutes
High
14 to 18 minutes
Medium
(160˚F)
1 inch
1-1/2 inches
Medium to
High
15 to 20 minutes
18 to 25 minutes
Well-Done
(170˚F)
1 inch
Medium
20 to 30 minutes
1/2 inch
1 inch
Medium
Medium
20 to 40 minutes
35 to 60 minutes
Medium
45 to 60 minutes
SPECIAL INSTRUCTIONS
and TIPS
MEATS
Beef
Hamburgers
Steaks
Rib, Club,
Tenderloin,
Porterhouse,
T-Bone,
Sirloin
Rare
(140˚F)
Lamb
Chops &
Steaks
Rare 1 inch
(140˚F)
Pork
Chops
Ribs
Page 21
Grill, turning once when juices
rise to the surface.
Do not leave hamburgers
unattended since a flare-up
could occur quickly.
Remove excess fat from edge.
Slash remaining fat
at 2-inch intervals. Grill,
turning once.
Remove excess fat from edge.
Slash remaining fat
at 2-inch intervals. Grill, turning
once.
Remove excess fat from edge.
Slash remaining fat
at 2-inch intervals. Grill, turning
once. Cook well done.
Grill, turning occasionally. During last few minutes brush with
barbecue sauce, turn several
times.
PRG Professional Ranges Care and Use
Section Four: Using the Cooktop
Grill Cooking Chart
FOOD
WEIGHT OR
THICKNESS
CONTROL
SETTING
TOTAL SUGGESTED
COOKING TIME
MEATS
Pork
Ham Steaks
(pre-cooked)
SPECIAL INSTRUCTIONS
and TIPS
Remove excess fat from edge.
Slash remaining fat at 2-inch
intervals. Grill, turning once.
1/2 inch
High
4 to 8 minutes
Slit skin. Grill, turning once.
Hot Dogs
Medium
5 to 10 minutes
Low or
1 to 1-1/2 hours
Medium
40 to 60 minutes
Medium
30 to 45 minutes
3/4 to 1 inch
High
Medium to
8 to 15 minutes
4 to 8 ounces
Medium to
High
12 to 20 minutes
POULTRY
Chicken
Broiler/Fryer
2 to 3 pounds
Halved or
Quartered
Breasts
FISH AND
SEAFOOD
Steaks
Halibut,
Salmon,
Swordfish
Whole
Catfish,
Rainbow
Trout
Page 22
Place skin side up. Grill, turning and brushing frequently
with melted butter, margarine,
oil or marinade.
Grill, turning once. Brush with
melted butter, margarine or
oil to keep moist.
Grill, turning once. Brush with
melted butter, margarine or
oil
PRG Professional Ranges Care and Use
Section Four: Using the Cooktop
Using the Griddle
THE GRIDDLE
The griddle is packaged with a protective grease coating that must be
completely removed with a spatula,
paper towels, (in crevices use a
table knife or toothpick) and
cleaned with hot sudsy water. Rinse
with vinegar/water and season now
or it will rust.
TO SEASON OR RE-SEASON YOUR GRIDDLE
Seasoning is an important process which keeps food from
sticking during cooking and
prevents rusting. Once the
griddle is seasoned, it can be
used with or without additional
grease or shortening.
1. Pour 1 teaspoon of vegetable oil
onto the center of the griddle.
Do not use corn oil. Spread
oil over entire surface with a
paper towel or coarse cloth.
2. Turn the control knob to a 350˚
setting. When the oil begins to
smoke, turn the control knob
OFF. Allow griddle to cool.
Wipe off excessive oil with paper towel or cloth.
3. Repeat steps 1 and 2.
4. When the griddle is cool, wipe it
clean with a paper towel. Apply
a very thin layer of vegetable
oil. The griddle is now ready to
use.
Do not place another
utensil on the seasoned
griddle to simmer or keep
food warm.
USING THE GRIDDLE
1. Check that the drip tray is in
place with one side tucked under the griddle overhang.
2. Push down and turn the control
knob to a temperature suggested on the Griddle Cooking
Chart.
3. Allow 10 to 15 minutes for the
griddle to preheat to the temperature selected.
4. Place the food on the griddle
and cook to desired
doneness.
GRIDDLE COOKING CHART
FOOD
TEMPERATURE
Eggs
225˚F to 250˚F
Bacon, Ham,
Pork Chops
300˚F to 325˚F
Sausage, Grilled
Cheese Sandwiches
325˚F to 350˚F
Pancakes,
French Toast
350˚F to 375˚F
Hash Brown
400˚F to 425˚F
to ignite the gas, a safety
valve opens and gas flows to
the burner and ignites. The
griddle burner is rated at
15,000 BTU HR.
GREASE TRAY
The grease tray is positioned
slightly under the front edge
of the steel griddle to catch
grease or food residue
scraped from the surface
with a metal spatula.
GRIDDLE BURNER
The built-in griddle has an aluminized steel tube burner, typical of
those used in restaurant griddles.
The burner is ignited by an electric
glow bar. This device eliminates the
need for the continuous burning
pilot light. When the glow bar
reaches a temperature hot enough
NOTE
1. It is normal for the griddle
to darken with use.
Tip and Lift
➥
(Available on some models)
GR IDDLE GREASE PAN
Use care when tipping the tray so
that the contents are not spilled
when it is removed.
2. The Griddle can be used
without any additional
grease or shortening, after
it has been properly
seasoned. However, grease
or shortening may be used
depending on the flavor
desired.
3. The griddle must be level
or tilted slightly forward
for proper operation.
Contact your authorized
ser vicer if the griddle
needs to be leveled.
4. When used with propane
gas, a slight pop or flash
may occur at the burner
ports a few seconds after
the burner has been
turned off. This usually
occurs after the burner has
been on awhile. This is a
normal function of your
griddle.
5. Remove and clean the
grease tray after every use.
Page 23
Griddle Control Knob
GRIDDLE KNOB
The griddle thermostat has an infinite number of heat settings between 150 and 500°F. There are no
fixed positions on the control knob.
To turn on the griddle, press then
rotate the control knob counterclockwise to the desired temperature setting. The glow igniter turns
on. As soon as it is hot (approximately 60 to 90 seconds), the gas
safety valve opens and the burner
ignites.
PRG Professional Ranges Care and Use
Section Five: Using the Oven
Bake Mode
TIPS FOR BAKE
RACK POSITIONS
Preheating The Oven
One or two racks of food can be cooked in the oven at the same time. Place
racks in the oven before turning it on. Position #2 is the most commonly
used for single rack cooking. See below for recommended rack positions.
Many foods such as meat, poultry,
casseroles, or other long cooking
foods cook well without preheating
the oven. See your recipe for preheating recommendation. Preheating is achieved in 10 to 15 minutes,
depending on the temperature setting.
Getting the Best Results
▲
Minimize opening the door:
• Use a minute timer.
• Use the interior oven lights.
▲ Choose the right size utensil:
use the utensil recommended
in the recipe.
▲ Store the broiler pans outside
the ovens. An extra pan without food, affects the browning
and cooking.
▲ The type of pan used affects the
browning:
•
•
For tender, golden brown
crusts, use light non-stick/
anodized or shiny metal
utensils.
For brown crisp crusts, use
dark non-stick/anodized or
dark, dull metal utensils or
glass bakeware. These may
require lowering the bake
temperature 25˚F.
Oven Heating Light
Thislight turns on when the oven
heats and cycles off when the set
temperature has been reached. The
cycling continues as long as a BAKE
or CONVECTION • BAKE
mode is set.
PRG304, PRG36 and PRG48 (large main oven)
#3 Use this rack in combinawith rack #1 for double
rack baking.
tion
#2 Use this rack when baking
single pan foods, such as
cakes, breads, pies, desserts, casseroles, cookies,
or a single rack oven meal.
3
2
1
#1 Use this rack for air leavened cakes (Angel Food),
a large roast, turkey or other large food item.
If you are using racks #1 and #3, be sure to check for doneness sooner
than the minimum time. The food on the lower rack position may cook
slightly faster than the food on the upper position. If using one rack with
a large commercial baking pan , the food may take a few extra minutes as
the air cannot circulate as freely as it does with a smaller pan.
PRG48 (secondary oven)
#3 Use this rack when broiling.
#2 Use this rack for baking single
food items, such as cake, bread,
pie, dessert, casserole, cookies,
etc.
#1 Use this rack for Angel Food
cake or a large roast or chicken,
etc.
3
2
1
UTENSILS
Type
▲
Metal bakeware (with or without a non-stick finish), heat-proof glass,
glass-ceramic, pottery, or other utensils suitable for the oven.
▲ Suitable cookie sheets have a small lip on one side only.
▲ One full commercial baking sheet (18" x 26") in large main oven.
▲ 10x13-inch cookie sheet and 7-3/4x2-inch baking sheet in secondary
oven
Placement
▲
To Set the All-Gas PRG Oven Models
1. Set Temperature on Gas Thermostat Dial.
▲ The bake burner flame lights in 60 to 90 seconds.
▲ The flame cycles of when the selected temperature is reached,
then cycles on again to maintain selected temperature.
Page 24
Allow at least 1" of space between the pans and the oven
walls so heat can circulate
around each pan.
▲ Stagger baking utensils so that
one is not directly above another. Allow 1-1/2 inches above
and below each pan.
PRG Professional Ranges Care and Use
Section Five: Using the Oven
Convection • Bake Mode
TIPS FOR CONVECTION•BAKE (Model PRG304, PRG36 and PRG48 - Main Oven Only)
Oven Heating Light
RACK POSITIONS
This light turns on when the oven
heats and cycles off when the set
temperature has been reached. The
cycling continues as long as a BAKE
or CONVECTION• BAKE mode is
set.
One, two or three racks of food can be cooked in the oven at the same time.
Place racks in the oven before turning it on. See previous page for
positioning racks.
#3 Use this rack in combination with rack #1 for double rack baking.
Preheating The Oven
#2 Use this rack when baking single pan foods such as sheet cakes, some
breads, pies, desserts, casseroles, cookies, or a single rack oven meal.
Use with racks #1 and #3 for three sheets of cookies.
When roasting and baking foods
with convection longer than 15
minutes, preheating is not necessary.
#1 Use this rack for air leavened cakes (Angel Food), frozen pie, large roast
or turkey. Use in combination with rack #3 for a 2 rack oven meal or
more than 2 cakes.
TIPS IN CONVECTION
MODE
•
Lower oven temperature 25° to
50°F. when converting regular
BAKE to CONVECTION •
BAKE settings for baked food
items such as breads, cakes,
cookies and muffins, etc.
•
Length of cooking time may be
shorter than the standard bake
time.
•
The pan shape, dimensions and
various combinations of pans
may affect cooking times and
browning.
•
Place a single crust pumpkin pie
directly on a small aluminum
cookie sheet for optimum baking.
If you have loaded the oven, be sure to check the items for doneness sooner
than the minimum time.
UTENSILS
Type
▲
Aluminum bakeware gives the best browning results.
▲
Cookie sheets should have low sides; use aluminum commercial halfsheets or professional cooking utensils.
▲
Light or dark pan finish affects timing: Light pan finish gives a medium
to golden brown appearance; dark pan finish gives a darker brown.
▲
The broil pan and grid can be used for roasting tender meats and poultry
as an alternate utensil to a roasting rack and low sided pan.
Placement
▲
For better browning, utensils such as cookie sheets, jelly roll pans and
rectangular baking pans should be placed crosswise on the rack with
the shorter sides on the right and the left. This allows the air to
circulate freely.
▲
When baking on more than one rack, pans do not need to be staggered.
HIGH ALTITUDE BAKING CONDENSATION
When baking at high altitudes, in
either BAKE or CONVECTION •
BAKE, recipes and baking times
vary. For accurate information,
write the Extension Service, Colorado State University, Fort Collins,
Colorado 80521. There may be a
cost for the bulletins. Specify the
type of information you want (example: cakes, cookies, breads, etc.).
It is normal for a certain amount of moisture to evaporate from the food
during any cooking process. The amount depends on the moisture content
of the food. The moisture will condense on any surface cooler than the
inside of the oven, such as the control panel.
CAUTION:
WHEN USING THE OVEN IN ANY MODE
Never use aluminum foil to cover the oven racks or to line
the oven. It can damage the oven liner if heat is trapped under it.
Page 25
PRG Professional Ranges Care and Use
Section Five: Using the Oven
Other Uses of Bake
SLOW COOKING AND LOW TEMPERATURE USES OF THE OVEN
In addition to providing perfect temperatures for baking and roasting,
the oven can be used at low oven
temperatures to keep hot, cooked
foods at serving temperature, to
cook foods long and slow (as if using
a crock pot), to dehydrate food, to
warm plates, and to defrost foods.
Hot cooked foods can be kept at
serving temperatures. Set the oven
to bake and use the temperature
suggested on the chart.
Foods needing to be kept moist
must be covered with a lid or aluminum foil.
Slow Cooking of one food or an
oven meal is possible by setting the
oven to bake and the thermostat to
225˚F.
Uncooked frozen foods can be
thawed with the oven selector set
to bake and the thermostat to
150˚F. Keep food tightly wrapped in
foil and thaw just enough to handle.
Cook immediately. Do not refreeze.
Frozen cooked foods can be
thawed with the oven selector set
to bake and the Thermostat set to
170˚F. Loosen the freezer paper
wrapping. Do not use plastic.
FOOD SAFETY
The United States Department of Agriculture says:
DO NOT hold foods at temperatures between 40˚F to 140˚F more
than 2 hours.
SUGGESTED
TEMPERATURE
CHART
Food
TO
KEEP
FOOD
HOT
Oven Temperature ˚F
Beef
Rare ........................................................................................ 140˚ – 155˚F
Medium .................................................................................. 155˚ – 170˚F
Well done ............................................................................. 170˚ – 180˚F
Bacon ..................................................................................... 200˚ – 225˚F
Biscuits and Muffins (covered) ........................................ 170˚ – 185˚F
Casserole (covered)........................................................... 170˚ – 200˚F
Fish and Seafood ................................................................. 170˚ – 200˚F
French Fried Foods ............................................................ 200˚ – 225˚F
Gravy or Cream Sauces (covered) ................................ 170˚ – 180˚F
Lamb and Veal Roasts ........................................................ 170˚ – 200˚F
Pancakes and Waffles (covered) ..................................... 200˚ – 225˚F
Potatoes
Baked ..................................................................................... 200˚F
Mashed (covered) ............................................................... 170˚ – 185˚F
Pies and Pastries .................................................................. 170˚F
Pizza (covered) .................................................................... 225˚F
Pork ........................................................................................ 170˚ – 200˚F
Poultry (covered) ................................................................ 170˚ – 200˚F
Vegetables (covered) ......................................................... 170˚ – 175˚F
OVEN CONTROL KNOB and HEATING LIGHT
✳
Page 26
PRG Professional Ranges Care and Use
Section Five: Using the Oven
Setting Broil Mode
BROIL IN THE LARGE
MAIN OVEN and PRG48
SECONDARY OVEN
RACK POSITIONS
Before turning on the oven, place the rack in the desired position. The PRG
ranges have a special rack in the large main oven for broiling. Turn this rack
over, so that the broil pan fits into the area outlined.
TIPS FOR BROIL
PRE-HEATING THE
INFRA-RED BROILER
(Large main oven)
It is recommended that you
do not pre-heat the broil
burner before starting to
cook. Only very fast cooking
foods, such as thin fillets of fish,
would require preheating so the
surface of the food could brown in
the time the food was cooked. If
pre-heating is necessary, pre-heat
no more than 2 to 3 minutes.
PRE-HEATING THE
BROIL BURNER PRG48
(secondary oven)
It is recommended that the broil
burner be pre-heated 5 minutes
before broiling, when food items
are 3/4" to 1" thick. Items less than
3/4", such as a fish fillet, need 10
minutes preheat. Do not preheat
for chicken pieces.
GETTING THE
BEST RESULTS
▲ Be sure to defrost food before
▲
▲
▲
▲
broiling.
Broil with the door closed in
PRG All-Gas ovens.
Steaks should be at least 1"
thick if rare meat is desired.
Turn foods over only once,
after half the total cooking
time. It is not necessary to turn
very thin foods (ham slices, fillets of fish, etc.). Liver slices
must be turned over regardless of thickness.
Use a Minute timer. Set it for
the minimum time to check the
food.
PRG Broil Pan Rack Template
#3 Use this rack position when broiling beef steaks, ground meat patties,
ham steak and lamb chops 1 inch or less in thickness. Also, use when
top browning foods.
#2 Use this rack position when broiling meat 1-1/8 inches or more in
thickness, fish, poultry, pork chops, ham steaks 1 inch or more in
thickness and when broiling chicken halves.
UTENSILS
▲ The PRG48 has two broil pans, all other ranges have one. The aluminum
broil pan is to be used in the secondary oven. Use the chrome and
porcelain enamel two-piece broil pan and grid in large main oven. DO
NOT cover the slotted grid (top) with aluminum foil.
▲ Use metal or glass-ceramic bakeware when top browning casseroles,
main dishes, or bread.
▲ DO NOT use heat-proof glass or pottery. This type of glassware
cannot withstand the intense heat of the infra-red broiler
BROILING WITH A REGULAR MEAT
THERMOMETER
For accurately determining the degree of doneness for a thick steak or
chop (at least 1-1/2 inches thick), use a regular meat thermometer. Insert
the point of the thermometer into the side of the meat to the center of
the steak or chop.
For rare steaks, cook the first side to 90˚F. For medium or well done
steaks, cook the first side to 100˚F. Turn and cook the second side to
desired internal temperature.
NOTE:
It is impossible to use the oven and the broiler simultaneously in the
same oven. When one is on the other one cannot be turned on.
Page 27
PRG Professional Ranges Care and Use
Section Five: Using the Oven
Setting Broil Mode
BROIL
In all the large main ovens only the gas infra-red broiler
heats in the BROIL mode. In the PRG48 secondary
oven only the broil burner heats in the BROIL mode.
NOTE: Successful broiling requires constant
exposure to high, intense heat (infra-red heat
from the gas broiler.
Place rack in position recommended on Page 27. For most foods that require use of a non-preheated broiler, set
food on two piece broil pan and place in oven. For very fast cooking foods in which the broiler may be preheated
for no more than 2 or 3 minutes, place food and broil pan in oven after preheating is complete.
To Set the Oven to Broil
1. Set Thermostat to BROIL setting.
▲ The Infrared broiler flame lights in 60 to 90 seconds.
2. KEEP DOOR CLOSED throughout broil cycle.
▲ Your Professional® Range comes with a large two-piece broil
pan. The slotted grid allows drippings to flow into the lower
pan, away from the intense heat of the broil element, minimizing
spattering and smoking.This pan is designed for use in the large
main oven.
Oven Heating Light
NOTE: In gas ovens, the intense heat emitted by the infra-red broiler makes it necessary to keep the door closed.
This light turns on when the oven heats and cycles off
when the set temperature has been reached. The
cycling continues as long as a BROIL mode is set.
HEATING LIGHT AND
OVEN CONTROL KNOBS
✳
CAUTION
Be careful not to damage the screen covering the
infra-red broiler of gas ovens. If the screen is
damaged, air can enter the distribution box behind the screen, possibly resulting in an explosion. Do not apply cleaners or wipe screen.
GAS OVEN INFRA-RED BROILER
Screen should be
glowing red
Flame should be
approximately
1/8" thick and blue
Oven broiler flame should be visually inspected to resemble
diagram.
Page 28
PRG Professional Ranges Care and Use
Section Six: Care and Maintenance
Care and Maintenance
Before cleaning the range, be certain that the burners and oven(s) are turned off and the grates and exterior
surfaces are cool. Clean Griddle and Grill carefully while still warm. Always clean the range with caution.
A wet sponge or cloth used to wipe spills off a hot area can result in steam burns.
BURNER GRATES
SEALED BURNERS
Porcelain
Enamel Cap
BURNER CAP
Ports
Locator
Igniter
BURNER GRATES
BURNER BASE
Two grates interlock, from front to
back, to form a continuous surface.
The burner grates are porcelain
enamel over cast iron for durability. They may be wiped while on the
cooktop with hot, soapy water,
rinsed and wiped dry.
Due to the extreme temperatures
and rapid temperature change that
the grates are exposed to, in addition to spillage of acidic and sugarladen foods onto the grates, some
deterioration of the porcelain
enamel surface is normal and expected over time. Deterioration
may include discoloration and, in
extreme cases, crazing (fine, hairlike cracks) and/or chipping of the
porcelain. The extent of deterioration will be directly related to the
severity and amount of usage.
For proper lighting and performance of the burners, keep the igniters,
burner caps, and ports clean and free of soil. It is necessary to clean these
only when the flame does not burn blue completely around and within the
burner, when there is a severe boil over, when the burner does not light,
or when the electronic igniter clicks continuously even after the flame has
been lit. See Cleaning Chart, Page 31.
When the burner and burner grate are cool, remove the grate. Grasp the
burner cap and remove it. Refer to drawing above.
Clean the burner cap with a cleanser suitable for enamel. Use a wire, a
straightened paper clip or needle to clear the ports. Do not use a
toothpick; it could break off in the port. If necessary, wash, rinse and dry
burner according to the Cleaning Chart. Be sure to dry the burner base
and cap thoroughly before reinstalling the burner cap.
Replace the burner cap, being sure to properly line up the locator tab with
the notch in the burner base. Thoroughly dry the igniters to prevent
nuisance or continuous sparking.
The trim strips are anodized aluminum; avoid cleaning products that
contain ammonia. See Cleaning Chart, Page 32.
Burner Spill Tray
If cleaning necessitates removal of
grates, care should be taken in
lifting them; they are very
heavy. Be sure to place the grate
on a protected surface.
Page 29
Trim Strips
PRG Professional Ranges Care and Use
Section Six: Care and Maintenance
CARE AND MAINTENANCE
GRILL GRATE
Grill
Grate
OTHER GRILL PARTS
After the grill has cooled, remove
the grate, stainless steel radiant
and double U-shaped burner,
heat deflector, removable heat
shield, and drip pan.
The easiest way to clean the grill is
while it is warm (not hot) after
cooking is completed and after
turning off the flame. Wear a
barbecue mitt to protect your hand
from the heat and steam. Use a
brass grill brush and water on the
grill grate in most instances. For
stubborn stains, use a soap filled
steel wool pad. Steam created as
the water contacts the hot grill
grate assists the cleaning process
by softening any food particles,
which will fall off and burn. If the
grill is allowed to cool before
cleaning, it will be more difficult.
Lift the double U-shaped burner
where it hooks to the brackets at
the rear of the box. (See Figure on
Page 19.) Pull burner from the
burner hole to remove it from the
gas connection. The burner may be
cleaned, if desired, with a wire brush.
All gas ports must be free of
blockage for safe operation. Use a
metal paper clip to remove debris
from port holes.
Stainless
Steel
Radiant
Double
U-shaped
burner
Heat
Deflector
Drip Pan
Lift out and wash the stainless steel
removable heat shield, and
grease drip pan. Use hot sudsy
water, rinse and dry.
Tape newspaper to cover the
2 black side trim rails next to
the grill on the porcelain
maintop and all griddle parts.
Oven cleaner will permanently
damage these parts so they
need to be covered. Spray
cleaner using short, controlled
applications to stainless surfaces
only. Don’t spray directly inside
hole for burner connection or onto
the spark igniter. Wait 30 minutes
to 1 hour. Wear rubber gloves and
wipe off cleaner; rinse and dry.
Apply again if necessary.
Grill
Box
!
GRILL
CAUTIONS:
1. Do not clean any part
of the grill in any selfcleaning oven.
2. When disassembling or
reassembling the grill,
use extreme caution
to avoid contact with
the spark igniter. The
igniter could break,
preventing operation
of the grill.
3. Use caution when
cleaning around sharp
metal corners and
edges. Use of cleaning
gloves is recommended.
Page 30
PRG Professional Ranges Care and Use
Section Six: Care and Maintenance
Range Cleaning Chart
When cleaning this range:
Brand Names
Avoid cleaning any part of the range while hot.
1. Use the mildest cleaning procedure that will do the job efficiently and
effectively. Some cleaners of the same type are harsher than others.
Try on a small area first.
2. Always rub metal finishes in the direction of the polish lines for maximum effectiveness and to avoid marring the surface.
3. Use only clean soft cloths, sponges, paper towels, fibrous brushes,
plastic, non-metal or steel wool soap pads for cleaning and scouring, as
recommended on the chart.
4. Any part of this appliance, except the steel griddle, can be cleaned with
hot sudsy water. When rinsing is required, rinse thoroughly.
5. Always wipe dry immediately to avoid water marks.
Part / Material /
Soil Condition
COOKTOP
Burner Caps
Control Knobs,
Plastic
Back Panel Frame
Stainless Steel
The use of brand names is intended
only to indicate a type of cleaner.
This does not constitute an endorsement. The omission of any
brand name cleaner does not imply
its adequacy or inadequacy. Many
products are regional in distribution and can be found in the local
markets.
It is imperative that all products be
used in strict accordance with instructions on the package.
The following chart gives directions for cleaning this range:
Cleaning Products / Directions
Wire, straightened paper clip or needle. Do not use a toothpick.
Hot sudsy water.
Powdered cleanser: Bon-Ami®, Ajax®, Comet®.
• Clear ports of any soil. Wash, rinse and dry. Make certain that all
burners, including the two far left ExtraLow® burners, are turned
OFF before cleaning.
Hot sudsy water.
• Pull knobs straight forward. Wash, do not soak. Rinse, dry and
replace. Make certain the knobs are reinstalled in the proper
location. Do not force knobs onto wrong control.
Hot sudsy water.
• Wash, rinse thoroughly, and dry.
General Kitchen Cleaners: Formula 409®, Fantastik®.
• Spray cleaner on cloth, then wipe surface.
Stainless steel cleaners: Stainless Steel Magic®, Revere Ware® Instant
Copper and Stainless Steel Cleaner, Bon-Ami.
• Use the mildest cleaning procedure first. Apply cleaner with a damp
sponge, rinse thoroughly, and dry. Always scrub in the direction
of the grain. Do not use a steel wool pad or steel brush, as
it will scratch the surface. Avoid applying too much pressure when
scrubbing.
DO NOT allow deposits to remain for long periods of time.
DO NOT allow salt solutions, disinfectants, bleaches or cleaning compounds to remain in contact with stainless steel for extended periods.
Many of these compounds contain chemicals which could prove harmful.
Rinse with water after exposure and wipe dry with a clean cloth.
Continued
Page 31
➟
➟
PRG Professional Ranges Care and Use
Section Six: Care and Maintenance
Range Cleaning Chart
Part/Material/Soil Condition
Grates
Porcelain Enamel on Cast Iron
Cleaning Products/Directions
Hot sudsy water. Mild Abrasive Cleansers: Bon-ami®, Soft
Scrub®. For stubborn stains: a soap filled steel wool pad.
• Wash, rinse and dry. The occasional use of mild abrasive cleaners
or steel wool soap filled pad is okay. Abrasive cleansers, used
vigorously or too often, can eventually harm the enamel.
Apply with a damp sponge, rinse thoroughly, and dry.
• When removing the grates, care should be taken in lifting
them. Be sure to place the grate on a protected surface.
NOTE: Grates will develop blisters and chips in the porcelain with
use due to the extreme operating temperatures
Griddle – Steel
See Pages 23 and 34 for detailed directions.
Griddle Grease Pan –
Stainless Steel
See Cooktop Back Panel Stainless Steel Directions on Page 37.
Grill Grate
Porcelain Enamel on Cast Iron
See Page 34 for detailed directions.
Grill Box, Heat Shields,
Radiant
Stainless Steel
Grill Drip Pan
Aluminum
The quality of this material resists most stains and pitting, providing the
surface is kept clean and protected.
Nonabrasive Cleaners: Hot soapy water, ammonia or detergent and
water.
• Apply with sponge or cloth then wipe clean using a clean cloth and
thoroughly dry the surface. Regularly apply stainless steel cleanerpolish such as Stainless Steel Magic® to protect the finish and leave a soft
lustre.
• Do not allow food deposits to remain on stainless steel for any length
of time.
Mild Cleaners: General kitchen cleaners such as Fantastik®, Formula
409®. Vinegar: to remove hard water spots
• Apply with sponge or cloth, then wipe clean using a clean cloth and
thoroughly dry the surface.
Mild Abrasive Cleaners: RevereWare Instant Stainless Steel Cleaner®.
Kleen King Stainless Steel Cleaner or Liquid.
• Apply with a damp sponge or cloth. Rub lightly in direction of the
polish lines. Wipe clean using damp cloth or sponge and dry surface.
Remember, chlorine or chlorine compounds (check the labels) are
corrosive to stainless steel. It is very important to rinse thoroughly and
dry if a cleaning agent with chlorine is used.
Heat tint or discoloration: RevereWare Instant Stainless Steel
Cleaner®.
• Apply with a damp cloth or sponge. Satisfactory for use on all finishes
if rubbing is light. Use in direction of grain lines.
Hot sudsy water, rinse and dry thoroughly. For stubborn stains use
a soap filled steel wool pad.
Page 32
PRG Professional Ranges Care and Use
Section Six: Care and Maintenance
Range Cleaning Chart
Part / Material /
Soil Condition
OVEN
Broil Pan Grid
Chrome Plated
Cleaning Products / Directions
To loosen cooked on food, sprinkle empty hot grid with powdered
laundry detergent or squirt with liquid detergent and cover with wet
paper towels. Allow to stand.
Hot sudsy water.
• Wash, rinse thoroughly, and dry.
Cleaners: Soft Scrub®.
• Apply with a damp sponge or cloth according to manufacturer’s
directions. Rinse and wipe dry.
Powdered Cleanser: Bon-Ami®, Comet®, Ajax®.
• Apply with a damp sponge or cloth according to manufacturer’s
directions. Rub lightly, it may scratch the finish. Rinse
thoroughly and wipe dry.
Soap-filled fiber or steel wool pads: S.O.S®, Brillo®.
• Dampen pad, rub lightly, it may scratch the finish. Rinse
thoroughly and wipe dry.
Broil Pan Bottom
Porcelain Enamel
See instructions for Cavity, Models PRG304, PRG36 and PRG48)
below.
Infra Red Broiler
DO NOT APPLY CLEANERS OR WIPE THE SCREEN.
Cavity
Porcelain Enamel on Steel
Porcelain enamel is acid resistant, but not acid proof. Acid foods such as
citric juices, tomatoes, rhubarb, vinegar, alcohol or milk, should be wiped
up and not allowed to bake onto the porcelain during the next use. Over
a period of time, the procelain may craze (get fine hairlike lines).
Hot sudsy water.
• Wash, rinse thoroughly, and dry.
Mild Cleaners: Bon-Ami, ammonia, or ammonia and water, Soft
Scrub.
• Apply to a damp sponge or cloth. Rub lightly. Rinse thoroughly.
Dry.
If food has burned onto the oven and is difficult to remove, the
spots can be soaked with a cloth saturated with household
ammonia. Close the door and allow it to soak for an hour or two,
or until the food soil can be easily removed with a damp soapy cloth
or mild abrasive. A solution of about 3 tablespoons of household
ammonia in a half cup of water may be placed in the warm oven over
night. This will loosen hardened residue and spillage so that it may
be easily wiped up. The ammonia solution may be added to warm
water for a thorough wiping of the oven.
Soap filled fiber or steel wool pads: S.O.S, Brillo.
• For stubborn stains, the occasional use of abrasive cleaners is okay,
but, if used vigorously or too often, they can eventually harm the
enamel. Dampen pad, rub surface lightly, rinse thoroughly, and dry.
Harsh Cleaners: Easy Off® Oven Cleaner, Dow® Oven Cleaner.
NOTE: Commercial oven cleaners are corrosive to infra-red broiler
and thermostat bulbs. DO NOT spray or wipe cleaners onto these parts.
If some cleaner gets on the broiler or thermostat bulb, wipe it off
immediately with a clean damp cloth.
• Follow manufacturer’s instructions. Rinse thoroughly and wipe dry.
Continued
➟
➟
Page 33
PRG Professional Ranges Care and Use
Section Six: Care and Maintenance
Range Cleaning Chart
Part/Material/Soil Condition
Cleaning Products/Directions
Front Frame
Stainless Steel
See Cooktop, Back Panel, Page 31.
Racks
Chrome Plated
Hot sudsy water.
• Wash, rinse thoroughly, and dry.
Cleaners: Soft Scrub®.
• Apply with a damp sponge or cloth according to manufacturer’s
directions. Rinse and wipe dry.
Powdered Cleanser: Bon-Ami®, Comet®, Ajax®.
• Apply with a damp sponge or cloth according to manufacturer’s
directions. Rub lightly. Rinse thoroughly and wipe dry.
Soap filled fiber or steel wool pads: PanHandl’rs, S.O.S®, Brillo®.
• Dampen pad, rinse thoroughly, and dry.
Harsh Cleaners: Easy Off ®Oven Cleaner, Dow® Oven Cleaner.
NOTE: Some commercial oven cleaners cause darkening and discoloration. Test the cleaner on a small part of the rack and check for
discoloration before cleaning the entire rack.
• Apply a generous coating. Allow to stand for 10 to 15 minutes.
Rinse thoroughly and wipe dry.
If the racks do not slide easily after being cleaned, dampen a paper towel
with a small amount of cooking oil and rub it lightly over the side rails.
DOOR
Exterior, Frame, Handle,
Heat Deflector
Stainless Steel
Use care to keep cleaners and water away from the door vents.
If water or cleaners spill into the vents, water may streak the
glass inside.
See Cooktop, Back Panel, Stainless Steel, Page 31.
Interior
Porcelain Enamel
See Oven Cavity, Page 33.
Seal
Door Gasket.
General Kitchen Cleaners: Formula 409®, Fantastik®.
• Spray on and blot dry with a cloth. Do not rub. Do not move,
remove or damage mesh
Page 34
PRG Professional Ranges Care and Use
Section Seven: Before Calling for Service
Do-It-Yourself Maintenance
OVEN LIGHT BULB REPLACEMENT
Replace only with a 40 watt, 120 volt appliance light bulb. DO NOT USE
a standard household light bulb in any oven.
To Replace the Light Bulb:
1. Turn oven light switch to the off position. Let bulb and cover cool
completely.
2. Remove the light cover. Turn the cover to the left (counterclockwise)
to unscrew it.
3. Remove the burnt out bulb. Replace it with a 40 watt, appliance
light bulb only.
4. Replace cover. Turn circuit back on, if need be. (See Caution.)
CAUTION:
Before replacing the light bulb,
be certain the Oven Light
Switch is in the off position.
Let bulb and cover cool completely before touching. If the
light bulb glass comes
loose from the base, turn
the power to the oven
OFF at the circuit breaker
panel, before attempting
to remove the bulb base
from the socket.
The two ExtraLow® burners on the
far left side, cannot be used during a
power failure. Be sure to turn them
POWER FAILURE
OFF if a power failure occurs, as
they will not turn back on until both
In the event of a power failure, only the standard burners can be lighted control knobs are turned OFF and
manually. It is necessary to light each standard burner individually.
then turned back on again. See
“What to do if you Smell Gas”,
If the cooktop is being used when the power failure occurs, turn all of the inside front cover.
burner control knobs to the OFF position. Then, the standard burners can
be lighted by holding a match at the ports and turning the control knob to For All-Gas Ranges, the oven and
the HI position. Wait until the flame is burning all the way around the broiler burners can not be turned
burner cap before adjusting the flame to the desired height.
on during a power failure.
Page 35
PRG Professional Ranges Care and Use
Section Seven: Before Calling for Service
Before Calling for Service
Before calling for Service, check the following to avoid
unnecessary service charges.
SERVICE INFORMATION
For handy reference, copy the information below from the data rating plate. Keep your invoice for
Warranty validation.
Be sure to check these items first:
Is there a power outage in the area?
Is the household fuse blown or the circuit breaker tripped?
Is the range disconnected from the electrical supply?
Model Number
Serial Number
IF THE BURNERS DO NOT IGNITE
•
Are the burner caps properly aligned and seated in the burner
base?
•
Are the burner ports clogged?
•
Is a fuse blown or is the circuit breaker tripped?
•
Is the manual shut-off valve closed, preventing the flow of gas?
Date of Purchase
Dealer’s Name
Dealer’s Phone Number
DATA RATING PLATE
Service Center's Name
The data rating plate shows the model and serial numbers of your range.
It is located behind the toe kick at the bottom of the range. To access the
rating plate, remove the two toe kick attachment screws, then carefully
remove the toe kick panel.
Service Center’s Phone Number
For PRG All-Gas models, the data rating plate is found in the
U-shaped channel at the bottom front of the range.
CAUTION:
BEFORE REMOVING THE TOE KICK PANEL, DISCONNECT THE RANGE FROM THE ELECTRICAL POWER
SUPPLY. REINSTALL THE TOE KICK PANEL BEFORE RECONNECTING THE RANGE TO THE POWER SUPPLY AND OPERATING THE RANGE.
PRG Data Rating Plate Location
Page 36
Also, enter this information on
the Product Registration Form included with this product, then mail
it to the indicated address to receive your free Thermador Professional® Cookbook.
PRG Professional Ranges Care and Use
Warranty
Full One Year Warranty
Covers one year from the date of installation or date of occupancy for a new previously
unoccupied dwelling, Save your dated receipt or other evidence of the installation/occupancy
date.
Thermador® Will Pay For:
All repair labor and replacement parts found to be defective due to materials and workmanship. Service
must be provided by a Factory Authorized Service Agency during normal working hours. For a Service
Agency nearest you, please call 800/735-4328.
Thermador Will Not Pay For:
1. Service by an unauthorized agency. Damage or repairs due to service by an unauthorized agency or use of
unauthorized parts.
2. Service visits to:
• Teach you how to use the appliance.
• Correct the installation. You are responsible for providing electrical wiring and other
connecting facilities.
• Reset circuit breakers or replace home fuses.
3. Damage caused from accident, alteration, misuse, abuse, improper installation or installation not in
accordance with local electrical codes or plumbing codes, or improper storage of the appliance.
4. Repairs due to other than normal home use.
5. Service labor during limited warranty period.
6. Travel fees and associated charges incurred when the product is installed in a location with limited or
restricted access, (i.e., airplane flights, ferry charges, isolated geographic regions).
Warranty applies to appliances used in residential application; it does not cover their use in commercial
installations.
This warranty is for products purchased and retained in the 50 states of the U.S.A., the District of Columbia
and Canada. Should the appliance be sold by the original purchaser during the warranty period, the new
owner continues to be protected until the expiration date of the original purchaser's warranty period.
The warranty applies even if you should move. THERMADOR DOES NOT ASSUME ANY
RESPONSIBILITY FOR INCIDENTAL OR CONSEQUENTIAL DAMAGES. Some states do not
allow the exclusion or limitation of incidental or consequential damages, so the above limitation or exclusion
may not apply to you. This warranty gives you specific legal rights and you may also have other rights which
may vary from state to state or province to province.
Page 37
Specifications are for planning purposes only. Refer to installation instructions and consult your countertop
supplier prior to making counter opening. Consult with a heating and ventilating engineer for your specific
ventilation requirements. For the most detailed information, refer to installation instructions accompanying
product or write Thermador indicating model number.
We reserve the right to change specifications or design without notice. Some models are certified for use
in Canada. Thermador is not responsible for products which are transported from the United States for
use in Canada. Check with your local Canadian distributor or dealer.
For the most up to date critical installation dimensions by fax, use your fax handset and call 702/833-3600.
Use code #8030.
5551 McFadden Avenue, Huntington Beach, CA 92649 • 800/735-4328
ECO 5203-1 • 15-13-095A • © BSH Home Appliances Corp. 1998 • Litho in U.S.A., 3/01