1
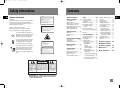
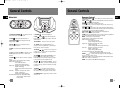
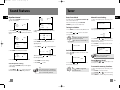
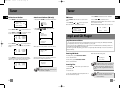
TM9255-EN
4/6/04
2:32 PM
Page 1
EN
No film output on this page
TM9255-EN
4/6/04
2:32 PM
Page 2
Contents
Safety Information
EN
Thomson Information
CAUTION!
Invisible laser radiation when open. Avoid exposure to
beam. Class 1 laser product. This system must be
opened only by qualified technicians to prevent accidents caused by the laser beam.
ADVARSEL!
USYNLIG LASERSTRÅLNING VED ÅBNING NAR
SIKKERHEDSAFBRYDERE ER UDE AF FUNKTION.
UNGDÅ UDSAETTELSE FOR STRÅLNING.
VORSICHT!
UNSICHTBARE LASERSTRALUNG
WENN ABDECKUNG GEÖFFNET UND SICHERHEITS–
VERRIEGELUNG ÜBERBRÜCKT.
NICHT DEM LASERSTRAHL AUSSETZEN!
CAUTION – INVISIBLE LASER RADIATION
WHEN OPEN AND INTERLOCKS FAILED OR
DEFEATED. AVOID EXPOSURE TO BEAM.
LASER λ = 780 nm, P max = 5 mW
Rating Information: At bottom/rear of the unit
this unit comply with the existing requirements
ATTENTION – RAYONNEMENT LASER INVISIBLE
DANGEREUX EN CAS D'OUVERTURE ET LORSQUE
LA SECURITE EST NEUTRALISEE.
EXPOSITION DANGEREUSE AU FAISCEAU.
In accordance with the rating plate of
the unit, this unit complies with current
standards concerning electrical safety
and electromagnetic compatibility.
Safety Information
Before you Begin . . . . . .1
Useful Advice . . . . . . . . . . . . . . .1
Battery Power . . . . . . . . . . . . . .1
What’s so special about this
audio CD/mp3 disc player? . . . .1
Music Management Software .2
MusicMatchTM Jukebox . . . . . . .2
Notes on CD-R/RW Disc . . . . . .2
General Controls . . . . . .3
Main Unit . . . . . . . . . . . . . . . . . .3
Remote Control . . . . . . . . . . . . .4
Display . . . . . . . . . . . . . . . . . . . .5
Clock and Timer Setting 6
Please respect the environment Before
throwing any batteries away, consult
your distributor who may be able to
take them back for specific recycling.
Have a Blast- Just Not in Your Eardrums
Make sure you turn down the volume
on the unit before you put on headphones. Increase the volume to the
desired level only after headphone is in
place.
CLASS 1 LASER PRODUCT
LASER KLASSE 1
APPAREIL A LASER DE CLASSE 1
LUOKAN 1 LASERLAITE
KLASS 1 LASERAPP ARAT
Display Setting . . . . . . .8
LCD Contrast . . . . . . . . . . . . . .8
VARNING–
OSYNLIG LASERSTRÅLNING NÄR DENNA DEL
ÄR ÖPPNAD OCH SPÄRRAN ÄR URKOPPLADE.
BETRAKTA EJ STRÅLEN.
VARO!
AVATTAESSA JA SOUJALUKITUS OHITETTAESSA
OLET ALTTIINA NÄKYMÄTTÖMÄLLE.
LASERSÄTEILYLLE ÄLÄ KATSO SÄTEESEEN.
CAUTION
RISK OF ELECTRIC SHOCK
DO NOT OPEN
THE LIGHTNING
FLASH AND ARROWHEAD WITHIN THE
TRIANGLE IS A
WA R N I N G S I G N
ALERTING YOU OF
"DANGEROUS
VOLTAGE" INSIDE
THE PRODUCT.
Setting Clock . . . . . . . . . . . . . . .6
Setting Timer . . . . . . . . . . . . . . .6
Enable/Disable Timer . . . . . . . .7
CAUTION: TO REDUCE THE
RISK OF ELECTRIC SHOCK,
DO NOT REMOVE COVER
(OR BACK). NO USERS E RV I C E A B L E PA R T S I N S I D E . R E F E R S E RV I C I N G
TO QUALIFIED SERVICE
PERSONNEL.
THE EXCLAMATION
POINT WITHIN THE
TRIANGLE IS A
WARNING
SIGN
ALERTING YOU OF
I M P O R TA N T
INSTRUCTIONS
A C C O M PA N Y I N G
T H E P R O D U C T.
SEE MARKING ON BOTTOM / BACK OF PRODUCT
WARNING: TO PREVENT FIRE OR ELECTRICAL
SHOCK HAZARD, DO NOT EXPOSE THIS PRODUCT
TO RAIN OR MOISTURE.
Sound Features . . . . . . .8
Volume Control . . . . . . . . . . . . .8
Digital Bass Boost System . . . . .8
Boosting the power . . . . . . . . .8
Equalizer Control . . . . . . . . . . .9
Custom Equalizer Setting . . . . .9
Tuner . . . . . . . . . . . . . .10
Enter Tuner Mode . . . . . . . . . .10
Tuning to a Station . . . . . . . . .10
Seek Mode . . . . . . . . . . . . . . . .10
Manual Preset Setting . . . . . .10
Preset Memory Recall . . . . . . .10
To Overwrite Memory
Locations . . . . . . . . . . . . . . . . .10
Delete Preset Station . . . . . . .11
Auto Preset Stations (FM only)
. . . . . . . . . . . . . . . . . . . . . . . . . .11
FM stereo . . . . . . . . . . . . . . . . .12
mp3 and CD Player . . .12
mp3 Recommendations . . . . .12
Entering CD Mode . . . . . . . . . .12
Inserting Disc . . . . . . . . . . . . . .12
Playing CD Discs . . . . . . . . . . . .13
Skip and Search Tracks . . . . .13
Stop Playback . . . . . . . . . . . .13
Playback Mode . . . . . . . . . . .13
Repeat . . . . . . . . . . . . . . . .14
Sampling Tracks . . . . . . . .14
Random Playback . . . . . . .14
Program Playlist . . . . . . . . . .15
Add Songs to Playlist . . . .15
Edit Playlist . . . . . . . . . . . .15
Activate Program Playback .
. . . . . . . . . . . . . . . . . . . . . . . . . .16
View Program Playlist . . .16
Delete Song from Playlist 16
Erase Entire Playlist . . . . .16
mp3 Main Navigation Keys . .17
mp3 CD . . . . . . . . . . . . . . . . .17
Smart Trax CD . . . . . . . . . . . .17
Display Options . . . . . . . . . . .18
Playing mp3 CD Discs . . . . . .18
Skip and Search Tracks . . . . .18
Stop Playback . . . . . . . . . . . .18
mp3 Playback Mode . . . . . . .19
SmartTrax mode . . . . . . . . .19
Repeat for mp3 Discs . . . . .19
Sampling mp3 Tracks . . . . .19
Random mp3 Playback . . .19
mp3 Program Playlist . . . .19
Add Songs to Playlist . . .19
Navigation Chart . . . . . . . . .20
Additional Smart Trax
Features . . . . . . . . . . . . . . . . .22
Troubleshooting Tips . .23
MusicMatch Jukebox
Troubleshooting Tips . .24
Maintenance . . . . . . . .25
More Information . . . .26
EN
TM9255-EN
4/6/04
2:32 PM
Page 4
Before You Begin
EN Useful Advice
Before You Begin
Battery Power
Do not use your system immediately after
transporting it from a cold place to a warm place, as
condensation may cause the system to malfunction.
If moisture forms inside this system, it may not operate properly. To correct the problem, turn off the
power and wait about 30 minutes for moisture to
evaporate
This system is fitted with a laser. To avoid accidents,
it is to be opened by qualified technicians only.
Never leave the tray open as dust could cover the
laser lens and/or the tray could be bumped into
accidentally.
Do not place the system near wet areas such as
bathrooms and pool side. Avoid storing the system
at humid places or near abnormally heated areas.
Power is continuously supplied to the system. To
disconnect power completely, unplug the power
cord from the power outlet.
You can insert 6 D-sized alkaline batteries (not
supplied) and you can take your stereo just about
anywhere.
• Open the battery compartment door on the bottom of the unit by pressing down on the tab and
pulling out the cover.
• Before inserting the batteries, observe the
polarities (that is, + and -) of the battery, then relate
the polarities to the engraved diagram inside the
battery compartment. Insert batteries in the battery
compartment.
Note that the AC line cord must be unplugged from
the jack on the back of the unit to operate on batteries. 3 AA-sized batteries (not supplied) are needed to keep radio station memory.
Besides traditional audio CDs, this player is meant to play mp3 files encoded on a CD-ROM. You can store up
to 12 hours of music on a single disc (at 128kbps).
Creating mp3 CDs requires the use of a computer with a CD-R / CD-RW writer and a music management software (MusicMatch Jukebox recommended).
To fully enjoy the functionalities of your mp3 CD player, we recommend you to record your mp3 CD using
folders and subfolders.
~ 10 CDs
~ 12 hours of music
CD-R/ CD-RW
Recorder
Upon unpacking the unit, you should find the music
management software - MusicMatch Jukebox
enclosed. Insert the software disc into your computer and click on “MusicMatch User’s Guide” if you
need assistance on installation of the software and
creating mp3 discs for your enjoyment with this
unit.
You need the latest MMJB Software to enjoy all the
features.
IMPORTANT: Be sure to remove batteries when storing the set for more than 30 days. Leaky batteries
can badly damage the system. Be sure to dispose of
leaky, weak or dead batteries properly according to
federal, state, and local regulations.
What’s so special about this audio CD / mp3 disc player?
Compression and transfer
Music management software TM
MusicMatch Jukebox
1. Select Update Software from the Options menu.
2. Select Update Software to Latest Release.
3. Click Continue.
It will automatically download and install the latest
MusicMatch Jukebox software.
Close the window that asks you to Get your Plus
Upgrade Key Now.
Creating a CD
After placing tracks in the playlist, click Burn on the
top menu bar.
Note: You are limited to only burning a certain
number of CDs. Upgrade to MusicMatch Plus
to get unlimited burning.
CD-R / RW
To check which version of MusicMatch Jukebox you
are currently using:
1. Click on Help to access help menu.
2. Select About MUSICMATCH Jukebox.
The software version number can be seen on the
top left corner of the information window.
Update MusicMatch Jukebox
Once you have installed the MusicMatch Jukebox
software included with your unit, follow the steps
below to update your software version.
EN
This unit is compatible with
CD-RW/ CD-R discs for playback.
Notes on CD-R/RW Disc:
• Do not affix any type of labels to either side
(recordable or labeled side) of a CD-R/RW disc as
this may result in the unit malfunctioning.
• To avoid damages to the CD-R/RW disc, do not
open the disc compartment door while the disc is
being read.
• Do not load an unrecorded CD-R/RW disc into
the unit. This may take a longer time to read the
disc.
• Playback capability for CD-RW discs may
vary due to variations in the quality of the
CD-RW disc and the recorder used to create
the disc.
Playback
Compressed music
www.musicmatch.com, www.emusic.com
1
2
TM9255-EN
4/6/04
2:32 PM
Page 6
General Controls
General Controls
EN Main Unit
Remote Control
BA
ND
SEEK
PRESET
T
U
N
E
Enter
T
U
N
E
SO
UND
COMPACT
CT DISC AAUDIO
OP
CD-R / RW COMPATIBLE
TIBLE
EN
PRESET
FUNCTION
STANDBY
1. FUNCTION/ STANDBY
- Selects functions: CD
mode / Radio mode / Standby mode.
2. OPEN
- Opens CD compartment door.
3. PLAY/PAUSE
mp3 playback.
ON
- Connects headphones.
9. STOP / home
- Stops CD and mp3 playback; returns to home directory in mp3 and Smart
Trax navigation.
- Plays and pauses CD and
4. CLOCK
- Enters clock and timer setting
mode; displays clock time.
5. BAND - Selects between FM, MW and LW radio
bands.
6.
Random Playback/ SEEK - In CD mode, selects
Random playback; In radio mode - enables seek
function.
7. MODE
- Selects options in various operating
modes:
Standby modes: System Setting. (LCD Contrast)
Radio modes: Delete Presets
Stereo (FM only) On/Off
System Setting. (LCD Contrast)
mp3 modes: Playmode... (Repeat / Intro / Mix)
Playlist... (Add Song)
System Setting. (LCD Contrast / Browse
mode)
CD modes : Playmode... (Repeat / Intro / Mix)
Playlist.... (Add Songs)
System Setting. (LCD Contrast)
SmartTrax mode: Playmode...(Repeat/Intro/Mix)
System Setting...(LCD Contrast /
Browse mode)
3
8. PHONES
OFF
10. VOLUME +/- - Increases or decreases volume.
11. SOUND - Turns on/off digital bass boost
system; selects among different E.Q. options (Flat,
Rock, Jazz, Pop, Classic or Custom)
12. PRESET
/
- Increase or decrease preset
location in radio mode; works as an up and down
navigation key in all menus.
13. TUNE
(SKIP / SEARCH BACKWARD) - Goes
back to previous CD or mp3 track or searches
backward; tunes down in radio frequency; returns
to the previous menu in navigation mode.
EN
FUNCTION/STANDBY
- Selects functions: CD mode / Radio mode /
Standby mode.
STOP / home
- Stops CD or mp3 playback; returns to home directory in mp3 and Smart Trax navigation.
ENTER
- In radio mode - Enters preset mode;
In navigation mode, enters selected menu. Also used to select among
options in mode menu.
TUNE
/
- Tunes down or up in radio frequency; skips/searches
back or skips/searches forward for CD and mp3; enters to the next menu
or return to the previous menu during navigation.
PLAY / PAUSE
- Starts and pauses CD or mp3 playback.
VOL +/- - Increases or decreases volume.
SOUND - Turns on/off digital bass boost system; selects among different
E.Q. options (Flat, Rock, Jazz, Pop, Classic or Custom)
MODE - Selects options in various modes:
Standby modes: System Setting. (LCD Contrast)
Radio modes: Delete Presets
Stereo (FM only) On/Off
System Setting. (LCD Contrast)
mp3 modes: Playmode... (Repeat / Intro / Mix)
Playlist...(Add Song)
System Setting. (LCD Contrast / Browse mode)
CD modes : Playmode... (Repeat / Intro / Mix)
Playlist.... (Add Songs)
System Setting. (LCD Contrast)
SmartTrax mode: Playmode...(Repeat/Intro/Mix)
System Setting...(LCD Contrast / Browse mode)
PRESET
/
- Selects preset radio stations; works as navigation
keys to move up or down menus.
Random / SEEK - Selects random playback in CD and mp3 mode. In
radio mode - enables seek function.
BAND - Selects between FM, MW and LW frequency.
14. TUNE
(SKIP / SEARCH FORWARD) - Goes to
next CD or mp3 track or searches forward; tunes up
in radio frequency; enters the next menu in navigation mode.
15. ENTER
- In radio mode - Enters preset
mode; In navigation mode, enters selected menu.
Also used to select among options in mode menu.
16. POWER BOOST – Toggles the power boost function on or off.
4
TM9255-EN
4/6/04
2:33 PM
Page 8
Display
Clock and Timer Setting
EN
Timer On/Off
Indicator
Repeat
Mode
Random
Playback
Battery Indicator
Folder Indicator
Indicates current
folder location in
SmartTrax mode.
PLAYLIST is for mp3
CD discs only.
SmartTrax CD
Setting Clock
Setting Timer
1. Press and hold CLOCK
on the main unit until
the clock and timer setting menu show on the
display
1. Press and hold CLOCK
on the main unit
until the clock and timer setting menu show on the
display.
Equalizer
Options
Set Clock
Set Timer
Timer
On
2. Press PRESET
select Set Timer.
or
to scroll the menu to
Set Clock
Set Timer
Timer
On
to scroll the menu to
3. Press ENTER or TUNE
to enter clock setting
menu. New Time hour will be flashing.
Note:
LCD backlight will be activated whenever the unit is powered on, in order
to give you a clear sight of the LCD.
or
Off
Digital Bass
Boost System
2. Press PRESET
select Set Clock.
EN
12:00
Old
12:00
New
Off
3. Press ENTER or TUNE
to enter Timer setting
menu. The Timer-On Time hour flashes on the display.
Timer-On Time
12:00
4. Press PRESET
or
to select hour.
5. Press ENTER or TUNE
to move to minutes
setting. The minutes digits will flash.
Press TUNE
6. Press PRESET
12:00
Old
12:00
New
4. Press PRESET
to select minutes.
to set the hour.
5. Press ENTER to move to minutes setting. The
minute digits will flash.
Timer-On Time
12:00
to move back to change the hour.
or
or
6. Press PRESET
or
to set the minutes.
7. Press ENTER to save settings and exit clock setting mode.
Tip:
• Press CLOCK while the power is on
to view current clock time.
• Press TUNE
or TUNE
when setting clock to readjust hour or minutes.
5
Tip:
• Press TUNE
or
to toggle between hour and minute setting.
6
TM9255-EN
4/6/04
2:33 PM
Page 10
Clock and Timer Setting
EN
7. Press ENTER to save timer on time and move to
Timer-Off Time setting. The Timer-Off hour flashes.
Display Setting
LCD Contrast
Set Clock
Set Timer
Timer
On
1. Press MODE in any mode to access Mode menu.
to enter LCD Contrast
Off
Timer-Off Time
The timer icon
will show on the display when
timer is activated.
12:00
5. Press ENTER or TUNE
menu.
2. Press PRESET
or
to scroll up and down
the menu and select System Setting.
Contrast
09
System Setting.
8. Repeat steps 4 to 6 to set the time.
Enable / Disable Timer
9. Press ENTER to save timer off time and move to
Timer Source setting.
1. Press and hold CLOCK
on the main unit
until the clock and timer setting menu show on the
display.
Timer source
CD
10. Press PRESET
or
and RADIO as timer source.
to select between CD
Caution: Ensure the right radio
frequency is tuned or CD is loaded before
turning off the power.
11. Press ENTER to save timer source and move to
Timer Volume setting.
Timer volume
Level
12. Press PRESET
between 1 to 32.
12
or
to select volume level
13. Press ENTER to save settings and return to Timer
setting menu.
7
2. Press PRESET
or
select Timer On/Off.
to scroll the menu to
Set Clock
Set Timer
Timer
On
3. Press ENTER or TUNE
Timer On and Off.
6. Press PRESET
trast.
3. Press ENTER or TUNE
System Setting menu.
to enter and view
7. Press TUNE
or
to adjust display con-
to exit to the previous menu level.
4. Press PRESET
or
to scroll up and down
the menu until LCD Contrast is selected.
LCD Contrast
Off
to select between
Note:
Timer will automatically be
activated after Timer settings.
Sound Features
Volume Control
Digital Bass Boost System
Press VOLUME + on the main unit or VOL. + on the
remote control to increase volume and VOLUME on the main unit or VOL. - on the remote control to
decrease volume.
Volume level will show on the display while you are
adjusting volume. Minimum volume level is 0 and
maximum is 32.
Press SOUND repeatedly to turn on and off DBBS
function. DBBS will show on the the display when it
is activated.
Volume 17
Boosting the Power
Slide POWER BOOST knob to “ON” position on the
main unit to activate the power boost function
which will enhance the output power of the unit.
Note:
When the POWER BOOST function is
activated, the unit will consume more
power than normal operation. Thus the
batteries life might be shortened when using
DC power.
8
EN
TM9255-EN
4/6/04
2:33 PM
Page 12
Sound Features
Tuner
EN Equalizer Control
Flat
Rock
Jazz
1. Press and hold SOUND until the E.Q. menu
appears on the display.
Flat
Rock
Jazz
= EQ =
2. Press PRESET
or
to move up and down
the E.Q. menu until the cursor points to the desired
effect.
Pop
Classic
Custom
+ 10
high - 10
or
to adjust low level.
5. Press ENTER to save setting and move on to
adjust high level.
6. Press PRESET
= EQ =
at anytime to exit E.Q. menu.
Custom Equalizer Setting
1. Press and hold SOUND until E.Q. menu appears
on the display.
2. Press PRESET
or
to move up or down
the menu until the cursor is pointing to Custom.
9
In standby mode, press FUNCTION/ STANDBY
twice to enter radio mode.
1. Tune to the frequency to be saved into preset
location.
If the unit is in CD mode, press FUNCTION/
STANDBY
once to select radio mode.
1. Press BAND to select between FM, MW and LW.
low
or
+ 10
FM 105.00 MHz
2. Press ENTER to enter preset mode. The last used
memory location will be displayed.
Preset 02?
Tip:
• Extend or reposition the antenna
for better FM reception.
• Move the unit for better MW or
LW reception.
3. Press PRESET
or
to select the highest
memory location accessible at the time (the next
available memory location).
4. Press ENTER to save frequency into selected
memory location.
to adjust high level.
high - 10
FM 105.00 MHz
Preset 02
mono
tuned
Seek Mode
1. Press
/SEEK to enable seek function. SEEK
will be displayed.
TIP: Press TUNE
or
low and high settings.
EN
to tune to the station
FM 105.00 MHz
3. Press ENTER to confirm your selection.
4. Press TUNE
Manual Preset Setting
2. Press TUNE
or
you want to listen to.
4. Press PRESET
= EQ =
Enter Tuner Mode
Tuning to a Station
= EQ =
Pop
Classic
Custom
Pop
Classic
Custom
= EQ =
3. Press ENTER to select and enter Custom EQ.
setting.
low
Flat
Rock
Jazz
= EQ =
to toggle between
FM 105.00 MHz
Note:
There are 30 preset memory
locations in tuner mode.
SEEK
Preset Memory Recall
7. Press ENTER to save the setting.
8. Press TUNE
to exit.
Note:
After Custom Setting is finished,the
unit will automatically entered Custom
EQ if it is not already selected.
2. Press TUNE
or
to auto search up or
down in radio frequency.
Tip:
Press
/SEEK to toggle seek
function on and off.
1. Press PRESET
or
desired preset stations.
repeatedly to access
To overwrite memory locations
1. Tune to the frequency to be saved into preset
location.
2. Press ENTER to enter preset mode.
3. Press PRESET
or
to select the memory
location to overwrite.
4. Press ENTER to overwrite the previous setting.
10
TM9255-EN
4/6/04
2:33 PM
Page 14
Tuner
Tuner
EN Delete Preset Station
1. Press MODE to enter radio mode menu.
Delete Preset
Stereo
On
System Setting.
2. Press PRESET
or
Off
to select Delete Preset.
3. Press ENTER or TUNE
to enter Delete Preset
menu. All Preset location will be listed.
01
02
03
FM
FM
MW
Auto Preset Stations (FM only)
FM Stereo
3. Press ENTER select between Stereo ON/ OFF.
1. Press and hold BAND to view Auto Preset menu.
1. Press MODE in tuner mode to access the tuner
menu.
4. Press TUNE
Auto Preset
=> Start
=> Abort
2. Press PLAY/PAUSE
to start auto preset.
Press STOP to Abort.
Existing
Preset Stations
Will be Erased!
87.5MHz
100.5MHz
603kHz
Searching up
for station
4. Press PRESET
or
to scroll up and down
the preset location and select the one you wish to
delete.
01
02
03
FM
FM
MW
87.5MHz
100.5MHz
603kHz
2. Press PRESET
or
to move up or down
the menu until the cursor points to Stereo.
When station is found, it will be stored into Preset.
Delete Preset
Stereo
On
System Setting.
01
02
03
FM
87.5MHz
MW
603kHz
-------------------------
FM
stereo
93.50MHz
tuned
mp3 and CD Player
mp3 Recommendations
• Use .mp3 as the extension when converting audio files into mp3 for saving onto CD-R(W) or CD-ROM,
e.g. Rocky08.mp3. Do not use any other extension e.g. .doc, .pdf.
• Do not use the .mp3 or WMA extension for other text or non-audio data files as this may result in serious malfunction and harmful noise interference.
• In order to get audio CD quality, you need to record your mp3 CD at 128 kbps. You can record from 32
kbps to 320kbps.
FM 88.00 MHz
Preset 1
Auto Preset will stop once all 30 preset stations are
full or when the frequency band ends.
In standby mode, press FUNCTION/STANDBY
once to enter CD mode.
In Tuner mode, press FUNCTION/STANDBY
twice to enter CD mode.
Auto Preset
Completed
Note:
DO NOT press any key until auto-preset search is complete.
Inserting Disc
1. Press OPEN
partment door.
on the unit to open the CD com-
2. Insert the disc
3. Close the compartment door and push down on
the door until it locks in place.
11
to exit Mode menu.
stereo will be displayed when Stereo mode is on and
stereo station is received.
mono will be displayed when Stereo mode is off.
Off
Entering CD Mode
5. Press ENTER to delete preset station from the
selected memory location. The next preset station
will move up to replace the memory location.
EN
Wait while the CD is being read.
Reading Disc
Please Wait...
Note:
If the disc has an error or if there is
no disc on the disc tray, the system
will take a long time for reading. If there is
no disc on the disc tray, NO DISC will be displayed
Note:
The unit will automatically power off
if no function is initiated for more
than 30 minutes.
12
TM9255-EN
4/6/04
2:33 PM
Page 16
mp3 and CD Player
EN Playing CD Discs
mp3 and CD Player
Playback Mode
1. Press MODE to view the CD mode menu.
Press PLAY/PAUSE
1. Select the Repeat
option in Playmode... menu.
to start playback.
00:11
Press PLAY/PAUSE
when the disc is playing to
pause playback. The playback time will flash.
Press again to resume .
to end playback.:
Tip:
To listen to CD through headphones,
insert your headphones into the
PHONES
jack on the back of
the player.
to
All
On
On
Off
Off
Off
2. Press ENTER to select between
1 - To repeat selected track. This display will
show
1.
All - To repeat entire disc. The display will show
ALL.
OFF - Turn off the repeat feature.
Playmode...
Playlist...
System Setting.
3. Press ENTER or TUNE
menu.
to enter Playmode....
EN
Enable mix play to randomly play tracks on the disc.
Press Random button
random playback.
to enable and disable
Enable Random Playback from Playmode
menu
1. Select the Mix option in Playmode... menu.
1
Intro
Mix
All
On
On
Off
Off
Off
2. Press ENTER to select between Mix On and Mix
Off .
Sampling Tracks
• Press TUNE
to go back to the previous track.
Press and hold the button to search back in a song.
• Press TUNE
to go to the next track. Press and
hold to search forward in a song.
Stop Playback
Intro
Mix
2. In CD mode menu, press PRESET
or
move up or down the menu until the cursor is
pointing to the Playmode... option.
Note:
When the unit is in pause mode for
more then 5 minutes, the unit will
automatically enter Stop mode.
Skip and Search Tracks
1
Playmode...
Playlist...
System Setting.
TRACK 01
Press STOP
Random Playback
Repeat
Activating Intro will play the first 10 seconds of each
track on the disc.
The random playback icon
play when it is activated.
will show on the dis-
1. Select the Intro option in Playmode... menu.
1
Intro
Mix
All
On
On
Off
Off
Off
1
Intro
Mix
4. Press PRESET
or
to move up or down
the menu until the cursor is pointing to the playback
mode option you want.
5. Press TUNE
All
On
On
Off
Off
Off
2. Press ENTER to select between Intro On and Intro
Off.
to return to the previous menu.
00:05
TRACK 01
Intro
Tip:
When in Intro mode playback, press
PLAY/PAUSE
to disable Intro
and continue with normal play.
13
14
TM9255-EN
4/6/04
2:33 PM
Page 18
mp3 and CD Playback
EN Program Playlist
1. Press MODE to view the CD mode menu.
Playmode...
Playlist...
System Setting.
2. In CD mode menu, press PRESET
or
move up or down the menu until the cursor is
pointing to Playlist.. .
mp3 and CD Playback
Add Songs to Playlist
4. Press ENTER to save new setting.
Delete Song from Playlist
1. Follow steps under Program Playlist and select
Add Song in step 4.
5. Repeat steps 2 and 4 to edit other program
location.
1. Follow steps 1 to 5 under Program Playlist and
select Erase Song in step 4.
2. Press TUNE
or
to select track number for
the next available program location.
6. Press MODE to quit.
to
01
02
03
TRK
TRK
TRK
(01)
---
View Song
Erase Song
Erase Playlist
Activate Program Playback
1. Follow steps 1 to 4 under Program Playlist and
select Playlist in step 4.
3. Press ENTER to save setting and move on to select
track for next memory location.
Playmode...
Playlist...
System Setting.
ON
Off
4. Press TUNE
to return to the previous menu.
to enter Playlist.... menu.
There are 30 program memory locations available.
4. Press PRESET
or
to move up or down
the menu until the cursor is pointing to the option
you want.
When creating program playlist for the first time,
only Add Song is available for selection.
Add Song
2. Press PRESET
or
location you want to edit.
If a playlist already exists, the following options can
be selected.
Add Song
Playlist
ON
Off
View Song
Erase Song
Erase Playlist
to enter selected
01
02
03
3. Press TUNE
number.
2. Press ENTER to select between Playlist On and
Playlist Off.
3. Press MODE to quit.
Edit Playlist
1. Follow steps under Program Playlist and select
Add Song in step 4.
5. Press ENTER or TUNE
menu.
2. Press PRESET
or
to scroll up and down
and select the song you want to delete from the list.
3. Press ENTER to delete the song.
Add Song
Playlist
4. Press MODE to quit.
3. Press ENTER or TUNE
EN
or
01
02
03
to select the program
TRK
TRK
TRK
1. Follow steps 1 to 5 under Program Playlist and
select View Song in step 4.
01
(05)
10
to select the new track
TRK
TRK
TRK
View Program Playlist
01
(09)
10
View Song
Erase Song
Erase Playlist
2. Press PRESET
and view Song list.
3. Press TUNE
or
Erase Entire Playlist
1. Follow steps 1 to 5 under Program Playlist and
select Erase Playlist in step 4.
View Song
Erase Song
Erase Playlist
2. Press ENTER. You will be asked to confirm or
Abort deleting playlist.
=> Erase
=> Abort
to scroll up and down
to return to the previous menu.
3. Press PLAY/PAUSE
to confirm and delete
playlist.
Press STOP
to abort selection.
6. Press MODE to quit.
15
16
TM9255-EN
4/6/04
2:33 PM
Page 20
mp3 and CD Playback
EN Playing mp3 Discs
Main mp3 Navigation Keys
PRESET
directory.
or
- to scroll up or down within a
TUNE
- to return to the previous menu level.
TUNE
- to enter into a selected menu level.
home
- to return directly to the home directory
Note:
Must be in STOP mode to view the
list of files and folders.
Listening to mp3 and mp3PRO files
mp3PRO is an improved version of the popular mp3
coding-decoding format that provides same sound
quality at roughly half the size of orginal mp3 files.
mp3PRO files will play normally on an old mp3
player. Sound quality will only be optimized when
mp3PRO files are played on a mp3PRO player.
mp3 CD
When a mp3 audio disc is read, the title of the folder
or the song name in the home directory will show on
the display.
“
“
” will indicate the title is a folder.
“ will indicate the title is a file.
Folder 1
Folder 2
Track 1
Track 2
Folder – files are divided and placed into individual
folder.
File – all files on the mp3 disc will be arranged
alphabetically.
mp3 and CD Playback
Smart Trax
Smart Trax is a music management system that allows
for the organization of mp3 or WMA files into 7
standardized categories. The categories include My
Selection, Artist, Title, Genre, Year, Album and CD
Playlist.
This systematic arrangement shortens the initiation
time for mp3 discs. Navigation also becomes easier as
files are placed into folders.
If the mp3 disc is formatted with the Smart Trax feature, Folder mode will be replaced with Smart Trax
mode.
The Smart Trax
icon will show on the display.
Smart Trax - all files are divided into 7 different
categories.
Display Options
Playing mp3 CD Discs
1. In STOP mode, press MODE to view mp3 menu.
Use the navigation buttons to select the file or folder
to be played.
When a file is selected, playback begins from that
file.
When a folder is selected, playback begins from the
first song in the selected folder.
Playmode...
System Setting.
Press PLAY/PAUSE
2. Press PRESET
or
to scroll down until the
icon is pointing to System Setting and press ENTER
to view mp3 System Setting menu.
3. Press PRESET
Browse Mode....
or
My Selection
Artist
Title
00:11
The display will toggle among Artist, Type, Year,
Genre, Title and Album information every 20
seconds.
Tip:
Press PRESET
or
can also
toggle among Artist, Type, Year,
Genre, Title and Album.
4. Press ENTER to view Browse Mode selections.
Genre
Album
Year
CD Playlist
---------------------------------Clear Selection
Note:
When reading a Smart Trax disc, the
unit will automatically enter the
Artist Folder. Press home
or TUNE
to return to the Home Directory.
Respective icons will appear on the display to indicate
which SmartTrax folder you are currently in during
navigation.
5. Press PRESET
or
to select among
display options:
mp3 CD without Smart Trax
Folder mode
File mode
Press PLAY/PAUSE
when the disc is playing to
pause playback. The playback time will flash.
Press again to resume .
Note:
When the unit is in pause mode for
more then 5 minutes, the unit will
automatically enter Stop mode.
mp3 CD with Smart Trax
Folder mode
File mode
Smarttrax mode
6. Press ENTER to confirm selection.
Skip and Search Tracks
• Press TUNE
to go back to the previous track.
Press and hold the button to search back in a song.
• Press TUNE
to go to the next track. Press and
hold to search forward in a song.
Stop Playback
Press STOP
17
to start playback.
File Name
Artist:
Artist 1
until the icon is at
LCD Contrast
Browse mode
EN
to end playback.
18
TM9255-EN
4/6/04
2:33 PM
Page 22
mp3 and CD Playback
EN mp3 Playback Mode
Follow the steps under Playback Mode on page 12
to access mp3 menu.
SmartTrax mode
If the cursor is at the middle level where all the
artists are listed, then the selected artist is picked
and his/her songs will be played randomly before
picking another artist
randomly.
mp3 and CD Playback
Random mp3 Playback
Navigation Chart
Refer to Random Playback on page 13 for instruction on enabling and disabling random playback.
mp3 Audio CD without Smart Trax
Note:
Go into the target folder to be
repeated or the folder to be played
randomly in stop mode.
Sampling mp3 Tracks
Repeat for mp3 Discs
Refer to Sampling Tracks on page 13 for details.
1. Select the Repeat
menu.
mp3 Program Playlist
option in Playmode...
1
Intro
Mix
All
On
On
Off
Off
Off
EN
Refer to Program Playlist on page 14 to access
Playlist menu.
Add Songs to Playlist
1. Follow steps under Program Playlist and select
Add Song in step 4.
2. Press ENTER to select between
1 - To repeat selected track. This display will show
.
1 - To repeat selected folder. The display will
show
. (For mp3 Folder mode only)
All - To repeat entire disc. The display will show
ALL.
OFF - Turn off the repeat feature
Note:
When repeat folder is selected, the
folder where playback begins or the
folder where repeat folder is activated will be repeated.
3. Press PRESET
or
to select other
features in mp3 menu or press TUNE
to exit the
menu.
2. Use the navigation keys to select the item to be
added into the playlist.
3. Once the item is selected, press ENTER to add it
into the next available program location. The
program location and the added item will show
briefly on the display.
01
02
03
Item 1
Item 2
--
4. Repeat steps 2 and 3 to add additional items into
the playlist.
5. Press MODE to quit.
Note:
mp3 playlists can not be edited.
Refer to page 14-15 for other
Playlist details.
19
20
TM9255-EN
4/6/04
2:33 PM
Page 24
mp3 and CD Playback
mp3 and CD Playback
Additional Smart Trax Features
EN mp3 Audio CD with Smart Trax
Smart Trax is only available for mp3 CDs created with
this feature. The Smart Trax icon
will show on the
display.
My Selection
Artist
Title
Genre
Album
Year
Note:
When reading a Smart Trax disc,
the unit will automatically enter the
Artist category. Press home
or BACK
to return to the Home Directory.
My Selection
For example, if the Artists category is selected,
press PLAY/PAUSE and all the songs in the category will be played.
When you press PLAY/PAUSE after entering one
of the Home Directory categories, only the
selected attribute will be played.
For example, if you are in the Artist category
and selected Artist 1 to play, the songs in Artist
1 folder as well as Artist 2,3 and 4 will be
played.
View My Selection
1. Press PRESET
or
to scroll the home directory to select the My Selection.
CD Playlist
---------------------------------Clear Selection
2. Press ENTER or TUNE
Selected categories and tracks can be bookmarked
and placed into My Selection.
1. Enter Smart Trax mode if the unit is currently in File
mode. Follow steps in “Display Options” on pg. 17 to
enter Smart Trax mode.
Note:
The unit must be in Smart Trax
mode in order to select tracks to be
placed in My Selection.
2. Press PRESET
or
to scroll the home directory
to select the category to enter.
3. Press ENTER or TUNE
Note:
•
indicates all tracks in a category have been selected to be placed
into My Selection.
•
indicates only certain tracks in the
category are selected to be placed into My
Selection.
My Selection
Artist
Title
CD Playlist
---------------------------------Clear Selection
Note:
When you press PLAY/PAUSE in the Smart Trax
Home Directory, all songs in the selected category will be played.
• Press TUNE
on the main unit or remote control
to enter a category.
to enter My Selection.
Clear My Selection
1. Press PRESET
or
to scroll the home
directory to select the Clear Selection.
=> ERASE
=> ABORT
2. Press ENTER to select.
3. Follow the instructions to clear My Selection.
Press PLAY/PAUSE
to clear all or
Press STOP
to abort.
to enter category.
4. Once you have entered one of the home directory
folders,
• press ENTER to select track(s) to place into My
Selection.
21
22
EN
TM9255-EN
4/6/04
2:33 PM
Page 26
Troubleshooting Tips
EN
MusicMatch Jukebox Troubleshooting Tips
Problem
Solution
Problem
Solution
Problem
System
doesn’t
turn on
Check power cord for a secure connection.
CD button
will not
respond,
Switch to another function and then back to
Can not burn Smart Trax CD in MusicMatch Jukebox
Remote
control
does not
work
Check that the batteries are properly installed.
Unplug the unit for a moment, and then plug
into power source again.
Increase the volume setting.
Check that you have selected the appropriate
function: CD, Tuner.
Solution
Replace weak batteries.
Check the system is plugged into power source.
Point the remote directly at the system’s front
panel.
Poor radio
reception
EN
CD.
Check the outlet by plugging in another device.
No sound
4. Select Settings to display Burn settings.
Move antenna for FM reception or rotate unit
Move closer to the system.
for better AM reception (MW or LW for
Remove any obstacles between the remote and
Thomson).
the system.
You may have exceeded the number of burns.
Upgrade to MusicMatch Jukebox Plus to get unlimited burns.
Check that MusicMatch Jukebox settings are correct.
1. Click the BURN button from the Main window to
display Burn window.
Turn off nearby electrical appliances, such as
hair dryer, vacuum cleaner, microwave, fluorescent lights.
CD does
not play
extension. e.g. Rocky08.mp3
Check that the recorded bit rate is within
32kbps and 320kbps.
Check that CD is in the tray.
Check that CD label is facing up.
Check that PAUSE mode is not on.
Check that CD function is selected.
Use CD lens cleaner.
Clean the disc.
Check disc for warping, scratches, or other
damage.
2. Click the mp3 button on the top of the Burn window to change to mp3 audio disc.
Cannot play Check that the WMA bit rate is within 64
WMA songs kbps and 192 kbps and sampling rate is
within 44.1 kHz and 48kHz.
Clean the disc.
CD sound
skips
5. Click on the General folder.
Make sure “mp3 disc” is selected under Disc type at
Startup.
Cannot play Clean the disc.
mp3 disc
Make sure files are saved under .mp3
Cannot play Check that the mp3PRO bit rate is within
mp3 PRO
24kbps and 96kbps and sampling rate is
songs
within 44.1 kHz and 48kHz.
Check if something is causing the system to
vibrate. If so, move the system.
23
The display
shows
strange
characters
Check that file names are created using the
ASCII-ISO 8859-1 (Latin - 1) Table.
3. Select Options from Options menu in the Burn
window.
6. Click on the mp3 folder.
Make sure Add MultiAudio Tracklist (MAU) box is
checked.
7. Click OK when finished.
24
TM9255-EN
4/6/04
2:33 PM
Page 28
Maintenance
EN
Disconnect the audio system from the power source
before performing any maintenance.
Cleaning
Clean the exterior of the system using a soft dust
cloth.
CD Player
CAUTION! This system operates with a laser. It must
be opened by only a qualified technician.
More Information
Cleaning CDs
Safety Precautions
• Dirty CDs can cause poor sound quality. Always
keep CDs clean by wiping them gently with a soft
cloth from the inner edge toward the outer perimeter.
• If a CD becomes dirty, wet a soft cloth in water,
wring it out well, wipe the dirt away gently, and
then remove any water drops with a dry cloth.
• Do not use record cleaning sprays or antistatic
agents on CDs. Also, never clean CDs with benzene,
thinner, or other volatile solvents which may cause
damage to disc surface
• Never open the cabinet under any circumstances.
Any repairs or internal adjustments should be made
only by a trained technician.
• Never operate this product with the cabinet
removed.
•Do not use your System immediately after
transporting it from a cold place to a warm place, as
condensation may cause the system to malfunction.
• Keep your unit away from humid areas and
abnormally hot places.
• Do not touch the player with wet hands. If any
liquid enters the player cabinet, take the player to a
trained technician for inspection.
• This compact disc player uses a laser to read the
music on the disc. The laser mechanism corresponds
to the cartridge and stylus of a record player.
Although this product incorporates a laser pick-up
lens, it is completely safe when operated according
to directions.
• Discs rotate at high speed inside the player. Do not
use damaged, warped, or cracked discs.
• Do not touch the pick-up lens which is located
inside the disc compartment. To keep dust from collecting on the pick-up lens, do not leave the compartment door open for an extended period of time.
If the lens becomes dirty, clean it with a soft brush, or
use an air blower brush designed for camera lenses.
• The apparatus shall not be exposed to dripping
and splashing.
Handling CDs
CD Lens Care
• Do not touch the signal surfaces. Hold CDs by the
edges, or by one edge and the hole. Do not affix
labels or adhesive tapes to the label surfaces. Do not
scratch or damage the label. CDs rotate at high
speeds inside the player. Do not use damaged
(cracked or warped) CDs.
When your CD lens gets dirty it can also cause the
system to output poor sound quality. To clean the
lens you will need to purchase a CD lens cleaner
which can maintain the output sound quality of your
system. For instructions on cleaning the CD lens,
refer to the ones accompanying the lens cleaner.
Important Battery Information
• Remove the batteries to avoid leakage if you do
not use your remote control for more than one
month.
• Discard leaky batteries immediately as leaking batteries may cause skin burns or other personal
injuries. Dispose of batteries in the proper manner,
according to provincial and local regulations.
• Any battery may leak electrolyte under the following circumstances:
25
- if mixed with a different battery type,
- if inserted incorrectly,
- if all batteries are not replaced at the same time,
- if disposed of in fire, or
- if an attempt is made to charge a battery not
intended to be recharged.
EN
Headset Safety
• Do not play your headset at high volume. Hearing
experts warn against extended high-volume play.
• If you experience ringing in your ears, reduce volume or discontinue use.
• You should use with extreme caution or temporarily discontinue use in potentially hazardous situations.
Even if your headset is an open-air designed to let
you to hear outside sounds, do not turn up the volume so high that you are unable to hear what is
around you.
Don’t Infringe
This product should only be used for the purposes
for which it is sold, that is, entertainment, violating
no copyright law. Any attempts to use this product
for which it is not intended is unlawful and therefore
not condoned by Thomson.
Technical Specification
Power supply: 230V-50Hz
Dimensions ( H x W x D mm): 145 x 355 x 265
CD player: Response curve (+/- 2dB): 20Hz to 20 kHz
Rating Plate: Look for it at the bottom of the set.
The descriptions and characteristics given in this document are given
as a general indication and not as a guarantee. In order to provide
the highest quality product possible, we reserve the right to make
any improvement or modification without prior notice. The English
version serves as the final reference on all products and operational
details should any discrepancies arise in other languages.
26