1
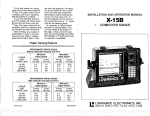
•
X-60
INSTALLATION AND OPERATION
INSTRUCTIONS
LITHO IN U.S.A.
988-0119-17
R9LOWRANCE ELECTRONICS, INC.
12000 E. SKELLY DR., TULSA, OK 74128
PDF compression, OCR, web-optimization with CVISION's PdfCompressor
Copyright ©1990, Lowrance Electronics, Inc.
All features and specifications
All rights reserved.
subject to change without notice.
31
PDF compression, OCR, web-optimization with CVISION's PdfCompressor
MENU - PAGE 5
TABLE OF CONTENTS
DIGITAL SONAR
When the X-60 is turned on br the first time, the digital depth display
shows at the screen's top 1St corner. This display comes from a.
separate digital sonar built intothe X-60. It displays only the bottom
depth. If it loses the bottom, the last known depth will flash on the
display. When the digital finds the bottom, it will automatically display
the bottom depth again.
Tarn Oft'
Di9ital sonar
t'iARNINGl
TURNING OFF THE
DIGITAL WILL TURN
OFF ALL AUTOMATIC
FEATURES
La
•
Select
A
INTRODUCTION
MOUNTING
POWER CONNECTIONS
AUTOMATIC
2
3
4
5
6
SENSITIVITY
6
TRANSDUCER
KEYBOARD
DISPLAY
GRAYLIN
RANGE - Automatic
RANGE - Manual
ZOOM
ZOOM - Aulomatlc
ZOOM - Manual
YoU can turn the digital sonar off,
howeverthis also turns all automatic
features dff also, such as auto sensitivity, auto ranging, and Fish l.D.
To turn the digital sonar off, press the MENU key, then the key
adjacent to the "More" label four times. Now press the key adjacent
to the 'TURN OFF DIGITAL SONAR" label. To turn it back on again,
repeat the same stops.
press the key adjacent to the "Select A Tune"
to the desired tune label.
key adjacent
11
11
12
14
14
15
FISHALARM
AUDIO ALARM ON/OFF
17
17
MENUS
18
18
18
19
16
CHART CURSOR
20
BACKLIGHTS
21
21
21
MENU-PAGE 2
CONSTRUCT DIGITALBLOCK
SELECTDIGITAL SIZES
FASTRAK
DISPLAY CONTRAST
MENU-PAGES
SELECTUNIT OF MEASURE
CLEAR DISTANCE LOG
SPEAKER VOLUME
MENU-PAGE4
ST
The X-60 has several songs pre-recorded. To play them, press the
MENU key, then the key adjacent to the "More" label four times. Now
9
13
NOISE REJECTION
SURFACE CLARITY (5CC)
DISPLAY ZONE BAR
DISPLAYZOOM WINDOW BAR
TUNES
g
DEPTH ALARMS
SHALLOWALARM
DEEP ALARM
ZONEALARM
FISH LD
.4
8
AL4RMS
MENU-PAGE 1
CHARTSPEED
Tune
1
MENU-PAGES
DIGITALSONAR
TUNES
22
23
24
25
25
26
26
26
26
27
28
29
30
30
30
label. Finally, press a
30
PDF compression, OCR,
web-optimization with CVISION's PdfCompressor
A
Li
4
Set tloise
Rejection
_____
MAHUALT
I
Set Stirf ace
ritz
5?
*LP
111110
Clarity
Display Zoiie
4
52.IFT
11111 1111111
Alarm Bar
Lbisplay
Zoom
Hft
Adjust Zoorrg
Window Bar
/0
A
Here
MENU -4th PAGE
(AUTOMATIC OFF)
ZOOM....
ZOOM ADJUST MENU
(MANUAL MODE)
DISPLAY ZOOM WINDOW BAR
The bar used to adjustthezoom window in the manual mode
normally
disappears after settingthe zoom window. YOU canturn it on continuously, which keeps the unit in the spht screen zoom mode. To turn
the zoom windowbar on, first make certain the X-60 is in the manual
mode. Next, pressthe MENU key, then the key adjacent to the
'More' label three times. Nowpressthe key adjacent to the "DISPLAYZOOM WINDOWBAR" label. The menu screen disappears
and the zoom window bar displays on the right side of the screen.
This will also place the X-60 in the split screen zoom mode. Repeat
these steps to turn the zoom window bar off.
PDF compression, OCR, web-optimization with CVISION's
29
PdfCompressor
The menu shown below appears. Simply press the key adjacent to
the desired 5CC level, either Off, Low, Medium, or High. The X-6O
will clear the display, return to the chart modeusing the SOC level you
entered.
A
Set Noise
Rejebtion
etSurfaoe
Clarity
.,Ihsplaytone
Alarn Bar
4
Control Is
Low
:
Although the X-60 has manyfeaturesand functions, the "soft key"
menu systemmakes it easyto use. Above all, don't be afraid to try
different features and functions on the unit. You can't hurt it by
prssing buttons!
Select
LoW
9ead this manual and take it with you the first few times you use your
unit. It makes a great referenceshould you need it. The moreyou
know when you get to the water, the more your X-60 can do for you!
:inI
MENU-4th PAGE
socADJUST
(AUTOMATIC ON)
MENU
The X-60 represents one of the best values in sportfishing sonar
today, It rivals other sonar units costingmuch more in featuresand
performance. With.its menus, the X-6O offers easy-to-use operation
at thetouch of a button. The wide screen shows the underwater
world with high resolution and detail. With the optional combination
speed and temperature sensor, the X-60 also displays boat speed,
surface watertemperature, and distancetravelled (distance log).
The Chart
Surface Clarity
4
INTRODUCTION
DISPLAY ZONE BAR
The bar used in the zone alarm
normally disappeas after setting the
alarm. You dan turn it on continuously, if desired. To turn the zone
alarm bar on, press the MENU key,
then the key adjacent to the "More"
tébet threetimes. Now press the
key adjacent to the "DISPLAY ZONE
BAR" label. The menu screen
disappears and the.zonealarm bar
displayson the right side of the
screen. This wilt also turn the zone
alarm on if it wasn't already on.
Repeat these steps to turn the zone
larm bar off or use the ALARM
menus. Turning the Zone Alarm bar
off also turns the zone alarm off.
rIuTor
-
0?
MQUNTING
Yqu can install the X-6O in any convenient location, provided there is
clearance behind the unit. Place it in positionfirst and tilt it for the
I
best viewing angle. Then mark the holes in the bracket base. You
can usewood screws or through-boltsto attachthe bracketto the
boat. You may need to place a piece of plywood on the back of thin
fiberglass panels to secure the mounting hardware. Make certain
thGre is enough room behind the unit to attachthe power and
trahducer cables.
The smallest hole that will pass one power or transducerplug is one
inch. After drilling the hole, pass the transducer connectorup through
the hole first, then pass the power cable down through it.
ZONE ALARM
ON
After routing the cables, fill the hole with a good marine sealing
compound. Offsetthe bracket to coverthe hole.
PDF compression, OCR,
web-optimization with CVISION's PdfCompressor
28
POWER CONNECTIONS
The X-60 works from a twelve-volt battery system only. You can
attach the power cable to an accessory or power buss, howeveryou
may have problems with electrical interference. If so, attach the
power cable directlyto the battery. If the cable is not long enough,
splice #18 gauge wire onto it.
The power cable has three wires, red, white, and black. Red is th9
positive lead, black is negative or ground. The white wire is not used.
Cut and tape the end to prevent a short. Mach the in-line fuse holder
as close to the power sOurce as possible. In otherwords, attach qne
end of the fuse holder directlyto the batteryor power buss. This will
protect both the unit and thepower cable in the event of a short.
Splicethe other end of the fuse holder to the red wire on the power
cable.
_
4
4
Set
Noise
The Chart Noise
Bejection Is
Norma1
Rejection
Set Surface
t1aPit9
Display Zone
li.1rm 8...
iiQre
4
Select
nm!
I
1
MENLJ-4thPAGE
(AUTOMATIC ON)
NOISE REJECTION
MENU
To "p"
CONNECTOR
SET SURFACE CLARITY (SCC)
The markings extending downwards from the zero line can extend
many feet belowthe surface. These markings are called surface
clutter and are caused by wave action, boat wakes, temperature
inversions, and other activity.
SE
TO
OPTIONAL
SPEED/
TEMP
SENSOR
SurfaceClarity Control (SCC) reduces or eliminates undesired signals
from the display. 5CCvaries the sensitivity of the receiver, decreasing it nearthe surface and gradually increasing it as the range in-.
creases. Typically, the maximum depth that 5CC affects is 75% of
the range. For example, on a 0-60 foot range with maximum 5CC,
surface clutter is reduced from the surface to about 45 feet.
There are three levels of 5CC; low, medium, and high. Note that
SCC is not available when the Fish l.D. feature is on. The SCC menu
doesn't show until the Fish l.D. feature is turned off.
To adjustthe 5CC level, first make certain that the Fish ID. feature is
off. Now pressthe MENU key, then the key adjacent to the "More",
label three times. Now press the key adjacent to the "Set Surface
Clarity" label.
27
PDF compression, OCR, web-optimization with CVISION's
PdfCompressor
2
tLEAR DISTANCE LOG
To reset the distancelog to zero, press the MENU key, then
press the
key adjacent to the "More" label two times. Now press the key
adjacent to the "Clear Distance Log" label. This resets the distance
log and returns to thechart display.
SPEAKER VOLUME
The speakervolume hastwo steps - low and high. The
speaker
volume is high when the unit is first turned on. To change it, first
press the MENU key, then press the key adjacent to the "More" label
two times. Now press the key adjacent to the "Set SpeakerVolume
Low" label. To switch back to the high volume, repeat the above
steps.
MENU - PAGE 4
NOISE REJECTION
The X-60's noise rejection feature is an effectivetool in cdmbating
noise. In sonar terms, noise is any undesired signal. It is caused
by
electrical and mechanical sources such as bilge pumps, engine
ignition systems and wiring, air bubbles passingover the face of the
transducer, even vibration from the engine. In all cases, noise produces unwanted marks on the display.
The X-60 has a two step nise rejection system. Whed the unit is
turned on, the noiserejection is normal. If you have noise
problems
(identified by random lines or dots on the display),try changing the
The X-60 has reverse polarity protection. No damagewill occurto the
unit if the powerwires are hooked up backwards. However,the unit
will not work until you connect the wiring properly.
Minimize electrical noise by routing the power cable away from other
ppssible sources of electrical interference. One of the largest noise
generators is the engine's wiring harness. For best results, keepthe
powerand transducer cables awayfrom the engine wiring. Bilge
pumps and their wiring can also radiate noise, so keep the cables
away from them, if possible.
VHF radio antennas and cables radiate RF energy at high
power
levels. It is important to keep the powerand transducer cables away
from them, also.
If qntèrference begins at slow boat speeds and gets worse as the
spead increases, then the probable cause is cavitation. This noise is
caused by air bubbles passing over the face of thetransducer-. It's
easy to determine if this noise is electrical or cavitation. Stop the
boat, put the engine in neutral, and increase the Rpm. If the noise
increases, then it's electrical, If it doesn'tshow on the
then
the problem is cavitation. To solvethis problem, movedisplay,
the transducer
outpf the turbulent waterflow. Adjust the bracket so smooth water
flows over the transducer's face at all boat speeds.
TRANSDUCER CONNECTIONS
See the transducerowner's manual included with the unit for
transducerinstallation instructiops.
noise rejection level to high.
To do this, first press:the MENU key, then the
key adjacent to the
"More" label three times. Now press the key adjacent to the1Set
Noise Rejection" label. The screen below appears. Now pressthe
key adjacent to the "High" label. The screen will clear and return to
the chart screen. The noise should clear from the
display as new
echoes scroll across the screen. If it isn't, you may have a
problem
with electrical wiring, engine, or transducer installation. Checkwith
your local dealer, Lowrance servicecenter, or the Lowrance factory
cu.tomer servicedepartment for help.
26
PDF compression, OCR,
web-optimization with CVISION's PdfCompressor
3
0
UT0 T
468 FT
io
2
[NsH
[RANG
S
4
[ALARM
]
[
MENU-PAGE 3
SELECT UNIT OF MEASIJRE
[Ao]
The X-60 can displaythe water depth in feet or meters, and surface
watertemperature in degrees Fahrenheit or Celsius. It also shows
speed in miles per hour or knots and distance (log) in miles or nautical
miles. This menu switchesall displays to the metric/nautical versions
and back again. You cannot switch each display individually.
j
[4u J
5
S
7
a
9
60
[j
The Units OF
Heasure Are
Select Units
[ ON]
A
Of Measure
CIeat'
A
KEYBOARD
Distance Log
FT
(Feet)
°F
(Fahrenheit)
(Miles/Hour)
(Miles)
NH-I
MI
Set Speaker
The keyboard has keys arranged in two verticalcolumns. The keys in
the left column are used for menu selections and numeric entry. The
keys in the right column are for the basic sonar functions. The thenu
key activates the first menu page.
SENS - Press this key to Sjust the unit's sensitivity and GRAYLINE.
RANGE - This key lets you adjust the range when the unit is in the
manual mode.
!Jo lane
Low
I
Change To
A
(Meters)
4
More
MENU -3rd PAGE
(Celsius)
(Knots)
(Maut. Miles) I
I
METRIC FEET SELECTION
MENU
ZOOM - The X-60 gives you 2X and 4X zoom capabilitywith this key.
AUTO - This turns the automatic feature off and on.
ALARM - Activateand adjustthe alarms through this key.
MENU - Pressthis key to show the menus and gain access to most
functions.
I
ENTER - This key is used to enter selections from menus.
To changethe units of measure, first press the MENU key, then
press
the key adjacent to the "More" label two times. Next, pressthe
key
adjacent to the "SELECT UNIJS OF MEASURE" label. Now press
the key adjacent to the "Change To Meters, Celsius, Knots, Naut.
Miles" label. The unit of measure will change to the metric equivalent
Repeat the same steps to switch the units of measure again.
4
25
PDF compression, OCR,
web-optimization with CVISION's
PdfCompressor
CLEAR- Use this key to erase a previous keystroke or menu.
To turn FASTRAK on, press the menu key, then press the key
adjacent to the 'More" label. Now press the key adjacent to the 'Turn
• On Fastrak" label. To turn it oft, repeat the same steps. The "Turn
Off Fastrak" labelappears instead of the 'Turn On Fastrak" label:
H
Cpnstr'uct
Djgita.
I-'
B1OcI
4
ON - The ON key turns the X-60 on.
a tiimii
OFF - The Off key turns the X-60 off.
"Soft Keys" - Use these keys to select menu items and turn other
featureson or off. They're called this because the same keys arc
used for manydifferentfeatures.
Select
4
Digital Sizes
Turn
A
DISPLAY - General
On
The lights are on for about ten seconds when you first turn the X-60
on. Menus appear at the sametime. To keep the lights on, press the
key adjacent to the Light label. It controls the backlighting used on
the display and keyboard. If you don't want the lights on, wait ten
secondsand the lights automatically turn off. The menus also disappOar after ten seconds. You can turn them off at any time by pressing
the CLEAR key.
Fastrak
Adjust
Displas
Contrast
4
I
MENU -2nd PAGE
DISPLAY CONTRAST
Press the key adjacent to the
Metric label to change the depth from feet to meters. This also
changes the temperature display to degreesCelsius, speed to knots,
anø logto kilometers.
•
The unit's display contrastlis
adjustable to suit different lighting
bonditions. To adjust it, firstpress
the MENU key, then press the key
adjacent to the "More" label. Now
press the key adjacent to the
'tAdjust Display Contrast." The
display contrastarrows appear.on
the left side of thecreen. To
increase the contrast, press the
key adjacent to the up arrdw. To
decreaseit, press the key nextto
the down arrow. Press the Clear
key to erase the menu, or wait
about ten seconds and it automatically clears.
the Metric menu works the sameway.
FASTRAK.ÔN
The ADd Display label lets you adjustthe display's contrastbr the
best viewing angle. Pressing this key gives you the contrastadjust
menu. See the Display Contrast section for more information on this
feature.
Afterthe menus clear, the display appears similarto the one on the
next page. The word "AUTO" in the display's upper left corner mdicates the automatib feature is on. A small note symbol next to the
•"AUTO" indicator means the alarm
speakeris enabled. The digital
bottom depth displays immediately beneaththe AUTO indicator.
CONTRAST ADJUST
MENU
24
5 PdfCompressor
PDF compression, OCR,
web-optimization with CVISION's
AUTOMATIC
When the X-60 is first turned on, the Automatic feture is on.
This is
shown by the word "AUTO" at the
the screen. The Auornatic
topof
feature adjuststhe sensitivity and
range so the bottom signal always
shows in the lower half of the screen.
To turn Automaticoff, simply pressthe AUTO
key. The word "MANUAL" appears, showing the unit is in the manual
mode. To turn!
Automatic on, press the AUTO key again.
Snail
soil
AUTOMATIC
MODE ON
Lr Large
Iladiurri
-. -
-l
The large digital selection erases the chart
and' shows the digital
displays in large numbers. Pressing the menu key gives
only one
menu page which is different from othermenus. This
menu lets you
go back to chart information, placingthedigital displayback in the
medium size. It also lets you select digital
displèys and adjust
depth alarm. Returning to the chart restores the normal menu the!
opera-
tioh.
SENSITIVITY
The sensitivity key on the X-60 controls the
ability of the unit to pick
up echoes. A low sensitivity level excludes much of the bottom
information, fish signals, and other target information. High
sensitivity
levels enables you to see this detail, but it can also clutter the
ecrëen
with noise. Typically, the best sensitivity level shows a
solid
good
bottom signal with GIRAYLINE and some surface clutter.
The X-60 adjuststhe sensitivity when it's in the automatic
mode. This
keeps a solid bottom signal displayed, plus the capability to
showish.
!and other detail.
However,situationsoccur where it becomes necessary to increase or
decreasethe sensitivity. This typicallyhappens when
you wish to.see
more detail. The procedure to adjust it is thesame whetherthe unitis
FASTRAK
This feature converts all echoes to short horizontal lines on
the
display'sfar right side. The graph continues to operate
normally.
FASTRAK gives you a rapid updateof conditions
directlyunder the
boat. This makes it useful for ice
fishing, or when you're fishing at
anchor. Since the boat is not moving, fish
signals are long, drawn out
lines on a normal chart display. FASTRAK converts the
graph to a
verticalbar graph that, with practice, makes a useful addition
to fishing
at a stationary location.
NOTE: Fish I.D. is automatically turned off when FASTRAK is
turned
on.
PDF compression, 6OCR, web-optimization with CVISION's PdfCompressor
23
AUTO
Construpt
A
Diflital Block
4
Select
Digital Sizes I
Turn
A
On
Fastrak
Adjust
a
Contrast
4'
50,,SFT
I
!Block
*git1.
Bu
Construct
Se Jeptiiig
Choices
I
I
._; More.
MENU - 2nd PAGE
To hdjust the sensitivity, press the SENS key. The sensitivity adjust
men appears on the left side of the screen. The SRAYLINE adjust
rnnu is immediatelybeneath it.
Te sensitivity menu has up and down arrows, plus a verticalbar
Refloue Depth
Temp.,1
Disla
Display Speed
Disp1
in the automatic or manual mode.
rph.
The graph gives a visual indication of the sensitivity level. The
number above the up arrow also shows the percentage of sensitivity
in use.
!
—
Display All
I
All.
I
Benoue
DIGITAL BLOCKMENU
•SY4
?fl .
SEWS
sENsmvlTv
.,
ADJU5T
MENU
Now press thekey adjacent to the desired display. For example, to
turn the temperature display on, pressthe key adjacent to the "Display
Temp." label. . Once you do this, the display will showthetemperature
and read "TEMP. IS ON." You can turn each displayon or off individually.
You can easily switch all of the displayson or off. Simply prqssthe
key adjacent to the "Display All" or "Remove All" label.
Press the CLEAR key to exit from this menu or wait about ten seconds and the menus will automatically clear.
SELECT DIGITAL SIZES
The digital displays can show in three differentsizes - small, medium,
cr large. Whenthe X-60 is turned on, the digital depth shows in the
thediumdigital size. To change the size of the digital display, first
press the MENU key. Next, press the key adjacept to the 'More"
label. Now pressthe key adjacent to the "Select Digital Sizes" menu.
The screen shown below appears.
A sample of the digit'al sizes appears at the top of the display.
Now simply pressthe key adjacent to the desired label. For example,
if you press the key adjacent to the "SMALL" label, the digital displays
show in small numbers.
To ihcrease the sensitivity level, press the key adjacentto the menu's
up arrow on the left side of the unit. As you press the key, the menu's
bar graph will growtaller and the percentage will increase in value.
You can also seethe difference on the chart record as it scrolls.
Whenthe sensitivity is at th? desired level, release the key.
the sensitivity level, press the key adjacentto the down
The
bar
qrrow.
graph and percentage wilt decrease. When the
seisitivity is at the desired level, release the key.
Tqdec.rease
When you reach either the maximum or minimum limit, the-speaker
will sound an alert tone.
To turn the menus off, press the key adjacent to the CLEAR key at
the bottom left side of the unit.
22
7
PDF compression, OCR,
web-optimization with CVISION's
PdfCompressor
GRAYLINE
AUTO
GRAYLINE°lets you distinguish between strong and weak echoes. It
"paints" gray on targets that are strongerthan a preset value. This
allows you to tellthe differencebetween a hard and soft bottom. For
example, a soft, muddy or weedy bottom returns a weaker signal
which displays with a narrow or no gray line. A hard bottom returns a
strong signal which causes a wide gray line.
without,the target with gray is the stronger signal. This helps distinguish weeds from trees on the bottom, or fish from structure.
GRAYLINE ®is adjustable. Since GRAYLINE®shows the difference
between strong and weak signals, adjusting the sensitivity may require
a differentGRAYLINE®level, also. The level chosen by the X-60 at.
poweron is usually adequate for most conditions. Experiment with
your unit to find the GRAYLINE setting that's best for you.
SElls,,
8Th
—T
CHART
CURSOR
•
BACKLIGHTS
n
7FT
,
—
\—irai
If you havetwo signals of equal size, one with gray and the other
46
F
46.6F1
OJ
The X-GO has internal lights fQr the display and keyboard. To turn
these on, first press the menu key. Now press the key adjacent to the
'TURN ON BACKLIGHT" label. To turn the bthcklightsoff, repeatthe
same steps.
GRAVUNE®
MENU - PAGE 2
ADJUsT
MENU
CONSTRUCT DIGITAL BLOCK
The X-6O can display the depth, speed, surface water temperature,
and distancelog on the upper left portion of the screen. (The speed,
surface femprature, and log requires the optional speed/temperature
sensor.) When the X60 is first turned on, only the digital depth
shows. You can turn each digital display on or off as desired.
To adjust GRAYLINE,®press the SENS key. The sensitivity mehu
appears in the upper left side of the display, while the GRAYLINE®
label appears immediately beneath it. Now pressthe key adjacent to
the GRAY up arrow to increase the gray level. Press the key adjacent
to the down arrow to decrease it. The percentage of GRAYLINE®in
use chariges as you press the arrow keys. The ba chart also gives a
graphical indication of the GRAYLINE®level.
8
To selectthedigital displays, firstpress the menu key, then presthe
key adjacent to the "More" label. Next, press the key adjacentto The
"CONSTRUCTDIGITAL BLOCK" menu at thetop of the screen. A
screen similarto the one at the top of the next page appears.
.
PDF compression, OCR, web-optimization with CVISION's PdfCompressor
21
Li
A
j.,..
A4jufl
Chart:Speed
AUTO
J
52.OFT
——--U
Turn. On
A
4
Li
Fish—ID
Twn On
Chart Cursor
-C
.C
-
RFANGE Automatic
41
When first turned on, the X-60 automaticallyplaces the boftom signa!
in. the lower half of the screen. This is called Auto Ranging and is part
of the.automaticfunction. You cannot changethe range while the unit
is in automatic.
Tttrp On
RacE 1 'gut
RANGE - Manual
4
:
Yop can see the change on the screen (both on the ffienu and on the
char record) as you press the keys. After you've made the adjustmsnt, press the key adjacent to theCLEAR key to erase the menu.
More I
FISH LD. ON
Remember, you can't usethe Fish 1.0. feature when the X-60 is in the
manual mode. If you turnthe Fish ID. feature on when the X60 is in
manual, the micro-computer will turn the automatic feature on. If you
turn automatic off when the Fish 1.0. feature is on, the Fish 1.0.
feature will be turned off also.
CHART CURSOR
The X-60 has a chart cursorthat allows you to pinpoint a target's
depth. The cursor is simply a horizontal line that extends across the
display from left to right. ;A depth box at the end of the line on the
right side shows the line%2depth. In the example at thetop of the next
page, the cursor (line) is at 16.1 feet.
The X-60 gives you control over the range when it's in the manual
mode. Both the lowerand the upperlimit are adjustable.
To change the range, first make certain the X-60 is in the manual
mode. If necessary, press the AUTO key to switch to the manual
mode. Next, pressthe RANGE key. Two arrows appear in the lower
left corner of the display. These are the range adjust arrows. Press
the key corresponding to the Shallower or Deeperarrow to decrease
or increase the range. The available rangesare 0-5, 10, 20, 40, 60,
100,150, 200, 300, 500, 800, 1000,1500, 2000, 3000, and 5000 feet.
(Mtric rangesare 3, 5, 10, 15, 20, 30, 40, 60, 100, 150, 250, 300,
400, 600, 1000, and 1500 meters.) After you've set the desired
range, press the CLEAR key to erase the range arrows.
(1
51.
To display the chart cursor, press the MENU key. Now press the key
adjacent to.the "Tutn On Chart Cursor"label. A screen sirililarto the
one below appears.
Use the keys adjacent to the up and down arrow to move the cursor
up or down to the desired depth.
To turn the chart dursor off, press the MENU key. Now pressthe key
adjacent to the 'Turn Off Chart Cursor"label. The X-60 returnsto the
RANGE
ADJUST
MENU
(MANUAL
MODE
ONLY)
Adjust Range
Shallower
Deeper
sonar screen withoutthe chart cursor.
NOTE:You can't usethe Chart Cursor when FASTRAKis oh.
20
9 PdfCompressor
PDF compression, OCR,
web-optimization with CVISION's
To adjustthe upperor lowerlimit, press the key adjacent to the.
"More' label. The menus shown below appear. To adjust the upper
limit-press the key adjacent to the UpperLimit" arrow. A new rtienu
appears:"Enter Upper Limit." Using the number keys at thadisplay's
left side, enterthedesired upper limit. In this example, we used21
feet. If you make an error, press the CLEAR key and start agêiri.
Now press the ENTER key. The X-8O changes the upper limit to the
value you entered.
a
flTfltth
0
The chart speed is preset to maximum when the X-6O is first turned
oh.
To stop the chart, press the key adjacent to the 'START/STOP" label.
Repeat this step to start the chart again. If desired, the chart can be
stopped, then the CLEAR key pressed to erase the menus from the
screen. This gives a clear view of the display.
pI:sH l.D.
The Fish ID. feature identifies targets that meet certain conditions as
fish. The micro-computer analyses all echoes)and eliminates surface
clutter, thermoclines, and othersignals that are undes&able. In most
instances, remaining targets are fish. The Fish l.D. feature displays
syhibolson the screen in place of the actual fish echoes. There are
fout fish symbolsizes: tiny, small, medium, anct.Iarga These show
therelative size between targets. In other words, it displaysa smell
fish symbolwhen it thinks a target is a small fish, a mediumfish
sythbolon a larger target, etc.
UPPER/LoWER LIMITMENU
MaNUnLT
21
5O,14FT
? FOOT
WINDOW
(21 FEET
TO
51 FEED
The, micro-computer is sophisticated, but it can be fooled, It can't.
distinguish between fish and other suspended objects such as trotlines, turtles, submerged floats, air bubbles, etc. Individualtree limbs
extending outwards from a group of limbs is the hardest object for the
Fish l.D. feature to distinguish from-fish. You may see Fish ID.
symbols on the screen when actually, there are no fish. Practice with
the.unit in both the Fish I.D. mode and withoutto becomemore
familiar with the Fish l.D. feature.
When the X-60 is turned on, the Fish ID. feature is off. To turn the
Fish ID. feature on, first press the MENU key. Now press the key
adjacentto the "Turn On Fish-ID" label. The menu immediately
disappears and the sonar screen returns. Echoes will continueto:
scroll across the screen, however, the sUrface clutter no
longer
shows. Any targetsthe micro-computer determines are fish show as
fish symbols. To turn the Fish ID. feature off again, first
press the
menu key. Next, press the key adjacent to the "Turn Off Fish-ID"
label. Or press the AUTO key. Thisturns the Fish ID. feature and
automatic off at the sametime.
A
19
PDF compression, OCR, web-optimization with CVISION's
PdfCompressor
10
MENUS
The X-60 uses menus extensively to guide you through the functions
and featuresof the unit. The menu key accesses many of these
features, allowing you to customize the unitto your particularneeds
and water conditions: If you ever get lost in a menu, simply press
CLEAR key. This returns the X-60 to the sonar screen. There are
five menus, total. All of the following features are available through
the menu key.
The lpwer limit is adjustable in. the same manner: You can choose
any Upper limit between zero and 4995 feet. The lower limit can be
any range between 5 and 5000 feet.
The smallest "window" or distance between the upper and lower limit
is five feet. For example, an upperlimit of 21 feet and a lower limit of
51 eet gives a window of 30 feet. Upper and tower lirñits can be set
in various combinations to show windows from the surfaceto the
bottofti and anywhere in between.
NOTE: The depth capability of the X-6O dependson the transducer
installation, water and bottom conditions, and other factors. You can
expect.o read depths morethan 35b feet in both fresh and salt water.
MENU - PAGE-I
CHART SPEED
Chart speed is the rate echoes scroll across the screen. It's adjustable by first pressing the menu key, then pressing the key adjacentto
the "ADJUST CHARTSPEED" label. The chart speed menu appears
on the left side of the screen. Increase thechart speed by pressing
the key adjacent to the up arrow. Decrease it by pressing the key
adjacentto the down arrow. The percentage of chart speed in use
changes as the arrow keys are pressed. The bar chart also gives a
graphical indication of the chart speed. You can see the change on
the screen (both on the menu and on the chart record)as you press
the keys. After you've made the adjustment, press the key adjacent
to the CLEAR key to erase the menu.
Adjust
A
Chart Speed
ZOOM
Enlarging or "zooming"the picture is a common method used to show
small detail and fish signals. The X-60 gives you two differentzoom
sizes, plus a split screen zoom option. The zoom operation and
adjustmentis differentin the automatic and manual modes.
ZOOM - AUTOMATIC MODE
To zoom the display in the automatic mode, first press the ZOOM
key. AII targets on the display are enlarged four times normal size
automatically. The menus shown below also appear.
AUTOT
TtpiOii
Fish—ID
203
47SFT
I
Tttvn On
• ChaM
Cursor
4
:!'
Turn On.
llacI1 i9ht
ZOOM
1ENUS
(AUTOMATIC
MOOE)
.MENu--Ist PAGE
çSplitiflhl Il
CHART SPEED ADJUSTMENU
PDF compression, OCR, web-optimization with CVISION's PdfCompressor
18
11
To switch targets between twicetheir normal size and fourtimes
normal) press the key adjacent to the "2X14X"label.
To switch between the split screen zoom and full screen zoom, prss
the key adjacent to the "SPLIT/FULL" label. The screen instantly
splits into two sections. All targets on the left are shown at fourtiniQs
the size of the ones on the right. If you switchto the 2X zoom modb,
echoes on the left side of the screen are shown at twice the size as
the ones on the right. The echoes that scroll across the screen are
the exact same echoes on bath sides of the screen. They're siniIy
enlargedon the left side. This feature tracks the bottom, always
keeping it on the display whilethe automaticfeature is on. Once
you've set the zoom as desired, press the CLEARkey to erase the
menus.
Fish Alarm
UseThe fish alarm for a distinctive audible alarm when the Fish ID
feature detects fish or other suspended objects. To use the Fish
Alarm feature, first pressthe ALARM keyt Nowpres the key adjacent to the "Turn On" label in the Fish Alarm section. The screen vill
clear. Eachtime a fish symbol displays on the screen, a tone will
sound. This will also turn the Fish ID. feature on if it was'off.
To turn the Fish Alarm off, again pressthe ALARM key. Now press
the key adjacent to the 'Turn Off' label. The alarm is now disabled.
Audio Alarm On/Off
34.6
AUTO
r
47,.6F1
SPLIT-ScREEN
ZOOM
(AUTOMATIC
MODE)
When the X-8O is first turned on, a note symbofat the top
screen shows the aUdio alarm is enabled.
!?r_Alarms
Shéti
Zone
Lr
-—
-t
-
To turn theZoom feature off, press the RANGEkey.
-
1
Alarri
irrn._I
--
Ti
On -
I
-
Fish Alarm
---
MANUAL MODE
When you pressthe zoom key while the unit is in the manual mode,
the screen shown below appears. The 4Xzoom mode automatically
appears. For a 2X zoom, simply press the key adjacent to the 2X/4X
label. For a split screen zoom, pressthe key adjacent tO the SPLIT/
FULL label. Remember, the X-60 won't track the bottom signal while
it's in the manual mode.
the
To turn the audio alarm on or off; pressthe ALARM
key. Next, press
the key adjacent to the 'Turn Off' label in the "All Alarms"
Section. To
turn the audio alarm on, pressthe ALARM key again. The label that
was used to turn the sound off now reads "Turn On." Press the
key'adjacent to this label to turn the sound on.
,
ZOOM
f
-4
Tan' On I
ALL Alarms
-
--
--
'-tup*J4SSI
NOTE: The words corresponding to the alarm in use will still flash at
the display'sside whenthe alarm is triggered even if the speakeris
turned off. For example, the words "ZONE ALARM" flash when the
zone alarm trips.
17
PDF compression,12OCR, web-optimization with CVISION's
PdfCompressor
-
Zone Alarm
To activate theZone Alarm, first press the ALARM key. Next, press
the key next to the Zone Alarm's ADJUSTlabel. The words
:'ZONE
ALARM' show at the screens top right side, signifying the
Zone! Alarm
is active. The zone bar shows immediately beneath t. Any
epho that
appears between the top and boftom of this bar will trigger the alarm.
This alarm will sound on fish, structure, bottom echoes,
etc.!
SPLIT-ScREEN ZOOM
(MANUALMODE)
ZONE
ALARM
MENU
ZOOM ADJUST MENU
(MANUALMODE)
To adjust the zoom, press the keyadjacent to the ADJUSTlabel; A
screen similarto the one at the upper right appears. A zoom bar appears at the top right side of the screen and adjust arrows appear at
the boftom left. The echoes on the left side of the screen are the
same ones that appear between top and boftom of the zoom bar.
Press the keys adjacent to the arrows to move the zoom bar up or
down. As you adjustthezoom bar, the echoes move on the left.side
of the screen at the same time. The zoom adjust menus and zoom
bar automatically erase a few seconds after you've pressedthe last
key.
To adjust the zone alarm bar press the key adjacent to the up or down
arrows. To adjustthe top of the bar shalloweror deeper, press the
key adjacent to the Set ShaVDeep label until the word Shal is highlighted. To adjust the boftom of the zone alarm bar, press the key
until the Deep label is highlighted. Now simply pressthe key adjacent
Jo the up arrow to move the end of the bar up. Pressthe key adjacent to the down arrow to move it down.
Once you've made the adjustments, press the key adjacent to the
CLEARlabel to erase the menus.
To turn the ZoneAlrm off, first pressthe ALARM key. Then press
the key adjacent to the 'Turn Off" label in theZone Alarm section.
To keepthe zoom bar on the screen, press the MENU key whileithe
uht is in the manual mode. Next, press the key adjacent to the
"More" label three times. The "Display Zoom Window Bar" menuS
ápjears at the bottom of the screen. This menu only appearswhen
the X-6O is in the manual mode. Press the key adjacent to this menu
tp displaythe zoom bar. To erase the bar, press the RANGEkey.
ALARMS
The X-60 has three differenttypes of alarms. The first is the Fish
Alarm. It sounds when the Fish ID. feature determines a group of
echoes is a fish. Another alarm is the Zone Alarm which consistsof a
bar. Any echo that appears inside this bar triggersthe alarm. The last
alarm. is the BottomAlarm. Only the bottom signal will 'Thp" this
16
PDF compression, OCR,
web-optimization with CVISION's PdfCompressor
13
alarm. This is useful as an anchorwatch, a shallowwater
navigation.
alert, br for
All of the alarms have a visual and audio
signal. If desired, the audio
signal can be turned offthrough the ALARM menu.
Depth Alarms
The Depth Alarms are only triggered from the bottom
No bther
echo wifl "trip" this alarm. The shallow alarm souhds asignal. tone
warning
when the bottom signal goes shallowerthan the alarm set
point. The
deep alarm sounds when the bottom signal goes deeper than
alarm set point. Use the shallow alarm to warn you of shallow water.
Use the deep alarm to alert you to
deeper water, such as a drop-off.
SHALLOW
ALARM
ENTRY
MENU
th
Shallow Alarm
t
To use the Shallow Alarm, first pressthe ALARM
key. The Shallow
and Deep Alarm menus are thetop of this screen. Now
press the
key adjacent to the "Set Shallow" label. The screen similarto the ohé
at the lower right appears.
ALARMS.MENu
SHALLOwALARM MENU
Depth Alarms
Shallow I
(set
. Set Deep
4
Zone Alarm
:r.. Adjust
,
I
UIQ
.
I
ptiiJ
Fish Alarm
La
Tui,n
ALL
Orb
Alarms
I
t\NSSuc
Now press the key adjacent to the "Enter
Depth" arrow. A new menu
appears "EnterShal Alarm", as shown above. Nowsimply enter the
desired shallow alarm depth usingthe keys on the left side of the
screen. This example uses a shallow alarm
setting of ten feet. If the
bottom depth goes shallower than ten feet the alarm will
sound. Now
press the Enterkey. The menu automatically erases and the words
"SHAL ALARM" appear in the screen's lowerleft corner, This automatically turns the shallow alarm on. When the bottom
triggers,
this alarm, a tone sounds and the words "SHAL ALARM"signal
flash on the
display. An arrow appears with the word "MUTE" inside..
Pressing the
key adjacent to this arrow temporarily turns the alarm's sound
off.
The next time the alarm trips, the tone will sound
again.
To turn the shallowalarm off, first press the ALARM
key, Then press
the key adjacent to the "Set Shallow" label. Now
press the key
adjacent to theON/OFF label. Anotherway to turn the shallow alarm
off is tp simply set the shallow alarm depth to zero
Deep Alarm
The deep alarm adjustsand activates
exactly like the shallow alarm
except the initial setting. When you first set the deep alarm, the initial
setting is 5000 feet. Setting thedeep alarm to 5000 feet turns it off.
The only other difference is the sound thedeep alarm makes when
the bottom goesdeeper than the alarm depth.
This tone is different
so you can tell by the sound which alarm was
triggered.
14
15
PDF compression,
OCR, web-optimization with CVISION's
PdfCompressor