1
MSS Reference Manual
For the Lantronix MSS Family of Device Servers
The information in this guide may change without notice. The manufacturer assumes no responsibility for
any errors which may appear in this guide.
UNIX is a registered trademark of The Open Group. Ethernet is a trademark of XEROX Corporation.
NetWare is a trademark of Novell Corp. Windows is a trademark of Microsoft.
Copyright 2001, Lantronix. All rights reserved. No part of the contents of this book may be transmitted or
reproduced in any form or by any means without the written permission of Lantronix. Printed in the United
States of America.
The revision date for this manual is 4 June, 2001.
Part Number: 900-157
Rev. D
WARNING
This equipment has been tested and found to comply with the limits for a Class A digital device pursuant to
Part 15 of FCC Rules. These limits are designed to provide reasonable protection against such interference
when operating in a commercial environment. This equipment generates, uses, and can radiate radio
frequency energy, and if not installed and used in accordance with this guide, may cause harmful
interference to radio communications.
Operation of this equipment in a residential area is likely to cause interference in which case the user, at his
or her own expense, will be required to take whatever measures may be required to correct the interference.
Changes or modifications to this device not explicitly approved by Lantronix will void the user's authority
to operate this device.
Contents
1: Introduction............................................................................................................. 1-1
1.1 What’s New ................................................................................................................................1-1
1.2 Command Syntax........................................................................................................................1-1
1.3 Command Line Editing...............................................................................................................1-2
1.4 Help.............................................................................................................................................1-3
1.5 About This Manual .....................................................................................................................1-3
2: Command Reference.............................................................................................. 2-1
2.1 Backward ....................................................................................................................................2-2
2.2 Change 80211 .............................................................................................................................2-2
2.2.1 Change 80211 Enabled ...............................................................................................2-2
2.2.2 Change 80211 Antenna...............................................................................................2-3
2.2.3 Change 80211 Channel...............................................................................................2-4
2.2.4 Change 80211 ESSID .................................................................................................2-4
2.2.5 Change 80211 Fragmentation.....................................................................................2-5
2.2.6 Change 80211 MAC Address .....................................................................................2-5
2.2.7 Change 80211 Network Mode....................................................................................2-6
2.2.8 Change 80211 Power ..................................................................................................2-7
2.2.9 Change 80211 Region.................................................................................................2-7
2.2.10 Change 80211 Reset .................................................................................................2-8
2.2.11 Change 80211 RTS...................................................................................................2-8
2.2.12 Change 80211 WEP..................................................................................................2-9
2.3 Change Access ..........................................................................................................................2-10
2.4 Change Autobaud......................................................................................................................2-11
2.5 Change Autostart ......................................................................................................................2-12
2.6 Change Backward Switch .........................................................................................................2-14
2.7 Change Bootgateway ................................................................................................................2-14
2.8 Change BOOTP ........................................................................................................................2-15
2.9 Change Break............................................................................................................................2-15
2.10 Change Buffering....................................................................................................................2-16
2.11 Change Charsize .....................................................................................................................2-16
2.12 Change Datasend ....................................................................................................................2-17
2.13 Change Dedicated ...................................................................................................................2-19
2.14 Change DHCP.........................................................................................................................2-21
2.15 Change Domain ......................................................................................................................2-21
2.16 Change DSRLogout ................................................................................................................2-22
2.17 Change DTRWait....................................................................................................................2-22
2.18 Change Flow Control..............................................................................................................2-23
2.19 Change Forward Switch..........................................................................................................2-24
2.20 Change Gateway .....................................................................................................................2-24
2.21 Change Inactive Logout..........................................................................................................2-25
2.22 Change Inactive Timer............................................................................................................2-25
2.23 Change Incoming ....................................................................................................................2-26
2.24 Change IPAddress...................................................................................................................2-27
i
Contents
2.25 Change IPSecurity ..................................................................................................................2-27
2.26 Change LAT CircTimer..........................................................................................................2-28
2.27 Change LAT Groups...............................................................................................................2-29
2.28 Change LAT Identification .....................................................................................................2-29
2.29 Change Loadhost ....................................................................................................................2-29
2.30 Change Local Switch ..............................................................................................................2-30
2.31 Change Loginpass...................................................................................................................2-31
2.32 Change Modem Control..........................................................................................................2-31
2.33 Change Modem Emulation .....................................................................................................2-32
2.34 Change Name..........................................................................................................................2-32
2.35 Change Nameserver ................................................................................................................2-33
2.36 Change NetWare Encapsulation .............................................................................................2-33
2.37 Change NetWare Internal Network ........................................................................................2-34
2.38 Change NetWare Loadhost .....................................................................................................2-34
2.39 Change NetWare Routing .......................................................................................................2-35
2.40 Change Parity..........................................................................................................................2-35
2.41 Change Passflow.....................................................................................................................2-36
2.42 Change Password Incoming....................................................................................................2-37
2.43 Change Password Limit ..........................................................................................................2-37
2.44 Change Password Protect........................................................................................................2-38
2.45 Change Portname ....................................................................................................................2-38
2.46 Change Preferred ....................................................................................................................2-39
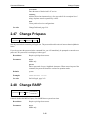
2.47 Change Privpass......................................................................................................................2-40
2.48 Change RARP.........................................................................................................................2-40
2.49 Change Retransmit Limit........................................................................................................2-41
2.50 Change Rlogin ........................................................................................................................2-41
2.51 Change RS485 ........................................................................................................................2-42
2.52 Change Secondary ..................................................................................................................2-43
2.53 Change Session Limit .............................................................................................................2-43
2.54 Change Signal Check..............................................................................................................2-43
2.55 Change Silentboot...................................................................................................................2-44
2.56 Change SNMPSetComm ........................................................................................................2-44
2.57 Change Software.....................................................................................................................2-45
2.58 Change Speed..........................................................................................................................2-45
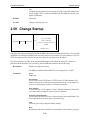
2.59 Change Startup........................................................................................................................2-46
2.60 Change Stopbits ......................................................................................................................2-47
2.61 Change Subnet Mask ..............................................................................................................2-47
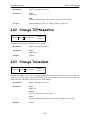
2.62 Change TCPKeepalive............................................................................................................2-48
2.63 Change Telnetdest...................................................................................................................2-48
2.64 Change Telnetpad ...................................................................................................................2-49
2.65 Change Termtype....................................................................................................................2-49
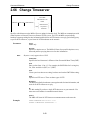
2.66 Change Timeserver .................................................................................................................2-50
2.67 Change Verify.........................................................................................................................2-51
2.68 Change WINS .........................................................................................................................2-51
2.69 Crypt Password .......................................................................................................................2-52
2.70 Disk .........................................................................................................................................2-53
2.71 Delete IPSecurity ....................................................................................................................2-57
2.72 Disconnect...............................................................................................................................2-57
2.73 Finger ......................................................................................................................................2-57
2.74 Forward ...................................................................................................................................2-58
ii
Contents
2.75 Help.........................................................................................................................................2-58
2.76 Hostlist ....................................................................................................................................2-58
2.77 Initialize ..................................................................................................................................2-59
2.78 LAT.........................................................................................................................................2-60
2.79 Logout Port .............................................................................................................................2-60
2.80 Netstat .....................................................................................................................................2-61
2.81 Ping .........................................................................................................................................2-61
2.82 Resume....................................................................................................................................2-61
2.83 Rlogin......................................................................................................................................2-62
2.84 RTC.........................................................................................................................................2-62
2.85 Set Privileged ..........................................................................................................................2-63
2.86 Show 80211 ............................................................................................................................2-63
2.87 Show Hostlist ..........................................................................................................................2-64
2.88 Show IPsecurity ......................................................................................................................2-64
2.89 Show NetWare ........................................................................................................................2-64
2.90 Show Nodes ............................................................................................................................2-64
2.91 Show Ports ..............................................................................................................................2-65
2.92 Show RS485 ...........................................................................................................................2-65
2.93 Show Server ............................................................................................................................2-65
2.94 Show Services.........................................................................................................................2-66
2.95 Show Session ..........................................................................................................................2-66
2.96 Show SNMP ...........................................................................................................................2-67
2.97 Show Users .............................................................................................................................2-67
2.98 Show Version..........................................................................................................................2-67
2.99 Source .....................................................................................................................................2-67
2.100 SPX .......................................................................................................................................2-68
2.101 Telnet ....................................................................................................................................2-68
2.102 Test........................................................................................................................................2-69
2.103 Zero .......................................................................................................................................2-69
A: Contact Information ...............................................................................................A-1
A.1 Problem Report Procedure ........................................................................................................A-1
B: Environment Strings..............................................................................................B-1
B.1 Usage.........................................................................................................................................B-1
B.1.1 Multiple Strings........................................................................................................ B-1
B.2 Available Strings .......................................................................................................................B-1
B.2.1 Usage Examples ....................................................................................................... B-2
2.2.1.1 nnnn ...........................................................................................................B-2
2.2.1.2 +C and -C...................................................................................................B-2
2.2.1.3 +D and -D ..................................................................................................B-2
2.2.1.4 +E and -E ...................................................................................................B-2
2.2.1.5 OR..............................................................................................................B-3
2.2.1.6 OS ..............................................................................................................B-3
2.2.1.7 +P and -P....................................................................................................B-3
2.2.1.8 R.................................................................................................................B-3
2.2.1.9 T.................................................................................................................B-3
2.2.1.10 U ..............................................................................................................B-3
2.2.1.11 Y ..............................................................................................................B-4
2.2.1.12 LD=port# .................................................................................................B-4
iii
Contents
2.2.1.13 LN=node# ................................................................................................B-4
C: Show 802.11 Errors................................................................................................C-1
C.1 Introduction ...............................................................................................................................C-1
C.2 Error Bits ...................................................................................................................................C-1
C.2.1 Leftmost Number ...................................................................................................... C-1
C.2.2 Rightmost Number .................................................................................................... C-3
Index
iv
1: Introduction
The Lantronix MSS family of Device Servers allows you to network-enable a variety of serial devices that
were not originally designed to be networked: personal computers, terminals, modems, industrial
machinery, and more. Certain MSS models offer fiber optic Ethernet, PC card support for 802.11, modem,
and ATA Flash cards, and multiple serial ports, ensuring a product for almost any networking need.
This manual provides the complete command set for all products in the MSS family. These commands can
be entered at the command line to configure the MSS to best meet your needs. While most basic MSS
features can be configured using EZWebCon or ThinWeb Manager, the command line interface allows you
to customize some of the more advanced features.
This chapter provides a brief introduction to the command line environment for the MSS.
◆
What’s New on page 1-1 describes what’s changed since the last revision of this manual.
◆
Command Syntax on page 1-1 provides the conventions used in the command diagrams and
descriptions.
◆
Command Line Editing on page 1-2 lists the keys that should be used for line editing.
◆
Help on page 1-3 offers information on various types of context-sensitive help.
Note:
Parts of this manual assume knowledge of the IEEE 802.11 Standard governing
wireless networking. If you do not understand wireless networking concepts and
implementation, please refer to the Standard or the documentation that came
with your wireless networking PC Card.
Throughout this manual, the term MSS refers to the MSS family in general. If a particular feature or
command applies only to certain models, it will be noted as such.
1.1 What’s New
◆
Most commands now include either a Port or Server parameter. These parameters are only necessary
if you are configuring an MSS4, which is the first member of the MSS family to have multiple
configurable serial ports. The Port parameter allows you to configure port-specific options; the Server
parameter applies to settings that affect the entire MSS.
◆
The Disk commands provide a wide-range of disk management options for the MSS4, MSS100,
MSSLiteX, and the MSS-VIA. Options for managing the internal flash disk and formatting ATA
Flash cards are included under this command tree.
1.2 Command Syntax
Command line entry is both simple and powerful. Users can enter up to 132 characters on a command line,
or abbreviate commands to a sequence of the smallest unique keywords (sometimes single characters).
Commands are executed when the Return key is pressed or when the command line exceeds 132 characters.
1-1
Introduction
Command Line Editing
Please read this section carefully so you can understand the conventions used in the command descriptions.
◆
Commands are listed in alphabetical order.
◆
Some commands do not apply to all members of the MSS family, and are so noted.
◆
Commands and keywords appear in BOLD face.
◆
User-entered parameters appear in italics. You must replace the italicized word.
When entering a parameter that is case-sensitive, such as file and host names, enclose the parameter
in quotes to preserve case.
◆
The Port portlist and Server parameters currently only apply to commands issued for the MSS4. Read
each command carefully for more details.
◆
When two or more parameters appear in curly braces {}, you must choose one and only one of the
items within each set of braces to complete the command.
◆
Parameters that appear in brackets [] are optional. If more than one parameter appears in a single set
of brackets, only one parameter may be chosen at a time. Single parameters enclosed in brackets may
be omitted from the command, or used in combination with one another.
◆
The MSS has a reduced command set from the EPS, ETS, and MPS product lines. Change commands
replace the Set/Define Server and Set/Define Port commands used in the earlier products.
A single Change command will take effect immediately (like a Set command), and will remain in
effect until another Change command is issued (like a Define command). The exceptions are the
Change Port and Set Privileged commands, which do not take effect until the port is logged out.
1.3 Command Line Editing
The following table lists keys that can be used for command line editing.
Table 1-1: Command Line Editing Keys
Key
Purpose
Return
Executes the current command line
Delete
Deletes the character before the cursor
Ctrl-A
Toggles insertion mode (insert or overstrike)
Ctrl-D
Logs the user out of the server
Ctrl-E
Moves the cursor to the end of the line
Ctrl-H or Backspace
Moves the cursor to the beginning of the line
Ctrl-R
Redisplays the current command
Ctrl-U
Deletes the entire line
1-2
Introduction
Help
Table 1-1: Command Line Editing Keys
Key
Purpose
Ctrl-Z
Logs the user out of the server
Left Arrow
Moves the cursor left
Right Arrow
Moves the cursor right
Ctrl-P or Up Arrow
Recalls the previous command
Ctrl-N or Down Arrow
Recalls the next command
!text
Recalls the last command starting with text
!!
Recalls and implements the last command
1.4 Help
Context-sensitive help is available at any time. You may type Help by itself for overall help, Help
<command> for help on a specific command, or a partial command line followed by a question mark for
help on what is appropriate at that particular point. See Help on page 2-58 for more details.
1.5 About This Manual
The rest of this Reference Manual is divided as follows:
◆
Chapter 2, Command Reference, contains a comprehensive listing of all MSS commands. These
commands can be entered at the command line to configure, monitor, and use the MSS.
◆
Appendices provide supplementary information. Read them as necessary.
◆
The comprehensive Index can be used to find specific information.
For installation and setup information, refer to your Installation Guide. It is provided in printed form, and
you can find HTML and PDF versions on the distribution CD-ROM and on the Lantronix web site
(www.lantronix.com).
1-3
2: Command Reference
This chapter describes all commands that can be used with the MSS. The commands are listed in
alphabetical order, excluding the Ports and Server parameters, which apply only to the MSS4. For example,
Change Server Bootgateway is considered the same command as Change Bootgateway and is
alphabetized according to the latter.
Commands that configure the MSS serial ports will not affect a dedicated console port unless explicitly
stated in the individual command description.,
Some commands can be used with environment strings, which are discussed in detail in Appendix B.
The following items are provided in the description of each command.
◆
The command’s full syntax, shown in diagram form. See Command Syntax on page 1-1 for more
information on the command syntax.
◆
Any restrictions on the command, such as whether you must be the privileged user to use it
◆
Potential errors that may be encountered when using the command
◆
Default settings, where applicable
◆
Examples of the command, where applicable
◆
Cross-references to related commands
2-1
Command Reference
Backward
2.1 Backward
BACKWARD
Moves the user to the previous session when entered in Local mode.
See Also
Change Backward Switch, page 2-14; Show Session, page 2-66.
2.2 Change 80211
Note:
The Change 80211 Reset command must be entered after any 802.11
configuration command is issued. The changes made by the configuration
commands will not take effect until after the Reset command is used. The Change
802.11 Enabled/Disabled command requires a reboot before the change will
take effect.
2.2.1 Change 80211 Enabled
CHANGE 80211
ENABLED
DISABLED
When 802.11 is enabled, the MSS checks for a compatible 802.11 wireless Ethernet PC card at startup and,
if one is present, uses the card instead of a wired Ethernet port. If no valid PC card is detected at startup, the
MSS uses the 10/100BASE-T (or, for the MSS4, the 100BASE-FX) network connection.
When 802.11 is disabled, the MSS will ignore an installed 802.11 card and will only look for a compatible
wired Ethernet connection.
You must reboot the MSS before those changes will take place.
Restrictions
Requires privileged user status.
Only applies to the MSS-VIA and certain MSS4 models. For the MSS4, only
one 802.11 card can be installed at a time. The card can be installed in either
slot of the MSS4.
Parameters
Enabled
Prompts the MSS to check for a compatible 802.11 wireless Ethernet
networking PC card at startup. If one is present, wireless networking will be
used instead of the wired Ethernet connection. You must reboot the MSS after
entering this command.
Disabled
Prompts the MSS to only look for a compatible 10/100BASE-T (or, for the
MSS4, the 100BASE-FX) wired Ethernet connection at startup. You must
reboot the MSS after entering this command.
2-2
Command Reference
Change 80211
Defaults
Enabled
See Also
Show 80211, page 2-63
2.2.2 Change 80211 Antenna
RX
list
CHANGE 80211 ANTENNA
TX DEFAULT
Controls the antenna(s), if any, on the installed wireless card. Not all antennas can be used for both receive
and transmit, so be sure to read your card documentation completely. The default settings should work in
most applications.
Any configuration changes you make with the above commands will not take place until you issue the
Change 80211 Reset command.
Restrictions
Requires privileged user status.
Only applies to the MSS-VIA and certain MSS4 models.
Errors
If you enter a command that is not applicable to the 802.11 card currently in
use, you will receive an Error message.
Parameters
RX
Specifies the antennas used to receive
TX
Specifies the antennas used to transmit.
list
Enter an integer or group of integers separated by commas (e.g. 1,2,3) to
specify the affected antenna(s). Antennas are numbered consecutively starting
with antenna number one. See the documentation that came with your card for
antenna numbering information.
Default
Sets the antennas to their default transmit and receive values.
Examples
Local>> CHANGE 80211 ANTENNA RX DEFAULT
Local>> CHANGE 80211 RESET
See Also
Show 80211, page 2-63
2-3
Command Reference
Change 80211
2.2.3 Change 80211 Channel
CHANGE 80211 CHANNEL num
ANY
Sets the MSS operating frequency within the 2.4 GHz band allotted to wireless networking. A directsequence 802.11 network on one channel will affect reception on channels up to two numbers away. For
best performance on collocated wireless networks, you should select channels that are at least five channels
apart from each other. For example, three networks could be put on channels 1, 6, and 11 (depending on
your regulatory region).
Any configuration changes you make with the above commands will not take place until you issue the
Change 80211 Reset command.
Restrictions
Requires privileged user status.
Only applies to the MSS-VIA and certain MSS4 models.
Errors
If you enter a command that is not applicable to the 802.11 card currently in
use, you will receive an Error message.
Parameters
num
Enter a valid channel for your regulatory region. This number should be an
integer between 1 and 14. Recommended for ad-hoc network mode.
Any
Tells the MSS to set itself for the channel used by the strongest AP with the
same ESSID. Recommended for infrastructure network mode.
Defaults
Any
Examples
Local>> CHANGE 80211 CHANNEL 6
Local>> CHANGE 80211 RESET
See Also
Show 80211, page 2-63
2.2.4 Change 80211 ESSID
name
CHANGE 80211 ESSID
NONE
Configures the ESSID, which tells the MSS the name of the Extended Service Set (ESS) to which it belongs.
Setting an ESSID ensures that the MSS will stay on the desired network subsegment.
Any configuration changes you make will not take place until you issue the Change 80211 Reset command.
Restrictions
Requires privileged user status.
Only applies to the MSS-VIA and certain MSS4 models.
2-4
Command Reference
Change 80211
Errors
If you enter a command that is not applicable to the 802.11 card currently in
use, you will receive an Error message.
Parameters
name
Enter a string of up to 32 characters. If the string contains lowercase letters or
non-alphanumerics, it may need to be enclosed in double-quotes to be
processed properly.
None
If no ESSID string is set, the MSS will communicate with whichever Access
Point (AP) gives the strongest signal, regardless of ESS association. Setting the
ESSID to none allows the MSS to associate with any AP within range.
Defaults
ESSID=None
See Also
Show 80211, page 2-63
2.2.5 Change 80211 Fragmentation
CHANGE 80211 FRAGMENTATION num
Changes the fragmentation threshold.
Any configuration changes you make will not take place until you issue the Change 80211 Reset command.
Restrictions
Requires privileged user status.
Only applies to the MSS-VIA and certain MSS4 models.
Errors
If you enter a command that is not applicable to the 802.11 card currently in
use, you will receive an Error message.
Parameters
num
Enter an integer between 256 and 2346 to change the fragmentation threshold.
Defaults
2346
See Also
Show 80211, page 2-63
2.2.6 Change 80211 MAC Address
CHANGE 80211 MACADDRESS CARD
MSS
Configures which of the two available MAC addresses the MSS will use on the network—its own or that
of the attached 802.11 wireless networking PC card. The MSS MAC address, which is the same as its
hardware address, is printed on bottom label of the MSS.
Any configuration changes you make will not take place until you issue the Change 80211 Reset command.
2-5
Command Reference
Restrictions
Change 80211
Requires privileged user status.
Only applies to the MSS-VIA and certain MSS4 models.
Errors
If you enter a command that is not applicable to the 802.11 card currently in
use, you will receive an Error message.
Parameters
Card
Instructs the MSS to use the MAC address of the wireless PC card that is
inserted into one of its PC card slots.
MSS
Instructs the MSS to use its own internal MAC address.
Defaults
MSS
Examples
Local>> CHANGE 80211 MACADDRESS CARD
Local>> CHANGE 80211 RESET
See Also
Show 80211, page 2-63
2.2.7 Change 80211 Network Mode
ADHOC
CHANGE 80211 NETWORKMODE
INFRASTRUCTURE
Denotes whether the MSS operates in a peer-to-peer (AdHoc) or managed (Infrastructure) network
environment.
Any configuration changes you make will not take place until you issue the Change 80211 Reset command.
Restrictions
Requires privileged user status.
Only applies to the MSS-VIA and certain MSS4 models.
Errors
If you enter a command that is not applicable to the 802.11 card currently in
use, you will receive an Error message.
Parameters
AdHoc
Specifies that the MSS is communicating with other wireless devices in a peerto-peer capacity.
Infrastructure
Specifies that the MSS is communicating with an Access Point (AP).
Defaults
Infrastructure
Examples
Local>> CHANGE 80211 NETWORKMODE ADHOC
Local>> CHANGE 80211 RESET
See Also
Show 80211, page 2-63
2-6
Command Reference
Change 80211
2.2.8 Change 80211 Power
CHANGE 80211 POWER DEFAULT
num
Controls the card’s transmit power settings. The numeric power setting specified must exactly match a value
supported by the card.
Any configuration changes you make will not take place until you issue the Change 80211 Reset command.
Restrictions
Requires privileged user status.
Only applies to the MSS-VIA and certain MSS4 models.
Errors
If you enter a command that is not applicable to the 802.11 card currently in
use, you will receive an Error message.
Parameters
Default
Sets the card to its default transmit power setting.
num
Enter a specific milliWatt power setting.
Examples
Local>> CHANGE 80211 POWER DEFAULT
Local>> CHANGE 80211 RESET
See Also
Show 80211, page 2-63
2.2.9 Change 80211 Region
FCC
IC
ETSI
CHANGE 80211 REGION
SPAIN
FRANCE
MKK
Sets the regulatory region under which you will operate the MSS. Users in the United States can leave this
at the default setting (FCC). Other users should set it to correspond with their region.
Any configuration changes you make will not take place until you issue the Change 80211 Reset command.
Restrictions
Requires privileged user status.
Only applies to the MSS-VIA and certain MSS4 models.
Errors
If you enter a region that will not work with your 802.11 card, an error bit will
be displayed when you enter the Show 80211 command.
2-7
Command Reference
Parameters
Change 80211
Regions
IC: Canada
ETSI: Europe, most countries (verify with your local regulatory body)
SPAIN: Spain
FRANCE: France
MKK: Japan
Defaults
FCC
Examples
Local>> CHANGE 80211 REGION FRANCE
Local>> CHANGE 80211 RESET
See Also
Show 80211, page 2-63
2.2.10 Change 80211 Reset
CHANGE 80211 RESET
Resets the MSS so any configuration changes will take effect immediately.
Restrictions
Requires privileged user status.
Only applies to the MSS-VIA and certain MSS4 models.
Parameters
Reset
Resets the MSS to make all 802.11 changes take effect immediately. This
command should be entered anytime you make an 802.11 configuration
change. It also clears out any previous errors and starts over with the current
802.11 parameters.
See Also
Show 80211, page 2-63
2.2.11 Change 80211 RTS
CHANGE 80211 RTS num
Changes the RTS threshold value.
Any configuration changes you make will not take place until you issue the Change 80211 Reset command.
Restrictions
Requires privileged user status.
Only applies to the MSS-VIA and certain MSS4 models.
Errors
If you enter a command that is not applicable to the 802.11 card currently in
use, you will receive an Error message.
2-8
Command Reference
Parameters
Change 80211
num
Enter a value between 0 and 3000.
Defaults
3000
Examples
Local>> CHANGE 80211 RTS 0
Local>> CHANGE 80211 RESET
See Also
Show 80211, page 2-63
2.2.12 Change 80211 WEP
ENABLED
DISABLED
INDEX num
CHANGE 80211 WEP
KEY
keydata
ALL
RECEIVE
ENCRYPTED
Enabling WEP (Wireless Equivalent Privacy) means the MSS will only connect to an AP (in infrastructure
mode) or communicate with other ad-hoc peers (in ad-hoc mode) that have been programmed with the same
WEP key as the MSS. All wireless network traffic the MSS sends will be encrypted with its WEP key and
any encrypted wireless network traffic the MSS receives will be decrypted with its WEP key. Disabling
WEP causes the MSS to ignore its WEP key and only receive and transmit unencrypted network traffic.
Any configuration changes you make will not take place until you issue the Change 80211 Reset command.
Restrictions
Requires privileged user status.
Only applies to the MSS-VIA and certain MSS4 models.
Errors
If you enter a command that is not applicable to the 802.11 card currently in
use, you will receive an Error message.
Parameters
Enabled
Enables WEP.
Disabled
Disables WEP.
Index
Assigns the index number that should be used with the WEP key.
num
Enter an integer between 1 and 4. For two keys to match, both their key data
and their index number must be identical.
Key
Sets the WEP key. The MSS allows both 40-bit and 128-bit keys, and will
determine which key length is being set by the length of the key data.
2-9
Command Reference
Change Access
keydata
Enter the WEP key. The key format should be entered as “xx-xx-xx-xx...”
where each x is a hexadecimal digit (0 through 9 and A through F). Each pair
of hex digits (xx) defines a byte of key data, and each byte is separated from
the next by a dash. For a 40-bit key, 5 bytes of key data must be given. For a
128-bit key, 13 bytes of data must be given.
Receive
Determines whether the MSS will receive unencrypted data while WEP is
enabled.
All
Allows reception of encrypted traffic while WEP is enabled. The MSS will
accept unencrypted wireless network frames, as well as frames encrypted with
its WEP key. This is the default setting once WEP has been enabled.
Encrypted
Refuses to accept unencrypted data while WEP is enabled. The MSS will
discard and ignore unencrypted wireless network frames, accepting only
frames encrypted with its WEP key.
Defaults
Disabled, Receive all
Examples
Local>>
Local>>
Local>>
Local>>
See Also
Show 80211, page 2-63
CHANGE
CHANGE
CHANGE
CHANGE
80211
80211
80211
80211
WEP ENABLED
WEP INDEX 3
WEP RECEIVE ENCRYPTED
RESET
2.3 Change Access
LOCAL
CHANGE PORT PortList ACCESS DYNAMIC
REMOTE
NONE
Specifies which types of connections the specified serial port will accept.
Restrictions
Requires privileged user status.
The None parameter is only valid for the MSS4.
Autobaud must be disabled for ports set to Dynamic and Remote access.
Errors
If a port is active, its access can not be changed.
Parameters
Port
MSS4 only. Specifies a particular port or group of ports.
Note:
In the absence of the Portlist parameter, the configuration will affect the MSS4’s
current port only.
2-10
Command Reference
Change Autobaud
PortList
Specify a particular port or group of ports. Port numbers are specified with
integers between 1 and 4, and should be separated with commas (for lists) or
dashes (for ranges).
Local
Permits only logins from the attached serial device.
Dynamic
Allows the port to initiate and receive connections.
Remote
Allows the port to accept network connection requests, but does not permit
local logins.
None
MSS4 only. Disables both outgoing and incoming connections for the
specified port(s).
Defaults
Dynamic
See Also
Change Autobaud, page 2-11.
2.4 Change Autobaud
CHANGE PORT PortList AUTOBAUD DISABLED
ENABLED
Detects the baud rate used for an incoming connection to the specified port and then changes its own baud
rate at login time to match that of the remote device.
When Autobaud is enabled, you may have to press Return several times to help the MSS determine the
proper speed.
Restrictions
Requires privileged user status.
Does not apply to the MSS485.
Errors
Autobaud must be disabled for Dynamic and Remote port access.
Autobaud only works when a port is set for 8 bits with No parity or for 7 bits
with Even parity.
Autobaud and Autostart are incompatible. If the port is set for Autostart,
enabling Autobaud will disable Autostart, clear the Autostart character, and
produce an error message.
Parameters
Port
MSS4 only. Specifies a particular port or group of ports.
2-11
Command Reference
Note:
Change Autostart
In the absence of the Portlist parameter, the configuration will affect the MSS4’s
current port only.
PortList
Specify a particular port or group of ports. Port numbers are specified with
integers between 1 and 4, and should be separated with commas (for lists) or
dashes (for ranges).
Defaults
Disabled
See Also
Change Autostart, page 2-12; Change Charsize, page 2-16; Change Parity,
page 2-35.
2.5 Change Autostart
DISABLED
ENABLED
x
y
CHARACTER ANY
CHANGE PORT PortList AUTOSTART
ANY
NONE
1
SAVE
2
NONE
Determines whether the specified port will wait for a carriage return or pre-set character(s) before starting
a connection. Enabling Autostart causes the port to start connections automatically. Autostart can also be
configured to allow a user-defined sequence of one or two characters to initiate sessions.
If the port is in Dedicated mode, the autostart characters can be sent to the host as the first bytes of data. In
all other modes, autostart characters are discarded.
Restrictions
Requires privileged user status.
Errors
Autostart and Autobaud are incompatible. If the port is set for Autobaud,
enabling Autostart will disable Autobaud and produce an error message.
The Save parameter is only applicable when the port is configured with a
dedicated host.
If Modem Control is enabled, a port enabled for autostart will not be idle unless
DSR is held low, and therefore will not be available for connections from the
network.
Parameters
Port
MSS4 only. Specifies a particular port or group of ports.
Note:
In the absence of the Portlist parameter, the configuration will affect the MSS4’s
current port only.
2-12
Command Reference
Change Autostart
PortList
Specify a particular port or group of ports. Port numbers are specified with
integers between 1 and 4, and should be separated with commas (for lists) or
dashes (for ranges).
Character
Sets a character that will cause a login event. Users will get the benefit of
Autostart without having to hit Return or enable Autostart for extended periods
of time.
x
Enter the desired alphanumeric character. To specify a control character, use
escaped hex (\xx). For example, Ctrl-B (ASCII character 0x02) would be
specified as \02.
y
Enter the optional second alphanumeric character. To specify a control
character, use escaped hex (\xx). For example, Ctrl-B (ASCII character 0x02)
would be specified as \02.
Any
Sets a wildcard character.
None
Clears the autostart character.
Save
Specifies what happens to the characters that start the connection. Either the
first and/or second autostart characters will be passed to the host as the first
bytes of data, or the characters will be discarded.
None
Discards the autostart characters.
Defaults
Disabled
Examples
Local> CHANGE AUTOSTART ENABLED
Local> CHANGE AUTOSTART CHARACTER A
Local> CHANGE AUTOSTART SAVE 1
See Also
Change Access, page 2-10; Change Autobaud, page 2-11; Change Datasend,
page 2-17; Change Modem Control, page 2-31; Change Modem Emulation,
page 2-32
2-13
Command Reference
Change Backward Switch
2.6 Change Backward Switch
CHANGE PORT PortList BACKWARD SWITCH character
NONE
Defines a key that will switch the user to a previous session without entering local mode. From local mode,
the key functions as if the Backward command was entered. Any key can be specified unless it conflicts
with MSS line editing or the Break or Forward keys. The key you specify will be stripped from the data
stream, so while it won’t interfere with remote operating systems, you will lose any functionality that key
would have on local programs.
Restrictions
Requires privileged user status.
Parameters
Port
MSS4 only. Specifies a particular port or group of ports.
Note:
In the absence of the Portlist parameter, the configuration will affect the MSS4’s
current port only.
PortList
Specify a particular port or group of ports. Port numbers are specified with
integers between 1 and 4, and should be separated with commas (for lists) or
dashes (for ranges).
character
Specifies a character to serve as the switch key. To specify a control character,
use escaped hex (\xx). For example, Ctrl-B (ASCII character 0x02) would be
specified as \02.
None
Clears any previously-defined Backward Switch key.
Defaults
No switch
See Also
Backward, page 2-2; Change Break, page 2-15; Change Forward Switch, page
2-24; Change Local Switch, page 2-30; Forward, page 2-58.
2.7 Change Bootgateway
CHANGE SERVER BOOTGATEWAY IPaddress
Specifies the IP address of a server to send packets to when downloading code. Setting a bootgateway
allows the MSS to download via a router without the router needing proxy arp support.
Note:
A bootgateway host is not the loadhost—the packets will be addressed to the
loadhost, but will be physically sent to the bootgateway host.
2-14
Command Reference
Change BOOTP
Restrictions
Requires privileged user status.
Parameters
Server
MSS4 only.
2.8 Change BOOTP
CHANGE SERVER BOOTP DISABLED
ENABLED
Disables or enables querying for a BOOTP host at system boot time.
Restrictions
Requires privileged user status.
Parameters
Server
MSS4 only.
Defaults
Enabled
2.9 Change Break
LOCAL
CHANGE PORT PortList BREAK REMOTE
NONE
Determines how and where the Break key will be processed.
Restrictions
Requires privileged user status.
Parameters
Port
MSS4 only. Specifies a particular port or group of ports.
Note:
In the absence of the Portlist parameter, the configuration will affect the MSS4’s
current port only.
PortList
Specify a particular port or group of ports. Port numbers are specified with
integers between 1 and 4, and should be separated with commas (for lists) or
dashes (for ranges).
Local
The MSS processes the Break key and returns the user to local mode.
2-15
Command Reference
Change Buffering
Remote
The MSS ignores the Break key and passes it to the remote host. Only
applicable if the session protocol supports Break events. Telnet supports Break
events, but Rlogin, raw TCP, and UDP do not.
None
Disables the Break key.
Defaults
None
See Also
Change Local Switch, page 2-30.
2.10 Change Buffering
CHANGE SERVER BUFFERING buffersize
Specifies the size of the buffer (in bytes) to use for network connections. The default size should be
sufficient in most cases.
Restrictions
Requires privileged user status.
Parameters
Server
MSS4 only.
buffersize
Specify a size from 128 to 4096 (bytes).
Defaults
4096 bytes
2.11 Change Charsize
CHANGE PORT PortList CHARSIZE 7
8
Sets the number of data bits per character for the specified serial port.
Restrictions
Requires privileged user status.
Errors
Autobaud will only work when a port is set for 8 data bits with No parity or for
7 data bits with Even parity.
The MSS100 can only use charsize 8 when parity is set to None. The MSS4
and MSS-VIA can have any parity with charsize 8.
Parameters
Port
MSS4 only. Specifies a particular port or group of ports.
Note:
In the absence of the Portlist parameter, the configuration will affect the MSS4’s
current port only.
2-16
Command Reference
Change Datasend
PortList
Specify a particular port or group of ports. Port numbers are specified with
integers between 1 and 4, and should be separated with commas (for lists) or
dashes (for ranges).
Defaults
8 data bits
See Also
Change Autobaud, page 2-11; Change Parity, page 2-35.
2.12 Change Datasend
IDLE num
TIMEOUT
FRAME num
NONE
x
y
CHANGE PORT PortList DATASEND CHARACTER ANY
ANY
NONE
1
SAVE
2
NONE
Changes the amount of time the MSS will allow serial characters to accumulate before sending them to the
host. Several different triggers can be used to notify the MSS when to send the accumulated data. You can
specify a “timeout” condition of either the time since the last character was received (the Timeout Idle
parameter) or the time since the current “character burst” was started (the Timeout Frame parameters). The
timer resolution on the MSS is approximately 20 milliseconds. Any timeout values lower than 30
milliseconds will be approximated as well as possible.
Another option is to set a one- or two-character trigger, specified through the Character parameter, that will
cause the MSS to transmit the data. You can also specify whether the trigger characters will be sent to the
host as part of the serial data or whether they should be discarded through the Save parameter.
Packets created by the serial handling rules will be queued to the ethernet driver as a single operation, but
there is no guarantee that they will be received at the host in a single network read. If the serial input buffer
is filled, the accumulated data will be queued to the ethernet driver regardless of the serial handling rules.
The serial input buffer size is 1024 bytes.
Restrictions
Requires privileged user status.
Parameters
Port
MSS4 only. Specifies a particular port or group of ports.
Note:
In the absence of the PortList parameter, the configuration will affect the MSS4’s
current port only.
PortList
Specify a particular port or group of ports. Port numbers are specified with
integers between 1 and 4, and should be separated with commas (for lists) or
dashes (for ranges).
2-17
Command Reference
Change Datasend
Timeout
Sets the trigger that allows serial data to be accumulated until a “timeout”
condition has been detected.
Idle
Defines the timeout as a period of time since the last character was received.
num
Sets the timeout in milliseconds.
Frame
Defines the timeout as the time since the current “character burst” was started.
None
Clears previous timeout settings, so the transmission takes place whenever the
MSS decides to send the data.
Character
Sets a trigger that transmits any accumulated data as soon as the specified one
or two byte character sequence is detected in the data stream.
x
Enter the desired alphanumeric character. To specify a control character, use
escaped hex (\xx). For example, Ctrl-B (ASCII character 0x02) would be
specified as \02.
Any
Sets any character as the trigger.
None
Clears any previous trigger characters.
y
Enter the optional second alphanumeric character. To specify a control
character, use escaped hex (\xx). For example, Ctrl-B (ASCII character 0x02)
would be specified as \02.
Save
Specifies what happens to the matched trigger characters. Either the first
character or both characters will be passed to the host as the first bytes of data,
or the characters will be discarded.
Defaults
30 (msec)
Examples
Local> CHANGE DATASEND TIMEOUT IDLE 50
(Triggers data transmission for 50 milliseconds since the last character was received.)
Local> CHANGE DATASEND TIMEOUT FRAME 150
(Triggers data transmission for 150 milliseconds since the current “character burst”
was started.)
Local> CHANGE DATASEND CHARACTER Z
Local> CHANGE DATASEND SAVE 1
(Transmits any accumulated data, including “Z,” as soon as the “Z” character is
detected in the data stream.)
See Also
Change Autostart, page 2-12
2-18
Command Reference
Change Dedicated
2.13 Change Dedicated
HOSTLIST
LAT
servicename:envString
NONE
CHANGE PORT PortList DEDICATED
hostname
RLOGIN
SEQLIST
SPX SAPname
TCP hostname:envString
Dedicates a port to a Telnet, Rlogin, or SPX host, or to a LAT service. Once logged into the port, a user is
automatically connected to the host or service; the user cannot return to local mode or enter MSS
commands. Upon exiting the remote host, the user is logged out of the MSS.
The Hostlist parameter dedicates the specified port to a list of hosts. A sequential hostlist goes through a
hostlist and attempts to contact each host in its listed order. As soon as a valid connection is established,
normal data flow will occur between the MSS and the connected host. See Hostlist on page 2-58 for more
information on hostlists.
Note:
Restrictions
Dedicating a port disables port verification. See Change Verify on page 2-51 for
more details.
Requires privileged user status.
The MSS-VIA, MSS-Lite, and the MSS4 do not support SPX or LAT.
There can only be one dedicated service per port configured at a time. A
dedicated service will override a preferred service.
Changes to the dedicated target do not take effect until the port is logged out
or the MSS is rebooted.
Errors
For all single port MSS, defining the single port as a dedicated port leaves no
easy way to log into the MSS. Only remote console port and EZWebCon
connections will work.
Specifying the “S” environment string without a timeout value will generate an
error. Including an IP address with the “S” string will also generate an error
message.
Parameters
Port
MSS4 only. Specifies a particular port or group of ports.
Note:
In the absence of the PortList parameter, the configuration will affect the MSS4’s
current port only.
PortList
Specify a particular port or group of ports. Port numbers are specified with
integers between 1 and 4, and should be separated with commas (for lists) or
dashes (for ranges).
2-19
Command Reference
Change Dedicated
Hostlist
Dedicates the port to a list of hosts. For more information, see the Hostlist
command on page 2-58.
LAT
Dedicates the port to a LAT service.
servicename
Enter the name of the desired LAT service.
None
Disables all previously-configured dedicated hosts.
Rlogin
Dedicates the port to Rlogin connections.
Seqlist
Enables a sequential hostlist. When a sequential hostlist is enabled, the MSS
will attempt to connect to the first host in the hostlist. If that connection fails,
it will attempt to connect to the second host listed, and if that fails, the third
host, continuing through all hostlist entries. As soon as a valid connection is
established, normal data flow will occur between the MSS and the connected
host.
SPX
Dedicates the port to an SPX host.
SAPname
Enter the target SPX host’s SAP name.
TCP
Specifies a TCP/IP host. By default, TCP opens a regular Telnet connection
that includes Telnet IAC option negotiation. The :T environment string allows
you to open a raw TCP socket with no Telnet option negotiation, if desired.
The :R environment string allows you to make an Rlogin connection. A socket
number can also be added to connect to a socket other than the default.
hostname
Enter a text host name or a numeric IP address.
envString
Add the desired environment key(s). See Appendix B for a complete list of
strings. Options must be separated by colons.
Defaults
Disabled
Examples
Local> CHANGE DEDICATED TCP chimaera:2001T
(forms a raw Telnet connection to socket 2001 on host chimaera)
Local> CHANGE DEDICATED TCP :4096US120
(forms a passive UDP connection with any host where once a packet is received, the
MSS will communicate with only that host until 120 seconds of inactivity have
occurred and will then return to the initial state of accepting a UDP packet from any
host.)
See Also
Change Preferred, page 2-39; Crypt Password, page 2-52; Hostlist, page 2-58
2-20
Command Reference
Change DHCP
2.14 Change DHCP
CHANGE SERVER DHCP DISABLED
ENABLED
Enables or disables querying for a DHCP host at system boot time.
Restrictions
Requires privileged user status.
Errors
Configuring an IP address will automatically disable DHCP.
Enabling DHCP will remove the IP address saved in non-volatile memory
(NVR).
Parameters
Server
MSS4 only.
Defaults
Enabled
See Also
The IP Address Configuration section of your Installation Guide.
2.15 Change Domain
CHANGE SERVER DOMAIN DomainName
NONE
Specifies the default domain name to be used when attempting to resolve text TCP/IP host names.
Restrictions
Requires privileged user status.
Parameters
Server
MSS4 only.
DomainName
Enter a domain name of no more than 64 characters.
None
Disables the previously configured domain name.
See Also
Change Nameserver, page 2-33
2-21
Command Reference
Change DSRLogout
2.16 Change DSRLogout
CHANGE PORT PortList DSRLOGOUT DISABLED
ENABLED
If DSRLogout is enabled, the specified port will be logged out when its DSR signal is de-asserted. This
logout usually happens only when the attached device is turned off or disconnected. The feature can be used
to keep users from switching physical terminal lines to access other sessions. Open connections will be
closed before logout.
Restrictions
Requires privileged user status.
Does not apply to the MSS485.
Errors
Modem Control must be disabled to use DSRLogout. Modem Control implies
DSRLogout.
Parameters
Port
MSS4 only. Specifies a particular port or group of ports.
Note:
In the absence of the PortList parameter, the configuration will affect the MSS4’s
current port only.
PortList
Specify a particular port or group of ports. Port numbers are specified with
integers between 1 and 4, and should be separated with commas (for lists) or
dashes (for ranges).
Defaults
Disabled
See Also
Change Modem Control, page 2-31.
2.17 Change DTRWait
CHANGE PORT PortList DTRWAIT DISABLED
ENABLED
If enabled, the MSS will not assert the DTR signal on the specified serial port until a user logs into the port,
or until a network connection is made to the port.
Restrictions
Requires privileged user status.
Does not apply to the MSS485.
Parameters
Port
MSS4 only. Specifies a particular port or group of ports.
Note:
In the absence of the PortList parameter, the configuration will affect the MSS4’s
current port only.
2-22
Command Reference
Change Flow Control
PortList
Specify a particular port or group of ports. Port numbers are specified with
integers between 1 and 4, and should be separated with commas (for lists) or
dashes (for ranges).
Defaults
Disabled
2.18 Change Flow Control
CTSRTS
CHANGE PORT PortList FLOW CONTROL NONE
XONXOFF
Sets the type of flow control to be used on the specified port.
Restrictions
Requires privileged user status.
Does not apply to the MSS485.
Errors
CTSRTS Flow Control is not available in RS-485 mode.
Parameters
Port
MSS4 only. Specifies a particular port or group of ports.
Note:
In the absence of the PortList parameter, the configuration will affect the MSS4’s
current port only.
PortList
Specify a particular port or group of ports. Port numbers are specified with
integers between 1 and 4, and should be separated with commas (for lists) or
dashes (for ranges).
CTSRTS
Uses RTS/CTS, or hardware, flow control.
None
Flow control is not used.
XONXOFF
Uses XONXOFF, or software, flow control.
Defaults
XONXOFF
2-23
Command Reference
Change Forward Switch
2.19 Change Forward Switch
CHANGE PORT PortList FORWARD SWITCH character
NONE
Defines a key that will switch the user to the next session without entering local mode. In local mode, the
key functions as if the Forward command was entered. Any key can be specified unless it conflicts with
MSS line editing or the Break or Forward keys. The key you specify will be stripped from the data stream,
so while it won’t interfere with remote operating systems, you will lose any functionality that key would
have on local programs.
Restrictions
Requires privileged user status.
Parameters
Port
MSS4 only. Specifies a particular port or group of ports.
Note:
In the absence of the PortList parameter, the configuration will affect the MSS4’s
current port only.
PortList
Specify a particular port or group of ports. Port numbers are specified with
integers between 1 and 4, and should be separated with commas (for lists) or
dashes (for ranges).
character
Type a character to serve as the switch key. To specify a control character, use
escaped hex (\xx). For example, Ctrl-B (ASCII character 0x02) would be
specified as \02.
None
Clears the previously-defined Forward Switch key.
Defaults
No switch
See Also
Change Backward Switch, page 2-14; Change Break, page 2-15; Change Local
Switch, page 2-30; Forward, page 2-58.
2.20 Change Gateway
CHANGE SERVER SECONDARY GATEWAY IPaddress
Specifies the host that is to be used as a TCP/IP gateway between networks. If a connection to a machine
on a different network is attempted, messages will be directed to the gateway for forwarding. The MSS will
try to learn gateways automatically if none have been configured.
Restrictions
Requires privileged user status.
Errors
If a gateway is not defined, an error will be returned.
2-24
Command Reference
Parameters
Change Inactive Logout
Server
MSS4 only.
Secondary
Configures a gateway to be used when the primary gateway is unavailable.
IPaddress
Specify a host using the numeric IP address format. Specifying an IP address
of 0.0.0.0 removes the previously-defined gateway.
See Also
Change Subnet Mask, page 2-47.
2.21 Change Inactive Logout
CHANGE PORT PortList INACTIVE LOGOUT
DISABLED
ENABLED
Determines whether a port will be automatically logged out after a period of inactivity. Any open
connections will be closed before logout. Inactivity is defined as having no keyboard or network activity on
the port. The inactivity period is set with the Change Inactive Timer command.
Restrictions
Requires privileged user status.
Parameters
Port
MSS4 only. Specifies a particular port or group of ports.
Note:
In the absence of the PortList parameter, the configuration will affect the MSS4’s
current port only.
PortList
Specify a particular port or group of ports. Port numbers are specified with
integers between 1 and 4, and should be separated with commas (for lists) or
dashes (for ranges).
Defaults
Disabled
See Also
Change Inactive Timer, page 2-25.
2.22 Change Inactive Timer
CHANGE SERVER INACTIVE TIMER period
Sets the period of time after which a port with Inactive Logout enabled will be considered inactive and
automatically logged out.
Restrictions
Requires privileged user status.
2-25
Command Reference
Parameters
Change Incoming
Server
MSS4 only.
period
Enter a length of time in minutes (1 to 120) or seconds (5 to 60). For minutes,
add an m after the number. For seconds, add an s after the number.
Defaults
30 minutes
Examples
Local> CHANGE INACTIVE TIMER 10m
See Also
Change Inactive Logout, page 2-25.
2.23 Change Incoming
CHANGE
TELNET
LAT
BOTH
INCOMING
SERVER
NONE
PASSWORD
NOPASSWORD
Permits or denies incoming Telnet, Rlogin, and LAT connections and enforces password protection. The
Show Server command shows the status of incoming connection parameters.
Restrictions
Requires privileged user status.
The MSSLite, MSS-VIA, and the MSS4 do not support LAT or the Both
parameter.
Parameters
Server
MSS4 only.
Telnet
Enables incoming Telnet connections.
LAT
Enables incoming LAT connections.
Both
Enables incoming Telnet and incoming LAT connections. Only valid on
models with LAT support.
None
Disables all incoming connections.
2-26
Command Reference
Change IPAddress
Password
Prompts the user to enter the login password when attempting an incoming
connection.
Nopassword
Allows incoming connections without prompting for the login password.
Defaults
Telnet, Nopassword
See Also
Change Loginpass, page 2-31.
2.24 Change IPAddress
CHANGE SERVER IPADDRESS IPaddress
Sets the MSS’s IP address. The IP address must be set before any TCP/IP functionality is available. The
new IP address will take effect immediately.
Restrictions
Requires privileged user status.
Errors
You will receive an error if the MSS cannot use the specified IP address or if
there are currently any network connections.
Parameters
Server
MSS4 only.
IPaddress
Specify the IP address in standard numeric format.
See Also
Change DHCP, page 2-21; the Getting Started chapter of your Installation
Guide.
2.25 Change IPSecurity
BOTH
ENABLED
CHANGE IPSECURITY IPaddress INCOMING DISABLED
OUTGOING
PORTS portlist
Adds entries to or edits entries in the IP Security table. The Ports parameter, applicable only to the MSS4,
restricts connections to the given IP address from certain ports, and connections from this address to the
specified ports.
2-27
Command Reference
Restrictions
Change LAT CircTimer
Requires privileged user status.
The Both, Incoming, and Outgoing parameters are only applicable to the
MSS4.
Parameters
IPaddress
Specify an address in standard numeric format. An address with 0 or 255 in any
segment restricts all addresses in that range.
Both
MSS4 only. Restricts logins from the network into the server and TCP sessions
to the network from the server.
Incoming
MSS4 only. Restricts logins from the network into the server, and connections
to the serial port.
Outgoing
MSS4 only. Restricts TCP sessions to the network from the server.
Ports
MSS4 only. Specifies a particular port or group of ports.
PortList
Specify a particular port or group of ports. Port numbers are specified with
integers between 1 and 4, and should be separated with commas (for lists) or
dashes (for ranges). If a portlist is not specified, all physical and virtual ports
apply.
Defaults
Disabled
Examples
Change IPsecurity 192.0.220.77 Disabled
(Restricts the single IP address from the table.)
Change IPsecurity 192.0.1.255 Both Disabled
(MSS4 only: Restricts all addresses between 192.0.1.0 and 192.0.1.255 from both
incoming and outgoing connections.)
2.26 Change LAT CircTimer
CHANGE LAT CIRCTIMER timerValue
Specifies the delay between messages sent from the MSS to other network nodes. This parameter should
not need to be altered, and should not be altered when there are active sessions.
Restrictions
Requires privileged user status.
Errors
The MSSLite, MSS4, and the MSS-VIA do not support LAT.
Parameters
timerValue
Specify a value from 30 to 200 milliseconds.
Defaults
80 (milliseconds)
2-28
Command Reference
Change LAT Groups
2.27 Change LAT Groups
ALL
CHANGE LAT GROUPS groupList
NONE
Specifies the LAT service groups to which the MSS can connect. Groups are numbered from 0 to 255.
Restrictions
Requires privileged user status.
Errors
The MSSLite, MSS4, and the MSS-VIA do not support LAT.
Parameters
groupList
Specify a list of groups to replace the current list. Use commas to separate
group numbers, and use hyphens to separate ranges.
Defaults
0 (group zero)
Examples
CHANGE LAT GROUPS 17,21-28,118-211,220
2.28 Change LAT Identification
CHANGE LAT IDENTIFICATION identString
Sets the text string that identifies the MSS on LAT networks.
Restrictions
Requires privileged user status.
Errors
The MSSLite, MSS4, and the MSS-VIA do not support LAT.
Parameters
identString
Enter a string of 40 or fewer characters. Enclose the string in quotes if it
contains lower-case letters, spaces, or punctuation.
2.29 Change Loadhost
CHANGE SERVER SECONDARY LOADHOST IPaddress
Specifies the TCP/IP host from which the MSS requests its runtime code.
Restrictions
Requires privileged user status.
Parameters
Server
MSS4 only.
2-29
Command Reference
Change Local Switch
Secondary
Configures a loadhost to be used when the primary loadhost is unavailable.
IPaddress
Specify a host using standard numeric format—host names cannot be resolved
via a nameserver. Specifying an IP address of 0.0.0.0 removes the previouslydefined loadhost.
2.30 Change Local Switch
CHANGE PORT PortList LOCAL SWITCH character
NONE
Defines a key that will allow you to access local mode from within a session. The Local Switch key
functions the same as the Break key. Any key can be specified unless it conflicts with MSS line editing or
the Break or Forward keys. The key you specify will be stripped from the data stream, so while it won’t
interfere with remote operating systems, you will lose any functionality that key would have on local
programs.
Restrictions
Requires privileged user status.
Parameters
Port
MSS4 only. Specifies a particular port or group of ports.
Note:
In the absence of the PortList parameter, the configuration will affect the MSS4’s
current port only.
PortList
Specify a particular port or group of ports. Port numbers are specified with
integers between 1 and 4, and should be separated with commas (for lists) or
dashes (for ranges).
character
Specify a character to serve as the switch key. To specify a control character,
use escaped hex (\xx). For example, Ctrl-B (ASCII character 0x02) would be
specified as \02.
None
Disables the Local Switch key.
Defaults
No switch
See Also
Change Backward Switch, page 2-14; Change Break, page 2-15; Change
Forward Switch, page 2-24.
2-30
Command Reference
Change Loginpass
2.31 Change Loginpass
CHANGE SERVER LOGINPASS passwd
Specifies the password used to log into the MSS. The password should consist of no more than 6 alphabetic
letters. Users are only required to provide this password if the port has Password Protect enabled.
If you do not enter the password at the command line, you will immediately be prompted to enter the new
password. This password is not displayed when typed.
Restrictions
Requires privileged user status.
Parameters
Server
MSS4 only.
passwd
Enter a password of up to 6 alphabetic characters. When entered as part of the
command, the password should be enclosed by quotation marks to preserve
case.
Defaults
access
Examples
CHANGE LOGINPASS “badger”
See Also
Change Password Protect, page 2-38; Change Incoming, page 2-26.
2.32 Change Modem Control
CHANGE PORT PortList MODEM CONTROL DISABLED
ENABLED
Causes the MSS to treat any attached serial device as a modem. When enabled, a DSR drop will log out the
enabled port and the MSS will drop DTR for three seconds and then raise it when the port logs out. If
Autostart is also enabled, the port will not start until DSR is raised. The MSS supports partial modem control
(DSR/DTR).
Restrictions
Requires privileged user status.
Does not apply to the MSS485.
Errors
Modem Control must be disabled to use DSRLogout.
Parameters
Port
MSS4 only. Specifies a particular port or group of ports.
Note:
In the absence of the PortList parameter, the configuration will affect the MSS4’s
current port only.
2-31
Command Reference
Change Modem Emulation
PortList
Specify a particular port or group of ports. Port numbers are specified with
integers between 1 and 4, and should be separated with commas (for lists) or
dashes (for ranges).
Defaults
Disabled
See Also
Change Autostart, page 2-12; Change DSRLogout, page 2-22.
2.33 Change Modem Emulation
CHANGE PORT PortList MODEM EMULATION DISABLED
ENABLED
Presents a modem interface to an attached serial device. The MSS can then accept AT-style modem
commands and handle the modem signals correctly. See your Installation Guide for more details on modem
emulation.
Note:
Restrictions
If the MSS is in modem emulation mode and a serial port is idle, the MSS can still
accept network TCP connections to that serial port.
Requires privileged user status.
Does not apply to the MSS485.
Parameters
Port
MSS4 only. Specifies a particular port or group of ports.
Note:
In the absence of the PortList parameter, the configuration will affect the MSS4’s
current port only.
PortList
Specify a particular port or group of ports. Port numbers are specified with
integers between 1 and 4, and should be separated with commas (for lists) or
dashes (for ranges).
Defaults
Disabled
See Also
Change Autostart, page 2-12; the Using the MSS chapter of your Installation
Guide
2.34 Change Name
CHANGE SERVER NAME serverName
Renames the MSS. The unit’s default name, which is based on its default Ethernet address, is printed on its
underside. This name is what will be advertised if WINS is enabled.
Restrictions
Requires privileged user status.
2-32
Command Reference
Change Nameserver
Errors
The server name must be unique to the network.
Parameters
Server
MSS4 only.
serverName
Enter a string of up to 16 characters. Strings must be enclosed in quotes if they
contain lower-case letters, spaces, or punctuation.
See Also
Change WINS, page 2-51.
2.35 Change Nameserver
CHANGE SERVER SECONDARY NAMESERVER IPaddress
Specifies the nameserver to be used during TCP/IP connections. The nameserver will attempt to resolve text
host names into numeric IP address form.
Restrictions
Requires privileged user status.
Parameters
Server
MSS4 only.
Secondary
Specifies a nameserver to be used when the primary nameserver is unavailable.
IPaddress
Specify a host using standard numeric format. Do not enter a text host name.
2.36 Change NetWare Encapsulation
ETHER_II
CHANGE NETWARE ENCAPSULATION NATIVE DISABLED
SNAP
ENABLED
802_2
Configures the frame types that the MSS will pay attention to during IPX connections. When NetWare
routing is enabled with the Change NetWare Routing command, all frame types are enabled regardless of
the settings made with this command.
Restrictions
Requires privileged user status.
The MSSLite, MSS4, and the MSS-VIA do not support Netware.
Errors
When enabling more than one frame type, you must enable NetWare Routing.
2-33
Command Reference
Parameters
Change NetWare Internal Network
Ether_II
Enables Ethernet v2 frame type.
Native
Enables the “native mode” NetWare frame type.
Snap
Enables the 802.2 frame type with SNAP SAPs.
802_2
Enables the 802.2 frame type with NetWare SAPs.
Defaults
all Enabled (Internal routing also enabled)
See Also
Change NetWare Internal Network, page 2-34; Change NetWare Routing,
page 2-35; Show NetWare, page 2-64.
2.37 Change NetWare Internal Network
CHANGE NETWARE INTERNAL NETWORK number
Changes the MSS’s preset internal network number, which is derived from the unit’s Ethernet address. This
number is used for internal NetWare routing.
Restrictions
Requires privileged user status.
The MSSLite, MSS4, and the MSS-VIA do not support Netware.
Parameters
number
Specify the new internal network number in the format annnnnnn where a
represents a letter and each n represents a number.
See Also
Change NetWare Encapsulation, page 2-33; Change NetWare Routing, page
2-35; Show NetWare, page 2-64.
2.38 Change NetWare Loadhost
CHANGE NETWARE LOADHOST fileserver
NONE
Specifies the name of the fileserver from which download attempts will be made at boot time.
Restrictions
Requires privileged user status.
The MSSLite, MSS4, and the MSS-VIA do not support Netware.
2-34
Command Reference
Parameters
Change NetWare Routing
fileserver
Enter the name of the desired fileserver using no more than 8 characters.
None
Specifies that no loadhost will be used.
See Also
Change Software, page 2-45.
2.39 Change NetWare Routing
CHANGE NETWARE ROUTING DISABLED
ENABLED
Allows the MSS to act as an internal router whenever there are multiple NetWare frame types in use on the
LAN.
Restrictions
Requires privileged user status.
The MSSLite, MSS4, and the MSS-VIA do not support Netware.
Defaults
Enabled
See Also
Change NetWare Encapsulation, page 2-33; Change NetWare Internal
Network, page 2-34; Show NetWare, page 2-64.
2.40 Change Parity
CHANGE PORT PortList PARITY
EVEN
MARK
NONE
ODD
SPACE
Sets the parity for the specified serial port.
Restrictions
Requires privileged user status.
Errors
Parity must be None for the MSS100 and MSS-VIA to use 8-bit characters.
Autobaud will not work unless the port is using 8 bit characters with No parity
or 7 bit characters with Even parity.
2-35
Command Reference
Parameters
Change Passflow
Port
MSS4 only. Specifies a particular port or group of ports.
Note:
In the absence of the PortList parameter, the configuration will affect the MSS4’s
current port only.
PortList
Specify a particular port or group of ports. Port numbers are specified with
integers between 1 and 4, and should be separated with commas (for lists) or
dashes (for ranges).
Defaults
None
See Also
Change Autobaud, page 2-11; Change Charsize, page 2-16.
2.41 Change Passflow
CHANGE PORT PortList PASSFLOW
DISABLED
ENABLED
Specifies whether XON/XOFF characters will be stripped from the data stream. Enabled means that the
MSS will both respond to XON/XOFF and send them to the host. Disabled means that we respond to XON/
XOFF but do not send them to the host. Passflow is only useful when XonXoff flow control is set.
Parameters
Port
MSS4 only. Specifies a particular port or group of ports.
Note:
In the absence of the PortList parameter, the configuration will affect the MSS4’s
current port only.
PortList
Specify a particular port or group of ports. Port numbers are specified with
integers between 1 and 4, and should be separated with commas (for lists) or
dashes (for ranges).
See Also
Change Flow Control, page 2-23.
2-36
Command Reference
Change Password Incoming
2.42 Change Password Incoming
CHANGE PORT PortList PASSWORD INCOMING DISABLED
ENABLED
Controls whether the MSS will ask users for an incoming password when they attempt to connect to the
network socket connection ports (ports 200x and 300x, where x is the number of the desired serial port). See
Environment Strings on page B-1 for more information on network socket connections.
Restrictions
Requires privileged user status
Parameters
Port
MSS4 only. Specifies a particular port or group of ports.
Note:
In the absence of the PortList parameter, the configuration will affect the MSS4’s
current port only.
PortList
Specify a particular port or group of ports. Port numbers are specified with
integers between 1 and 4, and should be separated with commas (for lists) or
dashes (for ranges).
2.43 Change Password Limit
CHANGE [ SERVER ] PASSWORD LIMIT number
Limits the number of failures allowed when entering the privileged password, with the Set Privileged
command, to become the privileged user. After the specified number of retries, the port will be logged out.
The Change Privpass command is used to set the privileged password.
Restrictions
Requires privileged user status.
Parameters
Server
MSS4 only.
number
Enter a value between 0 (no limit) and 100.
Defaults
3
2-37
Command Reference
Change Password Protect
2.44 Change Password Protect
CHANGE PORT PortList PASSWORD PROTECT
DISABLED
ENABLED
Controls whether a password is needed to log into the MSS from a serial port. For models with a dedicated
console port (the MSS-Via, MSS485, and the MSSLite A and C), this command will also affect the serial
console port. To set the login password, use the Change Loginpass command.
Restrictions
Requires privileged user status.
Parameters
Port
MSS4 only. Specifies a particular port or group of ports.
Note:
In the absence of the PortList parameter, the configuration will affect the MSS4’s
current port only.
PortList
Specify a particular port or group of ports. Port numbers are specified with
integers between 1 and 4, and should be separated with commas (for lists) or
dashes (for ranges).
Defaults
Disabled
See Also
Change Loginpass, page 2-31.
2.45 Change Portname
CHANGE PORT PortList PORTNAME name
Renames the specified serial port.
Restrictions
Requires privileged user status.
Parameters
Port
MSS4 only. Specifies a particular port or group of ports.
Note:
In the absence of the PortList parameter, the configuration will affect the MSS4’s
current port only.
PortList
Specify a particular port or group of ports. Port numbers are specified with
integers between 1 and 4, and should be separated with commas (for lists) or
dashes (for ranges).
name
Enter a 16-character name composed of alphanumeric characters or the
underscore character. Enclose the name in quotation marks to preserve case.
Defaults
Port_1 (also Port_2, Port_3, and Port_4 for MSS4 only)
2-38
Command Reference
Change Preferred
2.46 Change Preferred
hostname [ :envString ]
TCP
NONE
SPX SAPname
NONE
CHANGE PORT PortList PREFERRED
servicename : envString
LAT
NONE
NONE
Specifies a default service for the specified port. The MSS will attempt to use the preferred service for
autoconnecting, or when no host name is specified for a TCP (Telnet), Rlogin, SPX, or LAT connection
command.
Restrictions
Requires privileged user status.
The MSSLite, MSS4, and the MSS-VIA do not support LAT or SPX.
Errors
A dedicated service will override all preferred services.
Only one preferred service can be configured at a time.
Parameters
Port
MSS4 only. Specifies a particular port or group of ports.
Note:
In the absence of the PortList parameter, the configuration will affect the MSS4’s
current port only.
PortList
Specify a particular port or group of ports. Port numbers are specified with
integers between 1 and 4, and should be separated with commas (for lists) or
dashes (for ranges).
TCP
Specifies a TCP/IP host. By default, TCP opens a regular Telnet connection
that includes Telnet IAC option negotiation. Other connection types can be
made using environment strings—see Change Dedicated on page 2-19 for
more information.
hostname
Enter a text host name or a numeric IP address.
SPX
Specifies an SPX host for the preferred connection.
SAPname
Enter the SPX host’s SAP name.
LAT
Specifies a LAT host for the preferred connection.
2-39
Command Reference
Change Privpass
servicename
Enter the name of the desired LAT service.
envString
Add the desired environment key(s). See Appendix B for a complete list of
strings. Options must be separated by colons.
None
Clears preferred service configurations.
See Also
Change Dedicated, page 2-19.
2.47 Change Privpass
CHANGE SERVER PRIVPASS passwd
Sets the password to become the privileged user. The password should consist of no more than 6 alphabetic
letters.
If you do not enter the password at the command line, you will immediately be prompted to enter the new
password. This password is not displayed when typed.
Restrictions
Requires privileged user status.
Parameters
Server
MSS4 only.
passwd
Enter a password of up to 6 alphabetic characters. When entered as part of the
command, the password should be enclosed in quotation marks.
Defaults
system
Examples
CHANGE PRIVPASS “walrus”
See Also
Set Privileged, page 2-63.
2.48 Change RARP
CHANGE SERVER RARP DISABLED
ENABLED
Controls whether the MSS will query for a RARP host at system boot time.
Restrictions
Requires privileged user status.
Parameters
Server
MSS4 only.
2-40
Command Reference
Defaults
Change Retransmit Limit
Enabled
2.49 Change Retransmit Limit
‘
CHANGE SERVER RETRANSMIT LIMIT number
Specifies the number of retries attempted if a network message receives no acknowledgment. This number
may need to be increased on noisy or heavily-used networks. The rate at which retransmits are sent is
protocol and network dependent.
Restrictions
Requires privileged user status.
Applies to TCP and LAT sessions only.
Parameters
Server
MSS4 only.
number
Enter a value between 4 and 100.
Defaults
10
2.50 Change Rlogin
CHANGE SERVER RLOGIN DISABLED
ENABLED
Controls the use of the Rlogin command. Incoming Rlogin connections are always permitted, but when
Rlogin is disabled, users may not log into remote hosts. To view the current status of Rlogin connections,
enter the Show Server command.
Restrictions
Requires privileged user status.
Parameters
Server
MSS4 only.
Defaults
Disabled
2-41
Command Reference
Change RS485
2.51 Change RS485
DISABLED
ENABLED
2WIRE
MODE
4WIRE
CHANGE RS485 PORT Portlist
TERMINATION ENABLED
DISABLED
ALWAYS
TXDRIVE
AUTO
Enables RS-485 networking and configures the necessary RS-485 parameters on the MSS-VIA and the
MSS4. RS-485 networking is explained in the Configuration chapter of your MSS installation guide.
Restrictions
Requires privileged user status.
Errors
Only applies to the MSS-VIA and the MSS4 (the MSS485 is configured via
jumpers).
Parameters
Port
MSS4 only. Specifies a particular port or group of ports.
Note:
In the absence of the PortList parameter, the configuration will affect the MSS4’s
current port only.
PortList
Specify a particular port or group of ports. Port numbers are specified with
integers between 1 and 4, and should be separated with commas (for lists) or
dashes (for ranges).
Enabled/Disabled
Enables or Disables RS-485 mode. By default, the MSS is configured for RS232 networking.
Mode
When RS-485 Mode is enabled, you must choose either two-wire or four-wire
mode. If you do not explicitly set a mode with this command, the MSS will
default to four-wire mode.
2Wire
Sets the MSS to use two-wire mode.
4Wire
Sets the MSS to use four-wire mode.
Termination
Enable termination whenever you are using long cable runs and Disable it at
other times. Only end nodes should be terminated.
2-42
Command Reference
Change Secondary
TXDrive
Controls how the MSS drives the TX pin.
Always
Sets the MSS to drive TX. The MSS will never tristate TX, even if data is not
being sent.
Auto
Sets the MSS to drive TX only when transmitting, and tristate when not
transmitting.
Defaults
Disabled
Mode = 4Wire
Termination disabled
TXDrive = Always
2.52 Change Secondary
Users can configure a secondary gateway, loadhost, and/or nameserver in case the primaries are
unreachable. For information, please see the Change Gateway (page 2-24), Change Loadhost (page 2-29),
and Change Nameserver (page 2-33) command entries.
2.53 Change Session Limit
CHANGE SERVER SESSION LIMIT number
Sets a server-wide limit for active sessions per port.
Restrictions
Requires privileged user status.
Parameters
Server
MSS4 only.
number
Enter a value between 0 and 8.
Defaults
4
2.54 Change Signal Check
CHANGE PORT PortList SIGNAL CHECK DISABLED
ENABLED
Determines whether the MSS will check for the DSR signal when connections are made from the network
to a serial port. If the DSR signal is not present, the connection will be rejected.
2-43
Command Reference
Restrictions
Change Silentboot
Requires privileged user status.
Does not apply to the MSS485.
Parameters
Port
MSS4 only. Specifies a particular port or group of ports.
Note:
In the absence of the PortList parameter, the configuration will affect the MSS4’s
current port only.
PortList
Specify a particular port or group of ports. Port numbers are specified with
integers between 1 and 4, and should be separated with commas (for lists) or
dashes (for ranges).
Defaults
Disabled
2.55 Change Silentboot
CHANGE SERVER SILENTBOOT DISABLED
ENABLED
Causes the unit to attempt to boot without sending any status messages to the console port (unless there are
errors).
Restrictions
Requires privileged user status.
Parameters
Server
MSS4 only.
Defaults
Disabled
See Also
Show Server, page 2-65.
2.56 Change SNMPSetComm
CHANGE SERVER SNMPSETCOMM communityname
Creates an SNMP community name for the MSS and gives that community read/write access. By default,
the MSS has a single community (“public”) with read-only access.
Restrictions
Requires privileged user status.
Parameters
Server
MSS4 only.
communityname
Enter an alphanumeric string of up to 15 bytes.
2-44
Command Reference
Examples
Change Software
CHANGE SNMPSETCOMM WPHRED
(adds a single community with read-write access)
See Also
The Configuration chapter of your Installation Guide
2.57 Change Software
CHANGE SERVER SOFTWARE filename
Specifies the name of the download file that, when a reload has been requested, the MSS will attempt to
load at boot time.
Restrictions
Requires privileged user status.
Parameters
Server
MSS4 only.
filename
Specify a loadfile name of 11 or fewer characters. The server will
automatically add a .SYS extension to the file name. You can also enter the
complete pathname if the file is to be loaded via TFTP; place the filename in
quotes to preserve case.
See Also
Change Loadhost, page 2-29.
2.58 Change Speed
CHANGE PORT PortList SPEED rate
Specifies the baud rate of the serial port.
Restrictions
Requires privileged user status.
Errors
An error is displayed if an unsupported baud rate is specified.
Parameters
Port
MSS4 only. Specifies a particular port or group of ports.
Note:
In the absence of the PortList parameter, the configuration will affect the MSS4’s
current port only.
PortList
Specify a particular port or group of ports. Port numbers are specified with
integers between 1 and 4, and should be separated with commas (for lists) or
dashes (for ranges).
2-45
Command Reference
Change Startup
rate
Available speeds (baud rates) are generally 300, 600, 1200, 2400, 4800, 9600,
19200, 38400, 57600, 115200, and 230400 baud. The MSSLite can only go as
high as 38400 baud.
Defaults
9600 baud
See Also
Change Autobaud, page 2-11.
2.59 Change Startup
CHANGE SERVER STARTUP
FILE
host: filename
node:: filename
node\sys:\login\ filename
NONE
RETRY num
Configures the startup configuration file that the MSS will attempt to download at boot time. The included
commands will configure the MSS before any users and services are started. If a text hostname is used for
TFTP, the name must be resolvable at boot time, otherwise you must use an IP address.
The Telnet console is available at the time the MSS attempts to download the startup file. If there is a
problem with the download, you can still log into the MSS and determine what went wrong.
Restrictions
Requires privileged user status.
The MSSLite, MSS4, and the MSS-VIA do not support LAT or SPX.
Parameters
Server
MSS4 only.
host:filename
Used to load from a TCP/IP host via TFTP. Enter a TCP/IP hostname or IP
address followed by a colon and a startup file name of up to 47 characters. If
you use a text host name, it must be resolvable at boot time.
node::filename
Used to load from a VAX machine via LAT. Enter the nodename followed by
two colons and the startup file name of up to 47 characters.
node\SYS:\LOGIN\filename
Used to load from a Novell fileserver. Enter the proper node and filename. The
entire path should be no more than 47 characters long.
None
Clears any previously configured startup settings.
Retry
Re-attempts load of the startupfile a certain number of times before giving up.
2-46
Command Reference
Change Stopbits
num
Specify the desired number or retry attempts. Enter zero to make the MSS retry
until the startupfile is read (indefinitely).
Defaults
Retry: 5
Examples
Local>
Local>
Local>
Local>
See Also
Change Loadhost, page 2-29; Source, page 2-67.
CHANGE
CHANGE
CHANGE
CHANGE
STARTUP FILE “bob:start”
STARTUP FILE hevax::start.com
STARTUP FILE “engfs\sys:\login\start.cmd”
SERVER STARTUP RETRY 6
2.60 Change Stopbits
CHANGE PORT PortList STOPBITS 1
2
Specifies how many stop bits the port will use.
Restrictions
Requires privileged user status.
Parameters
Port
MSS4 only. Specifies a particular port or group of ports.
Note:
In the absence of the PortList parameter, the configuration will affect the MSS4’s
current port only.
PortList
Specify a particular port or group of ports. Port numbers are specified with
integers between 1 and 4, and should be separated with commas (for lists) or
dashes (for ranges).
Defaults
1
See Also
Change Autobaud, page 2-11; Change Charsize, page 2-16; Change Parity,
page 2-35.
2.61 Change Subnet Mask
CHANGE SERVER SUBNET MASK mask
Sets an IP subnet mask for the MSS. The mask is applied to target IP addresses to determine whether the
destination address is on the local network segment. If the address is not on the local segment, the MSS’s
gateway host will be accessed to provide the connection. A mask is created by default when the IP address
is first set, but can be overridden with this command.
2-47
Command Reference
Change TCPKeepalive
Restrictions
Requires privileged user status.
Parameters
Server
MSS4 only.
mask
Specify a mask in numeric IP format, for example, 255.255.255.0.
See Also
Change IPAddress, page 2-27; Change Gateway, page 2-24.
2.62 Change TCPKeepalive
CHANGE SERVER TCPKEEPALIVE DISABLED
ENABLED
Controls the transmission of TCP/IP keepalive packets.
Restrictions
Requires privileged user status.
Parameters
Server
MSS4 only.
Defaults
Enabled
2.63 Change Telnetdest
CHANGE SERVER TELNETDEST CONSOLE
SERIAL
Controls what happens when users Telnet into the MSS using the default Telnet socket (23). By default, a
Telnet session will get a Local> prompt from the MSS. By specifying the Serial option, a Telnet session will
connect directly to the MSS’s serial port (port 1 on the MSS4).
Restrictions
Requires privileged user status.
Parameters
Server
MSS4 only.
Console
Users are connected in Local> mode.
Serial
Users are connected to the serial port as if they Telnetted to port 2001.
Defaults
Console
2-48
Command Reference
Change Telnetpad
2.64 Change Telnetpad
CHANGE PORT PortList TELNETPAD DISABLED
ENABLED
When enabled, Telnetpad tells the MSS to pad carriage returns with null characters during Telnet sessions.
The Telnet RFC (Request for Comments) specifies Telnetpad Enabled.
Restrictions
Requires privileged user status.
Parameters
Port
MSS4 only. Specifies a particular port or group of ports.
Note:
In the absence of the PortList parameter, the configuration will affect the MSS4’s
current port only.
PortList
Specify a particular port or group of ports. Port numbers are specified with
integers between 1 and 4, and should be separated with commas (for lists) or
dashes (for ranges).
Defaults
Enabled
2.65 Change Termtype
CHANGE PORT PortList TERMTYPE termstring
NONE
Specifies a terminal type for the desired port. If supported by the network protocol, the MSS reports this
string to the remote host.
Parameters
Port
MSS4 only. Specifies a particular port or group of ports.
Note:
In the absence of the PortList parameter, the configuration will affect the MSS4’s
current port only.
PortList
Specify a particular port or group of ports. Port numbers are specified with
integers between 1 and 4, and should be separated with commas (for lists) or
dashes (for ranges).
termstring
Enter a string of up to 8 characters. The string is converted to all uppercase
unless it is enclosed in quotes in the command.
None
Clears the terminal type field.
Examples
CHANGE TERMTYPE VT100
CHANGE TERMTYPE IBM1000
2-49
Command Reference
Change Timeserver
2.66 Change Timeserver
DAYTIME
GMTOFFSET
num
NONE
CHANGE SERVER TIMESERVER
BROADCAST
NTP
IP ipaddress
PASSIVE
Specifies which timeserver the MSS will use to update its internal clock. The MSS can communicate with
either Daytime or Network Timeserver Protocol (NTP) servers. For NTP, the MSS can periodically
broadcast a message asking for time information and wait for an NTP timeserver to reply, periodically query
a specific NTP timeserver, or just listen for NTP broadcasts on the network.
Parameters
Server
MSS4 only.
Daytime
Specifies a daytime server. The MSS will listen for a possible daytime server,
then send packets querying that server for time information.
Note:
Daytime is only supported over UDP.
GMTOffset
Specifies the local timezone’s difference from Greenwich Mean Time (GMT).
num
Enter a value from -12 to +13. For example, the GMTOffset for Los Angeles,
CA, USA would be -8 (PST) or -7 (PDT).
None
Clears a previous timeserver setting, but does not clear the GMTOffset setting.
NTP
Specifies an NTP server. There are three types of NTP.
Broadcast
The MSS periodically broadcasts a message that asks for time information, and
waits for an NTP timeserver to reply.
IP
Use this method if you have a single NTP timeserver on your network. You
must enter an IP address in standard numeric format.
Passive
The MSS will listen for NTP timeserver announcements on the network.
Examples
CHANGE TIMESERVER NTP IP 192.0.1.122
CHANGE TIMESERVER GMTOFFFSET -7
2-50
Command Reference
Change Verify
2.67 Change Verify
CHANGE PORT PortList VERIFY DISABLED
ENABLED
Controls whether the MSS will provide informational messages whenever a session is connected,
disconnected, or switched.
Restrictions
Requires privileged user status.
If a port is Dedicated, Verify is disabled.
Parameters
Port
MSS4 only. Specifies a particular port or group of ports.
Note:
In the absence of the PortList parameter, the configuration will affect the MSS4’s
current port only.
PortList
Specify a particular port or group of ports. Port numbers are specified with
integers between 1 and 4, and should be separated with commas (for lists) or
dashes (for ranges).
Defaults
Enabled
2.68 Change WINS
CHANGE SERVER WINS DISABLED
ENABLED
Allows the MSS to broadcast a WINS name announcement at boot time, and answer broadcast WINS name
queries. This setting allows other hosts to locate the MSS.
Restrictions
Requires privileged user status.
Parameters
Server
MSS4 only.
Defaults
Disabled
2-51
Command Reference
Crypt Password
2.69 Crypt Password
CRYPT PASSWORD password
Changes the password used for the encryption mode environment string (:Y). Both ends of the connection
must agree on the encryption password being used. You must reboot after changing the encryption
password.
Note:
To use the encryption features for your MSS, you must use a special software file.
Contact Lantronix for more information.
This command can be used to configure an MSS to MSS encrypted session. Set the encryption password on
both units to be the same password, reboot both units, then telnet either to one of the unit’s local prompts
(i.e. socket 2100) or serial port (i.e. socket 210x where x is the serial port number) using the :Y environment
string. Sockets 2100 and 210x are assumed to be encrypted on the receiving MSS.
Restrictions
Requires privileged user status.
Parameters
password
Enter a new encryption password. The password can be up to 7 alphanumeric
or escaped hex (\xx) characters and is case sensitive.
See Also
Change Dedicated, page 2-19; Hostlist, page 2-58.
2-52
Command Reference
Disk
2.70 Disk
CAT file
CD directory
CHMOD code file
CP
file1
file2
DF /disk
/FLASH
FORMAT /PCCARD1
/PCCARD2
FSCK
HEAD file
LNflag file1 file2
LS flag file
DISK
MKDIRdirectory
MORE
file
MV file target
OD
file
flag
PWD
RM
file
flag
RMDIR directory
SYNC
TAIL file
TEST flag file
TOUCH file
Performs disk management functions for the MSS and, for models with PC card support, for any installed
ATA flash card. The MSS contains two modifiable directories—/ram and /flash—and one read-only
directory—/rom. For MSS models with one PC card slot, an ATA card can be accessed as /pccard1; for
models with two slots, the card in the top slot can be accessed as /pccard1 and the card in the bottom slot as
/pccard2.
The Disk commands are very similar to the file management commands in UNIX environments. Unlike the
similar UNIX commands, each disk command must be preceded by the word DISK. The commands are also
not case-sensitive.
The Disk commands honor disk permissions. All disks are read only for non-privileged users.
Restrictions
The Format and FSCK parameters requires privileged user status.
Only apply to the MSS4, MSS100, MSSLiteX, and the MSS-VIA.
The ROM disk is read-only and cannot be modified by users.
2-53
Command Reference
Disk
Errors
For the /pccard1 and /pccard 2 parameter, you will receive an error if either the
specified card is not a storage card or if there is no card in the slot.
Parameters
Cat
Displays an entire file in your terminal window.
Cd
Changes your current working directory.
Chmod
Changes permissions for a file or directory. To assign permissions, enter a 3digit number. The first digit represents the owner’s permissions. The second
digit represents the group’s permissions. The third digit represents the world’s
permissions.
Digit
Meaning
0
No permissions.
1
Execute permission only.
2
Write permission only.
3
Write and Execute permissions.
4
Read permission only.
5
Read and Execute permissions.
6
Read and Write permissions.
7
All permissions.
Cp
Copies or moves a file. To copy a file, enter the filename for file1 and the new
file name as file2. To move a file, specify the filename as file1 and the
destination directory as file2.
Df
Displays the blocks of free space on the MSS disks. When you add the -i
switch, the display includes in the display the number of inodes used versus the
number still available.
/disk
Enter the disk name, e.g. /flash.
Format
Formats either the Flash disk or the specified PC card with the Lantronix
filesystem.
/Flash
Formats or erases the /flash disk.
2-54
Command Reference
Disk
/PCCard1 and /PCCard2
Formats an ATA flash card for use in an MSS PC card slot. An unformatted
card can not be used by the MSS. The /pccard1 parameter applies to all MSS
products with one PC card slot (MSS-VIA) or the first (top) slot of the MSS4.
The /pccard2 parameter applies to the bottom PC card slot of the MSS4.
Fsck
Checks the MSS filesystem and corrects any problems.
Head
Outputs the beginning of a string.
Ln
Creates a hard or soft link for files, linking a file or set of files to another file.
using no flag creates a hard link. Adding the -s flag creates a soft link.
Ls
Displays the contents of a directory. The available flags are:
-l
Returns a list in long form, which includes information
about modification date, size, owner, and permissions.
-t
Sorts the list by modification date, with the newest file
appearing first.
-r
Reverses the order of the file listing. For example, if -t
was also specified, -r would list the oldest file first.
Mkdir
Creates a new directory on the MSS RAM or flash disk.
More
Displays the contents of a file on the terminal, 24 lines of text at a time.
Normally the display pauses after each screen and prints “--MORE--” at the
bottom of the screen. To access the next screen, press the Space bar. To abort,
press Ctrl-C.
Mv
Moves files or directories on the MSS RAM and flash disks. You can also
rename files with this command by inserting the new filename for target
Od
Displays the contents of the specified file as raw hexadecimal byte values. The
possible flags are:
-b
Prints the bytes in octal format.
-ct
Prints the bytes in ASCII format.
-x
Prints the bytes in hexadecimal format.
Pwd
Displays the full pathname of your current directory.
2-55
Command Reference
Disk
Rm
Removes files and/or directories from the MSS RAM and Flash disks. The
possible flags are:
-i
Prompts for a Y (yes) or N (no) before the file is removed.
-r
Removes an entire directory and all of its subdirectories.
Rmdir
Removes a directory from the specified disks. The command can only be used
if the directory is empty. If the directory is full, you must add the DISK RM rf command.
Sync
Forces the MSS to write files to flash immediately. Normally, when the MSS
is rewriting files to the Flash disk, it will buffer data before initiating a write
sequence. Write sequences are automatically written after 5 seconds of disk
inactivity.
Tail
Outputs the end of a file.
Test
Evaluates a file (true or false). The possible flags that will be returned are:
-d
True if file exists and is a directory.
-e
True if file exists (regardless of type).
-f
True if file exists and is a regular file.
-l
True if file exists and is a symbolic link.
-r
True if file exists and is readable.
-w
True if file exists and is writable. True indicates only that
the write flag is on. The file is not writable on a read-only
file system even if this test indicates true.
-x
True if file exists and is executable. True indicates only
that the execute flag is on. If the file is a directory, true
indicates that the file can be searched.
Touch
Creates an empty disk file.
Examples
Local>>
Local>>
Local>>
Local>>
DISK
DISK
DISK
DISK
CHMOD 755 /PCCARD1/index.txt
FORMAT /PCCARD1
LS -l /PCCARD1/
TEST /PCCARD1/add.exe
2-56
Command Reference
Delete IPSecurity
2.71 Delete IPSecurity
DELETE IPSECURITY IPaddress
ALL
Removes entries from the IP Security table.
Restrictions
Requires privileged user status.
Errors
An error will be returned if the IPSecurity entry does not exist.
See Also
Change IPSecurity, page 2-27; Show IPsecurity, page 2-64.
2.72 Disconnect
DISCONNECT session
Terminates the current session or specified session(s).
2.73 Finger
FINGER username
@ hostname
Displays information about local and remote users. This command is an implementation of the Unix Finger
command. Port information will not be displayed.
Restrictions
An error is returned when the host cannot be accessed.
Parameters
username
Enter a username to display information about that particular MSS user.
hostname
Enter a hostname to display information about all of the users at the specified
host site.
username@hostname
Enter both parameters with the “at” symbol (@) to display information about
a particular user on that host.
2-57
Command Reference
Forward
2.74 Forward
FORWARD
When entered in local mode, moves users one session forward (to a more recent session).
See Also
Backward, page 2-2; Change Backward Switch, page 2-14; Change Forward
Switch, page 2-24; Change Local Switch, page 2-30.
2.75 Help
HELP [ keyword ]
Allows the user to view command syntax information. Typing Help alone will show a list of top-level
commands.
Parameters
keyword
Specify one of the top-level commands to view suboptions of that command.
2.76 Hostlist
LAT serviceName
RLOGIN hostname
SPX SAPname
ADD
TCP hostname
: envString
HOSTLIST
UDP hostname : envString
ALL
DELETE
number
Edits the hostlist used for multihost mode connections. There can be a maximum of 12 hosts in the hostlist.
For information on Multihost Mode, which sets up a data pipe between one of the serial devices attached to
the MSS and multiple network hosts, see the Using the MSS chapter of your Installation Guide.
Restrictions
Requires privileged user status.
The MSS-VIA and the MSS4 do not support SPX or LAT.
Parameters
LAT
Adds a LAT service to the host table.
2-58
Command Reference
Initialize
servicename
Enter the name of the desired LAT service.
Rlogin
Adds an Rlogin entry to the host table.
hostname
Enter the IP address of the target host. For UDP only, resolvable hostnames
and broadcast/multicast IP addresses can be used.
SPX
Adds an SPX entry to the host table.
SAPname
Enter the SPX host’s SAP name.
TCP
Adds a TCP entry to the host table. By default, TCP opens a regular Telnet
connection that includes Telnet IAC option negotiation.
UDP
Adds a UDP entry to the host table.
envString
Add the desired environment key(s). See Appendix B for a complete list of
strings. Options must be separated by colons.
Delete
Removes one or all entries from the hostlist.
number
Specify which entry to remove. To view configured host entries, enter the
Show Hostlist command.
See Also
Change Dedicated, page 2-19; Crypt Password, page 2-52; Show Hostlist,
page 2-64
2.77 Initialize
DELAY num
INITIALIZE FACTORY
NOBOOT
RELOAD
Reboots the MSS.
Restrictions
Requires privileged user status.
Errors
When Reload or Factory initialization takes place, all user-entered commands
are lost; the MSS must be reconfigured.
2-59
Command Reference
Parameters
LAT
Delay
Schedules a reboot after a specified number of minutes.
num
Enter the number of minutes, from 0 (immediate) to 120.
Factory
Reboots the MSS with its factory-configured settings.
Noboot
Cycles power on the MSS, but without booting. The MSS will remain in the
Boot Configuration Program (BCP). See your installation guide for more
details on BCP.
Reload
Downloads operational software upon reboot.
See Also
Appendix C, Updating Software.
2.78 LAT
LAT serviceName :envString
Establishes a connection with a LAT service. If you do not specify a service or hostname, the MSS will
attempt a connection to the preferred host or service.
Errors
Does not apply to MSSLite, MSS-VIA, or the MSS4.
Parameters
serviceName
Enter the name of the desired LAT service, for example, “modem”.
envString
Add the desired environment key(s). See Appendix B for a complete list of
strings. Options must be separated by colons.
Examples
Local> LAT modem:LD=port5
2.79 Logout Port
LOGOUT
PORT PortList
Logs out the serial port, disconnecting any existing sessions. For the MSS4, you can log out multiple serial
ports at once. Can also be used to log out modem card ports (Port 3 on the Via, Ports 5 and 6 for the MSS4).
Parameters
Port
Logs out the current port if entered by itself or, if used with the PortList
parameter, logs out the specified port.
2-60
Command Reference
Note:
Netstat
In the absence of the PortList parameter, the configuration will affect the MSS4’s
current port only.
PortList
MSS4 and MSS-Via only. Specify a port number as an integer between 1 and
3 (Via) or 1 and 6 (MSS4). You can not log out multiple ports at once.
number
Enter a port number.
2.80 Netstat
NETSTAT
Displays currently-active NetWare and TCP/IP network connections and the depth of UDP packet queues.
This information is primarily intended for debugging network problems.
2.81 Ping
PING hostname length
Sends an IP echo packet request to another network host, and provides an easy way to test IP network
connections. In general, any host that supports IP will respond if it is able, regardless of login restrictions,
job load, or operating system. If the host does not reply, there may be a network IP configuration problem.
Parameters
hostname
Enter either a resolvable text host name or a numeric IP address.
length
Length of the ping packet. The default length is 50 bytes.
2.82 Resume
RESUME
session
Leaves local mode and resumes the current (most recently active) session or the specified session.
Errors
An error is returned if there are no active sessions.
Parameters
session
Specify the number of the session you wish to resume.
2-61
Command Reference
Rlogin
2.83 Rlogin
RLOGIN IPaddress username
Attempts to log in to a remote host as a local user.
Parameters
IPaddress
Specify a resolvable text host name or a numeric IP address. This parameter is
optional if a preferred Telnet service has been defined.
username
Specify a name to be used as the login name.
2.84 RTC
Sets
DATE date
RTC SET TIME time
SHOW
Sets the real time clock (RTC) on the MSSLite-A and MSSLiteX-A.
Restrictions
Only valid on the MSSLite-A and MSSLiteX-A.
Parameters
Set
Sets either the date or time.
Date
Sets the date. Must be used with the date parameter.
date
Enter the date as MM/DD/YY.
Time
Sets the time. Must be used with the time parameter.
time
Enter the time as HH:MM:SS.
Show
Shows the current RTC date and time settings.
Examples
Local_2>> RTC SET DATE 01/19/01
Local_2>> RTC SET TIME 17:01:16
Local_2>> RTC SHOW TIME
2-62
Command Reference
Set Privileged
2.85 Set Privileged
SET PRIVILEGED OVERRIDE
NOPRIVILEGED
Changes the port’s privileged status.
Note:
If you forget the password, you must reset the MSS to its factory defaults. See
Initialize on page 2-59 for instructions.
Restrictions
Secure users may not become the privileged user.
Only one port at a time can be the privileged port.
Parameters
Privileged
Allows a user to become the port’s privileged user, provided the user enters the
correct password.
Override
Forces the current port to become the privileged port (the previous port loses
the privilege).
Noprivileged
Removes privileged status for the port.
See Also
Change Privpass, page 2-40.
2.86 Show 80211
SHOW 80211 ANTENNA
POWER
Displays the current wireless networking settings. Entering the command without any parameters displays
basic 80211 settings including Region, MAC address, and ESSID. Also displayed are any 802.11 errors,
which are discussed in Appendix B, Show 802.11 Errors.
Errors
Only applies to the MSS-VIA and MSS4.
Parameters
Antenna
Displays the antenna diversity options (RX and TX) available on the currently
installed 802.11 card.
Power
Displays, in milliWatts, the transmit power settings supported by the currently
installed 802.11 card.
See Also
Change 80211, page 2-2; Show 802.11 Errors, page B-1.
2-63
Command Reference
Show Hostlist
2.87 Show Hostlist
SHOW HOSTLIST
Displays the current list of remote hosts to use for multihost mode connections.
See Also
Status Displays, page 5-6; Multihost Mode, page 5-11; Hostlist, page 2-58.
2.88 Show IPsecurity
SHOW IPSECURITY
Displays the current TCP/IP security table. Each address or range is shown, along with the direction of
concern.
See Also
Status Displays, page 5-6.
2.89 Show NetWare
SHOW NETWARE
Displays NetWare characteristics, including frame types, routing status, and internal network number.
Errors
Does not apply to MSSLite, MSS-VIA, or the MSS4.
See Also
Status Displays, page 5-6.
2.90 Show Nodes
SHOW NODES LAT
SPX
Displays information about the desired LAT or SPX service nodes.
Errors
All nodes will be shown if no node is specified.
Does not apply to the MSS-Via, MSS4, or MSSLite.
Parameters
LAT
Shows LAT nodes identification strings and availability.
2-64
Command Reference
Show Ports
SPX
Shows SPX node hop counts, frame types, and availability.
See Also
Status Displays, page 5-6.
2.91 Show Ports
SHOW PORTS
ALL
PortList
Displays all serial port settings, including the port’s connection status, the flow control state , the state of
DSR and DTR serial signals, the access type, and more. Can also be used to display modem card
information (for the MSS-Via, Port 3; for the MSS4, Ports 5 and 6).
Parameters
All
MSS4 only. Shows the port settings on all serial ports.
PortList
MSS4 and MSSVia only. Port numbers are specified with integers between 1
and 4. Port numbers should be separated with commas (for lists) or dashes (for
ranges).
See Also
Status Displays, page 5-6.
2.92 Show RS485
SHOW RS485
Displays the current RS-485 networking settings, including wire mode, termination, and TXDrive.
Errors
Only applies to the MSS-VIA and MSS4.
See Also
Change RS485, page 2-42.
2.93 Show Server
SHOW SERVER
BOOTPARAMS
COUNTERS
CHARACTERISTICS
Displays different types of MSS information. If you do not enter a parameter, the MSS will display general
server characteristics .
2-65
Command Reference
Parameters
Show Services
Bootparams
Displays MSS parameters that relate to the boot procedure and software
loadfile.
Counters
Displays Ethernet and TCP/IP error information.
Characteristics
Displays server settings including hardware address, timer limit, password
limit, session limit, retransmit limit, IP address, subnet mask, nameserver,
gateway, and more.
Defaults
Characteristics
See Also
Status Displays, page 5-6.
2.94 Show Services
SHOW SERVICES [ serviceName ]
Displays the characteristics of the LAT services on the network.
Restrictions
This list is masked by the service groups that the port is able to see. In other
words, users will not be able to see services to which they cannot connect.
Errors
Does not apply to MSSLite, MSS-VIA, or the MSS4.
Parameters
serviceName
Specify a service whose information you want to see. Wildcards are permitted.
All services will be shown if no service is specified.
See Also
Status Displays, page 5-6.
2.95 Show Session
SHOW SESSION
Displays information about the serial port’s current session(s). For the MSS4, this command shows the
current session(s) for the current serial port.
See Also
Status Displays, page 5-6.
2-66
Command Reference
Show SNMP
2.96 Show SNMP
SHOW SNMP
Displays configured SNMP communities and their access modes (read-only or read/write). The default
community name is public, and allows read-only access. There is one additional user-configurable SNMP
community.
See Also
Status Displays, page 5-6; Change SNMPSetComm, page 2-44.
2.97 Show Users
SHOW USERS
Displays the current users logged into the MSS, their port usernames, and current connection information.
See Also
The Status Displays section in your MSS Installation Guide.
2.98 Show Version
SHOW VERSION
Displays operating software version information.
Errors
Applies to the MSS4 only.
See Also
Change Software, page 2-45
2.99 Source
SOURCE hostname: filename
Downloads a configuration file from a TFTP host. The file is assumed to contain lines of server commands
to be executed. The Source command is most useful for trying out a configuration file before using the
Change Software command.
Errors
Only applies to the MSS-VIA and MSS4.
Parameters
hostname:filename
Enter the TFTP hostname (either a text name or an IP address) followed by a
colon and the download path and file name.
2-67
Command Reference
SPX
Examples
Local> SOURCE “labsun:start.com”
See Also
Change Startup File, page 2-46
2.100 SPX
SPX SAPname
Attempts a connection to an SPX-enabled device on the network. SPX devices announce their availability
to the network with SAP names; the target device must be advertising itself via SAP announcements for the
MSS to make a connection.
Errors
Does not apply to the MSSLite, MSS-VIA and MSS4.
Parameters
SAPname
Enter the target device’s SAP name, for example, MSS_xxxxxx.
2.101 Telnet
TELNET IPaddress : envstring
Initiates a Telnet connection to a remote host. An environment string can also be specified as described
below. If you have previously configured a preferred host, you can enter the command without a parameter
to automatically connect to the preferred host.
Errors
There can be no space between the hostname and the colon (:), or between the
colon and the environment string.
Parameters
IPaddress
Enter a text host name or an IP address. This parameter is only optional if a
preferred service has been defined.
envString
Add the desired environment key(s). See Appendix B for a complete list of
strings. Options must be separated by colons.
Examples
Local> Telnet 192.0.1.201:T
(Forms a raw TCP connection to the specified host)
Local> Telnet phred:7000
(Connects to the remote console port on host phred)
See Also
Change Dedicated, page 2-19; Status Displays, page 5-6.
2-68
Command Reference
Test
2.102 Test
TEST
PORT PortList
DTR
DELAY num
Tests a serial port’s connection. When the Test command is entered without any parameters, test lines of 70
characters are sent to the specified serial port until a key is pressed.
Restrictions
Nonprivileged users may only test their current port.
Parameters
Port
MSS4 only. Specifies a particular port or group of ports.
Note:
In the absence of the PortList parameter, the configuration will affect the MSS4’s
current port only.
PortList
Specify a port number as an integer between 1 and 4. You can not specify more
than one port at a time.
DTR
Lowers and then raise the DTR signal on the serial port. If a delay is not
specified, DTR will lower for approximately one second and then raise.
Delay
Lowers DTR will for the specified delay length, then raises DTR.
num
Enter a delay time from 50 to 3,000 (milliseconds).
2.103 Zero
ZERO
Resets all counters on the MSS (both serial and Ethernet).
Restrictions
Requires privileged user status.
2-69
A: Contact Information
If you are experiencing an error that is not listed in Appendix B of your Installation Guide, or if you are
unable to fix the error, contact your dealer or Lantronix Technical Support at 800-422-7044 (US) or 949453-3990. Technical Support is also available via Internet email at [email protected].
A.1 Problem Report Procedure
When you report a problem, please provide the following information:
◆
Your name, and your company name, address, and phone number
◆
Lantronix MSS model number
◆
Lantronix MSS serial number
◆
Software version (use the Show Server command to display)
◆
Network configuration, including the information from a Netstat command
◆
Description of the problem
◆
Debug report (stack dump), if applicable
◆
Status of the unit when the problem occurred (please try to include information on user and network
activity at the time of the problem)
A.2 Full Contact Information
Address:
Phone: 949/453-3990
Fax: 949/453-3995
World Wide Web: http://www.lantronix.com
North American Direct Sales: 800/422-7055
North American Reseller Sales: 800/422-7015
North American Sales Fax: 949/450-7232
Internet: [email protected]
International Sales: 949/450-7227
International Sales Fax: 949/450-7231
Internet: [email protected]
Technical Support: 800/422-7044 or 949/453-3990
Technical Support Fax: 949/450-7226
Internet: [email protected]
-1
B: Environment Strings
B.1 Usage
An environment string is a sequence of key letters, sometimes prefixed by a plus (+) or minus (-).
Environment strings can be used with Change Dedicated, Change Preferred, Hostlist, LAT, and Telnet
to configure connections. The keys are added after the hostname (if one is given) and a colon.
Key letters are not case-sensitive, and no white space is allowed in the environment string. In addition,
commands that oppose previously-configured settings will overwrite the previous setting, even if they
appear on the same command line.
Note:
Because of the syntax difference between the commands for the MSS4 and other
MSS models, you should read the Command Reference chapter carefully before
entering a command. The examples given in the following sections may not apply
to your MSS model.
B.1.1 Multiple Strings
More than one string can be entered as part of a single command. Multiple strings do not need to be
separated from each other. For example, you can enter a command that specifies both the desired port
number and that the connection should be encrypted.
Figure B-1: Entering Multiple Strings
Local>> CHANGE PREFERRED TELNET 192.0.1.3:2001Y
B.2 Available Strings
Note:
In most applications, environment strings are not necessary.
Environment keys must be separated from the hostname, if one is specified, by a colon. Read the following
sections carefully for more details on proper usage of each key.
Table B-1: Environment Strings
nnnn
socket number (TCP and UDP only)
C
+C = CR to CRLF,
-C = CR to LF
D
+D = Backspace mode
-D = Delete mode
E
+E = Local Echo mode
-E = Remote Echo mode
OR
Speaks the redirector protocol over the network connection
OS
Sends SYN packets less frequently, for slow-bandwidth
networks.
P
+P = Passall mode
-P = Passthru mode
B-1
Environment Strings
Usage Examples
Table B-1: Environment Strings
R
Rlogin protocol (sets port number to 513 if not already set)
T
TCP mode (raw uninterpreted data stream)
U
S
xxxx
UDP mode (the default UDP socket is 4096)
Specifies session mode. Only valid with U.
Timeout value in seconds, up to 3600 (1 hour). Only valid
with :S
Y
Encrypted mode (raw TCP socket that encrypts all data
using a 56-bit key)
LD=port#
Sets the LAT destination port to port#
LN=node#
Sets the target LAT node to node#
B.2.1 Usage Examples
These examples should illustrate the proper usage of the above environment strings.
2.2.1.1 nnnn
Sets a socket number. For TCP and UDP connections only. The most common socket numbers are 7000
(the MSS remote console port), 200x (for Telnet IAC interpretation), and 300x (for raw TCP/IP), where x
is the number of the desired serial port.
Examples
% telnet 192.0.1.88:7000
(connects to the remote console port of the specified host)
% telnet 192.0.1.66:3001
(forms a raw TCP/IP connection to the MSS serial console port)
Local> TELNET 192.0.1.45:2003
(forms a connection with Telnet IAC interpretation to the third serial port of an MSS4)
See Also
Your MSS Installation Guide for more information on socket connections
2.2.1.2 +C and -C
+C specifies CR to CRLF. -C specifies CR to LF.
Examples
Local>> CHANGE PREFERRED TELNET 192.0.1.3:+C
2.2.1.3 +D and -D
+D sets Backspace mode. -D sets Delete mode.
Examples
% telnet 192.0.1.5:-D
2.2.1.4 +E and -E
+E sets Local Echo mode. -E sets Remote Echo mode.
Examples
% telnet 192.0.1.48:+E
B-2
Environment Strings
Usage Examples
2.2.1.5 OR
Sets up a dedicated redirector connection. Enabling Autostart for the dedicated port, as shown in the
example below, will automatically start the redirector connection.
More information about the Lantronix Com Port Redirector software is available in your MSS Installation
Guide.
Examples
Local>> CHANGE DEDICATED TCP 192.0.2.25:OR
Local>> CHANGE AUTOSTART ENABLED
See Also
Change Dedicated, page 2-19; Change Autostart, page 2-12
2.2.1.6 OS
Sends TCP SYN packets less frequently. This string is useful for slow-bandwidth networks
Examples
% telnet 192.0.1.78:OS
2.2.1.7 +P and -P
+P specifies Passall method. -P specifies Passthru mode. Both Passall and Passthru will prevent the proper
handling of the Forward and Backward keys.
Examples
Local>> CHANGE DEDICATED TELNET 192.0.1.221:+P
2.2.1.8 R
Specifies that the connection use the Rlogin protocol. Sets the port number to 513 if not already set.
Examples
Local>> CHANGE DEDICATED TCP 192.0.1.8:R
2.2.1.9 T
Forms a raw Telnet connection. If no environment string is specified, a Telnet connection is assumed.
Examples
Local> CHANGE DEDICATED TCP chimaera:2001T
2.2.1.10 U
Sets the connection to UDP mode. The default UDP socket is 4096.
To configure a passive UDP session, do not enter a hostname before the environment key(s). If you want
the MSS to spoof a connection with whatever host sends a packet, use the S and xxxx keys along with :U.
In this state, the MSS will accept a packet from any host, and then wait for either another packet from that
host or a timeout of xxx seconds. The timeout sends the MSS back to passive mode.
Parameters
S
Only valid with the U environment string.
xxxx
Sets the session timeout value in seconds, up to 3600 (one hour). Only valid
with the :S string.
B-3
Environment Strings
Examples
Usage Examples
Local>> CHANGE DEDICATED TCP 192.73.220.1:U
Local>> CHANGE DEDICATED TCP :U
(forms a passive UDP session with any host)
Local>> CHANGE DEDICATED TCP :US60
(forms a passive UDP session where the MSS will wait 60 seconds after receiving a
packet from one host before returning to passive mode)
Local> CHANGE DEDICATED TCP :4096US120
(forms a passive UDP connection with any host where once a packet is received, the
MSS will communicate with only that host until 120 seconds of inactivity have
occurred and will then return to the initial state of accepting a UDP packet from any
host.)
2.2.1.11 Y
Sets up encrypted mode, a raw TCP socket that encrypts all data using a 56-bit key, for the MSS.
Note:
To use the encryption features for your MSS, you must use a special software file.
Contact Lantronix for more information.
This string can be used in conjunction with the encryption password to establish encrypted sessions between
two MSS products. To set up an encrypted session, set the encryption password on both MSS units to the
same password and reboot both units. Then, establish an encrypted session from one unit to the other. For
example, entering the command given in the example would set up an encrypted session to the second unit’s
first serial port.
Note:
To change the encryption key used for encryption mode, see Crypt Password on
page 2-52.
Examples
Local> TELNET 192.0.2.25:2101Y
(where 2101 is the encrypted serial port on the MSS)
Local> TELNET 192.0.2.25:2100Y
(will give you an encrypted local prompt on the specified MSS)
See Also
Crypt Password, page 2-52
2.2.1.12 LD=port#
Sets the LAT destination port to port#. The MSSLite, MSS-Via and MSS4 do not support LAT.
Examples
Local> LAT modem LN=vax8:LD=0005
2.2.1.13 LN=node#
Sets the target LAT node to node#. The MSSLite, MSS-Via and MSS4 do not support LAT.
Examples
Local> LAT modem LN=vax8:LD=0005
B-4
B: Show 802.11 Errors
B.1 Introduction
When you enter the Show 80211 command without any other parameters, the resulting screen includes a
field for errors. The “Errors:” field displays two eight-digit numbers, separated by a comma. These
numbers are a 64-bit wide bitfield of error bits, each one indicating whether or not the given error has
occurred at least once.
For example, suppose you're using an MSS-Via with a ZoomAir card in Infrastructure mode. After
having been running for a long time, your Access Point loses power in the middle of sending a fragmented
packet to the MSS. If you entered the Show 80211 command, you might see a screen resembling the
following:
Figure B-1: Example of Error Bits
Local_5>> SHOW 80211
802.11 Support:
Active
Network Type:
Infrastructure
Use MAC address from:
MSS (00-80-a3-30-ee-31)
ESS ID:
(none set)
Regulatory Region:
FCC/USA
DS Channel:
Any
RTS Threshold:
3000
Fragmentation Threshold: 2346
Card Present:
Zoom Air 4000
Status:
Errors:
Scanning
08020002,00000920
Card Firmware Revision:
2.01
The Errors bitfield is zeroed each time you issue either a Zero command or a Set 802.11 Reset command
at the Local> prompt.
The Errors bitfield is zeroed each time you issue either a Zero command or a Change 802.11 Reset
command at the Local> prompt.
B.2 Error Bits
B.2.1 Leftmost Number
80000000
An authentication or association sequence timed out. An expected reply from
the AP was not received within the required time window.
40000000
Internal error.
20000000
Internal error.
B-1
Show 802.11 Errors
Leftmost Number
10000000
Internal error.
08000000
Fragment reassembly timed out. Failed to receive all the fragments of a
fragmented 802.11 packet before the reassembly window expired. Dropped
some correctly received fragments.
04000000
Received an 802.11 packet with invalid subtype code.
02000000
Received an 802.11 packet with invalid type code.
01000000
Received an 802.11 packet with invalid version code.
00800000
Dropped a correctly received 802.11 packet due to lack of a sufficiently sized
buffer to hold it. May happen under heavy network load if applications are not
processing network data fast enough.
00400000
Internal error.
00200000
Internal error.
00100000
Failed to transmit an 802.11 management packet.
00080000
Failed to transmit an 802.11 data packet.
00040000
Internal error.
00020000
Lost contact with the AP. Unit will attempt to reestablish contact by itself.
00010000
Unit was deauthenticated or disassociated by the AP for attempting to pass data
packets before being fully associated. (Indicates confusion of either the unit or
the AP.)
00008000
Unit was disassociated by the AP for inactivity.
00004000
Unit was deauthenticated or disassociated by the AP because the AP is going
offline or being reconfigured to serve a different network.
00002000
Unit was deauthenticated by the AP because its previous authentication is no
longer valid.
00001000
Authentication or association with the AP failed, or the unit was
deauthenticated or disassociated by the AP for an unknown reason.
00000800
Association with the AP failed because the unit does not support all of the data
rates marked as basic in the AP.
00000400
Association with the AP failed, or the unit was disassociated by the AP because
the AP is full, and cannot handle any more stations associating with it.
00000200
Authentication with the AP timed out. The AP did not receive an expected
reply from the unit within the required time window.
B-2
Show 802.11 Errors
Rightmost Number
00000100
Authentication with the AP failed because the WEP key the unit is using is not
the same as the key the AP is using.
00000080
Authentication with the AP failed because either the unit or the AP sent an
incorrect authentication packet. Some APs will erroneously return this error
code when the problem is actually "authentication type not allowed".
00000040
Authentication with the AP failed because the AP does not allow the
authentication type requested by the unit.
00000020
Authentication or association with the AP failed for administrative reasons.
00000010
Reassociation with another AP serving the same ESS as the previous one failed
because the association could not be confirmed by the previous AP.
00000008
Association with the AP failed because the AP does not support all 802.11
options requested by the unit.
00000004
Authentication or association with the AP failed, or the unit was
deauthenticated or disassociated by the AP for a reason explicitly given as
"unspecified".
00000002
Could not find any beacons matching the network parameters the unit is
configured with. Most likely there is no AP or ad-hoc network within range
that satisfies the unit's ESSID, NETWORK-TYPE, and CHANNEL
parameters.
00000001
Internal error.
B.2.2 Rightmost Number
80000000
Unassigned.
40000000
Unassigned.
20000000
Unassigned.
10000000
Unassigned.
08000000
Unassigned.
04000000
Unassigned.
02000000
Unassigned.
01000000
Unassigned.
00800000
Unassigned.
00400000
Unassigned.
00200000
Unassigned.
B-3
Show 802.11 Errors
Rightmost Number
00100000
Unassigned.
00080000
Unassigned.
00040000
Unassigned.
00020000
Internal error. May occur on some cards in conjunction with other described
error codes.
00010000
The 802.11 card in use is not compatible with the regulatory region to which
the unit has been programmed.
00008000
Internal error.
00004000
Internal error. May occur on some cards in conjunction with authentication or
association failures, or other configuration mismatches.
00002000
Received an 802.11 packet that was too large to be handled.
00001000
Internal error.
00000800
Failed to queue a data packet that could not be sent immediately for later
transmission. It was dropped.
00000400
Internal error.
00000200
Failed to find, sync to, and associate with an AP or ad-hoc network within a
reasonable time. Most likely there is no AP or ad-hoc network within range
that satisfies the unit's ESSID, NETWORK-TYPE, and CHANNEL
parameters.
00000100
Received an 802.11 data packet that was not encapsulated as per RFC1042 or
802.1h. Unit will still decapsulate and interpret the packet. Some vendors'
APs trip this error when they send out "magic packets" containing proprietary
extensions not defined by the 802.11 spec.
00000080
Received an 802.11 data packet encapsulated in a completely foreign manner,
or not encapsulated at all. Unit will still attempt to interpret the packet, but
proper interpretation is not guaranteed. The packet may be dropped as
unintelligible.
00000040
Received an encrypted packet that could not properly be decrypted. Packet
was dropped.
00000020
Unspecified error during packet reception. At least one packet was dropped.
Absence of this error bit does not imply that all packets have been received
correctly, however.
00000010
A received packet failed CRC check and was dropped.
00000008
Internal error. May occur in conjunction with "no AP or ad-hoc network
within range" errors.
B-4
Show 802.11 Errors
Rightmost Number
00000004
Internal error.
00000002
Internal error.
00000001
Internal error.
B-5
Index
Numerics
802.11 2-2, 2-63
Antenna 2-3
Channel 2-4
Errors C-1
ESSID 2-4
Fragmentation 2-5
MAC address 2-5
Network mode 2-6
Power 2-7, 2-8
Region 2-7
RTS 2-8
WEP 2-9
A
Access mode 2-10
Antenna, 802.11 2-3
ATA flash cards 2-53
Autobaud 2-11
Autostart 2-12
B
Backward switch 2-2, 2-14
Baud rate 2-45
Boot Configuration Program (BCP) 2-60
Bootgateway 2-14
BOOTP 2-15
Break key 2-15
Buffering 2-16
Dedicated connections 2-19
DHCP 2-21
Disconnect command 2-57
Disk management 2-53
Domain name 2-21
DSR (Data Signal Ready)
Signal checking 2-43
DSRLogout 2-22
DTRWait 2-22
E
Encrypted mode 2-52, B-4
Encrypted sessions
MSS to MSS 2-52, B-4
Encryption password 2-52, B-4
Environment strings B-1–??
ESSID, 802.11 2-4
F
Factory defaults 2-59
Finger 2-57
Flash disk 2-53
Flow control 2-23
Forward switch 2-24, 2-58
Fragmentation, 802.11 2-5
Frame types 2-33
G
Gateway 2-24
C
H
Channel, 802.11 2-4
Character size 2-16, 2-17
Circuit timer 2-28
Command line
Editing 1-2
Command syntax 1-1
Community name (SNMP) 2-44
Contact information A-1
Counters 2-69
Help 1-3
Help command 2-58
Hostlist 2-20, 2-58
Displaying 2-64
Editing 2-58
Sequential 2-20
D
Datasend 2-17
I
Inactivity timer 2-25
Incoming connections 2-26
Password 2-26, 2-37
Initialize 2-59
Index-1
Index
Internal network number 2-34
IP
Address 2-27
Security 2-27, 2-57, 2-64
IPX (NetWare)
SPX 2-68
L
LAT 2-60, 2-64
Circuit timer 2-28
Destination port B-4
Groups 2-29
Identification 2-29
Target node B-4
Loadhost 2-29, 2-34
Local switch 2-30
Login password 2-26, 2-31
Logout 2-60
Inactivity 2-25
M
MAC address, 802.11 2-5
Modem
Control 2-31
Emulation 2-32
Multihost mode 2-64
N
Nameserver 2-32
Netmask 2-47
Netstat 2-61
NetWare 2-64
Encapsulation 2-33
Internal network number 2-34
Loadhost 2-34
Routing 2-35
Network mode 2-6
Networking, wireless 2-2
P
Parity 2-35
Passflow 2-36
Passive UDP B-3
Timeout value B-3
Passwords 2-37
Limit 2-37
Login 2-31, 2-37
Privileged 2-40, 2-63
Protect 2-38
Ping 2-61
Ports
Name 2-38
Privileged 2-63
Settings 2-65
Speed 2-45
Power, 802.11 2-7, 2-8
Preferred connections 2-39
Privileged password 2-40, 2-63
Problem report procedure A-1
R
RARP 2-40
Rebooting 2-59
Redirector connections B-3
Region, 802.11 2-7
Resume 2-61
Retransmit limit 2-41
Rlogin 2-20, 2-41, 2-62, B-3
Routing, NetWare 2-35
RS-485 2-42, 2-65
RTC (Real-time Clock) 2-62
RTS, 802.11 2-8
S
Sequential hostlist 2-20
Serial delay 2-17
Server characteristics 2-65
Server name 2-32
Services 2-66
Sessions 2-66
Limit 2-43
Set privileged 2-63
Show commands 2-63, 2-64, 2-65
Signal checking 2-43
Silent boot 2-44
SNMP 2-67
Community name 2-44
Sockets B-2
Software 2-45, 2-67
SPX 2-64, 2-68
Startup file 2-46
Stop bits 2-47
Subnet mask 2-47
Switches
Backward 2-14
Forward 2-24
Local 2-30
Index-2
Index
T
Telnet 2-48, 2-68
Padding characters 2-48, 2-49
Raw connections B-3
Terminal type 2-49
Test command 2-69
Timers
Circuit 2-28
Inactivity 2-25
Timeserver 2-50
U
UDP 2-50, B-3
Passive B-3
Unix commands 2-53
Users 2-67
V
Verification 2-51
W
WEP (Wireless Equivalent Privacy) 2-9
WINS 2-51
Wireless 2-2, 2-63
Z
Zeroing counters 2-69
Index-3