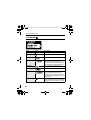
1
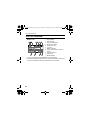
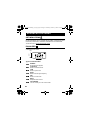
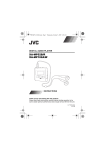
LVT1542-004A[J_E_EV]_Eng.book Page 1 Thursday, February 2, 2006 4:36 PM
DIGITAL AUDIO PLAYER
XA-F57A/P/R/S/W
XA-F107A/B/H/P/R/S
INSTRUCTIONS
Thank you for purchasing this JVC product.
Please read these instructions carefully before starting operation to be
sure to obtain optimum performance and a longer service life from the unit.
LVT1542-004A [J,E,EV]
LVT1542-004A[J_E_EV]_Eng.book Page 2 Thursday, February 2, 2006 4:36 PM
IMPORTANT SAFETY INSTRUCTIONS
1)
2)
3)
4)
5)
6)
7)
Read these instructions.
Keep these instructions.
Heed all warnings.
Follow all instructions.
Do not use this apparatus near water.
Clean only with dry cloth.
Do not install near any heat sources such as radiators, heat
registers, stoves, or other apparatus (including amplifiers) that
produce heat.
8) Refer all servicing to qualified service personnel. Servicing is
required when the apparatus has been damaged in any way, liquid
has been spilled or objects have fallen into the apparatus, the
apparatus has been exposed to rain or moisture, does not operate
normally, or has been dropped.
For qualified service personnel only
CAUTION:
Danger of explosion if battery is incorrectly replaced.
Replace only with the same or equivalent type.
These servicing instructions are for use by qualified service personnel only.
To reduce the risk of electric shock, do not perform any servicing other than
that contained in the operating instructions unless you are qualified to do so.
2
LVT1542-004A[J_E_EV]_Eng.book Page 3 Thursday, February 2, 2006 4:36 PM
IMPORTANT SAFETY INSTRUCTIONS
For U.S.A
This equipment has been tested and found to comply with the limits for a Class B digital device,
pursuant to part 15 of the FCC Rules.
These limits are designed to provide reasonable protection against hamful interference in a
residential installation.
This equipment generates, uses and can radiate radio frequency energy and, if not installed and
used in accordance with the instructions, may cause harmful interference to radio
communications. However, there is no guarantee that interference will not occur in a particular
installation. If this equipment does cause harmful interference to radio or television reception,
which can be determined by turning the equipment off and on, the user is encouraged to try to
correct the interference by one or more of the following measures:
Reorient or relocate the receving antenna.
Increase the separation between the equipment and receiver.
Connect the equipment into an outlet on a circuit different from that to which the receiver is
connected.
Consult the dealer or an experienced radio/TV technician for help.
For U.S.A
For the main unit:
Declaration of Conformity
Model Number:
Trade Name:
Responsible Party:
Address:
Telephone Number:
XA-F57A/P/R/S/W
XA-F107A/B/H/P/R/S
JVC
JVC Americas Corp.
1700 Valley Road, Wayne
New Jersey 07470
973-317-5000
This device complies with Part 15 of FCC Rules. Operation is subject to the following two
conditions: (1) This device may not cause harmful interference, and (2) this device must accept
any interference received, including interference that may cause undesired operation.
CAUTION:
Changes or modification not approved by JVC could void the user's
authority to operate the equipment.
For Canada:
This Class B digital apparatus complies with Canadian ICES-003.
Cet appareil numérique de la classe B est conforme à la norme
NMB-003 du Canada.
3
LVT1542-004A[J_E_EV]_Eng.book Page 4 Thursday, February 2, 2006 4:36 PM
IMPORTANT SAFETY INSTRUCTIONS
Player
• No altering or remodeling
This can cause malfunctioning.
• No dropping or strong impacts
This may damage the player.
• Locations to be avoided
Avoid using the player in the following locations since they can cause
malfunctioning.
1. Bathrooms and other moisture-prone places
2. Warehouses and other dusty places
3. Very hot places near heating appliances, etc.
Listening precautions
• Do not play your Headphones at a high volume.
• Hearing experts advise against continuous extended play.
• If you experience a ringing in your ears, reduce volume or discontinue
use.
• Do not use while operating a motorized vehicle. It may create traffic
hazard and is illegal in many areas.
• You should use extreme caution or temporarily discontinue use in
potentially hazardous situations.
• Even if your Headphones are an open-air type designed to let you
hear outside sounds, do not turn up the volume so high that you
cannot hear what is around you.
• Once you have established a comfortable sound level, leave the level
there.
4
LVT1542-004A[J_E_EV]_Eng.book Page 5 Thursday, February 2, 2006 4:36 PM
IMPORTANT SAFETY INSTRUCTIONS
Do not leave the player exposed to direct sunlight for long periods of
time
This may deform or discolor the player and may also cause
malfunctioning.
CAUTION:
Do not place any naked flame sources, such as lighted candles, on the
apparatus.
• We have no responsibility for any improper recording or
playback incurred by equipment malfunction.
• It is recommended to store backup copy of your important data
in your PC or the like.
5
LVT1542-004A[J_E_EV]_Eng.book Page 6 Thursday, February 2, 2006 4:36 PM
IMPORTANT SAFETY INSTRUCTIONS
Information for Users on Disposal of Old Equipment
[European Union]
This symbol indicates that the electrical and electronic
equipment should not be disposed as general household waste
at its end-of-life. Instead, the product should be handed over to
the applicable collection point for the recycling of electrical and
electronic equipment for proper treatment, recovery and
recycling in accordance with your national legislation.
Attention:
This symbol is
only valid in the
European Union.
By disposing of this product correctly, you will help to conserve
natural resources and will help prevent potential negative effects
on the environment and human health which could otherwise be
caused by inappropriate waste handling of this product. For
more information about collection point and recycling of this
product, please contact your local municipal office, your
household waste disposal service or the shop where you
purchased the product.
Penalties may be applicable for incorrect disposal of this waste,
in accordance with national legislation.
(Business users)
If you wish to dispose of this product, please visit our web page
www.jvc-europe.com to obtain information about the take-back
of the product.
[Other Countries outside the European Union]
If you wish to dispose of this product, please do so in
accordance with applicable national legislation or other rules in
your country for the treatment of old electrical and electronic
equipment.
6
LVT1542-004A[J_E_EV]_Eng.book Page 7 Thursday, February 2, 2006 4:36 PM
TABLE OF CONTENTS
IMPORTANT SAFETY INSTRUCTIONS ................................................ 2
TABLE OF CONTENTS .......................................................................... 7
GETTING STARTED............................................................................... 8
INSTALLING USB DRIVER (FOR WINDOWS 98SE ONLY) .............. 8
CHARGING THE BUILT-IN BATTERY ................................................ 9
CONNECTING TO PC....................................................................... 10
PARTS OF THE DIGITAL AUDIO PLAYER ...................................... 12
HOW TO USE THE NECK STRAP HEADPHONES ......................... 13
TURNING POWER ON/OFF ............................................................. 15
DISPLAY OVERVIEW ....................................................................... 16
BASIC OPERATIONS........................................................................... 17
USING THE MAIN MENU .................................................................. 17
PLAYING MUSIC .............................................................................. 18
NAVIGATE ........................................................................................ 19
RECORDING MUSIC FROM EXTERNAL AUDIO EQUIPMENT IN
LINE-IN MODE ................................................................................ 21
DELETING FILES .............................................................................. 23
ADVANCED FEATURES ...................................................................... 24
SET MENU ITEMS ............................................................................ 24
EQUALIZER....................................................................................... 24
PLAYMODE ....................................................................................... 26
SLEEP TIMER ................................................................................... 28
AUTO POWER OFF .......................................................................... 29
BACKLIGHT....................................................................................... 30
CONTRAST ....................................................................................... 31
RECORD SET ................................................................................... 32
LANGUAGE ....................................................................................... 34
ABOUT .............................................................................................. 35
RESETTING THE UNIT .................................................................... 36
LOCKING BUTTONS (HOLD) ........................................................... 37
DISPOSING OF THE DIGITAL AUDIO PLAYER .............................. 38
TROUBLESHOOTING .......................................................................... 41
SPECIFICATIONS................................................................................. 42
ACCESSORIES ................................................................................. 43
7
LVT1542-004A[J_E_EV]_Eng.book Page 8 Thursday, February 2, 2006 4:36 PM
GETTING STARTED
INSTALLING USB DRIVER
(FOR WINDOWS 98SE ONLY)
Follow these instructions to load software that enables a computer to
recognize the Digital Audio Player.
Make sure that no programs, such as games or anti-virus software, are
running on the PC. If programs are open, close and exit from the
programs before proceeding.
1. Insert the CD-ROM into the CD-ROM drive of your PC.
2. Turn off the Digital Audio Player and connect it to your PC with the
USB connector.
3. Follow the on-screen instructions to install the driver from the CDROM.
On a screen to search for the location of the Digital Audio Player‘s
driver, click the [Browse] button and select CD-ROM drive and then
proceed to the next screen.
Be sure that the installation completion screen appears.
4.
5. Reboot the PC.
NOTE
• If you are using Windows XP, Me or 2000, you do not need to install
the USB driver on the CD-ROM.
8
LVT1542-004A[J_E_EV]_Eng.book Page 9 Thursday, February 2, 2006 4:36 PM
GETTING STARTED
CHARGING THE BUILT-IN BATTERY
Charge the rechargeable battery before using it for the first time or when
it is depleted.
Charging the battery using a USB connection
Turn on the PC and connect the player to a USB port on your PC using a
USB cable. (Refer to "CONNECTING TO PC" on page 10.)
The battery indicator appears in the display, and charging of the battery
starts. During charging the indicator shows "
" repeatedly.
When charging is completed, " " appears.
NOTES
• It takes approximately 2.5 hours to fully charge an empty battery.
• When your PC is in standby mode, the battery cannot be charged.
• The player cannot be operated while it is being charged.
Notes on the built-in battery:
• To replace the battery, consult your dealer or JVC Service Center.
• To dispose of the player, follow the procedure described in
"DISPOSING OF THE DIGITAL AUDIO PLAYER" on page 38 and
remove the built-in battery. DO NOT disassemble the player, except
when you dispose of it (doing so may cause a failure or breakage).
Battery indicator
The battery indicator shows the remaining battery level. When the battery
level becomes low, "Low Battery" appears on the display. In this case, you
need to charge the battery.
9
LVT1542-004A[J_E_EV]_Eng.book Page 10 Thursday, February 2, 2006 4:36 PM
GETTING STARTED
CONNECTING TO PC
You can transfer MP3 and WMA format music files from the PC to your
Digital Audio Player through USB port. USB2.0 (480Mbps speed is not
supported.)
For Windows 98SE user:
Before connecting your player to the computer for the first time, you
need to install the USB driver from the supplied CD-ROM into your
computer. For details, see "INSTALLING USB DRIVER (FOR
WINDOWS 98SE ONLY)" on page 8.
Connecting Digital Audio Player to PC
1. Make sure that the player is turned off.
(Press and hold 7 button.)
2. Open the cover of the USB connector.
3. Connect the player to the USB port on your PC using USB cable.
"USB Connected" appears on the display, and the connection is
completed.
1
USB cable (supplied)
3
3
10
2
LVT1542-004A[J_E_EV]_Eng.book Page 11 Thursday, February 2, 2006 4:36 PM
GETTING STARTED
Transferring music files from PC to Digital Audio Player
1. Open the player’s folder (removable disk or device) from My
Computer or Explorer.
2. Copy and paste or drag and drop the music files from the PC to the
player’s folder. During copying files, "WRITING" appears on the
player's display. After completion, "READY" continuously appears.
NOTE
• When you transfer a WMA-DRM file from the PC, use Windows
Media® Player 9 or later. If you transfer it by drag and drop, it cannot
be played with the player.
Disconnecting from PC
For Windows 2000/Me/XP users:
Left-click the "
" icon in the task bar, and follow the on-screen
instructions.
For Windows 98SE users
Open "My Computer" and select "Removable Disk", then right-click to
select "EJECT".
• Microsoft, Windows and Windows Media are either trademarks or
registered trademarks of Microsoft Corporation in the United States
and other countries.
• Other names of systems and products mentioned in these instructions
are usually registered trademarks of the manufacturers who
developed the system or product concerned.
NOTES
• The player supports MP3 ID3 V1.0, 1.1 tags, ID3 V2.3 tags and WMA
tags. ID3 tags and WMA tags are the data including music names and
artist names recorded in MP3 files and WMA files.
• When the player is connected to the PC, it is recognized as an
external USB memory (removable disk) and shown on the PC. You
can treat the player as an external USB memory.
11
LVT1542-004A[J_E_EV]_Eng.book Page 12 Thursday, February 2, 2006 4:36 PM
GETTING STARTED
PARTS OF THE DIGITAL AUDIO PLAYER
1 23 4
8
7
!
9 0
~=-
56
1
2
3
4
5
6
7
12
Display
4 (Reverse) button
3 8 (Play/Pause) button
¢ (Forward) button
LINE IN jack
USB connector
Headphone jack
8
9
0
=
~
!
Hole for strap
Hold switch
Reset switch
7 (Stop) button
MENU button
REC button
VOL+/- (Volume) buttons
LVT1542-004A[J_E_EV]_Eng.book Page 13 Thursday, February 2, 2006 4:36 PM
GETTING STARTED
HOW TO USE THE NECK STRAP HEADPHONES
A neck strap with a pair of built in headphones, called "Neck Strap
Headphones", has been included for listening to your digital audio player.
By wearing the player around your neck using the Neck Strap
Headphones, you can enjoy listening to music anywhere you go without
having to worry about the cables.
1. Insert the supplied strap through the hole of the player and loop it
through itself.
* If you have difficulty in inserting the strap into the hole, use a thin,
sharp tool to push it through.
2. Insert the Neck Strap Headphones' plug into the headphone jack of
the player.
3. Adjust the positions of the silver slider on the Neck Strap
Headphones to make a loop large enough for your head to pass
through.
13
LVT1542-004A[J_E_EV]_Eng.book Page 14 Thursday, February 2, 2006 4:36 PM
GETTING STARTED
4. Once you are wearing the Neck Strap Headphones around your
neck, bring each earphone from the behind your neck and place in
the each ear respectively.
You can also adjust the position of the silver slider according to your
preference.
NOTE
• Be sure to read the separate sheet "Precautions for Use of the Neck
Strap Headphones" for its safety information.
14
LVT1542-004A[J_E_EV]_Eng.book Page 15 Thursday, February 2, 2006 4:36 PM
GETTING STARTED
TURNING POWER ON/OFF
To turn power ON
Press and hold 3 8 button till "Welcome!" appears. After a while, the
following screen appears.
DIGITAL
AUDIO
PLAYER
To turn power OFF
Press and hold 7 (Stop) button.
NOTE
• When the player is turned on, it resumes the mode it was in when it
was last turned off.
15
LVT1542-004A[J_E_EV]_Eng.book Page 16 Thursday, February 2, 2006 4:36 PM
GETTING STARTED
DISPLAY OVERVIEW
MUSIC mode
Play indicator
Volume level
Play mode indicator
EQ (sound mode)∗
Sleep Timer icon
Lock icon
Battery indicator
Track number/Total number of
tracks
9 File information∗∗
0 Track time
- Mode indicator
1
2
3
4
5
6
7
8
∗ This is not displayed when NORMAL mode is selected.
∗∗ If both the top and the bottom lines of the file information are long, the
top line is scrolled first, and then the bottom line is scrolled.
16
LVT1542-004A[J_E_EV]_Eng.book Page 17 Thursday, February 2, 2006 4:36 PM
BASIC OPERATIONS
USING THE MAIN MENU
There are number of modes you can operate using MAIN MENU.
MAIN MENU
MUSIC
Types of modes
MUSIC mode
Select to play music. (See
page 18.)
ABOUT mode
Select to display about the
player. (See page 35.)
NAVIGATE mode
Select to easily search for
the desired music. (See
page 19.)
RESET mode
Select to reset the settings
you have made. (See
page 36.)
LINE IN mode
Select to record music (MP3
file) from external audio
equipment. (See page 21.)
DELETE mode
Select to delete files. (See
page 23.)
SET mode
Select to set advanced
settings. (See pages 24 to
34.)
17
LVT1542-004A[J_E_EV]_Eng.book Page 18 Thursday, February 2, 2006 4:36 PM
BASIC OPERATIONS
PLAYING MUSIC
You can play the music files.
Before playing music, adjust the volume level with the volume +/- buttons.
Track time (in stop mode)
Playback time (during playing)
To play music
1. After turning on the player, press MENU button and ¢ / 4 button
2.
to select MUSIC mode from Main Menu, and then press 3 8 button
to enter that mode.
Press 3 8 button
To stop: Press 7 button.
To pause: Press 3 8 button.
To select track:
During playback or in stop mode, press ¢ / 4 button.
To fast-forward/reverse track:
During playback, press and hold ¢ / 4 button.
To exit MUSIC mode:Press MENU button.
NOTES
• If no audio files are stored, "NO FILES" appears.
• When the player is turned off in stop mode or during playback and
then turned on again, it will resume playback from the beginning of the
track lastly played when you start playback.
• The menu mode returns to the previous display before this menu is
displayed if no operation is made for approx. 10 seconds.
18
LVT1542-004A[J_E_EV]_Eng.book Page 19 Thursday, February 2, 2006 4:36 PM
BASIC OPERATIONS
NAVIGATE
Use to display the hierarchical tree structure of music folders and files
( ). From this tree structure, you can easily locate a desired music file
and play it back.
To locate a music file
1. After turning on the player, press MENU button and ¢ / 4 button
2.
3.
to select NAVIGATE mode from Main Menu, and then press 3 8
button to enter that mode.
Press ¢ / 4, 3 8 / 7 buttons to locate the desired file.
¢ / 4 : Moves the cursor (highlight) vertically. The cursor scrolls
through the files and folders in the selected folder.
3 8 / 7 : 1) Move the cursor to the desired folder and press 3 8
button to open it. Then, the files in the folder can be
selected.
2) When the cursor is inside the folder, press 7 button to
close the folder. Then, the hierarchical structure
appears including that folder.
Press 3 8 button to play it back.
(Press 3 8 button to pause and 7 button to stop.)
To exit NAVIGATE mode: Press MENU button.
19
LVT1542-004A[J_E_EV]_Eng.book Page 20 Thursday, February 2, 2006 4:36 PM
BASIC OPERATIONS
Music file playing order in Music mode:
From the hierarchical tree structure, you can easily understand the playing
order of music files when you normally play them in Music mode. You will
see that the music files are played back in the order from the higher
hierarchy to the lower one.
2
3
1
4
5
NOTES
• Maximum number of folders that can be recognized by the player is 50.
• Maximum number of hierarchies that can be recognized by the player
is 8, including the highest-order folders.
• You can change the playback order of music files by adding numbers
at the head of folder names or file names on PC.
(For example, add numbers like 01xxxx, 02yyyy, ...)
• The maximum number of files (WMA, MP3 and WAV files) that can be
displayed or operated is 550. On a file exceeding 550, its operation is
not guaranteed.
20
LVT1542-004A[J_E_EV]_Eng.book Page 21 Thursday, February 2, 2006 4:36 PM
BASIC OPERATIONS
RECORDING MUSIC FROM EXTERNAL AUDIO
EQUIPMENT IN LINE-IN MODE
You can record the music played back on external audio equipment.
Make sure that the audio cable is connected between the LINE IN terminal
of this audio player and the external audio equipment.
To record music from external audio equipment
1. After turning on the player, press MENU button and ¢ / 4 button
2.
3.
to select LINE IN mode from Main menu, and then press 3 8 button
to enter that mode.
Press and hold REC button until "Recording" appears.
The player is paused (the counter is stopped).
Play the music source on the external audio equipment.
The player automatically detects the sound, starts recording of the
music and numbers each track.
The default recording setting is as follows. Bit rate: 128kbps, A.TRK:
ON. For details, see pages 32 to 33.
To stop: Press 7 button.
To exit LINE IN mode: Press MENU button.
21
LVT1542-004A[J_E_EV]_Eng.book Page 22 Thursday, February 2, 2006 4:36 PM
BASIC OPERATIONS
NOTES
• The "LINE" folder is automatically generated, the recorded music files
are stored in it as MP3 files. The "LINE" folder can be displayed using
NAVIGATE mode. (See page 19.)
• If "Low Battery" appears when you press and hold REC button, it is
recommended to replace the battery with a new one.
• The player consumes an enormous amount of power for recording the
music stored in the external audio equipment. To prevent malfunction
due to low battery, the player is designed to stop faster in this mode. It
is recommended to use a fully charged battery if you continue to
record the music for many hours in this mode.
• AUTO LEVEL CONTROL (ALC)
• The player is equipped with Auto Level Control (ALC) to control
distortion during recording. When the output level from external
audio equipment is too high, the ALC automatically activates to
control the recording level, which can reduce distortion.
• When you perform test recording beforehand or check and control
the output level by inserting the headphones to the jack of the
player during recording, more proper level setting can be obtained.
• The recorded files can be copied to the computer connected to the
player by USB.
22
LVT1542-004A[J_E_EV]_Eng.book Page 23 Thursday, February 2, 2006 4:36 PM
BASIC OPERATIONS
DELETING FILES
(DELETE submenu)
(File deletion)
To delete files
1. After turning on the player, press MENU button and ¢ / 4 button
to select DELETE mode from Main Menu, and then press 3 8 button
to enter that mode.
Press ¢ / 4 button to select "MUSIC FILES".
2.
3. Press 3 8 button.
4. Press ¢ / 4 button to select a file you want to delete.
5. Press 7 button to select "YES".
To cancel the operation, select "NO".
6. Press 3 8 button to delete the file.
"File Deleted" appears. If you try to delete a read-only file, "Operation
Failed" appears.
(Each time you press 7 button, the status switches between "YES"
and "NO".)
To return to DELETE menu: Press MENU button once.
To exit DELETE mode:
Press MENU button again (or select "EXIT" and press 3 8 button in
DELETE submenu).
NOTE
• When all files in a folder are deleted, the folder disappears from the
player. However, it is not erased and remains in the player. You can
erase this folder by PC through USB.
23
LVT1542-004A[J_E_EV]_Eng.book Page 24 Thursday, February 2, 2006 4:36 PM
ADVANCED FEATURES
SET MENU ITEMS
In SET mode, you can set the following SET MENU items:
EQ SET (Equalization Set), PLAYMODE, SLEEP TIMER, A.POWER OFF (Auto
Power OFF), BACKLIGHT, CONTRAST, RECORD SET and LANGUAGE.
To set each item, see the relevant later page.
EQUALIZER
You can select from one of 6 different preset sound modes or one
customized sound mode.
Level
High
Low
Low
High
Frequency
Types of sound modes
NORMAL
No sound effect applies.
CLASSICAL
Good for classical music
JAZZ
Good for jazz music
ROCK
Boosts low and high frequency.
POP
Good for vocal music
BASS
Empowers bass sound.
CUSTOMIZED
You can create your own sound mode.
24
LVT1542-004A[J_E_EV]_Eng.book Page 25 Thursday, February 2, 2006 4:36 PM
ADVANCED FEATURES
To select sound mode
1. After turning on the player, press MENU button and ¢ / 4 button
to select SET mode from Main Menu, and then press 3 8 button to
enter that mode.
Press ¢ / 4 button to select "EQ SET".
2.
3. Press 3 8 button.
4. Press ¢ / 4 button to select the sound mode.
5. Press 3 8 button to return to SET MENU.
To create sound mode (CUST)
1. After turning on the player, press MENU button and ¢ / 4 button
to select SET mode from Main Menu, and then press 3 8 button to
enter that mode.
Press ¢ / 4 button to select "EQ SET".
2.
3. Press 3 8 button.
4. Press ¢ / 4 button to select "CUST".
5. Press MENU button briefly to start editing.
The indicator of the lowest frequency is highlighted.
6. Press ¢ / 4 button to select the frequency you want to edit.
7. Press 3 8 button.
The indicator starts to blink.
8. Press ¢ / 4 button to set the level up or down and then press
3 8 button to store it.
9. Repeat Steps 6 through 8 to edit for other frequencies.
10. Press MENU button briefly. The highlight disappears and the setting is
completed.
11. Press 3 8 button to return to SET MENU.
To exit SET mode:
Press MENU button (or select "EXIT" and press 3 8 button) in the SET
MENU.
25
LVT1542-004A[J_E_EV]_Eng.book Page 26 Thursday, February 2, 2006 4:36 PM
ADVANCED FEATURES
PLAYMODE
You can select various play modes.
Types of playback modes
Mode
Display
Explanation
NORMAL
Normal play
REPEAT ONE
Repeats one track.
REPEAT ALL
Repeats all tracks.
RPT FOLDER
Repeats all tracks of a folder which
has a track being played back, or
repeats all tracks of a folder which has
a track selected in NAVIGATE mode.
RANDOM
Plays all tracks in random order.
RANDOM RPT
Repeats all tracks in random order.
RND FOLDER
Repeats all tracks of a folder which
has a track being played back, or
plays all tracks of a folder which has a
track selected in NAVIGATE mode, in
random order.
INTRO
Plays first 10 seconds for each tracks.
When all tracks are played, the display
disappears and the mode is canceled.
26
LVT1542-004A[J_E_EV]_Eng.book Page 27 Thursday, February 2, 2006 4:36 PM
ADVANCED FEATURES
To select play mode
1. After turning on the player, press MENU button and ¢ / 4 button
to select SET mode from Main Menu, and then press 3 8 button to
enter that mode.
Press ¢ / 4 button to select "PLAYMODE".
2.
3. Press 3 8 button.
4. Press ¢ / 4 button to select the play mode.
5. Press 3 8 button to return to SET MENU.
To exit SET mode:
Press MENU button (or select "EXIT" and press 3 8 button) in the
SET MENU.
27
LVT1542-004A[J_E_EV]_Eng.book Page 28 Thursday, February 2, 2006 4:36 PM
ADVANCED FEATURES
SLEEP TIMER
Use the sleep timer to turn off the player after a certain period of time
during playback. You can set the period of time to 15, 30, 45, 60 minutes,
or OFF (default). The sleep timer works temporarily. Once it has worked,
it is canceled. When the sleep timer is set, the sleep timer icon ( )
appears on the upper right of the display.
To set sleep timer
1. After turning on the player, press MENU button and ¢ / 4 button
to select SET mode from Main Menu, and then press 3 8 button to
enter that mode.
Press ¢ / 4 button to select "SLEEP TIMER".
2.
3. Press 3 8 button.
4. Press ¢ / 4 button to select the time.
5. Press 3 8 button to return to SET MENU.
To exit SET mode:
Press MENU button (or select "EXIT" and press 3 8 button) in the
SET MENU.
28
LVT1542-004A[J_E_EV]_Eng.book Page 29 Thursday, February 2, 2006 4:36 PM
ADVANCED FEATURES
AUTO POWER OFF
Use the auto power off to turn off the player after a certain period of time
when no operation is made. You can set the period of time to 2, 5, or 10
minutes, or OFF (default).
To set auto power off
1. After turning on the player, press MENU button and ¢ / 4 button
to select SET mode from Main Menu, and then press 3 8 button to
enter that mode.
Press ¢ / 4 button to select "A.POWER OFF".
2.
3. Press 3 8 button.
4. Press ¢ / 4 button to select the time.
5. Press 3 8 button to return to SET MENU.
To exit SET mode:
Press MENU button (or select "EXIT" and press 3 8 button) in the
SET MENU.
29
LVT1542-004A[J_E_EV]_Eng.book Page 30 Thursday, February 2, 2006 4:36 PM
ADVANCED FEATURES
BACKLIGHT
Use to adjust the backlighting extension time (0 to Max) after finishing the
last operation. (Default: 5 seconds) When "Max" is set, the backlighting
remains on for approx. two hours.
To set back light
1. After turning on the player, press MENU button and ¢ / 4 button
to select SET mode from Main Menu, and then press 3 8 button to
enter that mode.
Press ¢ / 4 button to select "BACKLIGHT".
2.
3. Press 3 8 button.
4. Press ¢ / 4 button to select the time.
5. Press 3 8 button to return to SET MENU.
To exit SET mode:
Press MENU button (or select "EXIT" and press 3 8 button) in the
SET MENU.
NOTE
• When "Low Battery" appears, backlighting goes out and, after that, it
does not light again.
30
LVT1542-004A[J_E_EV]_Eng.book Page 31 Thursday, February 2, 2006 4:36 PM
ADVANCED FEATURES
CONTRAST
Use to adjust the contrast of the display.
To set contrast
1. After turning on the player, press MENU button and ¢ / 4 button
to select SET mode from Main Menu, and then press 3 8 button to
enter that mode.
Press ¢ / 4 button to select "CONTRAST".
2.
3. Press 3 8 button.
4. Press ¢ / 4 button to select the level.
5. Press 3 8 button to return to SET MENU.
To exit SET mode:
Press MENU button (or select "EXIT" and press 3 8 button) in the
SET MENU.
31
LVT1542-004A[J_E_EV]_Eng.book Page 32 Thursday, February 2, 2006 4:36 PM
ADVANCED FEATURES
RECORD SET
For external equipment input (LINE), set bit rate, A.TRK, etc. during
recording.
Source
LINE
Encode
(MP3 Stereo)
Bit Rate
96kbps, 128kbps, 160kbps
A. TRK
ON, OFF
To set recording
1. After turning on the player, press MENU button and ¢ / 4 button
to select SET mode from Main menu, and then press 3 8 button to
enter that mode.
Press ¢ / 4 button to select "RECORD SET".
2.
3. Press 3 8 button.
4. Press ¢ / 4 button to select item (Bit Rate or A.TRK).
5. Press 3 8 button to select the desired content from the selected
item.
6. Repeat the steps from 4 to 5, as necessary.
7. Press MENU button to return to the SET mode.
32
LVT1542-004A[J_E_EV]_Eng.book Page 33 Thursday, February 2, 2006 4:36 PM
ADVANCED FEATURES
To exit SET mode:
Press MENU button (or select "EXIT" and press 3 8 button) in the
SET MENU.
Bit Rate:
Indicates information content of the compressed data per second. As the
bit rate is higher, the audio quality becomes higher, but the data amount
increases.
Auto Track (A.TRK):
You can select ON or OFF of the A. TRK when you record music from the
input of the external audio equipment. When ON is selected, the A. TRK
detects each track automatically and numbers each track. When the
music starts, the A. TRK starts recording and when the music stops, the
A. TRK detects silence and the player pauses. When OFF is selected, no
track is detected and recording doesn't stop if the player is in silent state.
When silent state continues for 3 seconds or more in LINE-IN mode, the
A. TRK judges this state as a turn of the track and the track is divided. The
track, therefore, is not divided in this mode if the interval of two tracks is
too short, or noise continuously occurs in the interval. In addition, if a track
has very low sound or silent part, the track is divided.
In such cases, select OFF for A. TRK from "RECORD SET" in the SET
mode and record each track manually.
33
LVT1542-004A[J_E_EV]_Eng.book Page 34 Thursday, February 2, 2006 4:36 PM
ADVANCED FEATURES
LANGUAGE
Use to set the language for the menu, file names and ID3 tags (default:
English). For the file names and ID3 tags, you can select one of 27
languages. As for the menu, you can select one of three languages:
English, Simplified Chinese or Traditional Chinese.
To set language
1. After turning on the player, press MENU button and ¢ / 4 button
to select SET mode from Main Menu, and then press 3 8 button to
enter that mode.
Press ¢ / 4 button to select "LANGUAGE".
2.
3. Press 3 8 button.
4. Press ¢ / 4 button to select the language.
5. Press 3 8 button to return to SET MENU.
To exit SET mode:
Press MENU button (or select "EXIT" and press 3 8 button) in the
SET MENU.
NOTE
• When Simplified Chinese or Traditional Chinese is selected, the menu
is also displayed in the selected language. When other languages are
selected, the menu is displayed in English.
34
LVT1542-004A[J_E_EV]_Eng.book Page 35 Thursday, February 2, 2006 4:36 PM
ADVANCED FEATURES
ABOUT
Use to display firmware version and status of the player.
Amount of memory installed
Available memory space to store further
music files
To display:
After turning on the player, press MENU button and ¢ / 4 button
to select ABOUT mode from Main Menu, and then press 3 8 button
to enter that mode.
To exit ABOUT mode: Press MENU button.
Upgrading firmware version:
To upgrade the firmware of your player, please visit our website.
35
LVT1542-004A[J_E_EV]_Eng.book Page 36 Thursday, February 2, 2006 4:36 PM
ADVANCED FEATURES
RESETTING THE UNIT
Use to reset all the settings you have made to default.
To reset the unit
1. After turning on the player, press MENU button and ¢ / 4 button
2.
to select RESET mode from Main Menu, and then press 3 8 button
to enter that mode.
Press 3 8 button to reset the unit.
All the settings are reset and "RESET OK!" appears.
To cancel and exit RESET mode: Press MENU button.
Default value of each SET MENU item:
EQ SET
Normal
PLAYMODE
Normal
SLEEP TIMER
OFF
A.POWER OFF
OFF
BACKLIGHT
5 Sec
CONTRAST
Factory-set level
RECORD SET
Bit Rate : 128kbps
A.TRK : ON
LANGUAGE
ENGLISH
36
LVT1542-004A[J_E_EV]_Eng.book Page 37 Thursday, February 2, 2006 4:36 PM
ADVANCED FEATURES
LOCKING BUTTONS (HOLD)
Slide the HOLD switch to the right to lock all controls.
When the hold function is activated, the " " appears in the upper right of
the display.
To unlock: Slide the HOLD switch to the left.
NOTE
• When the player is turned on with the HOLD switch set to ON position,
"HOLD" appears after the initial message "DIGITAL AUDIO PLAYER".
Then, the player automatically shuts off. To use the player, set the
HOLD switch to OFF position and turn on the player again.
37
LVT1542-004A[J_E_EV]_Eng.book Page 38 Thursday, February 2, 2006 4:36 PM
ADVANCED FEATURES
DISPOSING OF THE DIGITAL AUDIO PLAYER
Remove the built-in battery before disposing of the XA-F series player. DO
NOT disassemble the player except when you dispose of it (doing so may
cause a failure or breakage). Do not remove the built-in battery before
making sure it has been completely used up.
DANGER:
• Do not subject the built-in battery to strong impacts.
Shorting the poles may cause heating, bursting, or start a fire.
• Do not store the built-in battery with a metal necklace or hairpin
in a pocket.
Shorting the poles may cause heating, bursting, or start a fire.
• Do not heat, disassemble, modify the built-in battery, or throw it
into water or fire.
Bursting, ignition, or heat may cause a fire or injury.
• Do not leave the built-in battery near fire or in direct sunlight.
Also, do not leave the built-in battery near a heater. Bursting, ignition,
or heat may cause a fire or injury.
CAUTION:
• Do not leave the built-in battery within the reach of small
children.
It may cause injury or accident if swallowed.
• If the battery liquid leaks and gets into an eye, rinse the eye
with clear water and consult a doctor immediately.
Leaving the eye untreated may cause loss of sight in that eye.
To remove the built-in battery
1. Make sure that the built-in battery is completely used up.
2.
38
Make sure that the player does not power on when the 3 8 button of
the player is pressed and held.
Open the cover for the LINE IN jack / USB connecter.
LVT1542-004A[J_E_EV]_Eng.book Page 39 Thursday, February 2, 2006 4:36 PM
ADVANCED FEATURES
3. Remove a screw on the side of the LINE IN jack with a screwdriver.
4. Remove the top half of the casing by lifting it up.
5. Remove the three screws shown in the illustration below.
6. Hold the part shown in the illustration below and turn the circuit board over.
39
LVT1542-004A[J_E_EV]_Eng.book Page 40 Thursday, February 2, 2006 4:36 PM
ADVANCED FEATURES
7. Lift the part shown below with your fingernail and turn the built-in
battery over.
8. Cut the red and black wires from the battery with scissors.
9. Stick the wires to the battery and place it in a plastic bag.
Using insulating tape, cover each of the wires and stick them to the
built-in battery to prevent them from touching each other, and place it
in a plastic bag.
NOTES
• To replace the battery, consult your dealer or JVC Service Center.
• Do not reuse the battery once it has been removed.
• The battery is designated recyclable. Please follow your local
recycling regulations.
40
LVT1542-004A[J_E_EV]_Eng.book Page 41 Thursday, February 2, 2006 4:36 PM
TROUBLESHOOTING
Problem
Solution
The player does not
function.
• Make sure the HOLD switch is off.
• Battery may be drained. Charge the battery.
There is no sound or • Make sure the headphone plug is correctly
a lot of noise.
connected to the player.
• Wipe the headphone plug with a clean cloth.
• Keep the player away from other equipment,
such as mobile phones or televisions.
• Turn the volume up.
The battery life is
short.
• Battery charging time is insufficient. Keep
charging until "
" appears.
• The built-in battery may have reached the
end of its life. Consult the JVC Service Center
and replace it with a new one if necessary.
The player suddenly
stops working.
• Press the reset switch by inserting a thin
object (for example a pin or a straightened
paperclip) into the hole on the back of the
player to turn the unit off, and then turn the
player back on. (Files and settings stored in
the memory will not be deleted.)
The display is too
dark or too bright.
• Adjust the contrast.
The player
automatically shuts
off.
• Auto power off function is set in effect. See
page 29.
(This is not a malfunction.)
Your computer does • If your operating system is Windows 98SE,
not recognize the
be sure to install the USB driver from the
player.
supplied CD-ROM in your computer.
41
LVT1542-004A[J_E_EV]_Eng.book Page 42 Thursday, February 2, 2006 4:36 PM
SPECIFICATIONS
Model Name
XA-F107
XA-F57
Type
Digital audio player
Built-in memory size
1 GB
Display
LCD with backlighting (4-line display)
Music playback format
MP3/WMA/WMA-DRM∗1
Bit rate
MP3: 8 kbps to 320 kbps, WMA: 32 kbps to 192 kbps
Maximum number of
tracks∗2
Approx. 500
Frequency response
60 Hz to 20 kHz, +0 dB to -3 dB (Audio)
Output terminal
Headphones (stereo mini jack)
Input terminal
Line in (stereo mini jack)
Power supply
Built-in rechargeable lithium-ion battery
Continuous playback time
Approx. 15 hours (Audio playback)∗3
Dimensions (Approx.)
73 (L) × 41 (W) × 17.5 (H) mm (excluding protruding
parts)
Mass (Approx.)
39 g
512 MB
Approx. 250
∗1 WMA-DRM: A WMA file with reproduction restriction for copyright protection of
digital data.
∗2 Condition: WMA: 64 kbps, 1 track: 4 minutes.
∗3 Condition: MP3 (128 kbs, fs=44.1 kHz) file playback, backlighting OFF,
Equalization: normal
Design and specifications are subject to change without notice.
■ OS supported: Microsoft® Windows® XP (Home Edition/Professional),
Windows® Me, Windows® 2000 Professional, Windows® 98SE∗
(∗ Installation of USB driver is necessary using CD-ROM supplied)
42
LVT1542-004A[J_E_EV]_Eng.book Page 43 Thursday, February 2, 2006 4:36 PM
SPECIFICATIONS
ACCESSORIES
Neck Strap Headphones
USB cable
CD-ROM (USB Driver for Windows 98SE)
Audio cable
43
LVT1542-004A[J_E_EV]_Eng.book Page 44 Thursday, February 2, 2006 4:36 PM
EN
© 2006 Victor Company of Japan, Limited
0206KMMCREBET