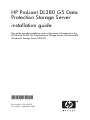
1
HP ProLiant DL380 G5 Data
Protection Storage Server
installation guide
This guide provides installation and configuration information for the
HP ProLiant DL380 G5 Data Protection Storage Server with Microsoft®
Windows® Storage Server 2003 R2.
434185-001
Part number: 434185-001
First edition: September 2006
Legal and notice information
© Copyright 2006 Hewlett-Packard Development Company, L.P.
Hewlett-Packard Company makes no warranty of any kind with regard to this material,
including, but not limited to, the implied warranties of merchantability and fitness for a
particular purpose. Hewlett-Packard shall not be liable for errors contained herein or for
incidental or consequential damages in connection with the furnishing, performance, or
use of this material.
This document contains proprietary information, which is protected by copyright. No part
of this document may be photocopied, reproduced, or translated into another language
without the prior written consent of Hewlett-Packard. The information contained in this
document is subject to change without notice. The only warranties for HP products and
services are set forth in the express warranty statements accompanying such products and
services. Nothing herein should be construed as constituting as additional warranty. HP
shall not be liable for technical or editorial errors or omissions contained herein.
Microsoft®, Windows®, and Windows NT® are U.S. registered trademarks of Microsoft
Corporation.
UNIX® is a registered trademark of The Open Group.
Hewlett-Packard Company shall not be liable for technical or editorial errors of omissions
contained herein. The information is provided “as is” without warranty of any kind and is
subject to change without notice. The warranties for Hewlett-Packard Company products
are set forth in the express limited warranty statements for such products. Nothing herein
should be construed as constituting an additional warranty.
Contents
About this guide . . . . . . . . . . . . .
Intended audience . . . . . . . . .
Getting help . . . . . . . . . . . .
Related documentation . . . . . . . .
Conventions . . . . . . . . . . . .
Document conventions and symbols
Text symbols . . . . . . . . . .
HP technical support . . . . . . . . .
HP subscriber’s choice . . . . . .
HP-authorized reseller . . . . . .
Other helpful web sites . . . . .
HP hardware support services . .
1 Setup overview
.
.
.
.
.
.
.
.
.
.
.
.
.
.
.
.
.
.
.
.
.
.
.
.
.
.
.
.
.
.
.
.
.
.
.
.
.
.
.
.
.
.
.
.
.
.
.
.
.
.
.
.
.
.
.
.
.
.
.
.
.
.
.
.
.
.
.
.
.
.
.
.
.
.
.
.
.
.
.
.
.
.
.
.
.
.
.
.
.
.
.
.
.
.
.
.
.
.
.
.
.
.
.
.
.
.
.
.
.
.
.
.
.
.
.
.
.
.
.
.
.
.
.
.
.
.
.
.
.
.
.
.
. . . . . . . . . . . .
Planning for installation . . . . . . . . . . . . . . . . . . .
Planning a network configuration . . . . . . . . . . . . . . .
Configuration checklist . . . . . . . . . . . . . . . . . . . .
2 Installing the server . . . . . . . . . . .
Checking kit contents . . . . . . . . . .
Becoming familiar with front/back panels .
Locating and writing down the serial number
Completing rail kit installation . . . . . . .
Cabling the server . . . . . . . . . . .
Powering on the server . . . . . . . . . .
.
.
.
.
.
.
.
.
.
.
.
.
.
.
.
.
.
.
.
.
.
.
.
.
.
.
.
.
.
.
.
.
.
.
.
.
.
.
.
.
.
.
.
.
.
.
.
.
.
.
.
.
.
.
3 Accessing the HP Data Protection Storage
Server Management console . . . . . . .
Using
Using
Using
Using
the
the
the
the
Direct attach method . . . .
Remote browser method . . .
Remote desktop method . . .
Integrated Lights-Out 2 method
.
.
.
.
.
.
.
.
.
.
.
.
.
.
.
.
.
.
.
.
.
.
.
.
.
.
.
.
.
.
.
.
.
.
.
.
.
.
.
.
.
.
.
.
HP ProLiant DL380 G5 Data Protection Storage Server
.
.
.
.
.
.
.
.
.
.
.
.
.
.
.
.
.
7
7
7
7
8
8
9
9
10
10
10
10
13
13
16
16
19
20
20
23
23
24
25
27
28
28
31
31
3
4 Configuring the server on the network . . .
35
5 Complete system configuration . . . . . .
43
A Configuring storage server for Web access
(optional) . . . . . . . . . . . . . . . .
45
Index
47
Before you begin . . . . . . . . . . . . . . . . . . . . . .
Running the Rapid Startup Wizard . . . . . . . . . . . . . . .
Running the DPM mini-setup . . . . . . . . . . . . . . . . .
Additional configuration tasks . . . . . . . . . . . . . . . . .
Setting up an Internet connection
4
. . . . . . . . . . . . . . .
. . . . . . . . . . . . . . . . .
35
38
39
43
45
Figures
1 Deciding upon a network access method
2 Kit contents . . . . . . . . . . . .
3 Front panel . . . . . . . . . . . .
4 Back panel . . . . . . . . . . . .
5 Cable connections . . . . . . . . .
6 Power on button . . . . . . . . . .
7 Internet options screen . . . . . . . .
8 iLO 2 connector port . . . . . . . .
9 Rapid Startup Wizard . . . . . . . .
10 Automatic configuration settings . . .
11 Proxy server settings . . . . . . . .
.
.
.
.
.
.
.
.
.
.
.
.
.
.
.
.
.
.
.
.
.
.
.
.
.
.
.
.
.
.
.
.
.
.
.
.
.
.
.
.
.
.
.
.
.
.
.
.
.
.
.
.
.
.
.
.
.
.
.
.
.
.
.
.
.
.
.
.
.
.
.
.
.
.
.
.
.
.
.
.
.
.
.
.
.
.
.
.
.
.
.
.
.
.
.
.
.
.
.
.
.
.
.
.
.
.
.
.
.
.
HP ProLiant DL380 G5 Data Protection Storage Server
.
.
.
.
.
.
.
.
.
.
.
14
20
21
22
24
25
29
32
38
45
46
5
Tables
1
2
3
4
6
Document conventions . . . . . . .
Network access methods . . . . . .
Installation and Configuration checklist
Server configuration worksheet . . .
.
.
.
.
.
.
.
.
.
.
.
.
.
.
.
.
.
.
.
.
.
.
.
.
.
.
.
.
.
.
.
.
.
.
.
.
.
.
.
.
.
.
.
.
. . 8
.
15
.
17
.
35
About this guide
This guide provides information for setting up and configuring the HP
ProLiant DL380 G5 Data Protection Storage Server.
This guide is available on the HP web site and is also provided as a PDF
document on the HP ProLiant Storage Server documentation CD.
Intended audience
This book is intended for use by technical professionals who are
experienced with the following:
• Microsoft® administrative procedures
• System and storage configurations
Getting help
If you still have a question after reading this guide, contact an HP
authorized service provider or access our web site: http://www.hp.com.
NOTE:
Known issues and work arounds for the storage server products and
the service release are addressed in release notes. To view the latest
version, visit http://www.hp.com/go/support. Select See support and
troubleshooting information and enter a product name/number. Under
self-help resources, select manuals (guides, supplements, addendums,
etc.).
Related documentation
In addition to this guide, refer to the following documents for more
information:
• HP ProLiant DL380 G5 Data Protection Storage Server
administration guide
• HP ProLiant 2U Rail installation instructions
• HP Integrated Lights-Out 2 User Guide
HP ProLiant DL380 G5 Data Protection Storage Server
7
These documents are available on the Documentation CD or they can be
obtained at http://www.hp.com/go/storageservers. Select your product,
then click Technical documentation under the Support section.
Conventions
This document contains the following conventions and symbols:
• Document conventions
• Text symbols
Document conventions and symbols
Table 1 Document conventions
Convention
Element
Blue text
Cross-reference links and e-mail addresses
Medium blue,
underlined
text (http://
www.hp.com)
Web site addresses
Bold font
• Key names
• Text typed into a GUI element, such as
into a box
• GUI elements that are clicked or
selected, such as menu and list items,
buttons, and check boxes
Italic font
Text emphasis
Monospace font
•
•
•
•
Monospace,
italic font
• Code variables
• Command-line variables
Monospace,
bold font
Emphasis of file and directory names,
system output, code, and text typed at the
command line
8
About this guide
File and directory names
System output
Code
Text typed at the command line
Text symbols
WARNING!
Indicates that failure to follow directions could result in bodily harm or
death.
CAUTION:
Indicates that failure to follow directions could result in damage to
equipment or data.
IMPORTANT:
Provides clarifying information or specific instructions.
NOTE:
Provides additional information.
TIP:
Provides helpful hints and shortcuts.
HP technical support
Telephone numbers for worldwide technical support are listed on the HP
support web site: http://www.hp.com/support/.
Collect the following information before calling:
•
•
•
•
•
•
Technical support registration number (if applicable)
Product serial numbers
Product model names and numbers
Applicable error messages
Operating system type and revision level
Detailed, specific questions
For continuous quality improvement, calls may be recorded or monitored.
HP ProLiant DL380 G5 Data Protection Storage Server
9
HP subscriber’s choice
HP strongly recommends that customers sign up online using the
Subscriber’s choice web site: http://www.hp.com/go/e-updates.
• Subscribing to this service provides you with e-mail updates on
the latest product enhancements, newest versions of drivers, and
firmware documentation updates, as well as instant access to
numerous other product resources.
• After signing up, you can quickly locate your products by selecting
Business support, and then Storage under Product Category.
HP-authorized reseller
For the name of your nearest HP-authorized reseller:
• In the United States, call 1-800-282-6672.
• Elsewhere, visit the HP web site: http://www.hp.com. Then, click
Contact HP to find locations and telephone numbers.
Other helpful web sites
For other product information, see the following HP web sites:
•
•
•
•
http://www.hp.com/go/storage
http://www.hp.com/support/
http://www.docs.hp.com
http://www.microsoft.com
HP hardware support services
HP Instant Support Enterprise Edition (ISEE) provides proactive remote
monitoring, diagnostics, and troubleshooting to help you enhance
the availability of your servers, as well as storage and network
devices. The ISEE software is located on the storage server in the
c:\hpnas\components\ISEE folder. For more information, go
to the HP web site: http://h20219.www2.hp.com/services/cache/
10707-0-0-225-121.aspx.
HP Services provides service tools that notify you when a significant system
event has or will occur. These tools, WEBES System Event Analyzer (SEA)
and OSEM, are used both as part of the ISEE remote service offering and
as standalone tools to HP service customers. They are designed to send a
notification only when an event or series of events has occurred that require
service action. They are not intended to be real-time system state monitors
10
About this guide
that trigger with every event. Most system components have the capability
of sending hundreds of state events during normal operation. SEA and
OSEM are designed to filter these component events and only notify
customers and/or HP Services when action needs to be taken to resolve or
prevent an outage. As designed they will not report all events. Other utilities
are available to monitor real time system state. The software is located on
the storage server in the c:\hpnas\components\ISEE\OSEM and
c:\hpnas\components\ISEE\WEBES folders.
HP ProLiant DL380 G5 Data Protection Storage Server
11
12
About this guide
1 Setup overview
Your HP ProLiant storage server comes pre-installed with the Windows®
Storage Server™ 2003 R2 operating system. Windows Storage Server
2003 R2 extends the Windows Storage Server 2003 operating system,
providing a more efficient way to manage and control access to local
and remote resources. In addition, Windows Storage Server 2003 R2
provides a scalable, security-enhanced Web platform for simplified branch
server management, improved identity and access management, and more
efficient storage management.
Planning for installation
Before you install your HP ProLiant storage server, you need to make a
few up-front decisions.
Determining a network access method
Before beginning setup and startup procedures, you should decide
upon an access method to connect to the storage server. The type of
network access you select is determined by whether or not the network
has a Dynamic Host Configuration Protocol (DHCP) server, as shown in
"Deciding upon a network access method" on page 14. "Network access
methods" on page 15 shows the types of network access methods that are
available and provides more information about each one.
HP ProLiant DL380 G5 Data Protection Storage Server
13
DHCP Access?
y/n
Yes
No
Direct Attach*
(mandatory)
Remote
Browser
Remote
Desktop
Direct
Attach*
Integrated
Lights-Out 2
*Direct Attach requires
display, keyboard, and mouse.
5061
Figure 1 Deciding upon a network access method
14
Setup overview
Table 2 Network access methods
Access
method
I.E.
5.5 or
later required?
Storage
server
desktop
accessible?
HP ProLiant
Rapid Startup
Wizard
access
Notes
Direct
attachment
No
Yes
Directly from
the storage
server
desktop.
Requires a
monitor,
mouse,
and
keyboard.
Remote
browser
Yes
No
Directly from
the HP ProLiant Data
ProtectionStorage
Server Management console.
Does not
display the
storage
server
desktop.
Remote
desktop
No
Yes
Indirectly
from the
storage
server
desktop.
Windows
remote
desktop
capability
required
on client.
HP Integrated
Lights-Out
2 (iLO 2)
connectivity
Yes
Yes
Indirectly
from the
storage
server
desktop.
See the HP
Integrated
Lights-Out
2 User
Guide for
server access instructions.
HP ProLiant DL380 G5 Data Protection Storage Server
15
Planning a network configuration
You use the Rapid Startup Wizard to configure your storage server. This
wizard is displayed automatically when you first start your system. Before
you run the Rapid Startup Wizard, it is helpful to gather together the
network configuration information you need, including:
• User name and administrator password (the system provides you
with defaults you need to change)
• E-mail addresses to set up system alerts
• SNMP settings
• Local area network (LAN) configuration settings
To help you gather this information, see "Configuring the server on the
network" on page 35.
Configuration checklist
Use the following checklist to make sure you have completed all
configuration tasks for your HP ProLiant storage server. The steps for each
task are explained in more detail in subsequent chapters of this guide.
16
Setup overview
Table 3 Installation and Configuration checklist
Steps
Reference
1. Unpack server, check kit
contents, and become familiar
with front and back panels of
storage server. Locate and
write down serial number of
storage server.
See "Checking kit
contents" on page 20.
2. Complete rail installation
instructions.
See the HP ProLiant rail
installation instructions, if
applicable.
3. Connect cables; (optional)
connect a keyboard, mouse,
and monitor; power on server,
and log in to the server.
See "Cabling the
server" on page 24,
Powering on the server, and
Direct attach method.
4. Access the HP Data
ProtectionStorage Server
Management console.
• Direct attach method
• Remote browse method
• Remote desktop method
• iLO 2 method
See "Accessing
the HP Storage
Server Management
console" on page 27.
5. Complete the storage server
configuration worksheet.
See "Server configuration
worksheet" on page 35.
6. Run Rapid Startup Wizard.
See "Rapid Startup
Wizard" on page 38.
7. Complete system
configuration.
See "Complete system
configuration" on page 43.
8. Configure storage server
for Web access, if necessary.
See "Configuring storage
server for Web access
(optional)" on page 45.
HP ProLiant DL380 G5 Data Protection Storage Server
17
18
Setup overview
2 Installing the server
To install your HP ProLiant storage server, follow the instructions in the
sections below:
• Checking kit contents
• Becoming familiar with front/back panels
• Cabling the server
• Powering on the server
HP ProLiant DL380 G5 Data Protection Storage Server
19
Checking kit contents
Remove the contents, making sure you have all the components shown in
the figure below. If components are missing, contact HP technical support.
1
5
6
2
4
7
3
ProLia
nt Ess
ential
s Inte
grated
Lights
-Out
Advan
ced
4
Pack
5235C
Figure 2 Kit contents
1
HP ProLiant DL380 G5
Data Protection Storage
Server (with operating
system preloaded)
5
Power cords (select the correct
one needed for your connection
needs)
2
HP ProLiant Data
Protection Storage Server
System Installation and
Recovery DVD
6
Slide rail Assembly
3
Product Documentation
and Safety and Disposal
Documentation CD
7
ProLiant Essentials Integrated
Lights-Out 2 Advanced Pack
4
End User License
Agreement
Becoming familiar with front/back panels
Become familiar with the function of the front/back panels on the server as
shown in the figures below.
20
Installing the server
6
1
2
3
4
5
6
gl0069
Figure 3 Front panel
1
DVD-RW drive
4
Systems Insight Display
2
Video connector
5
Hard drive bays
3
USB Connectors (2)
6
Quick release levers (2)
HP ProLiant DL380 G5 Data Protection Storage Server
21
6
7
5
4
3
2
8
1
9
18
10
17
16
15
11
14
12
13
gl0072
Figure 4 Back panel
Item
Description
Color
1
Expansion slot 1 (Occupied by the Smart
Array P400 Controller)
—
2
Expansion slot 2
—
3
Expansion slot 3
—
4
Expansion slot 4
—
5
Expansion slot 5
—
6
T-10/T-15 Torx screwdriver
—
7
External option blank
—
8
NIC 2 connector
—
9
NIC 1 connector
—
10
Power supply bay 2 (populated)
—
11
Power cord connector
Black
12
Power supply bay 1 (populated)
—
13
iLO 2 connector
—
14
Video connector
Blue
15
USB connectors (2)
Black
16
Serial connector
—
17
Mouse connector
Green
18
Keyboard connector
Purple
22
Installing the server
Locating and writing down the serial number
Before completing the installation portion of this guide, locate and write
down the storage server’s serial number, which may be needed to access
the HP Data Protection Storage Server Management console later on
during the set up process.
The HP ProLiant storage server’s serial number is located in three places:
• Top of the storage server
• Back of the storage server
• Inside the storage server shipping box
Completing rail kit installation
Install the server into the rack by following the rail installation instructions
for your server model. These installation instructions are provided in printed
form with your server, on the HP ProLiant Data Protection Storage Server
Documentation CD, or at http://www.hp.com/support.
For all models of the HP ProLiant DL380 G5 Data Protection Storage
Server, see HP ProLiant 2U Rail installation instructions.
HP ProLiant DL380 G5 Data Protection Storage Server
23
Cabling the server
Connect the cables in the sequence shown in the figure below.
1
2
7
6
3
5
4
gl0080
Figure 5 Cable connections
1
NIC 2 connector
5
Video connector
2
NIC 1 connector
6
Mouse connector
3
Power cord connector
7
Keyboard connector
4
iLO 2 connector
NOTE:
Connecting the power cord illuminates the LEDs on the front of the bezel,
the Systems Insight Display LED, and the LEDs on the NIC connector
(rear panel). The iLO 2 NIC LED (rear panel) illuminates if the iLO 2
port is connected. Connecting the power cord also restores the storage
server to whatever previous powered state it was last in. This could result
in the server powering up, the fans operating, and the power indicator
coming on.
NOTE:
The keyboard, mouse, and monitor are used only for the "Direct attach
method" on page 28. They are not provided with your storage server.
24
Installing the server
Powering on the server
Power on the server after connecting the cables.
1. Power on server by pushing the power button (1). The power LED
located on the power button illuminates green.
1
gl0084
Figure 6 Power on button
2. When the server powers on, an installation progress screen is
displayed. The installation process takes approximately 10 to 15
minutes to complete and the server will reboot twice. No user
interaction is required.
CAUTION:
Do not interrupt the installation process; when the
installation sequence is complete, the system prompt
appears.
3. By now you should have determined the access method for your
storage server. For more information, see "Deciding upon a network
access method" on page 14.
4. Go to "Accessing the HP Storage Server Management
console" on page 27 to set up server access.
HP ProLiant DL380 G5 Data Protection Storage Server
25
26
Installing the server
3 Accessing the HP Data
Protection Storage Server
Management console
Before accessing the HP Data Protection Storage Server Management
console, verify that the storage server is completely installed in the rack,
and that all cables and cords are connected. See the HP ProLiant 2U Rail
installation instructions for additional installation guidance.
To access the HP Data Protection Storage Server Management console,
you can use these access methods:
Direct attach
Remote browser
Remote desktop
HP Integrated Lights-Out
2 (iLO 2)
To connect directly to the storage server
without using the network.
To establish a browser-based connection
to the HP ProLiant Data Protection
Storage Server Management console
from a remote client running Internet
Explorer 5.5 (or later).
To establish a connection from a remote
client without using a browser. This
method requires the client to have
Windows remote desktop capability.
To establish a browser-based connection
from a remote client using the iLO 2
interface.
For more information, see "Planning for installation" on page 13.
IMPORTANT:
An IP address can be substituted for a storage server’s serial number and
hyphen when using either remote browser or remote desktop methods to
access the HP Data Protection Storage Server Management console. For
example: 192.0.0.1 can be substituted for TWT08466-.
HP ProLiant DL380 G5 Data Protection Storage Server
27
Using the Direct attach method
You can access the HP Data Protection Storage Server Management
console using a monitor, mouse, and keyboard directly attached to the
storage server.
To connect the storage server to a network using the direct attach method
1. Log in to the HP ProLiant Data Protection Storage Server with the
default user name administrator and the password hpinvent.
The HP ProLiant Data Protection Storage Server Management console
and Rapid Startup Wizard will start automatically.
NOTE:
You can change the administrator name and password
when you configure the server using the "Rapid Startup
Wizard" on page 38.
2. To complete network configuration using the Rapid Startup Wizard,
see "Configuring the server on the network" on page 35.
Using the Remote browser method
The storage server ships with DHCP enabled on the network port. If the
server is placed on a DHCP-enabled network and the serial number of
the device is known, the server can be accessed through a client running
Internet Explorer 5.5 (or later) on that network, using the TCP/IP 3202 port.
IMPORTANT:
Before you begin this procedure, ensure that you have the following:
• Windows-based PC loaded with Internet Explorer 5.5 (or later) on
the same local network as the storage server
• DHCP-enabled network
• Serial number or IP address of the storage server
To connect the server to a network using the remote browser method, you
must first ensure that the client is configured to download signed ActiveX
controls.
To enable ActiveX controls
28
Accessing the HP Data Protection Storage Server Management
console
1. On the remote client machine, open the Internet Explorer web browser
and select Tools > Internet Options > Security.
Figure 7 Internet options screen
2. On the Security screen, select Internet or Local intranet web content
zone, then click Custom Level.
3. Scroll down to locate the ActiveX Controls and plug-ins settings.
4. At Download signed ActiveX controls settings, select Enable to enable
ActiveX or Prompt to launch a notice requiring approval before
ActiveX is enabled.
5. Click OK to close the Security Settings dialog box.
HP ProLiant DL380 G5 Data Protection Storage Server
29
6. If prompted Are you sure you want to change the security settings for
this zone click YES.
7. On the Internet Options dialog box, click OK to finish.
To connect the storage server to a network using the remote browser
method
1. On the remote client machine open Internet Explorer and
enter https:// and the serial number of the storage server
followed by a hyphen (-), and then:3202. For example,
https://D4059ABC3433-:3202 Press Enter.
NOTE:
If you are able to determine the IP address from your DHCP
server, you can substitute the IP address for the serial
number and hyphen (-). For example: 192.100.0.1:3202.
2. Click OK on the Security Alert prompt.
3. Log in to the HP ProLiant Data Protection Storage Server Management
console with the default user name administrator and the
password hpinvent.
NOTE:
You can change the administrator name and password
when you configure the server using the "Rapid Startup
Wizard" on page 38.
4. To complete network configuration using the Rapid Startup Wizard,
see "Configuring the server on the network" on page 35.
IMPORTANT:
If you are using the remote browser method to access the HP Data
Protection Storage Server Management console and Rapid Startup
Wizard, always close the remote session before closing your Internet
browser. Closing the Internet browser does not close the remote session.
Failure to close your remote session impacts the limited number of remote
sessions allowed on the storage server at any given time.
30
Accessing the HP Data Protection Storage Server Management
console
Using the Remote desktop method
To connect the storage server to a network using the remote desktop
method
1. On the PC client, select Start > Run. At Open, type mstsc, then click
OK.
2. Enter the serial number of the storage server followed by a hyphen (-) in
the Computer box and click Connect. For example: D4059ABC3433-.
NOTE:
If you are able to determine the IP address from your
DHCP server, you can substitute the IP address for the
serial number and hyphen (-). For example: 192.100.0.1.
3. Log in to the HP ProLiant Data Protection Storage Server with the
default user name administrator and the password hpinvent.
The HP ProLiant Data Protection Storage Server Management console
and Rapid Startup Wizard will start automatically.
NOTE:
You can change the administrator name and password
when you configure the server using the "Rapid Startup
Wizard" on page 38.
4. To complete network configuration using the Rapid Startup Wizard,
see "Configuring the server on the network" on page 35.
Using the Integrated Lights-Out 2 method
The HP iLO 2 management processor provides multiple ways to configure,
update, operate, and manage servers remotely. The HP ProLiant Data
Protection Storage Server comes preconfigured with iLO 2 default factory
settings, including a default user account and password. These settings
can be found on the iLO 2 Default Network Settings tag found on the front
of the server. If iLO 2 is connected to a network running DNS and DHCP,
you can use it immediately without changing any settings.
For more information on using HP iLO 2, see the HP Integrated Lights-Out 2
User Guide.
HP ProLiant DL380 G5 Data Protection Storage Server
31
To quickly setup iLO 2 using the default settings for iLO 2 Standard and
iLO 2 Advanced features, follow the steps below.
1. Ensure that a network cable is connected to the iLO 2 port (1) located
on the back of the storage server.
1
gl0085
Figure 8 iLO 2 connector port
NOTE:
This connection method is easiest when the connection is
to a DHCP and DNS supported network.
2. If not using dynamic DHCP (IP addressing), you will need to input a
static IP address by using the direct attach method and the iLO 2 RBSU.
3. Using the methods described in the HP Integrated Lights–Out 2 User
Guide, connect to the iLO 2 port.
NOTE:
To find the default iLO 2 log in settings, see the iLO 2
Default Network Settings card attached to your server. The
default DNS, administrator name, and password needed
to log in will be on this card.
4. If desired, you can change the default user name and password on
the administrator account to your predefined selections.
5. Set up your user accounts, if using the local accounts feature.
6. Activate iLO 2 advanced features by entering a license key from the
included ProLiant Essentials Integrated Lights-Out 2 Advanced Pack.
7. Access the HP ProLiant Data Protection Storage Server using the iLO 2
Remote Console functionality. Log in to the HP ProLiant Data Protection
Storage Server with the default user name administrator and the
password hpinvent. The HP ProLiant Data Protection Storage Server
Management console starts automatically.
32
Accessing the HP Data Protection Storage Server Management
console
NOTE:
When the Remote Console feature is enabled, you can get
access to the storage server’s login screen.
For more information, see the HP Integrated Lights-Out 2 User Guide on the
HP ProLiant DL380 G5 Data Protection Storage Server Documentation CD.
HP ProLiant DL380 G5 Data Protection Storage Server
33
34
Accessing the HP Data Protection Storage Server Management
console
4 Configuring the server on the
network
Before you begin
When first powering on the storage server you need to have some
configuration data readily available to complete the Rapid Startup Wizard.
Complete the Server configuration worksheet and use the data collected to
initialize the storage server.
NOTE:
Ensure you are logged into the HP ProLiant Data Protection Storage
Server as a local or domain administrator.
Table 4 Server configuration worksheet
Configuration Worksheet
Administrative Identity
User name
Change system administrator’s user name, which
is set by default to administrator.
User password
Change system administrator’s password, which
is set by default to hpinvent.
Alert E-mail Notification
E-mail address
alert sent to
E-mail address for critical, warning, or
informational messages about server status.
E-mail address
alert sent from
Must be a valid, well-formed e-mail address that
will appear as the sender of server status e-mail
alerts.
SMTP server
name or IP
address
Must be an e-mail server on your network that
supports the Simple Mail Transfer Protocol (SMTP).
SNMP Settings (to be completed only if needed)
HP ProLiant DL380 G5 Data Protection Storage Server
35
Configuration Worksheet
Contact person
System administrator for the storage server. The
contact and location will be provided to any
SNMP management computer that requests them.
System location
Any text string, such as a location or phone
number. For example, Floor #3, Financial
Services Bldg.
Community name
No. 1
The community name is used for network
authentication when sending outgoing SNMP
messages.
Trap destination
No. 1
The IP address of a management computer that
will receive SNMP messages from the storage
server using the above community name.
Community name
No. 2
Same as above.
Trap destination
No. 2
Same as above.
Network Interfaces (to be completed for non-DHCP configurations)
Local area
connection 1
A local area connection is automatically created
for each network adapter that is detected.
IP address
An Internet Protocol (IP) address is assigned to the
server. If it is not automatically assigned, enter the
IP address that you want to assign to this server.
Subnet mask
A mask is used to determine what subnet an IP
address belongs to.
Default gateway
The gateway in a network that the network
adapter will use to access all other networks.
Local area
connection 2
Any additional local area connections can be
renamed to prevent confusion.
IP address
Same as above.
Subnet mask
Same as above.
Default gateway
Same as above.
iLO 2 settings
Change the host name, IP settings, and
administrator settings.
36
Configuring the server on the network
Configuration Worksheet
DNS server
A Domain Name System (DNS) server name
is required to provide for domain name to IP
address resolution.
WINS server
A Windows Internet Naming Service (WINS)
server name is required to determine the IP
address associated with a particular network
computer.
Server Name
Server name
Assign a unique name to the storage server. This
name identifies the storage server on the network.
HP ProLiant DL380 G5 Data Protection Storage Server
37
Running the Rapid Startup Wizard
The Rapid Startup Wizard is only displayed during the initial setup process.
This wizard guides you through the configuration process.
Figure 9 Rapid Startup Wizard
The Rapid Startup Wizard guides you through configuring the following
system settings:
• Date, time, and time zone
• Administrator Identity (user name and password)
• Alert e-mail notification
• Integrated Lights-Out 2 (iLO 2) settings
• Simple Network Management Protocol (SNMP) Settings
• Network Interfaces
• Server Name
For more information about the configuration settings available in the
Rapid Startup Wizard, click Help to see the corresponding Rapid Startup
Wizard online help topic.
38
Configuring the server on the network
Running the DPM mini-setup
Before you begin:
• Ensure that you have the product license key from the Certificate of
Authenticity (COA) card that shipped with your HP ProLiant Data
Protection Storage Server.
• Ensure that you assigned a host name to the server and joined
the server to the domain.
• Ensure that you are logged into the HP ProLiant Data Protection
Storage Server as a local or domain administrator.
• You must be connected via the Direct attach, iLO 2, or remote
desktop methods. The Remote browser method does not show
the desktop, so you can not run DPM mini-setup from the Remote
browser method.
1. On the desktop, double-click the Microsoft System Center Data
Protection Manager 2006 icon.
The DPM Mini-Setup Welcome window opens.
2. Review the information and click Next.
The License Agreement window opens.
3. Click Next to accept the terms of the license agreement.
HP ProLiant DL380 G5 Data Protection Storage Server
39
NOTE:
This licence agreement is for the DPM software, not the HP ProLiant
Data Protection Storage Server.
The Product Registration window opens.
4. Enter your user name, company name (required), and the product
license key, and then click Next.
NOTE:
The DPM product license key can be found on the Certificate of
Authenticity (COA) card that shipped with your HP ProLiant Data
Protection Storage Server.
The Security Settings window opens.
5. Enter a SQL Server password, and then confirm it. This password
must conform to the group security policy set up by your domain
administrator (for example, eight characters or more).
40
Configuring the server on the network
NOTE:
This is a required field.
The Summary of settings window opens, displaying your user
name and company name.
6. Click Configure.
The configuration process begins, displaying a slider bar. When
finished, the Confirmation window opens, indicating that DPM
has been successfully configured.
7. To start DPM, select Open DPM 2006 Administrator Console
when the Mini-Setup closes. Then, click Close. DPM opens in a
few moments.
IMPORTANT:
When DPM 2006 opens, a help window is displayed. Use the help
information to complete the following configuration tasks:
• Configure the server.
• Install disk agents.
• Create a Protection Group.
HP ProLiant DL380 G5 Data Protection Storage Server
41
42
Configuring the server on the network
5 Complete system
configuration
Additional configuration tasks
The physical installation and basic configuration for the HP ProLiant data
protection storage server is complete. Additional settings and configuration
tasks specific to the storage server role can be found in the HP ProLiant
DL380 G5 Data Protection Storage Server administration guide on the HP
ProLiant Data Protection Storage Server Documentation CD.
The HP ProLiant Data Protection Storage Server administration guide
includes:
•
•
•
•
•
Configuring and managing the file server role
Configuring and managing the print server role
Other network file and print services
Microsoft Cluster Service (applicable models only)
NIC teaming
IMPORTANT:
HP recommends performing a full system backup before putting the
system into production.
Other configuration tasks not found in the HP ProLiant DL380 G5 Data
Protection Storage Server administration guide that should be performed
include:
• Run Microsoft Update for new critical updates, see "Configuring
storage server for Web access (optional)" on page 45.
• Join the storage server to an Active Directory domain or workgroup.
• Create and manage users and groups.
• Adjust logging for system, application and security events.
• Install additional third-party software, such as backup, anti-virus,
or monitoring agents.
HP ProLiant DL380 G5 Data Protection Storage Server
43
44
Complete system configuration
A Configuring storage server
for Web access (optional)
Setting up an Internet connection
Before running Windows 2003 R2 operating system updates, you must set
up an Internet connection for the storage server. There are two methods for
configuring an Internet connection:
• Internet Explorer to use automatic configuration
• Internet Explorer to use a proxy server
To configure Internet Explorer to use automatic configuration
1.
On the Tools menu in Internet Explorer, click Internet Options,
click the Connections tab, and then click LAN Settings.
2. Under Automatic Configuration, click either the Automatically
detect settings or Use automatic configuration script check box.
Figure 10 Automatic configuration settings
3. Click OK to close the LAN Settings dialog box.
4. Click OK again to close the Internet Options dialog box.
To configure Internet Explorer to use a proxy server
1.
On the Tools menu in Internet Explorer, click Internet Options,
click the Connections tab, and then click LAN Settings.
HP ProLiant DL380 G5 Data Protection Storage Server
45
2. Under Proxy server, click the Use a proxy server for your LAN
check box.
Figure 11 Proxy server settings
3. In the Address box, type the network name or IP address of the
proxy server.
4. In the Port box, type the port number that is used by the proxy
server for client connections (for example, 8080).
5. Click the Bypass proxy server for local addresses check box if
you do not want the proxy server computer to be used when you
connect to a computer on the local network.
6. Click OK to close the LAN Settings dialog box.
7. Click OK again to close the Internet Options dialog box.
46
Configuring storage server for Web access (optional)
Index
A
accessing
HP Data Protection Storage
Server Management
console, 27
ActiveX
enabling, 28
audience, 7
authorized reseller
HP, 10
C
cable
installation, 24
configuration
completing system
configuration, 43
Internet, 45
network, 16
server, 35
worksheet, 35
conventions
document, 8
text symbols, 9
D
default login, 28
DHCP, 35
document
conventions, 8
related documentation, 7
DPM
installing, 39
running the mini-setup, 39
DPM mini-setup
running, 39
H
hardware support services, 10
help, obtaining, 7
host configuration protocols,
DHCP and non-DHCP, 35
HP
authorized reseller, 10
hardware support services,
10
storage web site, 10
Subscriber’s choice web site,
10
technical support, 9
HP Data Protection Storage
Server Management console
iLO 2 method, 31
direct attach method, 28
remote browser method, 31
remote desktop method, 31
remote server access, 27
I
iLO 2 method
connecting to network, 32
installation
planning, 13
rail kit, 23
server, 19
installing
DPM, 39
Internet
automatic configuration, 45
proxy server, 45
set up, 45
ISSE
See hardware support
services
HP ProLiant DL380 G5 Data Protection Storage Server
47
K
kit contents, 20
M
mini-setup
See DPM mini-setup
P
planning
configuration checklist, 16
installation, 13
network access method, 13
network configuration, 16
power on
server, 25
R
Rapid Setup Wizard, 38
related documentation, 7
remote browser method
connecting to network, 30
remote desktop method
connecting to network, 31
S
serial number, 23
48
server
cabling, 24
front and back panels, 20
installation, 19
power on, 25
set up
Internet, 45
setting up
overview, 13
startup
collecting information, 35
Subscriber’s choice
HP, 10
symbols in text, 9
T
technical support
HP, 9
text symbols, 9
W
web sites
HP documentation, 10
HP storage, 10
HP Subscriber’s choice, 10