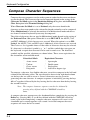
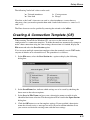
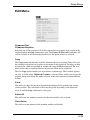
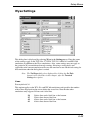
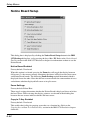
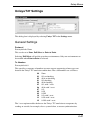
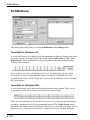
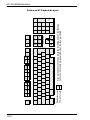
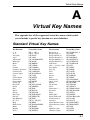
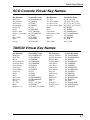
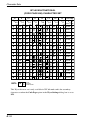
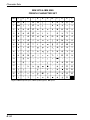
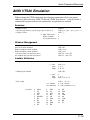
1
TeemTalk® 5.0 for Windows CE & XPe User's Guide USA Neoware, Inc. 3200 Horizon Drive King of Prussia, PA 19406 Tel: +1-610-277-8300 Fax: +1-610-771-4200 Email: [email protected] UK Neoware UK Ltd The Stables, Cosgrove Milton Keynes MK19 7JJ Tel: +44 (0) 1908 267111 Fax: +44 (0) 1908 267112 Email: [email protected] TeemTalk Software Support Telephone: +1-610-277-8300 Web: http://www.neoware.com/support/ Software Version 5.0.1 October 2004 Neoware UK Ltd, The Stables, Cosgrove, Milton Keynes, MK19 7JJ Tel: +44 (0) 1908 267111 Fax: +44 (0) 1908 267112 TeemTalk © 1988-2004 Neoware UK Ltd, All Rights Reserved. This product includes software developed by the OpenSSL Project for use in the OpenSSL Toolkit. (http://www.openssl.org/) This product includes cryptographic software written by Eric Young ([email protected]) The material in this manual is for information purposes only and is subject to change without notice. Neoware UK Ltd accepts no responsibility for any errors contained herein. Trademarks TeemTalk is a registered trademark of Neoware UK Ltd. ADDS Viewpoint A2 is a trademark of Applied Digital Data Systems Inc. AIX is a registered trademark of International Business Machines Corporation. D100, D200 and D410 are trademarks of Data General. Dataspeed is a registered trademark of AT&T. DEC, VT52, VT100, VT131, VT220, VT300, VT320 and VT340 are registered trademarks of Digital Equipment Corporation. Hazeltine is a trademark of Esprit Systems, Inc. HP700/92, HP700/94, HP700/96, HP2392A and HP2622A are trademarks of Hewlett Packard Company. IBM is a registered trademark of International Business Machines Corporation. Microsoft and MS-DOS are registered trademarks, and Windows and Excel are trademarks of Microsoft Corporation. Prime is a registered trademark and PT250 is a trademark of Prime Computer, Inc. Retrographics and VT640 are registered trademarks of Digital Engineering, Inc. Sun, PC-NFS and NFS are registered trademarks of Sun Microsystems, Inc. Tandem, NonStop and LXN are trademarks of Tandem Computers Inc. Tektronix is a registered trademark of Tektronix, Inc. TeleVideo is a registered trademark, and TeleVideo 910, 910+, 925, 950 and 955 are trademarks of TeleVideo Systems, Inc. Westward is a registered trademark of Telemetrix, Inc. WYSE is a registered trademark, and WY-50, WY-50+ and WY-60 are trademarks of Wyse Technology Inc. All other product names are trademarks of their respective manufacturers. © 1988-2004 Neoware UK Ltd, All Rights Reserved. Before reproduction of this material in part or in whole, obtain written consent from Neoware UK Ltd. Contents Contents Introduction ....................................................... 1-1 About This User's Guide ............................................................... 1-1 Terms & Conventions .................................................................... 1-3 Getting Started.................................................. 2-1 WBT Session Configuration .......................................................... 2-1 Using The Connection Wizard .......................................................... 2-1 Terminal Emulation Configuration ................................................... 2-4 Emulation Options ...................................................................... 2-4 Graphics Mode ............................................................................ 2-6 DEC Suite Options ..................................................................... 2-6 BQ 3107 Option .......................................................................... 2-7 HP 700-92/96 Option .................................................................. 2-7 IBM 3151 Option ........................................................................ 2-7 IBM 3270 Options ...................................................................... 2-7 IBM 5250 Options ...................................................................... 2-8 TCP/IP Connection Settings ............................................................. 2-9 TN3270 Options ....................................................................... 2-11 TN5250 Options ....................................................................... 2-13 5250 Printer Options ................................................................. 2-15 SSL Connection Settings ................................................................. 2-18 Notes About Certificates .......................................................... 2-19 SSH Connection Settings ................................................................ 2-21 SSH Key File Permissions ........................................................ 2-25 Modem Connection Settings ........................................................... 2-26 Serial Connection Settings .............................................................. 2-27 Automate Login Process ................................................................. 2-29 Printer Port Settings......................................................................... 2-31 GUI Overrides ................................................................................. 2-36 Aux Port Settings ............................................................................. 2-38 Contents-1 Contents Session Management (Windows XPe) ......................................... 2-39 Logged On As System Administrator ............................................. 2-39 Logged On As A User ..................................................................... 2-39 TeemTalk for Windows CE Display ............................................ 2-41 Setup Menus (Windows CE) ........................................................... 2-41 The Button Tools (Windows CE) ................................................... 2-42 The Soft Buttons (Windows CE) .................................................... 2-43 TeemTalk for Windows XPe Display .......................................... 2-44 The Menu Bar (Windows XPe) ....................................................... 2-44 The Toolbar (Windows XPe) .......................................................... 2-45 The Soft Buttons (Windows XPe) ................................................... 2-45 The Status Bar ............................................................................. 2-46 Hotspots ....................................................................................... 2-47 AT&T 4410 Emulation ................................................................ 2-48 Viewdata Mode ............................................................................ 2-49 Keyboard Configuration ................................... 3-1 Keyboard Mapping ........................................................................ 3-1 Defining Key Functions ................................................................. 3-1 Defining A Key Or Key Combination .............................................. 3-2 Key Combinations & Sequences ....................................................... 3-3 Specifying Characters ....................................................................... 3-3 Compose Character Sequences ..................................................... 3-4 Mouse Functions .............................................. 4-1 Introduction ................................................................................... 4-1 Redefining Mouse Functions ......................................................... 4-1 Selecting & Copying Text .............................................................. 4-2 Moving The Cursor In Block Mode ............................................... 4-2 Send Keyword ................................................................................ 4-3 Show & Action Hotspots ............................................................... 4-3 Emulating Middle Mouse Button .................................................. 4-3 The Toolbar ........................................................ 5-1 Using The Toolbar ........................................................................ 5-1 The Predefined Button Tools ......................................................... 5-1 Contents-2 Contents Redefining The Toolbar................................................................. 5-3 Adding Buttons .................................................................................. 5-3 Adding A Space Between Buttons .................................................... 5-4 Removing A Button Or Space ........................................................... 5-4 Saving The Button Tools .................................................................. 5-4 Assigning User-Defined Functions ................................................... 5-5 Setup Menus ..................................................... 6-1 Displaying & Closing Menus ........................................................ 6-1 Using The Menus ........................................................................... 6-2 Dialog Boxes ................................................................................. 6-3 Default Settings ............................................................................. 6-4 Specifying Characters In Setup Entries ........................................ 6-4 Creating A Connection Template (CE) ......................................... 6-5 Selecting A Connection Template (CE)......................................... 6-6 Saving The Session Configuration (XPe) ...................................... 6-6 Save Using Current Session Name ................................................... 6-6 Save Using New Session Name ........................................................ 6-7 Selecting A Session Configuration (XPe) ...................................... 6-7 Menu Descriptions ........................................................................ 6-9 File Menu ........................................................................................... 6-9 Edit Menu ........................................................................................ 6-23 Settings Menu .................................................................................. 6-24 Emulation Settings .......................................................................... 6-26 HP 700-92/96 Settings ..................................................................... 6-30 PT250 Settings ................................................................................. 6-36 IBM 3151 Settings ........................................................................... 6-39 Wyse Settings .................................................................................. 6-43 TA6530 Settings .............................................................................. 6-48 IBM 3270 Settings ........................................................................... 6-50 Notice Board Setup ......................................................................... 6-54 IBM 5250 Settings ........................................................................... 6-56 Unisys T27 Settings ......................................................................... 6-61 General Settings ........................................................................ 6-61 Environments Settings .............................................................. 6-63 Tab Settings .............................................................................. 6-68 BQ 3107 Settings ............................................................................. 6-69 Serial Settings .................................................................................. 6-72 Contents-3 Contents Auxport Setup .................................................................................. 6-74 Terminal Settings ............................................................................ 6-75 Tab Stops ......................................................................................... 6-82 Local Editing ................................................................................... 6-83 Block Transmission ......................................................................... 6-85 Tek 4014 Settings ............................................................................ 6-89 GIN Mouse Definitions ................................................................... 6-91 Attributes ......................................................................................... 6-92 Define Keyboard Macros ................................................................ 6-97 Defining A Key Or Key Combination ..................................... 6-98 Specifying Characters ............................................................... 6-99 Soft Buttons ................................................................................... 6-100 Programming A Soft Button ................................................... 6-101 Specifying Characters ............................................................. 6-102 Mouse Button Actions ................................................................... 6-103 Button Tools .................................................................................. 6-105 Adding Buttons ....................................................................... 6-105 Adding A Space Between Buttons ......................................... 6-106 Removing A Button Or Space ................................................ 6-106 Saving The Button Tools ........................................................ 6-106 Assigning User-Defined Functions ........................................ 6-106 DEC VT Emulations .......................................... 7-1 Session Configuration ................................................................... 7-1 WBT Mode ........................................................................................ 7-1 Non-WBT Mode ................................................................................ 7-2 The Status Bar ............................................................................... 7-4 Horizontal Scrolling ...................................................................... 7-5 Keyboard Mapping ........................................................................ 7-5 Typing Direction For Hebrew Language .......................................... 7-8 BQ 3107 Emulation ........................................... 8-1 Session Configuration ................................................................... 8-1 WBT Mode ........................................................................................ 8-1 Non-WBT Mode ................................................................................ 8-2 The Status Bar ............................................................................... 8-3 Keyboard Mapping ........................................................................ 8-4 Contents-4 Contents DG 410/412 Emulation ...................................... 9-1 Session Configuration ................................................................... 9-1 WBT Mode ........................................................................................ 9-1 Non-WBT Mode ................................................................................ 9-2 Keyboard Mapping ........................................................................ 9-3 Key Functions .................................................................................... 9-3 Key Codes .......................................................................................... 9-5 HP 700-92/96 Emulation ................................. 10-1 Session Configuration ................................................................. 10-1 WBT Mode ...................................................................................... 10-1 Non-WBT Mode .............................................................................. 10-2 Display Configuration ................................................................. 10-3 Keyboard Mapping ...................................................................... 10-3 Buttons & Function Keys ............................................................ 10-5 Mode Selection ................................................................................ 10-5 Configuration Selection .................................................................. 10-8 Device Control ................................................................................. 10-8 Device Modes ................................................................................ 10-10 Margins, Tabs & Start Column ..................................................... 10-11 Key Programming ..................................................................... 10-13 Character Display Attributes .................................................... 10-16 IBM 3270 Emulation ........................................ 11-1 Introduction ................................................................................. 11-1 Session Configuration ................................................................. 11-1 WBT Mode ...................................................................................... 11-1 Non-WBT Mode .............................................................................. 11-2 Network Virtual Terminal Mode ................................................. 11-4 IBM 3287-1 Printer Support ....................................................... 11-4 SysReq Key Support .................................................................... 11-4 The Status Line ............................................................................ 11-5 Text Display Options ................................................................... 11-9 Keyboard Mapping .................................................................... 11-10 Record & Playback Keystrokes Facility ................................... 11-12 Recording Keystrokes ................................................................... 11-12 Contents-5 Contents Playback Keystrokes ..................................................................... 11-13 Editing Macros .............................................................................. 11-13 Error Codes .................................................................................... 11-14 Notice Board Facility ................................................................ 11-15 Introduction ................................................................................... 11-15 Key Functions ................................................................................ 11-15 Copying Screen Data To The Display .......................................... 11-15 Copying Screen Data To A Function Key .................................... 11-16 IBM 5250 Emulation ........................................ 12-1 Introduction ................................................................................. 12-1 Session Configuration ................................................................. 12-1 WBT Mode ...................................................................................... 12-1 Non-WBT Mode .............................................................................. 12-3 Network Virtual Terminal Mode ................................................. 12-5 The Status Line ............................................................................ 12-5 Keyboard Mapping ...................................................................... 12-6 Word Processing Mode ................................................................... 12-6 Text Display Options ................................................................... 12-8 Record & Playback Keystrokes Facility ..................................... 12-9 Recording Keystrokes ..................................................................... 12-9 Playback Keystrokes ..................................................................... 12-10 Error Codes .................................................................................... 12-10 Fax Image Support .................................................................... 12-11 IBM 3151 Emulation ........................................ 13-1 Introduction ................................................................................. 13-1 Session Configuration ................................................................. 13-1 WBT Mode ...................................................................................... 13-1 Non-WBT Mode .............................................................................. 13-2 The Status Bar ............................................................................. 13-3 Keyboard Mapping ...................................................................... 13-4 Defining Function Keys ............................................................... 13-6 MDIS Prism Emulations ................................. 14-1 Session Configuration ................................................................. 14-1 WBT Mode ...................................................................................... 14-1 Contents-6 Contents Non-WBT Mode .............................................................................. 14-2 Keyboard Mapping ...................................................................... 14-3 PT250 Emulation ............................................. 15-1 Session Configuration ................................................................. 15-1 WBT Mode ...................................................................................... 15-1 Non-WBT Mode .............................................................................. 15-2 The Status Line ............................................................................ 15-3 Keyboard Mapping ...................................................................... 15-5 Displaying Alternate Characters ................................................ 15-7 Siemens 97801 Emulation .............................. 16-1 Session Configuration ................................................................. 16-1 WBT Mode ...................................................................................... 16-1 Non-WBT Mode .............................................................................. 16-2 Keyboard Mapping ...................................................................... 16-3 TA6530 Emulation ........................................... 17-1 Session Configuration ................................................................. 17-1 WBT Mode ...................................................................................... 17-1 Non-WBT Mode .............................................................................. 17-2 The Status Line ............................................................................ 17-3 Operating Modes ......................................................................... 17-4 The Rule Cursor .......................................................................... 17-5 Keyboard Mapping ...................................................................... 17-5 Unisys T27 Emulation ..................................... 18-1 Session Configuration ................................................................. 18-1 WBT Mode ...................................................................................... 18-1 Non-WBT Mode .............................................................................. 18-2 The Status Bar ............................................................................. 18-3 Keyboard Mapping ...................................................................... 18-4 Wyse Emulations ............................................ 19-1 Session Configuration ................................................................. 19-1 WBT Mode ...................................................................................... 19-1 Contents-7 Contents Non-WBT Mode .............................................................................. 19-2 Display Format ........................................................................... 19-4 Status Line Messages .................................................................. 19-4 Keyboard Mapping ...................................................................... 19-5 Initialization Commands ................................ 20-1 Introduction ................................................................................. 20-1 Command Summary .................................................................... 20-2 Host Connection .......................................................................... 20-5 Session Configuration ................................................................. 20-7 Display......................................................................................... 20-9 Keyboard & Mouse ................................................................... 20-20 Auxiliary Port ............................................................................ 20-21 Virtual Key Names ............................................ A-1 Character Sets .................................................. B-1 Host Command Summary................................ C-1 Product Specification ....................................... D-1 Contents-8 Introduction 1 Introduction This chapter introduces the contents of this User's Guide. About This User's Guide This User's Guide describes how to use TeemTalk version 5.0 for Windows CE and XPe. Most of the functionality is the same for both Windows CE and XPe versions, but where there are differences, the text will indicate them. Most of the dialog box illustrations show the Windows CE version of TeemTalk. Note that your version of TeemTalk may not support every emulation or feature described in this User's Guide. The User's Guide is divided into the following chapters and appendices: Chapter 1: Introduction Introduces the contents of this User's Guide. Chapter 2: Getting Started Describes how to configure a session and describes various display features. Chapter 3: Keyboard Configuration Describes how to assign functions to keys and how to use the Compose Character function to generate special characters. Chapter 4: Mouse Functions Describes the special functions assigned to the left mouse button and how to redefine them. Chapter 5: The Toolbar Describes how to use the TeemTalk for Windows XPe toolbar and assign functions to the buttons. Chapter 6: Setup Menus Describes all the commands and setup dialog boxes that can be accessed via drop-down menus in the command bar. 1-1 Introduction Chapter 7: DEC VT Emulations Describes features of the DEC VT emulations. Chapter 8: BQ 3107 Emulation Describes features of the Bull BQ 3107 emulation. Chapter 9: DG 410/412 Emulation Describes features of the Data General D410/412 emulation. Chapter 10: HP700-92/96 Emulation Describes features of the Hewlett Packard HP700/92 emulation. Chapter 11: IBM 3270 Emulation Describes features of the IBM 3270 emulation. Chapter 12: IBM 5250 Emulation Describes features of the IBM 5250 emulation. Chapter 13: IBM 3151 Emulation Describes features of the IBM 3151 emulation. Chapter 14: MDIS Prism Emulations Describes features of the McDonnell Douglas Prism-8, Prism-9 and Prism-12 terminal emulations. Chapter 15: PT250 Emulation Describes features of the Prime PT250 emulation. Chapter 16: Siemens 97801 Emulation Describes features of the Siemens 97801 emulation. Chapter 17: TA6530 Emulation Describes features of the Tandem 6530 emulation. Chapter 18: Unisys T27 Emulation Describes features of the Unisys T27 emulation. Chapter 19: Wyse Emulations Describes features of the Wyse WY-50, WY-50+ and WY-60 emulations. Chapter 20: Initialization Commands Describes commands that can be included in the registry and on the command line to specify the emulator start-up configuration. Appendix A: Virtual Key Names Lists all the virtual key names that enable you to include a specific key function in a user definition. Appendix B: Character Sets Shows the supported character set code tables. 1-2 Introduction Appendix C: Host Command Summary Lists the host commands that are supported in each terminal emulation mode. Appendix D: Product Specification Describes the level of support provided by each terminal emulation. Terms & Conventions This User's Guide uses the following terms and conventions. 1. When references to keys on the keyboard are shown linked by a + (plus sign), this means that two or more keys have to be pressed at the same time. For example, 'press Alt + F' means press and hold down the Alt key, press the F key then release both keys. 2. 'Click' means position the mouse pointer over an element on the display then quickly press and release the specified mouse button. 3. 'Double click' means position the mouse pointer over an element on the display then quickly press and release the specified mouse button twice in quick succession. 4. 'Drag the pointer' means hold down the left mouse button (or button assigned with the select function) and slide the mouse so that a selection box is displayed. 1-3 Introduction Notes 1-4 Getting Started 2 Getting Started This chapter describes how to configure a session and describes various display features. WBT Session Configuration Using The Connection Wizard This section describes the basic procedure for creating a session configuration in WBT mode. The options available are described in detail in the following sections. 1. Click the Configure tab in the Terminal Connection Manager then click the Add button to display the New Connection dialog box. 2. Select Terminal Emulation Client and click OK. The Connection Information dialog box will be displayed. 3. Specify the language to be used in all menus and dialog boxes by making a selection in the Operating Language list at the bottom of the dialog box. 2-1 Getting Started 4. Enter a name which will identify this session configuration for future selection in the Connection Name box. 5. Select the terminal emulation required in the Emulation list box. 6. If additional configuration options are displayed, make the relevant selections. Refer to the Terminal Emulation Configuration section later in this chapter for details. Clicking the International Settings button will display keyboard language and character set options for the selected terminal emulation. Refer to the relevant emulation settings dialog box description in the Setup Menus chapter for details. (Note that the DEC VT options are located in the Emulation and Terminal Settings dialog boxes.) 7. Click Next to display the Host Information dialog box. For a TCP/IP connection, click the TCP/IP button and enter the name or internet address of the host computer in the Host Name box. Selecting the Host Rollover On Connection Fail option will present four Host Name entry boxes. The emulator will attempt to connect to each specified host in turn until one is successful. Click Advanced for Telnet options. Refer to the TCP/IP Connection Settings section later in this chapter for details. For a modem connection, click the Modem button then click Advanced to display configuration options. Refer to the Modem Connection Settings section later in this chapter for details. For a serial connection, click the Serial button, specify the communications port in the Connect To box, then click Advanced for additional serial options. Refer to the Serial Connection Settings section later in this chapter for details. 2-2 Getting Started The optional SSL (Secure Sockets Layer) protocol enables authenticated and encrypted communication between clients and servers. Refer to the SSL Connection section later in this chapter for details. The optional SSH (Secure Shell) client/server protocol is used to encrypt and transmit data securely over a network, with authentication (proof of client identity) provided by a password and/or key. To enable an SSH connection, this option must be selected and the Telnet Port Number option set to the host's SSH port (22 is the default for SSH). When a Telnet connection is initiated, the SSH Connection dialog box will be displayed prompting the user for authentication. Refer to the SSH Connection section later in this chapter for details. Make the relevant selections then click OK to return to the Host Information dialog box, then click Next to display the Advanced Options dialog box. 8. The Advanced Options dialog box provides access to additional settings which are described later in this chapter. If you are running TeemTalk for Windows XPe and are logged on as system administrator, there will be two Session stored... options to enable a session to be created or modified either for yourself (current user) only, or for all users. Refer to the Session Management section later in this chapter for details. 9. When you have made your selections, click Finish to return to the Terminal Connection Manager. 10. In the Terminal Connection Manager, display the Connections list, select the session name you specified earlier in step 4, then click the Connect button. 2-3 Getting Started Terminal Emulation Configuration Emulation Options The Emulation options in the Connection Wizard Connection Information dialog box are as follows: The ADDS A2 emulation provides compatibility with software designed to drive the ADDS Viewpoint A2 terminal, as emulated by the Wyse WY-50/50+/60 terminals. Refer to the Wyse Emulations chapter for details. The AIXTerm emulation provides compatibility with software designed to drive an X terminal using X Windows. The ANSI BBS emulation is a derivative of the ANSI device driver ANSI.SYS supplied with all DOS based PCs and which provides the screen management for the DOS console screen. PC based UNIX systems and Bulletin Board Systems (BBS) often rely on the ANSI emulation when being accessed by a PC. The AT 386 emulation provides compatibility with software designed to drive the AT&T AT 386 terminal. The ATT4410 emulation provides compatibility with software designed to drive the AT&T Dataspeed 4410 terminal. Refer to the AT&T 4410 Emulation section later in this chapter for details. The BQ 3107 emulation provides compatibility with software designed to drive the Bull BQ 3107 terminal. Refer to the BQ 3107 Emulation chapter for details. The DG 410/412 emulation provides compatibility with software designed to drive the Data General D410 and D412 terminals. Refer to the DG 410/412 Emulation chapter for details. The HP 700-92/96 emulation provides compatibility with software designed to drive the Hewlett Packard 700/92, 2392A, 2622A, 70094 and 70096 terminals. This emulation is described in detail in the HP 700-92/96 Emulation chapter. The HZ1500 emulation provides compatibility with software designed to drive the Hazeltine 1500 terminal, as emulated by the Wyse WY-50/50+/60 terminals. Refer to the Wyse Emulations chapter for details. The IBM 3151 emulation provides compatibility with software designed to drive the IBM 3151 terminal. Refer to the IBM 3151 Emulation chapter for information on this emulation. The IBM 3270 emulation provides compatibility with software designed to drive the IBM 3270 terminal. Note that the initial display will be an ASCII text screen known as Network Virtual Terminal mode (NVT mode for short). The setting of the IBM 3270 Model option determines the size of the display and whether or not extended attributes are supported. Refer to the IBM 3270 Emulation chapter for details. 2-4 Getting Started The IBM 5250 emulation provides compatibility with software designed to drive IBM 5250 type alphanumeric terminals. This emulation can be used for connection to an IBM AS/400, System/36 or System/38. Note that the initial display will be an ASCII text screen known as Network Virtual Terminal mode (NVT mode for short). Refer to the IBM 5250 Emulation chapter for details. The MDI P12\P8 emulation provides compatibility with software designed to drive the McDonnell Douglas Prism-12 and Prism-8 terminals. Refer to the MDIS Prism Emulations chapter for details. The MDI Prism-9 emulation provides compatibility with software designed to drive the McDonnell Douglas Prism-9 terminal. Refer to the MDIS Prism Emulations chapter for details. The PT250 emulation provides compatibility with software designed to drive the Prime PT250 terminal. Refer to the PT250 Emulation chapter for details. Sco Console is an emulation of the SCO UNIX box. The Siemens 97801 emulation provides compatibility with software designed to drive the Siemens 97801 terminal. Refer to the Siemens 97801 Emulation chapter for details. The Stratus V102 emulation provides compatibility with software designed to drive the Stratus V102 terminal. The TA6530 emulation provides compatibility with software designed to drive the Tandem 6530 terminal. This emulation is described in the TA6530 Emulation chapter. The TVI 910, TVI 920 and TVI 925 emulations provide compatibility with software designed to drive the TeleVideo 910+, 920 and 925 terminals, respectively, as emulated by the Wyse WY-50/50+/60 terminals. Refer to the Wyse Emulations chapter for details. The TVI 950 and TVI 955 emulations provide compatibility with software designed to drive the TeleVideo 950 and 955 terminals, respectively. The Unisys T27 emulation provides compatibility with software designed to drive the Unisys T27 terminal. Refer to the Unisys T27 Emulation chapter for details. The Viewdata 40, Viewdata 80 and Viewdata Split modes enable access to a viewdata service using one of three display formats, as described in the Viewdata Mode section later in this chapter. The VT PCTerm emulation provides compatibility with software designed for the PC Term mode supported by DEC. This is the same as the VT510 emulation except that keyboard scan codes are sent on key press/release instead of ASCII codes by default. The VT52 and VT100 emulations enable you to run applications written for the DEC VT52 and VT100 terminals, respectively. Refer to the DEC VT Emulations chapter for details. The VT500 7-Bit and VT500 8-Bit emulations enable you to run applications written for the DEC VT320 terminal, the difference is in their treatment of 8-bit control codes. 2-5 Getting Started When VT500 7-Bit is selected, all 8-bit codes are converted to their 7-bit equivalents, whereas VT500 8-Bit leaves 8-bit codes unchanged. If you are using VT200 applications, select VT500 7-Bit. Refer to the DEC VT Emulations chapter for details. The VT+HP220 emulation is based on the VT500 terminal series and includes the HP function keys F1 - F8 (not user programmable). The terminal ID is set to VT220. The VT100+ emulation is an enhanced version of the VT100 emulation that provides additional functionality such as colours. It is the same as the VT-UTF8 emulation except that it only supports ASCII characters 0-127 (decimal). The VT-UTF8 emulation is an enhanced version of the VT100 emulation that supports non-English and drawing characters. It supports localization of the singlebyte and double-byte character sets and all other languages supported by Windows. Additional functionality, such as colours, is also provided. The WY50, WY50+ and WY60 emulations provide compatibility with software designed to drive the Wyse WY-50, WY-50+ and WY-60 terminals, respectively. Refer to the Wyse Emulations chapter for information on these emulations. The WYSE PCTerm emulation provides compatibility with software designed for the PC Term personality supported by Wyse. Keyboard scan codes are sent on key press/ release instead of ASCII codes by default. Graphics Mode The Graphics Mode option is only available if your version of TeemTalk supports graphics emulations and the Emulation option is set to one of the DEC VT, Ansi BBS, AIXTerm, AT 386 or Sco Console emulations. The setting determines the graphics mode that will be entered when the host sends graphics commands. The ReGIS emulation enables you to run applications written for the DEC VT340 terminal in ReGIS mode. The Tek4014 emulation enables you to run applications written for the Tektronix 4010 and 4014 terminals. The VT640 emulation enables you to run applications written for the Retrographics VT640 terminal. The W2119 emulation enables you to run applications written for the Westward 2119 terminal. DEC Suite Options The VT Terminal ID option applies to the DEC VT emulations. It specifies what is reported back to the host in response to a terminal identification request. (Note that not all features of the specified terminal may be supported.) The Cursor Moves Right to Left option applies to the DEC VT, Ansi BBS, AIXTerm, AT 386 and Sco Console emulations. It enables you change the direction in which the text cursor moves across the display. 2-6 Getting Started The High Function Terminal option is displayed when the AIXTerm emulation is selected. This enables you to switch between HFT (High Function Terminal) mode (default) and VT100 mode. BQ 3107 Option The VIP Mode option enables you to set the VIP mode to 7700 or 7760. HP 700-92/96 Option The HP Model option specifies what is reported back to the host in response to a terminal identification request. This can be set to 70092 (default), 2392A, 2622A, 70094 or 70096. (Not all features of the specified terminal may be supported.) IBM 3151 Option The setting of the IBM 3151 Model option identifies the terminal model being emulated in response to a terminal identification request from the host. Model 11 supports only one viewport containing 24 or 25 rows and 80 columns. Model 31 supports up to three viewports (80 or 132 columns wide) and pass-through printing. IBM 3270 Options The setting of the IBM 3270 Model option specifies what is reported back to the host in response to a terminal identification request. (Note that not all features of the specified terminal may be supported.) TN3287 printing is supported by selecting 3287-1. One of four display sizes can be selected: 3278/9-2 3278/9-3 3278/9-4 3278/9-5 24 rows by 80 columns 32 rows by 80 columns 43 rows by 80 columns 27 rows by 132 columns 3278 settings with the E extension provide support for the following extended attributes (these are supported by the 3279 as standard): 3270 Field Attributes Extended Highlighting Foreground Colour Query Reply Inbound Structured Fields The setting of the Left Ctrl acts as Reset Key option determines whether or not the left Control key performs the same function as the Reset key. 2-7 Getting Started The setting of the Right Ctrl acts as Enter Key option determines whether or not the right Control key performs the same function as the keypad Enter key. IBM 5250 Options The IBM 5250 Model option specifies what is reported back to the host in response to a terminal identification request. (Note that not all features of the specified terminal may be supported.) The terminal models and their display characteristics are listed below: Model Display Rows x Columns 5291_1 5292_2 5251_11 3179_2 3196_A1 3180_2 3477_FC 3477_FG 3486_BA 3487_HA 3487_HC 5555_B01 5555_C01 Monochrome Colour Monochrome Colour Monochrome Monochrome Colour Monochrome Monochrome Monochrome Colour Monochrome Colour 24 x 80 24 x 80 24 x 80 24 x 80 (default) 24 x 80 24 x 80 and 27 x 132 24 x 80 and 27 x 132 24 x 80 and 27 x 132 24 x 80 24 x 80 24 x 80 24 x 80 24 x 80 The printer models are listed below: 3812-1 5553-B01 Single byte printer Double byte printer If double byte character sets (e.g. Japanese) are supported and you wish to use them, then select either 5555_B01 (monochrome) or 5555_C01 (colour) for display, or 5553-B01 for printing. The setting of the IBM 5250 Monochrome option will match the normal display characteristic of the selected IBM 5250 model by default. Note that the emulation of all IBM 5250 models supports both monochrome and colour display. When monochrome is selected, characters will be displayed in green and intense fields will be displayed in white. When monochrome is not selected, the settings specified in the Attributes dialog box (described in the Setup Menus chapter) will be used for the display. The setting of the Left Ctrl acts as Reset Key option determines whether or not the left Control key performs the same function as the Reset key. The setting of the Right Ctrl acts as Enter Key option determines whether or not the right Control key performs the same function as the keypad Enter key. The setting of the Carriage Return acts as Enter Key option determines whether or not the Return key performs the same function as the keypad Enter key. 2-8 Getting Started TCP/IP Connection Settings The TCP/IP Telnet Configuration dialog box can be displayed from the Connection Wizard Host Information dialog box by setting the Connection Type to TCP/IP then clicking the Advanced button, or the New Connection dialog box when in nonWBT mode by selecting TCP/IP in the Type list box then clicking the Configure button. Note that the options available and the default settings depend on the current terminal emulation. Host Port Number This enables you to specify the Telnet port number. The default Telnet port number, 23, can be substituted with any valid 16 bit port number. Specifying a number outside the valid range will cause the setting to default to 1. If an SSH (Secure Shell) connection is to be made, set this to the host's SSH port number (22 is the default for SSH). Local Port Number This enables you to specify the local Telnet port number if required. Setting this to 0 will cause the number to be allocated automatically. Telnet Name This enables you to override the name that will be reported for the terminal type over Telnet. Enable Keep Alives Selecting this option will prevent the session from being disconnected from the host by an inactivity timeout. 2-9 Getting Started Connection Timeout (Secs:) This enables you to specify how many seconds the emulator has to attempt to make a host connection before it either attempts to connect to the next host (if Host Rollover is specified in the Host Connection dialog box) or it issues a Connection Failed message. The default 0 setting will cause the emulator to use the stack default timeout. Suppress Echo When selected, this will will prevent the emulator from generating the Telnet echo option on connection. Suppress 3270 Regime When running the IBM 3270 emulation, the setting of this option determines whether or not support for the Telnet "3270 regime" option is suppressed. Suppress TN3270E When running the IBM 3270 emulation, the setting of this option determines whether or not support of TN3270E is suppressed. When this option is not selected (i.e. TN3270E is not suppressed), additional options are available by clicking the 3270 Options button. These are described in the TN3270 Options section. Suppress TN5250E When running the IBM 5250 emulation, the setting of this option determines whether or not support of TN5250E is suppressed. When this option is not selected (i.e. TN5250E is not suppressed), additional options are available by clicking the 5250 Options button. These are described in the TN5250 Options section. Force Negotiation These settings determine whether or not the Telnet Binary or EOR options are supported. Both are set to no by default. No Will not force any negotiations. It will leave it up to the host to decide what to do. DO Will force negotiation. The host will be informed that the option is supported. DONT Will force negotiation. A negotiation packet will be sent to the host telling it that the option is not supported. Break Settings The setting of these options determine whether or not a timing mark (TM) and/or carriage return (CR) is sent with a Telnet break packet. A timing mark is sent by default. 2-10 Getting Started Send Location This enables you to enter the location of this terminal which may be used by the host to provide a list of users currently logged in giving their name and location. TN3270 Options This dialog box is displayed by clicking the 3270 Options button in the TCP/IP Telnet Configuration dialog box when TN3270 is not suppressed. Connect This specifies the name of the device which the server will be requested to assign to the Telnet session; it may be used when requesting either a terminal or a printer session. You can return the local host name by entering %s after the device name. To return the user name, enter %u after the device name. You can specify how many characters of the name is returned in each case. For example, %.3s will return the first three characters of the local host name, and %-.3s will return the last three characters. To automatically assign a new device name for each successive connection, either enter %dN% after the name, where N is a decimal value, or %xN%, where N is a hexadecimal value. Each time the host requests the device name a counter will be substituted into the device name. If the host rejects the device name as in use the counter will be incremented modulus N and the name retried until all possibilities have been tried, at which point the emulation will report a device name rejected error. For example, TEST%d4% will give TEST1 on all connections until the host rejects the name as in use, in which case TEST2 will be used. If this is already in use then TEST3 is used, or if already in use then TEST0. These values are preserved over 2-11 Getting Started power off, so the first connection of any given power on may not be TEST1. Assume that the start point is random. Note: There are separate counters for the IBM 3270 and IBM 5250 emulations. When you achieve a TN3270E connection, the LU device name that you are connected as will be displayed on the status line. If the specified device is rejected by the server or host, then an error message box will be displayed indicating the reason. Associate This is available when the IBM 3270 Model option is set to 3287-1 (a printer). It is used to request that the device name of the printer associated with a particular terminal is assigned to this Telnet session. The name of the terminal is specified here. (This is implemented as described in RFC 1647.) TN3270E Options TN3270E in implemented as described in RFC 1647. These options should not be changed unless required by your System Administrator. The Bind setting determines whether or not the server is allowed to send the SNA Bind image and Unbind notification to the emulator. When Responses is selected, positive and negative response handling is supported. It allows the server to reflect to the emulator any and all definite, exception, and no response requests sent by the host application. When SysReq is selected, some (or all, depending on the server) of the functions of the SysReq key will be emulated and the server in an SNA environment. The LU1 and LU3 Printer options are available when the IBM 3270 Model option is set to 3287-1 (a printer). They enable you to specify which printer type(s) to support. 2-12 Getting Started TN5250 Options This dialog box is displayed by clicking the 5250 Options button in the TCP/IP Telnet Configuration dialog box when TN5250 is not suppressed and the IBM 5250 Model is not set to 3812-1 or 5553-B01 (printers). Refer to the next section for 5250 Printer Options. Device Name This enables you to enter the name of the device which the server will be requested to assign to this Telnet session. You can return the local host name by entering %s after the device name. To return the user name, enter %u after the device name. You can specify how many characters of the name is returned in each case. For example, %.3s will return the first three characters of the local host name, and %-.3s will return the last three characters. To automatically assign a new device name for each successive connection, either enter %dN% after the name, where N is a decimal value, or %xN%, where N is a hexadecimal value. Each time the host requests the device name a counter will be incremented modulus N and substituted into the device name. For example, TEST%d4% will give TEST1 on first connect, TEST2 on second, TEST3 on third, TEST0 on fourth, TEST1 on fifth and so on. TEST%d100% will give TEST1 on first connect, TEST2 on second, ... TEST99 on 99th, TEST0 on 100th, TEST1 on 101st and so on. These values are preserved over power off, so the first connection of any given power on may not be TEST1. Assume that the start point is random. In addition there is a single counter for the unit so concurrent sessions will start from subsequent values. For example, if session one uses TEST1 then session two will use TEST2. Where a device name collision occurs (i.e. the device name is already in use on the host) the host will ask again for the device name during the same connection. In this 2-13 Getting Started case TEST1, TEST2, ... may all be tried in one connection until the host accepts one, or all possibilities have been tried. In the latter case the same name is sent twice in succession to indicate to the host all names have been tried. If concurrent 5250 sessions are started before a previous session has negotiated an acceptable device name, it is possible that the two sessions will access the counter simultaneously and not all possible names will be tried by each session. This should not cause a problem unless the separate sessions use different modulo values (for example, session one device name TEST%d4% and session two device name ANOTHER%d100%) or are connecting to different hosts. Note: There are separate counters for the IBM 3270 and IBM 5250 emulations. User, Password, Library , Menu These options enable you to specify the initial entries required on the standard startup screen so that it can be bypassed. Each entry can be a maximum of ten characters. Program This enables you to specify the name of the initial program to run. The entry can be a maximum of ten characters. 2-14 Getting Started 5250 Printer Options This dialog box is displayed by clicking the 5250 Options button in the TCP/IP Telnet Configuration dialog box when TN5250 is not suppressed and the IBM 5250 Model is set to 3812-1 (a printer). Device Name Specifies the name of the printer device. IGC Feature This is always set to Don't Report. Transform Specifies whether the printer will use the host print transform function to generate ASCII printer data. This is always set to Yes. The Mfg. Type and Model option must specify the printer manufacturer, type and model. Mfg. Type and Model Specifies the manufacturer, type and model of the printer. The entry must exactly match an AS400 printer type string, including the * (asterisk) character. The following valid entries are for the IBM AS/400 V3R1. Note that the list can change according to AS/400 settings. *IBM2380 *IBM3816 *IBM4019 *IBM4039HP *IBM42011 *IBM42023 *IBM4212 *IBM2381 *IBM3912HP *IBM4019HP *IBM4070 *IBM42012 *IBM42071 *IBM4216 *IBM2390 *IBM3916HP *IBM4029 *IBM4070EP *IBM42013 *IBM42072 *IBM4226 *IBM2391 *IBM39302 *IBM4029HP *IBM4072 *IBM42021 *IBM42081 *IBM4230 *IBM3812 *IBM39303 *IBM4037 *IBM4076 *IBM42022 *IBM42082 *IBM4232 2-15 Getting Started *IBM47121 *IBM5152 *IBM6404 *IBM6412EP *HPIIID *HP500 *CPQPM15 *EPAP5500 *EPFX1170 *EPLQ870 *EPSQ1170 *NECP2200XE *OKI184IBM *OKI393IBM *OKI810 *PAN1124IEP *PAN1654EP *PAN2624EP *PAN4451HP *IBM47122 *IBM5201 *IBM6404EP *HPII *HPIIIP *HP520 *CPQPM20 *EPDFX5000 *EPLX810 *EPLQ1070 *EPEPL7000 *NECP5200 *OKI320IBM *OKI590IBM *OKI820 *PAN1180EP *PAN1695EP *PAN4410HP *IBM47221 *IBM5202 *IBM6408 *HPIID *HPIIISI *HP550C *EPAP2250 *EPDFX8000 *EPLQ510 *EPLQ1170 *EPEPL8000 *NECP5300 *OKI321IBM *OKI591IBM *OKI3410 *PAN1180IEP *PAN2123EP *PAN4420HP *IBM47222 *IBM5204 *IBM6408EP *HPIIP *HP4 *HP560C *EPAP3250 *EPFX850 *EPLQ570 *EPLQ2550 *NECP2 *NECP6200 *OKI390IBM *OKI400 *PAN1123EP *PAN1191EP *PAN2124EP *PAN4430HP *IBM4770 *IBM5216 *IBM6412 *HPIII *HP310 *HPPAINT *EPAP5000 *EPFX870 *EPLQ860 *EPSQ870 *NECP2200 *NECP6300 *OKI391IBM *OKI800 *PAN1124EP *PAN1624EP *PAN2180EP *PAN4450IHP *MSGQ Name Specifies the name of the message queue to which operational messages for the printer are to be sent. *MSGQ Library Specifies the message queue library. Font Specifies the font identifier and point size used by the single-byte printer (e.g. 11). Formfeed This is always set to Don't Report. The Paper Source 1 option is used to specify the paper format to be used. Paper Source 1 & 2 These options specify the paper format to be used. The possible settings are: Don't Report *NONE 2-16 No value returned. No paper source is defined. *MFR The system determines the paper type used based on the manufacturer, type and model of the printer. *LET Letter-sized paper (8.5 x 11 inches). Getting Started *LEGL Legal-sized paper (8.5 x 14 inches). *EXEC Executive-sized paper (7.25 x 10.5 inches). *A4 A4-sized paper (210 mm x 297 mm). *A5 A5-sized paper (148 mm x 210 mm). *B5 B5-sized paper (182 mm x 257 mm). *C80 Continuous-form paper, 8.0 inches wide (Paper Source 1 only). *C132 Continuous-form paper, 13.2 inches wide (Paper Source 1 only). *A3 A3-sized paper (297 mm x 420 mm). *B4 B4-sized paper (257 mm x 364 mm). *LEDG Ledger-sized paper (11 inches x 17 inches). Envelope Hopper This specifies the envelope format to be used. The possible settings are: Don't Report *NONE *MFR *B5 *MON No value returned. No envelope source is defined. The system determines the envelope type used based on the manufacturer, type and model of the printer. B5-sized envelopes (176mm x 250mm). Monarch-sized envelopes (3.875 x 7.5 inches). *N9 Number 9-sized envelopes (3.875 x 8.875 inches). *N10 Number 10-sized envelopes (4.125 x 9.5 inches). *C5 C5-sized envelopes (162mm x 229mm). *DL DL-sized envelopes (110mm x 220mm). ASCII 899 Support Specifies whether the single-byte printer has ASCII code page 899 installed. Selecting Don't Report will cause no value to be returned. WSCST Name Specifies the name of the object containing pointers to the work station customizing tables. WSCST Library Specifies the library name of the object containing pointers to the work station customizing tables. 2-17 Getting Started SSL Connection Settings The optional SSL (Secure Sockets Layer) protocol enables authenticated and encrypted communication between clients and servers. Before anyone can connect to a server the system administrator must make available a copy of the root certificate used to sign the server’s identity certificate and the number of the telnet port the server is listening on (the default for secure telnet is 992). Additionally the system administrator may issue each user or terminal with their own password protected client certificate. To make an SSL connection: 1. Select the SSL option in the Connection Wizard Host Information dialog box, or from the New Connection dialog Type list box when running TeemTalk. 2. Display the Telnet Options dialog box and change the port to the number specified by the system administrator then click OK. 3. Click the Advanced or Configure button to display the SSL Connection dialog box. 4. If you have not already installed the root certificate you will have been given to verify the server you are going to connect to, click Add under Root Certificates and choose the file containing the certificate. This will import the certificate and add its name to the list. 5. If the server you are going to connect to requires you to have a client certificate, choose the relevant certificate from the Client Certificate drop down list. 6. If you have not already installed your client certificate, click Add under Client Certificate and choose the file containing the certificate. This will import the certificate and add its name to the list. 2-18 Getting Started 7. You may optionally enter your Password for the client certificate here too. If you check Save this password will be stored, encrypted, along with the certificate itself. Please note this is a security risk as anyone who can acquire a copy of your registry will be able to use your certificate. 8. Once you have configured the certificates click OK and then Connect in the New Connection dialog box. 9. Login as usual when the telnet login prompt appears. Error Messages Could not connect TCP/IP socket. The most likely causes of this error are that the service is not running on the server or the port number is incorrect. Could not connect SSL socket. Please check that your client certificate is correct. This message is returned if the server refuses the SSL connection. The most likely causes are that the server is expecting a client certificate but none has been specified or the client certificate specified is invalid for some reason. This error may also be seen if the server is running an incompatible version of SSL. TeemTalk currently supports SSL2, SSL3 and TLS. The server’s certificate cannot be verified. The server’s identity certificate was not signed by any of the root certificates installed in TeemTalk. TeemTalk will not connect to a host it cannot verify. Common name does not match host name. The common name is part of the server’s certificate. SSL assumes this will match the host name given in the Host Name box in the Connection Wizard, or Connect To box in the New Connection dialog box. If they do not match TeemTalk will not connect to the host. Notes About Certificates The SSL Protocol uses three types of certificate: 1. Server certificates. These are always sent by the server to the client to validate the server’s identity. SSL handles them internally and they are never saved on the client. 2. Client certificates. These are sent by the client, only if the server requests them, and validate the client’s identity. The client will need to store these locally. Usually a client will only have one certificate to validate it on a particular server but different servers may require different client certificates. 2-19 Getting Started 3. CA (Certificate Authority) or root certificates. These are used to authenticate the other two types. The client will need to store these locally. Storage of Certificates TeemTalk stores its certificates in the Registry as binary values. The following keys are used: HKEY_CURRENT_USER\Software\Neoware\Security\SSL\CA Certificates HKEY_CURRENT_USER\Software\Neoware\Security\SSL\Client Certificates CA (root) Certificates are stored unencrypted. The value name in the registry is in the form HHHHHHHH.UU where HHHHHHHH is the hash of the certificate's internal name and UU is a unique number. The UU section is to allow different certificates which happen to have the same hash value co-exist. This follows the convention used by openSSL file based system. TeemTalk will automatically discard any duplicate certificates. Client Certificates are stored encrypted. The value name may be any valid string of characters. Acquiring New Certificates There are two ways a client may acquire new certificates. They may be added directly to the registry keys detailed above or they may be installed on the file system and imported manually by TeemTalk. Adding to the Registry New CA (root) Certificates should be added to the CA Certificates key with a value name in the form NEWXXXXXXXX where XXXXXXXX is a unique number. Whenever it uses its certificate's, TeemTalk first scans the registry for any value name NEW*. If it finds one it checks that it is not a duplicate and then renames it with the correct hash.unique name. New Client certificates should be added to the Client Certificate key. They may be given any value name. Obviously if a value already exists with the same name it will be overwritten. TeemTalk uses this value name to identify the certificate to the user and to link particular certificates to particular sessions. Importing from the File System The SSL Connection dialog box allows users to add both CA and Client certificates by picking files from the file system. These files should be in PEM certificate format and the Client file should include both the certificate and the encrypted private key. An imported client certificate’s registry name will be the original filename minus any path or extension. 2-20 Getting Started SSH Connection Settings The optional SSH (Secure Shell) client/server protocol is used to encrypt and transmit data securely over a network, with authentication (proof of client identity) provided by a password and/or key. To enable an SSH connection, select the SSH option in the Connection Wizard Host Information dialog box or, when running TeemTalk, in the New Connection dialog box Type list box. The Telnet Port Number option must be set to the host's SSH port (22 is the default for SSH). SSH Connection using Username and Password 1. Select the SSH option in the Connection Wizard Host Information dialog box, or from the New Connection dialog Type list box when running TeemTalk. 2. Display the Telnet Options dialog box and change the Port Number to the host's SSH port (22 is the default for SSH) then click OK. 3. Click the Advanced or Configure button to display the SSH Connection dialog box. 4. Enter your username and password, ensuring that Password is selected. Then click OK. 5. Click the Connect button. TeemTalk will attempt to make the connection. If the username and/or password are invalid, TeemTalk will prompt you to re-enter them. (Note that some servers will not allow you to change the username at this point.) To work round this, if you see your username is incorrect, click Cancel to abort the connection and then restart as step 1. If your password has expired, TeemTalk will prompt you to enter a new one. 2-21 Getting Started SSH Connection to an openSSH Server using a Key File 1. Select the SSH option in the Connection Wizard Host Information dialog box, or from the New Connection dialog Type list box when running TeemTalk. 2. Display the Telnet Options dialog box and change the Port Number to the host's SSH port (22 is the default for SSH) then click OK. 3. Click the Advanced or Configure button to display the SSH Connection dialog box. 4. If you have already created a keyfile, go to step 19. 5. To create a new key file, click Generate Key to display the SSH Key Generation dialog box. 2-22 Getting Started 6. Enter a Filename. This is the name the key will be stored under in the registry and the name displayed in the Keyfile drop down list in the previous dialog box. 7. Select the type of key you wish to create. openSSH servers support both DSA and RSA keys. Other servers may only support one or the other. 8. Both key generation algorithms require a group of large prime numbers to generate the key. Generating these primes can take a several minutes. As the same primes can be used for generating different keys we have split generating primes and generating keys into two separate options. Clicking New Group will generate a new set of primes for the selected algorithm. Clicking New Key will create a new key of the algorithm type specified using the existing group of primes. If no group of primes already exists for that algorithm the New Key option will generate them automatically. The two algorithms do not share the same prime number group because they require their primes to be generated in different ways. 9. Click Generate Key to create a new key. You will be prompted for a passphrase to encrypt your private key. 10. Enter the Passphrase and Confirm it. If you check the Save box your password will be stored, encrypted, in the registry along with your key. Please bear in mind that this is a security risk. Although noone will be able to read your password in the registry, anyone who can get a copy of your registry settings can use them to logon as you. 11. The Key generated is actually a private/public key pair. The private key, and optionally the password to decrypt it, will be stored in your registry. The public key will be displayed in the SSH Key Generation dialog box. 2-23 Getting Started 12. To make use of your key you need to copy it on to the server. 13. Select all in the text box and then copy to put the key into the Windows clipboard. 14. Logon to your server using username and password. 15. In your home directory you need to have a sub-directory called .ssh. You may have to create this directory yourself. Within the .ssh directory you need a file called authorized_keys. Again if it is not there you will have to create it. 16. Using whatever editor is available on your server you need to paste the key into the file and save it. 17. If the authorized_keys file does not exist you can just do the following: cat > authorized_keys Edit | Paste from the TeemTalk menu. Control C 18. Finally logon and restart from step 1. 19. Select your key file from the drop down list. 20. Enter your passphrase (if it has not been saved) and click OK. 21. Click the Connect button. TeemTalk will attempt to connect to the host. 2-24 Getting Started SSH Connection to an SSH Communications Security Tectia Server using a Key File 1. Follow the instructions in the previous section for using a keyfile with openSSH up to and including step 12. 2. If they do not already exist you need to create a directory ~/.ssh2 and a text file within it called authorization. 3. Create another text file and paste your key into it. For example: cat > mykey.pub Control V Control C 4. Add the following line to the authorization file : key mykey.pub 5. You then have to edit your key file as follows: Remove ssh-dsa or ssh-rsa from the start of the key. Remove Comment from the end of the key. Insert the following lines before the key: —— BEGIN SSH2 PUBLIC KEY —— Subject: Your name Comment: And add the following line after the key: —— END SSH2 PUBLIC KEY —— 6. You should then be able to connect to the server using your keyfile. SSH Key File Permissions If you find that public key authentication does not work when you have copied your public key to authorized_keys, it is probably because the file permissions on $HOME, $HOME/.ssh or $HOME/.ssh/authorized_keys are more permissive than SSH allows by default. This may be resolved by executing the following on the server: $ chmod go-w $HOME $HOME/.ssh $ chmod 600 $HOME/.ssh/authorized_keys If this is not possible for some reason, an alternative is to set StrictModes no in sshd_config, however this is not recommended. More information can be found at http://www.openssh.com/faq.html. 2-25 Getting Started Modem Connection Settings The Modem Settings dialog box can be displayed from the Connection Wizard Host Information dialog box by setting the Connection Type to Modem then clicking the Advanced button, or the New Connection dialog box when in non-WBT mode by selecting Modem in the Type list box then clicking the Configure button. This enables you to define a particular modem configuration which can be saved under a specific name for future selection in the Host Information dialog box. 1. If this is a new configuration, enter a name to identify it in the Configuration Name box. 2. Select a Modem from the list box below. The Configure button provides access to the standard Microsoft dialog boxes for specifying port settings and call options. 3. Enter the Country Code, Area Code and Telephone Number. 4. Click the Dialing Properties button to display the standard Microsoft dialog boxes for specifying a variety of dialing formats. 5. If you want the country and area codes to be ignored when dialing, select Force Local. If you want the area code dialed even if you are in that area, select Force long distance. 6. Click OK to save the settings and the name you assigned to this configuration will appear in the Modem configuration selection box in the main Host Information dialog box. 2-26 Getting Started Serial Connection Settings The Serial Configuration dialog box can be displayed from the Connection Wizard Host Information dialog box by setting the Connection Type to Serial then clicking the Advanced button, or the New Connection dialog box when in non-WBT mode by selecting Serial in the Type list box then clicking the Configure button. Baud Rate Factory default: 9600 This specifies the transmit and receive baud rates for the port selected for host communications. Parity Factory default: None This option specifies the parity mode for each transmitted character. If the number of Data Bits is 8, set this option to None. Selecting Odd will cause an eighth bit to be added with a value of 1 if the previous 7 bits add up to an even number, and 0 if the previous 7 bits add up to an odd number. Selecting Even will cause an eighth bit to be added with a value of 1 if the previous 7 bits add up to an odd number, and 0 if the previous 7 bits add up to an even number. Mark parity will set every eighth bit to 1 and Space parity every bit to 0. Flow Control Factory default: Input This option specifies the type of flow control used by the line port to communicate readiness to transmit or receive data from the host. None Input Output In/Out Hardware - No flow control XON/XOFF on received data XON/XOFF on transmitted data XON/XOFF on transmitted & received data DTR/CTS hardware flow control. 2-27 Getting Started Data Bits Factory default: 8 This option specifies the number of data bits sent for each transmitted character. Stop Bits Factory default: 1 This specifies the number of stop bits sent for each transmitted character. Transmit Rate Factory default: Unlimited The setting of this option determines the maximum effective baud rate that the emulatortransmits terminal reports and data sent as a result of pasting data to the host. Local Echo Factory default: Unselected The setting of this option determines whether keyboard entered characters are displayed on the screen as well as sent to the host. When unselected, characters are not displayed when they are transmitted unless the host 'echoes' them back. 2-28 Getting Started Automate Login Process The Automate Login Process dialog box enables you to automate part or all of the host login procedure. The settings in this dialog box enable you to specify what is sent to the host in response to prompts displayed on the screen. 1. If an initiation string is required by the host when you first make a connection, select the Set Initiation String option, enter the required characters in the Initiate with box (the Respond With box in the illustration above), then click the Add button. The initiation string will be added to the Script window on the right. 2. The Wait For options enable you to specify the prompt or keyboard locked or unlocked command that the automatic login process is to wait for before proceeding. Some systems are case sensitive, so make sure your Text entries follow the correct conventions for your system. Note: When running the IBM 3270 or IBM 5250 emulation, Text entries are only applicable in NVT mode. 3. Enter the response required in the Respond With box. In order for a text entry to be sent to the host it must be followed by a carriage return command. This is specified by selecting C. Return in the list of predefined commands in the list box below then clicking the Insert button. A <CR> will appear in the Respond With box. You can also enter a predefined key function in the Respond With box by selecting Key Definition in the list of predefined commands in the list box below, selecting one of the virtual key names listed in the box below that, then clicking the Insert button. The Virtual Key Names appendix lists the predefined key functions available for each emulation. 2-29 Getting Started The list of predefined commands that can be inserted include UserName (indicated by <UN>) and Password (indicated by <PW>). Selecting either of these will cause a dialog box to pop-up when logging on to the host prompting the user to enter a name or password, respectively. You can also delay the script response by 2 seconds by inserting Delay (2s) (indicated by <D>) or 0.255 seconds by inserting Pause (0.255) (indicated by <P>). 4. When you have finished specifying the response to a particular prompt, click the Add button to add the definition to the Script window on the right. The script will perform the actions in the order displayed in the Script window. To change the order of the script lines, use the up and down arrow buttons to the right of the Script window. 5. Repeat this procedure for each prompt as required. If you want to edit one of the script lines, select the line in the Script window then click Remove to send it to the edit boxes on the left. Make the change(s) then click Add to send it back to the script. Note that this will now be the last line of the script. 6. When the Script window contains all the required responses to the relevant prompts in the correct order, click Finish. 2-30 Getting Started Printer Port Settings The Printer Port Settings dialog box provides several print options. The options available depend on whether you are running TeemTalk for Windows CE or XPe. TeemTalk for Windows CE TeemTalk for Windows XPe 2-31 Getting Started CE - Direct Print Data To The Print Manager The Current System Printer Driver box displays the name of the currently selected system printer when both the Use Network Printer (LPR) and Print Direct To Port options are not selected. Clicking the Configure button will display a Print Manager dialog box which enables you to specify printer settings. If you find a through print results in data being split into lines, each treated as a separate print job, specify a time in the Seconds Close Delay box (e.g. 5 seconds). This will enable the next line of data to be sent before the print job is assumed to have finished and therefore prevents the print job from being closed prematurely. When set to 0, printing will not start until a ‘print end of job’ command is received from the host. Entering any other number will cause printing to start after the specified number of seconds have elapsed, regardless of whether the ‘print end of job’ command has been received from the host. If you require the port to be kept open all the time (to stop the printer resetting) enter -1 (minus one). XPe - Direct Print Data To The Print Manager The Printer list box lists the printers handled by the Print Manager. You can select from this list when the Use Network Printer (LPR) option is not selected. Clicking the Advanced button will display the standard Print Manager dialog box which enables you to specify printer settings. The Microsoft Windows Print Manager normally controls all print formatting, translates host characters to supported printer characters, and also provides a spooling facility. A disadvantage of using the Print Manager is that any print formatting escape sequences received from the host are stripped. If you want to use the Print Manager but disable its print formatting process so that the original escape sequences from the host are retained, select the PassThru option. (Note that the PassThru option will be unselectable if the printer driver currently selected does not support this facility.) If you find a through print results in data being split into lines, each treated as a separate print job, specify a time in the Seconds Close Delay box (e.g. 5 seconds). This will enable the next line of data to be sent before the print job is assumed to have finished and therefore prevents the print job from being closed prematurely. When set to 0, TeemTalk will not start printing until it receives a ‘print end of job’ command from the host. Entering any other number will cause TeemTalk to print after the specified number of seconds have elapsed, regardless of whether the ‘print end of job’ command has been received from the host. If you require the port to be kept open all the time (to stop the printer resetting) enter -1 (minus one). 2-32 Getting Started Direct Print Data To A Specific Port To direct print data to a specific port, select Print Direct To Port and specify the Printer Port. Selecting the FormFeed Terminator option will cause the printer to advance the paper to the top of the form when it has finished printing. The Output Character Set option enables you to specify the character set used for printing when Print Direct To Port is selected. This allows non-ISO Latin-1 printers to be used. Selecting Auto Line Feed will cause the printer to print at the beginning of the next line when a carriage return command is received. When a serial port is selected, clicking the Configure button will display a dialog box in which you can specify the baud rate, parity, flow control, data bits and stop bits settings. These options are described in the Serial Settings section. If supported, clicking the Advanced button will display a dialog box that enables you to send printer-specific commands to specify, for example, font size, colour, or page header and footer. 2-33 Getting Started CE - Direct Print Data To A Network Printer To direct print data to a printer on the network when running Windows CE, select Use Network Printer (LPR) and enter the LPD Hostname. Clicking the Configure button will display a dialog box which enables you to specify various print settings. You must specify the Printer Name. The Job Name and User Name entries are optional (the User Name will default to root if none is specified). The Number of Copies to print is set to 1 by default. You can specify how many times the LPR protocol will attempt to execute the print job before cancelling by setting the number of Retries and the number of seconds delay between each attempt. When Add Banner is selected, information about this print job will be printed with it. You can display a message box which will indicate the progress of the print job by selecting Debug Information. If supported, clicking the Advanced button will display a dialog box that enables you to send printer-specific commands to specify, for example, font size, colour, or page header and footer. 2-34 Getting Started XPe - Direct Print Data To A Network Printer To direct print data to a printer on the network when running Windows XPe, select Use Network Printer (LPR) and enter the LPD Hostname. Clicking the Configure button will display a dialog box which enables you to specify various print settings. You must specify the Printer Name. The Job Name and User Name entries are optional (the User Name will default to root if none is specified). You can specify how many times the LPR protocol will attempt to execute the print job before cancelling by setting the number of Retries and the number of seconds delay between each attempt. Clicking the Advanced button will display a dialog box that enables you to send printer-specific commands to specify, for example, font size, colour, or page header and footer. When Add Banner is selected, information about this print job will be printed with it. You can display a message box which will indicate the progress of the print job by selecting Debug Information. 2-35 Getting Started GUI Overrides The GUI Overrides dialog box enables you to disable various GUI items and also enables you to specify how the emulator responds when the host closes the connection. Clicking the Disable Elements button will display another dialog box enabling you to disable any of the command bar elements. The Disable Status Bar and Disable Scroll Bar options allow you to disable the status bar and scroll bar, respectively. The Disable Clipboard Accelerators option will disable the Ctrl + C (copy) and Ctrl + V (paste) keyboard commands. The Action on Host Close options enable you to specify how the emulator responds when the host closes the connection. Selecting Display Options will cause a dialog box to be displayed with the following three options. Selecting Shutdown will cause the emulator to shutdown. Selecting Stay Alive will keep the emulator running. 2-36 Getting Started Selecting Reconnect will cause the emulator to attempt to reconnect to the host. By default, a warning message will be displayed if you attempt to exit the emulator while a host connection is still active. You can disable this message by selecting the No connection warning on close option. If supported, the optional Enable PC-Style Windowing option enables multiple windows to be displayed when running CE version 4.2 and above. The Mouse Cursor Style option enables you to choose from a range of cursor styles. 2-37 Getting Started Aux Port Settings The Aux Port Settings dialog box enables you to specify a COM or LPT port for bidirectional output when in any DEC VT mode, ANSI BBS, Sco Console, HP 70092/96 or IBM 3151 mode. The Functionality options enable you to set the auxiliary port as bidirectional and specify that it is to be opened at start-up. Clicking the Configure button will display a dialog box in which you can specify settings for the COM port. The options in it are described in the Serial Settings section earlier in this chapter. 2-38 Getting Started Session Management (Windows XPe) The way that TeemTalk for Windows XPe sessions are created or modified depends on whether you are logged on as a system administrator, or as a user without administrative privileges. Logged On As System Administrator If you are logged on as a system administrator, you can either create a unique session only for your own use, or you can create session templates that are available to all users of the system. The session templates can only be modified by the system administrator. However, a user can load a session template, change the setup settings then save the session to create their own local copy based on the template. This copy will have the same name as the session template. In order to create a new session, TeemTalk must be started without a session (i.e. not started by clicking on a desktop icon or by selecting a session from the Start menu). To create a session only for your own use, select the Session stored for current user only option in the Save Session As dialog box before saving the session. To create a session template for all users, select the Session stored for all users of system option in the Save Session As dialog box before saving the session. When TeemTalk is started without a session (i.e. not started by clicking on a desktop icon or by selecting a session from the Start menu), the name of each available session template will be listed in the Open Session dialog box together with the letter T to indicate that they are templates. When a user loads a template, modifies the settings then saves the session, a local copy of the template will be made with the same name, but with the changed settings. This copy will replace the template in the list of session configurations displayed in the Open Session dialog box. Note that the T template indicator will no longer be displayed. If the user deletes this session, the original template will be listed instead. The user cannot delete session templates. Logged On As A User If you are logged on as a user without administrative privileges, you can load a session template created by the system administrator, modify the setup to suit your requirements, then save a local copy of it. When TeemTalk is started without a session (i.e. not started by clicking on a desktop icon or by selecting a session from the Start menu), the name of each available session template will be listed in the Open Session dialog box together with the letter T to indicate that they are templates. 2-39 Getting Started When you load a template, modify the settings then save the session, a local copy of the template will be made with the same name, but with the changed settings. This copy will replace the template in the list of session configurations displayed in the Open Session dialog box. Note that the T template indicator will no longer be displayed. If you delete this session, the original template will be listed instead. As a user you cannot delete session templates. 2-40 Getting Started TeemTalk for Windows CE Display The TeemTalk for Windows CE command bar provides access to a series of menus and buttons that enable you to configure the terminal emulator and perform various functions. Note: The buttons available depend on whether or not you are in WBT mode. Setup Menus (Windows CE) Three menus can be displayed from the command bar. These are headed File, Edit and Settings. Note: The options available in the menus depend on whether or not you are in WBT mode. Refer to the Setup Menus chapter for a complete discussion on selecting and using the options in these menus. 2-41 Getting Started The Button Tools (Windows CE) The TeemTalk for Windows CE button tools provide a quick way of actioning commands or displaying setup dialog boxes by just clicking a button. Displays the New Connection dialog box for making a serial or network host connection. Closes the current host connection. Displays the Open Session dialog box. This enables you to load a particular setup configuration. Saves the current session configuration. Displays the Printer Setup dialog box. Displays the Print Screen dialog box for producing a hardcopy of screen data in a particular format. Copies selected data to the clipboard. Pastes clipboard data at the current cursor position. Displays help information. Toggles display of the soft buttons on and off and selects the level. Toggles display of the soft buttons on and off and selects the level. 2-42 Getting Started The Soft Buttons (Windows CE) A set of soft buttons are provided which can be programmed so that they perform various functions when clicked. You can toggle between command bar and soft button display either by clicking the following buttons: or by pressing the keys Ctrl + Alt + Left Cursor or Ctrl + Alt + Right Cursor. (Note that you can assign these functions to any other keys using the virtual key names CB_NEXT and CB_PREV.) You can define up to four soft button levels. Level 1 is displayed by default. Each level consists of twelve programmable buttons, providing a combined total of 48 programmable buttons. Levels stored off-screen can be 'scrolled' into view by clicking one of the arrow buttons. The soft buttons are programmed using the Soft Buttons dialog box, which is displayed by selecting Settings in the menu bar then Soft Buttons... Refer to the Setup Menus chapter for information on programming the buttons. 2-43 Getting Started TeemTalk for Windows XPe Display The Menu Bar (Windows XPe) The TeemTalk for Windows XPe menu bar provides access to three menus that enable you to perform various functions and configure TeemTalk for compatibility with the application. Note: The options available in the menus depend on your version of TeemTalk. To display a menu: Mouse: Click the title of the menu required. Keyboard: Hold down the Alt key and press the key bearing the underlined character in the menu title. For example, pressing Alt + F will display the File menu. Refer to the Setup Menus chapter for a complete description of all the menu options. 2-44 Getting Started The Toolbar (Windows XPe) A toolbar is displayed below the TeemTalk for Windows XPe menu bar. This displays a series of buttons which provide a quick way of actioning commands or displaying setup dialog boxes when clicked. You can redefine all the buttons and add or remove buttons from the toolbar using the Button Tools dialog box. Refer to the chapter entitled The Toolbar for a complete description of all the default buttons and how to redefine the toolbar. The Soft Buttons (Windows XPe) A set of soft buttons can be displayed along the bottom of the TeemTalk for Windows XPe window. These can be programmed so that they perform various functions when clicked. There are four soft button levels. Each level consists of twelve programmable buttons, providing a combined total of 48 programmable buttons. You can display all four levels at the same time if required. All levels are accessible even if not all are displayed, levels stored off-screen can be 'scrolled' into view by clicking the Level button. The soft buttons are programmed using the Soft Buttons dialog box, which is displayed by selecting Settings in the menu bar then Soft Buttons... The setting of the Visible Levels option determines how many soft button levels are displayed. Refer to the Setup Menus chapter for information on programming the buttons. 2-45 Getting Started The Status Bar Along the bottom of the display is a status bar which shows the status of various operations and enables you to switch between modes. The information displayed in the status bar depends on the current terminal emulation. The following description applies when running any of the DEC VT terminal emulations, though some of the fields and buttons will be applicable to other emulations as well. 1 2 3 4 5 6 7 8 9 10 11 Item 1: This displays two LEDs. The first LED indicates whether or not you are connected to the host. It will show red when not connected and green when you are connected. The second LED indicates whether or not data is being sent to or from the host. It will show dull green when there is no activity, red when data is being sent to the host, and bright green when data is being received from the host. Item 2: This button enables you to switch between Local and Online mode. The label indicates the mode you will switch to if the button is clicked. Item 3: This button enables you to Pause or Resume scrolling data in the window. The label indicates the action that will be taken if the button is clicked. Item 4: Indicates the current terminal emulation. Item 5: This displays the active session (always 1), the current page number (always 1), and the line,column location of the text cursor. Item 6: This indicates whether Overstrike Mode or Insert Mode is currently selected. In Overstrike Mode (default), new characters will replace already existing characters at the cursor position. When Insert Mode is selected, new characters will be inserted at the cursor position without deleting existing characters, which will move to the right. Item 7: This will display Edit when the terminal emulation is in Edit mode. Item 8: This will display the time in 24 hour format when in DEC VT500 mode if the VT525 set time command has been received from the host. Item 9: Indicates the status of the printer as follows: None signifies that the printer is not turned on or not connected, or not installed in Microsoft Windows. 2-46 Getting Started Not Ready signifies that the printer is not ready to receive data for printing. Ready signifies that the printer is ready to receive data for printing. Auto signifies that the emulation is in Auto Print mode in which the current cursor line is sent to the printer when a command for the cursor to move to the next line is issued. Controller signifies that the emulation is in Printer Controller mode in which the host has direct control over the printer. Print screen commands issued from the keyboard or mouse will be ignored. ErrGen indicates that an error has occurred and a message box will be displayed indicating the error. Item 10: This indicates the keyboard mode. It will be blank when the keyboard is in normal mode and will display DEC when in DEC mode. You can toggle between normal and DEC mode by pressing the keys Alt + Num Lock together. Item 11: Indicates the status of the aux port as follows: Ready indicates that the aux port is ready for bidirectional output. In Use indicates that the aux port is currently busy. Hotspots A hotspot facility is provided which enables you to invoke a function by clicking on a keyword displayed on the screen. For example, an application may display information relating to keys you can press to perform a particular function. Instead of pressing the key on the keyboard, you could invoke the function by holding down the Control key and clicking the mouse pointer on the key name on the display (assuming default mouse configuration). Hotspots are supported in ALL terminal emulation modes. A set of default keywords is provided for each mode. These keywords relate to key functions specific to the emulation. For example, in VT500 mode you can tap on the word Help displayed on the screen and the emulator will execute the function associated with the Help key. You can identify hotspots that are currently present in display memory by assigning the Show Hotspots function to a key + mouse button combination using the Mouse Button Actions dialog box (refer to the Mouse Functions chapter for details). Holding down the relevant key and left mouse button will cause all colour attributes to be temporarily removed from the display and the hotspots will be highlighted with a red background. Releasing the key and left mouse button will return the display to its original state. 2-47 Getting Started AT&T 4410 Emulation When running the AT&T 4410 emulation the display size is 80 (or 132) columns by 25 lines with a scroll region of 24 lines. A row of function buttons is displayed along the bottom of the window. These correspond to the function keys F1 through F8 on the keyboard. You can action a programmed function either by pressing the function key or click-ing the equivalent button displayed on the screen. The middle button has no function when clicked. To program the function keys, press any F1 - F8 key shifted. The Program Function Keys menu will be displayed. Each line relates to one particular function key and its button. The two fields following the f-key number allow you to enter a two line label of up to sixteen characters for the equivalent button on the screen. These are followed by the definition line which contains an escape sequence by default. Each definition can contain up to 50 ASCII characters. To program an f-key, press the F1 key to move the cursor to the relevant line and use the cursor keys to move from one section of the line to another. You must press the F1 key to end each definition line entry so that extra space characters are not sent to the host. Note that using the cursor keys to move to the next line will cause the remainder of the definition line to be sent as spaces. When you have finished defining the f-keys, press F7 to save the definitions and exit from the menu. If you want to exit without saving the settings, press F8. 2-48 Getting Started Viewdata Mode You can select one of three display formats for viewdata mode: 40 column, 80 column, or Split Screen. Selecting Viewdata 40 or 80 mode will enable a single viewdata page of 40 or 80 columns wide by 24 lines deep to be displayed. Viewdata Split enables simultaneous display of two pages side by side, each page consisting of 24 lines and 40 columns. Receipt of a clear screen command will move the cursor to the home position of the opposite page and its contents will be erased ready for the next page. The keys mapped as PF1 through PF4 have the following functions in viewdata mode: PF1: * PF3: Reveal PF2: # PF4: Exit to ANSI mode 2-49 Getting Started Notes 2-50 Keyboard Configuration 3 Keyboard Configuration This chapter describes how to configure the keyboard, define key functions and compose special characters. Keyboard Mapping The keyboard is mapped as close as possible to the terminal being emulated. An llustration showing the mapping of key functions on the 101/102 key Enhanced AT style keyboard layout is shown in each terminal emulation chapter. Special key functions supported by each terminal emulation can be mapped to keys using the predefined macros listed in the Define Key Macros dialog box as described in the next section. Defining Key Functions You can redefine the function of keys on the keyboard using the Define Keyboard Macros dialog box which is displayed by selecting Keyboard Macros in the Settings menu. 3-1 Keyboard Configuration This enables you to redefine the function of most of the keys on your keyboard, including the key combinations listed below: Key Shift + Key Control + Key Control + Shift + Key Alt + Key Alt + Shift + Key Alt + Control + Key Alt + Control + Shift + Key Each definition may contain a string of up to 127 characters. The combined total of all the characters that may be programmed into keys is determined by the 127 character limit per definition and the amount of memory available in your PC. The Predefined Macros box enables you to select from a list of standard functions associated with the current terminal emulation. Clicking the arrow button will display a list box in which the names of valid key functions (called virtual key names) are shown. The Virtual Key Names appendix lists all the functions and associated virtual key names for each terminal emulation. A key macro may be actioned automatically on start-up, or transmitted to the host or actioned locally when the key or key combination is pressed. This is determined by selecting Normal, Remote, Local or Startup in the list box when defining the key. Selecting Normal will cause the macro to be processed according to the current operating mode when the key or key combination is pressed. The Current Macro Definitions box displays the key and key combinations that are currently defined. The Type column indicates whether the macro is processed as normal (blank), remote (R), local (L) or on start-up (S). You can remove the selected definition or delete all the definitions by clicking the relevant Remove button. Defining A Key Or Key Combination 1. Click in the Program Key box then press the key or key combination to define. The current definition will be displayed. 2. Click in the With box then enter the new definition, or make a selection from the list of Predefined Macros then click Apply. 3. Specify how the macro is to be processed by selecting either Normal, Remote, Local or Startup in the list box. 4. Click the Add button to accept the definition. The new definition will be added to the Current Macro Definitions list. 5. To save the definitions, click OK to exit, then select Save Session As in the File menu, make sure the Keyboard Macros box is checked, then click OK. 3-2 Keyboard Configuration Key Combinations & Sequences You can program a key to perform the function of a combination or sequence of keys. For example, you can cause the F1 key to perform the same function as pressing the keys Alt + F4 together, or pressing the keys F2 then F3 then F4. Keys are identified by their virtual key names as listed in the Virtual Key Names appendix. The virtual key name has to be enclosed by the < and > characters in the key definition box. You may omit the VK_ and VT_ (etc.) parts of the virtual key name. To program a key so that it performs the same function as pressing two or more other keys together, type the < character followed by the virtual key names linked together with + (plus sign) characters and ending with the > character. For example, to program the F1 key so that when it is pressed it performs the same function as pressing the keys Alt + F4 together, enter the following characters in the key definition box: <ALT+F4> To program a key so that it performs the same function as pressing a sequence of keys one after the other, enter each virtual key name in the order required, enclosing each virtual key name with the < and > characters. Each enclosed virtual key name must immediately follow the previous enclosed virtual key name with no spaces. For example, to program the A key so that when it is pressed it performs the same function as pressing the keys F2 then F3 then F4 enter the following characters in the key definition box: <F2><F3><F4> Specifying Characters There are various ways in which you can specify a particular character. For example, the ESC character can be specified using any one of the following five entries: _027 \033 \u001B ^[ \e Decimal value (underscore character followed by a 3-digit number). Octal value (backslash character followed by a 3-digit number). Unicode value (backslash and u characters then unicode value). Control key value (^ represents the control key on the keyboard). Additional value for ESC. The following 'backslash' values can be used: \u Unicode introducer \n Line feed \r Carriage return \e Escape Note that as the \ and ^ characters are used as value introducers, to enter these as character values you need to precede them with a backslash character, i.e. enter \ as \\ and ^ as \^. The Euro character can be specified by entering the unicode value \u20ac. 3-3 Keyboard Configuration Compose Character Sequences Compose character sequences can be used to generate codes for characters not shown on your keyboard. The characters that can be composed depend on the setting of the Character Set Mode option in the Emulation Settings dialog box and the Preferred Char. Set option in the Terminal Settings dialog box. When Character Set Mode is is set to National, only characters found in the character set that corresponds to the selected keyboard nationality can be composed. When Multinational is selected, the emulator is in Multinational mode and characters from all national keyboard layouts may be composed. The tables of characters that are used in Multinational mode depend on the setting of the Preferred Char. Set option. When this is set to DEC-MCS, the ASCII (7-bit) and DEC Additional (8-bit) character sets are used. When this option is set to ISO Latin-1, the ASCII (7-bit) and ISO Latin-1 Additional (8-bit) character sets are used. The Character Sets appendix shows all the tables of characters that may be selected. If a character is a diacritical symbol (e.g. ´ or ¨) and this symbol does not appear on the keyboard, an equivalent character can be used in some cases. The diacritical symbols and the possible substitutes are shown below. There are no equivalents for the circumflex accent and tilde mark. Diacritical Mark Equivalent Character ´ ¨ ` ° ' " ' * Acute accent Umlaut Grave accent Ring mark Apostrophe Double quote Single quote Asterisk or degree sign To compose a character, first find the character you wish to compose in the left hand column of the following tables. The two characters shown in the right hand column are the keys that are used to create it. Several alternatives may be given for generating the same character. A compose sequence is initiated by pressing the keys Alt + C together, followed by the key bearing the first character then the key bearing the second character. Note: The compose character sequence can also be initiated by pressing a key defined with the COMPOSE virtual key name. A compose character sequence may be abandoned before completion by pressing the Delete key. Pressing Alt + C (or the key defined with the COMPOSE virtual key name) again before completing a compose character sequence will cause it to be abandoned and a second sequence to be started. An invalid compose character sequence will cause the bell to sound. 3-4 Keyboard Configuration The following tables use several conventions: The keys bearing the characters used to compose a special character may be pressed in any order unless (in order) is specified. (DEC Multinat.) indicates that the character can only be composed if the Character Set Mode option in the Emulation Settings dialog box is set to Multinational, and the Preferred Char. Set option in the Terminal Settings dialog box is set to DEC-MCS. (Latin-1) indicates that the character can only be composed if the Character Set Mode option in the Emulation Settings dialog box is set to Multinational and the Preferred Char. Set option in the Terminal Settings dialog box is set to ISO Latin-1. If a nationality is specified with the character description, for example (Dutch), then the character can only be composed when the Character Set Mode option in the Emulation Settings dialog box is set to National and the system is configured for the relevant language. 3-5 Keyboard Configuration COMPOSE CHARACTER SEQUENCES " quotation mark ¨ space ª feminine ordinal indicator a- # number sign ++ « double open angle brackets << ' apostrophe ' space ° degree sign a a or A A (Multinational) or A A or a A (National) ± plus or minus sign +- 2 superscript 2 2^ 3 superscript 3 3^ µ micro sign /u @ commercial at aa (Multinational) (National) opening bracket (( \ back slash // ] closing bracket )) ¶ paragraph sign p! ^ circumflex accent ^ space · centred period .^ ` grave accent ` space 1 superscript 1 1^ { opening brace (- º masculine ordinal indicator o_ | vertical line /^ » double closed angle brackets >> } closing brace )- 1 /4 fraction one quarter 14 /2 fraction one half 12 /4 fraction threequarters (Dutch) 34 ¡ tilde inverted ! ¢ cent sign £ pound sign ¥ yen sign § section sign or /< ~ space 1 !! 3 c / or C / c | or C | l - or L l = or L = y - or Y y = or Y = s o or S O or s ! S ! or s 0 or S 0 (National & Multinational) National includes s O or S o ¤ currency sign C copyright sign xo x0 co c0 or or or or XO X0 CO C0 A_ ° space [ ~ 3-6 0^ or or / (in order) or P! or (in order) (in order) (in order) fl Florin (Dutch) fl ij i j sign (Dutch) ij ¿ inverted ? ?? À A grave A` Á A acute A'  A circumflex A^ à A tilde A~ U (in order) (in order) O_ Keyboard Configuration COMPOSE CHARACTER SEQUENCES (continued) ¨A Û U circumflex U^ A* or A ° (degree sign) Ü U umlaut U" or ¨U A E diphthong AE Ÿ Y umlaut (DEC Multinat.) Y" or ¨Y Ç C cedilla /u ß German small sharp s ss È E grave E` à a grave a` É E acute E' á a acute a' Ê E circumflex E^ â a circumflex a^ Ë E umlaut E" ã a tilde a~ Ì I grave I` ä a umlaut a" or ¨a Í I acute I' å a ring a* Î I circumflex I^ æ a e diphthong ae Ï I umlaut I" ç c cedilla c, Ñ N tilde N~ è e grave e` Ò O grave O` é e acute e' Ó O acute O' ê e circumflex e^ Ô O circumflex O^ ë e umlaut e" Õ O tilde O~ ì i grave i` Ö O umlaut O" í i acute i' Œ O E diphthong (DEC Multinat.) OE (in order) î i circumflex i^ Ø O slash O/ ï i umlaut i" Ù U grave U` ñ n tilde n~ Ú U acute U' ò o grave o` Ä A umlaut A" Å A ring Æ or (in order) or / (in order) ¨E or or U ¨I or ¨O or a ° (degree sign) (in order) (comma) or or ¨e ¨i 3-7 Keyboard Configuration COMPOSE CHARACTER SEQUENCES (continued) ó o acute o' — soft (syllable) hyphen (Latin-1) -- ô o circumflex o^ R registered trademark (Latin-1) RO õ o tilde o~ – macron (Latin-1) -^ ö o umlaut o" /4 three quarters (Latin-1) 34 œ o e diphthong (DEC Multinat.) oe ÷ division sign (Latin-1) -: ø o slash o/ multiplication sign (Latin-1) xx ù u grave u` ´ acute accent (Latin-1) '' ú u acute u' ¨ dieresis (umlaut) (Latin-1) " " or " space û u circumflex u^ Y´ Y acute (Latin-1) Y' y´ y acute (Latin-1) y' capital Icelandic thorn (Latin-1) (in order) ü ÿ N S P ¬ 3-8 u umlaut ¨o or (in order) u" ¨u or 3 ¨y TH y" no break space (Latin-1) space space small Icelandic thorn (Latin-1) th broken vertical bar (Latin-1) || capital Icelandic Eth (Latin-1) -D logical not (Latin-1) -, small Icelandic Eth (Latin-1) -d or !^ (in order) D _^ (in order) y umlaut or or (in order) Mouse Functions 4 Mouse Functions This chapter describes the special functions assigned to the mouse and how to redefine them. Introduction You can assign up to six special functions to the left and right mouse buttons when used in conjunction with modifier keys. The following functions are defined by default: Left Button Right Button Normal: Shift: Control: Control + Shift: Alt: Double Click: Select Extend Selection Action Hotspot Select Rectangle Move Cursor Select Word Edit Copy Edit Paste Unassigned Unassigned Send Keyword Unassigned Redefining Mouse Functions You can redefine the functions assigned to the mouse buttons using the Mouse Button Actions dialog box, which is displayed from the Settings menu. 4-1 Mouse Functions This enables you to specify the functions of the left and right mouse buttons when clicked on their own or in conjunction with modifier keys. You can assign up to six functions to each button, either entering your own definition in the same format as described for keyboard macros and soft buttons, or selecting from a list of standard built-in functions. Clicking one of the arrow buttons will display a drop-down list box which lists all the standard functions that can be assigned: Unassigned Select Extend Selection Edit Copy Edit Paste Show Hotspots Action Hotspot Move Cursor Send CR Send Keyword Middle Button Select Rectangle Select Word Select and Copy Cursor Select Rectangular Select and Copy The setting of the Highlight When Actioned option determines whether or not a visual indication is given that a function has been actioned when a hotspot is clicked. Selecting & Copying Text You can use the mouse buttons to copy and paste text. The region of the display that will be selected for copying depends on whether you use the Select, Select and Copy, Select Rectangle, Rectangular Select and Copy or Select Word function. The Select function will select all text from the start position to the finish position, working left to right across the entire width of the display, whereas the Select Rectangle function will only select text contained within the rectangular area defined by the start position (top left corner) and the finish position (bottom right corner). The Select Word function will cause the word under the mouse cursor to be selected. The Select and Copy function is the same as Select but will also copy the selected data to the Clipboard automatically. The Rectangular Select and Copy function is the same as Select Rectangle but will also copy the selected data to the Clipboard automatically. Moving The Cursor In Block Mode When the emulator is in any of the local block modes you can use the mouse instead of the cursor keys to position the text cursor using the Move Cursor function. To position the text cursor, move the mouse pointer to the position required, hold down the Alt key then click the left mouse button. The Cursor Select function does the same as Move Cursor, but when running the IBM 3270 or IBM 5250 emulation it also performs a cursor select. 4-2 Mouse Functions Send Keyword The Send Keyword function enables you to click on any delimited word displayed on the screen and it will be sent to the host, as long as the word is not already defined as a hotspot. Keyword delimiters are space, NULL, / , : = ( ) [ and ]. Show & Action Hotspots A hotspot facility is provided which enables you to invoke a function by clicking the mouse pointer on a keyword displayed on the screen. For example, an application may display information relating to keys you can press to perform a particular function. Instead of pressing the key on the keyboard, you could invoke the function by holding down the Alt key and clicking the mouse pointer on the displayed key name (assuming default mouse configuration). Hotspots are supported in ALL terminal emulation modes. A set of default hotspot keywords is provided for each mode. These relate to key functions specific to the emulation. For example, in VT500 mode you can click on the word Help displayed on the screen and the emulator will execute the function associated with the Help key. You can identify hotspots that are currently present in display memory by using the Show Hotspots function. All colour attributes will be temporarily removed from the display and the hotspots will be highlighted with a red background. Emulating Middle Mouse Button You can assign the function of the middle button found on a three button mouse to any button or button and key combination by using the Middle Button option. 4-3 Mouse Functions Notes 4-4 The Toolbar 5 The Toolbar This chapter describes how to use and redefine the TeemTalk for Windows XPe toolbar. Using The Toolbar The TeemTalk for Windows XPe toolbar provides a quick way of actioning commands or displaying setup dialog boxes by just clicking a button. You can customize the toolbar by adding or removing buttons to suit your requirements using the Button Tools dialog box, which is displayed from the Settings menu. The Predefined Button Tools The toolbar displayed by default contains a series of buttons defined with functions found in the setup menus. These functions are listed below and described in the Setup Menus chapter. Displays the New Connection dialog box for making a serial or network host connection. Displays the Open Session dialog box. This enables you to load a particular setup configuration. Displays the Save Session As dialog box. This enables you to specify how the current session configuration is to be saved. 5-1 The Toolbar Copies selected data to the clipboard. Pastes clipboard data at the current cursor position. Displays the Printer Setup dialog box. This enables you to select any printer that is configured in Microsoft Windows. Will produce a hardcopy of screen data. Displays the Attributes dialog box. This enables you to specify the colours used in the emulation workspace and how text with attributes is displayed. Displays the Keyboard Macros dialog box. This shows the mapping of your keyboard and enables you to redefine the function of keys. Displays the Soft Buttons dialog box for defining the function of soft buttons. Displays the Mouse Button Actions dialog box for assigning up to six functions to the left mouse button. Displays the Button Tools dialog box for redefining the toolbar. Displays information about your version of TeemTalk. 5-2 The Toolbar Redefining The Toolbar Selecting Button Tools from the Settings menu will display a dialog box that enables you to redefine the toolbar. The Current Tool box displays the toolbar button and its function that is currently selected for editing, or located where a new button is to be inserted to its left in the toolbar. Clicking the down-arrow button to the right will display all the current toolbar buttons in order in a box below. This enables you to select a new button position for display in the Current Tool box. Click the down-arrow button again to return to the Button and Command selection display. The Visible option enables you to specify whether or not the toolbar is displayed. Adding Buttons 1. Click the down-arrow button to the right of the Current Tool box to display the buttons currently in the toolbar. 2. Click on the button which will be to the right of the new button to be added so that it is displayed in the Current Tool box. 3. Click the down-arrow button again to display the Command options. 4. Select a button bitmap from the Buttons list. You can add your own bitmaps to the standard bitmap list by clicking the Add Custom Bitmap button and selecting the bitmap files to load. Buttons will be automatically generated using the bitmaps in these files. 5-3 The Toolbar 5. Specify the command to be performed when this button is clicked either by selecting from the Commands list or by typing your own definition in the Current Tool text box. 6. Click the Insert at Current button. 7. Click OK when you have finished. The toolbar will immediately be updated. Adding A Space Between Buttons 1. Click the down-arrow button to the right of the Current Tool box to display the buttons currently in the toolbar. 2. Click on the button which will be to the right of the space to be added so that it is displayed in the Current Tool box. 3. Click the down-arrow button again to display the Command options. 4. Select the [Space] option at the top of the Commands list box. 5. Click the Insert at Current button. 6. Click OK when you have finished. The toolbar will immediately be updated. Removing A Button Or Space 1. Click the down-arrow button to the right of the Current Tool box to display the buttons currently in the toolbar. 2. Click on the button or space to be deleted so that it is displayed in the Current Tool box. 3. Click the down-arrow button again to display the Command options. 4. Click the Delete Current button to remove the button or space from the toolbar. 5. Click OK when you have finished. Saving The Button Tools When you have finished defining button tools you can save them so that they will be reasserted when the emulator is loaded or reset by selecting Save Session in the File menu. 5-4 The Toolbar Assigning User-Defined Functions You can enter a definition of your own in the Current Tool text box. The definition can contain key functions and control characters to be actioned as well as normal text. Specifying Key Functions You can cause a key function to be actioned by including the virtual key name of the key enclosed by the < and > characters. You may omit the VK_ and VT_ parts (etc.) of the virtual key name. For example, the Enter key would be specified as <ENTER>. To send the function of a key combination, type the < character followed by the virtual key names linked together with + characters and ending with the > character. For example, Alt F4 would be specified as <ALT+F4>. To send the function of a sequence of keys one after the other, enter each virtual key name in the order required, enclosing each virtual key name with the < and > characters. Each enclosed virtual key name must immediately follow the previous enclosed virtual key name with no spaces. For example, F2 then F3 then F4 would be specified as <F2><F3><F4>. Specifying Characters There are various ways in which you can specify a particular character. For example, the ESC character can be specified using any one of the following five entries: _027 \033 \u001B ^[ \e Decimal value (underscore character followed by a 3-digit number). Octal value (backslash character followed by a 3-digit number). Unicode value (backslash and u characters then unicode value). Control key value (^ represents the control key on the keyboard). Additional value for ESC. The following 'backslash' values can be used: \u Unicode introducer \n Line feed \r Carriage return \e Escape Note that as the \ and ^ characters are used as value introducers, to enter these as character values you need to precede them with a backslash character, i.e. enter \ as \\ and ^ as \^. The Euro character can be specified by entering the unicode value \u20ac. 5-5 The Toolbar Notes 5-6 Setup Menus 6 Setup Menus This chapter describes the options available in the setup menus and dialog boxes. Displaying & Closing Menus The following menus can be displayed from the command bar: Note: The options available in the menus depend on whether or not you are in WBT mode. To display a menu: Mouse: Click on the title of the menu required. Keyboard: Hold down the Alt key and press the key bearing the underlined character in the menu title. For example, pressing Alt + F will display the File menu. 6-1 Setup Menus To close a menu: Mouse: Click anywhere outside the menu. Keyboard: Press the Alt key. Using The Menus The menu options follow several conventions: Options that are displayed dimmed are not applicable to the current mode of operation and cannot be selected. An example of this is the IBM 5250 option in the Settings menu. This can only be selected when the IBM 5250 emulation is running. Options that include an underlined character may be actioned by pressing the key bearing that character. For example, pressing the X key while the File menu is displayed will cause the emulator to shut down. Options that are not followed by an ellipsis (...) perform a particular function when selected. For example, selecting Reset Terminal in the File menu will perform a terminal reset. Options that are followed by an ellipsis indicate that a dialog box will be displayed with all the selections applicable to that option. For example, selecting Emulation... in the Settings menu will display a dialog box in which you can specify various emulation settings. To select a menu option: Mouse: Click the menu option. Keyboard: Method 1: If the option includes an underlined character, press the key bearing that character. For example, pressing X while the File menu is displayed will cause the emulator to shut down. Method 2: Use the up or down arrow keys to highlight the option required then hit Return. 6-2 Setup Menus Dialog Boxes Selecting an option which is followed by an ellipsis (...) will cause a dialog box to be displayed. The example shown below is displayed by selecting the Block Transmission... option in the Settings menu. There are four basic methods for changing settings within the dialog boxes. Options preceded by a check box, such as Send Unprotected Only in the example above, are true or selected when the box contains a ✔, and false or unselected when the box is empty. Click the pointer in the box to toggle the setting on or off, or press the spacebar on the keyboard. When a group of options preceded by round buttons are enclosed in a box, such as the PF Key Effect options in the example above, only one of these options is selected or true at any one time. The currently selected option is indicated by a button with a dark centre. These buttons behave just like radio buttons in that clicking one will cause the previously selected button to be deselected. Some options require you to type information in a text box, such as the End of Line Characters option. When an option has many possible settings, these will be shown in a list box. The Alpha Emulation option in the Emulation Settings dialog box is an example of this. To make a selection using the mouse, click the arrow button to display a drop-down list box then click on the setting required. If the list is long a scroll bar may be displayed. To make a selection using the keyboard, press the up or down cursor keys to cycle through the available settings until the one required is highlighted in the box. 6-3 Setup Menus To select a dialog box option: Mouse: Click the check box, button or list box. The current setting is highlighted or surrounded by a dotted rectangle, or both. Keyboard: Move to the option to be changed either by holding down the Alt key and pressing the key bearing the character underlined in the option, if one is displayed, or press the Tab key to move forward through the options (left to right, top to bottom), or Shift + Tab to move backwards, until the required option is highlighted. Press the Spacebar to toggle check boxes or buttons on or off. To close a dialog box without actioning changes: Mouse: Click the Cancel button. Keyboard: Press the Tab or Shift + Tab keys to move the cursor until it rests over the Cancel button and press Return or the Spacebar. To close a dialog box and action changes: Mouse: Click the OK button. Keyboard: Press Return. Default Settings You can restore the factory default settings of all the setup options by selecting the Factory Default option in the File menu. Some dialog boxes include a Default button to enable the default settings of options contained in the dialog box to be reasserted. Specifying Characters In Setup Entries There are various ways in which you can specify a particular character in a setup entry. For example, the ESC character can be specified using any one of the following five entries: _027 \033 \u001B ^[ \e 6-4 Decimal value (underscore character followed by a 3-digit number). Octal value (backslash character followed by a 3-digit number). Unicode value (backslash and u characters then unicode value). Control key value (^ represents the control key on the keyboard). Additional value for ESC. Setup Menus The following 'backslash' values can be used: \u Unicode introducer \n Line feed \r Carriage return \e Escape Note that as the \ and ^ characters are used as value introducers, to enter these as character values you need to precede them with a backslash character, i.e. enter \ as \\ and ^ as \^. The Euro character can be specified by entering the unicode value \u20ac. Creating A Connection Template (CE) When running TeemTalk for Windows CE, you can save the current session configuration as a connection template. To make the emulator automatically attempt to make a host connection using the same settings the next time it is loaded, display the File menu and select the Save Session option. You can create multiple connection templates when the terminal is not in WBT mode, any one of which can be selected for use. The procedure is as follows: 1. In the File menu, select the Save Session As... option to display the following dialog box. 2. In the Saved Items box, indicate which settings are to be saved by checking the boxes next to the relevant options. 3. In the Save As File Name text box, enter a descriptive name to enable it to be identified for future selection. This description will be listed in the Open Session dialog box. 4. Click the OK button to save the template settings. If you specified a descriptive name that already exists, a message box will ask you to confirm whether or not you want to overwrite the existing name with the new settings. 6-5 Setup Menus Selecting A Connection Template (CE) The Open Session dialog box enables you to select a connection template to use when the terminal is not in WBT mode. This is displayed by selecting Open Session... in the File menu. The Description list box displays the names of connection templates that were created using the Save Session As dialog box. The descriptive name of the connection template currently in use is highlighted. The factory default connection template is Untitled. Clicking one of the descriptions then the OK button will cause the dialog box to close and the connection template associated with the chosen description will be actioned. You can specify a particular connection template to use by default by clicking the required description, checking the Save As Default check box, then clicking the OK button. To delete a connection template, select the description then click the Delete button. Saving The Session Configuration (XPe) When running TeemTalk for Windows XPe, you can either save the session configuration using the current session name, or you can save it under a new session name if TeemTalk was started without a session (i.e. not started by clicking on a desktop icon or by selecting a session from the Start menu). Save Using Current Session Name To save the session configuration using the current session name, select Save Session in the File menu. If you were using a session template and modified the settings, a local copy of the template will be made with the same name, but with the changed settings. This copy will replace the template in the list of session configurations displayed in the Open Session dialog box. Note that the T template indicator will no longer be displayed. 6-6 Setup Menus Save Using New Session Name If TeemTalk for Windows XPe was started without a session (i.e. not started by clicking on a desktop icon or by selecting a session from the Start menu), you can save the session configuration under a new name: 1. In the File menu, select Save Session As... option to display the following dialog box. 2. In the Saved Items box, indicate which settings are to be saved by checking the boxes next to the relevant options. 3. In the Save As File Name text box, enter a descriptive name (up to 132 characters long) to enable it to be identified for future selection. This description will be listed in the Open Session dialog box. 4. Click the OK button to save the session. If you specified a session name that already exists, a message box will ask you to confirm whether you want to overwrite the existing session name with the new settings. Selecting A Session Configuration (XPe) If TeemTalk for Windows XPe was started without a session (i.e. not started by clicking on a desktop icon or by selecting a session from the Start menu), you can use the Open Session dialog box to select a session configuration for TeemTalk to load. This is displayed by selecting Open Session... in the File menu. 6-7 Setup Menus The Defined Sessions list box displays one-line descriptions of session configurations that were created using the TeemTalk Connection Wizard or the Save Session As dialog box when running TeemTalk. The session configuration currently loaded is highlighted. Clicking on a defined session then the OK button will cause TeemTalk to load that session configuration. The session configuration that TeemTalk will load by default on startup is indicated by a letter D next to its name. You can change the default selection by selecting the required session description then clicking the Save As Default button. Session templates created by the system administrator are indicated by the letter T after the session name. Refer to the Session Management section in the Getting Started chapter for details. You can delete any session configurations except templates by selecting the description then clicking the Delete button. Note that if the session deleted was a copy of a template (which will have the same name), the template version will reappear in the Defined Sessions list, as indicated by the letter T. 6-8 Setup Menus Menu Descriptions The following pages describe the options available in all the menus and associated dialog boxes. The descriptions begin by showing the menu or dialog box as it is displayed on the screen. The factory default setting is shown below each option title where applicable. File Menu Factory Default... This will restore the factory default settings of all the setup options. A message box will be displayed asking you to confirm whether or not you want to assert the factory default settings. Click the OK button to assert the factory defaults. Reset Terminal This will reset the current terminal emulation mode. 6-9 Setup Menus New Connection... (Not available in WBT mode) Factory default: Serial, Com 1 This will display a dialog box that enables you to make a host connection. The Type list box specifies the type of host connection that is to be made. The Connect To box specifies the port or host to communicate with. You can either make a selection from the list or enter a valid host name or internet address. The host connection will be closed if you change the settings in the New Connection dialog box and attempt to connect, if you log out of the host, or the host closes the connection. Warning messages will be displayed if the host closes the connection, or you attempt to open a new session or exit the emulator while a session is open. Making A Serial Host Connection To connect to a serial host, select Serial in the Type list box (default), then select the Com port required in the Connect To list box. Click the Configure... button to display the Serial Settings dialog box and make sure the settings match that of the host. Click OK then Connect. Note: These options are described in the Serial Settings section later in this chapter and only apply when the connection type is set to Serial. 6-10 Setup Menus Making A Network Host Connection To connect to a network host node, select TCP/IP in the Type list box. The Connect To box will display the available devices on the network. Select the name of the device required or enter the host name or IP address. If the session was created using the Connection Wizard and the Host Rollover On Connection Fail option was selected, you can specify up to three more hosts in the boxes below. The emulator will attempt to connect to each specified host in turn until one is successful. Clicking the Telnet Options button will display a dialog box with additional options. These are described in the Getting Started chapter. Clicking the Connect button or the name of the host in the Connect To list box twice will cause the emulator to attempt to connect to the specified host. If a connection cannot be made because the network driver is not installed or the host node name is invalid, an error message will indicate this. Failure to connect for any other reason will result in a Connection Failed message. Making A Modem Host Connection For a modem connection, click the Modem button then click Advanced to display configuration options. Refer to the Modem Connection Settings section in chapter 2 for details. When you have made the relevant selections, click OK then Connect. 6-11 Setup Menus Making An SSL Or SSH Host Connection (if supported) The optional SSL (Secure Sockets Layer) protocol enables authenticated and encrypted communication between clients and servers. Refer to the SSL Connection section in the Getting Started chapter for details. The optional SSH (Secure Shell) client/server protocol is used to encrypt and transmit data securely over a network, with authentication (proof of client identity) provided by a password and/or key. To enable an SSH connection, this option must be selected and the Telnet Port Number option set to the host's SSH port (22 is the default for SSH). When a Telnet connection is initiated, the SSH Connection dialog box will be displayed prompting the user for authentication. Refer to the SSH Connection section in the Getting Started chapter for details. Open Session... (Not available in WBT mode) TeemTalk for Windows CE This enables you to select a connection template. The following dialog box will be displayed. The Description list box displays the names of connection templates that were created using the Save Session As dialog box. The name of the connection template currently in use is highlighted. The factory default connection template is Untitled. Selecting one of the descriptions then clicking the OK button will cause the dialog box to close and the connection template associated with the chosen description to be actioned. You can specify a particular connection template to use by default by clicking the required description, checking the Save As Default check box, then clicking the OK button. To delete a connection template, select the description then click the Delete button. TeemTalk for Windows XPe This option is only available if TeemTalk for Windows XPe was started without a session (i.e. not started by clicking on a desktop icon or by selecting a session from the Start menu). It enables you to select a session configuration for TeemTalk to load. The following dialog box will be displayed. 6-12 Setup Menus The Defined Sessions list box displays one-line descriptions of session configurations that were created using the TeemTalk Connection Wizard or the Save Session As dialog box when running TeemTalk. The session configuration currently loaded is highlighted. Clicking on a defined session then the OK button will cause TeemTalk to load that session configuration. The session configuration that TeemTalk will load by default on startup is indicated by a letter D next to its name. You can change the default selection by selecting the required session description then clicking the Save As Default button. Session templates created by the system administrator are indicated by the letter T after the session name. Refer to the Session Management section in the Getting Started chapter for details. You can delete any session configurations except templates by selecting the description then clicking the Delete button. Note that if the session deleted was a copy of a template (which will have the same name), the template version will reappear in the Defined Sessions list, as indicated by the letter T. Close Session (Not available in WBT mode) This will close the current session. Save Session Selecting this option will save the current session configuration. TeemTalk for Windows XPe If you were using a session template and modified the settings, a local copy of the template will be made with the same name, but with the changed settings. This copy will replace the template in the list of session configurations displayed in the Open Session dialog box. Note that the T template indicator will no longer be displayed. 6-13 Setup Menus Save Session As... (Not available in WBT mode) TeemTalk for Windows CE This will display a dialog box that enables you to save the current session configuration as a connection template. You can create multiple connection templates, any one of which can be selected for use. The procedure is as follows: 1. In the Saved Items box, indicate which settings are to be saved by checking the boxes next to the relevant options. 2. In the Save As File Name text box, enter a descriptive name to enable it to be identified for future selection. This description will be listed in the Open Session dialog box. 3. Click the OK button to save the template settings. If you specified a descriptive name that already exists, a message box will ask you to confirm whether or not you want to overwrite the existing name with the new settings. TeemTalk for Windows XPe This option is only available if TeemTalk for Windows XPe was started without a session (i.e. not started by clicking on a desktop icon or by selecting a session from the Start menu). It will display a dialog box that enables you to save the current session configuration under a new name. The procedure is as follows: 1. In the Saved Items box, indicate which settings are to be saved by checking the boxes next to the relevant options. 2. In the Save As File Name text box, enter a descriptive name (up to 132 characters long) to enable it to be identified for future selection. This description will be listed in the Open Session dialog box. 6-14 Setup Menus 3. Click the OK button to save the session. If you specified a session name that already exists, a message box will ask you to confirm whether you want to overwrite the existing session name with the new settings. Startup Options... (Not available in WBT mode) The following dialog box will be displayed when this option is selected. This enables you specify whether the emulator is to make a host connection using the default connection template, display the New Connection dialog box, or display the Open Session dialog box when it is loaded (but not when it is reset). Refer to the relevant descriptions earlier in this section for information on these dialog boxes. Printer Setup... This will display a dialog box that enables you to specify print settings. The options available depend on whether you are running TeemTalk for Windows CE or XPe. 6-15 Setup Menus TeemTalk for Windows CE TeemTalk for Windows XPe 6-16 Setup Menus You can direct print data to a printer handled by the Print Manager, a specific port, or a network printer. CE - Direct Print Data To The Print Manager When running TeemTalk for Windows CE, the Current System Printer Driver box displays the name of the currently selected system printer when both the Use Network Printer (LPR) and Print Direct To Port options are not selected. Clicking the Setup button will display a Print Manager dialog box that enables you to specify printer settings. If you find a through print results in data being split into lines, each treated as a separate print job, specify a time in the Seconds Close Delay box (e.g. 5 seconds). This will enable the next line of data to be sent before the print job is assumed to have finished and therefore prevents the print job from being closed prematurely. When set to 0, printing will not start until a ‘print end of job’ command is received from the host. Entering any other number will cause printing to start after the specified number of seconds have elapsed, regardless of whether the ‘print end of job’ command has been received from the host. If you require the port to be kept open all the time (to stop the printer resetting) enter -1 (minus one). XPe - Direct Print Data To The Print Manager When running TeemTalk for Windows XPe, the Printer list box lists the printers handled by the Print Manager. You can select from this list when the Use Network Printer (LPR) option is not selected. Clicking the Setup button will display a Print Manager dialog box that enables you to specify printer settings. The Microsoft Windows Print Manager normally controls all print formatting, translates host characters to supported printer characters, and also provides a spooling facility. A disadvantage of using the Print Manager is that any print formatting escape sequences received from the host are stripped. If you want to use the Print Manager but disable its print formatting process so that the original escape sequences from the host are retained, select the PassThrough option. (Note that the PassThruogh option will be unselectable if the printer driver currently selected does not support this facility.) If you find a through print results in data being split into lines, each treated as a separate print job, specify a time in the seconds Close Delay box (e.g. 5 seconds). This will enable the next line of data to be sent before the print job is assumed to have finished and therefore prevents the print job from being closed prematurely. When set to 0, TeemTalk will not start printing until it receives a ‘print end of job’ command from the host. Entering any other number will cause TeemTalk to print after the specified number of seconds have elapsed, regardless of whether the ‘print end of job’ command has been received from the host. If you require the port to be kept open all the time (to stop the printer resetting) enter -1 (minus one). 6-17 Setup Menus Direct Print Data To A Specific Port To direct print data to a specific port, select Print Direct To Port and specify the Printer Port. Selecting the FormFeed Terminator option will cause the printer to advance the paper to the top of the form when it has finished printing. The Output Character Set option enables you to specify the character set used for printing when Print Direct To Port is selected. This allows non-ISO Latin-1 printers to be used. Selecting Auto Line Feed will cause the printer to print at the beginning of the next line when a carriage return command is received. When a serial port is selected, clicking the Setup button will display a dialog box in which you can specify the baud rate, parity, flow control, data bits and stop bits settings. These options are described in the Serial Settings section. If supported, clicking the Advanced button will display a dialog box that enables you to send printer-specific commands to specify, for example, font size, colour, or page header and footer. 6-18 Setup Menus CE - Direct Print Data To A Network Printer To direct print data to a printer on the network when running TeemTalk for Windows CE, select Use Network Printer (LPR) and enter the LPD Hostname. Clicking the Setup button will display a dialog box that enables you to specify various print settings. You must specify the Printer Name. The Job Name and User Name entries are optional (the User Name will default to root if none is specified). The Number of Copies to print is set to 1 by default. You can specify how many times the LPR protocol will attempt to execute the print job before cancelling by setting the number of Retries and the number of seconds delay between each attempt. When Add Banner is selected, information about this print job will be printed with it. You can display a message box which will indicate the progress of the print job by selecting Debug Information. If supported, clicking the Advanced button will display a dialog box that enables you to send printer-specific commands to specify, for example, font size, colour, or page header and footer. 6-19 Setup Menus XPe - Direct Print Data To A Network Printer To direct print data to a printer on the network when running TeemTalk for Windows XPe, select Use Network Printer (LPR) and enter the LPD Hostname. Clicking the Setup button will display an LPD Device Settings dialog box that enables you to specify various print settings. You must specify the Printer Name. The Job Name and User Name entries are optional (the User Name will default to root if none is specified). You can specify how many times the LPR protocol will attempt to execute the print job before cancelling by setting the number of Retries and the number of seconds delay between each attempt. Clicking the Advanced button will display a dialog box that enables you to send printer-specific commands to specify, for example, font size, colour, or page header and footer. When Add Banner is selected, information about this print job will be printed with it. You can display a message box which will indicate the progress of the print job by selecting Debug Information. 6-20 Setup Menus Print Screen This enables you to produce a hardcopy of data displayed on the screen. The Print Screen dialog box will be displayed when a printer handled by the Print Manager is selected in the Printer Setup dialog box. The Text option is selected by default and the printer resolution and scaling options are not accessible. Clicking the OK button with Text selected will cause a fast print of the screen using Unicode. Selecting Graphics will print all the data in the emulation workspace, both graphics and text, when the OK button is clicked. The hardcopy output will be an almost exact representation of the emulation workspace. Note that a graphics print will take a lot longer than a text print. The Use Printer Resolution option is available when Graphics print is selected. This will force a dot for dot print of the screen on the printer and generally produces a small print, depending on the printer resolution. When this option is not selected (unchecked), the emulator will try and print as large an image as possible on the printer's paper. Both methods can print in landscape or portrait format, depending on the current setup of the printer. Selecting the Auto Wrap option will cause the printer to automatically move to the beginning of the next line when the right margin is reached. The Centre Image on Paper option is available when Graphics print is selected. This will ensure that the graphics image is printed centrally on the paper. The Scaling option is available when Graphics print is selected. This enables the image to be scaled to suit your preference. When the Use Printer Resolution option is selected, you can scale the image up, and when unselected you can scale the image down. (Scaling up when Use Printer Resolution is not selected may result in loss of some of the image.) The Graphics Image option is available when Graphics print is selected. This enables you to specify how the graphics image is to be printed. Clicking the arrow button next to the text box will cause four print options to be displayed. These options allow you to print the graphics image as displayed (Normal by default), with black and white 6-21 Setup Menus reversed, with colour converted to monochrome, or colour converted to monochrome with black and white reversed. Once a screen print is initiated by clicking OK, another dialog box will be displayed while the screen data is being spooled out to the print manager. This enables you to terminate the print process before data is actually printed. Print Buffer This will send a copy of all the data contained in the window buffer to the currently selected printer. Auto Print This toggles auto print mode on and off, as indicated by a tick when auto print mode is on. Auto print mode causes each line of data to be transmitted to the printer when the cursor moves to a new line as a result of a carriage return, line feed, vertical tab, or form feed. Cancel Print This will cancel the current Print Screen or Print Buffer function. Eject Page This option enables data that has been spooled to the printer to be printed. Exit This option will cause the emulator to shut down. 6-22 Setup Menus Edit Menu Clipboard Text Clipboard Graphics Selecting one of these options will enable selected text or graphics to be copied to the clipboard when the Copy command is used. The Paste and Select All commands will also be enabled. A tick will be displayed next to the option when it is selected. Copy The Copy commands become available when data has been selected. They will cause the currently selected text or graphics to be copied to the clipboard. The data can then be inserted in a different position or another file using the Paste command. The next block of data that is copied will delete the previous block on the clipboard. The first Copy option enables you to perform a standard copy. The last three options are only available when Clipboard Graphics is selected. They enable you to copy the graphics image with black and white reversed, with colour converted to monochrome, or both. Paste This will cause data that has been copied to the clipboard to be pasted at the current cursor position. The same block of data may be pasted repeatedly as the clipboard stores it until the Copy command is used again. Select All This will cause the window contents (not the entire buffer) to be selected. Clear Buffer This will erase the contents of the window and the scroll buffer. 6-23 Setup Menus Settings Menu The English, French and German options enable you to select the language that will be used in all menus and dialog boxes. The following dialog boxes can be displayed from this menu. Note that the dialog boxes used to configure specific emulations can only be displayed when the relevant emulation is running. Emulation Settings HP 700-92/96 Settings PT 250 Settings IBM 3151 Settings Wyse Settings TA 6530 Settings IBM 3270 Settings IBM 5250 Settings 6-24 - for specifying the terminal emulation, keyboard nationality and the answerback string. - for configuring the HP 700-92/96 emulation. - for configuring the Prime PT250 emulation. - for configuring the IBM 3151 emulation. - for configuring the Wyse 50/50+/60, TVI 910+/ 920/925, ADDS A2 and HZ 1500 emulations. - for configuring the Tandem 6530 emulation. - for configuring the IBM 3270 emulation. - for configuring the IBM 5250 emulation. Setup Menus Unisys T27 Settings BQ 3107 Settings Serial Settings Auxport Settings Terminal Settings Local Editing - Block Transmission - Tek 4014 Settings - GIN Mouse Definitions - Attributes - Keyboard Macros Soft Buttons Mouse Button Actions Button Tools - for configuring the Unisys T27 emulation. for configuring the Bull BQ 3107 emulation. for specifying serial communication settings. for specifying auxilliary port settings. for specifying terminal and display settings. for specifying DEC VT Block (Edit) mode local editing functions. for specifying DEC VT Block (Edit) mode text formatting and transmission. for specifying graphics text settings, screen mapping resolution and GIN termination characters. (Graphics versions of TeemTalk only.) for defining GIN mouse button codes. (Graphics versions of TeemTalk only.) for assigning colours and specifying how characters with attributes are displayed. for redefining the function of keys. for defining soft button functions. for defining mouse functions. TeemTalk for Windows XPe only - for defining the toolbat/floating button palette. 6-25 Setup Menus Emulation Settings This dialog box is displayed by selecting Emulation in the Settings menu. Alpha Emulation (Not available in WBT mode) The setting of this option determines the current alpha emulation mode. The ADDS A2 emulation provides compatibility with software designed to drive the ADDS Viewpoint A2 terminal, as emulated by the Wyse WY-50/50+/60 terminals. Refer to the Wyse Emulations chapter for details. The AIXTerm emulation provides compatibility with software designed to drive an X terminal using X Windows. The ANSI BBS emulation is a derivative of the ANSI device driver ANSI.SYS supplied with all DOS based PCs and which provides the screen management for the DOS console screen. PC based UNIX systems and Bulletin Board Systems (BBS) often rely on the ANSI emulation when being accessed by a PC. In ANSI BBS mode the screen size is adjusted to 25 lines and the Preferred Char. Set option in the Terminal Settings dialog box is automatically set to Ansi. The setting of the Ansi Code Page option in this dialog box determines the characters available in the ANSI BBS set. The AT 386 emulation provides compatibility with software designed to drive the AT&T AT 386 terminal. The ATT4410 emulation provides compatibility with software designed to drive the AT&T Dataspeed 4410 terminal. Refer to the AT&T 4410 Emulation section in the Getting Started chapter for details. The BQ 3107 emulation provides compatibility with software designed to drive the Bull BQ 3107 terminal. Refer to the BQ 3107 Emulation chapter for details. 6-26 Setup Menus The DG 410/412 emulation provides compatibility with software designed to drive the Data General D410 and D412 terminals. Refer to the DG 410/412 Emulation chapter for details. The HP 700-92/96 emulation provides compatibility with software designed to drive the Hewlett Packard 700/92, 2392A, 2622A, 70094 and 70096 terminals. This emulation is described in detail in the HP 700-92/96 Emulation chapter. The HZ1500 emulation provides compatibility with software designed to drive the Hazeltine 1500 terminal, as emulated by the Wyse WY-50/50+/60 terminals. Refer to the Wyse Emulations chapter for details. The IBM 3151 emulation provides compatibility with software designed to drive the IBM 3151 terminal. Refer to the IBM 3151 Emulation chapter for details. The IBM 3270 emulation provides compatibility with software designed to drive the IBM 3270 terminal. Note that the initial display will be an ASCII text screen known as Network Virtual Terminal mode (NVT mode for short). The setting of the IBM 3270 Model option in the IBM 3270 Settings dialog box determines the size of the display and whether or not extended attributes are supported. Refer to the IBM 3270 Emulation chapter for details. The IBM 5250 emulation provides compatibility with software designed to drive IBM 5250 type alphanumeric terminals. This emulation can be used for connection to an IBM AS/400, System/36 or System/38. Note that the initial display will be an ASCII text screen known as Network Virtual Terminal mode (NVT mode for short). Refer to the IBM 5250 Emulation chapter for details. The MDI P12\P8 emulation provides compatibility with software designed to drive the McDonnell Douglas Prism-12 and Prism-8 terminals. Refer to the MDIS Prism Emulations chapter for details. The MDI Prism-9 emulation provides compatibility with software designed to drive the McDonnell Douglas Prism-9 terminal. Refer to the MDIS Prism Emulations chapter for details. The PT250 emulation provides compatibility with software designed to drive the Prime PT250 terminal. Refer to the PT250 Emulation chapter for details. Sco Console is an emulation of the SCO UNIX box. The Siemens 97801 emulation provides compatibility with software designed to drive the Siemens 97801 terminal. Refer to the Siemens 97801 Emulation chapter for details. The Stratus V102 emulation provides compatibility with software designed to drive the Stratus V102 terminal. The TA6530 emulation provides compatibility with software designed to drive the Tandem 6530 terminal. This emulation is described in the TA6530 Emulation chapter. The TVI 910, TVI 920 and TVI 925 emulations provide compatibility with software designed to drive the TeleVideo 910+, 920 and 925 terminals, respectively, as 6-27 Setup Menus emulated by the Wyse WY-50/50+/60 terminals. Refer to the Wyse Emulations chapter for details. The TVI 950 and TVI 955 emulations provide compatibility with software designed to drive the TeleVideo 950 and 955 terminals, respectively. The Unisys T27 emulation provides compatibility with software designed to drive the Unisys T27 terminal. Refer to the Unisys T27 Emulation chapter for details. The Viewdata 40, Viewdata 80 and Viewdata Split modes enable access to a viewdata service using one of three display formats, as described in the Viewdata Mode section in the Getting Started chapter. The VT PCTerm emulation provides compatibility with software designed for the PC Term mode supported by DEC. This is the same as the VT510 emulation except that keyboard scan codes are sent on key press/release instead of ASCII codes by default. The VT52 and VT100 emulations enable you to run applications written for the DEC VT52 and VT100 terminals, respectively. Refer to the DEC VT Emulations chapter for details. The VT500 7-Bit and VT500 8-Bit emulations enable you to run applications written for the DEC VT320 terminal, the difference is in their treatment of 8-bit control codes. When VT500 7-Bit is selected, all 8-bit codes are converted to their 7-bit equivalents, whereas VT500 8-Bit leaves 8-bit codes unchanged. If you are using VT200 applications, select VT500 7-Bit. Refer to the DEC VT Emulations chapter for details. The VT+HP220 emulation is based on the VT500 terminal series and includes the HP function keys F1 - F8 (not user programmable). The terminal ID is set to VT220. The VT100+ emulation is an enhanced version of the VT100 emulation that provides additional functionality such as colours. It is the same as the VT-UTF8 emulation except that it only supports ASCII characters 0-127 (decimal). The VT-UTF8 emulation is an enhanced version of the VT100 emulation that supports non-English and drawing characters. It supports localization of the singlebyte and double-byte character sets and all other languages supported by Windows. Additional functionality, such as colours, is also provided. The WY50, WY50+ and WY60 emulations provide compatibility with software designed to drive the Wyse WY-50, WY-50+ and WY-60 terminals, respectively. Refer to the Wyse Emulations chapter for information on these emulations. The WYSE PCTerm emulation provides compatibility with software designed for the PC Term personality supported by Wyse. Keyboard scan codes are sent on key press/ release instead of ASCII codes by default. Graphics Emulation Factory default: ReGIS This option is only available if this version of TeemTalk supports graphics emulations and the Alpha Emulation option is set to one of the DEC VT, Ansi BBS, AIXTerm, 6-28 Setup Menus AT 386 or Sco Console emulations. The setting determines the graphics mode that will be entered when the host sends graphics commands. The ReGIS emulation enables you to run applications written for the DEC VT340 terminal in ReGIS mode. The Tek4014 emulation enables you to run applications written for the Tektronix 4010 and 4014 terminals. The VT640 emulation enables you to run applications written for the Retrographics VT640 terminal. The W2119 emulation enables you to run applications written for the Westward 2119 terminal. VT Terminal ID Factory default: VT420 This specifies what is reported back to the host in response to a terminal identification request. Either select from the list of IDs or edit the text box and enter a different terminal identity. (Not all features of the specified terminal may be supported.) National Factory default: Unselected This will only be available if the system is configured for a language that supports national replacement character sets. The setting of this option determines the type of character set used to generate characters. When selected, a character set specific to the selected keyboard nationality is used. When unselected (default) the emulator is in Multinational mode, a character set consisting of two tables of characters is used. This enables characters from any keyboard nationality to be generated. Tertiary Device Attribute When the emulator is in VT420 mode (Emulation set to VT500 and Terminal ID set to VT420), this option enables you to specify the tertiary device attribute report that is sent in response to a request from the host. Answerback String This option enables you to specify the Answerback string that is sent to the host in response to an ANSI mode enquiry command. The string may be up to 30 characters long. Answerback Concealed Factory default: Unselected Selecting this option will cause the Answerback string specified in the text box above to be locked from change and displayed as asterisks. Note that deselecting this option will cause the Answerback string to be deleted. 6-29 Setup Menus HP 700-92/96 Settings This dialog box is displayed by selecting HP 700-92/96 in the Settings menu. Local Echo Factory default: Unselected The setting of this option determines whether keyboard entered characters are displayed on the screen as well as sent to the host. When unselected, characters are not displayed when they are transmitted to the host unless the host 'echoes' them back. Caps Lock Factory default: Unselected This determines whether the full 128-character ASCII range can be generated, or only Teletype-compatible codes. When this option is unselected, all 128 ASCII characters can be generated. When selected, unshifted alphabetic keys will generate their shifted equivalents. For example, the A key unshifted will generate an uppercase A, and the {, | and } keys will generate [, \, and ], respectively. The key for generating ~ and ` is disabled. XmitFnctn (A) Factory default: Unselected This option determines whether escape sequences generated by control and function keys are sent to the host or only to the terminal emulation. When unselected, escape sequences are only sent to the terminal emulation. When selected, escape sequences are sent to the host. If the Local Echo option is selected, the sequences will also be sent to the terminal emulation. 6-30 Setup Menus SPOW (B) Factory default: Unselected The setting of the SPace OverWrite option determines whether or not keyboard entered spaces overwrite existing characters. When unselected, keyboard entered spaces will overwrite existing characters. Selecting this option will cause the SPOW latch to be enabled. The latch can then be activated by a carriage return. When activated, keyboard entered spaces will cause the cursor to move forward without deleting characters that already exist. The latch can be deactivated by a tab, line feed or home-up command. This will cause spaces to overwrite existing characters as normal. InhEolWrp (C) Factory default: Unselected The Inhibit End of line Wrap option determines whether characters wrap to the next line when the right margin is reached. When selected (i.e. inhibited), on reaching the right margin, the last character position will be overwritten with every new character received until a carriage return or other cursor movement command is issued. LineTx (D) Factory default: Unselected The setting of this option determines whether data is sent a line or a page at a time when in Edit mode. When this option is selected, data will be transmitted a line at a time. When unselected, data will be transmitted a page at a time. Page data will either be from the beginning of display memory or from the current cursor position. InhHndShk (G) InhDC2 (H) Factory default: Unselected The combined setting of these two options determine the type of handshaking used when blocks of data are transmitted to the host. One of three types of handshake may be used: 1. No handshake. Blocks of data are sent immediately when the relevant transmit key is pressed. 2. DC1 handshake. Data is only sent to the host when the host sends an ASCII DC1 control code to request it. 3. DC1/DC2/DC1 handshake. The host sends an ASCII DC1 control code, to which the emulator replies by sending a DC2 code if ready to transmit. The host sends the DC1 code again to cause the data block to be transmitted. 6-31 Setup Menus The type of handshake used for block transfers is determined by the type of block transfer to be performed, the mode that the HP70092 emulation currently operating in (character, block line, block page, or modify mode), and the setting of these two options. The setting of these two options will have the following general effect: InhHndShk only selected: The DC1/DC2/DC1 handshake or no handshake will be used. InhDC2 only selected: The DC1 handshake or no handshake will be used. InhHndShk and InhDC2 selected: No handshake will be used. Enq/Ack Pacing Factory default: Selected The setting of this option determines whether the Hewlett Packard ENQ ACK handshake is used or not. When selected, the host can send an ASCII ENQ (enquiry) control code at the end of transmission asking if the data has been processed, to which the emulator will reply by sending an ACK (acknowledge) code when it has. Note that this form of handshaking has the lowest priority after hardware and XON/XOFF handshaking. EscXfer Factory default: Unselected This option determines whether escape sequences relating to the display are sent when the display memory is transferred to the printer. When unselected, escape sequences relating to the display are not sent to the printer. When selected, each line transferred to the printer will begin with an escape sequence to select the primary character set and stop any character enhancements. When escape sequences relating to the display are encountered within the data (for example, to change the character set), they will be sent to the printer. Destructive Backspace Factory default: Unselected The setting of this option determines whether or not pressing the Backspace key will cause characters to be deleted. CR = CR/NULL Factory default: Unselected This option must only be selected if you are going to use the QEDIT application. It overcomes a bug within QEDIT that ignores the LF character if the terminal transmits CR/LF. Inserting a NULL after the CR character cures the problem. 6-32 Setup Menus Display Form Feeds Factory default: Selected When selected, this will cause form feeds to be represented on the display as FF characters. Ignore Form Feeds Factory default: Unselected When the emulator receives a form feed command from the host it normally results in a line feed on the display in HP 700/92 mode. Selecting this option will cause the emulator to ignore all form feed commands received from the host. Return Def Factory default: ^M (i.e. CR) This enables you to define the function of the Return key. Up to two characters may be used to define the key. If a second character is a space, it will be ignored. To change the current definition, delete the definition displayed in the text box and type in the new one, either as the control key character equivalent or the decimal value of the ASCII character. For example, the default code for the Return key function, CR (carriage return), can be entered by typing the characters ^ and M, representing the keys Ctrl + M which, when pressed together would generate the CR code. Decimal values are entered as three-digit numbers immediately preceded by an underscore character. Values with only two digits must be preceded by a zero. For example, the decimal value of CR is 13, so this would be entered as _013. Refer to the ASCII character table in the Character Sets appendix for code and decimal references. Start Column Factory default: 1 This text box is used to specify the start column for transmitted data when no logical start-of-text pointer is present and the Return or Enter keys are pressed in Modify Line or Modify All mode. Usually a start-of-text pointer is automatically generated to designate the leftmost character in the current line if it is the last line of data in display memory. This pointer will remain in display memory until the line is deleted. If the line has no start-of-text pointer, data transmission will begin at the start column specified by this option. The column range is from 1 to 80 inclusive. Note: The setting of this option may be temporarily redefined using one of the Margin/Tab/Col function keys. See the HP700/92 Emulation chapter for details. 6-33 Setup Menus FldSeparator Factory default: ^_ (i.e. US) This text box is used to specify the ASCII character used to indicate the end of each protected field (except the last) that is sent in Edit Mode. To change the current definition, delete the definition displayed in the text box and type in the new one, either as the control key character equivalent or the decimal value of the ASCII character. For example, the default ASCII character US can be entered by typing the characters ^ and _, representing the keys Ctrl + _ which, when pressed together would generate the US code. Decimal values are entered as three-digit numbers immediately preceded by an underscore character. Values with only two digits must be preceded by a zero. For example, the decimal value of US is 31, so this would be entered as _031. Refer to the ASCII character table in the Character Sets appendix for code and decimal references. BlkTerminator Factory default: ^^ (i.e. RS) This text box is used to specify the ASCII character sent to the host to indicate the end of a data block transmission. To change the current definition, delete the definition displayed in the text box and type in the new one, either as the control key character equivalent or the decimal value of the ASCII character. For example, the default ASCII character RS can be entered by typing the character ^ twice, representing the keys Ctrl + ^ which, when pressed together would generate the RS code. Decimal values are entered as three-digit numbers immediately preceded by an underscore character. Values with only two digits must be preceded by a zero. For example, the decimal value of RS is 30, so this would be entered as _030. Refer to the ASCII character table in the Character Sets appendix for code and decimal references. Terminal ID Factory default: 70092 This specifies what is reported back to the host in response to a terminal identification request. (Note that not all features of the specified terminal may be supported.) Clicking the arrow button will display a drop-down list box showing the available settings, 70092, 2392A, 2622A, 70094 or 70096. If you are using the keyboard, press the up or down arrow keys until the setting required is displayed. You can either select from this list or enter a different terminal identity in the text box. 6-34 Setup Menus Pages Factory default: 4 In HP 700-92/96 mode the display area is 80 or 132 columns by 24 lines with 168 lines stored off-screen, giving a total display memory of 192 lines. This option enables you to specify whether display memory is divided into 2, 4, 6 or 8 pages. Typeahead Enabled Factory default: Unselected When the emulator is connected to an HP 3000, you normally have to wait for the host to send a prompt before you can enter new data at the keyboard, otherwise the data is ignored. Selecting this option will enable you to type continuously without waiting for the prompt. Data is stored in the keyboard buffer and each time the emulator receives a prompt it will send a line of data to the host. Block mode also supports typeahead. Host Prompt Character Factory default: ^Q (i.e. DC1) Some hosts send a prompt character to the terminal to indicate that they are ready to receive the next line or block of data. This option enables you to specify the prompt character for your particular host. Most hosts either use the DC1 (^Q) character (e.g. HP 3000) or no prompt (^@) character. When Typeahead Enabled is selected, the emulator will wait for the specified prompt character from the host before transmitting the next line from the keyboard buffer. 6-35 Setup Menus PT250 Settings This dialog box is displayed by selecting PT 250 in the Settings menu. Screen Format Factory default: 80 x 24 The setting of this option determines the display memory format, the number of lines and columns that are displayed, and the amount of data transmitted to the host when the emulation is in Block mode (as determined by the setting of the Block Mode option in this dialog box). Selecting 80 x 24 will enable 24 rows of 80 columns to be displayed at the same time. In Block mode, this specifies 1-page mode transmission. Selecting 80 x 48 will enable 80 columns by 24 rows to be displayed, while another 24 rows are stored off-screen in the display buffer. These may be scrolled into view using the scroll bar. In Block mode, this specifies 2-page mode transmission. Selecting 132 x 27 will enable 27 rows of 132 columns to be displayed at the same time, useful for spreadsheets. In Block mode, this specifies 1-page mode transmission. Selecting 80 x 25 will enable 25 rows of 80 columns to be displayed at the same time. In Block mode, this specifies 1-page mode transmission. Block Mode Factory default: Unselected The setting of this option determines how data is transmitted to the host. When unselected, each character entered from the keyboard is immediately sent to the host which processes it then echoes it back to the display. When Block mode is selected, characters are displayed but not sent to the host until the Enter key is pressed. The size of the block of characters is determined by the Line Block Mode option. 6-36 Setup Menus Line Block Mode Factory default: Unselected The setting of this option determines how much data is transmitted when the emulation is in Block mode and the Enter key is pressed. When unselected, the contents of the screen (page) will be sent to the host. When selected, the contents of the current cursor line will be sent. Multinational Character Sets Factory default: Selected The setting of this option determines which characters may be generated from the keyboard. When unselected, the character set for the keyboard nationality specified in the Emulation Settings dialog box is mapped to G0, the default character set mode (as indicated on the status line). In effect, national characters from the Additional character set are swapped with Standard (ASCII) characters to form the National set mapped to G0, so the Additional set contains the missing ASCII characters. This means that you can still generate the full range of ASCII and Additional characters by using the Char Set function (refer to the PT250 Emulation chapter for details). When this option is selected, both ASCII and Additional characters are available, enabling characters from any keyboard nationality to be generated. Truncate At End Of Line Factory default: Selected This option determines what happens to received characters when the rightmost column of the display is reached. When unselected, on reaching the end of the line, the next character will be placed in the first column of the following line. When this option is selected, following characters will not be displayed. Screen Wrap Factory default: Unselected When screen wrap is selected, display memory is treated in a circular fashion. When the cursor reaches the last line it will automatically wrap to the first line again, and vice versa. When screen wrap is unselected, the cursor will not move above the first line or below the last line. 6-37 Setup Menus Received LF is CR/LF Factory default: Unselected The setting of this option determines how the emulation interprets received line feed characters. Selecting it will cause a carriage return command to be appended to every line feed command received. Received CR is CR/LF Factory default: Unselected The setting of this option determines how the emulation interprets received carriage return characters. Selecting it will cause a line feed command to be appended to every carriage return command received. Margin Bell Enabled Factory default: Unselected This option enables or disables an audible warning when the cursor approaches the right margin (column 71 or 123). 8-Bit Mode Factory default: Unselected This option determines whether characters are transmitted to the host in 7-bit or 8-bit format. When unselected, 8-bit characters are converted into 7-bit equivalents, so shift-in, shift-out characters are generated. When this option is selected, all characters are transmitted unchanged. Swap Fnn/PFnn Keys Factory default: Unselected This option enables you to swap the functions of the keys mapped as PF1 through PF12 on your keyboard with the functions they have when used with the Alt key. For example, when this option is selected, PF11 will function as Help when pressed on its own, and as PF11 when used in conjunction with Alt. 6-38 Setup Menus IBM 3151 Settings This dialog box is displayed by selecting IBM 3151 in the Settings menu. Operating Mode Factory default: Echo The setting of this option determines how keyboard entered data is sent to the host and displayed on the screen. In Echo mode, keyboard entered data is sent only to the host. The host is then responsible for returning the data to the display. In Character mode, keyboard entered data is sent simultaneously to the host and the display. In Block mode, keyboard entered data is displayed and processed locally, allowing you to edit it before a block of data is sent to the host. Row and Column Factory default: 24 x 80 This option enables you to select one of several display formats: 24 rows x 80 columns 25 rows x 80 columns 24 rows x 132 columns 25 rows x 132 columns 28 rows x 80 columns 28 rows x 132 columns 6-39 Setup Menus Note that the contents of the display will be cleared when you change the display format. Turnaround Char Factory default: CR This option specifies the line turnaround character (LTC) that is generated when a Read command is received or one of the block data transmission keys is pressed. Note that selecting DC3 will disable the XON/XOFF inbound and outbound pacing characters. Forcing Insert Factory default: Both This option specifies how an insert command affects displayed data when the screen is full. When set to Off, you will not be able to perform an insert operation. When set to Line, you will be able to insert one or more lines, using the Ins Ln key for example. The contents of the current and all following lines will move down the number of lines inserted, causing the lines originally at the bottom of the display to be discarded. When set to Character, you will be able to insert one or more characters in the current line. Characters to the right of the cursor position will move along. If the Auto Wrap option is set to No, then characters originally at the end of the current line will be discarded. If set to Yes, characters on all following lines will move along, forcing characters at the end of the last line to be discarded. When set to Both, the function of the Line and Character settings will be enabled. Insert Character Factory default: Space The setting of this option determines the effect of pressing the Insert key. When set to Space, a space character will be inserted after the current cursor position. When set to Mode, the emulation will enter Insert mode when the Insert key is pressed. Tab Operation Factory default: Field The setting of this option determines whether tab stops are according to field attribute characters or column-tab definitions. When set to Field, tab stops in a formatted page are provided by field attribute characters. Column-tab definitions are ignored. 6-40 Setup Menus When set to Column, tab stops are provided by column-tab definitions. Field attribute characters are ignored. Enter Key Factory default: Return This option enables you to specify whether the Enter key performs the same function as the Return key or the Send key. Return Key Factory default: Field This option specifies whether or not the cursor can enter a line within a protected field when the Return key is pressed. When set to Field, the result of pressing the Return key is determined by the setting of the Auto New Line option and the cursor will move to the next unprotected line. When set to New Line, the result of pressing the Return key is determined by the setting of the Auto New Line option. Send Operation Factory default: Page The setting of this option determines the effect of pressing the Send and Send Line keys. When set to Page, the contents of the current page will be sent to the host when Send is pressed, or the current line if Send Line is pressed. When set to Line, the contents of the current line will be sent to the host when Send is pressed, or the current page if Send Line is pressed. Auto Wrap Factory default: Selected The setting of this option determines what happens to the cursor and data sent to the display when the end of the current line is reached. When selected, the cursor will automatically move to the beginning of the next line. Note that this will always be the case in block mode or in a formatted page regardless of the setting of this option. When unselected, the cursor will remain at the end of the current line and each new character sent to the display will overwrite the character already occupying the cursor position. 6-41 Setup Menus Auto LF Factory default: Unselected The setting of this option in conjunction with that of the Auto New Line option determines the destination of the cursor when the Return key is pressed or the CR character is received. When both this and the Auto New Line options are unselected, the cursor will move to the first position of the current line when the Return key is pressed or the CR character is received. When this is unselected and Auto New Line is selected, the cursor will move to the first position of the next line when the Return key is pressed. When this is selected and Auto New Line is unselected, the cursor will move to the first position of the next line when the Return key is pressed or the CR character is received. When both this and the Auto New Line options are selected, the cursor will move to the first position of the line after the next line when the Return key is pressed. Auto New Line Factory default: Unselected The setting of this option determines the effect of pressing the Return key. When unselected, the Return key will generate a CR (carriage return) character. When selected, the Return key will generate a CR and an LF (line feed) character. Terminal ID Factory default: Unspecified This specifies what is reported back to the host in response to a terminal identification request. The terminal ID can be up to 20 characters long. (Note that not all features of the specified terminal may be supported.) Model Factory default: 11 This option identifies the terminal model being emulated in response to a terminal identification request from the host. Model 11 supports only one viewport containing 24 or 25 rows and 80 columns. Model 31 supports up to three viewports (80 or 132 columns wide) and pass-through printing. 6-42 Setup Menus Wyse Settings This dialog box is displayed by selecting Wyse in the Settings menu. Note that some of the settings apply to the TVI 910+, TVI 920, TVI 925, ADDS A2 and HZ 1500 emulations in addition to the Wyse emulations. Also, some settings may not apply to the particular Wyse emulation currently running. Selecting a setting that is not applicable to the current emulation will cause the emulator to use the default setting for that emulation when the dialog box is exited. Note: The Tab Stops dialog box displayed by clicking the Set Tabs button is described later in this chapter, after the Terminal Settings description. Lines Factory default: 24 This option applies to the WY-50+ and WY-60 emulations and specifies the number of data lines displayed on the screen below the status line. Note that the other emulations only support 24 lines and a label line. 24 25 42 43 24 data lines and a label line at the bottom. 25 data lines but no label line. 42 data lines and a label line at the bottom. 43 data lines but no label line. 6-43 Setup Menus Page Size Factory default: 1 x Lines This option applies to the WY-50+ and WY-60 emulations and specifies the size of a page in display memory in multiples of the Lines setting. Note that the other emulations only support 1 x Lines. The 1 + Rest setting will divide the display memory into two pages, the first containing the number of lines specified by the Lines option, the second containing all the remaining lines. Note that changing the page format will cause the entire display memory to be cleared, the cursor will move to the home position and the scroll margin will be reset. Status Line Factory default: Standard This option applies to all emulations and enables you to specify the type of status line displayed at the top of the screen, or remove it from the display. Both the Standard and Extended status lines display messages about the state of the emulation or application. The Extended status line displays additional editing status messages. Refer to the Wyse Emulations chapter for details. Block End Factory default: US / CR This option applies to all emulations and specifies the ASCII characters used to indicate the end of a line and a block when a block of data is sent to the host. When set to US / CR, the line terminator is a US character and the block terminator is a CR character. When set to CRLF / ETX, the line terminators are the CR and LF characters, and the block terminator is an ETX character. Attribute Type Factory default: Page The setting of this option determines whether display attributes are active to the end of the line or the end of the page. The Character setting only applies to the WY-60 emulation and causes attributes to only apply to characters written to the screen. The WY-50, ADDS A2 and HZ 1500 emulations only support the Page setting. Code Page Factory default: PC Multinational 437 This option determines the set of characters that form the second half of the multinational character set when in multinational mode (as set by the Character Set Mode option in the Emulation Settings dialog box). 6-44 Setup Menus ASCII Font Factory default: WY ASCII This option determines whether the Wyse ASCII or PC standard character set is used as the first half of the multinational character set when in multinational mode (as set by the Character Set Mode option in the Emulation Settings dialog box). WPRT Attribute Factory default: Dim This option applies to all emulations and enables you to specify the appearance of write-protected characters on the display. They can be displayed in reverse video, dimmed or blinking. The WY-50+ and WY-60 emulations also support the underline and invisible attributes. Multiple Page Factory default: Unselected This option applies to the WY-50+, WY-60 and all the TVI emulations. It determines whether or not more than one page of display memory can be accessed. When selected, all pages will be accessible. See also the Auto Page option. Note that the TVI emulations support two pages of 24 lines each when this and the Auto Page options are selected, regardless of the Lines and Page Size settings. 80 / 132 Clears Factory default: Unselected This option applies to the WY-50+ and WY-60 emulations and determines whether or not data is cleared from the display when the number of columns is changed. The screen is always cleared when the number of columns is changed in the other emulations. Economy 80 Factory default: Unselected This option applies to the WY-50+ and WY-60 emulations and enables 80 column display with more lines of display memory. Auto Scroll Factory default: Selected This option applies to all emulations and determines what happens when the cursor is moved beyond the last line of the current page. When selected, the displayed data scrolls up and the cursor remains on the last line. When unselected, the cursor moves to the top of the same page. 6-45 Setup Menus Auto Page Factory default: Unselected This option applies to the WY-50+, WY-60 and all the TVI emulations. It determines what happens when the cursor reaches the top or bottom of the page. When unselected, the cursor either moves to the top of the same page or data scrolls up from the bottom, as determined by the setting of the Auto Scroll option. When selected, a new page of memory will be displayed. Note: The other emulations will always display a new page of memory. Auto Wrap Factory default: Selected The setting of this option determines whether characters wrap to the next line when the right margin is reached. When unselected, on reaching the right margin, the last character position will be overwritten by every new character received. DEL = DestBS Factory default: Unselected This option applies to the WY-50+ and WY-60 emulations and determines what effect an ASCII DEL character has on displayed characters. The other emulations ignore the DEL character. When unselected, the DEL character is ignored. When selected, the DEL character is interpreted as a destructive backspace, causing the character to the left of the cursor to be deleted and the cursor to move into that position. Margin Bell Factory default: Unselected This option applies to all emulations and specifies whether or not an audible warning sounds when the cursor reaches a specified column. The default bell column number is 72 in 80 column mode and 124 in 132 column mode. Enhance Factory default: Selected When this option is selected, the emulator will recognize an additional set of Wyse codes which are not normally supported by specific non-Wyse terminals. Answerback Mode Factory default: Unselected This option applies to all emulations and specifies whether or not an answerback message is automatically sent to the host in response to an ASCII ENQ character. 6-46 Setup Menus Send ACK Factory default: Selected This option applies to all emulations and specifies whether or not an ASCII ACK character is sent to the host port after certain commands have been executed. Block Mode Factory default: Unselected This option applies to all emulations. In Block mode, keyboard entered data is displayed and processed locally, allowing you to edit it before a block of data is sent to the host. When Block mode is disabled, data is sent to the host as it is entered at the keyboard. Colour Support Factory default: Unselected When this option is selected, an additional set of host commands will be recognized to determine the colours used for the display. Wyse 350 colour commands will be recognized in all modes except Wyse 60, which will use Wyse 60 colour commands. Application Key Mode Factory default: Unselected When application key mode is selected, the function keys and certain editing keys will send application codes when pressed, regardless of whether or not the keys have been redefined. When this option is not selected, the keys will send their programmed definitions. CR=CR/NULL Factory default: Selected This option allows you to disable the NULL being automatically sent on CR. 6-47 Setup Menus TA6530 Settings This dialog box is displayed by selecting TA 6530 in the Settings menu. Power On Mode Factory default: Conversational This option determines the operating mode that is in effect when the TA6530 emulation is entered. Note: Changing the current setting will not take effect until you reload the emulation, so you will need to save the new setting before exiting the emulation. Conversational and Block modes are normally used for applications running on a NonStop host system, and ANSI mode for applications running on an LXN host system. Save the new setting before exiting the emulation by selecting Save Session in the File menu. Packet Block Factory default: OFF This option specifies whether you want to use packet blocking for X.25 communications line support, and if so, the size of the packet block. The size may be set to any of the listed 128-byte increments, or, by setting this option to OFF, the default size of 260 bytes. Status Border Factory default: Selected This option enables you to display a thin border which separates the status line from the rest of the lines on the display. Telserv Format Factory default: Selected The setting of this option determines how network data is treated. When selected, data will be treated in Tandem network server (Telserv) format. When unselected, data will be treated in serial format. 6-48 Setup Menus Return Function Factory default: Unselected This option specifies whether or not the function of the Enter key is defined by the application when in Block mode. When selected, the key is regarded as an application specific function key. Normally this should be unselected. Bell On Factory default: Selected This option enables or disables an audible tone which is heard when the emulation warns you about something. This needs to be selected when you want to use the Bell Column feature. Bell Column Factory default: 0 This option enables you to specify a particular column on the display which will cause an audible warning to sound when the cursor passes through it. The valid range of column numbers is 1 to 80. Setting this option to 0 will disable the feature. The Bell On option must be selected for this feature to work. 6-49 Setup Menus IBM 3270 Settings This dialog box is displayed by selecting IBM 3270 in the Settings menu. IBM 3270 Model Factory default: 3278-2-E This specifies what is reported back to the host in response to a terminal identification request. (Note that not all features of the specified terminal may be supported.) TN3287 printing is supported by selecting 3287-1. One of four display sizes can be selected: 3278/9-2 3278/9-3 3278/9-4 3278/9-5 24 rows by 80 columns 32 rows by 80 columns 43 rows by 80 columns 27 rows by 132 columns 3278 settings with the E extension provide support for the following extended attributes (these are supported by the 3279 as standard): 3270 Field Attributes Extended Highlighting Foreground Colour Query Reply Inbound Structured Fields 6-50 Setup Menus Numeral Swap Factory default: Unselected When using a code page that supports a bilingual keyboard, this will cause all numbers to be displayed using the National character set when in Latin mode. Symbol Swap Factory default: Unselected Selecting this option will cause symbols such as brackets to be displayed the correct way round when typing in right-to-left mode. Rule Line Factory default: Cross A rule can be displayed across the emulation workspace at the cursor position by pressing the keys Alt + Page Down, which toggles it on and off. The setting of this option determines whether it is displayed as a horizontal rule, vertical rule or both. Follows Cursor Factory default: Unselected When the rule is displayed in the emulation workspace, the setting of this option determines whether or not the rule follows the cursor when it moves. Notice Board Options This will display the Notice Board Setup dialog box as described in the next section. Keyboard Unlock Delay Factory default: 0 This option is available when the IBM 3270 Model is not set to a printer. When the keyboard is unlocked by the host, this specifies a delay in milliseconds before characters are sent. Print Bypass Character This option is available when the IBM 3270 Model option is set to a printer. The Start Seq box enables you to enter the character or sequence of characters that initiate a print bypass. The end sequence that terminates the print bypass can be specified either by entering the actual characters in the End Seq box when Specify End Sequence is selected, or by specifying the number of characters that make up the end sequence in the End Length box when End on Non-Hex is selected. If no End Seq is entered, the bypass is assumed to be for a single pair of characters only. If an End Seq is specified, characters in the data stream between the start and end are interpreted as encoded ASCII. For example, “1B0A” becomes ASCII 27 10 (ESC LF). 6-51 Setup Menus Selecting End on Non-Hex enables you to specify the number of characters that make up the end sequence in the End Length box. The bypass will then terminate as soon as a non-hexadecimal character is received (any character except in the range 0 through 9 and A through F) followed by the end sequence. Characters can be entered in several ways. For example, to specify the ASCII escape character, you can enter either _027, \u001B, \e, \033, or even ^[. Font This enables you to specify the font to be used for displaying characters. The available settings depend on the fonts installed. Telnet Options Clicking the Telnet Options button will display a dialog box with additional options. These are described in the Getting Started chapter. National Character Settings & APL2 This enables you to select the character set to be used. The IDs of the code page, character set and CCSID used for the currently selected language are displayed under the User Specified button. Clicking User Specified will display a dialog box that enables you to change these settings. There are separate Code Page, Character Set and CCSID entries for the Single Byte Character Set (SBCS) and, if supported, Double Byte Character Set (DBCS). These should only be changed by the System Administrator. If they have been changed and you wish to restore the default settings, click the Default button in the IBM 3270 Settings dialog box. The following table shows the default settings. 6-52 Setup Menus Default Language, Codepage & Character Set Settings Language Type Codepage Char Set English (US) SBCS 37 697 CCSID 37 English (UK) SBCS 285 697 285 500 Belgian SBCS 500 697 Canadian French SBCS 37 697 37 Danish SBCS 277 697 277 Finnish SBCS 278 697 278 German SBCS 273 697 273 Dutch SBCS 37 697 37 Italian SBCS 280 697 280 Swiss French SBCS 500 697 500 Swiss German SBCS 500 697 500 Swedish SBCS 278 697 278 Norwegian SBCS 277 697 277 French SBCS 297 697 297 Spanish SBCS 284 697 284 Portuguese SBCS 37 697 37 Japanese Kanji + Katakana SBCS 290 1172 290 DBCS 300 1001 930 Korean SBCS 833 1173 833 DBCS 834 934 933 Simplified Chinese SBCS 836 1174 836 DBCS 837 937 937 Traditional Chinese SBCS 37 1175 37 DBCS 835 935 935 Hebrew New Code SBCS 424 941 424 Hebrew Old Code SBCS 803 941 424 Thai SBCS 838 1176 838 Greek SBCS 875 925 875 Cyrillic SBCS 880 960 880 Turkish SBCS 1026 1152 1026 1025 Russian SBCS 1025 1150 Czech SBCS 870 959 870 Slovak SBCS 870 959 870 Polish SBCS 870 959 870 Icelandic SBCS 871 697 871 Arabic SBCS 420 697 285 6-53 Setup Menus Notice Board Setup This dialog box is displayed by clicking the Notice Board Setup button in the IBM 3270 Settings dialog box, or by pressing the keys Alt + F2. Refer to the Notice Board Facility section in the IBM 3270 Emulation chapter for information on how to use the Notice Board. Notice Board Enabled Factory default: Unselected When this option is selected, pressing the Zoom key will toggle the display between full screen (i.e. the screen currently containing the cursor) and split screen (host screen and Notice Board) mode. The following Zoom Settings options determine which is displayed above the other. Note that the host screen contains the same number of rows and columns whether displayed full screen or in split screen. Zoom Settings Factory default: Below Host These toggle settings determine whether the Notice Board is displayed above or below the host screen. When viewing the display, pointers at each end of the dividing line between the two screens indicate which is the host screen. Copy to F-Key Enabled Factory default: Unselected This enables the facility for copying screen data to a function key. Refer to the Copying Screen Data To A Function Key section in the IBM 3270 Emulation chapter for details. 6-54 Setup Menus Copy Only User Fields to F-Key Factory default: Selected This will enable only data contained in user entry fields in the selected area to be copied to a function key. Refer to the Copying Screen Data To A Function Key section in the IBM 3270 Emulation chapter for details. Copy All Data to F-Key Factory default: Unselected This will enable all screen data (protected and unprotected) in the selected area to be copied. Refer to the Copying Screen Data To A Function Key section in the IBM 3270 Emulation chapter for details. Copy Function Enabled Factory default: Unselected This determines whether the copy functions are available for copying selected data to another area of the display or to a function key. Single Step Macros Factory default: Unselected Selecting this option will enable an Fn key macro to be played one keystroke at a time by pressing the spacebar for each keystroke after issuing a play Fn key command. The status line will display the contents of the macro and the cursor position in the status line indicates the point that has been reached in the macro play back. Refer to the Play Back Keystrokes section in the IBM 3270 Emulation chapter for details. 6-55 Setup Menus IBM 5250 Settings This dialog box is displayed by selecting IBM 5250 in the Settings menu. IBM 5250 Model Factory default: 3179_2 This specifies what is reported back to the host in response to a terminal identification request. (Note that not all features of the specified terminal may be supported.) The terminal models and their display characteristics are listed below: 6-56 Model Display Rows x Columns 5291_1 5292_2 5251_11 3179_2 3196_A1 3180_2 3477_FC 3477_FG 3486_BA 3487_HA 3487_HC Monochrome Colour Monochrome Colour Monochrome Monochrome Colour Monochrome Monochrome Monochrome Colour 24 x 80 24 x 80 24 x 80 24 x 80 (default) 24 x 80 24 x 80 and 27 x 132 24 x 80 and 27 x 132 24 x 80 and 27 x 132 24 x 80 24 x 80 24 x 80 Setup Menus 5555_B01 5555_C01 Monochrome Colour 24 x 80 24 x 80 The printer models are listed below: 3812-1 5553-B01 Single byte printer Double byte printer If double byte character sets are supported, then select either 5555_B01 (monochrome) or 5555_C01 (colour) for display, or 5553-B01 for printing. Keyboard Type The settings of the Keyboard Type and National Character Settings options below will reflect the default settings for the chosen language and should only be changed by the System Administrator. If they have been changed and you wish to restore the default settings in this dialog box, click the Default button. Unlock Delay Factory default: 0 When the keyboard is unlocked by the host, this specifies a delay in milliseconds before characters are sent. Rule Line Factory default: Cross A rule can be displayed across the emulation workspace at the cursor position by pressing the keys Alt + Page Down, which toggles it on and off. The setting of this option determines whether it is displayed as a horizontal rule, vertical rule or both (cross). Follows Cursor Factory default: Unselected When the rule is displayed in the emulation workspace, the setting of this option determines whether or not the rule follows the cursor when it moves. Numeral Swap Factory default: Unselected When using a code page that supports a bilingual keyboard, this will cause all numbers to be displayed using the National character set when in Latin mode. Symbol Swap Factory default: Unselected Selecting this option will cause symbols such as brackets to be displayed the correct way round when typing in right-to-left mode. 6-57 Setup Menus Telnet Options Clicking the Telnet Options button will display a dialog box with additional options. These are described in the Getting Started chapter. Monochrome Factory default: Depends on terminal type By default the setting of this option will match the normal display characteristic of the IBM 5250 Model selected, as shown in the list above. In the emulator, all terminal types support both monochrome and colour display. When monochrome is selected, characters will be displayed in green and intense fields will be displayed in white. When monochrome is not selected, the settings specified in the Attributes dialog box will be used for the display. Ignore Host Cursor Style Factory default: Unselected Selecting this option will cause the emulator to ignore any commands from the host to change the cursor style. Enhanced UI Factory default: Unselected Selecting this option will enable support of the IBM 5250 Extended User Interface for generating windows on the screen. (Note that menus and scroll bars are not supported.) Hide WP Controls Factory default: Unselected This enables you to toggle the display of word processing characters on and off. Field Minus Justification Factory default: Unselected The setting of this option determines whether pressing the Field Minus key affects the last digit (unselected) or the space following the last digit (selected). Font This enables you to specify the font to be used for displaying characters. The available settings depend on the fonts installed. National Character Settings This enables you to select the character set to be used. The IDs of the code page and character set used for the currently selected language are displayed under the User Specified button. Clicking User Specified will display a dialog box that enables you to change these settings. 6-58 Setup Menus There are separate entries for the Single Byte Character Set (SBCS) and, if supported, Double Byte Character Set (DBCS). These should only be changed by the System Administrator. If they have been changed and you wish to restore the default settings, click the Default button in the IBM 5250 Settings dialog box. The following table shows the default settings. If double byte character sets (e.g. Japanese) are supported and you wish to use them, then set the IBM 5250 Model to either 5555_B01 (monochrome) or 5555_C01 (colour) for display, or 5553-B01 for printing. 6-59 Setup Menus Default Language, Character Set & Codepage Settings Language KBDTYPE SBCS CODEPAGE 37 English (US) USB 697 English (UK) UKB 697 285 Belgian BLI 697 500 Canadian French CAI 697 500 Danish DMB 697 277 Finnish FNB 697 278 German AGB 697 273 Dutch NEB 697 37 Italian ITB 697 280 Swiss French SFI 697 500 Swiss German SGI 697 500 Swedish SWB 697 278 Norwegian NWB 697 277 French FAB 697 297 Spanish SPB 697 284 DBCS CODEPAGE Portuguese PRB 697 37 Japanese Kanji + Katakana JKB 1172 290 300 Korean KOB 1173 833 834 Simplified Chinese RCB 1174 836 837 Traditional Chinese TAB 1175 37 835 Hebrew New Code NCB Hebrew Old Code 941 424 941 803 Thai THB 1176 838 Greek GNB 925 875 Cyrillic CYB 960 880 Turkish TRB 1152 1026 1025 Russian RUB 1150 Czech CSB 959 870 Slovak SKB 959 870 Polish POB 959 870 Icelandic ICB 697 871 697 420 Arabic 6-60 CHARSET Setup Menus Unisys T27 Settings This dialog box is displayed by selecting Unisys T27 in the Settings menu. General Settings Protocol Factory default: None This can be set to None, Poll/Select or Point to Point. Selecting Poll/Select will enable up to three environments. Only one environment can be enabled when Point to Point is selected. Tx Number Factory default: 0 This specifies a sequence of numbers to ensure correct sequencing of messages sent between the Unisys T27 emulation and the host. The valid numbers are as follows: 00 01 02 03 04 05 06 07 08 09 10 11 12 None 0/1 no checking @/A no checking 0/1 checking @/A checking 0/1, with * reset @/A with * reset 0-9 0-99 0-999 0-9 with * reset 0-99 with * reset 0-999 with * reset The * reset option enables the host or the Unisys T27 emulation to resequence by sending an asterisk, for example, after a system failure, to ensure synchronization. 6-61 Setup Menus Group Select Character Factory default: ^D This specifies a single character address so that the host can simultaneously transmit to all terminals with that address. Address Factory default: ^D’ This enables you to specify a two-character group poll address that enables the host to simultaneously poll all terminals with that address. Downstream Terminal Port Factory default: None This specifies the port used to send transmissions to other terminals. Beep on NAK Factory default: Selected Specifies whether an audible warning is emitted when the Unisys T27 emulation sends a negative acknowledgement of a select received from the host. Fast Select enabled Factory default: Selected Selecting this option will cause the Unisys T27 emulation to accept fast select, group select, and broadcast select messages while not in receive ready mode. Monitor mode enabled Factory default: Unselected When enabled, line activity is monitored and messages being transmitted to and from stations on the data communications line to which you are connected are displayed. Pass through printing enabled Factory default: Unselected Enables or disables pass through printing. Return key in forms exits field Factory default: Unselected This determines the effect of the Return key in forms mode. When unselected, it moves to the next line. 6-62 Setup Menus Use optional poll/select characters Factory default: Unselected Specifies whether the optional poll select sequence, 7B 7C hex, is to be used instead of the standard sequence 70 71 hex (default). Environments Settings Lines per page Factory default: 24 This specifies the number of lines allocated to each logical page of data in the range 1 to 256. Chars per line Factory default: 80 This specifies the width of the page as 40, 80 or 132 characters. Lines per Screen Factory default: 24 This specifies the number of text lines to be displayed per full screen in the rage 0 to 24. Note that lines can be displayed as single-height or double-height as determined by the setting of the Lines are double height option. Alt US Char Factory default: ^_ This specifies the character to be used as the unit separator. This will be converted into a US character when you invoke forms mode. Alt RS Char Factory default: ^^ This specifies the character to be used as the record separator. This will be converted into an RS character when you invoke forms mode. Pages Factory default: 2 This determines the number of pages in each environment, in the range 1 to 24. Env Factory default: 1 An environment is an area of memory reserved for exclusive use by applications. Up to three environments can be defined (depending on the Protocol setting) and this option specifies the number of the current environment definition. 6-63 Setup Menus Address Factory default: ^D’ The address can be any two characters, except NUL and SYNC, that uniquely identify a T27 environment in a host network. ID Factory default: ENVMNT 1 This enables you to specify a name, up to eight characters long, which will be displayed on the screen to identify the current environment. Append CR to LF Factory default: Unselected When selected, all line feed characters received from the host will be appended with carriage return characters. Append LF to CR Factory default: Selected When selected, all carriage return characters received from the host will be appended with line feed characters. Append LF to Return key Factory default: Unselected This determines the result of pressing the Return key. When unselected, only a carriage return is performed. When selected, a carriage return and line feed is performed. Auto form field advance Factory default: Selected The setting of this option determines whether the text cursor moves to the next unprotected field when the current unprotected US field is filled. CLR clears unprotected only Factory default: Unselected This specifies whether the page-clearing function clears all characters (default) or only unprotected characters. Cursor is a block (else underline) Factory default: Selected The cursor can be displayed as a block or underline character, depending on the setting of this option. 6-64 Setup Menus Cursor is hidden Factory default: Unselected The cursor can be displayed or hidden, depending on the setting of this option. Cursor is static Factory default: Selected The cursor can be displayed as static or blinking, depending on the setting of this option. Cursor wrap around Factory default: Selected When selected, when the cursor reaches the last data position on the screen it will automatically move to the home position. DC1 clears line Factory default: Unselected The setting of this option determines whether the line is cleared or the emulator stays in receive mode when a DC1 character is received. DC2 advances dcp Factory default: Unselected The setting of this option determines whether the DCP (data comm pointer) is advanced or forms are toggled when a DC2 character is received. Display CR from host Factory default: Unselected When this option is selected, carriage return characters received from the host are displayed. Display CR from keyboard Factory default: Unselected When this option is selected, carriage return characters entered using the keyboard are displayed. Display ETX from host Factory default: Unselected When this option is selected, an ETX character received from the host will be stored at the DCP (data comm pointer) location when the emulation is in nonforms mode. 6-65 Setup Menus Display HT when tabbing from host Factory default: Unselected When this option is selected, an HT character is displayed when a tab character is received in a message from the host. Display HT when tabbing from keyboard Factory default: Unselected When this option is selected, an HT character is displayed when the Tab key is pressed. ETX advance Factory default: Unselected This determines the response of the Unisys T27 emulation when an ETX character is received. FF clears tabs Factory default: Unselected This determines whether the tabs are cleared when a form feed character is received. Form delimiters visible Factory default: Selected This determines whether form delimiter characters are displayed as a graphic (default) or as a blank. Form xmit to cursor Factory default: Selected This determines how the XMIT key works in forms mode. Insert key inserts space Factory default: Selected The setting of this option determines whether the Insert key inserts a space when pressed. Line at a time xmit Factory default: Unselected This determines how much data can be transmitted to the host at a time. When this option is not selected, a message as large as one full page of data can be transmitted. When selected, only the line containing the text cursor can be transmitted. 6-66 Setup Menus Lines are double height Factory default: Unselected This determines whether each line is single-height (normal) or double-height. Lower case lockout Factory default: Unselected When selected, this will cause the LOCK key to be on so that only UPPERCASE characters can be generated. SOH clears screen Factory default: Unselected When selected, this will cause the Unisys T27 emulation to automatically clear the screen whenever it receives an SOH character. SOH exits forms Factory default: Selected When selected, this will cause the Unisys T27 emulation to automatically exit forms mode whenever it receives an SOH character. SO/SI XTN SO/SI XLT Factory default: Unselected The setting of these options determine the effect of the ESC SO and ESC SI sequences when receiving or transmitting data. When receiving from the host, the setting of the SO/SI XTN option determines whether the sequences are used to switch between standard and extended character sets (selected), or reverse highlight and underline (unselected). When transmitting to the host, the setting of both options determine the sequences used for switching between standard and extended character sets, and reverse highlight and underline as follows: XTN OFF ON OFF ON XLT OFF OFF ON ON SO Reverse Video SI Underline Extended Sent as Sent as Begin SO ESC’. ESC’. ESC’. SI ESC’/ ESC’/ ESC’/ ESC SO SO ESC SO SO Characters End ESC SI SI ESC SI SI The SO (shift out) and SI (shift in) sequences allow switching between two sets of characters: the standard character set and the extended character set. Each set consists of 128 characters. When an ESC SO sequence is received from the host, the emulation 6-67 Setup Menus displays all subsequent characters from the extended character set until an ESC SI sequence is received to switch back to the normal character set. The Unisys T27 emulation transmits an ESC SO sequence when it encounters extended characters in its display buffer and an ESC SI when standard characters are to be sent. There is no automatic shift in (ESC SI) at the end of a data transmission block. SPCFY key sends hex values Factory default: Unselected This determines whether the SPCFY key transmits in hexadecimal or ASCII (default). SPCFY key sends page number Factory default: Unselected This determines whether the SPCFY key transmits the page number in addition to the column and row information it usually sends. VT page advance Factory default: Unselected If the emulation is configured for 32 lines per page, vertical tabs are set on lines 1, 9, 17 and 25 when this option is selected. Xmit printer status Factory default: Unselected The setting of this option determines whether the Unisys T27 emulation informs the host of the current printer status. Tab Settings This enables you to set tab stops for each environment. Tab stops are set every eight columns by default when the Type option is set to Fixed, as indicated by the T character above the relevant column numbers. Individual tab stops can be toggled on or off by setting the Type option to Variable then clicking the mouse pointer on or above the relevant column number. To save the tab stops, click the Apply button. To remove all the tab stops when in Variable mode, click the Clear button. Note that switching from Fixed to Variable mode will clear all the default tabs. To restore the default tabs, click the Default button. The Show Ruler option enables a tab ruler to be displayed on the 25th line of the screen. 6-68 Setup Menus BQ 3107 Settings This dialog box is displayed by selecting BQ 3107 in the Settings menu. Operating Mode Factory default: Block In Block mode, keyboard entered data is displayed and processed locally, allowing you to edit it before a block of data is sent to the host. In Character mode, keyboard entered data is sent simultaneously to the host and the display. VIP Mode Factory default: 7760 The VIP mode can be set to 7700 or 7760. Rendition Mode Factory default: VIP The setting of this option determines whether VIP or SDP display attributes are used. Transmit Terminator Factory default: ETX This specifies the last character that is sent to indicate the end of a block transmission. The character can be ETX, EOT or CR. Partition 0 Factory default: Message Row The display is divided into two partitions numbered 0 and 1. Partition 0 is a single line that can be used to display status reports and messages either at the bottom or top of the display, as determined by the setting of the Message Row option. Partition 1 is a page of 24 lines. The setting of this option determines whether Partition 0 is Blank or used as a Message Row. 6-69 Setup Menus Message Row Factory default: At Row 25 The setting of this option determines whether the message row (Partition 0) is at the top or bottom of the display. Blink Displayed As Factory default: Caret In VIP mode the start of a flashing field can be indicated by a caret or space character. Blank Displayed As Factory default: Tilde In VIP mode the start of a blank field can be indicated by a tilde or space character. Fill Character Factory default: Asterix When inserting or deleting characters, the setting of this option determines whether a Space or Asterisk character is displayed. At Page Overflow Factory default: Stop The setting of this option determines what happens when the cursor reaches the bottom of the screen. Selecting Stop will cause the cursor to stop at the last position. Scroll will cause the display to shift up one line and move the cursor to the new last line, while Wrap will move the cursor to the top of the screen. Auto Tabbing Factory default: Selected When an unprotected field is filled, the setting of this option determines whether or not the cursor automatically moves to the next field. Auto Wrap Tabbing Factory default: Unselected When the last unprotected field on the screen is filled, the setting of this option determines whether or not the cursor automatically moves back to the first field on the screen. Function Keys The keys mapped as FKC1 to FKC12 on your keyboard can be programmed to send control sequences or messages when pressed. The button underneath the FKC text entry boxes enables you to toggle the display of shifted and unshifted functions. 6-70 Setup Menus The T (Type) box entry determines what happens to the programmed contents of an FKC key when pressed. This can have the value 0, 1 or 2. When set to 0, the contents of the Message box will be sent to the host. When set to 1, the contents of the Message box together with text that can be transmitted from the screen will be sent to the host. When set to 2, the contents of the Message box will not be sent to the host but will will appear on the screen to the right of the cursor position. The FC box has no function. The Message box entry can consist of any alphanumeric characters. Control characters can also be entered either as the control key character equivalent or the decimal value of the ASCII character. For example, the ASCII character ESC can be entered by typing the characters ^[, where ^ represents the Ctrl key. Decimal values are entered as three-digit numbers immediately preceded by an underscore character. Values with only two digits must be preceded by a zero. For example, the decimal value of ESC is 27, so this would be entered as _027. Refer to the ASCII character table in the Character Sets appendix for code and decimal references. 6-71 Setup Menus Serial Settings When the terminal is not in WBT mode, this dialog box is displayed by selecting Serial in the Settings menu, or by clicking the Configure... button in the New Connection dialog box when the connection type is set to Serial. Note that the port for serial communications is selected via the New Connection dialog box which is displayed from the File menu. Baud Rate Factory default: 9600 This specifies the transmit and receive baud rates for the port selected for host communications. Parity Factory default: None This option specifies the parity mode for each transmitted character. If the number of Data Bits is 8, set this option to None. Selecting Odd will cause an eighth bit to be added with a value of 1 if the previous 7 bits add up to an even number, and 0 if the previous 7 bits add up to an odd number. Selecting Even will cause an eighth bit to be added with a value of 1 if the previous 7 bits add up to an odd number, and 0 if the previous 7 bits add up to an even number. Mark parity will set every eighth bit to 1 and Space parity every bit to 0. Flow Control Factory default: Input This option specifies the type of flow control used by the line port to communicate readiness to transmit or receive data from the host. None Input Output 6-72 - No flow control - XON/XOFF on received data - XON/XOFF on transmitted data Setup Menus In/Out - XON/XOFF on transmitted & received data Hardware - DTR/CTS hardware flow control. Data Bits Factory default: 8 This option specifies the number of data bits sent for each transmitted character. Stop Bits Factory default: 1 This specifies the number of stop bits sent for each transmitted character. Transmit Rate Factory default: Unlimited The setting of this option determines the maximum effective baud rate that the emulator transmits terminal reports and data sent as a result of pasting data to the host. On Line Factory default: Selected When this option is selected, normal two-way communication between the emulator and the host is enabled. When unselected, the emulator is in Local mode and data will not be sent to, or received from the host. Data typed on the keyboard will be displayed on the screen or actioned if a control command is typed. Local Echo Factory default: Unselected The setting of this option determines whether keyboard entered characters are displayed on the screen as well as sent to the host. When unselected, characters are not displayed when they are transmitted unless the host 'echoes' them back. 6-73 Setup Menus Auxport Setup This dialog box is displayed by selecting Auxport in the Settings menu. It enables you to specify a COM or LPT port for bidirectional output when in any DEC VT mode, ANSI BBS, Sco Console, HP 700/92 or IBM 3151 mode. The Functionality options enable you to set the auxiliary port as bidirectional and specify that it is to be opened at start-up. Clicking the Configure button will display a dialog box in which you can specify settings for the COM port. The options in it are described in the Serial Settings section earlier in this chapter. 6-74 Setup Menus Terminal Settings This dialog box is displayed by selecting Terminal in the Settings menu. Note: The Tab Stops dialog box displayed by clicking the Set Tabs button is described in the next section. Display Rows Factory default: 24 This specifies the number of text rows that can be viewed in the workspace at any one time out of the total number stored in memory. This can be set to a maximum of 64. Note that the number of rows stored in memory is specified by the Memory Rows option. Display Columns Factory default: 80 This option enables you to specify a width of 80 or 132 columns for the workspace. When set to 132, the setting of the Use 80 Column Font option determines whether all 132 columns are displayed using a narrow font, or only 80 columns at a time using the normal (80 column) font, with the ability to scroll horizontally to view the remaining columns. Use 80 Column Font Factory default: Unselected This option specifies which font to use when the Display Columns option is set to 132. When unselected, a narrow font will be used so that all 132 columns are visible in the window. When selected, only 80 columns will be visible using the normal font, with the remaining columns stored off-screen. You can scroll horizontally to view the hidden columns by holding down the Ctrl key and pressing the Left or Right Cursor keys. 6-75 Setup Menus Memory Rows Factory default: 144 This option determines the number of text rows that are stored in memory. This can be set from 0 to 528 rows by default. The Display Rows option specifies the number of memory rows that can be viewed in the workspace at any one time. Memory Page Size Factory default: 24 When the emulator is in VT420 mode, the display memory of 144 lines can be divided into several pages, up to a maximum of six pages of 24 lines each. The setting of this option determines the number of lines on a page and therefore how many pages are available. Note that the page size can be larger than the Display Rows setting, in which case you can scroll the page up or down in the window by holding down the Ctrl key and pressing the Up or Down Cursor keys. When the emulator is in any mode other than VT420, the page size is the same as the Display Rows setting. Memory Page Width Factory default: 80 This option specifies the width of display memory for DEC VT modes, in the range 80 to 132 columns. When the number of Display Columns is less than the page width specified here, you can scroll horizontally to view the hidden columns by holding down the Ctrl key and pressing the Left or Right Cursor keys. Cursor Type Factory default: Block This enables you to specify how the text cursor is displayed. Select from the following: Underline Block Static Underline Static Block Hidden Status Line Factory default: Unavailable This option determines whether or not the 25th screen line is used as a status line when the emulator is in any DEC VT terminal emulation mode. When Unavailable or Host Writable is selected, the host can write application-specific messages to the 25th line. Selecting None will prevent this. Ignore Numlock Factory default: Unselected The setting of this option determines whether or not the Num Lock key toggles Num Lock mode on and off when pressed. When selected, the Num Lock key will perform the function defined by the terminal emulation. 6-76 Setup Menus Keyboard Type Factory default: 101\102 (Windows XPe only) This TeemTalk for Windows XPe option enables driver-less support for a 122 or 108key keyboard instead of the standard 101\102-key keyboard. Preferred Font This enables you to specify the font to be used for displaying characters. The available settings depend on the fonts installed. Preferred Char. Set Factory default: DEC-MCS This enables you to specify the character set to be used for displaying characters. The DEC-MCS, ISO Latin-1 and ISO Latin-2 settings enable you to specify the 8bit character set that is used within VT320 mode when the Character Set Mode option in the Emulation Settings dialog box is set to Multinational. The DEC MCS and both ISO Latin character sets consist of two tables of characters. The first table, ASCII 7-bit, is common to all three sets and provides standard alphabetic, numeric and symbolic characters, and control codes. The second (8-bit) table differs between the three sets and provides various special and multinational characters and additional control codes, as shown in the Character Sets appendix. The Ansi setting will use the PC (ANSI) character set specified by the Ansi Code Page option. The ANSI BBS emulation will use this character set by default. When ISO Hebrew is selected, the following key functions will be enabled: Ctrl + Alt + F1 Select Multinational 8-bit mode and left-to-right typing. Ctrl + Alt + F2 Select National 7-bit mode (lowercase English characters will be displayed as Hebrew) and right-to-left typing. Ctrl + Alt + F3 Toggle between left-to-right and right-to-left typing. Ansi Code Page Factory default: 437 This option specifies the character set used for display when the Preferred Char. Set option is set to Ansi. Note that selecting the ANSI BBS emulation will automatically set the preferred font to Ansi. The character set mappings (code pages) supported are 437 for normal usage (default) and 850, 858 or 1250 for multinational usage. Each set consists of two tables of characters. The first table is the standard ASCII character set. The second table contains special characters which differ between the sets. Refer to the Character Sets appendix for details. 6-77 Setup Menus When PC Hebrew 862 is selected, the following key functions will be enabled: Ctrl + Alt + F1 Select Multinational 8-bit mode and left-to-right typing. Ctrl + Alt + F2 Select National 7-bit mode (lowercase English characters will be displayed as Hebrew) and right-to-left typing. Ctrl + Alt + F3 Toggle between left-to-right and right-to-left typing. Save Screen Before Clearing Factory default: Unselected This applies to all DEC 'VT' emulations except VT340 and VT420. It determines the effect of a clear screen command received from the host. When unselected, the contents of the current page will be cleared. When selected, the contents of the current page will be saved and the display will scroll to the next page. Save Scrolled Lines Factory default: Unselected If a scroll region is set, selecting this option will cause data scrolled out of the region to be stored in a history buffer. Vertical Coupling Factory default: Selected The setting of this VT420 mode option determines what happens when the application moves the cursor to a line not currently displayed in the window when the number of displayed lines is less than the page size. When selected, the display will automatically scroll vertically to keep the cursor in view. When unselected, the display will remain static and the cursor will move off-screen to the relevant line stored in memory. You can scroll the display to view the lines stored off-screen by holding down the Ctrl key and pressing the Up or Down Cursor keys. Horizontal Coupling Factory default: Unselected The setting of this DEC VT mode option determines what happens when the cursor moves beyond the last column displayed in the window when there are more columns stored off-screen. When selected, the display will automatically scroll horizontally to keep the cursor in view. When unselected, the display will remain static and the cursor will move off-screen. To scroll horizontally to view the hidden columns, hold down the Ctrl key and press the Left or Right Cursor keys. Page Coupling Factory default: Selected The setting of this VT420 mode option determines the effect of a remote command to move the cursor to another page. When selected, the page to which the cursor is moved 6-78 Setup Menus is automatically displayed. When unselected, the display remains unchanged and the cursor moves off-screen to the relevant page stored in memory. Auto Wrap Factory default: Unselected The setting of this option determines whether characters wrap to the next line when the right margin is reached. When unselected, on reaching the right margin, the last character position will be overwritten by every new character received. Auto New Line Factory default: Unselected When selected, this will cause a carriage return command to be appended to every line feed command received. Auto Line Feed Factory default: Unselected When selected, this will cause a line feed command to be appended to every carriage return command received. Application Keypad Factory default: Unselected The setting of this option determines the effect of pressing keys in the keypad on the right side of the keyboard. When unselected, the keypad is in numeric mode and keys will generate the characters shown on the key caps. When selected, the keypad is in application mode and keys will generate control functions when pressed. The top row of four keys act as the equivalent DEC function keys PF1 through PF4. Application Cursor Keys Factory default: Unselected When this option is selected the cursor keys will generate application program codes when pressed. Unselected, the keys will generate normal cursor movement commands. Display Controls Factory default: Unselected The setting of this option determines whether received control codes are actioned or displayed. When selected, a representation of most control codes will be displayed on the screen. 6-79 Setup Menus Display Error Codes Factory default: Selected This option determines whether or not a chequerboard symbol is displayed when the delete code is received. Jump Scroll Factory default: Unselected The setting of this option determines whether data is scrolled one or several lines at a time when the window becomes full. Data will scroll up several lines at a time when this is selected. 80 / 132 Clears Screen Factory default: Selected This option determines whether or not data is cleared from the display when the number of columns is changed. Backspace = DEL Factory default: Unselected The setting of this option determines whether or not a backspace command performs a delete. Ignore Nulls Factory default: Unselected The setting of this option determines whether Null characters received from the host are actioned or ignored. High Function Terminal Factory default: Selected This applies to the AIXTerm emulation. It enables you to switch between HFT (High Function Terminal) mode (default) and VT100 mode. Cursor Moves Right to Left Factory default: Unselected This applies to the DEC VT, AIXTerm, Ansi BBS, AT 386 and Sco Console emulations. It enables you change the direction in which the text cursor moves across the display. Copy Right to Left Factory default: Unselected This applies to the DEC VT, AIXTerm, Ansi BBS, AT 386 and Sco Console emulations. It enables the copy commands to function in right to left display mode. 6-80 Setup Menus Keyboard Sends Scan Codes Factory default: Unselected This applies to the DEC VT520, VT PC-Term and Wyse PC-Term emulations. It determines whether keyboard scan codes or ASCII codes are sent to the host on key press/release. Note that this cannot be selected at the same time as the Keyboard Sends Position Codes option. Keyboard Sends Position Codes Factory default: Unselected This applies to the DEC VT520, VT PC-Term and Wyse PC-Term emulations. It determines whether keyboard position codes or ASCII codes are sent to the host on key press/release. Note that this cannot be selected at the same time as the Keyboard Sends Scan Codes option. Auto Resize Factory default: Unselected This applies to the DEC VT520 emulation only. When this option is selected, the window size will automatically be adjusted each time the buffer size is changed either by the host or through setup. The following table indicates the window size (lines per screen) that is used for the specified number of lines per page. Lines per Page: Lines per Screen: 24 26 25 26 36 43 42 43 43 43 48 52 52 52 72 52 6-81 Setup Menus Tab Stops This dialog box is displayed by clicking the Set Tabs button in the Terminal Settings or Wyse Settings dialog box. Tab stops can be set for the DEC VT, ANSI and SCO Console emulations using the Tab Stops dialog box displayed from the Terminal Settings dialog box, and for the Wyse emulations by using the Tab Stops dialog box displayed from the Wyse Settings dialog box. Tab stops are set every eight columns by default, as indicated by the T character below the relevant column numbers. If you want tab stops to be set at regular intervals other than every 8th column, enter the number of columns required between each tab stop next to the Set Every button, then click the button. Individual tab stops can be toggled on or off by clicking the mouse pointer above or below the relevant column number. To remove all the tab stops, click the Clear All button. To save the current tab stops, select Save Session in the File menu. 6-82 Setup Menus Local Editing This dialog box is displayed by selecting Local Editing in the Settings menu. Edit Operation Factory default: Unavailable The setting of this option determines whether Local Editing mode can be selected and how editing is performed. Selecting Unavailable will prevent you or the host from entering Edit mode. Selecting Edit will cause text to be stored in page memory so that it can be edited locally. This enables the host to get on with other tasks. A block of data will be transmitted to the host when the Enter key is pressed. Selecting Interactive will cause characters to be sent to the host as soon as they are typed at the keyboard. The host will perform editing functions. Edit Key Action Factory default: Immediate When this option is set to Immediate, Edit mode will be entered immediately when the Shift + Delete key combination is pressed without waiting for the host to send the command to enter. When set to Deferred, pressing Shift + Delete will cause a code to be sent to the host asking permission to enter Edit mode. The host will reply by sending the 'Enter Edit Mode' command. Clear Unprotected Factory default: Selected The setting of this option determines which characters can be erased by the host or user. When selected, only unprotected characters can be erased, protected characters will be left untouched. When unselected, both protected and unprotected characters can be erased. 6-83 Setup Menus Attributes Cleared Factory default: Unselected The setting of this option determines the effect of an erase command on character attributes. When selected, both attributes and characters will be cleared from display memory when an erase command is issued. When this option is unselected, all video attributes currently used will remain in display memory when an erase command is issued. This will result in new characters being displayed with the video attributes associated with their positions on the display. Protect From Host Factory default: Unselected The setting of this option determines whether or not the host can overwrite protected characters. 6-84 Setup Menus Block Transmission This dialog box is displayed by selecting Block Transmission in the Settings menu. The options in this dialog box only apply to the block mode functionality supported by the DEC 'VT' terminal emulations. The block mode settings that are supported by other terminal emulations are specified in their respective dialog boxes. Send Unprotected Only Factory default: Unselected The setting of this option determines whether protected characters can be sent to the host or not. When unselected, both protected and unprotected characters will be sent to the host when the Enter key is pressed. When selected, only unprotected characters will be sent to the host when the Enter key is pressed. Send Only Selected Areas Factory default: Unselected The setting of this option determines whether all characters or only those in selected areas on the current page are sent to the host when the Enter key is pressed. When unselected, all characters on the current page will be sent when the Enter key is pressed. When selected, this option will enable only the characters in selected areas to be sent to the host when the Enter key is pressed. The setting of the Send All Selected Areas option determines which selected areas are sent. 6-85 Setup Menus Send All Selected Areas Factory default: Selected When the Send Only Selected Characters option is selected, the setting of this option determines whether all selected areas on a page are sent to the host when the Enter key is pressed, or only the area containing the cursor. When selected, this option will enable all selected areas to be sent to the host. When unselected, only the selected area containing the cursor will be sent to the host. Line Transmission On Factory default: Unselected The setting of this option determines whether data is sent to the host a single line at a time or a full or partial page at a time when the Enter key is pressed. When selected, a single line of valid characters will be sent to the host. In this mode the Return key has the same function as Enter. When unselected, a full or partial page will be sent to the host when the Enter key is pressed. The size of the page is determined by the setting of the Send Partial Page and Transmit Protocol options. Send Font Information Factory default: Selected The setting of this option determines whether character set selection sequences for all character sets represented in the data block are transmitted to the host, or whether spaces are substituted for characters not contained in the current character set. When selected, the character set selection sequences for all character sets represented in the data block will be sent. When unselected, characters which are not contained in the currently selected National or Multinational character set will be substituted with spaces. Send Record Separators Factory default: Selected The setting of this option determines whether or not a record separator (RS) code is appended to each field of data when a block is transmitted to the host. Record separator codes are used as markers between each field when this option is selected. Send Spaces Compressed Factory default: Unselected This option determines how spaces and empty character fields within a block of data are sent to the host. When unselected, a space character will be sent for each empty character position. When selected, a record separator code (RS) will be sent in place of empty character positions. The last field on a line will contain end of line characters as specified by the End of Line Characters option. 6-86 Setup Menus Send Partial Page Factory default: Unselected The setting of this option determines whether a partial page or data in the scrolling region is sent to the host when the Enter key is pressed and the Line Transmission On option is unselected. When selected, this option will enable a partial page to be sent to the host. The format of the partial page is determined by the setting of the Transmit Protocol option. When unselected, the contents of the scrolling region will be sent to the host when the Enter key is pressed. PF Key Effect Factory default: None This option determines how unshifted PF keys work in Local Editing mode. When set to None, the unshifted function of PF keys will be disabled. When set to Breakthrough, unshifted PF keys will function immediately when pressed if they have been assigned functions by application software. When set to As TX Prefix, the function of unshifted PF keys will be sent to the host before a block of data is transmitted. When set to As TX Suffix, the function of unshifted PF keys will be sent to the host after a block of data is transmitted. Send Key Effect Factory default: Immediate The setting of this option determines the effect of pressing the Enter key when sending data to the host. When Immediate is selected, data will be sent to the host immediately without waiting for permission to transmit. When Deferred is selected, a code will be sent to the host notifying it that data is ready for transmission. The keyboard will be locked until the host requests that the data is transmitted. Transmit Protocol Factory default: ANSI The setting of this option determines whether a partial page of data is transmitted in ANSI or VT131 format when the Send Partial Page option is selected. When ANSI is selected, Local Editing mode will function according to ANSI (American National Standards Institute) rules. When VT131 is selected, Local Editing mode will function in the same way as a VT131 terminal. Select this option when running software written for the VT131. 6-87 Setup Menus End of Line Characters Factory default: ^M (i.e. CR) This text box is used to specify the characters that are to indicate the end of a line in a data block. To change the current definition, delete the definition displayed in the text box and type in the new one, either as the control key character equivalent or the decimal value of the ASCII character. For example, the default ASCII character CR can be entered by typing the characters ^ and M, representing the keys Ctrl + M which, when pressed together would generate the CR code. Decimal values are entered as three-digit numbers immediately preceded by an underscore character. Values with only two digits must be preceded by a zero. For example, the decimal value of CR is 13, so this would be entered as _013. Refer to the ASCII character table in the Character Sets appendix for code and decimal references. End of Block Characters Factory default: None This specifies the characters that are to indicate the end of a block of data. To change the current definition, delete the definition displayed in the text box and type in the new one, either as the control key character equivalent or the decimal value of the ASCII character. For example, the ASCII character CR can be entered by typing the characters ^ and M, representing the keys Ctrl + M which, when pressed together would generate the CR code. Decimal values are entered as three-digit numbers immediately preceded by an underscore character. Values with only two digits must be preceded by a zero. For example, the decimal value of CR is 13, so this would be entered as _013. Refer to the ASCII character table in the Character Sets appendix for code and decimal references. 6-88 Setup Menus Tek 4014 Settings This dialog box is only available if your version of TeemTalk supports graphics emulations. It is displayed when running the Tek 4014 emulation by selecting Tek Graphics in the Settings menu. Auto New Line Factory default: Unselected When selected, this will cause a carriage return command to be appended to every line feed command received. Auto Line Feed Factory default: Unselected When selected, this will cause a line feed command to be appended to every carriage return command received. Dual Margin Factory default: Unselected This option enables a second margin for graphics text. When selected, the window will be divided vertically into two halves. The cursor will move to the top of the second margin after it has reached the last column of the bottom line of the first margin. Text will then fill the right half of the window. Destructive Backspace Factory default: Unselected The setting of this option determines whether the graphics text character preceding the current cursor position will be deleted or not when the Backspace key is pressed. 6-89 Setup Menus Screen Mapping Factory default: 1024 (x) by 768 (y) This option enables you to select the correct resolution for screen addressing when in Tek 4014 or Westward 2119 graphics modes. For Tek 4014 mode select 1024 (x) by 768 (y) resolution (default). For Westward 2119 mode select 1024 (x) by 784 (y) resolution. Gin Terminators Factory default: ^M^D (i.e. CR EOT) This option enables you to specify the termination character(s) that follow a GIN address transmission. A maximum of 6 characters can be entered. To change the current definition, delete the definition displayed in the text box and type in the new one, either as the control key character equivalent or the decimal value of the ASCII character(s). For example, the ASCII character CR can be entered by typing the characters ^ and M, representing the keys Ctrl + M which, when pressed together would generate the CR code. Decimal values are entered as three-digit numbers immediately preceded by an underscore character. Values with only two digits must be preceded by a zero. For example, the decimal value of CR is 13, so this would be entered as _013. 6-90 Setup Menus GIN Mouse Definitions This dialog box is only available if your version of TeemTalk supports graphics emulations. It is displayed by selecting GIN Mouse in the Settings menu. This enables you to specify the code which each mouse button sends when it is pressed and released. Each definition can consist of a maximum of 10 characters. The default settings are shown in the dialog box above and can be reasserted once changed by clicking the Default button. Control characters are entered either as the control key character equivalent or the decimal value of the ASCII character. For example, the ESC (escape) character can be entered by typing the characters ^ and [, representing the keys Ctrl + [ which, when pressed together would generate the ESC character. Decimal values are entered as three-digit numbers immediately preceded by an underscore character. Values with only two digits must be preceded by a zero. For example, the decimal value of ESC is 27, so this would be entered as _027. 6-91 Setup Menus Attributes This dialog box is displayed by selecting Attributes in the Settings menu. It enables you to specify the colours used in the emulation workspace and how text with attributes is displayed. To change the way a screen element is displayed, select the relevant item from the Screen Element list box, for example, Bold (BD) for characters with the bold attribute. The settings of the other options in the dialog box will change to reflect the settings currently assigned to the screen element, and the Sample Text window will show how the screen element is actually displayed with these settings. Text with attributes can be displayed in various ways. For example, characters with the underline attribute can be displayed as standard (e.g. underlined only), as a particular colour only (e.g. green without the underline), or with both attribute and a specific colour (e.g. underlined and green). The Attribute options allow you to enable or disable any of the attributes normally associated with the currently selected screen element. Note that the Column Sep (CS) option is only applicable to the IBM 5250 emulation, and the Hidden option is only applicable to the Wyse 60 emulation. The setting of the Use Colours option in the Preferences box determines whether or not a specific colour is assigned to the text attribute. When the Use Colours option is selected, the colour of the screen element can be changed by tapping on the required colour block in the palette of Foreground and/or Background colours. The two palettes enable you to specify a different colour for text (foreground) and text cell (background). 6-92 Setup Menus Screen Element This list box enables you to select the screen element for definition. The Ansi Palette option allows you to specify which set of eight Foreground and Background colour indices are used when ANSI colour escape sequences are received. Either the upper or lower eight colours in the Foreground and Background palettes can be selected. The current eight colours are enclosed within a box. To change the current set of eight, just tap on any colour in the set required. The list box also enables you to select various display options, depending on the current terminal emulation mode: Normal Screen Bold (BD) Underline (UL) Flashing (FL) Inverse (IV) UL+BD FL+BD FL+UL IV+FL IV+BD IV+UL FL+BD+UL IV+UL+BD IV+FL+BD IV+FL+UL IV+FL+BD+UL When running the IBM 5250 emulation, the list of character attributes is extended to include the column separator (CS) attribute. When running the IBM 3270 emulation, the list box will allow selection of the following items: Unprotected Normal Unprotected Bold Protected Normal Protected Bold Status BG Attribute The list of attribute options allow you to enable or disable the actual display of attributes associated with the selected screen element. Note that the Column Sep (CS) option is only applicable to the IBM 5250 emulation, and the Hidden option is only applicable to the Wyse 60 emulation. Use Colours When selected, the currently selected screen element will be displayed in the colours highlighted in the Foreground and Background colour palettes. For default display, deselect this option. Inverse Colours Factory default: Unselected When this option is selected, characters with the inverse attribute will have the text (foreground) colour swapped with that of the text cell (background). 6-93 Setup Menus Swap Black/White Factory default: Unselected When selected, anything that has the white attribute will be displayed as black, and vice versa. AutoColour Factory default: Unselected This option is only applicable to the DEC VT terminal emulations. When selected, displayed characters are colour coded according to type. For example, all numeric characters are displayed in one colour while all alphabetic characters are displayed in another. Deselecting this option will display characters according to the settings in this dialog box. Ansi Colours Disabled Factory default: Unselected Selecting this option will cause ANSI colour commands to be ignored. Colours Cleared With Attributes Factory default: Selected The setting of this option determines whether or not the foreground and background colours are cleared to the default colours when an ANSI clear attributes command is received. Attributes Use Normal BG Factory default: Unselected This option only applies to the IBM 3270 emulation. If attribute indicators take up character positions on the screen, you can force those positions to display the normal background colour instead of the attributes by selecting this option. Use Italic with Intensity Factory default: Unselected Selecting this option will cause any characters that have the intensity (bold) attribute to be italicized. Use Bold Font Factory default: Unselected Selecting this option will cause all characters to be displayed using a bold font. Non Anti-alias Font Factory default: Unselected Selecting this option will prevent characters from overlapping when using a low display resolution in Microsoft Windows ClearType display mode. 6-94 Setup Menus Customizing The Colour Selection You can change any of the 16 colours displayed in the Foreground and Background colour palettes. To do this, select the colour you wish to change in one of the palettes then click the Set Colour... button to display the Colour dialog box. This shows the basic and custom colours currently available for selection. If you want to use one of these, click on the colour required then tap OK. If you want to define a different custom colour, click the Define button to display the colour definition facilities. This provides two methods for specifying a different colour, one visual and the other numeric. All the settings initially displayed relate to the colour selected in the Attributes dialog box and shown in the large Colour box. When you start changing any of the settings, the Colour box will display the new colour. Visual Method The full range of colours available is displayed in the large colour selection box. A target cursor is positioned over the currently selected colour. To select a new colour you can either click on the colour required or drag the target cursor over it. The colour displayed in the Colour box will change accordingly. The lightness of the selected colour can be altered by dragging the triangular pointer up or down the vertical bar to 6-95 Setup Menus the right. When you have the required colour, click the Add to Custom Colours button to apply the change to the set of custom colours. Numeric Value Method The numeric value of Hue, Lightness and Saturation, or the Red, Green and Blue percentage values can be entered directly in the text boxes. The colour displayed in the Colour box will change accordingly. When you have the required colour, click the Add to Custom Colours button to apply the change to the set of custom colours. 6-96 Setup Menus Define Keyboard Macros This dialog box is displayed by selecting Keyboard Macros in the Settings menu. The Define Keyboard Macros dialog box enables you to redefine the function of most of the keys on your keyboard, including the key combinations listed below: Key Shift + Key Control + Key Control + Shift + Key Alt + Key Alt + Shift + Key Alt + Control + Key Alt + Control + Shift + Key Each definition may contain a string of up to 127 characters. The combined total of all the characters that may be programmed into keys is determined by the 127 character limit per definition and the amount of memory available in your PC. The Predefined Macros box enables you to select from a list of standard functions associated with the current terminal emulation. Clicking the arrow button will display a list box in which the names of valid key functions (called virtual key names) are shown. The Virtual Key Names appendix lists all the functions and associated virtual key names for each terminal emulation. A key macro may be actioned automatically on start-up, or transmitted to the host or actioned locally when the key or key combination is pressed. This is determined by selecting Normal, Remote, Local or Startup in the list box when defining the key. Selecting Normal will cause the macro to be processed according to the current operating mode when the key or key combination is pressed. The Current Macro Definitions box displays the key and key combinations that are currently defined. The Type column indicates whether the macro is processed as normal (blank), remote (R), local (L) or on start-up (S). 6-97 Setup Menus You can remove the selected definition or delete all the definitions by clicking the relevant Remove button. Defining A Key Or Key Combination 1. Click in the Program Key box then press the key or key combination to define. The current definition will be displayed. 2. Click in the With box then enter the new definition, or make a selection from the list of Predefined Macros then click Apply. 3. Specify how the macro is to be processed by selecting either Normal, Remote, Local or Startup in the list box. 4. Click the Add button to accept the definition. The new definition will be added to the Current Macro Definitions list. 5. To save the definitions, click OK to exit, then select Save Session As in the File menu, make sure the Keyboard Macros box is checked, then click OK. Key Combinations & Sequences You can program a key to perform the function of a combination or sequence of keys. For example, you can cause the F1 key to perform the same function as pressing the keys Alt + F4 together, or pressing the keys F2 then F3 then F4. Keys are identified by their virtual key names as listed in the Virtual Key Names appendix. The virtual key name has to be enclosed by the < and > characters in the key definition box. You may omit the VK_ and VT_ (etc.) parts of the virtual key name. To program a key so that it performs the same function as pressing two or more other keys together, type the < character followed by the virtual key names linked together with + (plus sign) characters and ending with the > character. For example, to program the F1 key so that when it is pressed it performs the same function as pressing the keys Alt + F4 together, enter the following characters in the key definition box: <ALT+F4> To program a key so that it performs the same function as pressing a sequence of keys one after the other, enter each virtual key name in the order required, enclosing each virtual key name with the < and > characters. Each enclosed virtual key name must immediately follow the previous enclosed virtual key name with no spaces. For example, to program the A key so that when it is pressed it performs the same function as pressing the keys F2 then F3 then F4 enter the following characters in the key definition box: <F2><F3><F4> 6-98 Setup Menus Specifying Characters There are various ways in which you can specify a particular character. For example, the ESC character can be specified using any one of the following five entries: _027 \033 \u001B ^[ \e Decimal value (underscore character followed by a 3-digit number). Octal value (backslash character followed by a 3-digit number). Unicode value (backslash and u characters then unicode value). Control key value (^ represents the control key on the keyboard). Additional value for ESC. The following 'backslash' values can be used: \u Unicode introducer \n Line feed \r Carriage return \e Escape Note that as the \ and ^ characters are used as value introducers, to enter these as character values you need to precede them with a backslash character, i.e. enter \ as \\ and ^ as \^. The Euro character can be specified by entering the unicode value \u20ac. 6-99 Setup Menus Soft Buttons This dialog box is displayed by selecting Soft Buttons in the Settings menu. TeemTalk for Windows CE A set of soft buttons can be displayed in the command bar either by clicking one of the two arrow buttons, or by pressing the keys Ctrl + Alt + Left Cursor or Ctrl + Alt + Right Cursor. These soft buttons can be programmed so that they perform various functions when clicked. You can define up to four soft button levels. Level 1 is displayed by default. Each level consists of twelve programmable buttons, providing a combined total of 48 programmable buttons. Levels stored off-screen can be 'scrolled' into view by clicking the arrow buttons. TeemTalk for Windows XPe A set of soft buttons can be displayed along the bottom of the window. These can be programmed so that they perform various functions when clicked. There are four soft button levels. Each level consists of twelve programmable buttons, providing a combined total of 48 programmable buttons. The Visible Levels setting determines the number of levels displayed. All levels are accessible even if they are not displayed, levels stored off-screen can be ‘scrolled’ into view by clicking the Level 6-100 Setup Menus button. Each level can be assigned a title which will be displayed under the Level button by entering up to eight characters in the Title box. The soft buttons can be removed from the display by setting the Visible Levels option to 0. You can display the soft buttons in a separate window by deselecting the Attached option. If you close the Soft Buttons window, you can display it again by setting the Visible Levels option to anything other than 0, then clicking OK. The current position and size of the Soft Buttons window can be saved so that it is displayed the same way the next time TeemTalk is loaded. To do this, select the Save Session As option in the File menu, make sure the Soft Buttons option is checked, then click OK. Programming A Soft Button 1. Select the Level number. 2. Select the Button number. 3. Check the Local check box to make the button definition action locally, or uncheck it to transmit the definition to the host when the button is pressed. 4. Enter a Name to be displayed on the button, up to ten characters long. 5. Enter the button definition in the Command box, or make a selection from the list of Predefined Macros then click Apply. 6. Click the Add button to accept the definition. The new definition will be added to the Current Definitions list. 7. To save the definitions, click OK to exit, then select Save Session As in the File menu, make sure the Soft Buttons box is checked, then click OK. Key Combinations & Sequences You can program a soft button to perform the function of a combination or sequence of keys. For example, you can cause a button to perform the same function as pressing the keys Alt + F4 together, or pressing the keys F2 then F3 then F4. Keys are identified by their virtual key names as listed in the Virtual Key Names appendix. The virtual key name has to be enclosed by the < and > characters in the key definition text box. You may omit the VK_ and VT_ (etc.) parts of the virtual key name. To program a soft button so that it performs the same function as pressing two or more other keys together, type the < character followed by the virtual key names linked together with + (plus sign) characters and ending with the > character. 6-101 Setup Menus For example, to program a button so that when it is pressed it performs the same function as pressing the keys Alt + F4 together, enter the following characters in the Command box: <ALT+F4> To program a button so that it performs the same function as pressing a sequence of keys one after the other, enter each virtual key name in the order required, enclosing each virtual key name with the < and > characters. Each enclosed virtual key name must immediately follow the previous enclosed virtual key name with no spaces. For example, to program the A key so that when it is pressed it performs the same function as pressing the keys F2 then F3 then F4 enter the following characters in the Command box: <F2><F3><F4> Specifying Characters There are various ways in which you can specify a particular character. For example, the ESC character can be specified using any one of the following five entries: _027 \033 \u001B ^[ \e Decimal value (underscore character followed by a 3-digit number). Octal value (backslash character followed by a 3-digit number). Unicode value (backslash and u characters then unicode value). Control key value (^ represents the control key on the keyboard). Additional value for ESC. The following 'backslash' values can be used: \u Unicode introducer \n Line feed \r Carriage return \e Escape Note that as the \ and ^ characters are used as value introducers, to enter these as character values you need to precede them with a backslash character, i.e. enter \ as \\ and ^ as \^. The Euro character can be specified by entering the unicode value \u20ac. 6-102 Setup Menus Mouse Button Actions This dialog box is displayed by selecting Mouse Button Actions in the Settings menu. This enables you to specify the function of the left and right mouse buttons when they are clicked on their own or in conjunction with modifier keys. You can assign up to six functions to each button, either entering your own definition in the same format as described for keyboard macros and soft buttons, or selecting from a list of standard built-in functions. Clicking one of the arrow buttons will display a drop-down list box which lists all the standard functions that can be assigned: Unassigned Select Extend Selection Edit Copy Edit Paste Show Hotspots Action Hotspot Move Cursor Send CR Send Keyword Middle Button Select Rectangle Select Word Select and Copy Cursor Select Rectangular Select and Copy The Select function will select all text from the start position to the finish position, working left to right across the entire width of the display, whereas the Select Rectangle function will only select text contained within the rectangular area defined by the start position (top left corner) and the finish position (bottom right corner). The Select Word function will cause the word under the mouse cursor to be selected. The Select and Copy function is the same as Select but will also copy the selected data to the Clipboard automatically. The Rectangular Select and Copy function is the same as Select Rectangle but will also copy the selected data to the Clipboard automatically. The Show Hotspots and Action Hotspots functions are described in the Hotspots section of the Getting Started chapter. The Send Keyword function is very similar to 6-103 Setup Menus the hotspot feature. It enables you to send delimited text displayed on the screen to the host just by clicking on it. Delimiters are the same as for hotspots. The Move Cursor function can be used in any of the local block modes as a quick way of positioning the text cursor within a block of text. To position the text cursor, move the mouse pointer to the position required, hold down the modifier key(s) assigned with the function then click the left mouse button. The Cursor Select function does the same as Move Cursor, but when running the IBM 3270 or IBM 5250 emulation it also performs a cursor select. The Middle Button setting enables you to make the left or right button (and key combination) of a two button mouse emulate the middle button of a three button mouse. The setting of the Highlight When Actioned option determines whether or not a visual indication is given that a function has been actioned when a hotspot is clicked. 6-104 Setup Menus Button Tools (TeemTalk for Windows XPe only) This TeemTalk for Windows XPe dialog box is displayed by selecting Button Tools in the Settings menu. It enables you to redefine the button tools displayed in the toolbar. The Current Tool box displays the toolbar button and its function that is currently selected for editing, or located where a new button is to be inserted to its left in the toolbar. Clicking the down-arrow button to the right will display all the current toolbar buttons in order in a box below. This enables you to select a new button position for display in the Current Tool box. Click the down-arrow button again to return to the Button and Command selection display. The Visible option enables you to specify whether or not the toolbar is displayed. Adding Buttons 1. Click the down-arrow button to the right of the Current Tool box to display the buttons currently in the toolbar. 2. Click on the button which will be to the right of the new button to be added so that it is displayed in the Current Tool box. 3. Click the down-arrow button again to display the Command options. 4. Select a button bitmap from the Buttons list. You can add your own bitmaps to the standard bitmap list by clicking the Add Custom Bitmap button and selecting the bitmap files to load. Buttons will be automatically generated using the bitmaps in these files. 6-105 Setup Menus 5. Specify the command to be performed when this button is clicked either by selecting from the Commands list or by typing your own definition in the Current Tool text box. 6. Click the Insert at Current button. 7. Click OK when you have finished. The toolbar will immediately be updated. Adding A Space Between Buttons 1. Click the down-arrow button to the right of the Current Tool box to display the buttons currently in the toolbar. 2. Click on the button which will be to the right of the space to be added so that it is displayed in the Current Tool box. 3. Click the down-arrow button again to display the Command options. 4. Select the [Space] option at the top of the Commands list box. 5. Click the Insert at Current button. 6. Click OK when you have finished. The toolbar will immediately be updated. Removing A Button Or Space 1. Click the down-arrow button to the right of the Current Tool box to display the buttons currently in the toolbar. 2. Click on the button or space to be deleted so that it is displayed in the Current Tool box. 3. Click the down-arrow button again to display the Command options. 4. Click the Delete Current button to remove the button or space from the toolbar. 5. Click OK when you have finished. Saving The Button Tools When you have finished defining button tools you can save them so that they will be reasserted when the emulator is loaded or reset by selecting Save Session in the File menu. Assigning User-Defined Functions You can enter a definition of your own in the Current Tool text box. The definition can contain key functions and control characters to be actioned as well as normal text. 6-106 Setup Menus Specifying Key Functions You can cause a key function to be actioned by including the virtual key name of the key enclosed by the < and > characters. You may omit the VK_ and VT_ parts (etc.) of the virtual key name. For example, the Enter key would be specified as <ENTER>. To send the function of a key combination, type the < character followed by the virtual key names linked together with + characters and ending with the > character. For example, Alt F4 would be specified as <ALT+F4>. To send the function of a sequence of keys one after the other, enter each virtual key name in the order required, enclosing each virtual key name with the < and > characters. Each enclosed virtual key name must immediately follow the previous enclosed virtual key name with no spaces. For example, F2 then F3 then F4 would be specified as <F2><F3><F4>. Specifying Characters There are various ways in which you can specify a particular character. For example, the ESC character can be specified using any one of the following five entries: _027 \033 \u001B ^[ \e Decimal value (underscore character followed by a 3-digit number). Octal value (backslash character followed by a 3-digit number). Unicode value (backslash and u characters then unicode value). Control key value (^ represents the control key on the keyboard). Additional value for ESC. The following 'backslash' values can be used: \u Unicode introducer \n Line feed \r Carriage return \e Escape Note that as the \ and ^ characters are used as value introducers, to enter these as character values you need to precede them with a backslash character, i.e. enter \ as \\ and ^ as \^. The Euro character can be specified by entering the unicode value \u20ac. 6-107 Setup Menus Notes 6-108 DEC VT Emulations 7 DEC VT Emulations This chapter describes features of the DEC VT terminal emulations. Session Configuration WBT Mode This section describes the basic procedure for creating a session configuration when the terminal is in WBT mode. The options available are described in detail in chapter 2. 1. Click the Configure tab in the Terminal Connection Manager then click the Add button to display the New Connection dialog box. 2. Select Terminal Emulation Client and click OK. The Terminal Emulation Client Connection Wizard - Connection Information dialog box will be displayed. 3. Enter a name which will identify this session configuration for future selection in the Connection Name box. 4. Select the DEC VT terminal emulation required in the Emulation list box. The VT52 and VT100 emulations enable you to run applications written for the DEC VT52 and VT100 terminals, respectively. The VT500 7-Bit and VT500 8-Bit emulations enable you to run applications written for the DEC VT320 terminal, the difference is in their treatment of 8-bit control codes. When VT500 7-Bit is selected, all 8-bit codes are converted to their 7-bit equivalents, whereas VT500 8-Bit leaves 8-bit codes unchanged. If you are using VT200 applications, select VT500 7-Bit. 5. Specify the required VT Terminal ID setting. 6. Click Next to display the Host Information dialog box. For a TCP/IP connection, click the TCP/IP button, enter the name or internet address of the host computer in the Host Name box, then click Advanced for 7-1 DEC VT Emulations additional Telnet options. Refer to the TCP/IP Connection Settings section in chapter 2 for details. For a modem connection, click the Modem button then click Advanced to display configuration options. Refer to the Modem Connection Settings section in chapter 2 for details. For a serial connection, click the Serial button, specify the communications port in the Connect To box, then click Advanced for additional serial options. Refer to the Serial Connection Settings section in chapter 2 for details. Make the relevant selections then click OK to return to the Host Information dialog box, then click Next to display the Advanced Options dialog box. 7. Click Finish to return to the Terminal Connection Manager. 8. In the Terminal Connection Manager, display the Connections list, select the session name you specified earlier in step 3, then click the Connect button. Non-WBT Mode This section describes the basic procedure for creating a session configuration when the terminal is not in WBT mode. The options available are described in detail in the Setup Menus chapter. 1. Display the Settings menu from the command bar and select Emulation... to display the Emulation Settings dialog box. 2. Select the DEC VT terminal emulation required in the Alpha Emulation list box. The VT52 and VT100 emulations enable you to run applications written for the DEC VT52 and VT100 terminals, respectively. The VT500 7-Bit and VT500 8-Bit emulations enable you to run applications written for the DEC VT320 terminal, the difference is in their treatment of 8-bit control codes. When VT500 7-Bit is selected, all 8-bit codes are converted to their 7-bit equivalents, whereas VT500 8-Bit leaves 8-bit codes unchanged. If you are using VT200 applications, select VT500 7-Bit. 3. Specify the required VT Terminal ID setting then click OK to close the dialog box. 4. Display the File menu from the command bar and select New Connection to display the New Connection dialog box. 5. Select the type of host connection required in the Type list box. For a TCP/IP connection, select TCP/IP, enter the name or internet address of the host computer in the Connect To box, then click Configure for additional Telnet options. Refer to the TCP/IP Connection Settings section in chapter 2 for details. 7-2 DEC VT Emulations For a modem connection, select Modem, specify the communications port in the Connect To box, then click Configure to display configuration options. Refer to the Modem Connection Settings section in chapter 2 for details. For a serial connection, select Serial, specify the communications port in the Connect To box, then click Configure for additional serial options. Refer to the Serial Connection Settings section in chapter 2 for details. 6. When you have specified the required settings in the New Connection dialog box, click the Connect button to make the connection. Note: You can save these settings as a connection template using the Save Session As dialog box. Refer to the Setup Menus chapter for details. 7-3 DEC VT Emulations The Status Bar The status bar along the bottom of the display enables you to switch between modes and show the status of various operations. 1 2 3 4 5 6 7 8 9 10 11 Item 1: This displays two LEDs. The first LED indicates whether or not you are connected to the host. It will show red when not connected and green when you are connected. The second LED indicates whether or not data is being sent to or from the host. It will show dull green when there is no activity, red when data is being sent to the host, and bright green when data is being received from the host. Item 2: This button enables you to switch between Local and Online mode. The label indicates the mode you will switch to if the button is clicked. Item 3: This button enables you to Pause or Resume scrolling data in the window. The label indicates the action that will be taken if the button is clicked. Item 4: Indicates the current terminal emulation. Item 5: This displays the active session (always 1), the current page number (always 1), and the line,column location of the text cursor. Item 6: This indicates whether Overstrike Mode or Insert Mode is currently selected. In Overstrike Mode (default), new characters will replace already existing characters at the cursor position. When Insert Mode is selected, new characters will be inserted at the cursor position without deleting existing characters, which will move to the right. Item 7: This will display Lock when the keyboard is locked, or Edit when the terminal emulation is in Edit mode. Item 8: This will display the time in 24 hour format when in DEC VT500 mode if the VT525 set time command has been received from the host. Item 9: Indicates the status of the printer as follows: None signifies that the printer is not turned on or not connected, or not installed in Microsoft Windows. Not Ready signifies that the printer is not ready to receive data for printing. Ready signifies that the printer is ready to receive data for printing. 7-4 DEC VT Emulations Auto signifies that the emulation is in Auto Print mode in which the current cursor line is sent to the printer when a command for the cursor to move to the next line is issued. Controller signifies that the emulation is in Printer Controller mode in which the host has direct control over the printer. Print screen commands issued from the keyboard or mouse will be ignored. ErrGen indicates that an error has occurred and a message box will be displayed indicating the error. Item 10: This indicates the keyboard mode. It will be blank when the keyboard is in normal mode and will display DEC when in DEC mode. You can toggle between normal and DEC mode by pressing the keys Alt + Num Lock together. Refer to the illustrations in the Keyboard Mapping section for the key functions available in each mode. Item 11: Indicates the status of the aux port as follows: Ready indicates that the aux port is ready for bidirectional output. In Use indicates that the aux port is currently busy. Horizontal Scrolling It is possible to make the width of display memory larger than the width of the window by using the Memory Page Width option in the Terminal Settings dialog box. When you want to view columns stored off-screen, you can scroll horizontally by holding down the Ctrl key and pressing the Left or Right Cursor keys. Keyboard Mapping The illustrations on the following pages show where DEC VT500 keyboard functions are mapped to keys on the 101/102 key Enhanced AT keyboard layout. Special key functions that are provided on the DEC VT keyboard can be mapped to any key on your keyboard by using the VT virtual key names listed in the Define Keyboard Macros dialog box. The keyboard can be used in two modes, Normal and DEC. You can toggle between the two modes by pressing the keys Alt + Num Lock together. The 10th item on the status bar will display DEC when the keyboard is in DEC mode. The field will be blank when in normal mode. 7-5 7-6 Alt key usage: Normal key usage: F12 PF2 F11 PF1 F13 PF3 F13 PF3 F14 HELP F6 DO F7 F17 F8 F18 F9 F19 F14 F10 F20 F12 BACKSPACE DELETE F11 INSERT REMV HERE (SCRL) (SCRL) (SCRL) (SCRL) PREV NEXT SELECT SCREEN SCREEN FIND BREAK NUMLK DEC / * + , ,[ ] Alt + Num Lock toggles between Normal & DEC mode. All unmarked keys function as indicated by the legends on the keycaps. Functions in round brackets are generated when used in conjunction with Control. Functions in square brackets are generated in application keypad mode. PF4 DEC VT Emulations Enhanced AT Keyboard Layout Normal Mode Alt key usage: Normal key usage: F12 PF2 F11 PF1 F13 HOLD F11 PF3 F14 PF4 HELP F6 DO F7 F17 F8 F18 F9 F19 F14 F10 F20 F12 DELETE F11 INSERT REMV HERE PREV NEXT NEXT SCREEN SCREEN FIND SELECT PF1 NORM PF2 PF3 _ + , ,[ ] PF4 Alt + Num Lock toggles between Normal & DEC mode. All unmarked keys function as indicated by the legends on the keycaps. Functions in square brackets are generated in application keypad mode. BREAK DEC VT Emulations Enhanced AT Keyboard Layout DEC Mode 7-7 DEC VT Emulations Typing Direction For Hebrew Language When ISO Hebrew or Ansi PC Hebrew 862 is selected as the Preferred Character Set in the Terminal Settings dialog box, the following key functions will be enabled: 7-8 Ctrl + Alt + F1 Select Multinational 8-bit mode and left-to-right typing. Ctrl + Alt + F2 Select National 7-bit mode (lowercase English characters will be displayed as Hebrew) and right-to-left typing. Ctrl + Alt + F3 Toggle between left-to-right and right-to-left typing. BQ 3107 Emulation 8 BQ 3107 Emulation This chapter describes the Bull BQ 3107 terminal emulation. Session Configuration WBT Mode This section describes the basic procedure for creating a session configuration when the terminal is in WBT mode. The options available are described in detail in chapter 2. 1. Click the Configure tab in the Terminal Connection Manager then click the Add button to display the New Connection dialog box. 2. Select Terminal Emulation Client and click OK. The Terminal Emulation Client Connection Wizard - Connection Information dialog box will be displayed. 3. Enter a name which will identify this session configuration for future selection in the Connection Name box. 4. Select the BQ3107 terminal emulation in the Emulation list box. 5. Click Next to display the Host Information dialog box. For a TCP/IP connection, click the TCP/IP button, enter the name or internet address of the host computer in the Host Name box, then click Advanced for additional Telnet options. Refer to the TCP/IP Connection Settings section in chapter 2 for details. For a modem connection, click the Modem button then click Advanced to display configuration options. Refer to the Modem Connection Settings section in chapter 2 for details. For a serial connection, click the Serial button, specify the communications port in the Connect To box, then click Advanced for additional serial options. Refer to the Serial Connection Settings section in chapter 2 for details. 8-1 BQ 3107 Emulation Make the relevant selections then click OK to return to the Host Information dialog box, then click Next to display the Advanced Options dialog box. 6. Click Finish to return to the Terminal Connection Manager. 7. In the Terminal Connection Manager, display the Connections list, select the session name you specified earlier in step 3, then click the Connect button. Non-WBT Mode This section describes the basic procedure for creating a session configuration when the terminal is not in WBT mode. The options available are described in detail in the Setup Menus chapter. 1. Display the Settings menu from the command bar and select Emulation... to display the Emulation Settings dialog box. 2. Select the BQ3107 terminal emulation required in the Alpha Emulation list box. 3. Display the File menu from the command bar and select New Connection to display the New Connection dialog box. 4. Select the type of host connection required in the Type list box. For a TCP/IP connection, select TCP/IP, enter the name or internet address of the host computer in the Connect To box, then click Configure for additional Telnet options. Refer to the TCP/IP Connection Settings section in chapter 2 for details. For a modem connection, select Modem, specify the communications port in the Connect To box, then click Configure to display configuration options. Refer to the Modem Connection Settings section in chapter 2 for details. For a serial connection, select Serial, specify the communications port in the Connect To box, then click Configure for additional serial options. Refer to the Serial Connection Settings section in chapter 2 for details. 5. When you have specified the required settings in the New Connection dialog box, click the Connect button to make the connection. Note: You can save these settings as a connection template using the Save Session As dialog box. Refer to the Setup Menus chapter for details. 8-2 BQ 3107 Emulation The Status Bar The status bar displayed along the bottom of the window will show the status of various operations. F1 F2 F3 F4 F5 F6 F7 F8 F9 F10 F11 F12 F13 F14 F15 Field 1: This will always display RUN, indiocating that the line shown corresponds to normal operation. Field 2: Indicates whether you are in Block or Character mode. In Block mode, keyboard entered data is displayed and processed locally, allowing you to edit it before a block of data is sent to the host. In Character mode, keyboard entered data is sent simultaneously to the host and the display. You can change the mode using the Operating Mode option in the BQ 3107 Settings dialog box. Field 3: This will display a bell symbol when the terminal emulation receives a BEL command from the host or when the user has pressed the wrong key. Field 4: Not used. Field 5: Displays ERR when an error is detected. Field 6: Displays BSY when the host is busy processing data. The keyboard will be locked when this is displayed. Field 7: This is used to display warning messages. Field 8: Not used. Field 9: Not used. Field 10: This will display P.DISCT when the printer is disconnected. Field 11: This will display OVERFLOW when there is a data overflow. Field 12: Indicates the current line and column position of the cursor relative to the top left corner of the display, which is L01:C01. Field 13: This will display the current terminal emulation mode, 3107. Field 14: This will display MESS when a message is waiting to be displayed on the status line. Field 15: This will display LINE when the emulation is online to the host, or LOCAL when in local mode. 8-3 BQ 3107 Emulation Keyboard Mapping The illustration on the following page shows where BQ 3107 keyboard functions are mapped to keys on the 101/102 key Enhanced AT keyboard layout. Special key functions that are provided on the BQ 3107 keyboard can be mapped to any key on your keyboard by using the BQ virtual key names listed in the Define Keyboard Macros dialog box. 8-4 FKC1 BLINK FKC7 FKC8 BACKSPACE FKC9 FKC10 FKC11 FKC12 LOCAL EXTND (D TAB) (S TAB) I LINE P RSET D MSG H MSG I CHAR HOME (L MSG) D LINE ER EOP NEXT ERASE D CHAR (E EOL) LINE Print Form Screen with Alt P FRM P PART (P SCR) [NUM] NUM All unmarked keys function as indicated by the legends on the keycaps. Functions in round brackets are generated when the keys are shifted. Functions in square brackets are generated when used with Alt. FKC6 FKC5 FKC4 IN RIS2 SYSTM ONLNE MENU FKC3 FKC1 FKC2 BLINK BLANK RESET IN PART Control key usage: Normal key usage: (BACKTAB) TAB (CLEAR) ESC TXMIT + , ( ) BQ 3107 Emulation Enhanced AT Keyboard Layout 8-5 BQ 3107 Emulation Notes 8-6 DG 410/412 Emulation 9 DG 410/412 Emulation This chapter describes the Data General D410/412 terminal emulation. Session Configuration WBT Mode This section describes the basic procedure for creating a session configuration when the terminal is in WBT mode. The options available are described in detail in chapter 2. 1. Click the Configure tab in the Terminal Connection Manager then click the Add button to display the New Connection dialog box. 2. Select Terminal Emulation Client and click OK. The Terminal Emulation Client Connection Wizard - Connection Information dialog box will be displayed. 3. Enter a name which will identify this session configuration for future selection in the Connection Name box. 4. Select the DG 410/412 terminal emulation in the Emulation list box. This emulation provides compatibility with software designed to drive the Data General D410/412 terminal. 5. Click Next to display the Host Information dialog box. For a TCP/IP connection, click the TCP/IP button, enter the name or internet address of the host computer in the Host Name box, then click Advanced for additional Telnet options. Refer to the TCP/IP Connection Settings section in chapter 2 for details. For a modem connection, click the Modem button then click Advanced to display configuration options. Refer to the Modem Connection Settings section in chapter 2 for details. 9-1 DG 410/412 Emulation For a serial connection, click the Serial button, specify the communications port in the Connect To box, then click Advanced for additional serial options. Refer to the Serial Connection Settings section in chapter 2 for details. Make the relevant selections then click OK to return to the Host Information dialog box, then click Next to display the Advanced Options dialog box. 6. Click Finish to return to the Terminal Connection Manager. 7. In the Terminal Connection Manager, display the Connections list, select the session name you specified earlier in step 3, then click the Connect button. Non-WBT Mode This section describes the basic procedure for creating a session configuration when the terminal is not in WBT mode. The options available are described in detail in the Setup Menus chapter. 1. Display the Settings menu from the command bar and select Emulation... to display the Emulation Settings dialog box. 2. Select the DG 410/412 terminal emulation in the Alpha Emulation list box. This emulation provides compatibility with software designed to drive the Data General D410/412 terminal. Click OK to close the dialog box. 3. Display the File menu from the command bar and select New Connection to display the New Connection dialog box. 4. Select the type of host connection required in the Type list box. For a TCP/IP connection, select TCP/IP, enter the name or internet address of the host computer in the Connect To box, then click Configure for additional Telnet options. Refer to the TCP/IP Connection Settings section in chapter 2 for details. For a modem connection, select Modem, specify the communications port in the Connect To box, then click Configure to display configuration options. Refer to the Modem Connection Settings section in chapter 2 for details. For a serial connection, select Serial, specify the communications port in the Connect To box, then click Configure for additional serial options. Refer to the Serial Connection Settings section in chapter 2 for details. 5. When you have specified the required settings in the New Connection dialog box, click the Connect button to make the connection. Note: You can save these settings as a connection template using the Save Session As dialog box. Refer to the Setup Menus chapter for details. 9-2 DG 410/412 Emulation Keyboard Mapping The illustration on the following page shows where DG 410/412 keyboard functions are mapped to keys on the 101/102 key Enhanced AT keyboard layout. Special key functions that are provided on the DG 410/412 keyboard can be mapped to any key on your keyboard by using the DG virtual key names listed in the Define Keyboard Macros dialog box. Key Functions Local Print The Local Print key is used to print the current window or initiate the Print Form operation. You can print the contents of the current window starting with the row containing the cursor by pressing the Local Print key on its own. Keyboard entered data will be ignored while the print is in progress. You can abort the print operation by pressing the Local Print key again. You can initiate the Print Form operation by holding down the Shift key then pressing Local Print. This performs the same function as Local Print pressed on its own, except that only data appearing at full intensity will be printed when protected text is disabled. When protected text is enabled, only unprotected text will be printed. Cursor Type This key enables you to change the appearance of the cursor. By default the cursor is displayed as a reverse video block. Pressing and releasing the Cursor Type key one or more times will cause the cursor display to change in the following order: Blinking underline Invisible cursor Blinking reverse video block Non-blinking reverse video block (default) N/C Pressing this key will cause the display of the current text region to toggle between normal and compressed character spacing mode. In normal mode the display is 81 columns wide. Pressing the N/C key once will change the display width to 135 columns. Note that the margins will not be affected by this key. 9-3 9-4 F13 F1 F14 F2 Alt key usage: Normal key usage: ESC F1 F13 F15 F3 F4 F6 F7 F8 F9 PRINT C4 ER PG EOL HOME C1 C2 DELETE C3 LOCAL (CURS) (N/C) PRINT SCROL HOLD F10 F11 F12 NUM LOCK CURS SCROL N/C ER PG EOL / * NEW LINE , _ = Cursor Type = Scroll Rate = Normal/Compressed = Erase Page = Erase To End Of Line All unmarked keys function as indicated by the legends on the keycaps. Functions in brackets are generated when the keys are shifted. F5 DG 410/412 Emulation Enhanced AT Keyboard Layout DG 410/412 Emulation Composing Characters The Data General D410 keyboard has a SPCL key which enables you to generate characters from the DG International character set. You can generate the same characters by using the method described for the DEC emulation. Refer to the Compose Character Sequences section in the Keyboard Configuration chapter for details. Key Codes The following table lists the decimal value of codes generated when keys that emulate those found on the Data General keyboard are pressed alone or in conjunction with the Shift and/or Ctrl keys. Note that each code shown is the second code generated when the key or key combination is pressed, the first always being the code RS (Hex 1E). F1 F2 F3 F4 F5 F6 F7 F8 F9 F10 F11 F12 F13 F14 F15 C1 C2 C3 C4 UP DOWN LEFT RIGHT HOME PRINT Key Shift + Key Ctrl + Key Ctrl + Shift + Key 113 114 115 116 117 118 119 120 121 122 123 124 125 126 112 92 93 94 95 17 97 98 99 100 101 102 103 104 105 106 107 108 109 110 96 88 89 90 91 23 26 25 24 8 1 49 50 51 52 53 54 55 56 57 58 59 60 61 62 48 - 33 34 35 36 37 38 39 40 41 42 43 44 45 46 32 - 9-5 DG 410/412 Emulation Notes 9-6 HP 700-92/96 Emulation 10 HP 700-92/96 Emulation This chapter describes features of the Hewlett Packard 700-92/96 terminal emulation. Session Configuration WBT Mode This section describes the basic procedure for creating a session configuration when the terminal is in WBT mode. The options available are described in detail in chapter 2. 1. Click the Configure tab in the Terminal Connection Manager then click the Add button to display the New Connection dialog box. 2. Select Terminal Emulation Client and click OK. The Terminal Emulation Client Connection Wizard - Connection Information dialog box will be displayed. 3. Enter a name which will identify this session configuration for future selection in the Connection Name box. 4. Select the HP 700-92/96 terminal emulation in the Emulation list box. This emulation provides compatibility with software designed to drive the Hewlett Packard 700/92, 2392A, 2622A, 70094 and 70096 terminals. 5. Specify the required HP Model setting: 70092 (default), 2392A, 2622A, 70094 or 70096. This identifies the particular terminal model being emulated in response to a terminal identification request from the host. 6. Click Next to display the Host Information dialog box. For a TCP/IP connection, click the TCP/IP button, enter the name or internet address of the host computer in the Host Name box, then click Advanced for additional Telnet options. Refer to the TCP/IP Connection Settings section in chapter 2 for details. 10-1 HP 700-92/96 Emulation For a modem connection, click the Modem button then click Advanced to display configuration options. Refer to the Modem Connection Settings section in chapter 2 for details. For a serial connection, click the Serial button, specify the communications port in the Connect To box, then click Advanced for additional serial options. Refer to the Serial Connection Settings section in chapter 2 for details. Make the relevant selections then click OK to return to the Host Information dialog box, then click Next to display the Advanced Options dialog box. 7. Click Finish to return to the Terminal Connection Manager. 8. In the Terminal Connection Manager, display the Connections list, select the session name you specified earlier in step 3, then click the Connect button. Non-WBT Mode This section describes the basic procedure for creating a session configuration when the terminal is not in WBT mode. The options available are described in detail in the Setup Menus chapter. 1. Display the Settings menu from the command bar and select Emulation... to display the Emulation Settings dialog box. 2. Select the HP 700-92/96 terminal emulation in the Alpha Emulation list box. This emulation provides compatibility with software designed to drive the Hewlett Packard 700/92, 2392A, 2622A, 70094 and 70096 terminals. Click OK to close the dialog box. 3. Display the HP Settings dialog box from the Settings menu and specify the required Terminal ID setting: 70092 (default), 2392A, 2622A, 70094 or 70096, then click OK to close the dialog box. 4. Display the File menu from the command bar and select New Connection to display the New Connection dialog box. 5. Select the type of host connection required in the Type list box. For a TCP/IP connection, select TCP/IP, enter the name or internet address of the host computer in the Connect To box, then click Configure for additional Telnet options. Refer to the TCP/IP Connection Settings section in chapter 2 for details. For a modem connection, select Modem, specify the communications port in the Connect To box, then click Configure to display configuration options. Refer to the Modem Connection Settings section in chapter 2 for details. For a serial connection, select Serial, specify the communications port in the Connect To box, then click Configure for additional serial options. Refer to the Serial Connection Settings section in chapter 2 for details. 10-2 HP 700-92/96 Emulation 6. When you have specified the required settings in the New Connection dialog box, click the Connect button to make the connection. Note: You can save these settings as a connection template using the Save Session As dialog box. Refer to the Setup Menus chapter for details. Display Configuration When you run the HP 700-92/96 emulation the following buttons will appear along the bottom of the display. These buttons indicate the current function of keys F1 through F8 on the keyboard and are described later in this chapter. The two numbers in the middle button indicate the current line and column position of the cursor. The display area is 80 columns wide by 24 lines deep by default, and 168 lines are stored off-screen. You can toggle between 80 and 132 column display by pressing the function key F12, and you can divide the display memory into 2, 4, 6 or 8 pages from the HP Settings dialog box, as described in the Setup Menus chapter. Keyboard Mapping The following illustration shows where HP 700-92/96 keyboard functions are mapped to keys on the 101/102 key Enhanced AT keyboard layout. Special key functions that are provided on the HP 700-92/96 keyboard can be mapped to any key on your keyboard by using the HP virtual key names listed in the Define Keyboard Macros dialog box. 10-3 10-4 F1 Normal key usage: F3 INSERT LINE F2 Control key usage: F1 F4 INSERT DELETE CLEAR CLEAR LINE LINE LINE PAGE F6 F7 F8 SOFT HARD RESET RESET MENU UKEY DEFS USYST UKEYS (SCR D) (SCR U) SCR = Scroll DELETE HOME NEXT CHAR DOWN PAGE INSERT HOME PREV MODE UP PAGE All unmarked keys function as indicated by the legends on the keycaps. Functions in brackets are generated when the keys are shifted. F5 SELECT TXMIT HP 700-92/96 Emulation Enhanced AT Keyboard Layout HP 700-92/96 Emulation Buttons & Function Keys The buttons along the bottom of the HP 700-92/96 window indicate the current function of keys F1 through F8 on the keyboard, each key and equivalent button having several functions within the emulation. The buttons and equivalent function keys enable selection of various operating modes and display configurations. Clicking a button has the same effect as pressing the equivalent F# key. When a key or button is attributed an on/off toggle action, the button will display an asterisk when the function is selected. The middle button displays the row and column position of the cursor. It has no other function. On entering HP 700-92/96 mode, the buttons and function keys enable various operating modes to be selected. The buttons will show the Mode Selection configuration. Mode Selection The Mode Selection functions are displayed when the HP 700-92/96 emulation is first entered. If the functions are changed while using the emulation, you can redisplay the Modes menu by pressing the F9 key (the equivalent of the HP 700-92/ 96 User System key), then F4. Line Modify - F1 This function enables you to edit and retransmit an incorrectly entered command string when the emulation is in Remote mode and Character mode and you are communicating interactively with the host. This saves you having to retype the entire string again. Note: This will not function when the emulation is in Block or Format mode. When the host causes an error message to be displayed indicating that the string has been incorrectly entered, press the F1 key or click the equivalent button. An asterisk will appear on the button indicating that the function is selected. Move the cursor to the line containing the error, edit the line then press Return or Enter. This will cause the edited string to be transmitted and Line Modify mode to be exited. If after activating Line Modify mode you wish to cancel it, just press F1 or click the button again. 10-5 HP 700-92/96 Emulation Modify All - F2 This is similar to the Line Modify F1 function described previously, the only difference being that the editing mode is not exited when Return or Enter is pressed. F2 and its equivalent button acts as a toggle key, switching the mode on or off. The setting may be saved by selecting Save Session in the File menu. The F2 Modify All key and button enables you to edit and retransmit an incorrectly entered command string when the emulation is in Character mode. This saves you having to retype the entire string again. Note: This will not function when the emulation is in Block or Format mode. When the host causes an error message to be displayed indicating that the string has been incorrectly entered, press the F2 key. An asterisk will appear on the button indicating that the function is selected. Move the cursor to the line containing the error, edit the line then press Return or Enter. This will cause the edited string to be transmitted. To exit Modify All mode, press F2 or click the button again. Note: Even though this function is a special form of Block mode it is completely separate from it and you do not need to enable Block mode before using the Modify All function. Block Mode - F3 Data may be transmitted to the host a character at a time or as a block of characters. The F3 key and equivalent button toggles the form of data transmission between Character mode and Block mode. The setting may be saved by selecting Save Session in the File menu. The emulation is in Character mode when the button does not display an asterisk. Each character will be sent to the host as it is entered at the keyboard. When Block mode is activated (as indicated by an asterisk), data entered at the keyboard will not be sent to the host until the Enter key is pressed. In this mode, displayed text may be edited locally before it is transmitted to the host. Control codes such as CR (carriage return) and LF (line feed) are acted upon locally and are not transmitted to the host when Enter is pressed. Remote Mode - F4 The current setting of this button determines whether pressing an alphanumeric key causes a character to be sent to the host (remote) or only to the display (local). The button and F4 key toggles between Remote mode and Local mode. The setting may be saved by selecting Save Session in the File menu. The emulation is in Local mode when the button does not display an asterisk. Pressing alphanumeric keys will cause characters to be sent to the display only. When Remote mode is activated (as indicated by an asterisk), pressing alphanumeric keys will cause characters to be sent to the host. 10-6 HP 700-92/96 Emulation Terminal Test - F5 When this button or F5 key is pressed, the HP 700-92/96 emulation will perform a self-test and display a test screen showing all the displayable characters. Memory Lock - F6 This enables data to be locked on the display so that it is not scrolled off the top of the window when display memory is full. Once enabled, it can only be disabled if this button or F6 key is pressed again, a reset is performed, or the emulation is exited. Placing the cursor on the first line and enabling Memory Lock will prevent data from automatically scrolling off the top of the display when display memory is full. Instead, the message 'MEMORY FULL Press RETURN to clear' will be displayed. You may use the cursor keys to edit data already displayed. To disable the Memory Lock and continue entering new data, press F6 or click the button again and position the cursor immediately below the last line. The Memory Lock function may also be used to lock a specific number of lines from the top of the display, leaving the remaining lines to scroll past them. This is useful when you want column headings or instructions to remain on the display. To lock a specific number of lines, place the cursor on the last line to be locked and press F6 or click the button. The lines from the top of the display down to the cursor line will now be locked. Note: You can edit data contained in locked lines but if new data is inserted it may cause data on the last line of the locked region to be pushed down into the scrolling region. Display Functions - F7 This button and the F7 key toggles the Display Functions mode on or off. The effect of activating Display Functions mode depends on whether the emulation is in Local or Remote mode. In Local mode, activating Display Functions mode will cause subsequently received control codes and escape sequences to be displayed on the screen but not actioned. Exceptions to this rule are the commands issued when the button or F7 key is pressed and the carriage return and line feed commands, which will be executed. In Remote mode, activating Display Functions mode will cause subsequently received control codes and escape sequences to be transmitted to the host but not actioned locally. Exceptions to this rule are the commands issued when the button or F7 key is pressed and the carriage return and line feed commands, which will be executed. If the Local Echo option is enabled in the HP Settings dialog box (see the Setup Menus chapter), commands will be displayed on the screen as well as transmitted to the host. Note: If the XmitFnctn (A) option is selected in the HP Settings dialog box, the button and F7 key will not deactivate Display Functions mode. 10-7 HP 700-92/96 Emulation Auto LF - F8 This button and the F8 key enables or disables Auto Line Feed mode. When enabled, a line feed command is automatically appended to every carriage return command generated from the keyboard. The setting may be saved by selecting Save Session in the File menu. Configuration Selection This set of function buttons is displayed by pressing the F9 key (which is equivalent to the HP 700-92/96 User System key). These functions enable you to access three other sets of function labels. Device Control - F1 Clicking this button or pressing F1 will cause the Device Control function labels to be displayed. The buttons and keys F1 through F8 will function as described in the following section entitled Device Control. Margins/Tabs/Col - F2 Clicking this button or pressing F2 will cause the Margins/Tabs/Col function labels to be displayed. The buttons and keys F1 through F8 will function as described in the section entitled Margins, Tabs & Start Column. Modes - F4 Clicking this button or pressing F4 will cause the Mode Selection function labels to be displayed. The buttons and keys F1 through F8 will function as described in the previous section entitled Mode Selection. Device Control This set of function buttons is displayed by pressing the F9 key (which is equivalent to the HP 700-92/96 User System key) then F1. These functions enable you to select the device(s) to which data is sent and also to copy portions of data from display memory to the printer. 10-8 HP 700-92/96 Emulation Device Modes - F1 Clicking this button or pressing F1 will cause the Device Modes function labels to be displayed. The keys F1 through F8 will function as described in the following section entitled Device Modes. To Ext Dev - F2 This toggle function determines whether data is sent to the printer or not. Data will be sent to the printer when an asterisk is displayed on this button. To Display - F3 This toggle function determines whether data is sent to the display or not. Data will be sent to the display when an asterisk is displayed on this button. Advance Page - F4 When a printer is connected and enabled by the To Ext Dev function, clicking this button or pressing F4 will cause paper in the printer to be advanced to the top of the next page. Advance Line - F5 When a printer is connected and enabled by the To Ext Dev function, clicking this button or pressing F5 will cause paper in the printer to be advanced by one line. Copy All - F6 When a printer is connected and enabled by the To Ext Dev function, clicking this button or pressing F6 will cause a copy of all lines from and including the cursor line to the last line in display memory to be sent to the printer. The cursor will move to the leftmost column on the next line when the current line has been printed. You can cancel printing at the end of the current line by pressing Return. Note: If the cursor is positioned on a line below the last displayable line of data, nothing will be sent to the printer. Copy Page - F7 When a printer is connected and enabled by the To Ext Dev function, clicking this button or pressing F7 will cause a copy of all lines from and including the cursor line to the last line displayed on the screen to be sent to the printer. The cursor will move to the leftmost column on the next line when the current line has been printed. You can cancel printing at the end of the current line by pressing Return. Note: If the cursor is positioned on a line below the last displayable line of data, nothing will be sent to the printer. 10-9 HP 700-92/96 Emulation Copy Line - F8 When a printer is connected and enabled by the To Ext Dev function, clicking this button or pressing F8 will cause a copy of the line containing the cursor to be sent to the printer. The cursor will move to the leftmost column on the next line when the line has been printed. Note: If the cursor is positioned on a line below the last displayable line of data, nothing will be sent to the printer. If the cursor is positioned on an empty line between two blocks of data, the printer will perform a carriage return and line feed. Device Modes Device Control - F1 Clicking this button or pressing F1 will cause the Device Control function labels to be displayed, enabling you to select the device(s) to which data is sent and also to copy portions of data from display memory to the printer. The buttons and keys F1 through F8 will function as described in the previous section entitled Device Control. Record Mode - F2 This is used to copy data received from the host to the printer and/or display, depending on the setting of the To Ext Dev and To Display labels in the Device Control menu. Note: This function does not take effect when the emulation is in Local mode. In Remote mode, received data is sent directly to the selected device(s). The keyboard will be disabled when Record mode is activated except for the F2 key which is used to exit the mode. Log Bottom - F3 When the cursor moves to the next line as a result of an explicit line feed or end-ofline wraparound, the line of data which the cursor has just moved from will be sent to the printer when this function is activated. This enables you to create a hardcopy of all the lines in the order in which they were entered via the keyboard or received from the host. Note: Both the emulation and the host must be using the ENQ/ ACK or Xon/Xoff handshakes or a baud rate that is no higher than the rate supported by the printer. 10-10 HP 700-92/96 Emulation Log Bottom remains activated until either this button or F3 is pressed again, Log Top is activated, a reset is performed, or the emulation is exited. Log Top - F4 When the display memory becomes full and more data is received from the host or keyboard, lines of data from the top of the display are deleted to make way for the new data. The Log Top function enables the data that is removed from the top of the display to be sent to the printer when the To Ext Dev function is activated in the Device Control menu. Note: Both the emulation and the host must be using the ENQ/ ACK or Xon/Xoff handshakes or a baud rate that is no higher than the rate supported by the printer. Log Top remains activated until either this button or F4 is pressed again, Log Bottom is activated, a reset is performed, or the emulation is exited. Note: This function does not take effect when Memory Lock is activated. Margins, Tabs & Start Column This set of function buttons is displayed by pressing the F9 key (which is equivalent to the HP 700-92/96 User System key) then F2. These functions enable you to redefine the start column, set tabs, and specify the left and right margins. Start Column - F1 This function is used to temporarily redefine the start column for transmitted data when no logical start-of-text pointer is present and the Return or Enter keys are pressed in Modify Line or Modify All mode. Note: The default start column is specified in the HP Settings dialog box. Refer to the Setup Menus chapter for details. Usually a start-of-text pointer is automatically generated to designate the leftmost character in the current line if it is the last line of data in display memory. The pointer will remain in display memory until the line is deleted. If the line has no start-of-text pointer, data transmission will begin at the start column specified by this option. The column range that can be specified is from 1 to 80, inclusive. 10-11 HP 700-92/96 Emulation To change the current start column, move the cursor to the new starting point and click this button or press the F1 key. The start column will revert to that specified within setup when the emulation is reset or re-entered. Set Tab - F2 This function enables tab stops to be defined. To define a tab stop, move the cursor to the column to contain the tab and click this button or press F2. Note: Tab stops that do not lie within the left and right margins will be ignored when the Tab key is pressed. All tab stops will be ignored when the emulation is in Format mode. Clear Tab - F3 This function enables an individual tab stop to be cleared. To clear a tab stop, move the cursor to the column containing it and click this button or press F3. Clr All Tabs - F4 Clicking this button or pressing F4 will cause all defined tab stops to be cleared (except the left margin which is an implicit tab stop). Left Margin - F5 This function enables you to define the left margin. Margins determine the boundary for certain cursor movement commands (such as carriage return and cursor home), and insert character and delete character functions. Data to the left of this margin will still be accessible. The left margin is an implicit tab stop. When data received from the host or entered through the keyboard reaches the right margin, the cursor will move to the specified left margin on the next line down (as long as InhEolWrp is not selected in the HP Settings dialog box and, in the case of keyboard-entered data, auto line feed mode is enabled). To specify the left margin, place the cursor in the column for the margin location and click this button or press F5. The left margin can be reset to column 1 by pressing F7 (this will also reset the right margin to column 80). Note: Margins are disregarded when data is transferred from display memory to the host. The margins will be cleared when Format mode is enabled. Right Margin - F6 This function enables you to define the right margin. Margins determine the boundary for certain cursor movement commands (such as carriage return and cursor home), and insert character and delete character functions. Data to the right of this margin will still be accessible. 10-12 HP 700-92/96 Emulation When data received from the host or entered through the keyboard reaches the specified right margin, the cursor will move to the left margin on the next line down (as long as InhEolWrp is not selected in the HP Settings dialog box and, in the case of keyboard-entered data, auto line feed mode is enabled). To specify the right margin, place the cursor in the column for the margin location and click this button or press F6. The right margin can be reset to column 80 by pressing F7 (this will also reset the left margin to column 1). Note: Margins are disregarded when data is transferred from display memory to the host. The margins will be cleared when Format mode is enabled. Clr All Margins - F7 This function will reset both left and right margin settings so that the left margin is in column 1 and the right margin in column 80. Key Programming The keys F1 through F8 and their equivalent buttons can be programmed by the host or user to perform additional functions to those described in the previous section. The keys may be assigned a string of alphanumeric characters and/or control codes, and you can define whether the key string is executed locally or transmitted to the host, or both. The buttons can also be programmed to display the new functions when in User Keys mode. User Keys mode is entered by pressing the F10 key. The f-key buttons displayed on the screen will change to display the current User Key definitions. If no definitions have been assigned, either by you or the host, the buttons will just display the legends of each f-key as shown below. To define the function of an f-key or equivalent button locally, press the keys Shift + F10 to display the User Key Definition menu as shown overleaf. The menu can be exited by pressing F9. Default Definitions While this menu is displayed the f-keys and equivalent buttons have the functions shown by the buttons at the bottom of the window, so pressing F4 or the Default Values button will cause the default key and button definitions to be asserted. The default definitions will take effect once the User Key Definition menu is exited. 10-13 HP 700-92/96 Emulation Key String Treatment Each f-key and button definition displayed in the menu consists of two lines. The first line begins with the f-key number followed by space then a one-character attribute field. This field will contain either an uppercase L, T or N. These characters indicate the following: L : T : N : The key string is executed locally. The key string is transmitted to the host only. The key string is treated as keyboard-entered data. The default selection is T for all f-keys. To change this setting, use the Tab or Shift + Tab keys to move the cursor over the field then press F2 (Next Choice button) or F3 (Previous Choice button) to cycle through the options until the one required is displayed. Function Indicator The remainder of the first line is used to specify what is displayed on the screen button to indicate its function. The default display shows the numbers of the f-keys. The two fields following LABEL represent the upper and lower lines that can be displayed on the button. To change the current definition, use the Tab or Shift + Tab keys to move the cursor into the relevant field and type in the new definition which can consist of a maximum of 16 characters, eight characters per field. 10-14 HP 700-92/96 Emulation Key String Definition The second line of each f-key definition contains the character string that is to be displayed, executed, and/or transmitted to the host when the key or button is pressed. The string may contain alphanumeric characters, control characters, and explicit escape sequence characters entered when Display Functions mode is enabled by pressing F7 or the Display Functns button. The default f-key string begins with the characters EC which represent the escape code that is used to begin each escape sequence. The EC characters are displayed in the key definition line by pressing the Esc key or the keys Ctrl + [ together when Display Functions mode is enabled. Note that you must enter the entire escape sequence before disabling Display Functions mode (by pressing F7 again). When Display Functions is enabled, the Return key may be used to insert carriage return codes (CR) in the string. If Auto LF mode is selected in the Mode Selection function menu, Return will generate a line feed (LF) code as well as carriage return. To change an f-key/button string definition, use the Tab or Shift + Tab keys to move the cursor onto the second line (the line following LABEL definition for that key/ button) and type in the new definition which can consist of a maximum of 80 characters. When you have finished defining f-key/button strings, press the F9 key to exit the menu. To enable the new definitions and display the relevant functions on the buttons, press the F10 key. Note: The host may reset the f-key definitions to their default values if required by the application. 10-15 HP 700-92/96 Emulation Character Display Attributes The HP 700-92/96 emulation incorporates various display attributes which can be enabled by host commands or from the keyboard by the user. These attributes are listed in the table below. When an attribute or set of attributes are enabled, they affect all subsequently displayed characters until an end attribute command or another attribute command is received, or the end of the line is reached. Attributes remain at the display location where they were enabled and will not move when characters are inserted or deleted. You can configure the f-keys and buttons so that they will enable these attributes when pressed. To do this, display the User Key Definition menu by pressing the keys Shift + F10 together. Use the Tab or Shift + Tab keys to position the cursor in the first field next to the number of the f-key to be defined and press F2 until the letter L for Local is displayed. Press Tab and type in the text that will appear in the display label for the key, for example, Under in the first field and Line in the second for Under Line. Press Tab to move down to the next line. Press F7 to enable Display Functions mode then press Ctrl + [ together or the Esc key, followed by the characters &d and the attribute character, which for underline is D. The key definition should look like this if the F1 key was defined to enable the underline attribute: For any other attribute or combination of attributes, substitute the last character in the second line (D in the example above) with the relevant character from the following table. @ A B C D E F G H I J K L M N O S Half-Brightness Underline Inverse Video Flashing Invisible End Attribute When you have finished assigning character attribute commands to f-keys, press F9 to exit from the User Key Definition menu then F10 to enable the User Keys and display the defined attribute labels. 10-16 IBM 3270 Emulation 11 IBM 3270 Emulation This chapter describes features of the IBM 3270 terminal emulation. Introduction The IBM 3270 emulator provides emulation of all four models of the IBM 3278 alphanumeric terminal and also supports the IBM 3287-1 printer. The terminal emulation supports Extended Attribute mode which allows different representation of highlighted fields and permits host definition of text colours. (Note that you can modify colours using the Attribute Settings dialog box but they cannot be saved as colours are mapped differently in this mode.) The emulation also includes typeahead capability so that you can continue to enter data without waiting for a prompt from the host. Session Configuration WBT Mode This section describes the basic procedure for creating a session configuration when the terminal is in WBT mode. The options available are described in detail in chapter 2. 1. Click the Configure tab in the Terminal Connection Manager then click the Add button to display the New Connection dialog box. 2. Select Terminal Emulation Client and click OK. The Terminal Emulation Client Connection Wizard - Connection Information dialog box will be displayed. 3. Enter a name which will identify this session configuration for future selection in the Connection Name box. 4. Select the IBM 3270 terminal emulation in the Emulation list box. 11-1 IBM 3270 Emulation 5. Select the IBM 3270 Model which determines the size of the display and whether or not extended attributes are supported. One of four display sizes can be selected: 3278/9-2 3278/9-3 3278/9-4 3278/9-5 24 rows by 80 columns 32 rows by 80 columns 43 rows by 80 columns 27 rows by 132 columns Settings with the E extension provide support for the following extended attributes: 3270 field attributes, extended highlighting (blink, flash and underscore, but not in combination), foreground colour, and query reply inbound structured fields. These attributes are also supported by the 3279. 6. Specify if you want the right or left Control keys to perform the same function as the keypad Enter or Reset keys, respectively. 7. Click Next to display the Host Information dialog box. For a TCP/IP connection, click the TCP/IP button, enter the name or internet address of the host computer in the Host Name box, then click Advanced for additional Telnet options. Refer to the TCP/IP Connection Settings section in chapter 2 for details. For a modem connection, click the Modem button then click Advanced to display configuration options. Refer to the Modem Connection Settings section in chapter 2 for details. For a serial connection, click the Serial button, specify the communications port in the Connect To box, then click Advanced for additional serial options. Refer to the Serial Connection Settings section in chapter 2 for details. Make the relevant selections then click OK to return to the Host Information dialog box, then click Next to display the Advanced Options dialog box. 8. Click Finish to return to the Terminal Connection Manager. 9. In the Terminal Connection Manager, display the Connections list, select the session name you specified earlier in step 3, then click the Connect button. Non-WBT Mode This section describes the basic procedure for creating a session configuration when the terminal is not in WBT mode. The options available are described in detail in the Setup Menus chapter. 1. Display the Settings menu from the command bar and select Emulation... to display the Emulation Settings dialog box. 2. Set the Alpha Emulation option to IBM3270, then click OK. The terminal will now be in Network Virtual Terminal mode. 11-2 IBM 3270 Emulation 3. Display the IBM 3270 Settings dialog box if you wish to change the setting of the IBM 3270 Model option which determines the size of the display and whether or not extended attributes are supported. One of four display sizes can be selected: 3278/9-2 3278/9-3 3278/9-4 3278/9-5 24 rows by 80 columns 32 rows by 80 columns 43 rows by 80 columns 27 rows by 132 columns Settings with the E extension provide support for the following extended attributes: 3270 field attributes, extended highlighting (blink, flash and underscore, but not in combination), foreground colour, and query reply inbound structured fields. These attributes are also supported by the 3279. Click OK to close the dialog box. 4. Select Save Session in the File menu. 5. Select New Connection in the File menu to display the New Connection dialog box. 6. Select the type of host connection required in the Type list box. For a TCP/IP connection, select TCP/IP, enter the name or internet address of the host computer in the Connect To box, then click Configure for additional Telnet options. Refer to the TCP/IP Connection Settings section in chapter 2 for details. For a modem connection, select Modem, specify the communications port in the Connect To box, then click Configure to display configuration options. Refer to the Modem Connection Settings section in chapter 2 for details. For a serial connection, select Serial, specify the communications port in the Connect To box, then click Configure for additional serial options. Refer to the Serial Connection Settings section in chapter 2 for details. 7. When you have specified the required settings in the New Connection dialog box, click the Connect button to make the connection. 8. If necessary, enter the appropriate information to establish an IBM host session in the Network Virtual Terminal mode screen. 9. When an IBM host session has been established, the screen will switch out of Network Virtual Terminal mode and display the IBM 3270 emulation screen. Note: You will be returned to the Network Virtual Terminal screen when the connection to the IBM host has been closed. 11-3 IBM 3270 Emulation Network Virtual Terminal Mode Network Virtual Terminal (NVT) mode allows the operator to communicate with a network gateway (in ASCII) for routing, logon etc, before the full IBM terminal emulation protocol is established. NVT mode is indicated by the ? symbol in the status line along the bottom of the display. NVT mode displays an unformatted screen for data entry, allowing most of the keyboard functionality for local editing. However, when the Enter key is pressed, the line that the cursor is positioned on will be sent over Telnet as an ASCII string with CR/LF terminators. The cursor will then be positioned at the start of the next line. ASCII data received over Telnet will also be displayed at the current cursor position. A CR character will be actioned as a 'new line' character, causing the cursor to move to the start of the next line, scrolling the display if necessary. Once the appropriate details have been entered to establish an IBM host session (which may be automatic), the screen is cleared and switched into full IBM 3270 terminal emulation mode, as indicated by the symbol in the status line. IBM 3287-1 Printer Support TN3287 printing is supported by setting the IBM 3270 Model option in the IBM 3270 Settings dialog box to 3287-1. When a new Telnet connection is made, the display will change to show a message box which will indicate the current printer status. When printing commences a Print Abort box will be displayed enabling you to cancel the print job. Note that this will stop print data being sent but will not disconnect you from the host. SysReq Key Support When the SysReq option in the Telnet Options dialog box is selected, the key mapped with the SysReq function enables you to toggle the display and keyboard entries between the host operating system and the application. This enables you to switch to the operating system and issue a LOGOFF command. When communicating with the operating system the status line will display the symbol. Note: Not all TN3270E servers provide full support of the SysReq key. 11-4 IBM 3270 Emulation The Status Line The last line in the window is used to display status information in the form of symbols and alphanumeric characters. A coloured line separates status information from the rest of the display. Information is displayed in any of nine regions within the status line as listed below. 1: Readiness & System Connection Symbol Colour Column Meaning T A Blue Blue Blue Blue Blue 1 2 3 3 3 Telnet session running Online (non-SNA) Network Virtual Terminal mode My job (IBM emulation screen) Host operating system mode Colour Column Meaning Yellow White Red Red White Red 10-18 10-13 10-15 10-14 10-17 10-13 Program check (nnn = error code) Terminal wait Numeric data only Go elsewhere System lock Too much ? 2: Do Not Enter Symbol PROGnnn NUM SYSTEM > 3: Typing Direction Symbol Colour Column Meaning => <= Blue Blue 19 19 Typing direction left-to-right Typing direction right-to-left 4: Bilingual Keyboard Mode Symbol Colour Column Meaning N L Blue Blue 20 20 National character set mode Latin character set mode 5: TN3270E Device Name Symbol Colour Column Meaning dddddddd White 22-29 TN3270E actual device name connected as 11-5 IBM 3270 Emulation 6: Shift Symbol Colour Column Meaning NUM Blue 43-45 Numeric lock on Symbol Colour Column Meaning ^ Blue 53 Insert mode on Colour Column Meaning Blue Blue 73 73 Normal display Right-to-left mirror display 7: Mode Symbol 8: Display Direction Symbol 9: Cursor Position Symbol Colour Column Meaning rr/cc or rr/ccc White 75-80 Row/column cursor position Readiness & System Connection T This indicates that a Telnet session is running. A This indicates that the protocol for communication between an application program and the IBM 3270 emulation is not system network architecture (SNA). ? This indicates that the current screen is a Network Virtual Terminal screen. This screen is displayed when IBM 3270 mode is entered before a telnet session has been initiated with the remote host. This enables you to enter login text. Note that you will be returned to this screen when you log off. This indicates that the current screen is an IBM 3270 screen. This screen will be displayed when you have initiated a Telnet session with the host. This indicates that you are currently communicating with the host operating system, not the application. 11-6 IBM 3270 Emulation Do Not Enter The Do Not Enter ( ) symbol will appear when input from the keyboard or mouse will not be accepted by the host (except Reset and SysReq). Symbols to the right of this will indicate the reason. Pressing the Reset key will remove some of these symbols from the status line. Note that the emulation includes typeahead capability so that in most cases you can continue to enter data without waiting for the Do Not Enter message to clear as the data will be stored until the host is ready. PROGnnn Indicates that a programming error in the data from the host has been detected, possibly due to incompatible application software. Press the Reset or SysReq key to remove this indicator and unlock the keyboard. Indicates that you must wait while the requested function is performed. NUM Indicates that you tried to enter an invalid character into a numeric field when the numeric-lock feature was active. The keyboard numeric-lock feature can be overridden by using a Shift key. The keyboard can be unlocked and the indicator removed by pressing the Reset key. Indicates that you tried to enter data in the wrong location. This will occur when you attempt to do any of the following: Enter, insert, erase, or delete a character when the cursor is in a protected field or at a field attribute location. Perform a cursor-select operation when the cursor is not in a valid cursor-select field. The keyboard can be unlocked and the indicator removed by pressing the Reset key. SYSTEM > Indicates that you cannot enter any data because the application program has disabled the keyboard following an entry. Indicates that you attempted to insert characters into an unprotected field when the cursor was at the end of the field, or you attempted to word wrap to the next line when there were not enough spaces to enable a word wrap. The keyboard can be unlocked and the indicator removed by pressing the Reset key. 11-7 IBM 3270 Emulation Typing Direction => or <= This indicates the direction in which characters are displayed on the screen when typed. The direction is toggled between left-toright (normal) and right-to-left by pressing the keys Shift + / on the keypad. Bilingual Keyboard Mode N or L This indicates whether the National (N) or Latin (L) character set is active when a code page that supports a bilingual keyboard is selected. Pressing the keys Shift + - on the keypad will toggle between the two character sets. Shift NUM This indicates that the numeric lock function is enabled and the current cursor is in a numeric field. When the numeric lock function is on, the current cursor is in an unprotected field and the keyboard is in lowercase shift, you can only use the 0 to 9, decimal sign (.), minus (-), and Dup keys. Mode Symbol ^ This symbol indicates that the keyboard is in Insert mode. Already existing characters to the right of the cursor will move to make room for new characters that are entered. Insert mode can be disabled by pressing the Reset or SysReq key, or by performing any action that sends data to the host, such as pressing the Enter, Clear, PA, or PF keys. Display Direction or 11-8 This indicates the orientation of the screen display. A right arrow indicates normal left-to-right display, a left arrow indicates a right-to-left mirror image display. The display can be toggled between the two directions by pressing the keys Shift + Backspace. IBM 3270 Emulation Text Display Options Display Right-to-Left The contents of the screen can be displayed in reverse, i.e. as a right-to-left mirror image, by pressing the keys Shift + Backspace. This is a toggle function, so pressing the keys again will revert to normal left-to-right display. An arrow will be displayed on the status line to indicate normal (right arrow) or mirror (left arrow) display. Typing Direction The direction in which characters are displayed on the screen when typed can be toggled between normal left-to-right and right-to-left by pressing the keys Shift + / on the keypad. The characters => or <= will be displayed on the status line to indicate the current typing direction. Selecting the Symbol Swap option in the IBM 3270 Settings dialog box will cause symbols such as round or angle brackets to be displayed the correct way round when typing right-to-left. Close Key If text has been typed using both typing direction modes in the same line or field, you can force the right-hand text to join the left-hand text by pressing the keys Shift + * on the keypad. Push Mode Push mode allows you to edit text whose direction is opposite the screen orientation. In this mode the cursor orientation is reversed and a Push segment is created. Push mode is toggled on/off by pressing the keys Ctrl + Shift + - (keypad minus). Push mode has two secondary modes, Boundary mode and Edit mode. Boundary mode is activated when Push mode is entered. The cursor will remain at its current position while you type additional characters, and text will be pushed in the opposite direction of the screen orientation. Edit mode is activated when the cursor is moved from its Boundary position into the Push segment area. In this mode, text can be edited within the Push segment while typing in the field's natural direction. Bilingual Keyboard Support When a code page that supports a bilingual keyboard is selected, you can toggle between the National and Latin character set by pressing the keys Shift + - on the 11-9 IBM 3270 Emulation keypad. The character N or L will be displayed on the status line to indicate which character set is currently active. Selecting the Numeral Swap option in the IBM 3270 Settings dialog box will cause all numbers to be displayed using the National character set when in Latin character set mode. Alternate Code Page If a language supports two code pages (e.g. Hebrew New Code and Hebrew Old Code), you can switch between the two by pressing the keys Ctrl + Shift + Alt + - on the numeric keypad. This function can be assigned to a different key or key combination by using the IB_ALTCP virtual key name. Keyboard Mapping The illustration on the following page shows where IBM 3270 keyboard functions are mapped to keys on the 101/102 key Enhanced AT keyboard layout. Special key functions that are provided on the IBM 3270 keyboard can be mapped to any key on your keyboard by using the IB virtual key names listed in the Define Keyboard Macros dialog box. 11-10 QUIT > ) PRINT SYSRQ > Generates Field Tab with Ctrl. (F17) (F18) RECRD PLAY (F19) (F20) F5 F6 F7 F8 MONO = Mono Case CRSEL = Cursor Select NEWLINE (REVERSE DISP) BACKSPACE (F21) (F22) (F23) F9 F10 F11 F12 FLCR = Flashing Cursor ALTCR = Alternate Cursor (CRSEL) [(FLCR)] [(ALTCR)] (F24) (PAUSE) CLEAR P WRD N WRD P WRD = Previous Word N WRD = Next Word (DUP) (FIELD ZOOM MARK) (PA3) INS HOME PA1 D WRD ER INP RULE (EOL) (COPY) DEL ER EOF PA2 with Ctrl + Shift: NB COPY with Ctrl: JUMP PRINT SYSRQ 5 0 2 1 INSERT 4 E EOF + _ 3 ENTER DEL . 6 PA2 9 7 * PA1 HOME 8 / (TYPE (CLOSE [(PUSH)] DIRECT) TEXT) (NAT/LAT) D WRD = Delete Word ER INP = Erase Input ER EOF = Erase EOF All unmarked keys function as indicated by the legends on the keycaps. Functions in round brackets are generated when the keys are shifted. Functions in square brackets are generated when used with Ctrl. (F13) NB SET FN EDIT MONO (F14) (F15) (F16) F1 F2 F3 F4 Alt key usage: Normal key usage: < ( < (ATTN) RESET IBM 3270 Emulation Enhanced AT Keyboard Layout 11-11 IBM 3270 Emulation Record & Playback Keystrokes Facility The record/playback keystrokes facility enables you to eliminate repetitive operations by using the Fn keys to store, retrieve and display data. The Fn keys can store a total of 1500 keystrokes. A sequence of recorded keystrokes may be interrupted so that keystrokes can be entered manually before continuing with the recording or playback. Note that local Fn key functions cannot be recorded. The keys used to initiate recording and playback are shown below together with the equivalent virtual key names which can be used to assign the functions to any key on the keyboard: Record: Pause: Quit: Play: Edit: 101/102 Key Keyboard Virtual Key Names Alt + F7 Shift + Pause Alt + Escape Alt + F8 Alt + F3 IB_RECORD IB_PAUSE IB_QUIT IB_PLAY IB_FEDIT Recording Keystrokes 1. Press Record to enter Record mode. The status line will display RECRD and a number from 0-1500 indicating the number of new keystrokes that may be stored. A series of boxes displayed to the right represent the Fn keys. A solid box indicates that the Fn key in that position is currently storing recorded keystrokes. 2. Press the Fn key which will store the keystrokes. (On 101/102 keyboards you can also use Shift + Fn.) The status line will display R**** F* where R indicates you are in Record mode, **** is the number of keystrokes that may be stored, and F* is the number of the Fn key pressed. Note: If you press a pre-recorded Fn key, its contents will be replaced with the following keystrokes. You can also remove the contents of the Fn key before recording by pressing the Delete key. 3. Enter the keystrokes to be recorded. You may pause recording at any time to allow keystrokes to be entered manually when played back by pressing Pause. To continue recording, press Pause again. Note: You can cancel the newly recorded keystrokes by pressing the Quit key. This cancellation does not affect the previously recorded keystrokes. 11-12 IBM 3270 Emulation 4. To finish and save the recording, press the Record key. Playback Keystrokes You can play back the contents of an Fn key as normal or one keystroke at a time. The following procedure describes normal play back. For one keystroke play back, select Single Step Macros in the Notice Board Setup dialog box. 1. Position the text cursor where the playback is to start. 2. Press the Play key to enter Play mode. The status line will display PLAY and a series of boxes representing the Fn keys. A solid box indicates that the Fn key in that position is currently storing recorded keystrokes. 3. Press the Fn key storing the recorded data to play back. Playback will begin immediately, as indicated by a P on the status line. All the recorded keystrokes will be played back automatically. When playback is completed the P will disappear. If the recorded keystrokes included Pause, then playback will halt at that point to allow you to enter keystrokes manually. Press Play to resume playback from where you stopped typing. If you want to cancel during the playback operation, press the Quit key. Editing Macros 1. Press Alt + F3. 2. Press the Fn key containing the macro to be edited. The status line will display information about the Fn key macro as follows: Item 1: Displays EDIT or INSERT depending on the current mode. Item 2: Indicates the number of new keystrokes that may be stored. Item 3: Displays the current Fn key number. Item 4: Displays the cursor position within the macro (i.e. the number of keystrokes from the start of the macro). Item 5: Displays the contents of the macro. 11-13 IBM 3270 Emulation 3. Use the Left or Right cursor keys to move the cursor one character position at a time through the macro, or the Up or Down cursor keys to move 20 character positions at a time. 4. If required, press the Insert key to toggle between Insert and Edit mode, as indicated in the status line. 5. Make the required changes to the macro. 6. To save the edit, press Alt + F3. 7. Press Quit to exit. Error Codes The following error codes may appear on the status line if an error occurs during recording or playback. 9001 Exceeded the maximum number of allowed keystrokes. Remedy: Press the Record key to exit Record mode. To record a new keystroke sequence, either: a) Press the Record key and the target Fn key that has erasable data, then enter the new data. b) Press the Record key and the target Fn key that has erasable data, then press the Delete key to erase the recorded data for that key. 9003 You pressed an invalid Fn key while performing the Record or Play function. Remedy: Press the Reset key. 9007 You pressed an invalid sequence key (e.g. Play) while performing the Record function. Remedy: Press the Reset key. 9010 While performing the Play function, you pressed an Fn key that does not have a keystroke assigned to it. Remedy: Press the Reset key. 9015 In communication mode, you pressed either the Quit or Pause key. Remedy: Press the Reset key. 11-14 IBM 3270 Emulation 9019 In Record or Play mode. While the Record/play pause indicator was displayed on the status line you pressed an invalid key (e.g. Play key in Record mode, or Record key in Play mode). Remedy: Press the Reset key. Notice Board Facility Introduction The Notice Board is an area of the display in which copied data can be stored and manipulated. When the Notice Board is enabled (see Notice Board Setup dialog box), pressing the Zoom key will toggle the display between full screen (i.e. the screen currently containing the cursor) and split screen (host screen and Notice Board) mode. The Zoom Settings options in the Notice Board Setup dialog box determine which screen is displayed above the other. When viewing the display, pointers at each end of the dividing line between the two screens indicate which is the host screen. Key Functions The keys used by default for Notice Board functions are shown below together with the equivalent virtual key names which can be used to assign the functions to any key on the keyboard. NB Setup: Zoom: Jump: NB Copy: Copy: 101/102 Key Keyboard Virtual Key Names Alt + F2 Alt + Page Up Ctrl + Page Up Ctrl + Shift + Page Up Shift + Page Down IB_NB_SETUP IB_NB_ZOOM IB_NB_JUMP IB_NB_COPY IB_COPY Copying Screen Data To The Display 1. Position the text cursor at the start of the area to be copied. 2. Press the Copy key to start the Copy function. Note that the status line will display the key functions available. 3. Use the cursor keys to move the text cursor to the diagonally-opposite corner of the display area to be copied. The currently selected area will be highlighted in green. Note that you can toggle the position of the text cursor between the two diagonally-opposite corners of the selected area by pressing the Return key. 11-15 IBM 3270 Emulation 4. Press F13 to copy the selected area. The copied area (i.e. the target) will be highlighted in red. 5. Use the cursor keys to move the red target area to the required position on the display. You can also use the Jump key to move the target area to the host screen or Notice Board. 6. Press Enter on the numeric keypad to save the copied area at the current position on the display. Copying Screen Data To A Function Key Note that the Notice Board Setup dialog box has several options which determine whether this facility is enabled and whether all screen data in the selected area is copied, or only data in user entry fields. 1. Position the text cursor at the start of the area to be copied. 2. Press the Copy key to start the Copy function. Note that the status line will display the key functions available. 3. Use the cursor keys to move the text cursor to the diagonally-opposite corner of the display area to be copied. The currently selected area will be highlighted in green. Note that you can toggle the position of the text cursor between the two diagonally-opposite corners of the selected area by pressing the Return key. 4. Press F14 to copy the selected area. 5. Press the function key required to store the copied data. 6. Press Enter on the numeric keypad to store the copied data in the chosen function key. 11-16 IBM 5250 Emulation 12 IBM 5250 Emulation This chapter describes features of the IBM 5250 terminal emulation. Introduction The IBM 5250 emulator provides emulation of 5250 type alphanumeric terminals, both monochrome (green/white plus attributes) and colour. Colours may be modified using the Attribute Settings dialog box. This emulation can be used for connection to an IBM AS/400, System/36 or System/38. A typeahead capability is provided so that you can continue to enter data without waiting for a prompt from the host. Session Configuration WBT Mode This section describes the basic procedure for creating a session configuration when the terminal is in WBT mode. The options available are described in detail in chapter 2. 1. Click the Configure tab in the Terminal Connection Manager then click the Add button to display the New Connection dialog box. 2. Select Terminal Emulation Client and click OK. The Terminal Emulation Client Connection Wizard - Connection Information dialog box will be displayed. 3. Enter a name which will identify this session configuration for future selection in the Connection Name box. 4. Select the IBM 5250 terminal emulation in the Emulation list box. 5. Select the IBM 5250 Model. This is reported back to the host in response to a terminal identification request. (Note that not all features of the terminal model may be supported.) This also allows you to specify whether the display is treated 12-1 IBM 5250 Emulation as monochrome (green for normal characters, white for intense attribute) or colour for attributes. The terminal models currently supported and their display characteristics are listed below. Type Display Rows x Columns 5291_1 5292_2 5251_11 3179_2 3196_A1 3180_2 3477_FC 3477_FG 3486_BA 3487_HA 3487_HC 5555_B01 5555_C01 Monochrome Colour Monochrome Colour Monochrome Monochrome Colour Monochrome Monochrome Monochrome Colour Monochrome Colour 24 x 80 24 x 80 24 x 80 24 x 80 (default) 24 x 80 24 x 80 and 27 x 132 24 x 80 and 27 x 132 24 x 80 and 27 x 132 24 x 80 24 x 80 24 x 80 24 x 80 24 x 80 The printer models supported are listed below: 3812-1 5553-B01 Single byte printer Double byte printer If double byte character sets (e.g. Japanese) are supported and you wish to use them, then select either 5555_B01 (monochrome) or 5555_C01 (colour) for display, or 5553-B01 for printing. 6. Specify if you want the right or left Control keys to perform the same function as the keypad Enter or Reset keys, respectively. 7. Specify the IBM5250 Monochrome setting. Note that all IBM 5250 models support both monochrome and colour display. When monochrome is selected, characters will be displayed in green and intense fields will be displayed in white. When monochrome is not selected, the settings specified in the Attributes dialog box (described in the Setup Menus chapter) will be used for the display. 8. Click Next to display the Host Information dialog box. For a TCP/IP connection, click the TCP/IP button, enter the name or internet address of the host computer in the Host Name box, then click Advanced for additional Telnet options. Refer to the TCP/IP Connection Settings section in chapter 2 for details. For a modem connection, click the Modem button then click Advanced to display configuration options. Refer to the Modem Connection Settings section in chapter 2 for details. For a serial connection, click the Serial button, specify the communications port in the Connect To box, then click Advanced for additional serial options. Refer to the Serial Connection Settings section in chapter 2 for details. 12-2 IBM 5250 Emulation Make the relevant selections then click OK to return to the Host Information dialog box, then click Next. 9. The following four dialog boxes provide further configuration options which are described in chapter 2. Click Next to advance through the dialog boxes. Automate Login Process Printer Port Settings GUI Overrides Aux Port Settings 10. When you have made your selections, click Finish to return to the Terminal Connection Manager. 11. In the Terminal Connection Manager, display the Connections list, select the session name you specified earlier in step 3, then click the Connect button. Non-WBT Mode This section describes the basic procedure for creating a session configuration when the terminal is not in WBT mode. The options available are described in detail in the Setup Menus chapter. 1. Display the Settings menu from the command bar and select Emulation... to display the Emulation Settings dialog box. 2. Set the Alpha Emulation option to IBM5250 then click OK. The terminal will now be in Network Virtual Terminal mode. 3. Display the Settings menu and select IBM 5250... to display the IBM 5250 Settings dialog box. 4. Specify the IBM 5250 Model. This is reported back to the host in response to a terminal identification request. (Note that not all features of the terminal model may be supported.) This also allows you to specify whether the display is treated as monochrome (green for normal characters, white for intense attribute) or colour for attributes. The terminal models currently supported and their display characteristics are listed below. Model Display Rows x Columns 5291_1 5292_2 5251_11 3179_2 3196_A1 3180_2 3477_FC 3477_FG 3486_BA 3487_HA Monochrome Colour Monochrome Colour Monochrome Monochrome Colour Monochrome Monochrome Monochrome 24 x 80 24 x 80 24 x 80 24 x 80 (default) 24 x 80 24 x 80 and 27 x 132 24 x 80 and 27 x 132 24 x 80 and 27 x 132 24 x 80 24 x 80 12-3 IBM 5250 Emulation 3487_HC 5555_B01 5555_C01 Colour Monochrome Colour 24 x 80 24 x 80 24 x 80 The printer models supported are listed below: 3812-1 5553-B01 Single byte printer Double byte printer If double byte character sets (e.g. Japanese) are supported and you wish to use them, then select either 5555_B01 (monochrome) or 5555_C01 (colour) for display, or 5553-B01 for printing. 5. Specify the Monochrome setting. Note that all IBM 5250 models support both monochrome and colour display. When monochrome is selected, characters will be displayed in green and intense fields will be displayed in white. When monochrome is not selected, the settings specified in the Attributes dialog box (described in the Setup Menus chapter) will be used for the display. Click OK to close the dialog box. 6. Select Save Session in the File menu. 7. Select New Connection in the File menu to display the New Connection dialog box. 8. Select the type of host connection required in the Type list box. For a TCP/IP connection, select TCP/IP, enter the name or internet address of the host computer in the Connect To box, then click Configure for additional Telnet options. Refer to the TCP/IP Connection Settings section in chapter 2 for details. For a modem connection, select Modem, specify the communications port in the Connect To box, then click Configure to display configuration options. Refer to the Modem Connection Settings section in chapter 2 for details. For a serial connection, select Serial, specify the communications port in the Connect To box, then click Configure for additional serial options. Refer to the Serial Connection Settings section in chapter 2 for details. 9. When you have specified the required settings in the New Connection dialog box, click the Connect button to make the connection. 10. If necessary, enter the appropriate information to establish an IBM host session in the Network Virtual Terminal mode screen. 11. When an IBM host session has been established, the screen will switch out of Network Virtual Terminal mode and display the IBM 5250 emulation screen. Note: You will be returned to the Network Virtual Terminal screen when the connection to the IBM host has been closed. 12-4 IBM 5250 Emulation Network Virtual Terminal Mode Network Virtual Terminal (NVT) mode allows the operator to communicate with a network gateway (in ASCII) for routing, logon etc, before the full IBM terminal emulation protocol is established. NVT mode is indicated by the absence of the symbol in the status line along the bottom of the window. NVT mode displays an unformatted screen for data entry, allowing basic keyboard functionality as a simple ASCII terminal. In addition to data keys, other recognized keys are: Clear Enter Newline Backspace Tab clears the screen sends a CR to the host sends a CR to the host sends a BS to the host sends an HT to the host Once the appropriate details have been entered to establish an IBM host session (which may be automatic), the screen is cleared and switched into full IBM 5250 terminal emulation mode, as indicated by the symbol in the status line. The Status Line The last line in the window is used to display status information in the form of symbols and alphanumeric characters. A coloured line separates status information from the rest of the display. Information is displayed in any of six regions within the status line as listed below. Region Symbol Colour Column Meaning 1 2 3 4 5 6 T Blue Blue Blue Blue Red White 1 18 28 48 57 75-80 Telnet session running On line (IBM 5250 mode) Message waiting Insert mode on Input inhibited Row/column cursor position M ^ rr/cc or rr/ccc The meaning of the symbols is as follows: T Indicates that a Telnet session is running. Indicates that the current screen is an IBM 5250 screen. This screen will be displayed when you have initiated a Telnet session with the host. M Indicates that the system has one or more messages waiting for you. ^ Indicates that the keyboard is in Insert mode. Already existing characters to the right of the cursor will move to make room for new characters that are entered. 12-5 IBM 5250 Emulation Insert mode can be disabled by pressing the Insert key again, pressing the Reset key, or by performing any action that sends data to the host, such as pressing the Enter, Clear, or PF keys. Indicates when input from the keyboard or mouse will not be accepted by the host. When this is because an error has occured, as shown in the error line, pressing the Reset key will remove the error. Alternatively, more information can be obtained by pressing the Help key. The only other keys available are Attn, SysReq and Print. Note that the emulation includes typeahead capability so that in most cases you can continue to enter data without waiting for the Do Not Enter message to clear as the data will be stored until the host is ready. Keyboard Mapping The following illustration shows where IBM 5250 keyboard functions are mapped to keys on the 101/102 key Enhanced AT keyboard layout. Special key functions that are provided on the IBM 5250 keyboard can be mapped to any key on your keyboard by using the AS virtual key names listed in the Define Keyboard Macros dialog box. Word Processing Mode The following keyboard functions are available when the IBM 5250 emulation is in Word Processing mode: Symbols Command Begin Bold Centre Text Next Text Column Half-Index Down End Attribute Find Stop Code Start New Page Required Page End Insert Stop Code Begin Underline Word Underline Half-Index Up Beginning of Line End of Line Top of Page End of Page Insert Carrier Return Required Space Required Tab 12-6 Alt + A Alt + B Alt + C Alt + D Alt + H Alt + J Alt + N Alt + P Alt + R Alt + S Alt + U Alt + W Alt + Y Alt + Cursor Left Alt + Cursor Right Alt + Cursor Up Alt + Cursor Down Alt + Field Exit Alt + Space Alt + Tab ) RECRD ROLL D PA3 PLAY (F18) (F19) (F20) (F17) F6 F7 F8 F5 (F21) F9 F10 F12 (NEWLINE) FIELD EXIT (REVERSE DISP) BACKSPACE F11 [CRSEL] (F22) (F23) (F24) <FAST ROLL D FAST> ROLL U ER FLD = Erase Field ER EOF = Erase EOF PA1 PA2 PA3 (DUP) (F MRK) INSERT HOME ROLL D ER FLD RULE DEL (EOL) ER EOF ROLL U CLEAR SYSRQ TEST (PAUSE) [L PRT] PRINT 5 8 0 2 1 INSERT 4 ER EOF 7 HOME FIELD + 3 ENTER DEL . 6 ROLL U ROLL D (FIELD EXIT) 9 (TYPE (CLOSE [(PUSH)] DIRECT) TEXT) (NAT/LAT) HELP FIELD / MONO = Monochrome CRSEL = Cursor Select L PRT = Local Print F MRK = Field Mark EOL = End Of Line All unmarked keys function as indicated by the legends on the keycaps. Functions in round brackets are generated when the keys are shifted. Functions in square brackets are generated when used with Ctrl. QUIT (F14) (F15) [MONO] (F16) (F13) F2 F3 F4 F1 Alt key usage: Normal key usage: ( (ATTN) RESET IBM 5250 Emulation Enhanced AT Keyboard Layout 12-7 IBM 5250 Emulation Text Display Options Display Right-to-Left The contents of the screen can be displayed in reverse, i.e. as a right-to-left mirror image, by pressing the keys Shift + Backspace. This is a toggle function, so pressing the keys again will revert to normal left-to-right display. An arrow will be displayed on the status line to indicate normal (right arrow) or mirror (left arrow) display. Typing Direction The direction in which characters are displayed on the screen when typed can be toggled between normal left-to-right and right-to-left by pressing the keys Shift + / on the keypad. The characters => or <= will be displayed on the status line to indicate the current typing direction. Selecting the Symbol Swap option in the IBM 5250 Settings dialog box will cause symbols such as round or angle brackets to be displayed the correct way round when typing right-to-left. Close Key If text has been typed using both typing direction modes in the same line or field, you can force the right-hand text to join the left-hand text by pressing the keys Shift + * on the keypad. Push Mode Push mode allows you to edit text whose direction is opposite the screen orientation. In this mode the cursor orientation is reversed and a Push segment is created. Push mode is toggled on/off by pressing the keys Ctrl + Shift + - (keypad minus). Push mode has two secondary modes, Boundary mode and Edit mode. Boundary mode is activated when Push mode is entered. The cursor will remain at its current position while you type additional characters, and text will be pushed in the opposite direction of the screen orientation. Edit mode is activated when the cursor is moved from its Boundary position into the Push segment area. In this mode, text can be edited within the Push segment while typing in the field’s natural direction. Bilingual Keyboard Support When a code page that supports a bilingual keyboard is selected, you can toggle between the National and Latin character set by pressing the keys Shift + - on the 12-8 IBM 5250 Emulation keypad. The character N or L will be displayed on the status line to indicate which character set is currently active. Selecting the Numeral Swap option in the IBM 5250 Settings dialog box will cause all numbers to be displayed using the National character set when in Latin character set mode. Alternate Code Page If a language supports two code pages (e.g. Hebrew New Code and Hebrew Old Code), you can switch between the two by pressing the keys Ctrl + Shift + Alt + - on the numeric keypad. This function can be assigned to a different key or key combination by using the AS_ALTCP virtual key name. Record & Playback Keystrokes Facility The record/playback keystrokes facility enables you to eliminate repetitive operations by using the Fn keys to store, retrieve and display data. The Fn keys can store a total of 1500 keystrokes. A sequence of recorded keystrokes may be interrupted so that keystrokes can be entered manually before continuing with the recording or playback. Note that local Fn key functions cannot be recorded. The keys used to initiate recording and playback are shown below together with the equivalent virtual key names which can be used to assign the functions to any key on the keyboard: Record: Pause: Quit: Play: 101/102 Key Keyboard Virtual Key Names Alt + F4 Shift + Pause Alt + LControl (see note) Alt + F5 AS_RECORD AS_PAUSE AS_QUIT AS_PLAY Note: Quit is Alt + Left Control if Left Control is defined as the Reset key. Recording Keystrokes 1. Press Record to enter Record mode. The status line will display RECRD and a number from 0-1500 indicating the number of new keystrokes that may be stored. A series of boxes displayed to the right represent the Fn keys. A solid box indicates that the Fn key in that position is currently storing recorded keystrokes. 12-9 IBM 5250 Emulation 2. Press the Fn key which will store the keystrokes. (On 101/102 keyboards you can also use Shift + Fn.) The status line will display R**** F* where R indicates you are in Record mode, **** is the number of keystrokes that may be stored, and F* is the number of the Fn key pressed. Note: If you press a pre-recorded Fn key, its contents will be replaced with the following keystrokes. You can also remove the contents of the Fn key before recording by pressing the Delete key. 3. Enter the keystrokes to be recorded. You may pause recording at any time to allow keystrokes to be entered manually when played back by pressing Pause. Pause mode is indicated by R ^. To continue recording, press Pause again. Note: You can cancel the newly recorded keystrokes by pressing the Quit key. This cancellation does not affect the previously recorded keystrokes. 4. To finish and save the recording, press the Record key. Playback Keystrokes 1. Position the text cursor where the playback is to start. 2. Press the Play key to enter Play mode. The status line will display PLAY and a series of boxes representing the Fn keys. A solid box indicates that the Fn key in that position is currently storing recorded keystrokes. 3. Press the Fn key storing the recorded data to play back. Playback will begin immediately, as indicated by a P on the status line. All the recorded keystrokes will be played back automatically. When playback is completed the P will disappear. If the recorded keystrokes included Pause, then playback will halt at that point to allow you to enter keystrokes manually. Press Play to resume playback from where you stopped typing. If you want to cancel during the playback operation, press the Quit key. Error Codes The following error codes may appear on the status line if an error occurs during recording or playback. 12-10 IBM 5250 Emulation 9001 Exceeded the maximum number of allowed keystrokes. Remedy: Press the Record key to exit Record mode. To record a new keystroke sequence, either: a) Press the Record key and the target Fn key that has erasable data, then enter the new data. b) Press the Record key and the target Fn key that has erasable data, then press the Delete key to erase the recorded data for that key. 9003 You pressed an invalid Fn key while performing the Record or Play function. Remedy: Press the Reset key. 9007 You pressed an invalid sequence key (e.g. Play) while performing the Record function. Remedy: Press the Reset key. 9010 While performing the Play function, you pressed an Fn key that does not have a keystroke assigned to it. Remedy: Press the Reset key. 9015 In communication mode, you pressed either the Quit or Pause key. Remedy: Press the Reset key. 9019 In Record or Play mode. While the Record/play pause indicator was displayed on the status line you pressed an invalid key (e.g. Play key in Record mode, or Record key in Play mode). Remedy: Press the Reset key. Fax Image Support Fax images in Tiff, PCX and G3 format are supported. The following display facilities are supported if the host provides them: Scrollbars These are displayed if the image is larger than the screen area allocated to it. EasyScroll IBM term for scrolling by dragging the image with the mouse. Zoom Enables you to highlight an area of the image to magnify it so that it fills the allocated space (the aspect ratio is preserved). Additional functions such as rotation and colouring are controlled by the host. 12-11 IBM 5250 Emulation Notes 12-12 IBM 3151 Emulation 13 IBM 3151 Emulation This chapter describes features of the IBM 3151 terminal emulation. Introduction The IBM 3151 emulation is based on the native mode of the IBM 3151 Model 11 terminal. The emulation is configured using the IBM 3151 Settings dialog box which is described in the Setup Menus chapter. The display is set to 24 rows by 80 columns by default, but you can select one of four display formats from the IBM 3151 Settings dialog box: 24 rows x 80 columns 25 rows x 80 columns 24 rows x 132 columns 25 rows x 132 columns Session Configuration WBT Mode This section describes the basic procedure for creating a session configuration when the terminal is in WBT mode. The options available are described in detail in chapter 2. 1. Click the Configure tab in the Terminal Connection Manager then click the Add button to display the New Connection dialog box. 2. Select Terminal Emulation Client and click OK. The Terminal Emulation Client Connection Wizard - Connection Information dialog box will be displayed. 3. Enter a name which will identify this session configuration for future selection in the Connection Name box. 13-1 IBM 3151 Emulation 4. Select the IBM 3151 terminal emulation in the Emulation list box. 5. Click Next to display the Host Information dialog box. For a TCP/IP connection, click the TCP/IP button, enter the name or internet address of the host computer in the Host Name box, then click Advanced for additional Telnet options. Refer to the TCP/IP Connection Settings section in chapter 2 for details. For a modem connection, click the Modem button then click Advanced to display configuration options. Refer to the Modem Connection Settings section in chapter 2 for details. For a serial connection, click the Serial button, specify the communications port in the Connect To box, then click Advanced for additional serial options. Refer to the Serial Connection Settings section in chapter 2 for details. Make the relevant selections then click OK to return to the Host Information dialog box, then click Next to display the Advanced Options dialog box. 6. Click Finish to return to the Terminal Connection Manager. 7. In the Terminal Connection Manager, display the Connections list, select the session name you specified earlier in step 3, then click the Connect button. Non-WBT Mode This section describes the basic procedure for creating a session configuration when the terminal is not in WBT mode. The options available are described in detail in the Setup Menus chapter. 1. Display the Settings menu from the command bar and select Emulation... to display the Emulation Settings dialog box. 2. Select the IBM 3151 terminal emulation in the Alpha Emulation list box. 3. Display the File menu from the command bar and select New Connection to display the New Connection dialog box. 4. Select the type of host connection required in the Type list box. For a TCP/IP connection, select TCP/IP, enter the name or internet address of the host computer in the Connect To box, then click Configure for additional Telnet options. Refer to the TCP/IP Connection Settings section in chapter 2 for details. For a modem connection, select Modem, specify the communications port in the Connect To box, then click Configure to display configuration options. Refer to the Modem Connection Settings section in chapter 2 for details. For a serial connection, select Serial, specify the communications port in the Connect To box, then click Configure for additional serial options. Refer to the Serial Connection Settings section in chapter 2 for details. 13-2 IBM 3151 Emulation 5. When you have specified the required settings in the New Connection dialog box, click the Connect button to make the connection. Note: You can save these settings as a connection template using the Save Session As dialog box. Refer to the Setup Menus chapter for details. The Status Bar The status bar along the bottom of the display shows the status of various operations. 1 2 3 4 Field 1: (rrr,ccc) indicates the current row and column position of the cursor. Field 2: INSERT indicates that Insert mode is active when the Insert key is pressed or when the Insert Character command is received. Note that the message will not be displayed if the Insert Character option is not set to Mode. Insert mode is exited by pressing the Insert or Reset key. Field 3: Indicates the current operating mode. In BLOCK mode, keyboard entered data is displayed and processed locally, allowing you to edit it before a block of data is sent to the host. In CHAR mode, keyboard entered data is sent simultaneously to the host and the display. In ECHO mode, keyboard entered data is sent only to the host. The host is then responsible for returning the data to the display. Field 4: HOLD SCREEN indicates that the Hold Screen key has been pressed to suspend screen update. Press Hold Screen again to enable screen update. INVALID KEY appears when you press an invalid key. KEYS LOCKED appears when the keyboard is locked. The keys will be unlocked when the Keyboard Unlock command is received or when the Cancel key is pressed. NUMERIC indicates the cursor is located in an unprotected numeric field. PRINTING indicates that data is being sent to the printer. SENDING indicates that data is being sent to the host. WRONG PLACE appears when you press an invalid key in a protected field or field attribute character position. It is also displayed when you 13-3 IBM 3151 Emulation try to insert a character or line in a screen already full when the Forcing Insert option is set to Off. If two or more messages are sent to a particular field, then the message with the highest priority will be displayed. Messages in field 4 are displayed in the following order: HOLD SCREEN SENDING PRINTING KEYS LOCKED INVALID KEY WRONG PLACE NUMERIC Keyboard Mapping The following illustration shows where IBM 3151 keyboard functions are mapped to keys on the 101/102 key Enhanced AT keyboard layout. Special key functions can be mapped to any key on your keyboard by using the virtual key names listed in the Define Keyboard Macros dialog box. 13-4 F1 Control key usage: Normal key usage: F2 S LINE S MSG F3 RESET PR MSG BREAK Alt + F1 = RESET ESC (DEF F) F4 F6 F7 F8 P SCR S MSG S LINE F9 F10 MSG SEND RETURN LF F11 F12 PA2 2 PA1 1 0 5 4 . 3 PA3 6 9 S LINE MSG 8 7 // JUMP S MSG ENTER SEND _ , (Alt) = Send Message = Send Line = Print Message = Print Screen = Erase Input DEL ER INP S MSG S LINE PR MSG P SCR ER INP INSERT HOME CLEAR DEL LN ER EOP TAB DELETE ER EOF INS LN PRINT PRINT HOLD LINE All unmarked keys function as indicated by the legends on the keycaps. Functions in brackets are generated when the keys are shifted. F5 IBM 3151 Emulation Enhanced AT Keyboard Layout 13-5 IBM 3151 Emulation Defining Function Keys The keys mapped as F1 through F12 can be redefined from the keyboard or by the host. The function keys can store up to 128 characters between them and can include escape sequences and ASCII control characters in addition to character strings. Here we describe how to define a function key from the keyboard. 1. Display the function key menu by pressing the keys Shift + Esc. DEF F: __ ......................................................................................................................... Field A Field B 2. Specify the function key to be defined by entering a two-digit number in field A, for example, 01 for F1, 12 for F12, then press Enter. Field B will display the current definition of the function key. DEF F: 01 E C a................................................................................................................... AID 3. In field B, enter the new definition for the function key. This can include a character string, escape sequence or control characters. A control character is entered by typing the keyboard equivalent. For example, the CR (carriage return) character is entered by pressing Ctrl + M. Refer to the Character Sets appendix to find the keyboard equivalents of other control characters. The following example shows the definition entry for the F1 key so that it displays New definition then performs a carriage return when pressed: DEF F: 01 Pericom SoftwareCR .......................................................................................... You can erase the character at the current cursor position by pressing the keys Ctrl + 2. If you want to restore the default definition, press the Clear key while the cursor is in field B. 4. Press the Send key to store the key definition. The function key menu will be cleared to allow you to enter the next key definition. If you do not wish to save the definition, press Ctrl + Shift + Esc instead of Enter. Note that the function keys can store a maximum of 128 characters between them. When this number is reached or exceeded, field A will start blinking and any characters following the 128th character will be discarded. 5. Repeat steps 2 to 4 until you have finished defining function keys. 6. To exit from the function key menu, press Ctrl + Shift + Esc. 13-6 MDIS Prism Emulations 14 MDIS Prism Emulations This chapter describes the MDIS Prism terminal emulations. Session Configuration WBT Mode This section describes the basic procedure for creating a session configuration when the terminal is in WBT mode. The options available are described in detail in chapter 2. 1. Click the Configure tab in the Terminal Connection Manager then click the Add button to display the New Connection dialog box. 2. Select Terminal Emulation Client and click OK. The Terminal Emulation Client Connection Wizard - Connection Information dialog box will be displayed. 3. Enter a name which will identify this session configuration for future selection in the Connection Name box. 4. Select the MDI P12\P8 or MDI Prism-9 terminal emulation in the Emulation list box. 5. Click Next to display the Host Information dialog box. For a TCP/IP connection, click the TCP/IP button, enter the name or internet address of the host computer in the Host Name box, then click Advanced for additional Telnet options. Refer to the TCP/IP Connection Settings section in chapter 2 for details. For a modem connection, click the Modem button then click Advanced to display configuration options. Refer to the Modem Connection Settings section in chapter 2 for details. 14-1 MDIS Prism Emulations For a serial connection, click the Serial button, specify the communications port in the Connect To box, then click Advanced for additional serial options. Refer to the Serial Connection Settings section in chapter 2 for details. Make the relevant selections then click OK to return to the Host Information dialog box, then click Next to display the Advanced Options dialog box. 6. Click Finish to return to the Terminal Connection Manager. 7. In the Terminal Connection Manager, display the Connections list, select the session name you specified earlier in step 3, then click the Connect button. Non-WBT Mode This section describes the basic procedure for creating a session configuration when the terminal is not in WBT mode. The options available are described in detail in the Setup Menus chapter. 1. Display the Settings menu from the command bar and select Emulation... to display the Emulation Settings dialog box. 2. Select the MDI P12\P8 or MDI Prism-9 terminal emulation in the Alpha Emulation list box. 3. Display the File menu from the command bar and select New Connection to display the New Connection dialog box. 4. Select the type of host connection required in the Type list box. For a TCP/IP connection, select TCP/IP, enter the name or internet address of the host computer in the Connect To box, then click Configure for additional Telnet options. Refer to the TCP/IP Connection Settings section in chapter 2 for details. For a modem connection, select Modem, specify the communications port in the Connect To box, then click Configure to display configuration options. Refer to the Modem Connection Settings section in chapter 2 for details. For a serial connection, select Serial, specify the communications port in the Connect To box, then click Configure for additional serial options. Refer to the Serial Connection Settings section in chapter 2 for details. 5. When you have specified the required settings in the New Connection dialog box, click the Connect button to make the connection. Note: You can save these settings as a connection template using the Save Session As dialog box. Refer to the Setup Menus chapter for details. 14-2 MDIS Prism Emulations Keyboard Mapping The following illustration shows where MDIS Prism keyboard functions are mapped to keys on the 101/102 key Enhanced AT keyboard layout. Special key functions that are provided on the MDIS Prism keyboard can be mapped to any key on your keyboard by using the MD virtual key names listed in the Define Keyboard Macros dialog box. 14-3 14-4 F14 F2 F13 F1 Alt key usage: Normal key usage: TAB (BACKTAB) ESC F1 F13 F3 F15 F4 F5 F17 F6 F18 F7 F8 F9 LINE SCRN FEED DOWN CLEAR HOME SCRN UP BACKSPACE DEL PRINT HOLD BREAK SCRN F10 F11 F12 ENTER _ , (SCRN R) (SCRN L) SCROL SCROL UP DOWN SCRL R SCRL L All unmarked keys function as indicated by the legends on the keycaps. Functions in brackets are generated when the keys are shifted. F16 MDIS Prism Emulations Enhanced AT Keyboard Layout PT250 Emulation 15 PT250 Emulation This chapter describes the Prime PT250 terminal emulation. Session Configuration WBT Mode This section describes the basic procedure for creating a session configuration when the terminal is in WBT mode. The options available are described in detail in chapter 2. 1. Click the Configure tab in the Terminal Connection Manager then click the Add button to display the New Connection dialog box. 2. Select Terminal Emulation Client and click OK. The Terminal Emulation Client Connection Wizard - Connection Information dialog box will be displayed. 3. Enter a name which will identify this session configuration for future selection in the Connection Name box. 4. Select the PT250 terminal emulation in the Emulation list box. 5. Click Next to display the Host Information dialog box. For a TCP/IP connection, click the TCP/IP button, enter the name or internet address of the host computer in the Host Name box, then click Advanced for additional Telnet options. Refer to the TCP/IP Connection Settings section in chapter 2 for details. For a modem connection, click the Modem button then click Advanced to display configuration options. Refer to the Modem Connection Settings section in chapter 2 for details. For a serial connection, click the Serial button, specify the communications port in the Connect To box, then click Advanced for additional serial options. Refer to the Serial Connection Settings section in chapter 2 for details. 15-1 PT250 Emulation Make the relevant selections then click OK to return to the Host Information dialog box, then click Next to display the Advanced Options dialog box. 6. Click Finish to return to the Terminal Connection Manager. 7. In the Terminal Connection Manager, display the Connections list, select the session name you specified earlier in step 3, then click the Connect button. The PT250 emulation is configured using the PT250 Settings dialog box which is described in the Setup Menus chapter. Non-WBT Mode This section describes the basic procedure for creating a session configuration when the terminal is not in WBT mode. The options available are described in detail in the Setup Menus chapter. 1. Display the Settings menu from the command bar and select Emulation... to display the Emulation Settings dialog box. 2. Select the PT250 terminal emulation in the Alpha Emulation list box. 3. Display the File menu from the command bar and select New Connection to display the New Connection dialog box. 4. Select the type of host connection required in the Type list box. For a TCP/IP connection, select TCP/IP, enter the name or internet address of the host computer in the Connect To box, then click Configure for additional Telnet options. Refer to the TCP/IP Connection Settings section in chapter 2 for details. For a modem connection, select Modem, specify the communications port in the Connect To box, then click Configure to display configuration options. Refer to the Modem Connection Settings section in chapter 2 for details. For a serial connection, select Serial, specify the communications port in the Connect To box, then click Configure for additional serial options. Refer to the Serial Connection Settings section in chapter 2 for details. 5. When you have specified the required settings in the New Connection dialog box, click the Connect button to make the connection. Note: You can save these settings as a connection template using the Save Session As dialog box. Refer to the Setup Menus chapter for details. The PT250 emulation is configured using the PT250 Settings dialog box which is described in the Setup Menus chapter. 15-2 PT250 Emulation The Status Line The last line in the window is used to display a status line consisting of eleven fields which show the status of various operations. The following illustration shows the information that is displayed by default. 1 2 3 4 5 6 7 8 9 10 11 Field 1: Will display either ONLINE or LOCAL, depending on whether the emulation is online to the host or in local mode. Field 2: Indicates whether the input line from the main port is connected. DSR will be displayed when the Data Set Ready (DSR) connection is active. Pressing the Stop key to stop the host from transmitting data will cause this field to display XOFF. When this field is blank, the connection is inactive. Field 3: Indicates the mode of data transmission as follows: CHAR indicates that the emulation is in Character mode in which each character is sent to the host when it is typed at the keyboard. CNTRL indicates that the emulation is in Control Representation mode in which all received data and commands from the host or keyboard are displayed but not acted upon. LINE or PAGE indicates that the emulation transmits data a line or a page at a time when the Enter key is pressed in Block mode. Field 4: Indicates how many pages are in the display memory, 1 or 2. Field 5: Indicates when in Block mode the type of data that is to be transmitted, as determined by the application. ALL indicates that all fields are transmitted to the host. MODIFIED indicates that only fields that have changed are transmitted to the host. SELECTED indicates that only fields specified by the program are transmitted to the host UNPROTCT indicates that only unprotected fields are transmitted to the host. Field 6: Indicates the currently selected character set or graphics mode as follows: 8B indicates the 8-bit ASCII character set. G0 indicates the 7-bit ASCII character set (default). G1 indicates a second 7-bit ASCII character set. 15-3 PT250 Emulation GR indicates the Block Graphics character set. LD indicates the Line Drawing character set. Field 7: Indicates the current transmission status as follows: AUX SEND is displayed when data is being sent to an auxiliary device. KEYBD LOCK is displayed when the keyboard is locked to prevent data entry, usually set by the application. MAIN SEND is displayed when a block of data is sent to the host. SOFT LOCK is displayed when errors are detected. Pressing the Clear key will correct this condition. SYSTEM RDY is the default message that is displayed indicating that everything is functioning correctly and that no block of data is being sent to the host. Field 8: Displays terminal operation status messages. These are generally error messages which can be cleared by pressing the Clear key for each message displayed. ALL GRAPHICS indicates that you have attempted to enter data in a field reserved for graphics characters when in Block mode. ALPHA ONLY indicates that you have attempted to enter non-alphabetic data in a field reserved for alphabetic characters when in Block mode. ALPHANUMERIC indicates that you have attempted to enter nonalphanumeric data in a field reserved for alphanumeric characters when in Block mode. FILL WHOLE indicates that every position in the field must be filled with data before you can continue when in Block mode. HOST RX OVFW indicates that at least one character of data has been lost during a transmission from the host. This occurs when the host sends data faster than the emulation can process it. INVALID CMD indicates that an invalid control character or escape sequence was received, or an invalid key was pressed. KYBD OVFW indicates that at least one character of data has been lost during a transmission from the keyboard to the host. This occurs when the keyboard sends data faster than the host can process it. MUST ENTER indicates that you must enter data in a specific field before you can continue when in Block mode. NUMERIC ONLY indicates that you have attempted to enter nonnumeric data in a field reserved for numeric characters when in Block mode. RX ERROR indicates that the emulation received incorrect data as a result of a parity or framing error. SCREEN FULL indicates that the emulation cannot display any more characters that it may receive when in Block mode. 15-4 PT250 Emulation Field 9: Displays messages defined by the program or user. Field 10: Displays NUM when Num Lock is activated, otherwise this field is blank. Field 11: Displays INS when Insert mode is activated. In Replace mode (default), this field is blank. Keyboard Mapping The following illustration shows where PT250 keyboard functions are mapped to keys on the 101/102 key Enhanced AT keyboard layout. Special key functions that are provided on the PT250 keyboard can be mapped to any key on your keyboard by using the PT virtual key names listed in the Define Keyboard Macros dialog box. 15-5 15-6 F3 PF3 F4 PF4 A CHARSET Alt key usage: Normal key usage: TAB BACKTAB F1 PF1 4 EURO F5 PF5 F6 F7 PF7 F8 PF8 F9 PF9 F10 PF10 CHARSET is a toggle function. PF6 PF11 PF12 HELP MENU HOME PGUP CLEAR USM SCR L SCR D SCR R SCR U SCR = Scroll ERASE END PAGE DEL BEGIN DOWN INSERT PRINT SCRL BREAK SCRN LOCK STOP 00 - (CHM) 0 2 1 (INSERT) 3 ENTER (DEL) . PA1 PA2 PA3 PA4 (HOME) ( ) (PGUP) CANCL 7 8 9 ( ) ( ) + 4 5 6 (END) ( ) (PGDN) NUMLK , (ULG) ULG = Unlabelled Large CHM = Change Mode USM = Unlabelled Small All unmarked keys function as indicated by the legends on the keycaps. Functions in brackets are generated when Num Lock is OFF. TAB functions as BACKTAB when shifted. F2 PF2 F1 PF1 PT250 Emulation Enhanced AT Keyboard Layout PT250 Emulation Displaying Alternate Characters PT250 mode uses two character sets called Standard and Alternate to display characters. Both sets incorporate all the characters contained in the ASCII (7-bit or lower half) and PT250 Additional (8-bit or upper half) character set tables shown in the Character Sets appendix. When the emulation is in 7-bit mode, only the lower half (i.e 7-bit part) of the Standard and Alternate character sets can be used, so the ASCII characters in the Alternate character set are replaced by the PT250 Additional characters, which are then treated as 7-bit characters. You can toggle between Standard and Alternate character set mode by pressing the keys Alt + A. This emulates the function of the Char Set key found on the PT250 keyboard, enabling you to display characters from the Additional character set which are not available for the keyboard nationality you have selected in setup. The following table lists the Standard ASCII characters in the left column with their equivalent Additional characters in the right column of each block. Press the key bearing the ASCII character to generate the Additional character when you are in Alternate character set mode. Alternate Equivalents Of Standard Characters SP 0 ° @ À P D ` à p ! ¡ 1 ± A Á Q Ñ a á q ñ " ¶ 2 2 B  R Ò b â r ò 3 C à S Ó c ã s ó D Ä T Ô d ä t ô E Å U Õ e å u õ Ö f æ v ö g ç w ÷ # £ 3 $ ¤ 4 % ¥ 5 µ 6 ¢ F Æ V ◆ G Ç W H È X Ø h è x ø I É Y Ù i é y ù & ´ § 7 Ç ( ¨ 8 ) © 9 * ª : º J Ê Z Ú j ê z ú + « ; » K Ë [ 1 /4 k ë { û , < Û L Ì \ Ü l ì | ü - = Y´ M Í ] 1 /2 m í } y´ > 3 /4 N Î ^ n î ~ ? ¿ O Ï _ o ï DEL . / ® 1 ß ÿ 15-7 PT250 Emulation Notes 15-8 Siemens 97801 Emulation 16 Siemens 97801 Emulation This chapter describes the Siemens 97801 terminal emulation. Session Configuration WBT Mode This section describes the basic procedure for creating a session configuration when the terminal is in WBT mode. The options available are described in detail in chapter 2. 1. Click the Configure tab in the Terminal Connection Manager then click the Add button to display the New Connection dialog box. 2. Select Terminal Emulation Client and click OK. The Terminal Emulation Client Connection Wizard - Connection Information dialog box will be displayed. 3. Enter a name which will identify this session configuration for future selection in the Connection Name box. 4. Select the Siemens 97801 terminal emulation in the Emulation list box. 5. Click Next to display the Host Information dialog box. For a TCP/IP connection, click the TCP/IP button, enter the name or internet address of the host computer in the Host Name box, then click Advanced for additional Telnet options. Refer to the TCP/IP Connection Settings section in chapter 2 for details. For a modem connection, click the Modem button then click Advanced to display configuration options. Refer to the Modem Connection Settings section in chapter 2 for details. For a serial connection, click the Serial button, specify the communications port in the Connect To box, then click Advanced for additional serial options. Refer to the Serial Connection Settings section in chapter 2 for details. 16-1 Siemens 97801 Emulation Make the relevant selections then click OK to return to the Host Information dialog box, then click Next to display the Advanced Options dialog box. 6. Click Finish to return to the Terminal Connection Manager. 7. In the Terminal Connection Manager, display the Connections list, select the session name you specified earlier in step 3, then click the Connect button. Non-WBT Mode This section describes the basic procedure for creating a session configuration when the terminal is not in WBT mode. The options available are described in detail in the Setup Menus chapter. 1. Display the Settings menu from the command bar and select Emulation... to display the Emulation Settings dialog box. 2. Select the Siemens 97801 terminal emulation in the Alpha Emulation list box. 3. Display the File menu from the command bar and select New Connection to display the New Connection dialog box. 4. Select the type of host connection required in the Type list box. For a TCP/IP connection, select TCP/IP, enter the name or internet address of the host computer in the Connect To box, then click Configure for additional Telnet options. Refer to the TCP/IP Connection Settings section in chapter 2 for details. For a modem connection, select Modem, specify the communications port in the Connect To box, then click Configure to display configuration options. Refer to the Modem Connection Settings section in chapter 2 for details. For a serial connection, select Serial, specify the communications port in the Connect To box, then click Configure for additional serial options. Refer to the Serial Connection Settings section in chapter 2 for details. 5. When you have specified the required settings in the New Connection dialog box, click the Connect button to make the connection. Note: You can save these settings as a connection template using the Save Session As dialog box. Refer to the Setup Menus chapter for details. 16-2 Siemens 97801 Emulation Keyboard Mapping The following illustration shows where Siemens 97801 keyboard functions are mapped to keys on the 101/102 key Enhanced AT keyboard layout. Special key functions that are provided on the Siemens 97801 keyboard can be mapped to any key on your keyboard by using the SI virtual key names listed in the Define Keyboard Macros dialog box. 16-3 16-4 F1 F2 P1 P2 P3 F6 F7 F8 F5 (F15) (F16) (F17) (F18) P4 P5 F10 F11 F12 F9 (F19) (F20) (F21) (F22) SCR L SCR R SCR = Scroll DEL START END NEXT (D LINE) (HELP) I WORD D WRD INSERT PRIOR (I LINE) HOME All unmarked keys function as indicated by the legends on the keycaps. Functions in square brackets are generated when used with Ctrl + Shift. F3 (F16) F4 (F13) (F14) F4 [CODE] CURSOR MODE Alt key usage: MODE Normal key usage: F4 Control key usage: (F14) BACKTAB TAB ESC + = Siemens 97801 Emulation Enhanced AT Keyboard Layout TA6530 Emulation 17 TA6530 Emulation This chapter describes features of the Tandem 6530 terminal emulation. Session Configuration WBT Mode This section describes the basic procedure for creating a session configuration when the terminal is in WBT mode. The options available are described in detail in chapter 2. 1. Click the Configure tab in the Terminal Connection Manager then click the Add button to display the New Connection dialog box. 2. Select Terminal Emulation Client and click OK. The Terminal Emulation Client Connection Wizard - Connection Information dialog box will be displayed. 3. Enter a name which will identify this session configuration for future selection in the Connection Name box. 4. Select the TA6530 terminal emulation in the Emulation list box. 5. Click Next to display the Host Information dialog box. For a TCP/IP connection, click the TCP/IP button, enter the name or internet address of the host computer in the Host Name box, then click Advanced for additional Telnet options. Refer to the TCP/IP Connection Settings section in chapter 2 for details. For a modem connection, click the Modem button then click Advanced to display configuration options. Refer to the Modem Connection Settings section in chapter 2 for details. For a serial connection, click the Serial button, specify the communications port in the Connect To box, then click Advanced for additional serial options. Refer to the Serial Connection Settings section in chapter 2 for details. 17-1 TA6530 Emulation Make the relevant selections then click OK to return to the Host Information dialog box, then click Next to display the Advanced Options dialog box. 6. Click Finish to return to the Terminal Connection Manager. 7. In the Terminal Connection Manager, display the Connections list, select the session name you specified earlier in step 3, then click the Connect button. The Tandem 6530 emulation is configured using the TA6530 Settings dialog box which is described in the Setup Menus chapter. Non-WBT Mode This section describes the basic procedure for creating a session configuration when the terminal is not in WBT mode. The options available are described in detail in the Setup Menus chapter. 1. Display the Settings menu from the command bar and select Emulation... to display the Emulation Settings dialog box. 2. Select the TA6530 terminal emulation in the Alpha Emulation list box. 3. Display the File menu from the command bar and select New Connection to display the New Connection dialog box. 4. Select the type of host connection required in the Type list box. For a TCP/IP connection, select TCP/IP, enter the name or internet address of the host computer in the Connect To box, then click Configure for additional Telnet options. Refer to the TCP/IP Connection Settings section in chapter 2 for details. For a modem connection, select Modem, specify the communications port in the Connect To box, then click Configure to display configuration options. Refer to the Modem Connection Settings section in chapter 2 for details. For a serial connection, select Serial, specify the communications port in the Connect To box, then click Configure for additional serial options. Refer to the Serial Connection Settings section in chapter 2 for details. 5. When you have specified the required settings in the New Connection dialog box, click the Connect button to make the connection. Note: You can save these settings as a connection template using the Save Session As dialog box. Refer to the Setup Menus chapter for details. The Tandem 6530 emulation is configured using the TA6530 Settings dialog box which is described in the Setup Menus chapter. 17-2 TA6530 Emulation The Status Line The last (25th) line in the window is used to display messages and status information. You can enable or disable display of a border which separates this line from the rest of the lines above it by setting the Status Border option in the TA6530 Settings dialog box accordingly. The status line is divided into two fields. The first and leftmost field is used to display messages of up to 64 characters in length. The second field displays the current operating status and will usually display at least one of the following status indicators: ANSI The emulation is operating in ANSI mode. BLOCK The emulation is operating in Block mode. CNTRL Display controls mode activated. In this mode, received control codes will be displayed but not actioned. CONV The emulation is operating in Conversational mode. HOLD Hold screen is activated. The emulation stops processing incoming data when the Ctrl + S keys are pressed in ANSI mode. To release the hold state and continue normal processing, press Ctrl + Q. INS Insert mode is activated. In Block mode, keyboard entered characters are inserted at the cursor position without overwriting already existing characters. LOCKED The keyboard has been temporarily locked by the application. NUM Num lock is activated. Num lock is toggled on and off by pressing the keys Alt + Num Lock. PROT Block Protect mode enabled. Refer to the Block Mode section for details. When the emulation detects an error, the status line will be temporarily replaced by an error line which will display one of the following messages: INVALID LANGUAGE SET REQUESTED You tried to use an invalid national character set. INVALID DATA You tried to enter an invalid character in the current field when in Block protect mode. 17-3 TA6530 Emulation Operating Modes The Tandem 6530 emulation operates in one of three main modes, Conversational, Block, or ANSI. Conversational and Block modes are normally used for applications running on a NonStop host system, and ANSI mode for applications running on the LXN host system. Conversational Mode In Conversational mode, characters are sent to the host as you type them. This is useful when applications need to interact with you on a character, word or line-byline basis. Display memory is treated as one long page consisting of 400 lines, of which 24 lines may be viewed at any one time. Lines above or below those currently displayed may be scrolled into view using cursor or display control keys. Once all the display memory has been used, new data will force all previous lines of data up one line so that the first line is erased, ensuring that the oldest data is erased first. The status line will display CONV when you are in Conversational mode. Block Mode In Block mode, characters are stored in a communications buffer and are not transmitted to the host until the application requests them. The characters are then sent as a block. This enables you to enter a large amount of data and edit it locally before it is transmitted. Block mode has two sub-modes: Block Nonprotect and Block Protect. In Block Nonprotect mode you can enter any type of character at any position on the screen (except on the 25th line). In Block Protect mode the application divides the screen into protected and nonprotected areas called fields. The cursor cannot be moved into protected fields, which may contain prompts or information or be empty. The cursor can only be moved into unprotected fields, which may also define the type of characters that can be entered. In Block mode, display memory is divided into pages, the number of pages being determined by the application. The status line will display BLOCK when you are in Block mode, and PROT when in Block Protect mode. 17-4 TA6530 Emulation ANSI Mode In ANSI mode, characters are sent to the host as you type them, and standard ANSI (American National Standard Institute) functions are executed. Applications that run on the LXN host system generally recognize and use these functions. The status line will display ANSI when you are in ANSI mode. The Rule Cursor A cross-hair rule cursor can be displayed by pressing the keys Alt + Page Up. To return to the normal cursor, press Alt + Page Down. Keyboard Mapping The following illustration shows where TA6530 keyboard functions are mapped to keys on the 101/102 key Enhanced AT keyboard layout. Special key functions that are provided on the TA6530 keyboard can be mapped to any key on your keyboard by using the TA virtual key names listed in the Define Keyboard Macros dialog box. 17-5 17-6 F1 ESC F2 F12 Alt key usage: Normal key usage: TAB (BACKTAB) F11 (DEL) BREAK RESET F3 F13 F4 F14 F6 F16 F7 F8 F9 F10 F11 F12 R DWN R UP R = Roll ) ( * ) 6 ) (PGDN) ( 9 ) (PGUP) + , 2 1 3 ENTER (CHAR INSERT) (C DEL) . 0 4 (END) ( 5 8 7 (HOME) ( / DELETE LINE CHAR END INS (DL) RULE C OFF PG DN INSERT LINE with Control DELETE LINE Ctrl+Shift+Alt = CLR ALL R DWN R UP C/S TAB INSERT HOME ON CHAR PG UP RULE C with Control (PAGE) PRINT ERASE RESET SCRN LINE BREAK All unmarked keys function as indicated by the legends on the keycaps. Numeric keypad bracketed functions are generated when Num Lock is OFF. Bracketed functions not on the Numeric keypad are generated when shifted. F5 F15 TA6530 Emulation Enhanced AT Keyboard Layout Unisys T27 Emulation 18 Unisys T27 Emulation This chapter describes features of the Unisys T27 terminal emulation. Session Configuration WBT Mode This section describes the basic procedure for creating a session configuration when the terminal is in WBT mode. The options available are described in detail in chapter 2. 1. Click the Configure tab in the Terminal Connection Manager then click the Add button to display the New Connection dialog box. 2. Select Terminal Emulation Client and click OK. The Terminal Emulation Client Connection Wizard - Connection Information dialog box will be displayed. 3. Enter a name which will identify this session configuration for future selection in the Connection Name box. 4. Select the Unisys T27 terminal emulation in the Emulation list box. 5. Click Next to display the Host Information dialog box. For a TCP/IP connection, click the TCP/IP button, enter the name or internet address of the host computer in the Host Name box, then click Advanced for additional Telnet options. Refer to the TCP/IP Connection Settings section in chapter 2 for details. For a modem connection, click the Modem button then click Advanced to display configuration options. Refer to the Modem Connection Settings section in chapter 2 for details. For a serial connection, click the Serial button, specify the communications port in the Connect To box, then click Advanced for additional serial options. Refer to the Serial Connection Settings section in chapter 2 for details. 18-1 Unisys T27 Emulation Make the relevant selections then click OK to return to the Host Information dialog box, then click Next to display the Advanced Options dialog box. 6. Click Finish to return to the Terminal Connection Manager. 7. In the Terminal Connection Manager, display the Connections list, select the session name you specified earlier in step 3, then click the Connect button. The Unisys T27 emulation is configured using the Unisys T27 Settings dialog box which is described in the Setup Menus chapter. Non-WBT Mode This section describes the basic procedure for creating a session configuration when the terminal is not in WBT mode. The options available are described in detail in the Setup Menus chapter. 1. Display the Settings menu from the command bar and select Emulation... to display the Emulation Settings dialog box. 2. Select the Unisys T27 terminal emulation in the Alpha Emulation list box. 3. Display the File menu from the command bar and select New Connection to display the New Connection dialog box. 4. Select the type of host connection required in the Type list box. For a TCP/IP connection, select TCP/IP, enter the name or internet address of the host computer in the Connect To box, then click Configure for additional Telnet options. Refer to the TCP/IP Connection Settings section in chapter 2 for details. For a modem connection, select Modem, specify the communications port in the Connect To box, then click Configure to display configuration options. Refer to the Modem Connection Settings section in chapter 2 for details. For a serial connection, select Serial, specify the communications port in the Connect To box, then click Configure for additional serial options. Refer to the Serial Connection Settings section in chapter 2 for details. 5. When you have specified the required settings in the New Connection dialog box, click the Connect button to make the connection. Note: You can save these settings as a connection template using the Save Session As dialog box. Refer to the Setup Menus chapter for details. The Unisys T27 emulation is configured using the Unisys T27 Settings dialog box which is described in the Setup Menus chapter. 18-2 Unisys T27 Emulation The Status Bar LTIA On: The host connection is active, but the Unisys T27 emulation does not have an active address. Off: No line activity; or the Unisys T27 emulation transmitted a character to the host, or the user pressed LOCAL. Blink: The host connection is active and the Unisys T27 emulation has an active address. ENQUIRY On: The host is unable to send a message to the keyboard environment, press RCV to enable the keyboard environment to receive data. Off: The DCP (data comm pointer) page went into receive mode; or the user pressed LOCAL. LOCAL On: The user pressed LOCAL; or the user pressed a key when the cursor and the DCP (data comm pointer) were in the same page. Off: The Unisys T27 emulation is switched to transmit or receive mode. RCV On: The keyboard environment is in receive mode (ready to receive data) or is receiving data from the host; or FSL, GSL, BSL was received while the T27 was in transmit or local mode and the Fast Select enabled option is selected in the Unisys T27 Settings dialog box. Off: Data has been received successfully; or the T27 went into transmit mode by use of XMIT or SPCFY; or the cursor and DCP are in the same page upon data entry. XMIT On: The keyboard environment is transmitting data to the host or is ready to transmit data. 18-3 Unisys T27 Emulation Off: Transmission has been successfully completed or the T27 is switched to local mode. Keyboard Mapping The following illustration shows where Unisys T27 keyboard functions are mapped to keys on the 101/102 key Enhanced AT keyboard layout. Special key functions that are provided on the Unisys T27 keyboard can be mapped to any key on your keyboard by using the UT virtual key names listed in the Define Keyboard Macros dialog box. 18-4 F2 Alt key usage: Normal key usage: F1 F1 ENV 1 F3 F4 F5 F6 F7 F8 MARK BOUND ETX UNDER F9 SPLIT F10 FULL LOCAL RECVE (SCR L) (SCR D) (SCR R) (SCR U) SCR = Scroll (D LINE) (C EOP) NEXT D CHR CL EOL PAGE (I LINE) (CL ALL) PREV I CHAR HOME PAGE (PR ALL) RECALL HELP PR UNP STORE XMIT SPCFY , (SRCH CHAR) I LINE = Insert Line D LINE = Delete Line C EOP = Clear To End Of Page CL EOL = Clear To End Of Line All unmarked keys function as indicated by the legends on the keycaps. Functions in brackets are generated when the keys are shifted. ENV 1 ENV 2 ENV 3 CONFG Unisys T27 Emulation Enhanced AT Keyboard Layout 18-5 Unisys T27 Emulation Notes 18-6 Wyse Emulations 19 Wyse Emulations This chapter describes features of the Wyse WY-50, WY-50+ and WY-60 terminal emulations. Session Configuration WBT Mode This section describes the basic procedure for creating a session configuration when the terminal is in WBT mode. The options available are described in detail in chapter 2. 1. Click the Configure tab in the Terminal Connection Manager then click the Add button to display the New Connection dialog box. 2. Select Terminal Emulation Client and click OK. The Terminal Emulation Client Connection Wizard - Connection Information dialog box will be displayed. 3. Enter a name which will identify this session configuration for future selection in the Connection Name box. 4. Select the Wyse terminal emulation required in the Emulation list box. The WY50, WY50+ and WY60 emulations provide compatibility with software designed to drive the Wyse WY-50, WY-50+ and WY-60 terminals, respectively. The ADDS A2 emulation provides compatibility with software designed to drive the ADDS Viewpoint A2 terminal, as emulated by the Wyse WY-50/50+/60 terminals. The HZ 1500 emulation provides compatibility with software designed to drive the Hazeltine 1500 terminal, as emulated by the Wyse WY-50/50+/60 terminals. The TVI 910+, TVI 920 and TVI 925 emulations provide compatibility with software designed to drive the TeleVideo 910+, 920 and 925 terminals, respectively, as emulated by the Wyse WY-50/50+/60 terminals. 19-1 Wyse Emulations 5. Click Next to display the Host Information dialog box. For a TCP/IP connection, click the TCP/IP button, enter the name or internet address of the host computer in the Host Name box, then click Advanced for additional Telnet options. Refer to the TCP/IP Connection Settings section in chapter 2 for details. For a modem connection, click the Modem button then click Advanced to display configuration options. Refer to the Modem Connection Settings section in chapter 2 for details. For a serial connection, click the Serial button, specify the communications port in the Connect To box, then click Advanced for additional serial options. Refer to the Serial Connection Settings section in chapter 2 for details. Make the relevant selections then click OK to return to the Host Information dialog box, then click Next to display the Advanced Options dialog box. 6. Click Finish to return to the Terminal Connection Manager. 7. In the Terminal Connection Manager, display the Connections list, select the session name you specified earlier in step 3, then click the Connect button. All the Wyse associated emulations are configured via the Wyse Settings dialog box which is described in the Setup Menus chapter. Note that some settings may not apply to the particular emulation currently running. Selecting a setting that is not applicable to the current emulation will cause the emulator to use the default setting for that emulation when the dialog box is exited. Non-WBT Mode This section describes the basic procedure for creating a session configuration when the terminal is not in WBT mode. The options available are described in detail in the Setup Menus chapter. 1. Display the Settings menu from the command bar and select Emulation... to display the Emulation Settings dialog box. 2. Select the Wyse terminal emulation required in the Alpha Emulation list box. The WY50, WY50+ and WY60 emulations provide compatibility with software designed to drive the Wyse WY-50, WY-50+ and WY-60 terminals, respectively. The ADDS A2 emulation provides compatibility with software designed to drive the ADDS Viewpoint A2 terminal, as emulated by the Wyse WY-50/50+/60 terminals. The HZ 1500 emulation provides compatibility with software designed to drive the Hazeltine 1500 terminal, as emulated by the Wyse WY-50/50+/60 terminals. 19-2 Wyse Emulations The TVI 910+, TVI 920 and TVI 925 emulations provide compatibility with software designed to drive the TeleVideo 910+, 920 and 925 terminals, respectively, as emulated by the Wyse WY-50/50+/60 terminals. 3. Display the File menu from the command bar and select New Connection to display the New Connection dialog box. 4. Select the type of host connection required in the Type list box. For a TCP/IP connection, select TCP/IP, enter the name or internet address of the host computer in the Connect To box, then click Configure for additional Telnet options. Refer to the TCP/IP Connection Settings section in chapter 2 for details. For a modem connection, select Modem, specify the communications port in the Connect To box, then click Configure to display configuration options. Refer to the Modem Connection Settings section in chapter 2 for details. For a serial connection, select Serial, specify the communications port in the Connect To box, then click Configure for additional serial options. Refer to the Serial Connection Settings section in chapter 2 for details. 5. When you have specified the required settings in the New Connection dialog box, click the Connect button to make the connection. Note: You can save these settings as a connection template using the Save Session As dialog box. Refer to the Setup Menus chapter for details. All the Wyse associated emulations are configured via the Wyse Settings dialog box which is described in the Setup Menus chapter. Note that some settings may not apply to the particular emulation currently running. Selecting a setting that is not applicable to the current emulation will cause the emulator to use the default setting for that emulation when the dialog box is exited. 19-3 Wyse Emulations Display Format Below the command bar (described in chapter 2) the display is divided into three areas by default: the status line, the data area, and the label line. The status line which is used to display information relating to the emulation and messages from the application. The following section describes the status messages that can be displayed by the emulation. The data area is where data entered from the keyboard or the application is displayed. The data area is set to 24 lines by 80 columns by default. The label line is displayed at the bottom of the screen when the data area is set to 24 or 42 lines. This is can be used to display messages or function key labels defined by the host. Status Line Messages The status line is divided into two sections. The left section displays messages relating to the emulation and the right section is used to display messages from the host. The type of status line displayed is determined by the setting of the Status Line option in the Wyse Settings dialog box. The Extended status line provides similar information to the Standard status line but with additional fields for displaying information on local editing mode. The emulation status messages are displayed in one of six or eight fields along the first section of the status line, depending on whether the Standard or Extended status line is displayed. The messages and their meanings are listed below. FDX 1 2 3 4 001,001 5 6 7 8 Host Messages Standard & Extended Status Line Field 1: Indicates the current keyboard mode. CAPS indicates that Caps Lock is on. Press the Caps Lock key to toggle the mode on and off. LOCK indicates that the keyboard is locked. This takes precedence over the CAPS and NUM messages. NUM indicates that Num Lock is on. Press the Num Lock key to toggle the mode on and off. 19-4 Wyse Emulations Field 2: Indicates the number of the page that is currently displayed. No message is displayed when the current page is 0. Field 3: * indicates that Monitor mode is on. In this mode, received codes are not actioned but displayed as symbolic representations. Field 4: Indicates the current operating mode. FDX indicates full-duplex mode. HDX indicates half-duplex mode. LCL indicates local mode. BLK indicates block mode. HBLK indicates half-duplex block mode. HLD indicates that display update has been suspended. Pressing the Hold key will toggle display update on and off. Field 5: >AUX indicates that the emulation is in auxiliary print or transparent print mode. <AUX indicates that the emulation is in auxiliary receive mode. =AUX indicates that the emulation is in auxiliary receive mode and auxiliary print mode. %AUX indicates that a print screen operation is in progress. Standard Status Line Field 6: rrr-ccc indicates the current row and column position of the cursor. Extended Status Line Field 6: PROT indicates that Protect mode is on. Field 7: WPRT indicates that Write-protect mode is on when in Protect mode. Field 8: INS indicates that Insert mode is on. Keyboard Mapping The following illustration shows where Wyse keyboard functions are mapped to keys on the 101/102 key Enhanced AT keyboard layout. Special key functions that are provided on the Wyse keyboard can be mapped to any key on your keyboard by using the WY virtual key names listed in the Define Keyboard Macros dialog box. 19-5 19-6 F2 F1 F3 F13 F4 F14 F5 F15 F6 F16 F2 F12 F7 F8 F9 BACKSPACE DELETE F10 F11 F12 D = Delete C = Clear (REPL) HOME PREV INSERT (D LIN) (C SCR) NEXT D CHR C LINE PRINT FUNCT (SEND) HOLD BREAK INS CH with Alt ) 8 ( 9 ) ) (PREV) 0 2 1 (REPLACE) + 3 ENTER (DEL) . 4 5 6 (C LINE) ( ) (NEXT) ( 7 (HOME) ( INS LIN with Ctrl All unmarked keys function as indicated by the legends on the keycaps. Numeric keypad bracketed functions are generated when Num Lock is OFF. Bracketed functions not on the Numeric keypad are generated when shifted. F1 - F6 function as F13 - F16 when shifted. F12 F11 Alt key usage: Normal key usage: TAB (BACKTAB) ESC Wyse Emulations Enhanced AT Keyboard Layout Initialization Commands 20 Initialization Commands This chapter describes all the initialization commands that can be included in the registry or on the command line to run the emulator. Introduction This chapter describes the registry entries and command line options that can be used to specify how the emulator is initially run. Registry entries for the emulator are read from a registry key under HKLM\Software\Pericom\<product name> using Startup,Default or Startup,NAME (where NAME is specified using the -N command line option). Command line options are used to modify the configuration of the emulator on startup. They are entered after the name of the emulator and each option must be preceded by a space. An option is immediately followed by its setting if one is required, without a space in between. The following section provides a summary of all the registry entries and command line options supported by the emulator. This is followed by sections describing the commands in detail, grouped according to their function. 20-1 Initialization Commands Command Summary Note that ◆ indicates the command is only available for NT or XP embedded versions of the emulator. ■ indicates the command is only available if your version of TeemTalk supports graphics emulations. Host Connection Command Function Registry Entry Command Line Load Winsock on start-up Exit on connection close/fail No exit on connection close/fail Reconnect on close/fail New session warning message Close connection on exit none ExitOnClose = "on" ExitOnClose = "off" ExitOnClose = "Connect" SessionWarning = "off" WarnExit = "off" -LW -E -E1 -E2 -OS -J Session Configuration Command Function Registry Entry Command Line Start-up command group to action Session configuration to use Disable bell ◆ Enable debug (Capture/Replay) ◆ Enable debug, log send/receive none none Bell = "off" none none -Ngroupname -SE"description" -BE -Debug -Debug2Way Display Command Function Registry Entry Command Line ◆ Window minimized on start-up ◆ Window maximized on start-up ◆ Window full screen on start-up ◆ Disable window frame resize Title to display in title bar Subtitle to display in title bar ◆ Disable title bar Disable Min/Max & Close buttons ◆ Disable Minimize button ◆ Disable Maximize button Disable Close button ◆ Disable System menu ◆ Disable System & Min/Max Disable Command bar Disable Command bar Disable tool buttons on cmd bar WindowSize = "minimized" WindowSize = "maximized" WindowSize = "FullScreen" none none none none none MinimizeBox = "off" MaximizeBox = "off" MenuCloseItem = "off" SystemMenu = "off" SystemMenu = "none" CommandBar = "off" CmdBarTools = 0 CmdBarTools = 1 -MI -MZ -F -WF -T"title" -ST"subtitle" -TB -SY -MN -MX -MT none none -CB -MA -TB 20-2 Initialization Commands Disable toolbar none Disable menu bar/pop-ups, toolbar none ◆ Disable menu bar none ◆ Disable menu bar & pop-ups none Disable File menu FileMenu = "off" Disable Factory item Factory = "off" Disable Reset item Reset = "off" Disable New Connection item NewConnection = "off" Disable OpenSession item OpenSession = "off" Disable CloseSession item CloseSession = "off" Disable Save Session item SaveSession = "off" Disable Save Session As item SaveSessionAs = "off" Disable Start-up Options item StartupOptions = "off" Disable File Transfer item FileTransfer = "off" Disable FTP item FTP = "off" Disable Print Setup item PrintSetup = "off" Disable Print Screen item PrintScreen = "off" Disable Print Buffer item Print Buffer = "off" Disable Auto Print item AutoPrint = "off" Disable Cancel Print item CancelPrint = "off" Disable Eject Page item EjectPage = "off" Disable Exit item Exit = "off" Disable Edit menu EditMenu = "off" Disable Clipboard Text item ClipboardText = "off" Disable Clipboard Graphics item ClipboardGraphics = "off" Disable Copy item Copy = "off" Disable Paste item Paste = "off" Disable Select All item SelectAll = "off" Disable Clear Buffer item ClearBuffer = "off" Disable Settings menu SettingsMenu = "off" Disable Attributes item Attributes = "off" Disable Block Transmission item BlockTransmission = "off" Disable BQ3107 item BQ3107 = "off" Disable Emulation item Emulation = "off" ■ Disable Graphics item Graphics = "off" Disable HP2392A item hp2392a = "off" Disable IBM 3151 item Ibm3151 = "off" Disable IBM 3270 item Ibm3270 = "off" Disable IBM5250 item Ibm5250 = "off" Disable Keyboard Macros item KeyboardMacros = "off" Disable Local Editing item LocalEditing = "off" Disable Mouse Buttons item MouseButtons = "off" Disable Serial item Serial = "off" Disable Soft Buttons item SoftButtons = "off" Disable TA6526 item ta6526 = "off" Disable Terminal item Terminal = "off" -L -CB1 -MB -MB1 -MF none none none none none none none none none none none none none none none none none -MD none none none none none none -MS none none none none none none none none none none none none none none none none 20-3 Initialization Commands Disable Unisys T27 item Disable Wyse item ◆ Disable Tools menu Disable scroll bar ◆ Soft button levels displayed Disable status bar & DEC status Disable colour palette Flashing characters in all sessions Reflection 4 colour support ■ Graphics redraw on resize ■ Crosshaie cursor size ■ Save 4014 graphics display ■ Tek graphics area height ■ Tek graphics area width ■ Disable backing store ■ Enable plane masking ■ Disable sixel graphics scaling UnisysT27 = "off" Wyse = "off" ToolsMenu = "off" ScrollBar = "off" ButtonLevels = 0-4 StatusLine = "off" UsePalette = "off" none iR4Colours = 1 GraphicsRedraw = mode CrosshairSize = 0-1024 SaveTekImage = "on" GraphicsHeight = integer GraphicsWidth = integer BackingStore = "off" PlaneMasking = "on" ScaleSixels = "off" none none -MO -SB -BL0-4 -V -SP -FB -R4 -G0-4 -X0-1024 -P -GHinteger -GWinteger -B -PM -Y Keyboard & Mouse Command Function Registry Entry Command Line MDIS P9 emulation: convert £ to $ ◆ Disable all mouse edit functions ◆ Enable all mouse edit functions ◆ Enable mouse highlighting only MDCUK = "Yes" MouseEdit = "off" MouseEdit = "on" MouseEdit = "disabled" none -ME1 -ME2 -ME0 Registry Entry none none none Command Line -BA1 -BA2 -BA3 Auxiliary Port Command Function Set auxiliary port as bidirectional Auxiliary port opened at start-up Aux port opened & bidirectional 20-4 Initialization Commands Host Connection Load Winsock On Start-up Registry Entry: None Command Line: -LW Default Setting: Off This will initialize the Winsock stack immediately when the emulator is started, enabling dialup over PPP or SLIP to gain a connection to a service provider. Action On Host Connection Close Registry Entry: ExitOnClose = "on" emulator exits immediately ExitOnClose = "off" emulator does not exit ExitOnClose = "connect" emulator attempts to reconnect Command Line: -E emulator exits immediately -E1 emulator does not exit -E2 emulator attempts to reconnect Default Setting: Message box displayed When the host closes the connection or the connection fails, the emulator normally displays a message box giving you the option to reconnect, cancel or exit. These commands will disable the message box and cause the emulator to immediately perform the required option. Disable New Session Warning Message Box Registry Entry: SessionWarning = "off" Command Line: -OS Default Setting: Enabled A warning message is displayed by default when you attempt to open a new session while a session is currently open. These commands enable you to disable the message box so that the emulator automatically closes the current session and opens the new session. 20-5 Initialization Commands Disable 'Exit' Message Box Registry Entry: WarnExit = "off" Command Line: -J Default Setting: Enabled A message box will be displayed if you attempt to exit the emulator while a network session is still active. These commands will disable the message box so that the emulator automatically closes the network connection when it is exited. 20-6 Initialization Commands Session Configuration Start-up Command Group To Action Registry Entry: None Command Line: -Nname Default Setting: Default You can specify more than one set of start-up commands in the registry. This enables you to configure each instance of the emulator differently. Each set of commands other than the default set must have the following heading in the registry under HKLM\Software\Pericom\<product name>: Startup,name where name can be any unique identifying name. You can specify which set of startup commands the emulator is to use by including the following on the command line for loading the emulator, where name is substituted with the actual name of the start-up group required: -Nname If this command is not present then the emulator will use the start-up commands under the Startup,Default heading. Connection Template To Use Registry Entry: None Command Line: -SE"description" Default Setting: Untitled This command enables you to override the default connection template used when the emulator is loaded, as specified in the Open Session dialog box. The description must exactly match the description assigned to a connection template already saved using the Save Session As dialog box and must be enclosed by double-quotes. Disable Bell Registry Entry: Bell = "off" Command Line: -BE Default Setting: Enabled These commands enable you to turn off the terminal bell. 20-7 Initialization Commands Enable Debug (File Capture/Replay) Registry Entry: None Command Line: -Debug Default Setting: Disabled This command is only available for NT or XP embedded versions of the emulator. It enables the File Capture and File Replay options in the File menu which allow received host data to be logged in a file then replayed. Enable Debug Log Send & Receive Registry Entry: None Command Line: -Debug2Way Default Setting: Disabled This command is only available for NT or XP embedded versions of the emulator. It enables the File Capture and File Replay options in the File menu which allow received host data and data sent to the host to be logged in a file then replayed. 20-8 Initialization Commands Display Window Minimized On Start-Up Registry Entry: WindowSize = "minimized" Command Line: -MI Default Setting: Not applicable These commands are only available for NT or XP embedded versions of the emulator. They will cause the window to be displayed as an icon when the emulator is loaded. Window Maximized On Start-Up Registry Entry: WindowSize = "maximized" Command Line: -MA Default Setting: Not applicable These commands are only available for NT or XP embedded versions of the emulator. They will cause the window to be displayed at the maximum size possible when the emulator is loaded, while retaining the default number of lines and columns and including all window elements if enabled (title bar, soft buttons etc.). Workspace Fills Screen On Start-Up Registry Entry: WindowSize = "FullScreen" Command Line: -F Default Setting: Not applicable These commands are only available for NT or XP embedded versions of the emulator. They will cause the emulation workspace to fill the entire display when the emulator is loaded, while retaining the default number of lines and columns. Disable Window Frame Resize Registry Entry: None Command Line: -WF Default Setting: Enabled This command is only available for NT or XP embedded versions of the emulator. It prevents the mouse from resizing the window by dragging the edge. 20-9 Initialization Commands Window Title Registry Entry: None Command Line: -T"title" Default Setting: Emulator name This enables you to specify the title that is to be displayed in the title bar. This is useful when you are running more than one instance of the emulator. If no title is specified then the name of your version of the emulator will be displayed. Window Subtitle Registry Entry: None Command Line: -ST"subtitle" Default Setting: Untitled This enables you to specify a subtitle for display in the title bar of a specific emulator window. By default the subtitle is the name of the session. Disable Title Bar Registry Entry: None Command Line: -TB Default Setting: on This command is only available for NT or XP embedded versions of the emulator. It will remove the title bar from the window. Disable Min/Maximize & Close Buttons Registry Entry: None Command Line: -SY Default Setting: on This will remove the Control (System) menu icon and the minimize and maximize buttons from the emulator window. 20-10 Initialization Commands Disable Minimize Button Registry Entry: MinimizeBox = "off" Command Line: -MN Default Setting: on These commands will remove the minimize button from the emulator window. Disable Maximize Button Registry Entry: MaximizeBox = "off" Command Line: -MX Default Setting: on These commands will remove the maximize button from the emulator window. Disable Close Window Items Registry Entry: MenuCloseItem = "off" Command Line: -MT Default Setting: on These commands will remove the Close window option from the Control (System) menu and disable the close window (X) button at the top right corner of the emulator window. Disable System Menu Registry Entry: SystemMenu = "off" Command Line: None Default Setting: on This command is only available for NT or XP embedded versions of the emulator. It will remove the System (Control) menu icon from the emulator window. 20-11 Initialization Commands Disable System Menu & Min/Maximize Buttons Registry Entry: SystemMenu = "none" Command Line: None Default Setting: on This command is only available for NT or XP embedded versions of the emulator. It will remove the System (Control) menu icon and the Minimize and Maximize buttons from the emulator window. Disable Command Bar Registry Entry: CmdBarTools = 0 Command Line: -MA Default Setting: on This will disable the command bar. Disable Command Bar Registry Entry: CommandBar = "off" Command Line: -CB Default Setting: on This will remove the Command bar (menus, tool buttons and soft buttons) from the emulator window. Note that the menus can still be displayed by pressing the Alt key in conjunction with the relevant keyboard accelerator. For example, pressing the keys Alt + F will display the File menu. Disable Tool Buttons On Command Bar Registry Entry: CmdBarTools = 1 Command Line: -TB Default Setting: on This will disable the tool buttons on the command bar. 20-12 Initialization Commands Disable Toolbar Registry Entry: None Command Line: -L Default Setting: on This command will remove the toolbar from the window. Disable Menu Bar, Pop-Up Menus & Toolbar Registry Entry: None Command Line: -CB1 Default Setting: on This will remove the menu bar and toolbar from the emulator window and prevent access to pop-up menus using keyboard commands. Disable Menu Bar Registry Entry: None Command Line: -MB Default Setting: on This command is only available for NT or XP embedded versions of the emulator. It will remove the menu bar from the emulator window. Disable Menu Bar & Pop-Up Menus Registry Entry: None Command Line: -MB1 Default Setting: on This command is only available for NT or XP embedded versions of the emulator. It will remove the menu bar from the emulator window and prevent access to pop-up menus using keyboard commands. 20-13 Initialization Commands Disable File Menu Registry Entry: FileMenu = "off" Command Line: -MF Default Setting: on These commands will disable the File menu. Individual items in the File menu can be disabled by using the following registry entries: Disable Factory item Disable Reset item Disable New Connection item Disable OpenSession item Disable CloseSession item Disable Save Session item Disable Save Session As item Disable Startup Options item Disable File Transfer item Disable FTP item Disable Print Setup item Disable Print Screen item Disable Print Buffer item Disable Auto Print item Disable Cancel Print item Disable Eject Page item Disable Exit item Factory = "off" Reset = "off" NewConnection = "off" OpenSession = "off" CloseSession = "off" SaveSession = "off" SaveSessionAs = "off" StartupOptions = "off" FileTransfer = "off" FTP = "off" PrintSetup = "off" PrintScreen = "off" Print Buffer = "off" AutoPrint = "off" CancelPrint = "off" EjectPage = "off" Exit = "off" Disable Edit Menu Registry Entry: EditMenu = "off" Command Line: -MD Default Setting: on These commands will disable the Edit menu. Individual items in the Edit menu can be disabled by using the following registry entries: Disable Clipboard Text item Disable Clipboard Graphics item Disable Copy item Disable Paste item Disable Select All item Disable Clear Buffer item 20-14 ClipboardText = "off" ClipboardGraphics = "off" Copy = "off" Paste = "off" SelectAll = "off" ClearBuffer = "off" Initialization Commands Disable Settings Menu Registry Entry: SettingsMenu = "off" Command Line: -MS Default Setting: on These commands will disable the Settings menu. Individual items in the Settings menu can be disabled by using the following registry entries: Disable Attributes item Disable Block Transmission item Disable BQ3107 item Disable Emulation item Disable Graphics item (option) Disable HP2392A item Disable IBM 3151 item Disable IBM 3270 item Disable IBM5250 item Disable Keyboard Macros item Disable Local Editing item Disable Mouse Buttons item Disable Serial item Disable Soft Buttons item Disable TA6526 item Disable Terminal item Disable Unisys T27 item Disable Wyse item Attributes = "off" BlockTransmission = "off" BQ3107 = "off" Emulation = "off" Graphics = "off" hp2392a = "off" Ibm3151 = "off" Ibm3270 = "off" Ibm5250 = "off" KeyboardMacros = "off" LocalEditing = "off" MouseButtons = "off" Serial = "off" SoftButtons = "off" ta6526 = "off" Terminal = "off" UnisysT27 = "off" Wyse = "off" Disable Tools Menu Registry Entry: ToolsMenu = "off" Command Line: -MO Default Setting: on These commands are only available for NT or XP embedded versions of the emulator. They will disable the Tools menu. Disable Scroll Bar Registry Entry: ScrollBar = "off" Command Line: -SB Default Setting: on These commands will remove the scroll bar from the window. 20-15 Initialization Commands Soft Buttons Displayed Registry Entry: ButtonLevels = 0-4 Command Line: -BL0-4 Default Setting: 1 These commands are only available for NT or XP embedded versions of the emulator. A set of soft buttons is displayed at the bottom of the emulatoor window by default. There are four soft button levels. Level 1 is displayed by default. Each level consists of twelve programmable buttons, providing a combined total of 48 buttons. You can display all four levels (48 buttons) at the same time if required. All levels are accessible even if not all are displayed, levels stored off-screen can be 'scrolled' into view by clicking the Level button. You can specify how many soft button levels are actually displayed by using this registry entry or command line option. All four levels can be displayed by specifying 4. Specifying 0 will cause no soft buttons to be displayed. Disable Status Bar & DEC Status Line Registry Entry: StatusLine = "off" Command Line: -V Default Setting: on These commands will remove the status bar and DEC VT Status line at the bottom of the window. Disable Colour Palette Registry Entry: UsePalette = "off" Command Line: -SP Default Setting: on The colour palette used by the emulator can be disabled if it interferes with colours used by other applications running at the same time. 20-16 Initialization Commands Flashing Characters Enabled In All Sessions Registry Entry: None Command Line: -FB Default Setting: off This enables characters with the flashing attribute to be displayed as such in all session windows in addition to the currently focused window. Reflection 4 Colour Support Registry Entry: iR4colours = "on" Command Line: -R4 Default Setting: off These commands will cause the colours displayed by the emulator to be compatible with Reflection 4 software. Graphics Redraw On Resize Registry Entry: GraphicsRedraw = “off” / “all” / “on” Command Line: -G0-2 Default Setting: on Only applicable to versions of TeemTalk that support graphics emulations. TeemTalk logs ReGIS or Tek graphics data in local memory by default so that if the window is resized the graphics can be quickly redrawn. This command enables you to prevent logging of data, log graphics data only (default), or log both text and graphics (from which TeemTalk will use just the graphics data when the window is resized). Note that specifying redraw text and graphics may cause TeemTalk to run out of memory. The valid settings are as follows: -G -G0 -G1 -G2 “off” “off” “on” “all” No redraw No redraw Redraw graphics Redraw text & graphics 20-17 Initialization Commands Crosshair Cursor Size Registry Entry: CrosshairSize = 1-1024 Command Line: -X1-1024 Default Setting: 1024 Only applicable to versions of TeemTalk that support graphics emulations. This command specifies the size of the graphics cursor, where size is a numeric value in the range 1 to 1024, i.e. world coordinates. Save 4014 Graphics Display Registry Entry: SaveTekImage = “on” Command Line: -P Default Setting: off Only applicable to versions of TeemTalk that support graphics emulations. This specifies that the 4014 graphics display is saved when you switch to alpha mode so that it is restored when you switch back to graphics mode. Set Tek Graphics Height Registry Entry: GraphicsHeight = <integer> Command Line: -GH<integer> Default Setting: Not applicable Only applicable to versions of TeemTalk that support graphics emulations. This specifies the height of the Tek graphics area in pixels. Set Tek Graphics Width Registry Entry: GraphicsWidth = <integer> Command Line: -GW<integer> Default Setting: Not applicable Only applicable to versions of TeemTalk that support graphics emulations. This specifies the width of the Tek graphics area in pixels. 20-18 Initialization Commands Disable Backing Store Registry Entry: BackingStore = “off” Command Line: -B Default Setting: on Only applicable to versions of TeemTalk that support graphics emulations.When TeemTalk is in ReGIS mode it automatically stores a copy of graphics data in memory when graphics are initially drawn by the host in the window, a feature known as ‘backing store’. This enables graphics to be redrawn quickly from local memory when the TeemTalk window is uncovered after being obscured by other windows, or when the window is restored or maximized from an iconized state. The backing store feature can be disabled so that graphics data sent from the host can be drawn up to 50% faster. Enable Plane Masking Registry Entry: PlaneMasking = “on” Command Line: -PM Default Setting: off Only applicable to versions of TeemTalk that support ReGIS mode. When TeemTalk is in ReGIS mode and you are using an application that uses multiple surfaces, you can use this command to enable TeemTalk to support them. Note that your PC must have a display adaptor that supports 256 colour mode and your system must be running in this mode in order for multiple surfaces to be supported. Disable Sixel Graphics Scaling Registry Entry: ScaleSixels = “off” Command Line: -Y Default Setting: on Only applicable to versions of TeemTalk that support graphics emulations. By default the ReGIS sixel graphics display of 800x400 (world coordinates) is automatically scaled to fit the current size of the TeemTalk window. This command will prevent scaling of the image and cause the right and bottom edges of the image to be clipped to fit the window if it is too big. 20-19 Initialization Commands Keyboard & Mouse Convert £ To $ (MDIS P9) Registry Entry: MDCUK = "Yes" Command Line: None Default Setting: no This command is only applicable to the MDIS P9 emulation. It will convert the £ character to $ and vice versa on the UK keyboard. Disable Editing Functions Registry Entry: MouseEdit = "disabled" allows highlighting but no copy/paste MouseEdit = "off" all editing functions disabled MouseEdit = "on" all editing functions enabled Command Line: -ME0 allows highlighting but no copy/paste -ME1 all editing functions disabled -ME2 all editing functions enabled Default Setting: All functions enabled In some cases it may be necessary to disable the copy and paste function of the mouse buttons to prevent accidental editing. This can be achieved by using one of these commands. When the editing functions are disabled, use the Edit menu options or the numeric keypad keys Shift + . (i.e. Del) to copy and Shift + 0 (i.e. Ins) to paste instead. 20-20 Initialization Commands Auxiliary Port Set Aux Port As Bidirectional Registry Entry: None Command Line: -BA1 Default Setting: Disabled This causes the auxiliary port to be set as bidirectional. Aux Port Opened At Start-Up Registry Entry: None Command Line: -BA2 Default Setting: Disabled This causes the auxiliary port to be opened on start-up. Aux Port Opened & Bidirectional Registry Entry: None Command Line: -BA3 Default Setting: Both functions disabled This causes the auxiliary port to be opened on start-up and set as bidirectional. 20-21 Initialization Commands Notes 20-22 Virtual Key Names A Virtual Key Names This appendix lists all the supported virtual key names which enable you to include a specific key function in a user definition. Standard Virtual Key Names Key Function Virtual Key Name Key Function Virtual Key Name 0-9 A-Z Alt (right) Apps Apostrophe Backspace Break Clear Comma Compose Character Control (left) Control (right) Copy Cursor Down Cursor Left Cursor Right Cursor Up Data Talk Delete End Equal Escape Euro Sign Execute Exit Emulator F1 - F12 Help Hold Screen Home Hyphen Insert VK_0 - VK_9 VK_A - VK_Z VK_RALT VK_APPS VK_APOSTROPHE VK_BACK VK_BREAK VK_CLEAR VK_COMMA VK_COMPOSE VK_CONTROL VK_RCONTROL VK_COPY VK_DOWN VK_LEFT VK_RIGHT VK_UP VK_DATATALK VK_DELETE VK_END VK_EQUAL VK_ESCAPE VK_EUROSIGN VK_EXECUTE VK_EXIT VK_F1 - VK_F12 VK_HELP VK_HOLDSCREEN VK_HOME VK_HYPHEN VK_INSERT Keypad 0 - 9 Keypad Add (+) Keypad Divide (/) Keypad Decimal (.) Keypad Multiply (*) Keypad Subtract (-) Num Lock Off (` ¬ |) 102 key kbd Page Down Page Up Paste Pause Period Print Print Screen Quote (back) Return Scroll Lock Select Semicolon (; :) Separator Setup Shift (right) Slash (backward) Slash (forward) Spacebar Square Bracket (left) Square Bracket (right) Tab Windows (left) Windows (right) VK_NUMPAD0 - 9 VK_ADD VK_DIVIDE VK_DECIMAL VK_MULTIPLY VK_SUBTRACT VK_NUMLOCK VK_OFF VK_NEXT VK_PRIOR VK_PASTE VK_PAUSE VK_PERIOD VK_PRINT VK_SNAPSHOT VK_BACKQUOTE VK_RETURN VK_SCROLL VK_SELECT VK_SEMICOLON VK_SEPARATOR VK_SETUP VK_RSHIFT VK_BACKSLASH VK_SLASH VK_SPACE VK_LBRACKET VK_RBRACKET VK_TAB VK_LWIN VK_RWIN A-1 Virtual Key Names AT&T 4410 Virtual Key Names Key Function Virtual Key Name Key Function Virtual Key Name Backspace Break Clear Cursor Down Cursor Left Cursor Right Cursor Up Delete Escape AT_BACKSPACE AT_BREAK AT_CLEAR AT_DOWN AT_LEFT AT_RIGHT AT_UP AT_DELETE AT_ESCAPE F1 - F8 Home Down Home Up Line Feed Num Lock Return Setup Tab AT_F1 - AT_F8 AT_HOMEDOWN AT_HOMEUP AT_LINEFEED AT_NUMLOCK AT_RETURN AT_SETUP AT_TAB BQ 3107 Virtual Key Names Key Function Backspace Back Tab Blank Blink Clear Cursor Down Cursor Left Cursor Right Cursor Up Delete Character Delete Line Delete Message Delete Tab Erase Erase End Of Line Erase End Of Page Escape Extend FKC1 - FKC12 Shift FKC1 - FKC12 Home Host Message Initialize Partition Init. Both Partitions Insert Character A-2 Virtual Key Name BQ_BACKSPACE BQ_BACKTAB BQ_BLANK BQ_BLINK BQ_CLEAR BQ_DOWN BQ_LEFT BQ_RIGHT BQ_UP BQ_DELETECHAR BQ_DELETELINE BQ_DELMSG BQ_DELTAB BQ_ERASE BQ_ERASEEOL BQ_ERASEEOP BQ_ESCAPE BQ_EXTEND BQ_FKC1 - BQ_FKC12 BQ_S_FKC1 - FKC12 BQ_HOME BQ_HOSTMSG BQ_INITPART BQ_INITRIS2 BQ_INSERTCHAR Key Function Insert Line Keypad 0-9 Keypad Comma Keypad Decimal Keypad Divide Keypad Minus Keypad Multiply Keypad Plus Local Local Message Menu Next Line Num Lock Online Print Form Print Form Screen Print Partition Print Screen Reset Reset Partition Return Set Tab System Tab Transmit Virtual Key Name BQ_INSERTLINE BQ_PAD0 - PAD9 BQ_PADCOMMA BQ_PADDECIMAL BQ_PADDIVIDE BQ_PADMINUS BQ_PADMULTIPLY BQ_PADPLUS BQ_LOCAL BQ_LOCALMSG BQ_MENU BQ_NEXTLINE BQ_NUMLOCK BQ_ONLINE BQ_PRTFORM BQ_PRTFORMSCREEN BQ_PRTPART BQ_PRTSCREEN BQ_RESET BQ_PARTRESET BQ_RETURN BQ_SETTAB BQ_SYSTEM BQ_TAB BQ_TRANSMIT Virtual Key Names DEC VT500 Virtual Key Names Key Function Virtual Key Name Key Function Virtual Key Name Back Tab Break Backspace Compose Character Cursor Down Cursor Left Cursor Right Cursor Up Datatalk Delete Do (F16) Enter Escape F6 - F14 F17 - F20 Find Help (F15) Hold Screen VT_CSIZ VT_BREAK VT_BACKSPACE VT_COMPOSE VT_DOWN VT_LEFT VT_RIGHT VT_UP VT_DATATALK VT_DELETE VT_DO VT_ENTER VT_ESCAPE VT_F6 - VT_F14 VT_F17 - VT_F20 VT_FIND VT_HELP VT_HOLD Insert Keypad 0 - 9 Keypad Comma Keypad Decimal Keypad Minus Next Page PF1 - PF4 Previous Page Print Remove Return Scroll Down Scroll Left Scroll Right Scroll Up Select Setup Tab VT_INSERT VT_PAD0 - 9 VT_COMMA VT_PADDECIMAL VT_MINUS VT_NEXT VT_PF1 - VT_PF4 VT_PREV VT_PRINT VT_REMOVE VT_RETURN VT_PANDOWN VT_PANLEFT VT_PANRIGHT VT_PANUP VT_SELECT VT_SETUP VT_TAB DG 410/412 Virtual Key Names Key Function Virtual Key Name Key Function Virtual Key Name C1 - C4 Cursor Type Cursor Down Cursor Left Cursor Right Cursor Up Erase Line Erase Page F1 - F15 Hold DG_C1 - DG_C4 DG_CURSOR DG_DOWN DG_LEFT DG_RIGHT DG_UP DG_ERASELINE DG_ERASEPAGE DG_F1 - DG_F15 DG_HOLD Home Keypad Comma Keypad Enter Keypad Minus Local Print New Line Normal/Compressed Print Scroll Rate DG_HOME DG_COMMA DG_ENTER DG_MINUS DG_LOCALPRINT DG_NEWLINE DG_SPACING DG_PRINT DG_SCROLLRATE A-3 Virtual Key Names HP 700-92/96 Virtual Key Names Key Function Virtual Key Name Key Function Virtual Key Name Backspace Clear Display Clear Line Cursor Down Cursor Left Cursor Right Cursor Up Delete Delete Character Delete Line Delete Wrap Enter Escape F1 - F8 Home Cursor Home Cursor Shift Insert Character Insert Line HP_BACKSPACE HP_CLEARMEM HP_CLEARLINE HP_DOWN HP_LEFT HP_RIGHT HP_UP HP_DELETE HP_DELETECHAR HP_DELETELINE HP_DELETEWRAP HP_SEND HP_ESCAPE HP_F1 - HP_F8 HP_HOMEUP HP_HOMEDOWN HP_INSERTMODE HP_INSERTLINE Insert Wrap Menu Next Page Previous Page Print Return Scroll Down Scroll Up Select Tab Tab Shifted User System HP_INSERTWRAP HP_MENU HP_NEXTPAGE HP_PREVPAGE HP_PRINT HP_RETURN HP_ROLLDOWN HP_ROLLUP HP_SELECT HP_TAB HP_BACKTAB HP_SYSTEM Mode Sel. Keys User Keys Mode User Key Def. Menu Soft Reset Hard Reset HP_MODES HP_USER HP_FKEYDEFS HP_SOFTRESET HP_HARDRESET IBM 3270 Virtual Key Names Key Function Virtual Key Name Key Function Virtual Key Name Alternate Code Page Attention Back Tab Backspace Clear Close (Delete Space) Copy Cursor Down Cursor Left Cursor Right Cursor Select Cursor Up Cursor Flash On/Off Cursor Line/Block Delay 1 Second Delete Character Delete Word Duplicate Enter Erase End Of Field Erase Input F1 - F24 IB_ALTCP IB_ATTN IB_BACKTAB IB_BACKSPACE IB_CLEAR IB_REV_CL IB_COPY IB_DOWN IB_LEFT IB_RIGHT IB_CURSORSEL IB_UP IB_FLCR IB_ALTCR IB_DELAY IB_DELCHAR IB_DELWORD IB_DUP IB_ENTER IB_ERASEEOF IB_ERASEINPUT IB_F1 - IB_F24 Local National Map M. Slot Reader Start M. Slot Reader Send Mono Case New Line Next Word Notice Board Copy Notice Board Jump Notice Board Setup Notice Board Zoom Num Lock PA1 - PA3 Pause Play Keystrokes Previous Word Print Screen Push Mode On/Off Quit Record Keystrokes Reset Return Rev. Input Direction IB_LCLMAP IB_MSRATTRIB IB_OPIDRDR IB_MONO IB_NEWLINE IB_NEXTWORD IB_NB_COPY IB_NB_JUMP IB_NB_SETUP IB_NB_ZOOM IB_NUMLOCK IB_PA1 - IB_PA3 IB_PAUSE IB_PLAY IB_PREVWORD IB_PRINT IB_PUSH IB_QUIT IB_RECORD IB_RESET IB_RETURN IB_REV_IP A-4 Virtual Key Names Field Mark Fn Edit Go To End Of Line Home Insert Mode IB_FIELDMARK IB_FEDIT IB_GO_EOL IB_HOME IB_INSERT Reverse Screen Rule Display Selectable Field Tab System Request Tab IB_REV_SC IB_RULE IB_FIELDTAB IB_SYSREQ IB_TAB IBM 5250 Virtual Key Names Key Function Virtual Key Name Key Function Virtual Key Name Alternate Code Page Attention Back Tab Backspace Backspace (non-dest) Clear Cursor Down Cursor Left Cursor Right Cursor Fast Left Cursor Fast Right Cursor Select Cursor Up Delay 1 Second Delete Character Duplicate Enter Erase End Of Field Erase Input F1 - F24 Field Exit Field Mark Field Minus AS_ALTCP AS_ATTN AS_BACKTAB AS_BACKSPACE AS_NONDESTBS AS_CLEAR AS_DOWN AS_LEFT AS_RIGHT AS_FASTLEFT AS_FASTRIGHT AS_CURSORSEL AS_UP AS_DELAY AS_DELCHAR AS_DUP AS_ENTER AS_ERASEEOF AS_ERASEINPUT AS_F1 - AS_F24 AS_FIELDEXIT AS_FIELDMARK AS_FIELDMINUS Field Plus Go To End Of Line Help Home Insert Mode Monochrome New Line PA1 - PA3 Pause Play Keystrokes Print Local Print Push Mode On/Off Quit Record Keystrokes Reset Roll Down Roll Up Rule Display System Request Tab Test AS_FIELDPLUS AS_GO_EOL AS_HELP AS_HOME AS_INSERT AS_MONO AS_NEWLINE AS_PA1 - AS_PA3 AS_PAUSE AS_PLAY AS_PRINTLOCAL AS_PRINT AS_PUSH AS_QUIT AS_RECORD AS_RESET AS_ROLLDOWN AS_ROLLUP AS_RULE AS_SYSREQ AS_TAB AS_TEST IBM 5250 Word Processing Mode Key Function Virtual Key Name Begin Bold AS_WP_BOLD Begin Underline AS_WP_UNDERLINE Word Underline AS_WP_WORD_UNDER End Attribute AS_WP_END_ATTR Centre Text AS_WP_CENTRE Half-Index Up AS_WP_HI_UP Half-Index Down AS_WP_HI_DOWN Next Text Column AS_WP_NEXT_COL Beginning of Line AS_WP_BEG_LINE End of Line AS_WP_END_LINE Key Function Virtual Key Name Top of Page End of Page Start New Page Insert Carrier Return Insert Stop Code Find Stop Code Required Page End Required Space Required Tab Symbols Command AS_WP_TOP_PAGE AS_WP_END_PAGE AS_WP_NEW_PAGE AS_WP_RETURN AS_WP_STOP_CODE AS_WP_FIND_STOP AS_WP_REQD_PAGE AS_WP_REQD_SPACE AS_WP_REQD_TAB AS_WP_SYMBOLS A-5 Virtual Key Names MDIS Prism Virtual Key Names Key Function Virtual Key Name Key Function Virtual Key Name Back Tab Backspace Break Clear Cursor Down Cursor Left Cursor Right Cursor Up Delete Enter Escape F1 - F18 Hold Screen Home Keypad 0 - 9 MD_BACKTAB MD_BACKSPACE MD_BREAK MD_CLEAR MD_DOWN MD_LEFT MD_RIGHT MD_UP MD_DELETE MD_ENTER MD_ESCAPE MD_F1 - MD_F18 MD_HOLD MD_HOME MD_PAD0 - 9 Keypad Comma Keypad Decimal Keypad Minus Line Feed Print Screen Return Screen Down Screen Left Screen Right Screen Up Scroll Down Scroll Left Scroll Right Scroll Up Tab MD_PADCOMMA MD_PADDECIMAL MD_PADMINUS MD_LINEFEED MD_PRINT MD_RETURN MD_SCREENDOWN MD_SCREENLEFT MD_SCREENRIGHT MD_SCREENUP MD_SCROLLDOWN MD_SCROLLLEFT MD_SCROLLRIGHT MD_SCROLLUP MD_TAB PT250 Virtual Key Names Key Function Virtual Key Name Key Function Virtual Key Name Back Tab Backspace Break Cancel Change Mode Character Set Clear Cursor Down Cursor Left Cursor Right Cursor Up Delete End/Begin Enter Erase Escape F1 - F10 Help Home Insert Keypad 00 PT_BACKTAB PT_BACKSPACE PT_BREAK PT_CANCEL PT_CHNGMODE PT_CHARSET PT_CLEAR PT_DOWN PT_LEFT PT_RIGHT PT_UP PT_DELETE PT_ENDBEGIN PT_ENTER PT_ERASE PT_ESC PT_F1 - PT_F10 PT_HELP PT_HOME PT_INSERT PT_PAD00 Keypad 0 - 9 Keypad Decimal Keypad Minus Keypad Plus Menu Next Num Lock PA1 - PA4 PF1 - PF12 Previous Print Screen Return Scroll Down Scroll Left Scroll Lock Scroll Right Scroll Up Stop Tab Unlabelled Large Unlabelled Small PT_PAD0 - 9 PT_PADDECIMAL PT_PADMINUS PT_PADPLUS PT_MENU PT_NEXT PT_NUMLOCK PT_PA1 - PT_PA4 PT_PF1 - PT_PF12 PT_PREV PT_PRTSCN PT_RETURN PT_SCROLLDOWN PT_SCROLLLEFT PT_SCROLLLOCK PT_SCROLLRIGHT PT_SCROLLUP PT_STOP PT_TAB PT_UNLLARGE PT_UNLSMALL A-6 Virtual Key Names SCO Console Virtual Key Names Key Function Virtual Key Name Key Function Virtual Key Name Backspace Cursor Down Cursor Left Cursor Right Cursor Up Delete Delete + Shift Delete + Ctrl + Shift End End + Shift Enter Escape SC_BACKSPACE SC_DOWN SC_LEFT SC_RIGHT SC_UP SC_DELETE SC_S_DELETE SC_CS_DELETE SC_END SC_S_END SC_ENTER SC_ESCAPE F1 - F12 F1 - F12 + Shift F1 - F12 + Ctrl F1 - F12 + Ctrl + Shift Home Insert Page Down Page Down + Shift Page Up Return Tab Tab + Shift SC_F1 - SC_F21 SC_S_F1 - SC_S_F12 SC_C_F1 - SC_C_F12 SC_CS_F1 - SC_CS_F12 SC_HOME SC_INSERT SC_PAGEDOWN SC_S_PAGEDOWN SC_PAGEUP SC_RETURN SC_TAB SC_S_TAB TA6530 Virtual Key Names Key Function Virtual Key Name Key Function Virtual Key Name Backspace Back Tab Break Character Delete Character Insert Cursor Down Cursor Left Cursor Right Cursor Up Delete End Erase Line Erase Page Escape F1 - F16 Home Keypad 0 - 9 TA_BACKSPACE TA_BACKTAB TA_BREAK TA_CHARDEL TA_CHARINS TA_DOWN TA_LEFT TA_RIGHT TA_UP TA_DEL TA_END TA_ERASELINE TA_ERASEPAGE TA_ESC TA_F1 - TA_F16 TA_HOME TA_PAD0 - TA_PAD9 Keypad Comma Keypad Decimal Keypad Enter Keypad Minus Line Delete Line Insert Num Lock Page Down Page Up Print Screen Return Roll Down Roll Up Tab Tab Clear Tab Clear All Tab Set TA_PADCOMMA TA_PADDECIMAL TA_ENTER TA_PADMINUS TA_LINEDEL TA_LINEINS TA_NUMLOCK TA_PAGEDOWN TA_PAGEUP TA_PRTSCR TA_RETURN TA_ROLLDOWN TA_ROLLUP TA_TAB TA_TABCLEAR TA_TABCLRALL TA_TABSET A-7 Virtual Key Names TVI 955 Virtual Key Names Key Function Virtual Key Name Key Function Virtual Key Name Back Tab Backspace Break Clear Entry Clear Space Cursor Down Cursor Left Cursor Right Cursor Up Delete Enter Escape TV_BACKTAB TV_BACKSP TV_BREAK TV_CLRENTRY TV_CLRSPACE TV_DOWN TV_LEFT TV_RIGHT TV_UP TV_DELETE TV_ENTER TV_ESCAPE F0 - F22 Go To Keypad 00 Line Feed Misc. Functions No Scroll Print Reset Return Status Tab TV_F0 - TV_F22 TV_GOTO TV_PAD00 TV_LINEFEED TV_M0 - TV_M9 TV_NOSCROLL TV_PRINT TV_RESET TV_RETURN TV_STATUS TV_TAB Unisys T27 Virtual Key Names Key Function Virtual Key Name Key Function Alt Alt Lock Back Backspace Block Bound Clear Clear EOL Clear EOP Config Ctrl Ctrl Lock Cursor Down Cursor Left Cursor Right Cursor Up Delete Character Delete Line ENV1 - ENV3 Escape ETX F1 - F10 Full GS Help Home Insert Character UT_ALT UT_ALTLOCK UT_BACK UT_BACKSPACE UT_BLOCK UT_BOUND UT_CLEAR UT_CLEAREOL UT_CLEAREOP UT_CONFIG UT_CTRL UT_CTRLLOCK UT_DOWN UT_LEFT UT_RIGHT UT_UP UT_DELETECHAR UT_DELETELINE UT_ENV1 - UT_ENV3 UT_ESCAPE UT_ETX UT_F1 - UT_F10 UT_FULL UT_GS UT_HELP UT_HOME UT_INSERTCHAR Insert Line UT_INSERTLINE Keypad 00 UT_NUMPAD00 Keypad 0 - 9 UT_NUMPAD0 - 9 Keypad Comma UT_NUMPADCOMMA Keypad Decimal UT_NUMPADDECIMAL Local UT_LOCAL Lock UT_LOCK Lock Shift UT_LOCKSHIFT Mark UT_MARK Next UT_NEXT Print Unprotected UT_PRINTUNP Print All UT_PRINTALL RCV UT_RCV Recall UT_RECALL Return UT_RETURN Reverse Tab UT_REVERSETAB Search Character UT_SEARCHCHAR Scroll Down UT_SCROLLDOWN Scroll Left UT_SCROLLLEFT Scroll Right UT_SCROLLRIGHT Scroll Up UT_SCROLLUP Specify UT_SPCFY Split UT_SPLIT Store UT_STORE Tab UT_TAB Underscore UT_UNDERSCORE XMIT UT_XMIT A-8 Virtual Key Name Virtual Key Names Viewdata Virtual Key Names Key Function Virtual Key Name Key Function Virtual Key Name * (Star) # (Hash) Cancel Print Cursor Down Cursor Left PR_STAR PR_HASH PR_CANCEL PR_DOWN PR_LEFT Cursor Right Cursor Up Exit to ANSI mode Reveal PR_RIGHT PR_UP PR_EXIT PR_REVEAL Wyse Virtual Key Names Key Function Virtual Key Name Key Function Virtual Key Name Backspace Cursor Down Cursor Left Cursor Right Cursor Up Delete Del Key End Enter Escape F1 - F16 Function Home Insert Keypad 5 Page Down Page Up Print Return Tab WY_BACKSPACE WY_DOWN WY_LEFT WY_RIGHT WY_UP WY_DELETE WY_DELKEY WY_END WY_ENTER WY_ESC WY_F1 - WY_F16 WY_FUNCT WY_HOME WY_INSERT WY_KP5 WY_PAGEDOWN WY_PAGEUP WY_PRINT WY_RETURN WY_TAB Delete Delete shifted End End shifted Insert Insert shifted Insert shifted Print shifted Alt + A WY_DELCHAR WY_DELLINE WY_CLRLINE WY_CLRSCRN WY_INSCHAR WY_INSLINE WY_REPLACE WY_SEND WY_CHARSET Notes: To obtain the virtual key names for shifted functions of the keys listed at left, substitute WY_ with WY_S_. The virtual key names listed above are alternative names that can be used. A-9 Virtual Key Names TeemTalk Virtual Key Name Functions TeemTalk provides additional virtual key name functions for special tasks such as sending text to a file or the serial port, and reading text from a file to place in the keyboard buffer as if typed. Key Function Virtual Key Name Start Send Text sequence Start Read Text sequence End Send/Read Text sequence Delay (nnn = tenths of a second) VK_FILE_O VK_FILE_I VK_FEND VK_SLEEPnnn The following sections describe how to use these virtual key names. Sending Text To A File <VK_FILE_O><filename>data string<VK_FEND> will write the data string to filename. If the file already exists it is replaced. For example, <VK_FILE_O><c:\file.txt>text to enter to file_013_010next line of file<VK_FEND> will create a file called file.txt containing the following two lines of text: text to enter to file next line of file Sending Text To The Serial Port The following command will send text to the serial port: <VK_FILE_O><com1:>text to send to serial port_013_010next line<VK_FEND> which will result in the following being sent: text to send to serial port<CR><LF> next line A-10 Virtual Key Names Reading Text From A File The following command format is used to read a string from a file and push it into the keyboard buffer as if typed: <VK_FILE_I><filename>max length,retries,termination character <VK_FEND> The string is terminated when the maximum length is read, or the maximum number of retries is reached, or the termination character is read. Each can be defaulted by entering 0, so entering 0,0,0 will result in a maximum length of 1024, a single retry, and a termination character of 26 (EOF). If the file does not exist an error will be displayed. For example, the following command will read up to 20 characters, retry 5 times and end at the first <CR>: <VK_FILE_I><c:\file.txt>20,5,13<VK_FEND> There is normally a 100 millisecond delay between retries, however many Unix systems will round this up to one second. Insert Delay The following command can be used to insert a delay of nnn tenths of a second: <VK_SLEEPnnn> For example, to insert a delay of 10 seconds you would enter: <VK_SLEEP100> The delay can be interrupted by pressing any key. Note that if you want characters to be processed before the delay, insert any other VK virtual key name immediately before <VK_SLEEPnnn>. For example: 123<VK_TAB><VK_SLEEP100>456 If you do not include the additional virtual key name, the <VK_SLEEPnnn> delay will be executed before any preceding characters are processed. A-11 Virtual Key Names Notes A-12 Character Sets B Character Sets This appendix shows the supported character sets. Introduction Each character set consists of a series of control characters and displayable characters. Displayable characters are alphanumeric, symbolic or graphic characters that can be displayed on the screen or printed by a hardcopy device. Control characters enable the terminal emulation or the printer to perform specific tasks, such as a line feed or carriage return. These will be actioned when received from the host or when the emulator is in local mode and they are entered from the keyboard. Note: When the Display Controls option in the Terminal Settings dialog box is selected, a representation of most control characters received will be displayed on the screen instead of actioned. To enter a control character from the keyboard, first find the displayable character equivalent by adding 64 to the decimal value of the control character in the relevant character set table. For example, the control character CR (carriage return) has a decimal value of 13. Adding 64 makes 77 which is the decimal value of the displayable character M. When the Ctrl (control) key is held down and Shift + M is pressed, this will generate a CR code in local mode. Some setup options require you to specify one or more control characters. A control character can be specified by typing ^ to represent the Ctrl key, immediately followed by the displayable character equivalent of the control character as described in the previous paragraph. For example, ^M, represents Ctrl + M, which generates the control character CR. Another way of specifying control characters is by entering the decimal value of the ASCII character. Decimal values are entered as three-digit numbers immediately preceded by an underscore character. Values with only two digits must be preceded by a zero. For example, the decimal value of CR is 13, so this would be entered as _013. B-1 Character Sets ASCII CHARACTER SET (Multinational 7 Bit) COLUMN R 8 7 BITS 65 O W 4321 2 3 6 7 0 1 4 5 01 01 01 00 01 00 00 00 11 10 01 10 00 11 00 01 0 0000 NUL 1 0001 SOH 2 0010 STX 3 0011 ETX 4 0100 EOT 5 0101 ENQ 6 0110 ACK 7 0111 BEL 8 1000 BS 9 1001 HT 10 1010 LF 11 1011 VT 12 1100 FF 13 1101 CR 14 1110 SO 15 1111 KEY: SI ESC 0 20 0 DLE 16 0 10 1 21 1 DC1 17 1 XON 11 2 22 2 DC2 18 2 12 3 23 3 DC3 19 3 XOFF 13 4 24 4 DC4 20 4 14 5 25 5 NAK 21 5 15 6 26 6 SYN 22 6 16 7 27 7 ETB 23 7 17 10 30 8 CAN 24 8 18 11 31 9 EM 25 9 19 12 32 10 SUB 26 A 1A 13 33 11 ESC 27 B 1B 14 34 12 FS 28 C 1C 15 35 13 GS 29 D 1D 16 36 14 RS 30 E 1E 17 37 15 US 31 F 1F 33 27 1B SP ! " # $ % & ´ ( ) * + , . / 40 32 20 41 33 21 42 34 22 43 35 23 44 36 24 45 37 25 46 38 26 47 39 27 50 40 28 51 41 29 52 42 2A 53 43 2B 54 44 2C 55 45 2D 56 46 2E 57 47 2F 0 1 2 3 4 5 6 7 8 9 : ; < = > ? 60 48 30 61 49 31 62 50 32 63 51 33 64 52 34 65 53 35 66 54 36 67 55 37 70 56 38 71 57 39 72 58 3A 73 59 3B 74 60 3C 75 61 3D 76 62 3E 77 63 3F @ A B C D E F G H I J K L M N O 100 64 40 101 65 41 102 66 42 103 67 43 104 68 44 105 69 45 106 70 46 107 71 47 110 72 48 111 73 49 112 74 4A 113 75 4B 114 76 4C 115 77 4D 116 78 4E 117 79 4F P Q R S T U V W X Y Z [ \ ] ^ _ 120 80 50 121 81 51 122 82 52 123 83 53 124 84 54 125 85 55 126 86 56 127 87 57 130 88 58 131 89 59 132 90 5A 133 91 5B 134 92 5C 135 93 5D 136 94 5E 137 95 5F ` a b c d e f g h i j k l m n o 140 96 60 141 97 61 142 98 62 143 99 63 144 100 64 145 101 65 146 102 66 147 103 67 150 104 68 151 105 69 152 106 6A 153 107 6B 154 108 6C 155 109 6D 156 110 6E 157 111 6F p q r s t u v w x y z { | } ~ DEL 160 112 70 161 113 71 162 114 72 163 115 73 164 116 74 165 117 75 166 118 76 167 119 77 170 120 78 171 121 79 172 122 7A 173 123 7B 174 124 7C 175 125 7D 176 126 7E 177 127 7F OCTAL DECIMAL HEXADECIMAL The ASCII (American Standard Code for Information Interchange) character set will be selected when the language is set to North American, or the Character Set Mode option in the Emulation Settings dialog box is set to Multinational. This table forms the first half of the Multinational character set, the second half of which may be the DEC Additional or one of the ISO Latin Additional sets (as determined by the Preferred Char. Set option in the Terminal Settings dialog box). B-2 Character Sets NATIONAL REPLACEMENT CHARACTERS BINARY BIT 8 7 6 5 4 3 2 1 OCTAL DECIMAL HEXADECIMAL 0 0 1 0 0 0 1 1 43 35 23 0 1 0 0 0 0 0 0 100 64 40 0 1 0 1 1 0 1 1 133 91 5B 0 1 0 1 1 1 0 0 134 92 5C 0 1 0 1 1 1 0 1 135 93 5D 0 1 0 1 1 1 1 0 136 94 5E 0 1 0 1 1 1 1 1 137 95 5F 0 1 1 0 0 0 0 0 140 96 60 0 1 1 1 1 0 1 1 173 123 7B 0 1 1 1 1 1 0 0 174 124 7C 0 1 1 1 1 1 0 1 175 125 7D 0 1 1 1 1 1 1 0 176 126 7E ASCII # @ [ \ ] ^ _ ` { | } ~ British £ @ [ \ ] ^ _ ` { | } ~ Canadian # à â ç ê î _ ô é ù è û Danish Norwegian # Ä Æ Ø Å Ü _ ä æ ø å ü Dutch £ 3 /4 ij 1 /2 | ^ _ ` ¨ fl 1 /4 ´ Finnish # @ Ä Ö Å Ü _ é ä ö å ü French Belgian £ à ° ç § ^ _ ` é ù è ¨ German # § Ä Ö Ü ^ _ ` ä ö ü ß Italian £ § ° ç é ^ _ ù à ò è ì Portuguese # @ Ã Ç Õ ^ _ ` ã ç õ ~ Spanish £ § ¡ Ñ ¿ ^ _ ` ° ñ ç ~ Swedish # É Ä Ö Å Ü _ é ä ö å ü Swiss French Swiss German ù à é ç ê î è ô ä ö ü û This table shows the characters that replace certain ASCII characters when the Character Set Mode option in the Emulation Settings dialog box is set to National. The national character set consists of the ASCII set with the changed characters listed on the line for the selected keyboard nationality. B-3 Character Sets DEC ADDITIONAL CHARACTER SET (Multinational 8 Bit) 10 11 14 15 COLUMN 8 9 12 13 8 7 BITS R 11 11 11 10 11 10 10 10 65 O 11 10 01 10 00 11 01 00 4321 W IND NEL SSA ESA HTS HTJ VTS PLD PLU RI SS2 SS3 200 128 80 201 129 81 202 130 82 203 131 83 204 132 84 205 133 85 206 134 86 207 135 87 210 136 88 211 137 89 212 138 8A 213 139 8B 214 140 8C 215 141 8D 216 142 8E 217 143 8F KEY: DCS PU1 PU2 STS CCH MW SPA EPA CSI ST OSC PM APC ESC 220 144 90 221 145 91 222 146 92 223 147 93 224 148 94 225 149 95 226 150 96 227 151 97 230 152 98 231 153 99 232 154 9A 233 155 9B 234 156 9C 235 157 9D 236 158 9E 237 159 9F 33 27 1B ¡ ¢ £ ¨ ¥ § ¤ © ª « 240 160 A0 241 161 A1 242 162 A2 243 163 A3 244 164 A4 245 165 A5 246 166 A6 247 167 A7 250 168 A8 251 169 A9 252 170 AA 253 171 AB 254 172 AC 255 173 AD 256 174 AE 257 175 AF ° ± 2 3 µ ¶ · 1 º » /4 1 /2 1 ¿ 260 176 B0 261 177 B1 262 178 B2 263 179 B3 264 180 B4 265 181 B5 266 182 B6 267 183 B7 270 184 B8 271 185 B9 272 186 BA 273 187 BB 274 188 BC 275 189 BD 276 190 BE 277 191 BF À Á Â Ã Ä Å Æ Ç È É Ê Ë Ì Í Î Ï 300 192 C0 301 193 C1 302 194 C2 303 195 C3 304 196 C4 305 197 C5 306 198 C6 307 199 C7 310 200 C8 311 201 C9 312 202 CA 313 203 CB 314 204 CC 315 205 CD 316 206 CE 317 207 CF Ñ Ò Ó Ô Õ Ö Œ Ø Ù Ú Û Ü Ÿ ß 320 208 D0 321 209 D1 322 210 D2 323 211 D3 324 212 D4 325 213 D5 326 214 D6 327 215 D7 330 216 D8 331 217 D9 332 218 DA 333 219 DB 334 220 DC 335 221 DD 336 222 DE 337 223 DF à á â ã ä å æ ç è é ê ë ì í î ï 340 224 E0 341 225 E1 342 226 E2 343 227 E3 344 228 E4 345 229 E5 346 230 E6 347 231 E7 350 232 E8 351 233 E9 352 234 EA 353 235 EB 354 236 EC 355 237 ED 356 238 EE 357 239 EF ñ ò ó ô õ ö œ ø ù ú û ü ÿ 360 240 F0 361 241 F1 362 242 F2 363 243 F3 364 244 F4 365 245 F5 366 246 F6 367 247 F7 370 248 F8 371 249 F9 372 250 FA 373 251 FB 374 252 FC 375 253 FD 376 254 FE 377 255 FF 0000 0 0001 1 0010 2 0011 3 0100 4 0101 5 0110 6 0111 7 1000 8 1001 9 1010 10 1011 11 1100 12 1101 13 1110 14 1111 15 OCTAL DECIMAL HEXADECIMAL This is one of three possible second halves of the Multinational character set (the first half is the ASCII character set and the other possible second halves are the ISO Latin-1 and ISO Latin-2 Additional character sets). These characters may be generated when the terminal is in VT500 7 or 8 bit mode, the Character Set Mode option in the Emulation Settings dialog box is set to Multinational, and the Preferred Char. Set option in the Terminal Settings dialog box is set to DECMCS. B-4 Character Sets DEC LINE DRAWING CHARACTER SET COLUMN R 8 7 BITS 65 O W 4321 2 3 6 7 4 5 0 0 0 0 01 00 00 0 11 11 00 101 11 00 001 010 1 0 0 0 0000 NUL 1 0001 SOH 2 0010 STX 3 0011 ETX 4 0100 EOT 5 0101 ENQ 6 0110 ACK 7 0111 BEL 8 1000 BS 9 1001 HT 10 1010 LF 11 1011 VT 12 1100 FF 13 1101 CR 14 1110 SO 15 1111 KEY: SI ESC 1 0 20 0 DLE 16 0 10 1 21 1 DC1 17 1 XON 11 2 22 2 DC2 18 2 12 3 23 3 DC3 19 3 XOFF 13 4 24 4 DC4 20 4 14 5 25 5 NAK 21 5 15 6 26 6 SYN 22 6 16 7 27 7 ETB 23 7 17 10 30 8 CAN 24 8 18 11 31 9 EM 25 9 19 12 32 10 SUB 26 A 1A 13 33 11 ESC 27 B 1B 14 34 12 FS 28 C 1C 15 35 13 GS 29 D 1D 16 36 14 RS 30 E 1E 17 37 15 US 31 F 1F 33 27 1B SP ! " # $ % & ´ ( ) * + , . / 40 32 20 41 33 21 42 34 22 43 35 23 44 36 24 45 37 25 46 38 26 47 39 27 50 40 28 51 41 29 52 42 2A 53 43 2B 54 44 2C 55 45 2D 56 46 2E 57 47 2F 0 1 2 3 4 5 6 7 8 9 : ; < = > ? 60 48 30 61 49 31 62 50 32 63 51 33 64 52 34 65 53 35 66 54 36 67 55 37 70 56 38 71 57 39 72 58 3A 73 59 3B 74 60 3C 75 61 3D 76 62 3E 77 63 3F @ A B C D E F G H I J K L M N O 100 64 40 101 65 41 102 66 42 103 67 43 104 68 44 105 69 45 106 70 46 107 71 47 110 72 48 111 73 49 112 74 4A 113 75 4B 114 76 4C 115 77 4D 116 78 4E 117 79 4F P Q R S T U V W X Y Z [ \ ] ^ 120 80 50 121 81 51 122 82 52 123 83 53 124 84 54 125 85 55 126 86 56 127 87 57 130 88 58 131 89 59 132 90 5A 133 91 5B 134 92 5C 135 93 5D 136 94 5E 137 95 5F H F F C L T R F ° ± N V L T 140 96 60 141 97 61 142 98 62 143 99 63 144 100 64 145 101 65 146 102 66 147 103 67 150 104 68 151 105 69 152 106 6A 153 107 6B 154 108 6C 155 109 6D 156 110 6E 157 111 6F ≤ ≥ π ≠ £ · DEL 160 112 70 161 113 71 162 114 72 163 115 73 164 116 74 165 117 75 166 118 76 167 119 77 170 120 78 171 121 79 172 122 7A 173 123 7B 174 124 7C 175 125 7D 176 126 7E 177 127 7F OCTAL DECIMAL HEXADECIMAL This is a special DEC character set which is used by some applications. B-5 Character Sets ISO LATIN-1 ADDITIONAL CHARACTER SET (Multinational 8 Bit) 10 11 14 15 COLUMN 8 9 12 13 8 7 BITS R 11 11 11 10 11 10 10 10 65 O 11 10 01 10 00 11 01 00 4321 W IND NEL SSA ESA HTS HTJ VTS PLD PLU RI SS2 SS3 200 128 80 201 129 81 202 130 82 203 131 83 204 132 84 205 133 85 206 134 86 207 135 87 210 136 88 211 137 89 212 138 8A 213 139 8B 214 140 8C 215 141 8D 216 142 8E 217 143 8F KEY: DCS PU1 PU2 STS CCH MW SPA EPA 240 220 144 NBSP 160 A0 90 241 221 161 145 91 A1 222 242 146 162 92 A2 223 243 147 163 93 A3 224 244 148 164 94 A4 225 245 149 165 95 A5 226 246 150 166 96 A6 227 247 151 167 97 A7 230 250 152 168 98 A8 231 251 153 169 99 A9 232 252 154 170 9A AA 233 253 155 171 9B AB 234 254 156 172 9C AC 235 255 157 173 9D AD 236 256 158 174 9E AE 237 257 159 175 9F AF ° ¡ ± ¢ 2 £ 3 ¤ ¥ § µ ¶ · ¨ CSI ST OSC PM APC ESC 33 27 1B © 1 ª º « » ¬ 1 — 1 ® 3 – ¿ /4 /2 /4 260 176 B0 261 177 B1 262 178 B2 263 179 B3 264 180 B4 265 181 B5 266 182 B6 267 183 B7 270 184 B8 271 185 B9 272 186 BA 273 187 BB 274 188 BC 275 189 BD 276 190 BE 277 191 BF À Á Â Ã Ä Å Æ Ç È É Ê Ë Ì Í Î Ï 300 192 C0 301 193 C1 302 194 C2 303 195 C3 304 196 C4 305 197 C5 306 198 C6 307 199 C7 310 200 C8 311 201 C9 312 202 CA 313 203 CB 314 204 CC 315 205 CD 316 206 CE 317 207 CF D Ñ Ò Ó Ô Õ Ö Ø Ù Ú Û Ü Y´ ß 320 208 D0 321 209 D1 322 210 D2 323 211 D3 324 212 D4 325 213 D5 326 214 D6 327 215 D7 330 216 D8 331 217 D9 332 218 DA 333 219 DB 334 220 DC 335 221 DD 336 222 DE 337 223 DF à á â ã ä å æ ç è é ê ë ì í î ï 340 224 E0 341 225 E1 342 226 E2 343 227 E3 344 228 E4 345 229 E5 346 230 E6 347 231 E7 350 232 E8 351 233 E9 352 234 EA 353 235 EB 354 236 EC 355 237 ED 356 238 EE 357 239 EF ñ ò ó ô õ ö ÷ ø ù ú û ü y´ ÿ 360 240 F0 361 241 F1 362 242 F2 363 243 F3 364 244 F4 365 245 F5 366 246 F6 367 247 F7 370 248 F8 371 249 F9 372 250 FA 373 251 FB 374 252 FC 375 253 FD 376 254 FE 377 255 FF 0000 0 0001 1 0010 2 0011 3 0100 4 0101 5 0110 6 0111 7 1000 8 1001 9 1010 10 1011 11 1100 12 1101 13 1110 14 1111 15 OCTAL DECIMAL HEXADECIMAL This is one of three possible second halves of the Multinational character set (the first half is the ASCII character set and the other possible second halves are the DEC Additional and ISO Latin-2 character sets). These characters may be generated when the terminal is in VT500 7 or 8 bit mode, the Character Set Mode option in the Emulation Settings dialog box is set to Multinational, and the Preferred Char. Set option in the Terminal Settings dialog box is set to ISO Latin-1. B-6 Character Sets ISO LATIN-2 ADDITIONAL CHARACTER SET (Multinational 8 Bit) 10 11 14 15 COLUMN 8 9 12 13 8 7 BITS R 11 11 11 10 11 10 10 10 65 O 11 10 01 10 00 11 01 00 4321 W t Z´ z´ ^ PM APC ESC Z z · z· Z 33 27 1B ´´ L´ C´ Ç C É E Ë E Í Î ^ T Ä D ´ N N Ó Ô ´´ O Ö R ° U Ú ´´ U Ü Y´ T ß 320 208 D0 321 209 D1 322 210 D2 323 211 D3 324 212 D4 325 213 D5 326 214 D6 327 215 D7 330 216 D8 331 217 D9 332 218 DA 333 219 DB 334 220 DC 335 221 DD 336 222 DE 337 223 DF r´ á â a ä ´ c´ ç c é e ë e í î ^ s ^ OSC S A D ^ ST s ^ KEY: CSI S ^ SS3 ¨ ^ SS2 § s´ ^ RI S´  ^ PLU EPA L Á 300 192 C0 301 193 C1 302 194 C2 303 195 C3 304 196 C4 305 197 C5 306 198 C6 307 199 C7 310 200 C8 311 201 C9 312 202 CA 313 203 CB 314 204 CC 315 205 CD 316 206 CE 317 207 CF ^ PLD SPA ´ ´ R ^ VTS MW ¤ 260 176 B0 261 177 B1 262 178 B2 263 179 B3 264 180 B4 265 181 B5 266 182 B6 267 183 B7 270 184 B8 271 185 B9 272 186 BA 273 187 BB 274 188 BC 275 189 BD 276 190 BE 277 191 BF d 340 224 E0 341 225 E1 342 226 E2 343 227 E3 344 228 E4 345 229 E5 346 230 E6 347 231 E7 350 232 E8 351 233 E9 352 234 EA 353 235 EB 354 236 EC 355 237 ED 356 238 EE 357 239 EF n´ n ó ô ´´ o ö ÷ ^ HTJ CCH L ^ HTS STS a ^ ESA PU2 A ° ^ SSA PU1 240 220 144 NBSP 160 A0 90 241 221 161 145 91 A1 222 242 146 162 92 A2 223 243 147 163 93 A3 224 244 148 164 94 A4 225 245 149 165 95 A5 226 246 150 166 96 A6 227 247 151 167 97 A7 230 250 152 168 98 A8 231 251 153 169 99 A9 232 252 154 170 9A AA 233 253 155 171 9B AB 234 254 156 172 9C AC 235 255 157 SHY 173 9D AD 236 256 158 174 9E AE 237 257 159 175 9F AF ^ NEL DCS ^ IND 200 128 80 201 129 81 202 130 82 203 131 83 204 132 84 205 133 85 206 134 86 207 135 87 210 136 88 211 137 89 212 138 8A 213 139 8B 214 140 8C 215 141 8D 216 142 8E 217 143 8F r u° ú ´´ u ü y´ t · 360 240 F0 361 241 F1 362 242 F2 363 243 F3 364 244 F4 365 245 F5 366 246 F6 367 247 F7 370 248 F8 371 249 F9 372 250 FA 373 251 FB 374 252 FC 375 253 FD 376 254 FE 377 255 FF 0000 0 0001 1 0010 2 0011 3 0100 4 0101 5 0110 6 0111 7 1000 8 1001 9 1010 10 1011 11 1100 12 1101 13 1110 14 1111 15 OCTAL DECIMAL HEXADECIMAL This is one of three possible second halves of the Multinational character set (the first half is the ASCII character set and the other possible second halves are the DEC Additional and ISO Latin-1 character sets). These characters may be generated when the terminal is in VT500 7 or 8 bit mode, the Character Set Mode option in the Emulation Settings dialog box is set to Multinational, and the Preferred Char. Set option in the Terminal Settings dialog box is set to ISO Latin-2. B-7 Character Sets ANSI 437 CHARACTER SET COLUMN 10 11 14 15 12 13 BITS R 8 1 1 1 1 76 11 10 1 10 11 11 O 00 101 11 00 001 010 1 4 3 2 15 W 0 8 Ç ü é â ä à å ç ê ë è ï î ì Ä Å 9 200 128 80 201 129 81 202 130 82 203 131 83 204 132 84 205 133 85 206 134 86 207 135 87 210 136 88 211 137 89 212 138 8A 213 139 8B 214 140 8C 215 141 8D 216 142 8E 217 143 8F KEY: É æ Æ ô ö ò û ù ÿ Ö Ü ¢ £ ¥ Pt ƒ Ñ 220 144 90 221 145 91 222 146 92 223 147 93 224 148 94 225 149 95 226 150 96 227 151 97 230 152 98 231 153 99 232 154 9A 233 155 9B 234 156 9C 235 157 9D 236 158 9E 237 159 9F 245 165 A5 á í ó ú ñ Ñ ª º ¿ /2 1 /4 1 ¡ « » 240 160 A0 241 161 A1 242 162 A2 243 163 A3 244 164 A4 245 165 A5 246 166 A6 247 167 A7 250 168 A8 251 169 A9 252 170 AA 253 171 AB 254 172 AC 255 173 AD 256 174 AE 257 175 AF 260 176 B0 261 177 B1 262 178 B2 263 179 B3 264 180 B4 265 181 B5 266 182 B6 267 183 B7 270 184 B8 271 185 B9 272 186 BA 273 187 BB 274 188 BC 275 189 BD 276 190 BE 277 191 BF 300 192 C0 301 193 C1 302 194 C2 303 195 C3 304 196 C4 305 197 C5 306 198 C6 307 199 C7 310 200 C8 311 201 C9 312 202 CA 313 203 CB 314 204 CC 315 205 CD 316 206 CE 317 207 CF 320 208 D0 321 209 D1 322 210 D2 323 211 D3 324 212 D4 325 213 D5 326 214 D6 327 215 D7 330 216 D8 331 217 D9 332 218 DA 333 219 DB 334 220 DC 335 221 DD 336 222 DE 337 223 DF oc ß 340 360 224 240 E0 F0 341 361 225 241 E1 F1 342 362 226 242 E2 F2 343 363 227 243 E3 F3 344 364 228 244 E4 F4 345 365 229 245 E5 F5 346 366 230 246 E6 F6 347 367 231 247 E7 F7 350 370 232 248 E8 F8 351 371 233 249 E9 F9 352 372 234 250 EA FA 353 373 235 251 EB FB 354 374 236 252 EC FC 355 375 237 253 ED FD 356 376 238 254 EE FE 357 BLANK 377 239 255 FF EF FF ∫ µ ≈ Ω oo 0000 0 0001 1 0010 2 0011 3 0100 4 0101 5 0110 6 0111 7 1000 8 1001 9 1010 10 1011 11 n 1100 12 2 1101 13 1110 14 1111 15 OCTAL DECIMAL HEXADECIMAL This table forms the second half of the ANSI 437 character set, the first half being the ASCII character set. The ANSI 437 character set is used when the Preferred Char. Set option in the Terminal Settings dialog box is set to Ansi and the Ansi Code Page option is set to 437. B-8 Character Sets ANSI 850 CHARACTER SET 10 11 14 15 COLUMN 12 13 BITS R 8 1 1 1 1 76 11 10 1 10 11 11 O 00 101 11 00 001 010 1 4 3 2 15 W 0 8 Ç ü é â ä à å ç ê ë è ï î ì Ä Å 9 200 128 80 201 129 81 202 130 82 203 131 83 204 132 84 205 133 85 206 134 86 207 135 87 210 136 88 211 137 89 212 138 8A 213 139 8B 214 140 8C 215 141 8D 216 142 8E 217 143 8F KEY: É æ Æ ô ö ò û ù ÿ Ö Ü ø £ Ø ƒ Ñ 220 144 90 221 145 91 222 146 92 223 147 93 224 148 94 225 149 95 226 150 96 227 151 97 230 152 98 231 153 99 232 154 9A 233 155 9B 234 156 9C 235 157 9D 236 158 9E 237 159 9F 245 165 A5 á í ó ú ñ Ñ ª º ¿ ® /2 1 /4 1 ¡ « » 240 160 A0 241 161 A1 242 162 A2 243 163 A3 244 164 A4 245 165 A5 246 166 A6 247 167 A7 250 168 A8 251 169 A9 252 170 AA 253 171 AB 254 172 AC 255 173 AD 256 174 AE 257 175 AF Á  À © ¢ ¥ 260 176 B0 261 177 B1 262 178 B2 263 179 B3 264 180 B4 265 181 B5 266 182 B6 267 183 B7 270 184 B8 271 185 B9 272 186 BA 273 187 BB 274 188 BC 275 189 BD 276 190 BE 277 191 BF ã à ¤ 300 192 C0 301 193 C1 302 194 C2 303 195 C3 304 196 C4 305 197 C5 306 198 C6 307 199 C7 310 200 C8 311 201 C9 312 202 CA 313 203 CB 314 204 CC 315 205 CD 316 206 CE 317 207 CF Ê Ë È Í Î Ï Ì 320 208 D0 321 209 D1 322 210 D2 323 211 D3 324 212 D4 325 213 D5 326 214 D6 327 215 D7 330 216 D8 331 217 D9 332 218 DA 333 219 DB 334 220 DC 335 221 DD 336 222 DE 337 223 DF Ó ß Ô Ò õ Õ µ Ú Û Ù y´ Y´ ´ 340 360 224 240 E0 F0 341 361 225 241 E1 F1 342 362 226 242 E2 F2 343 363 227 3 243 4 E3 F3 344 364 228 244 E4 F4 345 365 229 245 E5 F5 346 366 230 246 E6 F6 347 367 231 247 E7 F7 350 370 232 248 E8 F8 351 371 233 249 E9 F9 352 372 234 250 EA FA 353 373 235 251 EB FB 354 374 236 252 EC FC 355 375 237 253 ED FD 356 376 238 254 EE FE 357 BLANK 377 239 255 FF EF FF 0000 0 0001 1 0010 2 / 0011 3 ¶ 0100 4 § 0101 5 ¨ 0110 6 0111 7 1000 8 1001 9 1010 10 1 1011 11 3 1100 12 2 1101 13 1110 14 1111 15 OCTAL DECIMAL HEXADECIMAL This table forms the second half of the ANSI 850 character set, the first half being the ASCII character set. The ANSI 850 character set is used when the Preferred Char. Set option in the Terminal Settings dialog box is set to Ansi and the Ansi Code Page option is set to 850. B-9 Character Sets ANSI 858 CHARACTER SET 10 11 14 15 COLUMN 12 13 BITS R 8 1 1 1 1 76 11 1 10 10 11 11 O 00 101 11 00 001 010 0 1 4 3 2 15 W 8 Ç ü é â ä à å ç ê ë è ï î ì Ä Å 9 200 128 80 201 129 81 202 130 82 203 131 83 204 132 84 205 133 85 206 134 86 207 135 87 210 136 88 211 137 89 212 138 8A 213 139 8B 214 140 8C 215 141 8D 216 142 8E 217 143 8F KEY: É æ Æ ô ö ò û ù ÿ Ö Ü ø £ Ø Ñ 220 144 90 221 145 91 222 146 92 223 147 93 224 148 94 225 149 95 226 150 96 227 151 97 230 152 98 231 153 99 232 154 9A 233 155 9B 234 156 9C 235 157 9D 236 158 9E 237 159 9F 245 165 A5 á í ó ú ñ Ñ ª º ¿ ® 1 /2 /4 1 ¡ « » 240 160 A0 241 161 A1 242 162 A2 243 163 A3 244 164 A4 245 165 A5 246 166 A6 247 167 A7 250 168 A8 251 169 A9 252 170 AA 253 171 AB 254 172 AC 255 173 AD 256 174 AE 257 175 AF Á  À © ¢ ¥ 260 176 B0 261 177 B1 262 178 B2 263 179 B3 264 180 B4 265 181 B5 266 182 B6 267 183 B7 270 184 B8 271 185 B9 272 186 BA 273 187 BB 274 188 BC 275 189 BD 276 190 BE 277 191 BF ã à ¤ 300 192 C0 301 193 C1 302 194 C2 303 195 C3 304 196 C4 305 197 C5 306 198 C6 307 199 C7 310 200 C8 311 201 C9 312 202 CA 313 203 CB 314 204 CC 315 205 CD 316 206 CE 317 207 CF Ê Ë È C Í Î Ï Ì 320 208 D0 321 209 D1 322 210 D2 323 211 D3 324 212 D4 325 213 D5 326 214 D6 327 215 D7 330 216 D8 331 217 D9 332 218 DA 333 219 DB 334 220 DC 335 221 DD 336 222 DE 337 223 DF Ó ß Ô Ò õ Õ µ Ú Û Ù y´ Y´ ´ 360 340 240 224 F0 E0 361 341 241 225 F1 E1 362 342 242 226 F2 E2 363 343 243 227 3 4 F3 E3 364 344 244 228 F4 E4 365 345 245 229 F5 E5 366 346 246 230 F6 E6 367 347 247 231 F7 E7 370 350 248 232 F8 E8 371 351 249 233 F9 E9 372 352 250 234 FA EA 373 353 251 235 FB EB 374 354 252 236 FC EC 375 355 253 237 FD ED 376 356 254 238 FE EE 357 BLANK 377 255 239 FF FF EF 0000 0 0001 1 0010 2 / 0011 3 ¶ 0100 4 § 0101 5 ¨ 0110 6 0111 7 1000 8 1001 9 1010 10 1 1011 11 3 1100 12 2 1101 13 1110 14 1111 15 OCTAL DECIMAL HEXADECIMAL This table forms the second half of the ANSI 858 character set, the first half being the ASCII character set. The ANSI 858 character set is used when the Preferred Char. Set option in the Terminal Settings dialog box is set to Ansi and the Ansi Code Page option is set to 858. B-10 Character Sets ANSI 1250 CHARACTER SET 10 11 14 15 COLUMN 12 13 BITS R 8 1 1 1 1 76 11 10 1 10 11 11 O 00 101 11 00 001 010 1 4 3 2 15 W 0 ¨ S s S s CSI ST OSC T t’ Z´ z´ ^ PM APC ESC Z z · z· Z 33 27 1B ´´ Ä L´ C´ Ç C É E Ë E Í Î ^ § ^ KEY: s´ A ^ SS3 S´  D 300 192 C0 301 193 C1 302 194 C2 303 195 C3 304 196 C4 305 197 C5 306 198 C6 307 199 C7 310 200 C8 311 201 C9 312 202 CA 313 203 CB 314 204 CC 315 205 CD 316 206 CE 317 207 CF D ´ N N Ó Ô ´´ O Ö R ° U Ú ´´ U Ü Y´ T ß 320 208 D0 321 209 D1 322 210 D2 323 211 D3 324 212 D4 325 213 D5 326 214 D6 327 215 D7 330 216 D8 331 217 D9 332 218 DA 333 219 DB 334 220 DC 335 221 DD 336 222 DE 337 223 DF r´ á â a ä ´ c´ ç c é e ë ^ SS2 ’ ^ RI EPA L’ ^ PLU SPA ´ ^ PLD MW ¤ Á ^ VTS CCH L ´ R ^ HTJ STS a 260 176 B0 261 177 B1 262 178 B2 263 179 B3 264 180 B4 265 181 B5 266 182 B6 267 183 B7 270 184 B8 271 185 B9 272 186 BA 273 187 BB 274 188 BC 275 189 BD 276 190 BE 277 191 BF ^ HTS PU2 A ° e í î d’ 340 224 E0 341 225 E1 342 226 E2 343 227 E3 344 228 E4 345 229 E5 346 230 E6 347 231 E7 350 232 E8 351 233 E9 352 234 EA 353 235 EB 354 236 EC 355 237 ED 356 238 EE 357 239 EF n´ n ó ô ´´ o ö ÷ ^ ESA PU1 240 220 144 NBSP 160 A0 90 241 221 161 145 91 A1 222 242 146 162 92 A2 223 243 147 163 93 A3 224 244 148 164 94 A4 225 245 149 165 95 A5 226 246 150 166 96 A6 227 247 151 167 97 A7 230 250 152 168 98 A8 231 251 153 169 99 A9 232 252 154 170 9A AA 233 253 155 171 9B AB 234 254 156 172 9C AC 235 255 157 SHY 173 9D AD 236 256 158 174 9E AE 237 257 159 175 9F AF ^ SSA DCS ^ NEL 200 128 80 201 129 81 202 130 82 203 131 83 204 132 84 205 133 85 206 134 86 207 135 87 210 136 88 211 137 89 212 138 8A 213 139 8B 214 140 8C 215 141 8D 216 142 8E 217 143 8F ^ IND 9 ^ 8 r ° u ú ´´ u ü y´ t · 360 240 F0 361 241 F1 362 242 F2 363 243 F3 364 244 F4 365 245 F5 366 246 F6 367 247 F7 370 248 F8 371 249 F9 372 250 FA 373 251 FB 374 252 FC 375 253 FD 376 254 FE 377 255 FF 0000 0 0001 1 0010 2 0011 3 0100 4 0101 5 0110 6 0111 7 1000 8 1001 9 1010 10 1011 11 1100 12 1101 13 1110 14 1111 15 OCTAL DECIMAL HEXADECIMAL This table forms the second half of the ANSI 1250 character set, the first half being the ASCII character set. The ANSI 1250 character set is used when the Preferred Char. Set option in the Terminal Settings dialog box is set to Ansi and the Ansi Code Page option is set to 1250. B-11 Character Sets DG 410/412 WORD PROCESSING, MATH & GREEK ALPHABET CHARACTER SET 0 COLUMN R 8 7 BITS 65 O W 4321 00 00 0 0000 NUL 1 0001 SOH 2 0010 STX 3 0011 ETX 4 0100 EOT 5 0101 ENQ 6 0110 ACK 7 0111 BEL 8 1000 BS 9 1001 HT 10 1010 LF 11 1011 VT 12 1100 FF 13 1101 CR 14 1110 SO 15 1111 KEY: B-12 SI ESC 2 1 00 01 0 20 0 DLE 16 0 10 1 21 1 DC1 17 1 XON 11 2 22 2 DC2 18 2 12 3 23 3 DC3 19 3 XOFF 13 4 24 4 DC4 20 4 14 5 25 5 NAK 21 5 15 6 26 6 SYN 22 6 16 7 27 7 ETB 23 7 17 10 30 8 CAN 24 8 18 11 31 9 EM 25 9 19 12 32 10 SUB 26 A 1A 13 33 11 ESC 27 B 1B 14 34 12 FS 28 C 1C 15 35 13 GS 29 D 1D 16 36 14 RS 30 E 1E 17 37 15 US 31 F 1F 33 27 1B 00 SP ƒ oo OCTAL DECIMAL HEXADECIMAL 3 10 40 32 20 41 33 21 42 34 22 43 35 23 44 36 24 45 37 25 46 38 26 47 39 27 50 40 28 51 41 29 52 42 2A 53 43 2B 54 44 2C 55 45 2D 56 46 2E 57 47 2F 00 0 1 2 3 4 5 6 7 8 9 • 4 11 60 48 30 61 49 31 62 50 32 63 51 33 64 52 34 65 53 35 66 54 36 67 55 37 70 56 38 71 57 39 72 58 3A 73 59 3B 74 60 3C 75 61 3D 76 62 3E 77 63 3F 01 !! ß 6 5 00 100 64 40 101 65 41 102 66 42 103 67 43 104 68 44 105 69 45 106 70 46 107 71 47 110 72 48 111 73 49 112 74 4A 113 75 4B 114 76 4C 115 77 4D 116 78 4E 117 79 4F 01 Ω ¶ B P B E F N F E 01 120 80 50 121 81 51 122 82 52 123 83 53 124 84 54 125 85 55 126 86 56 127 87 57 130 88 58 131 89 59 132 90 5A 133 91 5B 134 92 5C 135 93 5D 136 94 5E 137 95 5F 01 7 10 140 96 60 141 97 61 142 98 62 143 99 63 144 100 64 145 101 65 146 102 66 147 103 67 150 104 68 151 105 69 152 106 6A 153 107 6B 154 108 6C 155 109 6D 156 110 6E 157 111 6F 01 11 0 1 2 3 4 5 6 7 8 9 H F DEL 160 112 70 161 113 71 162 114 72 163 115 73 164 116 74 165 117 75 166 118 76 167 119 77 170 120 78 171 121 79 172 122 7A 173 123 7B 174 124 7C 175 125 7D 176 126 7E 177 127 7F Character Sets DG 410/412 LINE DRAWING CHARACTER SET COLUMN R 8 7 BITS 65 O W 4321 0 0000 1 0001 2 0010 3 0011 4 0100 5 0101 6 0110 7 0111 8 1000 9 1001 10 1010 11 1011 12 1100 13 1101 14 1110 15 1111 KEY: 0 00 2 1 00 0 0 0 1 1 1 2 2 2 3 3 3 4 4 4 5 5 5 6 6 6 7 7 7 10 8 8 11 9 9 12 10 A 13 11 B 14 12 C 15 13 D 16 14 E 17 15 F 75 61 3D 00 01 00 20 16 10 21 17 11 22 18 12 23 19 13 24 20 14 25 21 15 26 22 16 27 23 17 30 24 18 31 25 19 32 26 1A 33 27 1B 34 28 1C 35 29 1D 36 30 1E 37 31 1F 3 10 40 32 20 41 33 21 42 34 22 43 35 23 44 36 24 45 37 25 46 38 26 47 39 27 50 40 28 51 41 29 52 42 2A 53 43 2B 54 44 2C 55 45 2D 56 46 2E 57 47 2F 00 ¢ T M 4 11 60 48 30 61 49 31 62 50 32 63 51 33 64 52 34 65 53 35 66 54 36 67 55 37 70 56 38 71 57 39 72 58 3A 73 59 3B 74 60 3C 75 61 3D 76 62 3E 77 63 3F 01 R C 6 5 00 100 64 40 101 65 41 102 66 42 103 67 43 104 68 44 105 69 45 106 70 46 107 71 47 110 72 48 111 73 49 112 74 4A 113 75 4B 114 76 4C 115 77 4D 116 78 4E 117 79 4F 01 01 120 80 50 121 81 51 122 82 52 123 83 53 124 84 54 125 85 55 126 86 56 127 87 57 130 88 58 131 89 59 132 90 5A 133 91 5B 134 92 5C 135 93 5D 136 94 5E 137 95 5F 01 7 10 140 96 60 141 97 61 142 98 62 143 99 63 144 100 64 145 101 65 146 102 66 147 103 67 150 104 68 151 105 69 152 106 6A 153 107 6B 154 108 6C 155 109 6D 156 110 6E 157 111 6F 01 11 160 112 70 161 113 71 162 114 72 163 115 73 164 116 74 165 117 75 166 118 76 167 119 77 170 120 78 171 121 79 172 122 7A 173 123 7B 174 124 7C 175 125 7D 176 126 7E 177 127 7F OCTAL DECIMAL HEXADECIMAL B-13 Character Sets WYSE NATIVE MODE CHARACTER SET 0 COLUMN R 8 7 BITS 65 O W 4321 00 0 0000 1 0001 S H 2 0010 S X 3 0011 E X 4 0100 E T 5 0101 E Q 6 0110 A K 7 0111 B L 8 1000 B S 9 1001 H T 10 1010 L F 11 1011 V T 12 1100 F F 13 1101 C R 14 1110 S O 15 1111 S I KEY: 2 1 00 0 0 0 1 1 1 2 2 2 3 3 3 4 4 4 5 5 5 6 6 6 7 7 7 10 8 8 11 9 9 12 10 A 13 11 B 14 12 C 15 13 D 16 14 E 17 15 F 35 29 1D 00 01 20 16 10 21 17 11 22 18 12 23 19 13 24 20 14 25 21 15 26 22 16 27 23 17 30 24 18 31 25 19 32 26 1A 33 27 1B 34 28 1C 35 29 1D 36 30 1E 37 31 1F 00 ! " # $ % & ´ ( ) * + , . / 3 10 40 32 20 41 33 21 42 34 22 43 35 23 44 36 24 45 37 25 46 38 26 47 39 27 50 40 28 51 41 29 52 42 2A 53 43 2B 54 44 2C 55 45 2D 56 46 2E 57 47 2F 00 0 1 2 3 4 5 6 7 8 9 : ; < = > ? 4 11 60 48 30 61 49 31 62 50 32 63 51 33 64 52 34 65 53 35 66 54 36 67 55 37 70 56 38 71 57 39 72 58 3A 73 59 3B 74 60 3C 75 61 3D 76 62 3E 77 63 3F 01 @ A B C D E F G H I J K L M N O 6 5 00 100 64 40 101 65 41 102 66 42 103 67 43 104 68 44 105 69 45 106 70 46 107 71 47 110 72 48 111 73 49 112 74 4A 113 75 4B 114 76 4C 115 77 4D 116 78 4E 117 79 4F 01 P Q R S T U V W X Y Z [ \ ] ^ _ 01 120 80 50 121 81 51 122 82 52 123 83 53 124 84 54 125 85 55 126 86 56 127 87 57 130 88 58 131 89 59 132 90 5A 133 91 5B 134 92 5C 135 93 5D 136 94 5E 137 95 5F 01 ` a b c d e f g h i j k l m n o 7 10 140 96 60 141 97 61 142 98 62 143 99 63 144 100 64 145 101 65 146 102 66 147 103 67 150 104 68 151 105 69 152 106 6A 153 107 6B 154 108 6C 155 109 6D 156 110 6E 157 111 6F 01 p q r s t u v w x y z { | } ~ 11 160 112 70 161 113 71 162 114 72 163 115 73 164 116 74 165 117 75 166 118 76 167 119 77 170 120 78 171 121 79 172 122 7A 173 123 7B 174 124 7C 175 125 7D 176 126 7E 177 127 7F OCTAL DECIMAL HEXADECIMAL This character set is used by all Wyse emulations and associated emulations. In WY-60 mode this is the default primary character set. B-14 Character Sets WY-60 MULTINATIONAL (CODE PAGE 437) CHARACTER SET 8 10 Ç ü é â ä à å ç ê ë è ï î ì Ä Å 10 9 00 200 128 80 201 129 81 202 130 82 203 131 83 204 132 84 205 133 85 206 134 86 207 135 87 210 136 88 211 137 89 212 138 8A 213 139 8B 214 140 8C 215 141 8D 216 142 8E 217 143 8F KEY: 10 É æ Æ ô ö ò û ù ÿ Ö Ü ¢ £ ¥ Pt ƒ Ñ 01 220 144 90 221 145 91 222 146 92 223 147 93 224 148 94 225 149 95 226 150 96 227 151 97 230 152 98 231 153 99 232 154 9A 233 155 9B 234 156 9C 235 157 9D 236 158 9E 237 159 9F 245 165 A5 10 á í ó ú ñ Ñ ª º ¿ /2 1 /4 1 ¡ « » 10 11 10 240 160 A0 241 161 A1 242 162 A2 243 163 A3 244 164 A4 245 165 A5 246 166 A6 247 167 A7 250 168 A8 251 169 A9 252 170 AA 253 171 AB 254 172 AC 255 173 AD 256 174 AE 257 175 AF 11 260 176 B0 261 177 B1 262 178 B2 263 179 B3 264 180 B4 265 181 B5 266 182 B6 267 183 B7 270 184 B8 271 185 B9 272 186 BA 273 187 BB 274 188 BC 275 189 BD 276 190 BE 277 191 BF 12 11 00 300 192 C0 301 193 C1 302 194 C2 303 195 C3 304 196 C4 305 197 C5 306 198 C6 307 199 C7 310 200 C8 311 201 C9 312 202 CA 313 203 CB 314 204 CC 315 205 CD 316 206 CE 317 207 CF 13 11 01 320 208 D0 321 209 D1 322 210 D2 323 211 D3 324 212 D4 325 213 D5 326 214 D6 327 215 D7 330 216 D8 331 217 D9 332 218 DA 333 219 DB 334 220 DC 335 221 DD 336 222 DE 337 223 DF 14 11 oc ß 10 15 11 ∫ µ ≈ Ω oo 11 340 360 224 240 E0 F0 341 361 225 241 E1 F1 342 362 226 242 E2 F2 343 363 227 243 E3 F3 344 364 228 244 E4 F4 345 365 229 245 E5 F5 346 366 230 246 E6 F6 347 367 231 247 E7 F7 350 370 232 248 E8 F8 351 371 233 249 E9 F9 352 372 234 250 EA FA 353 373 235 251 EB FB 354 374 236 252 EC FC 355 375 237 253 ED FD 356 376 238 254 EE FE 357 BLANK 377 239 255 FF EF FF COLUMN 8 7 BITS R 65 O 4321 W 0000 0 0001 1 0010 2 0011 3 0100 4 0101 5 0110 6 0111 7 1000 8 1001 9 1010 10 1011 11 n 1100 12 2 1101 13 1110 14 1111 15 OCTAL DECIMAL HEXADECIMAL This Wyse character set is only available in WY-60 mode and is the secondary character set when the Code Page option in the Wyse Settings dialog box is set to 437. B-15 Character Sets WY-60 MULTINATIONAL (CODE PAGE 850) CHARACTER SET 8 10 Ç ü é â ä à å ç ê ë è ï î ì Ä Å 10 9 00 200 128 80 201 129 81 202 130 82 203 131 83 204 132 84 205 133 85 206 134 86 207 135 87 210 136 88 211 137 89 212 138 8A 213 139 8B 214 140 8C 215 141 8D 216 142 8E 217 143 8F KEY: 10 É æ Æ ô ö ò û ù ÿ Ö Ü ø £ Ø ƒ Ñ 01 220 144 90 221 145 91 222 146 92 223 147 93 224 148 94 225 149 95 226 150 96 227 151 97 230 152 98 231 153 99 232 154 9A 233 155 9B 234 156 9C 235 157 9D 236 158 9E 237 159 9F 245 165 A5 10 á í ó ú ñ Ñ ª º ¿ ® /2 1 /4 1 ¡ « » 10 240 160 A0 241 161 A1 242 162 A2 243 163 A3 244 164 A4 245 165 A5 246 166 A6 247 167 A7 250 168 A8 251 169 A9 252 170 AA 253 171 AB 254 172 AC 255 173 AD 256 174 AE 257 175 AF 11 10 Á  À © ¢ ¥ 11 260 176 B0 261 177 B1 262 178 B2 263 179 B3 264 180 B4 265 181 B5 266 182 B6 267 183 B7 270 184 B8 271 185 B9 272 186 BA 273 187 BB 274 188 BC 275 189 BD 276 190 BE 277 191 BF 12 11 ã à ¤ 00 300 192 C0 301 193 C1 302 194 C2 303 195 C3 304 196 C4 305 197 C5 306 198 C6 307 199 C7 310 200 C8 311 201 C9 312 202 CA 313 203 CB 314 204 CC 315 205 CD 316 206 CE 317 207 CF 13 11 Ê Ë È Í Î Ï Ì 01 320 208 D0 321 209 D1 322 210 D2 323 211 D3 324 212 D4 325 213 D5 326 214 D6 327 215 D7 330 216 D8 331 217 D9 332 218 DA 333 219 DB 334 220 DC 335 221 DD 336 222 DE 337 223 DF 14 11 Ó ß Ô Ò õ Õ µ Ú Û Ù y´ Y´ ´ 10 15 11 11 360 340 240 224 F0 E0 361 341 241 225 F1 E1 362 342 242 226 F2 E2 363 343 243 227 3 4 F3 E3 364 344 244 228 F4 E4 365 345 245 229 F5 E5 366 346 246 230 F6 E6 367 347 247 231 F7 E7 370 350 248 232 F8 E8 371 351 249 233 F9 E9 372 352 250 234 FA EA 373 353 251 235 FB EB 374 354 252 236 FC EC 375 355 253 237 FD ED 376 356 254 238 FE EE 357 BLANK 377 255 239 FF FF EF COLUMN 8 7 BITS R 65 O 4321 W 0000 0 0001 1 0010 2 / 0011 3 ¶ 0100 4 § 0101 5 ¨ 0110 6 0111 7 1000 8 1001 9 1010 10 1 1011 11 3 1100 12 2 1101 13 1110 14 1111 15 OCTAL DECIMAL HEXADECIMAL This Wyse character set is only available in WY-60 mode and is the secondary character set when the Code Page option in the Wyse Settings dialog box is set to 850. B-16 Character Sets WY-60 PC EQUIVALENT CHARACTER SET COLUMN R 8 7 BITS 65 O W 4321 0 0000 1 0001 2 0010 3 0011 4 0100 5 0101 6 0110 7 0111 8 1000 9 1001 10 1010 11 1011 12 1100 13 1101 14 1110 15 1111 KEY: 0 00 2 1 00 0 0 0 1 1 1 2 2 2 3 3 3 4 4 4 5 5 5 6 6 6 7 7 7 10 8 8 11 9 9 12 10 A 13 11 B 14 12 C 15 13 D 16 14 E 17 15 F 33 27 1B 00 !! ¶ § 01 20 16 10 21 17 11 22 18 12 23 19 13 24 20 14 25 21 15 26 22 16 27 23 17 30 24 18 31 25 19 32 26 1A 33 27 1B 34 28 1C 35 29 1D 36 30 1E 37 31 1F 00 ! " # $ % & ´ ( ) * + , . / 3 10 40 32 20 41 33 21 42 34 22 43 35 23 44 36 24 45 37 25 46 38 26 47 39 27 50 40 28 51 41 29 52 42 2A 53 43 2B 54 44 2C 55 45 2D 56 46 2E 57 47 2F 00 0 1 2 3 4 5 6 7 8 9 : ; < = > ? 4 11 60 48 30 61 49 31 62 50 32 63 51 33 64 52 34 65 53 35 66 54 36 67 55 37 70 56 38 71 57 39 72 58 3A 73 59 3B 74 60 3C 75 61 3D 76 62 3E 77 63 3F 01 @ A B C D E F G H I J K L M N O 6 5 00 100 64 40 101 65 41 102 66 42 103 67 43 104 68 44 105 69 45 106 70 46 107 71 47 110 72 48 111 73 49 112 74 4A 113 75 4B 114 76 4C 115 77 4D 116 78 4E 117 79 4F 01 P Q R S T U V W X Y Z [ \ ] ^ _ 01 120 80 50 121 81 51 122 82 52 123 83 53 124 84 54 125 85 55 126 86 56 127 87 57 130 88 58 131 89 59 132 90 5A 133 91 5B 134 92 5C 135 93 5D 136 94 5E 137 95 5F 01 ` a b c d e f g h i j k l m n o 7 10 140 96 60 141 97 61 142 98 62 143 99 63 144 100 64 145 101 65 146 102 66 147 103 67 150 104 68 151 105 69 152 106 6A 153 107 6B 154 108 6C 155 109 6D 156 110 6E 157 111 6F 01 p q r s t u v w x y z { | } ~ 11 160 112 70 161 113 71 162 114 72 163 115 73 164 116 74 165 117 75 166 118 76 167 119 77 170 120 78 171 121 79 172 122 7A 173 123 7B 174 124 7C 175 125 7D 176 126 7E 177 127 7F OCTAL DECIMAL HEXADECIMAL This Wyse character set is only available in WY-60 mode. B-17 Character Sets WY-60 STANDARD ASCII CHARACTER SET 0 COLUMN R 8 7 BITS 65 O W 4321 00 0 0000 1 0001 S H 2 0010 S X 3 0011 E X 4 0100 E T 5 0101 E Q 6 0110 A K 7 0111 B L 8 1000 B S 9 1001 H T 10 1010 L F 11 1011 V T 12 1100 F F 13 1101 C R 14 1110 S O 15 1111 S I KEY: E C 2 1 00 0 0 0 1 1 1 2 2 2 3 3 3 4 4 4 5 5 5 6 6 6 7 7 7 10 8 8 11 9 9 12 10 A 13 11 B 14 12 C 15 13 D 16 14 E 17 15 F 33 27 1B 00 D L D 1 D 2 D 3 D 4 N K S Y E B C N E M S B E C F S G S R S U S 01 20 16 10 21 17 11 22 18 12 23 19 13 24 20 14 25 21 15 26 22 16 27 23 17 30 24 18 31 25 19 32 26 1A 33 27 1B 34 28 1C 35 29 1D 36 30 1E 37 31 1F 00 ! " # $ % & ´ ( ) * + , . / 3 10 40 32 20 41 33 21 42 34 22 43 35 23 44 36 24 45 37 25 46 38 26 47 39 27 50 40 28 51 41 29 52 42 2A 53 43 2B 54 44 2C 55 45 2D 56 46 2E 57 47 2F 00 0 1 2 3 4 5 6 7 8 9 : ; < = > ? 4 11 60 48 30 61 49 31 62 50 32 63 51 33 64 52 34 65 53 35 66 54 36 67 55 37 70 56 38 71 57 39 72 58 3A 73 59 3B 74 60 3C 75 61 3D 76 62 3E 77 63 3F 01 @ A B C D E F G H I J K L M N O 00 100 64 40 101 65 41 102 66 42 103 67 43 104 68 44 105 69 45 106 70 46 107 71 47 110 72 48 111 73 49 112 74 4A 113 75 4B 114 76 4C 115 77 4D 116 78 4E 117 79 4F 01 P Q R S T U V W OCTAL DECIMAL HEXADECIMAL This Wyse character set is only available in WY-60 mode. B-18 6 5 X Y Z [ \ ] ^ _ 01 120 80 50 121 81 51 122 82 52 123 83 53 124 84 54 125 85 55 126 86 56 127 87 57 130 88 58 131 89 59 132 90 5A 133 91 5B 134 92 5C 135 93 5D 136 94 5E 137 95 5F 01 ` a b c d e f g h i j k l m n o 7 10 140 96 60 141 97 61 142 98 62 143 99 63 144 100 64 145 101 65 146 102 66 147 103 67 150 104 68 151 105 69 152 106 6A 153 107 6B 154 108 6C 155 109 6D 156 110 6E 157 111 6F 01 p q r s t u v w x y z { | } ~ 11 160 112 70 161 113 71 162 114 72 163 115 73 164 116 74 165 117 75 166 118 76 167 119 77 170 120 78 171 121 79 172 122 7A 173 123 7B 174 124 7C 175 125 7D 176 126 7E 177 127 7F Character Sets WY-60 STANDARD ANSI CHARACTER SET 0 COLUMN R 8 7 BITS 65 O W 4321 00 0 0000 1 0001 2 0010 3 0011 H 4 0100 F 5 0101 C 6 0110 L 7 0111 ° T F R F 8 1000 ± 9 1001 N 10 1010 V L T 11 1011 12 1100 13 1101 14 1110 15 1111 KEY: ≥ 2 1 00 0 0 0 1 1 1 2 2 2 3 3 3 4 4 4 5 5 5 6 6 6 7 7 7 10 8 8 11 9 9 12 10 A 13 11 B 14 12 C 15 13 D 16 14 E 17 15 F 33 27 1B 00 ≤ ≥ π ≠ £ · 01 20 16 10 21 17 11 22 18 12 23 19 13 24 20 14 25 21 15 26 22 16 27 23 17 30 24 18 31 25 19 32 26 1A 33 27 1B 34 28 1C 35 29 1D 36 30 1E 37 31 1F 00 ! " # $ % & ´ ( ) * + , . / 3 10 40 32 20 41 33 21 42 34 22 43 35 23 44 36 24 45 37 25 46 38 26 47 39 27 50 40 28 51 41 29 52 42 2A 53 43 2B 54 44 2C 55 45 2D 56 46 2E 57 47 2F 00 0 1 2 3 4 5 6 7 8 9 : ; < = > ? 4 11 60 48 30 61 49 31 62 50 32 63 51 33 64 52 34 65 53 35 66 54 36 67 55 37 70 56 38 71 57 39 72 58 3A 73 59 3B 74 60 3C 75 61 3D 76 62 3E 77 63 3F 01 @ A B C D E F G H I J K L M N O 6 5 00 100 64 40 101 65 41 102 66 42 103 67 43 104 68 44 105 69 45 106 70 46 107 71 47 110 72 48 111 73 49 112 74 4A 113 75 4B 114 76 4C 115 77 4D 116 78 4E 117 79 4F 01 P Q R S T U V W X Y Z [ \ ] ^ _ 01 120 80 50 121 81 51 122 82 52 123 83 53 124 84 54 125 85 55 126 86 56 127 87 57 130 88 58 131 89 59 132 90 5A 133 91 5B 134 92 5C 135 93 5D 136 94 5E 137 95 5F 01 ` a b c d e f g h i j k l m n o 7 10 140 96 60 141 97 61 142 98 62 143 99 63 144 100 64 145 101 65 146 102 66 147 103 67 150 104 68 151 105 69 152 106 6A 153 107 6B 154 108 6C 155 109 6D 156 110 6E 157 111 6F 01 p q r s t u v w x y z { | } ~ 11 160 112 70 161 113 71 162 114 72 163 115 73 164 116 74 165 117 75 166 118 76 167 119 77 170 120 78 171 121 79 172 122 7A 173 123 7B 174 124 7C 175 125 7D 176 126 7E 177 127 7F OCTAL DECIMAL HEXADECIMAL This Wyse character set is only available in WY-60 mode. B-19 Character Sets WY-60 GRAPHICS 1 CHARACTER SET COLUMN R 8 7 BITS 65 O W 4321 0 0000 1 0001 2 0010 3 0011 4 0100 5 0101 6 0110 7 0111 8 1000 9 1001 10 1010 11 1011 12 1100 13 1101 14 1110 15 1111 KEY: 0 00 2 1 00 0 0 0 1 1 1 2 2 2 3 3 3 4 4 4 5 5 5 6 6 6 7 7 7 10 8 8 11 9 9 12 10 A 13 11 B 14 12 C 15 13 D 16 14 E 17 15 F 156 110 6E 00 01 00 20 16 10 21 17 11 22 18 12 23 19 13 24 20 14 25 21 15 26 22 16 27 23 17 30 24 18 31 25 19 32 26 1A 33 27 1B 34 28 1C 35 29 1D 36 30 1E 37 31 1F 3 10 40 32 20 41 33 21 42 34 22 43 35 23 44 36 24 45 37 25 46 38 26 47 39 27 50 40 28 51 41 29 52 42 2A 53 43 2B 54 44 2C 55 45 2D 56 46 2E 57 47 2F 00 0 1 2 3 4 5 6 7 8 9 4 11 60 48 30 61 49 31 62 50 32 63 51 33 64 52 34 65 53 35 66 54 36 67 55 37 70 56 38 71 57 39 72 58 3A 73 59 3B 74 60 3C 75 61 3D 76 62 3E 77 63 3F 01 00 01 100 64 40 101 65 41 102 66 42 103 67 43 104 68 44 105 69 45 106 70 46 107 71 47 110 72 48 111 73 49 112 74 4A 113 75 4B 114 76 4C 115 77 4D 116 78 4E 117 79 4F OCTAL DECIMAL HEXADECIMAL This Wyse character set is only available in WY-60 mode. B-20 6 5 01 120 80 50 121 81 51 122 82 52 123 83 53 124 84 54 125 85 55 126 86 56 127 87 57 130 88 58 131 89 59 132 90 5A 133 91 5B 134 92 5C 135 93 5D 136 94 5E 137 95 5F 01 0 1 2 3 4 5 6 7 8 9 7 10 140 96 60 141 97 61 142 98 62 143 99 63 144 100 64 145 101 65 146 102 66 147 103 67 150 104 68 151 105 69 152 106 6A 153 107 6B 154 108 6C 155 109 6D 156 110 6E 157 111 6F 01 11 160 112 70 161 113 71 162 114 72 163 115 73 164 116 74 165 117 75 166 118 76 167 119 77 170 120 78 171 121 79 172 122 7A 173 123 7B 174 124 7C 175 125 7D 176 126 7E 177 127 7F Character Sets WY-60 GRAPHICS 2 CHARACTER SET COLUMN R 8 7 BITS 65 O W 4321 0 0000 1 0001 2 0010 3 0011 4 0100 5 0101 6 0110 7 0111 8 1000 9 1001 10 1010 11 1011 12 1100 13 1101 14 1110 15 1111 KEY: 0 00 2 1 00 0 0 0 1 1 1 2 2 2 3 3 3 4 4 4 5 5 5 6 6 6 7 7 7 10 8 8 11 9 9 12 10 A 13 11 B 14 12 C 15 13 D 16 14 E 17 15 F 114 76 4C 00 01 00 20 16 10 21 17 11 22 18 12 23 19 13 24 20 14 25 21 15 26 22 16 27 23 17 30 24 18 31 25 19 32 26 1A 33 27 1B 34 28 1C 35 29 1D 36 30 1E 37 31 1F 3 10 40 32 20 41 33 21 42 34 22 43 35 23 44 36 24 45 37 25 46 38 26 47 39 27 50 40 28 51 41 29 52 42 2A 53 43 2B 54 44 2C 55 45 2D 56 46 2E 57 47 2F 00 4 11 60 48 30 61 49 31 62 50 32 63 51 33 64 52 34 65 53 35 66 54 36 67 55 37 70 56 38 71 57 39 72 58 3A 73 59 3B 74 60 3C 75 61 3D 76 62 3E 77 63 3F 01 6 5 00 01 100 64 40 101 65 41 102 66 42 103 67 43 104 68 44 105 69 45 106 70 46 107 71 47 110 72 48 111 73 49 112 74 4A 113 75 4B 114 76 4C 115 77 4D 116 78 4E 117 79 4F 01 120 80 50 121 81 51 122 82 52 123 83 53 124 84 54 125 85 55 126 86 56 127 87 57 130 88 58 131 89 59 132 90 5A 133 91 5B 134 92 5C 135 93 5D 136 94 5E 137 95 5F 01 7 10 140 96 60 141 97 61 142 98 62 143 99 63 144 100 64 145 101 65 146 102 66 147 103 67 150 104 68 151 105 69 152 106 6A 153 107 6B 154 108 6C 155 109 6D 156 110 6E 157 111 6F 01 11 160 112 70 161 113 71 162 114 72 163 115 73 164 116 74 165 117 75 166 118 76 167 119 77 170 120 78 171 121 79 172 122 7A 173 123 7B 174 124 7C 175 125 7D 176 126 7E 177 127 7F OCTAL DECIMAL HEXADECIMAL This Wyse character set is only available in WY-60 mode. B-21 Character Sets WY-60 GRAPHICS 3 CHARACTER SET COLUMN R 8 7 BITS 65 O W 4321 0 0000 1 0001 2 0010 3 0011 4 0100 5 0101 6 0110 7 0111 8 1000 9 1001 10 1010 11 1011 12 1100 13 1101 14 1110 15 1111 KEY: 0 00 2 1 00 0 0 0 1 1 1 2 2 2 3 3 3 4 4 4 5 5 5 6 6 6 7 7 7 10 8 8 11 9 9 12 10 A 13 11 B 14 12 C 15 13 D 16 14 E 17 15 F 114 76 4C 00 01 00 20 16 10 21 17 11 22 18 12 23 19 13 24 20 14 25 21 15 26 22 16 27 23 17 30 24 18 31 25 19 32 26 1A 33 27 1B 34 28 1C 35 29 1D 36 30 1E 37 31 1F 3 10 40 32 20 41 33 21 42 34 22 43 35 23 44 36 24 45 37 25 46 38 26 47 39 27 50 40 28 51 41 29 52 42 2A 53 43 2B 54 44 2C 55 45 2D 56 46 2E 57 47 2F 00 4 11 60 48 30 61 49 31 62 50 32 63 51 33 64 52 34 65 53 35 66 54 36 67 55 37 70 56 38 71 57 39 72 58 3A 73 59 3B 74 60 3C 75 61 3D 76 62 3E 77 63 3F 01 00 01 100 64 40 101 65 41 102 66 42 103 67 43 104 68 44 105 69 45 106 70 46 107 71 47 110 72 48 111 73 49 112 74 4A 113 75 4B 114 76 4C 115 77 4D 116 78 4E 117 79 4F OCTAL DECIMAL HEXADECIMAL This Wyse character set is only available in WY-60 mode. B-22 6 5 01 120 80 50 121 81 51 122 82 52 123 83 53 124 84 54 125 85 55 126 86 56 127 87 57 130 88 58 131 89 59 132 90 5A 133 91 5B 134 92 5C 135 93 5D 136 94 5E 137 95 5F 01 7 10 140 96 60 141 97 61 142 98 62 143 99 63 144 100 64 145 101 65 146 102 66 147 103 67 150 104 68 151 105 69 152 106 6A 153 107 6B 154 108 6C 155 109 6D 156 110 6E 157 111 6F 01 11 160 112 70 161 113 71 162 114 72 163 115 73 164 116 74 165 117 75 166 118 76 167 119 77 170 120 78 171 121 79 172 122 7A 173 123 7B 174 124 7C 175 125 7D 176 126 7E 177 127 7F Character Sets PT250 ADDITIONAL CHARACTER SET 10 11 14 15 COLUMN 12 13 BITS R 8 1 1 1 1 76 11 10 1 10 11 11 O 00 101 11 00 001 010 1 4 3 2 15 W 0 8 9 200 128 80 201 129 81 202 130 82 203 131 83 204 132 84 205 133 85 206 134 86 207 135 87 210 136 88 211 137 89 212 138 8A 213 139 8B 214 140 8C 215 141 8D 216 142 8E 217 143 8F KEY: 220 144 90 221 145 91 222 146 92 223 147 93 224 148 94 225 149 95 226 150 96 227 151 97 230 152 98 231 153 99 232 154 9A 233 155 9B 234 156 9C 235 157 9D 236 158 9E 237 159 9F ESC 33 27 1B ¡ ¢ £ ¤ ¥ § ¨ © ª « ® 240 160 A0 241 161 A1 242 162 A2 243 163 A3 244 164 A4 245 165 A5 246 166 A6 247 167 A7 250 168 A8 251 169 A9 252 170 AA 253 171 AB 254 172 AC 255 173 AD 256 174 AE 257 175 AF ° ± 2 3 µ ¶ ◆ Ç 1 º » 1 /4 1 /2 3 /4 ¿ 260 176 B0 261 177 B1 262 178 B2 263 179 B3 264 180 B4 265 181 B5 266 182 B6 267 183 B7 270 184 B8 271 185 B9 272 186 BA 273 187 BB 274 188 BC 275 189 BD 276 190 BE 277 191 BF À Á Â Ã Ä Å Æ Ç È É Ê Ë Ì Í Î Ï 300 192 C0 301 193 C1 302 194 C2 303 195 C3 304 196 C4 305 197 C5 306 198 C6 307 199 C7 310 200 C8 311 201 C9 312 202 CA 313 203 CB 314 204 CC 315 205 CD 316 206 CE 317 207 CF D Ñ Ò Ó Ô Õ Ö Ø Ù Ú Û Ü Y´ ß 320 208 D0 321 209 D1 322 210 D2 323 211 D3 324 212 D4 325 213 D5 326 214 D6 327 215 D7 330 216 D8 331 217 D9 332 218 DA 333 219 DB 334 220 DC 335 221 DD 336 222 DE 337 223 DF à á â ã ä å æ ç è é ê ë ì í î ï 340 224 E0 341 225 E1 342 226 E2 343 227 E3 344 228 E4 345 229 E5 346 230 E6 347 231 E7 350 232 E8 351 233 E9 352 234 EA 353 235 EB 354 236 EC 355 237 ED 356 238 EE 357 239 EF ñ ò ó ô õ ö ÷ ø ù ú û ü y´ ÿ 360 240 F0 361 241 F1 362 242 F2 363 243 F3 364 244 F4 365 245 F5 366 246 F6 367 247 F7 370 248 F8 371 249 F9 372 250 FA 373 251 FB 374 252 FC 375 253 FD 376 254 FE 377 255 FF 0000 0 0001 1 0010 2 0011 3 0100 4 0101 5 0110 6 0111 7 1000 8 1001 9 1010 10 1011 11 1100 12 1101 13 1110 14 1111 15 OCTAL DECIMAL HEXADECIMAL These characters can normally be displayed in PT250 mode by holding down the Alt + E keys and pressing the equivalent standard (ASCII) character key. The equivalent standard character key is generally found by subtracting 128 from the decimal value of the Additional character, then looking up the character with the resulting decimal number in the ASCII character set. Exceptions to this rule are the standard characters ", 6, <, =, [ and ]. 6 should be swapped with ", [ and ] should be swapped with < and =, and vice versa. B-23 Character Sets PT250 LINE DRAWING CHARACTER SET COLUMN R 8 7 BITS 65 O W 4321 0 0000 1 0001 2 0010 3 0011 4 0100 5 0101 6 0110 7 0111 8 1000 9 1001 10 1010 11 1011 12 1100 13 1101 14 1110 15 1111 KEY: 2 3 6 7 4 5 0 0 0 0 01 00 00 0 11 11 00 101 11 00 001 010 1 0 0 1 0 0 0 1 1 1 2 2 2 3 3 3 4 4 4 5 5 5 6 6 6 7 7 7 10 8 8 11 9 9 12 10 A 13 11 B 14 12 C 15 13 D 16 14 E 17 15 F 57 47 2F 20 16 10 21 17 11 22 18 12 23 19 13 24 20 14 25 21 15 26 22 16 27 23 17 30 24 18 31 25 19 32 26 1A 33 27 1B 34 28 1C 35 29 1D 36 30 1E 37 31 1F 40 32 20 41 33 21 42 34 22 43 35 23 44 36 24 45 37 25 46 38 26 47 39 27 50 40 28 51 41 29 52 42 2A 53 43 2B 54 44 2C 55 45 2D 56 46 2E 57 47 2F 60 48 30 61 49 31 62 50 32 63 51 33 64 52 34 65 53 35 66 54 36 67 55 37 70 56 38 71 57 39 72 58 3A 73 59 3B 74 60 3C 75 61 3D 76 62 3E 77 63 3F 100 64 40 101 65 41 102 66 42 103 67 43 104 68 44 105 69 45 106 70 46 107 71 47 110 72 48 111 73 49 112 74 4A 113 75 4B 114 76 4C 115 77 4D 116 78 4E 117 79 4F 120 80 50 121 81 51 122 82 52 123 83 53 124 84 54 125 85 55 126 86 56 127 87 57 130 88 58 131 89 59 132 90 5A 133 91 5B 134 92 5C 135 93 5D 136 94 5E 137 95 5F 140 96 60 141 97 61 142 98 62 143 99 63 144 100 64 145 101 65 146 102 66 147 103 67 150 104 68 151 105 69 152 106 6A 153 107 6B 154 108 6C 155 109 6D 156 110 6E 157 111 6F OCTAL DECIMAL HEXADECIMAL This is a special PT250 character set which is used by some applications. B-24 160 112 70 161 113 71 162 114 72 163 115 73 164 116 74 165 117 75 166 118 76 167 119 77 170 120 78 171 121 79 172 122 7A 173 123 7B 174 124 7C 175 125 7D 176 126 7E 177 127 7F Character Sets PT250 BLOCK GRAPHICS CHARACTER SET COLUMN R 8 7 BITS 65 O W 4321 0 0000 1 0001 2 0010 3 0011 4 0100 5 0101 6 0110 7 0111 8 1000 9 1001 10 1010 11 1011 12 1100 13 1101 14 1110 15 1111 KEY: 2 3 6 7 4 5 0 0 0 0 01 00 00 0 11 11 00 101 11 00 001 010 1 0 0 1 0 0 0 1 1 1 2 2 2 3 3 3 4 4 4 5 5 5 6 6 6 7 7 7 10 8 8 11 9 9 12 10 A 13 11 B 14 12 C 15 13 D 16 14 E 17 15 F 57 47 2F 20 16 10 21 17 11 22 18 12 23 19 13 24 20 14 25 21 15 26 22 16 27 23 17 30 24 18 31 25 19 32 26 1A 33 27 1B 34 28 1C 35 29 1D 36 30 1E 37 31 1F 40 32 20 41 33 21 42 34 22 43 35 23 44 36 24 45 37 25 46 38 26 47 39 27 50 40 28 51 41 29 52 42 2A 53 43 2B 54 44 2C 55 45 2D 56 46 2E 57 47 2F 60 48 30 61 49 31 62 50 32 63 51 33 64 52 34 65 53 35 66 54 36 67 55 37 70 56 38 71 57 39 72 58 3A 73 59 3B 74 60 3C 75 61 3D 76 62 3E 77 63 3F 100 64 40 101 65 41 102 66 42 103 67 43 104 68 44 105 69 45 106 70 46 107 71 47 110 72 48 111 73 49 112 74 4A 113 75 4B 114 76 4C 115 77 4D 116 78 4E 117 79 4F 120 80 50 121 81 51 122 82 52 123 83 53 124 84 54 125 85 55 126 86 56 127 87 57 130 88 58 131 89 59 132 90 5A 133 91 5B 134 92 5C 135 93 5D 136 94 5E 137 95 5F 140 96 60 141 97 61 142 98 62 143 99 63 144 100 64 145 101 65 146 102 66 147 103 67 150 104 68 151 105 69 152 106 6A 153 107 6B 154 108 6C 155 109 6D 156 110 6E 157 111 6F 160 112 70 161 113 71 162 114 72 163 115 73 164 116 74 165 117 75 166 118 76 167 119 77 170 120 78 171 121 79 172 122 7A 173 123 7B 174 124 7C 175 125 7D 176 126 7E 177 127 7F OCTAL DECIMAL HEXADECIMAL This is a special PT250 character set which is used by some applications. B-25 Character Sets SIEMENS 97801 INTERNATIONAL A CHARACTER SET 0 COLUMN R 8 7 BITS 65 O W 4321 00 00 0 0000 NUL 1 0001 SOH 2 0010 STX 3 0011 ETX 4 0100 EOT 5 0101 ENQ 6 0110 ACK 7 0111 BEL 8 1000 BS 9 1001 HT 10 1010 LF 11 1011 VT 12 1100 FF 13 1101 CR 14 1110 SO 15 1111 KEY: B-26 SI ESC 2 1 00 01 0 20 0 DLE 16 0 10 1 21 1 DC1 17 1 XON 11 2 22 2 DC2 18 2 12 3 23 3 DC3 19 3 XOFF 13 4 24 4 DC4 20 4 14 5 25 5 NAK 21 5 15 6 26 6 SYN 22 6 16 7 27 7 ETB 23 7 17 10 30 8 CAN 24 8 18 11 31 9 EM 25 9 19 12 32 10 SUB 26 A 1A 13 33 11 ESC 27 B 1B 14 34 12 FS 28 C 1C 15 35 13 GS 29 D 1D 16 36 14 RS 30 E 1E 17 37 15 US 31 F 1F 33 27 1B 00 SP ! " # $ % & ´ ( ) * + , . / OCTAL DECIMAL HEXADECIMAL 3 10 40 32 20 41 33 21 42 34 22 43 35 23 44 36 24 45 37 25 46 38 26 47 39 27 50 40 28 51 41 29 52 42 2A 53 43 2B 54 44 2C 55 45 2D 56 46 2E 57 47 2F 00 0 1 2 3 4 5 6 7 8 9 : ; < = > ? 4 11 60 48 30 61 49 31 62 50 32 63 51 33 64 52 34 65 53 35 66 54 36 67 55 37 70 56 38 71 57 39 72 58 3A 73 59 3B 74 60 3C 75 61 3D 76 62 3E 77 63 3F 01 @ A B C D E F G H I J K L M N O 6 5 00 100 64 40 101 65 41 102 66 42 103 67 43 104 68 44 105 69 45 106 70 46 107 71 47 110 72 48 111 73 49 112 74 4A 113 75 4B 114 76 4C 115 77 4D 116 78 4E 117 79 4F 01 P Q R S T U V W X Y Z [ \ ] ^ _ 01 120 80 50 121 81 51 122 82 52 123 83 53 124 84 54 125 85 55 126 86 56 127 87 57 130 88 58 131 89 59 132 90 5A 133 91 5B 134 92 5C 135 93 5D 136 94 5E 137 95 5F 01 ` a b c d e f g h i j k l m n o 7 10 140 96 60 141 97 61 142 98 62 143 99 63 144 100 64 145 101 65 146 102 66 147 103 67 150 104 68 151 105 69 152 106 6A 153 107 6B 154 108 6C 155 109 6D 156 110 6E 157 111 6F 01 11 p q r s t u v w x y z { | } ~ DEL 160 112 70 161 113 71 162 114 72 163 115 73 164 116 74 165 117 75 166 118 76 167 119 77 170 120 78 171 121 79 172 122 7A 173 123 7B 174 124 7C 175 125 7D 176 126 7E 177 127 7F Character Sets SIEMENS 97801 INTERNATIONAL CHARACTER SET 0 COLUMN R 8 7 BITS 65 O W 4321 00 00 0 0000 NUL 1 0001 SOH 2 0010 STX 3 0011 ETX 4 0100 EOT 5 0101 ENQ 6 0110 ACK 7 0111 BEL 8 1000 BS 9 1001 HT 10 1010 LF 11 1011 VT 12 1100 FF 13 1101 CR 14 1110 SO 15 1111 KEY: SI ESC 2 1 00 01 0 20 0 DLE 16 0 10 1 21 1 DC1 17 1 XON 11 2 22 2 DC2 18 2 12 3 23 3 DC3 19 3 XOFF 13 4 24 4 DC4 20 4 14 5 25 5 NAK 21 5 15 6 26 6 SYN 22 6 16 7 27 7 ETB 23 7 17 10 30 8 CAN 24 8 18 11 31 9 EM 25 9 19 12 32 10 SUB 26 A 1A 13 33 11 ESC 27 B 1B 14 34 12 FS 28 C 1C 15 35 13 GS 29 D 1D 16 36 14 RS 30 E 1E 17 37 15 US 31 F 1F 33 27 1B 00 SP ! " # ¤ % & ´ ( ) * + , . / 3 10 40 32 20 41 33 21 42 34 22 43 35 23 44 36 24 45 37 25 46 38 26 47 39 27 50 40 28 51 41 29 52 42 2A 53 43 2B 54 44 2C 55 45 2D 56 46 2E 57 47 2F 00 0 1 2 3 4 5 6 7 8 9 : ; < = > ? 4 11 60 48 30 61 49 31 62 50 32 63 51 33 64 52 34 65 53 35 66 54 36 67 55 37 70 56 38 71 57 39 72 58 3A 73 59 3B 74 60 3C 75 61 3D 76 62 3E 77 63 3F 01 @ A B C D E F G H I J K L M N O 6 5 00 100 64 40 101 65 41 102 66 42 103 67 43 104 68 44 105 69 45 106 70 46 107 71 47 110 72 48 111 73 49 112 74 4A 113 75 4B 114 76 4C 115 77 4D 116 78 4E 117 79 4F 01 P Q R S T U V W X Y Z [ \ ] ^ _ 01 120 80 50 121 81 51 122 82 52 123 83 53 124 84 54 125 85 55 126 86 56 127 87 57 130 88 58 131 89 59 132 90 5A 133 91 5B 134 92 5C 135 93 5D 136 94 5E 137 95 5F 01 ` a b c d e f g h i j k l m n o 7 10 140 96 60 141 97 61 142 98 62 143 99 63 144 100 64 145 101 65 146 102 66 147 103 67 150 104 68 151 105 69 152 106 6A 153 107 6B 154 108 6C 155 109 6D 156 110 6E 157 111 6F 01 11 p q r s t u v w x y z { | } ¯ DEL 160 112 70 161 113 71 162 114 72 163 115 73 164 116 74 165 117 75 166 118 76 167 119 77 170 120 78 171 121 79 172 122 7A 173 123 7B 174 124 7C 175 125 7D 176 126 7E 177 127 7F OCTAL DECIMAL HEXADECIMAL B-27 Character Sets SIEMENS 97801 GERMAN CHARACTER SET 0 COLUMN R 8 7 BITS 65 O W 4321 00 00 0 0000 NUL 1 0001 SOH 2 0010 STX 3 0011 ETX 4 0100 EOT 5 0101 ENQ 6 0110 ACK 7 0111 BEL 8 1000 BS 9 1001 HT 10 1010 LF 11 1011 VT 12 1100 FF 13 1101 CR 14 1110 SO 15 1111 KEY: B-28 SI ESC 2 1 00 01 0 20 0 DLE 16 0 10 1 21 1 DC1 17 1 XON 11 2 22 2 DC2 18 2 12 3 23 3 DC3 19 3 XOFF 13 4 24 4 DC4 20 4 14 5 25 5 NAK 21 5 15 6 26 6 SYN 22 6 16 7 27 7 ETB 23 7 17 10 30 8 CAN 24 8 18 11 31 9 EM 25 9 19 12 32 10 SUB 26 A 1A 13 33 11 ESC 27 B 1B 14 34 12 FS 28 C 1C 15 35 13 GS 29 D 1D 16 36 14 RS 30 E 1E 17 37 15 US 31 F 1F 33 27 1B 00 SP ! " # $ % & ´ ( ) * + , . / OCTAL DECIMAL HEXADECIMAL 3 10 40 32 20 41 33 21 42 34 22 43 35 23 44 36 24 45 37 25 46 38 26 47 39 27 50 40 28 51 41 29 52 42 2A 53 43 2B 54 44 2C 55 45 2D 56 46 2E 57 47 2F 00 0 1 2 3 4 5 6 7 8 9 : ; < = > ? 4 11 60 48 30 61 49 31 62 50 32 63 51 33 64 52 34 65 53 35 66 54 36 67 55 37 70 56 38 71 57 39 72 58 3A 73 59 3B 74 60 3C 75 61 3D 76 62 3E 77 63 3F 01 § A B C D E F G H I J K L M N O 6 5 00 100 64 40 101 65 41 102 66 42 103 67 43 104 68 44 105 69 45 106 70 46 107 71 47 110 72 48 111 73 49 112 74 4A 113 75 4B 114 76 4C 115 77 4D 116 78 4E 117 79 4F 01 P Q R S T U V W X Y Z Ä Ö Ü ^ _ 01 120 80 50 121 81 51 122 82 52 123 83 53 124 84 54 125 85 55 126 86 56 127 87 57 130 88 58 131 89 59 132 90 5A 133 91 5B 134 92 5C 135 93 5D 136 94 5E 137 95 5F 01 ` a b c d e f g h i j k l m n o 7 10 140 96 60 141 97 61 142 98 62 143 99 63 144 100 64 145 101 65 146 102 66 147 103 67 150 104 68 151 105 69 152 106 6A 153 107 6B 154 108 6C 155 109 6D 156 110 6E 157 111 6F 01 11 p q r s t u v w x y z ä ö ü ß DEL 160 112 70 161 113 71 162 114 72 163 115 73 164 116 74 165 117 75 166 118 76 167 119 77 170 120 78 171 121 79 172 122 7A 173 123 7B 174 124 7C 175 125 7D 176 126 7E 177 127 7F Character Sets SIEMENS 97801 EURO CHARACTER SET 7 0111 BEL 8 1000 BS 9 1001 HT 10 1010 LF 11 1011 VT 12 1100 FF 13 1101 CR 14 1110 SO 15 1111 KEY: SI ESC 33 27 1B ä å a ã a æ ç c c´ ð d ^ 6 0110 ACK â d é ê ë e e g î ì ï j ^ 5 0101 ENQ á è 11 60 48 30 61 49 31 62 50 32 63 51 33 64 52 34 65 53 35 66 54 36 67 55 37 70 56 38 71 57 39 72 58 3A 73 59 3B 74 60 3C 75 61 3D 76 62 3E 77 63 3F 01 n n´ ñ ò ó ô ö õ ø o ´´ œ þ r r´ š s´ 6 5 00 100 64 40 101 65 41 102 66 42 103 67 43 104 68 44 105 69 45 106 70 46 107 71 47 110 72 48 111 73 49 112 74 4A 113 75 4B 114 76 4C 115 77 4D 116 78 4E 117 79 4F 01 s ß ù ú û ü u° ´´ u ý ÿ z z´ · z É 01 120 80 50 121 81 51 122 82 52 123 83 53 124 84 54 125 85 55 126 86 56 127 87 57 130 88 58 131 89 59 132 90 5A 133 91 5B 134 92 5C 135 93 5D 136 94 5E 137 95 5F 01 Å Æ Ð · I 1J Ø Œ Þ Ä Ö Ü § $ £ ® 7 10 140 96 60 141 97 61 142 98 62 143 99 63 144 100 64 145 101 65 146 102 66 147 103 67 150 104 68 151 105 69 152 106 6A 153 107 6B 154 108 6C 155 109 6D 156 110 6E 157 111 6F 01 11 © Ω µ ° Ç Pt π ´ ´´ Ñ ~ ^ 4 0100 EOT à 40 32 20 41 33 21 42 34 22 43 35 23 44 36 24 45 37 25 46 38 26 47 39 27 50 40 28 51 41 29 52 42 2A 53 43 2B 54 44 2C 55 45 2D 56 46 2E 57 47 2F 00 ^ 3 0011 ETX SP 10 4 ^ 2 0010 STX 0 20 0 DLE 16 0 10 1 21 1 DC1 17 1 XON 11 2 22 2 DC2 18 2 12 3 23 3 DC3 19 3 XOFF 13 4 24 4 DC4 20 4 14 5 25 5 NAK 21 5 15 6 26 6 SYN 22 6 16 7 27 7 ETB 23 7 17 10 30 8 CAN 24 8 18 11 31 9 EM 25 9 19 12 32 10 SUB 26 A 1A 13 33 11 ESC 27 B 1B 14 34 12 FS 28 C 1C 15 35 13 GS 29 D 1D 16 36 14 RS 30 E 1E 17 37 15 US 31 F 1F 00 ^ 1 0001 SOH 01 ^ 0 0000 NUL 00 ^ 00 3 ^ 00 2 1 ^ R 8 7 BITS 65 O W 4321 ^ 0 COLUMN DEL 160 112 70 161 113 71 162 114 72 163 115 73 164 116 74 165 117 75 166 118 76 167 119 77 170 120 78 171 121 79 172 122 7A 173 123 7B 174 124 7C 175 125 7D 176 126 7E 177 127 7F OCTAL DECIMAL HEXADECIMAL B-29 Character Sets SIEMENS 97801 BRACKETS CHARACTER SET 0 COLUMN R 8 7 BITS 65 O W 4321 00 00 0 0000 NUL 1 0001 SOH 2 0010 STX 3 0011 ETX 4 0100 EOT 5 0101 ENQ 6 0110 ACK 7 0111 BEL 8 1000 BS 9 1001 HT 10 1010 LF 11 1011 VT 12 1100 FF 13 1101 CR 14 1110 SO 15 1111 KEY: B-30 SI ESC 2 1 00 01 0 20 0 DLE 16 0 10 1 21 1 DC1 17 1 XON 11 2 22 2 DC2 18 2 12 3 23 3 DC3 19 3 XOFF 13 4 24 4 DC4 20 4 14 5 25 5 NAK 21 5 15 6 26 6 SYN 22 6 16 7 27 7 ETB 23 7 17 10 30 8 CAN 24 8 18 11 31 9 EM 25 9 19 12 32 10 SUB 26 A 1A 13 33 11 ESC 27 B 1B 14 34 12 FS 28 C 1C 15 35 13 GS 29 D 1D 16 36 14 RS 30 E 1E 17 37 15 US 31 F 1F 33 27 1B 00 SP OCTAL DECIMAL HEXADECIMAL 3 10 40 32 20 41 33 21 42 34 22 43 35 23 44 36 24 45 37 25 46 38 26 47 39 27 50 40 28 51 41 29 52 42 2A 53 43 2B 54 44 2C 55 45 2D 56 46 2E 57 47 2F 00 4 11 60 48 30 61 49 31 62 50 32 63 51 33 64 52 34 65 53 35 66 54 36 67 55 37 70 56 38 71 57 39 72 58 3A 73 59 3B 74 60 3C 75 61 3D 76 62 3E 77 63 3F 01 6 5 00 100 64 40 101 65 41 102 66 42 103 67 43 104 68 44 105 69 45 106 70 46 107 71 47 110 72 48 111 73 49 112 74 4A 113 75 4B 114 76 4C 115 77 4D 116 78 4E 117 79 4F 01 01 120 80 50 121 81 51 122 82 52 123 83 53 124 84 54 125 85 55 126 86 56 127 87 57 130 88 58 131 89 59 132 90 5A 133 91 5B 134 92 5C 135 93 5D 136 94 5E 137 95 5F 01 7 10 140 96 60 141 97 61 142 98 62 143 99 63 144 100 64 145 101 65 146 102 66 147 103 67 150 104 68 151 105 69 152 106 6A 153 107 6B 154 108 6C 155 109 6D 156 110 6E 157 111 6F 01 11 DEL 160 112 70 161 113 71 162 114 72 163 115 73 164 116 74 165 117 75 166 118 76 167 119 77 170 120 78 171 121 79 172 122 7A 173 123 7B 174 124 7C 175 125 7D 176 126 7E 177 127 7F Character Sets IBM 3270 & IBM 5250 ENGLISH (U.S.), CANADIAN BILINGUAL & NETHERLANDS CHARACTER SET HEX 4- 5- 6- 7- 8- 9- A- B- C- D- E- F- -0 SP & - ø Ø ° µ ^ { } \ 0 -1 RSP é / É a j ~ £ A J ÷ 1 -2 â ê Â Ê b k s ¥ B K S 2 -3 ä ë Ä Ë c l t · C L T 3 -4 à è À È d m u © D M U 4 -5 á í Á Í e n v § E N V 5 -6 ã î à Πf o w ¶ F O W 6 -7 å ï Å Ï g p x 1 /4 G P X 7 -8 ç ì Ç Ì h q y 1 /2 H Q Y 8 -9 ñ ß Ñ ` i r z 3 /4 I R Z 9 -A ¢ ! : « ª ¡ [ SHY 1 2 3 -B . $ , # » º ¿ ô û Ô Û -C < * % @ æ D ] _ ö ü Ö Ü -D ( ) _ ´ Ç Y´ ¨ ò ù Ò Ù -E + ; > = ´ ó ú Ó Ú -F | ¬ ? " õ ÿ Õ y´ Æ ± ¤ ® Legend: RSP required space, SHY syllable hyphen, SP space. B-31 Character Sets IBM 3270 & IBM 5250 ENGLISH (U.K.) CHARACTER SET HEX 4- 5- 6- 7- 8- 9- A- B- C- D- E- F- -0 SP & - ø Ø ° µ ¢ { } \ 0 -1 RSP é / É a j - [ A J ÷ 1 -2 â ê Â Ê b k s ¥ B K S 2 -3 ä ë Ä Ë c l t · C L T 3 -4 à è À È d m u © D M U 4 -5 á í Á Í e n v § E N V 5 -6 ã î à Πf o w ¶ F O W 6 -7 å ï Å Ï g p x 1 /4 G P X 7 -8 ç ì Ç Ì h q y 1 /2 H Q Y 8 -9 ñ ß Ñ ` i r z 3 /4 I R Z 9 -A $ ! : « ª ¡ ^ SHY 1 2 3 -B . £ , # » º ¿ ] ô û Ô Û -C < * % @ æ D ~ ö ü Ö Ü -D ( ) _ ´ Ç Y´ ¨ ò ù Ò Ù -E + ; > = ´ ó ú Ó Ú -F | ¬ ? " õ ÿ Õ y´ Æ ± ¤ ® Legend: RSP required space, SHY syllable hyphen, SP space. B-32 Character Sets IBM 3270 & IBM 5250 DANISH & NORWEGIAN CHARACTER SET HEX 4- 5- 6- -0 SP & - -1 RSP é / -2 â ê -3 ä -4 7- 8- 9- A- B- C- D- E- F- @ ° µ ¢ æ å \ 0 É a j ü £ A J ÷ 1 Â Ê b k s ¥ B K S 2 ë Ä Ë c l t · C L T 3 à è À È d m u © D M U 4 -5 á í Á Í e n v § E N V 5 -6 ã î à Πf o w ¶ F O W 6 -7 } ï $ Ï g p x 1 /4 G P X 7 -8 ç ì Ç Ì h q y 1 /2 H Q Y 8 -9 ñ ß Ñ ` i r z 3 /4 I R Z 9 -A # ¤ ø : « ª ¡ ¬ SHY 1 2 3 -B . Å , Æ » º ¿ ô û Ô Û -C < * % Ø { D | _ ö ü Ö Ü -D ( ) _ ´ Ç Y´ ¨ ò ù Ò Ù -E + ; > = ´ ó ú Ó Ú -F ! ^ ? " õ ÿ Õ y´ [ ± ] ® Legend: RSP required space, SHY syllable hyphen, SP space. B-33 Character Sets IBM 3270 & IBM 5250 FRENCH CHARACTER SET HEX 4- 5- 6- 7- 8- 9- A- B- C- D- E- F- -0 SP & - ø Ø [ ` ¢ é è ç 0 -1 RSP { / É a j ¨ # A J ÷ 1 -2 â ê Â Ê b k s ¥ B K S 2 -3 ä ë Ä Ë c l t · C L T 3 -4 @ } À È d m u © D M U 4 -5 á í Á Í e n v ] E N V 5 -6 ã î à Πf o w ¶ F O W 6 -7 å ï Å Ï g p x 1 /4 G P X 7 -8 \ ì Ç Ì h q y 1 /2 H Q Y 8 -9 ñ ß Ñ µ i r z 3 /4 I R Z 9 -A ° § ù : « ª ¡ ¬ SHY 1 2 3 -B . $ , £ » º ¿ ô û Ô Û -C < * % à æ D | _ ö ü Ö Ü -D ( ) _ ´ Ç Y´ ~ ò Ò Ù -E + ; > = ´ ó ú Ó Ú -F ! ^ ? " õ ÿ Õ y´ Æ ± ¤ ® Legend: RSP required space, SHY syllable hyphen, SP space. B-34 Character Sets IBM 3270 & IBM 5250 GERMAN & AUSTRIAN CHARACTER SET HEX 4- 5- 6- 7- 8- 9- A- B- C- D- E- F- -0 SP & - ø Ø ° µ ¢ ä ü Ö 0 -1 RSP é / É a j ß £ A J ÷ 1 -2 â ê Â Ê b k s ¥ B K S 2 -3 { ë [ Ë c l t · C L T 3 -4 à è À È d m u © D M U 4 -5 á í Á Í e n v @ E N V 5 -6 ã î à Πf o w ¶ F O W 6 -7 å ï Å Ï g p x 1 /4 G P X 7 -8 ç ì Ç Ì h q y 1 /2 H Q Y 8 -9 ñ ~ Ñ ` i r z 3 /4 I R Z 9 -A Ä Ü ö : « ª ¡ ¬ SHY 1 2 3 -B . $ , # » º ¿ ô û Ô Û -C < * % § æ D | _ } \ ] -D ( ) _ ´ Ç Y´ ¨ ò ù Ò Ù -E + ; > = ´ ó ú Ó Ú -F ! ^ ? " õ ÿ Õ y´ Æ ± ¤ ® Legend: RSP required space, SHY syllable hyphen, SP space. B-35 Character Sets IBM 3270 & IBM 5250 ITALIAN CHARACTER SET HEX 4- 5- 6- 7- 8- 9- A- B- C- D- E- F- -0 SP & - ø Ø [ µ ¢ à è ç 0 -1 RSP ] / É a j ì # A J ÷ 1 -2 â ê Â Ê b k s ¥ B K S 2 -3 ä ë Ä Ë c l t · C L T 3 -4 { } À È d m u © D M U 4 -5 á í Á Í e n v @ E N V 5 -6 ã î à Πf o w ¶ F O W 6 -7 å ï Å Ï g p x 1 /4 G P X 7 -8 \ ~ Ç Ì h q y 1 /2 H Q Y 8 -9 ñ ß Ñ ù i r z 3 /4 I R Z 9 -A ° é ò : « ª ¡ ¬ SHY 1 2 3 -B . $ , £ » º ¿ ô û Ô Û -C < * % § æ D | _ ö ü Ö Ü -D ( ) _ ´ Ç Y´ ` Ò Ù -E + ; > = ó ú Ó Ú -F ! ^ ? " õ ÿ Õ y´ Æ ± ¤ ¨ ´ ® Legend: RSP required space, SHY syllable hyphen, SP space. B-36 Character Sets IBM 3270 & IBM 5250 SPANISH CHARACTER SET HEX 4- 5- 6- 7- 8- 9- A- B- C- D- E- F- -0 SP & - ø Ø ° µ ¢ { } \ 0 -1 RSP é / É a j ¨ £ A J ÷ 1 -2 â ê Â Ê b k s ¥ B K S 2 -3 ä ë Ä Ë c l t · C L T 3 -4 à è À È d m u © D M U 4 -5 á í Á Í e n v § E N V 5 -6 ã î à Πf o w ¶ F O W 6 -7 å ï Å Ï g p x 1 /4 G P X 7 -8 ç ì Ç Ì h q y 1 /2 H Q Y 8 ß # ` i r z 3 /4 I R Z 9 -9 -A [ ] ñ : « ª ¡ ^ SHY 1 2 3 -B . $ , Ñ » º ¿ ! ô û Ô Û -C < * % @ æ D ö ü Ö Ü -D ( ) _ ´ Ç Y´ ~ ò ù Ò Ù -E + ; > = ´ ó ú Ó Ú -F | ¬ ? " õ ÿ Õ y´ Æ ± ¤ - ® Legend: RSP required space, SHY syllable hyphen, SP space. B-37 Character Sets IBM 3270 & IBM 5250 SWEDISH & FINNISH CHARACTER SET HEX 4- 5- 6- 7- 8- 9- A- B- C- D- E- F- -0 SP & - ø Ø ° µ ¢ ä å É 0 -1 RSP ` / \ a j ü £ A J ÷ 1 -2 â ê Â Ê b k s ¥ B K S 2 -3 { ë # Ë c l t · C L T 3 -4 à è À È d m u © D M U 4 -5 á í Á Í e n v [ E N V 5 -6 ã î à Πf o w ¶ F O W 6 -7 } ï $ Ï g p x 1 /4 G P X 7 -8 ç ì Ç Ì h q y 1 /2 H Q Y 8 -9 ñ ß Ñ é i r z 3 /4 I R Z 9 -A § ¤ ö : « ª ¡ ¬ SHY 1 2 3 -B . Å , Ä » º ¿ ô û Ô Û -C < * % Ö æ D | _ ~ @ Ü -D ( ) _ ´ Ç Y´ ¨ ò ù Ò Ù -E + ; > = ´ ó ú Ó Ú -F ! ^ ? " õ ÿ Õ y´ Æ ± ] ® Legend: RSP required space, SHY syllable hyphen, SP space. B-38 Character Sets IBM 3270 & IBM 5250 BELGIAN & SWISS-FRENCH/GERMAN CHARACTER SET HEX 4- 5- 6- 7- 8- 9- A- B- C- D- E- F- -0 SP & - ø Ø ° µ ¢ { } \ 0 -1 RSP é / É a j ~ £ A J ÷ 1 -2 â ê Â Ê b k s ¥ B K S 2 -3 ä ë Ä Ë c l t · C L T 3 -4 à è À È d m u © D M U 4 -5 á í Á Í e n v § E N V 5 -6 ã î à Πf o w ¶ F O W 6 -7 å ï Å Ï g p x 1 /4 G P X 7 -8 ç ì Ç Ì h q y 1 /2 H Q Y 8 -9 ñ ß Ñ ` i r z 3 /4 I R Z 9 -A [ ] : « ª ¡ ¬ SHY 1 2 3 -B . $ , # » º ¿ ô û Ô Û -C < * % @ æ D | _ ö ü Ö Ü -D ( ) _ ´ Ç Y´ ¨ ò ù Ò Ù -E + ; > = ´ ó ú Ó Ú -F ! ^ ? " õ ÿ Õ y´ Æ ± ¤ ® Legend: RSP required space, SHY syllable hyphen, SP space. B-39 Character Sets IBM EBCDIC CODEPAGES SUPPLIED Codepage B-40 Type Countries 37 SBCS USA, Canada, Netherlands, Portugal, Brazil 273 SBCS Austria, Germany 274 SBCS Belgium (old) 277 SBCS Denmark, Norway 278 SBCS Finland, Sweden 280 SBCS Italy 284 SBCS Spain, Latin America (Spanish) 285 SBCS UK 290 SBCS Japanese - Katakana 297 SBCS France 300 DBCS Japanese - Kanji 420 SBCS Arabic 424 SBCS Hebrew New Code 500 SBCS (Latin 1) Belgium, Canada, Switzerland 803 SBCS Hebrew Old Code 833 SBCS Korean 834 DBCS Korean 835 DBCS Traditional Chinese 836 SBCS Simplified Chinese 837 DBCS Simplified Chinese 838 SBCS Thai 870 SBCS (Latin 2) Czech, Slovak, Polish 871 SBCS Icelandic 875 SBCS Greek 880 SBCS Cyrillic 905 SBCS (Latin 3) Turkish (old) 1025 SBCS Russian Cyrillic 1026 SBCS (Latin 5) Turkish 1027 SBCS Japanese - Latin extended 1140 SBCS [EURO] USA, Canada, Netherlands, Portugal, Brazil 1141 SBCS [EURO] Austria, Germany 1142 SBCS [EURO] Denmark, Norway 1143 SBCS [EURO] Finland, Sweden 1144 SBCS [EURO] Italy 1145 SBCS [EURO] Spain, Latin America 1146 SBCS [EURO] UK 1147 SBCS [EURO] France 1148 SBCS [EURO] Belgium, Canada, Switzerland 1149 SBCS [EURO] Icelandic Host Command Summary C Host Command Summary This appendix lists the host commands that are valid in each terminal emulation mode. Additional special commands are listed at the back. The following conventions are used in this command list. Spaces in a command are for clarity only and are not to be entered as part of the command. A space character that is part of the command will be shown as SP. An asterisk (*) in a command indicates the location of one or more parameters except otherwise indicated next to the command. Note that IBM 3270 and IBM 5250 emulation commands are not included because of their complexity. Refer to the manuals supplied with these terminals for the host commands that are supported. VT52 Emulation CHARACTER SET SELECTION Invoke G0 character set Invoke G1 character set Select G0 character set Select Line Drawing character set SI SO ESC G ESC F CURSOR Direct cursor addressing (1 to 96 = SP to DEL) Insert FF character & advance cursor Line feed Move cursor down one line Move cursor down one line Move cursor home Move cursor one column left Move cursor one column left Move cursor one column right Move cursor to left margin of current line Move cursor to next tab stop Move cursor up one line Reverse line feed ESC Y *line *column FF LF ESC B VT ESC H BS ESC D ESC C CR HT ESC A ESC I C-1 Host Command Summary TEXT ERASURE Erase text to end of line Erase text to end of screen ESC K ESC J GENERAL Cancel current ESC sequence & display error Sound audible tone CAN BEL MODE SELECTION Select numeric keypad application mode Select numeric keypad normal mode Select VT100 mode ESC = ESC > ESC < PRINTING Auto print off Auto print on Print controller off Print controller on ESC _ ESC ^ ESC X ESC W REPORTS Request mode identification report Send terminal emulation mode report ESC Z ESC # ! 0 ANSI VT100 Emulation CHARACTER ATTRIBUTES Assign * attribute(s) to following characters Default attributes Bold on Dim White Underline on Flashing on Inverse video on Half intensity off Underline off Flashing off Inverse video off Black foreground Red foreground Green foreground Yellow foreground C-2 0 1 2 4 5 7 22 24 25 27 30 31 32 33 Blue foreground Magenta foreground Cyan foreground White foreground 'Normal' foreground White background Red background Red background Yellow background Blue background Magenta background Cyan background White background 'Normal' background ESC [ * m 34 35 36 37 39 40 41 42 43 44 45 46 47 49 White background Red background Red background Yellow background Blue background Magenta background Cyan background White background 'Normal' background 50 51 52 53 54 55 56 57 59 Host Command Summary Deselect underline character mode Double width & height (top half) characters Double width & height (bottom half) characters Double width single height characters Select underline character mode Single width & height (normal) characters ESC [ < 1 h ESC # 3 ESC # 4 ESC # 6 ESC [ < 1 l ESC # 5 CHARACTER SET SELECTION Assign G0 label to * character set Assign G1 label to * character set ASCII / N.American British Dutch Finnish French French Canadian German B A 4 5 or C R 9 or Q K ESC ( * ESC ) * Italian Danish / Norwegian Portuguese Spanish Swedish Swiss Line Drawing Assign G0 labelled set to 7 bit codes Assign G1 labelled set to 7 bit codes Y ' or E or 6 %6 Z 7 or H = 0 SI SO CURSOR Cursor on Cursor off Clear tab stops (0 = cursor position, 2 or 3 = all) Deselect auto carriage return Disable cursor Disable cursor autowrap Enable cursor Enable cursor autowrap Index cursor (move down one line) Insert FF character & advance cursor Line feed Move cursor down * lines Move cursor down one line Move cursor left * columns Move cursor one column left Move cursor right * columns Move cursor to beginning of next line Move cursor to left margin of current line Move cursor to line (*l) column (*c) Move cursor to line (*l) column (*c) Move cursor to next tab stop Move cursor up * lines Reverse index cursor (move up one line) Select absolute origin mode Select auto carriage return Select relative origin mode Set tab stop at current cursor position Tab cursor backward * tabs Tab cursor forward * tabs ESC [ ? 25 h ESC [ ? 25 l ESC [ * g ESC [ 20 l ESC [ ? 50 l ESC [ ? 7 l ESC [ ? 50 h ESC [ ? 7 h ESC D FF LF ESC [ * B VT ESC [ * D BS ESC [ * C ESC E CR ESC [ *l ; *c H ESC [ *l ; *c f HT ESC [ * A ESC M ESC [ ? 6 l ESC [ 20 h ESC [ ? 6 h ESC H ESC [ * Z ESC [ * I C-3 Host Command Summary DISPLAY Scroll display down * lines Scroll display up * lines Select 80 column display mode Select 132 column display mode Select invisible display Select normal colour display mode Select reverse colour display mode Select thin-line graphics in ANSI BBS mode Select visible display Set top (*t) and bottom (*b) margin positions ESC [ * T ESC [ * S ESC [ ? 3 l ESC [ ? 3 h ESC [ ? 75 l ESC [ ? 5 l ESC [ ? 5 h ESC 10 m ESC [ ? 75 h ESC [ *t ; *b r EDITING Delete * characters from cursor position right Delete * lines from cursor position down Enable all characters to be erased Enable erasure of unprotected characters only End protected area Erase * characters & attributes from cursor right Erase line portion (0 = from, 1 = to, 2 = all) Erase screen portion (0 = from, 1 = to, 2 = all) Insert * blank lines Insert * space characters Protect characters with * attribute(s) Select insert mode Select replace mode Start protected area ESC [ * P ESC [ * M ESC [ 6 h ESC [ 6 l ESC W ESC [ * X ESC [ * K ESC [ * J ESC [ * L ESC [ * @ ESC [ * } ESC [ 4 h ESC [ 4 l ESC V GENERAL OPERATION Cancel current ESC sequence & display error Local echo mode on Local echo mode off Reset features (* = * in ESC [ * h commands) Reset terminal emulation Restore saved features Save features (char. set, attrib's, cursor, origin) Select VT52 mode Select VT100 mode from VT320 mode Select VT400 7 bit mode Select VT400 8 bit mode Select VT400 8 bit mode (* can be 0 or 2) Select Wyse 60 mode Set features (* = * in ESC [ * h commands) Soft reset Sound audible tone Transmit rate limited to 150-180 cps Transmit rate unlimited C-4 CAN ESC [ 12 l ESC [ 12 h ESC [ * l ESC c ESC 8 ESC 7 ESC [ ? 2 l ESC [ 61 " p ESC [ 62 ; 1 " p ESC [ 62 " p ESC [ 62 ; * " p ESC [ 42 h ESC [ * h ESC [ ! p BEL ESC [ ? 73 h ESC [ ? 73 l Host Command Summary KEYBOARD Backspace key performs backspace only Backspace key performs delete Data processing keys mode Disable key autorepeat Disable keyboard Disable keyboard input Enable key autorepeat Enable keyboard Enable keyboard input Select cursor key application mode Select cursor key normal mode Select keypad application mode Select keypad numeric mode Typewriter keys mode ESC [ ? 67 h ESC [ ? 67 l ESC [ ? 68 h ESC [ ? 8 l ESC ` ESC [ 2 h ESC [ ? 8 h ESC b ESC [ 2 l ESC [ ? 1 h ESC [ ? 1 l ESC = ESC > ESC [ ? 68 l LOCAL EDITING Data block for transmission is cursor line Data block for transmission is page Disable transmission of protected areas Edit key changes mode immediately Edit key waits for host to enable mode change Enable all selected areas to be transmitted Enable only cursor area to be transmitted Enable transmission of all characters Enable transmission of protected areas Enable transmission of selected characters only End of block indicator character(s) (0 = no, 1 = FF, 2 = ETX, 3 = EOT, 4 = CR, 5 = DC3) End selected area Enter edit mode Enter interactive mode Function according to ANSI rules Function as VT131 terminal Line termination characters (ASCII decimal) Space compression mode off Space compression mode on Start selected area Transmission occurs immediately Transmission waits for host Transmit block of data Transmit scrolling region Transmit VT131 or ANSI partial page ESC [ ? 11 h ESC [ ? 11 l ESC [ 1 l ESC [ ? 16 h ESC [ ? 16 l ESC [ 15 h ESC [ 15 l ESC [ 17 h ESC [ 1 h ESC [ 17 l ESC [ * | ESC G ESC [ ? 10 h ESC [ ? 10 l ESC [ ? 53 l ESC [ ? 53 h ESC [ ? * ' s ESC [ ? 13 l ESC [ ? 13 h ESC F ESC [ ? 14 h ESC [ ? 14 l ESC 5 ESC [ 16 h ESC [ 16 l PRINTING Auto print off Auto print on Form feed at end of print No form feed at end of print Print controller on Print controller off ESC [ ? 4 i ESC [ ? 5 i ESC [ ? 18 h ESC [ ? 18 l ESC [ 5 i ESC [ 4 i C-5 Host Command Summary Print cursor line Print page Print page prints complete page Print page prints scrolling region only ESC [ ? 1 i ESC [ i ESC [ ? 19 h ESC [ ? 19 l REPORTS Report compatibility level Report current colour Report cursor position Report keyboard nationality Report operating status Report terminal emulation mode Report VT terminal identity Report VT terminal identity Report VT terminal identity ESC [ > c ESC [ = M ESC [ 6 n ESC [ ? 26 n ESC [ 5 n ESC # ! 0 ESC [ 0 c ESC [ c ESC Z ANSI VT500 Emulation When running the VT500 7 or 8 bit emulation, the following commands will be executed in addition those listed previously for ANSI VT100. CHARACTER ATTRIBUTES Assign * attribute(s) to following characters Attributes: Invisible 8 Flashing off Bold off 22 Reverse video off Underline off 24 Invisible off ESC [ * m 25 27 28 Non-erase attribute on Non-erase attribute off (* = 0 or 2) ESC [ 1 " q ESC [ * " q CHARACTER SET SELECTION C-6 Assign G2 label to * character set Assign G3 label to * character set Extra character sets: DEC Additional ISO Latin-1 Additional ESC * * (second * is parameter) ESC + * %5 A Assign G1 labelled set to 8 bit codes Assign G2 labelled set to 7 bit codes Assign G2 labelled set to 7 bit codes for 1 character Assign G2 labelled set to 8 bit codes Assign G3 labelled set to 7 bit codes Assign G3 labelled set to 7 bit codes for 1 character Assign G3 labelled set to 8 bit codes Clear redefinable character set Load redefinable character set Preferred Additional set is DEC Preferred Additional set is ISO Latin-1 Select Multinational character set mode Select National character set mode ESC ~ ESC n ESC N ESC } ESC o ESC O ESC | ESC P 1 ; 1 ; 2 { SP @ ESC \ ESC P * { * ESC \ ESC P 0 ! u %5 ESC \ ESC P 1 ! u A ESC \ ESC [ ? 42 l ESC [ ? 42 h Host Command Summary DISPLAY Display host-writable status line Display indicator status line Display no status line Send data to main display Send data to status line Display time on status line (*h = hour (24) *m = minutes) Display controls on Display controls off Rectangular fill (*c = fill character, *sr = start row *sc = start column, *er = end row, *ec = end column ESC [ 2 $ ~ ESC [ 1 $ ~ ESC [ 0 $ ~ ESC [ 0 $ } ESC [ 1 $ } ESC [ *h ; *m , p ESC [ 3 h ESC [ 3 l ESC [ *c ; *sr ; *sc ; *er ; *ec $ z EDITING Selective erase line (0 = from, 1 = to, 2 = all) Selective erase screen (0 = from, 1 = to, 2 = all) ESC [ ? * K ESC [ ? * J GENERAL OPERATION Enter HP 700-92/96 mode (0 = zero) Select C1 7 bit control mode Select C1 8 bit control mode ESC & k 0 \ ESC SP F ESC SP G KEYBOARD Set national keyboard *= 1 2 3 4 5 6 7 8 9 10 11 12 13 American British Belgian Canadian Danish Finnish German Dutch Italian Swiss French Swiss German Swedish Norwegian Select application keypad mode Select numeric keypad mode Set DEC keyboard mode Reset DEC keyboard mode 14 15 16 19 22 29 31 33 34 35 36 38 39 ESC [ 2 ; * space } French Spanish Portuguese Hebrew Greek Turkish Hungarian Slovak Czech Polish Romanian Serbian Russian ESC [ ? 66 h ESC [ ? 66 l ESC [ ? 99 h ESC [ ? 99 l PF KEYS Clear all PF keys Lock PF keys Program a PF key ESC P 0 ; 1 | ESC \ ESC P 1 ; 0 | ESC \ ESC P * ; * | * / * ESC \ C-7 Host Command Summary PRINTING Enable bidirectional printing Disable bidirectional printing Enable printer/tablet to talk directly to host (one way) Disable printer/tablet from talking directly to host Destination port (only first * is parameter: 0 = None, 1 = LPT 1/2, 2 = COM 1, 3 = COM 2, etc.) ESC [ 7 i ESC [ 6 i ESC [ ? 9 i ESC [ ? 8 i ESC [ * * u REPORTS Request colour table report Request control function settings Request cursor information report Request emulation state report Request locator device port status Request locator device type Request mode settings Request tab stop report Request user-preferred Additional set Restore colour table Restore cursor information Restore emulation state Restore tab stops C-8 ESC [ 2 $ u ESC P $ q ESC [ 1 $ w ESC [ 1 $ u ESC [ ? 55 n ESC [ ? 56 n ESC [ * $ p ESC [ 2 $ w ESC [ & u ESC P 2 $ p ESC P 1 $ t ESC P 1 $ p ESC P 2 $ t Host Command Summary ANSI VT420 Emulation When running the VT420 emulation, the following commands will be executed in addition those listed for ANSI VT100 and VT500. CURSOR MOVEMENT & PANNING Back index Forward index Pan down (*l = number of lines) Pan up (*l = number of lines) Vertical cursor coupled mode Vertical cursor uncoupled mode Page cursor coupled mode Page cursor uncoupled mode ESC 6 ESC 9 ESC [ *l S ESC [ *l T ESC [ ? 61 h ESC [ ? 61 l ESC [ ? 64 h ESC [ ? 64 l EDITING Delete column(s) (*c = number of columns to delete) Insert column(s) (*c = number of columns to insert) ESC [ *c ' ~ ESC [ *c ' } GENERAL OPERATION Secure reset (*n = any number in range 0 - 16383) Secure reset confirmation (*n = number in range 0 - 16383) ESC [ *n + p ESC [ *n * q MACROS Define macro ESC P *n ; *d ; *e ! z D...D ESC \ *n = Macro ID number 0-63 *d = Delete all macros Delete current macro 0 1 *e = Encoding format for macro text: Standard ASCII characters Hex pairs for each ASCII character 0 1 Control data string Repeat sequence introducer Invoke macro (*n = macro ID number) D...D ! ESC [ *n * z KEYBOARD Enable local functions *n = Function number: All local functions Local copy & paste Local panning Local window resize ESC [ *n ; *c ; ... *n ; *c + q 0 1 2 3 *c = Control performed: Factory default Enable local function Disable local function 0 1 2 C-9 Host Command Summary Local function key control ESC [ *k ; *f ; ... *k ; *f * } *k = Function key number: All local function keys F1 or Hold F2 or Print F3 or Set-Up F4 or Session *f = Function performed: Factory default Local function Send key sequence Disable key 0 1 2 3 4 Select modifier key reporting *k = Key number: All keys Left Shift Right Shift Lock key Ctrl key Left Alt Function Right Alt Function Left Compose Char Right Compose Char 0 1 2 3 ESC [ *k ; *c ... *k ; *c + r *c = Control performed: Factory default 0 Modifier function 1 Extended keyboard report 2 Key disabled 3 0 1 2 3 4 5 6 7 8 PAGE MEMORY Set lines per page ESC [ *l t Session: Dual *l = 3 pages 2 pages 2 pages 1 page 1 page - Single 6 pages 5 pages 4 pages 3 pages 2 pages 1 page Set left & right margins (*l = left column, *r = right) Vertical split screen mode - L&R margins can be changed Vertical split screen mode - L&R margins cannot be changed Move cursor to page *n at same position 24 25 36 48 72 144 ESC [ *l ; *r s ESC [ ? 69 h ESC [ ? 69 l ESC [ *n SP P RECTANGULAR AREA OPERATIONS Copy rectangular area *t *l *b *r Top-line border Left-column border Bottom-line border Right-column border ESC [ *t ; *l ; *b ; *r ; *s ; *dt ; *dl ; *dp $ v *s *dt *dl *dp Source page number Destination top-line border Destination left-column border Destination page number Erase rectangular area *t Top-line border *b Bottom-line border *l Left-column border *r Right-column border C-10 ESC [ *t ; *l ; *b ; *r $ z Host Command Summary Fill rectangular area ESC [ *f ; *t ; *l ; *b ; *r $ x *f Decimal code of fill character *t Top-line border *l Left-column border *b Bottom-line border *r Right-column border Selective erase rectangular area ESC [ *t ; *l ; *b ; *r $ { *t Top-line border *b Bottom-line border *l Left-column border *r Right-column border Select attribute change extent ESC [ *c * x *c = character positions affected: Stream of character positions Rectangular area of character positions 0 or 1 2 Change attributes in rectangular area ESC [ *t ; *l ; *b ; *r *a $ r *t Top-line border *r Right-column border *l Left-column border *a Visual character attributes *b Bottom-line border Reverse attributes in rectangular area ESC [ *t ; *l ; *b ; *r *a $ t *t Top-line border *r Right-column border *l Left-column border *a Visual character attributes *b Bottom-line border VT420 REPORTS Tertiary device attribute request Request extended cursor position report Request checksum of rectangular area *id Request label *p Page number *t Top-line border ESC [ = c or ESC [ = 0 c ESC [ ? 6 n ESC [ *id ; *p ; *t ; *l ; *b ; *r * y *l Left-column border *b Bottom-line border *r Right-column border Request macro space report Request memory checksum report (*l = request label) Request multiple session status report Request window report ESC [ ? 62 n ESC [ ? 63 ; *l n ESC [ ? 85 n ESC [ " v C-11 Host Command Summary ANSI VT510 Emulation When running the VT510 emulation, the following commands will be executed in addition those listed for ANSI VT100 and VT500. USER-DEFINED KEYS Download definitions for user-defined keys DCS *c ; *l ; *m | D...D ST *c 0 or none 1 Clear all keys before loading new values (0 is default). Load new UDK values; clear old values only when redefined. *l 0 or none 1 Lock the keys. Do not lock the keys against future redefinition. *m 0, 2 or none 1 3 4 Defines the shifted function key. Defines the unshifted function key. Defines the alternate unshifted function key. Defines the alternate shifted function key. | (vertical bar) The final character. Key definition strings follow and these are terminated by ST. D...D are the key definition strings in the following format: Key1/UDS/UDS Direction;Key2/UDS/UDS Direction;........; Key# Is the key selection number of the key to be defined as listed below: F1 F2 F3 F4 / 11 12 13 14 F5 F6 F7 F8 15 17 18 19 F9 F10 F11 F12 20 21 23 24 Is a delimiter. UDS Is the user-defined string consisting of hex pairs in the following ranges: 3/0 through 3/9 (0 through 9) 4/1 through 4/6 (A through F) 6/1 through 6/6 (a through f) For example, the hex encoding for "PRINT" would be as follows: 5 0 5 2 4 9 4 E 5 4 This enables you to use any of the 256 character codes in the key string. You can enter key definition strings in any order. UDS Direction Specifies the transmission direction: 0 or none 1 2 C-12 Normal (Host and/or terminal) default Local (Terminal only) Remote (Host only) Host Command Summary PROGRAMMING ALPHANUMERIC KEYS Program Alphanumeric Key(s) DCS " y D...D ST where the data string D...D format is as follows: Key1/Hex Code String/Function #/UDS/UDS Direction;Key2/...; Key# Is the key station number of the key to be programmed as listed below: Esc F1 F2 F3 F4 F5 F6 F7 F8 F9 / 110 112 113 114 115 116 117 118 119 120 F10 F11 F12 Print Screen Scroll Lock Pause Insert Delete Home End 121 122 123 124 125 126 75 76 80 81 Page Up Page Down Cursor Left Cursor Right Cursor Up Cursor Down Keypad Enter Return Backspace Tab 85 86 79 89 83 84 108 43 15 16 Is a delimiter. Hex Code String Specifies the hex code of the character to be transmitted with each of the four modifier states in the following order: Unshifted, Shifted, Alternate Shifted (Shift 2), and Control (if omitted, use default). Use a period "." as a place holder for an undefined modifier combination. The hex code represents a valid code in the current 7-bit or 8-bit character set. Use a minus "-" preceding the hex representation of a diacritical sign if a diacritical mark is to be defined. Function # Is a number associated with a local function as listed below. For example, function number "0" makes the key or key/modifier inoperative. Function number "100" indicates a user-defined sequence (UDS), and a UDS direction is defined following the slash "/" delimiter. 0 No Function 100 UDS 91 92 Backspace Cancel 93 94 Escape Delete UDS Is the user-defined sequence specified in Hex format. Each hex code in this string represents a value transmitted by the defined key combined with the modifiers. UDS Direction Specifies the transmission direction: 0 or none 1 2 Normal (Host and/or terminal) default Local (Terminal only) Remote (Host only) C-13 Host Command Summary PROGRAMMING FUNCTION KEYS Program Function Key(s) DCS " x D...D ST where the data string D...D format is as follows: Key1/Mod1/Function #/UDS/UDS Direction; Key2/Mod2/Function #/UDS/UDS Direction;........; Key# Is the key station number of the key to be programmed as listed below: Esc F1 F2 F3 F4 F5 F6 F7 F8 F9 / 110 112 113 114 115 116 117 118 119 120 F10 F11 F12 Print Screen Scroll Lock Pause Insert Delete Home End Page Up Page Down Cursor Left Cursor Right Cursor Up Cursor Down Keypad Enter Return Backspace Tab 85 86 79 89 83 84 108 43 15 16 Is a delimiter. Mod# Is an integer that specifies the modifier key that is to be pressed at the same time as the defined key: 0 or none 1 2 3 4 Function # Normal Normal Shift Alt Alt+Shift 5 6 7 8 Control Shift+Control Alt+Control Alt+Control+Shift Is a number associated with a local function as listed below. For example, function number "0" makes the key or key/modifier inoperative. Function number "100" indicates a user-defined sequence (UDS), and a UDS direction is defined following the slash "/" delimiter. 0 No Function 100 UDS 91 92 Backspace Cancel 93 94 Escape Delete UDS Is the user-defined sequence specified in Hex format. Each hex code in this string represents a value transmitted by the defined key combined with the modifiers. UDS Direction Specifies the transmission direction: 0 or none 1 2 C-14 121 122 123 124 125 126 75 76 80 81 Normal (Host and/or terminal) default Local (Terminal only) Remote (Host only) Host Command Summary ANSI VT520 Emulation When running the VT520 emulation, the following commands will be executed in addition to those listed for ANSI VT100 and VT500. Note that an * (asterisk) before a command description indicates the command is accepted but not actioned. Sessions * Enable session * Session page memory (*ps# = pages per session 1-4) * Update session * = Only when active When available At regular intervals CSI & x CSI *ps1 ; *ps2 ; *ps3 ; *ps4 ; , x CSI * , y 1 2 3 Window Management Auto reset mode enabled Auto reset mode disabled Framed windows mode enabled Framed windows mode disabled * Set icon name (12 characters max.) Set window title (30 characters max.) CSI ? 98 h CSI ? 98 l CSI ? 111 h CSI ? 111 l OSC 2 L ; name ST OSC 2 1 ; name ST Audible Attributes * Margin bell volume CSI * SP u * = Off Low High * Warning bell volume none, 0, 1 2, 3, 4 5, 6, 7, 8 CSI * SP t * = Off Low High * Play sound 1 2, 3, 4 none, 0, 5, 6, 7, 8 CSI *v , *d ; *n , ~ *n = Note 0 1 2 3 4 5 6 7 8 Silent C5 C#5 D5 D#5(Eb) E5 F5 F#5 G5 *v = Volume *d = Duration 0 - 7 (0 = silent) 0 - 255 (1/32nd of a sec) 9 10 11 12 13 14 15 16 17 18 19 20 21 22 23 24 25 G#5 A5 A#5 B5 C6 C#6 D6 D#6 E6 F6 F#6 G6 G#6 A6 A#6 B6 C7 C-15 Host Command Summary Colour Selection Assign colour CSI *i *f *b , | *i = Item Normal text Window frame 1 2 (not actioned) *f = Foreground colour index 0 - 15 *b = Background colour index 0 - 15 Alternate text colour *a = Attribute CSI *a *f *b , } 0 1 2 3 4 5 6 7 Normal text Bold Reverse Underline Blink Bold reverse Bold underline Bold blink 8 9 10 11 12 13 14 15 Reverse underline Reverse blink Underline blink Bold reverse underline Bold reverse blink Bold underline blink Reverse underline blink Bold reverse underline blink *f = Foreground colour index 0 - 15 *b = Background colour index 0 - 15 Alternate text colour blink enabled Alternate text colour blink disabled Alternate text colour underline enabled Alternate text colour underline disabled Bold and blink foreground & background enabled Bold and blink foreground only enabled Colour table request (* value: 1 = HLS, 2 = RGB) Colour table reply to host (*...* = parameter group) Colour table restore format (*...* = parameter group) CSI ? 115 h CSI ? 115 l CSI ? 114 h CSI ? 114 l CSI ? 116 h CSI ? 116 l CSI 2 ; * $ u DCS 2 $ s *...* ST DCS 2 $ p *...* ST *...* = group of 5 parameters: *n ; *s ; *1 ; *2 ; *3 / *n = Colour number: 0 - 255 *s = Colour coordinate system: 0 = illegal, 1 = HLS, 2 = RGB *1 = HLS hue: 0 - 360 or RGB red: 0 - 100 *2 = HLS lightness: 0 - 100 or RGB green: 0 - 100 *3 = HLS saturation: 0 - 100 or RGB blue: 0 - 100 Select colour look-up table CSI * ) { *= 0 1 2 3 Mono Alternate colour (use text attributes) Alternate colour ANSI SGR colour Text Processing Cursor backward tabulation (* = no. of active tab positions) Cursor horizontal absolute (* = no. of active char. positions) Cursor horizontal forward tab (* = no. of active tab positions) Cursor next line (* = number of active position) Cursor previous line (* = number of active position) Save cursor position (SCO) C-16 CSI * Z CSI * G CSI * I CSI * E CSI * F CSI s Host Command Summary Restore saved cursor (SCO) Set cursor style CSI u CSI * SP q * = Blinking block Steady block Blinking underline Steady underline Right-to-left copy enabled Right-to-left copy disabled Right-to-left mode enabled Right-to-left mode disabled Vertical line position absolute Vertical line position relative Set tab every 8 columns * Set scroll speed none, 0, 1 2 3 4 CSI ? 96 h CSI ? 96 l CSI ? 34 h CSI ? 34 l CSI * d CSI * e CSI ? 5 W CSI * SP p * = Smooth 2 Smooth 4 Jump Clear screen on column change Do not clear screen on column change none, 0, 1, 2, 3 4, 5, 6, 7, 8 9 CSI ? 95 l CSI ? 95 h Character Sets Assign user-preferred supplemental character set DCS *s ! u *c ST *s = 94-character set 0 96-character set 1 *c = character set as follows: Default 94-Character Set %5 DEC Supplemental "? DEC Greek "4 DEC Hebrew %0 DEC Turkish &4 DEC Cyrillic < User-pref. Supplemental Default 96-Character Set A ISO Latin-1 Supplemental B ISO Latin-2 Supplemental F ISO Greek Supplemental H ISO Hebrew Supplemental L ISO Latin-Cyrillic M ISO Latin-5 Supplemental < User-pref. Supplemental * Down-line load allocation CSI * , z * = One each Two each S1 & S2 Select character set 1 2 ESC *g *c *g = G-set as follows: 94-Character Set ( G0 ) G1 * G2 + G3 96-Character Set - G1 . G2 / G3 C-17 Host Command Summary *c = character set as follows: Default 94-Character Set %4 Cyrillic (DEC) "? Greek (DEC) "> Greek NRCS "4 Hebrew (DEC) %= Hebrew NRCS %6 Portuguese NRCS &5 Russian NRCS %3 SCS NRCS %0 Turkish (DEC) %2 Turkish NRCS Default 96-Character Set A ISO Latin-1 Supplemental B ISO Latin-2 Supplemental F ISO Greek Supplemental H ISO Hebrew Supplemental M ISO Latin-5 Supplemental L ISO Latin-Cyrillic Select zero symbol CSI * , { * = Oval zero Zero with slash Zero with dot Request user-preferred supplemental set 1 2 3 CSI & u Keyboard Auto repeat rate CSI * - p * = Off Slow (10 cps) Fast (30 cps) Copy key default (*...* = Key-source/Key-dest;K-s/K-d...;) Define function key (SCO) Extended keyboard report Hebrew encoding mode set (8-bit char.) Hebrew encoding mode reset (7-bit char.) Keyboard language selection *t = keyboard type: DEC keyboard layout Enhanced PC layout 0-5 6 - 15 16 - 30 DCS " z *...* ST ESC Q Fn string APC : ppp mm ST CSI ? 36 h CSI ? 36 l CSI *t ; *l SP } 0, 1 2 *l = keyboard language as follows: Keyboard language (VT/PC) none, North American 0 or 1 2 British 3 Belgian 4 French Canadian 5 Danish 6 Finnish 7 German 8 Dutch 9 Italian 10 Swiss-French 11 Swiss-German C-18 Keyboard language (VT/PC) 15 Spanish 16 Portuguese 19 Hebrew 22 Greek 28 Canadian English 29 Turkish Q/Turkish 30 Turkish F/Turkish 31 Hungarian 33 Slovak 34 Czech 35 Polish 36 Romanian Host Command Summary 12 13 14 Swedish Norwegian French 38 39 40 SCS Russian Latin-American Key position mode set (key position) Key position mode reset (char. codes) North American/Greek selection set (North American) North American/Greek selection reset (Greek keyboard) Program alphanumeric key (for *...* see below) Program function key (for *...* see below) CSI ? 81 h CSI ? 81 l CSI ? 57 h CSI ? 57 l DCS " y *...* ST DCS " x *...* ST *...* = Key# / Mod# / Func# / UDS / Dir ; Key# / Mod# / Func# / UDS / Dir ; Key# 11 12 13 14 15 17 18 19 20 21 23 24 25 26 28 29 31 32 33 34 VT F1 F2 F3 F4 F5 F6 F7 F8 F9 F10 F11 F12 F13 F14 F15 F16 F17 F18 F19 F20 PC Keyboard F1 F2 F3 F4 F5 F6 F7 F8 F9 F10 F11 F12 Mod# 0, none 1 2 3 4 5 6 7 8 Modifier Key Normal Normal Shift Alt Alt + Shift Control Shift + Ctrl Alt + Ctrl Alt + Ctrl + Shift Func# = Local function number UDS = User-defined sequence Dir 0, none 1 2 UDS Direction Normal Local Remote Program key action CSI * + z * = None Lock keys & modifiers Restore factory defaults Recall key definitions Program key free memory report (*t = total bytes, *f = free) Request program key free memory Request key definition *n = Key station number *m = Modifier key: Normal Shift Alt Alt + Shift Control Shift + Ctrl Alt + Ctrl Alt + Ctrl + Shift none, 0 1 2 3 CSI *t ; *f + y CSI + x CSI *n ; *m , w 0, none, 1 2 3 4 5 6 7 8 C-19 Host Command Summary Request key type (* = decimal key station number) Report key type CSI * , u CSI *n ; *t , v *n = decimal key station number *t = key type: Alphanumeric key Function key Report function key definition (for *...* see below) Report modifiers/key state (for *...* see below) 0 1 DCS " } *...* ST DCS " ~ *...* ST *...* = Key# / Mod# / Func# / UDS / Dir (except no Func# for function key report) Key# 11 12 13 14 15 17 18 19 20 21 23 24 25 26 28 29 31 32 33 34 VT F1 F2 F3 F4 F5 F6 F7 F8 F9 F10 F11 F12 F13 F14 F15 F16 F17 F18 F19 F20 PC Keyboard F1 F2 F3 F4 F5 F6 F7 F8 F9 F10 F11 F12 Mod# 0, none 1 2 3 4 5 6 7 8 Func# = Local function number UDS = User-defined sequence Dir 0, none 1 2 UDS Direction Normal Local Remote * Set key click volume CSI * SP r * = Off Low High * Set lock key style 1 2, 3, 4 none, 0, 5, 6, 7, 8 CSI * SP v * = Caps lock Shift lock Reverse lock * Load LEDs none, 0, 1 2 3 CSI * q * = Clear all LEDs Light Num lock Light Caps lock Light Scroll lock Extinguish Num lock Extinguish Caps lock Extinguish Scroll lock C-20 Modifier Key Normal Normal Shift Alt Alt + Shift Control Shift + Ctrl Alt + Ctrl Alt + Ctrl + Shift 0 1 2 3 21 22 23 Host Command Summary Printer Media copy - send screen data Select digital printed data type CSI 2 i CSI * ) p * = Print National only National & Line Drawing Print Multinational Print all characters * Select printer type none, 0, 1 2 3 4 CSI * $ s * = DEC ANSI none, 0, 1 IBM ProPrinter 2 DEC + IBM 3 * Select ProPrinter character set *c = PC Greek PC Spanish PC International PC Multilingual PC Slavic (Latin 2) PC Turkish 210 220 437 850 852 857 CSI *c * p PC Portuguese PC Hebrew PC French-Canada PC Danish-Norway PC Cyrillic 860 862 863 865 866 Terminal Management * Select Setup language CSI * p * = English French German Spanish Italian Load time of day (*h = hour 00 - 23, *m = minutes 00 - 59) * CRT saver timing none, 0, 1 2 3 4 5 CSI *h ; *m , p CSI * - q * = Never 5 min 15 min 30 min 60 min 0 5 15 30 60 * = Never 5 min 15 min 30 min 0 5 15 30 * Energy saver timing CSI * - r Report terminal ID (*...* = 4 hexadecimal pairs) Set terminal unit ID (*...* = 4 hexadecimal pairs) DCS ! | *...* ST DCS ! { *...* ST C-21 Host Command Summary Enter/exit VT PC Term mode / select ASCII or scancodes *m = VT Emulation Mode VT Mode VT PCTerm Mode *c = SCO Console Mode ASCII characters none, 0 Scancodes 1 character set as follows: VT Emulation Mode 210 PC Greek 220 PC Spanish 437 PC International 850 PC Multilingual 852 PC Slavic (Latin-2) 857 PC Turkish 860 PC Portuguese 862 PC Hebrew 863 PC French-Canadian 865 PC Danish 866 PC Cyrillic SCO Console Mode none, 0 No change 1 PC Multilingual 2 PC International 3 PC Danish/Norwegian 4 PC Spanish 5 PC Portuguese 6 DEC Supplemental 7 ISO Latin-1 Select conformance (operating) level *l = level: *b = data bits: CSI *l ; *b ; " p 1 - VT100 5 - VT520/525 none, 0, 1 2, 3, 4, 5 8-bit controls 7-bit controls none, 0, 2 1 Terminal mode emulation * = terminal mode: CSI * SP ~ VT520/525 (VT level 5) VT100 VT52 VT PCTerm WYSE 160/60 WYSE PCTerm WYSE 50/50+ WYSE 150/120 TVI 950 TVI 925 TVI 910+ ADDS A2 SCO Console WYSE 325 Auto answerback mode set Auto answerback mode reset Conceal answerback message mode set Conceal answerback message mode reset Load answerback message (*...* = data string of hex pairs) Load banner message (*...* = string of up to 30 chars.) *e = message encoding: ASCII hexadecimal pairs Text as VT default char. set C-22 CSI ? *m ; *c r VT mode or SCO ASCII/Scancodes as follows: 1 2 3 4 5 6 7 8 9 10 11 12 13 14 CSI ? 100 h CSI ? 100 l CSI ? 101 h CSI ? 101 l CSI 1 v *...* ST CSI *e r *...* ST 1 2, none, 0 Host Command Summary Status line type CSI * $ ~ * = No status line 0 Indicator status line 1 Host-writable status line 2 Communications Select communication port CSI *p ; *h * u *p = printer port: *h = host port: None 0 Centronics 1 Comm3 4 Comm1 Comm2 Comm3 1 2 3 (note that the last * is part of the command) Select communication speed CSI *l ; *s * r *l = comm line: Host transmit Host receive Printer Modem Hi Modem Lo *s = speed: none, 0, 1 2 3 4 5 Use default 300 600 1200 2400 4800 9600 19200 38400 57600 76800 115200 none, 0 1 2 3 4 5 6 7 8 9 10 11 (note that the last * is part of the command) Set port parameters CSI *p ; *d ; *y ; *s + w *p = port: *d = data: Comm port none, 0, 1 Printer port 2 *y = parity: 8 bits 7 bits 1, 0, none 2 *s = stop bits: No parity none, 0, 1 Even 2 Odd 3 Even 4 Odd, unchecked 5 Mark 6 Space 7 1 bit 2 bits none, 0, 1 2 Set transmit rate limit CSI *k ; *s " u *k = key type: All keys Graphic key Function key none, 0, 1 2 3 C-23 Host Command Summary *s = characters per second: 150 cps 50 cps 30 cps Transmit rate limiting mode set (limited) Transmit rate limiting mode reset (unlimited) none, 0, 1 2 3 CSI ? 73 h CSI ? 73 l Terminal Synchronization Disconnect delay time CSI * $ q * = delay time: None 60 ms 2 seconds Flow control 1 2 none, 0, 3 CSI *p ; *d ; *f ; *t * s *p = port type: *d = direction: Comm port none, 0, 1 Printer port 2 *f = flow control type: XON/XOFF or XPC DTR Both None Transmit Receive Tx & Receive 1, 0, none 2 3 *t = flow control threshold: 1, 0, none 2 3 4 Low (64) none, 0, 1 High (768) 2 (note that the last * is part of the command) Null mode set (ignore NUL) Null mode reset (accept NUL) C-24 CSI ? 102 h CSI ? 102 l Host Command Summary AIXTerm Emulation All commands are supported in both VT100 and HFT (High Function Terminal) modes unless indicated otherwise. SINGLE BYTE CONTROLS Bell Backspace Horizontal tab Linefeed Vertical tab Form feed Carriage return Shift out Shift in Device control 1 Device control 3 Cancel Substitute Escape BEL BS HT LF VT FF CR SO SI DC1 DC3 CAN SUB ESC CHARACTER ATTRIBUTES Assign * attribute(s) to following characters Normal Bold Underscore Blink (appears bold) Reverse Invisible (HFT) Foreground colours (HFT) Background colours (HFT) Foreground colours (HFT) Background colours (HFT) ESC [ * m 0 1 4 5 7 8 30...37 40...47 90...97 100...107 CHARACTER SET SELECTION United Kingdom character set G0 (VT100) United Kingdom character set G1 (VT100) United Kingdom character set G2 (VT100) United Kingdom character set G3 (VT100) ASCII (USASCII) character set G0 (VT100) ASCII (USASCII) character set G1 (VT100) ASCII (USASCII) character set G2 (VT100) ASCII (USASCII) character set G3 (VT100) Special graphics character set G0 (VT100) Special graphics character set G1 (VT100) Special graphics character set G2 (VT100) Special graphics character set G3 (VT100) Single shift G2 (VT100) ESC ( A ESC ) A ESC * A ESC + A ESC ( B ESC ) B ESC * B ESC + B ESC ( 0 ESC ) 0 ESC * 0 ESC + 0 ESC N C-25 Host Command Summary Single shift G3 (VT100) Set G0 character set (HFT) Set G1 character set (HFT) Lock shift G2 (VT100) Lock shift G3 (VT100) ESC O ESC ( < ESC ) < ESC n ESC o COLOUR Set foreground & background colour *fg and *bg are integers as listed below: Dull Colour Bold 0 1 2 3 4 5 6 7 Black Blue Green Cyan Red Magenta Yellow White 8 9 10 11 12 13 14 15 Set inverse & foreground & background colour (* as above) Set normal foreground colour (* = integer as above) Set normal background colour (* = integer as above) Set reverse foreground colour (* = integer as above) Set reverse background colour (* = integer as above) Set graphic foreground colour (* = integer as above) Set graphic background colour (* = integer as above) Request current colour attribute (* = integer as above) ESC [ 2 ; *fg ; *bg m ESC [ 7 ; *fg ; *bg ; m ESC [ = * F ESC [ = * G ESC [ = * H ESC [ = * I ESC [ = * J ESC [ = * K ESC [ = * M CURSOR Clear tab stop ESC [ * g Clear horizontal tab stop at active position Vertical tab at cursor line (HFT) Horizontal tabs on line (HFT) All horizontal tabs All vertical tabs (HFT) Vertical tab stop (HFT) Cursor backward * tabs Cursor horizontal absolute Cursor forward * tabs (HFT) Cursor tab stop control (HFT) Cursor down * lines (HFT) Cursor up * lines Horizontal tab stop Index cursor (move down one line) Reverse index cursor (move up one line) Move cursor to beginning of next line Move cursor left * columns Move cursor down * lines Move cursor right * columns Move cursor to line (*l) column (*c) C-26 0 1 2 3 4 ESC I ESC [ * Z ESC [ * G ESC [ * I ESC [ * W ESC [ * E ESC [ * F ESC H ESC D ESC M ESC E ESC [ * D ESC [ * B ESC [ * C ESC [ *l ; *c f Host Command Summary Move cursor to line (*l) column (*c) Move cursor up * lines Move cursor up * tabs (HFT) Restore cursor position Save cursor position ESC [ *l ; *c H ESC [ * A ESC [ * Y ESC [ u ESC [ s DISPLAY Restore cursor & attributes Save cursor & attributes Scroll display down * lines (HFT) Scroll display up * lines Scroll left * columns (HFT) Scroll right * columns (HFT) Select screen direction (HFT) ESC 8 ESC 7 ESC [ * T ESC [ * S ESC [ * SP @ ESC [ * SP A ESC [ * 1 ; 1 S Left-to-right, set to Latin keyboard Right-to-left, set to National keyboard Screen alignment display Set top & bottom margins Erase status line Return from status line Hide status line Show status line Go to column * of status line Set text parameters 0 1 ESC # 8 ESC [ *t ; *b r ESC [ ? E ESC [ ? F ESC [ ? H ESC [ ? S ESC [ ? * T ESC ] * ; *t \007 Change window name & title to *t Sets only the icon name Sets only the title name 0 1 2 EDITING Delete * characters from cursor position right Delete * lines from cursor position down Erase * characters from cursor right Erase area (* is one of the following) Erase to end of area Erase from area start Erase entire area Erase display (* is one of the following) Erase to end of display Erase from display start Erase entire display Erase field (* is one of the following) Erase to end of field Erase from field start Erase entire field Erase line (* is one of the following) Erase to end of line Erase from line start Erase entire line ESC [ * P ESC [ * M ESC [ * X ESC [ * O 0 1 2 ESC [ * J 0 1 2 ESC [ * N 0 1 2 ESC [ * K 0 1 2 C-27 Host Command Summary Insert * blank lines Insert * space characters ESC [ * L ESC [ * @ GENERAL OPERATION Lock shift G2 Lock shift G3 Reset to initial state ANSI specified modes ESC n ESC o ESC c ESC [ *;...;* h IRM insert mode SRM send/rec mode (HFT) TSM tab stop mode (HFT) LNM linefeed/newline XTERM private modes 4 12 18 20 ESC [ ? *;...;* h 132/80 column mode Scrollbar hide/show Save scroll text on/off Margin bell on/off Reverse wraparound on/off Screen buffer alternate/normal Status line reverse/normal Scroll mode page/normal Other private modes 40 42 43 44 45 47 48 49 ESC [ ? *;...;* h Normal/application cursor (VT100) 80/132 columns Reverse/normal video Origin/normal Autowrap on/off Autorept on/off CNM CR-NL (HFT) Reset mode, ANSI specified modes Reset mode, other private modes & XTERM private modes Restore mode, other private modes & XTERM private modes Save mode, other private modes & XTERM private modes Ignore everything between ESC - P and ESC \. AIXTerm works as normal after ESC \ 1 3 5 6 7 8 21 ESC [ * ;...; * ESC [ ? *;...;* l ESC [ ? *;...;* r ESC [ ? *;...;* s ESC - P ... ESC \ KEYBOARD & MOUSE Select numeric keypad application mode (VT100) Select numeric keypad normal mode (VT100) Disable manual input (HFT) Enable manual input (HFT) ESC = ESC > ESC ` ESC b REPORTS Device status report (* is one of the following) Response from VT100: ready Command from host: please report status Command from host: report active position Keyboard status information C-28 ESC [ * n 0 5 6 ESC [ * p Host Command Summary PF key report (HFT) Report cursor position Report terminal identity (host to VT100) Report terminal identity (host to VT100) Terminal response (VT100 to host) ESC [ * q ESC [ *l ; *c R ESC [ c ESC [ 0 c ESC [ ? 1 ; 2 c C-29 Host Command Summary AT&T 4410 Emulation CHARACTER ATTRIBUTES Normal Dimmed Underline Flashing Reverse video Blanked ESC [ 0 m ESC [ 2 m ESC [ 4 m ESC [ 5 m ESC [ 7 m ESC [ 8 m CURSOR Cursor down one line or * lines Cursor left one column or * columns Cursor right one column or * columns Cursor up one line or * lines Cursor to line 1, column 1 Origin mode Origin mode reset Move cursor to line (*l) and column (*c) Move cursor to line (*l) and column (*c) Save cursor location Restore cursor location Reverse index ESC [ B or ESC [ * B ESC [ D or ESC [ * D ESC [ C or ESC [ * C ESC [ A or ESC [ * A ESC [ H ESC [ ? 6 h ESC [ ? 6 l ESC [ *l ; *c f ESC [ *l ; *c H ESC 7 ESC 8 ESC M DISPLAY 132 column display 80 column display Clear all Clear to cursor Clear to end of display Clear to end of line Clear line to cursor Clear entire line Download label entry (*1 = 1-8, *2 = no. of chrs in def.) Reverse video screen Reverse video screen reset Scrolling region ESC [ ? 3 h ESC [ ? 3 l ESC [ 2 J ESC [ 1 J ESC [ J ESC [ K or ESC [ 0 K ESC [ 1 K ESC [ 2 K ESC [ *1 ; *2 q label definition ESC [ 5 ? h ESC [ 5 ? l ESC [ *1 ; *2 r EDITING Delete character or * characters Delete line or * lines Insert character or * characters Insert line or * lines ESC [ P or ESC [ * P ESC [ M or ESC [ * M ESC [ @ or ESC [ * @ ESC [ L or ESC [ * L GENERAL OPERATION Reset terminal Report status Test passed C-30 ESC c ESC [ 5 n ESC [ 0 n Host Command Summary BQ 3107 Emulation CHARACTER DISPLAY Blank area rendition Blink area rendition Select graphic rendition Select G0, national or ASCII character set Select G1 graphic symbols character set Select G2 accented characters and special symbols set ~ ^ ESC [ * ; * ; * m SI SO ESC E CURSOR Cursor addressing (1 to 80 = SP to g Cursor position is end of next transmitted text Cursor position is start of next transmitted text Cursor On (* = 0) or Off (* = 1) Move cursor to left margin of current line Move cursor one column left Move cursor one column right Move cursor to begining of partition or field Move cursor down one line Move cursor up one line Move cursor to next tab stop Set tab stop Cancel tab stop DC3 *line *column ESC U ESC T ESC [ * r CR BS DC2 DC4 LF DC1 HT ESC 1 ESC 2 ERASE Active partition erasure Erase in field (0 = from cursor, 1 = to cursor, 2 = all) Erase in line (0 = from cursor, 1 = to cursor, 2 = all) Erase in partition (0 = from cursor, 1 = to cursor, 2 = all) FF ESC [ * N ESC [ * K ESC [ * J FIELDS Start of a fixed field Start of a variable field Repeat fields FS GS * RS X GENERAL Buffer character repetition (* = @ to DEL) Define area qualification Format mode Normal mode Message waiting Set mode (? = SDP mode, ? < extended mode) Reset mode (? = VIP mode, ? < 94 character mode) Reset both partitions Select current partition (0 = partition 0, 1 = partition 1) Warning (bell) US * ESC [ * o ESC M ESC N ESC R ESC [ ? = ; ? < ; ? 0 h ESC [ ? = ; ? < ; ? 0 l ESC c ESC [ * v BEL C-31 Host Command Summary DG 410/412 Emulation DG Mode In the following command sequences, <n> represents a 1-byte argument, <nn> represents a 2-byte argument, and <nnn> represents a 3-byte argument. Bytes are entered as ASCII characters. Only the four least significant bits are used in each byte. Commands that are D100/200 compatible are indicated by an ◆. CHARACTER ATTRIBUTES Change attributes (<count><on><off>) ◆ Blink enable ◆ Blink disable ◆ Blink on ◆ Blink off ◆ Dim on ◆ Dim off Protect enable Protect disable Protect on Protect off ◆ Reverse video on ◆ Reverse video off ◆ Underscore on ◆ Underscore off RS F N <nnn><n><n> ETX EOT SO SI FS GS RS F V RS F W RS F L RS F M RS D or SYN RS E or STX DC4 NAK CURSOR ◆ Carriage return ◆ Cursor left ◆ Cursor right ◆ Cursor down ◆ Cursor up ◆ New line Read screen address Write screen address (<column><row>) ◆ Read window address ◆ Write window address Screen home ◆ Window home Set cursor type CR EM CAN SUB ETB LF RS F b RS F P <nn><nn> ENQ DLE *column *row RS F G BS RS F Q <nn> DISPLAY ◆ Roll enable ◆ Roll disable C-32 DC2 DC3 Host Command Summary Scroll down Scroll up Scroll left Scroll right Select compressed spacing Select normal spacing Set margins Set alternate margins Set scroll rate Set windows (<rows><0 = 81 cols, 1 = 135 cols>) Show columns Horizontal scroll enable Horizontal scroll disable Restore normal margins RS I RS H RS F C <n> RS F D <n> RS F K RS F J RS F X <nn><nn> RS F Y <nn><nn><nn> RS F T <n> RS F B <nn><n>... RS F <nn><nn> RS F ^ RS F ] RS F Z EDITING Delete character Delete line Delete line between margins ◆ Erase window Erase screen Erase unprotected ◆ Erase to end of line Insert character Insert line Insert line between margins RS K RS F I RS F \ FF RS F E RS F F VT RS J RS F H RS F [ GENERAL ◆ Bell Read horizontal scroll offset ◆ Read model ID Reset Select ANSI mode Select 7/8 bit operation (0 = 7-bit, 1 = 8-bit) Select character set Set keyboard language (0 = match native language, 1 = US ASCII & DG International) Shift in Shift out BEL RS F O RS C RS F A RS F @ RS F U *bit RS F S <nn> RS F f * RS N RS O PRINTING Form bit dump Window bit dump ◆ Print form Print pass through on Print pass through off ◆ Print window RS F ? 6 RS F ? 5 SOH RS F ` RS F a DC1 C-33 Host Command Summary DG 410/412 ANSI Standard Mode CHARACTER ATTRIBUTES Change attributes CSI *count ; *on ; *off q CURSOR Backspace Carriage return Cursor left * columns Cursor right * columns Cursor down * lines Cursor up * lines Cursor position (line ; column) Cursor position (line ; column) Form feed Index Insert * space characters Insert * lines New line Next line BS CR CSI * D CSI * C CSI * B CSI * A CSI *l ; *c f CSI *l ; *c H FF ESC D CSI * @ CSI * L LF ESC E EDITING Delete * character(s) from cursor Delete * lines from & including cursor line End protected area Erase line portion (0 = from cursor, 1 = to, 2 = all) Erase window portion (0 = from cursor, 1 = to, 2 = all) CSI * P CSI * M ESC w CSI * K CSI * J GENERAL Bell Device status report BEL CSI 6 n PRINTING Media copy C-34 CSI i Host Command Summary HP 700-92/96 Emulation CHARACTER ATTRIBUTES Assign * attribute(s) to following characters Assign invisible & * attribute(s) to following chars. Dim Flashing Inverse video Invisible Underline Dim & Flash Dim & Inverse Dim & Underline Dim, Flash & Inverse H A B S D I J L K Dim, Flash & Underline Dim, Under & Inverse Dim, Flash, Und. & Inv. Flash & Inverse Flash & Underline Flash, Inverse & Under Inverse & Underline Attributes off ESC & d * ESC & d s * M N O C E G F @ CHARACTER SETS Select ROMAN 8 (normal) character set Select Line Drawing character set SI SO CURSOR Clear all tab stops Clear tab stop at current cursor position Cursor relative addressing (column) Cursor relative addressing (column/line) Cursor relative addressing (line) Cursor relative addressing (line/column) Cursor sensing absolute Cursor sensing relative End of line wrap inhibited End of line wrap enabled Memory absolute addressing (column) Memory absolute addressing (column/line) Memory absolute addressing (line) Memory absolute addressing (line/column) Move cursor home down Move cursor home up Move cursor one column left Move cursor one column right Move cursor one line down Move cursor one line up Move cursor to left margin Move cursor to next tab stop Move cursor to previous tab stop Screen relative addressing (column) Screen relative addressing (column/line) Screen relative addressing (line) Screen relative addressing (line/column) Set tab stop at current cursor position ESC 3 ESC 2 ESC & +/- * C ESC & a +/- *c c +/- *l R ESC & a +/- * R ESC & a +/- *l r +/- *c C ESC a ESC ` ESC & s 1 C ESC & s 0 C ESC & a * C ESC & a *c c *l R ESC & a * R ESC & a *l r *c C ESC F ESC H or ESC h ESC D ESC C ESC B ESC A ESC G ESC I (uppercase i) ESC i ESC & a * C ESC & a *c c *l Y ESC & a * Y ESC & a *l y *c C ESC 1 C-35 Host Command Summary DISPLAY 80 column display 132 column display Clear all margins Display next page Display previous page Format mode off Format mode on Jump scroll enabled Memory lock disabled Memory lock enabled Scroll down one line Scroll up one line Select invisible display Select visible display Set left margin Set right margin Smooth scroll enabled Define colour pair ESC & w 6 f 80 X ESC & w 6 f 132 X ESC 9 ESC U ESC V ESC X ESC W ESC & k 0 [ ESC m ESC l ESC T ESC S ESC & w 13 F ESC & w 12 F ESC 4 ESC 5 ESC & k 1 [ ESC & v *parameters *parameters can be one or more of the following: <0/1> m <decimal> a <decimal> b <decimal> c <decimal> x <decimal> y <decimal> z <0 - 7> i <0 - 7> s <0 - 7> ^ RGB (0) or HSL (1) colour specification method Red or Hue colour value for foreground Green or Saturation colour value for foreground Blue or Luminosity colour value for foreground Red or Hue colour value for background Green or Saturation colour value for background Blue or Luminosity colour value for background Colour pair # to be initialized Colour pair # to be selected Colour pair definition status Assign colours to colour pair (* = decimal #) ESC & v * a * b * c * x * y * z <colour pair #> i Select an alpha colour pair (* = 0 - 7) ESC & v * S EDITING Clear display memory from cursor Clear line or field from cursor Delete character Delete line Insert character mode Insert line Modify all mode disabled Modify all mode enabled Replace character mode Unprotected field end Unprotected field start C-36 ESC J ESC K ESC P ESC M ESC Q ESC L ESC & k 0 M ESC & k 1 M ESC R ESC ] ESC [ Host Command Summary FUNCTION KEYS Begin user key definition mode Default definition for f1 key Default definition for f2 key Default definition for f3 key Default definition for f4 key Default definition for f5 key Default definition for f6 key Default definition for f7 key Default definition for f8 key Define f-key Disable User System & Menu and label Modes Enable User System & Menu and label Modes Enable f-keys & remove labels and status line Enable & display Modes labels Enable & display user function key labels End user key definition mode Replace key labels with character string Restore labels ESC j ESC p ESC q ESC r ESC s ESC t ESC u ESC v ESC w ESC & f * ESC & j S ESC & j R ESC & j @ ESC & j A ESC & j B ESC k ESC & j *n L *s ESC & j C GENERAL OPERATION 7 bits & existing parity 8 bits & no parity Audible tone disabled Audible tone enabled Check parity no Check parity yes Configuration menus locked Configuration menus unlocked Data speed high Data speed low DC2 not inhibited DC2 inhibited Delay one second Display functions mode disabled Display functions mode enabled Enter VT220 7-bit mode (25 line display, keypad F1 - F4 mapped to top left F1 - F4 keys, F5 - F12 as per VT220) Hand shake not inhibited Hand shake inhibited Hard reset Local echo disabled Local echo enabled Local mode disabled (only for user f-key) Local mode enabled (only for user f-key) Modem disconnect Self test Soft reset ESC & k 0 I ESC & k 1 I ESC & k 0 D ESC & k 1 D ESC & s 0 Z ESC & s 1 Z ESC & q 1 L ESC & q 0 L ESC & s 1 X ESC & s 0 X ESC & s 0 H ESC & s 1 H ESC @ ESC Z ESC Y ESC & k 1 \ ESC & s 0 G ESC & s 1 G ESC E ESC & k 0 L ESC & k 1 L ESC & k 1 R ESC & k 0 R ESC f ESC z ESC g C-37 Host Command Summary KEYBOARD Auto keyboard lock off Auto keyboard lock on Auto line feed mode off Auto line feed mode on Caps lock off Caps lock on Caps mode off Caps mode on Function key codes local only Function key codes transmitted to host Lock keyboard Space overwrite latch disabled Space overwrite latch enabled SPOW latch off SPOW latch on Unlock keyboard ESC & k 0 K ESC & k 1 K ESC & k 0 A ESC & k 1 A ESC & k 0 C ESC & k 1 C ESC & k 0 P ESC & k 1 P ESC & s 0 A ESC & s 1 A ESC c ESC & s 0 B ESC & s 1 B ESC & k 0 N ESC & k 1 N ESC b LOCAL EDITING MODE Data block for transmission is cursor line Data block for transmission is page Enter edit mode Enter interactive mode Transmit block of text to host ESC & s 0 D ESC & s 1 D ESC & k 1 B ESC & k 0 B ESC d PRINTING Copy all to printer Copy display memory to printer Copy line to printer Copy page to printer Data transfer host to printer (* = 1-256) Disable logging Enable bottom logging Enable top logging Execute form feed Execute * line feeds Record mode on (* is optional) Select external device Transfer display escape sequences no Transfer display escape sequences yes ESC & p M or ESC & p 0 M ESC 0 ESC & p B or ESC & p 0 B ESC & p F or ESC & p 0 F ESC & p * W ESC & p 13 C ESC & p 11 C ESC & p 12 C ESC & p 4 u 0 C ESC & p 1 * 4 u 1 C ESC & p * 20 C ESC & p 4 D ESC & s 0 N ESC & s 1 N REPORTS Request cursor position report disabled Request cursor position report enabled Request external printer status report Request primary terminal status report Request secondary terminal status report Request terminal identity report Request application program name report C-38 ESC & x 0 C ESC & x 1 C ESC & p 4 ^ ESC ^ ESC ~ ESC * s ^ ESC * s 12347 ^ Host Command Summary IBM 3151 Emulation CHARACTER SET SELECTION Select G0 Select G1 Select character set G0 Select character set G1 SI SO ESC < *set ESC > *set CURSOR Backspace Carriage return, new line or LTA Cursor down Cursor left Cursor right Cursor up Cursor home Index Insert cursor Line feed Line feed or new line Line feed or erase input Next line Page down AID Reverse index Read cursor address Set buffer address Set cursor address Reset buffer address mode Tab Back tab Set column tab Clear column tab Clear all column tabs BS CR ESC B ESC D ESC C ESC A ESC H ESC SP M ESC Z VT LF FF ESC M ESC ! B ESC ! M ESC 5 ESC X *row *column ESC Y *row *column ESC SP Z HT ESC 2 ESC 0 ESC 1 ESC SP 1 DISPLAY Clear all Clear page Create viewport Disable default field attribute Disable field attribute visible renditions Disable host protect Disable OIA divide line Disable host protect Disable OIA divide line Disable partition separate line Disable read unprotected field Display machine status Enable default field attribute Enable field attribute visible renditions ESC ! L ESC L ESC SP r *...* ESC ' ; ESC , ; ESC & ; ESC * ; ESC & ; ESC * ; ESC + ; ESC % ; ESC # : ESC ' : ESC , : C-39 Host Command Summary Enable host protect Enable OIA divide line Enable read unprotected field Host message write Host message display Set character attribute Set field attribute Set field attribute response ESC & : ESC * : ESC % : ESC = *message ESC = ESC # ; ESC 4 *attrib *operation ESC 3 *attrib *attrib *operation ESC 3 *attrib *attrib Create 1 viewport 24 rows x 80 columns Create 1 viewport 25 rows x 80 columns Create 1 viewport 28 rows x 80 columns Create 1 viewport 24 rows x 132 columns Create 1 viewport 25 rows x 132 columns Create 1 viewport 28 rows x 132 columns Create 2 viewports in 80 column screen Create 2 viewports in 132 column screen Create 3 viewports in 80 column screen Create 3 viewports in 132 column screen ESC SP r ! ! SP 8 " P ESC SP r ! ! SP 9 " P ESC SP r ! ! SP " D ESC SP r ! ! SP 8 $ D ESC SP r ! ! SP 9 $ D ESC SP r ! ! SP $ D ESC SP r " ! SP *r1 " 0 " SP *r2 " P ESC SP r " ! SP *r1 $ $ " SP *r2 $ D ESC SP r # ! SP *r1 " 0 " SP *r2 " 0 # SP *r3 " P ESC SP r # ! SP *r1 $ $ " SP *r2 $ $ # SP *r3 $ D The ASCII character values of *r1, *r2 and *r3 are listed below. When creating two viewports, *r1 + *r2 must be 24 or 25. When creating three viewports, *r1 + *r2 + *r3 must be 24 or 25. Rows ASCII Rows ASCII Rows ASCII Rows ASCII 1 2 3 4 5 6 7 ! " # $ % & ' 8 9 10 11 12 13 ( ) * + , - 14 15 16 17 18 19 . / 0 1 2 3 20 21 22 23 24 25 4 5 6 7 8 9 Select active partition command/response (not model 11) Select host partition command/response (not model 11) * A = Viewport 1, B = Viewport 2, C = Viewport 3 ESC ! q * ESC SP q * Jump partition command/response (not model 11) Enable partition separator line (not model 11) Disable partition separator line (not model 11) ESC " A ESC + : ESC + ; EDITING Delete character Delete line Erase to end of field/line Erase to end of page Erase input Insert character Insert line ESC Q ESC O ESC I ESC J ESC K ESC P *character ESC N GENERAL OPERATION Bell Cancel Disable write Null Enable write Null Line turnaround character (if selected) C-40 BEL ESC S or CAN ESC " ; ESC " : ETX, CR, EOT or DC3 Host Command Summary Read status Enter transparent mode (control characters displayed) Exit transparent mode Mandatory disconnect Begin pass-through data stream End pass-through data stream Restart transmission (pacing) Stop transmission (pacing) Begin outbound trace End outbound trace Reset to initial state Reset keyboard lock & keep MDT bit Read control 1 Read control 2 Read control 3 Read control 4 Read control 5 Read control 6 Read control 7 Read model Read model (extended) Read terminal ID Read all Read line/send line Read message/send message Read page/send page Write send mark Set control 1 Set control 2 Set control 3 Set control 4 Set control 5 Set control 6 Set control 7 ESC 6 DLE STX DLE ETX DLE EOT DLE DC2 DLE DC4 DC1 (XON) DC3 (XOFF) ESC SP : ESC SP ; ESC SP S ESC ! S ESC SP 7 ESC ! 7 ESC " 7 ESC # 7 ESC $ 7 ESC % 7 ESC & 7 ESC SP 6 ESC " 6 ESC ! 6 ESC # 8 ESC ! 8 ESC SP 8 ESC 8 ESC E ESC SP 9 *mode1 *mode2 *op ESC ! 9 *mode1 *mode2 *op ESC " 9 *mode1 *mode2 *op ESC # 9 *mode *operation ESC $ 9 *m1 *m2 *m3 *m4 *op ESC % 9 *m1 *m2 *m3 *m4 *op ESC & 9 *m1 *m2 *m3 *op KEYBOARD Disable print key attention Disable reset key attention Enable print key attention Enable reset key attention Keyboard lock Keyboard unlock Load programmable function key Set all default function keys Set default function key ESC ) ; ESC ( ; ESC ) : ESC ( : ESC : ESC ; ESC ! = *fn *fnx *ff *fp ESC = ESC SP t ESC t *key PRINTING Print line Print message Print screen Print viewport ESC U ESC V ESC SP W ESC W C-41 Host Command Summary MDIS Prism-8 & Prism-9 Emulations CHARACTER SET SELECTION Assign G0 label to * character set Assign G1 label to * character set Assign G2 label to * character set Assign G3 label to * character set Assign G0 labelled set to 7 bit codes Assign G1 labelled set to 7 bit codes Assign G2 labelled set to 7 bit codes Assign G3 labelled set to 7 bit codes Assign G1 labelled set to 8 bit codes Assign G2 labelled set to 8 bit codes Assign G3 labelled set to 8 bit codes Assign G1 labelled set to 7 bit codes for 1 character Assign G2 labelled set to 7 bit codes for 1 character Assign G3 labelled set to 7 bit codes for 1 character Load redefinable character set ESC ( * ESC ) * ESC * * (second * is parameter) ESC + * SI SO ESC n ESC o ESC ~ ESC } ESC | ESC R ESC N ESC O ESC P *b ; *c ; *e % q S1 ;....Sn ESC \ COMMUNICATIONS Transmission on Transmission off Select 7-bit C1 code transmission Select 8-bit C1 code transmission XON XOFF ESC SP F ESC SP G CURSOR Cursor off Cursor on Move cursor * lines up (default 1) Move cursor * lines down (default 1) Move cursor * columns right (default 1) Move cursor * columns left (default 1) Move cursor * lines down and to start of line (default 1) Move cursor * lines up and to start of line (default 1) Move cursor to specified line (*l) and column (*c) on page Move cursor to specified line (*l) and column (*c) on page Move cursor to absolute column number * position Move cursor to absolute column number * position Horizontal position relative Move cursor * columns left (default 1) Move cursor to absolute line number * position Move cursor * lines down (default 1) Move cursor * lines up (default 1) Move cursor * columns right (default 1) Line addressing relative to top line of page Line addressing relative to scroll region Make cursor invisible Make cursor visible Set tab stop at current cursor position C-42 Hex E4 Hex E2 ESC [ * A ESC [ * B ESC [ * C ESC [ * D ESC [ * E ESC [ * F ESC [ *l ; *c ; H ESC [ *l ; *c ; f ESC [ * G ESC [ * ` ESC [ * a ESC [ * j ESC [ * d ESC [ * e ESC [ * k ESC [ * o ESC [ < 6 l ESC [ < 6 h ESC [ < 4 1 ESC [ < 4 h ESC H Host Command Summary Set tab stops at specified * column numbers Clear tab stops (0 = at cursor position, 2 & 3 = all on page) Set tab stop at current cursor position Clear tab stops (2 = at cursor position, 4 & 5 = all on page) Move cursor to next tab stop Move cursor to next tab stop Move cursor to previous tab stop ESC [ *c ; *c ; .... *c SP N ESC [ * g ESC [ 0 W ESC [ * W HT ESC [ * I ESC [ * Z DISPLAY Status line off Status line on Hex E5 Hex E3 Assign * attribute(s) to following characters (default 0) Attributes: Flashing 1 Bold Underline 2 Protected Inverse video 4 ESC [ * % { 8 32 Select graphic rendition Attributes: Clear all Bold Underline Flashing Inverse video ESC [ Pa;...Pa m 22 24 25 27 0 1 4 5 7 Normal intensity Underline off Flashing off Inverse video off Assign * line attributes to current line Attributes: Single width, single height (default) Double width Double height & width top half Double height & width bottom half ESC [ * % | 0 1 2 3 No attributes Bold attribute Flashing attribute Bold & Flashing attributes Inverse attribute Bold & Inverse attributes Flashing & Inverse attributes Bold, Flashing & Inverse attributes Blank attribute Bold & Blank attributes Flashing & Blank attributes Bold, Flashing & Blank attributes Inverse & Blank attributes Bold, Inverse & Blank attributes Flashing, Inverse & Blank attributes Bold, Flashing, Invers & Blank attributes Underline attribute Bold & Underline attributes Flashing & Underline attributes Bold, Flashing & Underline attributes Inverse & Underline attributes Bold, Inverse & Underline attributes Flashing & Underline attributes ETX SP ETX A ETX B ETX C ETX D ETX E ETX F ETX G ETX H ETX I ETX J ETX K ETX L ETX M ETX N ETX O ETX P ETX Q ETX R ETX S ETX T ETX U ETX V C-43 Host Command Summary Bold, Flashing, Inverse & Underline attributes Blank & Underline attributes Bold, Blank & Underline attributes Flashing, Blank & Underline attributes Bold, Flashing, Blank & Underline attributes Inverse, Blank & Underline attributes Bold, Inverse & Underline attributes Underline attribute Bold & Underline attributes Flashing & Underline attributes Bold, Flashing & Underline attributes Inverse & Underline attributes Bold, Inverse & Underline attributes Flashing, Inverse & Underline attributes Bold, Flashing, Inverse & Underline attributes Blank & Underline attributes Inverse, Blank & Underline attributes Flashing, Inverse, Blank & Underline attributes Flashing, Inverse, Blank & Underline attributes ETX W ETX X ETX Y ETX Z ETX [ ETX \ ETX ] ETX 0 ETX 1 ETX 2 ETX 3 ETX 4 ETX 5 ETX 6 ETX 7 ETX 8 ETX / ETX ^ ETX _ EDITING Insert * number of blank characters from cursor position Delete * number of characters from cursor position Insert * number of blank lines from cursor position Delete * number of lines from cursor position Replace character mode Insert character mode Blank * number of columns from cursor position Erase in field (0 = from cursor, 1 = to cursor, 2 = all) Erase in line (0 = from cursor, 1 = to cursor, 2 = all) Erase in page (0 = from cursor, 1 = to cursor, 2 = all) Enable erasure of unprotected characters only Enable all characters to be erased, including protected Erasing characters clears display attributes to default Erasing characters retains display attributes ESC [ * @ ESC [ * P ESC [ * L ESC [ * M ESC [ 4 l ESC [ 4 h ESC [ * X ESC [ * N ESC [ * K ESC [ * J ESC [ 6 l ESC [ 6 h ESC [ < 5 l ESC [ < 5 h ENCODING DATA Escape sequence introducer Control sequence introducer Device control string String terminator Cancel Abort control sequence & display error Set mode Reset mode ESC ESC [ ESC P ESC \ CAN SUB ESC [ *m ; *m ; ... *m h ESC [ *m ; *m ; ... *m l FORMATTING DATA Move cursor to left margin of current line Move cursor down one line Move cursor down one line Move cursor down one line C-44 CR LF ESC D VT Host Command Summary Move cursor to start of next line Move cursor up one line Move cursor to start of new page Move cursor one column left Repeat last displayable character * times (default 1) ESC E ESC M FF BS ESC [ * b KEYBOARD Key presses generate codes which are sent to host Key presses are ignored (except Break) Define function key Extended keypad mode reset Extended keypad mode set ESC [ 2 l ESC [ 2 h ESC P *k % p *n ESC \ ESC [ < 15 l ESC [ < 15 h PAGE MANIPULATION Page layout definition where *p = page number in range 1 - 8, default 1 *l = number of lines, default 24 *c = number of columns, default 80 or 132 *s = start of scroll area, default 1 *e = end of scroll area, default as *l ESC [ *p ; *l ; *c ; *s ; *e % w Display buffer & video format definition ESC [ *p ; *c ; *f % x where *p = number of pages, default 8 (80 col) or 4 (132 col) *c = number of columns, default 80 *f = format options: 0 =single active page, 1 = multiple active page Set scrolling area ESC [ *s ; *e % v where *s = starting line number, default 1 *e = ending line number, default is page length 80 column display mode 132 column display mode Move active position to absolute page number Move forward by * number of pages Move backward by * number of pages Save page state mode reset Save page state mode set Save current active page state Restore last saved page state Page display absolute Display page number * Move forward by * number of pages Move backward by * number of pages Scroll up * lines (forward) Scroll down * lines (backward) Active page display mode reset Active page display mode set Screen/scroll keys action mode reset Screen/scroll keys action mode set ESC [ 14 l ESC [ 14 h ESC [ * SP P ESC [ * SP Q ESC [ * SP R ESC [ < 11 l ESC [ < 11 h ESC [ % y ESC [ % z ESC [ *p 5 p ESC [ * % p ESC [ * U ESC [ * V ESC [ * S ESC [ * T ESC [ < 7 l ESC [ < 7 h ESC [ < 13 l ESC [ < 13 h PRINTING Printer output control ESC [ < *o ; *s ; *e i C-45 Host Command Summary where *o = output type as listed below, default 0 0 = print page, 1 = print partial page, 2 = hardcopy off 3 = hardcopy on, 4 = direct print off, 5 = direct print on *s = starting line number, default start of scrolled region *e = ending line number, default end of scrolled region Media copy ESC [ *o i where *o = 0 = print page, 4 = direct print off, 5 = direct print on REPORTS Report on device configuration (* = 0 by default) Give terminal configuration report Give screen configuration report Give printer configuration report Give keyboard configuration report ESC [ < * c 0 1 2 3 Device attributes (* = device type, 0) ESC [ * c Terminal configuration report ESC [ < 10 ; *m ; *f ; *h ; *v c where *m = model number (9 for 12090) *f = features (1 = down-loadable charcter set, 2 = programmable function keys, 4 = software down-load capability 16 = field-read capability) *h = hardware options *v = version number Screen configuration report ESC [ < 11 ; *p ; *l ; *c ; *f c where *p = number of (80 x 25) pages available *l = maximum lines displayable on screen *c = maximum columns displayable on screen *f = features (1 = per field attribute capability, 2 = per character attribute capability, 4 = 80/132 screen width selectable) Printer configuration report (* = printer type) ESC [ < 12 ; * c Keyboard configuration report ESC [ < 13 ; *l ; *n c where *l = keyboard layout (1 = standard, 2 = data entry) *n = nationality (1 = UK, 2 = USA, 3 = German, 4 = French, 5 = Swiss (Ger), 6 = Swiss (Fre), 7 = French Canadian) STATUS REPORTING Report on device status (* = device identifier) ESC [ < * n Device status report (5 = device status, 6 = cursor position) ESC [ * n Terminal status report ESC [ < 10 ; *e ; *g n where *e = emulation mode (1 = ANSI 7-bit, 2 = ANSI 8-bit, 3 = 12080 mode) *g = general status (1 = 7-bit comms link, 2 = flow control enabled, 4 = foreground executive active) Screen status report where *p = number of pages currently defined *l = number of lines displayed (24 or 25) C-46 ESC [ < 11 ; *p ; *l ; *c ; *g n Host Command Summary *c = number of columns displayed (80 or 132) *g = general status (1 = multiple active page format, 2 = per-character attributes) Printer status report (*g = general status, *b = buffer left) Keyboard status report (*m = mode, *g = general status) Cursor position report (*l = line, *c = column) ESC [ < 12 ; *g ; *b n ESC [ < 13 ; *m ; *g n ESC [ < *l ; *c R SYSTEM MESSAGES Write data into system message area starting at column * System messages not visible System messages displayed on last screen line ESC [ * % } ESC [ < 8 l ESC [ < 8 h TERMINAL CONTROL Soft reset Reset to initial state ANSI terminal emulation mode Model 12080 terminal emulation mode Sound alarm ESC [ & p ESC c ESC [ < 12 l ESC [ < 12 h BEL MDIS Prism-12 Emulation When teemtalk is running the Prism-12 emulation, the following commands will be executed in addition those listed previously for Prism-8 and Prism-9. Data stream filler character Cursor home Function key control * = Generate user defined codes Do not generate any codes Generate standard codes Generate short codes (hex 80 - B3) Set video attributes for next display field Cursor forward 1 character position Sound bell Backspace Line feed Cursor vertical position Form feed Carriage return Select Multinational character set (in Multinational mode) Select ASCII character set (in Multinational mode) Horizontal position Cursor back Cursor up Escape sequence introducer Special single shift Space compression codes Reserved NUL SOH STX * 90 91 92 93 ETX * ACK BEL BS LF VT * FF CR SO SI DLE * NAK SUB ESC GS * Hex A0 to Hex BF Hex E0 C-47 Host Command Summary Set S-mode Cursor on Start of system message Cursor off End of system message Give terminal status Set screen format Display system message Display user line 25 Select active screen Set R-mode Set video prior conditions Screen move Filler Character fill Page back Page forward Scroll back Scroll forward Run diagnostics Erase to end of page Erase to end of line DCS sequence Printer on Printer off Print screen CSI sequence introducer C-48 Hex E1 Hex E2 Hex E3 * Hex E4 Hex E5 Hex E6 Hex E7 * Hex E8 Hex E9 Hex EA * Hex EB Hex EC * Hex ED * Hex EE Hex EF * Hex F5 Hex F6 Hex F7 Hex F8 ESC D ESC J ESC K ESC P ESC R ESC T ESC U ESC [ Host Command Summary PT250 Emulation AREA & LOGICAL ATTRIBUTES Assert defined logical attributes Assert defined logical attributes disabled Clear (reset) selected areas Define area qualification * = All printing characters Numeric characters Alphabetic characters Right-justify in area Protected; no input accepted (default) Must enter the area Must fill the whole area Set modified data tag Define logical attributes * = All printing characters Numeric characters Alphabetic characters Right-justify in area Protected; no input accepted (default) Must enter the area Must fill the whole area Set modified data tag Field entry check Logical attributes start Logical attributes end Protected area start Protected area end Reset modified tags Selected area start Selected area end ESC [ > 3 h ESC [ > 3 l ESC $ K ESC [ * o 2 3 4 5 >0 >1 >2 >3 ESC [ * v 2 3 4 5 >0 >1 >2 >3 ESC $ C ESC $ L ESC $ M ESC V ESC W ESC $ J ESC F ESC G CHARACTER SET SELECTION Set G0 alternate character set Set G0 ASCII character set Set G1 alternate character set Set G1 ASCII character set ESC $ 2 ESC $ 0 ESC $ 3 ESC $ 1 COMPRESSED COMMANDS Compressed cursor position (*l = line, *c = column) Compressed logical area (* = logical attribute) Compressed logical attributes (*l = line, *c = column *a = logical attributes *n = number of characters) Compressed visual area (* = visual attributes) Compressed visual attributes (* = visual attributes) ESC 0 *l *c ESC 3 * ESC 1 *l *c *a *n ESC 4 * ESC 2 * C-49 Host Command Summary CURSOR Autowrap disabled Autowrap enabled Carriage return = carriage return only Carriage return = carriage return & line feed Cursor invisible Cursor movement keys immediate effect Cursor movement keys require host permission Cursor position report (*l = line, *c = column) Cursor tabulation control * = Set tab at cursor position Clear tab at cursor postion Clear all tab stops Cursor visible Home cursor absolute Home cursor relative Index (cursor down to next unlocked line) Line feed = line feed only Line feed = line feed & carriage return Move cursor down to next unlocked line 1st column Move cursor down * lines Move cursor down * unlocked lines to 1st column Move cursor left * columns Move cursor right * columns Move cursor to column * (absolute) Move cursor to line * (absolute) Move cursor to absolute line (*l) & column (*c) Move cursor to relative line (*l) & column (*c) Move cursor up * unlocked lines Move cursor up * unlocked lines to 1st column Restore cursor & attributes Reverse index (cursor up to next unlocked line) Save cursor & attributes Set tab stop at current cursor position Tab cursor backward * tab stops Tab cursor forward * tab stops ESC [ > 9 h ESC [ > 9 l ESC [ > 1 l ESC [ > 1 h ESC $ S ESC [ > 13 l ESC [ > 13 h ESC [ *l ; *c R ESC [ * W 0 2 5 ESC $ R ESC $ B ESC $ A ESC D ESC [ 20 h ESC [ 20 l ESC E ESC [ * B ESC [ * E ESC [ * D ESC [ * C ESC [ * G ESC [ * d ESC [ *l ; *c H ESC [ *l ; *c f ESC [ * A ESC [ * F ESC $ Q ESC M ESC $ O ESC H ESC [ * Z ESC [ * I DISPLAY Clear display memory (except locked lines) Display size * = 80 columns by 24 lines 80 columns by 48 lines (2 pages) 132 columns by 27 lines 80 columns by 25 lines Display error message (* = string) Display invisible Display memory 24 lines (1 page) Display memory 48 lines (2 pages) Display status line C-50 ESC ? ESC [ * N 1 2 3 4 ESC : * ESC \ ESC $ E ESC [ > 11 l ESC [ > 11 h ESC $ T Host Command Summary Display system line (data on line preserved) Display system line (blank) Display visible Jump scroll enabled Lock lines (*l = screen line number to begin, *n = # of lines) Next page (* = 1 page one, 2 page two) Page down Page up Previous page (* = 1 page one, 2 page two) Repeat previous character * times Screen wrap mode enabled Screen wrap mode disabled Scroll automatically Scroll manually only Scroll unlocked lines down * lines Scroll unlocked lines up * lines Smooth scroll enabled Unlock lines (*l = screen line # to begin, *n = # of lines) ESC $ U ESC $ V ESC $ P ESC [ > 5 l ESC [ *l ; *n u ESC [ * U ESC $ b ESC $ a ESC [ * V ESC [ * b ESC [ > 8 h ESC [ > 8 l ESC $ W ESC $ X ESC [ * T ESC [ * S ESC [ > 5 h ESC [ *l ; *n y EDITING Delete * characters from cursor position right Delete * lines from cursor position down Editing extent mode * = Entire display Line only Area only Enable all characters to be erased Enable erasure of unprotected characters only Enter character mode Enter edit (block) mode Erase * characters & substitute with pad characters Erase in area & substitute with pad characters * = Erase to end of area, line, or display Erase from start of area, line, or display Erase entire area, line, or display Erase in display & substitute with pad characters * = Erase to end of display Erase from start of display Erase entire display Erase in line & substitute with pad characters * = Erase to end of line Erase from start of line Erase entire line Insert * blank lines Insert * space or null characters Insert mode disabled (replace mode selected) Insert mode enabled Pad character is null Pad character is space ESC [ * P ESC [ * M ESC [ * Q 0 1 2 ESC [ 6 h ESC [ 6 l ESC [ > 2 l ESC [ > 2 h ESC [ * X ESC [ * O 0 1 2 ESC [ * J 0 1 2 ESC [ * K 0 1 2 ESC [ * L ESC [ * @ ESC [ 4 l ESC [ 4 h ESC [ > 7 l ESC [ > 7 h C-51 Host Command Summary Read cursor character Read cursor character normal mode Read cursor character erase mode ESC ; ESC [ > 23 l ESC [ > 23 h GENERAL OPERATION Action all control characters except CR & HT Action all control characters including CR & HT DOS merge mode disabled DOS merge mode enabled Host notification mode disabled Host notification mode enabled Local echo mode on Local echo mode off Reset to initial state Tab characters separate fields enabled Tab characters separate fields disabled ESC [ > 14 h ESC [ > 14 l ESC [ > 25 l ESC [ > 25 h ESC [ > 16 l ESC [ > 16 h ESC [ 12 l ESC [ 12 h ESC c ESC [ > 17 h ESC [ > 17 l KEYBOARD Application program command Menu Help Shift + Help Ctrl + Help ESC _ * ESC \ 0 1 2 3 Ctrl + Shift + Help Shift + Menu Ctrl + Menu Ctrl + Shift + Menu Cursor movement keys immediate effect Cursor movement keys require host permission E2 mode enabled (Enter = 4 ESC sequences) E2 mode disabled (Enter functions as normal) Escape key disabled Escape key enabled Flow control codes from kbd not sent immediately Flow control codes from keyboard sent immediately Function keys (F#, PF#, PA#) terminated with CR Function keys not terminated with CR Hard keyboard lock disabled Hard keyboard lock enabled Load keyboard table (*d = data, *c = checksum) Numeric keypad application mode Numeric keypad numeric mode Print screen key local function Print screen key normal function Single shift three (* = key identifier) Single shift two (* = key identifier) Soft keyboard lock enabled Soft keyboard lock disabled Soft lock keyboard on illegal command enabled Soft lock keyboard on illegal command disabled C-52 4 5 6 7 ESC [ > 13 l ESC [ > 13 h ESC [ > 21 h ESC [ > 21 l ESC $ H ESC $ I ESC [ > 15 h ESC [ > 15 l ESC [ > 18 h ESC [ > 18 l ESC ' ESC b ESC < *d *c ESC \ ESC [ > 10 h ESC [ > 10 l ESC [ > 24 h ESC [ > 24 l ESC 0 * ESC N * ESC $ F ESC $ G ESC [ > 19 h ESC [ > 19 l Host Command Summary LOCAL EDITING Data block is cursor line Data block is page(s) (depends on display memory) Dump block data Enter character mode Enter edit (block) mode Modified unprotected areas only transmitted Modified & unmodified unprotected areas transmitted Page dump waits for host request Transmission waits for host request Transmit block data (excluding locked lines) Transmit selected areas Transmit unprotected areas (depends on modified mode) ESC [ > 4 h ESC [ > 4 l ESC 6 ESC [ > 2 l ESC [ > 2 h ESC [ > 6 h ESC [ > 6 l ESC = ESC S ESC 5 ESC [ 17 l ESC [ 17 h PRINTING Auto print off Auto print on (data not displayed) Initiate page dump Initiate screen transfer Print & display received host data Print screen Print screen qualified areas ESC [ 4 i ESC [ 5 i ESC [ > 2 i ESC [ > 1 i ESC [ > 3 i ESC [ 0 i ESC [ > 0 i REPORTS Device control string (* = string) Display revision Report potentially destructive action to host * = Reset to original state notification Clear screen notification Load keyboard table command failed Load keyboard table command successful Report terminal identity Report terminal identity Report terminal status ESC P * ESC \ ESC $ Z ESC ] * ESC \ 0 2 3 4 ESC [ c ESC [ 0 c ESC [ * n * = Ready Report status Report cursor position 0 5 6 VISUAL ATTRIBUTES Change visual attributes of area * = Active position to end of area Start of area to active position Entire area Change visual attributes of character Change visual attributes of display ESC [ * p 0 1 2 ESC [ * q ESC [ * r * = Active position to end of display 0 Start of display to active position 1 Entire display 2 C-53 Host Command Summary Change visual attributes of line ESC [ * t * = Active position to end of line Start of line to active position Entire line Select graphic rendition Normal video Dimmed Underline Flashing Inverse video Visual attributes locked Visual attributes unlocked C-54 0 1 2 ESC [ * m 0 2 4 5 7 Strike-through Invisible Line drawing graphics Block drawing graphics >1 >2 >3 >4 ESC [ > 12 h ESC [ > 12 l Host Command Summary ReGIS Emulation MODE SELECTION Exit to VT100/VT200 mode ESC \ MOUSE BUTTON PROGRAMMING Program a mouse button (*c = clear, *b = button, *p = press code, *r = release code) ESC P *c $ w *b/*p/*r ESC \ SIXEL GRAPHICS Direct sixels to host ESC [ ? 2 i Direct sixels to printer ESC [ ? 0 i or ESC [ ? 1 i Transmit sixel data (*p = pixel shape, ESC P *p ; *b ; *h ; q *..* ESC \ *b = backgrnd colour *h = horiz. spacing, *..* = sixel data) COMMAND LEVEL INPUT SELECTION Select command level input ; COMMAND SET STORING/INVOKING Clear all stored command sets Clear stored command set Invoke command set Store command set @. @: character @; @ character @: character set definition @; CURVE DRAWING Draw arc from specified start position Draw arc with specified centre position Draw circle with specified centre Draw circle specified circum. point Draw closed interpolated curve intersecting current & specified positions Draw closed interpolated curve intersecting current & specified positions, closed with a straight line Draw open interpolated curve Draw open interpolated curve intersecting current & all specified positions Set temporary writing controls effective only for the command, using 'W' Writing Control cmd & options C(A deg of drawing ) start posn C(A deg of drawing C) centre posn C(C) centre position C circumference point C(B) positions (E) C(B)[] positions [](E) C(S) positions (E) C(S)[] positions [](E) C options (W( sub-opts )) opts FILLING SHAPES Define curved boundary shape for filling using 'C' Curve Drawing com. & options Define straight boundary shape for filling using 'V' Draw Vector command & options Set cursor position using 'P' command & options Set temporary writing controls effective only for the command using 'W' Writing Control cmd & options F(C sub-options ) F(V sub-options ) F(P( sub-options )) F(W( sub-options ) options) C-55 Host Command Summary LOADING CHARACTER SETS Assign name to set currently selected for loading Select set for loading & assign name Select specified character set for loading Specify character form in hex codes & ASCII reference character L(A ' set name ') L(A set number ' set name ') L(A set number ) L' ascii char ' hex codes POSITION SELECTION Select active position & move cursor to it Specify position to move to via a PCV using PCV active only for current command Specify series of positions to move to. Postcommand active position = last specified position Specify series of positions to move to. Post-command active position = pre-command active position Specify writing with first bit of pattern P[ coordinates ] P(W(M pcm )) pcv P(S) positions & options (E) P(B) positions & options (E) P[] REQUESTING REPORTS Request report of active position Request report of command set stored for specified character Request report of last detected error Request report of name assigned to char. set currently selected for loading Request report of total & remaining space available for storage of command sets Select GIN mode R(P) R(M( character )) R(E) R(L) R(M(=)) R(P(I) SCREEN SETTING Select display addresing range Scroll from specified coordinates Scroll from specified position Define hardcopy region Specify printed image offset Specify output map location lightness value (monochrome monitor) Specify output map location RGB character Specify output map location HLS colour val. Select specifed output map location colour for background Select output map location colour approx. specified RGB character for background Select output map location colour approx. specified HLS values for background Erase screen to current background Erase screen to specified background Specify time delay before command Control cursor display Set temporary writing controls C-56 S(A[ coords ][ coords ] S[ coordinates ] S(W(M pcm )) pcv S(H positions ) S(H( positions ) S(M location (lightness )) S(M location ( rgb character )) S(M location ( hls values )) S(I location ) S(I( rgb character )) S(I( hls values )) S(E) S(I location ,E) S(T time ) S(C control value ) S(W( sub-options )) Host Command Summary TEXT DISPLAY Select 1 of 17 standard sets of char. cell, character matrix & char. cell spacing Select character cell size Select character cell & matrix height multiplier Select character cell spacing Select character matrix size Select character slant Select character string & orientation Select character string orientation Select font Select subscript/superscript/overstrike Select width & height multipliers for standard set 1 character matrix Set temporary writing controls Set temporary text controls Specify text T(S standard set ) T(S[ cell width , cell height ]) T(H cell & matrix height mult ) T[ relative position ] T(U[ matrix width , height ]) T(I tilt ) T(D string or S set D char or ) T(D orientation S set ) T(A font ) T pcv T(M[ width mult , height mult ]) T(W sub-options )) T(B) options (E) T' text' VECTOR DRAWING Draw point Draw vector to specified coordinates Draw vector to specified PCV Draw closed vector sequence Draw open vector sequence Set temporary writing controls V[] V [ coordinates ] V pcv V(B) positions & options (E) V(S) positions & options (E) V(W( sub-options )) WRITING CONTROL Character shading Define writing pattern Define writing pattern & set multiplier Pattern reversal control Pixel memory bit plane selection Select comp. writing with plane 0 enabled Select comp. writing with plane 1 enabled Select comp. writing both planes enabled Select comp. writing for current write plane selection Select erase writing mode Select output map location colour approx. specified HLS values for foreground Select output map location colour approx. specified RGB character for foreground Select overlay writing mode Select replace writing mode Select specified output map location foreground colour Select standard writing pattern Select standard writing pattern & multiplier Set pixel change multiplier (PCM) Shading control Shading horizontal limit selection Shading vertical limit selection W(S' chading character ') W(P binary pattern ) W(P pattern def (M multiplier )) W(N pattern control value ) W(F plane selection value ) W(F1,C) W(F2,C) W(F3,C) W(C) W(E) W(I( hls values )) W(I( rgb character)) W(V) W(R) W(I location ) W(P standard pattern number ) W(P std pattern (M multiplier )) W(M multiplier ) W(S( shading control value )) W(S(X)[ x coordinate ]) W(S([, y coordinate ])) C-57 Host Command Summary SCO Console Emulation CONTROLLING TERMINAL PROCESSING Sound audible tone Select iBCSe2 compliance Deselect iBCSe2 compliance Save cursor position Restore cursor position BEL ESC [ = 2 L ESC [ = 3 L ESC 7 ESC 8 KEYBOARD FUNCTIONS Disable keyboard input Enable keyboard input Program function keys ASCII F1 F2 F3 F4 F5 F6 F7 F8 F9 F10 F11 F12 F13 F14 F15 F16 ESC [ 2 h ESC [ 2 l ESC Q *key ' *data ' 105-Key Enhanced ANSI PC-Style *key Unshifted *key Shifted F6 F7 F8 F9 F10 F11 F12 F13 F14 Help Do F17 F18 F19 F20 0 1 2 3 4 5 6 7 8 9 : ; ` a b c < = > ? @ A B C D E F G d e f g F1 F2 F3 F4 F5 F6 F7 F8 F9 F10 F11 F12 *data = data string of up to 29 characters ' = a string delimiter (any character except contained in string) COLOUR Set foreground & background colour *fg and *bg are integers as listed below: C-58 Dull Colour Bold 0 1 2 3 4 5 6 7 Black Blue Green Cyan Red Magenta Yellow White 8 9 10 11 12 13 14 15 ESC [ 2 ; *fg ; *bg m Host Command Summary Set inverse & foreground & background colour (* as above) Set normal foreground colour (* = integer as above) Set normal background colour (* = integer as above) Set reverse foreground colour (* = integer as above) Set reverse background colour (* = integer as above) Set graphic foreground colour (* = integer as above) Set graphic background colour (* = integer as above) Request current colour attribute (* = integer as above) ESC [ 7 ; *fg ; *bg ; m ESC [ = * F ESC [ = * G ESC [ = * H ESC [ = * I ESC [ = * J ESC [ = * K ESC [ = * M CONTROLLING THE SCREEN DISPLAY Assign * attribute(s) to following characters Default attributes Bold on Underline on Flashing on Inverse video on Blank ESC [ * m 0 1 4 5 7 8 Fill regions with attribute (* = integer as below) *= 0 1 Fill with current attribute Fill with normal attribute 2 3 ESC [ = * L Select iBCSe2 compliance Deselect iBCSe2 compliance Select page (* = 1 - 6) Clear page Scroll display up * lines, insert blank lines Scroll display down * lines, insert blank lines Access bank 1 & 2 characters using decimal values Clear tab stops (0 = cursor position, 3 = all) ESC [ * z FF ESC [ * S ESC [ * T ESC [ = * g ESC [ * g (* = 0 - 255) CURSOR Cursor on Cursor off Move cursor to specified column (* = integer) Move cursor up * lines Move cursor down * lines Move cursor right * columns Move cursor left * columns Move cursor to specified line (* = integer) Move cursor to line (*l) column (*c) Move cursor to line (*l) column (*c) Move cursor down 1 line & to column 1 Move cursor to start of line Move cursor down 1 line in current column Move cursor up * lines & to first column Move cursor down * lines & to first column Move cursor one column left Move cursor to next tab stop Tab cursor backward * tabs Enable cursor autowrap Disable cursor autowrap ESC [ ? 25 h ESC [ ? 25 l ESC [ * ` or ESC [ * G ESC [ * A ESC [ * B or ESC [ * e ESC [ * C or ESC [ * a ESC [ * D ESC [ * d ESC [ *l ; *c H ESC [ *l ; *c f NAK CR LF ESC [ * F ESC [ * E BS HT ESC [ * Z ESC [ ? 7 h ESC [ ? 7 l C-59 Host Command Summary EDITING Erase from cursor to end of display Erase from start of display to cursor Erase entire display Erase from cursor to end of line Erase from start of line to cursor Erase entire line Erase * characters from cursor right Insert * blank characters Insert * blank lines Delete * lines from cursor position down Delete * characters Set tab at cursor position ESC [ 0 J ESC [ 1 J ESC [ 2 J ESC [ 0 K ESC [ 1 K ESC [ 2 K ESC [ * X ESC [ * @ ESC [ * L ESC [ * M ESC [ * P ESC H PRINTING Send page Send line Print page Print all pages Print cursor line Transparent print mode off Transparent print mode on Auxiliary print mode on Auxiliary print mode off C-60 ESC [ 2 i ESC [ ? 3 i ESC [ 0 i ESC [ ? 11 i ESC [ ? 1 i ESC [ ? 4 i ESC [ ? 5 i ESC [ 5 i ESC [ 4 i Host Command Summary Siemens 97801 Emulation CHARACTER SET SELECTION Assign International character set to G0 ESC ( @ Assign International character set to G1 ESC ) @ Assign International A character set to G0 ESC ( B Assign International A character set to G1 ESC ) B Assign German character set to G0 ESC ( K Assign German character set to G1 ESC ) K Assign Brackets character set to G0 ESC ( w Assign Brackets character set to G1 ESC ) w Assign FACET character set to G0 ESC ( c Assign FACET character set to G1 ESC ) c Assign IBM character set to G0 ESC ( v Assign IBM character set to G1 ESC ) v Assign Euro character set to G0 ESC ( u Assign Euro character set to G1 ESC ) u Assign Mathematics Symbols character set to G0 ESC ( t Assign Mathematics Symbols character set to G1 ESC ) t Assign Blanks character set to G0 ESC ( y Assign Blanks character set to G1 ESC ) y Assign G2 to G0 ESC ( x Assign G2 to G1 ESC ) x Load G2 with character set (*s = @ or B, K, w ...) ESC * *s Load character generator address(es) with new symbol ESC R B ... ESC \ (Three bytes address and 28 byte description of pattern in hex format) Switch to G0 (same as keyboard Ctrl + O) SI Switch to G1 (same as keyboard Ctrl + N) SO Switch within G0 (national/international) ESC [ 5 v Lock Change Code key ESC [ 10 v Unlock Change Code key ESC [ 11 v Report current code set ESC [ 13 v CURSOR Cursor on Cursor off Move cursor up * lines Move cursor down * lines Move cursor right * columns Move cursor left * columns Move cursor to line *l and column *c Report cursor position Short poll of cursor position Move cursor left one column Move cursor one tab to the right Move cursor * tabs to the left Line Feed Carriage Return Move cursor to begining of next line ESC [ 7 p ESC [ 6 p ESC [ * A ESC [ * B ESC [ * C ESC [ * D ESC [ *l ; *c H ESC [ 6 n ESC [ 5 p BS HT ESC [ * Z LF CR ESC E C-61 Host Command Summary Save cursor position Move cursor to last saved position ESC [ s ESC [ u DISPLAY AREA MOVEMENT Roll mode (do not destroy data) Scroll mode (destroy data) Move display up * lines Move display down * lines ESC [ 10 u ESC [ 11 u ESC [ * S ESC [ * T EDITING Insert * (1-80) blanks to the right starting at cursor position Insert * (1-24 or 25) lines, starting at cursor position Delete * character(s) ,including attributes, at cursor position Delete * line(s), including attributes, at cursor position Erase line - * determines extent Erase in screen area - * determines extent ESC [ * @ ESC [ * L ESC [ * P ESC [ * M ESC [ * K ESC [ * J INITIALIZING SCREEN & ATTRIBUTES Define screen moving area at line *t (top) to line *b (bottom) Set 24 line mode Set 25 line mode Switch on/off blinking in 24/25th line * = Flashing on, Line 1-25 / 1-24 (25/24 line mode) Flashing off, Line 1-25 / 1-24 (25/24 line mode) Flashing on, line 25 Flashing off, line 25 Auto roll mode enabled Page mode enabled Set attribute(s) for the following character *a = Normal Screen Underline Blink 0 2 4 5 ESC [ *t ; *b r ESC [ 1 u ESC [ 0 u ESC [ * p 0 1 2 3 ESC [ 9 u ESC [ 8 u ESC [ *a ; ...*a m Inverse Hidden Store attributes Set delete character to blank Set delete character to nil Dim screen Undim screen Set background dark (white characters on black screen) Set background highlight (black characters on white screen) Set off cursor position Video timeout enabled Video timeout disabled Reset screen to initial state 7 8 50 ESC [ 3 u ESC [ 2 u ESC [ 8 p ESC [ 9 p ESC [ 20 u ESC [ 21 u ESC [ 10 p ESC [ 5 u ESC [ 4 u ESC c KEYBOARD Lock keyboard Unlock keyboard Keyboard repeat rate off Keyboard repeat rate on C-62 ESC ` ESC b ESC [ 0 s ESC [ 1 s Host Command Summary Sound bell Key click disabled Key click enabled Report keyswitch status Map scan codes corresponding to German keyboard values Map scan codes corresponding to all other keyboard values Load more national keyboards (Multiuser systems: 1024 Byte, PC-X/PC-X10: 10280 Byte) Read actual keyboard layout BEL ESC [ 2 s ESC [ 3 s ESC [ 0 w ESC [ 7 u ESC [ 6 u ESC R A ... ESC \ ESC E " y SERVICE Display all ESCape sequences (except ESC) on screen Switch to standard mode Display all ESCape sequences - system must be switched off to return to standard mode Start system test and poll result Poll firmware Poll keyboard firmware Fill the screen moving area with the following character Display complete character generator Reset the previous two commands ESC [ 3 v ESC [ 2 v ESC [ 4 v ESC [ 3 y ESC [ 4 y ESC [ 5 y ESC [ 8 v ESC [ 9 v ESC [ 7 v C-63 Host Command Summary TA6530 Emulation Conversational & Block Mode ATTRIBUTES Set display attribute * Normal video Dimmed Inverse video Italics Invisible Underline Inverse dim Inverse italics ESC 6 * SP ! $ " ( 0 % & Inverse invisible Underline dim Underline italics Underline inverse Underline inverse dim Underline inverse italics Underline invisible Underline inverse invisible Set video prior condition register (* = attribute as above) Set/reset colour map table Read colour configuration (Block mode) Set colour configuration (Block mode) Read colour mapping table (Block mode) Set colour mapping table (Block mode) , 1 2 4 5 6 8 ? ESC 7 * ESC - q ESC - u ESC - t ESC - v ESC - x CURSOR Back tab (Block mode) Clear all tabs Clear tab at current position Move cursor down one line Move cursor home Move cursor home down Move cursor left one column Move cursor right one column Move cursor to beginning of current line Move cursor to next tab stop Move cursor up one line Report cursor address Set cursor address Set cursor address extended (Block mode) Set tab at current position ESC i ESC 3 ESC 2 LF ESC H ESC F BS ESC C CR HT ESC A ESC a DC3 ESC - D ESC 1 DISPLAY Clear memory to spaces Clear memory to spaces extended Display message on 25th line Display next page (Conversational mode) Display previous page (Conversational mode) Display page * Scroll down one line (Conversational mode) Scroll up one line (Conversational mode) C-64 ESC I ESC - I ESC o ESC U ESC V ESC ; * ESC T ESC S Host Command Summary Select page * (Block mode) Set current line to 40 (double width) columns Set current line to 80 (single width) columns Set max. number of pages for display (Block mode) Set page size to 24 lines by 40 characters Start field (Block mode) Start field extended (Block mode) Start enhanced colour field (Block mode) Define field using pre-defined attributes (Block mode) Write message (*m) on 25th line ESC : * ESC 8 ESC 9 ESC p * ESC t GS ESC [ *display *data *case ESC ` FS ESC o *m EDITING Delete character (Block mode) Delete line (Block mode) Disable local line editing (Block mode) Erase to end of line/field Erase to end of page/memory Insert character (Block mode) Insert line (Block mode) Reset modified data tags (Block mode) ESC P ESC M ESC N ESC K ESC J ESC O ESC L ESC > GENERAL OPERATION Data compression (Enhanced) (Block mode) Data compression (Limited) (Block mode) Define data-type table (Block mode) Define data-type table extended (Block mode) Define/update variable table (Block mode) Delay processing for one second End of transmission (Block mode) Enter protect submode (Block mode) Exit protect submode (Block mode) Execute self tests Execute self test while loading Print current screen (Conv) or selected page (Block) Read buffer (Block mode) Read emulation configuration Read with address (Block mode) Read with address extended (Block mode) Read with address all (Block mode) Read with address all extended (Block mode) Read with all attributes (Block mode) Reinitialize (Block mode) Set buffer address (Block mode) Set buffer address extended Set emulation configuration Soft reset Text start (Block mode) Text end (Block mode) Sound bell DC2 DC4 ESC r ESC - r ESC - s ESC @ EOT ESC W ESC X ESC - P ESC z ESC 0 (zero) ESC < ESC ? ESC = * ESC - J * ESC ] * ESC - K * ESC Q ESC q DC1 ESC - C ESC v * ESC [ ! p STX ETX BEL C-65 Host Command Summary KEYBOARD Define Return key (Conversational mode) Lock keyboard Unlock keyboard Simulate function key ESC u * ESC c ESC b ESC d * REPORTS Report cursor address Report emulation status Report firmware revision level ESC a ESC ^ ESC _ ANSI Mode CHARACTER SETS Select G0 character set * Select G1 character set * Shift out to G0 character set Shift out to G1 character set ESC ( * ESC ) * SI SO CURSOR Autowrap enabled Autowrap disabled Clear tab stops (0 = cursor position, 2 or 3 = all) Cursor enabled Cursor disabled Horizontal tab LF is LFCR (new line mode) LF is LF only Move cursor left one column Move cursor left * columns Move cursor right * columns Move cursor down one line Move cursor down one line Move cursor down * lines Move cursor up one line Move cursor up * lines Move cursor to beginning of line Move cursor to column one of next line Move cursor to column one of next line Move cursor to column one & down * lines Move cursor to column one & up * lines Move cursor to column * on current line Move cursor to line *l and column *c Move cursor * tab stops Move cursor * previous tab stops Set/clear * tab stops Set horizontal tab C-66 ESC [ ? 7 h ESC [ ? 7 l ESC [ * g ESC [ ? 25 h ESC [ ? 25 l HT ESC [ 20 h ESC [ 20 l BS ESC [ * D ESC [ * C LF or VT or FF ESC D or IND ESC [ * B ESC M or RI ESC [ * A CR NEL ESC E ESC [ * E ESC [ * F ESC [ * G ESC [ *l ; *c H ESC [ * I ESC [ * Z ESC [ * W ESC H or HTS Host Command Summary DISPLAY Insert * spaces at cursor location Restore cursor position & video attribute Save cursor position & video attribute Set current line to single width (80 columns) Set current line to double width (40 columns) Scroll display down * lines Scroll display up * lines Set current video attributes Write to message field ESC [ * @ ESC 8 ESC 7 ESC # 5 ESC # 6 ESC [ * T ESC [ * S ESC [ * m ESC P * = * ESC \ EDITING Delete * blank lines at cursor position Delete * characters at cursor position Erase * characters & attributes at cursor Erase field * Erase line portion (0 = from, 1 = to, 2 = all) Erase screen portion (0 = from, 1 = to, 2 = all) Insert * blank lines at cursor position Repeat last character * times ESC [ * M ESC [ * P ESC [ * X ESC [ * N ESC [ * K ESC [ * J ESC [ * L ESC [ * b GENERAL OPERATION Cancel current escape sequence Execute self tests Reset emulation Set emulation configuration Set mode Reset mode Sound bell Read screen contents Terminate current escape sequence Transmission enabled (XON) Transmission disabled (XOFF) CAN ESC [ * y ESC c ESC P * ? * ESC \ ESC [ * h ESC [ * l BEL ESC [ * ; * ; * ; * v SUB DC1 DC3 KEYBOARD Lock keyboard Lock keyboard Unlock keyboard Unlock keyboard ESC ` ESC [ 2 h ESC b ESC [ 2 l REPORTS Report configuration values Report cursor position Report terminal ID & version Report status of last self test ESC [ * x ESC [ 6 * ESC [ * c ESC [ 5 * C-67 Host Command Summary Tek 4010/4014 Emulation ALPHANUMARIC MODE Select G0 character set for alpha text Select G1 character set for alpha text ESC SI ESC SO CURSOR MOVEMENT Move cursor down 1 pixel Move cursor down 16 pixels Move cursor left 1 pixel Move cursor left 16 pixels Move cursor right 1 pixel Move cursor right 16 pixels Move cursor up 1 pixel Move cursor up 16 pixels Move cursor to beginning of line Move text cursor down Move text cursor left Move text cursor right Move text cursor up Move text cursor to start of line ESC \ b ESC \ B ESC \ d ESC \ D ESC \ c ESC \ C ESC \ a ESC \ A ESC \ CR LF BS HT VT CR GENERAL OPERATION Clear screen & enter Graphics Text mode Copy screen data to parallel port Request status report Select bypass mode Sound bell ESC FF ESC ETB ESC ENQ ESC CAN BEL GRAPHICS TEXT MODE Select character size 0 (80x34) Select character size 1 (40x17) Select character size 2 (26x11) Select character size 3 (20x8) Select Graphics Text font 1 (74x35) Select Graphics Text font 2 (81x38) Select Graphics Text font 3 (121x58) Select Graphics Text font 4 (133x64) Select text zoom factor 1 Select text zoom factor 2 Select text zoom factor 3 Select text zoom factor 4 ESC 0 ESC 1 ESC 2 ESC 3 ESC 8 ESC 9 ESC : ESC ; ESC \ e ESC \ f ESC \ g ESC \ h MODE SELECTION Select Alphanumeric mode Select Alphanumeric mode Select Alphanumeric mode Select GIN mode C-68 ACK CAN ESC \ CAN ESC SUB Host Command Summary Select Graphics Text mode Select Graphics Text mode Select Graphics Text mode Select Incremental Point mode Select Point mode Select Vector mode Select Vector mode CR US ESC FF RS FS GS ESC \ GS VECTOR MODE Clear Vector mode screen Deselect write-through & selective erase Disable block fill/erase Disable dark vector Disable dark vector Disable rectangle drawing Enable block fill/erase Enable circle plotting (* = ASCII equiv. of coords) Enable dark vector Enable dark vector Enable rectangle drawing (*c = corner coords) Enable selective erase Enable write-through mode Select dot-dash line style Select dot-dash line style Select dotted line style Select dotted line style Select long dash line style Select long dash line style Select short dash line style Select short dash line style Select solid line style Select solid line style Select solid line style Select solid line style Select solid line style Select solid line style Select solid line style Select solid line style ESC \ FF ESC SOH ESC ETX BEL ESC BEL ESC \ r ESC STX ESC \ O * GS ESC GS ESC \ R *c *c ESC DLE ESC NAK ESC b ESC j ESC a ESC i ESC d ESC I ESC c ESC k ESC ` ESC e ESC f ESC g ESC h ESC m ESC n ESC o C-69 Host Command Summary TVI 955 Emulation GENERAL OPERATION Block mode on Local mode on Half duplex mode on Full duplex mode on Return to previous conversational mode Set terminal operating mode(s) (0 = 955, 1 = 950) Reset terminal operating mode(s) (0 = 955, 1 = 950) Select a terminal operating value (0 = 955, 1 = 950) Select a programming compatibility mode (0 = 955, 1 = 950) Reset terminal to factory default values Reset terminal to saved settings values Reset function keys to factory default values Reset editing keys to factory default values Monitor mode on Monitor mode off ESC B ESC c ESC D H ESC D F ESC C ESC [ = * h ESC [ = * l ESC [ *1 ; *2 v ESC [ 10 ; * v ESC ~ 0 ESC ~ 1 ESC ~ 2 ESC ~ 3 ESC U ESC X or ESC u CHARACTER SETS & BLOCK GRAPHICS Select character set (0 = US ASCII, 1 = UK ASCII) Special graphics mode on Special graphics mode off Select a character from the multinational character set Read 7-bit data words Read 8-bit data words Define block graphics area ESC [ 9 ; * v ESC $ ESC % CTRL U * ESC [ = 1 l ESC [ = 1 h ESC H w h CURSOR Cursor home Line feed Reverse line feed New line (line feed/carriage return) Carriage return Move cursor up * lines Move cursor up one line Move cursor down one line Move cursor down * lines Move cursor right * columns Move cursor right one column Move cursor left * columns Move cursor left one column Move cursor to line (*l) and column (*c) Move cursor to line (*l) and column (*c) Send cursor to line (*l) & columns 1 - 80 (*c) Send cursor to line (*l) & columns 81 - 132 (*c) Send cursor to page (*p), line (*l) & columns 1 - 80 (*c) Send cursor to page (*p), line (*l) & columns 81 - 132 (*c) Read cursor's line & column position C-70 ESC [ H or RS LF ESC j US CR ESC [ * A VT SYN ESC [ * B ESC [ * C FF ESC [ * D BS ESC [ *l ; *c H ESC [ *l ; *c f ESC = *l *c ESC = *l ~ *c ESC - *p *l *c ESC - *p *l ~ *c ESC ? Host Command Summary Read cursor's page, line & column position Read cursor's line & column position in decimal units Read cursor's page, line & column position in decimal units ESC / ESC [ 6 n ESC [ ? 6 n DISPLAY Turn screen on Turn screen off Light background with dark characters Dark background with light characters Define visual attribute(s) * 0 1 2 3 4 5 6 7 ESC n ESC o ESC b ESC d ESC G * Normal (default) video Invisible normal video Flash Invisible flash Reverse current background Invisible reverse Reverse and flash Invisible reverse & flash 8 9 : ; < = > ? Underline Invisible underline Underline & flash Invisible underline & flash Reverse & underline Invisible reverse & underline Reverse, underline & flash Invisible reverse, underline & flash Attributes occupy a character space Attributes do not occupy a character space Half intensity mode Full intensity mode Page base attribute mode Line base attribute mode Select status line visual attribute(s) 0 1 Normal Reverse 2 3 ESC F 0 ESC F 1 ESC [ = 5 h ESC [ = 5 l ESC [ = 2 h ESC [ = 2 l ESC [ 3 ; * v Normal underline Reverse underline Set cursor style to * 0 1 2 Cursor not displayed Flashing block cursor Steady block cursor Enable 132 columns per line Enable 80 columns per line ESC . * 3 4 Flashing underline cursor Steady underline cursor ESC [ = 3 h ESC [ = 3 l EDITING MODES Autowrap mode on Autowrap mode off New line mode on New line mode off DOWN key sends CTRL J DOWN key sends CTRL V Turn on write protect mode Turn off write protect mode Turn on protect mode Turn off protect mode ESC [ = 7 h ESC [ = 7 l ESC [ = 6 h ESC [ = 6 l ESC [ = 9 h ESC [ = 9 l ESC ) ESC ( ESC & ESC ' C-71 Host Command Summary EDITING DATA Enable page edit mode Enable line edit mode Enable insert mode Enable replace mode Load a replacement character Insert a replacement character at cursor position Insert * replacement characters at cursor position Insert line of replacement characters on current line Insert * lines of replacement characters starting at cursor line Delete character at cursor position Delete * characters starting at cursor position Delete current line & replace with replacement characters Delete * lines at cursor line & replace with replacement characters Erase from cursor to end of line & replace with replacement characters Erase line portion & replace with replacement characters (0 = from cursor, 1 = to cursor, 2 = all unprotected) Erase from cursor to end of line & replace with null characters Erase from cursor to end of page & replace with replacement characters Erase page portion & replace with replacement characters (0 = from cursor, 1 = to cursor, 2 = all unprotected) Erase from cursor to end of page & replace with null characters Clear current unprotected field, replace with replacement characters Clear all characters & replace with null characters 955 mode: Clear all characters & replace with replacement characters (reset protect and write protect modes) 950 mode: Clear unprotected characters & replace with replacement characters (do not reset protect and write protect modes) 955 mode: Clear unprotected characters & replace with write protected space characters (reset protect mode) 950 mode: Clear unprotected characters & replace with write-protected space characters (do not reset protect mode) Clear unprotected characters & replace with replacement characters Clear unprotected characters & replace with null characters ESC N ESC O ESC q ESC r ESC e * ESC Q ESC [ * @ ESC E ESC [ * L ESC W ESC [ * P ESC R ESC [ * M ESC T ESC [ * K ESC t ESC Y ESC [ * J ESC y CAN ESC * ESC + ESC + ESC , ESC , ESC ; or SUB ESC : FUNCTION KEYS Select function key set (0 = set one, 1 = set two) Reprogram a function key C-72 ESC [ 7 ; * v ESC ¦ *1 *2 <message> EM Key 955 compatible *1 value Unshifted Shifted 955 compatible *1 value Key Unshifted Shifted F1 F2 F3 F4 F5 F6 F7 F8 1 2 3 4 5 6 7 8 F9 F10 F11 F12 F13 F14 F15 F16 A B C D E F G H 9 : ; < = > ? @ I J K L M N O P Host Command Summary Additional *1 values: <space> Clear entire current function key set from memory Load function keys in sequence 0 *2 message destination values: 1 2 3 Send message to host Send message to terminal Send message to both host and terminal Save function key reprogramming in non-volatile memory Do not save function key reprogramming in non-volatile memory Invoke a function key ESC [ = 10 h ESC [ = 10 l ESC [ * ¦ REPROGRAMMING EDITING KEYS Reprogram the SEND key (950 mode) ESC 0 *k *c *k = 1 Unshifted 2 Shifted *c = 4 5 6 ESC 4 command ESC 5 command ESC 6 command 7 S s ESC 7 command ESC S command ESC s command Reprogram any individual editing key (955 mode) Reprogram all editing keys ESC 0 *Ps *p1 *p2 *p3 ESC ] *Ps *p1 ... *p60 KEYBOARD & BELL Keyboard locked Keyboard unlocked Lock keys Unlock keys * = 11 Set Up 12 Esc ESC # ESC " ESC [ = * l ESC [ = * h 13 Clear Space 14 Break Local editing key mode enabled Duplex editing key mode enabled Load the margin bell column Margin bell on Margin bell off Sound bell ESC k ESC l ETB ESC [ = 4 h ESC [ = 4 l BEL LOADING & SENDING MESSAGES Send terminal's identification Program the answerback message Send the answerback message Display user message 1 on bottom screen line Display status line on bottom screen line Select contents of top information line Select contents of bottom information line *= 0 1 Blank Status line Load text into user message 1 Load text into a user message 2 3 ESC M ESC ^ <text> EM ENQ ESC g ESC h ESC [ 4 ; * v ESC [ 5 ; * v User message 1 User message 2 ESC f <text> CR ESC _ *m *e <text> CR C-73 Host Command Summary User Message *m = 0 Status line message field 1 User message 1 2 User message 2 Effect *e = 0 1 Clears message before loading Writes over existing message Send contents of information line *= 0 1 2 ESC Z * User message 1 Status line User message 2 PRINTING Buffered copy print mode on Buffered copy print mode off Buffered transparent print mode on Buffered transparent print mode off Buffered bidirectional print mode on Buffered bidirectional print mode off Print unprotected formatted page Print all unformatted page Page print *= 0 1 Formatted all Formatted unprotected ESC @ ESC A ESC ` ESC a DC2 DC4 ESC P ESC L ESC [ 0 ; * i 4 5 Unformatted all Unformatted unprotected Define page print terminator ESC p * SCREEN MEMORY Define number of lines on each page *= 1 2 3 Lines per Page 24 48 96 ESC \ * Number of Pages 4-Page Memory 2-Page Memory 4 2 2 1 1 - Autopage mode on Autopage mode off Display previous page Display next page Display page * ESC v ESC w ESC J ESC K ESC [ 1 ; * } SCROLLING Define a scrolling region Enable line lock Disable line lock ESC [ *t ; *b r ESC ! 1 ESC ! 2 SENDING SCREEN DATA Reprogram delimiter (*d) characters *1 & *2 0 1 C-74 Field Separator End of line 2 3 Start of protected field End of protected field ESC x *d *1 *2 4 Message terminator Host Command Summary Send unprotected characters in cursor line up to & including cursor Send unprotected page up to & including cursor Send entire cursor line characters up to & including cursor Send entire page up to & including cursor Send unprotected message between start of text and end of text Send whole message between start of text (STX) and end of text (ETX) ESC 4 ESC 5 ESC 6 ESC 7 ESC S ESC s TAB STOPS Clear typewriter tab stop at cursor position Clear all typewriter tab stops Create column of tab stops at cursor position Move cursor forward to next typewriter or field tab stop Move cursor forward to next field tab stop Move cursor backward to previous typewriter or field tab stop ESC 2 ESC 3 ESC 1 HT ESC i ESC I C-75 Host Command Summary Unisys T27 Emulation FORM OPERATIONS Set forms mode Reset forms mode Toggle forms mode Exit forms mode ESC W ESC X DC2 SOH SEARCH OPERATIONS Set search mode Set search character (if 80 hex or less) Set search character (if greater than 80 hex) Reset search mode ESC E ESC - * ESC - ESC SO * ESC SI ESC F POINTER MOVEMENT Move pointer up Move pointer down Move pointer right Move pointer left Align KBC to DCP Tab right Clear variable tabs Vertical tab down Home Jump to page * Position pointer at *c column & *r row (using hex values) Position pointer at *c column & *r row (using ASCII chars.) Carriage return Prevent align in cursor page DC3 LF ESC C or DC2 BS ESC & HT ESC # VT DC4 ESC $ * ESC ^ *c *r ESC " *c *r CR or LF ESC 6 EDITING SEQUENCES Insert character by line Insert character by page Delete character by line Delete character by page Line insert Line delete Move line up Move line down Clear to end of line Clear to end of page Roll page up Roll page down Clear page C-76 ESC ! ESC @ ESC % ESC P ESC L EC M ESC > ESC < ESC K or DC1 ESC J ESC S ESC T SOH or FF or ESC FF Host Command Summary VIDEO ATTRIBUTE SEQUENCES Underline video highlight Reverse video highlight End highlight Start video blink Start secure video Start bright video Set reverse video Set normal video ESC 3 ESC 4 ETB CAN EM SUB ESC N ESC O TERMINAL RECONFIGURATION SEQUENCES Store ASCII codes as data Configure Data Comm, Screen & KPT buffer sizes Reconfigure terminal Selective key programming ESC R A *start *length *data ESC R C ESC R B *dc *s *kpt ESC R C ESC R D *hex *prog 00 ... *hex *prog 00 00 Store data in hexadecimal codes ESC R H *start *length *data ESC R C Program function keys F1 - F10 ESC R K *length *key *prog A 9 ... *length *key *prog A 9 A 9 Transmit error log ESC R L Copy temporary storage into nonvolatile RAM ESC R P Display message in environmental user status line ESC R S *number of bytes *data Transmit memory (temporary storage) contents to host ESC R T *start *number of bytes MISCELLANEOUS SEQUENCES Start escape sequence Set shift out (to extended character set) Reset shift out (shift in) Character translation *= : / . bright underscore reverse 7 8 9 ESC ESC SO or SO ESC SI or SI ESC ' * end highlight blink secure Reset keystroke lockout Fill with character * Transmit terminal screen to host Toggle audible alarm Display character set Load contents of permanent storage & reconfigure Display version number Toggle variable tabs Set mobile home Lowercase disable Lowercase enable End of text processing End of transmission ESC = ESC _ * ESC ( ESC ? or BEL ESC space C ESC space D ESC space V ESC . or VT ESC D ESC Y ESC Z ETX EOT C-77 Host Command Summary Viewdata Mode COLOUR SELECTION Background cell colour = previous character colour Cell background colour black (default) Select blue alphanumeric character set Select blue graphics character set Select cyan alphanumeric character set Select cyan graphics character set Select green alphanumeric character set Select green graphics character set Select magenta alphanumeric character set Select magenta graphics character set Select red alphanumeric character set Select red graphics character set Select white alphanumeric character set Select white graphics character set Select yellow alphanumeric character set Select yellow graphics character set ESC ] ESC \ ESC D ESC T ESC F ESC V ESC B ESC R ESC E ESC U ESC A ESC Q ESC G ESC W ESC C ESC S CHARACTER ATTRIBUTES Block graphics Border graphics Flashing on Flashing off Single line height Double line height ESC Y ESC Z ESC H ESC I ESC L ESC M CURSOR Cursor display on Cursor display off Home cursor Move cursor down one line Move cursor left one column Move cursor right one column Move cursor up one line Move cursor to beginning of line DC1 DC2 RS LF BS HT VT CR DISPLAY Clear screen & home cursor Conceal display Hold graphics character Release graphics character FF ESC X ESC ^ ESC _ GENERAL OPERATION Enter 40 column viewdata mode Enter 80 column viewdata mode Send Answerback string C-78 ESC # 6 ESC # 5 ENQ Host Command Summary VT640 Emulation ALPHANUMARIC MODE Select G0 character set for alpha text Select G1 character set for alpha text ESC SI ESC SO CURSOR MOVEMENT Move cursor down 1 pixel Move cursor down 16 pixels Move cursor left 1 pixel Move cursor left 16 pixels Move cursor right 1 pixel Move cursor right 16 pixels Move cursor up 1 pixel Move cursor up 16 pixels Move cursor to beginning of line Move text cursor down Move text cursor left Move text cursor right Move text cursor up Move text cursor to start of line ESC \ b ESC \ B ESC \ d ESC \ D ESC \ c ESC \ C ESC \ a ESC \ A ESC \ CR LF BS HT VT CR GENERAL OPERATION Clear screen & enter Graphics Text mode Copy screen data to parallel port Request status report Select bypass mode Sound bell Specify data (*) for graphics memory loading Specify screen address for g. memory load Specify writing mode (0 = pix. off, 1 = on, 2 = comp) Transmit graphics memory (*h *v coords, *s bit sets) ESC FF ESC ETB ESC ENQ ESC CAN BEL ESC + * # ESC " *h ; *v a ESC / * d ESC " *h ; *v *s c GRAPHICS TEXT MODE Select character size 0 (80x34) Select character size 1 (40x17) Select character size 2 (26x11) Select character size 3 (20x8) Select Graphics Text font 1 (74x35) Select Graphics Text font 2 (81x38) Select Graphics Text font 3 (121x58) Select Graphics Text font 4 (133x64) Select text zoom factor 1 Select text zoom factor 2 Select text zoom factor 3 Select text zoom factor 4 ESC 0 ESC 1 ESC 2 ESC 3 ESC 8 ESC 9 ESC : ESC ; ESC \ e ESC \ f ESC \ g ESC \ h C-79 Host Command Summary MODE SELECTION Select Alphanumeric mode Select Alphanumeric mode Select Alphanumeric mode Select GIN mode Select GIN mode Select GIN mode Select Graphics Text mode Select Graphics Text mode Select Graphics Text mode Select Incremental Point mode Select Point mode Select Vector mode Select Vector mode ACK CAN ESC \ CAN ESC SUB ESC " 4 g ESC " 5 g CR US ESC FF RS FS GS ESC \ GS VECTOR MODE Clear Vector mode screen Define user line style x (* = # pixels on ; # pixels off) Define user line style y (* = # pixels on ; # pixels off) Define user line style z (* = # pixels on ; # pixels off) Disable block fill/erase Disable dark vector Disable dark vector Disable rectangle drawing Enable block fill/erase Enable circle plotting (* = ASCII equiv. of coordinates) Enable dark vector Enable dark vector Enable rectangle drawing (*c = corner coordinates) Select 3 dot-dash line style Select 3 dot-dash line style Select dot-dash line style Select dot-dash line style Select dotted line style Select dotted line style Select long dot-dash line style Select long dot-dash line style Select long dash line style Select long dash line style Select medium dash line style Select medium dash line style Select short dash line style Select short dash line style Select solid line style Select solid line style Select user defined line style a Select user defined line style b Select user defined line style c C-80 ESC \ FF ESC / * a ESC / * b ESC / * c ESC ETX BEL ESC BEL ESC \ r ESC STX ESC \ O * GS ESC GS ESC \ R *c *c ESC e ESC m ESC b ESC j ESC a ESC i ESC f ESC n ESC d ESC I ESC g ESC o ESC c ESC k ESC ` ESC h ESC x ESC y ESC z Host Command Summary W2119 Emulation ALPHANUMARIC MODE Select G0 character set for alpha text Select G1 character set for alpha text ESC SI ESC SO CURSOR MOVEMENT Move cursor down 1 pixel Move cursor down 16 pixels Move cursor left 1 pixel Move cursor left 16 pixels Move cursor right 1 pixel Move cursor right 16 pixels Move cursor up 1 pixel Move cursor up 16 pixels Move cursor to beginning of line Move text cursor down Move text cursor left Move text cursor right Move text cursor up Move text cursor to start of line ESC \ b ESC \ B ESC \ d ESC \ D ESC \ c ESC \ C ESC \ a ESC \ A ESC \ CR LF BS HT VT CR GENERAL OPERATION Clear screen & enter Graphics Text mode Copy screen data to parallel port Deselect write-through & selective erase Enable selective erase Enable write-through Request cursor position report Select bypass mode Sound bell ESC FF ESC ETB ESC SOH ESC DLE ESC NAK ESC ENQ ESC CAN BEL GRAPHICS TEXT MODE Select graphics text font (120x58) Select graphics text font (132x38) Select graphics text font (132x64) Select graphics text font (146x70) Select graphics text font (73x35) Select graphics text font (80x38) Select graphics text font (80x64) Select text zoom factor 1 Select text zoom factor 2 Select text zoom factor 3 Select text zoom factor 4 ESC : ESC < ESC ; ESC > ESC 8 ESC 9 ESC = ESC \ e ESC \ f ESC \ g ESC \ h C-81 Host Command Summary MODE SELECTION Select Alpha mode & erase alpha memory Select Alphanumeric mode Select Alphanumeric mode Select Alphanumeric mode Select Alphanumeric mode Select GIN mode Select Graphics Text mode Select Graphics Text mode Select Graphics Text mode Select Graphics Text mode Select Incremental Point mode Select Point mode Select Vector mode ESC EOT ACK CAN ESC 2 ESC \ CAN ESC SUB CR US ESC 1 ESC FF RS FS GS VECTOR MODE Clear Vector mode screen Disable block fill/erase Disable dark vector Disable dark vector Disable rectangle drawing Enable block fill/erase Enable circle plotting (* = ASCII equiv. of coords) Enable dark vector Enable dark vector Enable rectangle drawing (*c = corner coords) Select dot-dash line style Select dot-dash line style Select dot-dash line style Select dotted line style Select dotted line style Select dotted line style Select long dash line style Select long dash line style Select long dash line style Select short dash line style Select short dash line style Select short dash line style Select solid line style Select solid line style Select solid line style Select solid line style Select solid line style Select solid line style Select solid line style Select solid line style Select solid line style Select solid line style Select solid line style Select solid line style C-82 ESC \ FF ESC ETX BEL ESC BEL ESC \ r ESC STX ESC \ O * GS ESC GS ESC \ R *c *c ESC b ESC j ESC r ESC a ESC i ESC q ESC d ESC I ESC t ESC c ESC k ESC s ESC ` ESC e ESC f ESC g ESC h ESC m ESC n ESC o ESC p ESC u ESC v ESC w Host Command Summary Wyse Emulations ATTRIBUTES Assign character display attribute Assign line attribute Assign write-protected character attribute Line attribute mode on Page attribute mode on Wyse 60 character attribute mode on Wyse 60 character attribute mode off ESC G *attribute ESC G *line attribute ESC ' *attribute ESC e 3 ESC e 2 ESC e 1 ESC e 0 CHARACTER SETS (WY-60 only) Define & load soft character ESC c A *b *p *...*c CTRL Y *b = bank 0-3, *p = position in character set (2-byte hex) *...*c = character bit pattern (32-byte character string) Automatic font loading enabled Automatic font loading disabled Load font bank with predefined character set ESC e O ESC e N ESC c @ *bank *set Bank: 0 = Bank 0, 1 = Bank 1, 2 = Bank 2, 3 = Bank 3 Set: Native mode Multinational Standard ASCII Graphics 1 PC Equivalent Graphics 2 Graphics 3 @ A B C D E F Standard ANSI 44-line Native mode 44-line Multinational 44-line PC Equivalent 44-line Standard ASCII 44-line Standard ANSI Clear font bank (* = 0 - 3) Specify font bank for primary character set (* = 0 - 3) Specify font bank for secondary character set (* = 0 - 3) Select primary character set for display Select secondary character set for display G ' a b c d ESC c ? * ESC c B * ESC c C * ESC c D ESC c E CLEARING DATA Clear cursor column Clear entire rectangle in 80 column page Clear entire rectangle in 132 column page Clear page to nulls Clear page to spaces Clear page to write-protected spaces Clear unprotected column to nulls Clear unprotected column to specified character Clear unprotected line to nulls from cursor Clear unprotected line foreground to nulls from cursor Clear unprotected line to spaces from cursor Clear unprotected line foreground to spaces from cursor Clear unprotected page to attribute character ESC V ESC c H *line *col *character ESC c H *line ~ *col *character ESC * ESC + ESC , ESC c K ESC c I *character ESC t ESC c S ESC T ESC c R ESC ! C-83 Host Command Summary Clear unprotected page to nulls Clear unprotected page to nulls from cursor Clear unprotected page foreground to nulls from cursor Clear unprotected page to spaces Clear unprotected page to spaces from cursor Clear unprotected page foreground to spaces from cursor Clear unprotected page to specified character Clear unprotected rectangle in 80 column page Clear unprotected rectangle in 132 column page Clear unprotected to end of line with nulls Clear unprotected to end of line with spaces Box rectangle in 80 column page Box rectangle in 132 column page Box rectangle to right of cursor ESC : ESC y ESC c Q ESC ; or SUB ESC Y ESC c P ESC . *character ESC c F *line *col *character ESC c F *line ~ *col *character ESC c L ESC c O ESC c G *line *column ESC c G *line ~ *column ESC c N *width *height COLOUR SELECTION Wyse 350 colour: Select colour palette (* = palette ID in range 0 - ?) ESC % * Redefine attribute association ESC m *r *c *m *r = display attribute group or write protect to be redefined (range 0 - 8) *c = the colour assigned (range ! - 6) *m = the monochrome attributes assigned: 0 = Normal, - = Reverse, . = Underline, / = Underline & reverse Wyse 60 ASCII colour: Foreground colour palette Select border colour Background colour Assign foreground colour Assign background colour Assign display attribute to unprotected characters Redefine character attribute association Assign foreground/background colours Assign fore/background colours to write-prot. chars. Assign foreground colours to write-protected chars. Assign background colours to write-protected chars. Assign display attribute to write-protected characters Assign replacement character colours & attributes ESC A a * ESC A b * ESC A c * ESC A d * ESC A e * ESC A f * ESC A g *attr *f *b *assoc ESC A h * ESC A i * ESC A j * ESC A k * ESC A l * ESC A y *f *b *a CURSOR Address cursor in current 80/132 column page Address cursor in current 80 column page Address cursor in specific 80 column page Address cursor in specific 80 column window/page Address cursor column Address cursor row Autowrap mode off Autowrap mode on Clear all tab stops Clear tab stop Cursor down (scroll) Cursor left C-84 ESC a *line R *column C ESC = *line *column ESC w @ *page *line *column ESC - *win/pg *line *column ESC _ ESC [ ESC d . ESC d / ESC 0 ESC 2 or ESC 3 LF BS Host Command Summary Cursor right Cursor up (no scroll) Cursor to start of current line Cursor to start of next line Home cursor Line lock mode on Line lock mode off Move cursor up; scroll Read 80 column window/page & cursor address Read 80 column page number & cursor address Read cursor address in current 80 column page Read cursor address in current 80/132 column page Redefine screen as one window & clear pages Set cursor display features Set tab stop Tabulate cursor Tab cursor Tab cursor backward Tabs are not initialized Tabs are initialized FF VT CR US ESC { or RS ESC ` H ESC ` I ESC j ESC / ESC w ' ESC ? ESC b ESC x 0 ESC ' *cursor ESC 1 ESC i HT ESC I ESC e : ESC e ; DISPLAY 80 column display 132 column display 80/132 change clears screen on 80/132 change clears screen off Activate lower window Activate other window/display previous page Activate other window/display next page Activate upper window Autopage mode off Autopage on Autoscrolling mode on Autoscrolling mode off Display 24 data lines Display 25 data lines Display 42 data lines Display 43 data lines Display graphics character Display next page Display previous page Display specific page Divide memory into pages Economy 80 column mode on Economy 80 column mode off Horizontal split higher Horizontal split lower Program label line Protect mode on Protect mode off Redefine screen as one window Redefine screen as one window & clear pages ESC ' : ESC ' ; ESC e / ESC e . ESC } ESC J ESC K ESC ] ESC d * ESC d + ESC 0 ESC N ESC e ( ESC e ) ESC e * ESC e + ESC H *key ESC w C ESC w B ESC w *page ESC w *length ESC e G ESC e F ESC x R ESC x P ESC f ESC & ESC ' ESC x @ ESC x 0 C-85 Host Command Summary Restore normal display Reverse display Roll window up in page Roll window down in page Split screen Split screen (two pages only) Split screen & clear pages Split screen & clear pages (2 pages only) Status line format (a = extended, b = standard) Status line message Status line not displayed Turn display off Turn display on ESC ^ 0 ESC ^ 1 ESC w E ESC w F ESC x C *line ESC x A *line ESC x 3 *line ESC x 1 *line ESC ' * ESC F *message CR ESC ' c ESC ' 8 ESC ' 9 EDITING Begin send at top of page Begin send at top of screen Delete cursor character Delete cursor column Delete cursor line Insert column of nulls Insert line of spaces Insert mode on, replace mode off Insert mode off, replace mode on Insert space character Page edit mode on (Wyse 60 mode) Page edit mode off (Wyse 60 mode) Write-protect mode off Write-protect mode on ESC d ' ESC d & ESC W ESC c j ESC R ESC c M ESC E ESC q ESC r ESC Q ESC e # ESC e " ESC ( ESC ) GENERAL OPERATION Answerback mode off Answerback mode on Graphics mode on Graphics mode off Received CR mode off Received CR mode on Run script in Wyse and TVI/ADDS/HZ enhanced modes Set MODEM port receive handshake Set MODEM port transmit handshake ESC e SP ESC e ! ESC H CTRL B ESC H CTRL C ESC e 4 ESC e 5 ESC c s *filename CR ESC c 2 *handshake ESC c 4 *handshake HOST COMMUNICATIONS Select terminal emulation *emulation: Wyse 50 Wyse 50+ Wyse 60 TVI 910+ TVI 912/920 TVI 925 ADDS VP A2 HZ 1500 C-86 @ " 4 # ' $ % & VT52 VT100 VT220-7 VT220-8 VT320-7 VT320-8 ESC ~ *emulation 6 ; < = B C Host Command Summary Enhance mode on Enhance mode off Monitor mode on (display control codes) Monitor mode off Block mode on Half-duplex mode on Half-duplex block mode on Full-duplex mode on ACK mode (6 = off, 7 = on) Set MODEM port operating parameters Set maximum data transmission speed Send terminal ID Program answerback message Answerback message (= = conceal, < = send) ESC ~ ! ESC ~ SP ESC U ESC u or ESC X ESC B ESC C ESC D H ESC D H ESC B ESC C ESC D F ESC e * ESC c 0 *b *s *p *w ESC c 6 *max ESC SP ESC c ; *answer CTRL Y ESC c * KEYBOARD FUNCTIONS Application key mode on Application key mode off Keyboard locked Keyboard unlocked Caps lock on Caps lock off Clear all programmable keys Clear key definition Key repeat on Key repeat off Margin bell on Margin bell off Set margin bell at cursor position Program function key definition Program key direction & definition Read key direction & definition Sound Bell Turn local edit mode on, duplex edit mode off Turn local edit mode off, duplex edit mode on ESC ~ 3 ESC ~ 2 ESC # or SI ESC " or SO ESC e & ESC e ‘ ESC c U ESC z *key DEL ESC e ESC e , ESC e M ESC e L ESC ` J ESC z *fkey seq DEL ESC Z *dir key seq DEL ESC Z ~ *key BEL ESC k ESC l LABEL LINE Clear function key label Clear shifted label line message Clear unshifted label line message Display shifted label line Program/display function key label Program/display unshifted label line Program shifted label line Shifted label line off ESC z *field CR ESC z ) CR ESC z ( CR ESC z P CR ESC z *field *label CR ESC z ( *text CR ESC z ) *text CR ESC z DEL SENDING DATA Begin print/send at top of page Begin print/send at top of screen Bidirectional mode off ESC d ' ESC d & ESC d $ C-87 Host Command Summary Bidirectional mode on Enable transmission (XON/XOFF handshaking) Stop transmission (XON/XOFF handshaking) Mark block beginning Mark block end Print entire formatted page Print formatted unprotected page Print unformatted page Secondary receive mode off Secondary receive mode on Send ACK Send cursor character Send entire block Send entire cursor line Send entire page Send unprotected characters in block Send unprotected cursor line Send unprotected page Send next incoming character to printer port Transparent print mode on Turn auxiliary print mode on Turn print modes off C-88 ESC d % DC1 (XON) DC3 (XOFF) ESC 8 ESC 9 ESC P ESC @ ESC p or ESC L ESC d SP ESC d ! ENQ ESC M ESC s ESC 6 ESC 7 ESC S ESC 4 ESC 5 DLE ESC d # or CAN DC2 DC4 Host Command Summary Wyse PC Term Emulation MONITOR MODE Monitor mode on Monitor mode off ESC U ESC u or ESC X SELECTING PERSONALITIES Enhance mode off Enhance mode on Select WYSE 50+ personality Select WYSE 50 personality Select WYSE ASCII personality Select TeleVideo 905 personality Select TeleVideo 910+ personality Select TeleVideo 925 personality Select TeleVideo 950 personality Select ADDS A2 personality Select PC Term personality Select HZ 1500 personality Select VT52 personality Select VT100 personality Select VT220 7-bit personality Select VT220 8-bit personality Select UNIX Console personality ESC v SPACE ESC v ! ESC v " ESC v @ ESC v 4 ESC v b ESC v # ESC v $ ESC v ( ESC v % ESC v 5 ESC v & ESC v 6 ESC v ; ESC v < ESC v = ESC v ] HOST COMMUNICATIONS Enable transmission Stop transmission Send ACK Full-duplex mode on Half-duplex mode on Block mode on Half-duplex block mode on Send terminal ID Assign COMM 1 port as host port (enhanced) Assign COMM 2 port as host port (enhanced) Send time of day Enable DTR COMM 1 port handshaking Enable XON-XOFF/XPC COMM 1 port handshaking CTRL Q CTRL S CTRL E ESC C ESC } ESC C ESC { ESC B ESC } ESC B ESC { ESC M ESC e 8 ESC e 9 ESC SPACE 2 CTRL N CTRL O TERMINAL & KEYBOARD CONTROL Local edit mode on Duplex edit mode on Sound bell Unlock keyboard Lock keyboard Keyclick off Keyclick on ESC k ESC l CTRL G ESC " ESC # ESC < ESC > C-89 Host Command Summary CAPS LOCK on (enhanced) CAPS LOCK off (enhanced) Margin bell off Margin bell on Select standard ASCII key code mode Select PC scan code mode Key repeat off (enhanced) Key repeat on (enhanced) Application key mode off Application key mode on Read keyboard status Default unit ESC e & ESC e ' ESC n ESC o ESC e H ESC e I ESC e , ESC e ESC v 2 ESC v 3 ESC [ ESC m PROGRAMMING KEYS Program function key definition Clear function key definition Program key direction & definition Read key direction & definition Clear key direction & definition Clear all programmable keys ESC z *key *seq DEL ESC z *key DEL ESC ¦ *p1 *p2 *seq CTRL Y ESC Z ~ *key ESC z *dir *key DEL ESC c U DISPLAY Screen display off Screen display on Reverse screen (light background) Restore normal screen (dark background) Set cursor display features Display 25 data lines Display 43 data lines Display next page Display previous page Load user line Display user line User line display off Clear unshifted label line Program & display function key label Clear function key label Assign display attribute to a message field Clear unprotected page to display attribute Assign line attribute ESC O ESC N ESC b ESC d ESC . *cursor ESC ^ ESC _ ESC K ESC J ESC f ESC g ESC e or ESC h ESC z ( CR ESC z *field *label CR ESC z *field CR ESC \ *mf *attr ESC ! *attr ESC G *attr PROTECTING DATA Write-protect mode off Write-protect mode on Clear cursor column to write-protected spaces Protect mode off Protect mode on ESC ( ESC ) ESC V ESC ' ESC & GRAPHICS CHARACTERS Line-drawing graphics mode on Line-drawing graphics mode off C-90 ESC $ ESC % Host Command Summary CURSOR CONTROL Cursor left (backspace) Cursor right Cursor up - no scroll Cursor up - scroll Cursor down - no scroll Cursor down - scroll Cursor to start of line Cursor to start of next line Move cursor to home position on current page Move cursor to specific line End-of-line wrap mode off End-of-line wrap mode on Received CR mode = CR Received CR mode = CRLF Autopage mode off Autopage mode on Address cursor in 80-column current page Address cursor in specific 80-column page Address cursor in specific 80-column window Read cursor address in 80-column current page Read 80-column window/page number & cursor address CTRL H CTRL L CTRL K ESC j CTRL V CTRL J CTRL M CTRL _ ESC { or CTRL ^ ESC [ *line ESC 0 ESC ~ ESC 9 ESC 8 ESC w ESC v ESC = *line *col ESC - *page *line *col ESC - *wind/page *line *col ESC ? ESC / EDITING Clear all tab stops Set tab stop Clear tab stop Tabulate cursor Backtab Insert mode on, replace mode off Insert mode off, replace mode on Insert space character Insert line of spaces Delete cursor character Delete cursor line ESC 3 ESC 1 ESC 2 ESC i or CTRL I ESC I ESC Z ESC r ESC Q ESC E ESC W ESC R CLEARING DATA Clear page to nulls Clear page to spaces Clear page to write-protected spaces Clear unprotected page to spaces Clear unprotected page to nulls Clear unprotected page to display attribute Clear unprotected page to spaces from cursor Clear unprotected page to nulls from cursor Clear unprotected line to spaces from cursor Clear unprotected line to nulls from cursor Fill page with Hs ESC * ESC + ESC , ESC ; or ESC + ESC : ESC ! *attr ESC Y ESC y ESC T ESC t ESC F C-91 Host Command Summary SENDING DATA Send line through cursor Send unprotected line through cursor Send page through cursor Send unprotected page through cursor Mark block beginning Mark block end Send entire block Send unprotected characters in block Report terminal status Report attribute under cursor ESC 6 ESC 4 ESC 7 ESC 5 ESC CTRL B ESC CTRL C ESC s ESC S ESC [ ESC D PRINT FUNCTIONS Print formatted page through cursor Print formatted unprotected page through cursor Print unformatted page through cursor Auxiliary print mode off Auxiliary print mode on Transparent print mode off Transparent print mode on Bidirectional mode off Bidirectional mode on Pass next incoming character to printer (enhanced) Set print terminator Define delimiters ESC P ESC P ESC p or ESC L ESC A ESC @ ESC a ESC ` CTRL T CTRL R CTRL P *schar ESC P *t1 *t2 ESC x *d1 *d2 CHARACTER SETS Select PC character set Set national mode Set multinational mode ESC SPACE m *charset ESC SPACE U ESC SPACE T 325 COLOUR PALETTE MODE Select colour map values Select a predefined colour palette Map blank attribute Map reverse attribute Select border colour Disable intensity attribute Enable intensity attribute ESC SPACE $ *fc325 *bc *map ESC SPACE # *pal325 ESC SPACE % ESC SPACE & ESC SPACE ` *col325 ESC SPACE " ESC SPACE ! 370/350 COLOUR MAP MODE Select foreground colour palette Select background colour Redefine character attribute association ESC SPACE a *pal370 ESC SPACE c *col370 ESC SPACE g *a *fc *bc *assoc 370/350 COLOUR DIRECT MODE Assign foreground colour Assign background colour Assign display attribute to unprotected characters C-92 ESC SPACE d *fc370 ESC SPACE e *bc370 ESC SPACE f *assattr Host Command Summary Assign foreground/background colours Assign fore/background colours to write-protected chars Assign foreground colours to write-protected chars Assign background colours to write-protected chars Assign display attribute to write-protected characters ESC SPACE h *CGAcol ESC SPACE i *CGAcol ESC SPACE j *fc370 ESC SPACE k *fc370 ESC SPACE 1 *assattr 370/350 COLOUR MISCELLANEOUS Select border colour Assign replacement character colours & attributes ESC SPACE b *c370 ESC SPACE y *fc370 *bc *attr C-93 Host Command Summary Additional Commands DISPLAY COLOUR DEC VT modes: Foreground colour Background colour CSI = * F CSI = * G where * is one of the following numbers: 0 1 2 3 Black Blue Green Cyan 4 5 6 7 Reflection 4 compatibility: Red Magenta Brown White 8 9 10 11 Grey Light Blue Light Green Light Cyan 12 13 14 15 Foreground colour Foreground+bold colour Background colour Background+bold colour Light Red Light Magenta Yellow Light White ESC [ 3 x m ESC [ 4 x m ESC [ 5 x m ESC [ 6 x m DISPLAY SIZE Number of screen lines ESC [ = 1 ; * p MOUSE CURSOR Mouse cursor style (see table below for * value) 0 Default Cursor (I-Beam) ESC [ = 2 ; * p 4 8 1 5 9 2 6 10 3 7 No Cursor MOUSE REPORTING IN ALPHANUMERIC APPLICATIONS Arm the emulator for mouse operation where *arg is of the format: bit 7 - 3 bit 2 bit 1 bit 0 ESC [ = *arg g 00110 when set enables motion events when set enables button release events when set enables button press events If all bits are cleared then any outstanding arming request is cancelled. The mouse remains armed until cancelled. When any of the selected events occur, the following report format is sent to the host: ESC [ = <Event Type> ; <Button Status> ; <Column> ; <Row> r Where: <Event Type> is the event(s) that caused the report in the same format as the arming sequence. C-94 Host Command Summary <Button Status> is of the format: 00110LMR where LMR indicates which button caused the event. <Column> and <Row> are the alphanumeric position of the mouse. REPORTS Report application name & version (in DEC VT modes) ESC [ 0 ; 1234 c C-95 Host Command Summary Notes C-96 Product Specification D Product Specification This appendix describes the level of support provided by each terminal emulation. Introduction The following sections describe the level of support provided by each terminal emulation throughout the product range. Note that your product version may not support all the terminal emulations listed here. General Limitations: Key click not supported. Badge and Magnetic Card reader support are supported via ‘Wedged' data devices connected to the unit’s keyboard. No downloadable program module. The keyboard layouts may differ but substantially provide the same capabilities as the native terminal. No screensavers. File Transfer protocols not supported on embedded products / thin clients. API’s not supported on embedded products / thin clients. Smooth Scroll and Variable Scroll rates not supported. No graphics or APA graphics. D-1 Product Specification Telnet Specification: Implements RFC 854, 855, 856, 857, 858, 860, 1091, 1408, 1571, 1572. Implements RFC 1205, 2877 for IBM 5250. Implements RFC 2355, 1576, 1646, 1647 for IBM 3270. AixTerm Limitations: No Vertical tab stops. No Select Alternate presentation variant. No Select reversed string. No Select font in graphic rendition. No Virtual terminal commands. No Set curses fix. No Page scroll. No Alternate screen buffer. No Xwindows capabilities. Bull BQ3107/7107 Specification: Reference manual Bull Questar 310, Terminal BQ 3107 (82 A2 78ST REV0. February 1990). Limitations: Remote and Line printing are not supported. D-2 Product Specification Data General D200/D410 Specification: Dasher D410 Display Terminals User’s Manual (014-000761-02 December 1983). Digital VT Emulation Specification: Digital VT 420 Programmer's Manual (EK-VT420-RM-001). Limitations: The DEC Multisession and SSU protocols are not implemented. HP 700/92 Emulation Specification: HP 2392A Reference Guide (02394-90001. April 1984). IBM 3270 Emulation Specification: 3270 Information Display System Data Stream Programmer's Reference (GA23-0059-07). Limitations: No Double byte printing. D-3 Product Specification IBM 5250 Emulation Specification: 5494 Remote Control Unit Functions Reference. Release 2.0. (SC30-3533-02). Limitations: No text assist in Right to Left writing mode. No double-byte printing. The 3812-1 Non Host Print Transform (Non-HPT) print protocol is not supported. No Calculator / Hex key. No Password encryption. No Auxillary port support. No Control Unit customisation. The specification is also defined by the 5250 Device Capabilities report Bytes 0 thru 5 which are 0x7f,0x11,0x4e,0x00,0x03,0x80 for Display Sessions. IBM 3151 Native Emulation Model 11 & 31 Specification: IBM 3151 Ascii Display Station Reference Manual (GA18-2634-01. 1989). ICL 7561 Specification: ICL DRS300 manual (R15722/001 Appendix 1 September 1986). Limitations: Some field validation checks are not supported. Load templates are not supported. Host print protocol is not supported. D-4 Product Specification Stratus V102 Specification: V102 Display Terminal Operator’s Manual (TVI 131974-00 June 1985). Limitations: Page print flip mode not supported. Serial configuration commands not supported. Select character set commands not supported. Tandem 6526/6530 Emulation Specification: Tandem 653x Multi-Page Terminal Programmer’s Guide (82310-B00 December 1983). Limitations: Telnet Line-Mode is not supported. Ansi media copy commands are not supported. No support for auxiliary port. No support for extended buffer and cursor commands. String configuration, machine and directory commands not supported. Data table re-definition commands not supported. Remote termination not supported. I/O device and file commands not supported. Set colour configuration commands not supported. D-5 Product Specification Televideo 955 Specification: Televideo 955 Display Terminal Operator's Manual (131969-00-B Sept 1985). Limitations: Page print flip mode not supported. Serial configuration commands not supported. Select character set commands not supported. Unisys T27 Specification: Burroughs T27 Programmer’s Reference Manual (1196904 Aug 1986). Limitations: Print protocol, printer sessions and auxiliary i/o are not supported. Some local-only keyboard ctrl and esc commands are not supported. Data sharing and scratchpad functions are not supported. Wyse 60 Native Emulation Specification: WY-60 Programmer’s Guide (880261-01 Rev A). Limitations: Only 16 colours supported, not 64. Some colour commands are not supported. No page edit mode. Modem and aux port commands not supported. No Keyboard scan code mode. Character cell size commands not supported. D-6 Product Specification Function key label save commands not supported. Automatic font loading not supported. Remote caps lock commands not supported. Ignore nulls commands not supported. Attribute overwrite mode not supported. Disable intensity commands not supported. Some select personality commands not supported. Wyseword mode not supported. Wyse 50, 50+, TVI 910, 925, 950, ADDS-A2, HZ 1500, Wyse PC-Term Specification: WY355/ES Reference Manual (883227-01 Rev. A). Limitations: All modes: As Wyse 60 above where applicable. TVI modes: Select Print / Line termination characters. Wyse PC-Term: Default unit command not supported. Program key with direction not supported. Set print terminators not supported. Define delimiters not supported. D-7 Product Specification Notes D-8 Index Index Symbols Status bar 8-3 Virtual key names A-2 4010/4014 Emulation Screen mapping 6-90 Settings menu 6-89 Buffer Rows Button Tools Predefined functions (XPe) 5-1 Redefining (XPe only) 5-3 Windows CE 2-42 Windows XPe 2-45 A AIXTerm Emulation Host command summary Specification D-2 Answerback String C-25 6-29 Aux Port Settings Connection Wizard 2-29 2-38 B Baud Rate Selection Block Mode Cursor positioning Settings 6-85 C Character Set Selection AT&T 4410 Emulation Host command summary C-30 Programming function keys 2-48 Selecting 2-4, 6-26 Virtual key names A-2 Automate Login Process 6-76 2-27, 6-72 4-2 BQ 3107 Emulation Host command summary C-31 Keyboard mapping 8-4 Session configuration 8-1 Setup 6-69 Specification D-2 6-77 Character Sets B-1 ANSI 1250 B-11 ANSI 437 B-8 ANSI 850 B-9 ANSI 858 B-10 ASCII B-2 Control characters B-1 DEC Additional B-4 Line Drawing B-5 National characters B-3 DG 410/412 emulation B-12 IBM 3270 emulation B-31 IBM 5250 emulation B-31 ISO Latin-1 Additional B-6 ISO Latin-2 Additional B-7 Multinational B-4 PT250 emulation B-23 Siemens 97801 mode B-26 Wyse emulations B-14 Characters In Setup Entries 6-4 Index-1 Index Codes In Setup Entries 6-4 Colour Attributes 6-92 Colour Selection Line styles 6-92 Text attributes 6-92 Command Bar (CE) 2-41 Command Line Options Action on host connection close 20-5 Aux port bidirectional 20-21 Aux port opened & bidirectional 20-21 Aux port opened at start-up 20-21 Connection template to use 20-7 Crosshair cursor size 20-18 Disable backing store 20-19 Disable bell 20-7 Disable close window menu item 20-11 Disable colour palette 20-16 Disable Command bar 20-12 Disable Edit menu 20-14 Disable 'Exit' box 20-6 Disable File menu 20-14 Disable maximize button 20-11 Disable menu bar 20-13 Disable menu bar & pop-up menus 20-13 Disable Menu bar & toolbar 20-12 Disable Menu bar, pop-ups & toolbar 20-13 Disable min/maximize & close button 20-10 Disable minimize button 20-11 Disable mouse editing 20-20 Disable scroll bar 20-15 Disable Settings menu 20-15 Disable sixel graphics scaling 20-19 Disable status bar & DEC status line 20-16 Disable title bar 20-10 Disable tool buttons 20-12 Disable toolbar 20-13 Disable Tools menu 20-15 Disable window frame resize 20-9 Enable debug (File Capture/ Index-2 Replay) 20-8 Enable Debug Log Send & Receive 20-8 Enable plane masking 20-19 Flashing for all sessions 20-17 Graphics redraw on resize 20-17 New session warning message 20-5 Preload Winsock DLL for PPP usage 20-5 Reflection 4 colour support 20-17 Save 4014 graphics display 20-18 Set Tek graphics height 20-18 Set Tek graphics width 20-18 Soft buttons displayed 20-16 Summary 20-2 Window maximized 20-9 Window minimized 20-9 Window subtitle 20-10 Window title 20-10 Workspace fills screen 20-9 Compose Character Sequences 3-4 Connection Information Connection Wizard 2-1 Connection Template (CE) Creating 6-5 Selecting 6-6 Connection Template (XPe) Creating 6-6 Connection Wizard Automate Login Process 2-29 Aux Port Settings 2-38 Connection Information 2-1 GUI Overrides 2-36 Host Information 2-2 Printer Port Settings 2-31 Control Characters B-1 Displaying 6-79 Keyboard equivalents Conventions B-1 1-3 Copy & Paste Edit menu options 6-23 Using mouse 4-2 Cursor Positioning in block mode 4-2 Index D DEC Multinational Set Status line DEC VT emulations 7-4 IBM 3151 emulation 13-3 IBM 3270 emulation 11-5 IBM 5250 emulation 12-5 Wyse emulations 19-4 6-77 DEC VT Emulations Horizontal scrolling 7-5 Keyboard mapping 7-5 Specification D-3 Status bar 7-4 E Default Setup Settings Edit Menu 6-4, 6-9 DG 410/412 Emulation Character sets Alphabet B-12 Line Drawing B-13 Math B-12 Word Processing B-12 Host command summary C-32 Keyboard mapping 9-3 Session configuration 9-1 Specification D-3 Virtual key names A-3 Display 80 column font 6-75 80/132 columns 6-75 Auto resize 6-81 Buffer size 6-76 Control codes 6-79 Copy right to left 6-80 Cursor moves right to left 6-80 Cursor type 6-76 DEC status line 6-76 Error codes 6-80 Jump/smooth scroll 6-80 Language selection 2-1, 6-24 Preferred font 6-52, 6-58, 6-77 Rows 6-75 Text attributes 6-92 Display Elements Button tools (CE) 2-42 Button tools (XPe) 2-45 Command bar (CE) 2-41 Hotspots 2-47, 4-3 Menu bar (XPe) 2-44 Soft Buttons (CE) 2-43 Soft Buttons (XPe) 2-45 Status bar 2-46 6-23 Edit Mode Indicator 2-46, 7-4 Editing Text 6-23 Emulation Settings 6-26 Emulation Support Level D-1 Enhanced AT Keyboard Mapping BQ 3107 functions 8-5 DEC VT500 functions DEC mode 7-7 Normal mode 7-6 DG 410/412 functions 9-4 HP 700-92/96 functions 10-4 IBM 3151 functions 13-5 IBM 3270 functions 11-11 IBM 5250 functions 12-7 MDIS Prism functions 14-4 PT250 functions 15-6 Siemens 97801 functions 16-4 TA6530 functions 17-6 Unisys T27 functions 18-5 Wyse functions 19-6 Entering Codes In Setup Entries 6-4 Error Messages TA6530 emulation 17-3 Euro Character 6-5 F Factory Default Setup File Menu 6-4 6-9 Flow Control 2-27, 6-72 Font Selection 6-52, 6-58, 6-77 Index-3 Index G Host Information Connection Wizard GUI Overrides Connection Wizard Hotspots Displaying all Using 2-47 2-36 H Hebrew Language Typing direction (DEC suite) 6-77, 6-78, 7-8 Host Command Summary AIXTerm emulation C-25 ANSI VT100 emulation C-2 AT&T 4410 emulation C-30 BQ 3107 emulation C-31 DG 410/412 emulation C-32 HP 700-92/96 emulation C-35 IBM 3151 emulation C-39 MDIS Prism-12 emulation C-47 MDIS Prism-8 emulation C-42 MDIS Prism-9 emulation C-42 PT250 emulation C-49 ReGIS emulation C-55 SCO Console emulation C-58 Siemens 97801 emulation C-61 TA6530 emulation C-64 Tek 4010/4014 emulation C-68 TVI 955 emulation C-70 Unisys T27 emulation C-76 Viewdata mode C-78 VT400 emulation C-6 VT420 emulation C-9 VT510 emulation C-12 VT52 emulation C-1 VT520 emulation C-15 VT640 emulation C-79 W2119 emulation C-81 Wyse emulations C-83 Wyse PC Term emulation C-89 Host Communications Auxport setup menu 6-74 Serial settings menu 6-72 Host Connection SSH (Secure Shell) 2-21 SSL (Secure Sockets Layer) Index-4 2-18 2-2 2-47 HP 700-92/96 Emulation Configuration selection 10-8 Device control 10-8 Display attributes 10-16 Function keys & labels 10-3 Host command summary C-35 Key programming 10-13 Keyboard mapping 10-3 Margins, tabs, column 10-11 Mode selection 10-5 Session configuration 10-1 Setup settings 6-30 Specification D-3 Virtual key names A-4 I IBM 3151 Emulation Host command summary C-39 Introduction 13-1 Keyboard mapping 13-4 Session configuration 13-1 Setup 6-39 Specification D-4 Status bar 13-3 IBM 3270 Emulation Bilingual keyboard support 11-9 Character sets Austrian B-35 Belgian B-39 Canadian bilingual B-31 Danish B-33 English (UK) B-32 English (US) B-31 Finnish B-38 French B-34 German B-35 Italian B-36 Netherlands B-31 Norwegian B-33 Spanish B-37 Index Swedish B-38 Swiss-French B-39 Swiss-German B-39 Close key 11-9 Display right-to-left 11-9 Display rule 6-51 Introduction 11-1 Keyboard mapping 11-10 National character settings 6-52 Notice Board facility 11-15 Notice Board setup 6-54 NVT mode 11-4 Printer support 6-50, 11-4 Push mode 11-9 Record/playback keystrokes 11-12 Selecting 11-1 Session configuration 11-1 Setup 6-50 Specification D-3 Status line 11-5 SysReq key support 11-4 Text display options 11-9 Typing direction 11-9 Virtual key names A-4 IBM 5250 Emulation Bilingual keyboard support 12-8 Character sets Austrian B-35 Belgian B-39 Canadian bilingual B-31 Danish B-33 English (UK) B-32 English (US) B-31 Finnish B-38 French B-34 German B-35 Italian B-36 Netherlands B-31 Norwegian B-33 Spanish B-37 Swedish B-38 Swiss-French B-39 Swiss-German B-39 Close key 12-8 Display right-to-left 12-8 Display rule 6-57 Fax image support 12-11 Introduction 12-1 Keyboard mapping 12-6 National character settings 6-58 Push mode 12-8 Record/playback keystrokes 12-9 Selecting 12-1 Session configuration 12-1 Setup 6-56 Specification D-4 Status line 12-5 Text display options 12-8 Typing direction 12-8 Virtual key names A-5 Word Processing mode 12-6 IBM 5250 Printer Options 2-15 IBM EBCDIC Codepages B-40 ICL 7561 Emulation Specification D-4 Initialization Commands Introduction 20-1 ISO Latin Multinational Set 6-77 K Key Mapping Changing 3-1, 6-97 Displaying 3-1, 6-97 Key Programming HP 700-92/96 emulation 10-13 IBM 3151 emulation 13-6 Macros menu 6-97 Keyboard Changing key functions 3-1 Composing characters 3-4 Cursor key mode 6-79 Defining keys 3-1, 6-97 Enhanced AT mapping BQ 3107 functions 8-5 DEC VT500 functions 7-6, 7-7 DG 410/412 functions 9-4 HP 700-92/96 functions 10-4 IBM 3151 functions 13-5 IBM 3270 functions 11-11 IBM 5250 functions 12-7 Index-5 Index MDIS Prism functions 14-4 PT250 functions 15-6 Siemens 97801 functions 16-4 TA6530 functions 17-6 Unisys T27 functions 18-5 Wyse functions 19-6 Entering control characters B-1 Keypad mode 6-79 Macros 3-1, 6-97 Mapping 3-1 Mapping (changing) 6-97 Mapping (showing) 6-97 Send position codes 6-81 Send scan codes 6-81 Type 6-77 Viewdata function keys 2-49 Virtual key names A-1 Keywords 4-3 L Language Selection Line Styles Colour selection 2-1, 6-24 Mouse Button tools 6-105 GIN Button definitions 6-91 Middle button emulating 4-3 Mouse Functions 6-103 Action hotspots 4-3 Default 4-1 Move text cursor 4-2 Select rectangle 4-2 Selecting text for copy 4-2 Send keyword 4-3 Show hotspots 4-3 Multinational Character Set N National Character Settings IBM 3270 emulation 6-52 IBM 5250 emulation 6-58 Network New Connection dialog box New Connection Dialog Box Notice Board Setup settings 6-92 Local Echo 2-28, 6-73 Local Editing Settings 6-83 6-54 On Line/Local Setting M Operating Language Macros 3-1, 6-97 P MDIS Prism Emulations Session configuration 14-1 Virtual key names A-6 MDIS Prism-12 Emulation Host command summary C-47 MDIS Prism-8 Emulation Host command summary C-42 MDIS Prism-9 Emulation Host command summary Middle Button Modem Settings Index-6 2-44 4-3 2-26 Parity Selection Print Manager C-42 6-73 2-1, 6-24 2-27, 6-72 Print Auto 6-22 Buffer 6-22 Cancel 6-22 Screen 6-21 2-32, 6-17 Printer Port Settings Connection Wizard Printer Setup 2-31 6-15 Product Specification D-1 6-10 6-10 O Local/On Line Setting 6-73 Menu Bar (XPe) 6-77 Index PT250 Emulation Character sets Additional B-23 Block Graphics B-25 Line Drawing B-24 Displaying alternate characters 15-7 Host command summary C-49 Keyboard mapping 15-5 Session configuration 15-1 Setup settings 6-36 Status line 15-3 Virtual key names A-6 Disable Tools menu 20-15 Enable plane masking 20-19 Graphics redraw on resize 20-17 New session warning message 20-5 Reflection 4 colour support 20-17 Save 4014 graphics display 20-18 Set Tek graphics height 20-18 Set Tek graphics width 20-18 Soft buttons displayed 20-16 Startup command group to action 20-7 Window maximized 20-9 Window minimized 20-9 Workspace fills screen 20-9 R ReGIS Emulation Host command summary C-55 Registry Commands Action on host connection close 20-5 Convert £ to $ (MDIS P9) 20-20 Crosshair cursor size 20-18 Disable backing store 20-19 Disable bell 20-7 Disable close window menu item 20-11 Disable colour palette 20-16 Disable Command bar 20-12 Disable Edit menu 20-14 Disable Edit menu items 20-14 Disable 'Exit' box 20-6 Disable File menu 20-14 Disable File menu items 20-14 Disable maximize button 20-11 Disable minimize button 20-11 Disable mouse editing 20-20 Disable scroll bar 20-15 Disable Settings menu 20-15 Disable Settings menu items 20-15 Disable sixel graphics scaling 20-19 Disable status bar & DEC status line 20-16 Disable System menu 20-11 Disable System menu & Min/Max buttons 20-12 Disable tool buttons on command bar 20-12 Registry Entries Command summary 20-2 Reset Terminal 6-9 S Save Session 6-13 Save Session (CE) Save Session (XPe) 6-5 6-6 SCO Console Emulation Host command summary Virtual key names A-7 C-58 Scrolling Horizontally DEC VT emulations 7-5 Serial Connection Settings 2-27 Serial Port Sending text to A-10 Virtual key names A-10 Session Management (XPe) 2-39 Opening new 6-12 Save 6-13 Save as 6-14 Session Configuration BQ 3107 emulation 8-1 DEC VT emulations 7-1 DG 410/412 emulation 9-1 HP 700-92/96 emulation 10-1 IBM 3151 emulation 13-1 Index-7 Index IBM 3270 emulation 11-1 IBM 5250 emulation 12-1 MDIS Prism emulations 14-1 PT250 emulation 15-1 Siemens 97801 emulation 16-1 TA6530 emulation 17-1 Unisys T27 emulation 18-1 Wyse emulations 19-1 Session Configuration (XPe) Selecting 6-7 Set Tabs 6-82 Settings Menu 6-24 Setup Menus Attributes 6-92 Auxport settings 6-74 Block Transmission 6-85 BQ 3107 settings 6-69 Button Tools 6-105 Closing 6-2 Codes in entries 6-4 Default settings 6-4 Define Keyboard Macros 3-1 Displaying 6-1 Edit Menu 6-23 Emulation settings 6-26 File menu 6-9 GIN Mouse Definitions 6-91 HP 700-92/96 settings 6-30 IBM 3151 settings 6-39 IBM 3270 settings 6-50 IBM 5250 settings 6-56 Keyboard Macros 6-97 Local Editing settings 6-83 Menu descriptions 6-9 Mouse Button Actions 6-103 New Connection 6-10 Notice Board Setup 6-54 Open Session 6-12 Option selection 6-2 PT250 settings 6-36 Save Session As 6-14 Serial settings 6-72 Settings menu 6-24 Soft Buttons 6-100 Specifying characters in entries 6-4 Index-8 Startup options 6-15 TA6530 settings 6-48 Tab Stops 6-82 Tek 4014 settings 6-89 Terminal settings 6-75 Unisys T27 settings 6-61 Wyse settings 6-43 Siemens 97801 Emulation Character sets Brackets B-30 Euro B-29 German B-28 International B-27 International A B-26 Host command summary C-61 Keyboard mapping 14-3, 16-3 Session configuration 16-1 Soft Buttons Settings menu 6-100 Windows CE 2-43 Windows XPe 2-45 Special Characters 6-4 Specification D-1 AIXTerm D-2 Bull BQ 3107/7107 D-2 Data General D200/D410 D-3 Digital VT emulation D-3 General D-1 HP 700/92 D-3 IBM 3151 D-4 IBM 3270 D-3 IBM 5250 D-4 ICL 7561 D-4 Stratus V102 D-5 Tandem 6526/6530 D-5 Televideo 955 D-6 Telnet D-2 Unisys T27 D-6 Wyse 60 Native D-6 Wyse emulations D-7 SSH Connection Settings 2-21 SSL Connection Settings 2-18 Startup Options Status Bar 2-46 6-15 Index DEC VT emulations 7-4 Unisys T27 emulation 18-3 Terminal Settings 6-75 Terms & Conventions 1-3 Status Line DEC host writable 6-76 IBM 3151 emulation 13-3 IBM 3270 emulation 11-5 IBM 5250 emulation 12-5 PT250 emulation 15-3 TA6530 emulation 17-3 Wyse emulations 19-4 TN3270 Options 2-11 TN5250 Options 2-13 Stratus V102 Emulation Specification D-5 TVI 955 Emulation Host command summary Specification D-6 Virtual key names A-8 Support Level D-1 T TA6530 Emulation Host command summary C-64 Keyboard mapping 17-5 Operating modes 17-4 Rule cursor 17-5 Session configuration 17-1 Setup settings 6-48 Specification D-5 Status line 17-3 Virtual key names A-7 Tab Stops 6-82 TCP/IP Connection Settings 2-9 Tek 4010/4014 Emulation Host command summary C-68 Tek 4014 Emulation Screen mapping 6-90 Settings menu 6-89 Telnet Specification D-2 Terminal Emulation Level of support Selecting 6-26 Terminal ID DEC VT 6-29 HP 6-34 IBM 3151 6-42 Terminal Reset 6-9 D-1 Toolbar Predefined button tools (XPe) Redefining (XPe only) 5-3 Windows XPe version 5-1 Toolbar (XPe) 5-1 2-45 C-70 Typing Direction Hebrew language (DEC suite) 6-77, 6-78, 7-8 U Unicode Entering values in Setup entries 6-4 Unisys T27 Emulation Host command summary C-76 Keyboard mapping 18-4 Session configuration 18-1 Setup 6-61 Specification D-6 Status bar 18-3 Virtual key names A-8 V Viewdata Mode Display formats 2-49 Host command summary Key functions 2-49 Virtual key names A-9 C-78 Virtual Key Names A-1 AT&T 4410 emulation A-2 BQ 3107 emulation A-2 DG 410/412 emulation A-3 HP 700-92/96 emulation A-4 IBM 3270 emulation A-4 IBM 5250 emulation A-5 Index-9 Index IBM 5250 Word Processing A-5 Insert delay A-11 MDIS Prism emulations A-6 PT250 emulation A-6 Reading text from a file A-11 SCO Console emulation A-7 Serial port functions A-10 Standard A-1 TA6530 emulation A-7 TVI 955 emulation A-8 Unisys T27 emulation A-8 Viewdata mode A-9 VT500 emulation A-3 Writing text to a file A-10 Wyse emulations A-9 VT+HP220 Emulation VT-UTF8 Emulation 2-6, 6-28 2-6, 6-28 VT100 Emulation Host command summary C-2 Session configuration 7-1 VT100+ Emulation 2-6, 6-28 VT400 Emulation Host command summary C-6 VT420 Emulation Host command summary C-9 VT500 Emulation Keyboard mapping 7-5 Session configuration 7-1 Virtual key names A-3 VT510 Emulation Host command summary C-12 VT520 Emulation Host command summary C-15 VT640 Emulation Host command summary C-79 W Index-10 6-90 15-3 Wyse 60 Native Emulation Specification D-6 Wyse Emulations Character sets Native Mode (ALL) B-14 WY-60 Graphics 1 B-20 WY-60 Graphics 2 B-21 WY-60 Graphics 3 B-22 WY-60 Multinational (437) B-15 WY-60 Multinational (850) B-16 WY-60 PC Equivalent B-17 WY-60 Standard ANSI B-19 WY-60 Standard ASCII B-18 Host command summary C-83 Keyboard mapping 19-5 Session configuration 19-1 Setup 6-43 Specification D-7 Status line 19-4 Virtual key names A-9 Wyse PC Term Emulation Host command summary VT52 Emulation Host command summary C-1 Session configuration 7-1 W2119 Emulation Host command summary Screen mapping Window Elements Status line PT250 emulation C-81 C-89