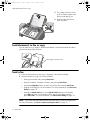
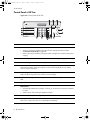
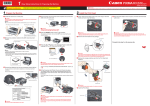
1
CB782-90008_UG_EN.book
Page i Monday, October 8, 2007
6:55 PM
HP 640 Fax series
User Guide
Part number: CB782-90008
Third edition: 09/2007
CB782-90008_UG_EN.book
Page ii
Monday, October 8, 2007
6:55 PM
© Copyright 2007 Hewlett-Packard Development
Company, L.P.
The information contained herein is subject to change
without notice. No part of the document may be
photocopied, reproduced, or translated to another
language without the prior written consent of HewlettPackard Company.
Notice
The only warranties for HP products and services are set
forth in the express warranty statements accompanying
such products and services. Nothing herein should be
construed as constituting and additional warranty. HP
shall not be liable for technical or editorial errors or
omissions contained herein.
The Hewlett-Packard Company shall not be liable for
incidental or consequential damages in connection with,
or arising out of the furnishing, performance, or use of
this document and program material which it describes.
Note: Regulatory information can be found in the
Specification section of this guide.
• Checks or drafts drawn on Governmental agencies
• Paper currency, traveler’s checks, or money orders
• Certificates of deposit
• Copyrighted works
Safety information
WARNING! To prevent fire or shock hazard, do not
expose this product to rain or any type of moisture.
Always follow basic safety precautions when using this
product to reduce risk of injury from fire or electric
shock.
WARNING! Potential shock hazard
• Read and understand all instructions in the setup
poster.
• Telephone lines can develop hazardous voltages. To
avoid electrical shock, do not touch the contacts on the
end of the cord, or any of the sockets on the HP Fax.
Replace damaged cords immediately.
• Never install telephone wiring during a lightning
storm.
• Observe all warnings and instructions marked on the
product.
It is not lawful in many places to make copies of the
following items. When in doubt, check with a legal
representative first.
• Governmental paper or documents
- Passports
- Immigration papers
- Selective service papers
- Identification badges, cards or insignias
• Governmental stamps:
• Unplug this product from wall outlets and telephone
jacks before cleaning.
• Do not install or use this product near water or when
you are wet.
• Install the product securely on a stable surface.
• Install the product in a protected location where no
one can step on or trip over the line cord, and where
the line cord will not be damaged.
• If the product does not operate normally, see the
Troubleshooting section of this user guide.
- Postage stamps
• No operator-serviceable parts inside. Refer servicing
to qualified service personnel.
- Food stamps
• Use in a well ventilated area.
CB782-90008_UG_EN.book
Page i Monday, October 8, 2007
6:55 PM
Contents
1 Quick start . . . . . . . . . . . . . . . . . . . . . . . . . . . . . . . . . . . . . . . . 1
Load paper . . . . . . . . . . . . . . . . . . . . . . . .
Load documents to fax or copy . . . . . . . . . .
Send a fax . . . . . . . . . . . . . . . . . . . . . . . .
Receive a fax. . . . . . . . . . . . . . . . . . . . . . .
Make a copy. . . . . . . . . . . . . . . . . . . . . . .
Make a telephone call . . . . . . . . . . . . . . . .
.
.
.
.
.
.
..
..
..
..
..
..
..
..
..
..
..
..
.
.
.
.
.
.
..
..
..
..
..
..
..
..
..
..
..
..
.
.
.
.
.
.
..
..
..
..
..
..
.
.
.
.
.
.
..
..
..
..
..
..
.
.
.
.
.
.
.
.
.
.
.
.
.
.
.
.
.
.
.
.
.
.
.
.
.
.
.
.
.
.
.
.
.
.
.
.
.
.
.
.
.
.
.
.
.
.
.
.
.
.
.
.
.
.
.
.
.
.
.
.
.
.
.
.
.
.
.
.
.
.
.
.
.
.
.
.
.
.
.
.
.
.
.
.
.
.
.
.
.
.
.
.
.
.
.
.
1
2
2
3
3
4
2 HP Fax basics. . . . . . . . . . . . . . . . . . . . . . . . . . . . . . . . . . . . . . 5
The HP 640 Fax. . . . . . . . . . . . . . . . . . . . . . . . . . . . . . . . . . . . . . . . . . . . . . . . . . . .
Parts of the HP Fax . . . . . . . . . . . . . . . . . . . . . . . . . . . . . . . . . . . . . . . . . . . . . . .
Control Panel of HP Fax . . . . . . . . . . . . . . . . . . . . . . . . . . . . . . . . . . . . . . . . . . . .
The menus. . . . . . . . . . . . . . . . . . . . . . . . . . . . . . . . . . . . . . . . . . . . . . . . . . . . . . . .
Overview of menu options . . . . . . . . . . . . . . . . . . . . . . . . . . . . . . . . . . . . . . . . . . . .
BASIC FAX menu . . . . . . . . . . . . . . . . . . . . . . . . . . . . . . . . . . . . . . . . . . . . . . . .
ADVANCED FAX menu . . . . . . . . . . . . . . . . . . . . . . . . . . . . . . . . . . . . . . . . . . . .
TOOLS menu . . . . . . . . . . . . . . . . . . . . . . . . . . . . . . . . . . . . . . . . . . . . . . . . . . .
Loudspeaker . . . . . . . . . . . . . . . . . . . . . . . . . . . . . . . . . . . . . . . . . . . . . . . . . . . . . .
Navigate the menus . . . . . . . . . . . . . . . . . . . . . . . . . . . . . . . . . . . . . . . . . . . . . . . . .
Ready mode . . . . . . . . . . . . . . . . . . . . . . . . . . . . . . . . . . . . . . . . . . . . . . . . . . . .
Menu buttons . . . . . . . . . . . . . . . . . . . . . . . . . . . . . . . . . . . . . . . . . . . . . . . . . . .
Enter dates, times, text, and telephone numbers . . . . . . . . . . . . . . . . . . . . . . . . . . . . . .
Most text fields . . . . . . . . . . . . . . . . . . . . . . . . . . . . . . . . . . . . . . . . . . . . . . . . . .
Fax header telephone number . . . . . . . . . . . . . . . . . . . . . . . . . . . . . . . . . . . . . . .
Speed dialing . . . . . . . . . . . . . . . . . . . . . . . . . . . . . . . . . . . . . . . . . . . . . . . . . . . . .
Store a number in the phone book . . . . . . . . . . . . . . . . . . . . . . . . . . . . . . . . . . . .
Print the phone book . . . . . . . . . . . . . . . . . . . . . . . . . . . . . . . . . . . . . . . . . . . . . .
Dial from the phone book. . . . . . . . . . . . . . . . . . . . . . . . . . . . . . . . . . . . . . . . . . .
One-touch dialing. . . . . . . . . . . . . . . . . . . . . . . . . . . . . . . . . . . . . . . . . . . . . .
Phone book dialing . . . . . . . . . . . . . . . . . . . . . . . . . . . . . . . . . . . . . . . . . . . .
Paper types and sizes. . . . . . . . . . . . . . . . . . . . . . . . . . . . . . . . . . . . . . . . . . . . . . . .
Document types and sizes . . . . . . . . . . . . . . . . . . . . . . . . . . . . . . . . . . . . . . . . . . . . .
Set document resolution and contrast for a single copy . . . . . . . . . . . . . . . . . . . . . . . . .
Adjust volume . . . . . . . . . . . . . . . . . . . . . . . . . . . . . . . . . . . . . . . . . . . . . . . . . . . . .
Ringer volume. . . . . . . . . . . . . . . . . . . . . . . . . . . . . . . . . . . . . . . . . . . . . . . . . . .
Speaker volume . . . . . . . . . . . . . . . . . . . . . . . . . . . . . . . . . . . . . . . . . . . . . . . . .
Automatic fax redial . . . . . . . . . . . . . . . . . . . . . . . . . . . . . . . . . . . . . . . . . . . . . . . . .
Receiving via an extension telephone . . . . . . . . . . . . . . . . . . . . . . . . . . . . . . . . . . . . .
. 6
. 6
. 8
10
11
11
13
13
13
14
14
14
15
15
16
17
17
18
18
18
18
19
20
21
22
22
22
22
22
3 Additional features . . . . . . . . . . . . . . . . . . . . . . . . . . . . . . . . . 23
Set rings to answer. . . . . . . . . . . . . . . . . . . .
Use Caller ID . . . . . . . . . . . . . . . . . . . . . . . .
Turn Caller ID on. . . . . . . . . . . . . . . . . . .
See who called with Caller ID. . . . . . . . . .
Print a list of Caller ID numbers . . . . . . . . .
..
..
..
..
..
..
..
..
..
..
.
.
.
.
.
..
..
..
..
..
..
..
..
..
..
.
.
.
.
.
..
..
..
..
..
.
.
.
.
.
..
..
..
..
..
..
..
..
..
..
.
.
.
.
.
..
..
..
..
..
.
.
.
.
.
.
.
.
.
.
.
.
.
.
.
.
.
.
.
.
.
.
.
.
.
.
.
.
.
.
.
.
.
.
.
.
.
.
.
.
.
.
.
.
.
.
.
.
.
.
23
24
24
24
24
Contents i
CB782-90008_UG_EN.book
Page ii
Monday, October 8, 2007
6:55 PM
Block junk fax numbers. . . . . . . . . . . . . . . . . . . . . . . . . . . . . . . . . . . . . . . . . . . . . . .
Add a junk fax number . . . . . . . . . . . . . . . . . . . . . . . . . . . . . . . . . . . . . . . . . . . .
Delete a number . . . . . . . . . . . . . . . . . . . . . . . . . . . . . . . . . . . . . . . . . . . . . . . . .
Favorites. . . . . . . . . . . . . . . . . . . . . . . . . . . . . . . . . . . . . . . . . . . . . . . . . . . . . . . . .
Save a document . . . . . . . . . . . . . . . . . . . . . . . . . . . . . . . . . . . . . . . . . . . . . . . .
Delete a document . . . . . . . . . . . . . . . . . . . . . . . . . . . . . . . . . . . . . . . . . . . . . . .
Send a document . . . . . . . . . . . . . . . . . . . . . . . . . . . . . . . . . . . . . . . . . . . . . . . .
Print a document. . . . . . . . . . . . . . . . . . . . . . . . . . . . . . . . . . . . . . . . . . . . . . . . .
Image TCR . . . . . . . . . . . . . . . . . . . . . . . . . . . . . . . . . . . . . . . . . . . . . . . . . . . . . . .
Distinctive ring (DRPD) . . . . . . . . . . . . . . . . . . . . . . . . . . . . . . . . . . . . . . . . . . . . . . .
Step 1—Teach the HP Fax the ring pattern. . . . . . . . . . . . . . . . . . . . . . . . . . . . . . .
Step 2—Set up distinctive ring (DRPD) answer mode . . . . . . . . . . . . . . . . . . . . . . . .
Answer/receive mode . . . . . . . . . . . . . . . . . . . . . . . . . . . . . . . . . . . . . . . . . . . . . . .
24
24
25
25
25
25
25
26
26
27
27
27
28
4 Advanced faxing . . . . . . . . . . . . . . . . . . . . . . . . . . . . . . . . . . 31
Broadcasting. . . . . . . . . . . . . . . . . . . . . . . . .
Delayed fax . . . . . . . . . . . . . . . . . . . . . . . . .
Polling . . . . . . . . . . . . . . . . . . . . . . . . . . . . .
Setting send polling . . . . . . . . . . . . . . . . .
Polling another fax to receive . . . . . . . . . . .
To cancel the scheduled job . . . . . . . . . . . . . .
Forward faxes . . . . . . . . . . . . . . . . . . . . . . . .
.............................
.............................
.............................
.............................
.............................
.............................
.............................
31
32
33
33
34
34
35
5 Feature reference . . . . . . . . . . . . . . . . . . . . . . . . . . . . . . . . . . 37
Set the date and time . . . . . . . . . . . . . . . . . . . . . . . . . . . . . . . . . . . . . . .
Turn on and off sounds. . . . . . . . . . . . . . . . . . . . . . . . . . . . . . . . . . . . . .
WakeUp sounds. . . . . . . . . . . . . . . . . . . . . . . . . . . . . . . . . . . . . . . .
Alarm sounds . . . . . . . . . . . . . . . . . . . . . . . . . . . . . . . . . . . . . . . . . .
Key sounds . . . . . . . . . . . . . . . . . . . . . . . . . . . . . . . . . . . . . . . . . . .
Silent mode . . . . . . . . . . . . . . . . . . . . . . . . . . . . . . . . . . . . . . . . . . .
Set the fax header information . . . . . . . . . . . . . . . . . . . . . . . . . . . . . . . .
Print reports . . . . . . . . . . . . . . . . . . . . . . . . . . . . . . . . . . . . . . . . . . . . .
Automatic reports . . . . . . . . . . . . . . . . . . . . . . . . . . . . . . . . . . . . . . .
Reports you can print . . . . . . . . . . . . . . . . . . . . . . . . . . . . . . . . . . . .
Reprinting faxes . . . . . . . . . . . . . . . . . . . . . . . . . . . . . . . . . . . . . . . . . .
Clearing memory. . . . . . . . . . . . . . . . . . . . . . . . . . . . . . . . . . . . . . . . . .
Loudspeaker . . . . . . . . . . . . . . . . . . . . . . . . . . . . . . . . . . . . . . . . . . . . .
Redial a number in memory . . . . . . . . . . . . . . . . . . . . . . . . . . . . . . . . . .
.
.
.
.
.
.
.
.
.
.
.
.
.
.
..
..
..
..
..
..
..
..
..
..
..
..
..
..
.
.
.
.
.
.
.
.
.
.
.
.
.
.
..
..
..
..
..
..
..
..
..
..
..
..
..
..
..
..
..
..
..
..
..
..
..
..
..
..
..
..
.
.
.
.
.
.
.
.
.
.
.
.
.
.
37
37
37
38
38
38
38
39
39
39
40
41
41
42
6 Care and maintenance . . . . . . . . . . . . . . . . . . . . . . . . . . . . . . 43
Print cartridge information . . . . . . . . . . . . . . . . . . . . . . .
View ink level . . . . . . . . . . . . . . . . . . . . . . . . . . . . . . . .
Print the self test. . . . . . . . . . . . . . . . . . . . . . . . . . . . . . .
Replace the print cartridge . . . . . . . . . . . . . . . . . . . . . . .
Clear jammed documents and paper . . . . . . . . . . . . . . . .
Document jams during transmission. . . . . . . . . . . . . . .
To clear document jam: . . . . . . . . . . . . . . . . . . . .
Paper jams during printing. . . . . . . . . . . . . . . . . . . . .
If the paper is jammed in the printing area . . . . . . .
If the paper is jammed in the paper feed area . . . . .
ii Contents
...
...
...
...
...
...
...
...
...
...
..
..
..
..
..
..
..
..
..
..
...
...
...
...
...
...
...
...
...
...
....
....
....
....
....
....
....
....
....
....
.
.
.
.
.
.
.
.
.
.
..
..
..
..
..
..
..
..
..
..
.
.
.
.
.
.
.
.
.
.
..
..
..
..
..
..
..
..
..
..
...
...
...
...
...
...
...
...
...
...
43
43
44
44
46
46
46
46
46
47
Page iii
Monday, October 8, 2007
6:55 PM
Maintain the print cartridge . . . . . . . . . . . . . . . . . . . . . . . . . . . . . . . . . . . . . . . . . . .
Clean the print cartridge nozzles . . . . . . . . . . . . . . . . . . . . . . . . . . . . . . . . . . . . .
Wipe the print nozzles and contacts . . . . . . . . . . . . . . . . . . . . . . . . . . . . . . . . . .
Clean the nozzles . . . . . . . . . . . . . . . . . . . . . . . . . . . . . . . . . . . . . . . . . . . . .
Clean the cartridge carrier contacts . . . . . . . . . . . . . . . . . . . . . . . . . . . . . . . .
Clean the document scanner area . . . . . . . . . . . . . . . . . . . . . . . . . . . . . . . . . . . . . .
Adjust the scanner . . . . . . . . . . . . . . . . . . . . . . . . . . . . . . . . . . . . . . . . . . . . . . . . .
LCD error messages . . . . . . . . . . . . . . . . . . . . . . . . . . . . . . . . . . . . . . . . . . . . . . . .
Troubleshooting . . . . . . . . . . . . . . . . . . . . . . . . . . . . . . . . . . . . . . . . . . . . . . . . . . .
Fax problems . . . . . . . . . . . . . . . . . . . . . . . . . . . . . . . . . . . . . . . . . . . . . . . . . .
Print quality problems. . . . . . . . . . . . . . . . . . . . . . . . . . . . . . . . . . . . . . . . . . . . .
Paper feeding problems . . . . . . . . . . . . . . . . . . . . . . . . . . . . . . . . . . . . . . . . . . .
47
47
47
47
48
49
51
51
54
54
56
56
7 Specifications and regulatory information . . . . . . . . . . . . . . . . 57
Paper types and sizes . . . . . . . . . . . . . . . . . . . . . . . . . . . . . . . . . . . . . . . . . . . . . . .
Document types and sizes . . . . . . . . . . . . . . . . . . . . . . . . . . . . . . . . . . . . . . . . . . . .
Acceptable documents . . . . . . . . . . . . . . . . . . . . . . . . . . . . . . . . . . . . . . . . . . . .
Print cartridge . . . . . . . . . . . . . . . . . . . . . . . . . . . . . . . . . . . . . . . . . . . . . . . . . . . .
Product specifications . . . . . . . . . . . . . . . . . . . . . . . . . . . . . . . . . . . . . . . . . . . . . . .
A sample of ITU #1 test chart (reduced to 60.5%) . . . . . . . . . . . . . . . . . . . . . . . . . . .
Environmental product stewardship program . . . . . . . . . . . . . . . . . . . . . . . . . . . . . . .
Regulatory notices . . . . . . . . . . . . . . . . . . . . . . . . . . . . . . . . . . . . . . . . . . . . . . . . .
Use Hewlett-Packard support services . . . . . . . . . . . . . . . . . . . . . . . . . . . . . . . . . . . .
Hewlett-Packard LIMITED WARRANTY STATEMENT . . . . . . . . . . . . . . . . . . . . . . . . . .
Contents
57
57
57
58
58
60
61
62
64
65
iii
Contents
CB782-90008_UG_EN.book
CB782-90008_UG_EN.book
iv Contents
Page iv
Monday, October 8, 2007
6:55 PM
Page 1 Monday, October 8, 2007
6:55 PM
This chapter gives you a quick introduction to the basic functions of your new fax
machine. Please refer to the later chapters for detailed instructions.
1 The “arrow buttons” located at the left
and right of OK button on the control
panel are designated by in the
instructions.
1 Slide the Paper Guide to Ltr
or A4 paper width. Be sure
not to bind the paper stack.
2 Pull the Paper Tray Cover
toward you to open it.
START
QUICK
START
QUICK
START
2
NOTE: You must open the Paper
Tray Cover to properly insert the
paper.
Quick start 1
QUICK
1
START
TIP: Some papers have a side that’s been conditioned for printing. The “print side” is
indicated on the paper’s packaging. Always load with the print side facing you.
QUICK
The HP Fax is designed to work with a variety of plain papers (cotton bond 75–90 g/m2
(20–24 lb.)) in A4, Letter, and Legal sizes.
START
You can load up to 50 sheets of plain paper in the input tray. Before loading the paper,
make sure the paper size is set correctly in the BASIC FAX menu. For more information,
see Paper Size on page 11.
QUICK
Load paper
QUICK
START
1
START
Quick start
QUICK
1
QUICK
START
CB782-90008_UG_EN.book
CB782-90008_UG_EN.book
Page 2 Monday, October 8, 2007
6:55 PM
Load documents to fax or copy
3 Fan, neatly stack, then insert
up to 50 sheets of paper with
the print side facing you.
3
4 Push the Paper Tray Cover
back into place.
4
Load documents to fax or copy
You can load up to 10 pages in the document feeder. Load the documents face down
(printed side toward the machine).
Adjust guides to document width.
Send a fax
1. Place the document to be sent (up to 10 pages) in the document feeder.
2. Dial the number by using one of these methods:
• Entering the number and pressing Start/Enter.
• Lifting the handset, entering the number, and pressing Start/Enter.
• Using the Loudspeaker button to listen as you dial, then pressing Start/Enter.
• Pressing and holding a One Touch button. For more information, see One-touch
dialing on page 18.
• Pressing the Speed Dial button, when Search & Dial appears in the display,
press OK and search for the number. When the correct number appears,
press Start/Enter. For more information, see Phone book dialing on page 18.
NOTE: One touch and speed dial locations must have been previously programmed.
For more information, see Store a number in the phone book on page 17.
2 Quick start
CB782-90008_UG_EN.book
Page 3 Monday, October 8, 2007
6:55 PM
Receive a fax
Receive a fax
TIP: However, if you accidentally answer the telephone and hear fax tones, press the
Start/Enter button to receive the fax.
AUTO answer mode
In AUTO mode the telephone rings for a certain number of rings (see Set rings to answer
on page 23), then switches to FAX receiving.
QUICK
START
The fax machine will answer the telephone, automatically detect fax tones, and receive
a fax.
QUICK
FAX or TAM answer mode
START
How faxes are received depends on how the Answer Mode/Receive Mode is set.
For more information, see Set rings to answer on page 23.
TEL answer mode
1. Answer the telephone.
2. If you hear fax tones, press the Start/Enter button.
START
3. Once you hear fax tones from both machines (this may take several seconds),
you should hang up the telephone.
QUICK
START
If the answer Mode is set to TEL, you must manually receive faxes.
QUICK
Make a copy
You can make multiple copies of a 10 page document.
START
Single copy—default settings
1. Turn the page face down and insert it into the document feeder.
2. Press Copy twice.
QUICK
Multiple copies or copies with options/settings
1. Turn the page face down and insert it into the document feeder.
2. Press Copy.
4. Press Copy to start copying or press OK to go to the next option.
Zoom Rate then 97% will display.
to select the reduction or enlargement percentage you want (50 –150).
START
6. Press Copy to start copying or press OK to go to the next option.
Print Order then Normal will display.
Quick start 3
QUICK
5. Press
QUICK
3. If you want more than one copy, use the phone pad to enter the number of copies.
START
Number of Copies then 01 [01-50] will display.
CB782-90008_UG_EN.book
Page 4 Monday, October 8, 2007
6:55 PM
Make a telephone call
7. Press
to select Reverse if you want the last page printed first.
Printing the copies in reverse order will cause the first page to be on top when the copy
is complete.
8. Pressing either Copy or OK will start copying.
Make a telephone call
Use one of the following methods:
• Pick up the handset and dial the number.
• Press and hold a One Touch number. This turns on the speaker. When you are
connected, pick up the handset. For more information, see One-touch dialing on
page 18.
• Press the Speed Dial button, when Search & Dial appears in the display, press OK and
search for the number. When the correct number appears, press Start/Enter. This turns
on the speaker. When you are connected, pick up the handset. For more information,
see Phone book dialing on page 18.
NOTE: One touch and speed dial locations must have already been entered before you
can use them. For more information, see Store a number in the phone book on page 17.
4 Quick start
CB782-90008_UG_EN.book
6:55 PM
The HP Fax features
The HP Fax offers the following features:
50 page fax memory
•
50 page paper tray
•
10 page document feeder
•
Favorites capability: Scan the entire document into memory before sending
(see page 25).
•
50 speed dialing locations (including10 One-Touch speed dials) (see page 17).
•
Distinctive Ring (DRPD) capability: Multiple numbers on the same phone line that
are differentiated by ring pattern (see page 27).
•
Broadcasting: Send the same document to multiple destinations (see page 31).
•
Fax forwarding: Forward documents to another fax machine (see page 35).
•
Delayed fax: Send the document at a later time (see page 32).
•
Send/Receive Polling: Retrieve a waiting fax or hold a fax to be picked up
(see page 33).
•
Caller ID (see page 24).
•
Last 10 number redial (see page 42).
•
Junk fax blocking (with Caller ID) (see page 24).
•
Reports to help you manage your work (see page 39).
BASICS
HP FAX
BASICS
HP FAX
BASICS
HP FAX
BASICS
HP FAX
BASICS
HP FAX
BASICS
•
HP FAX
This chapter lists the basic features of your new HP Fax and introduces you to the
machine.
BASICS
HP Fax basics
HP Fax basics 5
HP FAX
2
Page 5 Monday, October 8, 2007
CB782-90008_UG_EN.book
Page 6 Monday, October 8, 2007
6:55 PM
The HP 640 Fax
The HP 640 Fax
Parts of the HP Fax
Figure 2-1 Front view
8
7
6
1
Document support
2
Paper tray
3
Paper tray cover
1
4
Document guide
2
5
Document feeder
6
Handset
7
Paper guide
8
Paper support
1
Power cord socket
3
4
5
Figure 2-2 Rear view
1
6 HP Fax basics
CB782-90008_UG_EN.book
Page 7 Monday, October 8, 2007
6:55 PM
The HP 640 Fax
Connect answering
machine or extension
phone to the EXT. port.
HP FAX
3
BASICS
HP FAX
BASICS
HP FAX
BASICS
HP FAX
BASICS
HP FAX
BASICS
Connect telephone line
to the LINE port.
HP FAX
1
2
BASICS
2
Connect handset to the
HANDSET port.
HP Fax basics 7
HP FAX
3
1
BASICS
Figure 2-3 Bottom view
CB782-90008_UG_EN.book
Page 8 Monday, October 8, 2007
6:55 PM
The HP 640 Fax
Control Panel of HP Fax
Figure 2-4 Control panel of HP Fax
11
13
14
1
15
2
3
16
4
5
6
9 10 12
7
17
8
Label
1
Name and Description
Rcv.Mode/Contrast:
• When no document is loaded, pressing this button changes the Receive Mode.
See Answer/receive mode on page 28.
• When a document is loaded, pressing this button changes the contrast for faxing and
copying.
2
Resolution: Improves the clarity of a document that you are faxing or copying.
3
Access Cartridge: Moves the print cartridge to the center so it can easily be replaced.
4
Favorites: Enables you to store documents that are frequently faxed and send them to
selected fax numbers without the originals. Press Favorites repeatedly to save, delete,
send or print the documents.
5
Number keypad: Dials telephone and fax numbers and enters letters and symbols in text
fields. The phone key pad is also used for one-touch dialing.
6
Symbols: [The 0 key]. Used to enter special characters when entering a name in a text
field.
7
Speed Dial: Stores and dials 50 telephone/fax numbers.
8
Redial/Pause:
• Automatically redials the last number or allows you to select one of the last 10 numbers
to redial.
• Adds a pause while entering a speed dial number
9
Mute: Mutes the telephone during a telephone call.
10
Loudspeaker: Allows you to listen to the telephone while dialing without lifting the handset.
Allows you to listen only. There is no speakerphone capability.
8 HP Fax basics
CB782-90008_UG_EN.book
Page 9 Monday, October 8, 2007
6:55 PM
The HP 640 Fax
Scroll/Volume:
13
OK: Accepts the selection shown in the display.
14
Back: Allows you to return to the previous menu level.
15
Copy:
HP FAX
• When you are entering numbers or text, moves the cursor to the digit or character to
be edited.
• When Menu has been pressed, displays the next and previous menu options.
Referred to as the arrow keys in text and are designated by: .
• When no other button has been pressed, adjusts the ringer volume.
• If the handset is off hook, adjusts the handset volume.
• When Loudspeaker has been pressed, adjusts the speaker volume.
Start/Enter: Starts a fax job.
17
Cancel:
HP FAX
• Press twice to copy a document with the default copy settings.
• Press once then set options. Press OK between options. Press Copy to copy the
document.
16
HP FAX
12
BASICS
Menu: Displays the options available for your HP Fax.
BASICS
11
BASICS
Name and Description
BASICS
HP FAX
BASICS
HP FAX
BASICS
HP FAX
BASICS
• In a Menu, stops an operation and returns to Ready mode.
• When entering text or numbers:
- Press once to backspace delete numbers or letters when editing.
- Hold down to delete entire field.
- Press again after holding down to return to Ready mode.
HP Fax basics 9
HP FAX
Label
SET DATE & TIME
Date Format
Date & Time
SET FAX HEADER
Fax Number
10 HP Fax basics
Fax Name
Adjust Scanner
Self Test
View Ink Level
Factory Default
Align Cartridge
Clean Cartridge
TOOLS
Journal
Dial/Schedule
Fax Header
MEMORY CLEAR
Monday, October 8, 2007
Help List
Sent Journal
Received Journal
Phonebook
Sending Confirm
Schedule Inform
System Data
Caller ID
Junk Fax
Print Fax
Set Fax Forward
REPORTS
Key Sound
Set Polling Send
Cancel Schedule
Alarm Sound
WakeUp Sound
SET UP SOUND
Set Delayed Fax
Set Broadcasting
ADVANCED FAX
Page 10
Silent Mode
Language
Sending Confirm
Paper Size
Auto Reduction
Discard Size
Rings to Answer
Man Fax Rcv Code
ECM Mode
Send From Memory
Caller ID
Set Junk Fax No.
Auto Journal
Distinctive Ring
Resolution
Contrast
Image TCR
Dial Mode
BASIC FAX
CB782-90008_UG_EN.book
6:55 PM
The menus
The menus
CB782-90008_UG_EN.book
Page 11
Monday, October 8, 2007
6:55 PM
Overview of menu options
Overview of menu options
BASICS
Your fax machine has settings that you can change. To find out how the options are
currently set, print the System Data report (see Print reports on page 39).
To change these settings, see Navigate the menus on page 14.
HP FAX
The tables below shows the options for a menu in the left column and their setting
choices in the right column.
Silent Mode
You can turn off the machine sounds either manually or on a daily schedule
(for example, to turn off the sounds after work hours and overnight).
HP FAX
Settings
There are three languages you can use for display and reports: English,
Spanish, and French.
Sending Confirm
A confirmation report shows whether the transmission was successful or not,
how many pages were sent, etc.
HP FAX
Language
BASICS
The settings are: Off, On-Always, and On-Daily. For more information, see
Silent mode on page 38.
ON: prints a confirmation report automatically each time you send a fax.
BASICS
OFF: never prints a confirmation report (You can print one manually
(see Print reports on page 39)).
ERROR: prints only when an error occurs.
If you turn the Automatic Reduction option off, you can set the fax machine
to discard any excess image at the bottom of the page when receiving a
document as long as or longer than the paper loaded in your machine. If the
incoming fax is out of the margin you have set, it will be printed on two sheets
of paper.
The Discard Size can be 00 to 30 mm.
Rings To Answer
You can select the number of rings before answering an incoming call. If you
are using your machine as both a telephone and a fax machine (AUTO or
TAM mode), we suggest you set the ring count to at least 4 to give you time
to answer.
The number of rings can be 2 to 7.
BASICS
Discard Size
HP FAX
When receiving a document as long as or longer than the paper loaded, the
machine can automatically reduce the data to fit your paper. If the fax
machine cannot fit the data into one page with the feature enabled, the data
is divided and printed in actual size on two or more sheets. The settings are On
and Off.
BASICS
Auto Reduction
HP FAX
A4, Letter and Legal are the paper sizes you can use to receive faxes
and copy.
BASICS
Paper Size
HP FAX
Note that this report can include the Image TCR (see Image TCR on page 26).
Note that TAM mode can only be used with a separate answering machine.
HP Fax basics
11
HP FAX
Option
BASICS
BASIC FAX menu
CB782-90008_UG_EN.book
Page 12
Monday, October 8, 2007
6:55 PM
Overview of menu options
Option
Settings
Man Fax Rcv Code The Manual Fax Receive Code allows you to start receiving a fax from an
extension phone. If you pick up the extension phone and hear a fax tone,
enter the code and the fax will start receiving. You cannot change the * *,
just the number between them. The code can be 0 to 9.
ECM Mode
Error correction mode compensates for poor line quality and ensures accurate,
error-free transmission with any other ECM-equipped facsimile machine. If the
line quality is poor, transmission time may be increased when ECM is
enabled.
The settings are On and Off.
Caller ID
You can see the number of the person calling you. Before using this feature,
Caller ID service must be installed on your telephone line by the telephone
company.
The settings are On, On w/ Junk Fax, and Off. For more information, see Use
Caller ID on page 24.
Set Junk Fax No. If you have Caller ID set to On w/ Junk Fax, you can block faxes from
particular numbers. You must have received a fax from that number to block it.
Even though you have added junk fax numbers, if you turned off the Caller ID
option above, the Junk Fax protection will be removed. The settings are Add
and Delete.
Auto Journal
The Auto Journal shows the specific information concerning transmission or
reception activities, the time and date of most recent 40 transmissions or
receptions.
The settings are On and Off.
Distinctive Ring Distinctive ring (DRPD—distinctive ring pattern detection) is a service provided
by some telephone companies that assigns two phone numbers to one phone
line, each of which makes your phone ring differently. If you subscribe to this
service, you can program your machine to learn one phone number and
distinctive ring for incoming faxes. For more information, see Distinctive ring
(DRPD) on page 27.
Resolution
Sets the default resolution when copying and faxing.
The settings are: Standard, Fine, and Superfine. For more information,
see Set document resolution and contrast for a single copy on page 21.
Contrast
Sets the default contrast when copying and faxing.
The settings are: Normal, Lighten, Photo, and Darken. For more
information, see Set document resolution and contrast for a single copy on
page 21.
Image TCR
Image TCR prints a sending confirm page with a miniature image of the first
page of the fax. The settings are On and Off. For more information, see
Image TCR on page 26.
Dial Mode
Set the dialing mode to the type of the exchange to which you are connected:
Tone or Pulse.
12 HP Fax basics
CB782-90008_UG_EN.book
Page 13
Monday, October 8, 2007
6:55 PM
Loudspeaker
Settings
Set Broadcasting
Allows you to send a fax to several fax numbers at once.
Set Delayed Fax
Allows you to set up a fax to be sent at any time in the next 24 hours.
Set Polling Send
Allows you to set up a fax to be polled by another machine.
Cancel Schedule
Cancels all scheduled faxes.
Set Fax Forward
Allows you to forward incoming faxes to another fax number.
BASICS
HP FAX
Option
BASICS
ADVANCED FAX menu
HP FAX
TOOLS menu
Settings
Clean Cartridge
Cleans the print cartridge to improve print quality.
Align Cartridge
Aligns the print cartridge to improve print quality.
View Ink Level
Allows you to see the estimated level of ink remaining in the cartridge.
Adjust Scanner
Use only if you have dropped the fax machine.
Self Test
Prints a self test to allow you to troubleshoot problems.
TIP: If you want to share the conversation with somebody beside you, pick up the
handset and press Loudspeaker. The line is still connected and everybody can listen to
the conversation.
HP Fax basics
13
BASICS
HP FAX
BASICS
While you are using Loudspeaker, do not place the handset beside the speaker, as this
may result in noise interference.
HP FAX
NOTE: Your HP Fax does not have speakerphone capabilities. The loudspeaker enables
you to hear calls but you must speak using the handset.
BASICS
You do not need to pick up the handset to make a phone call. When dialing, just press
the Loudspeaker button and enter the numbers. When your party answers, pick up the
handset to talk to them. This feature is especially useful for checking voicemail messages.
HP FAX
Loudspeaker
HP FAX
BASICS
HP FAX
BASICS
Option
CB782-90008_UG_EN.book
Page 14
Monday, October 8, 2007
6:55 PM
Navigate the menus
Navigate the menus
Ready mode
Whenever the HP Fax is ready for faxing and copying (called Ready mode), it will display the
date, time, and answer mode. For example, OCT-05 14:23 FAX.
Menu buttons
Use the Menu buttons to navigate the menu items.
1
1
Press the Menu button to access the menu system.
2
Use the buttons to scroll through the options
on a particular level.
3
Press OK to select a particular menu option.
4
Press Cancel to return to Ready mode.
2
3
4
Example To change the default Resolution setting to Fine, you would take the following
steps.
1. Press the Menu button repeatedly until BASIC FAX displays.
2. Press OK.
Silent Mode will display.
3. Use the
to scroll until Resolution displays.
4. Press OK.
Standard will display.
5. Use the
to scroll until Fine displays.
6. Press OK.
7. Press Cancel to return to Ready mode.
14 HP Fax basics
CB782-90008_UG_EN.book
Page 15
Monday, October 8, 2007
6:55 PM
Enter dates, times, text, and telephone numbers
Enter dates, times, text, and telephone numbers
•
To enter a pause in a telephone number, press Redial/Pause. A P will appear in the
display. Press the button multiple times for a longer pause.
•
When entering text, press the phone pad button repeatedly to scroll through the
characters. Use the following table for reference.
Most text fields
The letters and numbers scroll as shown next to each button for text fields such as the
phone book. Press the 2 to display an A and press for the cursor to advance before
pressing 3 to select D. If you want a B, press 2 twice in rapid succession.
4
GHI4
5
JKL5
6
MNO6
7
PQRS7
8
TUV8
9
WXYZ9
0
+-,.‘/*#&0
*
nothing if text field, use the 0 key
to enter *
#
nothing if text field, use the 0 key
to enter #
BASICS
DEF3
HP FAX
3
BASICS
ABC2
HP FAX
2
BASICS
“space” 1
HP FAX
1
BASICS
Produces
HP Fax basics
15
HP FAX
Key
HP FAX
Table 2-1 Keys to enter text and numbers
HP FAX
Some items on the display will show up with the blinking cursor under the item to
change. Simply press the key for the new character or number or use the to
move to the one you want to change.
BASICS
•
HP FAX
If the date format seems unfamiliar, check that you selected the correct one for your
country when setting up your HP Fax (see Set the date and time on page 37).
BASICS
•
BASICS
Use these buttons when menu items ask you to enter dates, time or text.
CB782-90008_UG_EN.book
Page 16
Monday, October 8, 2007
6:55 PM
Enter dates, times, text, and telephone numbers
For example, to enter ‘Jacque & Baja,Inc.’ follow these steps.
Press
Result
r, o, , ooo, tt, uu, pp
‘JACQUE’ will display.
n
Enters a space.
mmmmmmmmm
‘&’ will display.
n
Enters a space.
oo, , o, r, o
‘BAJA’ will display.
mmm
‘,’ will display.
qqq, ss, ooo
‘INC’ will display
mmmm
‘.’ will display.
Fax header telephone number
For most telephone numbers you can only enter the numbers (for example,
1234567890). For the fax header that prints on all your faxes (see Set the fax header
information on page 38), you can enter some punctuation in the number.
To punctuate the telephone number in the fax header, use these keys.
Table 2-2
Keys to punctuate the fax header telephone number
Key
Produces
#
“space”
*
+
16 HP Fax basics
CB782-90008_UG_EN.book
Page 17
Monday, October 8, 2007
6:55 PM
Speed dialing
‘+‘ will display.
n, o, p
‘123’ will display.
#
Enters a space.
#
Enters a space.
t, u, v, m
‘7890’ will display.
‘
BASICS
‘456’ will display.
HP FAX
q, r, s
HP FAX
*
Speed dialing
Your HP Fax has a built-in phone book that allows you to enter up to 50 names and
numbers for faxing or telephone use. Once entered, you can dial the number by any of
these methods.
One-Touch (first 10 numbers)
•
Searching the phone book through the Speed Dial button
BASICS
•
BASICS
Result
HP FAX
Press
BASICS
For example, to enter ‘+123 456 7890’ follow these steps.
All numbers must be stored in the phone book before use.
HP FAX
Store a number in the phone book
Once in the phone book these numbers can be dialed using one touch buttons, or by
searching the phone book through the Speed Dial button.
BASICS
1. Press Speed Dial button repeatedly until New & Edit appears and press OK.
The display shows Speed [00-49]>##.
Numbers from 00 to 09 will be used for One-Touch dialing.
3. Enter the telephone/fax number you want to store (up to 40 digits) and press OK.
• If you want a pause between numbers (for example, when entering an access
code where you need to wait for a second dial tone), press Redial/Pause. A P
appears in the display. For a longer pause, simply press Redial/Pause again.
HP FAX
to move the cursor
• Cancel will backspace delete in the field.
BASICS
• Holding down Cancel will clear the whole field.
HP Fax basics
17
HP FAX
• If you make a mistake while entering a number, use
under the digit, then enter the correct digit.
BASICS
HP FAX
2. Enter a two-digit number and press OK.
CB782-90008_UG_EN.book
Page 18
Monday, October 8, 2007
6:55 PM
Speed dialing
4. Enter the name (up to 20 characters) and press OK.
If you do not want a name, just skip this step by pressing OK.
If you have subscribed to a Caller ID service, we recommend that you enter
a name.
TIP:
5. Press Cancel to exit.
Print the phone book
1. Press Menu repeatedly until REPORTS appears and press OK.
2. Press
until Phonebook displays and press OK.
Dial from the phone book
Dialing works the same for both faxes and telephone calls. If a document is loaded in
the document feeder, the HP Fax sends the fax.
One-touch dialing
S Press and hold the number (0 through 9) on the phone pad.
You can refer to the number assigned to each code by printing the phone book.
See Print the phone book on page 18.
Phone book dialing
You can search the entire phone book to find the number you want to dial.
Search sequentially through the phone book
1. Press Speed Dial button once and when Search & Dial appears, press OK.
2. Press
to move upward or downward through the directory until you find the
number you want.
3. When the number you want appears in the display, press Start/Enter to dial.
Search for a particular first letter
1. Press Speed Dial button once and when Search & Dial appears, press OK.
2. Press the phone pad button labelled with the letter you want to find.
• For example, if you want to find the name ‘NEW YORK’, press the 6 button,
which is labelled with ‘MNO’.
• The machine finds the closest entry.
• If the machine cannot find a name that begins with the given letter, the machine
shows the message Not Found.
3. When the name and number you want appears in the display, press Start/Enter.
18 HP Fax basics
CB782-90008_UG_EN.book
Page 19
Monday, October 8, 2007
6:55 PM
Paper types and sizes
Paper types and sizes
Bond paper
•
Dual-purpose paper
Because all paper varies in physical characteristics, you can receive mixed results from
different packages of paper even though the packages contain the same type of paper.
If you encounter undesirable results, try the other side of the paper, a different type,
or another package of the same kind of paper.
Do not use the following types of paper with your machine:
Continuous form feed paper
•
Synthetic paper (Tyvek®, etc.)
•
Thermal paper
•
Multi-sheet forms and documents
•
Chemically treated paper (pressure-sensitive paper, carbon-coated paper, etc.)
•
Coated (glossy, photo, etc.)
•
Papers with raised, embossed lettering
BASICS
HP FAX
BASICS
HP FAX
BASICS
HP FAX
BASICS
•
BASICS
•
HP FAX
Copier paper
HP Fax basics
19
HP FAX
•
HP FAX
You can load up to 50 sheets of paper in the paper tray. Satisfactory print and receive
quality can be obtained with many types of plain paper. Since the quality of plain
paper varies widely, test the print quality before buying large quantities of paper.
Your machine uses a variety of papers including:
BASICS
TIP: Some papers have a side that’s been conditioned for printing. The print side is
usually indicated on the paper’s packaging. Always load with the print side facing you.
HP FAX
BASICS
The HP Fax is designed to work optimally with plain paper (cotton bond: 20 lb.,
75 g/m2) in the following sizes: A4, Letter, and Legal.
CB782-90008_UG_EN.book
Page 20
Monday, October 8, 2007
6:55 PM
Document types and sizes
Document types and sizes
The following document size is acceptable when you send a fax.
•
The minimum document size is 148 mm (5.8 in.) wide by 128 mm (5 in.) long.
•
The maximum size is 216 mm (8.5 in.) wide by 356 mm (14 in.) long.
Follow these tips to ensure worry-free faxing.
•
Be sure that your document is dry and free of staples, paper clips, and other
foreign objects.
•
If you are sending more than one sheet, make sure the bottom sheet enters first.
Insert the sheets with a slight push to ensure smooth feeding.
•
For multiple sheets, all pages of the document must be the same size and paper type.
•
If you are loading pages that are unusually thick or thin, feed one sheet at a time.
If the document does not feed correctly, open the control panel, remove the
document, and try loading it again.
•
For more information on what kind of paper you can use for documents,
see Acceptable documents on page 57.
DO NOT try to send documents that are:
wet
•
•
covered with wet ink or paste
•
wrinkled, curled, or folded
•
too thin (less than 0.07 mm (0.18 in.) thick—onionskin, airmail paper, etc.)
•
too thick (more than 0.15 mm (0.38 in.) thick—index cards, file folders)
•
chemically processed (pressure-sensitive paper, carbon-coated paper, etc.)
•
coated (glossy, etc.)
•
too small or short (such as a label, voucher, etc.)
•
made of cloth or metal
To send these documents, use an office copier to make a photocopy first, and then send
the copy.
20 HP Fax basics
CB782-90008_UG_EN.book
Page 21
Monday, October 8, 2007
6:55 PM
Set document resolution and contrast for a single copy
Set document resolution and contrast for a single copy
BASICS
Document resolution and contrast are set in the same manner for both faxes and copies.
For most faxes and copies, default settings will work well.
HP FAX
If you need to send/copy a document with unusual contrast characteristics, including
images/embedded pictures, you can adjust the resolution and contrast for that
document using the control panel buttons.
Blue lines on a ruled pad don’t fax well. For more information on the types of paper you
can use for documents, see Document types and sizes on page 20.
HP FAX
NOTE: You must set the resolution and contrast before dialing the number.
BASICS
We recommend you use documents with a high contrast, such as, documents printed
using a high quality printer, felt tip pen, black ink, or typewriter. The paper should be
white or very light, and of normal weight, not cardboard or onionskin.
HP FAX
BASICS
TIP: You can also change the default settings for all documents using the menu.
See BASIC FAX menu on page 11.
BASICS
1. Turn the page face down and insert it into the document feeder. For more
information, see Load documents to fax or copy on page 2.
2. Press Resolution repeatedly to select the option you want:
HP FAX
• STANDARD works well for printed or typewritten originals with normal-sized
characters.
• FINE is good for documents containing a lot of detail.
NOTE: SUPER FINE mode is not used when sending documents scanned into memory
BASICS
(i.e., Broadcasting and Delayed Fax). If you are sending document using one of
these methods, SUPER FINE will be changed back to FINE even though you selected
SUPER FINE.
HP FAX
BASICS
• SUPER FINE works well for documents containing extremely fine detail;
for example, a map or engineering drawing. SUPER FINE only works if the
remote machine also has the SUPER FINE feature.
HP FAX
3. Press Rcv.Mode/Contrast repeatedly to select the option you want:
• NORMAL is used for normal handwritten, typed, or printed documents.
• LIGHTEN is used with very dark print.
HP Fax basics
21
HP FAX
BASICS
• DARKEN is used with light print or faint pencil markings.
CB782-90008_UG_EN.book
Page 22
Monday, October 8, 2007
6:55 PM
Adjust volume
• PHOTO is used when faxing images/embedded pictures or other documents
containing color or gray shades. When Photo is chosen, the resolution is
automatically set to FINE.
4. Dial the number and press Start/Enter or press Copy.
When sending/copying is finished, resolution/contrast automatically returns to default.
Adjust volume
You can adjust the volume level for both the ringer and the speaker.
Ringer volume
S Press when the fax is in Ready mode to adjust the volume of the ringer.
Whenever you press the button, it will increase or decrease the volume.
NOTE:
The volume 0 indicates that the machine will not ring when a call is received.
Speaker volume
1. Press Loudspeaker.
2. Then press to adjust the volume of the speaker.
Automatic fax redial
When you send a fax, if the number you have dialed is busy or there is no answer,
the machine will automatically redial the number every three minutes up to two times.
If you wish to manually redial the number immediately, press Start/Enter after the display
shows To redial now, press Start/Enter.
Or, press Cancel to stop redialing and the machine returns to Ready mode.
Receiving via an extension telephone
If you have an extension phone on the same line as your HP Fax you can remotely start
receiving a fax.
1. Answer the call on the extension phone.
2. Press *9* (manual fax receive code) in sequence when you hear a fax tone.
• Your fax machine detects the code and starts to receive the document.
• The default code is 9. You cannot change the asterisks but you can select any
number between 0 and 9. For more information, see Man Fax Rcv Code under
the BASIC FAX menu on page 11
3. Hang up the phone when your fax machine starts to receive.
22 HP Fax basics
CB782-90008_UG_EN.book
Page 23
Monday, October 8, 2007
6:55 PM
Set rings to answer
• Caller ID: If you subscribe to Caller ID through your local phone company, you can
use it with your HP Fax.
• Block Junk Faxes: In conjunction with Caller ID, you can block certain numbers from
sending you a fax.
• Favorites
• Image TCR
FEATURES
• Rings to answer: Sets the number of rings before the HP Fax answers the phone.
FEATURES
This chapter contains information on additional features you may want to set or change
for your HP Fax.
ADDITIONAL
Additional features
ADDITIONAL
3
ADDITIONAL
ADDITIONAL
You can select the number of rings that will occur before the fax answers an incoming
call.
NOTE: If you are using your machine as both a telephone and a fax machine, we
suggest you set the ring count to at least 4 to give you time to answer.
1. Press Menu repeatedly until BASIC FAX displays and press OK.
• The additional ring may occur once for a fax call
• The additional ring occurs 5 times for a voice call. After the 5 additional rings,
the answering machine will answer.
Additional features
23
FEATURES
The HP Fax rings the set number of times and then answers. It then produces a
different sounding ring to alert you to which type of call is incoming.
ADDITIONAL
3. Enter the number of rings you want (2–7) and press OK.
FEATURES
until Rings to Answer displays and press OK.
ADDITIONAL
2. Press
FEATURES
Set rings to answer
ADDITIONAL
1
1 The “arrow buttons” located at the left
and right of OK button on the control
panel are designated by in the
instructions.
FEATURES
• Answer/Receive mode: Determines how the HP Fax responds to incoming calls.
FEATURES
• Distinctive Ring
CB782-90008_UG_EN.book
Page 24
Monday, October 8, 2007
6:55 PM
Use Caller ID
Use Caller ID
Many countries have the Caller ID system that enables the receiver to view the numbers or
names of callers. Once you have subscribed to Caller ID services through your local phone
company, your machine can display caller information.
Turn Caller ID on
1. Press Menu repeatedly until BASIC FAX displays and press OK.
2. Use the
to scroll to Caller ID and press OK.
3. Use the to scroll to the desired option and press OK.
• On: Activates the Caller ID feature.
• On w/ Junk Fax: Activates Caller ID and ignores any fax registered as a junk fax
(Block junk fax numbers on page 24).
• Off: Deactivates the Caller ID feature.
See who called with Caller ID
This function allows you to see who has called. You cannot dial these numbers.
1. Hold Redial/Pause for about two seconds.
2. Press
until Caller ID displays and press OK.
3. Scroll through the numbers by pressing .
Print a list of Caller ID numbers
1. Press Menu repeatedly until REPORTS displays and press OK.
2. Press
until Caller ID displays and press OK.
Block junk fax numbers
If you subscribe to Caller ID through your local phone company, you can block future faxes
from numbers on the Caller ID List. Before using this feature, you must set the Caller ID
option to On w/ Junk Fax (see Use Caller ID on page 24).
Add a junk fax number
1. Press Menu repeatedly until BASIC FAX appears and press OK.
2. Press
until Set Junk Fax No. displays and press OK.
3. Press until Add displays and press OK.
The machine shows the first Caller ID number.
4. Press to find the Caller ID number you want to register as a junk fax and
press OK.
You can enter up to 20 numbers. Numbers which have already been entered as a junk
number are marked by * at the end of the display.
24 Additional features
CB782-90008_UG_EN.book
Page 25
Monday, October 8, 2007
6:55 PM
Favorites
Delete a number
1. Press Menu repeatedly until BASIC FAX appears and press OK.
ADDITIONAL
until Set Junk Fax No. displays and press OK.
3. Press until Delete displays and press OK.
The machine shows the first junk number.
4. Press
to scroll to the junk fax number you want to delete and press OK.
FEATURES
2. Press
ADDITIONAL
NOTE:
When you use this feature, set contrast to PHOTO is not supported.
ADDITIONAL
Save a document
1. Load the documents face down in the document feeder.
2. Press Favorites repeatedly until SAVE appears and press OK.
3. Enter the document ID name (up to 15 characters) by using the number keypad.
FEATURES
Favorites enables you to store documents that are frequently faxed and send them to
selected fax numbers without the originals.
FEATURES
Favorites
ADDITIONAL
The document will be scanned into memory.
Exceeded Job Memory message appears when you try to save more than
three Favorites.
Delete a document
FEATURES
4. Press OK.
3. Select Y and press OK when the machine asks if you are sure.
Send a document
1. Press Favorites repeatedly until SEND appears and press OK.
If you have more destinations, select Y and press OK when asked Another? Y/N
and repeat from step 3.
Additional features
25
FEATURES
4. Press OK when the correct number is displayed.
ADDITIONAL
3. Enter the fax number.
FEATURES
to scroll to the document you want to send and press OK.
ADDITIONAL
2. Press
FEATURES
2. Press to select to delete one or all documents and when the correct document
ID is displayed, press OK.
ADDITIONAL
1. Press Favorites repeatedly until DELETE appears and press OK.
CB782-90008_UG_EN.book
Page 26
Monday, October 8, 2007
6:55 PM
Image TCR
Print a document
1. Press Favorites repeatedly until Print appears and press OK.
2. Press to select to print one or all documents and when the correct document ID
is displayed, press OK.
Image TCR
Image TCR (Transmission Confirmation Report) is a valuable tool for keeping records of
faxes you send. It prints a Sending Confirm page with a miniaturized image of the first
page of the fax on it. See the following example.
To use image TCR, you must set these Menu options to On: Image TCR and Sending
Confirm. Follow these instructions to set the menu options:
1. Press the Menu button repeatedly until BASIC FAX displays and press OK.
2. Use the
buttons to scroll to Sending Confirm and press OK.
3. Use the buttons to select On and press OK.
4. Use the buttons to scroll to Image TCR and press OK.
5. Use the buttons to select On and press OK.
6. Press Cancel to return to Ready mode.
NOTE:
Image TCR is unavailable if the resolution is set to Super Fine.
26 Additional features
CB782-90008_UG_EN.book
Page 27
Monday, October 8, 2007
6:55 PM
Distinctive ring (DRPD)
Step 1—Teach the HP Fax the ring pattern
The HP Fax will learn the ring pattern when you call it from another telephone or fax
machine.
2. Press Menu repeatedly until ADVANCED FAX displays and press OK.
3. Use to scroll through the options until Distinctive Ring displays and
press OK.
Call this fax from another fax machine... Waiting Ring...
will display.
4. Call the HP Fax.
DRPD OK will display when the pattern has been learned and the HP Fax will return
to Ready mode.
ADDITIONAL
ADDITIONAL
1. Be ready to call the fax machine.
FEATURES
FEATURES
ADDITIONAL
If you have this service follow both of these instructions in this order to set it up and
use it.
FEATURES
Use Distinctive Ring to set your HP Fax to answer one of your phone numbers as a fax
only line. The phone number (ring pattern) that you teach the HP Fax will be answered
as if the machine is in FAX mode. All other numbers on the same line will be answered
if they are in AUTO mode.
FEATURES
Distinctive ring or distinctive ring pattern detection (DRPD) is a service offered by some
telephone companies. When you subscribe to this service through your local phone
company, you have different ring patterns; such as double ring and triple ring, that allow
you to have different telephone numbers on one physical line. Your HP Fax works with
distinctive ring service.
ADDITIONAL
Distinctive ring (DRPD)
S Press Rcv.Mode/Contrast repeatedly until DRPD Mode appears in the display.
• In Ready mode, DRPD appears in the right hand corner of the display.
FEATURES
Once you have activated distinctive ring, it becomes one of the answering modes you
can select by pressing the Rcv.Mode/Contrast button.
ADDITIONAL
Step 2—Set up distinctive ring (DRPD) answer mode
FEATURES
27
ADDITIONAL
Additional features
FEATURES
TIP: Distinctive ring must be set up again if you reassign your fax number or connect
the machine to another telephone line. Once set up again (that is, the fax machine has
learned the ring pattern and the answering mode is correctly set), you should test the fax
machine by calling the fax number and another number on the same line. The machine
should respond appropriately to a call placed to the fax number with fax tones, and to a
normal telephone call with the expected ring pattern.
ADDITIONAL
• Now, the HP Fax will manage calls and faxes as if it were set to AUTO mode
(AUTO mode on page 28)
CB782-90008_UG_EN.book
Page 28
Monday, October 8, 2007
6:55 PM
Answer/receive mode
Answer/receive mode
How the product receives faxes depends on the answer/receive mode you chose when
you set up the product. You can send faxes in any answer/receive mode. The answer/
receive mode setting determines how the device answers the incoming call.
How are you going to use your HP Fax?
Read about...
• Fax machine with few or no voice calls.
FAX mode
• Telephone and fax machine without an
AUTO mode
• As a fax machine with an external
TAM mode
• Using Distinctive Ring (DRPD) service to
See Distinctive ring (DRPD) on
page 27.
• Telephone with few or no fax calls.
TEL mode
external answering machine connected.
answering machine.
set up a separate telephone number for
your fax on the same physical line as
your other numbers.
S When no document is loaded, press the Rcv.Mode/Contrast button until the desired
option displays.
• FAX
mode
• In Ready mode, FAX appears in the right hand corner of the
display.
• When you get a call, the machine answers and receives the fax
•
• AUTO
mode
automatically. When reception is complete, the machine returns to
Ready mode.
If you want to change the number of rings before it answers,
see Set rings to answer on page 23.
• In Ready mode, AUTO appears in the right hand corner of the
display.
• When a call comes in, the machine answers it. If a fax is being
•
28 Additional features
sent, the device receives the fax. If the machine does not sense a
fax signal, it will ring 5 times in a different tone to tell you it may be
a regular telephone call. If you do not pick up the handset it will try
again to receive a fax after several more rings.
If you want to change the number of rings before it answers,
see Set rings to answer on page 23.
Page 29
Monday, October 8, 2007
6:55 PM
Answer/receive mode
• TAM
mode
You must have an answering machine attached to the EXT line socket
located on the bottom of your HP Fax.
•
•
FEATURES
ADDITIONAL
ADDITIONAL
ADDITIONAL
29
FEATURES
ADDITIONAL
Additional features
FEATURES
•
display.
Automatic fax reception is turned off. You can receive a fax only by
lifting the handset and pressing Start/Enter.
FEATURES
• In Ready mode, TEL appears in the right hand corner of the
ADDITIONAL
mode
FEATURES
• TEL
FEATURES
•
ADDITIONAL
•
display.
When a call comes in, the answering machine answers and listens.
If it detects fax tones, it receives the fax; otherwise, it records the
caller’s message.
If you have set your machine to TAM Mode and your answering
machine is switched off or the answering machine is not connected
directly to your fax machine, the machine will automatically attempt
to receive a fax after several rings.
If your answering machine allows you to set the number of rings
before it answers the telephone, set the answering machine to
answer an incoming call in less than 4 rings.
When your answering machine answers an incoming call, it
records a fax tone until it realizes a fax is coming through. Due to
this, your answering machine may tell you a voice message has
been left, even when it is actually a fax.
FEATURES
• In Ready mode, TAM appears in the right hand corner of the
ADDITIONAL
CB782-90008_UG_EN.book
CB782-90008_UG_EN.book
Page 30
Answer/receive mode
30 Additional features
Monday, October 8, 2007
6:55 PM
CB782-90008_UG_EN.book
Page 31
Monday, October 8, 2007
6:55 PM
Broadcasting
With Broadcasting you can have your HP Fax send your fax to up to 5 fax numbers
at once. The documents are automatically erased from memory when Broadcasting
is finished.
1. Turn the document face down and feed it into the machine.
2. Press Menu repeated until ADVANCED FAX displays and press OK.
3. Select Set Broadcasting by pressing
and press OK.
FAXING
FAXING
ADVANCED
Broadcasting
FAXING
1
1 The “arrow buttons” located at the left
and right of OK button on the control
panel are designated by in the
instructions.
ADVANCED
In this chapter, you will learn how to use the advanced fax features of your machine.
ADVANCED
Advanced faxing
• You can enter 5 fax numbers into one job.
FAXING
TIP: One touch buttons do not work with this Broadcasting function.
ADVANCED
4. Enter the fax number.
The document will be scanned into memory before transmission.
Advanced faxing 31
FAXING
FAXING
6. Press OK.
ADVANCED
• If you have finished entering all the numbers, answer N and press OK.
FAXING
• If you have more destinations, select Y by using and press OK when asked
Another? Y/N and repeat steps from 4.
ADVANCED
5. Press OK when the correct number appears in the display.
ADVANCED
4
CB782-90008_UG_EN.book
Page 32
Monday, October 8, 2007
6:55 PM
Delayed fax
Delayed fax
You can set your machine to send a fax any time in the next 24 hours. For example, it is
usually cheaper to send a fax at night because telephone rates are lower than they are
during the day. To cancel a scheduled fax, see To cancel the scheduled job on page 34.
1. Turn the document face down and feed it into the machine.
2. Press Menu repeatedly until ADVANCED FAX appears and press OK.
3. Select Set Delayed Fax by pressing
and press OK.
4. Enter the fax number.
TIP:
One touch buttons do not work with Delayed Fax.
• You can enter 5 fax numbers into one job.
5. Press OK when the number appears in the display.
• If you have more destinations, select Y by using
Another? Y/N and repeat steps from 4.
and press OK when asked
• If you have finished entering all the numbers, answer N and press OK.
6. Enter the name if you want to name the transmission.
If not, skip this step.
7. Press OK.
8. Enter the time (in the next 24 hours) for the transmission to start.
9. Press OK when the time appears correctly in the display.
The document will be scanned into memory before transmission and be sent at the
programmed time.
32 Advanced faxing
CB782-90008_UG_EN.book
Page 33
Monday, October 8, 2007
6:55 PM
Polling
Your HP Fax allows you to set one poll job at a time and it can be retrieved
1. Turn the document face down and feed it into the machine.
2. Press Menu repeatedly until ADVANCED FAX appears and press OK.
and press OK.
Poll Code [0000] will display.
4. Enter the poll code you want to use for this document and press OK.
• The poll code is preset to 0000, which means that the receiver does not need
to enter a poll code to receive the document.
FAXING
3. Select Set Polling Send by pressing
ADVANCED
NOTE:
once.
FAXING
You can program your fax machine to send a document when it is requested by a
remote fax machine.
FAXING
Setting send polling
ADVANCED
Polling enables you to set up a document so it can be retrieved at a later time.
For example, you can place the document in your machine, and the other party can
retrieve it when they are in the office or when their calling rates are lower.
ADVANCED
Polling
FAXING
FAXING
ADVANCED
FAXING
Advanced faxing 33
ADVANCED
• When it is polled, the page in memory will be deleted automatically. To cancel
Send Polling, see To cancel the scheduled job on page 34.
FAXING
• Your machine starts scanning the document(s) into memory and shows POLLING
SEND in the display. If the answer mode was TEL, the machine changes it to FAX
mode automatically.
ADVANCED
• The poll code is used to prevent your document from being retrieved by an
unauthorized caller.
ADVANCED
• The poll code is not static. You enter a new one for each document.
CB782-90008_UG_EN.book
Page 34
Monday, October 8, 2007
6:55 PM
To cancel the scheduled job
Polling another fax to receive
You can dial another fax machine that has a document waiting and request it to be sent to
your fax machine.
1. Dial the telephone number of the remote machine that is ready to be polled.
TIP:
One touch buttons do not work in this area.
2. Press Menu when you hear a fax tone from the remote machine.
The display shows To poll documents press Start/Enter.
3. Press Start/Enter.
4. Enter the other fax’s Poll Code to retrieve the document, and press OK.
NOTE:
If the other fax machine does not have a poll code, enter 0000.
The HP Fax receives and prints the polled document.
NOTE: Not all fax machines have polling capability, and polling incompatibility
sometimes occurs between fax machines made by different manufacturers.
To cancel the scheduled job
All scheduled jobs remain in memory after they have been set. To make more memory
available, cancel unnecessary scheduled jobs.
1. Press Menu repeatedly ADVANCED FAX appears and press OK.
2. Select Cancel Schedule by pressing
and press OK.
3. Select the scheduled job you want to cancel by pressing .
4. Press OK to cancel the selected schedule.
34 Advanced faxing
CB782-90008_UG_EN.book
Page 35
Monday, October 8, 2007
6:55 PM
Forward faxes
A Sending Confirm report will print for every fax that is forwarded.
1. Press Menu repeatedly until ADVANCED FAX appears and press OK.
to select the option you want and press OK.
• Off: disables fax forwarding
• Forward: forwards a fax to your new location
• Forward & Print: prints a fax and also forwards it to your new location
FAXING
3. Use
and press OK.
ADVANCED
2. Select Set Fax Forward by pressing
FAXING
While you are away from your home or office, you do not have to miss important faxes.
Your machine can forward any faxes it receives to a fax machine at your current
location, and if you choose, it can print a copy for you to review when you get back
as well.
ADVANCED
Forward faxes
ADVANCED
a. Enter the fax number and press OK.
Start Date&Time will display.
b. Press OK.
The current date and time will display.
FAXING
4. If you selected Forward or Forward & Print, Tel: will display.
Advanced faxing 35
FAXING
FAXING
ADVANCED
• During forwarding time, the answer mode temporarily changes to FAX.
FAXING
• The machine returns to Ready mode and FWD will appear in the display at
the start time and every fax will be forwarded to your new location till the
end time.
ADVANCED
e. Enter the end time and press OK.
FAXING
d. Press OK.
ADVANCED
End Date&Time will display.
ADVANCED
c. Enter the start time and press OK.
CB782-90008_UG_EN.book
Page 36
Forward faxes
36 Advanced faxing
Monday, October 8, 2007
6:55 PM
CB782-90008_UG_EN.book
Page 37
Monday, October 8, 2007
6:55 PM
Set the date and time
Feature reference
This chapter contains instructions for other features of the HP Fax that you may want to
use from time to time.
FEATURE
REFERENCE
1
1 The “arrow buttons” located at the left
and right of OK button on the control
panel are designated by in the
instructions.
FEATURE
REFERENCE
5
Set the date and time
FEATURE
REFERENCE
The current date and time are shown in the display when the machine is on and ready
for use (Ready mode). The date and time will be printed on all faxes you send.
1. Press Menu.
2. Press
to choose SET DATE & TIME and press OK.
3. Press OK when the display shows Date Format.
FEATURE
REFERENCE
4. Press to select either Europe (day month year) or USA (month day year) and
press OK.
5. Press OK when the display shows Date & Time.
6. Use the keypad to enter the date and time. You can move the cursor by
pressing . Enter the hour in 24-hour format.
7. Press OK.
FEATURE
REFERENCE
Turn on and off sounds
You can turn on and off the sounds the HP Fax makes.
WakeUp sounds
WakeUp sound will ring at a specific time set even when Silent Mode is enabled.
2. WakeUp Sound will display. Press OK.
3. Select On and enter the time you want the HP Fax to ring. Press OK.
Select Off to turn off WakeUp Sound. Press OK.
Feature reference
37
FEATURE
REFERENCE
FEATURE
REFERENCE
1. Press Menu repeatedly until SET UP SOUND appears and press OK.
CB782-90008_UG_EN.book
Page 38
Monday, October 8, 2007
6:55 PM
Set the fax header information
Alarm sounds
Alarm sounds include the fax tones and beeps.
1. Press Menu repeatedly until SET UP SOUND appears and press OK.
2. Press
to select Alarm Sound and press OK.
3. Select On or Off and press OK.
Key sounds
The Key sounds are the beeps the keys make.
1. Press Menu repeatedly until SET UP SOUND appears and press OK.
2. Press
to select Key Sounds and press OK.
3. Select On or Off and press OK.
Silent mode
You can turn the sounds of the HP Fax (including ringing) on and off using the control
panel button. You can also set all sounds to turn off on a daily schedule; for example, turn
all the sounds off between 8 pm and 8 am.
1. Press Menu repeatedly until BASIC FAX appears and press OK.
2. Silent Mode will display. Press OK.
3. Select On-Daily and press OK.
From: 00h To: 23h will display.
4. Enter a start time and an end time and press OK.
Set the fax header information
This information is required by law in many countries. The fax header prints your name
and fax number on the top of every fax you send.
1. Press Menu repeatedly until
SET FAX HEADER displays and press OK.
2. Press OK when the display shows Fax Number.
3. Enter the fax number to which your machine is connected.
• You can enter up to 20 digits, and include special characters (space, plus sign,
etc). For more information, see Fax header telephone number on page 16.
• To enter a space, press # once.
• To enter a plus sign +, press *.
• If you enter a wrong number, use
4. Press OK when finished.
38 Feature reference
to move to the number and correct it.
CB782-90008_UG_EN.book
Page 39
Monday, October 8, 2007
6:55 PM
Print reports
5. Press OK when the display shows Fax Name.
6. Enter the fax name (up to 40 characters) by using the number keypad.
• You can include special characters (space, plus sign, etc.). For more information,
see Enter dates, times, text, and telephone numbers on page 15.
FEATURE
REFERENCE
7. Press OK when the name in the display is correct.
Print reports
Your fax machine can print many reports for your use.
FEATURE
REFERENCE
Automatic reports
Report name
Content
Multi-Communication
This report prints automatically if you have faxed documents to
more than one location by using Broadcasting.
Power Fail Report
If you have a scheduled job (such as, delayed fax and send poll)
and there is a power failure, this report is printed automatically
when power is restored.
FEATURE
REFERENCE
These reports print automatically.
You can print these reports whenever you need to. Some of these reports can be set to
print automatically also.
1. Press Menu repeatedly until REPORTS appears and press OK.
2. Choose the report you want by using
.
FEATURE
REFERENCE
Reports you can print
3. Press OK when the desired report is displayed.
Help List
This report covers the machine’s basic functions and commands.
It can also be used as a quick reference guide.
Sent Journal
These reports show information concerning the transmission and
reception activities. They can be printed on command. Or if the
machine is set to do so, they will automatically print after every
40 transmissions or receptions. For more information, see Auto
Journal under the “BASIC FAX menu” on page 11.
Received Journal
Phonebook
FEATURE
REFERENCE
Content
This report shows all of the numbers currently stored in the fax
machine’s memory as One-Touch Dial and Speed Dial.
Feature reference
39
FEATURE
REFERENCE
Report name
FEATURE
REFERENCE
4. The selected report will be printed. The available reports are shown below:
CB782-90008_UG_EN.book
Page 40
Monday, October 8, 2007
6:55 PM
Reprinting faxes
Report name
Content
Sending Confirm
This report shows the fax number, the number of pages, elapsed
time of the operation, the communication mode, and the
communication results. To set up your machine to automatically
print, see Sending Confirm under the “BASIC FAX menu” on
page 11.
Schedule Inform
This report shows the document currently stored for Delayed FAX
and Send Polling along with the fax number, starting time and
type of scheduled event.
System Data
This report shows the current settings of your HP Fax. After you
have changed any setting, print this report to check your
changes.
Caller ID
If Caller ID is turned on, this report shows the most recent 30
callers who have called your machine. The report will be empty
if you don’t have Caller ID turned on.
Junk Fax
This report shows the telephone numbers that are marked as a
junk fax to be blocked.
Print Fax
Your machine stores fax data into memory as far as the memory
is available and lets you print it at later time. For more
information, see Reprinting faxes on page 40.
Reprinting faxes
You may sometimes need to reprint a received fax. Your machine stores the most recently
received faxes in memory (approximately 50 pages). As this memory is filled, old faxes
that have been printed will be erased to make room for new faxes.
NOTE: Unplugging the fax machine power cord and plugging it back in again clears the
memory including all unprinted or unsent faxes. A power outage also clears the fax
machine memory.
1. Press Menu repeatedly until REPORTS appears and press OK.
2. Press
to choose Print Fax and press OK.
• If there are only old faxes, the machine will automatically print all of them and
return to Ready mode without moving to the next step.
• If there are no faxes in memory, the machine will inform you by displaying
Memory Empty.
• If there are both old faxes and unprinted faxes in memory, the machine will go to
step 3.
40 Feature reference
CB782-90008_UG_EN.book
Page 41
Monday, October 8, 2007
6:55 PM
Clearing memory
3. Select between Print New Fax or Reprint Old Fax and press OK.
• Print New Fax: The machine prints all new faxes which have never been
printed.
FEATURE
REFERENCE
• Reprint Old Fax: The machine prints all faxes regardless of new or old.
Clearing memory
You can selectively clear information stored in your machine’s memory.
1. Press Menu repeatedly until MEMORY CLEAR appears, and press OK.
2. Select what you want to delete by pressing
FEATURE
REFERENCE
The display shows the type of information you can clear from memory.
and press OK.
3. Select Y and press OK when the machine asks if you are sure.
It will
Fax Header
Delete the name and phone number from your fax
header information.
Dial/Schedule
Clear the stored numbers in the phone book. In
addition, all the scheduled jobs are also cancelled.
Journal
Clear all records of transmissions and receptions.
Factory Default
Return all settings to factory defaults.
FEATURE
REFERENCE
Item
FEATURE
REFERENCE
The types of information you can clear are:
You do not need to pick up the handset to make a phone call. When dialing, just press
the Loudspeaker button and enter the numbers. When your party answers, pick up the
handset to talk to them. This feature is especially useful for checking voicemail messages.
FEATURE
REFERENCE
Loudspeaker
TIP: If you want to share the conversation with somebody beside you, pick up the
handset and press Loudspeaker. The line is still connected and everybody can listen to
the conversation.
FEATURE
REFERENCE
NOTE: Your HP Fax does not have speakerphone capabilities. The loudspeaker
enables you to hear calls but you must speak using the handset.
Feature reference
41
FEATURE
REFERENCE
While you are using Loudspeaker, do not place the handset beside the speaker, as this
may result in noise interference.
CB782-90008_UG_EN.book
Page 42
Monday, October 8, 2007
6:55 PM
Redial a number in memory
Redial a number in memory
These steps allow you to dial one of the last 10 numbers called that is in memory.
1. Hold Redial/Pause for about two seconds.
2 Press
until Recent Numbers displays and press OK.
3 Press to find the number you want to dial.
4 Press Start/Enter when the correct number appears.
If a document is loaded, the machine automatically begins to send.
42 Feature reference
CB782-90008_UG_EN.book
Page 43
Monday, October 8, 2007
6:55 PM
Print cartridge information
This chapter contains information about changing print cartridges, maintaining your HP
Fax, the menu settings, error messages, and troubleshooting.
Print cartridge information
• Store it in the same environment as the fax machine.
• If you have unpacked the cartridge but are not using it, store it in an airtight plastic
bag.
• DO NOT leave it exposed for an extended period.
• DO NOT refill the cartridge. The warranty will not cover damage caused by using
refilled cartridges.
View ink level
When using the 17ml print cartridge, your machine allows you to check the amount of
ink remaining. To view the current ink level:
1. Press Menu repeatedly until TOOLS appears and press OK.
2. Scroll to View Ink Level by pressing
and press OK.
The machine displays a fractional number. For examples, 1/8 means that ink is low
and you need to replace the cartridge. 8/8 means that a new cartridge is installed.
NOTE: If the HP Fax is low on ink (ink level is 1/8), new faxes that come in will not be
printed. They will be stored in memory. You must manually print the faxes from memory
(see Reprinting faxes on page 40) until you replace the ink cartridge (see Replace the
print cartridge on page 44).
TIP: If memory become full before the print cartridge is replaced, the HP Fax will stop
answering the phone. Be sure to print the faxes out of memory regularly if you do not
immediately replace the ink cartridge.
Care and maintenance
43
CARE AND
MAINTENANCE
• DO NOT unpack the cartridge until you are ready to use it.
CARE AND
MAINTENANCE
NOTE: Your HP Fax was shipped with a starter ink cartridge. Replace the starter
cartridge when it runs out of ink with the HP 701 cartridge.
CARE AND
MAINTENANCE
• Always use the HP 701 (CC635A) black inkjet print cartridge.
CARE AND
MAINTENANCE
CARE AND
MAINTENANCE
The print cartridge life is very sensitive to the content of received faxes or copies you
make. To increase its life, we recommend you follow the instructions below:
CARE AND
MAINTENANCE
Care and maintenance
CARE AND
MAINTENANCE
6
CB782-90008_UG_EN.book
Page 44
Monday, October 8, 2007
6:55 PM
Print the self test
Print the self test
When you want to test if the machine is working correctly, you can check it by printing the
self test.
1. Press Menu repeatedly until TOOLS appears and press OK.
2. Scroll to Self Test by pressing
and press OK.
The machine runs self test and prints a report which shows the current status of the
machine.
Replace the print cartridge
When you notice that the print becomes light or ink low or when install new ink
cartridge appears in the display, replace the print cartridge. The part number for
replacement cartridges is HP 701.
1. Take out a cartridge from its packaging and carefully remove the tape covering the
printhead.
Hold the cartridge by the colored top or black areas only. Do not touch the copper
area.
2. Press the Access Cartridge button on the control panel.
1 Access Cartridge
1
The cartridge carrier moves to the install position.
44 Care and maintenance
CB782-90008_UG_EN.book
Page 45
Monday, October 8, 2007
6:55 PM
Replace the print cartridge
3. Open the control panel and cartridge compartment cover (it will click and remain
open).
2
1 Control panel
CARE AND
MAINTENANCE
2 Cartridge compartment
cover
CARE AND
MAINTENANCE
1
Care and maintenance
45
CARE AND
MAINTENANCE
CARE AND
MAINTENANCE
If the cartridge moves loosely in the carrier, it has not clicked into place. Repeat this
step.
CARE AND
MAINTENANCE
5. To load the cartridge insert the cartridge as shown below. When the cartridge is
pushed to the back of the cartridge carrier, push the top of the cartridge until it clicks
into place.
CARE AND
MAINTENANCE
CARE AND
MAINTENANCE
4. Push the cartridge down and remove it.
CB782-90008_UG_EN.book
Page 46
Monday, October 8, 2007
6:55 PM
Clear jammed documents and paper
6. Close the cartridge compartment cover and control panel.
7. Press Start/Enter.
8. Press 1 for new cartridge, or 2 for the old one.
• When you put in a new cartridge, you must choose 1:New
• When you put in a used cartridge, choose 2:Used. This helps you to check the
correct amount of ink you have left.
TIP: If you mix up several used cartridges, it is not possible to check the correct amount
of remaining ink. Once you have put in a new cartridge, use it until it is completely
exhausted.
Clear jammed documents and paper
Document jams during transmission
If a document jams during transmission or copying, Remove jammed document appears
in the display. DO NOT pull the document out of the slot. Doing so could harm your
machine.
To clear document jam:
1. Open the control panel.
2. Carefully remove the jammed document.
3. Close the control panel firmly until it clicks into
place.
Paper jams during printing
If the fax paper jams while you are receiving or printing, Remove jammed paper and
press Cancel appears in the message.
If the paper is jammed in the printing area
1. Remove the jammed paper by pulling it out
smoothly in the direction of the arrow as
shown.
If the paper tears when it is being removed
check to ensure that no small pieces have been
left inside the machine.
2. Press Cancel.
3. If this was a fax, reprint the fax. For more
information, see Reprinting faxes on page 40.
46 Care and maintenance
CB782-90008_UG_EN.book
Page 47
Monday, October 8, 2007
6:55 PM
Maintain the print cartridge
If the paper is jammed in the paper feed area
1. Remove the jammed paper as shown.
Maintain the print cartridge
To maintain good printing quality, we recommend you occasionally maintain the print
cartridge and its associated parts:
Clean the print cartridge nozzles
If characters are not printing completely or white streaks appear in your text, you may
have clogged nozzles. Clean the print cartridge as described below:
1. Press Menu repeatedly until TOOLS appears and press OK.
2. Scroll to Clean Cartridge by pressing
and press OK.
3. Examine the printed test pattern.
• If print quality does not improve, reinstall the cartridge and repeat these steps.
• If the line is still broken, wipe the nozzles and contacts. For more information, see
Wipe the print nozzles and contacts on page 47.
Wipe the print nozzles and contacts
If cleaning the print cartridge nozzles as discussed above does not help and you are
certain the cartridge has plenty of ink, the problem may be caused by dried ink on the
print cartridge nozzles and contacts or the print cartridge carrier contacts. Follow these
two sets of instructions for manual cleaning.
Clean the nozzles
CARE AND
MAINTENANCE
4. If this was a fax, reprint the fax. For more
information, see Reprinting faxes on
page 40.
CARE AND
MAINTENANCE
3. Press Cancel when finished.
CARE AND
MAINTENANCE
2. Reload new paper with the print side facing
toward you.
CARE AND
MAINTENANCE
CARE AND
MAINTENANCE
If the paper tears when it is being removed
check to ensure that no small pieces have
been left inside the machine.
3. Gently blot and wipe the contacts and nozzles dry.
• Use a clean cloth dampened with water to gently clean
the entire copper-colored area, including the nozzles and
contacts.
• To dissolve any dried ink, hold the damp cloth against the
nozzles for about three seconds.
Care and maintenance
47
CARE AND
MAINTENANCE
2. Open the control panel and cartridge compartment cover and remove the cartridge.
See Replace the print cartridge on page 44.
CARE AND
MAINTENANCE
1. Press Access Cartridge.
CB782-90008_UG_EN.book
Page 48
Monday, October 8, 2007
6:55 PM
Maintain the print cartridge
4. Reinstall the cartridge and close the cover and panel.
If you spend a long time cleaning the cartridge, the cartridge carrier may have moved
back to the original position. If so, press Access Cartridge again to move the carrier to
the install position.
5. Press Start/Enter.
6. Press 1 for new cartridge or 2 for the old one.
Clean the cartridge carrier contacts
Before cleaning these parts, there should be no scheduled job such as delayed fax, send
polling, or faxes received into memory.
CAUTION: Once you have unplugged the power cord from the machine, all data in
memory will be lost.
1. Press Access Cartridge.
2. Open the control panel and cartridge compartment cover and remove the cartridge.
See Replace the print cartridge on page 44.
3. Remove the print cartridge.
4. Unplug the power cord from the electrical outlet of the rear of the machine.
WARNING!
Shock Hazard. Be sure to unplug the power cord before proceeding.
5. Clean the cartridge carrier contacts with clean and cotton swab.
6. Plug in the power cord and reinstall the cartridge.
48 Care and maintenance
CB782-90008_UG_EN.book
Page 49
Monday, October 8, 2007
6:55 PM
Clean the document scanner area
CAUTION: When you turn the power off to clean the scanner, documents stored in
memory will be lost.
1. Open the control panel.
2. Remove the white roller.
a. At the right-hand end of the white roller there is a bushing that is secured with a
small tab.
CARE AND
MAINTENANCE
b. Push the tab slightly inward, then rotate towards you. Then pull up the right-hand
end of the roller to remove it.
1 White roller
2 Drive roller
CARE AND
MAINTENANCE
3 White roller latch
1
3. Wipe the white roller surface and the driver roller surface with a soft cloth dampened
with water.
Care and maintenance
49
CARE AND
MAINTENANCE
CARE AND
MAINTENANCE
2
CARE AND
MAINTENANCE
3
CARE AND
MAINTENANCE
To keep your machine working properly, occasionally clean the white roller, document
feeder rubber piece, and the scanning glass. If they are dirty, documents sent to another
fax machine will not be clear.
CARE AND
MAINTENANCE
Clean the document scanner area
CB782-90008_UG_EN.book
Page 50
Monday, October 8, 2007
6:55 PM
Clean the document scanner area
4. Clean the document feeder rubber piece at the back of the control panel.
5. Carefully wipe the scanning glass with a soft, dry, lint free cloth.
• If the glass is very dirty, first wipe it with a slightly dampened cloth, then with a dry
one.
• Be careful not to scratch the glass surface.
6. Replace the roller in reverse order, and then close the control panel firmly until it clicks
into place.
50 Care and maintenance
CB782-90008_UG_EN.book
Page 51
Monday, October 8, 2007
6:55 PM
Adjust the scanner
Adjust the scanner
1. Press Menu repeatedly until TOOLS appears and press OK.
2. Scroll to Adjust Scanner by pressing
and press OK.
3. Load a plain WHITE sheet of paper (no writing or graphics) into the document feeder
and press OK.
CARE AND
MAINTENANCE
The scanner is adjusted at the factory. If, however, you drop your machine while moving
it, we recommend you adjust scanner.
• The machine starts to scan the document to adjust the scanner.
CARE AND
MAINTENANCE
• Printing quality may be unexpectedly worse if you do not use a plain WHITE
paper for the adjustment.
LCD error messages
Status/Solution
Adjust scanner
Adjust the scanner to fix this problem as described in Adjust
first in TOOLS menu the scanner on page 51.
You must use plain, white paper when adjusting the scanner.
See Adjust the scanner on page 51.
CARE AND
MAINTENANCE
Check white paper
document and try
again
Clean white roller, For more information, see Clean the document scanner area
glass and try again on page 49.
Duplicated with
[Speed No.xx]
The same number has already been registered into another
speed dial location.
CARE AND
MAINTENANCE
Exceeded Job Memory The machine can hold only 3 Favorites.
Exceeded Job Memory The broadcasting and delayed fax can hold 5 jobs in total.
Cancel a scheduled job and try again.
Cancel scheduled
Ink Low. Install
new ink cartridge
The print cartridge is low or has run out of ink. To install a new
print cartridge, see Replace the print cartridge on page 44.
Although this message is displayed, you can make a copy or
print a report. Incoming faxes will be stored in memory. You
must manually print them, see Reprinting faxes on page 40.
Install ink
cartridge
Print cartridge is not installed or improperly installed.
Invalid Time
The time you set for fax forwarding is wrong.
Care and maintenance
CARE AND
MAINTENANCE
job and try again
51
CARE AND
MAINTENANCE
Display
CARE AND
MAINTENANCE
These are the error message that may display along with solutions for you.
CB782-90008_UG_EN.book
Page 52
Monday, October 8, 2007
6:55 PM
LCD error messages
Display
Status/Solution
Job Not Assigned
You attempted to cancel a scheduled job but no jobs are
scheduled.
You attempted to delete, print or send the Favorites document
when there is no document stored.
Junk Fax Empty
You attempted to delete a junk fax number when there is no
junk fax number.
Junk Fax Full
The machine can hold only 20 junk fax numbers.
Load Document
You must load a document before proceeding.
Memory Full
Memory has become full while receiving a fax. It will not
answer the telephone until memory has been cleared. Print any
faxes stored in memory and, if necessary, clear scheduled jobs
See Reprinting faxes on page 40 and see Clearing memory
on page 41.
Memory Full
Memory has become full while scanning a document. Press OK
to send or copy the scanned pages only. To cancel the job press
Cancel and try again when memory becomes available, or split
the new document into smaller parts. See Clearing memory
on page 41.
Press OK to
continue
Memory Received
Ink Low. Install
new ink cartridge
The machine has data stored in memory. Replace the print
cartridge with new one in order to print the faxes.
Memory Received
Load paper and
press OK
Load paper and press OK. There might be a jam. Clear the jam
as described in Paper jams during printing on page 46.
Memory Received
Install ink
cartridge
There is no print cartridge in the machine. Install a print
cartridge.
No answer from
remote fax
The other machine has not answered after all redial attempts to
send a fax.
No CID Number
The machine could not detect the CID (Caller ID) number.
No Dial Number
There is no number in the redial memory.
Not available while The machine could not receive a new fax while printing the
reprinting fax
stored faxes.
Not Found
The number you are searching for does not exist in memory.
Number already
registered
The number you are trying to enter already exists in the phone
book or junk fax list.
52 Care and maintenance
CB782-90008_UG_EN.book
Page 53
Monday, October 8, 2007
6:55 PM
LCD error messages
Display
Status/Solution
Poll job exists
already
You have already programmed a polling send. Cancel
scheduled job and try again.
Polling Error
The machine you want to poll is not ready to answer your poll.
Check with the other person.
Check remote site
Receiving Error.
Ask sender to
try again.
There is an error while receiving a fax.
Remove jammed
document
The document you are sending has jammed in the document
feeder. To clear the document jam, see Document jams
during transmission on page 46.
CARE AND
MAINTENANCE
The remote user entered the wrong poll code.
CARE AND
MAINTENANCE
Poll Code Error
CARE AND
MAINTENANCE
Number Not Assigned There is no number assigned to this One-Touch or two-digit
Speed number.
You tried to copy or fax a document which is longer than
390 mm (15.4 in.).
Send Error.
Try again.
There is an error while sending a fax.
System Busy
Try again later
The fax machine is busy doing something else.
To redial now,
press Start/Enter
The machine is waiting (three minutes) to automatically redial
the fax number that was busy or did not answer.
CARE AND
MAINTENANCE
Remove jammed paper The paper has jammed during printing. To clear the paper jam,
and press Cancel
see Paper jams during printing on page 46.
CARE AND
MAINTENANCE
You attempted to enter Favorites while sending or printing
Favorites document.
Care and maintenance
53
CARE AND
MAINTENANCE
Processing Job
CARE AND
MAINTENANCE
You have the option to manually redial by pressing Start/Enter.
CB782-90008_UG_EN.book
Page 54
Monday, October 8, 2007
6:55 PM
Troubleshooting
Troubleshooting
Your problem may be listed in “LCD error messages” on page 51. The chart below shows
other problems you can solve yourself. For problems you cannot resolve here, see Use
Hewlett-Packard support services on page 64.
TIP: You can test your HP Fax to make sure it is set up properly for faxing. Place a
document in the document feeder, dial 1-888 HP FAX ME (1-888-473-2963) and press
Start/Enter. Please wait approximately 1 minute and you will receive a “Fax Back System
Test” page, confirming your product is working correctly. The Fax Header must be set up in
order to test the fax machine.
Fax problems
Problem
Solution
The machine is not working, there is
no display, and the buttons are not
working.
Unplug the power cord and plug it in again. Check that your
socket is live.
No dial tone.
Check that the phone line is connected properly to the port in
the bottom of the fax. Unplug and replug it. Make sure it clicks.
Check the phone socket in the wall by plugging in another
phone.
Someone calls and gets a busy signal This may rarely occur if the answer mode is set to AUTO, a
even though the fax is not busy.
voice call comes in and is hung up without being answered,
and another call is immediately received. In AUTO mode the
machine goes back to fax receive mode if the voice call is not
answered. The line will appear busy until the machine resets.
The numbers stored in memory do not Make sure the numbers are programmed correctly. To print a
dial correctly.
Phone book list, see Print reports on page 39.
The document does not feed into the
machine.
Be sure the document is not wrinkled, and you are putting it in
correctly. Check that the document is the right size and not too
thick or too thin. See Document types and sizes on page 57.
You cannot receive faxes
automatically.
Check if TEL appears on the right side of the display. In TEL
mode, you cannot receive a fax automatically. Be sure the
handset is seated on the cradle properly.
If the ink is low, the fax will stop printing faxes. Replace the
print cartridge.
If the fax memory is full, the fax will stop answering the phone.
Load paper and print the faxes in memory to clear out the
memory.
The machine cannot receive faxes
manually.
54 Care and maintenance
Do not hang up the handset before pressing Start/Enter to
receive a fax.
CB782-90008_UG_EN.book
Page 55
Monday, October 8, 2007
6:55 PM
Troubleshooting
Solution
You cannot poll another machine.
The fax machine you are polling may be using a poll code
(password).
The fax you received has blank bits
on it.
The machine sending to you may be faulty. A noisy phone line
can cause line errors. Check your machine by making a copy.
Spots or lines missing from the fax
you receive.
Maintain the print cartridge on page 47. Check with the
CARE AND
MAINTENANCE
The machine does not send anything. Check that the document is loaded face down.Send should
appear in the display after it dials. Check if the machine to
which you are sending can receive your fax.
CARE AND
MAINTENANCE
Check if the print cartridge is ok by making a copy. See
telephone company to see if your phone line is noisy.
You are receiving poor quality copies. The fax machine sending to you may have a dirty scan glass.
Also, check with the telephone company to see if your phone
line is noisy.
The machine sending to you had a temporary document jam.
CARE AND
MAINTENANCE
Some of the words on the fax you
received appear stretched.
Your machine does not make copies. Make sure your document is loaded face down.
There are lines on copies or
documents you send.
Check your scan glass for marks and clean it (see Clean the
document scanner area on page 49).
You cannot store a document in
memory.
CARE AND
MAINTENANCE
The machine dials a number, but fails The remote fax machine may be turned off or unable to answer
to make a connection with a remote incoming calls. Speak with the other fax operator to solve the
fax machine.
problem.
There may not be enough memory available to hold the
document you want to store. If the display shows a Memory
Full message, do the following until you can store your
document in memory:
CARE AND
MAINTENANCE
Print all unprinted faxes in memory (see Reprinting faxes on
page 40.
Delete unneeded polling faxes, broadcast faxes, or delayed
faxes (see To cancel the scheduled job on page 34).
Image TCR is not working
CARE AND
MAINTENANCE
Blank areas appear at the bottom of You may have selected the wrong paper size setting. To select
each page or on continuation pages, the proper paper size, see Paper Size on page 11.
with only a small strip of material
printed at the top.
You have the resolution set to SUPER FINE. Set the resolution to
FINE.
Care and maintenance
55
CARE AND
MAINTENANCE
Problem
CB782-90008_UG_EN.book
Page 56
Monday, October 8, 2007
6:55 PM
Troubleshooting
Print quality problems
Problem
Solution
Light or blurred characters.
Check ink level as described in View ink level on page 43. To
install a new print cartridge, see Replace the print cartridge
on page 44.
Make sure the print cartridge is installed correctly. To clean the
print cartridge, see Maintain the print cartridge on page 47.
Smudged or dark characters.
Make sure the paper is straight and unwrinkled. Let ink dry
before handling the paper. To clean the print cartridge, see
Maintain the print cartridge on page 47.
Characters with white lines.
If Ink Low. Install new ink cartridge is displayed,
install a new print cartridge as described in Replace the print
cartridge on page 44.
Remove and reinstall the print cartridge.
Clean the print cartridge (see Maintain the print cartridge on
page 47).
Improperly formed or misaligned
characters.
Abnormal black horizontal lines
Clean the print cartridge (see Clean the print cartridge
nozzles on page 47).
Clean the cartridge carrier (see Clean the cartridge carrier
contacts on page 48).
Paper feeding problems
Problem
Solution
Paper is jammed during printing.
Clear paper jam as described in Paper jams during printing
on page 46.
Paper sticks together.
•
•
Paper fails to feed.
Remove any obstructions inside the printer.
Multiple sheets of paper feed.
When loading paper, do not force the paper down into the
printer. If multiple sheets have caused a paper jam, clear the
paper jam. (see Paper jams during printing on page 46.)
Paper skews or buckles in the
paper tray.
The paper tray can hold up to 50 sheets. Make sure the paper
guides do not cause the paper to bow. When loading paper,
do not force it down into the machine.
56 Care and maintenance
Make sure you have fewer than 50 sheets in the paper tray.
Humid conditions may cause some paper to stick together.
Take the paper out and fan the pages and replace.
CB782-90008_UG_EN.book
Page 57
Monday, October 8, 2007
6:55 PM
Paper types and sizes
Specifications and regulatory information
This chapter contains product and supplies specifications, ordering information, and
regulatory statements.
Paper types and sizes
The HP Fax is designed to work optimally with plain cotton bond paper.
The following paper sizes and weight can be used with your machine:
Paper size
Dimensions
Paper weight
A4
210mm x 297mm (8.3in x 11.7in)
Letter
216mm x 279mm (8.5in x 11.0in)
Legal
216mm x 356mm (8.5in x 14.0in)
75 – 90g/m2
(20 – 24lbs)
Document types and sizes
You can insert a document that is up to 10 pages long in the document feeder.
Acceptable documents
Single sheet
Document size Max
Min.
Effective scanning width
2 or more sheets
216mm (W) x 356mm (L)a
8.5in (W) x 14in (L)
148mm (W) x 128mm (L)
5.8in (W) x 5in (L)
210mm
8.27in
Number of sheets which can
be loaded at a time
–
Up to 10
Thickness of document
0.07mm – 0.15mm
0.018in – 0.038in
0.075mm – 0.12mm
0.019in – 0.03in
Paper quality
Uncoated on both sides
a.When sending a document that is longer than A4 (297 mm/11.69 in.), you must immediately
take out each sheet as soon as it has been scanned. Otherwise, the document may jam.
Specifications and regulatory information 57
SPECIFICATIONS SPECIFICATIONS SPECIFICATIONS SPECIFICATIONS SPECIFICATIONS SPECIFICATIONS SPECIFICATIONS
AND REGULATORY AND REGULATORY AND REGULATORY AND REGULATORY AND REGULATORY AND REGULATORY AND REGULATORY
INFORMATION
INFORMATION
INFORMATION
INFORMATION
INFORMATION
INFORMATION
INFORMATION
7
CB782-90008_UG_EN.book
Page 58
Monday, October 8, 2007
6:55 PM
Print cartridge
Print cartridge
The HP Fax uses the following print cartridge.
HP 701 black inkjet print cartridge CC635A
Product specifications
The specifications are subject to change without notice.
Item
Specification
Type of unit
Inkjet Desktop Facsimile Transceiver
Communication System
Public Switched Telephone Network (PSTN) and PABX
Compatibility
ITU Group3
Compression scheme
MH, MR, MMR
Modem speed
14400/12000/9600/7200/4800/2400bps
Scanning method
CIS (Contact Image Sensor)
Input document size
8.5 inches (216 mm)
Effective scanning width
8.27 inches (210 mm)
Effective recording width
8 inches (203 mm)
Power consumption
Standby: 4.9Wh
Printing Mode: Maximum 15 Wh
Voltage
100 – 127~
Frequency
50 – 60 Hz
Current
500 mA
Temperature range
50°F to 89°F (10°C to 32°C)
Humidity range
20 to 80% RH (non-condensing)
Dimension (W x D x H)
364 x 253 x 134 mm (14.3 x 10.0 x 5.3 in.)
(without tray)
364 x 324 x 250 mm (14.3 x 12.8 x 9.8 in.)
(with tray)
58 Specifications and regulatory information
CB782-90008_UG_EN.book
Page 59
Monday, October 8, 2007
6:55 PM
Item
Specification
Weight
3.0 Kg (6.6 lb) (including handset)
Power source
See Rating Label attached on the back of the machine.
Resolution
Copy
Standard/Fine: 300 x 300 dpi
Super Fine/Photo: 600 x 300 dpi
Faxing Standard: 100 x 200 dpi
Fine: 200 x 200 dpi
Super Fine: 400 x 200 dpi
Speed dials
50
ECM mode
YES
Grey scale
64 levels
User memory capacity
640 Kbyte (capable of 50 pages at ITU#1 test chart
(2.5% coverage on A4)
Ink Cartridge Part Number
HP 701 (17ml) (CC635A)
Specifications and regulatory information 59
SPECIFICATIONS SPECIFICATIONS SPECIFICATIONS SPECIFICATIONS SPECIFICATIONS SPECIFICATIONS SPECIFICATIONS
AND REGULATORY AND REGULATORY AND REGULATORY AND REGULATORY AND REGULATORY AND REGULATORY AND REGULATORY
INFORMATION
INFORMATION
INFORMATION
INFORMATION
INFORMATION
INFORMATION
INFORMATION
Product specifications
CB782-90008_UG_EN.book
Page 60
Monday, October 8, 2007
6:55 PM
A sample of ITU #1 test chart (reduced to 60.5%)
A sample of ITU #1 test chart (reduced to 60.5%)
60 Specifications and regulatory information
CB782-90008_UG_EN.book
Page 61
Monday, October 8, 2007
6:55 PM
Environmental product stewardship program
Environmental product stewardship program
Hewlett-Packard Company is committed to providing quality products in an environmentally sound manner.
This product has been designed with several attributes to minimize impacts on our environment. For more
information, visit HP Commitment to the Environment website at:
http://www.hp.com/go/environment
Ozone production
This product generates no appreciable ozone gas (O3).
Paper use
This product is suited for the use of recycled paper according to DIN 19309.
Plastics
Plastic parts over 25 grams are marked according to international standards that enhance the ability to
identify plastics for recycling purposes at the end of the product's life.
Material safety data sheets
Material Safety Data Sheets (MSDS) can be obtained from the HP web site at:
http://www.hp.com/go/msds
Customers without Internet access should contact their local HP Customer Care Center.
Recycling program
HP offers an increasing number of product return and recycling programs in many countries, as well as
partnering with some of the largest electronic recycling centers throughout the world. HP also conserves
resources by refurbishing and reselling some of its most popular products.
This HP product contains the following materials that may require special handling at end-of-life:
• Mercury in the fluorescent lamp in the scanner (<2 mg)
• A lithium battery
This product contains a small Lithium battery that must be removed and disposed of properly at the end of the
product’s useful life. The battery is located on the main circuit board.
– Battery Part Number: Panasonic CR2032
– Battery Material: Lithium
– Battery Type: Button/Coin Cell Battery
– Quantity Per Product: 1
– Weight: approximately 3 grams
– Lithium Type: Solid
– Battery Manufacturer: Panasonic of Japan
California Hazardous Waste Requirement
Attention California users:
The battery supplied with this product may contain perchlorate material. Special handling may apply.
See www.dtsc.ca.gov/hazardouswaste/perchlorate for information.
Atención a los usuarios de California:
La pila proporcionada con este producto puede contener perclorato. Deberá con cuidado.
Consulte www.dtsc.ca.gov/hazardouswaste/perchlorate para información.
Specifications and regulatory information 61
SPECIFICATIONS SPECIFICATIONS SPECIFICATIONS SPECIFICATIONS SPECIFICATIONS SPECIFICATIONS SPECIFICATIONS
AND REGULATORY AND REGULATORY AND REGULATORY AND REGULATORY AND REGULATORY AND REGULATORY AND REGULATORY
INFORMATION
INFORMATION
INFORMATION
INFORMATION
INFORMATION
INFORMATION
INFORMATION
Protecting the environment
CB782-90008_UG_EN.book
Page 62
Monday, October 8, 2007
6:55 PM
Regulatory notices
Regulatory notices
The HP Fax meets product requirements from regulatory agencies in your country/region.
Regulatory model identification number
For regulatory identification purposes, your product is assigned a Regulatory Model Number. The Regulatory
Model Number for your product is SNPRG-0701. This regulatory number should not be confused with the
marketing name (HP 640 Fax series) or product number (CB780 series).
Notice to users of the U.S. telephone network: FCC requirements
This equipment complies with Part 68 of the FCC rules and the requirements adopted by the ACTA. On the back
of this equipment is a label that contains, among other information, a product identifier in the format
US:AAAEQ##TXXXX. If requested, this number must be provided to the telephone company.
The HP 640 Fax is provided with a RJ11C connector for connecting this product to the telephone network. An
additional RJ11C connector is provided for connecting an additional device to the telephone network from the
HP 640 Fax.
A plug and jack used to connect this equipment to the premises wiring and telephone network must comply with
the applicable FCC Part 68 rules and requirements adopted by the ACTA. A compliant telephone cord and
modular plug is provided with this product. It is designed to be connected to a compatible modular jack that is
also compliant. See installation instructions for details.
The REN is used to determine the number of devices that may be connected to a telephone line. Excessive RENs
on a telephone line may result in the devices not ringing in response to an incoming call. In most but not all
areas, the sum of RENs should not exceed five (5.0). To be certain of the number of devices that may be
connected to a line, as determined by the total RENs, contact the local telephone company. For products
approved after July 23, 2001, the REN for this product is part of the product identifier that has the format
US:AAAEQ##TXXXX. The digits represented by ## are the REN without a decimal point (e.g., 03 is a REN of
0.3).
For earlier products, the REN is separately shown on the label.
If the HP 640 Fax causes harm to the telephone network, the telephone company will notify you in advance that
temporary discontinuance of service may be required. But if advance notice isn't practical, the telephone
company will notify the customer as soon as possible. Also, you will be advised of your right to file a complaint
with the FCC if you believe it is necessary.
The telephone company may make changes in its facilities, equipment, operations or procedures that could affect
the operation of the equipment. If this happens, the telephone company will provide advance notice in order for
you to make necessary modifications to maintain uninterrupted service.
There are no customer serviceable parts inside the HP 640 Fax. If trouble is experienced with the HP 640 Fax, for
repair or warranty information, please contact Hewlett-Packard technical support by calling 866-331-9600. If
you have Internet access, you can go to www.hp.com/support for more information on the HP 640 Fax.
If the equipment is causing harm to the telephone network, the telephone company may request that you
disconnect the equipment until the problem is resolved.
Connection to party line service is subject to state tariffs. Contact the state public utility commission, public
service commission or corporation commission for information.
If your home has specially wired alarm equipment connected to the telephone line, ensure the installation of HP
640 Fax does not disable your alarm equipment.
If you have questions about what will disable alarm equipment, consult your telephone company or a qualified
installer.
This equipment is hearing aid compatible.
HP recommends the use of a Surge Suppressor when connecting the HP 640 Fax to AC power. Use of a Surge
Suppressor will help protect the HP 640 Fax and the telephone network from abnormal surges on the AC
powerline.
The Customer Information for facsimile (FAX) equipment must contain the following wording:
The Telephone Consumer Protection Act of 1991 makes it unlawful for any person to use a computer or other
electronic device, including FAX machines, to send any message unless such message clearly contains in a
margin at the top or bottom of each transmitted page or on the first page of the transmission, the date and time
it is sent and an identification of the business or other entity, or other individual sending the message and the
62 Specifications and regulatory information
CB782-90008_UG_EN.book
Page 63
Monday, October 8, 2007
6:55 PM
Regulatory notices
In order to program this information into your FAX machine, you should follow the instructions for setting the
Fax header on page 38 and 39 of this manual.
Automatic Dialers:
WHEN PROGRAMMING EMERGENCY NUMBERS AND (OR) MAKING TEST CALLS TO EMERGENCY
NUMBERS:
1) Remain on the line and briefly explain to the dispatcher the reason for the call.
2) Perform such activities in the off-peak hours, such as early morning or late evenings.
FCC statement
The United States Federal Communications Commission (in 47 CFR 15.105) has specified that the following
notice be brought to the attention of users of this product.
This equipment has been tested and found to comply with the limits for a Class B digital device, pursuant to
part 15 of the FCC Rules. Operation is subject to the following two conditions: (1) this device may not cause
harmful interference, and (2) this device must accept any interference received, including interference that may
cause undesired operation. Class B limits are designed to provide reasonable protection against harmful
interference in a residential installation. This equipment generates, uses, and can radiate radio frequency
energy, and, if not installed and used in accordance with the instructions, may cause harmful interference to
radio communications. However, there is no guarantee that interference will not occur in a particular
installation. If this equipment does cause harmful interference to radio or television reception, which can be
determined by turning the equipment off and on, the user is encouraged to try to correct the interference by
one or more of the following measures:
• Reorient the receiving antenna.
• Increase the separation between the equipment and the receiver.
• Connect the equipment into an outlet on a circuit different from that to which the receiver is connected.
• Consult the dealer or an experienced radio/TV technician for help.
The user may find the following booklet prepared by the Federal Communications Commission helpful: How to
Identify and Resolve Radio-TV Interference Problems. This booklet is available from the U.S. Government
Printing Office, Washington DC, 20402. Stock No. 004-000-00345-4.
CAUTION Pursuant to Part 15.21 of the FCC Rules, any changes or modifications to this equipment not
expressly approved by the Hewlett-Packard Company, may cause harmful interference and void the FCC
authorization to operate this equipment.
note à l’attention des utilisateurs du réseau téléphonique Canadien/notice to users of the Canadian telephone
network
This product meets the applicable Industry Canada technical specifications/Le présent materiel est conforme
aux specifications techniques applicables d'Industrie Canada.
The Ringer Equivalence Number is an indication of the maximum number of devices allowed to be connected
to a telephone interface. The termination on an interface may consist of any combination of devices subject
only to the requirement that the sum of the RENs of all the devices does not exceed five/L'indice d'équivalence
de la sonnerie (IES) sert à indiquer le nombre maximal de terminaux qui peuvent être raccordés à une interface
téléphonique. La terminaison d'une interface peut consister en une combinaison quelconque de dispositifs, à
la seule condition que la somme d'indices d'équivalence de la sonnerie de tous les dispositifs n'excède pas 5.
For non-European customers
This product is approved for use only in the country in which it was purchased. Local country laws may prohibit
the use of this product outside the country of purchase. It is strictly forbidden by law in virtually every country to
connect nonapproved telecommunications equipment (fax machines) to public telephone networks.
Specifications and regulatory information 63
SPECIFICATIONS SPECIFICATIONS SPECIFICATIONS SPECIFICATIONS SPECIFICATIONS SPECIFICATIONS SPECIFICATIONS
AND REGULATORY AND REGULATORY AND REGULATORY AND REGULATORY AND REGULATORY AND REGULATORY AND REGULATORY
INFORMATION
INFORMATION
INFORMATION
INFORMATION
INFORMATION
INFORMATION
INFORMATION
telephone number of the sending machine or such business, other entity, or individual. (The telephone number
provided may not be a 900 number or any other number for which charges exceed local or long-distance
transmission charges.)
CB782-90008_UG_EN.book
Page 64
Monday, October 8, 2007
6:55 PM
Use Hewlett-Packard support services
Use Hewlett-Packard support services
www.hp.com/support
If you are unable to find the answer you need in the printed documentation supplied with your product or on the
web, you can contact one of the HP support services listed in the following pages. If a support service number is
not listed for your country, contact your nearest authorized HP dealer for help.
Before calling customer support
1 Make sure that
• Your unit is plugged in and turned on.
• The correct print cartridge is installed properly.
• The recommended paper is loaded in the input tray.
2 Reset your unit by unplugging it and plugging it in again.
3 If you need to speak to an HP Customer Support Representative:
• Have your serial number ready.
• Print a Self-Test Report.
• Be prepared to discuss your problem in detail.
4 Be near your unit when you call.
Prepare your unit for shipment
If you are requested to send in your unit for service, do the following:
• Remove the print cartridge and place it in an airtight bag so it will not dry out. Do not send the print cartridge with the unit unless
asked to do so.
• If you do not have the original packing material, you can request a replacement package set from HP Customer Support. Shipping
damage caused by improper packaging is not covered under the warranty.
• Include these items in the box:
• A brief description of the symptoms (sample prints are helpful).
• A copy of your sales slip or proof of purchase (to establish the warranty period)
• Your name, address, and telephone number where you can be reached during the day.
Country/region
HP technical support
U.S. during warranty*
1-800-HP-INVENT
Canada during warranty
1-800-HP-INVENT
Canada post warranty
(per call charge)
(877) 621-4722
Mexico
01-800-472-6684
Mexico (Mexico City)
5258 9922
* U.S. phone support is available in both English and Spanish 24 hours a day, 7 days a week (days and hours of support may
change without notice).
64 Specifications and regulatory information
CB782-90008_UG_EN.book
Page 65
Monday, October 8, 2007
6:55 PM
Hewlett-Packard LIMITED WARRANTY STATEMENT
HP Product
Duration of limited warranty
Fax
1 year
Print cartridge
Until the HP ink is depleted of the “end of warranty” date
printed on the cartridge has been reached, whichever occurs
first. This warranty does not cover HP ink products that have
been refilled, remanufactured, refurbished, misused, or
tampered with.
Extent of limited warranty
Hewlett-Packard (“HP”) warrants to the end-user customer that the HP products specified above will be free
from defects in material and workmanship for the duration specified above, which duration begins on the date
of purchase by the customer.
For each software product, HP's limited warranty applies only to a failure to execute programming instructions.
HP does not warrant that the operation of any product shall be uninterrupted or error free.
HP's limited warranty covers only those defects which arise as a result of normal use of the product, and does
not cover any other problems, including those which arise as a result of (a) Improper maintenance or
modification, (b) Software, accessories, media, or supplies not provided or supported by HP, (c) Operation
outside the product’s specifications, or (d) Unauthorized modification or misuse.
For HP printing products, the use of a non-HP ink cartridge or a refilled ink cartridge does not affect either the
warranty to the customer or any HP support contract with the customer. However, if product failure or damage
is attributable to the use of a non-HP or refilled ink cartridge, HP will charge its standard labor and materials
charges to service the product for the failure or damage.
If HP receives, during the applicable warranty period, notice of a defect in any product, HP shall either repair
or replace the defective Product, at HP's option.
If HP is unable to repair or replace, as applicable, a defective product which is covered by HP's warranty, HP
shall, within a reasonable time after being notified of the defect, refund the purchase price for the Product.
HP shall have no obligation to repair, replace, or refund until the customer returns the defective product to HP.
Any replacement product may be either new or like-new, provided that it has functionality at least equal to that
of the Product being replaced.
HP products may contain remanufactured parts, components, or materials equivalent to new in performance.
HP's Limited Warranty Statement is valid in any country/region where the covered HP product is distributed by
HP. Contracts for additional warranty services, such as on-site service, may be available from any authorized
HP service facility in countries where the product is distributed by HP or by an authorized importer.
Limitations of warranty
TO THE EXTENT ALLOWED BY LOCAL LAW, NEITHER HP NOR ITS THIRD PARTY SUPPLIERS MAKE ANY
OTHER WARRANTY OR CONDITION OF ANY KIND, WHETHER EXPRESS OR IMPLIED WARRANTIES OR
CONDITIONS OF MERCHANTABILITY, SATISFACTORY QUALITY, AND FITNESS FOR A PARTICULAR
PURPOSE.
Limitation of liability
To the extent allowed by local law, the remedies provided in this Warranty Statement are the customer's sole
and exclusive remedies.
TO THE EXTENT ALLOWED BY LOCAL LAW, EXCEPT FOR THE OBLIGATIONS SPECIFICALLY SET FORTH IN
THIS WARRANTY STATEMENT, IN NO EVENT SHALL HP OR ITS THIRD PARTY SUPPLIERS BE LIABLE FOR
DIRECT, INDIRECT, SPECIAL, INCIDENTAL, OR CONSEQUENTIAL DAMAGES, WHETHER BASED ON
CONTRACT, TORT, OR ANY OTHER LEGAL THEORY AND WHETHER ADVISED OF THE POSSIBILITY OF
SUCH DAMAGES.
Specifications and regulatory information 65
SPECIFICATIONS SPECIFICATIONS SPECIFICATIONS SPECIFICATIONS SPECIFICATIONS SPECIFICATIONS SPECIFICATIONS
AND REGULATORY AND REGULATORY AND REGULATORY AND REGULATORY AND REGULATORY AND REGULATORY AND REGULATORY
INFORMATION
INFORMATION
INFORMATION
INFORMATION
INFORMATION
INFORMATION
INFORMATION
Hewlett-Packard LIMITED WARRANTY STATEMENT
CB782-90008_UG_EN.book
Page 66
Monday, October 8, 2007
6:55 PM
Hewlett-Packard LIMITED WARRANTY STATEMENT
Local law
This Warranty Statement gives the customer specific legal rights. The customer may also have other rights which
vary from state to state in the United States, from province to province in Canada, and from country to country
elsewhere in the world.
To the extent this Warranty Statement is inconsistent with local law, this Warranty Statement shall be deemed
modified to be consistent with such local law. Under such local law, certain disclaimers and limitations of this
Statement may not apply to the customer. For example, some states in the United States, as well as some
governments outside the United States (including provinces in Canada), may:
• Preclude the disclaimers and limitations in this Warranty Statement from limiting the statutory rights of a
consumer (e.g. the United Kingdom);
• Otherwise restrict the ability of a manufacturer to enforce such disclaimers or limitations; or
• Grant the Customer additional warranty rights, specify the duration of implied warranties which the
manufacturer cannot disclaim, or not allow limitations on the duration of implied warranties.
Complete the following information. It is necessary for contacts with the selling dealer or Hewlett-Packard
Company:
Date of Purchase:
Serial Number:
66 Specifications and regulatory information
CB782-90008_UG_EN.book
Page 67
Monday, October 8, 2007
Index
A
Access Cartridge
button 44
alarm sounds 38
align cartridge
menu 13
answer ring pattern detection 27
answer/receive mode 28
arrow buttons 1
Auto Journal
menu 12
auto reduction
menu 11
automatic fax redial 22
B
block junk faxes 24
bottom view 7
broadcasting 31
menu 13
broadcasting faxes 31
buttons
Access Cartridge 8
Back 9
Cancel 9
control panel 8
Copy 9
Favorites 8
Loudspeaker 8
Menu 9
Mute 8
Number keypad 8
OK 9
Rcv.Mode/Contrast 8
Redial/Pause 8
Resolution 8
Scroll/Volume 9
Speed Dial 8
Start/Enter 9
Symbols 8
C
Caller ID 24
junk faxes 24
list 24
report 40
turning on 24
6:55 PM
Caller ID menu 12
Cancel
button 9
cancel schedule
menu 13
cancelling a scheduled job 34
cartridge
cleaning 47
maintenance 43
part number 59
replacing 44
changing language 11
clean cartridge
menu 13
cleaning the fax 49
clearing jams
document 46
clearing memory 41
clearing paper jams 46
contrast 21
default 12
menu 12
control panel buttons 8
copies
collate 3
making 3
multiple 3
options 3
reduce or enlarge 3
Copy 9
Button 9
copy
collate 3
number of copies 3
print order 3
zoom 3
Copy button 9
D
date and time 37
date, setting 37
dates 15
delayed fax 13, 32
Dial Mode 12
dialing
automatic fax redial 22
discard size
(see also auto reduction) 11
menu 11
distinctive ring 27
menu 12
distribution list. See broadcasting faxes
CB782-90008_UG_EN.book
Page 68
Monday, October 8, 2007
document feeder
number of pages 5
document jams 46
documents
load 2
number of pages 2
DRPD 27
E
ECM mode 59
menu 12
entering 15
error messages 51
EXT. port 7
extension phone
fax receiving 22
F
Favorites 25
button 8
fax forwarding 13
fax header 38
fax memory
number of pages 5
FAX mode 28
fax name 38
fax number 38
fax problems 54
fax receiving 3
fax tones. See sounds
faxes
reprinting 40
faxing
color documents 21
images/embedded pictures 21
forwarding
faxes 13, 35
front panel 8
front view 6
G
getting help 64
H
HANDSET port 7
help 64
help list 39
HP Fax
parts of 6
HP support 64
6:55 PM
I
image TCR 26
menu 12
ink cartridge
maintenance 47
part number 43, 58
replacing 44
ink level 13
cartridge 43
ITU #1 chart 60
J
jams
clearing paper 46
document 46
paper 46
journal 12
junk fax
blocking 24
report 40
junk faxes 12
K
key sounds 38
L
language 11
menu 11
LINE port 7
loading documents 2
loading paper 1
Loudspeaker
button 8
loudspeaker 13, 41
button 8
M
making a copy 3
man fax rcv code
menu 12
memory
clearing 41
menu
BASIC FAX, options 11
button 9
picture 10
using 14
menu setting
language 11
messages
displayed 51
CB782-90008_UG_EN.book
Page 69
Monday, October 8, 2007
mute
button 8
N
number keypad 8
O
OK
button 9
one-touch
dialling 18
out of ink 13
out of paper. See reprinting faxes
P
paper
loading 1
not recommended 19
number of sheets 2
size 19
type 19
paper jams 46, 56
paper size 57
menu 11
paper tray
capacity 5
part number
ink cartridge 58
pause 17
phone book 17, 39
dialing 18
print 18
searching 18
photo
faxing 21
polling 13, 33
receive 34
send 33
ports
location of 7
print cartridge
ink level 43
maintenance 47
part number 43, 58
replacing 44
print fax 40
print quality
self test 44
print quality problems 56
6:55 PM
R
rcv.mode/contrast
button 8
ready mode 14
rear view 6
received journal 39
receiving faxes 28
redial/pause
button 8
redialing
automatic fax redial 22
redial a number in memory 42
regulatory information 62
regulatory notices
Canadian statement 63
reports 39
Caller ID 40
junk fax 40
phone book 39
printing faxes 40
received journal 39
schedule inform 40
sending confirm 40
sent journal 39
system data 40
reprinting faxes 40
resolution 21
button 8
default 12
menu 12
ring pattern detection 12, 27
ring volume 22
rings to answer 23
menu 11
S
scanner adjustment 51
scanner area
cleaning 49
schedule a fax 32
schedule inform 40
scheduled fax 13
scheduled faxes 40
scheduled job
cancelling 34
scheduled jobs
cancelling 13
scroll/volume
button 9
see answer mode 3
self test 44
menu 13
CB782-90008_UG_EN.book
Page 70
Monday, October 8, 2007
sending confirm 40
image TCR 12
menu 11
sent journal 39
set broadcasting
menu 13
set delayed fax
menu 13
set fax forward
menu 13
set junk fax no
menu 12
set polling send
menu 13
setting date and time 37
setting fax number 38
silent mode
daily 38
daily schedule 11
menu 11
sounds
alarm 38
keys 38
on and off 37
WakeUp 37
speaker volume 22
speed dial
button 8
programming 17
using 17
speed dials
number of 5
start/enter
button 9
supplies
print cartridge 43
symbols
button 8
system data 40
T
TAM mode 29
TEL mode 29
telephone
dialing 4
telephone numbers
entering 15
text
entering 15
time, setting 37
6:55 PM
troubleshooting
fax problems 54
messages 51
paper feeding 56
print quality 56
U
unwanted faxes 12
V
view ink level
menu 13
volume
ring 22
speaker 22
W
WakeUp 37
WakeUp sounds 37
warranty 65