1
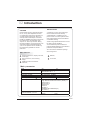
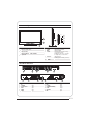
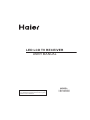
LED LCD TV RECEIVER
USER MANUAL
Please read this manual carefully before using
your television and keep this manual in a good
place for future reference.
MODEL:
LEY26C600
LEY32C600
01 Safety and warnings
Welcome ………………………………………………………………………… P.02
Important information ……………………………………………………………P.02
Safety notice …………………………………………………………………… P.03
Warnings and cautions ………………………………………………………… P.05
02 Introduction
Main Parameter ………………………………………………………………… P.06
Base Stand Assembly Instruction …………………………………………… P.08
Wall Mounting Installation Guidelines ………………………………………
P.09
Control Panel …………………………………………………………………… P.10
Rear/Side Sockets ……………………………………………………………… P.10
Connecting your TV ……………………………………………………………… P.11
Common interface ………………………………………………………………… P.12
03 Remote Control
04 Operation
05 DVD Operation
Remote Control ………………………………………………………………… P.13
Installation Guide ………………………………………………………………… P.15
DVD Side Panel ………………………………………………………………… P.23
Remote Control-DVD section ………………………………………………… P.24
Meun Operation ………………………………………………………………… P.25
Protect your DVD discs ……………………………………………………… P.26
06 DVD Trouble shooting
DVD Trouble shooting ………………………………………………………… P.27
07 Trouble shooting
Trouble shooting ……………………………………………………………… P.28
Specification …………………………………………………………………… P.30
Thanks for buying this 26"/32" LED LCD TV with DVD Player. This guide will help you set up and begin using your TV.
26" Full HD 1080P Digital LED LCD TV with DVD Player
Remote control
AAA battery x2
Instruction Manual
Quick start guide
Scart cable x1
Pedestal
32" Full HD 1080P Digital LED LCD TV with DVD Player
Remote control
AAA battery x2
Instruction Manual
Quick start guide
Scart cable x1
Pedestal
Now you can get started!
IMPORTANT INFORMATION
READ ALL INSTRUCTIONS BEFORE USE AND KEEP FOR FUTURE REFERENCE.
CAUTION
TO REDUCE THE RISK OF ELECTRIC SHOCK, DO NOT REMOVE COVER (OR BACK).NO USER SERVICEABLE PARTS INSIDE.
FOR ANY PROBLEMS, REFER SERVICING TO THE CUSTOMER HELP LINE. THERE IS A LIGHTNING ARROW SYMBOL IN
THE TRIANGLE: THIS SYMBOL INDICATES HIGH VOLTAGE IS PRESENT INSIDE. IT IS DANGEROUS TO MAKE ANY KIND OF
CONTACT WITH ANYINSIDE PART OF THIS PRODUCT.
THERE IS A EXCLAMATION MARK IN THE TRIANGLE: THIS SYMBOL ALERTS YOU THAT IMPORTANT LITERATURE
CONCERNING OPERATION AND MAINTENANCE HAS BEEN INCLUDED WITH THIS PRODUCT.
CAUTION:TO REDUCE THE RISK OF ELECTRIC SHOCK AND FIRE, DO NOT PUT THE TV SET NEAR
SOURCES OF HUMIDITY. DO NOT USE ANY ABRASIVE CLEANERS WHICH MAY SCRATCH OR DAMAGE
THE LCD SCREEN. AVOID CONTACT WITH OBJECTS THAT MAY SCRATCH THE LCD SCREEN.
NOTE: SERVICING THE UNIT YOURSELF IS UNAUTHORISED AND COULD LEAD TO INJURY OR PRODUCT
DAMAGE. REFER ALL SERVICING TO THE CUSTOMER HELPLINE.
VISIBLE AND INVISIBLE LASER RADIATION WHEN OPENED. AVOID EXPOSURE TO BEAM
(WARNING LOCATION: INSIDE ON LASER COVER SHIELD).
REGION MANAGEMENT INFORMATION
This DVD player is designed and manufactured to respond to the Region Management
Information that is recorded on a DVD disc. If the Region number described on the DVD
disc does not correspond to the Region number of this DVD Player, this DVD player can
not play that disc.
This Region number of this DVD player is
This TV is optimised for use in the United Kingdom. It is not certified to work in other countries
and some features and signal inputs may not work as described in the documentation.
P.02
the
accessable.
P.03
UK Only 13A Plug Connection.
If your TV is connected to the mains supply using a 3 pin 13 amp plug, the voltage rating is 220240 volts and should be protected by a 3 amp fuse in the plug.
Should the fuse require replacement for any reason, the fuse must be replaced with a fuse
rated at 3 amps and manufactured and approved to Bs1362.
If the mains plug is unsuitable for the socket outlet in your home or is removed for any other
reason, then the cut off plug should have its fuse removed and be disposed of safely to prevent
the hazard of electric shock.
There is a danger of electric shock if the cut off plug is inserted into any 13 amp socket outlet.
How to wire a 13 amp plug.
Important
The wires in the mains lead on a TV are colour coded in accordance with the following code.
Green and yellow
Earth
Not required on TV's as they are double insulated.
Blue
Neutral
Brown
Live
Double insulated appliances
Appliance with double insulation, have a symbol
than means that they do not have an earth
wire (green and yellow), so on these appliances only have two wires a blue and a brown.
If the colours do not correspond with the markings identifying the terminals in your plug,
proceed as follows.
The green and yellow wire, not required on double insulated appliances, must be connected to
the terminal in the plug which is marked with the letter E or with the earth symbol
or
coloured green and yellow.
The blue wire must be connected to the terminal marked N or coloured Blue or Black
The brown wire must be connected to the terminal marked L or coloured Brown or Red
P.04
WARNINGS AND CAUTIONS
Caution
Do not trap the power supply cord under
the television receiver.
Warning
To prevent fire or electrical shock
hazard, do not expose the television
receiver to rain or moisture.
Caution
Never stand on, lean on, or suddenly push
the television or its stand. You should pay
special attention to children. Serious injury
may result if it should fall.
Warning
Caution
Do not place your television on an unstable
cart, stand, shelf or table. Serious injury to
an individual , and damage to the
television, may result if it should fall.
Do not drop or push objects into the
television cabinet slots or openings.
Never spill any kind of liquid on the
television receiver.
Caution
When the television receiver is not
used for an extended period of time, it
is advisable to disconnect the AC power
cord from the AC outlet.
Caution
Do not block the ventilation holes in the
back cover. Adequate ventilation is
essential to prevent failure of electrical
components.
P.05
Dim:515*320mm(不包括底座)
Caution
If the television is to be built into a
compartment or similar enclosure, the
minimum distances must be maintained.
Heat build-up can reduce the service life of
your television, and can also be dangerous.
01Safety and warnings
Warning
High voltages are used in the operation
of this television receiver. Do not remove
the cabinet back from your set. Refer
servicing to qualified service personnel.
02 Introduction
INSTALLATION
CAUTION
Never tamper with any components inside
the TV, or any other adjustment controls
not mentioned in this manual. All LED-TVs
are high voltage instruments. When you
clean up dust or water drops on the LED
PANEL or CABINET, the power cord should
be pulled out from the receptacle, then
wipe the TV with a dry soft cloth. During
thunder and lighting, unplug the power cord
and antenna cord to prevent damage to
your TV. All repairs to this TV should only
be performed by qualified TV service
personnel.
*Locate the TV in the room where light
does not strike the screen directly.
*Total darkness or a reflection on the
picture screen can cause eyestrain. Soft
and indirect lighting is recommended for
comfortable viewing.
*Allow enough space between the TV and
the wall to permit ventilation.
*Avoid excessively warm locations to
prevent possible damage to the cabinet or
premature component failure.
*Do not cover the ventilation openings
when using theTV.
Main features
1
Used as Television, display terminal,
PC display;
4
NICAM;
2
High luminance, wide viewing
Angle;
5
Time-shift;
3
HDMI interface and SCART
Interface;
Main parameter
Panel
TV System
Video Signal System
Input Power Voltage
Power consumption
Audio Output Power (THD 7%)
Signal Input
Horizontal definition(TV line)
26"
32"
PAL-B/G、I、D/K
SECAM- B/G、D/K、L、L '
PAL/SECAM
AC 100V-240V 50/60Hz
55W
90W
2x8W
2x5W
Analog RGB(PC)x1
High-Definition Multimedia Interface (HDMI) x 2
Vdieo Input x1
Audio Input x2
USB Input x1
YPbPr x1
SCART x 1
COMMON IN INTERFACE(CI)
PC audio x1
Composite Video input >=350
YPbPr
>=400
P.06
PC
PRESET MODE
P.07
V.Freq.(Hz)
H.Freq.(KHz)
1
640x480
60
31.47
2
800x600
60
37.88
3
1024x768
60
48.36
4
1360x768
60
47.7
5
1280x1024
60
63.98
6
1920x1080
60
66.64
02 Introduction
RESOLUTION
Base Stand Assembly Instruction
1. Insert the stand support pillar into the stand as the arrow indicated
direction, and then fastened with three screws.
2. Insert the stand Ass'y into back cover as the arrow indicated direction,
and then fastened with one screw.
INSTALLATION NOTES
Locate the TV in a room where light does not strike the screen directly. Total darkness
or a reflection on the screen can cause eyestrain. Soft and indirect lighting is
recommended for comfortable viewing.
Allow enough space between the TV and the wall to permit ventilation.
Avoid excessively warm locations to prevent possible damage to the cabinet or
premature component failure.
P.08
WALL MOUNTING INSTALLATION GUIDELINES
This television can be wall mounted as follows:
1.Place the LED LCD Television onto a solid surface. Please place some soft material
over the front of the screen to protect it from any damage.
2.Remove the screws from the lower part of the television, where the base joins to the
TV, and take away the stand (put the stand somewhere safe for future use).
3.Use the four screws provided to fix the TV onto a wall mounting bracket (not included)
via the four VESA standard holes on the back of the television.
100.00
200.00
P.09
02 Introduction
100.00
200.00
100.00
200.00
Front control panel
SOURCE
1
MENU
2
CH+
3
3
CHVOL+
4
VOL-
1
STANDBY
5
2
1
2
3
Remote control sensor.
Indicator LED:
BLUE: POWER ON. RED: STAND BY.
Key board.
1
2
3
SOURCE
MENU
CH+/CH-
4
VOL+/VOL-
5
STANDBY
Display the input source menu.
Display main MENU.
In TV mode,press CH+ or CH- to change
the channel up and down.
In MENU, press CH+ or CH- to select items .
In standby mode, it can Turn on the TV.
Adjust sound level.
In MENU,adjust the item that you Selected.
Rear/Side Sockets
AV
L
R
Pb
Y
Pr
HDMI2
AC-INPUT
100-240V~ 50/60Hz
3
1
4
2
5
COMMON INTERFACE (CI)
HDMI1
6
1
2
3
4
5
6
AV
L/R AUDIO
AC Power Source
YPbPr
HDMI2
HDMI1
USB
PC AUDIO
7
8
input
input
input
input
input
input
9
SCART
VGA
ANT
10
11
12
7
8
9
10
11
12
USB
PC AUDIO
COMMON INTERFACE(CI)
SCART
VGA INPUT
ANT
input
input
Intput
Intput
Input
input
P.10
Connecting to your Haier TV
Connecting a DVD player / Satellite / cable
set top box receiver / games console / PC or
Laptop
There are several options to connecting a DVD
player / Satellite or Cable set top box receiver /
games console / PC or Laptop to your TV.
SCART
Option 5
Connect a SCART cable (not supplied)
from the SCART socket on the TV to the DVD
player / Satellite or cable set top box receiver or
games consol.
To select the device connected with the
SCART cable press the SOURCE button on the
remote and use the
keys to select SCART
and press the OK button.
Note:- The TV will default to the SCART
connection when the TV is switched on.
Option 2
Connect a VGA cable (not supplied) from the
VGA socket on the TV to the PC / Laptop.
To select the PC / Laptop connected with the
VGA cable press the SOURCE button on the
remote and use the
keys to select PC and
press the OK button.
Note VGA is video only. For audio from your
PC/Laptop you need to connect a separate
cable from the PC Audio (3.5mm jack) to the
headphone socket on you PC/Laptop (3.5mm
jack)
HDMI
Option 6
If the device you want to connect to the TT
is switched on, switch off the device first.
Connect a HDMI cable (not supplied) from
the HDMI socket on the TV to the DVD player /
Satellite or cable receiver or games consol.
Switch on the device you have just
connected to the TV
To select the device connected with the
HDMI cable press the SOURCE button on the
remote and use the
keys to select HDMI and
press the OK button.
Option 3
USB
Most USB sticks can be connected to your TV
and some digital cameras may also work.
Connect USB stick (not supplied) or a USB
cable (not supplied) to the TV.
To select the USB device connected to the TV,
press the SOURCE button on the remote and
use the
keys to select USB and press the
OK button.
Note1:- Only *.jpg and *.mp3 files will work,
other file types are not guaranteed and may not.
AV Audio Visual
(Yellow/White/Red)
Make sure that both TV and the device are
switched off before connecting.
Connect the AV cables (not supplied) from
the Video (yellow) and Audio (white, red)
sockets on the TV to the DVD player or games
console etc.
To select the device connected with the
AVI cable press the SOURCE button on the
remote and use the
keys to select AV and
press the OK button.
Option 4
COMPONENT
(Green/Blue/Red)+(White/Red)
Make sure that both TV and the device are
switched off before connecting.
P.11
VGA (15pin Sub-D)
Note 2. Apple iPhones and iPods are not
compatible with you TV.
Note 3. When connecting any device to the USB
connection, keep the USB cable length as short
as possible.
02 Introduction
Option 1
Connect the cables (not supplied) from the
COMPONENT IN sockets Y, Pb, Pr (green,
blue, red) and L-Audio-R (white, red) on the TV
to the DVD player or games console etc.
To select the device connected with the AVI
cable press the SOURCE button on the remote
and use the
keys to select COMPONENT
and press the OK button.
COMMON INTERFACE
The common interface (CI) slot is designed to
accept the conditional Access (CA) Module
and Smart card in order to view the pay TV
programmes and additional services.
Contact your Common Interface service
provider to get more information about the
modules and subscription.
Please noted that CA modules and smart
cards are neither supplied nor optional
accessories from us.
Auto Tunin g
<
CHANNEL
DTV Manual Tunin g
ATV Manual Tunin g
Pro gra mme Edit
Sig nal In fo rm atio n
>
CI In fo rm atio n
Softw are Update (O AD)O ff
Softw are Update (U SB)
P.12
POWER
MUTE
TV AUDIO
1
2
3
RECALL/GOTO
4
5
6
7
8
9
0
TV MENU
SOURCE
OK
DVD MENU
SOUND
EXIT
PIC
CH
+
+
VOL
_
_
SLEEP
DVD SETUP
ASPECT
TV/RADIO
FAV
EPG
A-B
TITLE
RETURN
DISPLAY
REVEAL
HOLD
SUBPAGE
SIZE
TEXT
INFO
PBC
ANGLE
DVD AUDIO SUBTITLE
LIST
INDEX
MIX
FREEZE
1: POWER:Press to turn the un it on or off .
2: NUMERIC KEY:Press for di rect acc ess to cha nn el s.
3: TV MENU:Press to di spl ay TV Mai n Men u.
4: CURSOR:Press to scrol l throug h the Men u.
6: VOL+/- :Press to ad just the sou nd leve l.
7: PIC:Press to sw itch be twee n pi ct ure mod es.
8: SLEEP:Press to set Slee p Timer.
9. REC:Press to reco rd the TV program you are watchi ng in
DTV Mod e.
10 :TV/RADIO:Press to sw itch be twee n TV an d Rad io mod es.
11: EPG:Press to di spl ay the 7 Day Electr on ic Prog ram Gui de
For infor mati on on the sho w you are watchi ng .
12 :FAV:Press to acc ess you r favo uri te cha nn el s list in TV or
DTV mod e
15 :REWIND:Press to rew ind pl ay in USB Mod e an d Timesh ift
Mod e.
16 : FAST FORWARD:Press to Fast Forw ard pl ay in USB mod e
or Timesh ift Mod e.
17 :PLAY:Press the Play Butt on in USB Mod e or Time Shi ft
Mod e to be gi n or con tinu e Playb ack .
18 :PAUSE:Press the Pau se Butt on to st art timesh ift fun ct ion
or pa use med ia pl ay in DMP mod e.
19 :TELETEXT KEYS:Refer to pa ge 12 .
20 :MUTE:Press to di sab le or en ab le the sou nd ou tpu t.
21 :TV/AUDIO:To sel ect the ava ilab le au di o lan gu ag e of TV
program s .
22 :RECALL/GOTO:Press to retur n to the previ ou sl y vi ew ed
cha nn el .
23 :SOURCE:Press to di spl ay the Inp ut Sou rce Li st .
24 :OK:Press to con firm Men u sel ecti on s.
25 :EXIT:To exi t the mai n men u, press the Exi t Butt on or to
can cel sett ing sel ecti on s.
26 :SOUND:Press to sw itch be twee n the sou nd mod es.
27 :CH+/C H-:Press to scrol l throug h you r Cha nn el Li st .
28 :ASPECT:Press to cha ng e the pi ct ure asp ect rati o.
29 :TEXT:Press to en ter or exi t TELE TEXT mod e.
30 :INFO:To di spl ay the program infor mati on of the sho w you
are watchi ng , press the Info Butt on .
33 :SKIP FORWARD:Press to ski p the ne xt file or track in
USB Mod e.
34 : SKIP BACKWARD:Press to ski p the previ ou s file or
Track in USB Mod e
35 :SUBTITLE:To turn on Sub titles press the Sub title Butt on
in DTV mod e.
36 . : Press to st op pl ayi ng in USB mod e, or press to st op
Time Shi ft.
37 :FREEZE:Press to free ze the pi ct ure you are watchi ng .
NOTE:
1) With no operation for 4 hours, the unit will
go into the standby mode automatically.
2) For the DVD section, please refer to page 23 .
P.13
03 Remote Control
03 Remote control
REMOTE CONTROL
TELETEXT
Press:
TEXT
E
Teletext is an information system broadcast by certain channels which can be
consulted like a newspaper. It also offers access to subtitles for viewers with hearing
problems or who are not familiar with the transmission language(cable networks,
satellite channels, etc.)
You will obtain:
This is used to call or exit teletext modes. The summary appears with
a list of items that can be accessed. Each item has a corresponding
3 digit page number. If the channel selected does not broadcast
teletext, theindication 100 will be displayed and the screen will
remain blank (in this case, exit teletext and select another channel).
Enter the number of the page required using the 0 to 9 up/down.
SELECTING A PAGE Example: page 120, enter 120. The number is displayed top left, the
counter turns and then the page is displayed. Repeat this operation to
view another page. If the counter continues to search, this means
that the page is not transmitted. Select another number.
DIRECT ACCESS
TO THE ITEMS
INDEX
SUB PAGE
HOLD
REVEAL
LIST
Coloured are as are displayed at the bottom of the screen. The 4
coloured keys are used to access the items or corresponding pages.
The coloured areas flash when the item or the page is not yet
available.
This returns to the contents page (usually page 100).
Certain pages contain sub-pages which are automatically
displayed successively. This key is used to stop or resume subpage acquisition. The indication appears top left.
To freeze the page.
To display or hide the concealed information (games solutions).
The user can set four favorite pages to be directly linked to the four
color keys. While list mode is activated, it is not possibility to use TOP
or FLOF navigation with the colorkeys. The favorite page numbers
should be stored and restored to/from nonvolatile memory for each
channel by the system software.
P.14
04 OPERATION
Installation Guide
Tune Type
Please select an OSD Language
Cesky
Engli sh
Fran ais Magyar
Dansk
Espanol
Hrvatski Nederla nds Portugues
Deutsch
E
Itali ano
~
ka
Norsk
Pols ki
DTV+ATV
Norway
Germany
Italy
Greece
Luxembourg
Pola nd
Hungary
Netherla nds
Portugal
MENU
Pycck
Please press
to select country at first , then
press OK button to start auto tuning .
OK
Mode Select
Channel Tuning
Home Mode
TV : 0 Programme(s)
DTV : 0 Programme(s)
Radio : 0 Programme(s)
Data: 0 Programme(s)
Shop Mode
OK
96%
UHF CH 68 DTV
Country
Rumania
Slo venia Swit zerla nd
Morocco
Pola nd
Russia n
Spain
UK
Tunis
Sweden
NewZeala nd Alg eria
Portugal Serbia
OK
This screen only appears the first time the TV
is turn on, or reset to factory set.You can choose
language,energy-saving mode and country,
auto turning programs .And after turning the
screen will skip to the first DTV program.
1.CHANNEL MENU
The first item of the MENU is channel menu( for
TV or DTV source only).
NOTE:
All the channels including ATV, DTV and Radio
can be tuning by one time,if the Tune Type is
DTV+ATV .
All the stored channels will be disappear after
auto tuning .
After auto tuning , the channel will skip to
the first DTV channel.
2).DTV Manual tuning:
You can select a DTV channel then find the
program in this channel.
Pls press
to select the channel , then press
OK to search the programs .
NOTE:
Bad Normal Good means signal intensity.
DTV Manual Tuning
Auto Tunin g
<
CHANNEL
_
DTV Manual Tunin g
ATV Manual Tunin g
Pro gra mme Edit
Sig nal In fo rm atio n
>
CI In fo rm atio n
Softw are Update (O AD)O ff
Softw are Update (U SB)
VHF CH
5
+
Press OK to search
Bad
You can search channels and edit programs here.
1).Auto tuning:
Search all the channels automatically(you can
select ATV and DTV)
P.15
Nomal
Good
3). ATV Manual tuning :
You can change the sound system to search
the analog TV channels and fine tune the
channels , then storage the channels you
selected.
04 Operation
Norway
ATV Manual Tunin g
_
Storage To 1
+
System BG
5). CI information: (optional)
This menu can display the CI card' s information.
Current CH 1
2. PICTURE MENU
Search
Fin e-Tune
Frequency 255.25 MHz
Save
Once your favorite group is created, you can
press the FAV key to quickly access your favorite
channel.
The second item of the MENU is PICTURE MENU.
You can adjust picture effect here, such as
contrast, brightness, etc.
Press OK to move, press OK to adjust.
MENU
Pic ture Mode Standard
Colo r Temperature
Aspect Ratio
NOTE:
<
PICTURE
Press teletext red button to storage to channels
after manual tuning .
4). Program edit:
You can Delete ,Rename ,Move, Skip , FAV any
programs.
Delete
Press teletext red button , the program in cursor
will delete.
Picture Mode
Standard
Nois e Reductio n
Screen
Colo r Temperatu re
Contr ast 82
Red 40
Brig htn ess 50
Green 31
Colo r 50
Blu e 50
Only can rename ATV programs .
Move the cursor to the program, press teletext
green button to rename the program.
Press
to choose the character. Press
to
move the cursor .
Press MENU button to exit edit , Press EXIT to
exit the menu.
Note: ATV programs name only can be 5 characters long,
DTV programs name can be 25 characters long.
Use the Arrow Buttons to select the channel you
wish to move. Then press the Yellow Button to
select Move function. Once active, enter the
number button and then press OK to confirm.
Mediu m
Sharpness 50
Tin t 50
MENU
MENU
Rename:
>
NOTE:
1).Tint is available in NTSC system only.
2).There are four colors temperature modes
can be selected medium, warm, cool,user
3).Screen is available in PC mode only which,
can adjust Horizontal position, vertical
position, size and phase.
3.SOUND MENU
The third item of the MENU is the SOUND
MENU.
You can adjust the sound effect here such as
treble, bass, balance etc.
Press
to move, press OK to adjust.
Sound Mode Standard
Press
to choose the program , press teletext
blue button to skip this program, The
will
show on the right side of the program .
Choose the skipped program, press blue button
again , you can cancel the skip ,The
will
disappear .
Favourite
Press
to choose the program , press FAV
button , it will show
on the right side of the
program.Choose the FAV program , press
FAV button again , you can cancel the FAV,
the will disappear .
Bala nce
Auto Volu me
<
SOUND
>
Note:
Auto volume: only available when the input
signal volume is too large or distortion.
4.TIME MENU
The forth item of the menu is the TIME MENU
You can adjust the clock, power on/off time,
sleep time etc Press
to move, press OK to
adjust
P.16
TIME
--
>
NOTE:
Within 15 minutes there is no signal, the TV
will auto sleep , if Auto Sleep is set ON. The
clock time can get from the DTV system auto.
5.OPTION MENU
OSD Language Engli sh
Audio Languages UK
Subtit le Languages UK
Country UK
PVR Fil e System
Restore Factory Default
TIME
28 Apr 04:39
800 SZTVM01
No Information
801 SZTVM02
No Information
802 SZTVM03
No Information
803 SZTVM04
No Information
804 Date
No Information
Record
INFO
Schedule
Remind
OK
INDEX
>
In PVR File system menu you can set up USB
disk for PVR.
Select Disk
The EPG menu is used to look at what is being
broadcasted on DTV or Radio channel in the day.
To access the EPG menu, press the EPG
botton,the following menu will be displayed:
PROGRAMME GUIDE
The fifth item of the MENU is the OPTION
MENU. You can adjust the Menu language,
Audio language,Subtitle language etc.
< OPTION
7.EPG Menu(Electronic Program
Guide).
C:
Check PVR File System Start
USB Disk
Format
INFO
1.
Use
to choose the programs , Press
INFO key, you can display the highlight program's
information.
Schedule
2.
Press the teletext yellow key, It can list
all the reminder schedule, press
to choose
the list, press red key
DELETE to delete the
schedule list, Press EPG to return to EPG menu.
Sch edule Li st
Time Shift Size
Speed
Time
04:55 28th Ap r
Program me Title
Date
Del et e
Chann el Nam e
Free Record Limit 6 Hr.
NOTE:
Restore factory default will clear all the programs
and password.
6.LOCK MENU
The sixth item of the menu is the LOCK MENU
You can lock system, set password, block program
and set parental guidance Once you set the lock
system on you can not search the channels or
change any programs.
Lock Syste m
Set Password
Blo ck Pro gra m
<
LOCK
3.
Record
Press the red key ,It can set the program
to be recorded.
Remind
4.
Press the blue key to choose one program
and set up one reminder time, the TV screen will
skip to the choosed program in the reminder time
automatically.
_
Remin der sett in g
802 SZTVM03
+
08 Min ute
Pare nta l Guid ance Off >
05 Hour
Apr Month
28 Date
Once Mode
OK
P.17
BACK
04 Operation
<
Clo ck -- -- -Off Tim e
On Tim e
Sle ep Tim er
Auto Sle ep
Tim e Zone
NOTE:
The default pass word is 0000, If you forget the
password, you can use the super password:9443.
Block program: Press
to choose the
program ,press teletext green button to block
the program. If you want unblock the program,
pls enter the main menu , input the password,
then press green button again.Parental
guidance: Press
to choose rating.
8.PVR function
1.Prepare to record the program
From OPTION MENU enter into PVR File
System In “OPTION MENU”, please
choose “check PVR File System”. Click
“OK”, until “checking”change into
“Success”.
Note: please check the term “speed”. If it
is “HD support”, that means the speed of
USB device is available for time shift and
record. If not, please format the device, to
make sure the device available. The default
“Free Record Limit” is 6 hour, if the space
on the disk is big enough. If the space is not
big enough, the record time should be
shorter, depends on the room on the
device. During the “check PVR File
System” checking, please do not take any
other operation until it finished.
Sele ct Dis k
C:
Check PVR File Syste m
Sta rt
USB Dis k
Format
Tim e Shift Siz e
Speed
Free Record Lim it
6 Hr.
OK
MENU
Select Disk:select which disc to save the
record file.
Sele ct Dis k
The recordings have to be done with TV PVR
system. It can only be played in the same TV,
not in any other kind of devices (computer,
DVD, etc...) which doesn't be compatible
with .TS. Format.
USB
0
Dis k
C:
See that in order to carry out any kind of
recording, the TV will oblige you to format the
connected device to store the recording.
WARNING. WHEN YOU FORMAT, THE
EXTERNAL DEVICE WILL LOSE ALL THE
FILES AND INFORMATION YOU STORAGE
IN THE DEVICE.
From OPTION MENU enter into PVR File
System as below:
Check PVR File System: check if the PVR File
System set up in the USB device or not.
Format:
File Syste m Siz e
PVR File Syste m Type Hi Speed FS
< OPTION
OSD Language
Engli sh
Audio Languages
Subtit le Language
Country
UK
PVR Fil e System
>
Restore Factory Default
PVR File Syste m Siz e
All
SD 104 Min s
HD 29 Min s
MENU
File Syste m Siz e
PVR File Syste m Type
PVR File Syste m Siz e
FAT32
All
SD 104 Min s
HD 29 Min s
OK
P.18
(Suggest to format the format the device by
“High Speed Fs...”, which can speed up
the record.)
Format dis k
Format dis k
2.Record the program
As playing the DTV source, choose the
channel and click “record”, the record
frame will pop up. Click “record” again,
the record frame will disappear and the
“REC” icon still on the left top. It will
disappear until you click “stop”.
Warnin g! All data will be lo st.
3.Play the record
Sta rt
Exit
In “USB”, the record program will be
saved in the folder “_MSTPVR” on the
device.
Do not unplu g USB devic e.
1. The USB storage size needs to be the
size between 4GB to 500GB.
Format dis k
Formatt in g,p le ase wait
2. Video may become pixelated when Video
bit rate is too low.
below menu appear after Format finish:
C:
Checkin g
USB Dis k
Pass
Format
Pass
Tim e Shift Siz e
All
Speed
Checkin g
Free Record Lim it
6 Hr.
MENU
Sele ct Dis k
C:
Check PVR File Syste m
USB Dis k
Pass
Format
Pass
Tim e Shift Siz e
Speed
SUCCESS
All
HD support 2048 KB/s
Free Record Lim it
6 Hr.
MENU
If you select the “Hi Speed FS ”format mode,
then you can change the time shift size:
Tim e Shift Siz e
Tim e Shift Dis k Siz e
SB 14 Min s
HD 4 Min s
P.19
512 MB
The USB support list are the same as
Timeshift function ,see the following pages
for details.
04 Operation
Sele ct Dis k
Check PVR File Syste m
3. Not all USB devices are compatible.
Below is a list of recommended USB
drvies.Models that are not listed may be
compatible, but it is not guaranteed to work.
9.Timeshift function
1.Prepare to record the program
This TV allows you to pause and record the
currently watched digital program to a USB
storage device, and to resume to the point
where it was paused.
00:00:33/00:04:22
Play
FB
FF
Prev .
Ne xt
Pause
Stop
NOTE:
Formatting a USB 2.0 storage device will
be needed. Save your original data
before formatting. All the data stored in
the USB device will be erased after
formatting.
Sleep timer will be suspended if it had
been set before activating the Time Shift
function.
NOTE:
Please do not unplug the USB storage
device when the Time Shift function is
activated.
Approximately 4GB of memory buffers
about offer 140 minutes.
USB Drive Storage Format
Select to format the USB device and
allocate the amount of space for the Time
Shift function.
NOTE:
The format process will take at least 2
minutes. Please do not turn off the power
or remove the USB device during
formatting.
During formatting, a speed test will be
done on the USB device. If it fails, it
means the USB device may not support
the Time Shift function.
Record a paused DTV program to
USB storage device
1. While in the DTV input source, insert
USB storage device to the USB port on the
side of your TV.
2. Press PAUSE 18 to start Time Shift
function. The TV program paused. The Time
Shift OSD appears, and starts recording.
3. Press STOP 36 to stop Time Shift
function and stop recording program.
18
A B
TITLE
PBC
ANGLE
RETURN
DISPLAY
REVEAL
HOLD
LIST
INDEX
SUBPAGE
SIZE
MIX
FREEZE
DVD AUDIO SUBTITLE
36
P.20
Time Shift limitations:
1. When the Time Shift feature is activated,
only the PLAY/PAUSE/STOP/FWD/REV/
VOL+/VOL-/MUTE keys and some basic
operation keys (ENTER/EXIT/navigation
keys) are available.
2. Video playback may not be smooth and
skip if USB recording speed does not meet
the minimum requirements .
3. Do Not remove USB disk or switch off the
power during Time Shift operations. It will
abort once the signal is lost.
4. Do Not remove the signal source during
Time Shift operations.
5. Do Not quickly and repeatedly change
operations between
PLAY/PAUSE/FWD/REV.
6. Sleep timer will be terminated if it had
been set before Time Shift.
8. Not all USB devices are compatible, The
USB hard disk drive electricty should be
< 500MA.
Below is a list of recommended USB drvies.
Models that are not listed may be
compatible, but it is not guaranteed to work.
9. This feature is not available for all digital
TV,such as scrambled or audio only
channels.
P.21
04 Operation
7. Video may become pixelated when Video
bit rate is too low.
10.USB Player
00:00:33/00:04:22
Press source key, and selsct USB in soure
list, press OK button to enter the USB menu.
FB
FF
Prev .
Ne xt
Stop
Repeat ALL
Inf o.
Press
to select the function icon, press OK
button to confirm the function.
Press
or EXIT button to exit the control bar.
NOTE:
You can adjust the audio track, or program in the
Info menu while Playing the video file.Choose the
Info icon and press OK can display the Info MENU.
USB 2.0
PHOTO
Pause
MUSIC
MOVIE
TEXT
Sample1.ts
Resolution: 720x576
Please make sure that the USB device have
plugged in the slot.There are four type media
item can be selected, such as photo, music,
Movie, and text. Select the type media item by
pressing
, press OK button to enter
the disk selection menu.
1/1
Return
AudioTrack:
1/2
Subtitle:
1/1
Program:
1/6
Size:
30574 KBytes
Close
C
Press the
to select the right disk and press
OK to display media files and folder list or
choose Return to back to the media type
selection menu.
1/1
Resolution: 688x412
AudioTrack: 1/2
Subtitle:
1/1
Program:
1/5
Size: 511457 KBytes
Return
Movies
Sample1.ts
Sample1.ts
Sample2.ts
Sample3.ts
Sample4.ts
Select the media file by pressing
or
, then
the preview frame will pop up.Press the button
to play the media file in full screen.When the
media file (photo,music, Movie, or text type) is
playing, press the OK or Info button can display
the control bar.
P.22
05 DVD OPERATION
DVD SIDE PANEL
9
MPEG4 files on discs
Multi-angle
32
OPEN/CLOSE
Dolby Digital
Subtitle choices
PLAY/PAUSE
8
KODAK picture CD
Audio choices
Caution
16:9
MP3 files on
CD-R/CD-RW
LB
TV Aspect
Ratio modes
R RESTRICTED
Features
Disc formats supported by this player:
DVD video
Parental Lock
This product incorporates copyright
protection technology that is protected
by method claims of certain
U.S.patents and other intellectual
property rights owned by Macro vision
Corporation and other rights owners.
Use of this copyright protection
technology must be authorized by
Macro vision Corporation, and is
intended for home and other limited
viewing uses only. Unless otherwise
authorized by Macro vision Corporation.
Reverse engineering or disassembly is
prohibited.
The product complies with the KODAK
Picture CD format and will display
KODAK Picture CDs. The "KODAK
Picture CD Compatible" logo is a
trademark of Eastman Kodak Company
and is used with permission.
Manufactured under license from Dolby
Laboratories."Dolby" and the double-D
symbol are trademarks of Dolby
Laboratories. Confidential Unpublished
Works. 1992-1997 Dolby Laboratories, Inc.
All rights reserved.
P.23
05 DVD Operation
This DVD Player has a Class 1 laser which
may be harmful to your eyes. Do not
attempt to disassemble the cabinet or make
And adjustments.
Refer all servicing to a qualified
prefessional.
Remote Control - DVD section
POWER
MUTE
TV AUDIO
1
2
3
RECALL/GOTO
4
5
6
7
8
9
0
TV MENU
SOURCE
OK
DVD MENU
SOUND
EXIT
PIC
CH
+
+
VOL
_
_
SLEEP
DVD SETUP
ASPECT
TV/RADIO
FAV
EPG
TEXT
INFO
PBC
ANGLE
A-B
TITLE
RETURN
DISPLAY
REVEAL
HOLD
LIST
INDEX
SUBPAGE
SIZE
MIX
FREEZE
DVD AUDIO SUBTITLE
2:Numeric keys:Press to set the time, select title, chapter or track
you wish to play. Press the ENTER/OK Button to confirm. When a
VCD is playing (with PBC off), press the Numeric keys to select a
track directly.
5:DVD MENU:During DVD playback, press MENU to display the
disc menu.
9:DVD SETUP:Press to enter the system setting menu. Press again
to exit the menu.
11:Play/Pause:Press to begin play of the DVD of media you wish to
view. Press again to pause play.
12:STOP:Press to stop play of the DVD you are watching at anytime.
13: A-B:Press to repeat a segment of the disc you are watching
between A and B. (DVD mode)
14: TITLE:Press to display the DVD Main Menu.
15:REV:Press to rewind play in DVD, CD MP3 or VCD mode. Press
repeatedly to scroll through rewind speeds. Press the Play/Pause
Button to resume play.
16:FWD:Press to fast-forward play in DVD, CD MP3 or VCD mode.
Press repeatedly to scroll through fast-forward speeds. Press the
Play/Pause Button to resume play
17:RETURN:Press to return to the Main Menu.
18:DISPLAY:Press to show the information of the current playing
disc.
21:
: To open the disc tray, press OPEN/CLOSE;To close the
disc tray, press OPEN/CLOSE again.
22:GOTO:For DVD discs, press to choose the desired title and
chapter and search the desired title, time and chapter time. For
Super VCD,VCD,CD discs, press this button to search the desired
disc time and track time and choose the desired track.
Note: During VCD playback, the PBC mode must be set to OFF.
24:OK:Press to confirm.
31:ANGLE:Press to view scenes shot from different angles. (Disc
support is required)
32:PBC:During VCD/SVCD playback, press PBC to control PBC
ON/OFF.
33:NEXT:During DVD,CD,MP3, or VCD playback, press NEXT to
play the next chapter, title or track.
34:PREV:During DVD, CD,MP3, or VCD playback, press PREV
to play the previous chapter, title or track.
35:SUBTITLE:Press to choose different captions (Requires support
from disc).
37: FREEZE:Press to freeze the picture you are watching.
P.24
DVD OPERATION
MENU OPERATION
Press the SETUP button on the remote control,
the SETUP MENU will be displayed. After
accessing the setup menu, press the direction
buttons for up and down movement to select an
item desired, and press RIGHT direction button
to select the lower item. Then press the OK
button to confirm. Press LEFT direction button
return to the menu of upper level. To exit the
setup, press the SETUP button again. In the
SETUP MENU, you may choose any of the
following options as you like.
LANGUAGE SETUP
Select Language in the setup menu, and display
the Language submenu:
SYSTEM SETUP
Aspect Ratio
Select the aspect ratio.
Notes:
The image display ratio is related to the
recorded disc format. Some disc can not
display images in the aspect ratio you choose.
If you play a disc recorded in 4:3 format on a
wide screen TV, black bars will appear on the
left and right side of the screen. You must
adjust the screen setting depending on the
type of the television you have.
TV System
Select the different TV system.
Note: The DVD player setting should be
matched to your TV set. For more information
of output format, refer to the instructions or
your TV set.
OSD Language
Use this item to select the language of the setup
menu and screen display.
Subtitle
This option provides the preset subtitle
language.
MPEG4 Subtitle(optional)
Select different MPEG4 subtitle encoding
option.
Note: Not all players support this item.
Audio
Select the built-in disc dubbing language
options.
DVD Menu
This option provides the film's menu language
options.
VIDEO SETUP
Select Video in the setup menu, and display the
Video submenu:
Parental Control
Set the parental control feature of the player
Note: Password is needed before setting
Parental Control.
Set Password
Input four digits (password), then press
ENTERto confirm.
Note: If you forget your password, please
use the universal password 6666 to unlock.
MISC SETUP
Select MISC in the setup menu, and
display the submenu:
Use Default Settings
Reset setup data to factory default
value.
P.25
05 DVD Operation
RATING SETUP
Select Rating in the setup menu, and
display the Rating submenu:
DVD OPERATION
MP3/WMA/JPEG/MPEG4 PLAYBACK
Press Direction key to choose the root
directory and then press OK button to
enter into the sub directory. Press
Direction key to choose the desired
picture and then press OK or PLAY to
enjoy the picture. If you want to return to
the upper menu, press Direction key to
choose
the icon and press OK button.
Image rotation
In picture play state, press Direction
key to rotate the picture.
The MP3/WMA/MPEG4 disc has such a
directory structure as shown picture above .
Press Direction key to choose the root
directory and then press OK button to enter
into the sub directory. Press Direction key to
choose the desired track and then pressOK or
PLAY to enjoy the music or movie. If you want
to return to the upper menu, press Direction
key to choose
the icon and pressOK
button.
Filter: Allows selecting the categories of files
displayed in the browser list.
Repeat: To switch different repeat playing
mode
Mode: Select different playing mode as
follows:
Normal: Shuffle mode is cancelled.
Shuffle: Shuffle mode enabled. When
playback reaches the end of the
currentchapter/track, playback jumps to a
random chapter/track. As the end of each
chapter/track is reached, another random
chapter/track will be played until all
tracks/chapters have been played or the
Shuffle mode is cancelled by toggling to a
different Mode Option.
PICTURE CD PLAYBACK
The PICTURE CD disc has such a directory
structure structure as shown in the following
picture.
Protect your DVD
discs
HANDLE DISCS PROPERLY
"
Do not touch the playback side of the disc.
"
Do not attach paper or tape to the disc.
HOW TO CLEAN A DISC
"
Fingerprints and dust on the disc cause pictu
sound deteriation. Wipe the disc with a soft cloth
from the centre outwards
"
If you cannot wipe off the dust with a soft cloth,
wipe the disc lightly with a slightly moistened soft
cloth and ?nish with a d ry cloth.
"
Do not use any type of solvent such as thinner,
benzine, commercially available cleaners or
antiseptic spray for vinyl LPs. It may damage
the disc.
P.26
06 DVD Trouble shooting
If you have any questions, please consult the troubleshooting guide below:
NO PICTURE OR SOUND
Ensure the power button is on.
Ensure the power outlet is operational.
Ensure the power cord is not damaged.
Ensure the power plug is connected
firmly to the outlet.
REMOTE NOT WORKING
Make sure the Main unit s POWER button is on
Ensure the remote batteries are working.
Point the remote control directly at the player s
IRsensor.
Remove any obstacles between the remote
and theIR sensor.
PICTURE BUT NO SOUND
UNIT NOT WORKING
Turn off the power, and then turn it on
again.
POOR PICTURE OR SOUND
Ensure you have set the player s AUDIO
settings correctly
Ensure the disc is not scratched or
stained.
“BAD DISC”DISPLAYED
Ensure the disc is not warped,
damaged or deformed.
Ensure the disc is not badly stained or
damaged.
Ensure the disc format is compatible
with the player.
Please check whether you have tried to
play a software CD. If so, please restart
the player.
P.27
“NO DISC”DISPLAYED
Ensure you have put the disc on the tray.
Ensure the disc is not upside down.
Ensure the disc is not distorted, stained or
scratched.
06 DVD Trouble shooting
Ensure the audio is not set to mute.
Ensure you have set the player s AUDIO
settings correctly.
07 Trouble shooting
Trouble phenomenon Symptom
Inspection Check
Audio
Snow
Noise
antenna position, direction
or connection
Ghost
Normal audio
antenna position, direction
or connection
Interference
Noise
electronic equipment,car/
motorcycle,fluorescent light
Mute
Volume(check if mute is
activated or if the audio system
connections are not correct)
Normal Picture
Power cord is not inserted
Power switch is not opened
Contrast and brightness/volume
setup
Press standby key on the remote
control for inspecting
No picture
Mute
No colour
Normal audio
Colour control
Picture
breaking up
Normal audio
or weak
retune channel
No colour
There is black bar
on top and bottom
Noise
Normal audio
TVsystem
Change aspect to zoom
P.28
07 Trouble shooting
Picture
Trouble Shooting Digital TV Problems and possible Solutions.
Picture Breaks into Pixels
A typical example of a reception problem includes the break up of pictures (pixilation) or the picture
freezing, sometimes there are clicking or squeaking sounds or the sound drops out or there is NO
reception at all.
Your picture may break into pixels due to the digital video signal dropping. The signal dropping may occur
because of either problems with weak signals (see TV Aerials) or if you are connected by cable a weak cable
signal. If the problem is weak signals, use an amplifier to strengthen the signal. A cable technician can help
you install an inline amplifier or a pre-amplifier. This will boost your signal strength and fix the pixel problem.
If you are receiving your TV signal by satellite, check your dish has not moved following high winds, or that
the signal is blocked by trees. Trees can be a problem as the TV signal can change depending if a tree
between the satellite dish and satellite is in bare or in full leaf.
Missing channels
It may be that you find that there are channels missing, or you're receiving channels from the wrong region.
Sometimes the interactive services (red button) doesn't work. This is usually caused by weak signal, see
TV Aerials
TV Aerials
Digital terrestrial television (Freeview) comes to your TV via an aerial, The old aerial that was good for
analogue TV may not work well for digital so may need upgrading. If you are getting some but not all of the
digital channels on DTV (Freeview) for example you get BBC1, BBC2, Channel 4 ,but not ITV or Channel 5,
this is usually because your aerial is a narrow band type, and needs to be changed to a wide band type.
Faulty Leads and Cables
Check your TV. Are the leads at the back - to the mains, the aerial, the set-top box, the video or DVD player or
recorder properly connected? SCART leads are known to work loose over time and can result in both audio
and video (picture) problems. Either left or right or both audio is missing and the colours are poor or muddy
looking. Push the SCART plugs firmly in, this should fix the problem.
HDMI plugs need to be pushed in firmly; it's only the last millimetre that the contacts make. Typically the black
plastic part of the HDMI plug should be very close or touching the body of the TV or component.
When plugging in any HDMI cables you may experience problems if the HDMI cables are plugged in when the
TV or the other component is switched on. Always switch off both the TV and the component you are plugging
in. If you have checked the plugs and sockets, switch off the TV and whatever you have plugged in to the TV
and then switch them on again.
I have connected my PC to the TV. There is no sound.
If you connect your PC or Laptop to the TV using a VGA (15 pin Sub D) cable there is no audio, you need to
connect a separate audio cable to the TV from the PC or laptop.
Unnatural Colours and Flesh Tones
Unnatural flesh tones and other colours could present another problem even in a new HDTV. This is due to
the TV picture settings, which are optimized for a showroom environment. Fix this by changing the picture
mode to natural in the picture menu. For more precision, try manually setting the colour, contrast and
brightness options in the picture menu.
White Outlines
White outlines around objects and people generally appear either if the TV sharpness is set to very high, or if
your television set uses some edge-enhancement processing technology. Go to the picture menu and adjust
the sharpness till the white outline disappears. If edge-enhancement is enabled, try to disable it using the
service menu.
Choppy Video
At times the video might become choppy. When this happens, check whether the signal is strong enough. If
the signal is strong the problem is with the cable operator. If the signal strength is weak, try boosting the
signal strength with the help of an amplifier.
The picture does not fill the screen
When connecting PC's or laptops to the TV, the picture may not fill the screen. Check the display settings on
your PC or laptop (Windows > Start > Control Panel > Appearance and Personalization > Display settings)
and select the best resolution. On your TV select:- TV Menu > Picture > Settings and then try AUTO, ZOOM1
or ZOOM2 for the best display.
USB Connection
The USB connection will work with *.jpg (photo) and *.mp3 (music) files. Please note the TV does not
recognize Apple iPhone, or iPod's connected to the USB connector on the TV. The TV may play other files, but
due to the multiple different file formats, there is no guarantee that these other file formats will work.
P.29
Specification
Television picture quality:
Full HD
Integrated digital.
Screen Size: 66"cm
Resolution 1920 x 1080 pixels 50Hz.
Connectivity:
2 HDMI sockets.
1 SCART socket.
PC input socket.
Component video socket.
Composite.
1 USB port.
Sound quality:
NICAM stereo sound system.
2 x 8 watts RMS power output.
Digital features:
Digitally interactive.
Digital text.
Digital video broadcasting (DVB) subtitles available.
Auto setup.
Auto scan for new channels.
Now and next programme guide.
7 day electronic programme guide (EPG).
Top up TV compatible.
CI slot.
Audio description compatible.
Additional features:
07 Trouble shooting
26" Full HD 1080P Digital LED LCD TV with DVD Player
UHF/VHF tuner.
Sleep timer.
Child lock.
Picture and text.
Remote control batteries required 2 x AAA (included).
VESA Mount Size 200 x 100 mm
Package Size (WxHxD): 730 x520 x130mm
Set Size (WxHxD) with Stand: 647 x461 x180mm
Set Size (WxHxD) without Stand: 647 x420 x40mm
Package weight : 7.8 kg
Set weight with stand: 6.5 kg
Set weight without stand: 5.94 kg
P.30
Specification
32" Full HD 1080P Digital LED LCD TV with DVD Player
Television picture quality:
Full HD
Integrated digital.
Screen Size: 81"cm
Resolution 1920 x 1080 pixels 50Hz.
Connectivity:
2 HDMI sockets.
1 SCART socket.
PC input socket.
Component video socket.
Composite.
1 USB port.
Sound quality:
NICAM stereo sound system.
2 x 8 watts RMS power output.
Digital features:
Digitally interactive.
Digital text.
Digital video broadcasting (DVB) subtitles available.
Auto setup.
Auto scan for new channels.
Now and next programme guide.
7 day electronic programme guide (EPG).
Top up TV compatible.
CI slot.
Audio description compatible.
Additional features:
P.31
UHF/VHF tuner.
Sleep timer.
Child lock.
Picture and text.
Remote control batteries required 2 x AAA (included).
VESA Mount Size 200 x 100 mm
Package Size (WxHxD): 864 x590 x125 mm
Set Size (WxHxD) with Stand: 775 x537 x180mm
Set Size (WxHxD) without Stand: 775 x503 x43mm
Package weight : 10.77 kg
Set weight with stand: 9.37 kg
Set weight without stand: 8.81 kg