1
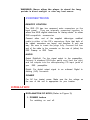
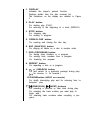
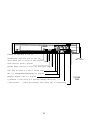
OWNER’S MANUAL
IRIS COMPACT DISC PLAYER
IRIS COMPACT DISC
PLAYER
A Division of Rockford Corporation
613 South Rockford Drive
Tempe, Arizona 85281
602 - 967 - 3565
TABLE OF CONTENTS
Introduction . . . . . . . . . . . . . . . . . . . . . . . . . . . Page 1
Installation
Set-Up . . . . . . . . . . . . . . . . . . . . . . . . . . . .
Page 1
Connections . . . . . . . . . . . . . . . . . . . . . . . . . .
Page 2
Operation
Explanation Of Keys
. . . . . . . . . . . . . . . . . . . . . .
Page 2
. . . . . . . . . . . . . . . . . . . . . . . .
Page 4
Display Indications . . . . . . . . . . . . . . . . . . . . . . .
Page 5
Loading/Unloading Disc
Page 7
Remote Control
PlayingaDisc
. . . . . . . . . . . . . . . . . . . .
. . . . . . . . . . . . . . . . . . . . . . . .
Next/Previous Track Selections
. . . . . . . . . . . . . . . .
Searching Function . . . . . . . . . . . . . . . . . . . . . . .
Page7
Page 8
Page 9
Random Play . . . . . . . . . . . . . . . . . . . . . . . . . . P a g e 9
Programming
Additional
. . . . . . . . . . . . . . . . . . . . . . . . . . Page 11
Information
. . . . . . . . . . . . . . . . . . . . .
Page 13
Technical Data . . . . . . . . . . . . . . . . . . . . . . . . . . Page 16
Symptoms and Their Likely Causes . . . . . . . . . . . . . . Page 17
Factory Service and Limited Warranty . . . . . . . . . . . . . Page 17
INTRODUCTION
The Hafler IRIS system is a major step forward in the world
of audio technology. The IRIS CD completes an intensive
engineering effort to create a series of components which
offer superior performance combined with the unprecedented convenience of the IRIS remote control.
The basic operation and features of the IRIS CD Player are
described in simplified form in figures 1 and 2. Although
operation of the CD Player is possible by studying these
diagrams only, complete appreciation of its features and
operating modes can only be realized by thoroughly reading this owner’s manual.
We have tried to present this information in an easy to
follow format. We urge you to take the time to read through
this manual as soon as possible.
INSTALLATION
SET-UP OF THE IRIS CD PLAYER
FREE STANDING
Always set the player horizontally on a flat, firm surface.
Allow a minimum space of a least 14" above the player so
as not to interfere with the cooling of the player.
STACKED
Locate the player preferably at the bottom. Never set the
player directly on top of a high-power amplifier, because
such an amplifier gives off a substantial amount of heat.
RACK MOUNTING
The IRIS CD Player is shipped with removable end caps
on its front panel. Optional rack mounting ears are available from the factory for mounting the unit in a standard
19” equipment rack.
1
WARNING- Never allow the player to stand for long
periods in direct sunlight or near any heat source.
CONNECTIONS
REMOTE CONTROL
The IRIS CD has two recessed male connectors on the
back panel. They are internally connected together to
allow the IRIS digital data-bus to “daisy-chain” to other
IRIS-compatible accessories.
Connect either end of the supplied ribbon-type umbilical
cable to either of the CD’s connectors. Note that both of
the cable’s connectors are keyed, and therefore fit only one
way. Be sure to insert the plugs fully. Connect the free
end of the cable to the connector on the rear of (either) the
IRIS Preamp or IRIS Tuner.
AUDIO
Output Right/Left: For the signal output to the preamplifier.
Connect a standard RCA-type patch cord from the right
and left outputs into the corresponding CD input jacks of
your IRIS preamplifier.
Digital: For digital output signal to an outboard Digital to
Analog (A/D) converter.
POWER
For AC line (mains) power. Make sure the line voltage on
the rear of the unit is appropriate for your location.
OPERATION
EXPLANATION OF KEYS (Refer to Figure 1)
1. POWER button
For switching on and off.
2. DISPLAY
Indicates the player’s present function.
Displays details from the disc contents list.
The indications on the display are detailed in Figure
2.
3. PLAY button
For starting play (PLAY).
For returning to the beginning of a track (REPLAY).
4. STOP button
For stopping play.
For erasing a program.
5. OPEN/CLOSE button
For opening and closing the disc tray.
6. SHF (SHUFFLE) button
For playing all tracks on a disc in random order.
7. PRG (PROGRAM) button
For storing track numbers in a program.
For erasing track numbers from a program.
For checking the program.
8. REPEAT button
For repeating a disc or a program.
9. W, >> (SEARCH) button
For fast search to a particular passage during play.
(G for reverse, >> for forward.)
1O.PAUSE button (HOLD on remote)
For briefly interrupting play and for returning from interrupted play.
11.((PREVIOUS), )1 (NEXT) buttons
For selecting a previous or later track during play.
For selecting the track number you want play to
begin with.
For selecting track numbers when compiling a program.
I
IRIS REMOTE CONTROL
TRANSMITTER
You should re-read the remote section of the IRIS
PREAMPLIFIER manual in conjunction with the following
additional
information.
HANDSHAKE SYSTEM
The umbilical connection established allows a very convenient “HANDSHAKE” operation between IRIS SYSTEM
COMPONENTS. In simple terms, your IRIS CD Player
tells your IRIS Preamplifier that it is connected and
powered. This tells the Preamplifier, when CD is selected,
to automatically “transfer” the remote’s top eight (multilegend) keys to perform CD command functions.
All of the KEY functions of the CD Player panel which are
convenient from remote operation are available from the 8
remote KEYS:
PREAMP
TUNER
CD
PHONO
MEM 1
PLAY
CD
MEM 2
STOP
TUNER
MEM 3
<<
(REVERSE SEARCH)
VIDEO
MEM 4
>>
(FORWARD SEARCH)
AUX 1
MEM 5
RPT
(REPEAT)
AUX 2
DOWN
I4
(PREVIOUS)
TAPE 1
SCAN STOP
HOLD
(PAUSE)
TAPE 2
SCAN UP
bl
(NEXT TRACK)
CLEAR KEY
The CLR (CLeaR) key on the remote transmitter causes
the CD Player to stop and allows selection of another input
source to the IRIS Preamp within 3 seconds. If another
source is not selected within three seconds, the remote’s
key functions will remain in CD mode. If you wish to select
another source but keep the CD Player operational:
j Press the HOLD key (prior to the CLR key).
-
This causes the CD Player to pause
Press the CLR key
Select another SOURCE
To return to the CD Player:
- Press CLR key
- Select CD
- Press HOLD key
- The CD Player will now continue playing
RECORD SECURITY
As explained in the “remote” section of the IRIS
Preamplifier Manual, if RECORD SECURITY is in effect
(either RECORD switch is IN on the IRIS Preamplifier), the
CD or Tuner will refuse all IRIS remote commands, including CLR. (Volume and Balance are always active.) The
Preamplifier’s red MUTE legend will remind you of this by
its distinctive interrupted-flashing mode.
THE INDICATIONS OF THE DISPLAY
(Refer to Figure 2)
Each Compact Disc has, along with the music, a list of
contents detailing the numbers of the tracks, the playing
time of each track and the total playing time of the disc.
The player always scans this first and stores it in memory
to provide information via the display.
5
1 ’. 9
---’ Lights up when the player is switched on.
- Flashes during scanning of the disc contents list.
2. TRACK
- The number of the track which is currently playing.
- The number of tracks on the disc when the tray is
closed with the OPEN/CLOSE button.
3. ARROW SYMBOL
- Lights up when the tray is closed by hand, with
PLAY, or with SHF.
4. TIME
-
The elapsed playing time in minutes and seconds
of the track which is playing.
The total playing time of the disc when the tray is
closed with OPEN/CLOSE.
5. PROGRAM
- Lights up when the first track number of a program
is entered.
6. SHUFFLE
- Lights up when the disc is played in random order.
7. REVIEW
- Lights up when checking the program.
8. PAUSE
- Lights up when the player is in the pause mode.
9. REPEAT
- Lights up when repeating a disc or program.
10. ‘0)))’ SYMBOL
- Lights up briefly when receiving a command
through the IRIS Handshake system.
11. ERROR
- Lights up briefly when an operating error is made.
6
LOADING THE DISC
Open the disc tray by pressing OPEN/CLOSE.
- Insert the disc into the tray printed side up.
-
Handle disc by edges only - do not touch the
surface.
To close the tray:
- Press the front of the tray lightly or OPEN/CLOSE,
or press PLAY, to simply play the disc.
-
Press SHF to play the disc in random order.
If ERROR lights up after the tray is closed, this means that
the disc is upside-down, dirty, badly scratched or otherwise
faulty.
UNLOADING THE DISC
Open the tray by pressing OPEN/CLOSE.
- Hold the disc in same way as when loading.
- Store the disc immediately in its holder. This
prevents soiling and damage.
Close an empty tray by pressing OPEN/CLOSE.
- Avoid leaving the tray open, to prevent dust from
entering.
PLAYING THE ENTIRE DISC
Close the tray by hand or by pressing PLAY
-
-
The ARROW SYMBOL indication lights up.
Track ‘1’ appears on the display.
Play starts as soon as the elapsed time indicates
‘0:OO’. Some compact discs have a 3 or 4 second
count-down feature that precedes the actual program material.
After the last track the disc stops.
The ARROW SYMBOL indication goes out.
The display again shows the number of tracks and
the total playing time of the disc.
7
GOING BACK TO THE BEGINNING
OF A TRACK (REPLAY)
Press PLAY
- The current track starts again from the beginning.
SELECTING ANOTHER TRACK
DURING PLAY
SELECTING A HIGHER TRACK NUMBER
Press )1 (NEXT) until the desired track number appears
on the display.
- The playing time indication disappears.
- Play is interrupted until selecting is finished.
- As soon as the playing time indication returns, the
selected track begins to play.
ifw (NEXT) is pressed while playing the last track, ERROR
lights up to indicate that there is no next track and playing
of the last track continues. If the player is in the REPEAT
mode, then play continues with the first track.
SELECTING A LOWER TRACK NUMBER
Press )( (PREVIOUS) until the desired track number appears on the display.
- The playing time indication disappears.
- Play is interrupted until selecting is finished.
- As soon as the playing time indication returns, the
selected track begins to play.
If )( (PREVIOUS) is pressed while playing the first track,
ERROR lights up to indicate that there is no previous track
and playing of the first track continues. If the player is in
the repeat mode, then play continues with the last track.
SEARCHING FOR A PARTICULAR
PASSAGE DURING PLAY
Hold << (SEARCH) down to search backward to the beginning.
Hold >> (SEARCH) down the search forward to the end.
As soon as the button is released play restarts at once.
The length of time for which the button is held down
determines the search speed:
- The first three seconds searching is relatively
slow.
- After approximately four seconds searching is
slightly faster.
- After approximately seven seconds searching
reaches highest speed.
At the first two speeds of searching, the sound of the disc
remains audible, although accelerated. When searching
by ear it is therefore advisable to release the button as soon
as the sound disappears. If PAUSE has been pressed
before beginning searching, then no sound will be heard.
During searching, as soon as the beginning of the first track
has been reached, ERROR lights up. Play will resume
there as soon as the button is released. If the end of the
last track is reached, ERROR lights up. Play will resume
a few seconds before the end of the disc as soon as the
button is released.
BEGINNING WITH A TRACK
NUMBER OTHER THAN THE FIRST
Close the tray by pressing OPEN/CLOSE.
- The highest selectable track number appears on
the display, together with the total playing time of
the disc.
Press )1 (NEXT) until the required track number appears.
- The playing time indication disappears.
9
Press PRG
- The PROGRAM indicator will light up and the
display will indicate ‘7 P’.
Go back to ‘3.’ using H (PREVIOUS)
Press PRG again
- You will now see ‘3P’.
Continue this sequence until track 10 has been stored.
- When the last number has been stored the display
will show ‘10P’ continuously.
CHECKING THE PROGRAM
(REVIEW)
The stored program sequence may be checked by pressing PRG.
- The REVIEW indication lights up.
- All the track numbers appear in the programmed
sequence on the display.
- The REVIEW goes out again.
In our example: ‘7’ ‘3’ ‘9’ ‘4’ ‘12’ ‘10’ 10P’ will appear.
If ERROR lights up, this means that no track numbers have
yet been stored.
ERASING A TRACK NUMBER FROM
THE PROGRAM OR THE ENTIRE
PROGRAM
Bring up the track number you wish to erase by pressing
)1 (NEXT) or )( (PREVIOUS).
Press PRG while the ‘P’ after the number is flashing.
- The ‘P’ is replaced by a ‘C’ (for clear).
Press STOP if you wish to erase the entire program.
- The display shows the number of tracks and the
total playing time of the disc.
12
PLAYING THE PROGRAM
Press PLAY
- The ARROW SYMBOL will light up.
- The first number of the program appears on the
display.
- Play begins as soon as the time display of the first
track is shown.
- As play continues the selected sequence and the
corresponding track numbers will appear.
- While playing, the entire program can be reviewed
by pressing PRG.
- Pressing H (PREVIOUS) or H (NEXT) during
programmed play will change the track to the
previous or next track in the sequence.
All player functions can be used during programmed play
except for:
- Beginning with a track other than the first one on
the program.
- Playing the program in random order.
Searching for a particular passage is limited to within the
track being played. When either end of the track is reached
ERROR lights up. When STOP is pressed or when all the
tracks of the program have been played, the disc stops,
but the program remains stored. The program will be
erased when you open the tray. It will also be erased if you
press STOP twice in succession during playback.
ADDITIONAL INFORMATION
CARE OF THE DISCS
Although both sides of a disc are protected by a special
coating, it is still advisable to treat the discs with care:
Never leave discs lying around: put them back in their
holders immediately after use. Never write on the printed
side! Do not attach any stickers on that side. Keep the
shiny surface of the disc clean. Use a soft lint-free cloth
and always wipe the disc in a straight line from center to
13
POWER For switching on and off
OPEN/CLOSE: Open and close the disc tray
DISPLAY
SEE DETAIL
PLAY. Starts play or returns to track beginning
STOP Stops or erases a program
PAUSE: Briefly
interrupt or return from interrupted
play-
SHF: Play all tracks on a disc in random order
PRG:
For
storing/erasing/checking t h e p r o g r a m
REPEAT. Repeat a disc o r a p r o g r a m
<< S E A R C H >> F a s t s e a r c h t o a p a r t i c u l a r p a s s a g e d u r i n g p l a y < PREVIOUS/NEXT
> Select previous/later track during play or programming
14
FIGURE
ONE
PROGRAM: Indicates storage of the first track of a program
TRACK: Indicates number of track playing
PAUSE: Indicates pause mode
TIME: Indicates playing time i n m i n u t e s a n d s e c o n d s
a REPEAT:
Indicates
n
repeat playing of disc
SHUFFLE: Indicates playing disc in random order
REVIEW: Indicates review of stored program selections
ERROR: Indicates error in operating
Ipa I n d i c a t e s r e c e p t i o n o f r e m o t e c o n t r o l c o m m a n d
wlndicates
when tray is closed by hand, with PLAY, or SHF
15
edge. You may breathe lightly on the disc first, to provide
slight moisture.
Warning: Cleaning agents for conventional vinyl records
are not suitable for cleaning a Compact Disc, nor may
detergents or abrasive cleaning agents be used.
PLAYER MAINTENANCE
When cleaning the player and face-plate, we advise a soft
cotton cloth with a non-abrasive cleaner that is safe for
Lexan and painted surfaces.
DO NOT use paper towels or any course material to clean
the face-plate as these materials may scratch the insert.
The disc tray should be kept free of dust with a dry cloth.
TECHNICAL DATA
TYPICAL AUDIO PERFORMANCE
- Frequency Response: 2-20,000 Hz
- Amplitude Linearity: +/- 0.1 dB (20-20,000 Hz)
- Phase Linearity: +/- 0.5 degrees (20-20,000 Hz)
- Dynamic Range: 96 dB (20-20,000 Hz)
- Signal-to-Noise Ratio: 100 dB (20-20,000 Hz)
- Channel Separation: 96 dB (1 kHz)
- Wow and Flutter: Quartz Crystal Precision
- D/A conversion: quadruple oversampling (176.4
kHz) with digital filter and two 16-bit D/A converters.
- Audio Output Level: 2V rms
POWER SUPPLY
- Supply Voltage: 120 VAC (or as marked)
- Supply Frequency: 60 Hz
- Power Consumption: 25W approx.
Specifications are subject to change without notice
16
SYMPTOMS AND THEIR LIKELY CAUSES
Insufficient
product and
use. These
operation or
familiarity with the combination of a new
new discs may lead to faults arising during
are generally caused by a simple error in
external factors.
It is perhaps useful to check the points listed below and
where possible remedy these before taking your player for
repair.
-
Condensation has formed on the lens of the laser
due to a dramatic change in temperature. This will
disappear automatically after some time.
There is a foreign object in the disc tray.
The disc has not been inserted with the printed
side up or there is no disc in the tray.
The disc is dirty, badly scratched or warped.
The player has been connected to the PHONO
jacks of the preamplifier.
If the fault remains, try to clear it by switching the player off
and on. If this also fails to help, do not continue experimenting, but remove the plug from the socket and
consult your dealer.
Under no circumstances should you repair the player
yourself: this action will void the warranty!
FACTORY SERVICE AND LIMITED
WARRANTY
If you encounter any difficulty or have any questions concerning you IRIS CD player, please call our Customer
Service weekdays, 8 am to 3:30 pm Mountain Standard
time, at 602-967-3565.
Before returning any unit to the factory for service, please
call us. All units being returned (regardless of warranty
status) must receive a Return Authorization (RA) Number.
In addition, we can offer trouble-shooting assistance that
17
may often simplify or even eliminate the need for factory
service.
The Hafler IRIS CD Player is warranted for 1 year from the
date of purchase, including parts, labor, and return shipping costs from the factory to the owner within the Continental USA.
It is the owner’s responsibility to pay shipping (preferably
UPS) to the factory: collect shipments will not be accepted.
Units under warranty should be accompanied by a copy of
a dated Bill of Sale. Use the original carton and all packaging material, and be sure to include a return address,
and a brief description of the difficulty, including whether it
is intermittent.
This warranty gives you specific legal rights. You may also
have other rights which vary from state to state.
Hafler
A Division Of Rockford Corporation
613 South Rockford Drive
Tempe, Arizona 85281
602 - 967 - 3565
18