1
~ ;?,,’,.
.,....s .,,,,’, ,,, ,,&
,,.,,.,.,hide
,a,.:,
ElectricSfide=in
Safety Instructions ...................4-7
Anti-Tip Device........................................ 4,46
Operating Instructions, Tps
Aluminum Foil.......................... 6,28,32, 34
Clock and Timer ................................... 24, 25
Features....................................................... 8,9
Oven .................................................... 26-39
Bating ................................................. 27-29
Broiling,BroilingGuide................... 34,35
Conmlsattings..... 27,29,30,32,34,37,38
Light Bulb Replacement................ 26,43
Roasting, RoastingGuide............... 32,33
Self%leaning Instructions.............36-39
Shelves............. 5,26-28,32,34-36,43
Timed Baking.................................... 29,30
Surface Module Cooking................... 10-23
CanningTips............................................. 23
Coil Surface Unit Module ............... 12,13
Control Settings....................................... 11
Cooktop Comparison............................. 10
Griddle Accessory............................ 20-22
Grill Module ....................................... 17-19
Module Cover.............................................. 3
Modules and Accessories........................ 3
Radiant Module..,..,.......................... 14-16
Range
Problem solver ...................... 56-58
Thermostat Adjustment–
Do It Yourself............................................ 31
More questions?..,call
GEAnswerCenteP8(J0.626.2000
Care and Cleaning ...................4G45
Coil Surface Unit Module .......................... 40
Door Removal .............................................. 44
Griddle Accessory....................................... 42
Grill Module .................................................. 42
Radiant Module ........................................... 41
Vent System.......................................... 43,45
Preparation ........................................... 7
Anti-Tip Device........................................ 4,46
Flooring Under the Range ........................... 7
Leveling............................................................ 7
Installation ................................. 47-55
Consumer Services ..................59
Appliance Registration................................. 2
Important Phone Numbers....................... 59
Model and Serial Numbers ......................... 2
Warranty ....................................... Back Cover
GEAppliances
Model: JSP69
164D2966P163
t
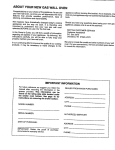
HELP US HELP YOU...
Beforeusing your range, read this
guide carefully.
If you receiveda damaged range or
modular components...
It is intended to help you operateand maintainyour
newrangeproperly.
Keepit handyfor answersto yourquestions.
Ifyoudon’tunderstandsomethingorneedmorehelp,call:
GEAnswerCenter@
800.626.2000
24 hoursa day,7 daysa week
Immediatelycontactthe dealer(or builder)that sold
you the range.
Save time and money.
Beforeyou requestservice...
Checkthe ProblemSolverin the backof this guide.
It listscausesof minoroperatingproblemsthatyou
can correctyourself.
Writedown the model and serialnumbers.
You’llfind themon a labelbehindthe storagedrawer.
Thesenumbersare alsoon the ConsumerProduct
OwnershipRegistrationCard that came with your
range.Beforesendingin this card, pleasewrite these
numbershere:
Accessories
To add versatilityto your modularrange,accessories
are availableat extracost from yourGE Appliance
dealer.SeetheModulesandAccessoriessection.
ModelNumber
SerialNumber
Use thesenumbersin any correspondenceor service
callsconcerningyourrange.
IF YOU NEED SERVICE...
To obtainservice,see the ConsumerServicespagein
the backof this guide.
We’reproudof our serviceand want you to be
pleased.If for somereasonyou are not happywith
the serviceyou receive,here are three stepsto follow
for furtherhelp.
FIRST,contactthe peoplewho servicedyour
appliance.Explainwhy you are not pleased.In most
cases,this will solvethe problem.
2
NEXT,if you are stillnot pleased,write all the
details-including yourphonenumber—to:
Manager,ConsumerRelations
GE Appliances
AppliancePark
Louisville,KY 40225
FINALLY,if your problemis still not resolved,write:
MajorApplianceConsumerActionProgram
20 NorthWackerDrive
Chicago,IL 60606
—
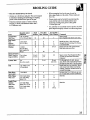
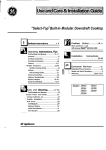
MOD~ES Am ACCESSO~S
General Information
A full selection of modules is available for the range cooktop. The modules
can be interchanged quickly and easily. Each module has an electrical plug
which fits into a receptacle in the side of the well nearest the center of the
cooktop. Some modules are inserted and removed differently than others.
See each module section for specific instructions for installing and
removing that module.
To purchase, contact your nearest GE Appliances dealer or service center.
If you need assistance in finding your nearest GE dealer, contact the GE
Answer Center@at 800.626.2000.
Care of Modules
Using Electric Surface Unit Modules
Some of the modules must be curedor preconditioned
before using them for the first time.
Modules and accessories should be cleaned after
each use. The longer a soil remains, the harder it is
to clean. See each module section in this guide for
specific instructions. Never immerse any module
in water.
When not in the cooktop, modules and accessories
should be stored in a clean, dry place. Alwaysbe careful
not to dropthe moddes or they couldbe damaged.
You must consider heat up and cool down times for
the surface units when determining cooking times.
Heat up and cool down times depend on the initial
temperature settings, the type of cookware used and
the amount of food being cooked.
Start cooking at a higher setting to heat the surface
unit faster, then turn to a lower setting to finish
cooking. Remember, cooking continues after the
surface unit is turned off.
Modules and Accessories
Coil Surface Module
Part Number JXGC53B (black)
JXBC53W (white)
This module has one 6“ and one 8“ coil
surface unit. The surface units and drip
pans are removable for cleaning.
Grill Module
Part Number JXGG50
With this module you can char-broil
meat indoors all year long.
Radiant Module
Part Number JXGR63B (black)
JXGR63W (white)
This module has two 7“ coils beneath a
smooth glass surface. The two surface
units are shown by the outlines on the
glass. This module provides fast heat,
energy efficient operation and is easy
to clean.
Griddle Accessory
Part Number JXGL90
You must have the grill module to
use the griddle accessory.
This griddle sits directly over the grill
heating element with the grill module
removed. Fat and meat drippingswill
collect in the reservoir at one end of
the ~tiddle.
D
—
3
U
!
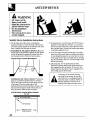
WORTAm
SME~
Rwd d imtmctiom beforewing t~ appfiance.
I~ORTANT SAFETY NOTICE
The CWornia Safe DrinkingWaterand Toxic
EnforcementAct requiresthe Governorof
Californiato publisha list of substancesknownto
the stateto causebirth defectsor otherreproductive
harm,and requiresbusinessesto warn customersof
potentialexposureto such substances.
● The flber~ass insulation in self-clean ovens
gives off a very small amount of carbon
monotide during the cleaning cycle. Exposure
can be minimized by venting with an open
window or using a ventilationfan or hood.
●
men using electrical appliances,basic safety
precautionsshould be followed, includingthe
following:
Use this appliance
onlyforitsintendeduse
as described in this guide.
● Have the instiller show you the locationof the
circuitbreakeror fuse. Mark it for easy reference.
● Be sure your appfianceis properlyinsta~ed and
groundedby a qualifiedtechnicianin accordance
with the provided installationinstructions.
● Do not attempt to repair or replace any
part of your range unless it is specifically
recommendedin this guide. All other servicing
should be referred to a qualified technician.
● Before performing any service, DISCONNECT
THE RANGE POWER SUPPLYAT THE
HOUSEHOLD DISTRIBUTIONPANEL BY
REMOVNG ~E FUSE OR SWTCHING OFF
THE CIRCU~ BREA~R.
●
●
●
●
mSTRUC~ONS
Do not leave chtidren don~hildren
should
not be left alone or unattendedin an area where an
applianceis in use. They should never be allowed
to sit or stand on any part of the appliance.
Do not a~ow anyone to climb, stand or hang
on the door or cooktop. Theycould damage
the range and even tip it over, causing severe
personal injury.
CAU~ON: ITEMS OF ~TEREST TO
CHKDREN SHOULD NOT BE STORED ~
CAB~ETS ABOVE A RANGE OR ON THE
BAC=PLASH OF A RANG&C~LDREN
CL~B~G
ON THE RANGE TO REACH
ITEMS CO~D BE SENOUSLY IN~mD.
WAMING–A1l
ranges
>
can tip and injury could result.
b ;4
To prevent accidentaltipping of
the range from abnormalusage,
d
attach it to the wall or floor by
installingthe Anti-Tip device
,.4
supplied.To check if the device is
installed and engaged properly,open
the lower compartmentand inspect E A
the device. Make sure the stability
bracket and stability mounting device are in place.
If you pull the range out from the wall for any
reason, make sure the device is properly engaged
before you push the range back against the wall.
If it is not, there is a possible risk of the range
tipping over and causing injury if you or a child
stand, sit or lean on an open door.
Please refer to the Anti-Tip device information in
this guide. Failure to take this precaution could
result in tipping of the range and injury.
● Teachchildrennot to play with the controls
or any other part of the range.
●
c Do not store flammablematerials in an oven
or near the cooktop.
●
Never wear loose-fitting or hanging garments
while using the appliance. Be careful when
r~ching for items stored over the range.
Hammable material could be ignited if brought
in contact with hot surface units or heating
elements and may cause severe burns.
Use only dry pot holders—moist
or damp pot holders on hot surfaces
may result in bums from steam.
Do not let pot holderstouch hot surface units or
heating elements.Do not use a towel or other
bulky cloth. Such cloths can catch fire on a hot
surface unit or heating element.
B
●
●
●
4
Always keep combustiblewall coverings,
curtains or drapes a safe distance from
your range.
●
Always keep dish towels, dish cloths, pot
holders and other finens a safe distance away
from your range.
Always keep wooden and plastic utensfls
and canned food a safe distance away from
your range.
For your safety, never use your appliancefor
warming or heating the room.
—
D
!
●
●
DO NOT STORE OR USE COMBUSTWLE
MATERIALS,GASOL~E OR OTHER
FLAWBLE
VAPORSAND LIQ~S ~
VIC~I~
OF T~S OR ANT OTnR
APPLIANCE.
●
●
●
●
Keep the hood and greasefalterscleanto maintain
good venting and to avoid grease fires.
Do not let cooking grease or other flammable
materi* accumulatein or near the range.
Do not obstruct the vent airflow gfls.
Do not put anything in them or allow anything to
spill over into them.
Oven
●
Stand away from the range when opening the
oven door. Hot air or steam which escapes can
cause bums to hands, face andor eyes.
●
Keep the gri~ pan clean to reduce smoking and
avoid grease fwes.
Keep the cooktop vent @k and the oven
vent unobstructed.
4
- Do not use water on grease fires.
‘J
Never pick up a flaming pan.
Turn the controls off. Smother a
e
flaming pan on a surface unit by covering the
pan completely with a well-fitting lid, cookie
sheet or fiat tray. Use a multi-purposedry
chemical or foam-typefire extinguisher.
●
●
When cooking pork, follow the directions
exactly and always cook the meat to an intemd
temperatureof at least 170°F.This assures that,
in the remote possibility that trichina maybe
present in the meat, it will be killed and the meat
will be safe to eat.
●
●
Keep the oven vent unobstructed.
●
Keep the oven free from grease buildup.
●
●
flaming grease outside a pan can be put out
by covering with baking s~a or, if av~lable,
a multi-purposedry chemicrdor foam-type fire
extinguisher.
●
Hame in the oven can be smothered completely
by closing the oven door and turning the oven
off or by using a multi-purposedry chemical or
foam-type fire extinguisher.
●
Do not touch the modde surface units,
heating elements or the interior surface of the
oven. These surfaces may be hot enough to burn
even though they are dark in color, During and
after use?do not touch, or let clothing or other
flammable materials contact the module surface
units, areas nearby the module surface units or
any interior area of the ovem allow sufficienttime
for cooling first.
Potentially hot surfaces include the grill grates,
griddle, cwktop and ar@ facing the cooktop.
oven vent opening, stiaces near the opening,
crevices around the oven door, the edges of the
door window and metal trim parts above the door.
Remember: The inside surface of the oven may
be hot when the door is opened.
Do notheat unopened food containers.
Pressure could build up and the container could
burst, causing an injury.
●
●
●
When using cooking or roasting bags in the
oven, follow the manufacturer’sdirections.
Place the oven shelf in the desired position
while the oven is cool. If the shelves must be
handled when hot, do not let pot holders contact
the heating elements.
Pnl~ng out the shelf to the shelf stop is a
conveniencein #iftingheavy foods. It is dso
a precautionagainst burns from touching hot
surfaces of the door or oven walls.
Do not use your oven to dry newspapers.
If overheated.they can catch fire.
Do not use the oven for a storage area.
Items stored in an oven can ignite.
Do not leave paper products, cooking utensils
or food in the oven when not in use.
.4fter brofing, always take the broiler pan out
of the range and clean it. Leftover grease in the
broiler pan can catch fire the next time you use
the pan.
*Never Ieavejars or cans of fat drippings on or
near your range.
●
●
Never leave the oven door open when you are
not watching the range.
The oven door must be dosed during broiling.
Open door broiling will cause the control panel to
get very hot.
(cotltinued tl<~.rt
page)
5
●
Ody ctypes
of*
gbs/@ra*
Mrthenware
orother*ed mntiers m
~tible fmcooktoptiee; othersmaybreak
-We
.To ~
of the sudden change in tempera~.
the poss~tityofbins, ignition
of flammablemateriak,andspfiage,$e Me
of a mntainershodd be -ed towardtherenter
of the range without extendingover the nearby
Stia
tits.
* Mways h
thernoddemtrok off before
remotig the mkw-
●
Du not tierse
orsoaktheremovnble
rnoddesad da~ *. M notpmthem
in a dishwasher.Dono%seE+Ieanthe moddes
in theovem
6
If a combination of oils or fats will be used
in frying, stir together before heating, or as fats
melt slowly.
● Always heat fat slowly, and watch as it heats.
● Use a deep fat thermometerwhenever
possible to prevent overheatingfat beyond the
smoking point.
*Never try to move a pan of hot fat, especially
a deep fat fryer. Waituntil the fat is cool.
● NEVER USE WATER ON A GREASE FIRE.
● Use care when touching the cooktop.
The glass surface of the cooktop will retain heat
after the controls have been turned off.
●
“Never leave the surface units unattended at
high heat settings. Boiloverscause smoking and
greasy sPilIoversthat may catch on fire.
.
● Do not operate the radiant surface units if
the ghtss is broken. Spilloversor cleaning
solutionmay penetrate a broken cooktop and
create a risk of electrical shock. Contact a
qualified technician immediately should your
glass cooktop become broken.
●
●
●
●
●
Avoidscratching the glass cooktop surface.
The cooktop can be scratched with items such
as sharp instruments,or rings or other jewelry
and rivets on clothing.
Never use the glass cooktop surface as a
cutting board.
Do not place or store items on top of the glass
cooktop surface when it is not in use.
Be careful when placing spoons or other
stirring utensils on glass cooktop surface
when it is in use. They may become hot and
could cause burns.
Do not stand on the radiant glass cooktop.
The weight may cause the top to bend.
SAW T~SE
~S~UCTIONS
I
L
PWPAMTION
Flooring under the Range
Leveling the Range
Your range, like many other household items, is
heavy and can settle into soft floor coveringssuch
m cushioned vinyl or carpeting. When movingthe
rangeon this typeof flooring,it shouldbe installedon
a 1/4-inchthick sheetof plywood(or similarmaterial)
as follows: When thefloor covering ends at thefront
of the range, the area the rangewill rest on shouldbe
builtup with plywoodto the samelevelor higherthan
the floor covering.Thiswill allowthe rangeto be
movedfor cleaningor servicing.
Use a 1X“openend or adjustablewrenchto equally
back out the four legs.The flanges(rims)belowthe
sidesof the cooktopmust be raised abovethe top of
the counter.Carefullyslidethe range into its
installationspace.Observethat it is clearingthe
countertop.Thenplace a spiritlevelor a glass
measuringcup partiallyfilled with wateron one of the
oven shelvesto checkfor levelness.If usinga spirit
level.taketwo readings,with the levelplaced
diagonallyfirst in one directionand then the other.
Adjustthe four legs carefully.The range legs should
rest on the floor.The range must not hang from the
counter.
7
I
~mS
OFYOm MODW
G-uG~Dm
WGE
See tie ModulesandAwessories sectionfor a listingof modulesavailable.
—
%111111
@
7/=,
,
Explainedon page
Featureshdex
Device
1 Anti-Mp
4,46
2
2 Modeland SerkdNumberP1ati
3 OvenDoor Gasket
6,36,44
4 htenor OvenLight
26,36,42
11,45
5 Modde SurfaceUnit Controls
6 OvenLight Switch
26
7 SurfaceUnit“ON hdicatorLightforModdesmen any surfaceunit is on, this light
11
will come on and stay on unti thesurfamunitis turnedoff.
8 Gfll Sheet GriUPan must be in placewhen usingthe grill module
or the gridde module),and Deflector
9 Gfil Modtie
10 GrillElement—Plug-belementused when cookingwith Grill.
11 GriHGrates(2>Remove when Gndde is being used.Gratessupportfoods
being@led.
12 GriddleAccessog Removewhen not in use. Use for meats,pancakesor otherfoods
usurdlypreparedin fryingpan or electricskillet.
17.21,42
3,6,17-19,42
17,20,42
17
3, 2&22,42
13 Cofl SurfaceUnit Module
14 l-Piee DripPa
15 ~fl Plug-In Surfaw Units
3,12,13,23,40
6,12,40
6,12,40
16 Radiant Modde
3,1616,23,41
17 RemovableDowndraftVentand GreaseFtiter
5,43
18 OvenControh
Oven“ON hdi~tor
bk Ught—Appearsduringseti-clean,me Doorkk
lockedposition.
24,25
26
3639
19 Downti
htch mustbemovedto the
VentSpeedSwitch
11
20 OvenDoortitch
Use for self-cleaningordy.
27,29,32,
34,3639
21 OvenShelveswith Stipkks
5,2628,32,
3*36, 43
22 BrotiElement
5,34,36,42
23 EmbossedSheUSupports
Shelfpositionsfor cookingare suggestedin the Baking,RoastingandBrodingsections.
27,28,34,35
24 BakeElementMaybe liftedgentlyfor cleaningovenfloor.
5,36,42
25 Lift-OffOvenDoor
Easilyremovedforcleaning
4,34,35,44
26 BrotierPan and Grid
5,32,34,45
9
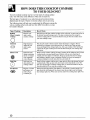
HOW DOES T~S COOKTOP COmAW
TO YO~ OLD Om?
Yournewmodularcooktopmay haveseveraltypesof cookingsurface
units.Youwill noticesomedifferenceswhenyou use each one.
The besttypesof cookwareto use, plus heat-upandcool-downtimes,
dependsuponthe type of burneror electricsurfaceunityou are using.
The followingchart will help you to understandthe differencesamongthe
variouscookingsurfaceunits and how they differfromothersyou may
haveused in the past.
~pe of Cooktop
Radiant
(GlassCeramic)
Cooktop
Description
Electriccoils
undera glassceramiccooktop.
Induction
Highfrequency
in~uctioncoil;
undera glass
surface.
ElectricCoil
Flattenedmetal
tubingcontaining
electricresistance
wiresuspended
o
o
@
SolidDisk
@ ‘,
o
GasBurners
10
overa drip pan.
Solidcast iron
disksealedto the
cooktopsurface.
Regularor sealed
gas burnersuse
eitherLP gas
or naturalgas.
Howit Works
Heattravelsto the glasssurfaceand thento the cookware,so pansmustbe flat on
the bottomfor goodcookingresults.The glasscooktopstayshotenoughto
continuecookingafterit is turnedoff. Removethe pan fromthe surfaceunitif
you wantcookingto stop.
Pansmustbe madeof ferrousmetals(metalthat attractsa magnet).Heatis
producedby a magneticcircuitbetweenthe coiland thepan.Heatsup right
awayandchangesheat settingsrightaway,like a gascooktop.Afterturningthe
controloff,the glasscooktopis hot fromthe heat of the pan,but cookingstops
rightaway.
Heatsby directcontactwiththe pan and by heatingtheair underthe pan.Forbest
cookingresults,usegoodqualitypans.Electriccoilsare moreforgivingof
warpedpansthanradiantor soliddisks.Heatsup quicklybut doesnot change
heat settingsas quictiy as gasor induction.Electriccoilsstayhot enoughto
continuecookingfor a shorttimeaftertheyare turnedoff.
Heatsby directcontactwiththe pan, so pansmustbe flaton thebottomfor good
cookingresults.Heatsup and coolsdownmore slowlythanelectriccoils.The
disk stayshot enoughto continuecookingafterit is turnedoff.Removethepan
fromthe soliddiskif you wantthecookingto stop.
Flamesheatthe pansdirectly.Pan flatnessis not criticalto cookingresults,but
pansshouldbe wellbalanced.Gas burnersheatthe pan rightawayand change
heat settingsrightaway.men you turnthe controloff,cookingstopsrightaway.
S~ACE
CONTROLS
At both OFF and HI the control“clicks”intoposition.Whencookingin a
quietkitchen,you may hear slight“clicking”sounds—anindicationthat the
heat settingsyou selectedare beingmaintained.
Switchingheats to highersettingsalwaysshowsa quickerchangethan
switchingto a lowersetting.
How to Set the Controls
Push the knob
Thecontrolmust be pushedin to
set only from the OFFposition.
When the control is in any
position other than OFF, it may
be turned without pushing it in.
+*
in and turn in
*
eitherdirection
to the desired
heat setting.
,, k
Be sure you turn the control to
OFFwhenyou finishcooking.
The surfaceunit “ON’ indicator
lightwill glowwhenANY heat
on any modulesurfaceunit is on.
\
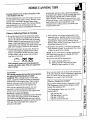
Cooking Guide for Using Heat Settings
HI—Used to begincookingor to bringwater
to a boil. Reduceheat settingafter waterboils.
Medium High—(SettinghalfwaybetweenHI and
MED)Maintainsa fast boil on largeamountsof food.
MED—Saut&and brown;keepsfoodat a medium
boil or simmer.
Medium Low—(SettinghalfwaybetweenMEDand
LO) Cookafter startingat HI; cookswith littlewater
in covered.Dan.
LO—Used for long slowcooking(simmering)to
tenderizeand developflavors.Use this settingto
meltbutterand chocolateor to keep foodswarm.
OFF
+\
— <w
m
..
~o: ~
~gg
~g~
(~
–
~’
a’ f
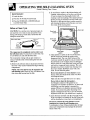
Downdraft Cooktop Modules VentSystem
The rangehas its own internaldowndraftventingsystemfor use with
modulecooking.Cookingvaporsand smokeare ventedthrougha wall duct
to the outsideof your home.The bloweris floorinstalledin the lower
compartment.
The blowerwill automaticallyturn onto keep internalrangeparts cool.
Theblowerwill come on automaticallyon low speedduringany grilling
operation.
Use the fan switchon the frontpanelto changethe blowerspeed.A low
settingis recommendedfor broilingor self-cleaning.
11
How to Insertthe Module
1. Be sure thecontrolsare turnedto OFF.To install
the module,positionthe electricalplug to face
the rear wallof the cooktopopening.Thereyou
will see the electricalreceptacle.(A receptacleis
availablein eithercooktopopening.)Let the
leadingcomersof the modulerest on the cooktop
surface.
2. Carefullyslidethe moduleplug towardthe
receptacleuntilplugis engagedcompletely
in receptacle.Allowthe moduleto fit into the
cooktopopening.
3. Lowerthe insideedgeof the moduleinto
the cooktopopeninguntilit is flush with the
cookingsurface.
.
How to Removethe Module
Be surethe entiremodulesurfaceis coolbefore
attemptingto removethe module.The coils of the
modulewillretainheatafter the controlshavebeen
turnedoff. Be carefulnot to get burnedon a module
that has not had sufficienttime to cool after use.
1. Lift the fingertab at the outsideedgeof the module
untilthe modulebase clears the cooktopopening.
2. Holdthe moduleby the front edges.Carefullypull
the moduleforwarduntil the moduleplug is
disengagedfrom the receptacle.
Cookware
Use medium-or heavy-weightcookware.Aluminum
cookwareconductsheat fasterthan othermetals,
Cast-ironandcoatedcast-ironcookwareare slowto
absorbheat,but generallycookevenlyat low to
mediumheat settings.Steelpans may cook unevenly
if not combinedwith othermetals.
For best cookingresultspans shouldbe flat on the
bottom.Matchthe sizeof the saucepanto the sizeof
the surfaceunit.The pan shouldnot extendover the
edgeof the sufiaceunitmore thanone inch.
Alwaysread and followthe cookwaremanufacturer’s
instructionson cookwareuse.
12
Right
Wrong
Notover1 inch
Over1 inch
Deep Fat Frying
Do not ovetilll cookwarewith fat that may spillover whenaddingfood.
Frostyfoodsbubblevigorously.Watchfood fryingat hightemperatures.
Keepthe rangeand hoodclean from grease.
Wok Cooking
Werecommendthatyou
useonly a flat-bottomed
wok.They are available
at your localretail store.
Do not use woks that
have support rings.
..—
Use of thesetypesof
woks,with or without
,::*:*~.:QN’<
the ring in placecan be
*
dangerous.piacingthe
,..
ring overthe su~ace unit
will causea build-upof heat that will damagethe
brushedchromecooktop.Do not try to use such woks
withoutthe ring. Youcouldbe seriouslyburnedif the
wok tippedover.
Coil Sutiace Unit Module Questionsand Answers
Q. May I can foods and preserves on my coil
surface uni~?
A. Yes,but only use cookwaredesignedfor canning
purposes.Checkthe manufacturer’sinstructions
and recipesfor preservingfoods.Be sure canner
is flat-bottomedand fits over the centerof the coil
surfaceunit module.Sincecanninggenerateslarge
amountsof steam,be carefulto avoidbums from
steamor heat. Canningshouldonly be doneon the
surfaceunits.
Q. Can I cover my drip pans with foil?
A. No. Cleanas recommendedin the Care and
Cleaningsection.
Q. Can I use special cooking equipment, like an
oriental wok, on any surface unit?
A. Cookwarewithouta flat surfaceis not
recommended.The life of the modulesurface
unitscan be shortenedand the cooktopcan be
damagedfrom the high heat neededfor this type
of cookware.A specialflat-bottomedwok can be
used safely.
Q. Why am I not getting the heat I need from my
surface units even though I have the controls on
the correct heat setting?
A. After turningthe surfaceunitsoff and making
sure they are cool, checkto makesure the plug-in
unitsare securelypluggedin.
Q. Why does my cookware tilt when I place it on
the surface unit?
A. Becausethe surfaceunit is not flat. Makesure the
feet of the surfaceunitsare sittingon the inside
rim of the drip pan and the drip pan is flat on the
cooktopsurface.
Q. Why is the porcelain finish on my cookware
coming o~
A. If you set the surfaceunit coil higherthanrequired
for the cookwarematerialand leaveit, the finish
may smoke,crack,pop or bum dependingon the
pot or pan.
Also, if you set the surfaceunitcoil higherthan
requiredfor a longperiodof time, with small
amountsof dry food,you can damagethe finish.
13
WDWNT MODULE
How to Insert the Module
1. Be surethe controlsare turnedto OFF.To install
the module,positiontheelectricalplug to face
the rear wallof the cooktopopening.There you
will see the electricalreceptacle.A receptacleis
availablein eithercooktopopening.Allowthe
leadingcornersof the moduleto rest
on the cooktopsurface.
2. Carefullyslidethe moduleplugtowardthe receptacle
untilplug is engagedcompletelyin the receptacle.
Allowthe moduleto fit into the cooktopopening.
3. Lowertheinsideedgeof the moduleintothecooktop
openinguntilit is flushwith the cooktopsurface.
How to Remove the Module
Be surethe entiremodulesurfaceis cool before
attemptingto removethe module.The glass surface
of the modulewill retainheatafter the controlshave
beenturnedoff. Be carefulnot to get burnedon
a modulethat has not had sufficienttime to cool
after use.
1. Lift the fingertab at the outsideedgeof the module
untilthe modulebase clearsthe cooktopopening.
2. Hold the moduleby the frontedges.Carefully
pull the moduleforwarduntilthe moduleplug
is disengagedfrom the electricalreceptacle.Store
the modulecarefullyafter cleaning.
GeneralIMormationAbout Radiant Modules
The radiantmodulefeaturesheatingcoils beneatha
smoothglassceramicsurface.The two surfaceunits
are shownby outlineson the glass.
● When a surfaceunitis activated,coilsbeneaththe
unit radiateheatthroughthe glassto the cookware.
The red glowof the coilswill be instantlyvisible
throughthe glass.It willtake the surfaceunit on the
surfacea few momentsto heat up. The coil cycles
on and and off to maintainyour selectedcontrol
setting.The coils havetemperaturelimitersto
preventrunawaytemperatures.
● If you are storingmodules,do not stackthemor
storeothermaterialson top of them, as damageto
the glassceramicsurfaceof the radiantmoduleis
likely.Be carefulnot to damageor bend the
electricalplug.
Do not let pots boildry.Overheatedmetalcan
bond to the glassmodule.An overheatedcopperpot
will leavea residuethat willpermanentlystain
the module.
● Slidingaluminumcookwareacrossthe glassmay
leavemetalmarks.Thesemetalmarkswill appear
as smallscratches.They can be removedwith Cook
TopCleaningCremeand a razor scraper.
● Whena surfaceunitis turnedon, the unit can be
seen glowingred withina few seconds.The red
glowwill turn on and off (cycling)to maintainthe
selectedheat setting.Withpoorcookware,you will
see frequentcyclingof the unitoff and on. Good,
flat cookwarewill minimizethe cycling.
● It is safeto placehot cookwarefromthe ovenor
surfaceon the glassceramicsurfacewhen it is cool.
●
~pes of Cookware
The followinginformation will help you choose
cookwarewhich will givegood performance.
StainlessSteel: highly recommended
Especially good with a sandwichclad bottom.The
sandwichbottomcombinesthe benefitsof stainless
steel(appearance,durability,and stability)withthe
advantagesof aluminumor copper(heatconduction,
evenheatdistribution).
Aluminum: heavy weight recommended
Goodconductivity.Aluminumresiduessometimes
appearas scratcheson the cooktop,but can be
removedif cleanedimmediately.Becauseof its
low meltingpoint,thin weightaluminumshouldnot
be used.
Glass-ceramic: Usable, but not recommended.
Poorperformance.May scratchsurface.
Stoneware: Usable, but not recommended.
Poor performance.May scratchsurface.
Cast Iron: Usable, but not recommended.
Poor performance.May scratchsurface.
Copper Bottom:
Goodperformance,but coppermay leaveresidues
whichcan appearas scratches.The residuescan be
removed,as long as the cooktopis cleaned
immediately.However,do not let thesepots boildry.
Overheatedmetalcan bond to glasscooktops.
An overheatedcopperpot willleave a residuethat
will permanentlystain the cooktop.
Porcelaidenamel:
Goodperformanceonly with a thick,flat, smooth
bottom.Avoidboilingdry, as porcelaincan meltand
fuse to the surface.
How to Check Pan Performance
Use of correct cookware can affect the cooking
performance and cleaning of your cooktop.
The correctcookwarereducesthe temperatureof
thecooktopsurfaceand minimizesthe chanceof
spilloversburningontothe cooktop.
Youmust use pans with perfectly flat bottoms.
Somepans may havecurvedor roundedbottomsor
may be warped.If you are unsureof the flatnessof
yourpansyou may do this quicktest.
Turnyourpan upside
downon the countertop,
m
placea rulerflat against
the pan surface.The
bottomof the pan and the
straightedgeof the ruler e
shouldfit flush againsteach otherall the way across.
Turnthe mler a full 360 degrees,checkingfor any
spacebetweenthe ruler and the bottomof the pan.
+-
●
Werecommendthat you use
only a flat-bottomedwok.
Theyare availableat your
localretail store.The bottom
of ‘thewok shouldhavethe
samediameteras the surface
unitto insurepropercontact.
-’
e-
Pans with rounded,curved,ridgedor warpedbottoms
are not recommended.
Anothersimpletestto determineeven heatdistribution
acrossthe cookwarebottomis to put one inchof water
in the pan. Bringthe waterto a boil and observethe
locationof bubblesas the waterstartsto boil.Good
flat cookwarewillhave an evendistributionof bubbles
overthe bottomsurfaceareaof the pan. Bubbles
localizedin onlya portionof thebottomindicate
unevencontactof the pan to the surfaceunit,uneven
heattransferor an unsuitablepan.
Use pans thatmatchthe diameterof the surface
unit.Cookingperformancewill not be as goodif
the cookwareis either smalleror largerthan the
surfaceunit.
●
=
●
Do not use woksthat have
supportrings. This typeof
wok wdl not heat on radiant
surfaceunits.
Somespecialcookingproceduresrequirespecific
cookwaresuchas pressurecookers,deepfat fryers,
etc. All cookwaremust haveflat bottomsand be the
correctsize.The cookwareshouldalso be covered,
if applicableto the cookingprocess.
(continued next page)
15
WDWNT MOD~E
(continued)
CAUTION
Nevercookdirectlyon the glass.Alwaysuse cookware.
● Alwaysplacethe pan in the centerof the surfaceunit you are cookingon.
● Do not slidecookwareacrossthe cooktopbecauseit can scratchthe glass.
The glassis scratchresistant,not scratch-proof.
● Do not use the surfaceas a cuttingboard.
●
Plastic and Sugary Spillovers
Sugaryspillovers(suchasjellies,fudge,candysyrups)
or melted plastics can causepittingof the surfaceof
yourmodule(notcoveredby the warranty)unlessthe
spillis removedwhilestillhot.
Specialcareshouldbe takenwhenremovinghot
substances. Followthe instructionsin the Care and
Cleaningsectioncarefully.
Deep Fat Frying
Wok Cooking
Do not ovetilllcookwarewith fat that may spillover
whenaddingfood.Frostyfoodsbubblevigorously.
Watchfood fryingat hightemperatures.Keep the
rangeand hoodcleanfrom grease.
16
We recommendthat you use
only a flat-bottomedwok.
They are availableat yourlocal
retail store.
I
How to Assemblethe Gtill Module
To insertthe gri~:
1. Be sure the controlsfor the cooktopgrill are 0~.
2. Placethe grillsheetin the centerof the well.
3. Plugthe grillpan intothe well.
4. Placethe deflectoron the grillpan.
5. Graspthe grillelementwith both handsnear the
plug.Keepingthe elementas nearlyhotiontal as
possible,pushthe plugfidy intothe receptacle
to insurecompletecontact.The elementshouldlie
flat and rest on the grillpan.
6. Placethe two grill gridsintothe openingin the
cooktopoverthe grillelement.
/ [$
Geneml InformationAbout the Gtill Module
Usethegrillforpreparingreeds withthe appearance
andflavorof commerciallychar-brotiedmeats.The@l
mustbe veryhotfor thistypeof cookingand smokeand
spatteris to be expected.Be sureto useyourventing
systemwhengri~g to helpm-e
smoke.
● Thefan will automatidly comeon at low fan speed
whflethe gri~is in use and cannotbe turnedoff.You
may turn it to high fan speed.
● Do notusepoti orpansonyour@.
Youcotid be
seriourdy
burnedby heatfromthe exposedsurfaces
of the@ whenreachingforthepothande. Pots
or pansmaytrapheatfromthe@ andresdt in
_etitie@~@sor@~k
● Thegrillmustbe preheatedto get the @l
componentshot enoughto sear the meat,sealing
in thejuices.Preheatthe grillon ~ for 5 to 10
minutes,thenturn back to the recommendedsetting.
c NEVER LEAVE=
~TC~N
w~e gtihg
meatsor otherjuicy foods.Fats andjuices drip
on the hot@ elementandmay causeflame-ups.
Whengrihg, you shodd alwaysbe presentto
controlflame=upsso tiey do not get out of hand.
● NEVERUSE WATERONA GREASEHRE.
Tocontrolflame-ups,set the heat settingat LO
ratherthan OFF.fi you have a bad flame-up
and thereis dangerof the fm spreading,take
the followingsteps immediately:
1.Turnthe grill controlsto 0~, and set the fan
switchto HI.
2. Use a long-handed utensilto removethe food
fromthe grill.Be careti not to get burned.
Thefi shouldstarttogo out.If it doesno~smother
theflamesby coveringthe entiregrillmodulewith
a largecookiesheet,a lid from a largeroasting
pan,the gridde or the modulecover.
● Never try to use charcoal or flavoredwood chips
in the we~ underthe @l grids.Use of charcoal
indoomwithoutproperventilationproduces
carbonmonoxidethat canbe fati. Mso, burning
charcoalin the we~ win Wrrnanentiydamagethe
Wrcelti coatingin the we~.
● Neverlinethe grillgrid or the porcelainenameled
greasewell with aluminumfoil. Doingso may block
drainageof grease,causingexassive smoking,fire
or moduledamage.
NOTE:Thenon-stick@l gridsmustbe preconditioned
beforeusingthemfor the first time. To precondition,
firstwashthem in soap andwater and dry.Then use a
papertowelto applya smallamountof cookingoil to
the grids.Removeexcessoil with a cleanpapertowel.
●
(conthued ntipage)
17
G~L
MOD~E
(continued)
NOTE:It is recommendedthatyou havea dry chemical,foam or Halon
typefire extinguisherwhereyou can easilyreach it in case of a cooking
fire. NEVERUSEWATERON A GREASEFIRE as it is likelyto spread
the flames.Readthe instructionson the extinguisheraheadof time and be
preparedto followthem in caseof a cookingfire.
Grill Tips
Do not leavethe grillunattendedwhileit is in use.
● Removeaccumulated
greasefromthe grillpan after
eachuseto lessensmokingandodors.Greasebuildup
can becomea fire hmard.
● The gratesshouldbe oiledor sprayedwith a
non-stick,salt-freevegetableoil beforecooking
to preventsticking.
● Preheatthe grill for 5-10 minutesat HI heat setting,
then turn to the desiredsettingfor cooking.
●
Trimthe fat from meatsbeforeplacingthem on the
grill.This will reducesmokingand lessengrease
buildupin the greasewell.
● Allowspacebetweenfoodswhen placingthemon
the grill.Air needsto circulatearoundthe food for
best cookingresults.
● Occasionallyrearrangefoodson the grillto prevent
stickingand providebetterbrowning.
● Seasonmeatsafter cookingratherthan before—
saltcan draw outjuices and dry out meat.Use tongs
to turn and rearrangemeatson the grill;forks will
piercethe meat and releasejuices.
●
Grill Questionsand Answers
Q. Whencookingmanyindividualfoods,what can
I do to insurethat foods will cookevenly?
A. When cookingfoodsof varioussizesand
thicknesses,startlargeror thickerpiecesfirst
and add quickercooking,smallerpieceslater.
Press the meat lightlyto lie flat on the grill.
Slashthe fat on the edgesof steaksand chops
to preventcurling.Breakthejoints of split
chickensso they will lie flat.
Q. My grilledmeatssometimescomeout
drierthan theyshould.Whatcan I do
to help preventthis?
A. Seasonmeats aftercookingratherthan before—
salt can draw outjuices and dry out meat.Use
tongsto turn and rearrangemeatson the grill;
forks willpiercethe meatand releasejuices.
Q. I followthe cookingtimessuggested,but my
foods don’tget done properly.Is there
somethingwrongwith my grill?
A. Probablynot. Suggestedcookingtimes shouldbe
used only as a generalguide.Variablesin food can
changecookingtimesrequired.
Q. Howcan I keepbarbecuedmeatsfrom
developingan unattractiveburnedlook
and taste?
A. Saucescontainingsugarwill often burn if used
duringthe entirecookingtime. If yourfavorite
saucecontainssugar,try addingit only during
the last 15 to 20 minutesof cookingtime for
bestresults.
Q. Canmy grillbe switchedto the otherside
of the range?
A. Yes.These interchangeablemodulescan be used
on eitherthe rightor left sideof the cooktop.
Wheninsertingor removinga module,take care
notto force the connectionor exertunduepressure
whichcoulddamagethe electricalcontacts.
Additionalmodulescan be purchasedfrom your
dealerto doubleyourgril~griddlecapacityor to
add two morecoil surfaceunits.
Q. Foods cooked on my grill are not browning as
much as I would like.Whatcouldcausethis?
A. A longerpreheatingand grilltime maybe
necessaryto achievethe desiredresults.
Do not leaverangeunattendedduring“preheat”
@ohs turnedto “~”) or anytimethe bobs are
turned to “HI” with food on the Grill or Griddle.
1. Preheatat HI settingfor 5 minutesbeforegrilling.
Turnto the heat settingin the guideor your
cookbookfor the food you are grilling.
2. Trimexcessfat fromthe meat.
3. Beforecookingsteaks,slashfat aroundthe edges
to preventcurlingof meat.
4. Suggestedcookingtimes shouldbe used only
as a guide,sincevariablesin food mn change
cookingtimes.
5. If your rangeis connectedto 208 volts, these
cookingtimesmay need to be extended.
Suggested
Foti
Set@
BeefCubs (1 inch)
BeefSte@ tender
Comments
Marinate
lesstenderbeefbeforegrilling.
HI
17–20
Medium
HI
HI
Well
HI
5-7 per side
= per side
*1O ~r side
HI
HI
5M0 (total)
7M0 (toti)
If saua is desired,bastelast 15to 20 minutes,turnmd rearrangeoften.
1s20
17-20
Brushwithmeltedbutter.
If stuffe~ add6 minutesto totaltime.Covertopwiti foil.
m
HI
m
&7 per side
%9 per side
lW1l per side
h
HI
HI
%10 per side
7-9 (total)
HI
2S30
1G15
(31: 1 inch)
]
Cticken
Pieeesor Quarters
Halves
H&:qers
(3/4 inch)
Medium
Well
Hmn
Steaks(1to 1%inch)
Hot Dogs
mhohs
Meat
overafterhalfof eootig time.
Forlesstendervegetablessuchas tomatoes,redueetime 4 to 6 minutes.
%10 per side
1S17 per side
6B0 (toti)
Parbofl5 minutesbeforegrilling.Rearrangeandturnover frequently.
Bastewith sauw last 10minutes,as desired.
19
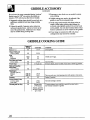
G~DLE
ACCESSORY
Yournon-stickcoatedgriddleprovidesan extra-largecookingsurface
for meats,pancakesor otherfoodsusuallypreparedin a fryingpan or
electricskiUet.Youcan also use the gridde as a warmingtray by using
a low-heatsetting.
How to Assemble the Gtiddle Accesso~
1. Be sure the controlsare OFF.
2. Plug the grill pan into the well.
3. Graspthe grill elementwithboth handsnearthe
plug. Keepingthe elementas nearlyhortionti as
possible,push the plugf~y intothe receptacle
to insurecompletecontact.The elementshouldlie
flat and rest on the grill pan.
4. Placethe gndde into the openingin the cooktop
with the reservoirat the back.The gndde will rest
on the ledgeof the grillpan.
Foodsplacedat the back of the gridde may cook
fasterthan thoseat the front.This is becausethe
gridde is designedto slopetowardsthe resemoir
placingit closerto the heatingelementat the rear.
NO~: men properlyplaced,the gndde sits
slightlyabovethe cooktop.This, and the open
spaceson the sidesand rear of the gridde, prevent
temperaturesfromgettingtoo high.
-
Using the Gtiddle
Thenon-stick@d@emti be pmonditionedbefore
using it for the fmt time.Topreconditionfirst wash
the gridde in soap and water and dry.Thenuse a
papertowelto applya smallamountof cookingoil to
thegridde. Removeexwss oilwitha cleanpapertowel.
Preheatthe gridde as recommendedin the Gridde
tioking Guide.Mer preheatingfor the recommended
amountof time,applya smallamountof oil or butter.
Do not overheatthe griddle.having the griddle
at ~ for more than 10 minutes without food can
damage the non-stick coating.
The fan will automaticallycome on at low fan speed
whilethe gridde is in use and cannotbe turnedoff.
Youmay turn it to highfan speed.
How to Removethe Gtiddle Accesso~
Be surethe controhare0~ md the gridde is cool.
To remove the gridde:
1. Lift the frontedgeof the gridde a bit to let any
excessfat or oil drainto the back.
2. Removethe gridde.
3. Gr=p the elementwith both handson eitherside
of the plug.
4. Raisethe oppositesideof the elementjust enough
to clearthe well,thenpullawayfromthe receptacle.
The elementwillnot sit levelwhenreplacedif it is
forcedtoo far upwardwhen removed.
5. Removethe grillpan.
Gtiddle Tips
Conditionor “season”the gndde before
first-timeuse.
● Mostgridded foodsrequirecookingon a preheated
surfaw,whichmaybe greasedlightlybeforeadding
food.Preheatthe @d&e 5 minutesat HI heatsetting,
urdessotherwiseindicatedin the Gndde Cooking
Guide,thenswitchto the recommendedcooksetting.
● Foodsto be warmedmay be placeddirectlyon the
gridde; a highdomedmeti @ver,suchas an
invertedkettle,placedoverthemwillhelpstorethe
heat.Foodsin covereddishesor pansmay dso be
warmedon thegridde. Use heat-resistantdishesordy.
●
Foodswhich are high in naturalfat, such as bacon
or sausage,may be startedon a cold gridde.
● Makesure the grillpan is cleanbeforeusing griddle.
● Topreservethe finish,use ordyTeflon”coate~
nylonor woodenspatulasand spoons.Neveruse
the griddlesurfaceas a cuttingboard.
. Over a periodof time,minorscratchesand some
discolorationmay appearin the non-stickcoating.
Thiswill not affectthe cookingperformanceor the
non-stickfinish.
●
Gtid~e Questionsand ~swem
Q. HowshouldI storemy griddlewhenit is not
in use?
A. Toavoidmarringthe non-stickfinish,storethe
gridde uprighton the edgewith the terminalsup
to avoiddamage.Hit is necessaryto storeit flat,
avoidplacingotherpans or cookwareon top.
Q. How long canfoods be kept warmwith the
grid~e withoutlosingtheirappeal?
A. No longerthan 2 hoursis recommended,to assure
goodf~odqualityand preventspoilage.“Delicate
foods,such as eggs,shouldnot be kept morethan
15 to 30 minutes;entreesand casserolesmaybe
warmedfor 30 to 60 minutes.Horsd’oeuvreswill
stay hot for servingup to 1 or 1%hours.Rearrange
or stir foodsoccasionally,if possible.
Q. Canmy gridde be stitched to the otherside
of the finge whereit wotid be moreconvenient
for me?
A. N1 interchangeablemodties canbe used on either
the rightor left side of your cooktop.Simplylift
outthe modules,takingcare not to damagethe
electricrdcontactsby jerkingor forcingthem.
Q. Mygriddleis cookingfasteriu the rearthan in
the front Is theresomethingwrong?
A No. Sin& the gridde is designedto slopeslightly
so thatthe greasewill collectin the reservoir,the
rear of the gridde sets closerto the element,which
maycausefoodsto cook more quic~y.
Q. my aren’tmy foodsdone eventhoughthey
havecookedthe fun time?
A Preheatthe gndde for a longertime and leave
foodson the gridde longerto attainthe desired
degreeof browning.
Q. Do I need special cookware for use with my
gridde?
A Avoidusingmetalcookwarewith sharp points
or roughor sharpedgeswhich mightdamagethe
non-stickcoatedgridde surface.Do not cut foods
on the gridde. Use ordyheat-resistantdisheswhen
foodsin containersareto be warmedon the @dde.
For furtherinformationon tig for yourgridde’s
surface,see the Careand Cleaningsection.
Q. Canprolongedperiodsof high heat damage
my griddle’ssurface?
A. A brief preheatingperiodis often necessaryfor
best resultswith manyfoods,but leavingthe
gridde on M heatsettingfor morethan 10 minutes
withoutfood can damagethe non-stickmating.
Aways be sure to turn the controlknobsto OFF
whenwoking is completed.
(continued n-page)
G~DLE
ACCESSORY
(continued)
3. Rearrangeor turn foodsover as neededto insure
evencooking.
4. Gridde settingsmay need to be adjustedif the
gridde is used for an emendedtime.
5. Avoidusingmetalutensilswith sharppointsor
roughor sharpedgeswhich mightdamagethe
non-stickcoatedgridde surface.Do not cut foods
on the gridde. Use onlyheat-resistantdisheswhen
foodsin containersare to be warmedon the gndde.
6. If yourrangeis connectedto 208volts,these
cookingtimesmay needto be extended.
Do not leavethe rangeunattendedduring“preheat”
(knobsturnedto “H~) or anytimethe knobsare
turnedto “H~ with food on the Grillor Gridde.
1. Suggestedcookingtimesshouldbe used only as a
guidesincevariablesinfd maychangecooking
tima.
2. Preheatthe gridde 5 minutesunlessotherwise
indicatedin guidebelow.Add oil or butter at the
end of the preheattime.Additiond od or butter
may be neededduringcookingtime.
G~DLE
COOmG
GmE
Suggested
Food
Bacon(1 lb.)
Chow Por~mh
(1/4to 12 inch)
Eggs
Fried
Scrambled
F~h Ftiets and Steaks
(1/4to 1 inch)
FrenchToast
HamandCanadian
BaconStiees
(1/4to lE inch)
Hamburgers
(3/4inch 4 perlb.)
Medium
Well
Pan*=
SausagePatties,Uiks,
(1 to 2 oz. each)
(4 oz. each)
WarmingandHottiy
CookTime
11-14
MED
m
65
2-3
m
m
17–24
>3% per side
I m I
&lo
MED~
~D M
H
l&18
1%21
2-3
Turnoverordyonce.Avoidpressingdownwithspatulato retainjuices.
Preheat10mkutes.
*1O
ti
H
H
m
2&22
Deli=te foods:
1>30 minutes
I
~trees, mseroles
andhorsd’oeuvres
22
Comments
Donotpreheat.
Setting
HI
Up to
1 hour
Griddleup to 6 eggs.
Turn overoften.
If breadis frozen,pierm witi forkseveraltimesto absorbeggmixture.
andrearrangeas needed.
Toretainmoisture,rover withfoflor metal lid,or plaw foodin
heat–resistantcontainerson griddle.
Canningshouldbe done on the Coil SurfaceUnits
or the RadiantUnits only.
Potsthatextendbeyond1inchof thesurfaceunitarenot
recommendedformostsurfacecooking.However,when
canningwitha water-bathor pressurecanner,largerdiametercookwaremaybe used.Thisisbecauseboiting
watertemperatures(evenunderpressure)arenot
harmfulto cooktopsurfacessurroundingthesurfaceunit.
HOWEVER,DO NOTUSELARGEDIAMETER
CANNERSOR OTHERLARGEDIAMETERPOTS
FOR FRYINGOR BOILINGFOODSOTHER
THANWATER.Most syrupor saucemixtures—and
all typesof frying-cook at temperaturesmuch higher
than boilingwater.Suchtemperaturescould
eventuallyharmcooktopsurfacessurroundingthe
modulesurfaceunits.
ObserveFolloting Poinfi in Canning
1. Be surethecannerfitsoverthecenterofthesurface
unit.Hyourcooktopor itslocationdoesnotallowthe
cannerto becenteredonthesurfaceunit,usesmdlerdiametercannersfor goodcanningresults.Be surethe
canneror otherlargedlarneterpansdo nottouchthe
controlknobsor theventgrille.Theknobsandthevent
grillewillbe damagedif touchedby hotcookware.
2. ~at-bottomed cannersmustbe used.Do not use
cannerswith flangedor rippledbottoms(often
foundin enamelware)becausetheydon’tmake
enoughcontactwith the surfaceunitand take a
long time to boil water.
Flat-bottomedcannersare recommendedfor
electriccoilsurfaceunits.Theyare required for
glasscooktops.
CAUTIONS:
Safe mnningrequiresthatharmfd microorganisms
aredestroyedand thatthejars aresealed
com~ietelv.
Whencanningfoodsin a water-bath
m
canner,a ~entlebut stead~boil mustbe maintained
continuouslyfor the requiredtime.Whencanning
foodsin a pressurecanner,the pressuremustbe
maintainedcontinuouslyfor the requiredtime.
Afteryou have adjustedthe controls,it is very
importantto make sure the prescribedboil or
pressurelevelsare maintainedfor the requiredtime.
RADMNTGLASSCAU~ONS:
Glasssurfaceunitshavetemperaturelimitersthat help
preventthemfrom gettingtoo hot.If the bottomof
yourcanneris not flat, the surfaceunitcan overheat,
triggeringthe temperaturelimitersto turnthe unit off
for a time.This will stopthe boilor reducethe
pressurein the canner.
3. When canning,use recipesand proceduresfrom
reputablesources.Reliablerecipesand procedures
are availablefrom the manufacturerof your canner;
manufacturersof glassjars for canning,such as
Bdl and Kerr; and the UnitedStatesDepartmentof
AgricultureExtensionService.
4. Rememberthat canningis a processthat generates
large amountsof steam,To avoidburnsfrom steam
or heat, be carefulwhencanning.
NOTE:If yourhousehas low voltage,canningmay
take longerthanexpected,eventhoughdirections
have been carefullyfollowed.
The processtime will be shortenedby:
(1) using a pressurecanner,and
(2) startingwith HOTtap water for fastest
heatingof largequantitiesof water.
Sinceyou mustmake sureto processthe canningjars
for theprescribedtime,withno interruptioninprocessing
time, you cannotcan on glass surfaceunitsif the
bottomof yourcanneris not flat enough.
mat is a TemperatureLimiter?
Everyradiantsurfaceunithasa TemperatureLimiter.
TheTemperatureLimiterprotectstheglass-ceramic
surfacefromgettingtoohot.
The TemperatureLimitermay turn off the
surfaceunitsifi
● The pan boilsdry.
● The pan bottomis not flat.
● The pan is off center.
● There is no pan on the unit.
23
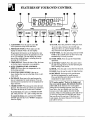
FEATURESOF YOUROWN CONTROL
&
1. CLEAWOFF.Press this pad to cancelall
ovenoperationsexceptclockand timer.
2. PROGRAM STATUS.Wordslightup in the
displayto indicatewhat is in time display.
Programmedinformationcan be displayedat any
timeby pressingthe pad of the operationyou want
to see.For example,you can displaythe current
time of day whilethe timer is countingdownby
pressingthe CLOCKpad.
3. T~E DISPLAY.Showsthe timeof day,the times
set for the timer or automaticovenoperation.
4. OVEN TEMPEWTURE ANDBRO~
DISPLAY.Showsthe oven temperatureor the
broilsettingselected.
5. FUNCTION INDICATORS. Lightsup to
showwhetherthe oven is in the bake,broil or selfcleanmode.
6. INCREASE. Shorttaps to this pad increasethe
timeor temperatureby smallamounts.Press and
holdthe pad to increasethe timeor temperatureby
largeramounts.
7. T~R ON/OFF.Pressthispad to selectthetimer
function.Thetimerdoesnot controlovenoperations.
Thetimercan timeup to 9 hoursand55 minutes.
Toset the timer,first press the TIMERON/0~
pad. Thenpress the + or – pad to changethe time.
Tocancelthe timer,press and holdthe TIMER
ON/0~ pad untilthe word “TIMER’disappears
fromthe display.
24
8. CLOCK. Press this pad beforesettingthe clock.
To set the clock,first pressthe CLOCKpad.
Thenpressthe + or – pad to changethe timeof
day.Pressthe CLOCKpad to start.
9. STOP TIME. Use this pad alongwith the COOK
T~E or the CLEANpad to set the ovento stop
automaticallyat a time you select.
10.COOKTIME.Press thispad for TimedBake
operations.
11.AUTOSELFCLEAN.Press this pad to select
the self-cleaningfunction.See the Operatingthe
Self-CleaningOven section.
12.BROIL. Press this pad to selectthe broilfunction.
13.BAKE.Press this pad to select the bake function.
14. DECREASE.Shorttaps to this pad decrease
the timeor temperatureby smallamounts.
Press and hold the pad to decreasethe time or
temperatureby largeramounts.
h
If “F-and a number”flash in the displayand
the ovencontrolsignals,this indicatesfunction
errorcode.If the functionerror codeappears
duringthe self-cleaningfunction,checkthe oven
doorlatch—thelatchhandlemay havebeen
moved,even if only slightly,from the latched
position.Make surethe handleis to the rightas far
as it will go. Press the CLEAWOFFpad. Allow
the ovento cool for one hour.If functionerror
coderepeats,disconnectthe powerto the range
and cdl for service.
OWN CONTROL,CLOCKAm T~R
Clock
Theclockmust be set for the
automaticoven timingfunctions
to workproperly.The time of day
cannotbe changedduringa Timed
Bakingor a Self-Cleaningcycle.
To Set the Clock
D
2. Press the+ or – pad to
set the timeof day.
1. Pressthe CLOCKpad.
CLOCK
A
@
e
v
3. Press the CLOCKpad to start.
Timer
Thetimer is a minutetimeronly.
The timerdoes not control
ovenoperations.The maximum
settingon the timer is 9 hoursand
55 minutes.
To Set the Timer
T~$~~
n
[Al
A
@
1. Pressthe TIMER
ON/OW pad.
2. Pressthe+ or – pad to
set the amountof time
on timer.
v
e
The timer will startautomatically
withina few secondsof releasing
the pad.
The timer,as you are settingit,
will displaysecondsuntil 1 minute
is reached.
Thenit will displayminutes
and secondsuntil59 minutes
is reached.
After 59 minutes,it will display
hours(“HR’ now appemsin
display)and minutesuntilthe
maximumtime of 9 hoursand
55 minutesis reached.
ToReset the Tmer
To Cancel the Timer
If “TIMER”is displayed,press the+ or – pad
untilthe desiredtimeis reached.
If “TIMER”is not displayed,press the TIMER
ON/0~ pad first, then followthe instructionsabove
to set the timer.
Press the TIMERON/OW pad untilthe word
‘TIMER’ disappearsfrom the display.
Power Outige
End of Cycle Tone
Display Messages
After a power outage,when power
is restored,the displaywill flash
andtime shown will no longerbe
correct-for exarnpIe,after a 5minutepowerinterruptionthe
clockwillbe 5 minutesslow.
All other functionsthat were in
operationwhen the powerwent out
willhaveto be programmedagain.
Theend of cycletoneis a series
of 3 beepsfollowedby 1 beep
every 6 seconds.If you wouldlike
to removethe signalthat beeps
every6 seconds,press and hold the
CLENO~ padfor 10seconds.
To returnthe signalthat beeps
every6 seconds,press and hold the
CLEAWO~ pad for 10 seconds.
U “door”appearsin the display,
thedoor latchhandleis not moved
all the wayto the right.Movethe
latchhandleand cleaningwill
start.If “LOCK’appearsin the
display,the ovendooris in the
lockedposition.BAKE,BRO~
and COOKTIMEcannotbe set if
the door is in the lockedposition.
25
BeforeUsing YourOven
1. Lookat the controls.Be sure you understand
how to set themproperly.Readover the directions
for the OvenControlsso you understandhow to
use them.
2. Checkthe oveninterior.Look at the shelves.
Takea practicerun at removingand replacing
themproperlyto give sure, sturdysupport.
3. Readover the informationand tips that follow.
4. Keepthis guidehandyso you can refer to it,
especiallyduringthe first weeksof usingyour
new range.
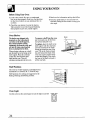
Oven Shelves
Theshelvesared=ignedwith
stop-locksso thatwhenplaced
correctlyon the shelfsuppoti,
theywillstopbeforecoming
completelyoutfromthe oven,and
willnot tiltwhenremovingfood
fromor placingfoodon them.
Whenplacingcookwareon a shelf,
pullthe shelfoutto thebumpon the
shelfsupport.Placethecookware
on the shelf,thenslidetheshelf
backintotheoven.Thiswill
eliminatereachingintothehotoven.
Toremovea shelf fromthe oven,
pull it towardsyou, tilt the front
end upwardand pull it out.
To replace, placethe shelfon the
shelfsupportwith the stop-locks
(curvedextensionof the shelo
facingup towardthe rear of the
oven.Tiltup the front and push
the shelftowardthe back of the
ovenuntilit goespastthe bump
on the shelfsupport.Then lower
the front of the shelfand pushit
all the wayback.
Bump
7
*
–\//
Shelf Positions
The ovenhas 5 shelfsupportsas identifiedin this
illustrationas A (bottom),B, C, D and E (top).
Shelfpositionsfor cookingare suggestedin the
Baking,Roastingand Broilingsections.
6
a
r
Oven Light
Use the switchon the controlpanelto turn the lighton and off. ovENLIGHT
o
PI
4
II
‘ ‘G,;
))11
‘ all
7
>’
/’/
!,
BA~G
Do not lock the ovendoortith the latchduring
baking. The latch is usedfor self-cleaningonly.
Youroven temperatureis controlledvery accurately
usingan oven controlsystem.Werecommendthat
youoperatethe rangefor a numberof weeksusingthe
timegivenon recipesas a guideto becomefamiliar
withyour new oven’sperformance.
If you thinkan adjustmentis necessary,see the Adjust
the OvenThermostatsection.It giveseasy Do It
Yourse~instructionson how to adjustthe thermostat.
NOTE: Whenthe oven is hot, the top and outside
surfacesof the rangeget hot too.
How to Set YourRange for Bating
To avoidpossibleburns,placethe shelvesin the
correctpositionbeforeyou turn the ovenon.
1. ~ess the BA~ pad.
n
BAKE
(AJ
2. Pressthe+ or – pad.
Thelast oven set temperatureappearsin the
display.Continuepressinguntilthe desired
temperatureis displayed.
The oven will startautomatically.The word “ON”
and “100°”willbe displayed.As the ovenheatsUP,
the displaywill showthe changingtemperature.
Whenthe ovenreachesthe temperatureyou set, a
tonewill sound.
3. Press the CLEAWO~ pad when btilng is finished
and then removethe food from the oven.
To change the oven temperature during the
BA~ cycle,pressthe BA~ pad and then the
+ or – pad to get the new temperature.
Oven Shelves
kange the oven
shelfor shelvesin
the desiredlocations
whilethe oven is
cool.The correct
shelfposition
dependson the kind
of food and the
browningdesired.
As a generalrule,
place-mostfoodsin the middleof the oven,on either
shelfpositionsB or C. See the chartfor suggested
shelfpositions.B will be used morethan C.
Typeof Food
Shelf Position
hgel food cake
A
Biscuitsor muffins
Bor C
Cookiesor cupcakes
Bor C
Brownies
Bor C
Layercakes
.
Bor C
Bundtor poundcakes
Aor B
Pies or pie shells
Bor C
~
Preheating
Preheatthe ovenif therecipecallsfor it. Preheatmeans
bringingthe ovenup to the specifiedtemperature
beforeputtingtie foodin the oven.Topreheat,set the
ovenat the correcttemperature-selectinga higher
temperaturedoesnot shortenpreheattime.
Preheatingis necessaryfor goodresultswhenbaking
cakes,cookies,pastryand breads.
For mostcasserolesand roasts,preheatingis not
necessary.For ovenswithouta preheatindicatorlight
or tone,preheat 10 minutes.After the oven is
preheated,placethe food in the oven as quicklyas
possibleto preventheat from escaping.
(continued next page)
27
BA~G
(continued)
Baking Pans
Pan Placement
Use theproperbakingpan.me typeof finishon the
pan determinesthe amountof browningthatwilloccur.
“ Dark,roughor dullpans absorbheat resultingin a
browner,crispercrust.Use thistypefor pies.
● Shiny,brightand smoothpansreflectheat, resulting
in a lighter,more delicatebrowning.Cakesand
cookiesrequirethis typeof pan.
● Glassbakingdishesalso absorbheat.Whenbaking
in glassbakingdishes,the temperaturemay needto
be reducedby 25°F.
For evencookingand properbrowning,theremustbe
enoughroom for air circulationin the oven.Baking
resultswillbe betterif bakingpans are centeredas
muchas possibleratherthanbeingplacedto the front
or to the back of the oven.
Pans shouldnot toucheach otheror the wallsof the
oven.Allow 1-to 1‘A-inchspacebetweenpans as well
as fromthe back of the oven,the doorand the sides.
If you need to use two shelves,staggerthe pans so
one is not directlyabovethe other.
Baking Guides
Whenusing preparedbakingmixes,followpackagerecipeor instructions
for the best bakingresults.
Cookies
Aluminum Foil
Whenbakingcookies,flat
cookiesheets(without
sides)producebetterlookingcookies.Cookies
bakedin a jelly roll pan
(shortsidesall around)
may have darkeredges
and pale or light
browningmay occur.
Do not use a cookiesheetso largethat it touchesthe
wallsor the door of the oven.Neverentirelycovera
shelfwith a largecookiesheet.
For best results,use onlyone cookiesheetin the oven
at a time.
Neverentirelycovera
shelfwith aluminum
foil. ~is will disturb
the heat circulationand
resultin poor baking.A
smallersheetof foil
may be used to catcha
spilloverby placingit
on a lower shelf severrd
inchesbelow the food.
Pies
Cakes
For best results,bake pies in dark,roughor dull pans
to producea browner,crispercrust.Frozenpies in foil
pans shouldbe placedon an aluminumcookiesheet
for bakingsincethe shinyfoil pan reflectsheat away
from the pie crust;the cookiesheethelpsretain it.
When bakingcakes,warpedor bentpans willcause
unevenbakingresultsandpoorlyshapedproducts.
A cakebaked in a pan largerthan the recipe
recommendswillusuallybe crisper,thinnerand drier
than it shouldbe. If bakedin a pan smallerthan
recommended,it may be undercookedandbattermay
oveflow. Checkthe recipeto makesurethe pan size
used is the one recommended.
28
u
Don’t Peek
Set the timerfor the estimatedcookingtime and do
notopenthe doorto look at your food.Most recipes
provideminimumand mwimum bakingtimes such
as “bake30-40minutes.”
T~D
DO NOTopenthe doorto checkuntilthe minimum
time. Takeadvantageof the “BigView”windowto
monitorcookingprogress.Openingthe oven door
frequentlyduringcookingallowsheat to escapeand
makesbakingtimeslonger.Yourbakingresultsmay
dso be affected.
BA~G
How to Time Bake
Do not lock the ovendoorwith the latch
during Timed Baking. The latchis used for selfcleaningonly.
Yourovencan be set to turn on and off automatically.
NOTE:Beforebeginning,makesurethe oven clock
showsthe correcttime of day.
Toset the clock,first press the CLOCKpad.Pressthe
+ or – pad untilcorrecttime of day is displayed.Press
the CLOCKpad to start.
I
How to Set Immediate Stiti and Automatic Stop
Toavoidpossibleburns,placethe shelvesin
the correctpositionbeforeyou turn the ovenon.
Theovenwill turn on immediatelyand cook for a
selectedlengthof time. At the end of the CookTime
the ovenwill turn off automatically.
1. Pressthe BAKEpad.
n
BAKE
\ LJ
2. Pressthe+ or – pad untilthe desired
temperatureis displayed.
A@
n
Cf$K
LAJ
3. Pressthe COOKTIMEpad.
4. Press the+ or – pad untilthe desiredlengthof
bakingtime is displayed.
The oven will startautomatically.The word “ON’
and” 100°”will be displayed.The CookTimewill
beginto countdown.As the ovenheatsup, the
displaywill showthe changingtemperature.men
the ovenreachesthe temperatureyou set, a tone
will sound.The ovenwill continueto cook for the
programmedamountof time,then shutoff
automatically.
5. At the end of TimedBaking,the displaywill show
“OHR:OO
COOKTIME’ and the ovenwill turn off.
The end of cycletone will sound.
6. Bess the CLEAWOFFpad to clearthe displayif
necessary.Removethe food fromthe oven.
Remember,foodsthat are left in the ovencontinue
cookingafterthe controlsare off.
NOTE: Foodsthat spoileasilysuch as milk,eggs,
fish, stuffings,poultryand pork shouldnot be allowed
to sit for morethan onehourbeforeor aftercooking.
Roomtemperaturepromotesthe growthof harmful
bacteria.Be sure thatthe ovenlightis off becauseheat
from thebulb will speedharmfulbacteriagrowth.
(continued next page)
HD
How to Set Delay Stirt and AutomaticStop
QuickReminder
1. Pressthe BA~ pad.
2. Press the+ or – pad to selectthe oven
temperature.
3. Press the COOKTIMEpad.
4. Press the+ or – pad to set the lengthof
CookingTime.
5. Press the STOPTIME pad.
6. Pressthe+ or – pad untilthe desiredStopTime
appearsin the display.
Toavoidpossibleburns,placethe shelvesin the
correctpositionbeforeyou programthe oven.
Youcan set the oven controlto delay-stti the oven,
cookfor a specificlengthof time and then turn off
automatically.
1. Press the BAKE pad.
n BAKE
(AJ
A
2. Press the+ or – pad until“325°”
is displayed.
@
v
n
e
C##K
A
@
30
BA~G
(continued)
3. Press the COOKTIMEpad.
4. Pressthe+ pad until“3HR:W’ appearsin
the display.A CookTimeof 3 hoursnow
appearsin the display.
n
5. Pressthe STOPTIMEpad. The display
promptsyou to set the StopTimeyou
want.It also showstheearliestStopTime
you can set. In this example,“5:O@’and
“STOP TIME’ appearin the display.
The controlautomaticallysetsthe StopTimeby
addingthe CookTimeto the timeof day.In this
example,the timeof day is 2:00and the Cook
Timeis 3 hours.Adding3 hoursto the time of day
equals5:00.
6. ChangeStopTimefrom 5:00 to 7:00
by pressingthe+ pad until “7:00’ and
@
StopTimeappearin the display.The
A
words“DELAYTIMEDBAW’ appear
in the display.
At 4:00,the ovenwillturnon automatically.The
word“ON’ and“100°”willbe displayed.The Cook
Timewillbeginto countdown.As the ovenheats
up, the displaywillshowthe changingtemperature.
The ovenwillcookfortheprogrammedthreehours
and shutoff automaticallyat 7:00.
7. At the end of TimedBaking,the displaywill show
COOK TIME’ and the oven will turn off.
“OHR:OO
The end of cycletonewill sound.
8. PresstheCLEAWOFFpad to clearthe
displayif necessary.Removethe food
C*R
fromthe oven.Remember,eventhough
theovenshutsoff automatically,
foods
continuecookingafterthe controlsareoff.
NOTE:Foodsthat spoileasilysuchas milk,eggs,
fish, stuffings,poultryandpork shouldnot be allowed
to sitfor morethanonehourbeforeor aftercooking.
Roomtemperaturepromotesthe growthof harmful
bacteria.Be surethatthe ovenlightis offbecauseheat
fromthe bulbwill speedharmfulbacteriagrowth.
s;:~
o
ADJUST THE OVEN THERMOSTAT—
DO ZTYOURSELF!
Y
Youmayfind that your new ovencooksdifferently
than the one it replaced.Werecommendthatyou
use yournew ovenfor a few weeksto becomemore
familiwwith it, followingthe timesgivenin your
recipesas a guide.
~ you thinkyournew ovenis too hot or too cold,
you canadjustthe thermostatyourself.If you think
it is too hot, adjustthe thermostatto makeit cooler.If
you thinkit is too cool,adjustthe thermostatto make
it hotter.
We do not recommend the use of inexpensive
thermometers, such as thosefound in grocerystores,
to checkthe temperaturesettingof your new oven.
Thesethermometersmay vary 2M0 degrees.
To Adjust the Thermostat:
1. Pressthe BA~ pad.
n
BAKE
lAJ
2. Selectan oven temperaturebetween500°F.
and 550°F.
3. Immediately,before“ON’ appears,press and
hold the BA= pad for about4 seconds.The time
displaywill changeto the ovenadjustmentdisplay.
4. The oven temperaturecan be adjustedup to (+)
35°F.hotteror (–) 35°F.cooler.Use the+ or – pad
to selectthe desiredchangein the display.
5. When you have madethe adjustment,pressthe
CLEAWOFFpad to go back to the time of day
display.Use youroven as you wouldnormally.
NOTE:Thisadjustmentwill not affectthe broilingor
the self-cleaningtemperatures.It will be retainedin
memoryafter a powerfailure.
31
ROAST~G
Do not lock the ovendoorwith the latchduring
roasting.The latchis used for self-cleaningonly.
Roastingis cookingby dry heat. Tendermeat or
poultrycan be roasteduncoveredin youroven.
Roastingtemperatures,which shouldbe low and
steady,keep spatteringto a minimum.
Roastingis really a bakingprocedureused for meats.
Therefore,ovencontrolsare set for Bakingor Timed
Baking.(Youmay hear a slightclicklngsound,
indicatingthe ovenis workingproperly.)Timed
Bakingwill turn the ovenon and off automatically.
1. Placethe shelfin A or B position.No preheating
is necessary.
2. Checkthe weightof the
meat.Place it, fat sideup,
e
Ill
-’
(or for poultry,breasty,,
side-up)on a roasting
#grid ii a shallowpan.The
@
meltingfat will bastethe
~~>
meat. Selecta pan as
closeto the size of the meat as possible.
(Thebroilerpan with grid is a goodpan for this.)
3. Press the BA~ pad.
-Jll
c- 0
n
BAKE
Most meats continue to cook slightly while standing,
after being removed from the oven. Standing time
recommended for roasts is 10 to 20 minutes.This
allowsroasts to firm up and makesthem easierto
carve.Internaltemperaturewill rise about5° to 10°F.;
to compensatefor temperatureincrease,if desired,
removethe roastfrom the oven sooner(at 5° to 10°F.
less than the temperaturein the RoastingGuide).
Rememberthat food will continueto cook in the hot
oven and thereforeshouldbe removedwhenthe
desiredinternaltemperaturehas beenreached.
4. Press the+ or – pad.The last oven set
temperatureappearsin the display.
@
Continuepressinguntilthe desired
temperatureis displayed.
The word “ON’ and “100°”will be
e
displayed.As the ovenheats up, the
displaywill showthe changing
v
temperature.men the ovenreachesthe
temperatureyou set, a tone will sound.
5. Press the CLEAWOFFpad whenroasting
is finished.
C#R
A
o
Tochangethe oventem~ra~ duringroastig,
pressthe BA~ pad and then the+ or – pad to get
the new temperature.
Use of Aluminm Foil
Youcan use aluminumfoil to linethe broilerpan.
This makesclean-upeasierwhen usingthe pan for
marinating,cookingwithfruits,cookingheavily
cured meatsor bastingfood duringcooking.~ess
the foil tightlyaroundthe insideof the pan.
32
Questionsand Answers
Q. Is it necessaryto check for donenesswith a
meat thermometer?
A. Checkingthe finishedinternaltemperatureat
the completionof cookingtime is recommended.
Temperaturesare shownin the RoastingGuide.
For roasts over 8 lbs,, checkwith thermometer
at half-hourintervalsafterhalf the cookingtime
has passed.
Q. Why is my roast crumbling when I try to
carve it?
A. Roastsare easierto sliceif allowedto cool 10to
20 minutesafterremovingthemfrom the oven.
Be sure to cut acrossthe grain of the meat.
Q. Do I need to preheat my oven each time I cook
a roast or poultry?
A. It is not necessaryto preheatyouroven.
Q. When buying a roast, are there any special tips
that would help me cook it more evenly?
A. Yes.Buy a roast as even in thicknessas possible,
or buy rolledroasts.
Q. Can I serdthe sides of my foil “tent” when
roasting a turkey?
A. Sealingthe foil will steamthe meat.Leavingit
unsealedallowsthe air to circulateand brown
the meat.
ROAST~G G~E
For Frozen Roask
Frozenroasts of beef, pork, lamb,etc., can be started
withoutthawing,but ailow 10to 25 minutesper
poundadditionaltime (10 minutesper poundfor
roastsunder 5 pounds,moretime for largerroasts).
Oven
Makesureuoulm is thawedbeforeroasting.
Unthawed~oult~ often doesnot cookeve~ly.
Somecommercialfrozenpoultrycan be cooked
successfullywithoutthawing.Followthe directions
givenon the packagelabel.
Approximate Roasting Time
Internal
Temperature
Doneness
Tendercuts;rib,highquality
sirlointip, rompor top round*
in Minutesper Pound
3 to 5 lbs.
6 to 8 lbs.
325°
Lambleg or bone-inshoulder*
325°
Vealshoulder,leg or loin*
Porkloin,rib or shoulder*
Ham,precooked
325°
325°
325°
Rare:
Medium:
WellDone:
Rare:
Medium:
WellDone:
WellDone:
WellDone:
ToWarm:
2633
18–22
35-39
22-29
4W5
3&35
21-25
20-23
25-30
2628
3G35
28–33
3545
3M0
3545
3W0
17-20minutesperpound(anyweight)
140°–1500+
150°–1600
170°–1850
140°–1500?
150°–1600
170°–1850
170°–1800
170°–1800
115°–1200
Chickenor Duck
Chickenpieces
325°
350°
WellDone:
WellDone:
3 to 5 Ibs.
3540
3540
10 to 15 lbs.
185°–1900
185°–1900
Over 15lbs.
In thigh:
Turkey
325°
Well Done:
18-25
15-20
185”–190°
Type
Meat
Podtry
Over 5 Ibs.
3&35
Temperature‘F.
*Forbonelessrolledroastsover 6 inchesthick,add 5 to 10minutesper poundto timesgivenabove.
~TheU. S. Departmentof Agriculturesays“Rarebeefis popular,butyoushouldknowthatcookingit to only140°F.meanssome
foodpoisoningorganismsmaysurvive.”(Source:SafeFoodBook.—Your
KtchenGuide.USDARev.June1985.)
BROm~G
Do not lock the oven doorwith the latchwhile
broiting. The latch is used for se~-cleaningonly.
Broilingis cookingfoodby intenseradiantheatfrom
the upperbroilelementin the oven.Mostfish and
tendercutsof meatcan be broiled.Followthese
directionsto keepspatteringandsmokingto a minimum.
Turnthe foodody onceduring
broiling.Timethe foodsfor the
first side accordingto the
BroflingGuide.
Turnthe foo~ thenuse the times
givenfor the secondside as a
guideto the preferreddoneness.
1. If the meat has fat or gnsde aroundthe edge,cut
verticalslashesthroughboth about2 inchesapart.
If desire~ the fat maybe trirnrne~leavinglayer
about1/8 inchthick.
2. Placethe meat on the broilergrid in the broilerpan.
Aways use the grid so the fat dripsintothe broiler
pan; otherwisethejuices may becomehot enough
to catch on fire.
3. Positiona shelf on the recommendedshelfposition
as suggestedin the BroilingGuide.
4. Closethe door Aways brotiwith the doorclosed
5. Press the BROILpad.
6. Press the INCREASEpad oncefor LO Broil or
press the INCREASEpad Wice for HI Broil.
To change tim ~ Broil to LO Broil, press the
DECREASEpad once.Tochangeback to HI Broil,
press the INCREASEpad once.
7. Whenbroilingis finishe~ pressthe CLENOFF
pad. Servethe food immediately,and leavethe
pan outsidethe ovento coolduringthe meal for
easiestcleaning.
Use of Muminum Fofl
Youcan use durninumfoil to line yourbroilerpan
and brofiergrid. However,you mustmoldthe fofl
tightlyto the grid and cut slits in it just likethe grid.
Withoutthe sli~, the foti wdl preventfat and mwt
juices from drainingto the broilerpan.Thejuices
cotid becomehot enoughto wtch on fire. If you do
not cut the slits, you are frying,not broiling.
Questionsand hswem
Q.Do I needtogreasemy broilergrid to prevent
meatfromsticking?
A. No. Thebroilergrid is designedto reflectbrotier
hea; thuskeepingthesurfacecoolenoughto prevent
meatfromstickingto thesurface.Howeveqspraying
the broilergrid Iighdywith a vegetablecooking
spraybefore rookingwill makeclean-upeasier.
Q. Shodd I salt the meatbeforebroiting?
A. No. Sdt drawsout thejuices and allowsthemto
evaporate.Aways dtafter cooking.Turnmeat
with tongq piercingmeatwith a fork dso allows
juices to-e~pe. Whenbroilingpoultryor fish,
brush each sideoftenwith butter.
34
Q. Why are my meati not turningout as brown
as they shotid?
A In some areas,the power(voltage)to the range
may be low.In the;e cases,preheatthe broil
elementfor 10 minutesbeforeplacingbroiler pan
with food in oven.~eck to see if you are using
the recommendedshelfposition.Broil for longest
periodof time indicatedin the BroilingGuide.
Turn food ordyonceduringbroiling.
~. Whenbrofling,is it necessaryto always
use a gridin the pan?
A Yes.Usingthegrid suspendsthe meatoverthe pan.
As the meat cooks,thejuicesfdl into the pan, thus
keepingmeatdrier.Juicesare protectedby the grid
and stay cooler,thuspreventingexcessivespatter
and smoking.
BROE~G
me doorshotid alwaysbe closed.
Nways usea broilerpan andgrid.~ey are designed
to minimizesmokingand spatteringby trapping
juices in the shieldedlowerpart of thepan.
If desire~ marimte meatsor chickenbefore
broiling,or brushwith barbecuesaucelast 5
to 10 &nutes ordy.
Food
GroundBeef
WellDone
BeefSteaks
Rare
Medium
WellDone
Chicken
Quantityandor
Thickness
1 lb. (4 patties)
1/2 to 3/4inchthicl
1 inchthick
(1 to 1%lbs.)
1 whole
(2 to 2%lbs.),
splitlengthwise
Piems
BakeryProducts
Breadcoast) or 2 to4 slices
EnglishMuffIns 2 (split)
LobsterTails
G~E
●
Whenarrangingfood on the pan, do not let
fatty edgeshangoverthe sides.~ese couldsoil
the oven.
Frozensteakscanbe broiledby positioningthe
ovenshelfat nextlowestshelfpositionand
increasingcookingtime givenin this guide
1%timesper side.
Use LO Broilto cookfoodssuchas poultryor thick
pork chopsthoroug~ywithoutover-browningthem.
Shelf
First Side
Positiol Time,Minutes
D
10
D
D
D
B
6
8
12
35
c
20
Dor E
Dor E
1Y*2
24
1/2
c
1>16
Do not
turnover.
4
~6<o8 oz. each)
Upto 8 pattiestakeaboutsametime.
~
5
6
11
l&15
Steakslessthan1inchthickcook
throughbeforebrowning.Panfrying
, is recommended.
I Brusheachsidewithmeltedbutter.
Broilskin-side-downfirst.
Spaceevenly.PlaceEnglishmuffins
cut-side-upandbrushwith butter,
if desired.
Cutthroughbackof shell.Spread
open.Brushwithmeltedbutterbefore
broilingandafterhalfof broilingtime.
Hande andturnvery carefully.Brush
Fish
l-lb. fillets1/4to
1/2inchthick
D
6
HamShces
1 inchthick
D
6
4
withlemonbutterbeforeandduring
cooking,if desited.Preheatbroilerto
increasebrowning.
Increasetime5 to 10minutes~r side
D
c
10
13
7
for 1’Ainchthickor homecuredham.
Slashfat.
WellDone
2 (1/2 inchthick)
2(1 inchthick),
about1 lb.
LambChops
Medium
WellDone
Medium
WellDone
2(1 inchthick),
about10to 12oz.
2 (1%inchthick),
D
D
D
10
12
14
17
@recooked)
Pork Chops
about1 lb.
c
10
I
Slashfat.
:
10
l&12
35
OPEWT~G T~ SELF-CLEA~G OWN
Norrnd CleaningTime:3 hours
QuickReminder:
1. Latchthe door.
2. Pressthe AUTOSELFCLEANpad.
3. Pressthe INCREASEor DECREASEpad
to set the CleanTime.
2. To avoidheavysmokein the kitchenduringselfcleaning,wipeup heavysoil on the ovenbottom.
(If you use soap,rinse thoroughlybeforeselfcleaningto preventstaining.)The enamelgrid and
broilerpan may be cleanedin the self-cleanoven.
However,to helppreventheavysmokecausedby
self-cleaningthe greasysoil in the pan, you must
first cleanoff the excessgrease.
Before a Clean Cycle
CAUTION:To avoidthe risk of personalinjurydo
not touchthe ovenventsor areasaroundthe vents
during self-cleaning.Theseareas can becomehot
enoughto causebums.
ight
Ov
Ov
‘oorLocWked
Unlocked
The rangemust be completelycoolin orderto set
the self-cleancycle.Youmay haveto allowthe oven
to coolbeforeyou can slidethe doorlatch.
Werecommendventingwith an openwindowor
usinga ventilationfan or hoodduringthe first selfclean cycle.
1. Removeall cookwareand any aluminumfoil from
the oven—theycannotwithstandthe high cleaning
temperatures.
NOTE:The ovenshelvesmay be cleanedin the
self-cleaningoven.However,they will darken,lose
their lusterand becomehard to slide.
36
Area inside
gasket
Area outside
gasket
3. Clean spattersor spillson the ovenfront frame,
and the ovendooroutsidethe gasketwith a
dampenedcloth.The oven front frameand the
ovendoor outsidethe gasketdo not get cleanedby
the self-cleancycle.On theseareas use detergent
and hot wateror a soap-filledsteelwoolpad. Rinse
well with a vinegarand water solution.This will
help preventa brownresiduefrom formingwhen
the oven is heated.Buff theseareas with a dry
cloth.Do not cleanthe gasket.
Do not use abrasivesor ovencleaners.Clean
the top, sidesand outsidefront of the oven door
with soap and water.
Make surethe ovenlight bulb coveris in place.
Do not rub or cleanthe doorgasket—
the fiberglassmaterialof the gaskethas an
extremelylow resistanceto abrasion.An intactand
well-fittingovendoor gasketis essentialfor
energy-efficientoven operationand goodbaking
results.If you noticethe gasketbecomingworn,
frayedor damagedin any way or if it has become
displacedon the door,you shouldhave it replaced.
4. Closethe door andmake surethe ovenlightis off.
If the ovenlightis not turnedoff,the life of the bulb
will be shortenedor it may bum out immediately.
Do not use commercialovencleanersor oven
protectorsin or nearthe self-cleaningoven.
A combinationof any of theseproductsplus the high
cleancycle temperaturesmay damagethe porcelain
finish of the oven.
How to Set the Oven for Cleaning
QuickReminder:
1. Latchthe door.
2. Press the AUTOSELFCLEANpad.
3. Press the+ or – pad to set the CleanTime.
L
If the oven is too hot andyou startto set a clean
cycle,the word“0~’ will appearin the display.
Allowadditionaltime for coolingbeforeyou try to
set the cycle.
1. Followthe directionsto preparethe oven
for cleaning.
2. Slidethe latchhandleto the ~
right as far as it willgo.
Never force the latch
&
handle.Forcingthe
handlewill damagethe
doorlock mechanism.
—~
3. Press the AUTO SELF CLEAN pad.
AUTO
SELF
CLEAN
A
4. Pressthe+ or - pad untildesired
CleanTimeis displayed.
@
v
e
CleanTimeis normally3 hours.Youcan changethe
CleanTimeto anywherebetween2 and 4 hours,
dependingon how dirtyyour ovenis.
The self-cleancyclewill automaticallybeginafter
“CLEAN”is displayedand the time for the clean
cycleis set. The words“ON’ and “LOCK’ will
appearin the display.It will not be possibleto open
the ovendoor untilthe temperaturedropsbelowthe
locktemperatureand the LOCK lightgoesoff.
5. Whenthe LOCKlightis off, slidethe latchhandle
to the left as far as it will go and open the door.
The word “door”willbe displayed,the word “LOCK’
will flash and the ovencontrolwill signalif you set
the cleancycleor forgetto closethe ovendoor.
After a Clean Cycle
After cleaningis complete,the doorlatchmust be
retumedto its originalpositionbeforeyou can use the
oven.The ovendoorwill stay lockeduntilthe oven
cools.If you cannotslidethe latcheasilyto unlockthe
door,allowadditionaltime for cooling.
Never force the latch handle. The latch slides
easily.Forcing the latch handle may damage the
door lock.
Youmay notice some white ash in the oven. Just
wipeit up witha dampcloth afterthe ovencools.
If white spots remain, removethemwith a soapfilled steelwoolpad. Be sure to rinse thoroughly
with a vinegarand watermixture.Thesedeposits
are usuallya saltresiduethatcannotbe removedby
thecleancycle.
E the oven is not clean after one clean cycle,
repeatthe cycle.
If the shelveshavebecomehard to slide,wipethe
shelfsupportswithcookingoil.
NOTE: No functionscan be programmedbeforethe
door automaticallyunlocks.
To Stop a Clean Cycle
1. Press the CLEAWOFFpad.
2. Whenthe LOCKlightgoes off and the oven has cooledbelowthe
lockingtemperature,openthe door.
(continued next page)
37
OPEWmG
T~ SELF-CLEA~G OWN
(continued)
How to Set Delay Stati of Cleaning
QuickReminder:
1. Latchthe door.
2. Pressthe AUTOSELFCLEANpad.
3. Pressthe+ or – pad untildesiredClean
Timeappears.
4. Press the STOPTIMEpad.
5. Pressthe+ or – pad untilthe desiredStop
Timeappearsin the display.
.Delay Startis settingthe oventimer to start me clean
cycleautomaticallyat a later time than the present
time of day.
NOTE: Beforebeginning,makesure the ovenclock
showsthe correcttime of day.
1. Followstepsto preparethe ovenfor cleaning.
2. Slidethe latchhandleto the
right as far as it will go.
‘i
Never force the latch
handle. Forcing the handle *
will damage the door lock
mechanism.
3. Pressthe AUTOSELFCLEANpad.
D
AUOSELF
CLEAN
A
4. Pressthe+ or – pad to enterthe
CleanTime.
@
u
n
s;:?
5. Press the STOP~E
pad. “STOP
~E’ and the earliestStopTimeyou
can set will appearin the display.
The earliestStopTimewill be the CleanTime
selectedplus the time of day.For example: If the
CleanTimeis 3 hoursand the time of day is 6:00,the
StopTimethat appearsin the displaywill be 9:00.
6. Pressthe+ pad to changethe StopTime
to a latertimeof day if desired.For
@
example: If you set StopTimeat 11:00,
ovenwill startcleancycleat 8:00and end
at 11:00.The doorlatchesautomatically.
The self-cleancyclewill automaticallybeginafter
“CLEAN’is displayedand the time for cleancycle
is set.The words“ON’ and “LOCK’ will appear
on the display.It willnot be possibleto openthe
ovendoor untilthe temperaturedropsbelowthe
lock temperatureand the LOCKlightgoes off.
7. Whenthe LOCKlightis off, slidethe latchhandle
to the left as far as it will go and open the door.
A
I
,
Questionsand Answers
Q. If my ovenclockis not set to the correcttime of
day,can I still self-cleanmy oven?
A. If the clockis not set to the correcttime of day
you will not be ableto set a delaycleanto end at a
specifictime.
Q. Can I use commercial oven cleaners on any part
of my self-cleaningoven?
A. No cleanersor coatingsshouldbe used around
any part of this oven.If you do use them and do
not thoroughlyrinsethe ovenwith water,wipingit
absolutelycleanafterwards,the residuecan scar
the oven surfaceand damagemetalpartsthe next
time the oven is automaticallycleaned.
Q. What shodd I do if excessivesmoking occurs
duringcleaning?
A. This is causedby excessivesoil.Press the
CLEAWO~ pad. Openthe windowsto rid the
room of smoke.Waituntilthe ovenhas cooledand
the word “LOCK’ is off in the display.Wipeup
the excesssoil and resetthe clean cycle.
Q. Is the “crackling” or “popping” sound I hear
during cleaning normal?
A. Yes.This is the soundof the metalheating
and coolingduringboth the cookingand
cleaningfunctions.
Q. Should there be any odor during the cleaning?
A. Yes,therewillbe an odorduringthe first few
cleanings.Failureto wipeout excessivesoilmight
dso causea strongodorwhen cleaning.
Q. Whatcausesthe hair-likelines on the enameled
surfaceof my oven?
A. This is a normalcondition,resultingfrom heating
and coolingduringcleaning.Theselinesdo not
affecthow youroven performs.
Q. Why do I have ash left in my ovenaftercleaning?
A. Sometypesof soilwillleavea depositwhichis ash.
It can be removedwith a damp spongeor cloth.
Q. My oven shelvesdo not slide easily.What is
the matter?
A. The self-cleancyclecausesthe oven shelvesto
losetheir lusterand becomehard to slide.To make
shelvesslidemoreeasily,wipe the shelf supports
withcookingoil.
Q. My oven shelveshave become gray after the
self-cleancycle.Is this normal?
A. Yes.Afterthe self-cleancycle,the shelveswill
lose somelusterand changeto a deep gray color.
Q. Can 1 cook food on the cooktop while the oven
is self-cleaning?
A. Yes.Whilethe ovenis self-cleaning,you can
use the cooktopjust as you norrndly do.
Q. The word “door” appeared in the display when
I selectedthe cleancycle.What’swrong?
A. The door latch handle must be moved all the
way to the right. Move the latch handle and
cleaning will start.
39
Propercare and cleaningare importantso your range
will giveyou efficientand satisfactoryservice.Follow
thesedirectionscarefullyin caringfor it to help assure
safe and propermaintenance.
BE SURE ELEC~CAL POWER 1S OFF AND
ALL SU~ACES ARE COOL BEFORE
CLEANINGP~T OF T~ RANGE.
Care of Modules
PomelainEnameledGrill Pan& Deflector
Someof the modulesmustbe curedor preconditioned
beforeusingthemfor the first time.Modulesand
accessoriesshouldbe cleanedaftereachuse. The
longera soil remains,the harderit is to clean.See each
modulesectionin thisguidefor specificinstructions.
Neverimmerseanymodulein water.Men not in the
maintop,modulesand accessoriesshouldbe storedin
a clean,dry place.Aways be weful notto dropthe
modulesor theycouldbe damaged.
Cleanafter everyuse. Porcelainenamelcan crack
or chipwith misuse.It can stain if spilloversof foods
with a high acid content(suchas tomatoesor lemon
juice) are not cleanedup quictiy.
Cofl Module SurfaceUnik
Tocleanthesurfaceunits,turnthe controlto thehighest
settingfor a minute.The coilswill bum off any soil.
CAUTfON
● Be sure d] the controlsare turnedto OFF and
the surfaceunitsare coolbeforeattemptingto
removethem.
● Do not immersethe surfaceunits or the module
in liquidsof any kind.
● Do not cIeanthe surfaceunits or the module
in a dishwasher.
● Do not bend the surfam unit plug terrninds.
● Do not attemptto clean,adjustor in anyway repair
the plug-inreceptaclesor the module.
Toremovea surfaceunit:
To removethe drip pans for cleaning,the surfaceunits
mustbe removedfirst.
SutiaM UnR
Receptacle
DripPan
Lift the surfaceunit about1 inch abovethe drip pan
and pullit out.
Do not lift the surfaceunit morethan 1 inch. If you
do, it may not lie flat on the drip pan when you
plug it backin.
Repeatedlitig of the surfaceunit morethan 1
inch abovethe drippan can permanentlydamage
the receptacle.
Toreplacea surfaceunit:
● Replacethe drip pan intothe recess in the
cooktop.Makesure the openingin the pan lines
up with the receptacle.
● Insertthe terminalsof the surfaceunit throughthe
openingin the drip pan and intothe receptacle.
● Guidethe surfaceunit intoplaceso it rests evedy.
DripPans
Removethe surfaceunits.Then lift out the drip pans.
For best resdti, cleanthe drip pans by hand.
Placethemin a coveredcontainer(or a plasticbag)
with 1/4cup ammoniato loosenthe soil. Then scrub
with a soap filledscouringpad if necessary.Rinse
with cleanwater and polishwith a clean soft cloth.
The drip pans may also be cleanedin the dishwasher.
Blackdrip pans (on somemodels)may be cleanedin
a self-cleaningovenafter theyhavebeen thoroughly
rinsed.However,self-cleaningthem may causethem
to lose theiroriginallusterand shine.
Cleanthe areaunderthe drip pans often.
Built-upsoil, especiallygrease,may catch on fire.
Do not coverthe drip pans with foil. Using foil
so closeto the receptaclecouldcauseshock fire or
damageto the range.
Radiant Modul*Glass Ceramic Cooktop Cleaning
Cleaningof glassceramiccooktopmodulesis
differentfrom cleaninga standardporcelainfinish.
Tomaintainand protectthe surfaceof your new glass
ceramicmodulefollowthesebasic steps.
Beforeyou use the modulefor the first time,clean
it with CookTopCleaningCreme.Thishelpsprotect
the top and makescleaningeasier.
DAILYCLEANING: Use only Cook Top Cleaning
Creme on Glass Ceramic.
For normal, light soil:
1. Ruba fewdrops(lessis better)of CookTopCleaning
Cremeontothesoiledareausinga damppapertowel.
Wipeuntilallsoilandcremeareremoved.Frequent
cleaningleavesa protectivecoatingwhichis essential
in preventingscratchesandabrasions.
2. Cleanthe surfacewith CookTopCleaningCreme
aftereachuse.
For heavy,burned on soil:
1. Applya few dropsof CookTopCleaningCreme
to the (cool)soiledarea.
2. Using a damppapertowel,rub cremeinto the
burnedon area. As with any burnedon spill,this
may requiresomeeffort.
3. Carefullyscraperemainingsoil with the razor
scraper.Hold the scraperat a 30°angleagainstthe
ceramicsurface.
4. If any soilremains,repeatthe stepslistedabove.
For additionalprotection,after all soil has been
removed,polishthe entiresurfacewith the Cook
Top CleaningCreme.
5. Buff with a dry papertowel.
NOTE:
● Using a razorscraperwill not damagethe surface
if the 30°angleis maintained.
● Be sureto use a new,sharprazor scraper.
Do not use a dullor nickedblade.
● Store the razor scraper out of reach of ch]ldren.
PRECAUTIONS
● Most cleaners
containarnmoni~chemicalsandabrasives
whichcan damagethe surfaceof yourmodule.Use
ody the Cook Top Cleaning Creme for proper
cleaningand protectionofyour ~ass ceramicsurface.
● If you slidealuminum or copper cookware across
the surfaceof your module,they may leavemeti
markings which appear as scratches. If this should
happen,use the razor scraperand CleaningCremeto
removethesemarkings.Failureto removethese
residuesimmediatelymay leavepermanentmarks.
● Waterstains(rninerddeposits)
areremovableusing
CookTopCleaningCremeorml strengthwhitevinegar.
SpecialCare:
Sugaryspillovers(such asjellies, fudge,candy
syrups)or melted plastics can causepittingof the
surfaceof yourmodule(not coveredby the warranty)
unlessthe spillis removedwhilestillhot. Special
care should be takenwhen removinghot
substances.Followtheseinstructionscarefullyand
removethe soil whilethe spillis stillhot.
1. Turn off all the surfaceunits affectedby the
spillover.Removehot pans.
2. Wearingan ovenmitt, hold the razor \ ,,+~,~!{::”,;;
scraperat a 30°~gle to the module –~ .~<:~’
and scrapethe hot spillto a cool area- e
outsidethe surfaceunit.
3. Withthe spillin a coolarea,usea drypapertowelto
removeanyexcess.Anyspilloverremainingshould
be leftuntilthe surfaceof themodulehascooled.
Do notcontinueto usethe soiledsurfaceunituntildl
of the spilloverhasbeenremoved.Followthe steps
underHeavySoilto continuethecleaningprocess.
General Information:
As the CookTopCleaningCremecleans,it
leavesa protectivecoatingon the modulesurface.
Thiscoatinghelpsto preventbuild-upof mineral
deposits(waterspots)and will makefuturecleaning
easier.Dishwashingdetergentsremovethis protective
coatingand thereforemakethe modulemore
susceptibleto staining.
To convenientlyorder more creme an~or
scrapers for cleaning your radiant module,
please call our toll free number:
800-626-2002
National Pam Center
# WB02X8273
Creme 10oz.
# WX5X1614
Scraper
# WB64X5027
Cremeand scraperkit
If pots with a thin overlay of aluminum,copper,or
enamel are allowed to boil dry, the overlay may bond
with the glass ceramic and leave a black discoloration.
This shouldbe removed immediatelybefore heating
again or the discolorationmay be permanent.
● Use of window cleaner may leave an iridescent
film on the module. Cook Top Cleaning Creme will
remove this discoloration.
●
Read and follow all instructions and warnings
on CookTopCleaningCremelabels.
(continued next page)
41
CM
N
CL~
G
(continued)
Gtil Module
Gtiddle Accesso~
Cleanthe ml module
after everyuse. Do
not .~utthe element
intowater.It cleans
itselfwhen heated
-’E’ement
duringnormaluse. To
Deflector
removeany charred
soil, cleanwith a dry,
stiffbrushwhen the
~Gfill Pan
elementis cool.Never
use steelwool or
metalscouringpads
*
becausethey may
damagethe outer
casingof the element. -sheet
Do not use abrasivecleaningprodu~s.
From timeto time,you shodd reconditionthe grids
with cookingoil as explainedin the GrillModule
sectionof Surfaw Cooking.
Washthe non-stickgrids in the sink in soap andwarm
water.Use a non-meti scouringpad if necew.
Washthe deflector,grillpan & grill sheetin the sink
in soap and warmwater or you may put themin the
dishwasher.Soakstubbornstainsthen rub gentlywith
a non-metalscouringpad.
After cookinga
greasyfoo~ wipe
the non-stickgridde
whileit is stillwarm
with a @ Pawr
Q
towel.B; ~~eful not
to bum yourfingers.When cool,wash the gridde at
the sink in soap and water.Use a non-metalscouring
pad if necessary.
Do not use abrasivecleaningproducts.Do not wash
in the dishwasher.Fromtime to time, reconditionthe
gridde with cookingoil as describedin the Gridde
Accessorysectionof SurfaceCooking.
It is a good idea to storethe gridde on one edge.
If you lay it flat, pans or othercookwaremaybe
put on top and scratchthe non-stickcoating.
Oven Heating Elements
Do not cleanthe bake elementor the broilelement
Anysoilwill burn off when the elementsare heated.
Thebake elementcan be lifted gentlyto cleanthe
ovenfloor.If spillovers,residueor ash accumulate
aroundthe bakeelementgentlywipe aroundthe
elementwith warmwater.
BroilElement
Bake Element
/
Oven Light Bulb
NO~: The @asscover
~,\;’.+,
shouldbe removedordy
J
) ,;j:- J ,
L
..!:?”
when cold.Wearing
OQ
latex #eves may offer a
- ‘{
bettergrip.
The lightbulb is locatedon the back wrdlof the o;en.
Beforereplacingthe bulb,disconnectelectricrdpower
to the rangeat the main fuse or circuitbreakerpanel
or unplugthe rangefrom the electrial outlet.Ut the
bulb coolcompletelybeforeremovingit. For your
safety,do not toucha hot bulb with a dampcloth.If
you do, the bulb will break.
42
Toremove Unscrewthe coverand removethe btib.
DO NOTREMO~ SCREWSTO REMOW
THE CO~R OR REPLACETHE LIGHTBULB.
Toreplace: Put in a new 40-wattappliancebdb.
NO~:
● A 40-wattappliancebulb is smallerthan
a standard4@watthouseholdbtib.
● Instrdland tightenthe cover.
● Reconnectelectricalpowerto the range.
I
RemovableDowndraftVentand GreaseFtiter
Downdraft vent and filter should be cleaned
frequently—after every use is best.
Toremove: Lift off the ventgrilland the aluminum
greasefilter.
Toclean:Cleanthe greasefilter in hot soapywater.
It may alsobe cleanedin a dishwasher.
I
Oven Shelves
Cleanthe shelveswith an abrasivecleanseror
steelwool.After cleaning,rinsethe shelveswith
cleanwater and dry with a cleancloth.
NOTE:The ovenshelvesmaybe cleanedin selfcleaningoven.However,they will darken,lose their
lusterand becomehard to slide.Wipethe shelf
supportswith cookingoil after self-cleaningto make
the shelvesslidemoreeasily.
BroilerPan and Grid
Afterbroiling,removethe broilerpan from the oven.
Removethe grid from the pan.Carefullypourout
greasefromthepan intoa propercontainer.Washand
rinsethe broilerpan and grid in hot waterwith a soapfilledor plasticscouringpad.
If foodhas burnedon, sprinklethe grid with
detergentwhilehot and coverwith wet papertowels
or a dishcloth.Soakingthe pan will removeburned
on foods.
The broilerpan may be cleanedwith a commercial
ovencleaner.Do not use an ovencleaneron the grid.
Boththe broilerpan and grid can dso be cleanedin
the dishwasher.
Do not cleanthe broilerpan or grid in the selfcleaningoven.
Do not storea soiledbroilerpan and grid anywhere
in the range.
43 I
CAW Am CLEA~G
(continued)
Ltit-Off Oven Door
The oven dooris removable,
but it is heavy. You may need
help removing and replacing
the door. Do not lift the door by
the handle. This can cause the
glass to break or can cause
damage to the door.
To removethe door,openit a
few inchesto the specialstop
positionthatwillholdthe door
open.Graspfirmlyon each side
and lift the door straightup and
off the hinges.
NOTE:
● Be carefulnot to placehandsbetweenthe hinge
and the ovendoorframeas the hingecouldsnap
back and pinchfingers.
● Whileworkingin the oven area,coverthe hinges
with towelsor emptypapertowelrollsto prevent
pinchedfingersand chippingthe porcelainenamel
on the frame.
To replace the door, makesurethe hingesare in the
specialstopposition.Positionthe slotsin the bottom
of the door squarelyoverthe hinges.Thenlowerthe
door slowlyandevenlyover both hingesat the same
time.If hingessnapback againstthe ovenframe,pull
themback out.
ACAUTION
Toavoidpersonalinjuryor propertydamage,
handlethe ovendoorwith care.Do not lift
the ovendoorusingthe doorhandle.The
dooris heavyand an be damagedif it is
dropped.
Do not placeyourhandsin the hingearea
whenthe dooris removed.The hingecan
snap shutand pinchyour hands.
The doorcontainstemperedglass.If the glass
is scratched,chipped,twistedor impactedit
may breaksuddenly.If the door glass
appearsdamagedit shodd be replaced
immediately.
TO CLEANTHEDOOR:
Insideof the door:
● Becausethe area insidethe gasketis cleanedduring
the self cleancycle,you do not need to cleanthis by
hand.Any soapleft on the linercausesadditional
stainswhenthe oven is heated.
● The area outsidethe gasketcan be cleanedwith a
soap-filledscouringpad.
● Do not rub or cleanthe door gasket—thefiberglass
materialof the gaskethas an extremelylow
resistanceto abrasion.An intactand well-fitting
oven door gasketis essentialfor energy-efficient
ovenoperationand goodbakingresults.If you
noticethe gasketbecomingworn,frayedor damaged
in any way-or if it has bec~me displaced on the door,
you should have it replaced.
NOTE:Thegasketis designedwith a gap at the
bottomto allowfor properair circulation.
,w’:eG
Outsideof the door:
Use soap and water to thoroughly clean the top,
sides and front of the oven door. Rinse well. You
may also use a glass cleaner to clean the glass on
the outside of the door.
● Spillage of marinades, fruit juices, tomato sauces
and basting materials containing acids may cause
discoloration and should be wiped up immediately.
When surface is cool, clean and rinse.
● Do not use oven cleaners, cleansing powders or
harsh abrasives on the outside of the door.
●
Oven VentDuct
CleaningUnder the Range
The ovenis ventedinto the downdraftventductin the
middleof the cooktop.Do not obstructthis opening.
Keepthe vent clean.Cleanthe associatedfilter after
eachuse.
The areaunderthe rangecan be reachedeasilyfor
cleaningby removingthe storagedrawer.
Do not use the area in this compartmentfor storage.
Neverplacecombustibleor flammableitemsinsideor
near the range.
ControlPanel and Knobs
It’sa goodidea to wipe the controlpanelaftereach
use. Clean with mild soapand wateror vinegarand
water,rinse withclean waterand polishdry with a
cleancloth.
Do not use abrasive cleansers, strong liquid cleansers,
plastic scouring pads or area cleansers on the control
panel—they will damage the finish. A 50/50 solution
of vinegar and hot water works well.
The controlknobsmaybe removedfor cleaning.
Beforeremovingthe knobsfor cleaning,pleasenote
thatthe knobson the left sideand the knobson the
rightsideare in the proper0~ position.When
replacingthe knobs,checkthe OFFpositionto insure
properalignment.
Toremovethe knob,pullit straightoffthecontrolshaft.
Washthe knobsin soapand waterbut do not soak.
Dry the knobsas muchas possiblewith a cleancloth.
Shakethe water out of the knob stem.
To replacethe knob,press it on the shaftmaking
sureto matchthe flat area on the knobto the flat area
on the shaft.
Painted Sutiaces
Glass Suflaces
Paintedsurfacesincludethe sidesand drawerfront.
Cleanthese with soap and wateror a vinegarand
watersolution.
Do not use commercial oven cleaners, cleansing
powders, steel WOOI
or harsh abrasives on any
painted surface.
To cleanthe outsideof the ovendoor,use a glass
cleaner.Rinse and polishwith a dry cloth.
Do not allow the water or cleaner to run down
inside the openingsin the top of the oven door
whilecleaning.
Removing the Storage Drawer
The storagedrawercan be removedfor cleaningor to
makeit easier to cleanunderthe range.
To Removethe Drawer:
1. Pull the drawer out to the first stop. Lift the front of
the drawer and pull it out to the second stop.
2. Let the drawer rest on the floor. Place yourhands
towardthe back of the drawerand lift it out.
ToReplacethe Drawer:
1. Placethe set of rollerson the
drawerbehindthe rollerson
the range.
2. Alignthe guideson the drawer
withthe guideson the range
andpush the drawerback into
position.
45
A WAmING
All ranges can tip.
Injury could result.
.M
the Anti-tip device
packed with the range.
. See the Instigation
Instructions.
● The Anti-tip device must
remain engaged.
●
●
Stability Device Instillation Instructions
1. On the right sideof the cutoutor installation
locationmeasure5ti” from the back wall forward
and mark a point.Repeaton the left-handside,then
draw a straightlinebetweenthe points.
2. If installing the unit against cabinet(s): Placethe
insideedge-ofthe brac~et(s)againstthe”line and the
end of the bracket(s)againstthe cabinetside.See
the illustrationbelow.Mark the hole locations.
Anti-fip Bracket Location Wth Cabinets
legs are extended at least 1/4” and are engaged with
the anti-tip bracket.
11,11
5. me rangemay nowbe pushedinto position.
Removethe storagedrawerand check thatthe leg
has engagedthe anti-tipbracket.If it has not, the
bracketmustbe relocatedto ensureengagementof
the levelingleg into the bracket.
Installingthe unit withoutcabinets:Position the
range as it would be installed. Draw a reference
line on the floor from front to back along one side
of the range. Place the inside edge of the
brackets(s) flush with the line drawn in Step 1 and
the end of the bracket(s) flush with the line you
have just drawn. Mark the hole locations.
Anti-~p Bracket Location Wthout Cabinets
RearWall
M
I
I
i
I ~
I
3. If mountingintowoodflooring,drill 3/32”holes as
marked.If mountingintoconcrete,use a masonry
drillbit and drill 3/16”holes.Insertplasticanchors
into concreteholes.Positionthe bracketand mount
it usingthe suppliedscrews.
4. Levelthe rangeusingthe levelinglegs.The range
mustbe levelto assureuniformcookingand baking.
A level shouldbe placedon an oven rack or on top
of the rangeto lev~lthe unit.Verifythatthe leveling
Anti-~p Bracket
I
I
ReferenceUneFor ~
RangePlacement
i
I
I
A
If the rangeis movedfor cleaning,
servicing or any reason, be sure the
anti-tip device is re-engaged properly
when the range is replaced. Failure to
take this precaution could result in
tipping of the range and cause injury.
BEFOREYOU BEGIN
Step 1
Read these instructions completely and carefu~y.
WORT~
Save these instructions for the
lod electricrd inspectors use.
~PORT~
OBSERVE ~
GOVE-G
CODES ~
ORDIN~C~.
N~
~ ~ST-R
have these instructions
with the appfianceafter initiation is completed.
N~
TO CONSUMER Keep tils Use and
Care Guide and Ins~ation Instructions for
future use.
N~.
This apptiancemust be properlygrounded.
CHOOSE
M lNSTMMT!OHLOUTIOW
Choosea ltim
based on the foU*
*H:
1. The range is designed to be vented outdoors.
2. The electrid rating is 14.7~, 120/240 V,
60 W.
3. Drafts caused by home heating and ~
conditioning and or open doors or windows can
disrupt the ventilation air pattern. The range
should not be instied near windows or doors.
4. The unit cannot be instied in a tunnel type
WWopening. M currents moving through the
tunnel m disrupt the ventilationair pattern.
5. The range can either be ducted through the
wd or through the floor to the outside.
6. Make sure there is adequate space for proper
initiation.
7. Remove protective packing materials from the
range. Tape residue can be cleaned with a soft
cloth and alcohol.
8. Carefu~y read d instructions before
beginning initiation.
TOOLSYOU WILL NEED
. kge bladescrewdriver
Channellockpfiersor smallratchetwrench
(forlevehg range)
l/4inch hex head nutdriver
●
●
ELECTRIU REQUIREMENTS
W~ON—POR
PERSON~
DO NOT USE ~ -NSION
=
~S
~P~CE.
(continuednti)age)
~
CORD
This apptice must be supptied with the proper
voltage and frequency, and connected to an
individud, properly grounded branch circuit
protected by a circuit breaker or time delay fuse,
as noted on the rating plate.
Wtig must conform to Natioti Electrid Codes.
Hthe electric service provided does not meet the
above spectications, it is recommended that a
ticensed electrician insti an approved outiet
Because the range terminals are not accessible
after the range is in position, a flexibleservice
conduit or cord must be used.
47
Repare the CaMnetOpening
The range shouldetiend approtiately 1%”
born the cabinetfrontto the ovendoorhandle.
Removeventing kit from the storage drawer.
Using the dimensions below and the special
countertop conditions in these hstiation
Instructions, prepare the cabinet opening,
r I
StandardCatinetandtiunte~p
Wdl
\
Height
[
1“~::.--2
4
35”
I
v
-e
~mensions:
Width-2gl%b”
Depth-28”
Height—36”
_um
Clearances to timbustible
S-ces:
● Minimum clearance to the rear w~ is O“
c Minimum clearace to a vertical right or left
side WWis 3“
● Minimum clearance to the countertop/cabinet
in each side is O
s Mtium of 30”between the top of the
cooking surface and the bottom of an
unprotected wood or meti cabinet
Specialtiunh~p Conditiom
Irr_
Ubinet and Countertop Hei@ts
Countertopssuch as ceramic tie tops wi~ cause
the ~binet and countertop to be higher than 36”.
Fo~owthese instructions when the countertop is
higher than 36”.
1. Raisethe levekg legs to the mtium
level.
2. Measure from the floor to the side trim. E the
measurement is less than the height of the
countertop the floor must be shimmed.
3. Shim the floor using a piece of plywood the
same ske as the range openhg. Secure the
plywoodto the floor.The plywood must be as
secure as the originalflooring.
4. Insti the anti-tipbracket and sfide the range
into place.
Ishd or Peninstia hstition
Islandor peninsulainitiations with 24” deep
base ~binets must use flush back cabinets with
no rear toe space to avoid range interference.
Ha rear toe space is desired, use 27” or deeper
base cabinets.
SEde-~ bstiation
W~G.
To avoid the risk of
A
burns or tie by reaching over the
surface units, cabinet storage space
Fora manufacturedmuntetiop,
withor withouta backsplash,
makethe cutoutkeepingthe
reardmensionas illustrated.
ne backrailontie backof the
rangewill slideoverthe
manufatired countenop
creatinga tightfi.
l~ted abovethe range shodd be avoided.
i
48
Sfide-k hstiation in a Formed
Countertop with a Backsphsh
mooring Under the Range
Your range, me many other household
items, is heavy and can setie into soft
floor cov~rings such as cushioned vinyl
. men movingthe range on
or -e
of ooring,it shouldbe ins~ed on
this type Y
a 1/4 inch thick sheet of pl~ood (or stiar
matend) as foflows
men thefloor covering ends at thefront of the
range, the areathatthe rangetil rest on should
be built up witi pl~ood to the same level or
higher than the floor covering.This ~ dow
the range to be moved for cleaning or servicing.
Shp
2
DU~IHG REQUIREMENTS
MD LO~llOH
1. The ductshodd be 6“roundmeti ducting.
Islandpeninsulainitiations mayrequire
3%”X 10”duct
2. Curvedfittingsshouldnot accountfor more
than 5W ofthe ductlength.
3. men usingflexibleduct onefootis equalto
2 feet ofmeti duct =R
USEP~C
~E
DRYERDU~G.
7. %d d ductjoints tigh@ using duct tape.
Openingsleftin ductig d dow smoke and odor
to e=pe inside the house.
S. Toensureproper ventition, the ductwork
must not exceed 60 equivalentfeet
9. For best performance, do not use over three
W“ elbows.
10. me 6“transition duct providedmust be
mechanidy secured h the exhaust blower ouflet
Secure tie transitionduct using the two screws
provided.
~~ce
for Ducdng hto tie Wd
7
II I
,,
+
,.4
AsLen
\,
I II
~
~
Cut Duct Opening in Wd
1. bcate the studs in the wd.
2. Measure and cut an opening for the thimble as
shown above.The cutout should be 6W diameter.
3. Ductig fl be completedin the “MakeFmd
DuctConnection”section.
I
4. Do not vent into an atticor crawl space. Duct
the range outside.
5. Hexible duct elbowsare equal to Mm as manY
feetas smoothmeti elbows.
6. Neverins@ twoelbowfittingsnW to each
other.Twoelbowsinstied togetherti create
a poorventpathandinsticient ventilation.
2. Measureandcut an openingforthe floor
transitionpieceas Uustratedabove.The cutout
shouldbe 7%”x 7%”square.E the openingis not
correcgtignment problemswifloccur.
3. Ductingti be completedin “MakeFiid
DuctConnection”section.
(continuedn&page,
4Y
TMLE 1
CalculateTotalEquhalentDu-ork
)uct Pieces
5“ round
D
;:::;d
straight
3X” x 1o“
\ str~ght
5“, No
elbow
Q
6“, %0
elbow
5“, 45”
elbow
Len@h
EquivalentNumber EquNalent
Length*x Used
= Length
2.7
X (
R.)i=
ft
1
x (
fi.)t=
fi
1
x
fi.)t=
ft
37 fi. x(
)=
ft
15 fi. x (
)=
fi
)=
ft
(
18 fi. x(
a
6“, 45”
elbow
ft.
@
Flexible
MetalOffset (14 ti. per inch)x
Adapter
in. offset) =
(—
3WX1O”
16fi. x(
)=
90°elbow
@
3WX1O”
45° elbow
5fi.
x(
)=
fi
Q
3TX1O”
W“ flat elbow
18fi. x(
)=
ft
5“ round
to 3B” x 1o“
transition
3fi.
)=
ft
%
9fi.
6“ round
to 3%”x 1o“
7ti.
transition
x(
x(
x (
SubtotalColumn1
)=
)=
=
ft
EquivalentNumber Equivalent
)uct Pieces
Length*x Used
= Length
5“ round
to 35” x 10”
transition
90° elbow
37 fi. x(
)=
R.
6“ round
to 3%”x lo”
transition
90° elbow
2ofi. x(
a
3%”x 1o“
to 6“ round
transition
5fi.
%
3%”x 1o“
to 6“ round
transition
90° elbow
Tapered
5“ round
to 6“ round
transtion
Q
)=
ft.
)=
ft.
12 fi. x(
)=
ft.
6fi.
X(
)=
ft.
x(
)=
R.
5“ round
wall cap
with damper 84 fi. x(
)=
ft.
21ti. x(
)=
ft!
=
3%”x 1o“
wdl cap
withdamper 27 fi. x(
)=
ft.
9
6“ round
roofcap
20X()=
ft.
e
6“ round
roofvent
24x()=
ft.
.
m
&
ft
R
ft
Equivalentlengthsofductpiecesare based
on actualtes~ andreflectrequirementsforgood
ventingperformancewithanydowndraftcooktop.
~Measureandfistfeetofstraightductused.
Countandtistthe quantityofd other duct
piecesfor the “NumberUsed”ofeachtype.
D
IMWRTMT
For maximumefficiency,use the shortest and
straightestductrun possible,withas fewfittings
as possible.Forsatisfactory
performance,
theductrun shodd notexceed60 feet
qtient
len~.
Ventingperformanceis improvedby using
largerdiameterducL
50
5“ roundcollar
to 6“ round
captransition 13fi.
6“ round
?;
*
x (
7&per
SubtotalColumn2
=
ft.
SubtotalColumn1
=
ft.
TOTALDUCWORK=
ft.
Should not exceed60 feet.
H flexiblemeti ductingis used,d the equivalent
feetvaluesin the tableshouldbe doubled.me
flexiblemeti ductshouldbe straightandsmooth
andextendedas muchas possible.
DO N~
usefitible plasticduc~.
Ventins~ation shouldnot exceed60feet
equivalentlength.
Bloweris ratedat 300 Cm at 0.1inch ofwater
backpressure.
I
Step3
LINEVOLTAGE
AKDOUTLETLOUTION
Clearance for Electrid tinnection
=
5“
me tie voltagemust not exceed the rated
voltage.tie voltageless thanthe ratedvoltage
W resultin slow heating.The wiringsystem
conformsto the UnderwritersLaboratories,hc.
standardsad the NationalElectrid Code.The
initiation must conformto dl led, municipal
and state btiding codes, NECandlocrdutifity
regulations.This rangemust be connectedonly
to a supplycircuitas specifiedon the nameplate
locatedon the frontframeof the range.The
outietmust be mountedon the floororWW
withinshadedarea.See the Uustrationabovefor
the electrid connectionclearancearea.
Reqtiements for Power Cords
N~:
Onlya power cord suitableforuse with
rangesmaybe used. For instigation in a mobfle
home, or area where local codes do not permit
grounding tiough the neutral terrnind, a Awire
cord must be used.
Power cord must be U.L.fisted and meet NEC
and Mobile Home Manufacturers Association
Standards. The cord must be rated at a minimum
250V40AM~ equipped with a plug configuration
in accordance with NEMA and conductors must
end with closed loop (ring) terminals at the
range. ~ee conductor cord plug NE~
l&50P dewed for residentid) @our conductor
cord plug NEMA l&50P allowedfor most
mobile home instigations but can be used for
residentid)
The range has been grounded at the factory to
the center (nickel plated) terminal of the
terminal block in accordance with the National
Electrid Code (section 2560).men a separate
ground is required by local code, disconnect the
grounding strap from the terminal block, (see
the below ~ustration). Ground the frame by
connectinga groundingwireto the rangeframe
usingONLYthe groundingscrewremovedfrom
the groundingstrap.
Term
step 4
WIRE~WER CORDTOTEWIU BLOCK
beating the Range Termti Block
me connectionblockis lo=ted attie bottomrear
of the rangebehindthe rearcoverpanel.Remove
the rearcoverscrew.Directiybelowthe terminal
blockis a holefora powersupplyservicecord,not
suppfiedwiththe range.
we @_.
block is a ro~&fr~pper
we connetion ody, #&
wiring. Haluminumhouse wiringis to be
connected,the fo~owingprocedureis suggested.
of copperbtiding wire to
1. Connectthe len
the rangeterminalPlock with ring terminals.
2. Spticethe copperwiresto the aluminum~g
using connectorswhich are designed certifiedby
UnderwritersLaboratoriesandrecomd for
joiningcopperto aluminum.FOUOW
the connector
manufactured recommendedprocedure.
3. The wire used, locationandenclosureof
spfices must conformto lod codes.
GrountingStiap
(continued
ndpage)
51
Step 5
Step 6
INSTWLIN6A*WIRE ~WER CORD
IHSTWLIH6A*WIRE HWER CORD
Connedonsfor a 3-Wre PowerCord
Connationsfor a 4Wlre PowerCord
NeutralTermin+
Conneotwirewith
NeutralTerminaL
Connedwirewith
Pow
tih
and
d
(240or 208voh bothsides)
Strap
v
PowerTerminals
(240or 208voltsbothsides)
d
insulationand
brassterminal
1. Removethe rear wirecover.
1. Removethe rear wirecover.
2. Placethe strainretief(wingedclamp)in the
cord accessholebelowthe terminalblock.Pkce
the wingsthroughthe hole,enteringfromthe
bottom.The screwholesin the clampshouldbe
belowthe mountingpanel.
2. Placethe strainrefief(wingedclamp)h the
cordaccessholebelowthe terminalblock.Place
tie wingsthroughthe hole,enteringfromthe
bottom.The screwholesinthe clampshouldbe
belowthe mountingpanel.
3. Removethe groundingstrapa~ched to the
centerterminalonthe terminalblock The strapis
notneededforthis initiation. Nso removethe
greengroundscrewandretainit forlater use.
3. Placethe cordthroughthe strainretief
Attachthe neuti (center)or the whitewire to
the center terrnindblock.
4. Attachthe powerlead, red tie or blackwire
to the left side powerterminal.
5. Atich the powerlead,red wireor blackwire
to the rightsidepowerterminal.
6. Afterthe wireshavebeenplacedonthe
terminrds,attachwiththe hex nuts provided.
Ftiy tightento insureproperelectrid
connection.
7. Placethe screwtirough the strainrefiefand
tighten.
8. Replacethe rearwire cover.
4. Place the cord through the strain refief.
Attach the cord neuti (center) or white wire to
the center terminal on the terrnind block.
5. Atich the power lead, red wire or black wire
to the left terminal.
6. Attachtie powerlead, red wire or blackwire
to the rightterminal.
7. A~ch the green or barewire to the back of
the rangeusing the green ground screw
previouslyremoved.
8. Attachthe wires with the hex nuts provided.
Piiy tightento insureproperelectrid
connection.
9. Hate the screwtiough the strainretiefand
tighten.
10. Replacethe rear wirecover.
W~G:
To avoidthe risk of
severeelectrid shockor deaththe
A
groundwiremustbe atiched to the
frameofthe rangeusingthe ground
screwprovided.The groundwiremust
not conhct anyother terminal.
52
Step 7
CONVERTING
FROMA +WIRE TOA&WIRE
HWER CORD
1. Removethe rear wire cover.
2. Removethe bottom strain refief screw and
retain it for further use.
3. Removethe screw/hex nuts from the
terminal block and retain them for further use.
4. Remove~ Swire or cable leads from the
terrnind block and proceed to remove the power
cord from the unit by pu~g in a downward
motion so that the cord is removed born the
strain retiet
5. Removethe grounding strap attached to the
center terminal on the terminal block. The
groundhg strap is not needed for this
initiation. Mso remove the green ground screw
and retain it for future use.
6. To ins~ the 4wire cord, fo~owSteps 4
through 9 of “hs-g
a 4Wire Cord”.
7. Rekstil the rear cover and secure it with tie
screw removed eartier.
~ electrid connections should be inspected
before power is turned on, to make certain that
they are tight.
Step 8
INSTWLTHESIDETRIM (optional)
Udesired, the optionalside trim provided can be
kstiled on the range. The side trim must be
instiled above countertop level and tapped
down into place.
The side trim can be mounted in several
different positions depending on the countertop
opening, cabinet structure and range features,
Frees~@
tith Backpbsh
To mounttrimflushwiththe frontofthe
countertop,use number3 trimholesand ‘N
range holes.
4“ BacW and Backsplash
To mountthe trimflush with the front of the
countertop,use number3 trimholes and ‘An
rangeholes.
Optiod Montig
‘Amrangeholes Wow an extra3/8 forward
adjustment.Trimholes number1,2 and 3 allow
a 1/2” adjustment.me trimm be mountedin
any desiredlocationusing the holes provided.
Ii
\
*
I
SideTrim
If the wuntefiop front is roll
formed,notchthe counterto
allowfor overlappingtrim,
SideTrim
Sfide.in Installation with Roll Fomad Countertop
(continued
n&page)
53
Step 9
Fii
~imble (aRati to tie wdl or floor)
FlexDud
Blowe
L~Ho”
C’amp
*
>
Blower
Scr
e
Duct Connection tiou@ the moor
1. Attachthe rubbergasket
aroundthe edge of the
transitionpiece. me flatside
\
/“\.
of the rubbergasket should
be on the under side of the
--
transitionpiece.
2. Placethe roundend transitionpieceintothe
floor.Securethe transitionpieceusingthe 8
screwsprovidedin tie kit YoumustM the edge
ofthe rubber gasketto installthe screws.Make
surethe roundedge ofthe gasketis facingup.
3. Insert the floorelbowductintothe transition
piece.me tide flze must face towardthe
front of the -e.
Attach the floor elbow duct
to duct plate using the two screws provided.
Tighten only the front screw.
4. Attach the floor elbow duct to the blower
using the 8 screws provided. me floor elbow
duct should be inside the blower.
5. Plug the range into the wd.
FloorElbow
Duet\
1. Removethe screw in the front of the blower
transition separating the blower transition from
the blower housing.
2. Place the hose clamp around the round end of
the blower transition. Attach the flex duct to the
blower transition using the hose clamp.
3. With the anti-tipbracket properly instied in
the floor,place the long end of the thimble hto
the wd and screw it into place using the four
screws provided, one in each corner.
4. Place the hose clamp provided around the
short end of the thimble. Attach the opposite end
of the flex duct to the short end of the thimble
using the hose clamp.
5. Plug the range into the wd.
6. CarefuUypush the range back into position.
Avoidpinching the transition piece or flex duct
7. Using the guide screw to locate the hole in
the rear of the blower housing, position the
transitionhside the blowerhousing.Rotatethe
transitionunti the hole in the frontofthe blower
housingis tigned. Securethe transitionwiththe
screwprovided.
8. Sed au ductjointswithducttape.
9. Checkunder the range to be sure the levehg
leg is fullyengagedin the anti-tipbracket
10. hsti the storagedrawer.
54
Blower
/
tape,
TranstionPie@
\ FloorPlate
6. Pushthe rmge intoposition.Makesure
that the floorelbowductis directiyoverthe
transitionpieceand rubber gasket me rubber
gasketfi providea sed be~een the floor
elbowandthe transitionpiece.Seethe above
Uustration.
7. hosen the frontscrewattachingthe floor
elbowductplateandthe floorelbowduct Sfide
the floorelbowductplatedowntight againstthe
rubbergasketandtightenthe screw.
8. Sed the jointbetweenthe blowerand elbow
trmsitionpiecewithducttape.Checkunder the
rangeto ensurethe anti-tipbracketis engaged.
9. Insti the storagedrawer.
TROUBLE
SHOOTING
GUIDE
Ethe ventilation system is not operating
correcfly check the fo~owingitems.
1. Do the ductig pieces look We the examples
in the Duct kn@ Chart? The system should be
constructed using the examples shown in the
Duct hngth Chart The ductwork should not
exceed W equivalent feet.
2. Were two elbows used together to get around
a floorjoist or w~ stud? Two elbows should not
be insta~ed together. They will create a poor
vent path.
3. H cooking odors are fikefig back into the
house, answer the fo~owingquestions. Was the
system vented outside? Was the system vented
into the attic or a crawl space?me system must
be vented outside. Are dl of the duct joints
sealed with duct tape? Ml joints must be sealed
with duct tape.
4. Was flexible ducting used in the initiation?
flexible plastic ducting should not be used. E
flexiblemeti ducting is used, each bend should
be counted as two meti duct elbows. A flexible
meti duct must be cddated as twice the length
of straight 6“ meti duct
-OVN
MD REPUCEMENT
OF~GE
1. Disconnectthe electricalsupplyat the house
circuitbreaker.
2. Disconnectthe rangeventing.
3. Unplugthe powersupplycord.
4. Removethe anti-tipbracket
5. Insti the anti-tipbracketintothe new
location using the instructions provided with
the bracket
6. To replace the range foflowthe hstilation
hstructions.
5. Doesthe ske ofthe ductig change?M
ductingshouldbe the samesk.
6. Is the ductingclearofd foreignmatter?
Clearentireducting.Foreignmatterin ducting
W restrictairflow.
7. Hasa pieceofductingcollapsed?Replace
damagedducting.
8. Is there a draftin the rangearea?Try to
e~ate the draftand checkthe operation.
9. Howhigh abovethe groundis the wdl cap?H
the capis too closeto the ground,airvelocity
d bounceoffthe groundand return intothe
WMcap,restrictingthe exhaustflow.
55
QUESmONS?
USE THIS PROBLEMSOLVER
PROBLEM
“F-AND A _ER=
MH
~ THE DISPLAY
POSS~LE CAUSE
H the timedisplayflashes% and a nmber,w you havefunctione~or *.
E the functionerrorcodeappearsdtig the se~deting cycle,checkme oven
doorlatch The latchmay havebeen mov~ even if ody sli@tly,fromthe
latchedposition.me sure the latch is moved to the right as far wit til go.
p~ Alow the ovento -1 for one hour.
Press the CWOFF
Put the ovenback tito operatiom
● Disconnectti powerto the rangefor 5 minutes=d then recomect powsr.
Uthe ~we re=
then call for servim.
*The plug on the rangeis not completelyinsertedin the electrid outiet.
● The circuitbreakerin yourhousehas been tripor a ti hasbeen blown.
● The ovencontrolsare not properlyse~
*The doorleft in thelockedpositionafter cleaning.
●
The lightbtib is looseor defhve. ~ghten or replace.
● The switchoperatingthe oven iightis broke~ ~
for service.
●
FOODDOES NOT
BROLPROPEWY
FOODDOWNOT
ROASTORB&
PROPERLY
o=
TOO
TEMP~
HOTORTOOCOLD
me ovenis not set at BRO&
● The doorwas notshutas reeo-ended
● bproper she~ positionbeingd
See the BroflingGuide.
● Food is beinginked
on hot ~
● @kware
is not suitedfor brofiin&
broflpan grid b notbeen fittedproperly
●
me ovenis not set at B-.
● SheM
positionis incorrect.See the Roastingor Bakingsections.
● The ovenshelfnot leveL
● Inmrrect cookwareor cookwareof impropersti
is being● A fofitentwas not usedwhen neededto slowdownbrowningduringroasting.
● The oventhermostatnadj-en~
Seethe Adjustthe Oven
Thermostat-DoJt Yome~sectio&
●
*The oventhermostatneedsad-ent
ThermosMo It YWe~sectio&
Seethe Adjust&e Oven
*we suretheelectri~ pm is pluggedintoalive, properlygrounded
poweroutiet
*-k
for powerowge.
● Reviewtie Oven ~atrol
~ock andTrier sectionof this guide.
*Theoventemperatureistoohigh tosetself+lean operatiomN1ow the rangeto
coolto roomtemperature=d reset the mtroh
● me doorktch Wde
not movedti the way to Weright.
. Pressthe ~0~
@ Mow the range tocool10roomtemperature
and resetthe controls.
OWN DOOR
IS ~00~
56
●
Becausetheovendooris mmovab}e,it sometimesgets out of positionduring
=ation.
To straightenthe door,ptrshdownon the tigh mmez
PROBLEM
POSSIBLECAUSE
OWDOOR WLL
NOTUNLOCK
* TheovenmustcoolbelowtheI&g
OH
-R
*The ovencontrolsare not set properly.
*HeavEysofiedovem may need to seu+la againor for a Iongerperi~
*Heavyspitioversshotid be claed beforestartingdean cycle.
NOT CLEAN
CLEAN~~
ternpera~e.
The self<iean cyclehas been seleti but the latchhan~e was not moved
~1the wayto the ri@t Movethe btch han~e.
. The latchhande was movedto the rightbut anotherprogramotherthan
se~wleanwas seIectd MoveMch haude to the rightody whensetting
self~ean cycle.
●
●
●
●
This is remindingyou to entera We temperature.
Youmustuse pans whichare absolutelyfla~E light can be seen between
the pan bottomand a straightedge,the radiantsurfaceunitsti not transfer
beatproperly.
-roper coo&are betig Pan bottomsshouldbe fl~ fairly heavyweigh?
and the samediameteras the surfaceunit sel@ed.
*ticoti dtig
methodshavebeen ~
cootiare with roughbottoms
has been uses or coarseparticles(At or sand)were betweenthe coo-e
and thesof the cooMop.Use recommendedcleaningprocedur~ be sw
coobare bottomsand coohare are cleanbeforeuse, and& cookare with
smoothbottoms.Tinysratches are not removablebut ti becomeless visl%le
in time as a redt of cleantig.
DWdty may be in the maindistributionprmelof yourhouse cawd by a
blown circuit~ a trippedcirtit br~r, the main & or the~
circuit
brending on natureof the powersupply.If a cirmit Mer is
involv@ reset it. If the controlbox uses fuses,the circuitfise (a mrtridge-type)
shodd be changd BUT ONLYBY SOMEONEFMW
WTH
E~CAL
~-.x
after perfo~g one of theseprocedure%
the b blowsor circuitbre~r trips adl for service.
NO~: Apartmenttenantsor condominiumownersshodd requesttheir building
managementto performthischd beforeMing for service.
● @n&ok are notproperlyset or wrongcontrolis set for the modde or surface
tit you are using.
. Entiremodde is not@uggedin propedy.
● E =y modse to h~t-itch
the rn~e to the othersideof coo&op.
Hit operateson that sik then switchmaybe at fatik H it does noth~
indi~ons are that there isa dfunctiotig componentin the m~e.
● Mark from&m’num md qper
pausas well as mineti deposits fr~m
water or W can be removedwith the cleaningaearn.
●
~
OF
DISCOLO~ON
ON coomoP
(continued nmpage)
57
~
PROBLEM
PROBLEM SOLVER
(continued)
POSS~LE CAUSE
~&
~GS
(mayappearas ~tdes)
●
karrm dtig
rnateri*
havebeen m enmed bofioversor grease
spattemremainm the surfam. Use a mor -per and mmmended
cleaningprtim.
Surf-units are notpluggedin soti~y.
S-unit
Qntrok are not propedy set or the wrongS*W unitantrol
knobset forthesurfamunityouareusing.
*Heatingelementis not pluggedin solidy.
,or gri~e mntrok are not properlyset.
●
●
G~L OR G~DN
MODULEIS NOT
FUN~ONNG PROPEWY
“B~G”
OR “Omr
FROM
ODOREMmG
OW TURNEDON
STRONGODOR
W
SYSW BLOWER
DOESNOT WOW
*GriWe was not pre-seasonedbefore~ use.
● Heatsetig
is too hi~
● O-g
of gridde has ~ damagedby use of sharp tients
or
abrasivedeanse~
● A_@tied
greaseon pte is ~using exeesssmoke.
● F*
not trimmedfiornmess priorto eootig.
*Thisis nob a new oven and WI diwppearin time.Tospeedthepr~ss,
set a seif+l- ~de for a minimumof 3 hem. See the Opera&g the
SeIf-~eaning Ovense~ion.
*An odor from the Hation around& insideof h ovenis noti fur the
firstfewtirnesthe ovenisti~is
temporary.
● The-t
breakerin yourhousehasbeen trix
or a * hasbeen blom
● E the m~es
operatebut the blowerdoesn’~the fadt may be in the blower
mntrol switchor blowerwiringmnndons. Be sure to -nnti
powerto
tbe mge at the ho~hold ti%ution panelbefore~mpting to servim tie
bioweryouBE.
If you needmorehelp...~ to~free:
GE Answer Center@
800.626.2000
consumer kforrnation sefice
58
WdllBeThere
WiththepurchaseofyournewGEappliance,receivetie assurancethatifyou everneed
informationor assistance
horn GE,wdUbe there.Allyouhavetodo iscaII–toil-free!
GEAnswer
Centep
Whatever your question about any GE major appliance, GE Answer Center@
information serviceis avaiIableto help. Your call-and your question-till be
answered prompdy and courteously.And you can call any time. GE Answer
Center@setice is open 24 hours a day, 7 daysa week.
AGE consumer service professional will provide expert repair service,
scheduled at a time that’s convenient for you. Many GE Consumer Service
company~perated locations offer you sefice today or tomorrow, or at your
convenience (7:00a.m. to 7:00 p.m. weekdays,9:00 a.m. to 2:00p.m. Saturdays).
Our facto~-trained technicians knowyour appfiance inside and out+o most
repairs can be handed injust one visit.
ForCustomerWti SpecialNeeds...
80~6262000
~
—-----—-. —.
Uponrequest,GEwillprovide
Braillecontrolsfor a varietyof GE
appliances,and a brochureto
assistin planninga barrier-free
kitchenfor personswithlimited
. .. . mobfiity.To obtaintheseitems,
free ofcharge,cdl 800.626.2000.
Consumerswithimpairedhearingor speechwhohave
accessto a TDDor a conventionalteletypewritermay
cdl 80&TDBGEAC(800#3W322) to request
informationor setice.
SemisCon&a&
8aM2&2224
You can have the secure feeling that GE Consumer Servicewillstillbe there
&er your warranty expires. Purchase a GE contract while your warranty is still
in effect and you’llreceive a substantial discount. With a multipleyear contract,
you’re assured of fiture sefice at today’sprices.
bdividti
q-led
to service tieir own app~ances
can have parts or accessories sent direcdy to their home.
The GE parts system provides access to over 47,000
par~...and all GE Genuine Renewal Parts are fully
warranted. VISA, MasterCard and Discovercards
are accepted.
Usermbtenmce
ktictions
contained in this @de
cover procedmes intended to be performed by any user.
Otier servi~
gene~y
shodd he referred to qu~led
service personnel. Caution must be exercise~ since
improper serncing may cause unsafe operation.
t
Staple sales slip or cancelled check
here. Proof of originalpurchase date
is needed to obtain se~ice
under warranty.
YOUR GE ELECTRIC RANGE
WARRANW
I I
WHAT IS COVERED
FULLONE-YEARWARRAN~
For oneyearfrom dateof original
purchase,we will provide,free of
charge, patis and service labor in
your hometo repairor replace
anypati of the rangethatfails
becauseof a manufacturingdefect.
WMT IS NOTCOVERED
Servicetrips to your hometo
teachyou howto usethe product.
ReadyourUseandCarematerial.
If youthen haveany questions
aboutoperatingthe productplease
contactyour dealeror our
ConsumerAffairsofficeat the
addressbelow,or call,toll free:
GE AnswerCenteP
800.626.2000
consumerinformationservice
● Improperinstallation.
●
This warrantyis ehended to the
originalpurchaserand any su-eding
ownerfor productspurchasedfor
ordina~ homeuse inthe 48 mainland
states,HawaiiandWashington,D.C.
InAlaskathe warrantyis the same
exce~tthat it is LIMITEDbecause
youmustpayto ship the productto
the serviceshopor for the service
technician’stravelcoststo yourhome.
All warrantyservicewill be provided
by our FactoryServiceCentersor by
our authorizedCustomerCar@
servicemduringnormalworkinghours.
Shouldyourapplianceneedservice,
duringwarrantyperiodor beyond,
call800-GE-CARES(800-2-2737)
If you havean installationproblem,
contactyour dealeror installer.
Youare responsiblefor providing
adequateelectri~, gas,exhausting
and otherconnectingfacilitiesas
describedinthe InstallationInstructions
providedwith the product.
● Replacementof housefuses or
resettingof circuitbreakers.
● Failureof the productif it is used
for otherthan its intendedpurpose
or usedcommercially.
● Damageto productcausedby
accident,fire, floods or acts of God.
WARRANTOR
IS NOTRESPONSIBLE
FORCONSEQUENTIALDAMAGES.
Somestatesdo not allowthe exclusionor limitationof incidentdor consequentialdamages,sothe ~ove limitationor exclusion
maynotapplyto you.~s warrantygivesyouspecificIegd rights,andyoumaydso haveotherrightswhichvaryfrom stateto state.
Toknowwhatyourlegalrightsare in yourstate,consultyourIod or stateconsumeraffairsofficeor yourstate’sARorneyGeneral.
Warranto~GeneralElectricCompany
If furtherhelpis neededconcerningthis warranty,write:
Manager<onsumer Affairs,GE Appliances,Louisville,N 40225
JSP69
PrintedintheUnitedStates