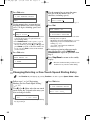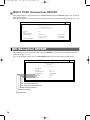
1
00 FAX_Contents.qxd
6/17/04 12:42 PM
Page i
Using Your Documentation
Your machine includes the following documentation. This documentation has been designed so that you can
easily use your machine to suit your particular needs.
Setting up the machine......................................
Setting up paper ..............................................
Installing Printer Driver .....................................
Document and paper handling .............................
Making copies ................................................
Maintenance ..................................................
Troubleshooting feed and copy issues ....................
Sending and receiving faxes ...............................
Speed dialing .................................................
Troubleshooting fax issues .................................
Set-up Instructions
Basic Guide
Fax Guide
Only for the imageCLASS D880 model
Printing with CAPT (Canon Advanced Printing Technology) ..
Checking the status of a print job..........................
Troubleshooting CAPT issues...............................
Printer Guide
• Guides with this symbol are PDF manuals included on the accompanying CD-ROM.
NOTE
• To view the manual in PDF format, Adobe Reader/Acrobat Reader/Acrobat is required. If Adobe
Reader/Acrobat Reader/Acrobat is not installed on your system, please download it from the Adobe
Systems Incorporated website (http://www.adobe.com).
Copyright
Copyright ©2004 by Canon, Inc. All rights reserved. No part of this publication may be reproduced, transmitted,
transcribed, stored in a retrieval system, or translated into any language or computer language in any form or by
any means, electronic, mechanical, magnetic, optical, chemical, manual, or otherwise, without the prior written
permission of Canon, Inc.
Trademarks
Canon is a registered trademark and UHQ (Ultra High Quality) is a trademark of Canon, Inc.
i
00 FAX_Contents.qxd
6/17/04 12:42 PM
Page ii
Super G3 is a phrase used to describe the new generation of fax machines that use ITU-T
V.34 standard 33.6 Kbps* modems. Super G3 High Speed Fax machines allow transmission
time of approximately 3 seconds* per page which results in reduced telephone line charges.
* Approximately 3 seconds per page fax transmission time based on ITU-T No. 1 Chart (Standard Mode) at
33.6 Kbps modem speed. The Public Switched Telephone Network (PSTN) currently supports 28.8 Kbps
modem speeds or lower, depending on telephone line conditions.
Disclaimers
The information in this document is subject to change without notice.
CANON INC. MAKES NO WARRANTY OF ANY KIND WITH REGARD TO THIS MATERIAL, EITHER
EXPRESS OR IMPLIED, EXCEPT AS PROVIDED HEREIN, INCLUDING WITHOUT LIMITATION,
THEREOF, WARRANTIES AS TO MARKETABILITY, MERCHANTABILITY, FITNESS FOR A
PARTICULAR PURPOSE OF USE OR AGAINST INFRINGEMENT OF ANY PATENT. CANON INC. SHALL
NOT BE LIABLE FOR ANY DIRECT, INCIDENTAL, OR CONSEQUENTIAL DAMAGES OF ANY
NATURE, OR LOSSES OR EXPENSES RESULTING FROM THE USE OF THIS MATERIAL.
ii
00 FAX_Contents.qxd
6/17/04 12:42 PM
Page iii
Contents
Chapter 1: Introduction
Customer Support..........................................1-1
Control Panel .................................................1-1
Standby Display .............................................1-3
Making Connections ......................................1-3
Connecting to the Telephone Line and an
External Device ...........................................1-3
Chapter 2: Registering Information
Methods of Registering Information in the
Machine .........................................................2-1
Guidelines for Entering Numbers, Letters, and
Symbols .........................................................2-1
Correcting a Mistake....................................2-2
Registering Required Sender Information .....2-3
About Sender Information............................2-3
Entering the Date and Time.........................2-4
Registering Your Fax/Telephone Number and
Name ...........................................................2-4
Printing a List to Check Information
Registered in Your Machine ........................2-5
Setting the Telephone Line Type ...................2-6
Chapter 3: Speed Dialing
What is Speed Dialing? .................................3-1
Speed Dialing Methods ...............................3-1
One-Touch Speed Dialing..............................3-1
Registering Numbers for
One-Touch Speed Dialing............................3-1
Changing/Deleting a One-Touch Speed
Dialing Entry ................................................3-2
Coded Speed Dialing.....................................3-3
Registering Numbers for
Coded Speed Dialing...................................3-3
Changing/Deleting a Coded Speed Dialing
Entry ............................................................3-4
Group Dialing .................................................3-6
Creating Groups ..........................................3-6
Speed Dialing Lists ........................................3-8
Printing Speed Dialing Lists ........................3-8
Canceling the Print Out List.......................3-10
Registering a Password and Subaddress....3-11
Chapter 4: Sending Faxes
Preparing to Send a Fax................................4-1
Documents You Can Fax.............................4-1
Adjusting the Quality of Your Faxes ............4-1
Dialing Methods...........................................4-2
Sending Methods ...........................................4-5
Memory Sending .........................................4-5
Canceling Sending.........................................4-6
Redialing When the Line is Busy...................4-7
Manual Redialing.........................................4-7
Automatic Redialing.....................................4-8
Sequential Broadcasting ................................4-8
Delayed Sending..........................................4-10
Confirming Transmission Status and
Sending Reservation....................................4-11
Confirming Transmission Status ................4-11
Confirming Sending Reservation ...............4-11
Documents Stored in Memory .....................4-12
Printing a List of Documents in Memory ...4-12
Resending a Document in Memory ...........4-13
Printing a Document in Memory ................4-13
Deleting a Document from Memory...........4-14
Chapter 5: Receiving Faxes
Different Ways to Receive a Fax ...................5-1
Setting the Receive Mode..............................5-2
Setting the Options for the FaxTel Mode.....5-3
Setting the Options for Distinctive
Ring Pattern Detection Feature: DRPD.......5-5
Receiving Faxes Manually.............................5-6
Registering a Password and Subaddress
for Polling .......................................................5-7
Receiving While Performing Other Tasks ......5-9
Receiving Faxes in Memory
When a Problem Occurs................................5-9
Canceling Receiving ......................................5-9
Printing a Received Document in the Correct
Page Order ..................................................5-10
iii
00 FAX_Contents.qxd
6/17/04 12:42 PM
Page iv
Chapter 6: Special Features
Special Dialing ...............................................6-1
Dialing Through a Switchboard ...................6-1
Dialing an Overseas Number
(With Pauses) ..............................................6-1
Switching Temporarily to Tone Dialing.........6-2
Chapter 7: Reports and Lists
Summary of Reports and Lists .....................7-1
ACTIVITY REPORT.......................................7-2
TX (Transmission) REPORT..........................7-3
MULTI TX/RX (Transaction) REPORT ........7-4
RX (Reception) REPORT ..............................7-4
Chapter 8: Troubleshooting
LCD Messages ..............................................8-1
Faxing Problems ............................................8-2
Sending Problems .......................................8-2
Receiving Problems.....................................8-3
Telephone Problems ......................................8-5
If a Power Outage Occurs .............................8-5
If You Cannot Solve the Problem...................8-6
Chapter 9: Setting the Additional
Functions
Understanding the “Additional Functions”......9-1
Accessing the Additional Functions.............9-1
Menu Descriptions.......................................9-2
Appendix: Specifications
Facsimile .....................................................A-1
Telephone....................................................A-1
Index ................................................................I-1
iv
00 FAX_Contents.qxd
6/17/04 12:42 PM
Page v
Users in the U.S.A.
Pre-Installation Requirements for Canon Facsimile
Equipment
A. Location
Supply a suitable table, cabinet or desk. See the Basic Guide for the machine’s dimensions and weight.
B. Phone Line Requirements
1. Only a single line, touch-tone or rotary telephone set is to be used.
2. Order an RJ11-C modular jack (USOC code), which should be installed by the telephone company. If the
RJ11-C jack is not present, installation cannot be performed.
3. Order a normal business line from your telephone company’s business representative. The line should be a
regular voice grade line or the equivalent. Use only one line per machine.
DDD (DIRECT DISTANCE DIAL) LINE
-orIDDD (INTERNATIONAL DIRECT DISTANCE DIAL) LINE IF YOU COMMUNICATE OVERSEAS
NOTE
• Canon recommends an individual line following industry standards, e.g., the 2500 (Touch Tone) or 500
(Rotary/Pulse Dial) telephones. A dedicated extension off a PBX unit without “Call Waiting” can be
used with your unit. Key telephone systems are not recommended because they send non-standard
signals to individual telephones for ringing and special codes, which may cause a fax error.
C. Power Requirements
This equipment should be connected to a standard 120-volt AC, three-wire grounded outlet only. Do not connect
this machine to an outlet or power line shared with other appliances that cause “electrical noise.” Air conditioners,
electric typewriters, copiers and machines of this sort generate electrical noise which often interferes with
communications equipment and the sending and receiving of documents.
Connection of the Equipment
This equipment complies with Part 68 of the FCC rules and the requirements adopted by the ACTA. On the rear
panel of this equipment is a label that contains, among other information, a product identifier in the format
US:AAAEQ##TXXXX. If requested, this number must be provided to the telephone company.
This equipment may not be used on coin service provided by the telephone company. Connection to party lines is
subjected to state tariffs.
An FCC compliant telephone cord and modular jack are provided with this equipment. This equipment is designed
to be connected to the telephone network or premises wiring using a compatible modular jack which is Part 68
compliant. See installation instructions for details.
The REN is used to determine the number of devices that may be connected to a telephone line. Excessive RENs
on a telephone line may result in the devices not ringing in response to an incoming call. In most but not all areas,
the sum of RENs should not exceed five (5.0). To be certain of the number of devices that may be connected to a
line, as determined by the total RENs, contact the local telephone company. The REN for this product is part of the
product identifier that has the format US:AAAEQ##TXXXX. The digits represented by ## are the REN without a
decimal point (e.g., 03 is a REN of 0.3).
v
00 FAX_Contents.qxd
6/17/04 12:42 PM
Page vi
In Case of Equipment Malfunction
Should any malfunction occur which cannot be corrected by the procedures described in this Fax Guide,
disconnect the equipment from the telephone line and unplug the power cord. The telephone line should not be
reconnected or the power cord plugged in until the problem is completely resolved. Users should contact Canon
Authorized Service Facilities for servicing of equipment. Information regarding Authorized Service Facility
locations can be obtained by calling the Canon USA Consumer Information Center. (1-800-828-4040)
Rights of the Telephone Company
Should the equipment cause harm to the telephone network, the telephone company may temporarily disconnect
service. The telephone company also retains the right to make changes in facilities and services which may affect
the operation of this equipment. When such changes are necessary, the telephone company is required to give
adequate prior notice to the user.
FCC Notice
Facsimile Transceiver, Model F188600
This device complies with Part 15 of the FCC Rules.
Operation is subject to the following two conditions:
(1) This device may not cause harmful interference, and
(2) this device must accept interference received, including interference that may cause undesired operation.
NOTE
• This equipment has been tested and found to comply with the limits for a class B digital device, pursuant
to Part 15 of the FCC Rules. These limits are designed to provide reasonable protection against harmful
interference in a residential installation. This equipment generates, uses and can radiate radio frequency
energy and, if not installed and used in accordance with the instructions, may cause harmful interference
to radio communications. However, there is no guarantee that interference will not occur in a particular
installation. If this equipment does cause harmful interference to radio or television reception, which can
be determined by turning the equipment off and on, the user is encouraged to try to correct the
interference by one or more of the following measures:
• Reorient or relocate the receiving antenna.
• Increase the separation between the equipment and receiver.
• Connect the equipment into an outlet on a circuit different from that to which the receiver is connected.
• Consult the dealer or an experienced radio/TV technician for help.
Use of shielded cable is required to comply with class B limits in Subpart B of Part 15 of FCC Rules.
Do not make any changes or modifications to the equipment unless otherwise specified in the Fax Guide. If such
changes or modifications should be made, you could be required to stop operation of the equipment.
Canon U.S.A. Inc.
One Canon Plaza, Lake Success, NY 11042, U.S.A.
TEL No. (516) 328-5000
The Telephone Consumer Protection Act of 1991 makes it unlawful for any person to use a computer or other
electronic device to send any message via a telephone fax machine unless such message clearly contains in a
margin at the top or bottom of each transmitted page or on the first page of the transmission, the date and time it is
sent and an identification of the business or other entity, or other individual sending the message and the telephone
number of the sending machine or such business, other entity, or individual.
To automatically enter this information into your machine, follow the instructions in Chapter 2 of this guide.
vi
00 FAX_Contents.qxd
6/17/04 12:42 PM
Page vii
Users in Canada
Pre-Installation Requirements for Canon Facsimile
Equipment
A. Location
Supply a suitable table, cabinet, or desk. See the Basic Guide for the machine’s dimensions and weight.
B. Order Information
1. Provide only a single-line to touch-tone or rotary telephone set terminated with a standard 4-pin modular phone
plug. (Touch-tone is recommended if available in your area.)
2. Order a CA11A modular jack, which should be installed by the telephone company. If the CA11A jack is not
present, installation cannot occur.
3. Order a normal business line from your telephone company’s business representative. The line should be a
regular voice grade line or equivalent. Use one line per machine.
DDD (DIRECT DISTANCE DIAL) LINE
-orIDDD (INTERNATIONAL DIRECT DISTANCE DIAL) LINE IF YOU COMMUNICATE OVERSEAS
NOTE
• Canon recommends an individual line following industry standards [e.g. the 2500 (Touch Tone) or 500
(Rotary/Pulse Dial) telephones]. A dedicated extension off a PBX machine without “Camp On” signals
is also permissible with your machine. Key telephone systems are not recommended because they send
non-standard signals to individual telephones for ringing and special codes, which may cause a fax error.
C. Power Requirements
The power outlet should be a three-prong grounded receptacle (Single or Duplex). It should be independent from
copiers, heaters, air conditioners or any electric equipment that is thermostatically controlled. The rated value is
120 volts and 15 amperes. The CA11A modular jack should be relatively close to the power outlet to facilitate
installation.
Notice
This equipment meets the applicable Industry Canada Terminal Equipment Technical Specifications. This is
confirmed by the registration number. The abbreviation, IC, before the registration number signifies that
registration was performed based on a Declaration of Conformity indicating that Industry Canada technical
specifications were met. It does not imply that Industry Canada approved the equipment.
Before installing this equipment, users should ensure that it is permissible to be connected to the facilities of the
local telecommunications company. The equipment must also be installed using an acceptable method of
connection. The customer should be aware that compliance with the above conditions may not prevent degradation
of service in some situations.
Repairs to certified equipment should be coordinated by a representative designated by the supplier. Any repairs or
alterations made by the user to this equipment, or equipment malfunctions, may give the telecommunications
company cause to request the user to disconnect the equipment.
Users should ensure for their own protection that the electrical ground connections of the power utility, telephone
lines and internal metallic water pipe system, if present, are connected together. This precaution may be
particularly important in rural areas.
vii
00 FAX_Contents.qxd
CAUTION
NOTE
6/17/04 12:42 PM
Page viii
• Users should not attempt to make such connections themselves, but should contact the appropriate
electric inspection authority or electrician, as appropriate.
• This Class B digital apparatus meets all requirements of the Canadian Interference-Causing Equipment
Regulations.
The Ringer Equivalence Number is an indication of the maximum number of devices allowed to be connected to a
telephone interface. The termination on an interface may consist of any combination of devices subject only to the
requirement that the sum of the RENs of all the devices does not exceed five.
CANON CANADA INC.
1-800-652-2666
Mon. – Fri 9 AM.– 8 P.M. E.S.T. (Excluding holidays)
For Canadian Users
Canon Canada Inc., offers a full range of customer technical support* options:
• For interactive troubleshooting, e-mail technical support, the latest driver downloads and answers to frequently
asked questions (www.canon.ca)
• Automated interactive telephone support on most current products 24 hours, 7 days a week (1-800-652-2666).
• Free live technical support Monday—Friday (excluding holidays) for products still under warranty (1-800-6522666)
• The location of the authorized service facility nearest you (1-800-652-2666)
If the problem cannot be corrected by using one of the above technical support options, repair options are
available at the time of your call to the Free live technical support number above or via the website at
www.canon.ca
* Support program specifics are subject to change without notice.
viii
00 FAX_Contents.qxd
6/17/04 12:42 PM
Page ix
Type Conventions Used in This Guide
Please read the following list of symbols, terms and abbreviations used in this guide.
WARNING
CAUTION
IMPORTANT
• Indicates a warning concerning operations that may lead to death or injury to persons if not
performed correctly. In order to use the machine safely, always pay attention to these warnings.
• Indicates a caution concerning operations that may lead to injury to persons or damage to
property if not performed correctly. In order to use the machine safely, always pay attention to
these cautions.
• Indicates an operational warning or restriction. Be certain to read these items to operate the machine
correctly, and to avoid damage to the machine.
• Indicates a note for operation or an additional explanation. Reading these is highly recommended.
NOTE
(→ p. n-nn)
A number preceded by an arrow and enclosed in parenthesis refers to a page in this guide
where more information on the topic of the previous sentence can be found.
→ Set-up Instructions
Refer to the Set-up Instructions for details on the topic of the previous sentence.
→ Basic Guide
Refer to the Basic Guide for details on the topic of the previous sentence.
machine
The word “machine” refers to the imageCLASS D880.
default
A setting that remains in effect unless you change it.
document or fax
The original sheet(s) of paper you send or receive.
menu
A list of settings from which you select an item to set up or change. A menu has a title
which appears on the LCD display.
transaction number
When you send or receive a document, your machine automatically assigns the document
a unique transaction number. A transaction number is a four-digit number that will help
you keep track of documents you send and receive.
TX/RX NO.
TX/RX NO. is the abbreviation used for Transaction number.
TX
Denotes Sending.
RX
Denotes Receiving.
In addition, this guide uses distinctive typefaces to identify keys and information on the LCD display:
• The keys you press are shown in this typeface: Stop/Reset.
• Information on the LCD display is shown in this typeface: FAX SETTINGS.
ix
00 FAX_Contents.qxd
x
6/17/04 12:42 PM
Page x
01 FAX_Chp1.qxd
6/17/04 12:42 PM
Page 1-1
Chapter 1
Introduction
Customer Support
Your machine is designed with the latest technology to provide trouble-free operation. If you encounter a problem
with the machine’s operation, try to solve it by using the information in Chapter 8. If you cannot solve the problem
or if you think your machine needs servicing, contact your service representative, → Basic Guide.
Control Panel
FAX Key
Switches standby display to the Fax Mode.
In Use/Memory indicator
Flashes green when a fax is being
received or sent. Lights green when
the reservation of fax transmission is
set, or a fax is received into the memory.
Alarm indicator
Flashes orange when the machine
has a problem such as paper
jams, etc. (The error message
is displayed on the LCD display).
LCD
Displays messages and
prompts during operation.
Also displays selections,
text and numbers when you
are specifying settings.
Additional Functions
Key
Customizes the way
your machine operates.
Energy Saver Key
Sets or cancels the energy
saver mode manually.
The key lights green
when the energy saver
mode is set, and goes off
when the mode is canceled.
COPY Key
Switches
standby display to
the Copy Mode.
Function
Additional Functions
Collate
Introduction
1
This section describes keys used when sending and receiving faxes.
Energy Saver
2 on 1
In Use/Memory
Fax Monitor
Alarm
Redial / Pause
Memory
Reference
Report
ABC
DEF
GHI
JKL
MNO
PRS
TUV
WXY
Stop/Reset
Coded Dial
+
Directory
Set
Delayed
Transmission
Book Sending
Space
Delete
Start
Receive Mode
Enlarge/Reduce
Paper Select
Exposure
Image Quality
FAX Resolution
OPER
SYMBOLS
Clear
Tone
4 (–), e (+) Keys
Scroll through the
selections so you can
see other settings.
Set Key
Determines the contents
you set or register.
Also, if the document being
scanned stops in the ADF,
pressing this key makes
the document come out
automatically.
Numeric Keys
Enter numbers when
dialing or registering
fax/telephone numbers.
Also enter characters
when registering names.
Tone Key
Connects to
information services
that accept tone dialing
only, even if you are
using a rotary pulse.
Start Key
Starts sending faxes.
Stop/Reset Key
Cancels sending or receiving
faxes and other operations,
and returns the machine to
the standby mode.
1-1
01 FAX_Chp1.qxd
6/17/04 12:42 PM
Page 1-2
One-Touch Speed Dialing Keys
The keys marked 01 to 12 can be used to dial pre-registered fax/telephone numbers.
To dial using these keys, you need to register the number for one-touch speed dialing.
When Function is pressed and the indicator lights green, the following keys can be
used for the fax functions.
Also, if fax functions are programmed into these keys, they can be used directly as One-Touch Keys
without pressing Function to execute the fax functions.
Fax Monitor Key
Confirms the status of fax communication.
Memory Reference Key
Confirms documents stored in the machine for memory sending or memory receiving.
Report Key
Prints a report listing fax communications, dial list, data list or document list.
You can also use this key to cancel the printing job.
Delayed Transmission Key
Specifies the fax sending time for the delayed sending function.
Book Sending Key
This key can be used to send documents from the platen glass.
+ Key
Enters a plus sign (+).
Space Key
Enters a space between letters and numbers.
Delete Key
Deletes characters one by one.
Clear Key
Deletes all characters.
Function
Fax Monitor
Redial / Pause
Memory
Reference
Report
Function Key
After pressing this key, you can use the keys marked
01 to 12 (except for 06 to 08) for the fax functions.
Lights green when the key is pressed and goes off when
the key is pressed again.
Redial/Pause Key
Dials the last number dialed with the numeric keys,
or inserts a pause within and/or after a number.
Coded Dial
+
Delayed
Transmission
Space
Book Sending
Delete
Clear
Directory
Coded Dial Key
The key can be used to dial fax/telephone numbers preregistered under a two-digit code. To dial by using this key,
you need to register a number for the coded speed dialing.
Receive Mode
FAX Resolution
Directory Key
Searches fax/telephone numbers pre-registered under
the One-Touch Speed Dialing Keys or Coded Speed Dialing
Keys using the names of the registers.
Receive Mode Key
Selects the receive mode.
FAX Resolution Key
Selects the fax resolution: STANDARD, FINE, PHOTO, SUPER FINE,
or ULTRA FINE.
1-2
01 FAX_Chp1.qxd
6/17/04 12:43 PM
Page 1-3
Standby Display
The standby display differs depending on which mode is selected. When the machine is plugged in, the Copy
Mode standby display appears. You can switch from the Copy Mode to the Fax Mode by pressing FAX.
The standby display in the Fax Mode is as follows:
■ Fax Mode
Date & Time
Receive Mode
Introduction
1
Fax Resolution
• The standby display in the Copy Mode → Basic Guide.
NOTE
Making Connections
Connecting to the Telephone Line and an External
Device
The machine has two jacks on the left side for connection of the following:
L
: Telephone line
: External device, such as a telephone or an
answering machine
2 If you need to send and
1 Connect the supplied
telephone cable to the
jack, then connect the other
end of the cable to the
telephone jack on your wall.
receive faxes and voice calls,
connect the cable from the
telephone or answering
machine to the jack.
1-3
01 FAX_Chp1.qxd
6/17/04 12:43 PM
Page 1-4
External Device Connections
The type of external devices you should connect to the machine depends on how you want to use the machine.
Recommended device connections and receive modes are shown below.
IMPORTANT
• If you have connected an external device to the machine, be sure to select the correct receive mode.
(→ p. 5-1)
Recommended Device Connections
Receive Modes
Machine and Telephone
FaxTel
DRPD
Manual
Wall Jack
Telephone
Machine Only
FaxOnly
Wall Jack
Machine and Answering Machine
AnsMode
Wall Jack
Answering
Machine
Machine, Answering Machine, and Telephone
Wall Jack
Telephone Answering
Machine
1-4
AnsMode
02 FAX_Chp2.qxd
6/17/04 12:43 PM
Page 2-1
Chapter 2
Registering Information
Methods of Registering Information in the Machine
To customize the machine to your particular needs, you can adjust the general operation, sending, receiving,
printing, system settings, and speed dialing settings.
You can adjust settings directly via the control panel of the machine. Detailed instructions are described in this
guide.
Guidelines for Entering Numbers, Letters, and Symbols
Key
Letters (:A)
Numbers (:1)
@.–_/
1
2
ABCabc
2
3
DEFdef
3
4
GHIghi
4
5
JKLjkl
5
MNOmno
6
7
PQRSpqrs
7
8
TUVtuv
8
WXYZwxyz
9
1
ABC
DEF
2
Registering Information
When you come to a step that requires you to enter a name or number, refer to the table below to determine
which numeric key to press for the character you want:
GHI
JKL
MNO
6
PRS
TUV
WXY
9
OPER
0
0
SYMBOLS
#
Letter input (:A)
Number input (:1)
Tone
NOTE
• If you do not press any key for more than two minutes when entering data, the machine will
automatically return to the standby mode with the auto clear function.
• AUTO CLEAR can be set within a range of 1 to 9 minutes at one minute intervals. You can also disable
the auto clear function, → Basic Guide.
2-1
02 FAX_Chp2.qxd
6/17/04 12:43 PM
Page 2-2
• The Function key will light up by pressing Function to be able to operate Space, Delete or Clear.
NOTE
■ Entering Letters
1 Press T to switch to the letter mode (:A).
:A
Ex: _
2 Press the numeric key that contains the
letter you want.
:A
C
Ex:
• Press the key repeatedly until the letter you want
appears. Each key cycles through the letters it
contains.
• If you are unsure which key to press for the letter
you want, → p. 2-1.
3 Continue entering other letters using the
numeric keys.
:A
C
A
Ex:
• If the next letter you want to enter is under a
different numeric key, simply press that key until
the letter you want appears.
-orIf the next letter you want to enter is under the
same numeric key you pressed in Step 2, use e
(+) to move the cursor to the right. Then press that
same numeric key repeatedly until the letter you
want appears.
• Press Space to enter a space and move the cursor
to the right.
■ Entering Symbols
1 Press T to switch to the letter mode (:A).
:A
Ex: _
3 If you want to enter another symbol, use e
(+) to move the cursor to the right, then
press # repeatedly until the symbol you
want appears.
2 Press # repeatedly until the symbol you
want appears.
:A
Ex: # -
:A
Ex: #
■ Entering Numbers
1 Press T to switch to the number mode (:1).
:1
3 Continue entering other numbers using the
numeric keys.
Ex: _
2 Press the numeric key that contains the
:1
Ex: 1 0 _
number you want.
:1
1
_
Ex:
• Press Space to enter a space and move the cursor
to the next digit.
Correcting a Mistake
If you make a mistake while entering letters or numbers, you can delete it by pressing Delete or Clear.
■ To delete the last letter/number
Press Delete once to delete the last letter or the last number you entered.
■ To delete all letters/numbers
2-2
Press Clear to delete all letters or all numbers you entered.
02 FAX_Chp2.qxd
6/17/04 12:43 PM
Page 2-3
Registering Required Sender Information
According to recent amendments to the FCC rules governing the use of facsimile equipment in the United States,
the following sender information must be printed on every facsimile transmission:
• Your fax/telephone number
• Your personal name or company’s name
• Time and date of transmission
NOTE
• Your machine is already set to print this information at the top of every document you send, but you
must register this information in the machine as described in this chapter.
About Sender Information
After your fax is sent, the recipient knows immediately where it came from because your sender information is
printed at the top of every page you send.
11:18
FAX 833 4423
WORLD ESTATE,INC.
→ ADAM BOOK,CPA
Date and Time
This is the date and time
of the transmission.
Telephone Number
This is your fax/telephone
number.You can set TX
TERMINAL ID feature to
set the prefix for this
number as FAX or TEL.
Unit Name or
Sender’s Name
This is the UNIT NAME or
a sender’s name.
Destination
If you dialed with a speed
dialing key, the other
party’s name appears
here.
December 28, 2004
Dear Member,
001
2
Registering Information
12/31/2004
By now you have all had a chance to become familiar with your new
Canon fax units and are ready to set up a reliable, economical
communications network that offers many exciting features.
We can save money by scanning documents in the memory and then
setting the delayed timer to send all the documents at the same
time later at night to take advantage of late night rates.
Many of us are separated by long distances and reside in
different time zones. We can set up the polling feature to poll
and receive documents from each other when we are not in the
office. For sensitive material about clients and confidential
bids, we can set up and use the confidential mailbox features. We
will also be able to keep down costs by limiting use of the fax
to operators who know the correct department codes and passwords.
Relay sending is another money saver. We can designate one relay
fax in your area, send one transmission from the home office on
the East coast and then have the document relayed to you locally.
We hope you will have these features set up in the very near
future so we can enjoy more efficient, secure, and economical
facsimile communications.
Page Number
The page number of the
document.
2-3
02 FAX_Chp2.qxd
6/17/04 12:43 PM
Page 2-4
Entering the Date and Time
1 Press Additional Functions.
2 Use 4 (–) or e (+) to select 5.TIMER
SETTINGS.
ADDITIONAL FUNCTIONS
5.TIMER SETTINGS
3 Press Set twice.
The date and time currently set for the machine are
displayed.
TIMER SETTINGS
1.DATE/TIME SETTING
DATE/TIME SETTING
12/03/04
12:10
Ex:
4 Use the numeric keys to enter the correct
month, day, year and time in this order.
DATE/TIME SETTING
12/03/04
15:30
Ex:
• Use 4 (–) or e (+) to move the cursor under the
number you want to change, then enter the correct
number.
• Enter only the last two digits of the year.
• Use the 24-hour format for the time setting
(e.g.1:00 p.m. as 13:00).
5 Press Set.
DATE/TIME SETTING
DATA ENTRY OK
TIMER SETTINGS
2.AUTO CLEAR
6 Press Stop/Reset to return to the standby
display.
Registering Your Fax/Telephone Number and Name
NOTE
• The Function key will light up by pressing Function to be able to operate the Space, Delete,
Clear or + key.
1 Press Additional Functions.
2 Use 4 (–) or e (+) to select 3.FAX
SETTINGS.
ADDITIONAL FUNCTIONS
3.FAX SETTINGS
3 Press Set four times.
FAX SETTINGS
1.USER SETTINGS
USER SETTINGS
1.TEL LINE SETTINGS
TEL LINE SETTINGS
1.USER TEL NO.
USER TEL NO.
Ex: T E L =
4 Use the numeric keys to enter your fax
number (max. 20 digits, including spaces).
USER TEL NO.
123 4567
Ex: T E L =
• If you have already registered your fax/telephone
number, the previous entry will be displayed. To
change your fax/telephone number, use the
numeric keys.
• Press Space to enter a space.
• To enter a plus sign (+) before the number, press +
key.
• If you make a mistake, press Delete or 4 (–) to
delete the last number or press Clear to delete all
the numbers you entered.
5 Press Set.
USER TEL NO.
DATA ENTRY OK
TEL LINE SETTINGS
2.TEL LINE TYPE
6
2-4
02 FAX_Chp2.qxd
6/17/04 12:43 PM
Page 2-5
6 Press Additional Functions.
• If you are unsure how to enter characters,
→ p. 2-1.
• If you have already registered your name or
company’s name, previous entry will be displayed.
To change your name, press Clear to delete the
previous entry and re-enter.
• Press Space to enter a space and move the cursor
to the right.
• If you make a mistake, press 4 (–) or e (+) to
move the cursor to the incorrect character, then
press Delete. Or press Clear to delete all the
characters you entered.
USER SETTINGS
1.TEL LINE SETTINGS
7 Use 4 (–) or e (+) to select 2.UNIT
NAME.
USER SETTINGS
2.UNIT NAME
8 Press Set.
:A
10 Press Set.
:A
9 Use the numeric keys to enter your name
Ex: D A T A E N T R Y O K
or company’s name (max. 24 characters,
including spaces).
USER SETTINGS
3.TX TERMINAL ID
:A
Ex: C A N O N
11 Press Stop/Reset to return to the standby
display.
2
Registering Information
Ex: _
Printing a List to Check Information Registered in
Your Machine
You can print the User’s Data List to check the sender information and current settings of your machine.
1 Press Additional Functions.
3 Press Set twice.
PRINT LISTS
1.USER DATA
2 Use 4 (–) or e (+) to select 7.PRINT
LISTS.
• The machine returns to the standby mode then
prints the User’s Data List.
ADDITIONAL FUNCTIONS
7.PRINT LISTS
The sender information is shown at the top of the list. The current settings of the machine are listed after this.
12/03/2004 16:40 FAX 123 4567
CANON
001
*****************************
*** USER S DATA LIST ***
*****************************
1. COMMON SETTINGS
DEFAULT SETTINGS
SW AFTER AUTO CLR
VOLUME CONTROL
KEYPAD VOLUME
VOLUME
ALARM VOLUME
VOLUME
TX DONE TONE
VOLUME
RX DONE TONE
COPY
DEFAULT MODE
ON
1
ON
1
ERROR ONLY
1
ERROR ONLY
2-5
02 FAX_Chp2.qxd
6/17/04 12:43 PM
Page 2-6
Setting the Telephone Line Type
Before using your machine, you need to make sure it is set for your telephone line type. If you are unsure of your
telephone line type, check with your local telephone company. Your machine is factory-set to operate with a tone
line (TOUCH TONE). If you need to change the setting, follow this procedure.
1 Press Additional Functions.
2 Use 4 (–) or e (+) to select 3.FAX
SETTINGS.
ADDITIONAL FUNCTIONS
3.FAX SETTINGS
3 Press Set three times.
FAX SETTINGS
1.USER SETTINGS
USER SETTINGS
1.TEL LINE SETTINGS
TEL LINE SETTINGS
1.USER TEL NO.
4 Use 4 (–) or e (+) to select 2.TEL
LINE TYPE.
TEL LINE SETTINGS
2.TEL LINE TYPE
2-6
5 Press Set.
Ex:
TEL LINE TYPE
TOUCH TONE
6 Use 4 (–) or e (+) to select the telephone
line type setting you want to set.
TEL LINE TYPE
ROTARY PULSE
Ex:
• You can select from the following:
- ROTARY PULSE
- TOUCH TONE
7 Press Set.
TEL LINE SETTINGS
3.TX START SPEED
8 Press Stop/Reset to return to the standby
display.
03 FAX_Chp3.qxd
6/17/04 12:44 PM
Page 3-1
Chapter 3
Speed Dialing
What is Speed Dialing?
Speed dialing allows you to simplify dialing procedures by registering a fax/telephone number(s) and name under
a one-touch speed dialing key or coded speed dialing keys. You can then dial that number by pressing only one or
a few keys.
Speed Dialing Methods
There are three speed dialing methods available with your machine as follows:
■ One-Touch Speed Dialing (→ p. 3-1)
Allows you to dial a fax or telephone number by pressing only one key. You can register up to 12 destinations
for one-touch speed dialing.
Allows you to dial a fax or telephone number by pressing Coded Dial followed by a two-digit code of your
choice. You can register up to 100 different destinations.
■ Group Dialing (→ p. 3-6)
Allows you to dial a group of registered one-touch and/or coded speed dialing fax numbers. By registering a
group under a one-touch key or a coded speed dialing code, you press only one or a few keys to send the same
document to several destinations.
3
Speed Dialing
■ Coded Speed Dialing (→ p. 3-3)
The following pages describe how to register numbers for speed dialing.
• For instructions on dialing using the speed dialing methods, → pp. 4-3, 4-4.
NOTE
One-Touch Speed Dialing
NOTE
• The Function key will light up by pressing Function to be able to operate Space, Delete or Clear.
Registering Numbers for One-Touch Speed Dialing
1 Press Additional Functions.
2 Use 4 (–) or e (+) to select 4.ADD.
REGISTRATION.
ADDITIONAL FUNCTIONS
4.ADD. REGISTRATION
3 Press Set twice.
ADD. REGISTRATION
1.1-TOUCH SPD DIAL
Ex:
1-TOUCH SPD DIAL
01=
905 795 1111
4 Use 4 (–) or e (+) to select a one-touch
speed dialing key (01 to 12).
1-TOUCH SPD DIAL
Ex: 0 4 =
• You can directly select the one-touch speed dialing
key by pressing it.
• If a one-touch speed dialing key has already been
registered, the number registered under that key
appears.
• If a group is already registered under a one-touch
speed dialing key, GROUP DIAL appears.
• If fax functions have been programmed into keys
marked 01 to 12 using PROG 1-TOUCH KEY in
the Additional Functions, PROG 1-TOUCH KEY
appears.
3-1
03 FAX_Chp3.qxd
6/17/04 12:44 PM
Page 3-2
5 Press Set twice.
8 Use the numeric keys to enter the name
1-TOUCH SPD DIAL
1.TEL NUMBER ENTRY
TEL NUMBER ENTRY
TEL=
6 Use the numeric keys to enter the fax/
telephone number you want to register
(max. 120 digits, including spaces and
pauses).
TEL NUMBER ENTRY
Ex: T E L = 2 5 0 9 2 1
• Press Space to enter a space and move the cursor
to the next digit. Spaces are optional and are
ignored during dialing.
• Press Redial/Pause to enter a pause (→ p. 6-1).
• If you make a mistake, move the cursor to the
incorrect number by pressing 4 (–) or e (+), and
press Delete repeatedly to delete the numbers one
by one. Or, press Clear to delete all the numbers
you have entered.
7 Press Set twice.
TEL NUMBER ENTRY
DATA ENTRY OK
1-TOUCH SPD DIAL
2.NAME
:A
_
that goes with the number (max. 16
characters, including spaces).
:A
C
a
n
o
n
I
T
A
L
I
A
Ex:
• If you are unsure how to enter characters, → p. 2-1.
9 Press Set.
:A
DATA ENTRY OK
1-TOUCH SPD DIAL
3.OPTIONAL SETTING
• For details on OPTIONAL SETTING, refer to the
following items as required.
– Registering a Password and Subaddress (→ p. 3-11)
– Registering a Password and Subaddress for
Polling (→ p. 5-7)
– TX TIME SETTING in the Additional
Functions (→ p. 9-9)
10 To continue registering other one-touch
speed dialing keys, press Additional
Functions then repeat the procedure from
Step 4.
11 Press Stop/Reset to return to the standby
display.
NOTE
• Place the destination label provided on your
machine for easy reference when dialing.
Changing/Deleting a One-Touch Speed Dialing Entry
• The Function key will light up by pressing Function to be able to operate Space, Delete or Clear.
NOTE
1 Follow steps 1 to 3 of “Registering
Numbers for One-Touch Speed Dialing.”
(→ p. 3-1)
2 Use 4 (–) or e (+) to select the one-touch
speed dialing key assigned to the entry you
want to change or delete.
1-TOUCH SPD DIAL
1 432 2015
Ex: 0 6 =
• You can directly select the one-touch speed dialing
key by pressing it.
3-2
3 Press Set twice.
1-TOUCH SPD DIAL
1.TEL NUMBER ENTRY
TEL NUMBER ENTRY
TEL=1 432 2015_
6/17/04 12:44 PM
Page 3-3
❚ To Change a One-Touch Speed Dialing
Entry:
4 Press Function, then Clear to delete the
previous entry, then re-enter the
fax/telephone number.
TEL NUMBER ENTRY
Ex: T E L = 1 4 3 2 2 0 6 0 _
• If you do not want to change the fax/telephone
number, proceed to Step 6.
• Press Space to enter a space and move the cursor
to the next digit. Spaces are optional and are
ignored during dialing.
• Press Redial/Pause to enter a pause.
• If you make a mistake, move the cursor to the
incorrect number by pressing 4 (–) or e (+), and
press Delete repeatedly to delete the numbers one
by one. Or, press Clear to delete all the numbers
you have entered.
7 Press Set.
:A
DATA ENTRY OK
1-TOUCH SPD DIAL
3.OPTIONAL SETTING
8 Press Stop/Reset to return to the standby
display.
❚ To Delete a One-Touch Speed Dialing
Entry:
4 Press Function, then Clear to delete the
fax/telephone number.
TEL NUMBER ENTRY
TEL=
• If you do not want to delete the fax/telephone
number, proceed to Step 6.
5 Press Set twice.
NOTE
TEL NUMBER ENTRY
DATA ENTRY OK
• If you delete the number by mistake, press
Stop/Reset before you press Set, so that
the number is not deleted.
5 Press Set.
1-TOUCH SPD DIAL
2.NAME
3
Speed Dialing
03 FAX_Chp3.qxd
TEL NUMBER ENTRY
ERASING END
:A
1-TOUCH SPD DIAL
2.NAME
Ex: C a n o n O P T I X
6 Press Clear to delete the previous entry,
then re-enter the name.
6 Press Stop/Reset to return to the standby
display.
:A
Ex: C a n o n O P T I C S
• If you do not want to change the name, proceed to
Step 7.
• If you are unsure how to enter characters, → p. 2-1.
• The registered name is automatically cleared when
you clear the fax/telephone number.
Coded Speed Dialing
Registering Numbers for Coded Speed Dialing
• The Function key will light up by pressing Function to be able to operate Space, Delete or Clear.
NOTE
1 Press Additional Functions.
2 Use 4 (–) or e (+) to select 4.ADD.
3 Press Set.
ADD. REGISTRATION
1.1-TOUCH SPD DIAL
REGISTRATION.
ADDITIONAL FUNCTIONS
4.ADD. REGISTRATION
3-3
03 FAX_Chp3.qxd
6/17/04 12:44 PM
Page 3-4
4 Use 4 (–) or e (+) to select 2.CODED
SPD DIAL.
ADD. REGISTRATION
2.CODED SPD DIAL
5 Press Set.
CODED SPD DIAL
2131 1250
Ex: A 0 0 =
6 Use 4 (–) or e (+) to select a coded speed
dialing code (00 to 99).
CODED SPD DIAL
Ex: A 0 2 =
• You can enter the coded speed dialing code (2digit) with the numeric keys after pressing Coded
Dial.
• If a coded speed dialing code has already been
registered, the number registered under that code
appears.
• If a group is already registered under a coded
speed dialing code, GROUP DIAL appears.
7 Press Set twice.
CODED SPD DIAL
1.TEL NUMBER ENTRY
TEL NUMBER ENTRY
TEL=
8 Use the numeric keys to enter the fax/
telephone number you want to register (max.
120 digits, including spaces and pauses).
TEL NUMBER ENTRY
Ex: T E L = 1 4 9 3 9 2 5 2 5 _
• Press Space to enter a space and move the cursor
to the next digit. Spaces are optional and ignored
during dialing.
• Press Redial/Pause to enter a pause.
• If you make a mistake, move the cursor to the
incorrect number by pressing 4 (–) or e (+), and
press Delete repeatedly to delete the numbers one
by one. Or, press Clear to clear the entire entry.
9 Press Set twice.
TEL NUMBER ENTRY
DATA ENTRY OK
CODED SPD DIAL
2.NAME
:A
_
10 Use the numeric keys to enter the name
that goes with the number (max. 16
characters, including spaces).
:A
Ex: C a n o n F R A N C E
• If you are unsure how to enter characters,
→ p. 2-1.
11 Press Set.
:A
Ex: D A T A E N T R Y O K
CODED SPD DIAL
3.OPTIONAL SETTING
• For details on OPTIONAL SETTING, refer to the
following items as required.
– Registering a Password and Subaddress (→ p. 3-11)
– Registering a Password and Subaddress for
Polling (→ p. 5-7)
– TX TIME SETTING in the Additional
Functions (→ p. 9-9)
12 To continue registering other coded speed
dialing codes, press Additional Functions
then repeat the procedure from Step 6.
13 Press Stop/Reset to return to the standby
display.
NOTE
• You can print the Coded Dial List showing
all the numbers and names registered for
coded speed dialing (→ pp. 3-8, 3-9). Keep
this list near your machine for easy
reference when dialing.
Changing/Deleting a Coded Speed Dialing Entry
• The Function key will light up by pressing Function to be able to operate Space, Delete or Clear.
NOTE
1 Follow Steps 1 to 5 of “Registering
Numbers for Coded Speed Dialing.”
(→ p. 3-3)
3-4
2 Use 4 (–) or e (+) to select the coded
speed dialing code assigned to the entry
you want to change or delete.
6/17/04 12:44 PM
Page 3-5
CODED SPD DIAL
81 773 3115
Ex: A 3 2 =
• You can enter the coded speed dialing code (2digit) with the numeric keys after pressing Coded
Dial.
3 Press Set twice.
CODED SPD DIAL
1.TEL NUMBER ENTRY
6 Press Function, then Clear to delete the
previous entry, then re-enter the name.
:A
Ex: C a n o n U K
• If you do not want to change the name, proceed to
Step 8.
• If you are unsure how to enter characters,
→ p. 2-1.
7 Press Set.
TEL NUMBER ENTRY
TEL=81 773 3115_
:A
DATA ENTRY OK
❚ To Change a Coded Speed Dialing
Entry:
4 Press Function, then Clear to delete the
previous entry, then re-enter the
fax/telephone number.
TEL NUMBER ENTRY
Ex: T E L = 8 1 7 7 3 3 1 7 3 _
• If you do not want to change the fax/telephone
number, proceed to Step 6.
• Use Space to enter a space and move the cursor
to the next digit. Spaces are optional and are
ignored during dialing.
• Press Redial/Pause to enter a pause.
• If you make a mistake, move the cursor to the
incorrect number by pressing 4 (–) or e (+), and
press Delete repeatedly to delete the numbers one
by one. Or, press Clear to delete all the numbers
you have entered.
5 Press Set twice.
CODED SPD DIAL
3.OPTIONAL SETTING
8 Press Stop/Reset to return to the standby
display.
❚ To Delete a Coded Speed Dialing
Entry:
4 Press Function, then Clear to delete the
fax/telephone number.
3
Speed Dialing
03 FAX_Chp3.qxd
TEL NUMBER ENTRY
TEL=
• If you do not want to delete the fax/telephone
number, proceed to Step 6.
5 Press Set.
TEL NUMBER ENTRY
ERASING END
CODED SPD DIAL
2.NAME
TEL NUMBER ENTRY
DATA ENTRY OK
6 Press Stop/Reset to return to the standby
CODED SPD DIAL
2.NAME
display.
:A
• The registered name is automatically cleared when
you clear the fax/telephone number.
Ex: C a n o n U C _
3-5
03 FAX_Chp3.qxd
6/17/04 12:44 PM
Page 3-6
Group Dialing
Creating Groups
• The Function key will light up by pressing Function to be able to operate Clear.
NOTE
1 Press Additional Functions.
2 Use 4 (–) or e (+) to select 4.ADD.
REGISTRATION.
ADDITIONAL FUNCTIONS
4.ADD. REGISTRATION
3 Press Set.
ADD. REGISTRATION
1.1-TOUCH SPD DIAL
4 Use 4 (–) or e (+) to select 3.GROUP
DIAL.
ADD. REGISTRATION
3.GROUP DIAL
5 Press Set.
Ex:
GROUP DIAL
01=1-TOUCH SPD DIAL
6 Select a one-touch speed dialing key or
coded speed dialing code under which you
want to register the group.
NOTE
3-6
• If you wish to register a group under an
already registered one-touch speed dialing
key or coded speed dialing code, or you
want to re-enter a group, you must delete
the previous information first. (→ pp. 3-2,
3-4, 3-5)
• Do not register a group under a one-touch
speed dialing key or coded speed dialing
code, in which SUBADDRESS TX or
POLLING RX has been set. If you do so,
you cannot send faxes to the parties that
have a subaddress or password registered.
❚ To register a group under a one-touch
speed dialing key:
Use 4 (–) or e (+) to select the key under
which you want to register the group (01 to
12).
GROUP DIAL
Ex: 0 3 =
• If a fax/telephone number has already been
registered in this key, 1-TOUCH SPD DIAL or
GROUP DIAL appears.
• If fax functions have been programmed into keys
marked 01 to 12 using PROG 1-TOUCH KEY in
the Additional Functions, PROG 1-TOUCH KEY
appears.
❚ To register a group under a coded
speed dialing code:
Press Coded Dial, then use the numeric
keys to enter the two digit code under
which you want to register the group (00 to
99).
GROUP DIAL
Ex: A 2 1 =
• If a fax/telephone number has already been
registered in this key, CODED SPD DIAL or
GROUP DIAL appears.
7 Press Set twice.
GROUP DIAL
1.TEL NUMBER ENTRY
TEL=
6/17/04 12:44 PM
Page 3-7
8 Enter the one-touch and/or coded speed
9 Press Set twice.
dialing numbers you want to register in the
group.
GROUP DIAL
2.NAME
• You cannot register numbers in groups that have
not been registered for speed dialing.
• You can review the numbers registered in the
group by pressing 4 (–) or e (+).
_
If you want to delete one of these numbers
from the group:
Press 4 (–) or e (+) to display the number you
want to delete and press Clear (ERASING END
is displayed).
If you want to delete all of the numbers in
the group:
Press 4 (–) or e (+) to display the first number
in the group and press Clear repeatedly until all
numbers are deleted.
• Deleting all of the numbers cancels the group.
If the group has already been registered, or the
transmission time has already been registered
using TX TIME SETTING, the group’s name or
the transmission time will not be deleted even if
you delete all the numbers.
• You can cancel registering numbers and return to
the standby display by pressing Stop/Reset
anytime before pressing Set in Step 9.
❚ To enter a destination registered for
one-touch speed dialing:
Press the one-touch speed dialing key
assigned to each number you want to
register in the group.
Repeat for the other keys.
TEL=
2 50921
0
4
C
a
n
o
n
I
T
A
L
IA
Ex:
❚ To enter a destination registered for
coded speed dialing:
Press Coded Dial, then use the numeric
keys to enter the two-digit code assigned to
the number you want to register in the
group.
Repeat for the other codes.
:A
10 Use the numeric keys to enter a name for
the group (max.16 characters, including
spaces).
:1
C
a
n
o
n
G
R
O
U
P
2
_
Ex:
• If you do not want to register the name, proceed to
Step 11.
• If you are unsure how to enter characters,
→ p. 2-1.
3
11 Press Set.
:1
DATA ENTRY OK
GROUP DIAL
3.TX TIME SETTNG
Speed Dialing
03 FAX_Chp3.qxd
• You can specify up to five different transmission
times. (→ p. 9-10)
12 To continue registering other groups, press
Additional Functions then repeat the
procedure from Step 6.
13 Press Stop/Reset to return to the standby
display.
NOTE
• You can print the Group Dial List showing
all the numbers and names registered for
group dialing (→ pp. 3-8, 3-10). Keep this
list near your machine for easy reference
when dialing.
TEL=
1 49 39 25 25
Ex: A0 2 C a n o n F R A N C E
3-7
03 FAX_Chp3.qxd
6/17/04 2:04 PM
Page 3-8
Speed Dialing Lists
You can print lists of fax/telephone numbers registered for speed dialing. Keep these lists near your machine so
you can refer to them when dialing.
Printing Speed Dialing Lists
1 Press Additional Functions.
2 Use 4 (–) or e (+) to select 7.PRINT
LISTS.
ADDITIONAL FUNCTIONS
7.PRINT LISTS
-
CODED DIAL LIST
1-TOUCH (DETAIL)
CODED (DETAIL)
GROUP DIAL LIST
7 Press Set.
1-TOUCH LIST
1.NO SORT
3 Press Set.
PRINT LISTS
1.USER DATA
4 Use 4 (–) or e (+) to select 2.SPEED
DIAL LIST.
PRINT LISTS
2.SPEED DIAL LIST
5 Press Set.
• If you selected 1-TOUCH LIST, or 1-TOUCH
(DETAIL), CODED DIAL LIST or CODED
(DETAIL), select SORT or NO SORT depending
on the order you want the list to be printed:
Select 1.NO SORT to print the list in key number
order.
Select 2.SORT to print the list with the names of
the destinations in alphabetical order.
8 Press Set.
SPEED DIAL LIST
1.1-TOUCH LIST
• The machine prints the list and returns to the
standby mode.
6 Use 4 (–) or e (+) to select the list you
want to print.
NOTE
SPEED DIAL LIST
Ex: 2 . C O D E D D I A L L I S T
• You can select from the following:
- 1-TOUCH LIST
• You can also print the list by pressing
Report. In the Fax Mode press Function
(the Function key lights up). Press
Report, and select a report you want, then
press Set.
Samples of the lists are shown as follows.
■ 1-TOUCH LIST
12/03/2004 17:02 FAX 123 4567
CANON
001
***********************************
12/03/2004 17:03 FAX 1-TOUCH
123 4567 SPD DIAL LIST
CANON
***
***
NO.
[
[
[
[
[
01]
03]
04]
06]
12]
905 795 1111
GROUP DIAL
2 50921
NO.
1 432 2060
12]
2 887 0166[
[
01]
[
03]
[
04]
[
06]
DESTINATION TEL #
2 887 0166
905 795 1111
GROUP DIAL
2 50921
1 432 2060
UNSORTED LIST: DESTINATIONS LISTED
IN KEY ORDER.
3-8
001
***********************************
**********************************************
CONNECTION TEL
TEL # LIST 1 ID***
*** ONE-TOUCH SPEED DIALCONNECTION
**********************************************
Canon CANADA
Canon EUROPA
Canon ITALIA
DESTINATION ID
Canon OPTICS
Canon
AUSTRALIA
Canon
AUSTRALIA
Canon CANADA
Canon GROUP 2
Canon ITALIA
Canon OPTICS
TX TYPE
REGULAR TX
REGULAR TX
REGULAR TX
REGULAR TX
SORTED LIST: DESTINATIONS LISTED IN
ALPHABETICAL ORDER.
03 FAX_Chp3.qxd
6/17/04 2:04 PM
Page 3-9
■ 1-TOUCH (DETAIL)
12/03/2004 17:07 FAX 123 4567
CANON
001
*****************************
CANON
***
*****************************
12/03/2004 17:07***
FAX 123
4567 (DETAIL)
1-TOUCH
2 887 0166 **********************************************
Canon AUSTRALIA
*** ONE-TOUCH SPEED DIAL TEL # LIST 2 ***
01] DESTINATION TEL #
DESTINATION ID
**********************************************
TX TYPE
REGULAR TX
[
12] DESTINATION TEL #
03] DESTINATION TEL #
905 795 1111
DESTINATION ID
DESTINATION ID
Canon CANADA
[
TX TYPE
[
2 887 0166
Canon AUSTRALIA
REGULAR TX
01] DESTINATION TEL #
DESTINATION ID
UNSORTED LIST: DESTINATIONS LISTED
IN KEY ORDER.
905 795 1111
Canon CANADA
SORTED LIST: DESTINATIONS LISTED IN
ALPHABETICAL ORDER.
3
■ CODED DIAL LIST
12/03/2004 17:04 FAX 123 4567
CANON
001
************************************
12/03/2004 17:05 FAX 123 4567
CANON
CODED SPEED DIAL LIST
***
***
NO.
[A
[A
[A
[A
[A
00]
02]
03]
21]
32]
001
Speed Dialing
[
001
************************************
****************************************
CONNECTION TEL
TEL # LIST 1 ID
*** CODED SPEED DIALCONNECTION
***
****************************************
Canon DEUTSCH.
2131 1250
1 49 39 25 25
NO.
516p488 6700
GROUP DIAL
[ A 00]
81 773 3173
[ A 02]
[ A 21]
[ A 03]
[ A 32]
DESTINATION TEL #
2131 1250
1 49 39 25 25
GROUP DIAL
516p488 6700
81 773 3173
UNSORTED LIST: DESTINATIONS LISTED
IN KEY ORDER.
Canon FRANCE
DESTINATION ID
Canon U.S.A.
Canon GROUP 1
CanonCanon
UK DEUTSCH.
Canon FRANCE
Canon GROUP 1
Canon U . S . A .
Canon UK
TX TYPE
REGULAR TX
REGULAR TX
REGULAR TX
REGULAR TX
SORTED LIST: DESTINATIONS LISTED IN
ALPHABETICAL ORDER.
3-9
03 FAX_Chp3.qxd
6/17/04 2:04 PM
Page 3-10
■ CODED (DETAIL)
12/03/2004 17:10 FAX 123 4567
CANON
001
*****************************
CANON
***
*****************************
12/03/2004 17:09***
FAX 123
4567 (DETAIL)
1-TOUCH
[A
*****************************************
2 887 0166
Canon AUSTRALIA
*** CODED SPEED DIAL TEL # LIST 2 ***
00] DESTINATION TEL #
DESTINATION ID
TX TYPE
[A
*****************************************
REGULAR TX
[ A 00] DESTINATION TEL #
02] DESTINATION TEL #
905 795 1111
DESTINATION ID
DESTINATION ID
Canon CANADA
2131 1250
Canon DEUTSCH.
TX TYPE
[A
001
REGULAR TX
02] DESTINATION TEL #
DESTINATION ID
1 49 39 25 25
Canon FRANCE
UNSORTED LIST: DESTINATIONS LISTED
IN KEY ORDER.
SORTED LIST: DESTINATIONS LISTED IN
ALPHABETICAL ORDER.
■ GROUP DIAL LIST
12/03/2004 17:06 FAX 123 4567
CANON
001
*********************************
*** GROUP DIAL TEL # LIST ***
*********************************
[ A 21] Canon GROUP 1
[A 03] 516p488 6700
[
01] 905 795 1111
Canon U . S . A .
Canon CANADA
[
[A
[A
[A
[
Canon
Canon
Canon
Canon
03] Canon GROUP 2
00]
02]
32]
04]
2131 1250
1 49 39 25 25
81 773 3173
2 50921
DEUTSCH.
FRANCE
UK
I TA L I A
Canceling the Print Out List
You can cancel printing lists even after performing the printing procedure.
1 Press Additional Functions.
2 Use 4 (–) or e (+) to select 7.PRINT
LISTS.
ADDITIONAL FUNCTIONS
7.PRINT LISTS
3 Press Set.
PRINT LISTS
1.USER DATA
4 Use 4 (–) or e (+) to select 3.CANCEL
REPORT.
PRINT LISTS
3.CANCEL REPORT
3-10
5 Press Set.
CANCEL REPORT?
<YES
NO>
6 Press 4 (–).
• Printing is canceled.
• If you change your mind and want to continue the
printing, press e (+).
NOTE
• You can also cancel the print job by
pressing Function (the Function key
lights up) then pressing Report.
03 FAX_Chp3.qxd
6/17/04 12:44 PM
Page 3-11
Registering a Password and Subaddress
The password and subaddress is required when you send faxes to the other party’s fax machine that has a
password and subaddress.
• You can register a password and subaddress in a one-touch speed dialing key or coded speed dialing
code.
• You must also know the password and subaddress of the other party’s fax so that you can enter them on
your fax. If you do not know the password and subaddress, contact the other party.
• The Function key will light up by pressing Function to be able to operate Space, Delete or Clear.
1 Press Additional Functions.
2 Use 4 (–) or e (+) to select 4.ADD.
REGISTRATION.
ADDITIONAL FUNCTIONS
4.ADD. REGISTRATION
9 Press Set.
OPTIONAL SETTING
OFF
Ex:
10 Use 4 (–) or e (+) to select ON.
OPTIONAL SETTING
ON
3 Press Set.
ADD. REGISTRATION
1.1-TOUCH SPD DIAL
4 Use 4 (–) or e (+) to select 1.1-TOUCH
SPD DIAL or 2.CODED SPD DIAL.
ADD. REGISTRATION
Ex: 1 . 1 - T O U C H S P D D I A L
5 Press Set.
Ex:
1-TOUCH SPD DIAL
01=
905795 1111
6 Use 4 (–) or e (+) to select the one-touch
speed dialing number or coded speed
dialing code.
1-TOUCH SPD DIAL
81 773 3115
Ex: 0 2 =
7 Press Set.
1-TOUCH SPD DIAL
1.TEL NUMBER ENTRY
11 Press Set.
OPTIONAL SETTING
1.TX TIME SETTNG
12 Use 4 (–) or e (+) to select 2.TX
TYPE.
OPTIONAL SETTING
2.TX TYPE
13 Press Set.
TX TYPE
REGULAR TX
Ex:
14 Use 4 (–) or e (+) to select
SUBADDRESS TX.
TX TYPE
SUBADDRESS TX
15 Press Set twice.
SUBADDRESS TX
1.PASSWORD
8 Use 4 (–) or e (+) to select
3.OPTIONAL SETTING.
3
Speed Dialing
NOTE
PASSWORD
Ex:
1-TOUCH SPD DIAL
3.OPTIONAL SETTING
3-11
03 FAX_Chp3.qxd
6/17/04 12:44 PM
Page 3-12
16 Enter a password.
PASSWORD
12345
Ex:
• If you do not need to enter a password, proceed to
Step 17.
• You can enter a password (up to 20 digits) using
the numeric keys, T, # or Space.
• Be sure to enter the password of the other party
correctly, taking into account the position of
spaces.
• If you make a mistake, press 4 (–) or e (+) to
move the cursor to the incorrect character, then
press Delete. Or press Clear to clear your entire
entry.
17 Press Set twice.
SUBADDRESS TX
2.SUBADDRESS
SUBADDRESS
Ex:
18 Enter a subaddress.
SUBADDRESS
123456789012
Ex:
• You can enter a subaddress (up to 20 digits) using
the numeric keys, T, # or Space.
• Be sure to enter the subaddress of the other party
correctly, taking into account the position of
spaces.
• If you make a mistake, press 4 (–) or e (+) to
move the cursor to the incorrect character, then
press Delete. Or press Clear to clear your entire
entry.
19 Press Set.
Ex:
1-TOUCH SPD DIAL
03=GROUP DIAL
20 To continue registering other passwords
and subaddresses, press Additional
Functions then repeat the procedure from
Step 4.
21 Press Stop/Reset to return to the standby
display.
3-12
04 FAX_Chp4.qxd
6/17/04 12:45 PM
Page 4-1
Chapter 4
Sending Faxes
Preparing to Send a Fax
Documents You Can Fax
For information on the types of documents you can fax, their requirements, and details on setting up documents,
→ Basic Guide.
Adjusting the Quality of Your Faxes
Canon’s UHQ (Ultra High Quality) imaging technology enables you to send documents with image quality
output similar to the original. The machine allows you to adjust the resolution and contrast to best suit your
particular document.
• You cannot change settings while your machine is scanning a document.
NOTE
Resolution is a measure of the fineness or clarity of a printout. Low resolutions may cause text and graphics to
have a jagged appearance, while higher resolutions provide smoother curves and lines, crisp text and graphics,
and a better match to traditional typeface designs.
• Higher resolution produces higher output quality, but requires longer transmission time.
Sending Faxes
4
Setting the Scanning Resolution
NOTE
1 Press FAX Resolution repeatedly to
select the desired resolution.
FAX RESOLUTION
STANDARD
Ex:
• You can select the resolution from the following:
- STANDARD
Suitable for most text-only documents.
- FINE
Suitable for fine-print documents.
- PHOTO
Suitable for documents that contain photographs.
- SUPER FINE
Suitable for documents that contain fine print
and images (the resolution is four times that of
STANDARD).
- ULTRA FINE
Suitable for documents that contain fine print
and images (the resolution is eight times that of
STANDARD).
2 Press Set.
FAX 12/03/2004 15:30
FINE
Ex: F a x T e l
NOTE
• You can set the Fax Resolution so that the
desired resolution such as STANDARD is
automatically returned after the AUTO
CLEAR function activates or documents are
scanned. (→ p. 9-8)
Since RESOLUTION of FAX DEFAULT is
set to OFF as the factory default setting,
the resolution set using FAX Resolution
will remain unchanged.
4-1
04 FAX_Chp4.qxd
6/17/04 12:45 PM
Page 4-2
Dialing Methods
There are several ways of dialing the number of the party to which you want to send a fax.
■ When the fax number is not registered in the machine
• Regular Dialing
• Redialing
■ When the fax number is registered in the machine
•
•
•
•
One-Touch Speed Dialing
Coded Speed Dialing
Group Dialing
Directory Dialing
NOTE
• If you are unsure of the registered fax number, check the destination label, or print each list and check
the numbers. (→ p. 3-8)
• For details on registering a fax number for speed dialing, → Chapter 3.
Regular Dialing
Dial a fax number by using the numeric keys, just like dialing a telephone number.
Ex:
1
9
0
5
9
7
5
Function
1
1
Additional Functions
1
Collate
1
Energy Saver
2 on 1
In Use/Memory
Fax Monitor
Alarm
Redial / Pause
Memory
Reference
Report
ABC
DEF
GHI
JKL
MNO
PRS
TUV
WXY
Stop/Reset
Coded Dial
+
Directory
Set
Delayed
Transmission
Space
Book Sending
Delete
Start
Receive Mode
Enlarge/Reduce
Paper Select
Exposure
Image Quality
FAX Resolution
OPER
SYMBOLS
Clear
Tone
w Press Start.
TEL=
9057951111
Ex:
• If you enter the wrong number, press Stop/Reset or Clear to clear your entire entry, then enter the correct
number.
• The Function key will light up by pressing Function to be able to operate Clear.
NOTE
4-2
04 FAX_Chp4.qxd
6/17/04 12:45 PM
Page 4-3
One-Touch Speed Dialing
Press the one-touch speed dialing key (01 to 12) to which the number is assigned.
Ex:
1
Function
Additional Functions
Collate
Energy Saver
2 on 1
In Use/Memory
Fax Monitor
Alarm
Redial / Pause
Memory
Reference
+
Report
ABC
DEF
GHI
JKL
MNO
PRS
TUV
WXY
Stop/Reset
Coded Dial
Directory
Set
Delayed
Transmission
Space
Book Sending
Delete
Start
Receive Mode
Enlarge/Reduce
Paper Select
Exposure
Image Quality
FAX Resolution
OPER
SYMBOLS
Clear
Tone
Coded Speed Dialing
Press Coded Dial ➞ the two-digit code (00 to 99) to which the number is assigned.
4
Sending Faxes
TEL=
905 795 1111
0
1
C
a
n
o
n
CANADA
Ex:
• The number registered under that one-touch speed dialing key is displayed.
• If you press the wrong key, press Stop/Reset. Then press the correct key.
• NO TEL # appears if no fax number is assigned to the one-touch speed dialing key you pressed.
Ex:
1
2
Coded Dial
Function
Additional Functions
Collate
0
2
Energy Saver
2 on 1
In Use/Memory
Fax Monitor
Alarm
Redial / Pause
Memory
Reference
Report
ABC
DEF
GHI
JKL
MNO
PRS
TUV
WXY
Stop/Reset
Coded Dial
+
Directory
Set
Delayed
Transmission
Space
Book Sending
Delete
Start
Receive Mode
Enlarge/Reduce
Paper Select
Exposure
Image Quality
FAX Resolution
OPER
SYMBOLS
Clear
Tone
TEL=
1 49 39 25 25
A02 Canon FRANCE
Ex:
• The number registered under that coded speed dialing code is displayed.
• If you enter the wrong code, press Stop/Reset. Then press Coded Dial and enter the correct code.
• NO TEL # appears if no fax number is assigned to the coded speed dialing code you entered.
4-3
04 FAX_Chp4.qxd
6/17/04 12:45 PM
Page 4-4
Group Dialing
Dial the fax numbers of the multiple destinations at the same time.
❚ To enter a group registered under a one-touch speed dialing key:
Press the one-touch speed dialing key assigned to the group you wish to fax. (→ p. 4-3)
TEL=GROUP DIAL
Ex: 0 3 C a n o n G R O U P 2
• The name of the group is displayed.
• If you press the wrong key, press Stop/Reset. Then press the correct key.
• NO TEL # appears if no fax number is assigned to the one-touch speed dialing key you pressed.
❚ To enter a group registered under a coded speed dialing code:
Press Coded Dial, then use the numeric keys to enter the two-digit code assigned to the group you wish to fax.
(→ p. 4-3)
TEL=GROUP DIAL
Canon GROUP 1
Ex:
• The name of the group is displayed.
• If you enter the wrong code, press Stop/Reset. Then press Coded Dial and enter the correct code.
• NO TEL # appears if no fax number is assigned to the coded speed dialing code you entered.
A21
Directory Dialing
Directory dialing allows you to look up the other party’s name and retrieve the number for dialing. This feature is
convenient when you know the other party’s name but cannot recall the One-Touch Speed Dialing key, the code
for Coded Speed Dialing or Group Dialing where the number is registered.
4 Press 4 (–) or e (+) to display the other
1 Press Directory.
:A
_
• NO TEL # appears if the name of the other party
is not registered and the display will return to the
dial entry mode.
2 Press a numeric key to enter the first letter
of the name of the party you are searching
for.
For example, if you want to search for a name that
starts with the letter “H”, press 4 (GHI) twice.
3 Press Set.
• The names registered in the machine are displayed
according to the letter you entered.
• If there is no name that starts with the letter you
entered, the next name in alphabetical order
appears.
4-4
names.
• Pressing e (+) will display the names registered
in alphabetical order. Pressing 4 (–) will display
them in reverse order.
• When you reach the last name, the display will
return to the first name.
5 Press Set.
• The other party’s fax number and name or GROUP
DIAL and the group’s name appear.
04 FAX_Chp4.qxd
6/17/04 12:45 PM
Page 4-5
Sending Methods
Memory Sending
The machine begins calling the other party and transmitting the information after all documents are scanned into
the memory.
Since the machine is multitasking, you can even scan a document into memory while performing other tasks.
The machine has enough memory to store up to approximately 255 pages* (fewer if the document contains many
graphics or particularly dense text).
* Based on ITU-T No.1 Chart, Standard mode.
NOTE
• When a large amount of memory is used, MEMORY FULL may be displayed depending on the
documents to be sent, or the machine can neither store the scanned documents in memory nor send
them. In this case, print or delete any documents in memory, or select a lower fax resolution, such as
STANDARD, then send the documents.
• The Function key will light up by pressing Function to be able to operate Delete or Clear.
■ Using the ADF
FAX 12/03/2004 15:30
STANDARD
Ex: F a x T e l
2 Prepare the document and load it face
down in the ADF. (→ Basic Guide)
MEM IN USE
4 Press Start to begin scanning for sending.
• The machine begins calling the other party after all
of the documents are scanned into the memory.
• If you use speed dialing or redialing and the TIME
OUT setting is on, scanning starts automatically.
(→ p. 9-6)
• To cancel sending once dialing has started, press
Stop/Reset.
4
Sending Faxes
1 Press FAX to set to the Fax Mode.
0%
Ex:
The currently used memory is displayed.
DOCUMENT READY
Standby to scan
• To adjust the resolution, → p. 4-1.
• To adjust the contrast, → p. 9-4.
3 Dial the other party’s fax number.
TEL=
9057951111
Ex:
• For dialing methods, → p. 4-2.
• If you enter the wrong number, press Delete to
delete the last number or press Clear to delete all
the numbers you entered, then enter the correct
number. You can also delete all the numbers by
pressing Stop/Reset.
• If you must first dial a number to get an outside
line (“9”, for example), add a pause after that digit
by pressing Redial/Pause.
NOTE
• You can scan a document up to 14 inches
(356 mm) long.
• You can load up to 30 pages of LTR size
paper in the ADF.
• After the machine finishes scanning the
document into the memory, it returns to the
Standby display. At this point, you can
make the next reservation. You can make
up to 20 reservations.
• If the machine’s memory becomes full
while scanning your document, MEMORY
FULL will appear on the LCD display and
the document being scanned stops in the
ADF. Press Set to make the document
come out automatically. If this happens,
divide the documents into several sections
and send each section separately.
4-5
04 FAX_Chp4.qxd
6/17/04 12:45 PM
Page 4-6
■ Using the platen glass
NOTE
• You need to remove documents in the ADF in advance, in order to fax from the platen glass.
• You can operate Book Sending, Delete or Clear when the Function key is lit. If the Function key
is not lit, press Function. However, you do not need to press Function in Step 3 to execute the Book
Sending mode if BOOK SENDING is programmed in PROGRAM 1-TOUCH KEY from ADDTIONAL
FUNCTIONS. (→ p. 9-4)
1 Press FAX to set to the Fax Mode.
FAX 12/03/2004 15:30
STANDARD
Ex: F a x T e l
2 Prepare the document and place it face
down on the platen glass. (→ Basic Guide)
• To adjust the resolution, → p. 4-1.
• To adjust the contrast, → p. 9-4.
3 Press Function.
• If you must first dial a number to get an outside
line (“9”, for example), add a pause after that
number by pressing Redial/Pause.
8 Press Start to begin scanning.
NEXT PAGE
:[START]
FINISH SCAN :[SET]
9 Place the next document on the platen glass
and press Start to begin scanning.
• Repeat for other documents.
4 Press Book Sending.
5 Press 4 (–) or e (+) to select the
document size.
10 After all of the documents have been
scanned, press Set to begin sending.
• To cancel sending after dialing has started, press
Stop/Reset then press 4 (–). (→ p. 4-7)
BOOK TX SCAN SIZE
LTR
Ex:
NOTE
6 Press Set.
7 Dial the other party’s fax number.
TEL=
9057951111
Ex:
• For dialing methods, → p. 4-2.
• If you enter the wrong number, press Delete to
delete the last number or press Clear to clear your
entire entry, then enter the correct number. You can
also delete all the numbers by pressing Stop/Reset.
• You can scan up to approximately 255
pages* for memory sending.
* Based on ITU-T No.1 Chart, Standard
mode.
• The Function key will light up by
pressing Function to be able to operate
Delete or Clear.
• If the machine’s memory becomes full
while scanning your document, MEMORY
FULL will appear on the LCD display. If
this happens, divide the documents into
several sections and send each section
separately.
Canceling Sending
Canceling memory sending
■ To cancel memory sending while documents are being scanned using the ADF
1 Press Stop/Reset.
• Scanning is canceled.
STOP KEY PRESSED
PRESS SET KEY
4-6
2 Press Set.
• The document will come out automatically.
04 FAX_Chp4.qxd
6/17/04 12:45 PM
Page 4-7
■ To cancel memory sending after all documents have been scanned
• The machine asks you to confirm that you want to
cancel.
CANCEL DURING TX/RX?
< YES
NO >
2 Press 4 (–) to cancel sending.
3 Use 4 (–) or e (+) to select TX
RESERVE STATUS.
FAX MONITOR
2.TX RESERVE STATUS
4 Press Set.
--:-- 0013 TX STNDBY
905795 1111
Ex:
• If you change your mind and want to continue
sending, press e (+).
• The machine prints an ERROR TX REPORT.
(→ p. 7-3)
5 Use 4 (–) or e (+) to select the document
❚ While documents are waiting to be sent:
6 Press Delete.
NOTE
• You can operate Fax Monitor or Delete
when the Function key is lit. If the
Function key is not lit, press Function.
However, you do not need to press
Function in Step 1 to execute the Fax
Monitor function if FAX MONITOR is
programmed in PROGRAM 1-TOUCH
KEY from ADDITIONAL FUNCTIONS.
(→ p. 9-4)
1 Press Function.
2 Press Fax Monitor.
to be canceled by checking the reservation
number and the fax number.
• The machine asks you to confirm that you want to
delete the document.
OK TO DELETE?
< YES
NO >
7 Press 4 (–) to cancel sending.
• If you change your mind and want to continue
sending, press e (+).
TX/RX NO.
Ex: E R A S I N G E N D
NOTE
0013
4
Sending Faxes
❚ While documents are being sent:
1 Press Stop/Reset.
• You can also cancel sending pressing
Memory Reference. (→ p. 4-16)
Redialing When the Line is Busy
There are two methods of redialing: Manual redialing and Automatic redialing. This section explains these two
methods.
Manual Redialing
Press Redial/Pause to dial the last number you dialed with the numeric keys. (This starts redialing regardless of
whether automatic redialing is enabled.)
Canceling Manual Redialing
To cancel manual redialing, press Stop/Reset.
4-7
04 FAX_Chp4.qxd
6/17/04 12:45 PM
Page 4-8
Automatic Redialing
The fax automatically redials twice* after the first attempt at sending fails (e.g. the line is busy). The time
interval between redialing attempts is two minutes*.
The number of redialing attempts and the time interval between attempts can be adjusted by changing the settings
in the AUTO REDIAL. Automatic redialing can also be turned off and on. (→ p. 9-6)
If all attempts are unsuccessful, the machine cancels the transmission and prints an ERROR TX REPORT.
(→ p. 7-3)
* Indicates the default setting.
Canceling Automatic Redialing
NOTE
• If you want to cancel a transmission while the machine is waiting to redial, you must delete the
document from memory pressing Memory Reference. (→ p. 4-14)
1 Wait until the machine starts to redial.
3 Press 4 (–) to cancel redialing.
2 Press Stop/Reset.
• The machine asks you to confirm that you want to
cancel.
• If you change your mind and want to continue
redialing, press e (+).
• The machine prints an ERROR TX REPORT.
(→ p. 7-3)
CANCEL DURING TX/RX?
< YES
NO >
Sequential Broadcasting
Sending a Document to More Than One Destination
This feature allows you to scan a document once and send it to several destinations. You can send the document
to a maximum of 122 destinations using a combination of the following dialing methods:
• One-touch speed dialing: up to 12 destinations
• Coded speed dialing: up to 100 destinations
• Regular dialing (using the numeric keys) or redialing: 10 destinations
You can enter the destinations in any order. (Be sure to press Set after your entry with the numeric keys.)
NOTE
• If you frequently send documents to the same group of destinations, you can group them and register
these numbers for group dialing. You can register up to 111 fax numbers with group dialing and send
the same document to these numbers. (→ p. 3-6)
• The Function key will light up by pressing Function to be able to operate Clear.
1 Press FAX to set to the Fax Mode.
FAX 12/03/2004 15:30
STANDARD
Ex: F a x T e l
2 Prepare the document and load it face
down in the ADF.
MEM IN USE
Ex:
0%
The currently used memory is displayed
4-8
DOCUMENT READY
Standby to scan
• If you want to use the platen glass to send a
document → p. 4-6.
• To adjust the resolution, → p. 4-1.
• To adjust the contrast, → p. 9-4.
6/17/04 12:45 PM
Page 4-9
3 Enter up to 122 fax numbers using any of
the following methods:
❚ One-touch speed dialing:
Press the desired one-touch speed dialing
key(s).
TEL=
2 50921
0
4
C
a
n
o
n
I
T
A
L
IA
Ex:
❚ Coded speed dialing:
Press Coded Dial, then use the numeric
keys to enter the two-digit code.
Repeat for other codes.
TEL=
1 49 39 25 25
A02 Canon FRANCE
Ex:
❚ Regular dialing:
Use the numeric keys to enter the fax
number, then press Set.
TEL=
9057951111
Ex:
NOTE
• If you enter an incorrect destination, press
Clear to delete it.
• You must enter the second fax number
within five seconds of entering the first
one. After that, all subsequent fax numbers
must be entered within 10 seconds of each
other. If you wait longer than this, the
machine automatically begins scanning the
document for sending. If you prefer the
machine not to do this, disable the TIME
OUT setting. (→ p. 9-6)
• If you want to review the numbers you
entered, press 4 (–) or e (+) to scroll
through the numbers.
4 Press Start.
• When scanning is complete, the machine starts to
dial the number.
• The machine will first send the document to the
one-touch speed dialing destinations, then the
coded speed dialing destinations, and finally to the
destination dialed using regular dialing.
• If you prefer not to start scanning automatically in
5 or 10 seconds after dialing, disable the TIME
OUT setting. (→ p. 9-6)
• To cancel sending, press Stop/Reset then press
4 (–). Sending to all destinations specified in Step
3 will be canceled. You cannot cancel just one
destination.
After canceling, the machine will print a MULTI
TX/RX REPORT. (→ p. 7-4)
NOTE
• If a number is busy, the machine will
continue sending to the other destinations
and then redial the number that was busy.
4
Sending Faxes
04 FAX_Chp4.qxd
4-9
04 FAX_Chp4.qxd
6/17/04 12:45 PM
Page 4-10
Delayed Sending
You can use your machine to send faxes at a preset time. This feature is called Delayed sending or Timer sending.
By using this feature, you can take advantage of lower long distance rates at night, for example.
You can set up to 122 destinations, and up to 20 reservations of delayed sending.
NOTE
• You can perform other tasks even when you have set the machine for delayed sending.
• You can operate Book Sending, Delayed Transmission or Clear when the Function key is lit. If
the Function key is not lit, press it. However, you do not need to press Function in Step 1 or 2 to
execute the Delayed Transmission function or Book Sending function if DELAYED TX or BOOK
SENDING is programmed in PROGRAM 1-TOUCH KEY from ADDITIONAL FUNCTIONS. (→ p.
1 Prepare the document and place it on the
platen glass or load it face down in the
ADF.
NOTE
• When using the platen glass, press
Function and then Book Sending, and
select the document size with 4 (–) or e
(+). Proceed to Step 3.
2 Press Function.
5 Press Set.
DELAYED TX
SELECT LOCATIONS
TEL=
6 Enter a destination using a one-touch speed
dialing key, a coded speed dialing code,
Redial/Pause or the numeric keys.
3 Press Delayed Transmission.
NOTE
4 Use the numeric keys to enter the
reservation time to send documents.
DELAYED TX
Ex: T X T I M E S E T T N G 1 5 : 3 0
• You can use the one-touch speed dialing
key when the Function key is not lit. If
the Function key is lit, press Function.
• If you enter an incorrect destination, press
Clear to delete it.
7 Press Start to begin scanning.
• When you use speed dialing when the TIME OUT
setting is on, scanning starts automatically.
(→ p. 9-6)
• Your document will be sent when the delayed
transmission time is reached.
• If you placed the document on the platen glass,
follow Steps 8 and 9 on p. 4-6.
9-4)
4-10
04 FAX_Chp4.qxd
6/17/04 12:45 PM
Page 4-11
Confirming Transmission Status and Sending Reservation
You can check the status of sending or receiving fax, or sending reservation.
NOTE
• You do not need to press Function in Step 1 to execute the Fax Monitor function if FAX MONITOR is
programmed in PROGRAM 1-TOUCH KEY from ADDITIONAL FUNCTIONS. (→ p. 9-4)
Confirming Transmission Status
The sending or receiving status can be confirmed using the following method:
flashing.
NOTE
2 Press Fax Monitor.
FAX MONITOR
1.RX/TX STATUS
3 Press Set.
16:50 0056 TX
Ex:
12345
Destination
TX/RX mode
TX/RX number
Scanned/received time
• To return to the standby display, press
Stop/Reset.
• If you perform the procedure above when
the machine is not sending or receiving
faxes, NO CURRENT RX/TX JOB will
appear, and the display will return to the
display shown in Step 2.
• The transaction number, TX/RX means the
following:
– 0001 to 4999: A sent document;
– 5001 to 9999: A received document.
Confirming Sending Reservation
Sending reservation or checking if there is a document being scheduled to be sent can be confirmed using the
following method:
1 Press Function while In Use/Memory is
lit.
2 Press Fax Monitor.
FAX MONITOR
1.RX/TX STATUS
3 Press 4 (–) or e (+), then select 2.TX
RESERVE STATUS.
FAX MONITOR
2.TX RESERVE STATUS
4
Sending Faxes
1 Press Function while In Use/Memory is
4 Press Set.
16:00 0056 TX STNDBY
905 795 1111
Ex:
• The sending reservation can be confirmed by
checking the sending time, TX/RX NO. or fax
number.
5 Press 4 (–) or e (+) to confirm the
sending reservation.
17:00 0058 TX STNDBY
20 545 8584
Ex:
NOTE
• To return to the standby display, press
Stop/Reset.
• If you perform the procedure above when
there is no sending reservation, NO DOC.
STORED will appear, and the display will
return to the display shown in Step 3.
• You can also check the reservations by
printing out the Document Memory List.
(→ p. 4-12)
4-11
04 FAX_Chp4.qxd
6/17/04 12:45 PM
Page 4-12
Documents Stored in Memory
NOTE
• If there are no documents stored in memory, the machine will return to the standby mode when you
press Memory Reference.
• You do not need to press Function in Step 1 to execute the Memory Reference function if MEMORY
REFERENCE is programmed in PROGRAM 1-TOUCH KEY from ADDITIONAL FUNCTIONS.
(→ p. 9-4)
Printing a List of Documents in Memory
The machine can print a list of documents stored in memory, along with the transaction number (TX/RX NO.)
of each document.
1 Press Function.
NOTE
2 Press Memory Reference.
• Once you know the transaction number of
a document stored in memory, you can
print it or delete it. (→ pp. 4-13, 4-14)
MEMORY REFERENCE
1.DOC. MEMORY LIST
3 Press Set.
• The machine prints the Document Memory List
and returns to the standby mode.
12/03/2004 17:15 FAX 123 4567
CANON
001
**********************************
*** DOCUMENT MEMORY LIST ***
**********************************
TX/RX NO
0046
0047
0048
0049
4-12
MODE
DESTINATION TEL/ID
DELAYED TX
[A 01] Canon
DELAYED TX
[
04] Canon
DEL SQ BDCST [A 02] Canon
[
01] Canon
DEL SQ BDCST [
03] Canon
TOKYO
ITALIA
FRANCE
CANADA
GROUP 2
PGS.
SET TIME
3 12/03
2 12/03
1 12/03
16:30
16:37
16:42
1 12/03
16:55
ST. TIME
14:00
14:05
14:07
14:07
14:10
04 FAX_Chp4.qxd
6/17/04 12:45 PM
Page 4-13
Resending a Document in Memory
You can resend documents that are stored in memory. The machine stores faxes that are received but not printed
because paper or toner has run out, a paper jam has occurred or documents that have not been transmitted due to a
transmission error.
You can send such faxes to another fax machine to be printed.
5 Use 4 (–) or e (+) to select the
1 Press Function.
2 Press Memory Reference.
MEMORY REFERENCE
1.DOC. MEMORY LIST
3 Use 4 (–) or e (+) to select 4.RESEND
DOCUMENT.
transaction number (TX/RX NO.) of the
document you want to send again.
RESEND DOCUMENT
0053
Ex: T X / R X N O .
6 Press Set.
RESEND DOCUMENT
SELECT LOCATIONS
MEMORY REFERENCE
4.RESEND DOCUMENT
TEL=
• The document can also be resent if you
select 2.MEMORY RETRANSMT.
7 Enter the fax number.
4 Press Set.
RESEND DOCUMENT
0051
Ex: T X / R X N O .
8 Press Set.
• For dialing methods, → p. 4-2.
• Press Set twice if you use the numeric keys to dial
the fax number.
Sending starts.
4
Sending Faxes
NOTE
Printing a Document in Memory
5 Use 4 (–) or e (+) to select the
1 Press Function.
2 Press Memory Reference.
MEMORY REFERENCE
1.DOC. MEMORY LIST
3 Use 4 (–) or e (+) to select 3.PRINT
transaction number (TX/RX NO.) of the
document you want to print.
PRINT DOCUMENT
0003
Ex: T X / R X N O .
• You can enter the transaction number using the
numeric keys.
DOCUMENT.
6 Press Set.
MEMORY REFERENCE
3.PRINT DOCUMENT
PRINT 1ST PAGE ONLY?
< YES
NO >
4 Press Set.
PRINT DOCUMENT
Ex: T X / R X N O .
0001
4-13
04 FAX_Chp4.qxd
6/17/04 12:45 PM
Page 4-14
7 Press 4 (–) to print the first page only, or
press e (+) to print all the pages of the
document.
Printing starts.
NOTE
• Pressing 4 (–) prints the first page when
sending (this is the last scanned page, not
the first page when scanning with the
ADF).
8 To continue printing other documents in
memory, repeat the procedures from Step 5.
9 Press Stop/Reset to return to the standby
display.
Deleting a Document from Memory
1 Press Function.
2 Press Memory Reference.
3 Use 4 (–) or e (+) to select 5.DELETE
6 Press Set.
• The machine asks you to confirm that you want to
delete the document.
OK TO DELETE?
< YES
NO >
DOCUMENT.
MEMORY REFERENCE
5.DELETE DOCUMENT
4 Press Set.
DELETE DOCUMENT
0001
Ex: T X / R X N O .
5 Use 4 (–) or e (+) to select the
transaction number (TX/RX NO.) of the
document you want to delete.
DELETE DOCUMENT
0004
Ex: T X / R X N O .
• You can enter the transaction number using the
numeric keys.
4-14
7 Press 4 (–) to delete the document.
• The document is deleted.
• If you change your mind and want to keep the
document in memory, press e (+).
8 To continue deleting other documents in
memory, repeat the procedure from Step 5.
9 Press Stop/Reset to return to the standby
display.
05 FAX_Chp5.qxd
6/17/04 12:46 PM
Page 5-1
Chapter 5
Receiving Faxes
Different Ways to Receive a Fax
The machine provides you with several modes for receiving faxes. Once you have decided which mode is
suitable for your needs, set the mode as described (→ p. 5-2). You can change the mode when the machine is in
the standby mode. To determine which mode best suits your needs, refer to the table below:
Operation
Requirements
FaxTel*
Fax/Tel
Automatically switches between fax
calls and voice calls. Receives faxes
automatically and rings for voice calls.
To set the details, → pp. 5-3, 5-4.
Telephone connected to the machine
FaxOnly
Fax
Machine answers all calls as fax calls.
It receives faxes automatically and
disconnects voice calls.
Separate telephone line for fax use only
DRPD
Fax/Tel
Allows you to have separate fax and
telephone numbers that you distinguish
by the type of ring. To set the details,
→ p. 5-5.
Subscription to a DRP service
Telephone connected to the machine
5
Manual
Tel
Machine rings for every call, whether it
is a fax call or a voice call. For a fax
call, you have to activate reception
manually.
Telephone connected to the machine
AnsMode
Fax/Tel
Receives faxes automatically and routes
voice calls to the answering machine.
Answering machine connected to the
machine
Receiving Faxes
Receive Mode Main Use
* Indicates the default setting.
You can confirm which receive mode is set by checking the standby display. The receive mode is displayed in the
lower left corner of the LCD.
FAX 12/03/2004 15:30
STANDARD
Ex: F a x T e l
5-1
05 FAX_Chp5.qxd
6/17/04 12:46 PM
Page 5-2
Setting the Receive Mode
The setting of the receive mode can be changed if necessary.
1 Press Receive Mode until the mode you
want appears.
RECEIVE MODE
Ex: M a n u a l
• You can select from the following:
– FaxTel* :
when a telephone is connected to the machine,
the machine automatically switches between fax
calls and voice calls.
– FaxOnly :
if you use your machine to receive only faxes.
– DRPD* (Distinctive Ring Pattern Detection):
to distinguish between fax and voice calls using
Distinctive Ring Patterns.
– Manual :
when a telephone is connected to the machine,
you can receive faxes by pressing Start before
replacing the handset on the telephone.
– AnsMode :
if you want to receive faxes automatically and
route voice calls to an answering machine.
* You can set details for the FaxTel and DRPD
modes. (→ pp. 5-3 to 5-5)
5-2
2 Press Set.
FAX 12/03/2004 15:30
STANDARD
Ex: M a n u a l
The selected receive mode is set and the machine
returns to the standby mode. The current date and the
selected receive mode are displayed.
NOTE
• The machine does not ring when it receives
a fax in FaxOnly. If you want to be
alerted when a fax call is received, connect
a telephone to the machine, and enable the
INCOMING RING setting.
• When an answering machine or a
telephone with an answering machine is
connected to your machine, select
AnsMode. (→ p. 1-4)
• Follow these guidelines when using the
machine with an answering machine:
– Set the answering machine to answer on
the first or second ring.
– When recording the outgoing message on
the answering machine, the entire
message must be no longer than 15
seconds.
Ex: “Hello. I can’t answer the phone
right now, but please leave a message
after the beep. I’ll return your call as
soon as possible.”
05 FAX_Chp5.qxd
6/17/04 12:46 PM
Page 5-3
Setting the Options for the FaxTel Mode
When selecting the FaxTel mode, the following options can be set.
• Adjust the time the machine takes to check whether a call is from a fax machine or a telephone (RING
START TIME setting).
• Adjust the length of time the machine rings when the call is a voice call (F/T RING TIME setting).
• Set whether the machine switches to the receive mode after the ring time set in F/T RING TIME has elapsed
(F/T SWITCH ACTION setting).
■ What Happens When FaxTel Mode is Selected
Type of call
Telephone charges
begin for the caller.
Telephone
Fax
Fax
Sending document
manually
Sending document
automatically
The machine answers without ringing.
The machine listens for the fax tone.
(8 seconds)
The fax tone
is detected.
The fax tone is not detected.
The machine starts ringing.
F/T RING TIME
(Factory default
setting =15 sec.)
The document is
received automatically.
The fax tone is
detected and the
machine switches to
the receive mode.
Pick up the
handset to talk.
If you do not pick up the handset
(within 15 sec.).
F/T SWITCH ACTION
Choose between:
RECEIVE (Factory default setting) and DISCONNECT.
5
Receiving Faxes
RING START TIME
(Factory default
setting = 8 sec.)
DISCONNECT
The machine
disconnects the call.
RECEIVE
(The machine receives the fax.)
Not all fax machines are capable of sending a
fax tone. In this case, set the F/T SWITCH
ACTION to RECEIVE. The machine switches to
the receive mode automatically and starts
receiving the document. If no document comes
in, it disconnects the call after approximately 40
seconds.
5-3
05 FAX_Chp5.qxd
6/17/04 12:46 PM
Page 5-4
1 Press Additional Functions.
2 Use 4 (–) or e (+) to select 3.FAX
9 Press Set twice.
FAX/TEL OPT. SET
2.F/T RING TIME
SETTINGS.
ADDITIONAL FUNCTIONS
3.FAX SETTINGS
3 Press Set.
FAX SETTINGS
1.USER SETTINGS
F/T RING TIME
015SEC
Ex:
10 Use 4 (–) or e (+) to set how long the
machine rings until someone picks up the
handset.
F/T RING TIME
4 Use 4 (–) or e (+) to select 4.RX
SETTINGS.
FAX SETTINGS
4.RX SETTINGS
5 Press Set.
RX SETTINGS
1.ECM RX
6 Use 4 (–) or e (+) to select 2.FAX/TEL
OPT.SET.
RX SETTINGS
2.FAX/TEL OPT.SET
7 Press Set twice.
FAX/TEL OPT. SET
1.RING START TIME
Ex:
RING START TIME
08SEC
8 Use 4 (–) or e (+) to set the time the
machine waits before ringing when it
receives a call.
RING START TIME
09SEC
Ex:
• You can select from 0 to 30 seconds.
• The default setting is eight seconds.
• You can also use the numeric keys to set the time.
5-4
030SEC
Ex:
• You can select from 15 to 300 seconds.
• The default setting is 17 seconds.
11 Press Set twice.
FAX/TEL OPT. SET
3.F/T SWITCH ACTION
Ex:
F/T SWITCH ACTION
RECEIVE
12 Use 4 (–) or e (+) to select RECEIVE or
DISCONNECT.
F/T SWITCH ACTION
DISCONNECT
Ex:
• This setting tells the machine what to do if no one
picks up the handset within the specified ring time
set in Step 10.
• Select RECEIVE to receive the call, or
DISCONNECT to disconnect the call.
• The default setting is RECEIVE.
13 Press Set.
RX SETTINGS
3.DRPD:SELECT FAX
14 Press Stop/Reset to return to the standby
display.
05 FAX_Chp5.qxd
6/17/04 12:46 PM
Page 5-5
Setting the Options for Distinctive Ring Pattern
Detection Feature: DRPD
Some telephone companies offer a Distinctive Ring Pattern (DRP) service whereby they assign two or more
telephone numbers with distinctive ring patterns to a single telephone line. If your telephone company offers such
a service, you can have both fax numbers and telephone numbers for your machine using only one telephone line.
Your machine will automatically monitor incoming calls. Based on the distinctive ring pattern, it will determine if
the call is from a fax machine trying to send a document or from a telephone trying to make a voice call.
Use the information in this section to set up the machine for use with a DRP service. For more details on the
DRP service, contact your local telephone company. (Your telephone company may have a different name for this
service. Also, this service may not be offered in all areas.)
Types of Ring Patterns
Your telephone company will assign a distinctive ring pattern to each number when you order the DRP service.
See the fax ring pattern to match that assigned by the telephone company.
2 Use 4 (–) or e (+) to select 3.FAX
SETTINGS.
ADDITIONAL FUNCTIONS
3.FAX SETTINGS
3 Press Set.
FAX SETTINGS
1.USER SETTINGS
4 Use 4 (–) or e (+) to select 4.RX
SETTINGS.
FAX SETTINGS
4.RX SETTINGS
5 Press Set.
RX SETTINGS
1.ECM RX
7 Press Set.
DRPD:SELECT FAX
DOUBLE RING
Ex:
8 Use 4 (–) or e (+) to select the type of
ring pattern for the number the machine
uses.
DRPD:SELECT FAX
SHORT-SHORT-LONG
Ex:
• Select the type of ring pattern of which your
telephone company assigned for the number.
• You can select from the following:
- DOUBLE RING
- SHORT-SHORT-LONG
- SHORT-LONG-SHORT
- OTHER RING TYPE
- NORMAL RING
5
Receiving Faxes
1 Press Additional Functions.
9 Press Set.
RX SETTINGS
4.INCOMING RING
6 Use 4 (–) or e (+) to select
3.DRPD:SELECT FAX.
RX SETTINGS
3.DRPD:SELECT FAX
10 Press Stop/Reset to return to the standby
display.
5-5
05 FAX_Chp5.qxd
6/17/04 12:46 PM
Page 5-6
Receiving Faxes Manually
In the Manual mode, if you connect a telephone to your machine, you can receive voice calls as well as manually
receive faxes. You can activate reception from the machine or from the telephone connected to the machine (this
is called Remote Receiving).
NOTE
•
•
•
•
For this mode, you need to connect a telephone to your machine. (→ p. 1-4)
Make sure there are no documents in the ADF.
Make sure the REMOTE RX setting is enabled. (→ p. 9-7)
If your telephone line uses rotary pulse dialing, and the telephone connected to the machine cannot be
switched to tone dialing, you cannot activate remote receiving.
1 Make sure Manual is displayed on the
LCD display.
FAX 12/03/2004 15:30
STANDARD
Ex: M a n u a l
• To set Manual, → p. 5-2.
2 Make sure you have connected a telephone
to the machine.
3 When you hear the telephone ring, pick up
the handset.
4 ❚ If you hear a person’s voice:
Start your conversation. If the caller wants
to send you a fax, ask them to press the
Start key on their fax machine.
❚ If you hear a slow beep tone or silence:
Someone is trying to send you a fax.
If the telephone is close to your machine,
press Start on the machine to begin
receiving the fax.
Hang up the handset.
5-6
NOTE
• If no paper is loaded in the cassette, the
LCD displays RECEIVED IN MEMORY.
When paper is loaded, the machine
automatically resumes printing.
• The machine will beep and HANG UP
PHONE will be displayed if the handset is
not hung up properly. Make sure the
handset is seated properly in its cradle. If
you do not want the machine to beep,
disable the OFFHOOK ALARM setting. (→
p. 9-5)
• If the telephone is located away from your
machine, dial 25 (the remote receiving ID)
on your telephone, and hang up. When
your telephone line uses rotary pulse,
switch to tone dialing on your telephone
before dialing 25 (the remote receiving ID).
• You can change the number for the remote
receiving ID, with a combination of two
characters using 0 to 9, A and #, or disable
the remote receiving. (→ p. 9-7)
• If you have an answering machine
connected to your machine that can carry
out remote-control operations (controlling
your answering machine from a remote
telephone), the security code for this
function may be the same as the remote
receiving ID. If so, make sure you change
the machine’s remote receiving ID to make
it distinct from the answering machine’s
security code. (→ p. 9-7)
05 FAX_Chp5.qxd
6/17/04 12:46 PM
Page 5-7
Registering a Password and Subaddress for Polling
The polling feature allows you to request a document to be faxed to you from another fax machine. The sender
only needs to make sure that the document is on his fax machine and ready to be sent.
When this machine polls the sender’s machine, the document is sent automatically.
• You can register a password and subaddress in a one-touch speed dialing key or coded speed dialing
code.
• You must know if the other party’s fax is holding the document under both a password and subaddress
or only a password or subaddress. You must also know the password and subaddress so that you can
enter them on your fax. If you do not know the password and subaddress, contact the other party.
• The Function key will light up by pressing Function to be able to operate Space, Delete or Clear.
1 Press Additional Functions.
2 Use 4 (–) or e (+) to select 4.ADD.
REGISTRATION.
ADDITIONAL FUNCTIONS
4.ADD. REGISTRATION
3 Press Set.
ADD. REGISTRATION
1.1-TOUCH SPD DIAL
4 Use 4 (–) or e (+) to select 1.1-TOUCH
8 Use 4 (–) or e (+) to select
3.OPTIONAL SETTING.
1-TOUCH SPD DIAL
3.OPTIONAL SETTING
9 Press Set.
OPTIONAL SETTING
OFF
Ex:
10 Use 4 (–) or e (+) to select ON.
OPTIONAL SETTING
ON
SPD DIAL or 2.CODED SPD DIAL.
ADD. REGISTRATION
Ex: 1 . 1 - T O U C H S P D D I A L
5 Press Set.
Ex:
1-TOUCH SPD DIAL
01=
905795 1111
6 Use 4 (–) or e (+) to select the one-touch
speed dialing number or coded speed
dialing code.
1-TOUCH SPD DIAL
81 773 3115
Ex: 0 2 =
7 Press Set.
1-TOUCH SPD DIAL
1.TEL NUMBER ENTRY
11 Press Set.
OPTIONAL SETTING
1.TX TIME SETTNG
5
Receiving Faxes
NOTE
12 Use 4 (–) or e (+) to select 2.TX
TYPE.
OPTIONAL SETTING
2.TX TYPE
13 Press Set.
TX TYPE
Ex:
SUBADDRESS TX
14 Use 4 (–) or e (+) to select POLLING
RX.
TX TYPE
POLLING RX
5-7
05 FAX_Chp5.qxd
6/17/04 12:46 PM
Page 5-8
15 Press Set twice.
POLLING RX
1.PASSWORD
PASSWORD
Ex:
16 Enter a password.
PASSWORD
12345
Ex:
• You can enter a password (up to 20 digits) using
the numeric keys, T, # or Space.
• Be sure to enter the password of the other party
correctly, taking into account the position of
spaces.
• If you make a mistake, press Delete to delete the
last number, or press Clear to clear your entire
entry.
17 Press Set twice.
SUBADDRESS
Ex:
18 Enter a subaddress.
SUBADDRESS
123456789012
Ex:
• You can enter a subaddress (up to 20 digits) using
the numeric keys, T, # or Space.
• Be sure to enter the subaddress of the other party
correctly, taking into account the position of
spaces.
• If you make a mistake, press Delete to delete the
last character, or press Clear to clear your entire
entry.
19 Press Set.
Ex:
1-TOUCH SPD DIAL
03=GROUP DIAL
20 To continue registering other passwords
and subaddresses, press Additional
Functions then repeat the procedure from
Step 4.
21 Press Stop/Reset to return to the standby
mode.
5-8
05 FAX_Chp5.qxd
6/17/04 12:46 PM
Page 5-9
Receiving While Performing Other Tasks
Since the machine is a multitasking device, it can receive faxes and voice calls while you are performing other
tasks.
If you receive a fax while you are performing other tasks, the machine stores the incoming fax in memory. Then,
as soon as you finish your task, your fax will be received.
NOTE
• If you are copying or printing, printing of the received fax is suspended and then resumed after copying
or printing is finished.
Receiving Faxes in Memory When a Problem Occurs
If the machine encounters a problem when it is receiving a fax, the machine automatically stores the unprinted
pages of the fax in memory, and the LCD displays RECEIVED IN MEMORY. When the problem is cleared, the
machine automatically prints the stored fax in memory. For an explanation of the messages that appear on the
LCD display, and details on the action to take, → p. 8-1.
• The machine memory can store up to approximately 255 pages.*
• Once the pages are printed, they are deleted from memory.
• If the memory becomes full, you will not be able to receive the remaining pages. Contact the other
party and ask them to resend the remainder of the fax.
• The maximum number of pages that the machine’s memory can store differs depending on the other
party’s machine.
* Based on the condition that the other party sends the fax to imageCLASS D880, in the ITU-T No.1 Chart,
Standard mode.
Canceling Receiving
Follow this procedure to stop receiving a fax before reception is completed:
1 Press Stop/Reset.
• The machine asks you to confirm if you want to
cancel.
5
Receiving Faxes
NOTE
2 Press 4 (–) to cancel receiving.
• If you change your mind and want to continue
receiving, press e (+).
CANCEL DURING TX/RX?
< YES
NO >
5-9
05 FAX_Chp5.qxd
6/17/04 2:08 PM
Page 5-10
Printing a Received Document in the Correct Page Order
The machine collates your received fax documents in page order by default.
However, if you set PRINT IN ORDER to OFF, received faxes are printed in the reverse page order. (→
p. 9-8.)
The illustrations below show the order in which the document is received depending on if you have enabled
PRINT IN ORDER.
Sent Document
Document sent in
page order (1, 2, 3)
1
2
3
Your Machine
PRINT IN ORDER
setting is enabled.
Page order (1, 2, 3)
1
2
3
Reception
NOTE
5-10
PRINT IN ORDER
setting is disabled.
Reverse page order
3
2
1
Reception
• If you enable PRINT IN ORDER, the machine receives all pages of the document in memory first,
and then prints them out. In this case, reception takes longer.
• If there is insufficient memory to receive a document, the document will not print in page order even if
PRINT IN ORDER is set to ON.
06 FAX_Chp6.qxd
6/18/04 12:12 PM
Page 6-1
Chapter 6
Special Features
Special Dialing
This section explains special dialing features, such as dialing through a switchboard, dialing an overseas number,
and switching temporarily to tone dialing.
Dialing Through a Switchboard
A PBX (Private Branch Exchange) is an on-site telephone switchboard. If your machine is connected through a
PBX or other telephone switching system, you have to dial the outside line access number first, and then dial the
number of the party you are calling.
Dialing an Overseas Number (With Pauses)
When you dial or register an overseas number, you may need to insert a pause within or after the number. The
length and location of the pause depends on the telephone system of your country.
• The Function key will light up by pressing Function to be able to operate Delete or Clear.
NOTE
1 Press FAX to set to the Fax Mode.
FAX 12/03/2004 15:30
STANDARD
Ex: F a x T e l
2 Prepare the document and load it face
5 Use the numeric keys to dial the country
MEM IN USE
0%
The currently used memory is displayed.
DOCUMENT READY
Standby to scan.
• If you want to use the platen glass to send a
document, → p. 4-6.
3 Use the numeric keys to dial the
international access code.
TEL=
code, the area code, and the fax/telephone
number of the other party.
TEL=
Ex:
• If you enter the wrong number, press Delete to
delete the last number, then enter the correct
number. Or, press Clear or Stop/Reset to delete
all the numbers you entered, then start again from
Step 3.
6 If necessary, press Redial/Pause to enter
a pause at the end of the number.
00
Ex:
• If you enter the wrong number, press
Stop/Reset, then enter the correct number.
• For details on international access codes, contact
your local telephone company.
4 If necessary, press Redial/Pause to enter
TEL=
Ex:
00P
00p81123P
Ex:
• A pause at the end of a number (P), is fixed to 10
seconds.
7 Press Start to begin scanning.
• To cancel sending after dialing has started, press
Stop/Reset then 4 (–). (→ p. 4-7)
a pause.
TEL=
00p81123
6
Special Features
down into the ADF.
Ex:
• A pause entered within a number (p), is two
seconds long.
• For a longer pause, press Redial/Pause again to
insert another two-second pause. Alternatively,
you can change the length of the pause. (→ p. 9-5)
NOTE
• To take advantage of the speed dialing
features of your machine, register
frequently used overseas numbers for onetouch or coded speed dialing. (→ pp. 3-1,
3-3)
6-1
06 FAX_Chp6.qxd
6/17/04 12:47 PM
Page 6-2
Switching Temporarily to Tone Dialing
Many information services for banks, airline reservations, hotel reservations, etc., require tone dialing for their
services. If your machine is connected to a rotary pulse line, follow this procedure to set the machine temporarily
for tone dialing:
1 Press FAX to set to the Fax Mode.
FAX 12/03/2004 15:30
STANDARD
Ex: F a x T e l
5 Use the numeric keys on the machine to
enter the numbers requested by the
information service.
TEL=
2 Pick up the handset of your telephone.
3 Enter a destination using the numeric keys
on your telephone, a one-touch speed
dialing key, coded speed dialing code,
Redial/Pause or the numeric keys on the
machine.
4 When the recorded message of the
information service answers, press T
(Tone) to switch to tone dialing.
TEL=
T
Ex:
• When T (Tone) is pressed, T is displayed on the
LCD display.
• If your telephone line uses tone dialing, proceed to
the next step.
6-2
T34
Ex:
• Numbers entered after pressing T (Tone) will be
dialed using tone dialing.
• After pressing T (Tone), you cannot use the
numeric keys on your telephone. Use the numeric
keys on the machine.
6 If you want to receive faxes, press Start.
7 Hang up to disconnect the call.
• Tone dialing is canceled when you disconnect the
call.
07 FAX_Chp7.qxd
6/17/04 12:47 PM
Page 7-1
Chapter 7
Reports and Lists
Summary of Reports and Lists
The table below shows the reports and lists that can be printed from your machine. Refer to the pages indicated
for more details.
• Make sure that LTR or LGL-size paper is loaded in the cassette. If a different paper size is loaded, the
report or list cannot be printed. Also, you cannot use the multi-purpose tray for printing the report or
list.
Report or List
Description
Details
USER’S DATA LIST
Lists the current settings of your machine and the registered
sender information.
p. 2-5
ACTIVITY REPORT
Shows recent facsimile transactions performed by your machine.
You can enable or disable automatic printing of this report after
every 20 transactions. You can also manually set the machine to
print it.
p. 7-2
TX (Transmission)
REPORT
Prints after transmission of a document.
You can enable or disable this feature, or set the machine to print
a report only when an error occurs.
You can also set the machine to print the first page of the
document under the transmission report to remind you of the
contents of the document.
p. 7-3
RX (Reception) REPORT
Prints after reception of a document. You can enable or disable
this feature, or set the machine to print a report only when an
error occurs.
p. 7-4
DOCUMENT MEMORY
LIST
Lists the documents currently stored in the machine’s memory.
p. 4-12
1-TOUCH LIST/
1-TOUCH (DETAIL)
Lists the numbers and names registered under one-touch speed
dialing keys.
pp. 3-8, 3-9
CODED DIAL LIST/
CODED (DETAIL)
Lists the numbers and names registered under coded speed
dialing codes.
pp. 3-9, 3-10
GROUP DIAL LIST
Lists groups registered under one-touch speed dialing keys and
coded speed dialing codes.
p. 3-10
7
Reports and Lists
NOTE
7-1
07 FAX_Chp7.qxd
6/17/04 12:47 PM
Page 7-2
ACTIVITY REPORT
The machine is factory-set to print an ACTIVITY REPORT after every 20 transactions automatically. If you want
to print an ACTIVITY REPORT before it is automatically printed, follow this procedure:
• If you prefer not to print an ACTIVITY REPORT after every 20 transactions, set ACTIVITY REPORT
to OFF. (→ p. 9-5)
• You do not need to press Function in Step 1 to execute the Report function if REPORT is programmed
in PROGRAM 1-TOUCH KEY from ADDITIONAL FUNCTIONS. (→ p. 9-4)
NOTE
3 Use 4 (–) or e (+) to select
1 Press Function.
1.ACTIVITY REPORT.
2 Press Report.
REPORT
1.ACTIVITY REPORT
4 Press Set.
• The machine prints an ACTIVITY REPORT and
returns to the standby mode.
Transactions in an ACTIVITY REPORT are listed chronologically.
12/03/2004 17:28 FAX 123 4567
CANON
001
*****************************
ACTIVITY REPORT
***
***
*****************************
ST. TIME
A12/03
A12/03
A12/03
A12/03
A12/03
A12/03
A12/03
A12/03
12/03
12/03
15:10
15:14
15:22
15:24
16:10
16:16
16:27
16:30
16:53
17:08
12/03 17:20
DESTINATION TEL/ID
905 795 1111
905 795 1111
Canon TOKYO
Canon AUSTRALIA
905 795 1111
2 887 0166
Canon EUROPE
Canon EUROPE
03 3758 2111
Canon AUSTRALIA
CANON OPTICS
NO.
MODE
2 887 0166
5001
5002
0001
0001
5003
5004
0002
0003
5005
0004
AUTO RX
AUTO RX
,
SEQ. B CAST
,
SEQ. B CAST
AUTO RX
AUTO RX
TRANSMIT
TRANSMIT
AUTO RX
TRANSMIT
1 432 2060
0005
TRANSMIT
03 3758 2111
2 887 0166
20 545 8545
20 545 8545
PGS.
ECM
ECM
ECM
ECM
ECM
ECM
ECM
ECM
ECM
1
1
3
3
1
4
1
1
1
3
0
RESULT
,
OK 00 33
,
OK 00 24
,
OK 01 18
,
OK 01 18
,
OK 00 18
,
OK 00 59
,
OK 01 20
,
OK 04 12
,
OK 01 16
,
NG 00 51
3 STOP
,
NG 00 01
0 #0018
TRANSACTION (TX/RX) NUMBER
A
INDICATES AN
ENTRY THAT HAS
APPEARED ON A
PREVIOUS REPORT.
TRANSACTION MODE
ERROR CORRECTION MODE TRANSACTION
ERROR PAGE*
ERROR CODE
Stop/Reset WAS PRESSED DURING TRANSACTION
TRANSACTION DURATION
* The number of pages that have been printed may not be the same as the number of pages
indicated on the report.
7-2
07 FAX_Chp7.qxd
6/17/04 2:10 PM
Page 7-3
TX (Transmission) REPORT
The machine is factory-set to print a TX (transmission) REPORT only when an error occurs during sending. To
change this setting, → p. 9-5.
If you set the machine to print a report, a TX REPORT or an ERROR TX REPORT, a report similar to the ones
shown below, will be printed depending on the selected settings.
CANON
001
***********************
*** TX REPORT
***
***********************
7
TRANSMISSION OK
TX/RX NO
DESTINATION TEL #
CONNECTION ID
ST. TIME
USAGE T 17:21 FAX 123 4567
12/03/2004
PGS. SENT
RESULT
0003
1 432 2060
Canon OPTICS
12/27 14:59
00’00
CANON
0
NG
#018
BUSY/NO SIGNAL
001
*******************************
ERROR TX REPORT
***
***
*******************************
Reports and Lists
12/03/2004 17:47 FAX 123 4567
TX FUNCTION WAS NOT COMPLETED
TX/RX NO
DESTINATION TEL #
DESTINATION ID
ST. TIME
TIME USE
PAGES SENT
RESULT
0004
20 545 8545
Canon EUROPE
12/03 17:21
00 18
1
NG
#0018 BUSY/NO SIGNAL
THE SLEREXE COMPANY LIMITED
SAPORS LANE•BOOLE•DORSET•BH25 8ER
TELEPHONE BOOLE (945 13) 51617 – FAX 1234567
Our Ref. 350/PJC/EAC
December 3, 2004
Dr. P. N. Cundall,
Mining Surveys Ltd.,
Holroyd Road,
Reading,
Berks.
OK: TRANSMISSION SUCCESSFUL
NG: SOME OR NO PAGES SENT
NUMBER OF PAGES SENT
TRANSMISSION DURATION
TRANSMISSION TIME
IF YOU ENABLE THE REPORT WITH TX IMAGE
SETTING (→ p. 9-5), THE FIRST PAGE OF THE
DOCUMENT WILL PRINT ON THE REPORT TO
REMIND YOU OF THE CONTENTS OF THE
DOCUMENT .
7-3
07 FAX_Chp7.qxd
6/17/04 2:10 PM
Page 7-4
MULTI TX/RX (Transaction) REPORT
If the transmission was a sequential broadcast, a MULTI TX/RX (transaction) REPORT similar to the one shown
below, will be printed.
It will also be printed if you select OUTPUT YES under TX REPORT or RX REPORT in Report Settings (→ p. 9-5).
12/03/2004 18:16 FAX 123 4567
CANON
001
********************************
MULTI TX/RX REPORT
***
***
********************************
TX/RX NO
PGS.
TX/RX INCOMPLETE
TRANSACTION OK
0054
1
–––––
[ A 0 0 ] 2131 1250
[ A 02] 1 49 39 25 25
[
01] 905 795 1111
–––––
ERROR INFORMATION
Canon DEUTSCH.
Canon FRANCE
Canon CANADA
RX (Reception) REPORT
The machine is factory-set not to print an RX (reception) REPORT even if an error occurs during reception. To
change this setting, → p. 9-5.
If you set the machine to print a report, an RX REPORT similar to the one shown below, will be printed.
12/03/2004 17:52 FAX 123 4567
CANON
001
***********************
*** RX REPORT ***
***********************
RECEPTION OK
TX/RX NO
DESTINATION TEL #
DESTINATION ID
ST. TIME
TIME USE
PGS.
RESULT
OK: RECEPTION SUCCESSFUL
NG: SOME OR NO PAGES RECEIVED
NUMBER OF PAGES RECEIVED
RECEPTION DURATION
RECEPTION TIME
7-4
5004
905 795 1111
Canon CANADA
12/03 17:52
01 59
4
OK
08 FAX_Chp8.qxd
6/17/04 12:48 PM
Page 8-1
Chapter 8
Troubleshooting
LCD Messages
The following messages are displayed on the LCD display when the machine performs a function or if it
encounters an error.
This section describes messages related to fax functions. For other messages, → Basic Guide.
Message
Cause
Action
CHANGE DOCUMENT
When using the platen glass to send
documents in the Book Sending mode, you
pressed Start without changing the
document.
Place the next document on the platen
glass then press Start.
DOCUMENT TOO
LONG
The length of the document exceeds 14"
(356 mm).
The length of the document should be
within 14" (356 mm).
HANG UP PHONE
The handset is not placed in the handset
cradle correctly.
Replace the handset correctly.
MEM IN USE nn %
Shows the percentage of memory
currently in use.
Wait for the machine to send any faxes in
memory. Also, print or delete any
documents in memory you no longer need.
(→ pp. 4-13, 4-14)
MEMORY FULL
The memory becomes full during the
document scanning.
When sending the document, divide it
into parts or select a lower fax resolution.
If you need more space, wait for the
machine to send any faxes. Also, print or
delete any documents in memory you no
longer need. (→ pp. 4-13, 4-14)
If the machine’s memory becomes full
while scanning documents using the
ADF, the document being scanned stops
in the ADF. Press Set to release the
document automatically.
NO TEL #
The one-touch speed dialing key or coded
speed dialing code you entered has not
been registered.
Register the one-touch speed dialing key
or coded speed dialing code.
(→ pp. 3-1, 3-3)
RECEIVED IN
MEMORY
The machine received the fax in memory
because paper or toner ran out, or a paper
jam occurred.
Load paper in the cassette (→ Set-up
Instructions), replace the cartridge
(→ Basic Guide), or clear the paper jam.
(→ Basic Guide)
TX/RX NO. nnnn*
When the machine sends or receives a
fax, it assigns a unique identification
number (nnnn).
Write the number down for future
reference.
Troubleshooting
8
* The identification number does not appear in the standby display. It appears when scanning documents,
operating Fax Monitor or Memory Reference, or receiving faxes in Manual mode.
8-1
08 FAX_Chp8.qxd
6/17/04 12:48 PM
Page 8-2
Faxing Problems
Sending Problems
❚ You cannot send a fax.
The machine may have overheated.
• Unplug the machine, and let it cool for about 10 minutes. Plug in the machine and try sending again.
The machine may not be set for the type of telephone line in use (pulse/tone).
• Make sure that the machine is set for the correct telephone line type. (→ p. 2-6)
The document may not have been loaded.
• Remove the document, stack it if necessary, and place it on the platen glass or load it into the ADF correctly.
(→ Basic Guide)
The one-touch speed dialing key or coded speed dialing code you entered may not be registered for the
feature you want to use.
• Check the one-touch speed dialing key or coded speed dialing code and make sure that it is registered
correctly. (→ Chapter 3)
You dialed or have been provided with an incorrect number.
• Dial the number again, or check that you have the correct number.
The other party’s fax machine may be out of paper.
• Call the other party and ask them to make sure that paper is loaded in their fax machine.
There may be other documents being sent from memory.
• Allow time for those documents to finish sending.
An error may have occurred during sending.
• Print an ACTIVITY REPORT and check for an error. (→ p. 7-2)
The telephone line may not be working properly.
• Make sure that there is a dial tone when you lift the handset of the telephone connected to the machine. If there
is no dial tone, contact your local telephone company.
The receiving fax machine may not be a G3 fax machine.
• Make sure that the receiving fax machine is compatible with the machine (which is a G3 fax machine).
The other party’s telephone may be busy or the other party’s fax machine may be turned OFF.
Or, BUSY/NO SIGNAL is shown on the ERROR TX REPORT.
• The telephone number you dialed is busy. Try sending the document later.
• The other party’s fax machine is not working. Contact the other party and have them check their fax machine.
The receiving fax machine did not answer within 55 seconds (after all automatic redialing attempts).
• Contact the other party and have them check their fax machine. For an overseas call, add pauses to the
registered number. (→ p. 6-1)
❚ Faxes sent from the machine are spotted or dirty.
The receiving fax machine may not be working properly.
• Check the machine by making a copy (→ Basic Guide). If the copy is clear, the problem may be in the
receiving fax machine. If the copy is spotted or dirty, clean the platen glass or the rollers inside the main unit.
(→ Basic Guide)
The document may not have been loaded.
• Remove the document, stack it if necessary, and place it on the platen glass or load it into the ADF correctly.
(→ Basic Guide)
8-2
08 FAX_Chp8.qxd
6/17/04 12:48 PM
Page 8-3
❚ Cannot send using the Error Correction Mode (ECM).
The other party’s fax machine may not support ECM.
• If the other party’s fax machine does not support ECM, then the document is sent in the normal mode without
error checking.
ECM may be disabled.
• Make sure that ECM is on. (→ p. 9-5)
❚ Errors occur frequently while sending.
The telephone lines may be in poor condition, or you may have a bad connection.
• Select a slower transmission speed. (→ p. 9-4)
Receiving Problems
The machine may not be set to receive automatically.
• For the machine to receive faxes automatically, the receive mode must be set to FaxTel, FaxOnly,
AnsMode or DRPD (→ Chapter 5). If you have set AnsMode, confirm that an answering machine is
connected to the machine, and that it is turned on with a properly recorded outgoing message. (→ p. 5-2)
The machine’s memory is full.
• Print out or delete any documents stored in memory to free up space. (→ p. 4-13, 4-14)
8
Troubleshooting
❚ Cannot receive a fax automatically.
An error may have occurred during reception.
• Print an ACTIVITY REPORT and check for an error. (→ p. 7-2)
No paper in the cassette.
• Make sure that paper is loaded in the cassette. (→ Set-up Instructions)
The telephone line may not be connected properly.
• Make sure that all line connections are secure. (→ p. 1-3)
❚ The machine does not switch automatically between telephone and fax reception.
The machine may not be set to switch automatically between telephone and fax reception.
• For the machine to switch automatically, the receive mode must be set to FaxTel, AnsMode or DRPD (→
Chapter 5). If you have set AnsMode, confirm that an answering machine is connected to the machine and that
it is turned on with an outgoing message properly recorded. (→ p. 5-2)
The sending fax machine cannot send the CNG (Calling Tone) signal that tells the machine that the
incoming signal is a fax.
• Some fax machines cannot send the CNG (Calling Tone) signal that tells your machine the incoming call is
from a fax machine. In such a case, you will have to receive the fax manually. (→ p. 5-6)
8-3
08 FAX_Chp8.qxd
6/17/04 12:48 PM
Page 8-4
❚ Cannot receive a document manually.
You may have disconnected the call by pressing Start or dialing the remote receiving ID after hanging up
the handset.
• Always press Start or dial the remote receiving ID before hanging up the handset. Otherwise, you will
disconnect the call.
• When your telephone line uses rotary pulse dialing, switch to tone dialing on your telephone before dialing 25
(the remote receiving ID).
❚ Print quality is poor.
You may not be using the correct type of paper.
• Make sure you load paper that meets the paper requirements for the machine. (→ Basic Guide)
The sending fax machine may not be functioning properly.
• The sending fax machine usually determines the fax’s quality. Call the sender and ask them to ensure the top
cover and scanning glass on their fax machine are clean.
ECM (Error Correction Mode) may be disabled.
• Make sure that ECM is on. (→ p. 9-6)
❚ Faxes do not print.
The Cartridge may not be installed properly.
• Make sure that the Cartridge is installed properly. (→ Basic Guide)
The Cartridge may need to be replaced.
• Determine if the problem is with the Cartridge, and replace it if necessary. (→ Basic Guide)
No paper may be loaded in the cassette.
• Make sure that paper is loaded in the cassette. (→ Set-up Instructions)
❚ Faxed images are blotched or uneven.
The telephone lines may be in poor condition, or you may have a bad connection.
• ECM (Error Correction Mode) sending/receiving should eliminate such problems. However, if the telephone
lines are in poor condition, you may have to try again.
The sending fax machine may not be functioning properly.
• The sending fax machine usually determines the fax’s quality. Call the sender and have them make sure the top
cover and scanning glass of their fax machine are clean.
❚ Cannot receive using ECM (Error Correction Mode).
The other party’s fax machine may not support ECM.
• If the other party’s fax machine does not support ECM, the document will be received in the normal mode
without error checking.
ECM may be disabled.
• Make sure ECM is on. (→ p. 9-6)
❚ Errors occur frequently while receiving.
The telephone lines may be in poor condition, or you may have a bad connection.
• Slow down the reception speed. (→ p. 9-4)
The sending fax machine may not be functioning properly.
• Call the sender and ask them to check that their fax machine is functioning properly.
8-4
08 FAX_Chp8.qxd
6/17/04 2:11 PM
Page 8-5
Telephone Problems
❚ You cannot dial.
The telephone line may not be connected properly.
• Make sure that all line connections are secure. (→ p. 1-3)
The machine may not be set for the type of telephone line in use (pulse/tone).
• Make sure that the machine is set for the correct telephone line type. (→ p. 2-6)
❚ The telephone disconnects while you are talking.
The telephone line may not be plugged in securely.
• Check that the modular cord is connected securely to the jacks on the machine, the telephone jack on your wall
and the connecting jack on your telephone.
If a Power Outage Occurs
If power is suddenly lost due to an outage or if the machine is accidentally unplugged, a built-in battery retains
the user data settings and the speed dialing settings. Any sent or received documents stored in memory are
backed up for about two hours.
During a power outage, functions are limited as follows:
• You cannot send, receive, or copy documents.
• You can make or receive calls.
Troubleshooting
8
When power is restored to the machine, the machine will automatically print a list of documents that were stored
in memory at the time of the power outage.
12/03/2004 15:38 FAX 123 4567
CANON
001
************************************
MEMORY CLEAR REPORT
***
***
************************************
MEMORY FILES DELETED
TX/RX NO
NOTE
0023
MODE
,
SEQ. B CAST
0024
TRANSMIT
DESTINATION TEL/ID
[
01] Canon CANADA
[
05] Canon OPTICS
[A 32] Canon UK
PGS.
SET TIME
ST. TIME
3 12/03 14:23
1 12/03 14:28
• Make sure that LTR-size paper is loaded in the cassette. If a different paper size is loaded, the report
cannot be printed. Also, you cannot use the multi-purpose tray to print the report.
• If there is no paper in the cassette or no toner in the cartridge when power is restored, the MEMORY
CLEAR REPORT is not printed.
8-5
08 FAX_Chp8.qxd
6/17/04 12:48 PM
Page 8-6
If You Cannot Solve the Problem
If you have a problem with your machine that cannot be resolved by referring to the information in this chapter
or the Basic Guide, contact your service representative.
Canon’s support personnel are trained in the technical support of Canon’s products and should be able to help you
with your problem. For details on contacting your service representative, → Basic Guide.
8-6
09 FAX_Chp9.qxd
6/17/04 2:37 PM
Page 9-1
Chapter 9
Setting the Additional
Functions
Understanding the “Additional Functions”
The menus of the Additional Functions allow you to specify or register the various settings. Available menus
differ depending on the machine type. This section explains the procedure to access the menus, and the contents
of the menus only related to the fax functions.
• For details on the menus related to the common settings and copying functions, → Basic Guide.
• Before adjusting any settings, you may want to print the USER’S DATA LIST to check the current
settings. (→ p. 2-5)
Accessing the Additional Functions
1 Press Additional Functions to display
the menus.
4 Use 4 (–) or e (+) to select the sub menu
you want to change.
• The Additional Functions key blinks.
2 Press 4 (–) or e (+) to select the menu
you want to change.
ADDITIONAL FUNCTIONS
Ex: 3 . F A X S E T T I N G S
Ex:
FAX SETTINGS
2.REPORT SETTINGS
5 Press Set.
REPORT SETTINGS
1.TX REPORT
3 Press Set.
FAX SETTINGS
1.USER SETTINGS
NOTE
9
Setting the Additional Functions
NOTE
• For details on the submenus, → pp. 9-2 to
9-10.
• After selecting the item or value with
4 (–) or e (+), press Set to enter the
setting.
• If you press Stop/Reset before Set is
pressed, the item you have selected will not
be registered.
• Press Stop/Reset to exit from
ADDITIONAL FUNCTIONS.
• If you press Additional Functions, the
display returns to the previous screen.
9-1
09 FAX_Chp9.qxd
6/17/04 2:37 PM
Page 9-2
Menu Descriptions
COMMON SETTINGS
Name
DEFAULT SETTINGS
Selects which mode standby display appears on the LCD
display when the power cord is connected, or the AUTO
CLEAR function* activates.
COPY
The Copy mode is selected.
FAX
The Fax mode is selected.
SW AFTER AUTO CLR
Selects whether the machine switches to the mode you
set in DEFAULT SETTINGS after the AUTO CLEAR
function* activates.
DEFAULT MODE
The machine automatically switches to the mode you set
in DEFAULT SETTINGS after the AUTO CLEAR
function* activates.
CURRENT MODE
The machine does not automatically switch to the mode
you set in DEFAULT SETTINGS even after the AUTO
CLEAR function* activates.
VOLUME CONTROL
1.KEYPAD VOLUME
Adjusts the volume of the unit.
Adjusts the keypad volume.
ON
1 to 3 (1)
OFF
The volume is turned off.
2.ALARM VOLUME
Adjusts the alarm volume.
ON
1 to 3 (1)
OFF
The volume is turned off.
3.TX DONE TONE
ON
Adjusts the volume of the done tone sounded when
sending is complete.
1 to 3 (1)
ERROR ONLY
1 to 3 (1)
OFF
The volume is turned off.
4.RX DONE TONE
Adjusts the volume of the done tone sounded when
reception is complete.
ON
1 to 3 (1)
ERROR ONLY
1 to 3 (1)
OFF
The volume is turned off.
5.PRINTING END TONE
Adjusts the volume of the done tone sounded when
printing is complete.
ON
1 to 3 (1)
ERROR ONLY
1 to 3 (1)
OFF
The volume is turned off.
* (→ Basic Guide)
9-2
Description
(The factory default setting is in bold face.)
09 FAX_Chp9.qxd
6/17/04 2:37 PM
Page 9-3
Name
6.SCANNING END TONE
Description
Adjusts the volume of the done tone sounded when
scanning is complete.
ON
1 to 3 (1)
ERROR ONLY
1 to 3 (1)
OFF
The volume is turned off.
7.CALLING VOLUME
Adjusts the volume of the ring produced when the unit
detects a voice call.
1 to 3 (2)
8.LINE MONITOR VOL.
Adjusts the line monitor volume.
ON
1 to 3 (2)
OFF
The volume is turned off.
(The factory default setting is in bold face.)
• MP TRAY PAPERSIZE, CAS. PAPER SIZE, PRINT EXPOSURE, MP PAPERTYPE, HIGH
COPY MODE, TONER SAVER MODE, PRT FEED INTERVAL and DISPLAY LANGUAGE, →
Basic Guide.
COPY SETTINGS
For details, → Basic Guide.
9
Setting the Additional Functions
NOTE
9-3
09 FAX_Chp9.qxd
6/17/04 2:37 PM
Page 9-4
FAX SETTINGS
Name
USER SETTINGS
1.TEL LINE SETTINGS
Description
The basic operation settings in the Fax mode can be
specified.
Specify the telephone line settings.
1.USER TEL NO.
Your telephone and fax number can be registered.
(→ p. 2-4)
2.TEL LINE TYPE
Selects the telephone line type. (→ p. 2-6)
TOUCH TONE
The telephone line is set for touch-tone dialing.
ROTARY PULSE
The telephone line is set for rotary pulse dialing.
3.TX START SPEED
Sets the transmission speed for all documents you send.
33600bps/14400bps/9600bps/7200bps/4800bps/
2400bps
4.RX START SPEED
Sets the transmission speed for all documents you receive.
33600bps/14400bps/9600bps/7200bps/4800bps/
2400bps
2.UNIT NAME
You can register your name (or your company’s name).
(→ p. 2-5)
3.TX TERMINAL ID
Prints your ID (transmitting terminal ID) on each page
you send. (→ p. 2-3)
1.TTI POSITION
OUTSIDE IMAGE: Terminal ID is printed outside the
image border.
INSIDE IMAGE: Terminal ID is printed inside the
image border.
2.TEL NUMBER MARK
Selects the prefix for the identification header number.
FAX, TEL
4.DENSITY CONTROL
Sets the density of the documents.
LIGHT
Set for dark documents.
STANDARD
Set for the documents of normal density.
DARK
Set for light documents.
5.PROG 1-TOUCH KEY
01 - 12
Programs a fax function into a One-Touch key. The
programmed fax function will be executed by directly
pressing the corresponding One-Touch key. You do not
need to press Function before pressing the One-Touch
key.
Select a One-Touch key (01 to 12) in which you want to
program the fax function.
USE
Uses the PROGRAM 1-TOUCH KEY function.
The following functions can be programmed:
1.REPORT;
2.DELAYED TX;
3.FAX MONITOR;
4.MEMORY REFERENCE;
5.BOOK SENDING.
DO NOT USE
Disables the PROGRAM 1-TOUCH KEY function.
(The factory default setting is in bold face.)
9-4
6/17/04 2:37 PM
Page 9-5
Name
6.OFFHOOK ALARM
Description
Enables/disables the offhook alarm that alerts you when
the handset is not in the handset cradle.
ON
After reception, the offhook alarm sounds when the
handset of extension telephone is left off the hook.
OFF
No offhook alarm.
REPORT SETTINGS
1.TX REPORT
Sets the report setting.
Enables/disables automatic printing of a transmission
report.
OUTPUT NO
No report is printed.
PRINT ERROR ONLY
Prints a report only when a transmission error occurs.
REPORT WITH TX IMAGE
If you select PRINT ERROR ONLY or OUTPUT YES,
enables/disables printing of the first page of the fax under
the report.
ON
Prints a first page only when a transmission error occurs.
OFF
The first page is not printed.
OUTPUT YES
2.RX REPORT
Prints a report every time you send a document.
Enables/disables automatic printing of a reception report.
OUTPUT NO
No report is printed.
PRINT ERROR ONLY
Prints a report only when a reception error occurs.
OUTPUT YES
Prints a report every time you receive a document.
3.ACTIVITY REPORT
Enables/disables automatic printing of an ACTIVITY
REPORT after every 20 transactions.
ON
Prints the ACTIVITY REPORT.
OFF
The ACTIVITY REPORT is not printed.
TX SETTINGS
Sets the transmission functions.
1.ECM TX
ECM (error correction mode) transmission is turned on
or off.
ON
All transmissions are conducted with ECM if the other
party’s fax supports ECM.
OFF
ECM is turned off.
2.PAUSE TIME
9
Setting the Additional Functions
09 FAX_Chp9.qxd
Sets the length of the pause you insert into a dialing
sequence.
1 to 15 SEC (2 SEC)
(The factory default setting is in bold face.)
9-5
09 FAX_Chp9.qxd
6/17/04 2:37 PM
Page 9-6
Name
3.AUTO REDIAL
Description
Sets whether to perform automatic redialing when the
other line is busy or no answer.
ON
Customizes the redial operation.
OFF
After the first attempt at dialing fails, redialing is not
attempted.
1.REDIAL TIMES
Sets the number of retries.
1 to 10 TIMES (2 TIMES)
2.REDIAL INTERVAL
Sets the period of time between redialings.
2 to 99 MIN. (2 MIN.)
3.TX ERROR RESEND
Redialing is attempted when a transmission error occurred.
ON
RESEND TX FROM: Sets the number of pages to be
sent when redialing is attempted.
ERROR & 1ST PAGE, ERROR PAGE, ALL PAGES
OFF
Redialing is not attempted when a transmission error has
occurred.
4.ERASE FAILED TX
Sets the ERASE FAILED TX function.
ON
The document is deleted from the memory if a
transmission error has occurred.
OFF
The document is not deleted from memory stored in the
machine even if a transmission error has occurred.
5.TIME OUT
Enables/disables automatic scanning of documents after
the fax number is entered using speed dialing.
ON
Scanning begins automatically in 5 or 10 seconds after
you enter the phone number.
OFF
Press Start to scan the document. Otherwise, the
machine will return to the standby mode after two
minutes while the AUTO CLEAR function activates.
RX SETTINGS
1.ECM RX
Sets the reception functions.
ECM (error correction mode) receiving is turned on or off.
ON
All receptions are conducted with ECM if the other
party’s fax supports ECM.
OFF
ECM is turned off.
2.FAX/TEL OPT.SET
When FaxTel has been set, the optional settings are
available.
1.RING START TIME
Sets the duration that the machine listens for a fax tone
before ringing.
0 to 30 SEC (8 SEC)
2.F/T RING TIME
Sets the length of time the machine rings to alert you of
an incoming call.
15 to 300 SEC (15 SEC)
3.F/T SWITCH ACTION
Selects the action taken after the F/T RING TIME
expires.
RECEIVE
The machine switches to the fax receive mode
automatically, and starts to receive the document.
DISCONNECT
The machine disconnects the call.
(The factory default setting is in bold face.)
9-6
6/17/04 2:37 PM
Page 9-7
Name
3.DRPD:SELECT FAX
Description
Selects a ring pattern when the machine receives faxes.
(→ p. 5-5)
NORMAL RING
The normal ring type of the telephone line.
DOUBLE RING
Two short rings at regular intervals.
SHORT-SHORT-LONG
Short-short-long rings at regular intervals.
SHORT-LONG-SHORT
Short-long-short rings at regular intervals.
OTHER RING TYPE
Patterns other than those described above.
4.INCOMING RING
When the machine is set to FaxOnly and Fax/Tel, set
whether the machine rings when it receives a call.
OFF
The machine does not ring when it receives a fax. (In energy
saver mode, the machine may ring one or two times.)
ON
The machine rings when it receives a fax if the handset
or a telephone is connected.
RING COUNT
5.MAN/AUTO SWITCH
Sets the number of incoming rings before the machine
answers.
1 to 99 TIMES (2 TIMES)
Sets the machine to switch to the document receive mode
after ringing for a specified length of time in the manual
receive mode.
OFF
The machine keeps ringing until someone answers the
call manually with the handset or a connected extension
telephone.
ON
F/T RING TIME: Sets the length of time that elapses
before the machine switches to the document receive mode.
5 to 99 SEC (15 SEC)
6.REMOTE RX
9
Setting the Additional Functions
09 FAX_Chp9.qxd
Receives from a remote telephone with preset setting.
Remote receiving is turned on.
ON
REMOTE RX ID
OFF
PRINTER SETTINGS
1.RX REDUCTION
You can dial a number code from the remote extension
telephone to start receiving a document.
A combination of two characters using 0 to 9, A, or #
(25) is possible.
Remote receiving is turned off.
Sets the print functions.
Receives images at a reduced size.
Turns on image reduction.
ON
1.RX REDUCTION
AUTO SELECTION: Automatically selects the reduction size.
FIXED REDUCTION: Reduction size is preset.
97%, 95%, 90%, 75%
2.SELECT REDUCE DIR
VERTICAL ONLY: Reduction is performed in the
vertical direction only.
HORIZ & VERTICAL: Reduction is performed in the
horizontal and vertical direction.
OFF
Image reduction is turned off.
(The factory default setting is in bold face.)
9-7
09 FAX_Chp9.qxd
6/17/04 2:37 PM
Page 9-8
Name
2.PRINT IN ORDER
Description
Sets the order of printing.
ON
Arranges received faxes in the order they were sent.
Printing does not start until all pages are received.
OFF
Arranges received faxes in reverse order.
3.TONER SUPPLY LOW
Allows you to set whether the machine stores the
document in memory when the toner supply is low or
ignores the warning and keeps printing until the
document is completely printed. This setting is
convenient if a new cartridge is not at hand.
KEEP PRINTING
The keep printing function is turned on. With this setting,
the machine does not store documents in memory if the
toner has run out. Reset to RX TO MEMORY after
replacing the cartridge with a new one.
RX TO MEMORY
The machine receives the document in memory.
SYSTEM SETTINGS
1.FAX DEFAULT
1.RESOLUTION
Sets the functions of FAX DEFAULT and LOCK
PHONE.
Sets the FAX DEFAULT functions.
Sets the fax resolution.
OFF
The setting of resolution set using FAX Resolution
remains even after the AUTO CLEAR function activates.
STANDARD
Suitable for most text only documents.
FINE
Suitable for documents containing fine print.
PHOTO
Suitable for documents that contain photographs.
SUPER FINE
Suitable for documents that contain fine print and images
(the resolution is four times that of STANDARD).
ULTRA FINE
Suitable for documents that contain fine print and images
(the resolution is eight times that of STANDARD).
2.BOOK TX SCAN SIZE
2.LOCK PHONE
When you select SHEET:
Before sending a fax, you must press Book Sending
and specify the scanning size of either LGL or LTR.
When you select LGL or LTR:
The document will be scanned in the size you selected,
either LGL or LTR.
SHEET, LGL, LTR
Sets the LOCK PHONE functions.
OFF
The telephone or fax transmission can be used normally.
ON
The telephone transmission cannot be used. The
telephone reception and fax transmission/reception can
be used.
(The factory default setting is in bold face.)
9-8
09 FAX_Chp9.qxd
6/17/04 2:37 PM
Page 9-9
ADD. REGISTRATION
Name
1-TOUCH SPD DIAL
1-TOUCH SPD DIAL
Description
Registers the information on One-Touch Speed Dialing.
(→ p. 3-1)
Selects a one-touch speed dialing key.
1.TEL NUMBER ENTRY
Registers the other party’s telephone number.
2.NAME
Registers the other party’s name.
3.OPTIONAL SETTING
The transmission time and settings including the
registration of passwords and subaddresses can be specified.
The optional settings can be set.
1.TX TIME SETTING
Five settings of the transmission times can be specified.
Setting procedure
1 Select the time setting number (1 to 5) by repeatedly
pressing Set, and press Set again.
2 Enter the hour and minute for the transmission time
using the numeric keys, then press Set. (Enter all four
digits of the hour and minute settings. For example,
enter “0905” for 9:05 am.)
• If you make a mistake when entering the time, press
Function and Clear, then enter the correct time.
Sending procedure
1 Place the document face down in the ADF or on the
platen glass.
2 Press the one-touch speed dialing key containing the
set transmission time. The document is scanned and
stored in memory.
The machine transmits the document at the transmission
time. If you have set more than two transmission time
settings, the document will be transmitted at the preset time
closest to the time that the document has been scanned.
Once you set the transmission time, the machine will
transmit the document at the same time on every day.
However, you cannot use the one-touch speed dialing key to
send the document as usual, and cannot send the document
any time unless you cancel the transmission time setting.
To cancel the setting, press Set in TX TIME SETTING to
select the preset time, and press Set again. Then, press
Function and Clear, and press Set. The preset time is
canceled.
If you have set more than two transmission time settings,
repeat this procedure to delete all the preset times. Or. when
OFF is selected in OPTIONAL SETTING, TX TIME
SETTING and TX TYPE are canceled. You do not need to
delete all of the preset times.
2.TX TYPE
OFF
9
Setting the Additional Functions
ON
REGULAR TX: For a normal transmission.
SUBADDRESS TX: For a subaddress transmission.
Registers passwords and subaddresses.
POLLING RX: For a polling reception. Registers
passwords and subaddresses.
No setting.
(The factory default setting is in bold face.)
9-9
09 FAX_Chp9.qxd
6/17/04 2:37 PM
Name
Page 9-10
Description
CODED SPD DIAL
Registers the information on Coded Speed Dialing.
(→ p. 3-3) To register them, perform the same procedure
as described in 1-TOUCH SPD DIAL.
GROUP DIAL
Registers the information on Group Dialing. (→ p. 3-6)
1.TEL NUMBER ENTRY
Registers the other party’s telephone numbers by
specifying the One-Touch Speed Dialing keys or Coded
Speed Dialing codes.
2.NAME
Registers the group’s name.
3.TX TIME SETTING
Sets the transmission time.
Five transmission times can be specified.
To set them, perform the same procedure as described in
1-TOUCH SPD DIAL.
TIMER SETTINGS
For details, → Basic Guide.
ADJUST/CLEAN
For details, → Basic Guide.
PRINT LISTS
Name
USER DATA
Prints out a list of items set or registered in the
Additional Functions.
SPEED DIAL LIST
Prints the list of the fax/telephone numbers registered in
the One-Touch Speed Dialing keys, Coded Speed Dialing
codes or for Group Dialing.
1.1-TOUCH LIST
Prints the 1-TOUCH LIST.
1.NO SORT
The printout of the list is not sorted.
2.SORT
The printout of the list is sorted.
2.CODED DIAL LIST
Prints the CODED DIAL LIST.
1.NO SORT
The printout of the list is not sorted.
2.SORT
The printout of the list is sorted.
3.1-TOUCH (DETAIL)
Prints the details of the 1-TOUCH LIST.
1.NO SORT
The printout of the list is not sorted.
2.SORT
The printout of the list is sorted.
4.CODED (DETAIL)
Prints the details of the CODED DIAL LIST.
1.NO SORT
The printout of the list is not sorted.
2.SORT
The printout of the list is sorted.
5.GROUP DIAL LIST
CANCEL REPORT
9-10
Description
Prints the list of the Group Dialing.
Cancels the printout of the report.
10 FAX_Appendix.qxd
6/17/04 12:49 PM
Page A-1
Appendix:
Specifications
■ Applicable Line
PSTN (Public Switched Telephone Network)
■ Compatibility
G3
■ Data Compressing System
MH, MR, MMR, JBIG
■ Modem Speed
33.6/31.2/28.8/26.4/24/21.6/19.2/16.8/14.4/12/
9.6/7.2/4.8/2.4 Kbps
Automatic fallback
■ Transmission Speed
Approximately 3 seconds/page* at 33.6 Kbps,
ECM-MMR, transmitting from memory
* Based on ITU-T No. 1 Chart, Standard mode.
■ Scanning Image Processing
• UHQ™ (Ultra High Quality) image
enhancement
■ Dialing
• Automatic dialing
One-touch speed dialing (12 destinations)
Coded speed dialing (100 destinations)
Group dialing (Max. 111 destinations)
Directory dialing (with Directory key)
• Regular dialing (with numeric keys)
• Automatic redialing
• Manual redialing (with Redial/Pause key)
■ Networking
•
•
•
•
•
•
•
•
Sequential broadcast (Max. 122 destinations)
Automatic reception
Automatic Fax/Tel switchover
Remote reception by telephone (Default ID: 25)
Non-ring reception
ECM deactivation
DRPD (Distinctive Ring Pattern Detection)
ACTIVITY REPORT (after every 20
transactions)
• Non-delivery report
• TTI (Transmit Terminal Identification)
■ Transmission/Reception Memory
Transmission: Maximum approximately 255
pages*
Reception: Maximum approximately 255 pages*
* Based on ITU-T No. 1 Chart, Standard mode.
■ Fax Scanning Speed
A
Appendix
Facsimile
Telephone
■ Connection
Telephone/answering machine (CNG Calling
Tone detecting signal)/data modem
Approximately 3.2 seconds/page*
* Based on Standard mode.
■ Fax Resolution
STANDARD: 203 pels/in. × 98 lines/in.
(8 pels/mm × 3.85 lines/mm)
FINE: 203 pels/in. × 196 lines/in.
(8 pels/mm × 7.7 lines/mm)
SUPER FINE: 203 pels/in. × 392 lines/in.
(8 pels/mm × 15.4 lines/mm)
ULTRA FINE: 406 pels/in. × 392 lines/in.
(16 pels/mm × 15.4 lines/mm)
A-1
10 FAX_Appendix.qxd
A-2
6/17/04 12:49 PM
Page A-2
11 FAX_Index.qxd
6/17/04 12:49 PM
Page I-1
Index
A
Accessing, menus ......................................................9-1
ACTIVITY REPORT
description ......................................................7-1, 7-2
printing...................................................................7-2
sample ....................................................................7-2
setting.....................................................................9-5
Additional Functions
accessing ................................................................9-1
key..........................................................................1-1
understanding.........................................................9-1
Alarm indicator..........................................................1-1
ALARM VOLUME setting.......................................9-2
AnsMode, description................................................5-1
Answering machine
connecting..............................................................1-4
AUTO REDIAL settings ...........................................9-6
Automatic redialing
canceling ................................................................4-8
description..............................................................4-8
B
Book Sending key .....................................................1-2
BOOK TX SCAN SIZE setting ................................9-8
Broadcasting, sequential............................................4-8
BUSY/NO SIGNAL..................................................8-2
C
CALLING VOLUME setting....................................9-3
CANCEL REPORT setting .....................................9-10
Canceling
automatic redialing ................................................4-8
manual redialing ....................................................4-7
printing lists .........................................................3-10
receiving.................................................................5-9
sending ...................................................................4-6
CHANGE DOCUMENT message ............................8-1
Clear key....................................................................1-2
Coded Dial key..........................................................1-2
CODED DIAL LIST
description..............................................................7-1
printing...................................................................3-8
sample...........................................................3-9, 3-10
CODED SPD DIAL setting.....................................9-10
Coded speed dialing
changing, deleting..................................................3-4
description..............................................................3-1
registering numbers for..........................................3-3
using.......................................................................4-3
Confirming
sending reservation ..............................................4-11
transmission status ...............................................4-11
Connecting
answering machine ................................................1-4
external device .......................................................1-4
telephone ........................................................1-3, 1-4
telephone line.........................................................1-3
Control panel
registering information via ....................................2-1
COPY key..................................................................1-1
CURRENT MODE setting ........................................9-2
Customer support.......................................................1-1
I
Index
4 (–) key ...................................................................1-1
e (+) key...................................................................1-1
+ key ..........................................................................1-2
1-TOUCH
SPD DIAL setting..................................................9-9
1-TOUCH LIST
description..............................................................7-1
printing...................................................................3-8
sample.............................................................3-8, 3-9
D
Date, entering ............................................................2-4
DEFAULT MODE setting .........................................9-2
DEFAULT SETTINGS..............................................9-2
Delayed sending ......................................................4-10
Delayed Transmission key ...............................1-2, 4-10
Delete key..................................................................1-2
I-1
11 FAX_Index.qxd
6/17/04 12:49 PM
Page I-2
Deleting document from memory ...........................4-14
DENSITY CONTROL settings .................................9-4
Device connections....................................................1-4
Dialing
coded speed ..............................3-1, 3-3, 3-4, 3-5, 4-3
group................................................3-1, 3-6, 3-7, 4-4
methods..................................................................4-2
one-touch speed ...............................3-1, 3-2, 3-3, 4-3
overseas number ....................................................6-1
regular ....................................................................4-2
speed (See Speed dialing)
switching temporarily to tone ................................6-2
through switchboard ..............................................6-1
with pauses.............................................................6-1
Directory key .............................................................1-2
Document
in memory............................................................4-12
printing document in memory .............................4-13
printing list of documents in memory .................4-12
DOCUMENT MEMORY LIST
description..............................................................7-1
printing.................................................................4-12
sample ..................................................................4-12
DOCUMENT TOO LONG message.........................8-1
DOUBLE RING setting ............................................9-7
DRPD
description ......................................................5-1, 5-2
setting options for ..................................................5-5
settings ...................................................................9-7
types of ring patterns .............................................5-5
E
ECM
RX setting ..............................................................9-6
TX setting ..............................................................9-5
Energy Saver key.......................................................1-1
ERASE FAILED TX setting .....................................9-6
External device, connecting ......................................1-4
F
F/T RING TIME setting ............................................9-6
F/T SWITCH ACTION setting ..................5-3, 5-4, 9-6
FAX DEFAULT settings............................................9-8
FAX key.....................................................................1-1
Fax Monitor key ........................................................1-2
FaxOnly
description ......................................................5-1, 5-2
I-2
device connections.................................................1-4
FAX Resolution key ..................................................1-2
FaxTel
description ......................................................5-1, 5-2
device connections.................................................1-4
setting options for ..................................................5-3
FAX/TEL OPT. SET settings ....................................9-6
FINE
description..............................................................4-1
setting .............................................................4-1, 9-8
Function key ..............................................................1-2
G
GROUP DIAL LIST
description..............................................................7-1
printing...................................................................3-8
sample ..................................................................3-10
Group dialing
creating groups.......................................................3-6
description..............................................................3-1
using.......................................................................4-4
H
HANG UP PHONE message.....................................8-1
I
INCOMING RING settings.......................................9-7
In Use/Memory indicator ..........................................1-1
INSIDE IMAGE setting ............................................9-4
J
Jack ............................................................................1-3
K
KEEP PRINTING setting..........................................9-8
KEYPAD VOLUME setting .....................................9-2
Keys (See also individual key names)
numeric ..................................................................1-1
one-touch speed dialing .........................................1-2
L
LCD
description..............................................................1-1
messages (See also individual message names)
messages, descriptions...........................................8-1
Letters, entering.........................................................2-2
LINE MONITOR VOL. setting ................................9-3
6/17/04 12:49 PM
Page I-3
List (See individual list names)
LIST setting
1-TOUCH ............................................................9-10
CODED DIAL .....................................................9-10
GROUP DIAL .....................................................9-10
SPEED DIAL.......................................................9-10
LOCK PHONE setting ..............................................9-8
M
MAN/AUTO SWITCH settings ................................9-7
Manual
description ......................................................5-1, 5-2
device connections.................................................1-4
receiving in ............................................................5-6
Manual redialing
canceling ................................................................4-7
MEM IN USE nn % message ...................................8-1
Memory
deleting document from.......................................4-14
documents in........................................................4-12
printing document in............................................4-13
printing list of documents in................................4-12
receiving when problem occurs.............................5-9
sending (See Memory sending)
MEMORY CLEAR REPORT
description..............................................................8-5
sample ....................................................................8-5
MEMORY FULL message ........................................8-1
Memory Reference key .............................................1-2
Memory sending
canceling ................................................................4-7
using, ADF.............................................................4-5
using, platen glass..................................................4-6
Menu descriptions .....................................................9-2
Messages, LCD (See also individual message names)
descriptions ............................................................8-1
Mistake, correcting ....................................................2-2
MULTI TX/RX REPORT
description..............................................................7-4
sample ....................................................................7-4
N
NAME setting
for 1-TOUCH SPD DIAL......................................9-9
for GROUP DIAL................................................9-10
NO TEL # message ...................................................8-1
NORMAL RING setting ...........................................9-7
Numbers, entering .....................................................2-2
Numeric keys.............................................................1-1
O
OFFHOOK ALARM setting .....................................9-5
One-touch speed dialing
changing, deleting..................................................3-2
description..............................................................3-1
keys ........................................................................1-2
registering numbers for..........................................3-1
using.......................................................................4-3
OPTIONAL SETTING
for 1-TOUCH SPD DIAL......................................9-9
OTHER RING TYPE setting ....................................9-7
OUTSIDE IMAGE setting ........................................9-4
Overseas number, dialing ..........................................6-1
P
PRINT IN ORDER ..........................................5-10, 9-8
PAUSE TIME setting ................................................9-5
Pauses, dialing with...................................................6-1
PHOTO
description..............................................................4-1
setting .............................................................4-1, 9-8
Polling ................................................................5-7, 5-8
Power
cut...........................................................................8-5
PRINTER SETTINGS...............................................9-7
Printing
1-TOUCH LIST.....................................................3-8
ACTIVITY REPORT ............................................7-2
CODED DIAL LIST..............................................3-9
document in memory ...........................................4-12
DOCUMENT MEMORY LIST...........................4-13
GROUP DIAL LIST ............................................3-10
list of documents in memory ...............................4-12
speed dialing lists...................................................3-8
USER’S DATA LIST.............................................2-5
PRINTING END TONE setting................................9-2
I
Index
11 FAX_Index.qxd
I-3
11 FAX_Index.qxd
6/17/04 12:49 PM
Page I-4
Problems
cannot solve ...........................................................8-6
faxing .....................................................................8-2
receiving.................................................................8-3
receiving in memory when ....................................5-9
sending ...................................................................8-2
telephone................................................................8-5
PROG 1-TOUCH KEY settings ................................9-4
Q
Quality, adjusting.......................................................4-1
R
Receive Mode
device connections.................................................1-4
settings ...................................................................5-2
Receive Mode key .....................................................1-2
RECEIVED IN MEMORY message.........................8-1
Receiving (See also individual receive modes)
canceling ................................................................5-9
in memory when problem occurs ..........................5-9
manually.................................................................5-6
methods ..........................................................5-1, 5-2
problems.................................................................8-3
while performing other tasks .................................5-9
Redial/Pause key .......................................................1-2
REDIAL INTERVAL setting.....................................9-6
REDIAL TIMES setting ............................................9-6
Redialing
automatic................................................................4-8
manual....................................................................4-7
Registering
coded speed dialing ...............................................3-3
one-touch speed dialing .........................................3-1
password and subaddress.............3-11, 3-12, 5-7, 5-8
sender information ......................................2-3 to 2-5
via operation panel.................................................2-1
Regular dialing ..........................................................4-2
REMOTE RX ID setting ...........................................9-7
REMOTE RX settings...............................................9-7
Report (See also individual report names)
settings ...................................................................9-5
Report key .................................................................1-2
REPORT SETTINGS ................................................9-5
REPORT WITH TX IMAGE setting ........................9-5
I-4
Resolution, setting scanning......................................4-1
RESOLUTION settings.............................................9-8
RING COUNT setting...............................................9-7
RING START TIME setting......................................9-6
ROTARY PULSE setting ...................................2-6, 9-4
RX (Reception)
report......................................................................7-1
SETTINGS.............................................................9-6
RX DONE TONE setting ..........................................9-2
RX REDUCTION settings ........................................9-7
RX REPORT
description ......................................................7-1, 7-4
sample ....................................................................7-4
settings ...................................................................9-5
RX START SPEED setting .......................................9-4
RX TO MEMORY setting.........................................9-8
S
Scanning
resolution, setting...................................................4-1
SCANNING END TONE setting..............................9-3
SELECT REDUCE DIR setting................................9-7
Sender information
description..............................................................2-3
printing list to check ..............................................2-5
registering.......................................................2-4, 2-5
Sending
canceling ................................................................4-6
memory ..................................................................4-5
methods..................................................................4-5
preparing ................................................................4-1
problems.................................................................8-2
sequential broadcasting ..................................4-8, 4-9
setting scanning resolution ....................................4-1
timer (See Delayed sending)
to more than one destination ..........................4-8, 4-9
using coded speed dialing......................................4-3
using group dialing ................................................4-4
using one-touch speed dialing ...............................4-3
Set key .......................................................................1-1
Setting
resolution ...............................................................4-1
Settings, list of.........................................................9-10
6/17/04 12:49 PM
Page I-5
SHORT-LONG-SHORT setting ................................9-7
SHORT-SHORT-LONG setting.................................9-7
Space key...................................................................1-2
Speed dialing
coded................................................3-3, 3-4, 3-5, 4-3
description..............................................................3-1
group dialing ...........................................3-6, 3-7, 4-4
lists ........................................................3-8, 3-9, 3-10
methods..................................................................3-1
one-touch.................................................3-1, 3-2, 3-3
STANDARD
description..............................................................4-1
setting .............................................................4-1, 9-8
Standby display, fax mode.........................................1-3
Start key.....................................................................1-1
Stop/Reset key ...........................................................1-1
SUPER FINE
description..............................................................4-1
setting .............................................................4-1, 9-8
Support
customer.................................................................1-1
SW AFTER AUTO CLR setting ...............................9-2
Symbols, entering ......................................................2-2
SYSTEM SETTINGS ...............................................9-8
T
TEL LINE SETTINGS..............................................9-4
TEL LINE TYPE settings .........................................9-4
TEL NUMBER
ENTRY setting for 1-TOUCH SPD DIAL............9-9
ENTRY setting for GROUP DIAL......................9-10
TEL NUMBER MARK setting .................................9-4
Telephone
connecting ......................................................1-3, 1-4
problems.................................................................8-5
Telephone line
connecting..............................................................1-3
setting type.............................................................2-6
Time, entering............................................................2-4
TIME OUT setting ....................................................9-6
Timer sending (See Delayed sending)
Tone (T) key .............................................................1-1
Tone dialing, switching to .........................................6-2
TONER SUPPLY LOW setting.................................9-8
TOUCH TONE setting.......................................2-6, 9-4
TTI POSITION setting ..............................................9-4
TX DONE TONE setting ..........................................9-2
TX ERROR RESEND setting ...................................9-6
TX REPORT
description ......................................................7-1, 7-3
sample ....................................................................7-3
settings ...................................................................9-5
TX START SPEED setting........................................9-4
TX TERMINAL ID setting .......................................9-4
TX TIME SETTING
for 1-TOUCH SPD DIAL......................................9-9
for GROUP DIAL................................................9-10
TX (Transmission) SETTINGS.................................9-5
TX TYPE settings......................................................9-9
TX/RX NO. nnnn message........................................8-1
Type conventions, this guide .......................................ix
U
ULTRA FINE
description..............................................................4-1
setting .............................................................4-1, 9-8
UNIT NAME setting .................................................9-4
USER
DATA setting........................................................9-10
SETTINGS.............................................................9-4
USER TEL NO. setting .............................................9-4
USER’S DATA LIST
description..............................................................7-1
printing...................................................................2-5
sample ....................................................................2-5
I
Index
11 FAX_Index.qxd
V
VOLUME CONTROL setting ..................................9-2
I-5