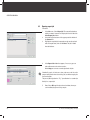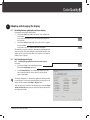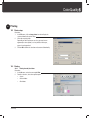
1
OPER AT ING M A NUA L
OPER ATING MANUAL
OPERATING MANUAL
Trademarks
X-Rite ColorQuality™, X-Rite InkFormulation™ and X-Rite ColorNet® are trademarks and registered
trademarks of X-Rite, Inc.
WINDOWS® is a registered trademark of the Microsoft Corporation.
© Copyright X-Rite 2010 • All rights reserved.
All rights reserved. Duplicating, processing or translating beyond the scope of the copyright are
expressly forbidden without previous written permission.
We reserve the right to make changes in this publication.
2
Symbols / Indications
Useful tips to a better understanding and an easier
handling of the software.
If there are further information to the specified topic
on another page in this manual, this symbol will show
you the respective chapter.
Contents
OPERATING MANUAL
Contents
1
2
3
4
5
General
1.1 Introduction
1.2 Registration
1.3 Software licensing contract
1.4 Contact address of X-Rite
1.5 Safety directives
1.6 Notes on using this handbook
9
9
10
10
11
11
ColorNet and CxF
2.1 ColorNet
2.2 CxF
15
15
Structure and function
3.1 General
3.2 Desktop
3.2.1 Menu bar
3.2.2 Control panel
3.3 White calibration of the measuring device
3.4 Basic sequence of a quality control job
3.5 `Quick compare‘ mode
3.6 Data administration
3.7 Settings
3.8 General operating information
3.8.4 `Edit‘ menu
19
19
19
20
23
23
28
28
29
29
32
Starting ColorQuality
4.1 Starting Color Quality
4.2 Perform a white calibration of the
measuring device
35
Defining a new quality control job
5.1 General
5.2 Opening a new quality control job
5.3 Assigning a job to a customer
39
39
39
Contents
5.4 Entering job designation / job information
5.5 Defining measuring conditions
5.6 Defining a new series
5.6.1 Measuring the reference colors
5.6.2 Loading reference colors from ColorNet
5.6.3 Entering reference colors
using the keyboard
5.6.4 Loading standards
5.6.5 Loading reference colors from a CxF file
5.6.6 Reference and tolerance calculation
5.6.7 Enter positionn
5.7 Saving the job data to SpectroEye
5.8 Quitting the job definition
6
7
35
8
40
41
41
43
43
44
45
46
47
48
48
48
Processing an existing quality control job
6.1 General
6.2 Opening a job
6.3 Opening repeat job
6.4 Modifying current job
51
51
52
53
Measuring and processing samples
7.1 General
7.2 Measuring samples
7.2.1 Assigning samples to an individual series
7.2.2 Carrying out measurements
7.2.3 Entering a sample name
7.3 Displaying and selecting samples
7.3.1 Selecting the sample group to be displayed
7.3.2 Selecting the active sample
7.4 Deleting samples
57
57
57
58
58
59
59
59
61
Adapting and changing the display
8.1 Switching between job display and series display 65
8.2 Selecting the type of display
65
3
OPERATING MANUAL
9
8.2.1 Selecting the type of display for
an active series display
8.2.2 Selecting the type of display for
an active job display
8.3 Selecting the series to be displayed
8.3.1 Selecting the series for
an active job display
8.3.2 Selecting the series for
an active series display
8.4 Changing the display configuration
8.4.1 Zoom
8.4.2 Arranging the windows
67
68
68
68
‚Quick compare‘ mode
71
10 Managing jobs
10.1 Deleting jobs
10.2 Exporting job data by e-mail
10.3 Exporting job data
10.4 Importing job data
10.5 Export job data to SpectroEye / import job data
from SpectroEye
65
66
67
67
77
78
78
79
80
11 Modifying standards and creating new standards
11.1 General
11.2 Opening database standards
11.3 Defining standards
11.4 Defining the settings for standards registration
11.5 Deleting standards
11.6 Exporting standards data by e-mail
11.7 Exporting standards data
11.8 Importing standards data
83
83
83
84
85
85
85
86
12 Modifying customers and entering new customers
12.1 General
12.2 Entering a customer
12.3 Deleting a customer
12.4 Exporting customer data by e-mail
89
89
90
90
4
12.5 Exporting customer data
12.6 Importing customer data
90
91
13 Creating and managing databases
13.1 General
13.2 Creating a new database
13.3 Linking an existing database
13.4 Disconnecting a database
13.5 Creating a common database in a network
13.6 Backing up your database
13.7 Restoring your database
95
95
97
97
98
98
99
14 Printing
14.1 Printer setup
14.2 Printing
14.2.2 Printing from the database
103
103
104
15 Settings to make
15.1 General settings
15.1.1 Default measuring conditions
(illumination, observer angle, filter)
15.1.2 Color Scale
15.1.3 White calibration request
15.1.4 Averaging
15.1.5 Language
15.1.6 User name
15.1.7 Measurement initiation
15.1.8 Assignment of individual samples to series
15.1.9 Metamerism
15.2 Settings program
15.2.1 Default tolerance
15.2.2 Density calculation
15.2.3 Dye strength calculation
15.3 Settings measuring device
15.3.1 Selecting the interface
15.3.2 Maximum transfer rate
107
107
107
108
108
108
108
109
109
109
110
110
111
112
113
113
114
Contents
OPERATING MANUAL
15.4
15.5
15.6
15.7
Settings displays
Settings check area
CxF Browser
Windows
15.7.1 Arranging windows
15.7.2 Creating a user-specific window
arrangement and saving it as
a preset setting
15.7.3 Applying user-specific preset settings
15.7.4 Organizing preset settings
114
115
115
117
117
117
119
120
16 Quitting ColorQuality
16.1 General
123
17 Application notes
17.1 Recommended device settings
17.2 Measuring patterns
17.3 Color distance formulas
127
127
127
18 Hotkeys
18.1 General
131
19 Installing ColorQuality
19.1 Hardware & software requirements
19.2 Installation on a personal computer
19.2.1 Preparing for the installation
19.2.2 Installation of ColorQuality
19.2.3 Connecting your PC to the
measuring device
19.2.4 Installation of the copy protection plug
136
136
20 Index
139
Contents
135
136
136
136
5
OPERATING MANUAL
6
Contents
OPERATING MANUAL
1
General
1.1 Introduction
9
1.2 Registration
9
1.3 Software licensing contract
10
1.4 Contact address of X-Rite
10
1.5 Safety directives
11
1.6 Notes on using this handbook
11
1 • General
7
OPERATING MANUAL
8
1 • General
OPERATING MANUAL
11
General
1.1
Introduction
X-Rite ColorQuality™ makes color quality verifiable and quality control measurable. Proof of your
quality standards is provided by glancing at the printout of our clearly-configured protocol.
By connecting to any X-Rite measuring device you open up unlimited control possibilities within
a closed quality circle. Colors, paper, specimens and final products remain under secure control
from receipt of your first or repeat job to delivery.
By networking with other software solutions – such as X-Rite InkFormulation™ and X-Rite
ColorNet™ - as well as by implementing ColorQuality in the Standard created by X-Rite for digital
exchange of color data, CxF (Color Exchange Format), you secure the interface of tomorrow
today.
ColorQuality is a multi-layer, flexible and network-supporting program. With it you can work
simply and quickly owing to its practice-oriented structure. Using ColorQuality requires a basic
knowledge of WINDOWS.
1.2
Registration
When you register online at www.xrite.com, you will receive:
• Information about software products of X-Rite™
• Announcements of new program versions
• Announcements concerning new update possibilities
• Support for problems with this software.
1 • General
9
OPERATING MANUAL
1.3
Software licensing contract
1. Licensing
1.1 X-Rite hereby licenses you to use the user, demonstration and operating software found
in the package, including all associated updates and associated documentation.
1.2 X-Rite retains all rights to the software.
1.3 You may not sell the software to a third party or otherwise pass it on unless the third party
obligates him/herself to abide by the conditions of this licensing agreement with X-Rite. This
also holds for backup copies.
1.4 You may not use this software for any purposes other than those specifically allowed
by this license.
2. License limitations
2.1 The know-how of this software is to be protected in that you are not allowed to decompile,
reverse engineer, disassemble or in any other way make it perceptible to persons.
2.2 You may not modify, adapt, translate sell or permit use of the software by others in
any way, either gratuitously or for payment, or prepare derivations of this software either
completely or partially.
2.3 You are not allowed to transfer the software to another computer by electronic means.
3. License termination
3.1 This license expires if you commit a breach against any provision of this contract.
3.2 You can terminate this license agreement at any time by destroying the software and
all copies of it.
1.4
Contact address of X-Rite
If you have questions or comments, please contact us at:
X-Rite, Incorporated
4300 44th Street, S.E.
Grand Rapids, Michigan 49512
U.S.A.
Telephone: 1 616 803 2100
Fax:
1 616 803 2705
E-mail:
[email protected]
Internet: http://www.xrite.com
10
1 • General
OPERATING MANUAL
If you experience problems with this program, please contact your X-Rite representative or us
directly at the above address.
Please inform us immediately if you discover any errors in our program. We will, of course,
eliminate them as soon as we can.
Suggestions for improvement
We welcome all comments and suggestions for improvement with regard to our programs. Please
detail all items as thoroughly as possible so that we can support you in the best possible way.
1.5
Safety directives
In order to avoid improper operation, only trained personnel should use ColorQuality.
Please observe all notes provided in chapter 19 “Installing ColorQuality“.
Also observe the safety regulations in the operating manual for the measuring device.
1.6
Notes on using this handbook
These operating instructions provide an introduction to ColorQuality and explain the various
functions and operational sequences.
The most important information is located in the following chapters:
Chapter 3
Terminology
Basic sequence of a quality control job.
Chapter 4 - 14 Detailed sequence of a quality control job, operation.
Chapter 15
Important settings, parameters
Chapter 19
Installation
1 • General
11
OPERATING MANUAL
12
1 • General
OPERATING MANUAL
2 ColorNet and CxF
2.1 ColorNet
15
2.2 CxF
15
2 • ColorNet and CxF
13
OPERATING MANUAL
14
2 • ColorNet and CxF
OPERATING MANUAL
22
ColorNet and CxF
2.1
ColorNet
X-Rite ColorNet™ completes the circle of complete color data processing in the graphics industry.
In the sense of Total Quality Management and the ISO quality standards, colorant data can be
checked and controlled all the way from order receipt and color specimen measurement, on up
to the adjustment of the printing press and job delivery. The programs grouped under ColorNet
software – usable on WINDOWS – allow direct access to a central colorant database. In this way
you can control and statistically analyze one and the same data using the ColorQuality Software
and in color formulation you can mix transparent and opaque colors using X-Rite InkFormulation
Software. With one single, reliable, exact measurement, you can now cover various steps in the
job sequence. ColorNet supports networks: Once-detected, original colors are stored on a server,
where they can be called up at anytime by different users. ColorNet guarantees decentralized
access to colorant data with various measuring devices..
2.2
CxF
CxF (Color Exchange Format) is an open standard created by X-Rite for color communication,
the principle aim of which is the secure exchange of color information in digital form. The CxFformat contains all important information, in particular the spectral values of the colors are
transferred.
Once colors have been acquired you can export them as CxF data from a X-Rite application
(e.g. from ColorQuality, from InkFormulation or from a X-Rite Color Management application)
and finally import them into another X-Rite application or – using the CxF Browser – connect
and display them.
You can therefore migrate a color directly from the CxF Browser as a reference color into
ColorQuality. Possible different filter conditions between CxF colors to be imported and the
measuring conditions currently installed in ColorQuality are made transparent through a
warning.
2 • ColorNet and CxF
15
OPERATING MANUAL
16
2 • ColorNet and CxF
OPERATING MANUAL
3 Structure and function
3.1 General
19
3.2 Desktop
3.2.1 Menu bar
3.2.2 Control panel
19
19
20
3.3 White calibration of the measuring device
23
3.4 Basic sequence of a quality control job
3.4.1 Check settings
3.4.2 Defining the job
3.4.3 Measuring samples
3.4.4 Displaying samples
3.4.5 Display functions
23
23
23
26
26
27
3.5 `Quick compare‘ mode
28
3.6 Data administration
28
3.7 Settings
29
3.8 General operating information
3.8.1 Standard buttons
3.8.2 Drag & Drop
3.8.3 E-Mail
3.8.4 `Edit‘ menu
29
30
31
31
32
3 • Structure and function
17
OPERATING MANUAL
18
3 • Structure and function
OPERATING MANUAL
3 Structure and function
3
3.1
General
ColorQuality can provide you with proof of perfect color control quality.
Upon opening a job you first assign a customer. You then define
the measuring conditions and stipulate reference colors and the
corresponding tolerances.
You measure reference colors and samples and then, in a simple way,
present, compare and evaluate on the screen using ColorQuality. Trend
data, CIELab-charts, spectra and statistics can be printed in the form of
graphics and tables.
The user desktop is clear. You are led through logical operations step
by step. Simple mouse clicks allow you to arbitrarily present, compare
and evaluate your data on the screen. You should become familiar with
the basic makeup of the ColorQuality program so that you can use it
efficiently. Thus please study this chapter attentively. Thus please study
this chapter attentively.
3.2
Desktop
The desktop of ColorQuality is based on a graphical user interface.
The main window appears after you have started ColorQuality appears
as follows:
3.2.1 Menu bar
IIndividual menu titles are displayed In the menu bar. Clicking on an item
brings up a list of additional functions.
3 • Structure and function
19
OPERATING MANUAL
You can execute the following functions in the different menus:
• File
• Edit
• Job
• Database
• Settings
• Window
• Help
Set up printer
Save/restore database
Change user
Change to InkFormulation
Quit
Copy reference
Copy current sample
Copy all
Open and process job
Display functions of the job window
Printing
Set up database
Process data relating to customers, jobs and
standards
System and program settings
Arrange windows
Call up subjects in the ColorQuality help functionInformation window with program version, serial
numbers and licenses
3.2.2 Control panel
The symbols bar provides a overview of all operating elements required
for measuring samples and displaying sample values.
The current settings are displayed in the status bar.
.
20
3 • Structure and function
OPERATING MANUAL
Description of toolbar elements
New job
Creation of a new job
Open job
Opening an existing jobs
Modify current job
Changing defined reference colors
or adding new reference colors
Measure sample
Calibrating samples
Copy sample from ColorNet
Loading saved colors as samples
Delete existing samples
The most recently measured or
loaded sample is deleted
Select displayed samples
Indicate filtered samples following
grouping criteria
Print job
Prints the selected viewt
3 • Structure and function
21
OPERATING MANUAL
SPM
Looks for and connects attached spectrophotometer
Change to InkFormulation
Loading InkFormulation or changing
between ColorQuality and InkFormulation
Quick compare
Possibility of quickly comparing sample
measurements with a reference color
Job display mode
One display for several series
Series display mode
Several displays for each series
Set display
For setting job or series display
Manage presets
C h a n g e t h e u s e r- s p e c i f i c w i n d o w
arrangement
Arrow keys for sample search / series
info
Searching or selecting sample / info about
selected series
Sample names / sample info
Entering sample names /info about selected
samples
Series name
Identification of active series
22
3 • Structure and function
OPERATING MANUAL
Sample number
Number of the selected sample, total number
of sample
Selection of samples displayed
Displays the selected filter or grouping
criteria
Measuring conditions
Measuring conditions of the job (type of
light, monitor, density standard, filter, white
reference)
Job / series display
Indicates which display mode is presently
selected: job or series
3.3
White calibration of the measuring device
The white calibration is the basis for exact measuring results. You have to regularly calibrate the
measuring device to the white reference to obtain the greatest precision.
Depending on the adjustments you have chosen, ColorQuality may request that you carry out a
white calibration in the course of your work with the measuring device ( refer to section 15.1
“General settings“).
Please also observe the instructions for using your measuring device.
3.4
Basic sequence of a quality control job
3.4.1 Check settings
Please ensure that the required settings (e.g. default measuring conditions) are properly selected
before you define a new quality control job. Measurements made with incorrectly-set parameters
can lead to incorrect results (
refer to section 3.7 “Settings“ and chapter 15 “Settings to
make“).
3.4.2 Defining the job
You have to define a new job or open an existing one before you can measure samples (
refer to chapter 5 „Defining a new quality control job“ and chapter 6 “Processing an existing
quality control job“).
3 • Structure and function
23
OPERATING MANUAL
A complete job definition consists of:
• a customer name
• a job designation
• one or more series (corresponding to the number of measuring fields to be checked) each with
a reference color and tolerance value.
a. Customer name
Since jobs are assigned to individual customers, you first have to enter in the database the
customer‘s name and, if required, additional customer data (
refer to chapter 12 “Modifying
customers and entering new customers“).
b. Job designation
The entry of a job designation is not a must. It is nevertheless a prerequisite for locating a
specific job again in the database. All jobs which do not have a job designation are stored in the
database as ‘nameless‘.
c. Measuring conditions
Once the job designation is entered, as the next step you can define the measuring conditions
applicable to this job. As default settings, the standard measuring conditions entered in the
menu under „Settings“ > „Program“ are displayed. Here, however, you can alter the measuring
conditions for the existing job corresponding to requirements.
d. Series
For each color of a print job to be monitored you must define a series. If a print job is to be monitored
with four colors, this quality control job then contains four series. All series of a quality control
job are stored in the database under a common job designation. This allows complete jobs to be
selected from the database very simply and quickly and then loaded for further processing.
A complete definition a series consists of:
• a reference color and
• a tolerance entry.
e. Reference color
The reference color is the target color. The samples measured later are compared with it. You
have to determine a reference color for each series of your quality control job. The reference
color can be defined in different ways (
refer to section 5.6 “Defining a new series“):
24
3 • Structure and function
OPERATING MANUAL
• by measuring target colors (e.g., from the OK bow)
• by loading standards or reference colors from ColorNet.
• by numerical entries via the keyboard (e.g., in form of L*a*b* or remission values)
f. Tolerance value
The tolerance value determines the maximum acceptable color distance between the reference
color and the samples of a series.
If you do not make any changes in the tolerances, ColorQuality automatically chooses the value
selected in the program setting (
refer to section 15.2 “Settings program“). Since ColorQuality
takes the tolerance you chose for following series, the simplest approach is to select the required
tolerance as the first step when defining the first series.
g. Closing the job definition
When you have defined all the series needed for your job and have defined the associated
tolerance values, ColorQuality automatically generates a new job in the database. You are then
ready to measure the samples of the individual series.
h. Modifying current job
During job processing, you have the possibility at any time of measuring additional reference
colors, deleting surplus reference colors or changing the reference colors, the tolerance value
and auxiliary information.
i. Saving the job
ColorQuality automatically saves all objects in the database, whether they be jobs, customers,
standards or samples. As a result, you can process a new job or quit ColorQuality at any time
without consciously saving the current job.
j. Open existing jobs
Existing jobs can be reopened anytime for further processing. With a job, ColorQuality stores
in the database not only all measuring values, but also the entire program configuration. Upon
re-opening a job, your screen again shows the exact configuration you had when you previously
quit the job.
k. Opening a repeat job
If you intend to carry out a quality control job identical to an already processed job, you have the
possibility of loading an existing job as a repeat job. ColorQuality copies, from that existing job,
all reference colors, tolerances and the entire program configuration in a repeat job, without,
3 • Structure and function
25
OPERATING MANUAL
however, copying the measured samples. The present job designation has ‚R_J‘ placed before
it to mark it as a repeat job. As soon as you have prepared a repeat job, you are in the position
of being able to immediately measure new samples, without having to concern yourself about
the job configuration.
3.4.3 Measuring samples
After a job has been newly defined or an existing job has been opened, samples can be measured.
After measuring, ColorQuality automatically assigns a sample as the last sample of the active
series and provides it with a sample number and a date/time stamp. The last sample measured
in each series thus receives the highest sample number and the most recent date.
a. Assigning the samples to the individual series
If the measuring fields to be monitored differ from one another, ColorQuality can automatically
undertake the assignment of the samples. Automatic assignment is the simplest and most
convenient type of assignment. In special cases you can, however, also select to make a manual
assignment (
refer to section 15.1 “General settings“).
b. Individual measurements or multiple measurements with average value calculation
You can choose between individual measurements and multiple measurements with average
value calculations for not only sample measurements, but also for reference colors and standards
(
refer to section 15.1 “General settings“).
c. Sample names and notices
Each measured sample is unambiguously characterized through its association with a series and
by a sample number. To better distinguish the samples from one another, each sample can also
be labeled with a sample name. Additional information can be entered via the keyboard.
3.4.4 Displaying samples
Numerical information in the display always refers to the active sample. This is symbolized on
the screen with large green, yellow or red cross. The sample number of the active sample is
shown on the status bar.
ColorQuality normally displays all samples of a job. For very large series this can result in
complex, excessively-detailed displays. To avoid this, ColorQuality allows you to limit the number
of displayed samples for large series in various different way (
refer to section 7.3 “Displaying
and selecting samples“).
26
3 • Structure and function
OPERATING MANUAL
3.4.5 Display functions
With ColorQuality you have the possibility of completely configuring two different display
modes:
• The job display: displays a specific type of display for all (or selected) series of a job.
• The series display: displays different types of display for the selected series.
You can quickly change between these two display modes. In this way you can present an
overview in the job display, or specific details about your measurements in the series display,
as you wish.
You can change the display in different ways, so that the required information is presented as
completely and as meaningfully as possible
(
refer to chapter 8 “Adapting and changing the display“).
a. Jobs display
A specific type of display is presented in the job display for all series of your quality control job.
Even on a monitor with a standard resolution, all the series of a job can be jointly displayed and
monitored on the same display page e.g. with the aid of a trend graphic. You can freely select
the display type to be common for all series.
b. Series display
For an individual series, you can stipulate that different display types be simultaneously presented
on a screen page in the series display. Depending on the resolution of your monitor and on the
type of parameters selected, there can be between two and six recommended displays. You thus
have the possibility to jointly display a series, e.g., a trend graphic, correction notes, statistics
and remission spectra. You can also quickly change from one series to another.
c. Configuring display changes
You can change the display in different ways so that the required information is presented as
completely and meaningfully as possible:
• Zoom for trend presentation
• Change the assignment via menu ‚window‘
• Select the displayed samples
3 • Structure and function
27
OPERATING MANUAL
3.5
`Quick compare‘ mode
ColorQuality allows you to compare sample measurements with a reference in Quick compare
mode, without having to open a job first.
Also in this mode, all displays are available, however it will be assumed from the user‘s intent
that the measurements are only going to be recorded temporarily and then discarded.
In case the user decides, once the series of measurements is completed, to keep the measurement
data, there is still an option to save the series of measurements as a job (
see chapter 9 „‘Quick
compare‘ mode“).
3.6
Data administration
ColorQuality can be simultaneously linked to a number of active databases. New jobs are still
stored in the same database as the selected customer.
A database can be opened at the same time by a number of ColorQuality programs running on
different computers or on the same computer. However, ColorQuality prohibits simultaneous
access to the same database object.
All data relating to jobs, customers, standards and samples is stored in the database. You can
process this data in a variety of ways:
In the ‘Customer‘ database you can:
• Modify customer data
• Forward customer data by e-mail
• Import and export customer data
• Delete customers.
In the ‘Job‘ database you can:
• Print job data
• Forward job data by e-mail
• Import and export job data
• Delete jobs.
In the ‘Standards‘ database you can:
• Define new standards
• Modify standard designations and additional information
28
3 • Structure and function
OPERATING MANUAL
• Print standard data
• Forward standards data by e-mail
• Import and export standards
• Delete standards
• Define settings for standard registration.
3.7
Settings
A broad spectrum of possibilities means that ColorQuality can be tailored to your job-related
requirements.
In the menu settings you determine the settings for the default measuring conditions (illuminant,
observer, filter, density standard), the color system, the types of light for metamerism, the standard
tolerances and the dye strength calculation (colorant, calculation method, substrate (
refer
to section 15.1 „General settings“ and 15.2 “Settings program“).
Ensure that you have correctly selected all settings before you define a new quality control job.
The default measuring conditions are permanently assigned to the job and cannot be changed
later.
Further, you can display information associated with your measuring device (
refer to section
15.3 “Settings measuring device“), you can select activable display types (
refer to section 15.4
“Settings displays“) and you can stipulate the extent of your check areas (
refer to section
15.5 “Settings check area“).
3.8
General operating information
While you work with ColorQuality, information windows will be displayed during various sequences. These will point out certain processes or possibilities. Please read these notes thoroughly and carefully before you either acknowledge by clicking on OK or Yes, or interrupt the
sequence with No or Cancel.
3 • Structure and function
29
OPERATING MANUAL
3.8.1 Standard buttons
Buttons are displayed for standard functions in different windows. These are not completely
explained in the operational sequences:
You can select all entries in a list in order
to process them (e.g., print them) and then
deselect them when you wish to select an
individual entry.
If you click on Info or i, another window
appears with information and notes about
the current object. Click OK to close the
window.
You have to tag data before you can
delete it. After you click on Delete, an
information window appears. Here you
must click on a Yes or OK button in order
to verify the delete. Click on No or Cancel
to cancel the delete action.
Search criteria window is opened.
You can search for database entries
(customers, jobs, standards) according
to date, designation and additional
descriptions.
You quit the window. Any entries or
changes you have made are not saved.
The entries made are saved and the
window is closed.
30
3 • Structure and function
OPERATING MANUAL
3.8.2 Drag & Drop
In the database dialog windows, one or more standards, customers or jobs can be dragged to an
Explorer window. The data is stored in ASCII format. This file then be imported into ColorQuality
at a later stage by clicking on Import.
Drag & Drop can be used to copy measuring values from one series to another.
3.8.3 E-Mail
For this function, a MAPI-compatible e-mail program, such as Microsoft Outlook, must be installed.
One or more standards, customers or jobs can be selected in the database windows and then
forwarded by e-mail by clicking on Send.
Procedure:
1.
In the database window, select the jobs, standards or customers
which are to be forwarded.
2.
In the database window, click on Send.
Your standard e-mail program is started and an ASCII file is
generated from the objects. This file is attached to the e-mail.
3.
Before transmitting, complete the message to include the
address and the required text.
The recipient can open the attached file in his own e-mail program.
ColorQuality is automatically started and the object can be imported.
3 • Structure and function
31
OPERATING MANUAL
3.8.4 `Edit‘ menu
The Edit menu incorporates the three commands Copy reference, Copy
current sample and Copy all.
If the active window contains a table, all the menu items can be accessed. The reference, only the current sample or the reference and
all samples are copied as text onto the clipboard. The values can be
pasted into another application, such as Microsoft Excel for example. It
is therefore a straightforward matter to transfer values from ColorQuality
into other applications.
If the active window is displaying a graphic, only the Copy all command is
accessible. This command is used to copy the graphic onto the clipboard,
from where it can be pasted into another application, such as Microsoft
Word. The size of the copied graphic is equivalent to the size of the
graphic in ColorQuality.
32
3 • Structure and function
OPERATING MANUAL
4 Starting ColorQuality
4.1 Starting ColorQuality
35
4.2 Perform a white calibration of the measuring device
35
4 • Starting ColorQuality
33
OPERATING MANUAL
34
4 • Starting ColorQuality
OPERATING MANUAL
4 Starting ColorQuality
4
4.1
Starting ColorQuality
The program must first be installed in accordance with the instructions given in chapter 19
“Installing ColorQuality“.
The measuring device need not be connected when ColorQuality is started up. For off-line
measurement use, you can even disconnect the measuring device when the program is running
and later reconnect it to the computer. ColorQuality automatically recognizes the interface you
selected.
Procedure:
1. Start ColorQuality.
If you have started ColorQuality without a measuring device connected, a Searching for SPM
window appears after the start screen. The program searches for all the interfaces with different
baud rates. Of course, you can also suspend the search.
After startup, the main window displays the last processed job.
When the program is started for the first time, the main window is blank.
4.2
Perform a white calibration of the measuring device
White calibration is the basis for exact measuring results (
refer to section 3.3 “White
calibration of the measuring device“). After you have selected the appropriate option
(
(refer to section 15.1 “General settings“), you will be requested to carry out a white calibration
at various points during “our work with ColorQuality.
With the X-Rite SpectroEye measuring device, the white calibration is always performed
automatically without a prompt.
If you have never calibrated your measuring device, or if it has been a long time since the last
calibration, then you should carry one out without fail. If you do not wish a white calibration, you
can skip the procedure by clicking No.
Procedure:
Refer to the operating manual for the measuring device and follow the instructions on the
screen.
4 • Starting ColorQuality
35
OPERATING MANUAL
36
4 • Starting ColorQuality
OPERATING MANUAL
5 Defining a new quality control job
5.1 General
39
5.2 Opening a new quality control job
39
5.3 Assigning a job to a custome
39
5.4 Entering job designation / job information
40
5.5 Defining measuring conditions
41
5.6 Defining a new series
5.6.1 Measuring the reference colors
5.6.2 Loading reference colors from ColorNet
5.6.3 Entering reference colors using the keyboard
5.6.4 Loading standards
5.6.5 Loading reference colors from a CxF file
5.6.6 Reference and tolerance calculation
5.6.7 Enter positionn
41
43
43
44
45
46
47
48
5.7 Saving the job data to SpectroEye
48
5.8 Quitting the job definition
48
5 • Defining a new quality control job
37
OPERATING MANUAL
38
5 • Defining a new quality control job
OPERATING MANUAL
55 Defining a new quality control job
5.1
General
A complete job definition consists of:
• a customer name
• a job designation
Before opening a new quality control job, pay careful attention to the
correct settings for the measuring conditions (
refer to section 15.1
“General settings“). These are permanently related to the job and cannot
be changed later.
5.2
Opening a new quality control job
Procedure:
1.
Connect up the measuring device.
2.
Click on the New Job symbol.
The Select a customer for the new job window appears.
If necessary, carry out a white calibration (
refer to section 4.2
“Perform a white calibration of the measuring device“).
5.3
Assigning a job to a custome
A list of all existing customers of the currently connected database is
displayed in this window.
Procedure for an existing customer:
1.
Click on the name of the customer to whom the new job should
be assigned.
2.
Click on Select. The Job: New window opens.
5 • Defining a new quality control job
39
OPERATING MANUAL
Procedure for new customers
1.
Click on New. The New Customer window appears.
2.
Click in the Designation field and use the keyboard to enter the
required designation.
3.
If required, click in the Additional description or Address fields
and enter your text.
4.
Click on OK after you have made your entry. The Select a
customer for the new job window reappears. The customer you
have opened appears in the list of customers.
5.
Now click on the customer name to be associated with the new
job.
6.
Click on Select. The Job: New window opens.
5.4
Entering job designation / job information
Procedure:
1.
In the field Job designation mark the previously-determined
job designation ‚nameless‘ and overwrite the entry using the
keyboard.
2.
In the field underneath this you can enter additional descriptions
for the job if necessary.
3.
Close the window by clicking on OK.
40
5 • Defining a new quality control job
OPERATING MANUAL
5.5
Defining measuring conditions
In the Measuring conditions window that now appears, you can set the
measuring conditions that apply to this job.
The measuring conditions that are displayed when this window appears
correspond to the general preset measuring conditions in the menu
under Settings > General > Default measuring condition, that is, they are
migrated from there (
see section 15.1 “General settings“).
If you work with measuring conditions that are always the same, it is
recommended that you define these from the beginning on in the abovementioned location. Consequently, they are suggested here as standard
for all new jobs.
Adjust the measuring conditions if required and click on OK.
You will then be taken to the next step for opening a job.
.
5.6
Defining a new series
A complete definition of a series consists of:
•
a reference color and
•·
a tolerance value.
The selected measuring conditions are displayed in the title line of the
Job: New window. Check this again here before you continue with the
series definitions:
1.
In the Job: New window, click on New.
5 • Defining a new quality control job
41
OPERATING MANUAL
2.
The New Series window opens
The dimmed Calculate reference and Calculate tolerance buttons are
not activated until the samples have been measured (
see section
5.6.6 “Reference and tolerance calculation“)
An additional Position button is then displayed if a X-Rite SpectroScan is
connected. In this case, you will be asked for the position of the measuring
field (
refer to section 5.6.7 “Enter position“)
3.
4.
5.
Click on the Tolerance field. This opens the tolerance range list.
Select the required tolerance range.
Also refer to section
15.2 “Settings program“.
Enter the maximum acceptable color distance in the fields beneath the color coordinates.
You can install a standard default for the tolerance range (e.g. preferred
dE-formula) and maximum acceptable color spacing in the menu under
Settings > Program > Default tolerance. This setting is taken as the
default for new series.
6.
7.
Define the reference color (
refer to following section and
section 3.4.2 “Defining the job“).
Click on OK in order to return to the Job: New window.
This series is now defined and is entered in the Series list of the Job:
New window. There you will also find the L*a*b* values of the measured
reference color and the tolerance value.
In order, for example, to define three additional series with the series
names of Magenta, Yellow and Black for four-color printing, repeat the
procedure described above with the corresponding reference colors.
To define paper white, click on Substrate and, in the displayed Substrate
window, define the paper white.
42
5 • Defining a new quality control job
OPERATING MANUAL
This is only necessary and significant if you want to display paper-based
values such as Density or Color intensity (
see also section 15.2
“Settings program“).
In order to change the substrate to calculate density and color intensity,
in the menu under Settings > Program the white reference must be set
to Substrate (
see section 15.2.2 “Density calculation“).
Furthermore, it is extremely important to remember here that a substrate
measurement has no influence whatever on colorimetric values, except
when the white reference is set to Substrate, as these values always
relate to absolute white.
5.6.1 Measuring the reference colors
Only measure the reference colors directly in the New series window
if you wish to use them singly for a quality control job. Reference colors
that you wish to use for several jobs should be entered in the database
as standards and loaded from there (
refer to section 5.6.2 “Loading
reference colors from ColorNet“).
Procedure:
1.
Place your measuring device on the pattern to be measured
which has the required target color.
2.
In the New series window, click on Measure. The measurement
is started.
By measuring the relevant reference color, ColorQuality gives the
generated series a designation derived from the hue of the reference
color (e.g., ‚cyan‘). You can expand this or overwrite it and enter further
information in an additional field.
5.6.2 Loading reference colors from ColorNet
Using ColorNet you can copy measuring values from arbitrary ColorNet
applications (InkFormulation, ColorQuality, X-Rite measuring devices) to
use as reference colors for a new series.
5 • Defining a new quality control job
43
OPERATING MANUAL
Procedure:
1.
Click in the Job: New or New series windows on ColorNet.
2.
In the left area of the ColorNet window, click on the required
directory.
If there are sub-directories under X-Rite ColorNet, open these by double
clicking. A list of the standard or reference colors appears in the center
of the window.
If you click on a standard or on a reference, the corresponding
measurement values will appear in the middle part of the window.
General note on navigating within ColorNet: If you lose your way in
ColorNet or have lost track of where you already are, then you should
double-click on the top entry “X-Rite ColorNet“. This will take you back
to the top level of the directory structure and the available ColorNet
applications are displayed underneath.
3.
4.
In the list, click on the standards or measuring values that you
wish to load.
Click on Select in order to load your selected reference colors
and to return to the Job: New window.
The Favorites button is displayed in the ColorNet window. The Favorites
window is opened by clicking on this button. Here you can add the current
path to the list or delete an entry. By clicking on Select, the selected entry
becomes the current path.
5.6.3 Entering reference colors using the keyboard
Procedure:
1.
In the New series window, click on Enter values. The Enter
values window appears.
44
5 • Defining a new quality control job
OPERATING MANUAL
2.
3.
4.
Select the required entry type in the color space list and enter
the required reference color value.
In order to enter your reference color as a numerical remission
spectrum, choose the Reflectance option in the color space
list and in the Value field, enter all associated values for the
wavelength between 380nm and 730nm. You can move through
the wavelength using the “>“ und “<“ keys..
Click on OK to return to the New series window.
5.6.4 Loading standards
Procedure:
1.
Click on Standards in the New Series window.
This takes you directly to the “Standards“ database, where
you can display the standards of one particular customer or
alternatively the standards of all customers.
5 • Defining a new quality control job
45
OPERATING MANUAL
If in the list field Customer you select the option All, then the standards of
all customers are displayed. To the right of job the name of the customer
to whom the job is assigned appears in brackets.
If you cannot see the customer in brackets, then expand the window by
dragging the sides outwards with the mouse, until they appear.
2.
3.
In the upper part of the window, under Customer, select the
customer whose standards you want to see from the list.
Highlight the required standard and click on Select to load the
selected standard and to return to the New Series window.
5.6.5 Loading reference colors from a CxF file
Procedure:
1.
In the New Series window, click on From CxF.
In the Open window, browse to find the memory location of the
CxF file for connection.
2.
3.
Highlight the CxF file and click on Open. This will open the
Reference selection window, in which the available colors are
listed.
Highlight the required colors and click on Select to load the
selected reference color and to return to the New Series
window.
CxF files can come from various sources, e.g. from X-Rite InkFormulation
or from X-Rite Color Management applications, but also from ColorQuality
itself.
Otherwise, colors contained in CxF files may display deviations in
measuring conditions. In this case, a corresponding warning is issued
during the import process.
46
5 • Defining a new quality control job
OPERATING MANUAL
Caution: Be aware that color variations may result in particular from
varying filter conditions! For this reason, you must be meticulously
precise in ensuring that the colors to be imported have filter conditions
corresponding with the job.
5.6.6 Reference and tolerance calculation
When you have measured samples, you can automatically calculate the
reference and the tolerance of the series with the aid of the measuring
values.
Begin by measuring all the samples with the deviations which are
acceptable to your customer. Then calculate the reference and the
optimal tolerance.
Procedure:
1.
Define a new series and measure the samples
(
refer to section 5.6 “Defining a new series“).
2.
Click in the main window on the Modify current job symbol.
3.
In the Modify current job menu, click on the series from which
you wish to calculate the reference or the tolerance..
4.
5.
Click on Modify. The Modify series window appears.
Click on Calculate reference or Calculate tolerance.
The Calculate reference function determines the spectra of all
the samples. This gives the new reference.
The current reference is used as the basis for the Calculate
tolerance function. The tolerance is set in such a way that all
the measured samples fall within the tolerance. The calculated
tolerances are dependent on the settings selected for the range
of tolerances (
refer to section 15.2.1 “Default tolerance“).
You can use these two functions independently of one another.
5 • Defining a new quality control job
47
OPERATING MANUAL
5.6.7 Enter positionn
IIf a X-Rite SpectroScan is connected, ColorQuality saves an X/Y option
to each series.
In this case, the Position button is displayed in the New series or Modify
series window. When you define a new series (
refer to section 5.6
“Defining a new series“), you will be asked to specify the position of
the measuring field. Use the buttons on the SpectroScan to move to the
measuring field.
The position of the measuring field can be redefined at any time in the
Modify series window.
If a measurement is initiated in the main window or on the X-Rite
Spectrolino, all the measuring fields are accessed in sequence and
measured. It is important to ensure that the bow is in exactly the same
location as when the position was defined.
5.7
Saving the job data to SpectroEye
You can export entire jobs from ColorQuality to X-Rite SpectroEye and
then re-import them from there (
refer to section 10.5 “Export job
data to SpectroEye / import job data from SpectroEye“.
5.8
Quitting the job definition
In the Job: New window, click on OK when you have defined all the series
and associated tolerance values required for your job. ColorQuality then
generates a new job in the database. You are now ready to measure the
samples of the individual series.
48
5 • Defining a new quality control job
OPERATING MANUAL
6 Processing an existing quality control job
6.1 General
51
6.2 Opening a job
51
6.3 Opening repeat job
52
6.4 Modifying current job
53
6 • Process an existing quality control job
49
OPERATING MANUAL
50
6 • Process an existing quality control job
OPERATING MANUAL
6 Processing an existing quality control job
6
6.1
General
You can open an existing quality control job, display data and evaluate
without having a measuring device connected. However, you must
connect the measuring device and click on Search in the Settings SPM
menu before you make changes to the current job or commence sample
measurements.
6.2
Opening a job
Procedure:
1.
Click in the main window on the Open job symbol.
The Open job window will appear.
2.
Select the required customer in the upper part of the window
from the Customer list.
In the Customer list field, alongside the customers there is also the
option All. If you select this option then the jobs of all customers are
displayed.
Also, in this case, to the right of job the customer to whom the particular
job belongs is shown in brackets.
If you cannot see this customer, then enlarge the window by dragging the
sides of the window area outwards with the mouse until they appear.
3.
Highlight the required job and click on Select. The job is loaded
from the database.
General user notice: Any time that an object has to be highlighted and then
selected using Select, the same action can alternatively be performed in
one single step, by double clicking on the object in question.
6 • Process an existing quality control job
51
OPERATING MANUAL
6.3
Opening repeat job
Procedure:
1.
In the Job menu, click on Repeat job. The name of the database
and the customers it contains are displayed in the left side of the
Select Repeat job window.
2.
Select the required customer in the upper part of the window in
the Customer list.
3.
Highlight the required job, for example one that must be printed
with unchanged colors, and click on Select. The job is loaded
from the database.
4.
In the Repeat Job window that appears, if necessary, you can
make adjustments to the reference colors..
Under Setup you can enter a new designation for the job.
ColorQuality copies all reference colors, tolerances and the entire
program configuration from that existing job, but without copying the
measured samples.
The present job designation has “R_J“ placed before it as standard, to
identify it as a repeat job.
5.
52
Now click on OK to go directly to the main window, where you
can immediately begin measuring samples.
6 • Process an existing quality control job
OPERATING MANUAL
6.4
Modifying current job
If you wish to modify a current job, open it (
refer to section 6.2
“Opening a job“). Then you can make the changes you require:
Procedure:
1.
Click in the main window on the Modify current job symbol.
The Modify current job window appears.
2.
Make the required entries in the Modify current job window.
Proceed exactly as for defining a new job (
refer to section 5.4
“Entering job designation / job information“ and 5.6 “Defining a
new series“).
For each series, the name, color values of the target color corresponding
to the selected color system, the selected tolerance formula and the
tolerance values are displayed on the Series field.
3.
Click on OK. You are returned to the job window.
6 • Process an existing quality control job
53
OPERATING MANUAL
54
6 • Process an existing quality control job
OPERATING MANUAL
7 Measuring and processing samples
7.1 General
57
7.2 Measuring samples
7.2.1 Assigning samples to an individual series
7.2.2 Carrying out measurements
7.2.3 Entering a sample name
57
57
58
58
7.3 Displaying and selecting samples
7.3.1 Selecting the sample group to be displayed
7.3.2 Selecting the active sample
59
59
60
7.4 Deleting samples
61
7 • Measuring and process samples
55
OPERATING MANUAL
56
7 • Measuring and process samples
OPERATING MANUAL
7 Measuring and processing samples
7
7.1
General
If you define a new quality control job (
refer to chapter 5 “Defining
a new quality control job“) or open an existing job (
refer to section
6.2 “Opening a job“) the job window is displayed. You are then ready to
measure samples.
In the ‚job‘ display mode, the window of an opened job typically appears
as follows for the display of various series:
Deviations can be immediately recognized with this type of display.
Because of the tolerance entered, you can immediately see whether
the sample is ‘Pass‘ or ‚Fail‘ or whether the process is entering a critical
phase (‘Check‘).
7.2
Measuring samples
7.2.1 Assigning samples to an individual series
If you select Automatic assignment (
refer to section 15.1 “General
settings“), the samples then measured are automatically assigned to the
series with the smallest color distance.
If, for some reason, you select Manual assignment, (
refer to section
15.1 “General settings“), the samples then measured are automatically
assigned to the active series. Therefore you must begin by selecting the
required series before you can measure a sample (
refer to step 1 in
section 7.3.2 “Selecting the active sample“).
7 • Measuring and process samples
57
OPERATING MANUAL
7.2.2 Carrying out measurements
You can carry out single measurements or multiple measurements
using average value calculations (
refer to section 15.1 “General
settings“).
Procedure:
1.
Place the measuring device on the measuring field to be measured.
2.
In the main window click on the Measure samples symbol.
The measurement is carried out.
If you have selected multiple measurements, the Averaging window
opens. Click there on Measure so that the measurement is started. Repeat
this sequence until the set value of the measurements for the average
value calculation has been reached. You then automatically return to the
job window where the measuring value is displayed.
If you wish to quit the average value calculations before the set number
of measurements has been reached, click on OK. In this case you will
also return to the job window.
7.2.3 Entering a sample name
During the measurement, the current date and time is automatically
displayed in the Sample name field. You can extend or overwrite this
information at any time.
Procedure:
1.
Click in the Sample name field.
2.
Enter the name of the active sample using the keyboard.
If you wish to enter or change the name of a sample measured earlier,
you must first make it active (
refer to section 7.3.2 “Selecting the
active sample“).
58
7 • Measuring and process samples
OPERATING MANUAL
These sample designations are listed in table form in the Name
column.
7.3
Displaying and selecting samples
7.3.1 Selecting the sample group to be displayed
Procedure:
1.
In the main window click on the Select displayed samples
symbol to open the window for choosing a sample group.
2.
3.
Select the required option.
Click on OK. The selected option is displayed in the status bar
leaving only the selection samples on display.
7 • Measuring and process samples
59
OPERATING MANUAL
7.3.2 Selecting the active sample
The number of the active sample is displayed in the symbols bar in the
Sample number field. ColorQuality automatically makes the last sample
measured the active sample.
Procedure to activate another sample:
1.
Select the required series using one of the following options (
also refer to Chapter 8 “Adapting and changing the display“):
• For an active job display: select the required series by
clicking on any location within an associated window.
You can activate one, several or all series. The series where you wish to
activate a sample must be active.
•
2.
For an active series display: Select the required series by
clicking on the corresponding tab.
Select the required sample using one of the following options:
• Navigate through the samples using the arrow keys until you
reach the required sample.
• In the Sample-No. Field, overwrite the sample number
displayed with the new number of the sample to be activated.
This activates it immediately.
• In a graph or table, click directly on the required sample.
• Use the keyboard to move through the samples:
By holding down the “Ctrl“ key and repeatedly pressing the
“→“ key, you can move through the samples in an ascending
direction.
By holding down the “Ctrl“ key and repeatedly pressing the
“←“ key, you can move through the samples in an ascending
direction.
By holding down the “Ctrl“ key and pressing the “End“ key
you can move to the last sample.
By holding down the “Ctrl“ key and pressing the “Home“ key
you can move to the first sample.
60
7 • Measuring and process samples
OPERATING MANUAL
7.4
Deleting samples
Procedure:
1.
Activate one of the series from which the sample is to be deleted.
2.
Select the samples to be deleted using one of the following
options:
• Activate an individual sample to be deleted and click on the
Delete symbol.
• If a particular field of samples is to be deleted together, then
select this option from the menu under Job > Samples >
Delete samples in range.
This opens a window in which you can define the field you
wish to delete.
•
•
If just the last sample in all series is deleted at any one time,
select this option from the menu under Job > Samples >
Delete last sample in all series.
Confirm delete in the window that appears.
7 • Measuring and process samples
61
OPERATING MANUAL
62
7 • Measuring and process samples
OPERATING MANUAL
8 Adapting and changing the display
8.1 Switching between job display and series display
65
8.2 Selecting the type of display
8.2.1 Selecting the type of display for
an active series display
8.2.2 Selecting the type of display for
an active job display
65
8.3 Selecting the series to be displayed
8.3.1 Selecting the series for an active job display
8.3.2 Selecting the series for an active series display
67
67
67
8.4 Changing the display configuration
8.4.1 Zoom
8.4.2 Arranging the windows
68
68
68
8 • Adapting and changing the display
65
66
63
OPERATING MANUAL
64
8 • Adapting and changing the display
OPERATING MANUAL
8 Adapting and changing the display
8
8.1
Switching between job display and series display
Procedure for changing the display mode:
1.
To select the Job display mode, click on the “Job“ symbol in the
main window.
In this mode, more than one series of a job can be displayed at
the same time.
2.
To select the Series display mode, click on the “Series“ symbol in
the main window.
In this mode, a series is shown in more than one display.
The mode that is currently selected is shown by the symbol button being
inset (pressed in). Also, when job display is activated, the heading “Job“
appears on the status bar, while when series display is activated the
heading “Series“ appears.
8.2
Selecting the type of display
8.2.1 Selecting the type of display for an active series display
Procedure:
1.
In the main window, click on the Displays button.
The window Job: Displays comes up.
2. In the Activated Displays list, activate those display types that
you wish to display on the screen. Do this by clicking on the
square control boxes.
The display mode which is selected here applies only to the job which
is currently open. To assign your preferred displays for general use, the
settings must be made on the Settings > Displays menu.
Jobs that have been saved are not affected, but by using the Apply
settings to ‘New job‘ button you can specify that your preferred views
be assigned to new jobs.
8 • Adapting and changing the display
65
OPERATING MANUAL
3.
Click on OK. The activated display types are displayed in the job
window for the selected series..
8.2.2 Selecting the type of display for an active job display
Procedure:
1.
Activate the required display type by clicking on one of the tabs
directly above the job window.
2.
If not all preselected display types are visible in the main
window, you can use the arrow keys
to bring the hidden
display types back into the window.
As an alternative to this, you can also select the required display
type from a list by using the list symbol .
If, when you are working, you cannot see a display type on the list opened
using the list symbol described above, then the reason is that this display
type has not been activated on the Settings > Displays menu.
The display type can be activated there at any time and will then be
available for selection on the list.
66
8 • Adapting and changing the display
OPERATING MANUAL
8.3
Selecting the series to be displayed
8.3.1 Selecting the series for an active job display
Procedure:
1.
In the main window, click on the Displays button.
The Job: Displays window appears.
2.
In the Activated series list, activate those series that you wish to
activate by clicking on the square control boxes. You can activate
or deactivate all series by clicking on Activate all or Deactivate
all.
3.
Click on OK. The selected display mode is shown in the job
window for all activated series.
If, when you are working with job display activated, no series is displayed
(blank main window), then the most likely reason is that, whether
intentionally or unintentionally, no series has been activated in the
window described above (all control boxes are deactivated).
8.3.2 Selecting the series for an active series display
Procedure:
1.
Select the required series by clicking on one of the tabs directly
above the job window.
2.
If not all series are visible in the main window, you can use the
arrow keys
to bring the hidden display types back into
the window.
As an alternative to this, you can also select the required display
type from a list by using the list symbol .
8 • Adapting and changing the display
67
OPERATING MANUAL
8.4
Changing the display configuration
8.4.1 Zoom
By using the Zoom button in the Trend display, you can change the
displayed measuring range step by step.
Procedure for changing the measuring range using Zoom:
1.
Select the window containing the required display by clicking
anywhere in the window.
2.
If you wish a smaller measuring range, click on the left button
. Alternatively, click on the right button
, if you wish
to display a larger measuring range. Each click reduces or
increases the measuring range by one step. Click as often as
necessary until you obtain the required size of measuring range.
8.4.2 Arranging the windows
The arrangement of the windows can be specified on the Windows menu.
You can choose from the following display types:
• Overlapping
• Side by side
• Horizontal split
• Vertical split
You also have the option of arranging the windows exactly as best meets
your needs. You can then give this view a name and save it as a preset
setting. You are not restricted to just one preset setting, but instead
more than one user-specific window arrangements can be saved, each
corresponding to specific requirements. The required display type can
be quickly and easily applied to the currently open job by selecting an
item from a list. In addition, a particular display type can be saved as a
general preset setting, which can then be applied, for example, to new
jobs. In this context, please also note the further explanations in
section 15.7 “Windows“.
Please do not confuse the options available on the Windows menu with
those on the Settings > Displays menu.
While the Settings > Displays menu defines which display types should
be shown, the Windows menu defines how those display types should
be shown.
68
8 • Adapting and changing the display
OPERATING MANUAL
9 Quick compare mode
9 • ‚Quick compare‘ mode
69
OPERATING MANUAL
70
9 • ‚Quick compare‘ mode
OPERATING MANUAL
9 Quick compare mode
9
In Quick compare mode, you can very quickly compare a given reference value with sample
measurements.
In the event that a job that is selectively assigned to a customer, does not initially have to be opened, the
user is immediately enabled for measuring.
This mode is therefore designed for situations in which colors need to be compared simply and quickly
and without complicated processes.
Since permanent logging of measuring data is not really the main purpose of this procedure, in this mode
it is assumed that a series of measurements are only to be temporarily recorded and then discarded
once the work in complete.
However, the option of transferring documented measurements to a job once it is completed is still
available.
Procedure:
1.
In the main window, click on the Quick compare symbol to the far
right of the window.
The Measuring conditions window appears.
2.
Check the measuring conditions, adjust the possible presettings
as required and click OK to confirm. The Reference window
appears.
9 • ‚Quick compare‘ mode
71
OPERATING MANUAL
3.
Measure the reference, either by measuring or by loading an
available saved reference using ColorNet. Next, the main window
is displayed taking into account the preset views.
Even in Quick compare mode, the full functional range of ColorQuality
is available. You can define which displays should appear in the menu
under Settings > Displays.
Also in this mode, you can switch between the display modes Job and
Series.
4.
Now begin recording the sample measurements. You can initiate
the measurements either using the Measure sample symbol
or, alternatively, directly with the measuring device.
In order to be able to initiate measurements directly using the measuring
device, you must activate the option “Initiate measurement also by SPM“
in the menu under Settings > General.
5.
Once the series of measurements has been completed, close the
Quick compare mode by clicking on the corresponding symbol
again.
The Save as job window appears.
72
9 • ‚Quick compare‘ mode
OPERATING MANUAL
6.
Decide whether you wish to retain or discard the measuring data.
If you wish to save the data, then you can do so by clicking on
Yes to convert the measurement series into a job. This, like any
other job, needs to be assigned to a customer.
If you decide that you do not want to retain the documented
measuring data, click on No to discard the measurement series.
9 • ‚Quick compare‘ mode
73
OPERATING MANUAL
74
9 • ‚Quick compare‘ mode
OPERATING MANUAL
10 Managing jobs
10.1 Deleting jobs
77
10.2 Exporting job data by e-mail
78
10.3 Exporting job data
78
10.4 Importing job data
79
10.5 Export job data to SpectroEye / import job data from
SpectroEye
80
10 • Managing jobs
75
OPERATING MANUAL
76
10 • Managing jobs
OPERATING MANUAL
10 Managing jobs
10
10.1 Deleting jobs
Procedure:
1.
In the Database menu, click on Jobs. The Database: Jobs
window is displayed.
2.
Select the customer whose job needs to be deleted in the upper
part of the Customer list field.
In the Customer list field, alongside the customers there is also the option
All. If you select this option, the jobs of all customers are displayed.
Moreover, in this case, to the right of job the name of the customer to
whom the job belongs is shown in brackets
If you cannot see these customer names, then expand the window by
dragging the sides outwards with the mouse until they appear.
3.
Highlight the jobs for deletion.
10 • Managing jobs
77
OPERATING MANUAL
You can perform multiple selections by holding down either the “Shift“
key or the “Ctrl“ key during highlighting with the mouse.
To highlight all jobs together, click on the Select / Deselect all button.
4.
Click on Delete. The jobs to be deleted appear in the Confirm
deleting window.
5.
If you wish to delete the jobs, click on OK..
10.2 Exporting job data by e-mail
In the Database: Jobs window, you can select one or more jobs and
then click on Send to export them by e-mail (
refer to section 3.8.3
“E-Mail“).
10.3 Exporting job data
Procedure:
1.
In the Database menu, click on Jobs.
2.
Select the customer from whom you wish to export a job. The job
list is displayed in the center of the window.t
3.
Click on the job that you wish to export.
You can select more than one job at a time. These will be written into the
same file when exported. In this case, in the Export to file window you
must enter a file name under which the data will be exported.
78
10 • Managing jobs
OPERATING MANUAL
You can use Drag & Drop to drag jobs directly into an Explorer window
(
also refer to section 3.8.2 “Drag & Drop“).
4.
5.
Click on Export. The Export to file window appears.
Choose the save location to which you wish to export the file.
You can also export jobs using formats from older ColorQuality versions
or in CxF format. To do this, select the corresponding option in the Save
as type field.
6.
Click on Save. The file is exported.
10.4 Importing job data
Procedure:
1.
In the Database menu, click on Jobs. The Database: Jobs
window is displayed.
2.
Select the customer to whom you wish to assign the file in the
upper part of the window in the Customer list field.
3.
Click on Import. The Import from file window appears.
4.
Select the location from which you wish to import the file.
5.
Highlight the file to be imported.
6.
Click on Open. The file is imported and its name appears in the
list of jobs.
10 • Managing jobs
79
OPERATING MANUAL
10.5 Export job data to SpectroEye / import job data from
SpectroEye
You can save complete jobs from ColorQuality on a connected X-Rite
SpectroEye spectrophotometer, and also import them back again from
there.
Procedure for exporting:
1.
In the Database menu, click on Jobs.
2.
In the Database: Jobs window, select the customer from whom
you wish to export a job. The list of jobs is displayed in the center
of the window.
3.
Highlight the job that you wish to export to SpectroEye.
4.
Click on the
button, then follow the instructions.
ColorQuality assigns unique names to the files to be exported. If a job is to
be overwritten in SpectroEye, enter the name of the job to be overwritten.
The overwrite must then be confirmed.
Procedure for importing:
1.
In the Database menu, click on Jobs.
2.
In the Database: Jobs window, select the name of the customer
to whom you wish to assign the file.
3.
Click on the
button, then follow the instructions.
80
10 • Managing jobs
OPERATING MANUAL
11 Modifying standards and creating new standards
11.1 General
83
11.2 Opening database standards
83
11.3 Defining standards
83
11.4 Defining the settings for standards registration
84
11.5 Deleting standards
85
11.6 Exporting standards data by e-mail
85
11.7 Exporting standards data
85
11.8 Importing standards data
86
11 • Modifying standards and creating new standards
81
OPERATING MANUAL
82
11 • Modifying standards and creating new standards
OPERATING MANUAL
11 Modifying standards and creating new standards
11
11.1 General
A standard is a target color with its entered tolerance. If you wish to
use a target color as a reference color in several jobs, then you should
define it in the database standards. A standard is always assigned to a
customer so that you can find it more easily.
11.2 Opening database standards
Procedure:
1.
In the Database menu, click on Standards. If necessary, carry
out a white calibration on your measuring device (
refer
to section 4.2 “Perform a white calibration of the measuring
device“). Then you are in the Database: Standards window.
In the Customer: list field, alongside the customer names there is the option
All. Selecting this option displays the standards of all customers.
Also, in this case to the right of job the customer to whom each standard
belongs is shown in brackets.
If you cannot see these customer names, then expand the window by
dragging the sides outwards with the mouse until they appear.
11.3 Defining standards
You can measure standards with the measuring device, load them
using ColorNet, load them using CxF or enter them as values using the
keyboard.
Procedure:
1.
In the Database: Standards window, select the customer to
whom you wish to assign the standard.
11 • Modifying standards and creating new standards
83
OPERATING MANUAL
When you have selected the options for measuring the standards (
refer to section 11.4 “Defining the settings for standards registration“),
you must also select the standard from which you wish to accept a
designation, an additional description or a tolerance.
2.
3.
4.
5.
Click on New. The New Standard window appears.
Define the tolerances and standard. Proceed as for the definition
of a new series (
refer to section 5.6 “Defining a new series“).
If necessary, change the automatically-selected designation and
enter a supplementary description.
Click on OK in order to return to the Database: Standards window.
11.4 Defining the settings for standards registration
Procedure:
1.
In the Database: Standards window, click on Options. The Option
for Standard Measurement window appears.
2.
Activate the required control boxes:
• Copy designation and increase the number: When you have
provided your standards with a permanent name and a run
number, this option automatically accepts the name for the
new standard and increments the run number by one.
• Copy additional description: ColorQuality accepts the onceonly entered notice of the selected standards. This saves you
having to repeat notice entries.
• Copy tolerance: This allows rapid entry of standards which
have the same tolerances. ColorQuality accepts the tolerance
of the selected standards. The standard tolerance is accepted
if this option is disabled (
refer to section 15.1 “General
settings“).
These options are only executed if you have selected an existing standard
before you define a new standard.
84
11 • Modifying standards and creating new standards
OPERATING MANUAL
11.5 Deleting standards
Procedure:
1.
In the Database: Standards window, select the customer
associated with the standard to be deleted. The list of standards
is displayed in the center of the window.
2.
Highlight the standard that you wish to delete.
3.
Click on Delete. The Confirm deleting window appears.
4.
Click on OK.
You can perform multiple selections by holding down either the “Shift“
key or the “Ctrl“ key while highlighting the standards with the mouse.
To highlight all standards together, click on the Select / Deselect all
button.
11.6 Exporting standards data by e-mail
In the Database: Standards window you select one or more standards
and then export them by e-mail by clicking on Send (
refer to section
3.8.3 “E-Mail“).
11.7 Exporting standards data
Procedure:
1.
In the Database menu, click on Standards.
2.
Select the customer from whom you wish to export the
standards. The list of standards is displayed in the center of the
window.
3.
Click on the standard that you wish to export.
You can also select several standards at the same time. They will be
written into the same file when exporting. In this case, in Export to file
you must enter a file name under which the data is to be exported.
11 • Modifying standards and creating new standards
85
OPERATING MANUAL
You can use Drag & Drop to drag standards direct to an Explorer window
(
also refer to section 3.8.2 “Drag & Drop“).
4.
5.
6.
Click on Export. The Export to file window appears.
Choose the location to which you want to export the file
Click on Save. The file is exported.
11.8 Importing standards data
Procedure:
1.
In the Database menu, click on Standards.
2.
Select the customer to whom the standard is to be assigned.
3.
Click on Import. The Import from file window appears.
4.
Choose the location from where you wish to import the file.
5.
Highlight the required file.
6.
Click on Open. This imports the file whose name appears in the
list of standards.
86
11 • Modifying standards and creating new standards
OPERATING MANUAL
12 Modifying customers and entering new customers
12.1 General
89
12.2 Entering a customer
89
12.3 Deleting a customer
90
12.4 Exporting customer data by e-mail
90
12.5 Exporting customer data
90
12.6 Importing customer data
91
12 • Modifying customers and entering new customers
87
OPERATING MANUAL
88
12 • Modifying customers and entering new customers
OPERATING MANUAL
12 Modifying customers and entering new customers
12
12.1 General
To enable you to arrange your data (jobs, standards, customers) in the
database, the jobs are sequenced according to customer. It is therefore
necessary to begin by entering the customer name and any additional
information in the database before you can assign the data to a job or
a standard.
12.2 Entering a customer
Procedure:
1.
In the Database menu, click on Customer. The Database:
Customer window appears.
2.
3.
4.
5.
Click on New. The New customer window appears.
Click in the Designation field and use the keyboard to enter the
customer designation.
In the Additional description and Address fields you can make
the corresponding entries if required.
Click on OK when you have completed your entries..
12 • Modifying customers and entering new customers
89
OPERATING MANUAL
12.3 Deleting a customer
If a customer no longer has any open jobs or any jobs that must be
processed, the customer can be deleted. Note that if you do this, all
associated jobs and standards will also be deleted.
Procedure:
1.
In the Database menu, click on Customer.
2.
Highlight the customers you wish to delete.
3.
Click on Delete. The Confirm deleting window appears.
4.
Click on OK.
If the client still has jobs and standards allocated, the warning appears
indicating that the customer cannot be deleted so long as there are still
jobs or standards allocated to him.
12.4 Exporting customer data by e-mail
In the Database: Customers window you can select one or more
customers and then export them by e-mail by clicking on Send (
refer
to section 3.8.3 “E-Mail“).
12.5 Exporting customer data
Procedure:
1.
In the Database menu, click on Customer.
2.
In the Database: Customers menu, select the customer that you
wish to export.
You can also select several customers at the same time. They will be
written into the same file when exporting. In this case, in Export to file, you
must to enter a file name under which the data should be exported.
You can use Drag & Drop to drag a customer directly into an Explorer
window (
also refer to section 3.8.2 “Drag & Drop“).
3.
4.
5.
90
Click on Export. The Export to file window appears.
Choose the location for the exported customer file.
Click on Save. The file is exported.
12 • Modifying customers and entering new customers
OPERATING MANUAL
12.6 Importing customer data
Procedure:
1.
In the Database menu, click on Customer.
2.
Click on Import. The Import from file window appears.
3.
Choose the location from where you want to import the file.
4.
Highlight the required file.
5.
Click on Open. The Confirm import window appears.
6.
Click on OK. The file is imported. The name appears in the list of
customers in the Database: Customers window.
12 • Modifying customers and entering new customers
91
OPERATING MANUAL
92
12 • Modifying customers and entering new customers
OPERATING MANUAL
13 Creating and managing databases
13.1 General
95
13.2 Creating a new database
95
13.3 Linking an existing database
97
13.4 Disconnecting a database
97
13.5 Creating a common database in a network
98
13.6 Backing up your database
98
13.7 Restoring your database
99
13 • Creating and managing databases
93
OPERATING MANUAL
94
13 • Creating and managing databases
OPERATING MANUAL
13 Creating and managing databases
13
13.1 General
A database can be opened at the same time by a number of ColorQuality
programs running on different computers or on the same computer.
Simultaneous access to the same database object is prohibited by
ColorQuality.
In a network, a common database can be created on any of the network
computers. However, for reasons of data security, it is preferable for the
common database to be created on a file server.
Network
Database
Network
Database
Local
Database
13.2 Creating a new database
When you first start ColorQuality after installing the program, the empty
Set up databases window is displayed. This requires the user to construct
an initial database. The database can be constructed locally on the
computer or at a user-defined location.
If required, you can construct further databases later that are fully
independent from one another.
Procedure:
1.
In the Database menu, click on Organize. The Set up databases
window is displayed.
13 • Creating and managing databases
95
OPERATING MANUAL
2.
Click on New. The Create new database window appears.
3.
Under Database path click on the
. button. The Save as
window appears.
In Windows Explorer, navigate to the location where the
new database is to be created and under File name enter a
designation for the database.
4.
5.
6.
96
Click on Save to create the database. It will appear in the Set up
databases window.
Highlight the database and click on Select to make it an active
database.
13 • Creating and managing databases
OPERATING MANUAL
13.3 Linking an existing database
To allow access to an existing database, it must be linked to
ColorQuality.
Procedure:
1.
In the Database menu, click on Organize. The Set up databases
window is displayed.
2.
In the Set up databases window, click on Connect.
3.
Navigate in Windows Explorer to find the location of the
database you wish to connect.
4.
Highlight the database and click on Open.
5.
In the Connect to database window, click on OK. This displays
the database name in the Set up databases window.
6.
Highlight the database and click on Select to make it an active
database.
13.4 Disconnecting a database
If a directory is no longer required, it can be closed. The database is not
deleted and it can be reactivated at any time by selecting Connect.
Procedure:
1.
In the Database menu, click on Organize. The Set up databases
window is displayed.
2.
Highlight the database you wish to remove.
3.
Click on Disconnect. This will delete the name of the database
from the list. However, the database remains intact in its location
and can be reached again if required.
In order to definitively delete a database, the database file must be deleted
from Explorer. But this should only occur once all workstations connected
to this database have been removed from the database.
13 • Creating and managing databases
97
OPERATING MANUAL
13.5 Creating a common database in a network
To create a database in the network, which can be accessed through
several workstations together, proceed as follows:
•
Create a new database by clicking New in the Set up databases
window (Menu Database > Organize) (
see section 13.2
“Creating a new database“).
•
In Explorer, browse the network location where the shared
database should be created. Alternatively, you can also enter a
network path, so long as the network resource really exists and
is accessible.
•
Enter a name for the new database, then click OK.
In order to access the network database from another computer, use the
Connect command in the Setup databases window (Menu Database >
Organize) to connect the database (
refer to section 13.3 “Linking an
existing database“). As the path for the database, enter the same path
that you specified when you created the database.
13.6 Backing up your database
X-Rite strongly recommends to its customers that they regularly save the
customer-supplied ColorQuality Data in their own interests and for their
own security, either on a server or an common storage medium.
Procedure:
1.
If you have a job open, close it by selecting the Close option in
the Job menu.
It is important to be very aware during the procedure described below
that you only save the data in the database that is currently connected. If
there are several databases, you must carry out the backup process for
each individual database. To do this, you must first highlight and select
the database in the menu under Database > Organize.
2.
98
In the File menu, click on Database.
13 • Creating and managing databases
OPERATING MANUAL
3.
4.
5.
In the selection field, click on Backup. The Export backup database window appears.
Navigate in Explorer to find the location to save the backup.
Give the backup file a name and click on Save.
Alternatively or additionally, you can also save a ColorQuality Database
in which the corresponding database files are copied to another location
using Explorer. This is a considerably quicker way of saving, especially
if there is a large volume of customer data.
If required a database saved in this way can easily be copied back to its
original location and reconnected if necessa (
see also section 13.3
“Linking an existing database“).
13.7 Restoring your database
Procedure:
1.
If a job is currently active, close it by clicking on Close in the Job
menu.
2.
In the File menu, click on Database.
It is important to be very aware during the procedure described below
that you only resave the data in the database that is currently connected.
If there are several databases, you must first highlight and select the
database in which the backup files are to be saved in the menu under
Database > Organize.
3.
4.
5.
In the selection field, select the Restore option. The Import
backup database window appears.
Navigate in Explorer to the location where the backup used to
restore is saved.
Highlight the backup file. It now appears in the File name field.
13 • Creating and managing databases
99
OPERATING MANUAL
6.
Click on Open. The Restore database window appears.
If you want to add the backup data for importing to the currently
connected database, select Append to DB.
If you want to completely replace the data in the currently connected
database with the backup data, select Overwrite DB. You will be informed
that all data stored in the connected database will be lost, i.e. it will be
overwritten by the backup data.
7.
100
Select the required option.
The Import backup database information window appears and
the database is updated or overwritten.
13 • Creating and managing databases
OPERATING MANUAL
14 Printing
14.1 Printer setup
103
14.2 Printing
14.2.2 Printing from the database
103
104
14 • Printing
101
OPERATING MANUAL
102
14 • Printing
OPERATING MANUAL
14 Printing
14
14.1 Printer setup
Procedure:
1.
In the File menu, click on Set up printer in order to display the
system window for the printer setup.
2.
Select the required printer.
Depending on which printer you are using, you may have an
opportunity to select options, such as portrait or landscape,
paper size and paper feed.
3.
Click on OK to confirm the selection and to return to ColorQuality.
14.2 Printing
14.2.1
Printing from the job window
Procedure:
1.
In the Job menu, select the menu option Print.
2.
From the sub-menu, select the required option:
• Screen
• Active window
• All windows
14 • Printing
103
OPERATING MANUAL
14.2.2 Printing from the database
You can print data and lists of customers, jobs and standards from the
database.
Procedure:
1.
In the Database menu, select the entry from which you wish to
print the data: Jobs, Standards or Customers.
2.
In the Database: Jobs window, select the customer whose job
you wish to print and highlight the jobs to be printed.
or
In the Database: Standards window, select the customer whose
standards you wish to print, and highlight the standards to be
printed.
or
In the Database: Customers window, select the customers whose
data you wish to print out.
3.
Click on Print. The selected data is printed.
104
14 • Printing
OPERATING MANUAL
15 Settings to make
15.1 General settings
15.1.1 Default measuring conditions
(illumination, observer angle, filter)
15.1.2 Color Scale
15.1.3 White calibration request
15.1.4 Averaging
15.1.5 Language
15.1.6 User name
15.1.7 Measurement initiation
15.1.8 Assignment of individual samples to series
15.1.9 Metamerism
107
15.2 Settings program
15.2.1 Default tolerance
15.2.2 Density calculation
15.2.3 Dye strength calculation
110
110
111
112
15.3 Settings measuring device
15.3.1 Selecting the interface
15.3.2 Maximum transfer rate
113
113
114
15.4 Settings displays
114
15.5 Settings check area
115
107
107
108
108
108
108
109
109
109
15.6 CxF Browser
115
15.7 Windows
15.7.1 Arranging windows
15.7.2 Creating a user-specific window arrangement
and saving it as a preset setting
15.7.3 Applying user-specific preset settings
15.7.4 Organizing preset settings
117
117
15 • Settings to make
117
119
120
105
OPERATING MANUAL
106
15 • Settings to make
OPERATING MANUAL
15 Settings to make
15
15.1 General settings
Procedure:
1.
In the Settings menu, click on General.
2.
Either select the options you require or make the required entries
(
refer to the following sections).
3.
After you have entered all your settings, click on OK.
15.1.1 Default measuring conditions (illumination, observer angle,
filter)
Here, you can define the required standard measuring conditions for your
jobs. When new jobs arrive, these conditions are suggested as default
settings, but can still be altered if required when opening jobs.
The following measuring settings can be installed here:
•
illumination,
•
observer angle,
•
density standard,
•
filter.
Be particularly careful and precise when exchanging color data that
the measuring conditions correspond. Only when measuring conditions
match can colorimetric values be compared. If measuring conditions
do not match (e.g. when importing color data) ColorQuality issues a
warning message.
15.1.2 Color Scale
You can choose among various color systems such as CIE-Lab and
CIE-LCH. Depending on the options you selected, e.g., LCH values may
be displayed instead of Lab values at various points in the program. The
color system can be repositioned if required, since only the display is
affected.
15 • Settings to make
107
OPERATING MANUAL
15.1.3 White calibration request
If you choose the Recommendation option, ColorQuality will
require you to perform a white calibration at various points in the
course of the program, depending on the measuring device used
(
refer to section 4.2 “Perform a white calibration of the measuring
device“).
If a X-Rite SpectroEye is connected, there will be no requirement to
perform white calibrations, since this measuring device calibrates
automatically.
If you select the never option, no requests will be made. In this case it is
up to you to ensure that the measuring device is correctly calibrated.
15.1.4 Averaging
Depending on the homogeneity of your patterns, you can perform single
or multiple measurements with average value calculations. In the average
calculations field, enter the number of measurements (if possible, a
number between 1 and 10) that you wish to carry out for the measurement
of a sample or a pattern.
If you have entered a number > 1, the measuring value averaging window
appears after the start of each measurement. The current measuring
value and the current average value are displayed in this window. If the
middle value appears sufficiently stable to you, you can finish measuring
at any point by clicking OK. The accepted measuring value corresponds
to the average of the performed measurements.
If you require a single measurement, enter 1.
15.1.5 Language
If required, you can select another language. Since it is not possible to
change the language while a program is running, the program must be
closed then restarted so that the selected language becomes active.
15.1.6 User name
The text (e.g., your company name) that you enter into this field is used
as the header when printing the job window.
108
15 • Settings to make
OPERATING MANUAL
15.1.7 Measurement initiation
If the Initiate measurement also by SPM control box is activated, the
measurement can be started either in ColorQuality or at the measuring
device. If deactivated, the measurement can be started in ColorQuality
only.
15.1.8 Assignment of individual samples to series
IIf the Sample is assigned to series with minimum color distance
checkbox is activated, then an automatic assignment of samples takes
place. If deactivated, then the assignment is carried out manually.
If the measuring fields to be monitored differ from one another
sufficiently strongly in color, ColorQuality can undertake the assignment
of the samples automatically. Following the measurements, ColorQuality
automatically activates the closest series in terms of color. The automatic
assignment is the simplest and most user-friendly type of assignment.
If the measuring fields to be monitored are very close to one another
in terms of color, then ColorQuality can no longer correctly assign the
relevant series under the circumstances. In this case, you must deactivate
the Sample is assigned to series with minimum color distance option and
manually select each series before measurement in the main window.
15.1.9 Metamerism
In fields M1 and M2, you can select two types of light that should be
used for metamerism observations in relation to the present job light. In
the metamerism display in the job window, the metamerism index is then
displayed against the corresponding type of light.
The types of light used are
D65
Daylight (6500 Kelvin)
D50
Daylight (5000 Kelvin)
A
Artificial (tungsten filament) light
F11 / TL 84
Department store light
15 • Settings to make
109
OPERATING MANUAL
15.2 Settings program
Procedure:
1.
In the Settings menu, click on Program.
2.
Select the required options or enter the required value (
to the following section).
3.
Click on OK when you have entered all the settings.
refer
15.2.1 Default tolerance
The tolerance formula selected here and the associated standard values
are recommended by ColorQuality when defining a new series or a new
standard.
The tolerance value determines the maximum acceptable color distance
between the reference color and the samples of a series.
CIELAB dLab tolerances:
Different tolerances can be entered for positive and negative dLab
values.
110
15 • Settings to make
OPERATING MANUAL
CIELAB dLCH elliptical tolerances:
Different tolerances can be entered for positive and negative dLCH
values. The tolerance is determined by an ellipsoid, which is bounded
by the dL-dC-dH cuboid.
LABmg:
An additional color space with tolerance definitions similar to CIELAB.
CMC l:c, dE*94, dE*2000, FMC II:
Special calculation formulas for color distance, based on the CIELAB
color space. For further information, please refer to the relevant technical
literature.
With the dE formulas CMC l:c dE, dE*94 and dE 2000, compared to the
formula CIELAB dE*, it is a question of “corrected“ formulas, i.e. of
formulas that through additional factors within the formula make the size
of the issued Delta E fit better with the visual perception of the eye.
For further explanations on this point and to help you decide which dE
formula to select in which case, please also read section 17.3 “Color
distance formulas“
Density dD
A standard tolerance can be entered for each density filter. The density
filter with the highest density (auto density) of the series is used for the
density tolerance calculation.
15.2.2 Density calculation
The density is calculated in relation to the substrate (paper) or to absolute
white.
If Substrate is selected as white reference, the density values are
calculated on the basis of the paper. To do this, the substrate must be
evaluated during the job definition process (
refer to section 5.6
“Defining a new series“ or section 6.4 “Modifying current job“).
15 • Settings to make
111
OPERATING MANUAL
This kind of paper measurement has no influence on colorimetric values,
as these are always based on absolute white. For this reason, the
substrate for colorimetric measurements must not be measured.
15.2.3 Dye strength calculation
ColorQuality gives the dye strength as the value of the function K/S, where
K signifies light absorption and S signifies light scatter.
The value K/S for the absolute dye strength serves as a measure of quality
and as an aid to color production and mixing. The calculated K/S value
is proportional to the color concentration.
The relative dye strength is indicated as the relationship of K/S value of
sample and reference color. The relative dye strength indicates whether
a color is available in sufficient concentration and the concentration in
which a color has to be produced in order to approximate as close as
possible to your target color.
Colorant
Depending on your application, select between
•
transparent ink and
•
opaque ink..
Offset colors are transparent in most cases. By mixing in opaque white,
opaque ink layers can be created, e.g., for packing and label printing.
Calculation method
Depending on your application, select the calculation method
•
at maximum K/S or
•
xyz-weighted K/S.
The dye strength can be calculated under various conditions. The
calculation at the absorption maximum is displayed for comparing the
dye strength of dyes with the same pigments. If the pigments differ
substantially, then select the method with the CIExyz-weighted dye
strength.
White base
You must take the substrate into account the substrate when calculating
the dye strength. ColorQuality therefore offers you two possibilities::
112
15 • Settings to make
OPERATING MANUAL
•
•
Substrate: The substrate which can be evaluated during job
definition is used for the calculation (
refer to section 5.6
“Defining a new series“ or section 6.4 “Modifying current job“).
Absolute white: ColorQuality uses an ideal white background
(100 % remission) for the calculation.
15.3 Settings measuring device
Using the Settings SPM menu, you can determine the measuring
device interface and select the option for the maximal transfer rate.
The following measuring device data is also displayed:
•
port
•
baud rate
•
device type
•
serial number
•
software version
15.3.1 Selecting the interface
ColorQuality is capable of automatically recognizing the interface you
selected. Normally you will not need to make use of this selection
sequence.
Procedure:
1.
In the Settings menu, click on SPM. The SpectroServer Settings
window appears.
2.
From the list under Device, select the device type that is
currently connected.
3.
Click anywhere in the Port field. An interface selection list
appears. Provided that you are absolutely certain, you can select
the corresponding COM interface directly. If you are not certain,
choose Automatic search. A search is made for the interface,
which appears in the Port field.
4.
By clicking on Calibration, you have the option of calibrating the
attached spectrophotometer.
5.
Depending on the attached measuring instrument, you can
conduct additional installations Setup if required.
6.
Click on Close to confirm your selection.
15 • Settings to make
113
OPERATING MANUAL
15.3.2 Maximum transfer rate
If you click on the Maximum speed control box, your measuring device
is set to a higher transfer rate. Do not select this option if your measuring
device is being used with a printer or other device which has a lower
transfer rate. Please refer to the operating instructions for the measuring
device.
15.4 Settings displays
IIn the Settings Displays menu, you can select the display types which
are activated in the job window and can therefore be displayed:
•
overview
•
delta-Trends
•
colorimetric diagrams
•
colorimetric tables
•
other tables
•
numeric spectra
•
graphic spectra.
If you activate the Accept settings for ‚New job‘ control box under
Availability, the selected display types will be accepted for all new jobs
and can be activated in the job window. You can, of course, change your
selection of display types for an existing job at any time
Procedure for selecting display types:
1.
In the Settings menu, click on Displays. The Settings: Displays
window appears.
2.
In the list, click on the required entry and activate the relevant
control box next to the selection list.
3.
Repeat this procedure for additional display types.
4.
If required, active the Accept settings for ‚New job‘ control box.
5.
Click on OK after you have made all your settings.
114
15 • Settings to make
OPERATING MANUAL
15.5 Settings check area
A hard blend between the pass region and the fail region is often
undesirable. By entering a factor between 0.50 and 1.00 you will be
permanently positioned in a check area between the pass and fail regions.
In this case, any samples with deviations from the reference of between
1.00 x tolerance and factor x tolerance are not classed as ‘Fail‘ but are
designated ‘Check‘.
A factor <1.00 produces a check area within the tolerance field. Example:
tolerance 3.00, factor 0.75
If you activate the Accept settings for ‚New job‘ control box, your selected
factor will be accepted for all new jobs.
Procedure:
1.
In the Settings menu, click on Check Area. The Settings - Check
Area window appears.
2.
Enter your required value into the Factor field.
3.
If required, activate the Accept settings for ‚New job‘ control
box.
4.
Click on OK.
15.6 CxF Browser
Selecting this option opens the CxF browser window. With the help of
this browser, you can access CxF files, whether local or stored on the
network. These files are opened in the browser window and the colors
contained within them can be taken into ColorQuality.
Procedure:
1.
In the Settings menu click on CxF Browser. The CxF Browser
window appears.
2.
Click on the
button and navigate in Explorer to the location
containing the CxF file to be connected.
15 • Settings to make
115
OPERATING MANUAL
3.
4.
Highlight the file and click on Open. The colors contained within
in the CxF file are displayed.
Use the mouse to drag the colors out of the window and directly
into the required location. Provided that the Job: New or Modify
current job has previously been opened , the colors from the CxF
browser can be defined e.g. directly as references.
Be especially careful that the colors you import have the same filter
conditions as the job into which they are to be imported!
Colors with differing filter conditions can still be imported once a warning
has been issued, but the spectrum data of the colors is transferred
unchanged to the new filter conditions, which can result in color
distortion.
116
15 • Settings to make
OPERATING MANUAL
15.7 Windows
The Windows menu is used to define how the windows are arranged.
Please do not confuse the options available on the Windows menu with
those on the Settings > Displays menu.
While the Settings > Displays menu defines which display types should
be shown, the Windows menu defines how those display types should
be shown.
15.7.1 Arranging windows
The following preset window arrangements can be selected on the
Windows menu:
• Overlapping
• Side by side
• Horizontal split
• Vertical split
Procedure for arranging windows:
1.
Click on the required option on the Windows menu. The windows
will be displayed in the way you have selected.
15.7.2 Creating a user-specific window arrangement and saving it as
a preset setting
The Windows menu can also be used to save user-defined window
arrangements to which you have given a name.
Such a setting can be applied to an open job by simply selecting the
name from a list.
A user-defined window arrangement can also be saved as a general
standard specification which can then be applied, for example, to new
jobs.
15 • Settings to make
117
OPERATING MANUAL
Procedure for saving user-defined window arrangements:
1.
Arrange as you wish the windows that are displayed for the open
job.
The windows can be moved about manually as required by using the
mouse, and if necessary changed in size to suit your needs.
2.
On the Windows menu, select the item Save as preset.
3.
In the window which appears, enter in the Designation field a
meaningful description of the setting you are saving, and confirm
with OK.
The setting is saved and the window is closed.
In this window it is possible to define the setting you are creating as
a standard preset setting. To do this, check the As Default box. This
standard view can then be applied, for example, to new jobs.
118
15 • Settings to make
OPERATING MANUAL
15.7.3 Applying user-specific preset settings
Procedure for applying a user-specific preset setting:
1.
Open a job.
2.
On the Windows menu, select the item Presets.
3.
Select the required preset setting from the list of saved settings,
to apply it to the open job.
15 • Settings to make
119
OPERATING MANUAL
15.7.4 Organizing preset settings
If there is more than one saved preset setting, then the menu item
Organize can be used to define any one of these settings as Standard:
1.
On the Windows > Presets menu, select the item Organize.
2.
In the window which appears, highlight the preset setting which
you now wish to define as standard and click on the As Default
button.
The yellow marker is positioned in front of the newly selected
standard setting.
If the preset setting Job setting is defined as standard, then when a job
is opened, the windows are displayed exactly as they were arranged
when the job was last closed.
Existing preset settings can also be deleted in this window:
1.
Highlight the setting that is to be deleted and check the Delete
button.
2.
Click on OK to close the window.
120
15 • Settings to make
OPERATING MANUAL
16 Quitting ColorQuality
16.1 General
16 • Quitting Color Quality
123
121
OPERATING MANUAL
122
16 • Quitting ColorQuality
OPERATING MANUAL
16 Quitting ColorQuality
16
16.1 General
ColorQuality continuously stores all objects – whether jobs, customers, standards or samples – in the
database automatically. Thus, you can always quit the program without having to save any information
beforehand.
Procedure:
1.
In the File menu, click on Quit.
Even though, as described above, the data is continuously being saved in the background, you should
never shut down your computer before the program has been closed correctly.
16 • Quitting ColorQuality
123
OPERATING MANUAL
124
16 • Quitting ColorQuality
OPERATING MANUAL
17 Application notes
17.1 Recommended device settings
127
17.2 Measuring patterns
127
17.3 Color distance formulas
127
17 • Application notes
125
OPERATING MANUAL
126
17 • Application notes
OPERATING MANUAL
17 Application notes
17
17.1 Recommended device settings
You must set the white basis (Auto/Pap/Abs) to Abs (absolute white reference) when measuring target
colors.
With the filter wheel setting Pol, you get a better agreement of the measured valued of wet and dry
surfaces on coated paper or on non-absorbent substrates.
Don‘t forget to carry out the white calibration before you initiate the measurements.
With the X-Rite SpectroEye, this process is automatic.
17.2 Measuring patterns
When measuring patterns with rough or structured upper surfaces (such as uncovered paper, textiles
etc.) you absolutely must perform multiple measurements. By observing the average value continuously
displayed on the screen, you can determine when sufficient measurements have been made. As a rule
of thumb, consider that you can quit the average value calculations as soon as the displayed L*a*b*
average value deviates by less than dE* = 0.2.
The pattern measurement should take place on the same homogeneous substrate (e.g. neutral white
ceramic tile or neutral white cardboard with no optical brighteners) as the one used for the comparison
between the pattern and the reproduced colors.
If the pattern is thick, all four feet of the measuring device must be positioned on the flat pattern. If this
is not possible, shim the feet accordingly.
17.3 Color distance formulas
At this point, there should be a short overview of the various dE formulas based on the CIELAB color space
available in the program, although without really being able to go into details. The main purpose here is
to give you some pointers to the question of what is the best color distance formula to use.
The first and oldest dE formula is the CIELAB dE* formula, which is published in 1976 by the CIE (Commission
Internationale de l‘Éclairage).
Already early on, users of this formula noticed that the height of the dE* that was given out did not always
agree with the visual perception of viewers.
With highly saturated colors (e.g. saturated yellow) it takes a relatively large amount of color variation
before the human eye can perceive it. However, highly saturated colors such as this are assessed harshly
by the CIELAB dE* formula (high dE*).
17 • Application notes
127
OPERATING MANUAL
Conversely, the CIELAB dE* formula assesses lightly saturated colors (e.g. mid-gray), a field in which the
human eye is very sensitive and can perceive the smallest color variations, relatively tolerantly (deep
dE*).
In order to agree well with visual perception, however, strongly saturated colors must be assessed
relatively tolerantly, and weakly saturated colors harshly.
This was the principle reason why new dE formulas were added later. The following formulas appear in
chronological order:
dE CMC l:c(Color Measuring Committee of the Society of Dyers and Colorists, published 1984)
dE*94
(CIE, published 1994)
dE 2000 (CIE, published 2000)
The aim of all these formulas is to correct the discrepancy shown in the CIELAB dE* formula between
the height of the dE being assessed and the visual perception of it.
This does not mean though that the CIELAB dE* formula should not be altered. However, when using this
formula, you should be aware of the features described above. More correctly, when the CIELAB dE*
formula is used, highly saturated colors should be allowed a higher dE tolerance than lightly saturated
colors.
This makes it clear that when the CIELAB dE* formula is used, the target of one single dE* tolerance,
valid for all colors, would not be realistic and would therefore - with highly saturated colors – possibly
not be retained in practice.
If the target of a general tolerance limit for all colors were intended, or if you wanted for example with
a customer to agree on one single fixed dE tolerance, then you would absolutely have to use one of the
“corrected“ dE formulas (dE CMC l:c, dE*94, dE 2000).
128
17 • Application notes
OPERATING MANUAL
18 Hotkeys
18.1 General
18 • Hotkeys
131
129
OPERATING MANUAL
130
18 • Hotkeys
OPERATING MANUAL
18 Hotkeys
18
18.1 General
Using hotkeys, you can very quickly carry out various commands or change to another window.
These functions are mainly accessible in the job window and the main window, but also to a
certain extent in other windows.
Purpose
Press
Copy all
Ctrl+C
Change to Select a customer for the new job window
Ctrl+N
Change to the Open job window
Ctrl+O
Print the active window
Ctrl+P
Arrange the windows horizontally
Shift+F4
Cascade the windows
Shift+F5
Help
F1
Measure
F2
Change to the ColorNet windowt
F3
Change to the Modify current job window
F4
Change to the Database. Jobs window
F5
Change to the Database: standards window
F6
Change to the Database: Customers window
F7
Change to the General Settings window
F9
Change to the Settings: Program window
F10
Change to the SpectroServer Settings window
F11
Display info picture (version, serial number, licenses)
F12
18 • Hotkeys
131
OPERATING MANUAL
132
18 • Hotkeys
OPERATING MANUAL
19 Installing ColorQuality
19.1 Hardware & software requirements
135
19.2 Installation on a personal computer
19.2.1 Preparing for the installation
19.2.2 Installation of ColorQuality
19.2.3 Connecting your PC to the measuring device
19.2.4 Installation of the copy protection plug
136
136
136
136
136
19 • Installing ColorQuality
133
OPERATING MANUAL
134
19 • Installing ColorQuality
OPERATING MANUAL
19 Installing ColorQuality
19
19.1 Hardware & software requirements
Minimum system requirements
• 800 MHz Pentium III PC or higher
• XP SP2, Windows Vista, Windows 7
• 256 MB RAM
• 120 MB of available hard-disk space
• Screen resolution of 1024 x 768
• USB-Port for hardware key and additional USB- or Serial-Port for the measurement
instrument
• Administrator rights for installation
Recommended system requirements
• Core 2 Duo, 2GHZ
• XP SP2, Windows Vista, Windows 7
• 2 GB RAM
• 100 GB of available hard-disk space
• Screen resolution of 1280 x 1024
• USB-Port for hardware key and additional USB- or Serial-Port for the measurement
instrument
• Administrator rights for installation
Minimum system requirements for Online Version
• 3,2 GHz Pentium IV PC or higher
• For configurations up to 20 users: 4 GB RAM, Windows® Server 2003
• For configurations over 20 users: 200 MB RAM per user, Windows® Server 2003 R2 64bit
Enterprise or DataCenter Edition
• Terminal Services and Application Server
• 100 GB of available hard-disk space
• Screen resolution of 1024 x 768
• USB-Port for hardware key
• Administrator rights for installation
19 • Installing ColorQuality
135
OPERATING MANUAL
19.2 Installation on a personal computer
19.2.1 Preparing for the installation
If you already have a version of this software installed and are performing an update, before updating you
should completely back up the program index and back up the database (
see section 13.6 “Backing
up your database“).
19.2.2 Installation of ColorQuality
Procedure:
1.
Start WINDOWS.
2.
Insert the CD into the CD-ROM drive and wait until the X-Rite Setup window appears.
3.
Click on the symbol for ColorQuality.
The Setup program then takes you step by step through the installation. Carefully read the
information displayed before you proceed with the installation.
19.2.3 Connecting your PC to the measuring device
In order to be able to perform measurements or import data from the measuring device, the measuring
device must be connected to a user-defined serial port (COM1:, COM2:, ..., COMn:) or to a USB port using
a USB serial converter. When you work with ColorQuality, you can disconnect the measuring device in
order to make off-line measurements at any time and then reconnect it to your computer. ColorQuality
automatically recognizes the interface you selected.
19.2.4 Installation of the copy protection plug
Connect the dongle to a USB port on your personal computer.
136
19 • Installing ColorQuality
OPERATING MANUAL
20 Index
20 • Index
137
OPERATING MANUAL
138
20 • Index
OPERATING MANUAL
20 Index
20
A
Adapting and changing the display ______________________ 65
Application notes___________________________________ 127
Arranging the windows _______________________________ 68
Arranging windows _________________________________ 117
Assigning a job to a custome___________________________ 39
Assigning samples to an individual series _________________ 57
Assignment of individual samples to series_______________ 109
Average value calculation _____________________________ 26
Averaging ______________________________________ 58,108
B
Backing up your database _____________________________ 98
Basic sequence of a quality control job __________________ 23
C
Calculation method _________________________________ 112
Carrying out measurements ___________________________ 58
Changing the display configuration ______________________ 68
Check area _______________________________________ 115
CIELab-charts ______________________________________ 19
Colorant __________________________________________ 112
ColorNet __________________________________________ 15
Color Scale _______________________________________ 107
Contact address of X-Rite _____________________________ 10
Control panel _______________________________________ 20
Copy protection plug ________________________________ 136
Customer: deleting___________________________________ 90
Customer: entering __________________________________ 89
Customer: exporting _________________________________ 90
Customer: importing _________________________________ 91
Customer: modifying _________________________________ 89
CxF ____________________________________________ 15,115
20 • Index
D
Database: backing up ________________________________ 98
Database: create ____________________________________ 95
Database: create in the network ________________________ 98
Database: disconnect ________________________________ 97
Database: link ______________________________________ 97
Database: restoring __________________________________ 99
Data administration __________________________________ 28
Default measuring conditions _______________________ 29,107
Default tolerance ___________________________________ 110
Defining a new series ________________________________ 41
Defining measuring conditions _________________________ 41
Defining standards __________________________________ 83
Defining the job _____________________________________ 23
Defining the settings for standards registration ____________ 84
Deleting a customer _________________________________ 90
Deleting jobs _______________________________________ 77
Deleting samples ____________________________________ 61
Deleting standards __________________________________ 85
Density___________________________________________ 111
Desktop ___________________________________________ 19
Display: adapting and changing ________________________ 65
Display: arranging windows ___________________________ 68
Display: changing configuration ________________________ 68
Display: functions ___________________________________ 27
Display: selecting series to be displayed__________________ 67
Display: Selecting type _______________________________ 65
Display: switching job / series display ____________________ 65
Displaying and selecting samples _______________________ 59
Displaying samples __________________________________ 26
Drag & Drop________________________________________ 31
Dye strength calculation ___________________________ 29,112
139
OPERATING MANUAL
E
E-Mail ____________________________________________
Entering a customer _________________________________
Entering a sample name ______________________________
Entering job designation / job information _________________
Exporting customer data ______________________________
Exporting job data ___________________________________
Exporting standards data______________________________
31
89
58
40
90
78
85
H
Hardware & software requirements ____________________ 135
Hotkeys __________________________________________ 131
I
Importing customer data ______________________________
Importing job data ___________________________________
Importing standards data _____________________________
Individual measurements _____________________________
InkFormulation Software ______________________________
Installation ________________________________________
Interface _________________________________________
91
79
86
26
15
136
113
J
Job: assigning to a customers __________________________ 39
Job: current ______________________________________ 53,83
Job: defining _______________________________________ 23
Job: deleting _______________________________________ 77
Job: display ________________________________________ 65
Job: entering designation / information ___________________ 40
Job: exporting ______________________________________ 78
Job: importing ______________________________________ 79
Job: managing ______________________________________ 77
Job: modifying ____________________________________ 53,83
Job: modifying current job _____________________________ 53
Job: opening existing job ______________________________ 51
Job: saving to SpectroEye _____________________________ 48
140
L
Language _________________________________________ 108
Loading standards ___________________________________ 45
M
Managing jobs ______________________________________ 77
Maximum transfer rate ______________________________ 114
Measurements: carrying out ___________________________ 58
Measurements: individual _____________________________ 26
Measurements: multiple _________________________ 26,58,127
Measurement initiation ______________________________ 109
Measuring and processing samples _____________________ 57
Measuring conditions: default _______________________ 29,107
Measuring device ______________________________ 23,35,113
Measuring samples ________________________________ 26,57
Measuring the reference colors ________________________ 43
Menu bar __________________________________________ 19
Metamerism ______________________________________ 109
Modifying current job ________________________________ 53
Modifying customers and entering new customers _________ 89
Modifying standards and creating new standards __________ 83
Multiple measurements __________________________ 26,58,127
N
Notes on using this handbook __________________________ 11
O
Opening a job_______________________________________
Opening database standards___________________________
Opening repeat job __________________________________
Operating information ________________________________
25
83
52
29
P
Printer setup ______________________________________ 103
Printing __________________________________________ 103
Processing an existing quality control job _________________ 51
20 • Index
OPERATING MANUAL
Q
Quality control job ___________________________________ 23
Quick compare mode_______________________________ 28,71
Quitting ColorQuality ________________________________ 123
R
Reference and tolerance calculation ____________________ 47
Reference colors: entering using the keyboard_____________ 44
reference colors : loading from a CxF file _________________ 46
Registration _________________________________________ 9
Restoring your database ______________________________ 99
S
Safety directives ____________________________________ 11
Samole: selection group to be displayed __________________ 59
Sample: assigningto an individual series__________________ 57
Sample: deleting ____________________________________ 61
Sample: displaying and selecting _______________________ 59
Sample: entering name _______________________________ 58
Sample: measuring ________________________________ 26,57
sample: measuring and processing ______________________ 57
Sample: selecting the active ___________________________ 59
Selecting the active sample ___________________________ 59
Selecting the interface ______________________________ 113
Selecting the sample group to be displayed _______________ 59
Selecting the series to be displayed _____________________ 67
Selecting the type of display ___________________________ 65
Series: defining a new series __________________________ 41
Series: display ______________________________________ 65
Settings for standards registration ______________________ 84
Settings to make ___________________________________ 107
Software licensing contrac ____________________________ 10
SpectroEye ________________________________________ 48
Standards: defining __________________________________ 83
Standards: deleting __________________________________ 85
Standards: exporting _________________________________ 85
Standards: inporting _________________________________ 86
Standards: modifying and creating new __________________ 83
20 • Index
Standards: opening database __________________________
Starting ColorQuality _________________________________
Structure and function________________________________
Substrate _________________________________________
Switching between job display and series display __________
83
35
19
127
65
T
Tolerance _________________________________________ 115
Tolerance calculation ________________________________ 47
Transfer rate ______________________________________ 114
U
User name ________________________________________ 108
W
White base _______________________________________ 112
White calibration of the measuring device ______________ 23,35
White calibration request ____________________________ 108
Windows: arranging ________________________________ 117
Z
Zoom ___________________________________________ 27,68
141
OPERATING MANUAL
142
20 • Index
Headquarters
4300 44th Street, Grand Rapids, MI 49512, USA
Phone: 800-248-9748 or +1 616-803-2100
European Headquarters
Althardstrasse 70, 8105 Regensdorf, Switzerland
Phone: +41 44 842 24 00, Fax: +41 44 842 22 22
Asia-Pacific
Room 808-810, Kornhill Metro Tower, 1 Kornhill Road, Quarry Bay, Hong Kong, China
Phone: +852 2 568 6283, Fax: +852 2 885 8610
Visit our world wide web site at www.xrite.com
Part No. CQS-500 (10/10).