1
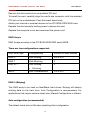
SATA1.5G/ATA133 RAID
Controller Card
RC215
User Manual
SATA105G/ATA 133 RAID Controller Card RC215
User Manual
Features and Benefits
z
Compliant with Serial ATA 1.0 specification
z
Compliant with PCI Specification, revision 2.2
z
Provides three independent channels to connect two SATA and one
PATA hard disk drive
z
Supports up to UDMA6 transfer mode of PATA
z
Supports up to 4 storage device connection
z
Supports RAID 0, 1, 0+1 and JBOD functions
z
Supports drives with capacities larger than 137GB
z
Supports Windows® 2000, XP/2003 32/64 bit, Vista 32/64 bit
Important Message for User before Installing RC-215:
Windows Device Manager can NOT recognize the hard drives that without
correct RAID setting before.
The working data on your existing HDD may NOT work when you migrate it to
RAID Host Card.
Raid sets can be created and managed by the BIOS utility setting.
For RAID creating, BIOS utility allow the random creating.
The “Rebuilding” function on Raid 1 or Raid 10 may spend long hours for
component ready and function available, please be patient for that.
Raid 0 and Raid1 need at least 2 drives, and Raid10 need 4 drives.
1.
Backup all your data in HD before setting any RAID. Setting RAID 0/0+1
will destroy all original data of your HD.
2.
New HD connecting to RC-215 must process “initial (F-disk)” and
“format” before using. Otherwise, PC might find nothing in the system.
3.
If you want to boot from correct HD connecting to either motherboard
or RC-215, please change correct HD source from CMOS “booting
sequence”.
4.
Although SATA HD is a “hot swap” design, it is strongly recommended
2
SATA105G/ATA 133 RAID Controller Card RC215
User Manual
that all users turn off the power before you add any HD to PC.
5.
If you want to use RC-215 without any RAID function, please do not
enter RAID BIOS and change the RAID setting. RAID function will only
be activate after you enter RAID BIOS and set a RAID set correctly.
Driver installation is the same for a RAID card whether you want to use
a RAID function or not. Never install a un-RAID version driver to a RAID
card even you want to use a RAID card without RAID function.
Bus Interface
PCI Bus 32 bit
Connectors
2 x internal SATA connectors
1 x PATA connector
Package Contents
1x PCI SATA + PATA Raid Card
1 x User Manual
1 x Driver CD
Note: Contents may vary depending on the market/country.
System Requirements
Pentium-class computer with one available PCI slot
Windows® 2000, XP/2003 32/64 bit, Vista 32/64 bit
Hardware Installation
Turn Off the power to your computer.
Unplug the power cord and remove your computer’s cover.
3
SATA105G/ATA 133 RAID Controller Card RC215
User Manual
Remove the slot bracket from an available PCI slot.
To install the card, carefully align the card’s bus connector with the selected
PCI slot on the motherboard. Push the board down firmly.
Attach your internal or external devices to the PCI SATA+PATA RAID card.
Replace the slot bracket’s holding screw to secure the card.
Replace the computer cover and reconnect the power cord.
RAID Arrays
RAID Arrays are setup in the PCI SATA+PATA RAID card’s BIOS.
There are four configurations supported:
RAID level/Type
Configurations
Number of disks needed
RAID 0
Disk Striping
2 or 3 or 4
RAID 1
Disk Mirroring
2
RAID 0+1
Disk Striping
4
JBOD
Disk Concatenation
+ Mirroring
2 or 3 or 4
RAID 0 (Striping)
This RAID array to be used on New/Blank hard drives. Striping will destroy
existing data on the hard drive. Auto Configuration is recommended. For
applications that require custom chunk size, Manual Configuration is offered.
Auto configuration (recommended)
The default chunk size is 64k when selecting Auto configuration.
4
SATA105G/ATA 133 RAID Controller Card RC215
User Manual
As the BIOS boots press Tab when prompted to enter the RAID BIOS.
At the RAID utility main menu select Create Array, press Enter.
At the next screen select Auto Setup For Performance, press Enter.
When asked Auto Create array will destroy all data on disks. Continue? (Y/N),
press Y to accept.
And then a Create New Raid Success!! Message will be displayed. Press ESC
to quit then go back to the RAID utility main menu.
Press ESC to exit the BIOS.
When asked Do you really want to exit the utility? (Y/N), press Y to accept.
Manual configuration
As the BIOS boots press Tab when prompted to enter the RAID BIOS.
At the RAID utility main menu select Create Array, press Enter.
At the next screen select Array Mode RAID 1 (Mirroring), press Enter.
At the next screen select RAID 0 for performance, press Enter.
At the next screen select Select Disk Drives, press Enter.
Please use arrow keys ↑and ↓ to switch the disk, then press Enter to mark
the selected disk.
Select Block Size 64, press Enter.
Select chunk size from 4K, 8K, 16K, 32K or 64K, then press Enter.
Select Start Create Process, press Enter.
When asked The data on the selected disk will be destroied. Continue? (Y/N),
press Y to accept.
And then a Create New Raid Success!! Message will be displayed. Press ESC
to quit then go back to the RAID utility main menu.
Press ESC to exit the BIOS.
When asked Do you really want to exit the utility? (Y/N), press Y to accept.
5
SATA105G/ATA 133 RAID Controller Card RC215
User Manual
RAID 1 (Mirroring)
For New/Blank Hard Drives
As the BIOS boots press Tab when prompted to enter the RAID BIOS.
At the RAID utility main menu select Create Array, press Enter.
At the next screen select Auto Setup For Data Security, press Enter.
When asked Auto Create array will destroy all data on disks. Continue? (Y/N),
press Y to accept.
And then a Create New Raid Success!! Message will be displayed. Press ESC
to quit then go back to the RAID utility main menu.
Press ESC to exit the BIOS.
When asked Do you really want to exit the utility? (Y/N), press Y to accept.
For Existing Hard Drives with Data
As the BIOS boots press Tab when prompted to enter the RAID BIOS.
At the RAID utility main menu select Create Array, press Enter.
At the next screen select Array Mode RAID 1 (Mirroring), press Enter.
At the next screen select RAID 1 for data protection, press Enter.
At the next screen select Select Disk Drives, press Enter.
Please use arrow keys ↑and ↓ to select the Source drive, press Enter.
Please use arrow keys ↑and ↓ to select the Mirror(Target) drive, press
Enter.
Select Start Create Process, press Enter.
When asked Save the data on source disk to mirror after creation? (Y/N),
press Y to accept.
The set will be built. The status of the built is displayed in the menu.
When build is completed, a Create New Raid Success!! Message will pop up
inform you that build is finished.
6
SATA105G/ATA 133 RAID Controller Card RC215
User Manual
Rebuild Mirror Drive
When a failure to one member occurs, you will be notified by the RAID BIOS
during boot. The steps below will guide you in rebuilding a failed mirror set.
Replace he failed drive(s) with one of equal or greater capacity, then start the
computer.
Then you will see the following message shown by the PCI SATA+PATA RAID
card’s BIOS on the screen.
Power off and check the failed drive
Destory the Mirroring Relationship
Choose replacement drive and rebuild
Continue to boot
Select Choose replacement drive and rebuild, press Enter.
Select the replacement drive then press Enter.
When asked WARNING: Would you like to Continue? Press Y/N?, press Y to
accept.
The set will be rebuilt. The status of the rebuild is displayed in the menu.
When rebuild is completed, a Enter the VIA RAID Utility after exiting?(Y/N)
message will pop up inform you that rebuild is finished, press N to reboot
system.
RAID 0+1 (Mirroring+Striping)
This RAID array to be used on New/Blank hard drives, do not use existing
hard drive(s) with data. To create a RAID 0+1 set four hard drives are required.
Auto configuration (recommended)
7
SATA105G/ATA 133 RAID Controller Card RC215
User Manual
The default chunk size is 64k when selecting Auto configuration.
As the BIOS boots press Tab when prompted to enter the RAID BIOS.
At the RAID utility main menu select Create Array, press Enter.
At the next screen select Auto Setup (Safe, Performance), press Enter.
When asked Auto Create array will destroy all data on disks. Continue? (Y/N),
press Y to accept.
And then a Create New Raid Success!! Message will be displayed. Press ESC
to quit then go back to the RAID utility main menu.
Press ESC to exit the BIOS.
When asked Do you really want to exit the utility? (Y/N), press Y to accept.
Manual configuration
As the BIOS boots press Tab when prompted to enter the RAID BIOS.
At RAID utility main menu select Create Array, press Enter.
At the next screen select Array Mode RAID 1 (Mirroring), press Enter.
At the next screen select RAID 0/1, press Enter.
At the next screen select Select Disk Drives, press Enter.
Please use arrow keys ↑and ↓ to select the first drive, press Enter.
Please use arrow keys ↑and ↓ to select the second drive, press Enter.
Please use arrow keys ↑and ↓ to select the third drive, press Enter.
Please use arrow keys ↑and ↓ to select the fourth drive, press Enter.
Select Block Size 64, press Enter.
Select chunk size from 4K, 8K, 16K, 32K or 64K, then press Enter.
Select Start Create Process, press Enter.
When asked The data on the selected disk will be destroied. Continue? (Y/N),
press Y to accept.
And then a Create New Raid Success!! Message will be displayed. Press ESC
to quit then go back to the RAID utility main menu.
8
SATA105G/ATA 133 RAID Controller Card RC215
User Manual
Press ESC to exit the BIOS.
When asked Do you really want to exit the utility? (Y/N), press Y to accept.
SPAN (JBOD)
As the BIOS boots press Tab when prompted to enter the RAID BIOS.
At the RAID utility main menu select Create Array, press Enter.
At the next screen select Auto Setup For Capacity, press Enter.
When asked Auto Create array will destroy all data on disks. Continue? (Y/N),
press Y to accept.
And then a Create New Raid Success!! Message will be displayed. Press ESC
to quit then go back to the RAID utility main menu.
Press ESC to exit the BIOS.
When asked Do you really want to exit the utility? (Y/N), press Y to accept.
Delete RAID Disk Drive
As the BIOS boots press Tab when prompted to enter the RAID BIOS.
At the RAID utility main menu select Delete Array, press Enter
Please use arrow keys ↑and ↓ to select the RAID set then press Enter.
When asked The selected array will be destoried. Are you sure? Continue?
Press Y/N, press Y to confirm.
BIOS Configuration
The PCI SATA+PATA RAID card’s BIOS will appear every time your system
starts up. During this (POST) process, the BIOS will show up and indicate the
devices attached to it.
Driver Installation
9
SATA105G/ATA 133 RAID Controller Card RC215
User Manual
For Windows® 2000
For A New Installation
A new installation requires a floppy disk for the driver installation. To make
this floppy disk, copy the contents of the “RC-212\VRAIDDrv\drvdisk” folder,
found on the driver CD, onto a blank floppy disk then follow the directions
below.
Setup the RAID Array prior to Windows installation.
Follow Windows® 2000 installation procedure.
Restart the computer when prompted by the installation.
At the Windows® 2000 Setup screen, press F6 to install the RAID driver.
When prompted, press S to specify the location of the driver.
Insert the floppy disk, then press Enter.
Select VIA V-RAID Controller Series (Windows 2K), then press Enter.
Press Enter again to finish driver installation, then follow the on-screen
instructions to complete the Windows installation.
For An Existing Installation
Setup the RAID Array prior to driver installation and boot up to Windows.
At the Found New Hardware Wizard window pop-up, please click Cancel
button to cancel the driver installation for the device at this moment. The
driver for this device will be installed in the next step.
Please insert the CD driver bound with PCI SATA+PATA RAID card into your
CD-ROM Drive.
At the Windows desktop, click Start, then Run.
Type D:\RC-212\SETUP.EXE, click OK. (Change D:\ to match your CD-ROM
drive letter)
Follow the on-screen instructions to complete the installation.
10
SATA105G/ATA 133 RAID Controller Card RC215
User Manual
Restart Windows to complete the installation.
For Windows® XP/Server 2003
For New Installation
A new installation requires a floppy disk for the driver installation. To make
this floppy disk, copy the contents of the “RC-212\VRAIDDrv\drvdisk” folder,
found on the driver CD, onto a blank floppy disk then follow the directions
below.
Setup the RAID Array prior to Windows installation.
Follow Microsoft’s Windows installation procedure.
Restart the computer when prompted by Windows’ installation.
At the Windows Setup screen, press F6 to install the RAID driver.
When prompted, press S to specify the location of the driver.
Insert the floppy disk, then press Enter.
Select VIA V-RAID Controller Series (Windows XP/SRV2003), then press
Enter.
Press Enter to finish driver installation, then follow the on-screen instructions
to complete the Windows installation.
For An Existing Installation
Setup the RAID Array prior to driver installation and boot up to Windows.
At the Found New Hardware Wizard window pop-up, please click Cancel
button to cancel the driver installation for the device at this moment. The
driver for this device will be installed in the next step.
Please insert the CD driver bound with PCI SATA+PATA RAID card into your
CD-ROM Drive.
At the Windows desktop, click Start, then Run.
11
SATA105G/ATA 133 RAID Controller Card RC215
User Manual
Type D:\RC-212\SETUP.EXE, click OK. (Change D:\ to match your CD-ROM
drive letter)
Follow the on-screen instructions to complete the installation.
Restart Windows to complete the installation.
For Windows® XP-x64/Server 2003-x64
For New Installation
A new installation requires a floppy disk for the driver installation. To make
this floppy disk, copy the contents of the “RC-212\VRAIDDrv\drvdisk” folder,
found on the driver CD, onto a blank floppy disk then follow the directions
below.
Setup the RAID Array prior to Windows installation.
Follow Microsoft’s Windows installation procedure.
Restart the computer when prompted by Windows’ installation.
At the Windows Setup screen, press F6 to install the RAID driver.
When prompted, press S to specify the location of the driver.
Insert the floppy disk, then press Enter.
Select VIA V-RAID Controller Series (Windows XP/SRV2003-x64), then press
Enter.
Press Enter to finish driver installation, then follow the on-screen instructions
to complete the Windows installation.
For An Existing Installation
Setup the RAID Array prior to driver installation and boot up to Windows.
At the Found New Hardware Wizard window pop-up, please click Cancel
button to cancel the driver installation for the device at this moment. The
driver for this device will be installed in the next step.
12
SATA105G/ATA 133 RAID Controller Card RC215
User Manual
Please insert the CD driver bound with PCI SATA+PATA RAID card into your
CD-ROM Drive.
At the Windows desktop, click Start, then Run.
Type D:\RC-212\SETUP.EXE, click OK. (Change D:\ to match your CD-ROM
drive letter)
Follow the on-screen instructions to complete the installation.
Restart Windows to complete the installation.
For Windows® Vista
For New Installation
A new installation requires a floppy disk for the driver installation. To make
this floppy disk, copy the contents of the “RC-212\VRAIDDrv\drvdisk” folder,
found on the driver CD, onto a blank floppy disk then follow the directions
below.
Setup the RAID Array prior to Windows installation.
Follow Microsoft’s Windows installation procedure.
Restart the computer when prompted by Windows’ installation.
At the Windows Setup screen, press Load Driver to install the RAID driver.
Insert the floppy disk, please select VIA VT6421 RAID Controller
(A:\VISTA\x86\viamraid.inf), then press Next. (Change A:\ to match your
floppy drive letter)
Follow the on-screen instructions to complete the Windows installation.
For An Existing Installation
Setup the RAID Array prior to driver installation and boot up to Windows.
At the Found New Hardware Wizard window pop-up, please click Cancel
button to cancel the driver installation for the device at this moment. The
13
SATA105G/ATA 133 RAID Controller Card RC215
User Manual
driver for this device will be installed in the next step.
Please insert the CD driver bound with PCI SATA+PATA RAID card into your
CD-ROM Drive.
At the Windows desktop, click Start, then Run.
Type D:\RC-212\SETUP.EXE, click OK. (Change D:\ to match your CD-ROM
drive letter)
Follow the on-screen instructions to complete the installation.
Restart Windows to complete the installation.
For Windows® Vista-x64
For New Installation
A new installation requires a floppy disk for the driver installation. To make
this floppy disk, copy the contents of the “RC-212\VRAIDDrv\drvdisk” folder,
found on the driver CD, onto a blank floppy disk then follow the directions
below.
Setup the RAID Array prior to Windows installation.
Follow Microsoft’s Windows installation procedure.
Restart the computer when prompted by Windows’ installation.
At the Windows Setup screen, press Load Driver to install the RAID driver.
Insert the floppy disk, please select VIA VT6421 RAID Controller
(A:\VISTA\x64\viamrx64.inf), then press Next. (Change A:\ to match your
floppy drive letter)
Follow the on-screen instructions to complete the Windows installation.
For An Existing Installation
Setup the RAID Array prior to driver installation and boot up to Windows.
At the Found New Hardware Wizard window pop-up, please click Cancel
14
SATA105G/ATA 133 RAID Controller Card RC215
User Manual
button to cancel the driver installation for the device at this moment. The
driver for this device will be installed in the next step.
Please insert the CD driver bound with PCI SATA+PATA RAID card into your
CD-ROM Drive.
At the Windows desktop, click Start, then Run.
Type D:\RC-212\SETUP.EXE, click OK. (Change D:\ to match your CD-ROM
drive letter)
Follow the on-screen instructions to complete the installation.
Restart Windows to complete the installation.
To Verify Windows Installation
Right click My Computer and click Manage.
Select Device Manager.
Double click SCSI and RAID Controller, then double click VIA VT6421 RAID
Controller to display driver properties. A message this device is working
properly is displayed in the dialog box, the driver has been correctly installed.
Thank you for purchasing a quality Rosewill Product.
Please register your product at : www.rosewill.com for complete warranty information and future support for
your product.
15