1
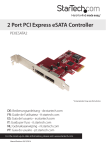
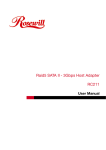
SATA 3 Gb/s
RAID PCI
Express
Card
user
manual
ModelS 150965
& 160377
Model 150965
Model 160377
MAN-150965/160377-UM-1006-05
Thank you for purchasing the MANHATTAN® SATA 3 Gb/s RAID PCI Express
Card, Model 150965 (2 external ports) or 160377 (2 internal ports).
This card lets you upgrade a desktop computer with two SATA 3 Gb/s channels to
access external eSATA storage devices, helping you to fully utilize the speed and
versatility of eSATA to directly connect eSATA storage devices, a port multiplier or
eSATA enclosure..
By following the instructions in this user manual — or the simpler setup procedure
in the printed quick install guide included with the product — you’ll soon be
enjoying these additional features:
• Supports 1-lane 2.5 Gbps PCI Express, SATA transfer rate of 3.0 Gbps and
RAID 5 data transfer rates
• Provides RAID 5 (distributed parity RAID), JBOD, RAID 0 (striping), RAID 1
(mirroring), RAID 0+1 (mirrored-striping)
• Native Command Queuing (NCQ) and Legacy Command Queuing (LCQ)
support maximizes drive efficiency and reduces latency
• Supports FIS-based switching with port multipliers
• Includes low-profile PCI bracket
• Plug and Play installation; hot-swappable — Windows and Mac compatible
• Lifetime Warranty (For a complete list of country-specific warranties, go to
www.manhattan-products.com/warranty.)
Package Contents
• SATA 3 Gb/s PCI Express Card
• Low profile and standard brackets
• Driver CD with user manual
• Quick install guide
System Requirements
• Windows 2000/XP/2003/Vista/2008/7 or Mac OS X v10.4.9 and higher
• Available PCI Express Card slot
• CD-ROM drive
2
Introduction
Before you install this card, it’s recommended that you become familiar with the
contents of the SATA RAID 5 manual on the enclosed driver CD, in the folder:
\SATA PCIe_Raid5_2Port\SiI3132\Windows\Gui (or \Raid5 SATA2_4Port\SiI3124\
Windows\Gui). This RAID manual has more information about RAID architecture,
features, installation and settings, plus management software for RAID 5 GUI
(graphical user interface).
After driver installation, if desired, install SATA RAID 5 GUI for RAID management.
First, however, remove any existing — and possibily conflicting — SATA RAID GUI
(or Java SATA RAID GUI) to ensure your new SATA RAID 5 GUI can work properly:
\Start\Control Panel\Add or Remove Programs\Select all SATARaid\Remove.
RAID sets can be created and managed by either the BIOS utility setting or the
SATA RAID 5 GUI setting under Windows. For RAID building, the BIOS utility
allows random creation; GUI just supports the building by sequential SATA Port1,
Port2, etc.
What Is RAID?
The brief definitions below present the basic concept: As mentioned above,
further details are available on the RAID-specific manual on the enclosed CD.
RAID (Redundant Array of Independent Disks)
RAID technology manages multiple disk drives to enhance I/O performance and
provide redundancy in order to withstand the failure of any individual member
without loss of data.
Disk Striping (RAID 0)
Striping is a performance-oriented, non-redundant data mapping technique. While
Striping is discussed as a RAID set type, it is actually does not provide fault
tolerance. With modern SATA bus mastering technology, multiple I/O operations
can be done in parallel, enhancing performance. Striping arrays use multiple
disks to form a larger virtual disk.
Disk Mirroring (RAID 1)
Disk mirroring creates an identical twin for a selected disk by having the data
simultaneously written to two disks. This redundancy provides instantaneous
protection from a single disk failure. If a read failure occurs on one drive, the
system reads the data from the other drive.
3
Mirrored-Striping (RAID 0+1, or RAID 10)
A Mirrored-Striping Set does just what it says, combining both Striping and Mirroring
technologies to provide both the performance enhancements that come from
Striping and the data availability and integrity that come from Mirroring. When
data is written to a Mirrored-Striped set, instead of creating just one virtual disk as
Striping would do, a second, Mirrored virtual disk is created, as well.
Parity RAID (RAID 0)
Parity, or RAID 5, adds fault tolerance to Disk Striping by including parity information
with the data. Parity RAID dedicates the equivalent of one disk for storing parity
stripes. The data and parity information is arranged on the disk array so that parity
is written to different disks. There are at least three members in a Parity RAID set.
The following example illustrates how the parity is rotated from disk to disk.
Parity RAID uses less capacity for protection and is the preferred method to reduce
the cost per megabyte for larger installations. Mirroring requires a 100 percent
increase in capacity to protect the data, whereas the above example requires only
a 50 percent increase. The required capacity decreases as the number of disks in
the group increases.
Just a Bunch of Disks (JBOD, or Contiguous)
The JBOD here (also known as Contiguous) means a logical drive that can be
either an entire disk drive or a segment of a single disk drive. For this card, the
JBOD function only supports one disk. JBOD here is a Contiguous configuration
option in “Create RAID Group” in SATA RAID5 Manager Utility.
card installation
1.Power down the computer system.
2. Insert the card into an available bus slot.
3. Power the system back on.
4. Install the driver (see Driver Installation).
5. Remove all the existing SATA RAID GUI (or Java SATA RAID GUI) to ensure
the new SATA RAID5 GUI can work properly (without possible conflicts).
6. Install the new SATA RAID5 GUI.
7. Power down the computer system again.
8. Connect hard drives to SATA ports.
9. Power the system back on.
10.If you connect the used HDDs to SATA ports, press <CTRL>+<S> or <F4>,
then delete the Raid setting on every used HDD when BIOS booting.
11. Use SATA RAID5 Manager GUI for the creation of a RAID Group.
• If 1 disk, select the “Make Pass-Thru” option in the Device menu, or
4
the “Concatenate” or “Contiguous” option in the Create RAID Group menu.
• If 2 disks, don’t select the “Parity RAID” or “Mirrored Striped” setting.
• If 3 disks, don’t select the “Mirrored Striped” setting.
12. Click “Task Manager” to make sure RAID setting is complete. With RAID5
setting, it can be hours before a component is ready and functions are
available, so schedule accordingly.
13. Use Device Manager for hard disk initialization, partitioning and formatting.
bios setting (raid setting)
Creating and deleting RAID sets is a function found in BIOS (Basic Input/Output
System). During bootup, the RAID setting message will appear and pause for a
few moments to allow the user to choose what to do. This board will act as a
normal non-RAID card when BIOS isn’t configured for RAID: Just proceed to the
Driver Installation section. If you use a traditional parallel ATA HDD, make sure
your hard drives are set up as Master mode before the RAID setting.
Creating Striped Sets (RAID 0)
1. As BIOS boots, press <CTRL>+<S> or <F4> to enter the RAID BIOS utility.
2. Select “Create RAID set.” Press <Enter>.
3. Select “RAID 0.” Press <Enter>.
4. Select the number of hard drives. Press <Enter>.
5. Select the RAID size. Press <Enter>.
6. Press <Y> to save your settings.
7. Press <CTRL>+<E>, then press <Y> to exit the setup.
8. Continue with conventional Fdisk and Format steps as if you were installing a
conventional hard drive.
9. Your RAID configuration is complete. Proceed to Driver Installation.
Creating Mirrored Sets (RAID 1)
1. As BIOS boots, press <CTRL>+<S> or <F4> to enter the RAID BIOS utility.
2. Select “Create RAID set.” Press <Enter>.
3. Select “RAID 1.” Press <Enter>.
4. Select “Auto Configuration.” Press <Enter>.
5. Press <Y> to save your settings.
6. Press <CTRL>+<E>, then press <Y> to exit the setup.
7. Continue with conventional Fdisk and Format steps as if you were installing a
conventional hard drive.
8. Your RAID configuration is complete. Proceed to Driver Installation.
5
Creating JBOD Sets
1. As BIOS boots, press <CTRL>+<S> or <F4> to enter the RAID BIOS utility.
2. Select “Create RAID set.” Press <Enter>.
3. Select “JBOD (Single).” Press <Enter>.
4. Select “JBOD Drives.” Press <Enter>.
5. Select the RAID size. Press <Enter>.
6. Press <Y> to save your settings.
Creating a Spare Drive
1. As BIOS boots, press <CTRL>+<S> or <F4> to enter the RAID BIOS utility.
2. Select “Create RAID set.” Press <Enter>.
3. Select “Spare Drive.” Press <Enter>.
4. Select “Spare Drives.” Press <Enter>.
5. Select the RAID size. Press <Enter>.
6. Press <Y> to save your settings.
Deleting RAID Sets
1. As BIOS boots, press <CTRL>+<S> or <F4> to enter the RAID BIOS utility.
2. Select “Create RAID set.” Press <Enter>.
3. Press <Y> to remove the RAID set. If the RAID set being deleted is a Striped
set, then all of the data will be lost. If the set being deleted is a Mirrored set,
then the data will remain intact and accessible on both drives.
Rebuilding Mirrored Sets (RAID 1)
1. After replacing the failed hard drives, boot up BIOS, then press <CTRL>+<S>
or <F4> to enter the RAID BIOS utility.
2. Select “Rebuild RAID 1 set.” Press <Enter.
3. Select “Rebuild Hard Drive.” Press <Enter.
4. Press <Y> to rebuild the Mirrored set of the hard drive.
Resolving Conflict
When a RAID set is created, the metadata written to the disk includes drive
connection information (Primary and Secondary). If, after a disk failure, the
replacement disk was previously part of a RAID set (or used in another system),
it may have conflicting metadata, specifically in reference to the drive connection
information. If so, this will prohibit the RAID set from being either created or rebuilt.
In order for the RAID set to function properly, this old metadata must first be
overwritten with the new metadata. To resolve this, select “Resolve Conflicts”: The
correct metadata, including the correct drive connection information, will be written
to the replacement disk.
6
driver installation
Fresh (Initial) Windows Installation
1. Turn the system off. Connect the hard drives to the PCI Express Card and
position the card in a PCI Express slot. Turn the system back on.
2. Insert your Windows CD in the CD-ROM/DVD drive.
3. Press <F6> for third-party SCSI or driver installation at the beginning of text
mode installation. Press <S> when setup asks if you want to specify an
additional device, and insert the driver CD. Press <Enter> and select
“E:\ SATA PCIe_Raid5_2Port \SiI3132\Windows\Driver” (where “E” designates
your CD-ROM/DVD).
4. Press <Enter> to continue with text mode setup.
5. Follow the setup instructions to select your choice for partition and file system.
6. After setup examines your disks, it will copy files to Windows installation
folders and restart the system. The setup program will continue and finish the
installation after the restart.
7. Once Windows finishes installing devices, regional settings, networking
settings, components and the final set of tasks, reboot the system if required. Adding to an Existing Windows Installation
1. Turn the system off. Connect the hard drives to the PCI Express Card and
position the card in a PCI Express slot. Turn the system back on.
2. During the O/S bootup, Windows will display the Found New Hardware Wizard
screen. Click “Next.”
3. Select “Search for a suitable driver for my device (Recommended)” and click
“Next.”
4. Insert the driver CD in your CD-ROM/DVD drive; check “Specify a location”;
uncheck the other boxes: click “Next”; type in “E:\” (or whatever designates
your CD-ROM/DVD). Click “Browse.”
5. Select a location; e.g., “E:\SATA PCIe_Raid5_2Port\SiI3132\Windows\Driver.”
Click “Open,” then “OK.”
6. When the wizard indicates that it found a driver for the device, click “Next.”
7. If the “Digital Signature Not Found” message appears, click “Yes” to continue
installing the driver.
8. The wizard will now copy the required files to the system and start the driver.
When the wizard displays a completion screen, click “Finish” to exit.
Verifying Installation with Windows
1. Right-click on “My Computer”; select “Properties”; click the “Hardware” tab;
click “Device Manager.”
2. Double-click “SCSI and RAID Controllers.” If there is no yellow “!” or “?” in
7
front of “Silicon Image SiI 3132 SoftRaid5 Controller,” the driver has been
installed correctly.
3. For information about the devices attached to the card, use the SiICfg utility
and select a device from the list.
Updating an Existing Driver in Windows
1. Right-click on “My Computer”; select “Properties”; click the “Hardware” tab;
click “Device Manager.” Then click “SCSI and RAID Controller” and right-click
“Silicon Image SiI 3132 SoftRaid5 Controller.”
2. Click “Driver,” then “Update Driver”; select “Search for a suitable driver for my
device (Recommended)”.
3. Insert the driver CD. Press <Enter> and select “E:\ SATA PCIe_Raid5_2Port \
SiI3132\Windows \Driver” (where “E” designates your CD-ROM/DVD). Click
“Next” to complete the driver installation.
4. The system will go through the enumeration process and install the driver. At
the end of the process, click “Yes” to reboot your system if necessary.
Mac Installation
When using the card as a non-bootable adapter on a Mac, refer to the Mac drivers
in the Mac OS folder on the included driver CD.
8
specifications
Standards and Certifications
• FCC
• CE
• SATA 1.0
• RoHS
• WEEE
Port Specifications
• Type:
- Model 150965: 2 eSATA (extermal) I-type
- Model 160377: 2 SATA (intermal) L-type
• Transfer rate: 3.0 Gbps
• Supports 2 independent SATA channels
General
• 48-bit Large Block Addressing
• 2-pin header for LED connection
• Supports 1-lane 2.5 Gbps PCI Express
• Hot-plug capability
• Independent link, transport and data FIFO
• Independent command fetch, scatter/gather and command execution
• Supports legacy command queuing (LCQ), native command queuing (NCQ),
non-zero offsets NCQ, out-of-order data delivery NCQ and FIS-based switching
with port multipliers
• 31 commands and scatter/gather tables per port
Physical
• Dimensions:
- Model 150965: 2.2 x 12.2 x 9.4 cm (0.85 x 4.8 x 3.7 in.)
- Model 160377: 2.2 x 12.2 x 6.8 cm (0.85 x 4.8 x 2.6 in.)
• Weight:
- Model 150965: 42.5 g (1.5 oz.)
- Model 160377: 39.6 g (1.4 oz.)
System Requirements
• Windows 2000/XP/2003/Vista/2008/7 or Mac OS X v10.4.9 and higher
• Available PCI Express Card slot
• CD-ROM drive
9
WARRANTY INFORMATION
english: For warranty information, go to www.manhattan-products.com/warranty.
deutsch: Garantieinformationen finden Sie unter www.manhattan-products.com/warranty.
ESPAñOL: Si desea obtener información sobre la garantía, visite www.manhattan-products.
com/warranty.
FRANçAIS: Pour consulter les informations sur la garantie, visitez www.manhattan-products.
com/warranty.
Polski: Informacje dotyczące gwarancji znajdują się na stronie www.manhattan-products. com/warranty.
Italiano: Per informazioni sulla garanzia, accedere a www.manhattan-products.com/
warranty.
EN MéXICO: Poliza de Garantia MANHATTAN — Datos del importador y responsable
ante el consumidor IC Intracom México, S.A. de C.V. • Av. Interceptor Poniente # 73, Col.
Parque Industrial La Joya, Cuautitlan Izcalli, Estado de México, C.P. 54730, México. •
Tel. (55)1500-4500
La presente garantía cubre los siguientes productos contra cualquier defecto de
fabricación en sus materiales y mano de obra.
A. Garantizamos los productos de limpieza, aire comprimido y consumibles, por 60 dias
a partir de la fecha de entrega, o por el tiempo en que se agote totalmente su
contenido por su propia función de uso, lo que suceda primero.
B. Garantizamos los productos con partes moviles por 3 años.
C.Garantizamos los demas productos por 5 años (productos sin partes moviles),
bajo las siguientes condiciones:
1. Todos los productos a que se refiere esta garantía, ampara su cambio físico,
sin ningún cargo para el consumidor.
2. El comercializador no tiene talleres de servicio, debido a que los productos
que se garantizan no cuentan con reparaciones, ni refacciones, ya que su
garantía es de cambio físico.
3. La garantía cubre exclusivamente aquellas partes, equipos o sub-ensambles
que hayan sido instaladas defábrica y no incluye en ningún caso el equipo
adicional o cualesquiera que hayan sido adicionados al mismo por el usuario
o distribuidor.
Para hacer efectiva esta garantía bastara con presentar el producto al distribuidor
en el domicilio donde fue adquirido o en el domicilio de IC Intracom México, S.A. de
C.V., junto con los accesorios contenidos en su empaque, acompañado de su
póliza debidamente llenada y sellada por la casa vendedora (indispensable el sello
y fecha de compra) donde lo adquirió, o bien, la factura o ticket de compra original
donde se mencione claramente el modelo, numero de serie (cuando aplique) y
fecha de adquisición. Esta garantia no es val da en los siguientes casos: Si el
producto se hubiese utilizado en condiciones distintas a las normales; si el producto
no ha sido operado conforme a los instructivos de uso; ó si el producto ha sido
alterado o tratado de ser reparado por el consumidor ó terceras personas.
10
REGULATORY STATEMENTS
FCC Class B
This equipment has been tested and found to comply with the limits for a Class B
digital device, pursuant to Part 15 of Federal Communications Commission (FCC)
Rules. These limits are designed to provide reasonable protection against harmful
interference in a residential installation. This equipment generates, uses and can
radiate radio frequency energy, and if not installed and used in accordance with the
instructions may cause harmful interference to radio communications. However,
there is no guarantee that interference will not occur in a particular installation. If this
equipment does cause harmful interference to radio or television reception, which
can be determined by turning the equipment off and on, the user is encouraged to
try to correct the interference by one or more of the following measures:
• Reorient or relocate the receiving antenna.
• Increase the separation between the equipment and the receiver.
• Connect the equipment to an outlet on a circuit different from the receiver.
• Consult the dealer or an experienced radio/TV technician for help.
CE / R&TTE
english
This device complies with the requirements of the R&TTE Directive 1999/5/EC.
deutsch
Dieses Gerät enspricht der Direktive R&TTE Direktive 1999/5/EC.
ESPAñOL
Este dispositivo cumple con los requerimientos de la Directiva R&TTE 1999/5/EC.
FRANçAIS
Cet appareil satisfait aux exigences de la directive R&TTE 1999/5/CE.
Polski
Urządzenie spełnia wymagania dyrektywy R&TTE 1999/5/EC.
Italiano
Questo dispositivo è conforme alla Direttiva 1999/5/EC R&TTE.
11
Copyright © MANHATTAN