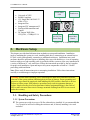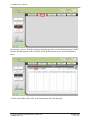
1
Storage Solution Group
G
X 100 Seeries
XD11
1U 10-B
1 Bay RBO
R OD
Userr’s Manu
ual
Model
SSG-DRFC41-1102--A1
SSG-DRSA11-1102--A1
Desscription
FC//SAS to SAS
S/SATA 1U10 Single Exxpander RBO
OD
SAS
S to SAS/SA
ATA 1U10 Single
S
Expannder RBOD
Documentt
XM-UG-A
A-XD1100-110
Date
02/09/201
10
Version
1.05
1U10 RBOD User’s Manual
Copyright
No part of this publication may be reproduced, stored in a retrieval system, or transmitted in any
form or by any means, electronic, mechanical, photo-static, recording or otherwise, without the
prior written consent of the manufacturer.
Trademarks
All products and trade names used in this document are trademarks or registered trademarks of
their respective holders.
Changes
The material in this document is for information purposes only and is subject to change without
notice.
FCC Compliance Statement
This device complies with Part 15 of the FCC Rules. Operation is subject to the following two
conditions:
(1) This device may not cause harmful interference.
(2) This device must accept any interference received, including interference that may cause
undesired operation.
Warning:
•
•
•
A shielded-type power cord is required in order to meet FCC emission limits and also to
prevent interference to the nearby radio and television reception. It is essential that only
the supplied power cord be used.
Use only shielded cables to connect I/O devices to this equipment.
You are cautioned that changes or modifications not expressly approved by the party
responsible for compliance could void your authority to operate the equipment.
Disclaimer:
Advanced Industrial Computer shall not be liable for technical or editorial errors or omissions
contained herein. The information provided is provided "as is" without warranty of any kind. To
the extent permitted by law, neither AIC or its affiliates, subcontractors or suppliers will be liable
for incidental, special or consequential damages including downtime cost; lost profits; damages
relating to the procurement of substitute products or services; or damages for loss of data, or
software restoration. The information in this document is subject to change without notice.
Copyright© 2010 Advanced Industrial Computer, Inc.
All Rights Reserved.
Page 2 of 72
Rev.1.05
1U10 RBOD User’s Manual
SAFETY PRECAUTIONS
Before getting started, please read the following important cautions:
• All cautions and warnings on the equipment or in the manuals should be noted.
• Most electronic components are sensitive to electrical static discharge, therefore, be sure to ground
yourself at all times when installing the internal components.
• Use a grounding wrist strap and place all electronic components in static-shielded devices. Grounding
wrist straps can be purchased in any electronic supply store.
• Be sure to turn off the power and then disconnect the power cords from your system before performing
any installation or servicing. A sudden surge of power could damage sensitive electronic components.
• Do not open the system’s top cover. If opening the cover for maintenance is a must, only a trained
technician should do so. Integrated circuits on computer boards are sensitive to static electricity. Before
handling a board or integrated circuit, touch an unpainted portion of the system unit chassis for a few
seconds. This will help to discharge any static electricity on your body.
• Place this equipment on a reliable surface when install. A drop or fall could cause injury.
• Please keep this equipment from away humidity.
• Carefully mount the equipment into the rack, in such manner, that it won’t be hazardous due to uneven
mechanical loading.
• Do not leave this equipment in an environment unconditioned, out of operation or storage temperature
range may damage the equipment.
• This equipment is to be installed for operation in an environment with maximum ambient temperature
below 35°C.
• The openings on the enclosure are for air convection to protect the equipment from overheating. DO
NOT COVER THE OPENINGS.
• Never pour any liquid into ventilation openings. This could cause fire or electrical shock.
• Make sure the voltage of the power source is within the specification on the label when connecting the
equipment to the power outlet. The current load and output power of loads shall be within the
specification.
• This equipment must be connected to reliable grounding before using. Pay special attention to power
supplied other than direct connections, e.g. using of power strips.
• Place the power cord out of the way of foot traffic. Do not place anything over the power cord. The
power cord must be rated for the product, voltage and current marked on the product’s electrical ratings
label. The voltage and current rating of the cord should be greater than the voltage and current rating
marked on the product.
• If the equipment is not used for a long time, disconnect the equipment from mains to avoid being
damaged by transient over-voltage.
• Never open the equipment. For safety reasons, only qualified service personnel should open the
equipment.
• If one of the following situations arise, the equipment should be checked by service personnel:
¾
¾
¾
¾
¾
¾
¾
The power cord or plug is damaged.
Liquid has penetrated the equipment.
The equipment has been exposed to moisture.
The equipment does not work well or will not work according to its user manual.
The equipment has been dropped and/or damaged.
The equipment has obvious signs of breakage.
Please disconnect this equipment from the AC outlet before cleaning. Do not use liquid or detergent
for cleaning. The use of a moisture sheet or cloth is recommended for cleaning.
Product features and specifications are subject to change without notice.
Copyright© 2010 Advanced Industrial Computer, Inc.
All Rights Reserved.
Page 3 of 72
Rev.1.05
1U10 RBOD User’s Manual
Document History
Author
Date
Action
Revision
ES
05/06/2009
Initial release, based on 3u16 RBOD manual ver 1.20
1.00
ES
05/26/2009
Added document number, mod key features, part number
1.01
ES
06/05/2009
1.02
ES
07/27/2009
ES
11/09/2009
Modify LED status and alert chapter 5
Add Chapter 4.7, modify LAN LED description, FW upload FTP
program
Changed P/N
1.04
ES
02/09/2010
Add hfs link
1.05
Copyright© 2010 Advanced Industrial Computer, Inc.
All Rights Reserved.
1.03
Page 4 of 72
Rev.1.05
1U10 RBOD User’s Manual
Table of Contents
1.
INTRODUCTION................................................................................................................. 7
1.1.
Key Features .................................................................................................................................................. 7
1.2.
System Components ...................................................................................................................................... 8
1.2.1.
Front Panel ............................................................................................................................................ 9
1.2.2.
Drive Carrier ......................................................................................................................................... 9
1.2.3.
Rear Panel ........................................................................................................................................... 10
1.2.5.
PSU Module ......................................................................................................................................... 10
2.
HARDWARE SETUP ........................................................................................................ 11
2.1.
Handling and Safety Precautions ............................................................................................................... 11
2.1.1.
System Precautions .............................................................................................................................. 11
2.1.2.
Static Precautions ................................................................................................................................ 12
2.2.
Drive Installation Options .......................................................................................................................... 12
2.3.
Removing a drive tray and installing a hard drive................................................................................... 13
2.3.1.
Removing a Disk Drive ........................................................................................................................ 13
2.3.2.
Installing a Disk Drive......................................................................................................................... 13
2.3.3.
Enclosure Slot Mapping....................................................................................................................... 14
2.4.
Removing and Installing an IO Module .................................................................................................... 14
2.4.1.
Removing an IO Module ...................................................................................................................... 15
2.4.2.
Installing an IO Module ....................................................................................................................... 15
2.5.
Removing and Installing a PSU Module.................................................................................................... 15
2.5.1.
Removing a PSU Module ..................................................................................................................... 16
2.5.2.
Installing a PSU Module...................................................................................................................... 16
2.6.
External Connections .................................................................................................................................. 16
2.6.1.
Single Host to Enclosure Connection .................................................................................................. 16
2.6.2.
Multiple Host to Enclosure Connections ............................................................................................. 16
2.6.3.
Multiple Enclosure Connections .......................................................................................................... 17
2.7.
3.
Rack-mount Installation ............................................................................................................................. 17
POWERING ON AND OFF THE SYSTEM ................................................................... 18
3.1.1.
3.1.2.
3.1.3.
3.1.4.
4.
Preparing to Power On........................................................................................................................ 18
Powering On the System ...................................................................................................................... 19
Power On Status .................................................................................................................................. 19
Power Off the System ........................................................................................................................... 19
RAID CONFIGURATION ................................................................................................ 20
4.1.1.
4.1.2.
RAID Preparation ................................................................................................................................ 20
RAID Addition ..................................................................................................................................... 22
4.3.
Quality of Service (QoS) ............................................................................................................................. 41
4.3.1.
Disk Management ................................................................................................................................ 41
4.3.2.
QoS Usage for RAID creation ............................................................................................................. 43
Copyright© 2010 Advanced Industrial Computer, Inc.
All Rights Reserved.
Page 5 of 72
Rev.1.05
1U10 RBOD User’s Manual
4.4.
RAID Rebuilding ......................................................................................................................................... 44
4.4.1.
Manually Rebuilding a RAID Array .................................................................................................... 45
4.4.2.
Managing Spare Drives ....................................................................................................................... 46
4.4.3.
Using the Automatic rebuild feature .................................................................................................... 49
4.5.
Using Filters in the GUI .............................................................................................................................. 53
4.6.
RAID Firmware Upgrade ........................................................................................................................... 57
4.7.
GUI Session Management........................................................................................................................... 61
4.7.1.
Reboot .................................................................................................................................................. 61
4.7.2.
Log Out ................................................................................................................................................ 61
4.7.3.
Shutdown ............................................................................................................................................. 61
5.
LED STATUS AND ALERT ............................................................................................. 62
6.
APPENDIX - SERIAL PORT INTERFACE ................................................................... 63
7.
GLOSSARY......................................................................................................................... 72
Copyright© 2010 Advanced Industrial Computer, Inc.
All Rights Reserved.
Page 6 of 72
Rev.1.05
1U10 RBOD User’s Manual
1.
Introduction
The 1U 10-Bay FC/SAS (Serial Attached SCSI) RBOD (RAID of Bunch Of Disks) is a high
performance, high density, scalable SAS to SAS/SATA (Serial ATA) and FC (Fibre Channel) to
SAS/SATA Disk RAID/Expansion Enclosure. The unit can be cascaded from a SAS/FC server, a
SAS/FC Switch, or SAS/FC DAS (Direct Attached Storage) through the integrated expander for
maximum storage expansion.
An optional FC mezzanine board is available for application with servers, switches and DAS in
Fibre Channel environment.
The RBOD is made up of several modules including single IO modules with intelligent
environmental monitoring, 10-port backplane board, power supply modules with integrated fans,
LED indicators on the drive carriers and rear display panel, and hot-swappable hard drive
canisters.
1.1. Key Features
•
Rack-mount 1U Enclosure
•
Single FC/SAS Switch Expander Modules
o 3 wide 4x 3Gb/s SAS Channels per Module
o 2x 4Gb/s FC Channels per Module
o Hot-Swap Redundancy Standard
•
10 High Density 2.5” Drive Trays
o 3Gb/s SAS Drives
o 3Gb/s SATA II Drives
•
12V Single Rail 300W Power Supplies
o Up to 85% Efficient Power Regulation and Utilization
o Auto ranging 100-240 VAC
o Integrated I2C Management & Control
o Integrated Fan with Fan Speed Control
o Integrated Temperature Monitoring
o DC Voltage Monitor
o DC Current and Load Monitor
o On/Off via I2C or Control Signal
•
Cableless Design
•
SES Configuration and Management
•
Serial Command Line Management
Copyright© 2010 Advanced Industrial Computer, Inc.
All Rights Reserved.
Page 7 of 72
Rev.1.05
1U10 RBO
OD User’s Man
nual
1.2. System
m Components
Before reemoving the subsystem from
f
the shippping cartonn, visually innspect the phhysical condiition
of the shiipping carton
n. Exterior damage
d
to thhe shipping carton
c
may inndicate that the contentss of
the cartonn are damag
ged. If any daamage is fouund, do not remove
r
the components;
c
contact the
dealer whhere the subsystem was purchased foor further instructions. Before
B
continnuing, first
unpack thhe subsystem
m and verifyy that the conntents of the shipping carrton are all there
t
and in good
g
conditionn.
Your new
w 1U 10-Bay
y RBOD inccludes:
Item#
1
Descriptioon
Enclosure Chassis
C
2
2.5” SATA
A Drive Tray
10
3
FC/SAS IO
O Module
1
4
300W AC/D
DC PSU Moddules
2
5
Printed Quiick Start Guidde
1
6
Manual and
d Utility CD
1
7
Power Cablle (US or EU)
2
8
Serial cablee
1
Copyright©
© 2010 Advan
nced Industrial Computer, Incc.
All Rights Reserved.
Imagge
Quan
ntity
1
Page 8 of 72
Reev.1.05
1U10 RBO
OD User’s Man
nual
Item#
9
Descriptioon
Imagge
M3 0.5Px4
4mm counteersunk flatheead
Quan
ntity
1 set
screw set fo
or mounting drives
d
in drivee
trays
10
Bracket Sett for Rack Moounting
1 set
11
FC Mezzan
nine Board
Optionaal
12
SAS cable or FC cable
Optionaal
If anny items are missing, pleease contact your authorrized resellerr or sales rep
epresentativee
1.2.11. Front Panel
P
F
Figure
1.1: 1U10 RAID Front
F
Side
1.2.22. Drive Ca
arrier
Blue LED for HDD
Activity
Power/A
Red LED
D for Fault
HDD
Fiigure 1.2: 1U
U10 RAID Drive
D
Tray
Copyright©
© 2010 Advan
nced Industrial Computer, Incc.
All Rights Reserved.
Page 9 of 72
Reev.1.05
1U10 RBOD User’s Manual
1.2.3. Rear Panel
Figure 1.3: 1U10 RAID Rear Side
1.2.4. IO Module
The system is equipped with single FC/SAS Expander and RAID module. The FC/SAS
Expander is a fully configurable FC/SAS switch with two 4x 3Gb/sec wide SAS ports for a total
of 1200MB/sec per channel or 2400MB/sec full duplex; and two 4Gb/s FC ports. The module
has a serial port to access the menu configuration and monitoring system.
Thumbscrews
SAS
Heartbeat
LED
Two 4Gb/sec
Fibre Channel
Ports
Reset
Button
Ethernet
Management
Port
Serial Port
Thumbscrews
Two 4x 3Gb/sec
Wide SAS Ports
Channels
Figure 1.4: 1U10 RAID IO Module
1.2.5. PSU Module
The system comes with 2 Intelligent PSU Modules described below.
Copyright© 2010 Advanced Industrial Computer, Inc.
All Rights Reserved.
Page 10 of 72
Rev.1.05
1U10 RBOD User’s Manual
•
•
•
•
•
•
•
Universal AC PSU
ROHS Compliant
12V Single Rail 100-240V 4763Hz 4.5-2A
Integrated Fan
Integrated I2C management IC
Fan Speed Measurement and
Control
DC Output 300W Max
12V@24A, [email protected]
Power Status
LED
100-240 Vac
Power Entry
Thumbscrew
Buzzer Mute
Button
Figure 1.5: 1U10 RAID PS Module
2.
Hardware Setup
This chapter provides detailed instructions on hardware setup and installation. Installation
involves mounting the system in a rack, installing disk drives, connecting to an external host or
FC/SAS switch, and optionally connecting to additional enclosures. Installation into a rack
enclosure should be performed prior to installing drive trays with disk drives. A set of mounting
brackets with screws and assembly guide is provided with the system to allow easy installation in
a variety of different 19” rack enclosures. Follow the instructions provided by the rack supplier
for proper rack installation. Open and inspect all system components as listed in 1.2 before
proceeding with installation.
Note: Please read all instructions prior to attempting installation. Follow these instructions
carefully to avoid damage or improper operation.
Warning: Electro-Static Discharge, ESD, can damage the hard drives and other electronic
elements of the system without exhibiting physical signs of damage. Proper grounding and
protective steps should be employed when handling any ESD sensitive materials or devices.
Failure to follow proper ESD protective procedures may result in equipment damage or
failure. Simple tests may be used to determine whether equipment damage is the result of
ESD or other electrical short circuit. Damage sustained resulting from ESD is not covered
under the warranty.
2.1. Handling and Safety Precautions
2.1.1. System Precautions
; The system can weigh in excess of 40 lbs without drives installed. It is recommended that
2 or 3 people be involved in lifting the enclosure and, if desired, installing it in a rack
enclosure.
Copyright© 2010 Advanced Industrial Computer, Inc.
All Rights Reserved.
Page 11 of 72
Rev.1.05
1U10 RBO
OD User’s Man
nual
; Prior to operaation make sure
s
all drivee trays are innstalled in thee enclosure regardless
r
of
w
whether
they contain diskk drives. Drive trays musst be presentt to insure prroper airflow
w and
coooling throu
ugh the system
; T
The system reequires openn space frontt, minimum 3”,
3 and rear,, 3”, to allow
w airflow forr
coooling.
; T
The system reequires reliaable AC pow
wer, either 1000-120 or 210-240 VAC, for proper
opperation. All power supppliers shouldd be connectted to properrly groundedd AC power
soource(s).
; Secure all mo
odules and drive
d
trays ass described inn the instrucctions. Loosee or unsecureed
coomponents can
c result in system dam
mage or persoonal injury.
; M
Make sure to retain packiing materialss and cartonss for possiblle re-packingg prior to
trransporting or
o shipping the
t system. Do
D NOT shipp system witth drives insstalled.
2.1.22. Static Prrecautionss
; Static Electriccity can dam
mage the systtem componnents and drivves without physical siggn of
D protection measures
m
whhen handlingg any electroonic componnents.
damage. Use proper ESD
Discharge staatic electricitty by using an
a anti-staticc strap. If a strap
s
is not avvailable
; D
discharge butt touching a grounded metal
m
object liike the encloosure chassiss if the PSU is
coonnected to a properly grounded
g
pow
wer source.
; Avoid
A
plasticcs unless theyy are anti-staatic materiall.
; A
Avoid carpetss, vinyl, andd Styrofoam in the work area or from
m coming in contact
c
withh the
ennclosure.
; H
Handle all mo
odules by their handles or
o metal trayys. Avoid touuching compponents or
prrinted circuiit boards.
2.2. Drive Installati
I
ion Optioons
This secttion describees the drive tray
t
configurration optionns.
The 1U10 supports both
b
SAS andd SATA drivves with the following options.
o
Item
1
Drive Tray Coonfiguration Options
Im
mage
2.5” SAS/SAT
TA Drive Carrrier
Accepts nativee SAS drives and single poort access to SATA
A
S
II
d
drives.
2
2.5” Dummy Carrier
C
N drive moun
No
nting screw holes.
h
Warningg: The system
m and drive trays are deesigned to acccept 2.5 inchh wide x 0.55 inch high SAS
S
or SATA
A drives. No other drive sizes
s
or typees should be installed in the system.
Copyright©
© 2010 Advan
nced Industrial Computer, Incc.
All Rights Reserved.
Page 122 of 72
Reev.1.05
1U10 RBOD User’s Manual
2.3. Removing a drive tray and installing a hard drive
This section describes the procedure to remove a drive carrier, install a hard drive, and replace
the carriers in the enclosure.
Please note: Use proper ESD protective measures when handling disk drives.
Figure 2.1: Opening 1U 10-Bay RBOD Drive Tray
2.3.1. Removing a Disk Drive
1) Release the handle mechanism by gently but firmly press release latch 1. Handle lever 2
should pop out slightly indicating the locking mechanism has been released.
2) Rotate handle 2 outward to disengage the drive carrier. The handle acts as a cam to
disengage the carrier from the backplane. If a drive(s) is present and the system is
powered on, retract the carrier a few inches to disconnect from the backplane. Allow a
minute for the drive(s) to spin down prior to removal from the system.
3) Fully retract and remove the carrier from the enclosure.
4) If a drive(s) is present the needs to be replaced, remove it by unscrewing the mounting
screws, sliding the drive toward the front of the tray to disengage it from the interposer
board, and gently lifting the drive out of the carrier.
2.3.2. Installing a Disk Drive
1) Unpack and remove any packing materials and interface covers from the replacement
hard drive.
2) Place the drive in the carrier position and slide toward the rear firmly seating the drive to
the interposer board.
3) Secure the drive using four (4) of the M3 0.5Px4mm countersunk flathead drivemounting screws provided.
Figure 2.2: 1U 10-Bay RBOD Drive Screw Locations
Warning: Properly securing the drives is required for proper system operation. Unsecured
drives may exhibit a variety of behaviors including sporadic or intermittent operation, shortened
drive life, and outright failure.
Copyright© 2010 Advanced Industrial Computer, Inc.
All Rights Reserved.
Page 13 of 72
Rev.1.05
1U10 RBOD User’s Manual
4) Replace the drive tray in the enclosure slot. Slide into the system until the carrier engages
the backplane.
5) Push latch 1 home to fully engage the drive. Handle 2 will rotate inward and engage with
Latch 1 and a click sound indicates the latch is secured.
6) After a moment the LED indicator should light indicating the drive has power and is
beginning initialization and spin up.
7) Allow a minute or two for the initialization process to complete. The LED should show
constant blue indicating normal inactive status or flashing blue if activity is present. If the
LED indicates red or does not illuminate:
a. Inspect the drive for proper installation. Reinsert the drive carrier to ensure proper
connection.
b. If the symptom persists, follow the procedure in above step 1 to remove the drive
tray, inspect for proper drive installation within the tray and mating with the
interposer board, and if necessary, remove and test the drive to validate it is
independent of the tray and enclosure.
Warning: Electro-Static Discharge, ESD, can damage the hard drive and other electronic
elements of the system without exhibiting physical signs of damage. Proper grounding and
protective steps should be employed when handling any ESD sensitive materials or devices.
Failure to follow proper ESD protective procedures may result in equipment damage or failure.
Warning: Handle hard drives with extreme care. Dropping the hard drive or touching the
components on the circuit board may damage the hard drive without exhibiting physical signs
of damage. Use only the mounting screws supplied with the system. Using larger screws may
damage the drive.
Warning: All drive trays must be installed regardless of whether they contain drives prior to
system operation. Drive trays in each of the drive tray slots insure proper air flow for cooling
the system. Prolonged operation with empty slots may result in overheating and resultant
damage to drives or system components.
2.3.3. Enclosure Slot Mapping
The map below shows physical locations and slot order in the enclosure.
Figure 2.3: 1U 10-Bay RBOD Slot Mapping
2.4. Removing and Installing an IO Module
This section describes removing and installing a FC/SAS IO Module.
Copyright© 2010 Advanced Industrial Computer, Inc.
All Rights Reserved.
Page 14 of 72
Rev.1.05
1U10 RBOD User’s Manual
2.4.1. Removing an IO Module
1) Remove any external cables connected to the module.
2) Turn the thumbscrews counterclockwise and pull out to release the IO module tray and
then pull gently.
3) Pull module firmly until it clears the enclosure chassis and place in anti-static bag or
container prior to storage or shipment.
2.4.2. Installing an IO Module
1) Remove any packing material and cover.
2) Align the IO module tray with the opening in the rear of the enclosure. Slide in until
module connector engages mating connector on backplane.
3) Firmly seat the module and backplane connectors until handle is fully latched and lock
the thumbscrews.
4) Connect cables to expander. If system is operational during installation, the Expander
will self test and begin FC/SAS link initialization.
Warning: Electro-Static Discharge, ESD, can damage the Expander and other electronic
elements of the system without exhibiting physical signs of damage. Proper grounding and
protective steps should be employed when handling any ESD sensitive materials or devices.
Handle Expander Tray. Avoid touching expander board or components. Failure to follow proper
ESD protective procedures may result in equipment damage or failure.
2.5. Removing and Installing a PSU Module
This section describes removing and installing a PSU Module.
Figure 2.4: 1U 10-Bay RBOD PSU
Copyright© 2010 Advanced Industrial Computer, Inc.
All Rights Reserved.
Page 15 of 72
Rev.1.05
1U10 RBOD User’s Manual
2.5.1. Removing a PSU Module
1) Remove any power cables connected to the PSU module.
2) Allow a minute for fan to spin down.
3) Loosen PSU module retaining thumbscrew.
4) Grab the handle and gently pull the PSU module out of the slot until it clears the chassis.
5) Place in anti-static bag or container prior to storage or shipment.
2.5.2. Installing a PSU Module
1) Remove any packing material and cover.
2) Hold the PSU module and align it with the slot opening in the rear of the enclosure. Slide
in until PSU is fully engaged.
3) Secure PSU module retaining thumbscrew.
4) Connect AC power cable to Module. If system is operational during installation, the PSU
module will self test and fan will begin operation. LEDs will reflect status.
2.6. External Connections
2.6.1. Single Host to Enclosure Connection
A single Server may be easily connected to a wide SAS channel on the Expander using the
SAS/FC cable (available separately). The figure below illustrates a typical connection.
Figure 2.5: 1U 10-Bay RBOD connected to host
2.6.2. Multiple Host to Enclosure Connections
The system may be connected to multiple servers via direct attachment to the Expander Channels
or by using a SAS switch. The expanders may be used to optimize operation in multi-host
configurations.
Copyright© 2010 Advanced Industrial Computer, Inc.
All Rights Reserved.
Page 16 of 72
Rev.1.05
1U10 RBO
OD User’s Man
nual
SAS Switch
1U10 SAS RA
AID
Hosts with SAS HBAs
H
Figure 2.6:
2 SAS fab
bric with mulltiple servers
rs connected via a SAS sw
witch to the 1U10 Expannder
2.6.33. Multiplee Enclosurre Connecttions
Single orr Dual config
gurations maay be expandded by daisyy chaining froom Expandeer to Expandder
using opttional SAS to
t SAS cablees. Up to 8 syystems may be cascadedd depending on the
limitationns of the HB
BA used withh the 1U10. Consult
C
the user
u manuall from the HB
BA supplierr for
details paarticular to th
hat unit.
Fiigure 2.7: Tw
wo 1U 10-Baay Enclosurres cascadedd using optional SAS to SAS
S cables
2.7. Rack-m
mount In
nstallation
n
Should 1U 10-Bay NAS/iSCSI unit need too be installedd in the rack, please use the rackmountinng bracket in
ncluded in thhe package.
Please follow
f
the sttep below too install the unit
u to the raack:
•
Innstall the basse metals wiith 2 screws below on eaach side of thhe chassis.
U M4 x 4.0
Use
0L round heaad Phillips sccrews to secure the basee metals (A)
A
Copyright©
© 2010 Advan
nced Industrial Computer, Incc.
All Rights Reserved.
Page 177 of 72
Reev.1.05
1U10 RBO
OD User’s Man
nual
•
Innstall slide raail to the bacck of the racck cabinet wiith M5 x 15..0L round heead screws and
a
suupporting metal
m
(B) beloow
B
3.
•
Slide the chasssis onto thee slide rail
•
hassis by M55 x 15.0L rouund head appplying screw
ws in the fronnt of the unitt to
Secure the ch
thhe rack
P
Powerin
ng On and
a Off
ff the Syystem
Preparring to Power On
Prior to powering
p
on
n the system you
y will neeed to have coompleted thee following:
; Enclosure
E
is installed
i
in rack,
r
if rack mount operaation is planned.
; Hard
H
drives are
a properly installed andd secured.
; All
A drive tray
ys are installeed and securred.
Copyright©
© 2010 Advan
nced Industrial Computer, Incc.
All Rights Reserved.
Page 188 of 72
Reev.1.05
1U10 RBOD User’s Manual
; All external cables are properly connected and secured.
; Power cables are installed.
; Power from a suitable power source
; The system should have been in place long enough to adjust to ambient temperature.
Warning: The system has 2 hot swap auto-ranging power supplies. These should be
connected to suitable grounded 100-120V or 210-240V AC power sources. It is recommended
separate power sources or rails be used for maximum redundancy and reliability.
Warning: The system requires adequate open space front and rear to allow for proper cooling.
3.1.1. Powering On the System
After the 1U10 is mounted in the rack, drive trays inserted, and external connections completed,
the system may be powered on using the following steps.
1) If you have not already done so, using the power cords supplied connect the PSU
modules to the power source. If the power is on, LED indicators on the Expanders will
flash indicating power is present and the System is in standby mode.
2) Power on any network switches in the configuration.
3) Turn on the power switch on the rear panel to power up the system. The fans should
come on immediately afterwards and the drives will begin to spin up and initialize.
4) Allow a few minutes for drive initialization to complete prior to powering on Host
System or Storage Appliances or Controllers.
5) After completing system configuration proceed to power on external hosts or Storage
Appliances and Controllers. It is recommended hosts be powered on last unless the
system is being installed into a live/hot environment.
3.1.2. Power On Status
Once the system has been powered on, the Display can be checked to verify proper operation.
System monitoring and status information is collected via the internal I2C bus and is made
available via external controllers and management tools via SES.
•
Drive LED status will be steady Blue indicating power on idle state or intermittent Blue
indicating Drive activity.
•
Expander LEDs will be flashing intermittent to indicate activity
3.1.3. Power Off the System
1) Flush and unmount all the volumes, and/or power off all the servers accessing volumes
on the system to be powered down, prior to powering down the unit.
2) Press the On/Off button on the rear panel.
3) Allow a few minutes for the drives to spin down.
Copyright© 2010 Advanced Industrial Computer, Inc.
All Rights Reserved.
Page 19 of 72
Rev.1.05
1U10 RBOD User’s Manual
4.
RAID Configuration
The following steps are used to configure the RAID system.
4.1. RAID Creation Quick Guide
4.1.1. RAID Preparation
Connect an Ethernet cable from 1U10 RBOD Ethernet port to Host. Open a web browser on the
host and type in the RBOD’s IP address. A GUI will be shown as below.
Log in to the system using the default Super User username and password.
After login, the main screen of the GUI will be displayed.
Copyright© 2010 Advanced Industrial Computer, Inc.
All Rights Reserved.
Page 20 of 72
Rev.1.05
1U10 RBOD User’s Manual
To check the disk installed, go to “Administration” tab then choose “Disks” from the left
column. All the disks will be defaulted to Mission Critical Quality of Service (QoS). There are 3
types of QoS:
•
Mission Critical: a QoS setting that is used to categorized drives with high speed
performance and high intensive purpose, i.e. SAS drives
• Business: Used by hard drives with medium level intensive purposes.
• Archives: QoS for low intensive resource disk drives, i.e. SATA drives
To change a Quality of Service of a hard drive, click the
button of the selected drive and
change the QoS from the drop down menu.
Copyright© 2010 Advanced Industrial Computer, Inc.
All Rights Reserved.
Page 21 of 72
Rev.1.05
1U10 RBOD User’s Manual
The 1U10 RAID requires having a host listed on the system. The purpose is to allow a host to
access the RAID logical volume created. To add a host, go to “System” tab then choose “Host”
from the left hand column; then create a host name and specify its WWN.
4.1.2. RAID Addition
1U10 RBOD supports the following RAID level:
-
RAID 0: Striped set without parity/Non-Redundant Array.
It provides improved performance and additional storage but no fault tolerance. It
requires a minimum of 2 disks. The capacity of RAID 0 will be roughly c1 + c2 + c3 + c4
…etc, where cn is the size of each of the drives.
-
RAID 1: 1U10 RBOD defines RAID1 as mirrored sets in a striped set. With or without
Spare drives. It provides fault tolerance and improved performance.
It works with either an odd or even number of disks, with a minimum of two disks.
The capacity of RAID 1 will be roughly (c x n)/2 where is the size of the smallest drive
and n is the number of disks.
-
RAID 5: Striped set with distributed parity. With or without Spare drives.
Distributed parity requires all drives but one to be present to operate; drive failure
requires replacement, but the array is not destroyed by a single drive failure. It requires a
minimum of 3 disks. The capacity of RAID 5 will be roughly (n-1) x c.
-
RAID 6: Striped set with dual distributed parity. With or without Spare drives.
Provides fault tolerance from two drive failures; array continues to operate with up to two
failed drives. It requires a minimum of 4 disks. The capacity of RAID 6 will be roughly
(n-2) x c.
Note: c is the size of the smallest drive and n is the number of disks.
To create a RAID volume, refer to the steps as follow:
Copyright© 2010 Advanced Industrial Computer, Inc.
All Rights Reserved.
Page 22 of 72
Rev.1.05
1U10 RBOD User’s Manual
By choosing “System” from the menu bar along the top of the screen and then selecting “RAID”
from the bar that appears on the left of the screen, RAID creation screen will be displayed as
below.
To add a new RAID, click on the “Add” button to the left of the data grid.
Copyright© 2010 Advanced Industrial Computer, Inc.
All Rights Reserved.
Page 23 of 72
Rev.1.05
1U10 RBOD User’s Manual
Input the desired RAID name, RAID level, and other parameters, and click “Next”.
Note: RAID will only be able to select drives with the same QoS setting.
Select the required amount of disks for the RAID. All disks selected must be the same size. Click
“Next”.
Copyright© 2010 Advanced Industrial Computer, Inc.
All Rights Reserved.
Page 24 of 72
Rev.1.05
1U10 RBOD User’s Manual
4.1.3. Add Spare Disks
Put aside a number of spare disks taken out from the selected disks (1 out of 16 in the above
example) and the RAID geometry.
Copyright© 2010 Advanced Industrial Computer, Inc.
All Rights Reserved.
Page 25 of 72
Rev.1.05
1U10 RBOD User’s Manual
The above screen is displayed, detailing the disks chosen and all other relevant details of the
RAID to be made. Clicking on “Create RAID” will initialize the RAID creation process.
The above screen appears to indicate that the RAID has been created successfully. This also
gives the details of the new RAID as well as showing the build progress.
The above screen shows Level 5 RAID in building progress with 16 drives and 513GB in size.
Copyright© 2010 Advanced Industrial Computer, Inc.
All Rights Reserved.
Page 26 of 72
Rev.1.05
1U10 RBOD User’s Manual
4.1.4. Add Logical Volumes
To add a Logical Volume to the system, click on the “Logical Volume” tab on the left of the
screen and then on “Add” when the data grid appears.
Copyright© 2010 Advanced Industrial Computer, Inc.
All Rights Reserved.
Page 27 of 72
Rev.1.05
1U10 RBOD User’s Manual
Set the name for the Logical Volume, Size of the logical volume (it should be the same or less
than the size of RAID), QoS type (logical volume will only recognize the created RAID array
with the same QoS type).
To reserve space on a RAID, click on the icon to the left of the data grid entry for that raid.
When the space reservation screen appears, select the amount of space one wish to reserve on
this RAID. Choose “Set to remaining space in LV” if you want to use all the available space.
Copyright© 2010 Advanced Industrial Computer, Inc.
All Rights Reserved.
Page 28 of 72
Rev.1.05
1U10 RBOD User’s Manual
The RAID display screen updates to display the required information.
Choose a host (that has been created from Section 4.1.1.) to be allowed to access the logical
volume.
Copyright© 2010 Advanced Industrial Computer, Inc.
All Rights Reserved.
Page 29 of 72
Rev.1.05
1U10 RBOD User’s Manual
This screen displays all details on the Logical Volume about to be created.
This screen is displayed when the Logical Volume has been created.
Copyright© 2010 Advanced Industrial Computer, Inc.
All Rights Reserved.
Page 30 of 72
Rev.1.05
1U10 RBOD User’s Manual
The above screen shows one logical volume created. To add more logical volume with the
remaining available RAID space, click on Add button.
4.1.5. Spare Drive Explained
In the RAID creation step, users are given a chance to allocate one or more disks to be spare
drives. Note that the spare disks will be taken from the assigned RAID drives. In the example
below, 1 disk out of 5 selected RAID 1 disks will be allocated as a dedicated spare disk. The end
result will be a RAID 1 volume with the capacity of 2 disks ((number of drives x smallest size of
disk)/2), and 1 spare disk.
The following is the steps of creating spare drives:
Copyright© 2010 Advanced Industrial Computer, Inc.
All Rights Reserved.
Page 31 of 72
Rev.1.05
1U10 RBOD User’s Manual
With 5 disks selected, set 4x1 organization and 1 spare.
Below is a diagram explaining how 1U10 RBOD RAID 1 works:
Copyright© 2010 Advanced Industrial Computer, Inc.
All Rights Reserved.
Page 32 of 72
Rev.1.05
1U10 RBOD User’s Manual
The RAID is shown as 4 disks and 1 spare in the RAID VIEW-DISKS field.
Looking at the logical volume, we have 4 disks used in the RAID1 and 1 dedicated spare.
Copyright© 2010 Advanced Industrial Computer, Inc.
All Rights Reserved.
Page 33 of 72
Rev.1.05
1U10 RBOD User’s Manual
Note: The controller's RAID 1 level also allows the creation of a RAID 1 on odd (or non-even)
number of disks.
This means that the creation of any RAID with at least two disks is possible, like the creation of
a RAID with 3 disks, 5 disks, 6 disks, 7 disks or 8 disks.
Please see below the diagram explaining the logic behind such a RAID (a RAID 1 with an odd
number of disks):
Copyright© 2010 Advanced Industrial Computer, Inc.
All Rights Reserved.
Page 34 of 72
Rev.1.05
1U10 RBOD User’s Manual
4.2. GUI Overview
Extreme Storage Manager (ESM) is a Graphical User Interface (GUI) embedded inside the 1U10
RAID system. This easy to use utility enables RAID management, monitoring and configuration
remotely.
With ESM tool, a system can concurrently support multiple RAID levels (0, 1, 10, 5, 6), a
variety of volume group sizes. This flexibility enables ESM to best match user’s experience in
terms of performance, capacity, and data protection requirements.
ESM does not require installation; its web based interface ensures the low usage of resources
thus provides a better experience for the user. To connect to ESM, enter the IP address of the
system from any browser.
The ESM interface is categorized into five types:
1. Administration: where user can view and manage installed packages, system setup, IP
and SMTP setup, users, and disks.
2. System: where user can manages hosts, RAID, Logical Volumes and Enclosure.
3. Application: Snapshot, Replication, and Commissioning are discussed here.
4. Report: it deals with log, history and alert management
5. Support: where user can manage the firmware and look for support.
Copyright© 2010 Advanced Industrial Computer, Inc.
All Rights Reserved.
Page 35 of 72
Rev.1.05
1U10 RBOD User’s Manual
4.2.1. RAID Administration Menu
Administration Options
Install
Description
List of installed packages in the system.
Used to view the software component detailed
information
To install software component
To uninstall software component
Setup
An administrator setup that manages System Name,
Current Date and Time, SMTP and IP Configuration.
To setup SMTP, input SMTP address in the form of
smtp.company.org (or refer to system administrator for the
address) and SMTP port (default to 25).
Check Authentication Required to “Yes” and set a
username and password if SMTP server requires it.
The GUI SMTP feature currently does not support secure
connections (SSL/TSL).
Users
This field handles the user creation, managing, and listing.
To add a user, click on the Add button on left of data grid
(shown in the picture).
Used to view the user detailed description
To edit the existing user’s password and access
privileges
To remove an existing user name
Disks
This field listed all the installed hard drives, their status,
sizes, manufacturers, models.
Used to view the disk detailed description as well as
the RAID volume associated with it
To edit disk’s QoS (default is Mission Critical) and
RAID role. Refer to Section 4.3 for details.
To remove a hard drive from the list
Green light is online, Red is fault or offline, Amber is
building, click for disk log.
Copyright© 2010 Advanced Industrial Computer, Inc.
All Rights Reserved.
Page 36 of 72
Rev.1.05
1U10 RBOD User’s Manual
4.2.2. RAID System Menu
System Options
Host
Description
This field lists and manage the hosts linked to the system.
To add a host, click on the Add button on left of data grid
(shown in the picture).
Logical Volume
This field handles and managing logical volumes.
Used to view the logical volume properties such as
LV name, disks.
To edit logical volume’s name and stop LV
To stop and delete logical volume
Green light is online, Red is fault or offline, Amber is
building, click for LV log.
RAID
To add a RAID, click on the Add button on left of data
grid (shown in the picture).
Used to view the RAID properties including RAID
build progress, logical volumes, disks
To edit RAID volume’s name, stop and rebuild a
RAID. Go to Section 4.4 for details.
To stop and delete RAID
Green light is online, Red is fault or offline, Amber
is building, click for RAID log.
Enclosure
This field lists the RAID enclosure as well as the daisychained enclosure.
Used to view the disk detailed description i.e.
enclosure front, back view and disks details
To edit enclosure’s name
To remove an enclosure from the list
Green light is online, Red is fault or offline, click the
button for enclosure log
Copyright© 2010 Advanced Industrial Computer, Inc.
All Rights Reserved.
Page 37 of 72
Rev.1.05
1U10 RBOD User’s Manual
4.2.3. Application Menu
Application Options
Description
Snapshot
In which some space is reserved for changes, snapshot is
presenting a static point-in-time view of the file system
Replication
This process is to ensure consistency between redundant
drives to improve reliability, fault-tolerance, or
accessibility.
Commissioning
TBD
Tools
Provides tools that is useful for RAID management
Copyright© 2010 Advanced Industrial Computer, Inc.
All Rights Reserved.
Page 38 of 72
Rev.1.05
1U10 RBOD User’s Manual
4.2.4. Report Menu
Report Options
LogViewer
Description
This field lists the log of the system
Press refresh (indicated by red circle on the picture) to
check for a new log.
To view the detailed log
Stats History
This field lists the stat history of disks and RAID arrays
Press refresh (indicated by red circle on the picture) to
check for a new history.
To view the item’s detailed description
Asset Management
This field manages the assets such as disk, power
modules, and controllers
To view the item’s detailed description such as drive
manufacturer, power module status and voltage level,
controller’s HW and FW version
Alert Management
The RBOD can send out alert of any error and occurrence
to a designated email address.
To use this feature, SMTP configuration must be
activated.
To add an email address, click on the Add button
Used to view the email detailed description
To edit the existing email address and send test email
To remove an email address
Copyright© 2010 Advanced Industrial Computer, Inc.
All Rights Reserved.
Page 39 of 72
Rev.1.05
1U10 RBOD User’s Manual
4.2.5. Support Menu
Support Options
Upload New Version
Description
This option lists the current firmware version of the box,
and to upload a new firmware version.
To upload a new version, click on the “Get New Version”
button.
The firmware image will be available on AIC http server.
For a complete instruction, go to Chapter 4.6.
Support Log
This field lists the debug files generated by the system
Press send (indicated by red circle on the picture) to send
the debug log to [email protected].
To view the debug lines
Support Portal
Support portal lists the technical support information.
Contacts
AIC office, sales and technical support information can be
found in Contacts screen.
Copyright© 2010 Advanced Industrial Computer, Inc.
All Rights Reserved.
Page 40 of 72
Rev.1.05
1U10 RBOD User’s Manual
4.3. Quality of Service (QoS)
This section outlines the QoS selection for individual disks and the usage instructions to create
QoS specific RAIDs.
The provided flash GUI allows you to manage the pool of online disk with a QoS (Quality of
Service) setting. This setting allows you to easily “mark” drives with a specific QoS setting in
accordance to the drive specs.
For instance, one would want to create different RAIDs on different disk quality or specs in
order to match the production requirement of this RAID.
A RAID destined to archiving files, for instance, would require bigger but cost effective drives
since the RAID will not be used for intensive IOs but rather for large storage. For that reason it
might be a good idea to only use large SATA drives for this RAID.
On the other hand, RAID serving very fast and data demanding applications might require less
storage space, but sturdier and faster drives, such as more expensive but more reliable SAS
drives.
For that reason, the QoS setting was introduced, letting the user marking his drives according to
their final use, and to be able to create a specific QoS RAID using the matching User defined
QoS drives.
4.3.1. Disk Management
•
•
•
The QoS setting must be defined for each drive separately.
The QoS setting can be changed at any time by the User, except if the drive is already
part of an active RAID.
There are currently 3 QoS level settings available on the system:
o Mission Critical (default level).
o Business
o Archive
In order to select the QoS for a specific drive, you need to navigate to the following section
within the GUI: Click on the Administration tab ÆClick on the Disks sidebar button.
Within this disk management view, you will then need to locate the drive for which the QoS
setting needs to be changed by clicking on the “disk edit” button as shown below:
Copyright© 2010 Advanced Industrial Computer, Inc.
All Rights Reserved.
Page 41 of 72
Rev.1.05
1U10 RBOD User’s Manual
Clicking on this button will bring you to the individual “Disk Edit View”:
Once you have selected the relevant QoS for this individual drive, click on the “OK” button to
validate.
The QoS for this drive had been set. You can now observe the QoS level for this drive in the
Disk View. It should have changed to the one you selected, as shown below:
Copyright© 2010 Advanced Industrial Computer, Inc.
All Rights Reserved.
Page 42 of 72
Rev.1.05
1U10 RBO
OD User’s Man
nual
4.3.22. QoS Usa
age for RA
AID creatioon
Once all your drives have been setup with the relevant QoS
Q level, yoou can then proceed
p
to
R
creating RAIDs.
• Click
C
on the “System
“
Tabb” to displayy the system leftside mennu bar.
• Click
C
on the “RAID”
“
leftside button to
t access thee RAID mannager.
Click on the Add buttton. The RA
AID creationn helper winddow will theen pop up as follow:
RAID
D Name Se
election
RAID
D QoS Sele
ection
•
•
•
•
Pick a name for
f this RAID
D (the namee cannot be loonger than 15
1 characterss).
Choose a QoS
C
S for this RA
AID using thhe Quality off Service droop down mennu, as shownn
abbove.
C
Choose
a RA
AID level for this RAID (0,
( 1, 5 or 6)).
C
Click
on the “Next”
“
buttoon to proceedd.
In the below examplee, we are chooosing “Bussiness”. We previously
p
setup 3 disks with the
“Businesss” QoS settiing:
Clicking on “Next” brings
b
us to the
t Disk Selection. We can
c only see disks that have
h
previously
been setuup with a “Business” QooS level sincee we are creaating a “Bussiness” QoS level RAID:
Copyright©
© 2010 Advan
nced Industrial Computer, Incc.
All Rights Reserved.
Page 433 of 72
Reev.1.05
1U10 RBOD User’s Manual
We can now click on the “Create RAID” button to complete the RAID creation process and start
the RAID building process.
The built RAID will be a “Business” QoS level set RAID. Its level cannot be changed unless the
RAID is taken apart.
To summarize:
•
The QoS is a handy feature that can facilitate disk and RAID management in a system
containing multiple enclosures with large amount of disks.
•
One example of the feature is that it can be used in conjunction with User management,
where a User could be setup with permissions to only “Add” items, but not delete nor modify
them. The User in question would then have to create RAIDs using the pre-determined disks
QoS.
•
The Administrator of the system could then setup a specific QoS for each disk while setting
up the system and let Users creating RAIDs only using the pre-determined disk QoS settings.
4.4. RAID Rebuilding
This section outlines the RAID rebuilding process, manual or automatic, as well as practical
usage information on the RAID rebuilding feature.
Because of the nature of a RAID, a disk belonging to an array will fail at a certain point of time.
The advantage of the RAID is to recover from this condition, without any data loss. To do so, a
drive that has either been removed, or failed, will need to be replaced with a similar drive (size,
type), to “rebuild” the RAID to a healthy status.
The disk used in an array to replace a failed/missing drive is called a “spare”, or “Hot Spare”.
Copyright© 2010 Advanced Industrial Computer, Inc.
All Rights Reserved.
Page 44 of 72
Rev.1.05
1U10 RBOD User’s Manual
The fact that when a RAID 5, for example is running on a “degraded” mode (with one missing
drive), is prone to corruption if any of the remaining drives fails, calls for an urgency to replace
the drive.
Because of this high demanding availability of administration, some automatic measures have
been put in place.
The Automatic rebuild feature is one of them. On a system with pre-defined “Hot Spares” or
“spare” disks, the automatic rebuild feature will automatically rebuild a RAID array that got into
a “degraded” state with one of the hot spare drives, if it is of similar size specifications.
4.4.1. Manually Rebuilding a RAID Array
In the figure below, we can see that the existing RAID on the system is “degraded” (i.e. one of
its drives is missing or failed). This is represented by an orange graphic button as well as the
“status” mention: “Degraded”.
•
Clicking on the magnifying glass left of this RAID allows us to access the RAID disk
view, which gives us an overview of the disks belonging to this RAID
•
On the picture above, we can see that one of the disks appears offline. That disk was
removed from the bay. The offline/failed disk has got a Red status button, while the
online disks have got a Green status button.
•
Clicking on “Return” then “OK” brings us back to the general RAID view window.
Copyright© 2010 Advanced Industrial Computer, Inc.
All Rights Reserved.
Page 45 of 72
Rev.1.05
1U10 RBOD User’s Manual
•
Clicking on the RAID “Edit” button (The small notepad icon in between of the “RAID
View icon” (magnifying glass) and the “RAID delete icon” (bin icon), shows us whether
this RAID is set to rebuild automatically or not
•
In the above example, we can observe that the “Automatic Rebuild” tickbox is not set.
o The Automatic Rebuild feature is therefore not enabled.
Note: the Automatic Rebuild feature can only be enabled at the RAID creation stage or while a
RAID is offline.
•
We then tried to click on the “Rebuild” button from the RAID view, which immediately
triggered the following error message: “No Spares Available”.
This error message is due to the fact that we did not previously set any spare drives, or “Hot
Spares”. We now need to add such a drive to our “disk pool” in order to rebuild our “degraded”
RAID array.
4.4.2. Managing Spare Drives
In order to add spare drives to the disk pool, you need to click on the “Administration” tab, and
then click on the “Disks” left side-bar button icon.
This will bring you to the “Disk view” menu, as shown below:
Copyright© 2010 Advanced Industrial Computer, Inc.
All Rights Reserved.
Page 46 of 72
Rev.1.05
1U10 RBOD User’s Manual
A spare disk needs to be
the same size as the size
of the drives in the
RAID it will be used in.
RAID Role summary.
Can be “Free”, “Used”,
“Dedicated Spare” or
“Global Spare”
This Disk is Offline.
This view gives you a detailed list of all the disks connected to your system. Here we can see that
one disk has become offline. It belongs to the array called “RAID 5” that we have used
previously.
We can see that two of the RAID pool disks do not belong to any RAID (i.e. the RAID column
shows them as “n/a” or Not Available.). Moreover, their “RAID Role” status is set to “Free”,
which means they have not been reserved for a later use, nor been set as “Dedicated Spare” or
“Global Spare” disks.
We now need to pick one of these disks to replace the missing drive from the “RAID 5” array.
We first make sure that this new drive is the same size as the missing drive by comparing the
displayed size of the free disks with the one of the missing disk.
In the above example, the free drives and the missing drive are all 8GB, which makes the two
free drives ideal candidates to become “Hot Spares”.
We then choose one of these two drives, and click on the drive’s “Edit” button. The “Disk Edit”
view is then displayed as shown below:
Copyright© 2010 Advanced Industrial Computer, Inc.
All Rights Reserved.
Page 47 of 72
Rev.1.05
1U10 RBOD User’s Manual
We can now change the “RAID Role” from “Free” to either “Global Spare” or “Dedicated
Spare” by clicking on the “RAID Role” corresponding drop down menu.
Note: the difference between these two roles is a priority difference. Rebuilding a RAID will
select the first available spare from the Global Spare disks, and if none available, from the
Dedicated Spare disk pool.
Note: the QoS for the spare disks is not taken in account when rebuilding a RAID manually nor
automatically. For instance, a RAID with a “Business” QoS can be rebuilt with an “Archive”
QoS disk.
Once the “RAID Role” has been set, click on “OK” to validate.
We can now re-attempt to rebuild the array by clicking on the “System” tab, then clicking on the
“RAID” left side-bar menu icon, followed by clicking on the “RAID Edit” button (the notepad
icon).
Clicking on the “Rebuild” button now closes the “RAID Edit” view and starts rebuilding the
RAID. A click on the “Refresh” button will be required to observe the RAID new state:
We can see here that the
RAID is being rebuilt, after
having clicked on the
“Rebuild” button.
Copyright© 2010 Advanced Industrial Computer, Inc.
All Rights Reserved.
Page 48 of 72
Rev.1.05
1U10 RBO
OD User’s Man
nual
The build progress indicates
the percenntage of the RA
AID
rebuild prrocess done .
Overall sppeed at which
the RAID
D is rebuilding .
Estimatedd time to
completioon , based on
the build speed.
The pictuure above sh
hows the RA
AID rebuild process.
p
The progress baar indicates thhe overall
process completion
c
status,
s
while the “Build Speed”
S
fieldd indicates att what speed in Mb per
second thhe array is beeing rebuilt over all the disks. The “Time to Com
mpletion” fieeld is an estiimate
of the rem
maining timee needed to rebuild
r
the array
a
fully. This
T estimatee is based onn the overall
Build Speed rate and
d may decreaase or increase dependingg on what acctions are beeing perform
med
on potenttial other RA
AIDs Onlinee the system.
Once thee progress baar is full, the RAID rebuiild status will go back too 0 percent: This
T means the
t
RAID haas finished reebuilding. Thhe RAID Viiew window can now be closed. Thee RAID statuus
should noow have chaanged from “Building”
“
too “Online”:
Your RA
AID is now reebuilt. Howeever, this proocedure needded the interrvention of a person to
completee. Because off the urgencyy of rebuildiing a RAID as mentioneed earlier, using the
Automatic Rebuild feature
fe
wouldd save a lot of
o time and effort
e
in order to rebuildd a RAID.
4.4.33. Using th
he Automaatic rebuildd feature
The prevvious section
ns of this doccumentation module alreeady coveredd how to addd a Spare to the
t
disk pooll, manually rebuild
r
a RA
AID, monitorr the progresssion of the RAID
R
rebuilld as well as the
completion of the pro
ocedure. Thiis section wiill explain hoow to setup an
a automaticc RAID rebuuild
h
preseence to admiin the system
m.
procedurre to reduce human
Setting up
u the “Automatic Reb
build” featurre at RAID creation tim
me:
•
•
•
Create a new RAID by cllicking on thhe “Add” icoon from the “RAID
C
“
View
w” general viiew.
Select the Qo
oS, the RAID
D level requiired for this RAID.
R
C
Click
on “Nex
xt” and selecct the disks required
r
for this RAID.
Copyright©
© 2010 Advan
nced Industrial Computer, Incc.
All Rights Reserved.
Page 499 of 72
Reev.1.05
1U10 RBOD User’s Manual
•
The next view lets you customize the RAID geometry as well as the number of spares
required.
Tick the “Automatic Rebuild” box as shown above to enable the Automatic rebuild feature for
this RAID. If this RAID loses a drive, the Automatic Rebuild feature will start rebuilding it
straight away, but only if a spare is available for it.
Note: it is a good idea to select one more disk than required for the RAID to set it up as spare
before the RAID creation. It avoids having to do so later on and makes sure at least a number of
spare disks of the right specifications will be available when needed for this RAID.
Click on “Next” and then on “Create RAID” to finish the RAID creation process.
Your RAID should now be building.
Once your RAID is built, if one of your RAID drive is pulled, or fails, your RAID array will start
rebuilding automatically and immediately, should any spare disk be available.
Setting up the “Automatic Rebuild” after RAID creation time
It could happen that a RAID that was created without the “Automatic Rebuild” feature needs to
be set as so.
To change the Automatic Rebuild setting on a specific RAID, click on the “Raid edit” button
(notepad icon) from the “RAID View” general menu.
Copyright© 2010 Advanced Industrial Computer, Inc.
All Rights Reserved.
Page 50 of 72
Rev.1.05
1U10 RBOD User’s Manual
The Automatic Rebuild box can only be activated while a RAID is offline.
For that reason, the RAID needs to be stopped (if no activity is currently performed on it), by
clicking on the “Stop RAID” button.
Once stopped, the Automatic Rebuild tick box, previously grayed out, becomes active.
In order to activate it, tick the box corresponding to the Automatic Rebuild field, but do not
directly click on the “Start RAID” button. This would cause the feature to be reset to the state it
was in before stopping the RAID and would cause the RAID to restart without the feature being
activated. Instead, once the box is ticked or unticked, click on the “OK” button to validate and
save this option onto the RAID. Once done, the Raid – Edit view form should close and you will
need to reopen it, and click on “Start RAID” to restart the RAID. You should observe that the
Automatic Rebuild tick box displays your setting and will get grayed out once the RAID has
restarted.
Automatic Rebuild Behavior
With the Automatic Rebuild feature enabled, and your disk pool containing at least one spare
disk of the similar specifications (similar size), pulling an active RAID disk from its bay will
automatically start rebuilding the array in which the disk is contained, even if the RAID is being
used at the same time, in total transparency. In the picture below, one of the RAID disk was
pulled, which kicked in the RAID rebuild process automatically:
Copyright© 2010 Advanced Industrial Computer, Inc.
All Rights Reserved.
Page 51 of 72
Rev.1.05
1U10 RBO
OD User’s Man
nual
Clicking on thee “Edit RAID
D” button
(nootepad icon), will show you
y that this
Auttomatic Rebbuild RAID is
i being
rebuilt, and willl show you the
t RAID
rebuild progresss bar, the RA
AID buildingg
speeed in Mb/seec as well as an estimatedd
tim
me to complettion.
Clicking on the “Can
ncel” button and clickingg on the “RA
AID View” button
b
(magnnifying glasss),
then clickking on the “View
“
Diskss” button icoon will show
w you that thee Offline dissk, the disk that
t
was puulled, has beeen “kicked out”
o
of the array
a
and repplaced by a
good disk, which was
w taken froom
the “gloobal” or “deedicated” spaare
disk poool.
The disk that was pulled was automatically put
p back in thhe disk pooll, with the “O
Offline” menntion,
and we can clearly seee that it’s RAID
R
Role has
h changed from
f
“Used”” to “Free”, and that it dooes
not belonng to the RA
AID named “RAID 1” annymore.
We can see
s also that one of the “ex”
“
spare diisk, that had a “Dedicateed Spare” RA
AID Role, is now
part of thhis array.
The Autoomatic Rebu
uild Process has
h now succcessfully coompleted. A good
g
idea would
w
be to
replace thhe failed/pullled disk by a healthy dissk of the sam
me size and mark
m
it as a “Dedicated
Spare”, to organize a spare replaccement for the spare diskk we just useed to be readdy for the neext
potential disk failure.
Copyright©
© 2010 Advan
nced Industrial Computer, Incc.
All Rights Reserved.
Page 522 of 72
Reev.1.05
1U10 RBOD User’s Manual
Usage examples:
RAID Rebuilding is an essential part of the RAID technology. Without it, an array would only
accept one and only failure, after which the data would not be considered as safe. This is for this
reason that enabling an Automatic RAID Rebuild feature greatly reduces the time window at
which an array is considered at risk, i.e, when one of its components, or disk, has failed or has
been removed.
However, this feature requires a sacrifice of one or more disk per array in order to work
automatically. But peace of mind can sometimes balance the lost of storage space.
The RAID rebuild feature can be used in conjunction with the Alert manager, which will alert
the system administrator in case of a disk failure. Activating the Automatic Rebuild feature will
then rebuild the degraded RAID automatically and immediately, together with alerting the
system administrator that a RAID had gone in a degraded state and is now being rebuilt.
4.5. Using Filters in the GUI
This section outlines the usage of filters for administration purposes and ease of use within the
AIC RAID Controller GUI.
The system you are working is a complex system, which can gather and accumulate a lot of
assets and information that can cause confusion if not presented properly to the User.
For this reason, a set of data and asset “filters” were implemented to facilitate the usage and the
information finding on this system.
The filters can be used within the GUI with any item that is listed in a data list, i.e., an item
present in a table with columns and rows, and can be combined between elements for a narrower
search.
Using filters – How to use the filters within the GUI:
For documentary purposes, we will use the filters within the Log Viewer only, although it is
good to note that they can be used in many of the GUI’s sections.
Locating the “Filter” button:
Although the filter feature is very intuitive, the User has to know where to find the feature first.
The filter menu is located at the top of a data sheet’s column, represented by a small pin
icon.
Copyright© 2010 Advanced Industrial Computer, Inc.
All Rights Reserved.
Page 53 of 72
Rev.1.05
1U10 RBO
OD User’s Man
nual
Thesee pins are all
corresponding to
differrent possible
filters for
f each data
type reepresented in
each column.
c
The
filter tyype will vary
dependiing on the datta
type bbeing filtered .
For a daate, a date filtter
will be displayed , fo
or
a field containing texxt ,
b
a generaal filter will be
The pictuure above sh
hows all the different
d
filters availablee for this “Loog Viewer” view. There is
one “Filtter” pin availlable for eacch column, allowing to select which column or element
e
is to be
filtered.
mple, we willl be filteringg the “Elemeent Types” in
i order to diisplay the log
In the folllowing exam
entries onnly regarding the “logicaal_volume” elements typpes.
You will first need to
o click on the correspondding columnn’s “Filter” pin
p that you need
n
to setupp the
filter for.. Therefore in
i our exampple we click on the “Elem
ment Type” Pin icon.
This dropp down mennu allows youu to
pick from
m the availabble “operandds” or
modifier for your filtter.
This boxx allows you to input the text
used by the
t filter to display
d
the
relevant entries you are
a looking for.
f
o
as show
wn above. Deepending onn the data typpe containedd in
The “Filtter” setup wiindow will open
this colum
mn, this win
ndow will vaary to match the best searrch options with
w the dataa type. For
instance, a column co
ontaining texxt and numbbers will alloow you to seaarch with thee following
operandss:
•
•
•
< - to search for
f a value under
u
the speecified valuee.
> - to search for
f a value over
o
the speccified value.
< - to search
<=
h for a value under or eqqual to the sppecified valuue
Copyright©
© 2010 Advan
nced Industrial Computer, Incc.
All Rights Reserved.
Page 544 of 72
Reev.1.05
1U10 RBO
OD User’s Man
nual
•
•
>= - to search
>
h for a value over or equual to the speecified value.
C
Contains
– Th
his is a text and
a number search featuures, searchees for a valuee containing the
saame string of text or num
mber as speccified.
There aree more filterrs setup winddow types foor different data
d type. Thhey will be reeviewed lateer on.
In the above examplee, we need too select the filter
f
operand to “containns” and inpuut the search
query reqquired, “logiical”. Once our
o filter is set,
s we then need
n
to clickk on the “OK
K” button to
activate the
t filter.
This is
i the filter
summ
mary drop
down menu. It
displaays the most
recentt active filterr.
Clickiing on it will
displaay the full lisst
of active filters.
Element Typpes” containiing the wordd “logical” arre
The filterr has been acctivated, andd only the “E
being dissplayed.
This facilitates browssing of all thhe events relating to the Logical
L
Volumes.
Howeverr, there could
d be too manny Logical Volume
V
evennts while we only want too display thee
th
Logical Volume
V
even
nts that occuurred after thhe 5 of Novvember 20088. We will thhen need to
combine the existing
g filter with a second “Tiimestamp” or
o date filter.
Combiniing filters
Combininng filters is very
v
straightt forward. Once
O
a filter is
i active andd is being dissplayed in thhe
“Filter” drop
d
down menu
m
at the top of the acttive page, a new
n filter caan be combinned to the
existing one
o by simply creating a new filter.
In the below examplee, we will addd a “Timesttamp” filter to
t the existinng “element__type” one
The calendaar icon needss to be
clicked in order
o
to display the
Date pickerr helper .
Copyright©
© 2010 Advan
nced Industrial Computer, Incc.
All Rights Reserved.
Page 555 of 72
Reev.1.05
1U10 RBOD User’s Manual
We first need to click on the “Timestamp” Pin icon to bring the Timestamp filter menu up.
We can observe that the filter selection has changed slightly for this “Date” filter data type.
A calendar date picker allows us to pick the specific we want to filter the events from.
We choose the date as higher than the 5th of November 2008 and validate by clicking on “Add
Filter”.
The Log Viewer now only shows the events concerning the Logical Volumes that occurred after
the 5th of November, as requested:
Once we have finished using the filters, they can be cleared to resume the display of a full
“Events” page by clicking on the “Clear” button.
Filter usages and conclusion:
The Filters are a great feature that can seriously reduce the time involved in browsing through
over populated event logs, or when dealing with multiple enclosures daisy-chained to a single,
central controller. They can be combined for perfect tuning of the queries and can be cleared
very easily. The filters are automatically changing regarding of the data type you are filtering,
and the following filter types are available on the system:
Copyright© 2010 Advanced Industrial Computer, Inc.
All Rights Reserved.
Page 56 of 72
Rev.1.05
1U10 RBOD User’s Manual
•
•
•
Text filtering with < > = contains operands.
Date filtering with a calendar date picker helper as well as minutes and seconds.
Value picking, used to pre-set standard values, used for a status for instance.
o Value picking allows you to pick a filter attribute from all the possible values for
this item, for example: “State: Start, Online, Offline”.
In order to use a filter, simply click on the column’s Pin
icon and follow the instructions.
4.6. RAID Firmware Upgrade
1U10 RAID provides a firmware upgrade through http server only. Firmware image will be
stored in AIC HTTP server to make the firmware upgrade process effortless.
The unit’s firmware is stored on an inboard flash memory chip that can be flashed to apply
updates, or fix the system.
The system can be flashed from the GUI, in the “Support” section. A tab called “Upload New
Version” allows you to flash the controller using fresh firmware images.
In order to transfer these images onto the controller’s flash, a HTTP connection will be used
from the controller to an AIC HTTP server sharing the required upgrade firmwares.
Should the AIC http server become unavailable, another way to upgrade the firmware is through
local download. The following details how to install a free, very simple and small HTTP server
for the Flash upgrading purpose:
1. Foremost, download the latest firmware from AIC website and extract it to reveal the
firmware files inside a folder as follow:
1. Download and open a simple HTTP server program from http://www.rejetto.com/hfs/
called hfs (HTTP File Server).
2. Please follow the diagram below to upload the firmware file into the http file server.
Make sure that you are using port 80.
Copyright© 2010 Advanced Industrial Computer, Inc.
All Rights Reserved.
Page 57 of 72
Rev.1.05
1U10 RBOD User’s Manual
-
Select Menu Æ Add folder from disk
Choose the folder extracted from the downloaded firmware file
Select “Real folder” and the folder will be uploaded to the local server
3. Once the firmware files are up on the HTTP file server, make sure that the files are
accessible by using a browser and entering the host IP address followed by the firmware
folder name.
Copyright© 2010 Advanced Industrial Computer, Inc.
All Rights Reserved.
Page 58 of 72
Rev.1.05
1U10 RBOD User’s Manual
4. A connection between server and 3U16 RBOD must be established before proceed with
the following steps:
Under Support Æ Upload New Version, click on “Get New Version” button to start. This screen
also shows the current version of the firmware.
On the source URL, type in the IP address of the host followed by the folder where the firmware
image resides. Click “Next” to proceed.
Copyright© 2010 Advanced Industrial Computer, Inc.
All Rights Reserved.
Page 59 of 72
Rev.1.05
1U10 RBOD User’s Manual
During firmware download, a window is seen as displayed above.
A progress bar shown during firmware installing.
Copyright© 2010 Advanced Industrial Computer, Inc.
All Rights Reserved.
Page 60 of 72
Rev.1.05
1U10 RBOD User’s Manual
After firmware is installed successfully, the above screen will appear showing the new firmware
version as well as its release notes. Reboot the system afterwards.
4.7. GUI Session Management
The power maintenance functions are located on the top right corner of the GUI.
4.7.1. Reboot
To restart the RAID controller, press “Reboot” button. Allow a couple of minutes for the RAID
controller to log out and restart itself.
4.7.2. Log Out
Press “Log Out” button to end the GUI session or login in as a different user.
4.7.3. Shutdown
The “Shutdown” button is available to turn off the RAID controller. Note that the enclosure
power will not turn off by using this function. To shut down the system entirely, press the Power
button of the enclosure as described in Chapter 3.1.4.
Copyright© 2010 Advanced Industrial Computer, Inc.
All Rights Reserved.
Page 61 of 72
Rev.1.05
1U10 RBOD User’s Manual
5.
LED Status and Alert
The following table describes the LED status information and alerts.
Item
Drive Tray Activity LED
Description of Operation
Blue LED is located on the top
Off – Drive not present or not powered on
Solid Blue – Drive powered on, no activity
Intermittent Blue – Drive powered on, activity
Drive Tray Error LED
Red Error LED is located at the bottom
Off – No fault
Red – Fault: check DSS GUI for detail
Fibre Channel LED
Red solid dim – standby power mode
Green solid – FC connection established
PSU unit Power LED
Green solid – Power on good status
Red solid – Power failure
Ethernet LAN Port LED
1GB/s
100MB/s
100Mb/s ACT/Link LED is located on the top while 1Gb/s
ACT/Link is the LED on the bottom:
•
•
•
Off – No link or activity
Solid Amber - Link established
Blinking Amber – Activity detected
Copyright© 2010 Advanced Industrial Computer, Inc.
All Rights Reserved.
Page 62 of 72
Rev.1.05
1U10 RBOD User’s Manual
6.
Appendix - Serial Port Interface
The serial Port Interface allows user to visualize the 1U10 Status using a standard serial port.
Most terminal types will work correctly.
The serial connection should be set to
•
115200 Baud
•
8 Bits
•
1 Stop bits
•
No H/W handshaking
To display the menu hit the <ESC> key at any time.
The menu shown in Figure 6.1 will be displayed.
Figure 6. Main Menu
6.1. Configuration
By choosing option number 1 from the main menu, the option displays the following selections
(Figure 6.1):
Figure 6.1. Configuration Submenu
Copyright© 2010 Advanced Industrial Computer, Inc.
All Rights Reserved.
Page 63 of 72
Rev.1.05
1U10 RBOD User’s Manual
6.1.1. System Configuration
This option number 1 of the submenu displays the following information:
•
Uptime: the time duration the system has been up
•
The name of the system
•
Date setting
•
Current state of the system
•
System ID
•
An option to edit the configuration (edit name and action)
6.1.2. IP Configuration
Option number 2 displays the following information:
•
DNS server
•
Default gateway
•
Subnet mask
•
DHCP setting
•
IP address
•
A selection to edit IP address, subnet mask and default gateway
6.1.3. HTTP Configuration
Option number 3 lists the following information:
•
Username
•
Proxy setting
•
Host name
•
Port number
•
Password
•
Choices to edit proxy setting, hostname, username, password and port
6.1.4. Serial Port Configuration
This configuration displays the current baud rate and a selection to edit the baud rate.
Copyright© 2010 Advanced Industrial Computer, Inc.
All Rights Reserved.
Page 64 of 72
Rev.1.05
1U10 RBOD User’s Manual
6.1.5. SMTP Configuration
This configuration option number 5 displays:
•
SMTP username
•
Authentication setting
•
SMTP port
•
Hostname and password
•
The option to change host name, port, username, password and authentication setting
6.2. Disks
Choosing this second option from the main menu will present the user a list of all disks installed
by selecting “View all disks” option from the submenu.
Figure 6.2.1. Disks Submenu
Furthermore, selecting “View disk details” will show the detail of the drive selected as exampled
below.
Figure 6.2.2. Disk Detailed View
Copyright© 2010 Advanced Industrial Computer, Inc.
All Rights Reserved.
Page 65 of 72
Rev.1.05
1U10 RBOD User’s Manual
6.3. RAIDs
Choosing the third option from the main menu will present the user a list of RAID built by
selecting “View all raids” option from the submenu.
Figure 6.3.1. RAID Submenu
Below is the detailed view of the selected RAID. See Figure 6.3.2. for example.
Figure 6.3.2. RAID Detailed View
6.4. Logical Volume
The fourth option of the terminal console main menu manages logical volumes.
Figure 6.4.1. Logical Volumes Submenu
Copyright© 2010 Advanced Industrial Computer, Inc.
All Rights Reserved.
Page 66 of 72
Rev.1.05
1U10 RBOD User’s Manual
Figure 6.4.2. Logical Volumes View
The above figure displays the logical volume created in Section 4.1.4. Selecting the logical
volume will provide options to view the details, start, stop, and delete the logical volume. Below
is the result of option number 1.
Figure 6.4.3. Logical Volumes Detailed View
Copyright© 2010 Advanced Industrial Computer, Inc.
All Rights Reserved.
Page 67 of 72
Rev.1.05
1U10 RBOD User’s Manual
6.5. Enclosure
The fifth option is to manage the enclosure.
Figure 6.5. Enclosure Submenu and Its Branches
6.5.1. Enclosure Map
By pressing key ‘1’, this option displays the following information:
Figure 6.5.1. Enclosure Map and Disk Status
Copyright© 2010 Advanced Industrial Computer, Inc.
All Rights Reserved.
Page 68 of 72
Rev.1.05
1U10 RBOD User’s Manual
6.5.2. Enclosure General Data
Pressing key ‘2’, the option displays the enclosure information such as temperature status, PSU
status, fan status, number of disk present. More information is attached below.
Figure 6.5.2. Enclosure General Data
This option allows the user to view what devices are installed in the system.
6.5.3. Enclosure Disk Data
This option will list all the installed disks in succession.
Figure 6.5.3. Enclosure Disk Data
Copyright© 2010 Advanced Industrial Computer, Inc.
All Rights Reserved.
Page 69 of 72
Rev.1.05
1U10 RBOD User’s Manual
6.5.4. Enclosure Power Module Data
This option displays the following information about the corresponding PSU.
Figure 6.5.4. Enclosure Power Module Data
6.6. Events
Choose option 1 to view all events, option 2 to filter events (shown in Figure 6.6.2.)
6.6.1. Events Submenu
Copyright© 2010 Advanced Industrial Computer, Inc.
All Rights Reserved.
Page 70 of 72
Rev.1.05
1U10 RBOD User’s Manual
6.6.2. Filter Events Menu
Copyright© 2010 Advanced Industrial Computer, Inc.
All Rights Reserved.
Page 71 of 72
Rev.1.05
1U10 RBOD User’s Manual
7.
Glossary
Mezzanine Card
A circuit board meant to be an extension or "daughter" of a motherboard or main board.
1U/2U
A “U”, Rack Unit, is equal to 1.75" in height. One rack unit is commonly designated as "1U";
similarly, 2 rack units are "2U" and so on.
HDD
A hard disk drive (HDD) commonly referred to as a hard drive or hard disk.
Hot Swap
The ability to pull out a component from a system and plug in a new one while the power is still
on and the unit is still operating. Redundant systems can be designed to swap drives, circuit
boards, power supplies and virtually anything that is duplicated within the system.
Redundant
It is used to guard the primary system from failure by acting as a backup system.
Host Bus Adapter (HBA)
An I/O adapter that sits between the host computer's bus and the storage device and manages the
transfer of information between the two devices
If you have any technical questions, please contact your authorized dealer before contacting us.
For more information, visit www.aicipc.com
Copyright© 2010 Advanced Industrial Computer, Inc.
All Rights Reserved.
Page 72 of 72
Rev.1.05